

Page 1

Photo Loader with HOT ALBUM
User's Guide
HOTALBUM COM Inc.
1
Page 2

1. Introduction............................................................................................................................................................... 4
2. Using Photo Loader with HOT ALBUM.......................................................................................................... 5
2.1. Computer System Requirements and Disk Capacity.....................................................5
2.2. Installing the Software ................................................................................................7
2.2.1. Installing the Software from the Installation CD-ROM ..........................................7
2.2.2. Migration ........................................................................................................10
2.2.3. Installing from a HOT ALBUM Disk that Contains Images ...................................13
2.2.4. Uninstalling Photo Loader with HOT ALBUM...............................................18
2.3. Using the Software for the First Time .......................................................................20
2.3.1. Importing Images Directly from a Memory Card ..................................................20
2.3.2. Importing Images from Other Media....................................................................23
2.4. Main Home Screen Functions ............................................................................32
2.4.1. Importing Images into Photo Pocket...................................................................44
2.4.2. Upgrading and Other Settings ............................................................................51
2.5. Creating a Video CD .................................................................................................54
2.5.1. Selecting a HOT ALBUM Disk or Video CD Disk .......................................55
2.5.2. Selecting Images................................................................................................56
2.5.3. Checking the Order and Orientation of the Images.............................................58
2.5.4. Creating a Title Screen......................................................................................60
2.5.5. Adding Background Music..................................................................................62
2.5.6. Checking Images................................................................................................65
2.5.7. Writing an Album to a Video CD Disk .................................................................67
2.5.8. Image Write Complete Screen............................................................................69
2.5.9. Creating a Disk Case Jacket..............................................................................70
2.5.10. Configuring Print Settings and Printing...............................................................72
2.6. Creating a HOT ALBUM (Secure Save) .....................................................................73
2.6.1. Edit and Create .................................................................................................73
Selecting a HOT ALBUM Disk or Video CD Disk......................................................74
2.6.2. Selecting Images................................................................................................75
2.6.3. Checking the Order and Orientation of the Images.............................................77
2.6.4. Creating a Title Screen......................................................................................79
2.6.5. Inputting Comment Text into an Image...............................................................81
2.6.6. Adding Background Music..................................................................................83
2.6.7. Checking the Images..........................................................................................90
2.6.8. Saving and Album to a HOT ALBUM Disk...........................................................92
2.6.9. Image Write Complete Screen............................................................................94
2.6.10. Creating a Disk Case Jacket..............................................................................95
2.6.11. Configuring Print Settings and Printing...............................................................97
2.6.12. Backing Up Album Contents ..............................................................................98
2.6.13. Temporarily Saving In-progress Edits.................................................................99
2
Page 3

2.6.14. Resuming an Editing Operation.........................................................................100
2.7. Copying a HOT ALBUM...........................................................................................102
2.7.1. Writing an Album to a HOT ALBUM Disk..........................................................103
2.7.2. Image Write Complete Screen..........................................................................105
2.7.3. Creating a Disk Case Jacket............................................................................106
2.7.4. Configuring Print Settings and Printing.............................................................108
2.8. Sending an Image as an E-mail Attachment.............................................................109
2.8.1. Selecting Images to Attach to E-mail...............................................................110
2.8.2. Confirming Mail Software Settings ...................................................................112
2.8.3. Sending Mail with Attached Images ..................................................................113
2.9. Printing...................................................................................................................114
2.9.1. Image Printing..................................................................................................116
2.9.2. Layout Printing................................................................................................123
2.9.3. Jacket Printing................................................................................................133
2.10. Ordering Prints .......................................................................................................136
2.10.1. Selecting Images and Specifying the Number of Copies....................................137
2.10.2. Checking the Print Data...................................................................................139
2.10.3. Saving the Order Data .....................................................................................140
2.11. Using the Album View .............................................................................................143
2.11.1. Using the Album View......................................................................................145
2.11.2. Printing the Album View...................................................................................148
2.12. Slideshow ...............................................................................................................149
2.12.1. Modifying Slideshow Settings ...........................................................................151
3. Using HOT ALBUM VIEWER.......................................................................................................................... 156
3.1. Using HOT ALBUM VIEWER....................................................................................156
3.2. Zooming Photos......................................................................................................158
3.3. Viewing a Slideshow................................................................................................159
3.3. Viewing a Slideshow................................................................................................160
3.4. Ordering Prints from a Print Service .......................................................................167
3.5. Copying Photos to a Folder.....................................................................................171
3.6. Saving Photos to a Computer..................................................................................172
4. Viewing HOT ALBUM Disks on a TV Screen ......................................................................................... 174
3
Page 4

1. Introduction
HOT ALBUM is a totally new type of album that makes management of your images simple and
secure, and lets you recall your images whenever you like. HOT ALBUM makes it possible to
expand enjoyment of video images on your computer or on your TV.
HOT ALBUM provides you with the following three digital image management tools.
Photo Loader with HOT ALBUM*1
Photo Loader with HOT ALBUM lets you transfer images from your digital camera to your
computer. It also includes viewing, printing, and automatic e-mail attachment features for quick
and simple, yet powerful digital image management.
HOT ALBUM Disks
HOT ALBUM disks let you save albums of digital images, complete with text comments or other
editing, and store them externally from your computer. By saving separate copies of your albums
on your computer and on disk helps to ensure that images are not lost due to computer problems
or because a disk is misplaced. Double-storage of all your important images is highly
recommended to protect against accidental deletion or loss. HOT ALBUM disks can be played
back on a DVD player*2, and you can even add music to create highly entertaining slideshows of
your images.
HOT ALBUM VIEWER*3
HOT ALBUM VIEWER makes it possible to view images on a HOT ALBUM disk can be viewed even
if the computer does not have Photo Loader with HOT ALBUM installed. This means you can give
away disks as gift items, without worrying whether the recipient has the proper software.
This User's Guide mainly explains operations using the Photo Loader with HOT ALBUM special
HOT ALBUM software.
*1: Installation is supported under Windows 2000, XP, and Vista.
*2: Playback is supported on a Video-CD player, DVD player, or DVD recorder that supports
Video-DC (VCD) 2.0. Note, however, that playback may not be possible depending on the
particular equipment being used. Visit our website at http://www.ha-hotalbum.com/ for the
latest information.
*3: HOT ALBUM VIEWER operation is supported under Windows 98SE, Me, 2000, XP, and Vista.
4
Page 5

2. Using Photo Loader with HOT ALBUM
2.1. Computer System Requirements and Disk Capacity
The recommended computer system environment for Photo Loader with HOT ALBUM is shown
below. As standard Windows software, Photo Loader with HOT ALBUM should operate without
any problem under this environment. Note, however, that operational response, image quality,
sound quality during audio playback, and other factors depend on the performance and
specifications of each particular system.
Be sure to contact your system administrator before installing and using this software.
The following describes the capacity of HOT ALBUM disks.
・ Snapshot and Movie Data
Maximum Number of Images: 240 (Size of each image is 1 KB to 30 MB.)
Regardless of the number of images currently stored on the disk, the total amount of data stored
cannot exceed 256 MB.
Each movie file can be no large than 256 MB and no longer than 25 minutes.
5
Page 6

・ Storage Capacities by Image Size (in Pixels)
2 million pixels (Fine): 220 to 230
3 million pixels (Fine): 140 to 150
5 million pixels (Fine): 90 to 100
6
Page 7

2.2. Installing the Software
2.2.1. Installing the Software from the Installation CD-ROM
Place the installation CD-ROM into your computer and the installer will start up automatically.
On the screen that appears, click the [Start] button.
Click to view minimum computer system requirements.
Click to view an explanation about HOT ALBUM.
7
Page 8
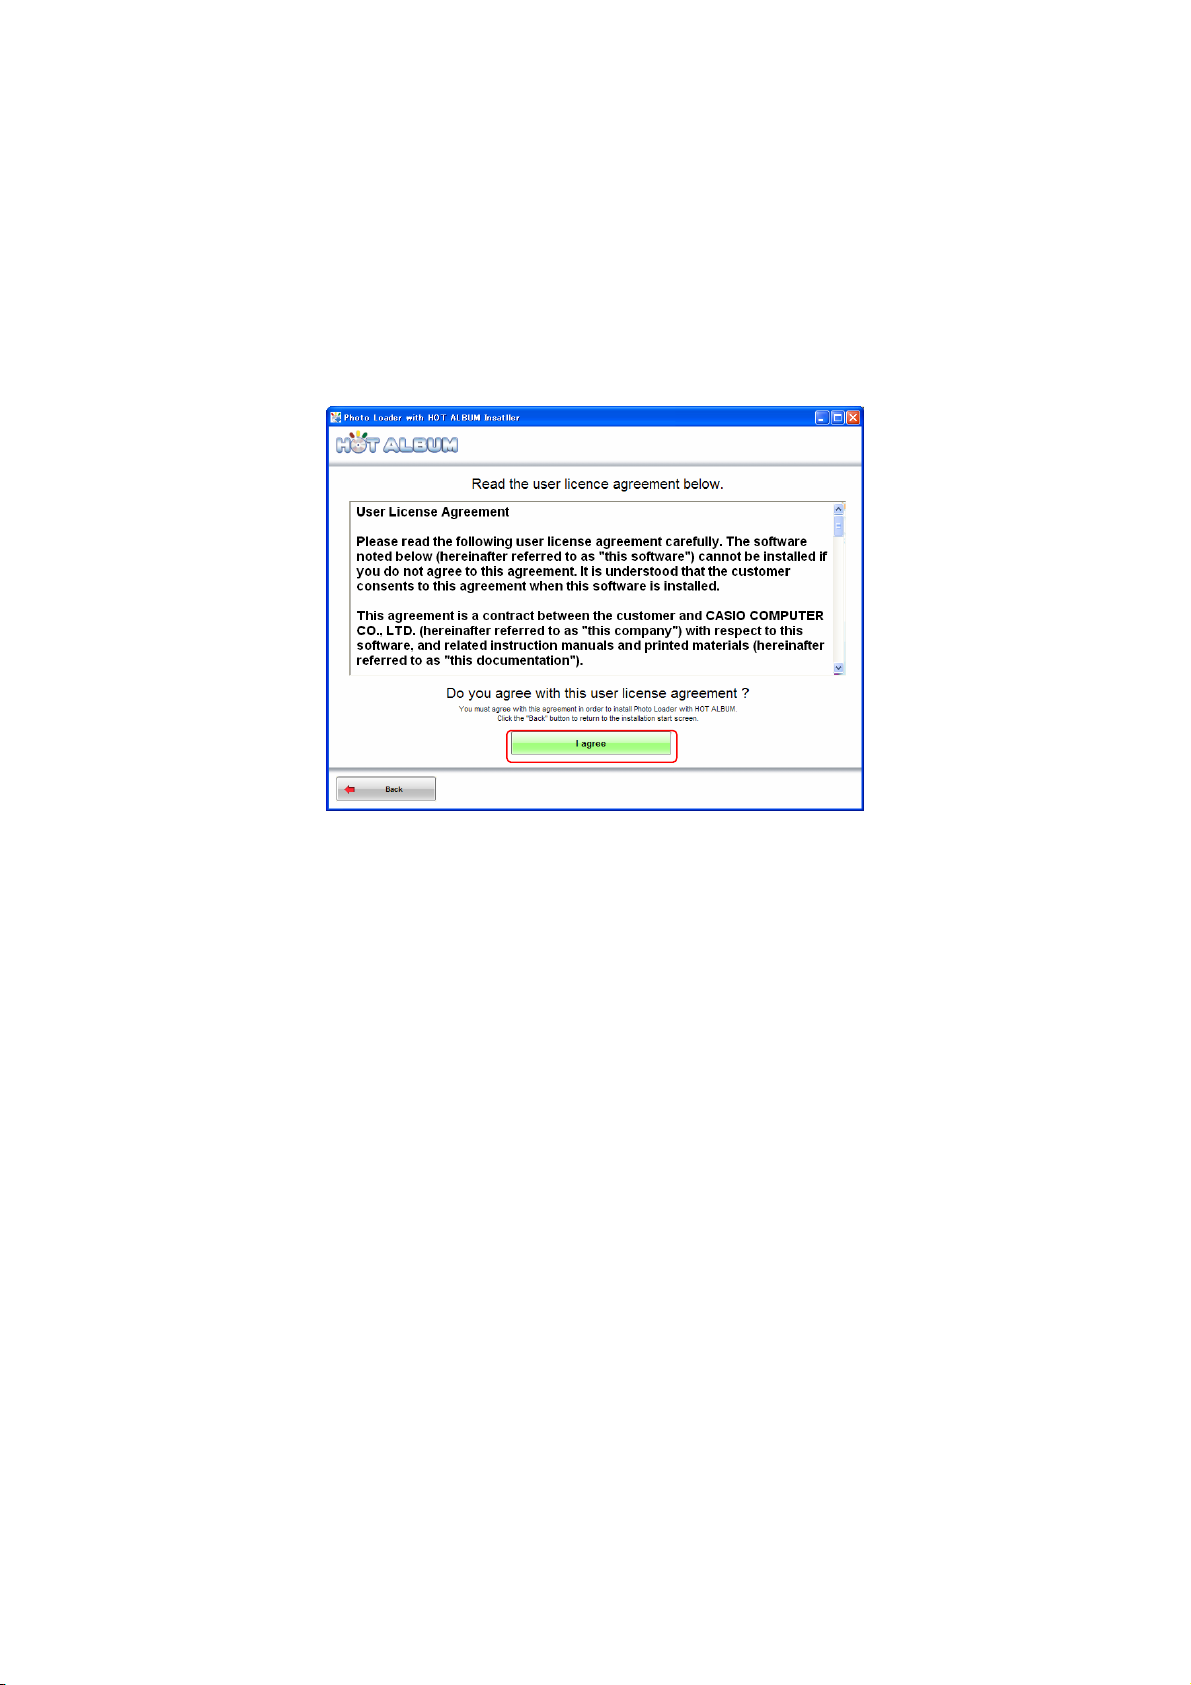
Read the End User License Agreement and then click the [I Agree] button.
A different screen will appear if you have an older version of HOT ALBUM MY BOX installed on
your computer. For more information, see "2.2.3 Upgrading from an Older Version during
Installation".
8
Page 9
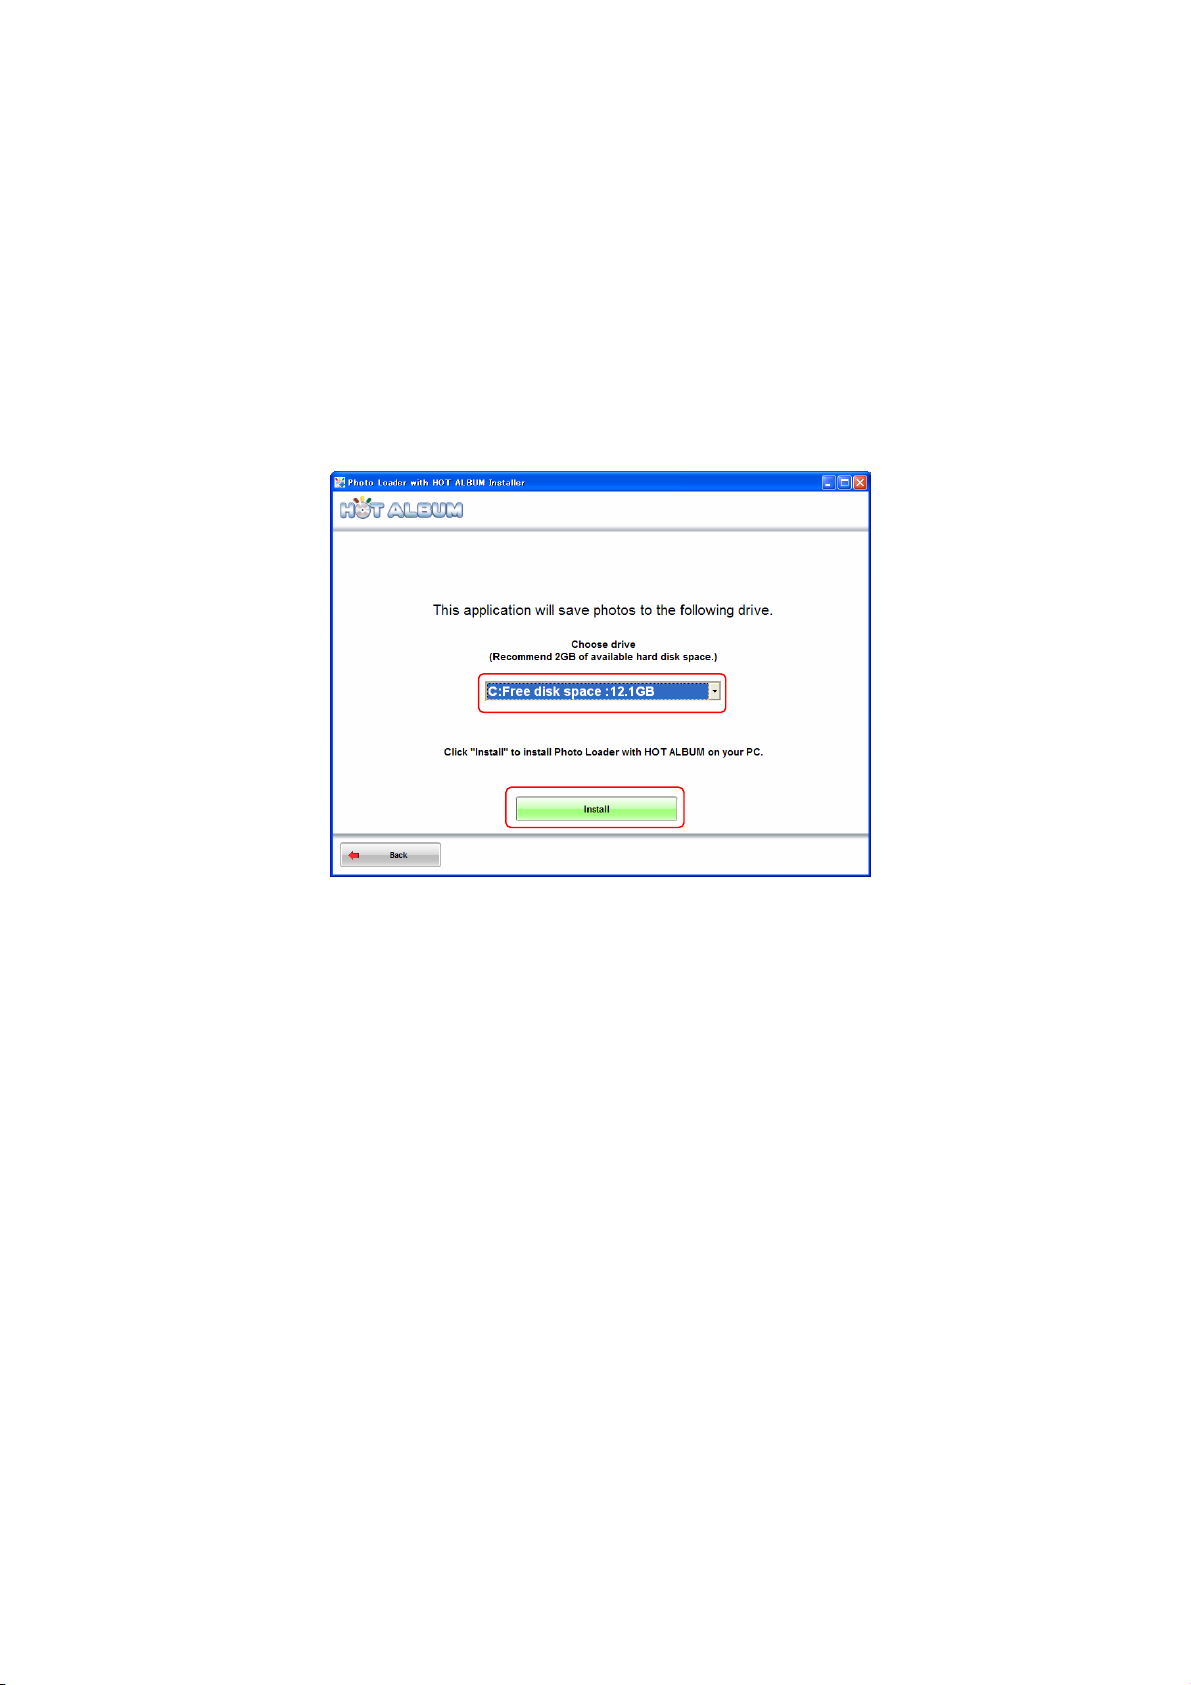
You can specify the drive name of the hard disk where you want to save image data. You can
specify a hard disk drive name only if your computer has multiple hard disks, if its hard disk is
partitioned into multiple drives, or if it has an external hard disk connected.
The amount of free space available on the A: drive will appear on the display. Select a drive that
has at least 2 GB of free space available.
Specify the B: drive and then click [Install].
Important!
・ You will be able to change the specification of the save drive on the Photo Loader with HOT
ALBUM version upgrade screen after installation is complete.
See "2.5.4 Upgrading and Other Settings" for more information.
・ The software will be installed on your computer's C: drive, even if you specify another drive
other than C: for storing images. The C: drive should have at least 2 GB of free space available for
use as a work area.
9
Page 10
2.2.2. Migration
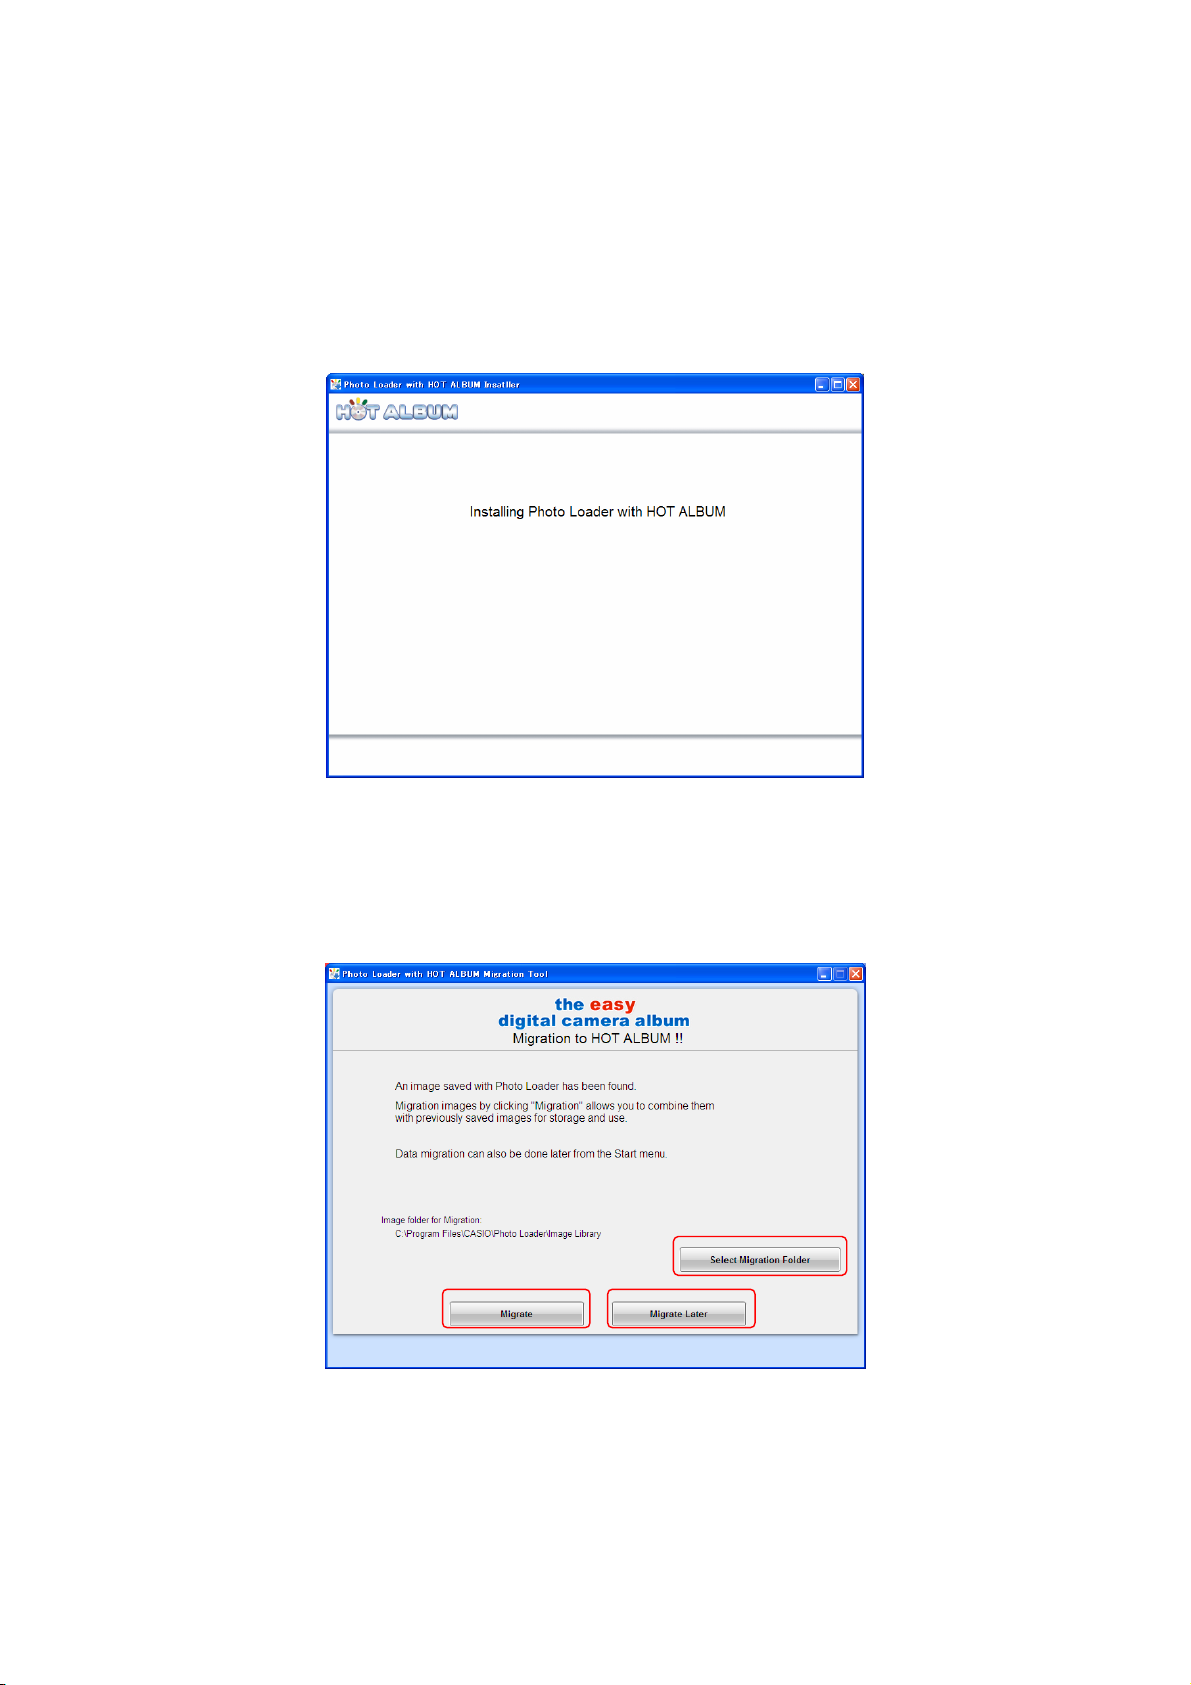
The following message remains on the display as the software is being installed.
If you have Photo Loader image data stored on your computer, a Data Migration Tool will
start up here to migrate the image data to Photo Loader with HOT ALBUM.
If you want to use your previously stored Photo Loader image data with Photo Loader with
HOT ALBUM, click [Migrate].
If you want to migrate images later or if you choose not to migrate your existing images, click
10
Page 11
[Migrate Later].
When you want to migrate images at any time after installing the software, perform the
following operation on the Windows [Start] menu to start up Data Migration Tool: [All
Programs] -> [Casio] -> [Photo Loader with HOT ALBUM] -> [Data Migration Tool].
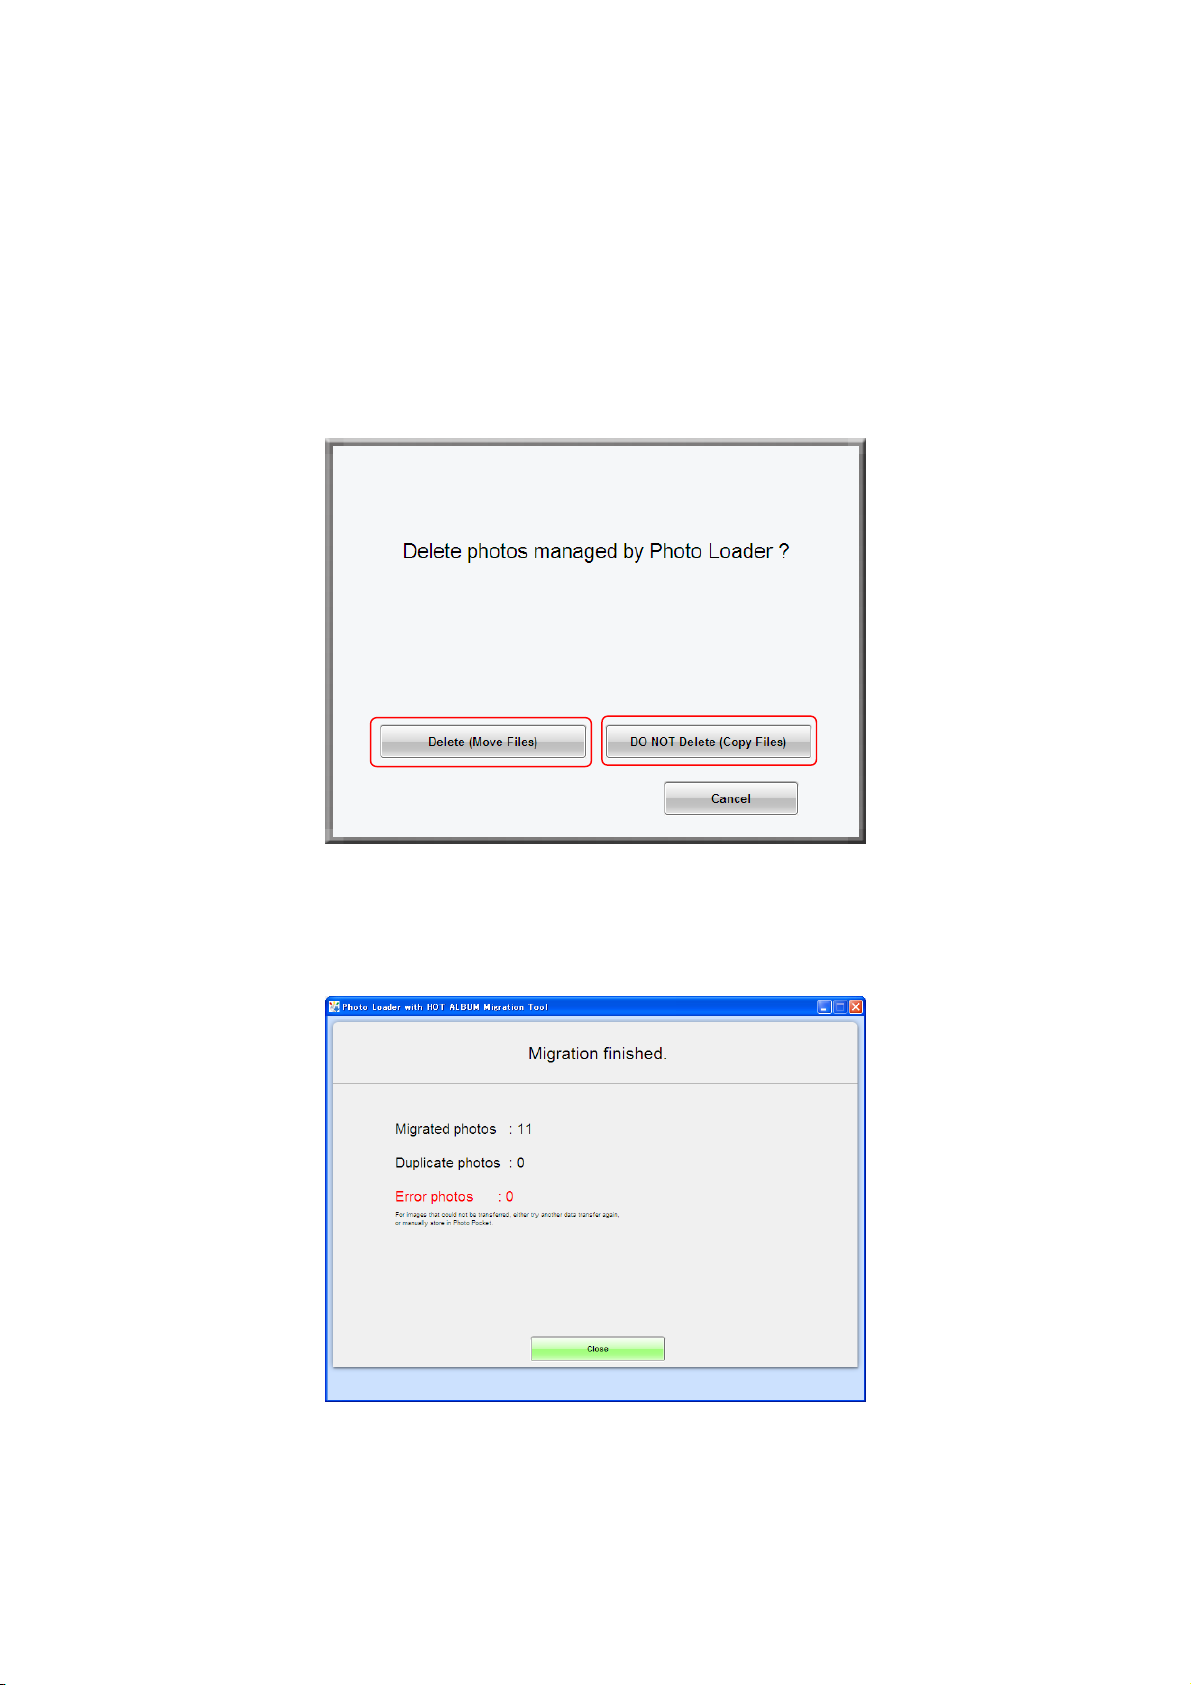
Clicking [Migrate] will start data migration and display the screen shown below.
At this time you should click a button to specify whether you want to delete the original Photo
Loader image data or retain it.
On the screen that appears after data migration is finished, click [Close].
11
Page 12
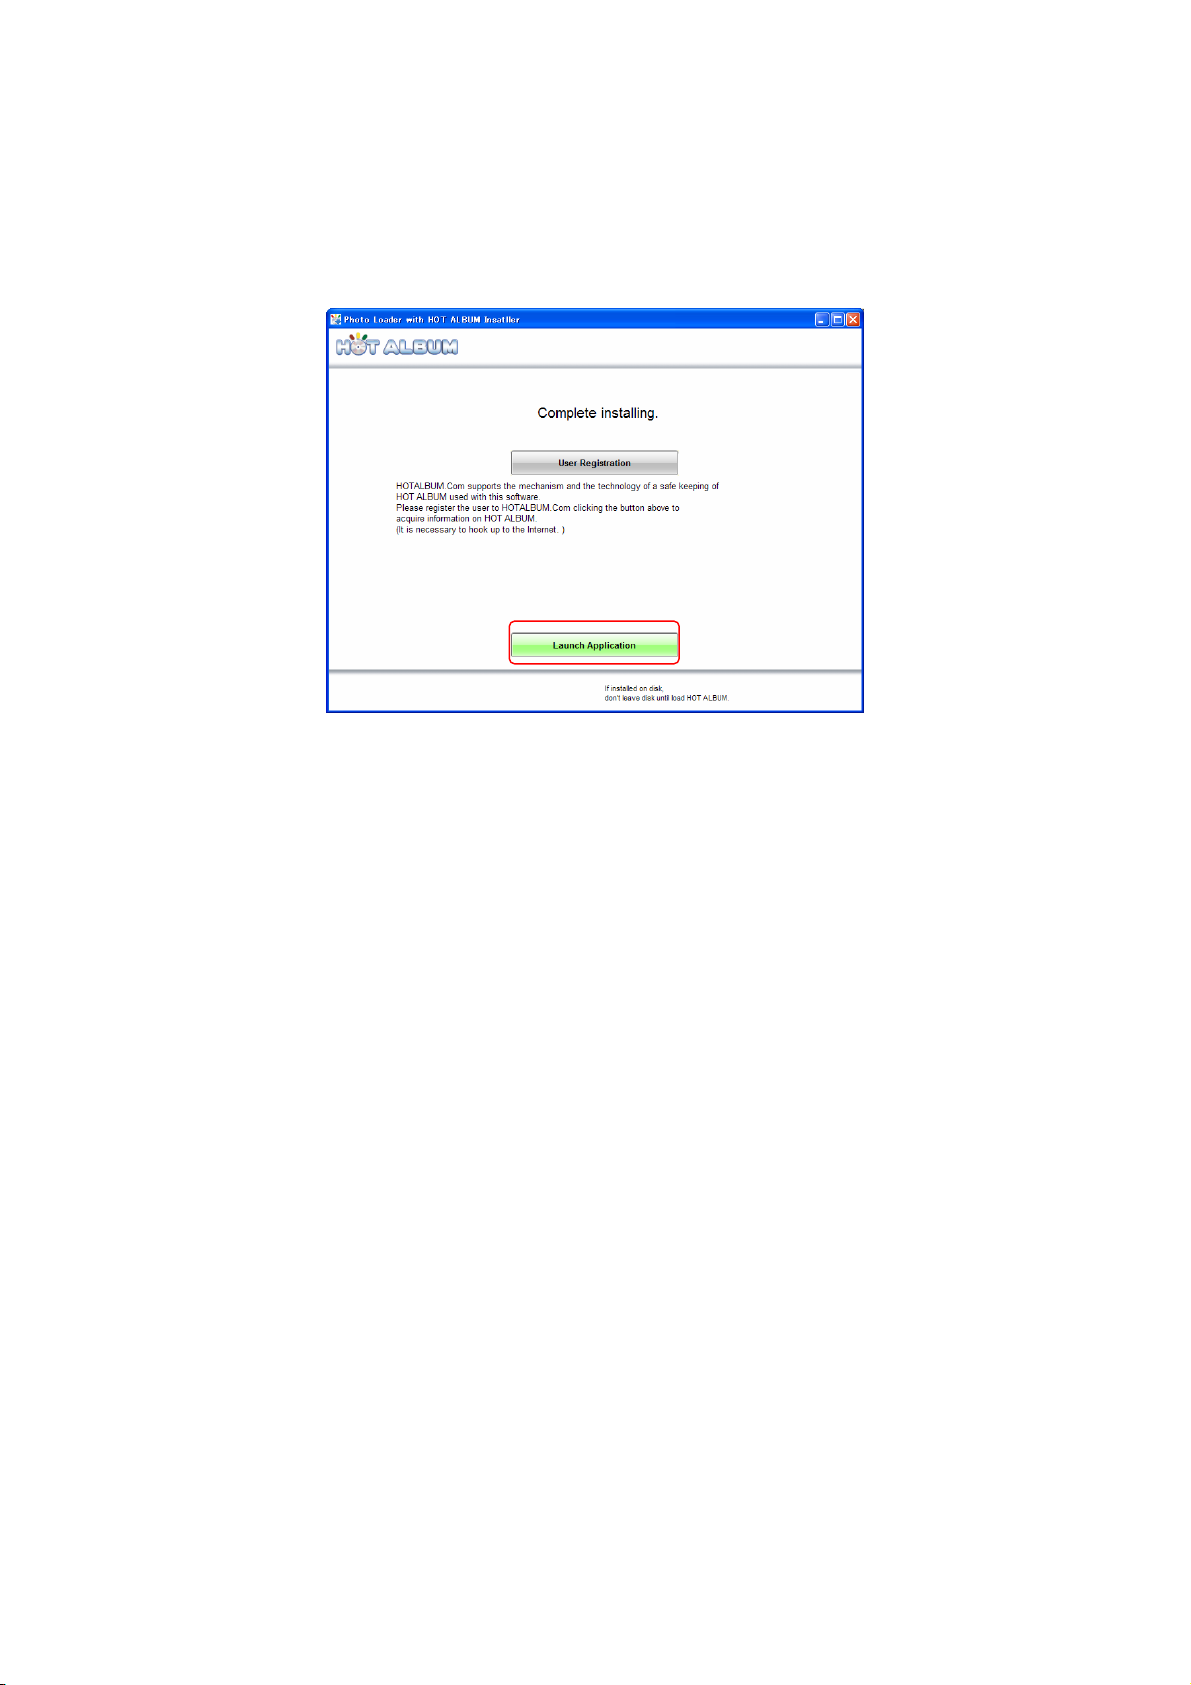
The message shown below appears after installation is completed successfully.
12
Page 13

2.2.3. Installing from a HOT ALBUM Disk that Contains Images
The special software also can be installed on your computer from a HOT ALBUM disk to which
images and other data has been written by another computer running Photo Loader with HOT
ALBUM. Installing the software will copy the images from the HOT ALBUM disk to your computer
at the same time.
Placing a HOT ALBUM disk that contains image data into the CD-ROM drive of your computer will
launch HOT ALBUM VIEWER automatically. If it does not start automatically, use "My Computer"
to navigate to the CD-ROM drive and double click "StartViewer.exe".
On the "HOT ALBUM VIEWER" screen, click [Install Photos and Application].
If your computer already has Photo Loader with HOT ALBUM installed, the button will change to
[Save Photos] instead of [Install Photos and Application]. Proceed with the installation and you
will be given a change to upgrade to a newer version if required.
See "3. Using HOT ALBUM VIEWER" for more information.
Important!
・ The green button in the lower right corner will not appear if your computer is running Windows
98SE or Windows Me. Installation and image registration are not supported on computers running
these operating systems.
・ The software that is installed from a HOT ALBUM disk that contains images is different
(no Data Migration Tool, etc) from that installed from the CD-ROM.
13
Page 14

On the screen that appears, click the [Start] button.
Click to view minimum computer system requirements.
Click to view an explanation about HOT ALBUM.
14
Page 15
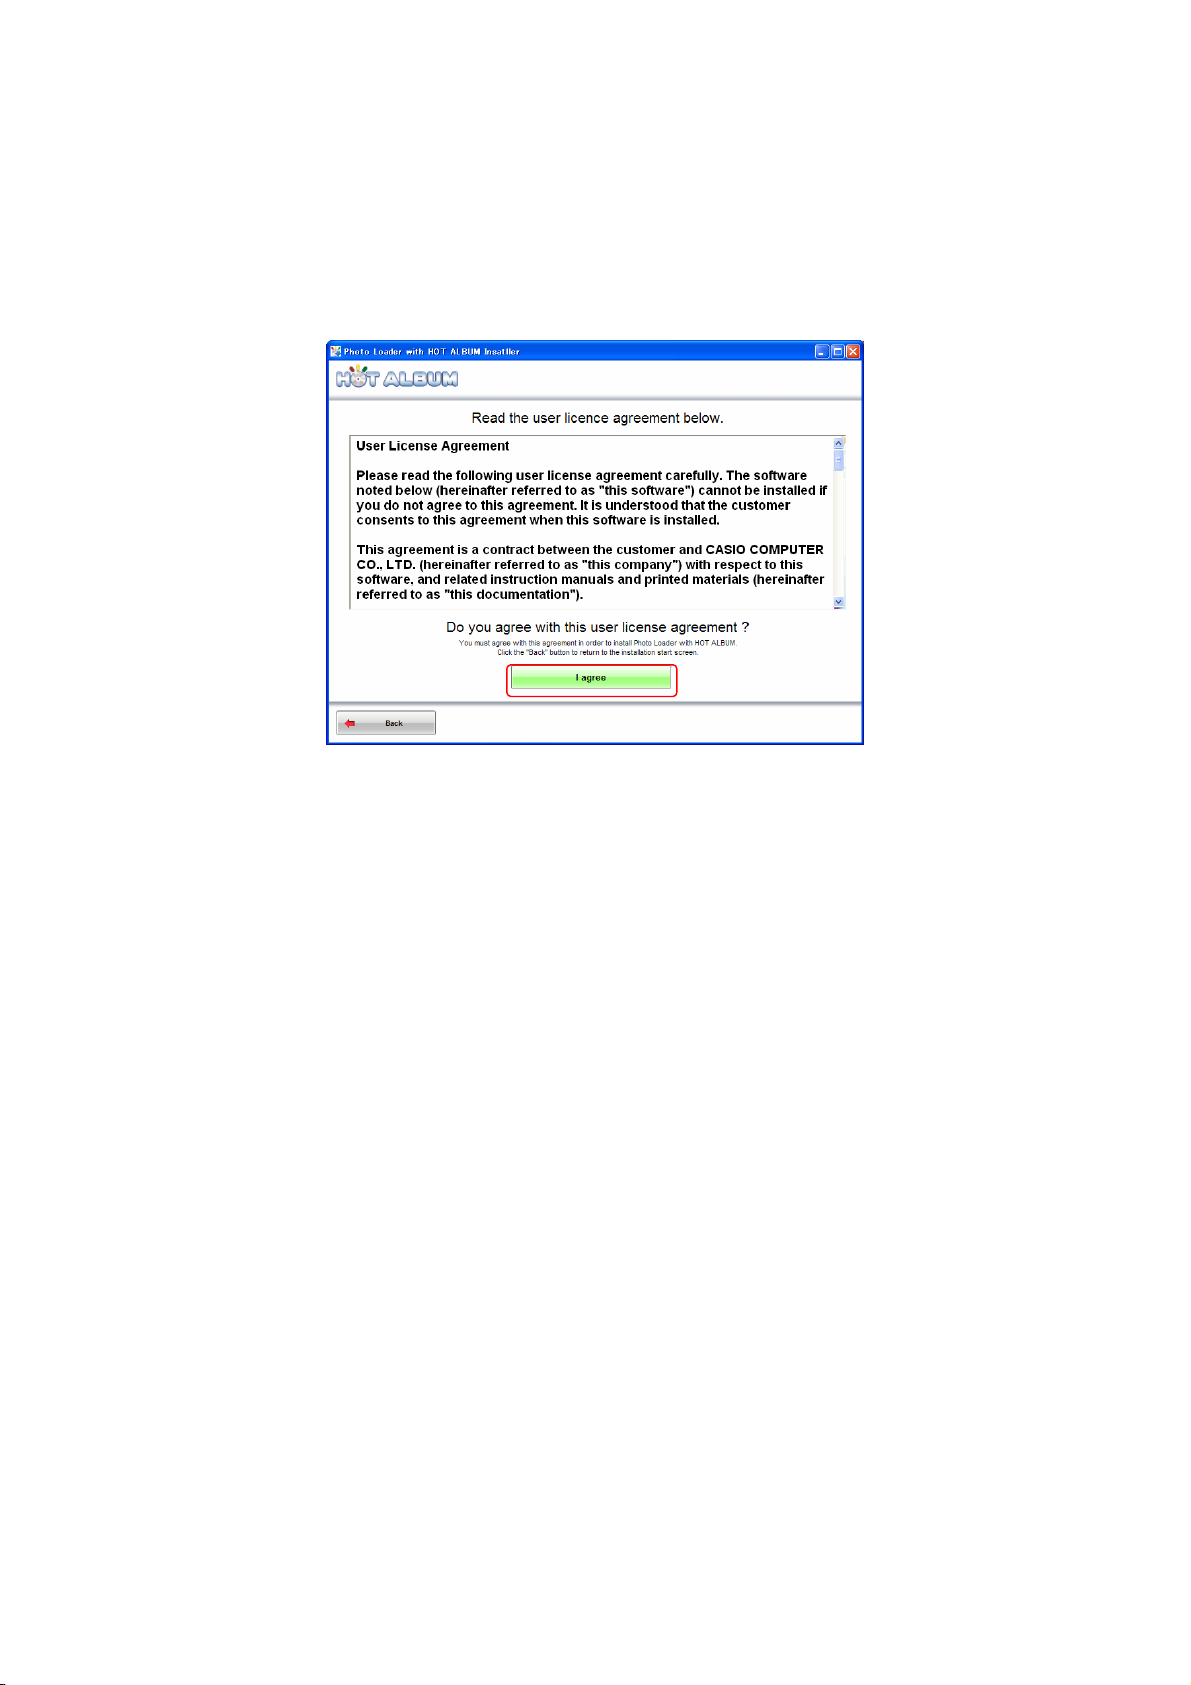
Read the End User License Agreement and then click the [I Agree] button.
A different screen will appear if you have an older version of HA MY BOX installed on your
computer. For more information, see "2.2.3 Upgrading from an Older Version during Installation".
15
Page 16
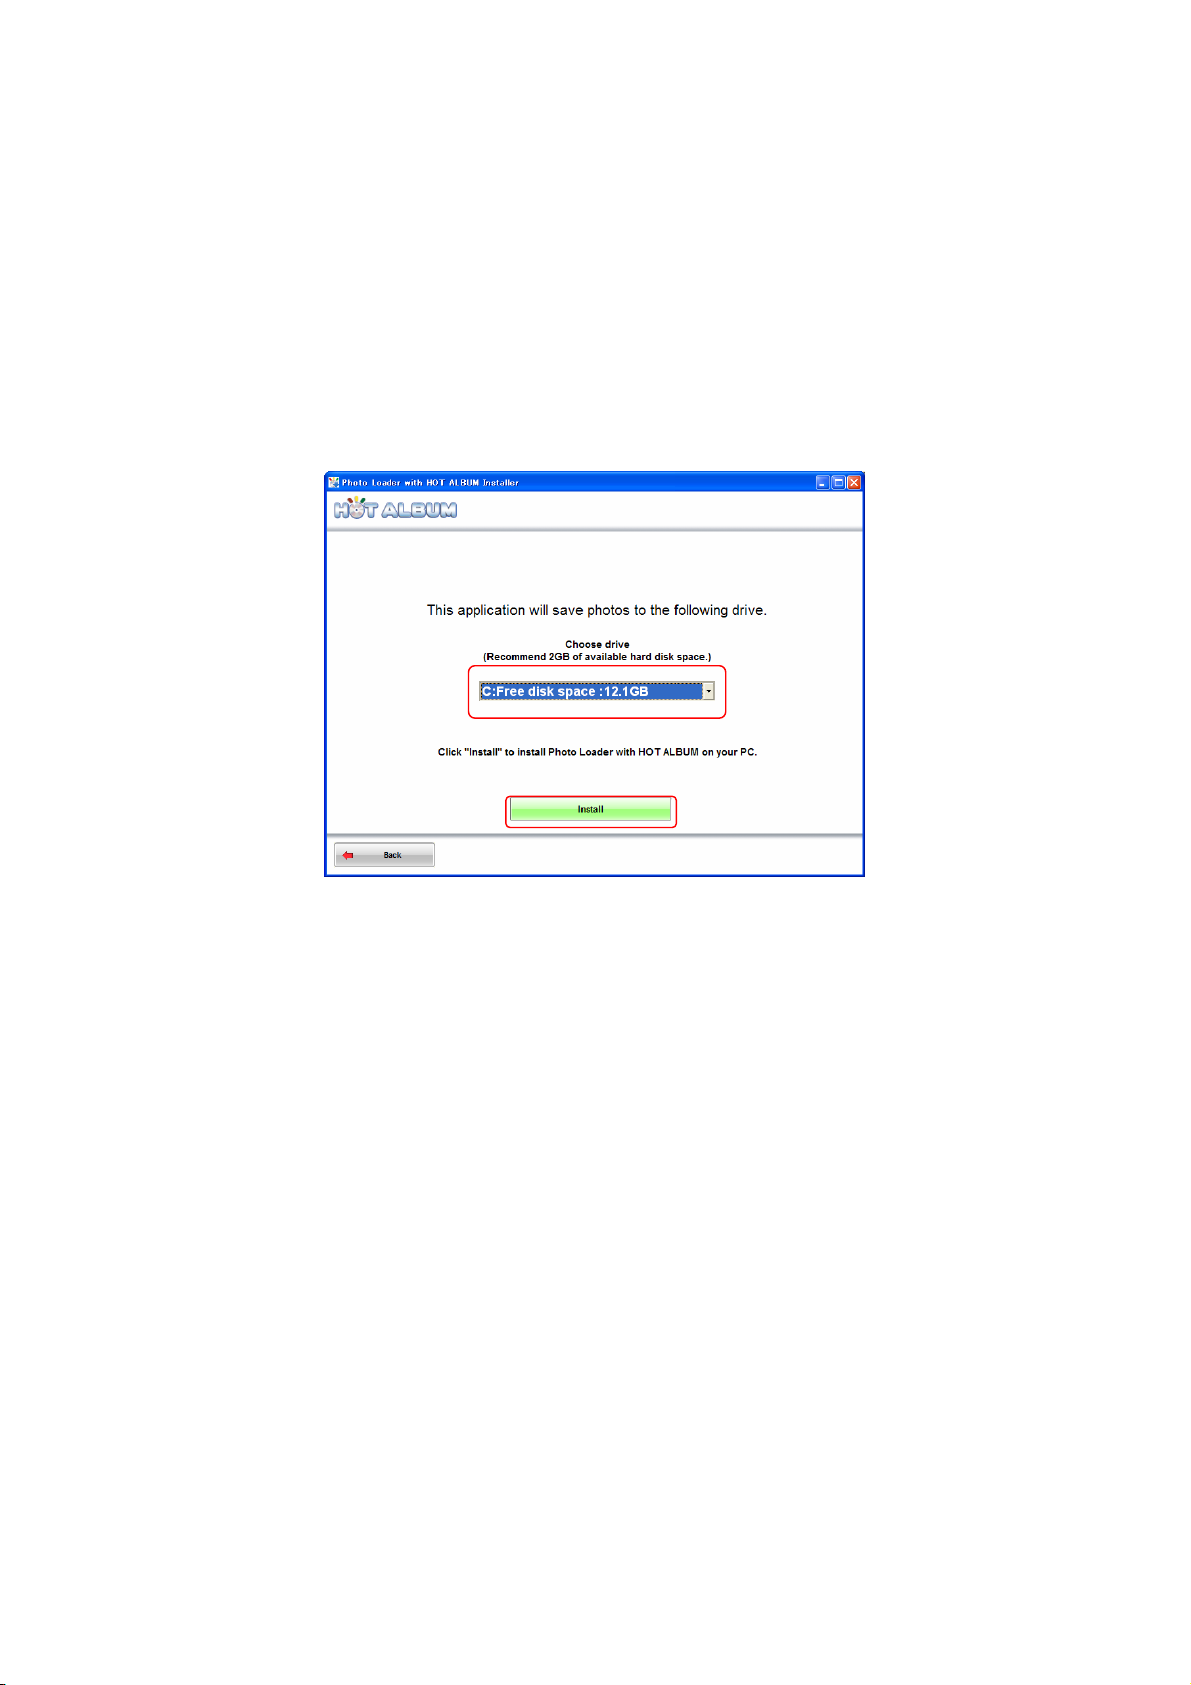
You can specify the drive name of the hard disk where you want to save image data. You can
specify a hard disk drive name only if your computer has multiple hard disks, if its hard disk is
partitioned into multiple drives, or if it has an external hard disk connected.
The amount of free space available on the A: drive will appear on the display. Select a drive that
has at least 2 GB of free space available.
Specify the B: drive and then click [Install].
Important!
・ You will be able to change the specification of the save drive on the Photo Loader with HOT
ALBUM version upgrade screen after installation is complete.
See "2.5.4 Upgrading and Other Settings" for more information.
・ The software will be installed on your computer's C: drive, even if you specify another drive
other than C: for storing images. The C: drive should have at least 2 GB of free space available for
use as a work area.
16
Page 17
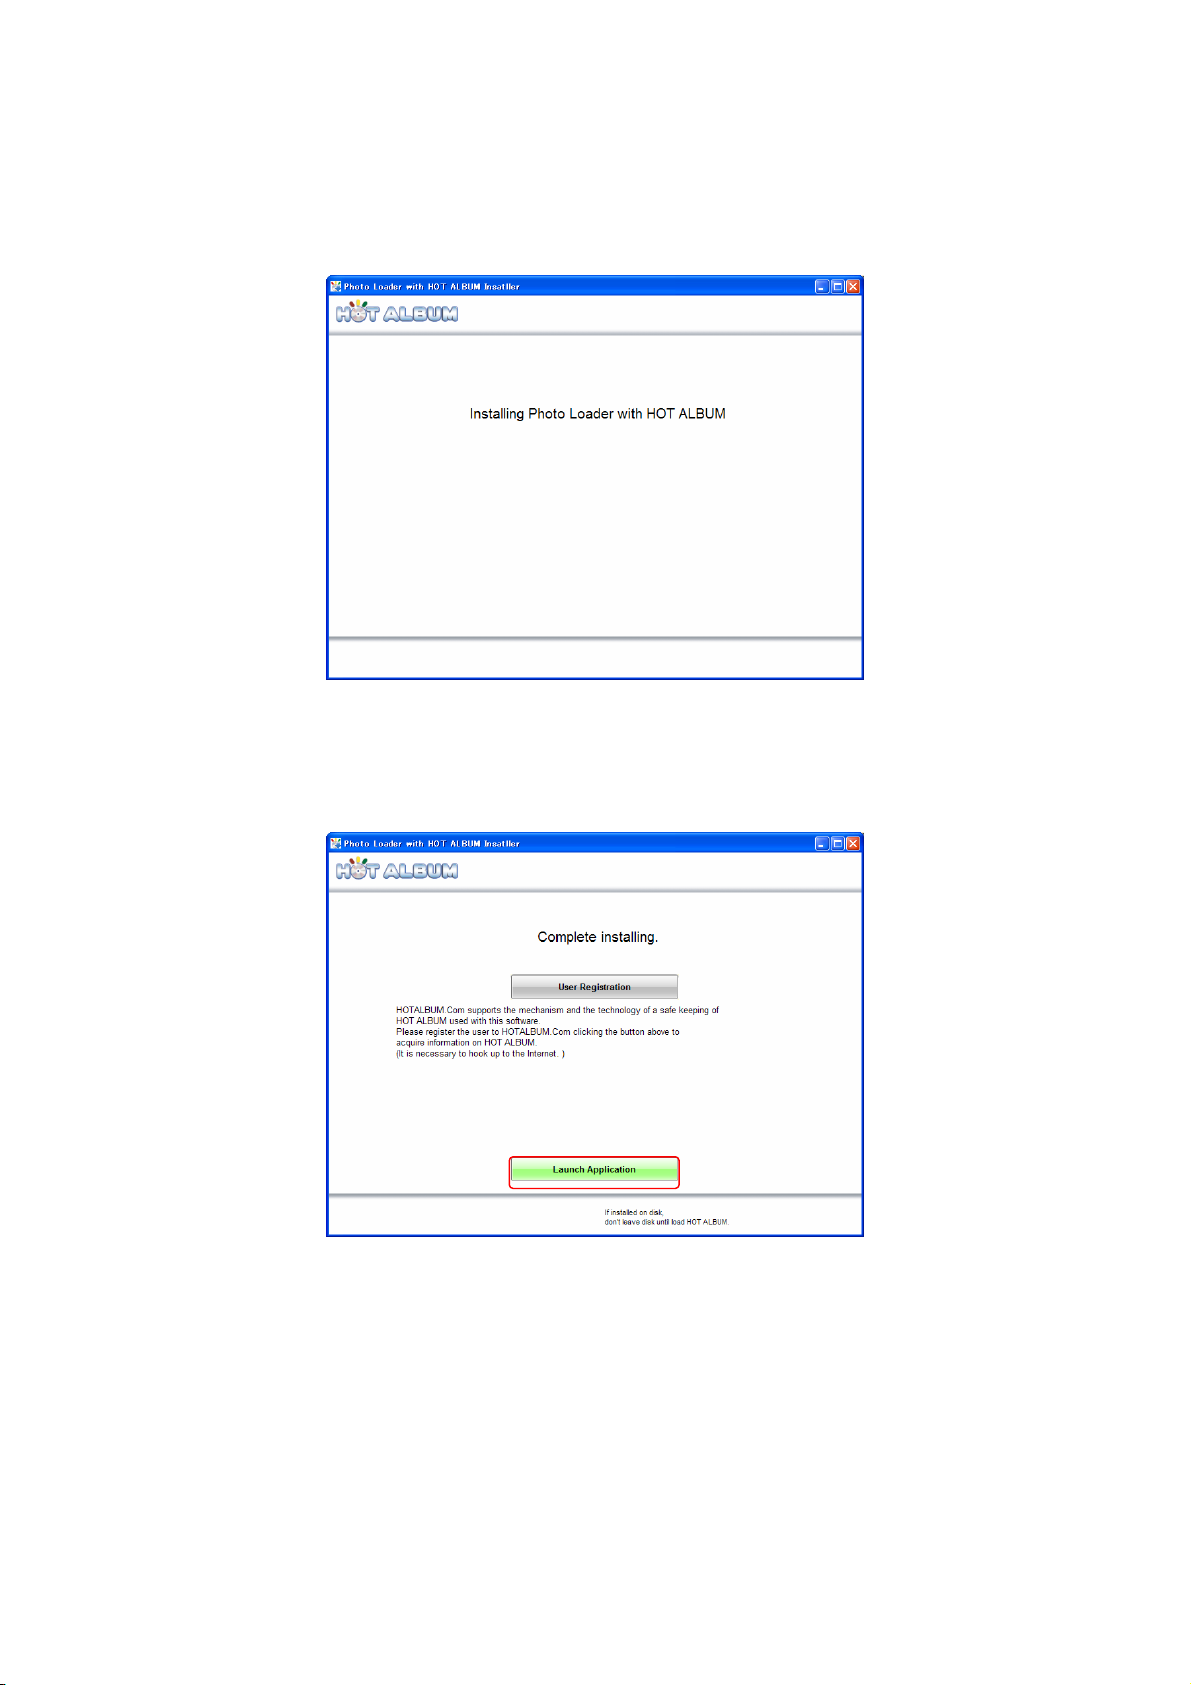
The following message remains on the display as the software is being installed.
The message shown below appears after installation is completed successfully.
17
Page 18

2.2.4. Uninstalling Photo Loader with HOT ALBUM
Perform the following operation on the Windows [Start] menu to start up HA Uninstall Tool:
[All Programs] -> [Casio] -> [Photo Loader with HOT ALBUM] -> [Uninstall].
In response to the confirmation message that appears, click [Yes] to uninstall.
Specify whether or not you want also to delete the image data associated with Photo Loader
with HOT ALBUM.
Clicking [No] will retain the image data, which will be re-associated with the software the
next time you install it.
18
Page 19

On the "Maintenance Complete" screen that appears after the uninstall operation is
completed normally, click [Finish].
19
Page 20

2.3. Using the Software for the First Time
The first thing you need to do after installing Photo Loader with HOT ALBUM is import some
images from your digital camera.
There are two different methods you can use to import images into HOT ALBUM the first time:
importing directly from a memory card and importing from a specified source.
2.3.1. Importing Images Directly from a Memory Card
When Photo Loader with HOT ALBUM is not running, insert the memory card that contains the
images into your computer's memory card slot. This will start up Photo Loader with HOT ALBUM
and display the screen shown below.
Click the [Import] button to start the import operation.
Important!
・If your computer does not have a memory card slot, use a card reader, card adapter, or some
other commercially available device.
If the automatic media monitoring feature is turned off, click "Settings and Software Update" on
the Home Screen and then select [Monitor] for automatic media monitoring.
・ If the above screen does not appear automatically, perform the procedure under "2.3.2
Importing Images from Other Media".
See "2.5.4 Upgrading and Other Settings" for more information.
20
Page 21

Thumbnails of all the images on the detected memory card will appear on the screen.
Select the images you want to import. Initially all of the images are selected for import.
Click an image to toggle it between selected and unselected. You also can select or deselect
multiple images by dragging the mouse pointer across the screen.
Click to change the size of the thumbnails.
Shows the number of currently
selected images.
Selects/Deselects all of the
displayed images.
Important!
・If the detected digital camera, memory card, or folder includes an image type that is not
supported by HOT ALBUM, the number of selected images value may be different from the
number of images that actually are selected. Unsupported Image Types
Unsupported movie files
Compressed TIFF format file
Snapshot file with a short side resolution of 1 pixels or less
Snapshot file with a long side resolution of 5001 pixels or greater
Importable but corrupted file
See "2.1 Computer System Requirements and Disk Capacity".
After selecting the images you want to import, click the [Import] button. This will start import of
the images.
21
Page 22
A screen appears to let you know when image import is complete.
The imported images are stored in a storage area called "Photo Pocket."
For more information, see "2.5.2 Importing Images with Photo Pocket".
The screen shows details about the image import operation. Click the [Next] button.
Important!
・During the import operation, the software checks to make sure that no two images have the
same filename, file size, and shooting date.
・The number of images actually input may be lower than the number of images you selected
for import because some images are skipped because they are damaged, because they
already exist in memory, etc.
22
Page 23

2.3.2. Importing Images from Other Media
Under initial default settings, Photo Loader with HOT ALBUM starts up whenever you double-click
the HOT ALBUM icon on your Windows desktop.
The screen shown below will appear if there are no images currently stored in Photo Loader with
HOT ALBUM.
Click [Start (Import Photos)].
23
Page 24

Select where the images you want to import are located.
[Digital Camera, Memory Card]
[Computer]
[CD, DVD]
Click the button that corresponds to the location from which you want to import images.
Importing Images from a Digital Camera or Memory Card
Establish a connection between the memory card or digital camera where the images you want to
import are located.
The media is detected automatically and the software prepares to display the images.
24
Page 25

Thumbnails of all the images on the detected digital camera or memory card will appear on the
screen.
Select the images you want to import. Initially all of the images are selected for import.
Click an image to toggle it between selected and unselected. You also can select or deselect
multiple images by dragging the mouse pointer across the screen.
Click to change the size of the thumbnails.
Shows the number of currently
selected images.
Selects/Deselects all of the
displayed images.
Important!
・If the detected digital camera, memory card, or folder includes an image type that is not
supported by HOT ALBUM, the number of selected images value may be different from the
number of images that actually are selected.
Unsupported Image Types
Unsupported movie file
Compressed TIFF format file
Snapshot file with a short side resolution of 1 pixels or less
Snapshot file with a long side resolution of 5001 pixels or greater
Importable but corrupted file
See "2.1 Computer System Requirements and Disk Capacity".
After selecting the images you want to import, click the [Import] button. This will start import of
the images.
25
Page 26

Importing Images from a Computer Folder
The folders on your computer's hard disk appear in a tree structure.
Select the folder that contains the images you want to import, and thumbnails of the images will
appear on the screen.
26
Page 27

Select the images you want to import. Initially, none of the images are selected.
Click an image to toggle it between selected and unselected. You also can select or deselect
multiple images by dragging the mouse pointer across the screen.
Click to change the size of the thumbnails.
Selects/Deselects all of the
displayed images.
Shows the number of currently
selected images.
Important!
・If the detected digital camera, memory card, or folder includes an image type that is not
supported by HOT ALBUM, the number of selected images value may be different from the
number of images that actually are selected.
Unsupported Image Types
Unsupported movie file
Compressed TIFF format file
Snapshot file with a short side resolution of 1 pixels or less
Snapshot file with a long side resolution of 5001 pixels or greater
Importable but corrupted file
See "2.1 Computer System Requirements and Disk Capacity".
After selecting the images you want to import, click the [Import] button. This will start import of
the images.
27
Page 28

Importing Images from a CD or DVD
Set the CD or DVD disk that contains the images you want to import into your computer's disk
drive. On the screen that appears, click the [Next] button.
28
Page 29

This will display thumbnails of all of the images on the disk.
Select the images you want to import. Initially all of the images are selected for import.
Click an image to toggle it between selected and unselected. You also can select or deselect
multiple images by dragging the mouse pointer across the screen.
Click to change the size of the thumbnails.
Shows the number of currently
selected images.
Selects/Deselects all of the
displayed images.
Important!
・If the detected digital camera, memory card, or folder includes an image type that is not
supported by HOT ALBUM, the number of selected images value may be different from the
number of images that actually are selected.
Unsupported Image Types
Unsupported movie file
Compressed TIFF format file
Snapshot file with a short side resolution of 1 pixels or less
Snapshot file with a long side resolution of 5001 pixels or greater
Importable but corrupted file
See "2.1 Computer System Requirements and Disk Capacity".
After selecting the images you want to import, click the [Import] button. This will start import of
the images.
29
Page 30
A screen appears to let you know when image import is complete.
The imported images are stored in a storage area called "Photo Pocket."
For more information, see "2.5.2 Importing Photos into Photo Pocket".
The screen shows details about the image import operation. Click the [Next] button.
Important!
・During the import operation, the software checks to make sure that no two images have the
same filename, file size, and shooting date.
・The number of images you selected for import and the number of images stored may be different.
30
Page 31

Home Screen
This is the Photo Loader with HOT ALBUM Home Screen.
You can use it to create a HOT ALBUM, to print, and to perform a variety of other operations.
31
Page 32

2.4. Main Home Screen Functions
You can access Photo Loader with HOT ALBUM functions by clicking the buttons on the Home
screen.
Click to view Home Screen help.
Click to view Photo Loader with HOT ALBUM version
information and to configure various settings.
See "2.5.4 Upgrading and Other Settings" for more
information.
Click to display HOT
ALBUM creating menus.
See 2.6 Creating a HOT
ALBUM".
Click to display menus for printing album
images, attaching images to mail, etc.
See "Using Images".
Use these buttons to access tools to create
slideshow viewing and image viewing more
enjoyable.
See "2.8 Viewing Images".
Importing Photos into Photo Pocket
Images must be imported into Photo Loader with HOT ALBUM. Imported, unedited images are
stored in a storage area called "Photo Pocket."
Use these buttons to select the album type, and to view or delete albums. to view or Selecting the
Viewing and Editing Images
You view images using a list view or an enlarged view. You also can rotate and
edit image as required. See "2.5.1 Viewing and Editing Images"
Album Type, Deleting an Album, and Viewing Album Contents
Photo Loader with HOT ALBUM select you select from among four different album types, depending
upon how much you need to use the images in an album.
32
Page 33

You can use the Home Screen to view and edit the images in an album.
Click to select large,
medium, or small for the
thumbnail size.
Displays the album ID< which is a number that
associates the album written to a HOT ALBUM disk
with the same album on your computer. It also protects
photo data from being deleted accidentally. An album
ID is not displayed for Photo Pocket.
Shows a list of album photos. Use the scroll
bar to scroll up and down.
33
Page 34

Select an image by clicking it or a range of images by dragging the mouse pointer, and then click
one of the buttons below the image screen to perform an operation.
Use these buttons to select or deselect all of the images.
Click to delete the selected image. Go to
"Calendar Screen".
Click to copy the selected image data to the
selected location. Go to "Deleting an Image".
Click to zoom the selected image. An image can be used
as wallpaper, and comment text can be inserted into an
image. Copying Images to Another Location.
Click to rotate a portrait orientation image.
Go to "Zooming an Image".
34
Page 35

Calendar Screen
The calendar screen shows images in date order, which simplifies searching for an image recorded
on a particular date.
Click the [Calendar] button on the Home Screen to display images according to the date they
were shot.
This button is disabled if the
images are note in date order.
35
Page 36

A full month calendar will appear.
Select the month you want to view at the top of the screen, and the applicable full-month calendar
will appear in the center.
Click the day whose images you want to view. This will return to the Home Screen, which now will
show the images for the day you selected on the calendar.
Months that contain image data are displayed in
blue. Clicking a month displays a calendar (or
list) for the selected month.
Clicking the [List] button in the lower right corner will switch from the Calendar Screen to a List
Screen.
Displays the full-month calendar for the selected month. The image shown for a day for which
photo data is available is the first photo that was recorded on that particular day.
36
Page 37

Clicking the [List] button in lower right corner of the full-month calendar screen will change to a
list type calendar screen.
Select the month you want to view at the top of the screen and the image data for the selected
month will appear in a list arranged by date.
Click the day whose images you want to view. This will return to the Home Screen, which now will
show the images for the day you selected on the calendar.
Displays up to the first five photos for the
dates in the selected month that contain
photo data.
37
Page 38

Deleting an Image
You can delete images from the Photo Pocket and an album you are editing as required. In
response to the confirmation message that appears, click [Delete Photo] to delete the image.
Important!
・ An image delete operation cannot be undone.
・ Images in a HOT ALBUM that has been written to a HOT ALBUM disk cannot be deleted. This
protects HOT ALBUM contents against accidental deletion.
38
Page 39

・ Copying Images to Another Location
Images can be selected and saved in another location.
A folder tree that shows the contents of your computers hard disk appear on the display, so you
can select the location you want.
The image data is stored in a folder that is created automatically at the location you select. The
newly created folder will have the name shown on the screen.
After all the settings are the way you want, click [Save].
39
Page 40

Zooming an Image
You can zoom an image to make it larger.
Image Information
"Image Information" shows image information that was input using the album view. This
information can be edited here.
"File Properties" shows image information from the digital camera. This information may be
lost (not displayed) if the image is edited.
Use the [Prev] and [Next] buttons to scrolls
through the images in the album. Use these
buttons to scroll through images when multiple
Click to toggle between [Image
Information] and [Enter Comment].
40
Page 41

Click to zoom to maximum
size for the current window.
Click to close this screen and
return to the screen under
Click to display the image at actual size (actual pixels).
If the entire image does not fit within the window, use
the scrolls bars that appear to scroll it.
41
Page 42

Comment Text
Use this input palette to insert comment text into an image.
You cannot insert comment text into a Photo Pocket image.
Click to return to the Home
Screen.
Click to rotate a portrait orientation
image.
[Image Information]/[Enter Comment]
Click to toggle between the two
screens.
Wallpaper Settings
Click to make the currently display image
your computer monitor's wallpaper image.
Comment text cannot be inserted into a
wallpaper image.
42
Page 43

Rotating an Image
Images that were recorded in portrait orientation can be rotated so they are displayed using the
correct orientation.
Select the images to be rotated.
▼ Before Rotation
Click [Rotate Left] or [Rotate Right].
▼ After Rotation
43
Page 44

2.4.1. Importing Images into Photo Pocket
Photo Pocket is an area for temporary storage of images that are imported into Photo Loader with
HOT ALBUM.
Though there is really no limit on Photo Pocket capacity, it is a good idea to protect important
images by putting them into a HOT ALBUM.
Click to select images from Photo
Pocket, an album, or your computer, and
to edit and album.
Click to import images into Photo Pocket.
Click [Import Photos to Photo Pocket] to start import of images to Photo Pocket. See "2.3.2
Importing Image from other Media" for more information.
44
Page 45

Selecting the Album Type, Deleting an Album, and Viewing Album Contents
Photo Loader with HOT ALBUM provides you with three types of albums.
Editing Album
This is an album created of Pocket Album images or images selected from a folder or some other
source, which are being edited by inserting comment text, etc.
HOT ALBUM
This is a secure album that is stored both on a HOT ALBUM disk and on your computer.
Thumbnail Album
This is an album that contains thumbnails only. This type of album makes it possible to store large
volumes of images without using up too much disk space. Use this type of album to store
thumbnails of images you don't need to view often. Thumbnails can be viewed on a list. Originals
are stored on a HOT ALBUM disk.
45
Page 46

Click the [Sort by Date] button to display photos
by date, regardless of their albums.
Click to modify the album title or date.
Go to "Modifying the Title or Date".
Click to delete an album that is no
longer needed. Go to "Deleting an
Album".
46
Page 47

Album Type an Supported Photo
Loader with HOT ALBUM Function
Album Type Home Screen Operation
Thumbnail
Photo Pocket Editing Album HOT ALBUM
Album
Edit and Create
Write to Disk
Send Mail
Print
Main Menu
Order Print
Album View
Slideshow
Display Size
display/Manage Images
Delete Image
Digital Camera Print
Layout Print
Jacket Print
○ ○ ○
○
○ ○ ○ ○
○ ○ ○
○ ○ ○
○ ○ ○
○ ○ ○
○ ○ ○
○
(No Music)
○
(No Music)
○
○ ○ ○ ○
○ ○
○
Copy to Folder
Zoom
Rotate
Sort by Date
Delete
Mange Albums
Album
Re-register Album
Modify Title or Date
Other
Import Images to Photo Pocket
Settings and Software Update
Delete All
Delete Main Image
Only
○ ○ ○
○ ○ ○ ○
○ ○ ○ ○
○ ○ ○ ○
○ ○ ○ ○
○
○
○ ○
○ ○ ○ ○
○ ○ ○ ○
47
Page 48

Deleting an Album
Albums can be deleted when you no longer need them.
There are two methods you can use to delete an album from a HOT ALBUM: Delete the entire
album (which will make it impossible to display the album on your computer), or delete the main
image (which maintains the thumbnail).
To replace the main images back into a Thumbnail Album, select the applicable mini album and
then click [Restoring images].
48
Page 49

Place the HOT ALBUM disk that has the same album ID as the one that appears on the display
into the computer's CD-ROM drive.
Click [OK] to replace the main images. This will cause the Thumbnail Album symbol to change to a
HOT ALBUM symbol.
Click [Back] to return to the Home Screen.
Deleting an Editing Album or a Thumbnail Album completely deletes the album.
Important!
An album delete operation cannot be undone.
49
Page 50

Modifying the Title or Date
You can modify the title or date information of a saved album. Such information cannot be changed
for a Thumbnail Album
Input the new information and then click [Set].
Important!
Though you can modify the title or date information for a HOT ALBUM, you cannot modify the title
or date, or the slideshow title that appears when the slideshow is viewed on a computer.
50
Page 51

2.4.2. Upgrading and Other Settings
Click [Settings and Software Update] when you want to check the current version of Photo
Loader with HOT ALBUM or configure its settings.
51
Page 52

Album Save Drive
Change the album save drive setting here. This setting can
be change when your computer's hard disk is partitioned into
multiple drives, or if it has an external hard disk connected.
Clicking this button displays the selectable
▼ Settings and Software Update Screen
Photo Loader with HOT ALBUM Version Information
We are constantly upgrading Photo Loader with HOT ALBUM in order to improve its
functions, to make digital imaging more enjoyable, and to make it operation easier and
more enjoyable. Each time you start up Photo Loader with HOT ALBUM your Internet
connection is used to see if there is a newer version available. You will be notified
whenever there is. You also can check manually by clicking [Check for Updates Online].
CD Drive Settings
These settings specify the CD drive conditions used when creating a HOT ALBUM.
If your computer has multiple CD drives, you can distinguish between a read drive (for
reading image data and music data from a CD) and a write drive.
Normally you should leave the writing speed setting at "Default". In very rare cases,
incompatibility between the HOT ALBUM disk and CD drive can result in writing
problems. If this happens, try using a slower writing speed.
52
Page 53

Screen Skin
Use this setting to change the look of the
operation screens.
Skip Screen Display
Photo Loader with HOT
ALBUM has a number of
guidance screens designed to
assist you when you are
performing operations.
After you become accustomed
to the operations, you can
disable these guidance screens
by selecting the "Skip All"
check box. To re-enable display
of the guidance screens, click
the [Show All] button here.
Automatic Media Monitoring
Automatic media monitoring
automatically detects when
there is a memory card (media)
that contains digital camera
images whenever Photo Loader
with HOT ALBUM is started up,
and imports the images. You
can select either [Monitor] or
[Do not monitor] for this
function.
After configuring settings, click the [Back]. A confirmation dialog box will appear asking if you want
to save them.
Click [Yes] to save the settings.
53
Page 54

2.5. Creating a Video CD
To create a video CD, simply select the images you want to copy to the CD in Photo Pocket
or computer folder, edit them as required, and then save them to the disk.
While editing an album, you can temporarily save what you have done up to a certain point
and resume work later, if you want.
Click [Edit album/Write to disk].
54
Page 55

2.5.1. Selecting a HOT ALBUM Disk or Video CD Disk
You can use the above screen to specify whether you want to create a HOT ALBUM disk or
a Video CD. Under the initial configuration of the software, you can create Video CDs only.
In order to be able to create a HOT ALBUM disk, you will need to purchase the HOT ALBUM
write function separately. The following are the features of each type of disk.
・ HOT ALBUM Disk
Your images and thumbnail images are stored based on the EVERYPLAY standard.
You also can add comment text to album images.
You can add built-in background music to a slideshow, or even import WAV files from music
CDs or your computer disk.
HOT ALBUM disk image viewer software (HA Viewer) or Photo Loader with HOT ALBUM
also is included with images stored on a HOT ALBUM disk.
Video CD data is also included, which means you can playback from the disk on a DVD
player, etc.
・ Video CD Disk
This feature lets you write data to a general CD-R disk.
To create a Video CD, simply select the images you want in the Photo Pocket or from a
folder on your computer.
You can add built-in background music to a slideshow.
55
Page 56

2.5.2. Selecting Images
Select the images in Photo Pocket that you want to include in the album.
You can select a single image by clicking it, or you can select a range of image by dragging the
mouse pointer across a range of images.
Clicking a selected image deselects it.
Double-clicking an image will enlarge it.
Selected images are the ones that have a check mark.
List View
Click to change the size of the thumbnails.
You can select a single image by clicking it, or you can select a
range of image by dragging the mouse pointer across a range of
images.
Click to select all of the images.
56
Page 57

Click to de-select all selected
images.
Click to return to the
Home Screen.
Shows the number of selected images and the data size.
Up to 240 images (or 256 MB) can be selected.
For movies, up to a total playback time of 25 minutes can be selected.
After all of the images you want are selected, click the [Next] button.
Double-click an image to
enlarge it. Double-click a
movie to play it.
57
Page 58

2.5.3. Checking the Order and Orientation of the Images
Check the order and orientation of the images. This is a very important step that determines
how your HOT ALBUM slideshow images will appear.
Images that were recorded in portrait orientation should be rotated so the bottom of the
image is at the bottom of the screen when displayed.
Images appear in the slideshow in the order they are selected. You can chance the order of
the images as you like at this time. You also can rearrange the images by date order. Click an
image or drag across a range of images to select them.
To rotate, click [Rotate Left] or [Rotate Right]. To change the order of an image, drag it from
its current location to a different location.
You can select multiple images to rotate or move them with a single operation.
Click to sort all images by date and time.
Important!
Images are sorted by digital camera Exif information. Proper noting
may not be possible if the camera's calendar was not set correctly
or if information was modified.
▼ Includes Portrait Orientation Images before Rotation
Click to change the size
of the thumbnails.
Click to return to the image
selection screen.
Click and image or drag the mouse
pointer across a range of images to
select them.
58
Page 59

Click to temporarily save the data you working on and terminate editing.
See "2.6.13 Temporarily Saving In-progress Edits" and "2.6.14 Resuming
and Editing Operation".
▼ Includes Portrait Orientation Images after Rotation
Click to delete the
selected image(s).
Click to rotate the selected image(s).
After the images are the order and the orientation you want, click [Next].
59
Page 60

2.5.4. Creating a Title Screen
You can create a title screen that appears at the beginning of a slideshow. Select the
background you want to use, and then input the album title text.
You can configure size, type, color, shadowing (on/off), and position settings for the title font.
Important!
Title text input is limited to one line of 50 byte characters.
The date the image was shot is displayed automatically using the Exif information of the
image, but can be edited if you want.
You also can specify non-display for the date.
Click to select a title background.
▼ Before Title Input
Click to return to the screen under "Checking the
Order and Orientation of the Images".
60
Input the title. The date is displayed
automatically based on the digital
camera Exif information, but you can
change it if you want.
Date display can be turned off by clicking
the [No Date] button.
Page 61

Click to temporarily save the data you working on and
terminate editing. See "2.6.13 Temporarily Saving In-progress
Edits" and "2.6.14 Resuming and Editing Operation".
▼ After Title Input
Use this palette to
change the
attributes of the title
text.
This is a preview of the title screen.
The album ID is an album control number that is generated
and assigned automatically when the album is created.
When the title screen is the way you want, click [Next].
61
Page 62

2.5.5. Adding Background Music
You can add music to a slideshow so it plays back while the images are being shown.
A slideshow can be played back on a TV screen from a Video-CD using a DVD player
(Video-CD ver.2 compatible).
Background Music Performance Time
When playing back on a DVD player, the slide change interval is set automatically to a time that
allows optimum viewing, in the range of four to seven seconds. The approximate duration of a
slideshow is calculated and displayed based on the number of selected images, and the playback
time of movies if any are included in the slideshow.
Note that the displayed slideshow duration is a rough approximation only, intended to give you
some idea of the length of background music required.
Important!
Background music that is longer than 10 minutes cannot be used.
There is nothing wrong with selecting background music that is shorter or longer than the
displayed slideshow duration. If the music is shorter than the displayed slideshow duration, the
music will keep repeating until the end of the slideshow is reached, and then fade out. If the music
is longer than the displayed slideshow duration, the slideshow will repeat until the end of the music
is reached.
Important!
When viewing a slideshow on a computer, you can select from among five different slide change
intervals.
You can select any one of the following for background.
Music that comes with Photo Loader with HOT ALBUM
Music on a CD
WAV music file
Of course, you can create a slideshow without any music, if you want.
62
Page 63

Lists the music in the currently selected source.
Data can be saved temporarily and editing can be terminated, but
doing so does not save background music. Music must be selected
again when you resume editing.
See "2.6.13 Temporarily Saving In-progress Edits" and "2.6.14
Resuming and Editing Operation".
Indicates the approximate slideshow duration
when the album is played on a DVD player.
▼ Add Background Music Screen
Click to return to the
previous screen.
Music plays back automatically when selected.
Use these controls to start and stop playback, and to adjust the volume
level.
Click a button to select the background
music source. You can create a
slideshow without any music, if you
want.
Shows the currently selected music.
This list shows the music that comes with the
software.
63
Page 64

Adding Music that comes with Photo Loader with HOT ALBUM
Photo Loader with HOT ALUM comes with a great selection of music that you can use for your
slideshows. Simply click the music you want on the list to select it.
List of music that comes with the software.
Shows the currently selected music.
After selecting the music you want, click [Next].
Selecting music (so it is highlighted) and
clicking the [Use the selected music] button
adds the selected music to the list at the
bottom of the screen.
64
Page 65

2.5.6. Checking Images
Check the current contents of the Video-CD before storing image data on it.
You can use the preview screen to check the slideshow images and background music.
Important!
Though the timing of the slideshow shown in the preview screen is different from the timing when
playing back on a DVD player, you can use it to check the images and their order.
Data can be saved temporarily and editing can be terminated, but
doing so does not save background music. Music must be selected
again when you resume editing.
See "2.6.13 Temporarily Saving In-progress Edits" and "2.6.14
Resuming and Editing Operation".
Click to change the size of the
thumbnails.
This is a preview screen for checking slideshow
images. Comment text is displayed, but slide
duration is different from actual playback..
65
Page 66

You can check the album images and the order of the slideshow here.
Click to return to the Add Background Music .screen.
Use these controls to start, stop, and fast forward
preview play, and to adjust the volume level.
When everything is the way you want, click [Next].
66
Page 67

2.5.7. Writing an Album to a Video CD Disk
Open the computer's CD-ROM drive.
Data can be saved temporarily and editing can be terminated, but doing so
does not save background music. Music must be selected again when you
resume editing.
See "2.6.13 Temporarily Saving In-progress Edits" and "2.6.14 Resuming and
Editing Operation".
Click to return to the screen under "Checking Images".
Place a blank disk into the CD-ROM drive and then click [Write].
Important!
・ If the selected images include a movie file, you will need to have Windows Media Player 9
or higher and DirectX 9.0 or higher installed on your computer in order to write the move
file to a HOT ALBUM disc or to create a video CD.
・ If the selected images include a MOV format move file, you will need to have QuickTime
7.1.3 installed on your computer in order to write the move file to a HOT ALBUM disc or to
create a video CD.
Unsupported files cannot be written to a HOT ALBUM disk (Video CD). See "Supported Data
Formats" in the table under "Computer System Requirements and Disk Capacity" for more
information.
67
Page 68

The program will check whether the disk you inserted is a blank disk..
Progress bars will appear on the screen to show you the progress of the data write operation. The
time required to complete the data write operation depends on the number of images you selected
and the size of each image.
68
Page 69

2.5.8. Image Write Complete Screen
The disk will be ejected automatically when the write operation is complete.
To ensure proper disk management, you should write the title, date, and album ID on the disk
surface.
When writing information on a disk, be sure to write only on the disk label with a soft-tip pen or
similar writing instrument.
Returns to the Home Screen.
Now you can create and print an attractive jacket for your disk case.
Click [CD Jacket Printing] to begin.
69
Page 70

2.5.9. Creating a Disk Case Jacket
First, design the jacket.
・ Select the jacket background.
・ Check and edit the title and date, and change text attributes.
・ Select the cover image and specify whether or not you want an image index on the back.
Click to return to the [Complete screen] screen.
Click a jacket template
(background) to select it.
This is a preview of the edits.
Shows the album title and date, which can be
edited.
Disk contents cannot be modified.
70
Page 71

Click to return to the [Complete
screen] screen.
Everything is the way you want, click [Next].
Use this palette to change the font and
color of the title and date.
71
Page 72

2.5.10. Configuring Print Settings and Printing
Specify the type of printer you have connected to your computer and configure printer settings.
Click to return to the [Complete screen] screen.
Click to return to the
[Select a design] screen.
Use this area to select the printer type and
configure print settings.
This is the print image.
After all the settings are the way you want, click [Start Printing].
After printing is complete, click [Return to complete screen].
72
Page 73

2.6. Creating a HOT ALBUM (Secure Save)
There are two methods you can use on the Home Screen to create a HOT ALBUM: Edit and
Create, and HOT ALBUM Copy.
2.6.1. Edit and Create
Editing involves selecting images from Photo Pocket, a computer folder, or another source for
inclusion in the album, and performing such editing functions as inserting comment text to make
your slideshows more interesting and enjoyable. You also can write to a blank disk and create a
HOT ALBUM.
While editing an album, you can temporarily save what you have done up to a certain point and
resume work later, if you want.
To start an edit and create operation, click [Edit album Write to disk].
73
Page 74

Selecting a HOT ALBUM Disk or Video CD Disk
You can use the above screen to specify whether you want to create a HOT ALBUM disk or
a Video CD. Under the initial configuration of the software, you can create Video CDs only.
In order to be able to create a HOT ALBUM disk, you will need to purchase the HOT ALBUM
write function separately. The following are the features of each type of disk.
・ HOT ALBUM Disk
Your images and thumbnail images are stored based on the EVERYPLAY standard.
You also can add comment text to album images.
You can add built-in background music to a slideshow, or even import WAV files from music
CDs or your computer disk.
HOT ALBUM disk image viewer software (HA Viewer) or Photo Loader with HOT ALBUM
also is included with images stored on a HOT ALBUM disk.
Video CD data is also included, which means you can playback from the disk on a DVD
player, etc.
・ Video CD Disk
This feature lets you write data to a general CD-R disk.
To create a Video CD, simply select the images you want in the Photo Pocket or from a
folder on your computer.
You can add built-in background music to a slideshow.
74
Page 75

2.6.2. Selecting Images
Select the images you want to include in the album. Select the images in Photo Pocket that
you want to include in the album.
Click an image or drag across a range of images to select them.
Clicking a selected image deselects it.
Double-clicking an image will enlarge it.
Selected images are the ones that have a check mark.
List View
Click to change the size of the thumbnails.
Click to import images into Photo
Pocket.
You can select a single image by
clicking it, or you can select a range
of image by dragging the mouse
pointer across a range of images.
Click to select all of the images.
75
Page 76

Double-click an image to
enlarge it. Double-click a
movie to play it.
Click to de-select all
currently selected images.
Shows the number of selected images and the
Click to return to the Home
Screen.
data size.
Up to 240 images (or 256 MB) can be selected.
After all of the images you want are selected, click the [Next] button.
76
Page 77
2.6.3. Checking the Order and Orientation of the Images
Check the order and orientation of the images. This is a very important step that determines how
your HOT ALBUM slideshow images will appear.
Images that were recorded in portrait orientation should be rotated so the bottom of the image is
at the bottom of the screen when displayed.
Images appear in the slideshow in the order they are selected. You can chance the order of the
images as you like at this time. You also can rearrange the images by date order. Click an image or
drag across a range of images to select them.
To rotate an image click [Rotate]. To reposition an image, drag it to the location you want.
Click to sort all images by date and time.
Important!
Images are sorted by digital camera Exif information. Proper noting may not be
possible if the camera's calendar was not set correctly or if information was
modified.
▼ Includes Portrait Orientation Images before Rotation
Click to change the size
of the thumbnails.
Click to return to the image
selection screen.
Click and image or drag the mouse
pointer across a range of images to
select them.
77
Page 78

Click to temporarily save the data you working on and terminate editing.
See "2.6.9 Temporarily Saving In-progress Edits".
▼ Includes Portrait Orientation Images after Rotation
Click to delete the selected
image(s).
After the images are the order and the orientation you want, click [Next].
Click to rotate the selected image(s).
78
Page 79

2.6.4. Creating a Title Screen
You can create a title screen that appears at the beginning of a slideshow. Select the background
you want to use, and then input the album title text.
You can configure size, type, color, shadowing (on/off), and position settings for the title font.
Important!
Title text input is limited to one line of 25 double-byte characters.
The date the image was shot is displayed automatically using the Exif information of the image, but
can be edited if you want.
You also can specify non-display for the date.
Click to select a title background.
▼ Before Title Input
Click to return to the screen under "Checking the
Order and Orientation of the Images".
Input the title. The date is
displayed automatically based
on the digital camera Exif
information, but you can
change it if you want.
Date display can be turned
off by clicking the [No Date]
button.
79
Page 80

Click to temporarily save the data you working on and terminate
editing.
See "2.6.9 Temporarily Saving In-progress Edits".
▼ After Title Input
Use this palette to
change the attributes
of the title text.
This is a preview of the title screen.
The album ID is an album control number that is generated
and assigned automatically when the album is created.
When the title screen is the way you want, click [Next].
80
Page 81

2.6.5. Inputting Comment Text into an Image
You can input comment text into each of the selected images. The text appears both in the
slideshow and in prints.
You also can change the font type, size, color, and position, and turn shadowing on or off.
Important!
You can input up to one horizontal line of 50byte characters.
You can insert a date stamp in the lower right corner of an image. A date stamp can be inserted
into a particular image or into all images.
Initially date the image was shot shows Exif information from the digital camera. It will be displayed
as-is in the zoomed view and album if you do not modify it.
Click the image into which you
want to insert comment text.
Input the comment text here.
▼ Before Comment Text is Inserted
Click to return to the screen under
"Creating a Title Screen".
Use these buttons to turn date stamping (lower
right corner) on or off. When on, click [Apply to
all photos] to date stamp all of the images.
81
Page 82

Click to temporarily save the data you working on and terminate
editing.
See "2.6.9 Temporarily Saving In-progress Edits".
▼ After Comment Text is Inserted
This is a preview of the edited image.
Use this palette to change the attributes of the comment text.
Text also can be dragged to reposition it.
After the comment text is the way you want, click [Next].
82
Page 83

2.6.6. Adding Background Music
You can add music to a slideshow so it plays back while the images are being shown.
A DVD player (Video-CD Version 2 compatible) can be used to play back a slideshow from an
album written to a HOT ALBUM disk.
Background Music Performance Time
When playing back on a DVD player, the slide change interval is set automatically to a time that
allows optimum viewing, in the range of four to seven seconds. The approximate duration of a
slideshow is calculated and displayed based on the number of selected images, and the playback
time of movies if any are included in the slideshow.
Note that the displayed slideshow duration is a rough approximation only, intended to give you
some idea of the length of background music required.
Important!
Background music that is longer than 10 minutes cannot be used.
There is nothing wrong with selecting background music that is shorter or longer than the
displayed slideshow duration.
If the music is shorter than the displayed slideshow duration, the music will keep repeating until
the end of the slideshow is reached, and then fade out.
If the music is longer than the displayed slideshow duration, the slideshow will repeat until the end
of the music is reached.
Important!
When viewing a slideshow on a computer, you can select from among five different slide change
intervals.
You can select any one of the following for background.
Music that comes with Photo Loader with HOT ALBUM
Music on a CD
WAV music file
Of course, you can create a slideshow without any music, if you want.
83
Page 84

Lists the music in the currently selected source.
to adjust the volume level.
previous screen.
music.
Data can be saved temporarily and editing can be
terminated, but doing so does not save background music.
Music must be selected again when you resume editing.
See "2.6.9 Temporarily Saving In-progress Edits".
Indicates the approximate slideshow duration when
the album is played on a DVD player.
▼ Add Background Music Screen
Click to return to the
Music plays back automatically when selected.
Use these controls to start and stop playback, and
Click a button to select the background
music source. You can create a
slideshow without any music, if you
want.
Shows the currently selected
This list shows the music that comes with the
software.
84
Page 85

Adding Music that comes with Photo Loader with HOT ALBUM
Photo Loader with HOT ALUM comes with a great selection of music that you can use for your
slideshows. Simply click the music you want on the list to select it.
List of music that comes with the software.
Shows the currently selected music.
After selecting the file you want, click [Next].
85
Page 86

Adding Music from a Music CD
Important!
・ You may not be able to import music CDs with copy control and other types of CDs.
・ Note that you should never import or copy any music for background music from a commercially
available CD, except for personal or household use, without permission of the copyright holder.
Click [From Music CD] and your computer's CD drive will be opened automatically.
Click to return to the Add Background Music screen.
Set the music CD you want to use into the drive and then click [Next].
86
Page 87

This will display the music list of the music CD as track number. You can hear a preview of a track
by clicking it on the screen.
Lists the track numbers of a music CD.
Click to select a different music CD.
After selecting the file you want, click [Next].
Shows the number of the currently
selected track..
87
Page 88

This will convert the music to HOT ALBUM music format.
88
Page 89

Selecting a WAV File
Important!
Only the WAV format is supported for HOT ALBUM movie files.
You can enable support for MP3 files, WMA files, and other music files by purchasing a new
function. See "2.13 New Functions" for more information.
This will display a tree view of the folders on your computer. Use it to select the folder that
contains the WAV file you want to use.
List of WAV files.
Shows the currently selected music.
After selecting the file you want, click [Next].
89
Page 90

2.6.7. Checking the Images
You should carefully check the contents of your album before saving your images to a HOT
ALBUM disk. You can use the preview screen to check the slideshow images and background
music.
Important!
Though the timing of the slideshow shown in the preview screen is different from the timing when
playing back on a DVD player, you can use it to check the images and their order.
Data can be saved temporarily and editing can be
terminated, but doing so does not save background music.
Music must be selected again when you resume editing.
See "2.6.9 Temporarily Saving In-progress Edits".
Click to change the size of the
thumbnails.
This is a preview screen for checking slideshow
images. Comment text is displayed, but slide
duration is different from actual playback..
90
Page 91

You can check the album images and the order of the slideshow here.
Click to return to the Add Background Music screen.
Use these controls to start, stop, and fast forward preview play,
and to adjust the volume level.
When everything is the way you want, click [Next].
91
Page 92

2.6.8. Saving and Album to a HOT ALBUM Disk
Open the computer's CD-ROM drive.
Data can be saved temporarily and editing can be terminated, but doing
so does not save background music. Music must be selected again when
you resume editing. See "2.6.9 Temporarily Saving In-progress Edits".
Click to return to the screen under "Checking Images".
Place a blank disk into the CD-ROM drive and then click [Write].
Important!
・ You can write to a HOT ALBUM disk only once. You cannot add to or modify the contents of a
HOT ALBUM disk.
・ Note that you cannot save a HOT ALBUM to a standard CD-R, DVD-R, or any other type of
disk.
・ If the selected images include a movie file, you will need to have Windows Media Player 9
or higher and DirectX 9.0 or higher installed on your computer in order to write the move
file to a HOT ALBUM disc or to create a video CD.
・ If the selected images include a MOV format move file, you will need to have QuickTime
7.1.3 installed on your computer in order to write the move file to a HOT ALBUM disc or to
create a video CD.
・ Unsupported files cannot be written to a HOT ALBUM disk. See "Supported Data Formats" in
the table under "Computer System Requirements and Disk Capacity" for more information.
92
Page 93

The program will check whether the disk you inserted is a blank disk.
Progress bars will appear on the screen to show you the progress of the data write operation. The
time required to complete the data write operation depends on the number of images you selected
and the size of each image.
93
Page 94

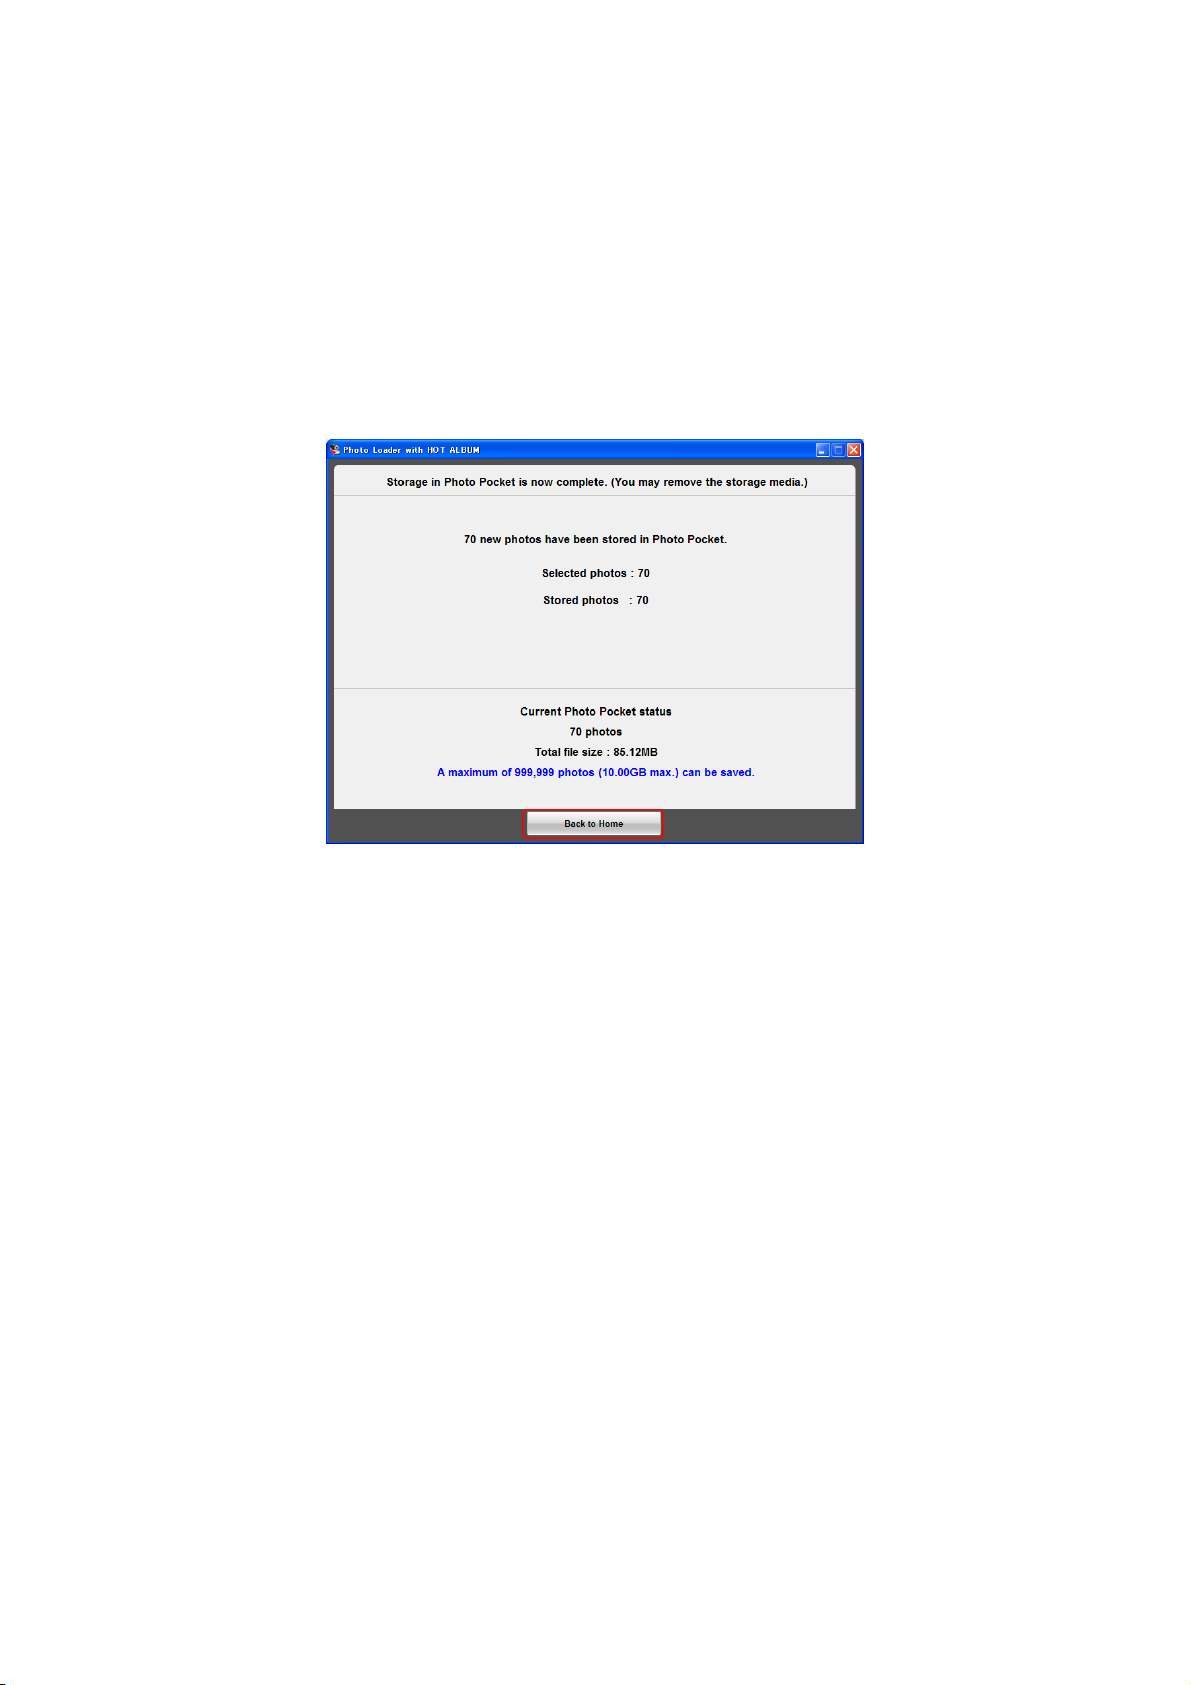
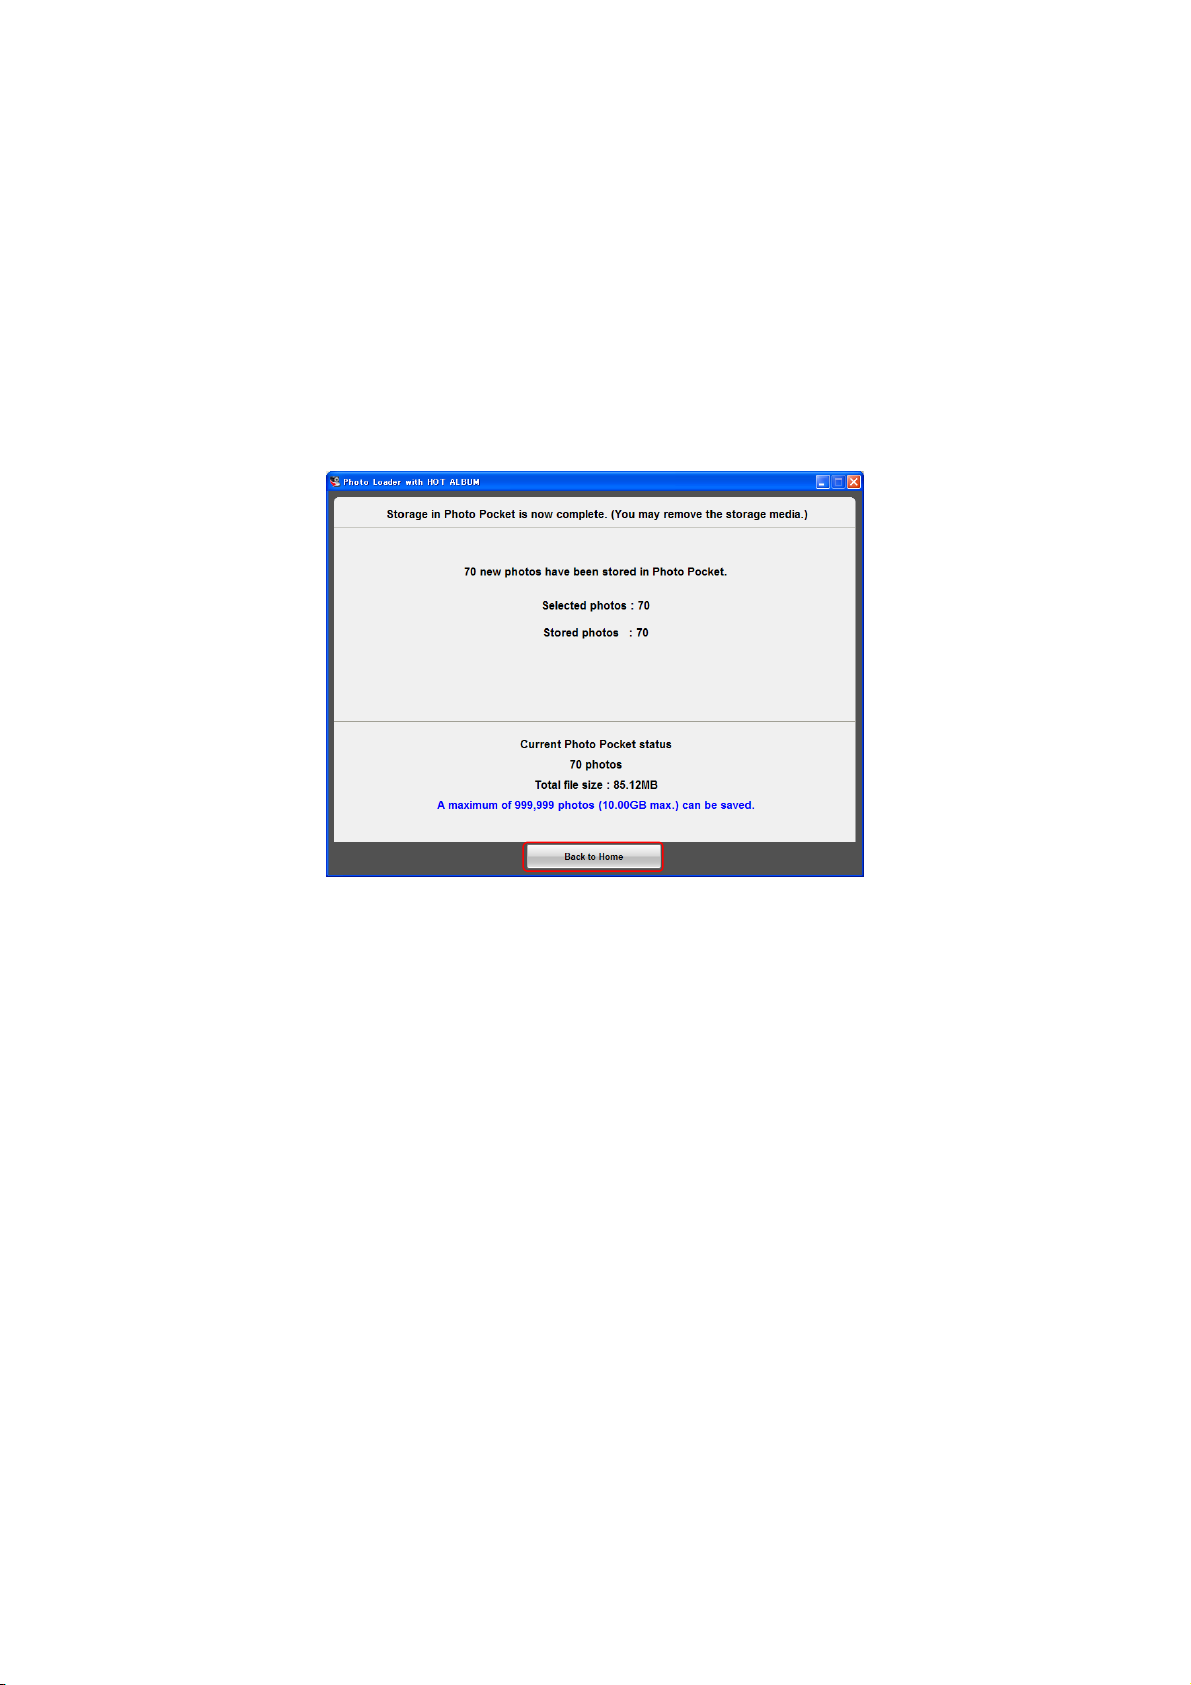
2.6.9. Image Write Complete Screen
The disk will be ejected automatically when the write operation is complete.
To ensure proper disk management, you should write the title, date, and album ID on the disk
surface.
Click here to back up the
album on your computer.
Click here to create another HOT ALBUM
disk with the same album content.
Important!
When writing information on a disk, be sure to write only on the disk label with a soft-tip pen or
similar writing instrument.
Now you can create and print an attractive jacket for your disk case.
Click [Print Jacket] to begin.
94
Page 95

2.6.10. Creating a Disk Case Jacket
First, design the jacket.
・ Select the jacket background.
・ Check and edit the title and date, and change text attributes.
・ Select the cover image and specify whether or not you want an image index on the back.
Click a jacket template (background)
to select it.
Click to return to the [Complete
screen].
This is a preview of the edits.
Shows the album title and date, which can be
edited.
Disk contents cannot be modified.
Date display can be turned off by clicking the [No
Date] button.
95
Page 96

Everything is the way you want, click [Next].
Click to return to the [Complete
screen].
Use this palette to change the font and
color of the title and date.
96
Page 97

2.6.11. Configuring Print Settings and Printing
Specify the type of printer you have connected to your computer and configure printer settings.
Click to return to the [Complete screen].
Click to return to the
[Select a design] screen.
Use this area to select the printer type
and configure print settings.
This is the print image.
After all the settings are the way you want, click [Print].
After printing is complete, click [Return to Complete screen].
97
Page 98

2.6.12. Backing Up Album Contents
Album contents can be written to a HOT ALBUM disk and saved on your computer to help keep its
contents safe and secure.
Clicking [Back to Home] will save the album to your computer and display the Home Screen.
The Home Screen shows an icon for each of the saved albums.
▼ Home Screen
98
Page 99

2.6.13. Temporarily Saving In-progress Edits
Data can be saved partway through an editing and creation operation for later recall when you
want to work on it again.
This means you can take your time editing or you can put the data aside when you do not have a
blank disk on hand to save it permanently.
To temporarily save data, first click [Return to Home screen].
The in progress data will be saved temporarily as a Editing Album
Important!
・ Any music you select under "Adding Background Music" is not saved in the temporary Editing
Album
・ If you want to include music when you create a HOT ALBUM disk, you will need to select it
again before writing the data to disk.
99
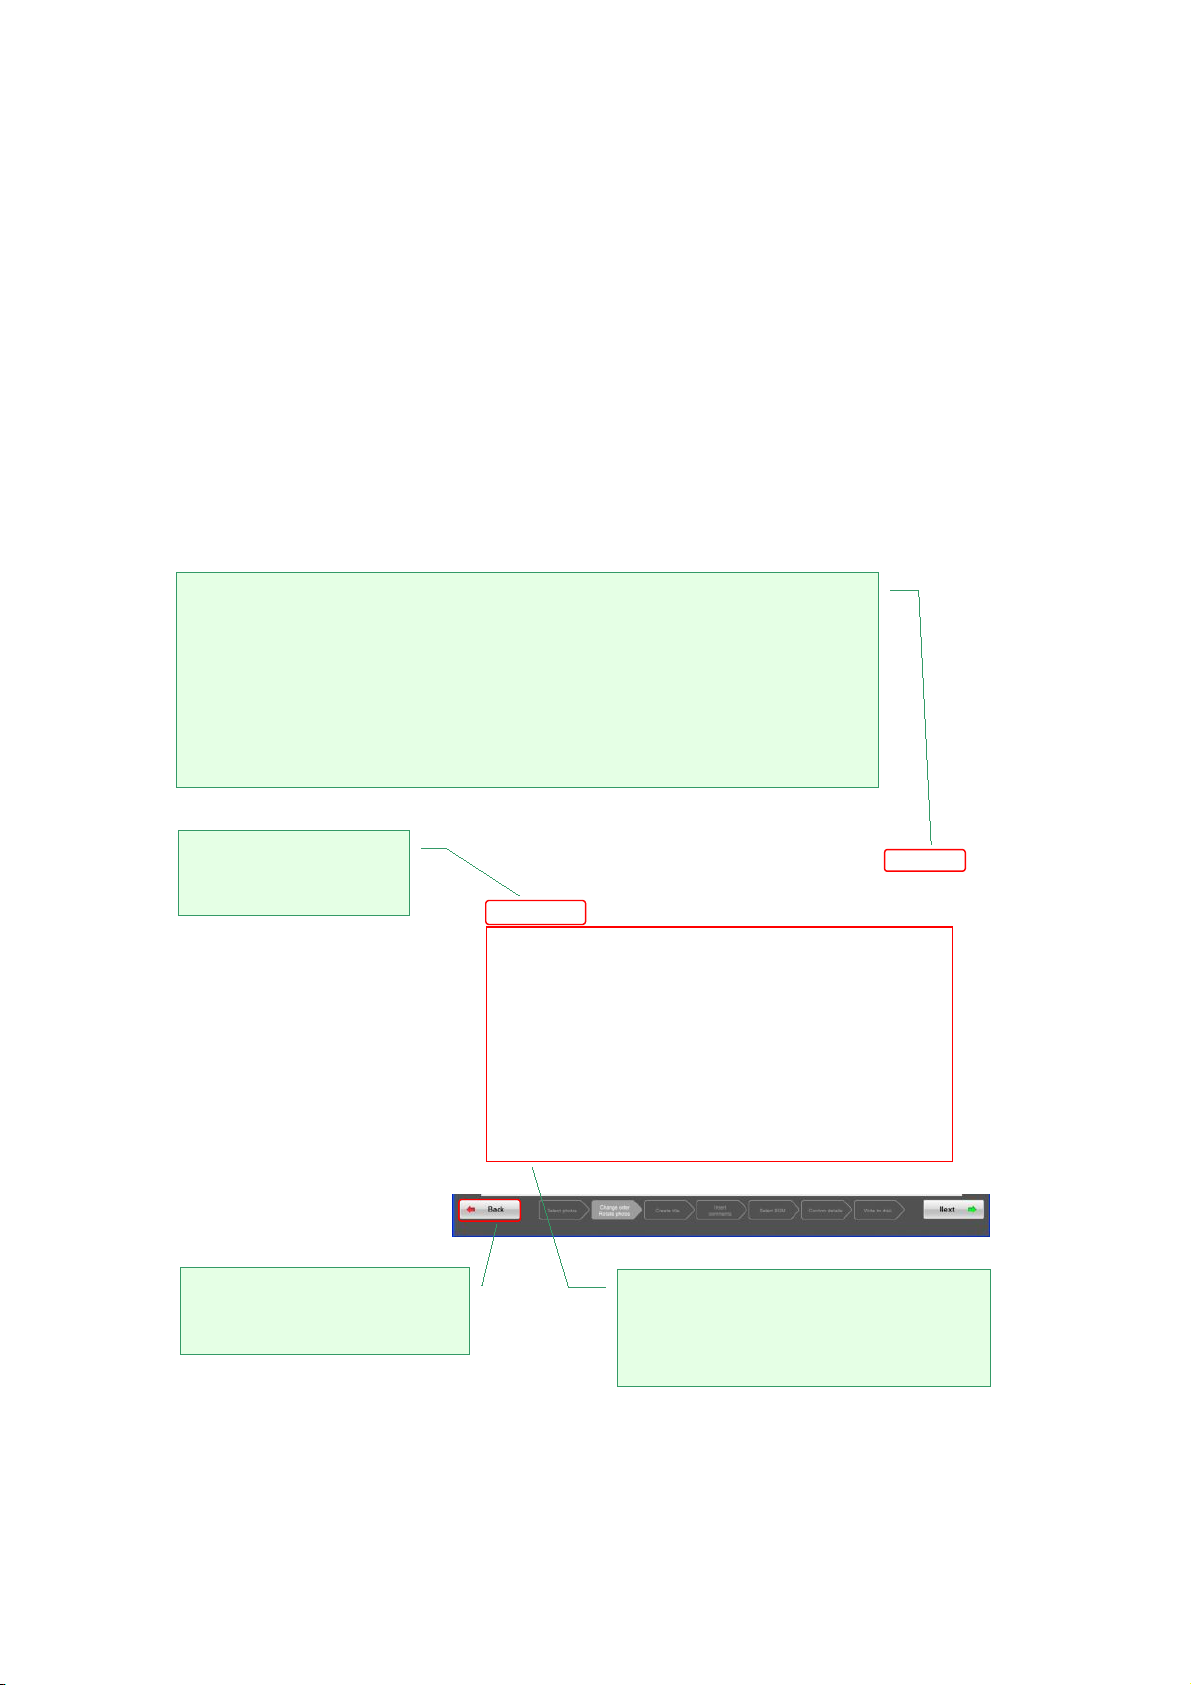
Page 100

Click [Save the Project and Return].
The saved work data is named using the title you input under "Creating a Title Screen". If
there is no title input, a title input box appears and you should input a title.
Temporarily saved album is displayed in the Home Screen album list as an Editing Album
2.6.14. Resuming an Editing Operation
100
 Loading...