

Page 1

z
c
x
x
x
@
B +
b
z
x
c
v
b
n
B +6>
*
@
MA1204-EA
Ú
#!3)/#/-054%2#/,4$
Operation Guide 5102
About This Manual
Button operations are indicated using the letters A
through C shown in the illustration.
Hand Functions
<Regular timekeeping>
Hour Hand
Second Hand
Minute Hand
24-hour Hand
<Others>
Ornament (page E-3)
Moon Phase Indicator (page E-14)
This User’s Guide uses numbers shown above to identify
E-2
watch hands.
Things to check before using the watch
Observe the movement of the x Second Hand.
Is the x Second Hand moving smoothly at one-second intervals?
Is the x Second Hand moving at
two-second intervals or is it stopped
completely?
Power is low. Charge the watch by placing
it in a location where it is exposed to light.
For details, see “Charging the Watch”
(page E-6).
E-4
NO
YES
The watch is now ready for use.
The watch is charged suffi ciently.
For details about charging, see
“Charging the Watch” (page E-6).
Set the current time.
For details, see “Timekeeping”
(page E-12).
YES
NEXT
Congratulations upon your selection of this CASIO watch.
Ornament
Ornament normally performs a random movement at the top and at the
The
30-minute mark of each hour, and whenever C is pressed.
Note that no movement will be performed late at night if the watch is left in the dark.
x
Important!
The A button is designed to protect against accidental
pressing. Use a thin pointed object to press the
depression of the button to operate it.
Contents
E-2 About This Manual
E-4 Things to check before using the watch
E-6 Charging the Watch
E-11 To recover from the sleep state
E-12 Timekeeping
E-12 To adjust the time setting
E-14 Moon Phase
E-15 To adjust the Moon phase indicator setting
E-16 Hand Home Position Adjustment
E-21 Troubleshooting
E-23 Specifi cations
ENGLISH
E-1
E-3
E-5
Charging the Watch
The face of the watch is a solar panel that generates power from light. The generated
power charges a built-in rechargeable battery, which powers watch operations. The
watch charges whenever it is exposed to light.
Charging Guide
E-6
Power Levels
Moves at two-second
intervals.
E-8
Whenever you are not
wearing the watch, leave
it in a location where it is
exposed to light.
Best charging
x
performance is achieved
by exposing the watch to
light that is as strong as
possible.
When wearing the watch,
make sure that its face is
not blocked from light by the
sleeve of your clothing.
x
You can get an idea of the watch’s power level by
observing the movement of the
regular timekeeping.
If the
x
Second Hand is moving normally at one-second
intervals, power is at Level 1.
If the
x
Second Hand is moving at two-second intervals,
power is at Level 2, which is quite low. Expose the
watch to light as soon as possible so it can charge (Low
battery alert).
The watch may enter a
sleep state (page E-11) if
its face is blocked by your
sleeve even only partially.
Second Hand in the
Warning!
Leaving the watch in bright light for charging can cause it to become quite hot.
Take care when handling the watch to avoid burn injury. The watch can become
particularly hot when exposed to the following conditions for long periods.
x
On the dashboard of a car parked in direct sunlight
Too close to an incandescent lamp x
Under direct sunlight x
Important!
x
Keep the watch in an area normally exposed to bright light when storing it for long
periods. This helps to ensure that power does not run down.
Storing the watch for long periods in an area where there is no light or wearing it in
x
such a way that it is blocked from exposure to light can cause power to run down.
Make sure that the watch is exposed to bright light whenever possible.
Level Hand Movement Function Status
1 Normal.
xx Second Hand moves at two-second
2
intervals.
z
Hour Hand, xx Second Hand and
3
Minute Hand stopped at 12 o’clock.
c
When power drops to Level 3, all functions will be disabled but the watch will x
continue to keep time internally for about one week. If you recharge the battery
suffi ciently during this period, the analog hands will move automatically to the
correct setting and regular timekeeping will resume. After one week, all settings
(including timekeeping) will be cleared. Recharging the battery will reset all settings
to their initial factory defaults.
All functions enabled
All functions disabled
E-7
E-9
Page 2
Operation Guide 5102
z
x
c
+ >@B
+@
c
+@
n
n
*
6
n
x
x
v
>@
Charging Times
Exposure Level (Brightness)
Outdoor sunlight (50,000 lux) 8 minutes 3 hours 39 hours
Window sunlight (10,000 lux) 30 minutes 9 hours 149 hours
Window sunlight on cloudy day
(5,000 lux)
Indoor fl uorescent lighting (500 lux) 8 hours 173 hours – – –
1 Approximate exposure each day to generate power for normal daily operation. *
2 Approximate exposure to take power up one level. *
The above times are for reference only. Actual times depend on lighting conditions.
x
E-10
Daily
Operation *1
48 minutes 14 hours 241 hours
Level Change *2
Level 3 Level 2 Level 1
Timekeeping
To adjust the time setting
E-12
Hold down 1. A for about two seconds until the
Hand moves to 12 o’clock.
Use 2. C (+1 minute) and B (–1 minute) to change the
current time setting.
x
Holding down either button for about two seconds and
then releasing it starts high-speed hand movement in
the applicable direction.
Pressing
x C and B at the same time will start high-
speed hand movement, which will continue until the
hands complete a 24-hour rotation.
To stop high-speed hand movement, press any button. x
Check the x
is set properly (1:00 a.m. = 1 o’clock,
1:00 p.m. = 13 o’clock).
24-hour Hand to make sure that the time
Second
Moon Phase
Moon Phase lets you view the current phase of the Moon.
Before using the watch for the fi rst time, check to make sure that the
Indicator is correctly indicating the current Moon phase. If it isn’t, use the procedure
on the next page to adjust it.
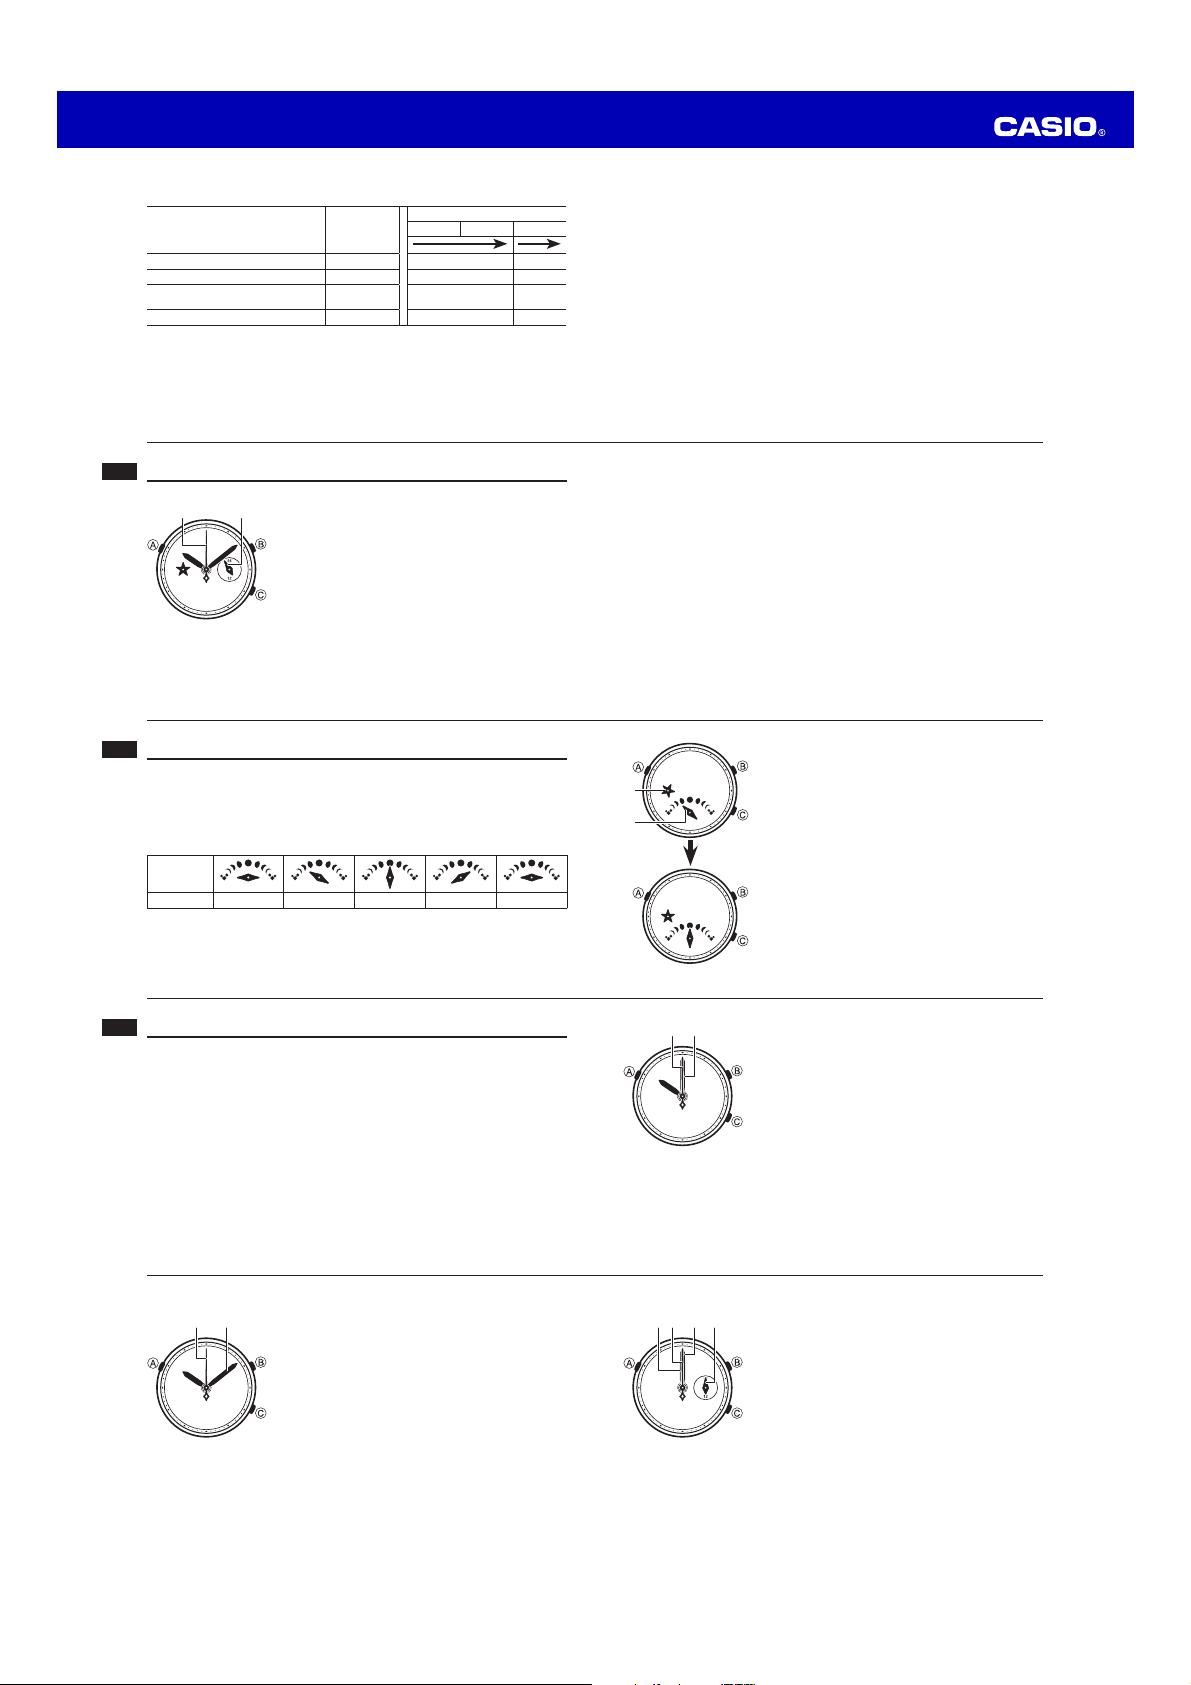
Moon Phase Indicator
The n Moon Phase Indicator indicates the current Moon phase as shown below.
Moon Phase
Indicator
Moon Phase
New Moon (Waxing) Full Moon (Waning) New Moon
Moon Phase
Power Saving
Power Saving enters a sleep state automatically whenever the watch is left for one
week in an area where it is dark.
What happens when the watch is in the sleep state
All regular timekeeping hands move to 12 o’clock and stop. x
Internal timekeeping functions continue to operate normally. x
To recover from the sleep state
Move the watch to a well-lit area or press any button.
x
It can take up to 14 minutes for the watch to recover from the sleep state to normal
operation. Do not perform any button operations during that time.
After the setting is the way you want, press 3. A.
This will exit the setting mode and the x
timekeeping.
For best timekeeping accuracy, press
x A on a time signal from the TV or radio.
The watch will exit the setting mode automatically if you do not perform any
x
button operation for about two or three minutes.
To adjust the Moon phase indicator setting
Hold down B for about one second to advance the
Moon Phase Indicator by one day. Repeat as many
times as necessary until the phase is indicated correctly.
Holding down
x B longer will advance the n Moon
Phase Indicator at high speed.
Pressing
x B will also cause the b Ornament to move.
Adjustment of the x
recommended on a day that there is a full Moon or
a new Moon, since the current phase is easiest to
determine on these days.
Second Hand will resume regular
Moon Phase Indicator is
E-11
E-13
E-14
Hand Home Position Adjustment
Strong magnetism or impact can cause the hands of the watch to be off.
If this happens, perform the applicable home position adjustment procedures in this
section.
Hand home position adjustment is not required if the time and day settings are
x
correct.
Important!
x
It can take up to 14 minutes for the hands to move to their home positions for hand
home position adjustment. It also can take up to 14 minutes for the hand to return to
their normal positions following hand home position adjustment.
If you need to move a hand to the left, move it past the correct home positions and
x
then use C to move back to the right. This helps to ensure better home position
adjustment accuracy.
E-16
If the current home positions are within ±15 minutes 00 seconds
E-18
Use 2. C (+1 second) and B (–1 second) to adjust the
hand positions so they point to 12 o’clock.
Holding down either button for about two seconds and
x
then releasing it starts high-speed hand movement in
the applicable direction.
To stop high-speed hand movement, press any
x
button.
After adjusting the home positions, go to step 4. x
In the regular timekeeping, hold down 1. A for about
7 seconds until the
move to 12 o’clock.
The
xc Minute Hand and x Second Hand are in their
correct home positions if they are pointed precisely
at 12 o’clock. If the hands are in the correct home
positions, advance to step 4.
If the current home positions are greater than ±15 minutes 00 seconds
2. After performing step 1, hold down C and B at the
same time until the
Second Hand, and v 24-hour Hand all move to
12 o’clock.
Use 3. C (+1 second) and B (–1 second) to adjust the
hand positions so they point to 12 o’clock.
x
Holding down either button for about two seconds and
then releasing it starts high-speed hand movement in
the applicable direction.
To stop high-speed hand movement, press any button.
x
The xv 24-hour Hand is synchronized with the z Hour
Hand and
not required.
After adjusting the home positions, go to step 4.
x
Minute Hand and x Second Hand
Hour Hand, c Minute Hand,
Minute Hand, so separate adjustment is
E-15
E-17
E-19
Page 3

Operation Guide 5102
x
x
x
n
n
6
Press 4. A. This will cause the n Moon Phase Indicator to
move to its home position (Full Moon).
If the
x
Moon Phase Indicator is at the correct home
position, advance to step 6.
Use 5. C (+) and B (–) to adjust the
Indicator so it is at its home position (Full Moon).
x
Holding down either button for about two seconds and
then releasing it starts high-speed hand movement in
the applicable direction.
To stop high-speed hand movement, press any button.
x
After adjusting the home position, go to step 6. x
Press 6. A to exit home position correction and return to
regular timekeeping.
E-20
Charging
■ The watch does not resume operation after I expose it to light.
This can happen after the power level drops to Level 3 (page E-9). Continue exposing
the watch to light until the
intervals).
■ The
Second Hand starts to move at one-second intervals, but then suddenly
returns to moving at two-second intervals.
The watch probably is not suffi ciently charged yet. Continue keeping it exposed to
light.
E-22
Second Hand starts moving normally (at one-second
Moon Phase
Troubleshooting
Hand Movement and Position
■ The
Second Hand is moving at two second intervals.
■ All regular timekeeping hands are stopped at 12 o’clock and none of the
buttons work.
Power may be low. Expose the watch to light until the x Second Hand starts moving
normally, at one-second intervals (page E-8).
■ The hands of the watch suddenly start moving at high speed, even when I do
not perform any operation.
The hand movement does not indicate malfunction, and should stop shortly.
The watch is recovering from a sleep state (page E-11).
■ The hands are off.
This could indicate that the watch has been exposed to magnetism or strong impact,
which has caused problems with proper hand alignment. Adjust the watch’s hand
home position alignment (page E-16).
Specifi cations
Accuracy at normal temperature: ±15 seconds a month
Timekeeping: Hour, minutes, seconds, 24-hour
Other: Moon Phase; Power Saving; Low battery alert
Power Supply: Solar panel and one rechargeable battery
Approximate battery operating time: 9 months (no exposure to light after a full
charge)
E-21
E-23
 Loading...