

Page 1
User Manual
Page 2

Contents
Product Features..............................................… 1
Buttons and Indicators............………….……...... 1
Connecting the Printer.............….……………...... 2
Installing Paper..............………….……………...... 2
Using your Printer................................................. 3
Troubleshooting.................................................... 4
Specification......................................................... 4
Global Support............………………….…..…….... 5
Copyright © 2018Cashmaster International Ltd- All Rights Reserved.
Other product and company names may be trademarks or registered trademarks of other companies,
and are the property of their owners. They are used only for explanation, without intent to infringe.
Page 3
Product Features
2.
1.
4.
5.
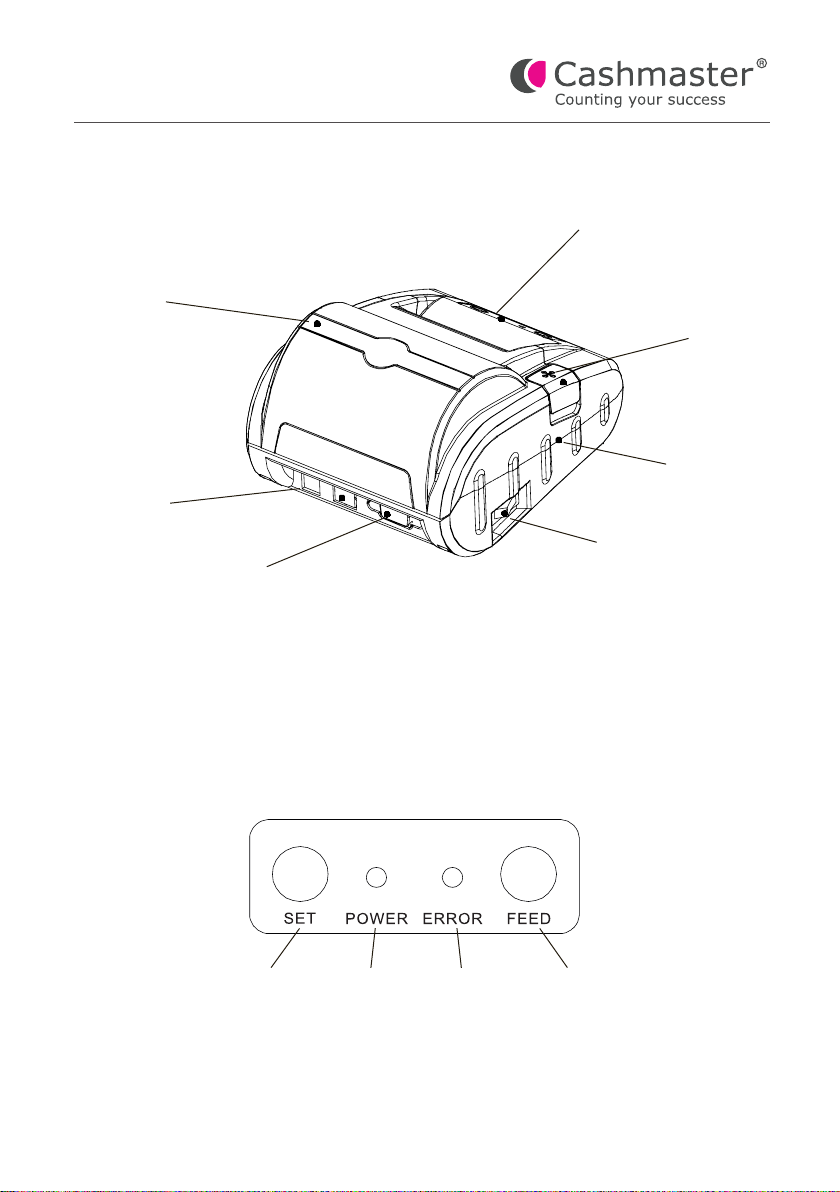
1. Paper cover (as used in Installing Paper, Page 2, Point 2)
2. Control panel
3. Cover release button
4. Power socket
5. Serial cable interface
6. Power switch
7. Main body
3.
7.
6.
Buttons and Indicators
1.
1. Set button – Factory / trouble shooting use only
2. Power LED – indicates when the printer is turned on
3. Error indicator – indicates errors. Flashing when the paper has run out
4. Feed button – feeds paper through the printer
10564A
2.
3.
1
4.
Page 4
Connecting the Printer
1. Connect the printer to your Cashmaster counter using the serial cable provided:
Sigma 105, 170 and Omega 230: PN 000765
Cashmaster One: PN 000766
2. Plug the AC adapter into the power supply socket and switch on the mains
supply.
Warning: Only use the supplied Cashmaster Printer 5 power adapter,
!
Warning
part number 04892 and labelled “Only for use with Cashmaster Printer
Five”. Connecting a power adapter from a Cashmaster money counter,
or other device, may cause permanent damage.
Installing Paper
!
Warning
The paper roll should be changed when the red ink end of roll indicator is observed on the
print output. A new roll should be installed before the end of the paper is reached to prevent
partial printing or feeding errors.
1. Turn off the printer using the power switch [5].
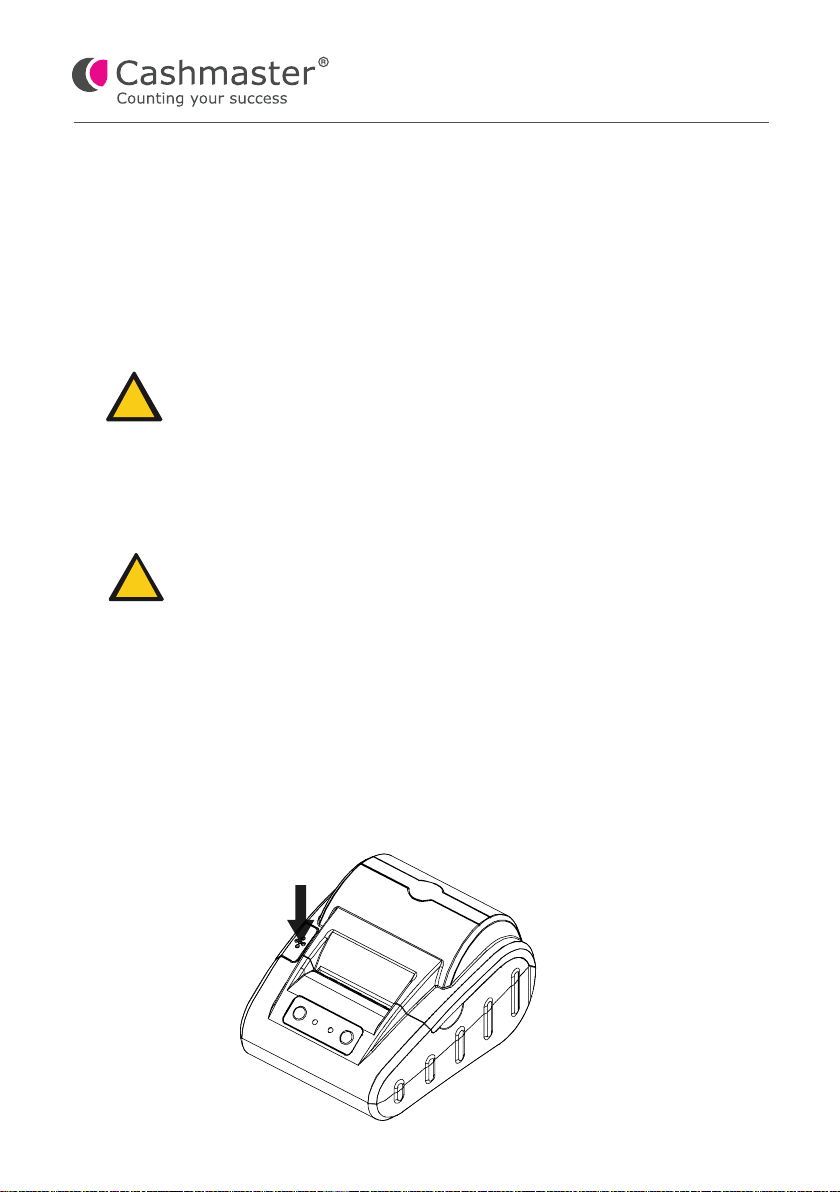
2. Push the cover release button [3] to release the paper cover and reveal the
paper chamber.
3. Remove the used paper roll, if present. Insert the new roll, orientated so that the
free end unspools from the bottom of the roll, towards the front of the printer.
10564A
Warning: Hot surface. Do not touch the print head.
2
Page 5
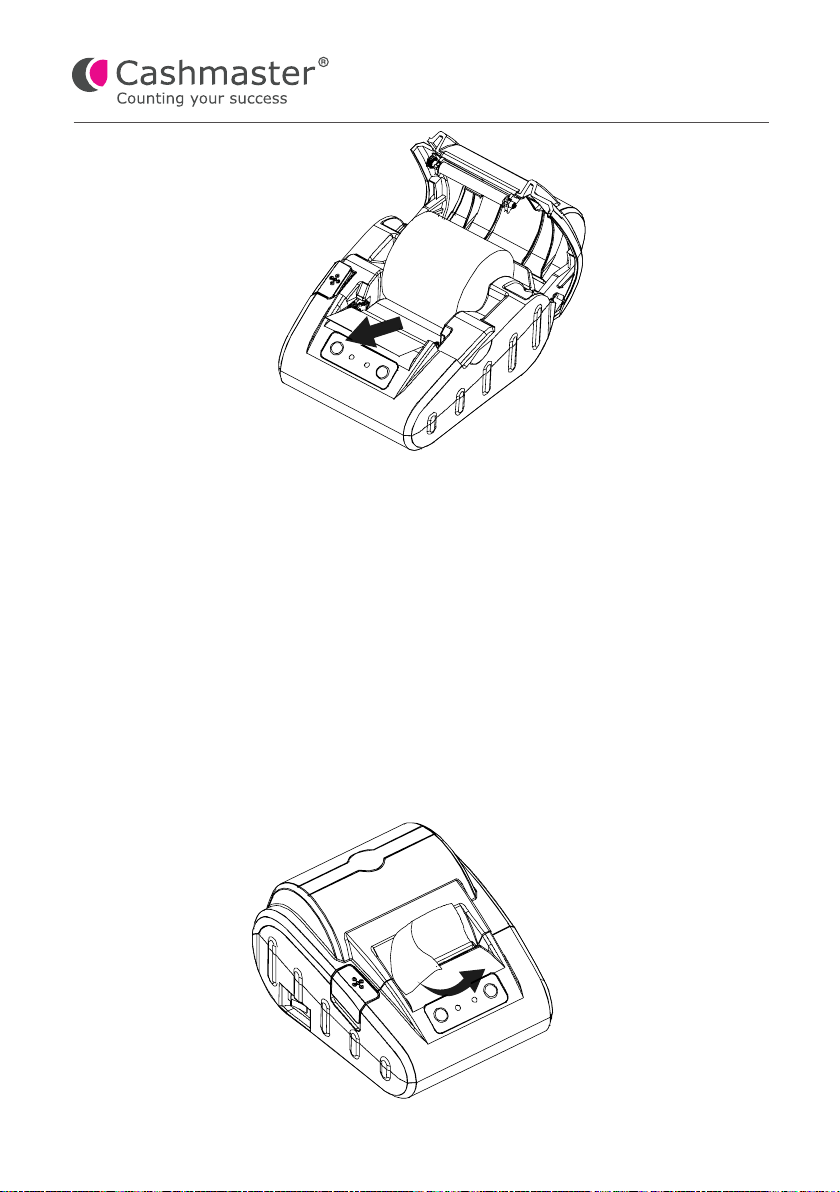
4. Unspool sufficient paper to lay it over the tear off strip, and then close the cover.
5. Turn the printer on. Verify that the power LED is illuminated, and no errors are
indicated.
6. Press the feed key, checking the paper feeds correctly.
7. Tear off the excess paper.
Using your printer
1. Turn the printer on.
2. Verify that the power LED is illuminated, and no errors indicated.
3. When you are ready to print your count, press the print button on your
Cashmaster counter.
4. To feed additional paper if required, push the feed button.
5. When the print is complete, tear off the paper using a sideways motion:
10564A
3
Page 6
Troubleshooting
Error LED flashing Paper out, or paper cover not closed. Open the
cover and check the paper. Verify that the paper
is loaded in accordance with the ‘Installing
Paper’ section.
Power LED not illuminated Check that the printer power switch [5] is turned
on, and the external power adapter is correctly
plugged in to the device and mains power socket.
Paper feed error / jam Open the paper cover and clear the jam. Ensure
the paper is correctly installed in accordance with
the ‘Installing Paper’ section.
Print timeout Check that the printer serial cable is correctly
installed to the money counter and printer.
Self test Press and hold the FEED button while turning the
printer on. The printer will automatically print a self
test receipt.
Specification
Print method Direct thermal
Paper roll Width: 57.5 +/- 0.5mm
Maximum OD: 62mm
Minimum ID: 13mm
Thickness: 0.05 – 0.08mm
Power supply 7.5V DC, 2A
Interface Serial
Operating temperature 10°C to 40°C
10564A
4
Page 7

Global Support
Hong Kong and Asia
t: +852 2157 9363
e: [email protected]
Germany
t: +49 (0) 2463 999 339
e: [email protected]
North America
t: +1 877 227 4627
e: [email protected]
UK and all other customers
t: +44 (0) 1383 410 121
e: [email protected]
cashmaster.com
10564A
5
Page 8

www.cashmaster.com
 Loading...