

Page 1

Owner’s Manual
Page 2

Page | 3
CONGRATULATIONS
CONGRATULATIONSCONGRATULATIONS
CONGRATULATIONS
You have just become a valued Cascade customer. Our team is
committed to making your cycling experience fun and rewarding
— offering you detailed product information, expert fitness
advice, and direct customer support you can depend on. We want
to thank you for purchasing the Cascade CMX Pro indoor group
cycle.
This CMX Pro
CMX Pro CMX Pro
CMX Pro Owner’s Manual will help you get the most
enjoyment from your new indoor group cycle. It not only
explains all the important features and safety considerations of
the CMX Pro
CMX ProCMX Pro
CMX Pro, it also includes great workout tips and exercise
principles. If at any time you have questions about this
information, please call us at
(425) 402-4062 and we will be happy to help you. To help us
answer your questions quickly, we recommend that you have the
serial number of your bike ready when you call us. The serial
number of your bike is located on bike frame.
The CMX Pro
CMX Pro CMX Pro
CMX Pro has been built to deliver an incredible workout,
every component of the CMX Pro
CMX Pro CMX Pro
CMX Pro has been designed to be more
durable, more user friendly and more comfortable than any
other indoor group cycle you have ridden. Whether you are a
beginning fitness enthusiast or a highly conditioned athlete, you
will immediately feel the difference.
GGGGrrrreeeeat
atat
ater
er er
er CCCCom
omom
omffffoooorrrrtttt
4-way handlebar & seat adjustability allows you to
properly fit your bike ranging from the upright position to
a low, stretched out setup ideal for triathletes.
Narrower crank design replicates the geometry of a road
bike for greater comfort.
Comfortable ergonomic seat.
Finally, its attractiveness and small footprint allows you to
position the CMX Pro
CMX Pro CMX Pro
CMX Pro anywhere in your home/facility for
maximum enjoyment; and you’ll also enjoy how quiet a CMX Pro
CMX Pro CMX Pro
CMX Pro
workout is. You will quickly discover that the CMX Pro
CMX Pro CMX Pro
CMX Pro gives you
a better cycling experience than any other
indoor group cycle.
Page 3

Page | 4
FEATURES
FEATURESFEATURES
FEATURES
Smooth, quiet magnetic resistance
Smooth, quiet magnetic resistanceSmooth, quiet magnetic resistance
Smooth, quiet magnetic resistance reduces maintenance
and service
Durable
DurableDurable
Durable ffffrrrrame
ameame
ame desi
desidesi
desiggggnnnn — Excellent stability, and 350 lb. user
load
Extra strong
Extra strongExtra strong
Extra strong bot
botbot
botttttom
omom
om bbbbrrrracket
acketacket
acket design
designdesign
design — Fast, simple
assembly and service
Sweat guard and fender
Sweat guard and fenderSweat guard and fender
Sweat guard and fender to keep sweat off flywheel
and brake assembly
Wide
WideWide
Wide adjustme
adjustmeadjustme
adjustmennnntttt rrrrange
angeange
ange — Better fit for tall and short users for
improved comfort
Complete bike designed for maximum ccccor
oror
orrrrrosion
osionosion
osion
rrrresistan
esistanesistan
esistancccceeee
Pop pin post
Pop pin postPop pin post
Pop pin post clamps
clampsclamps
clamps — Quick and secure locking for
easy vertical adjustment of the seat and handlebar
SSSStanda
tandatanda
tandarrrrdddd pedal
pedalpedal
pedal th
thth
thrrrread
eadead
ead — Accepts most standard cycling
pedals
FFFFas
asas
astttter
erer
er assembly
assemblyassembly
assembly — Most components are pre-assembled
No
NoNo
No calib
calibcalib
calibrrrraaaation
tiontion
tion rrrrequi
equiequi
equirrrred
eded
ed — Just hop on & ride
4444----wwwwaaaayyyy mic
micmic
micrrrroooo adjustabili
adjustabiliadjustabili
adjustabilittttyyyy for both seat & handlebars
allows you to find the perfect fit.
Left and right stretch pads
Left and right stretch pads Left and right stretch pads
Left and right stretch pads –––– for post rider stretching.
Wide cross legs
Wide cross legs Wide cross legs
Wide cross legs –––– for maximum stability
Large in
Large inLarge in
Large in----line wheels
line wheelsline wheels
line wheels- easy and quick to move bike
Two
Two Two
Two water bottle
water bottlewater bottle
water bottle holders
holders holders
holders – provides for plenty of
water during long rides
Large diameter leveler feet
Large diameter leveler feet Large diameter leveler feet
Large diameter leveler feet – allows you to make the
bike stable on uneven surfaces
The CMX Pro
CMX Pro CMX Pro
CMX Pro is so smooth and comfortable you can
work out much longer than you ever imagined.
Page 4

Page | 5
OVERVIEW
OVERVIEWOVERVIEW
OVERVIEW
Please review the rest of this Owner’s Manual carefully before you
start using your new CMX Pro
CMX ProCMX Pro
CMX Pro. The information enclosed here
will help you get the most enjoyment out of your workout and
includes valuable operating, service, safety, and troubleshooting information, as well as guidelines for an effective
exercise program.
We are confident that you will love your new CMX Pro
CMX ProCMX Pro
CMX Pro.
Enjoy your riding.
Page 5

Page | 6
INDEX
INDEXINDEX
INDEX
WARRANTY PAGE 7
SAFETY INSTRUCTIONS/INFORMATION PAGE 8
DELIVERY PAGE 11
DIAGRAM PAGE 12
UNPACKING INSTRUCTIONS PAGE 13
ASSEMBLY INSTRUCTIONS PAGE 15
OPERATING INSTRUCTIONS PAGE 17
GUIDELINES FOR SAFE OPERATION PAGE 18
BASIC OPERATION PAGE 22
GENERAL EXERCISE GUIDELINES PAGE 23
MAINTENANCE INSTRUCTIONS PAGE 25
TROUBLESHOOTING PAGE 27
SPECIFICATIONS PAGE 29
EXERCISE LOG PAGE 31
Page 6
Page | 7
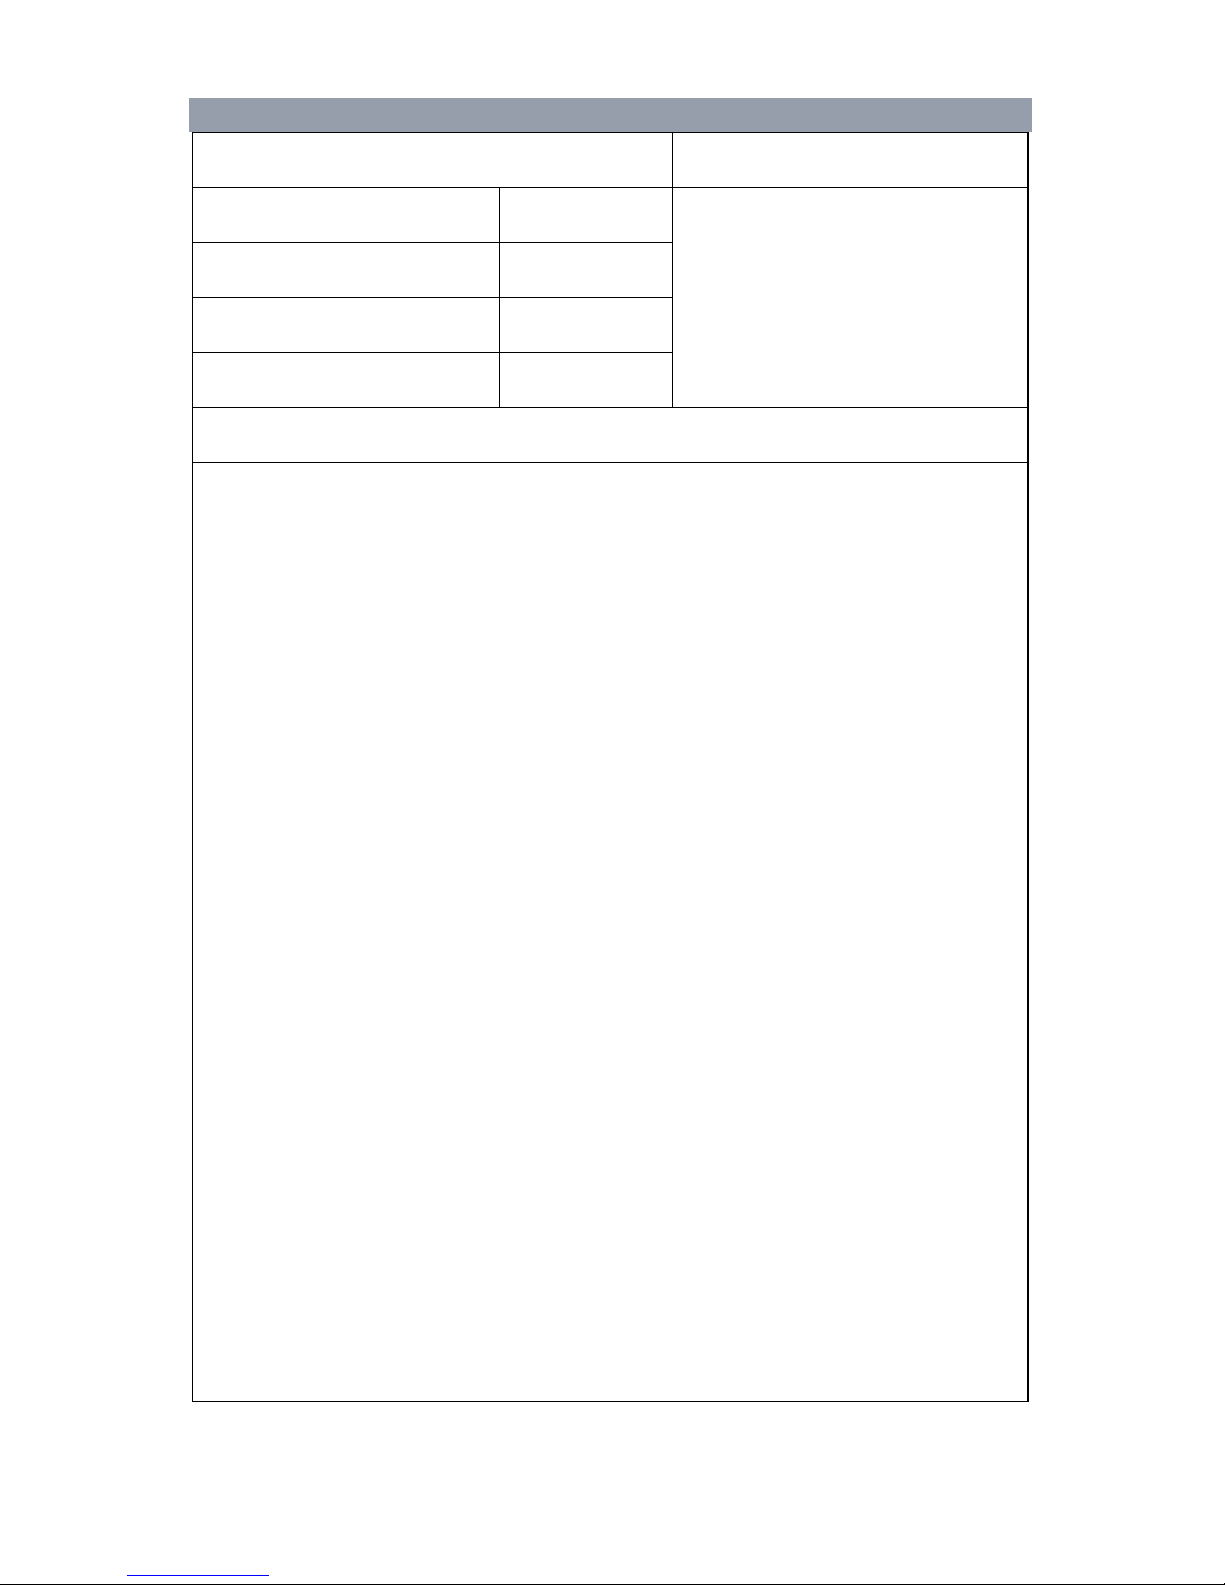
WARRANTY
WARRANTYWARRANTY
WARRANTY
PARTS
PARTSPARTS
PARTS LABOR
LABORLABOR
LABOR
FRAME 5 YEARS 1 YEAR FOLLOWING
CUSTOMER INSTALLATION
NON WEARABLE PARTS 3 YEARS
PEDALS 1 YEAR
WEARABLES 1 YEAR
NEED ASSISTANCE? Customer Service: (425) 402
NEED ASSISTANCE? Customer Service: (425) 402NEED ASSISTANCE? Customer Service: (425) 402
NEED ASSISTANCE? Customer Service: (425) 402----4062
40624062
4062
Prior to contacting our Customer Service Department, please have the
Prior to contacting our Customer Service Department, please have the Prior to contacting our Customer Service Department, please have the
Prior to contacting our Customer Service Department, please have the
following information
following informationfollowing information
following information:
Your name, Customer Number, Shipping Address & Telephone
Number
Serial Number(s) of the inoperable bike(s)
Date(s) of Purchase for the inoperable bike(s)
Your Billing Address
The above information will ensure that you are the only one ordering
parts under your warranty protection. If warranty replacement parts
are shipped to you, you may be required to return the inoperable
part(s). To facilitate this process, the following policy has been
established:
Contact our Customer Service Department
Customer Service DepartmentCustomer Service Department
Customer Service Department to receive a
Return Author
Return AuthorReturn Author
Return Authorization #
ization #ization #
ization # prior to shipment
Cascade will incur all UPS Ground freight charges for
Warranty Parts ordered for a machine that is less than 90 days
old. You are responsible for freight charges on warranty parts
for machines that are more than 90 days old. You will not be
responsible for freight charges for any returned inoperable
parts.
If an inoperable warranty part(s) must be returned to our
Customer Service Department, we will pay the shipping cost
and provide detailed return shipping instructions. These
instructions will be sent along with your warranty replacement
part(s)
Page 7
Page | 8
SAFETY INSTRUCTIONS/INFORMATION
SAFETY INSTRUCTIONS/INFORMATIONSAFETY INSTRUCTIONS/INFORMATION
SAFETY INSTRUCTIONS/INFORMATION
PRIOR TO BEGINNING AN EXERCISE PROGRAM, READ ALL
PRIOR TO BEGINNING AN EXERCISE PROGRAM, READ ALL PRIOR TO BEGINNING AN EXERCISE PROGRAM, READ ALL
PRIOR TO BEGINNING AN EXERCISE PROGRAM, READ ALL
INSTRUCTIONS CONTAINED WITHIN THIS DOC
INSTRUCTIONS CONTAINED WITHIN THIS DOCINSTRUCTIONS CONTAINED WITHIN THIS DOC
INSTRUCTIONS CONTAINED WITHIN THIS DOCUMENT
UMENTUMENT
UMENT
1. The CMX Pro Indoor Group Cycle is intended for
cardiovascular fitness training and may be used in group or
individual settings.
a. Use this equipment only for its intended use as
described in this manual
b. Do not attempt to ride this bike at high pedal speeds or
in a standing position until you have practiced and are
comfortable riding at slower pedal speeds.
2. This unit is NOT equipped with a freewheel system. If the
flywheel is in motion, the pedals will be in motion.
a. Do not attempt to stop the unit by applying reverse
pressure to the pedals as knee injury may occur.
3. Do not attempt to remove your feet from the pedals while
they are in motion as serious injury may occur from the
spinning pedals.
4. Wait for the flywheel to coast to a stop.
a.
If you want to quickly stop the flywheel, apply firm down-
ward pressure to the brake knob. Do not attempt to
dismount the CMX Pro unless the pedals and the flywheel
are at a complete stop.
WARNING
WARNINGWARNING
WARNING
When present, this statement is an
indication that there are potential
hazards that could result in injury or
death.
When present, this symbol is an
indicator that you should proceed
cautiously and be alert as your safety
is dependent on your attention to the
instructions.
Page 8

Page | 9
SAFETY INSTRUCTIONS/INFORMATION
SAFETY INSTRUCTIONS/INFORMATIONSAFETY INSTRUCTIONS/INFORMATION
SAFETY INSTRUCTIONS/INFORMATION
5. Injury or death may occur from improper use or overtraining. Consult a medical doctor or qualified fitness
instructor to determine an exercise program appropriate to
your level of fitness.
6. Never attempt to turn the pedal crank arms by hand.
a. Do not expose ANY part of your body or clothing to the
drive mechanism as possible injury could occur.
7. In commercial settings, the CMX Pro should always be
used in a supervised environment with qualified
instructors.
8. In a home setting, keep unsupervised children away from
the unit when not in use.
a. Keep children and pets away from the unit while in use.
9. Do not perform push-up type movements on the
handlebars.
10. Never drop or insert any object into any opening on the
exercise equipment.
11. Only use the unit on a stable, level floor.
12. Follow the instructions for safe use of the equipment
including proper seat position, handlebar position, and
use of the foot positioning system of the pedals. Never
adjust the handlebar height higher then maximum height
which is marked with the word “MAX”.
13. For safe operation, allow for at least 1foot (30cm) of free
space to either side of the unit and 2 feet (60cm) of free
space to the rear and front of the unit.
14. DO NOT attempt to make any handlebar or seat
adjustments while sitting or standing on the bike.
15. Users, agents, and anyone directing the use of this
equipment shall be responsible for determining the
suitability of the product for its intended use as outlined
in this manual, including regular
maintenance tasks.
Said parties are put on notice that they assume all risk
and liability in connection herewith.
Page 9

Page | 10
SAFETY INSTRUCTIONS/INFORMATION
SAFETY INSTRUCTIONS/INFORMATIONSAFETY INSTRUCTIONS/INFORMATION
SAFETY INSTRUCTIONS/INFORMATION
16. Rider capacity of the CMX Pro is 350lb (159 kg).
The safety level of this equipment can only be maintained by
following the guidelines in this manual and examining the
equipment regularly for damage and wear.
Damaged or inoperable components should be replaced
immediately and the equipment should not be used until it is
repaired.
Failure to follow all guidelines above may compromise your
exercise experience, expose you and others to injury, and reduce
the longevity of the equipment.
Page 10
Page | 11
DDDDELIVERY
ELIVERYELIVERY
ELIVERY
Upon delivery of your Cascade CMX Pro, take a moment to check
the exterior of the box for any damage and make a note of it on
the delivery receipt before signing. Make sure your delivery agent
has been made aware of any concerns you have and that they
have been denoted on the delivery receipt. Please contact our
Customer Service department (425) 402-4062 if there are any
issues.
Your Cascade CMX Pro will arrive in (1) carton and will require
some assembly.
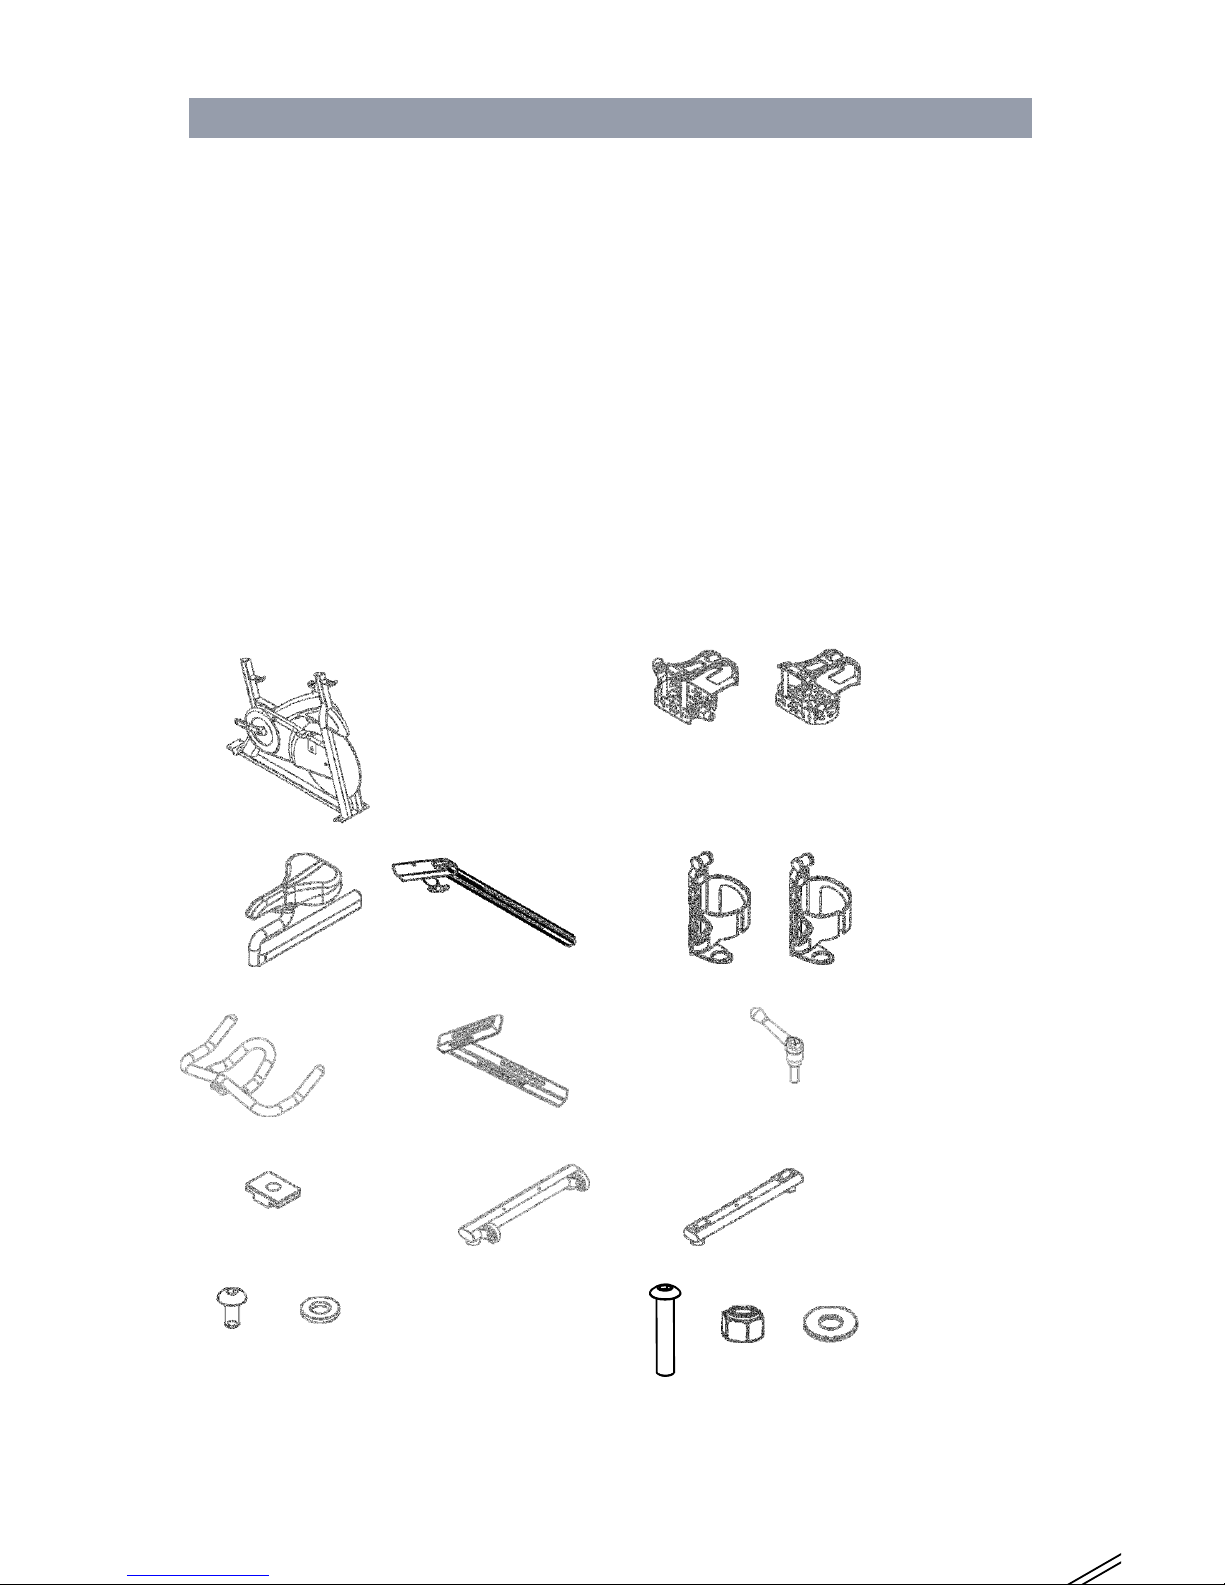
What’s Inside the Box:
Bike Frame with Flywheel Pedal, Left Pedal, Right
Seat/seat slider Seat Post Water bottle holders(2)
Handlebar Handlebar Post Adjustment handle
Square washer Front Cross leg Rear Cross leg
Screw, washer(M5) (4) Screw, nut, washer (4)(M8)
Tools for assembly – two hex wrenches and multi tool
Page 11
Page | 12
DIAGRAM
DIAGRAMDIAGRAM
DIAGRAM
Page 12
Page | 13
UNPACKING
UNPACKINGUNPACKING
UNPACKING INSTRUCTIONS
INSTRUCTIONSINSTRUCTIONS
INSTRUCTIONS
Before leaving the manufacturing facility, your Cascade CMX Pro
exercise bike was thoroughly inspected and tested for proper
operation. To minimize shipping damage, careful attention was
given to making your bike ready for shipment.
Prior to opening the box, place it in the room of use where there
is a large, clear area in order to facilitate an easy assembly.
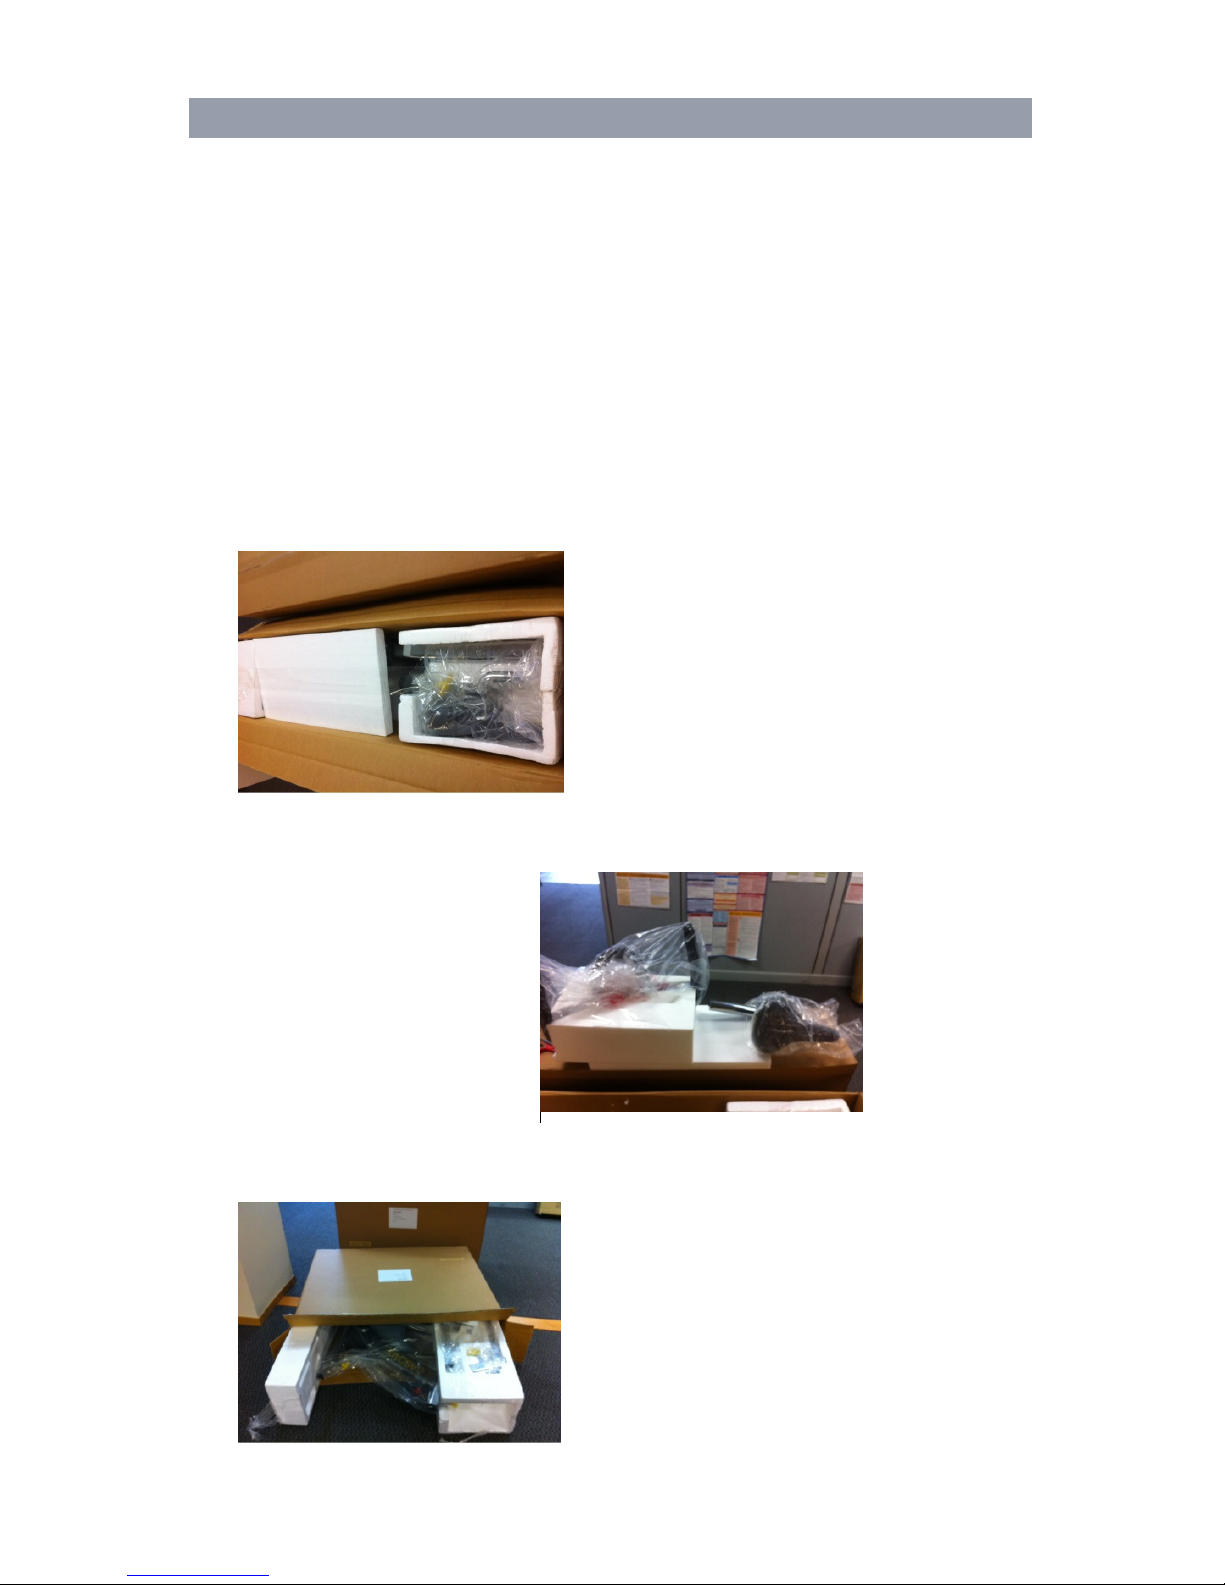
1) With the box in upright position, remove the strapping
material. Next remove the staples on the top of the carton.
2) Open the carton from the top of the carton.
3) Remove the seat assembly and the foam piece in the center of
the carton.
4) Remove the handlebars.
5) Carefully lay the carton on its side and pull out the bike frame
and foam supports from inside the carton.
Page 13
Page | 14
UNPACKING INSTRUCTIONS
UNPACKING INSTRUCTIONSUNPACKING INSTRUCTIONS
UNPACKING INSTRUCTIONS
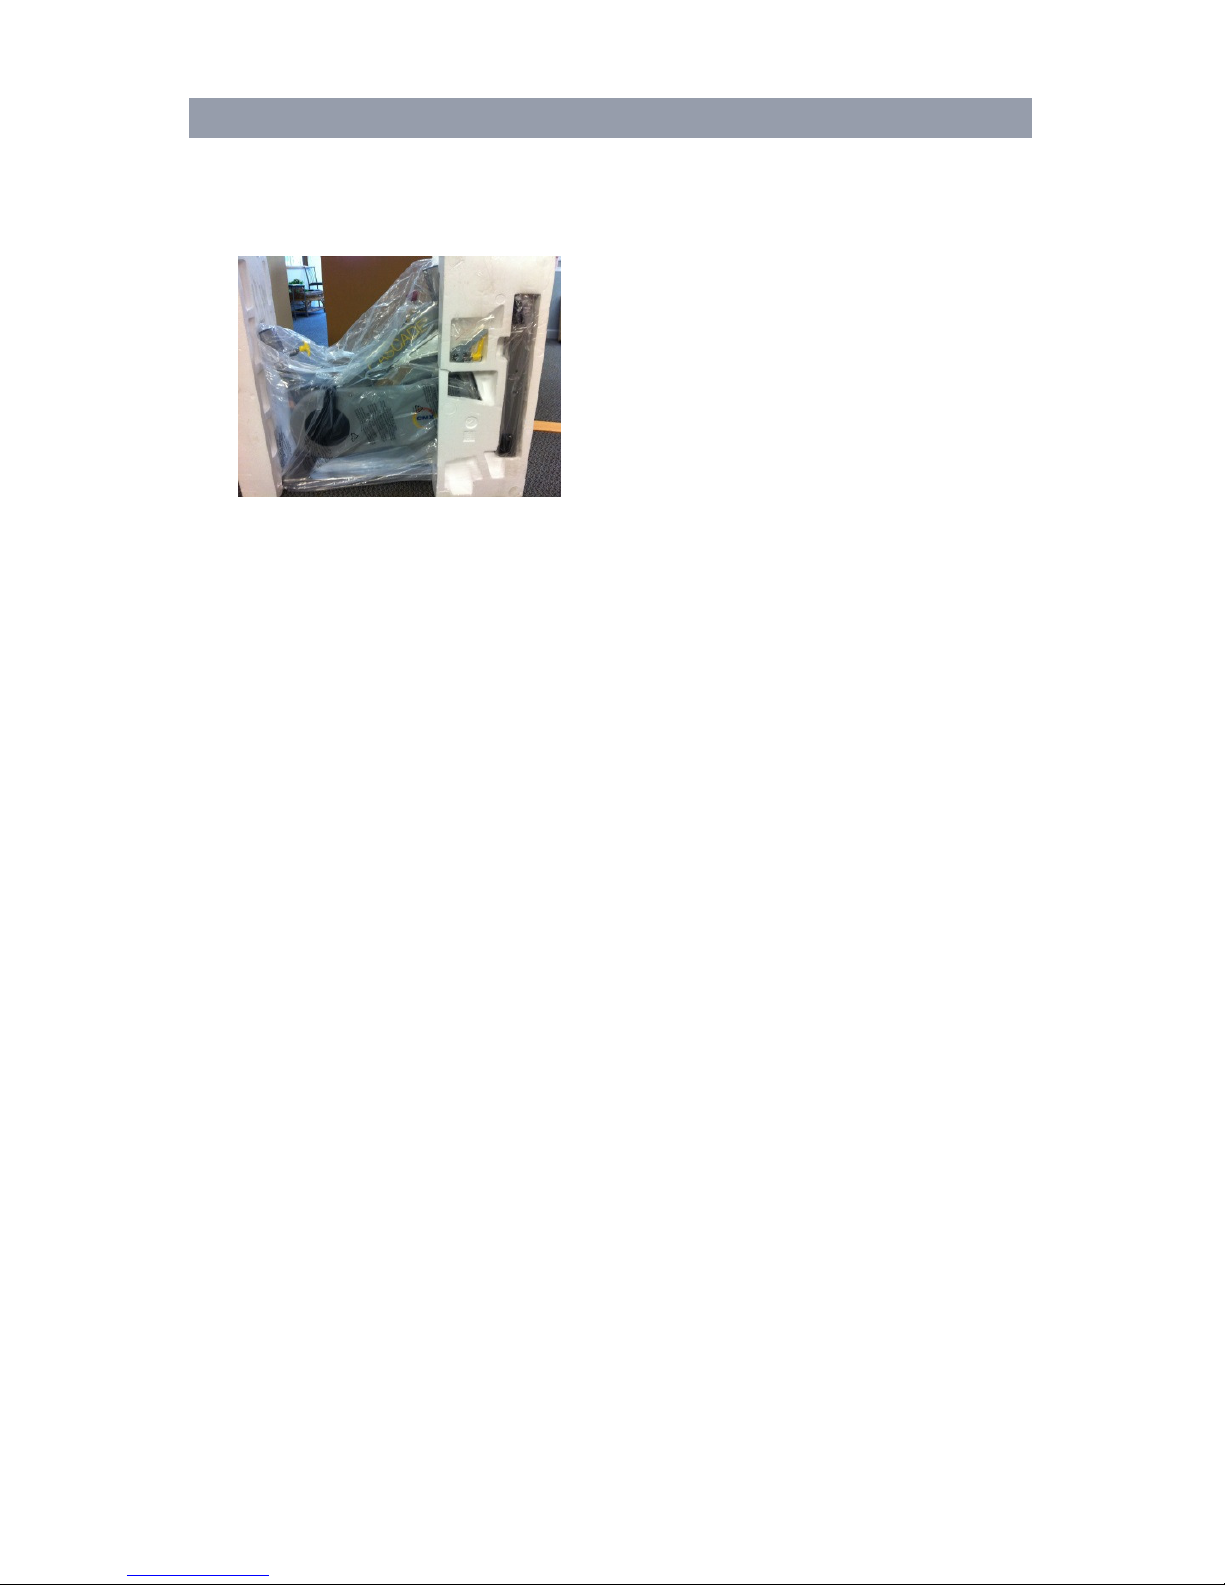
6) Stand up the frame and foam supports, then remove the foam
pieces from each end of the bike frame.
7) Remove all the parts/pieces from the foam supports. You
should have:
a. An Owner’s Manual
b. All the parts required to assembly the CMX Pro
c. All the necessary tools to assemble the CMX Pro
Page 14
Page | 15
ASSEMBLY INSTRUCTIONS
ASSEMBLY INSTRUCTIONSASSEMBLY INSTRUCTIONS
ASSEMBLY INSTRUCTIONS
STABILIZERS
STABILIZERSSTABILIZERS
STABILIZERS//// HANDLEBAR
HANDLEBARHANDLEBAR
HANDLEBAR POST AND
POST AND POST AND
POST AND
HANDLEBAR
HANDLEBAR HANDLEBAR
HANDLEBAR ASSEMBLY
ASSEMBLYASSEMBLY
ASSEMBLY
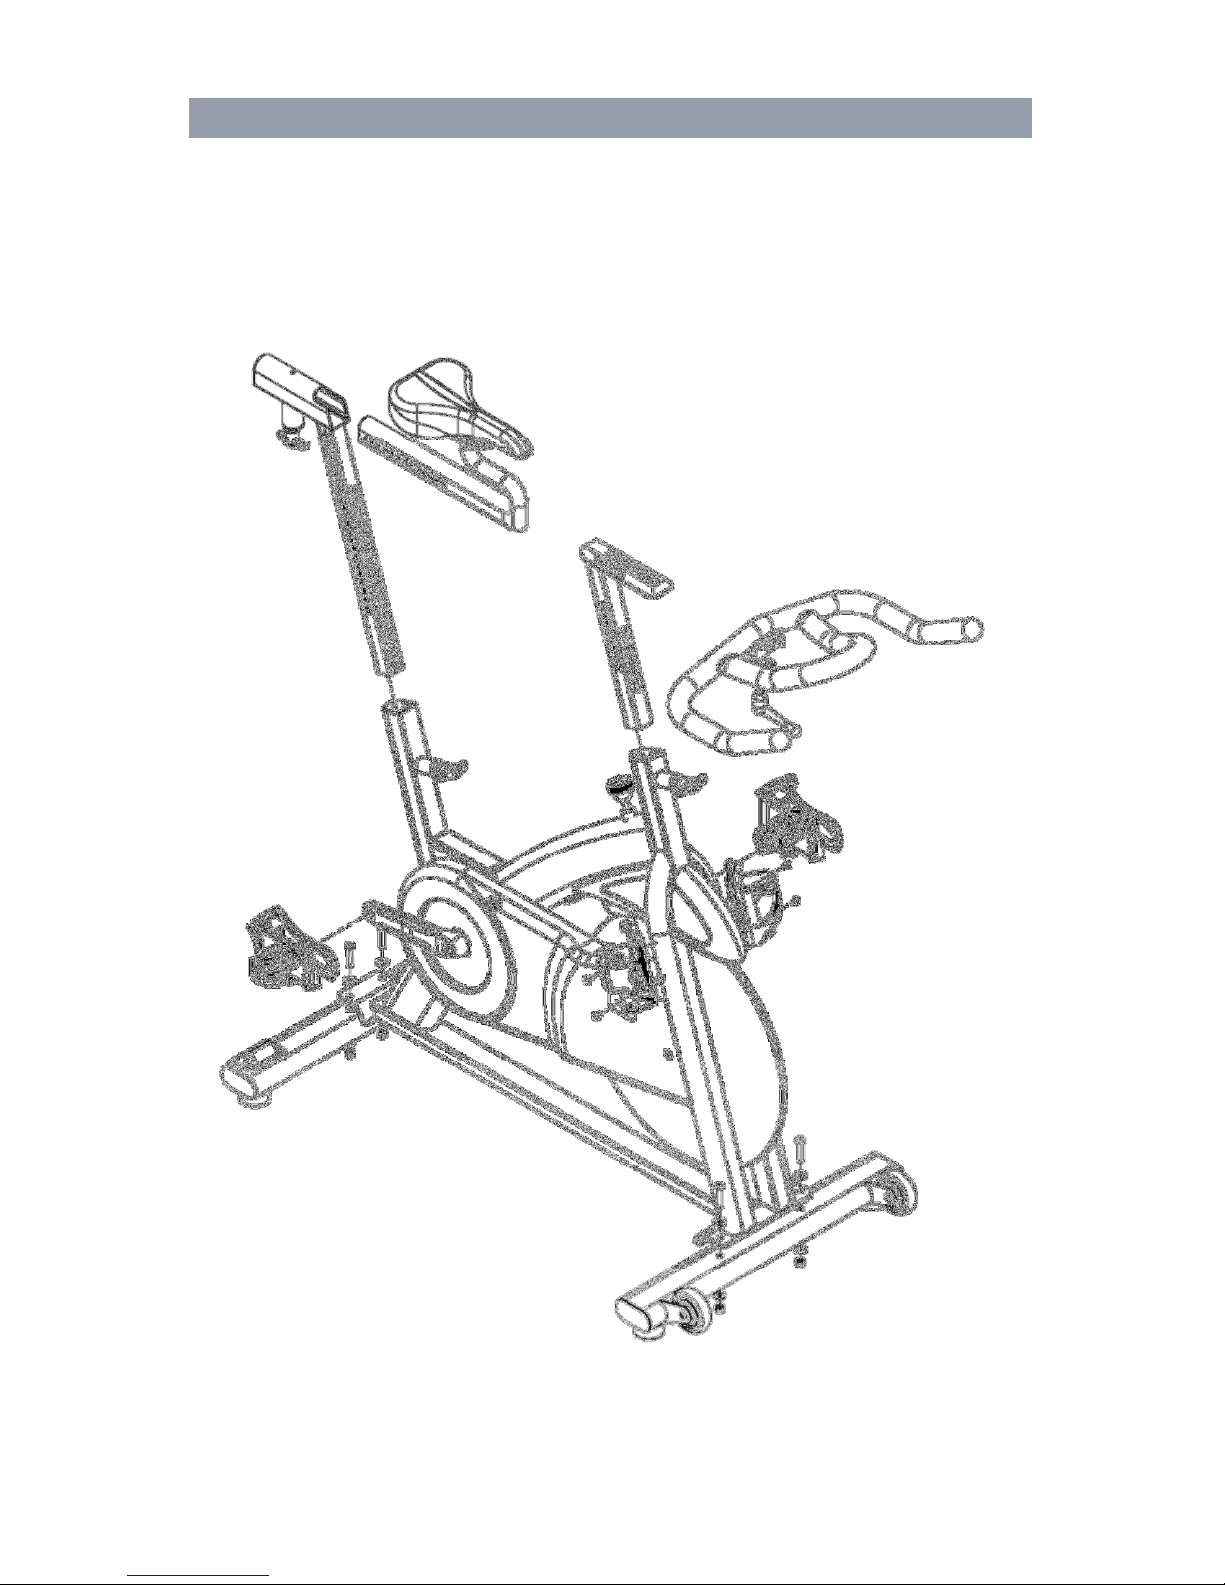
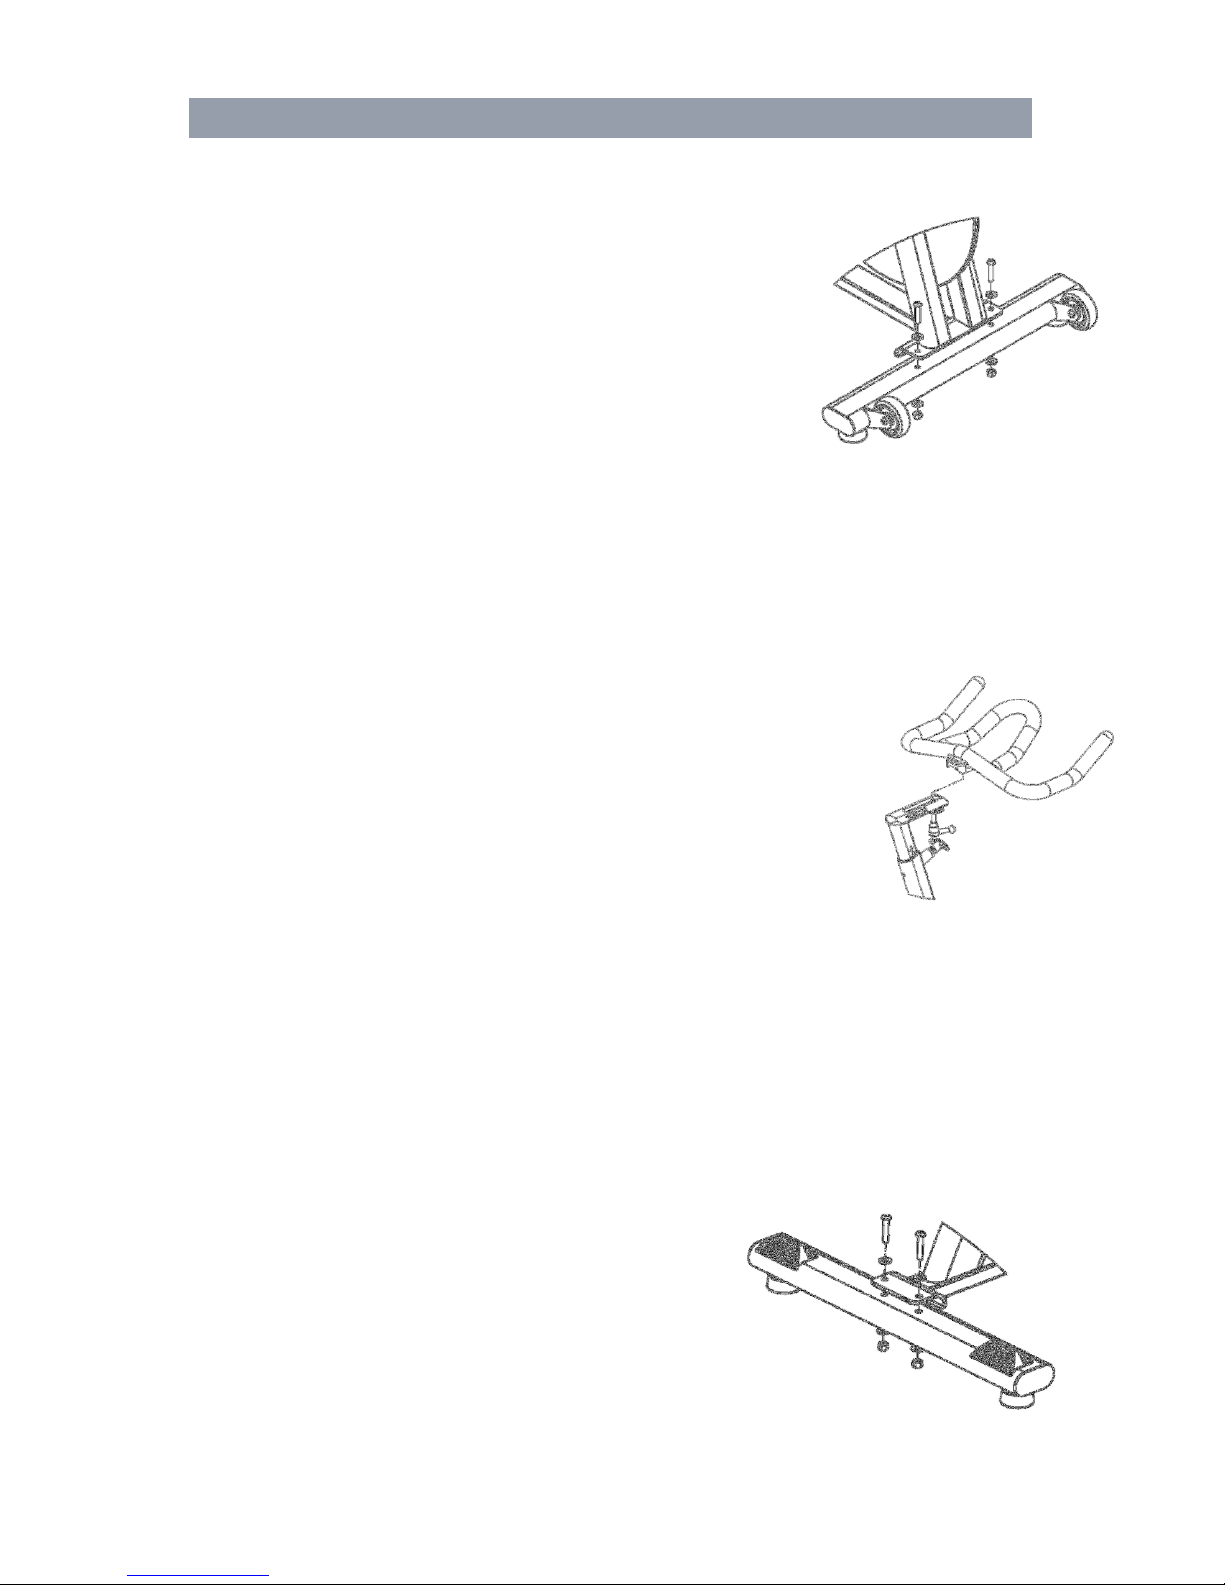
1) Align the front stabilizer (the one with the
transport wheels) with the holes in the
main frame, below the flywheel.
2) Attach the stabilizer with (2) M8x60mm
screws and (4) Washers(two on top of
frame and two on bottom of stabilizer).
3) Tighten with the provided Hex key and multi tool.
4) Attach the handlebar to the handlebar post using the included
adjustment handle and square washer. The simplest way to
do this is put the handlebar on the ground
upside down and then place the handlebar
post over the handlebar and attach using the
adjustment handle and square washer(make
sure the square washer is on the adjustment
handle with the smaller side facing the
handlebars) and tighten.
5) Loosen and then pull the T handle on the frame while inserting the
handlebar post and handlebar into the front frame opening.
Tighten the T handle.
6) Standing in front of the bike, grab the handlebars and tip the bike
forward and rest the handlebars on the ground. Be careful not to
let the frame fall over to either side.
7) Align the rear stabilizer (the one with the stretch pads) with
holes in the main frame as shown
8)
Attach the stabilizer with (2) M8x60mm screws and (4)
Washers(two on top of frame and two on bottom of stabilizer)
Page 15
Page | 16
ASSEMBLY INSTRUCTIONS
ASSEMBLY INSTRUCTIONSASSEMBLY INSTRUCTIONS
ASSEMBLY INSTRUCTIONS
9) Tighten with the provided Hex key and multi tool.
SEAT
SEAT SEAT
SEAT POST
POSTPOST
POST AND SEAT ASSEMBLY
AND SEAT ASSEMBLYAND SEAT ASSEMBLY
AND SEAT ASSEMBLY
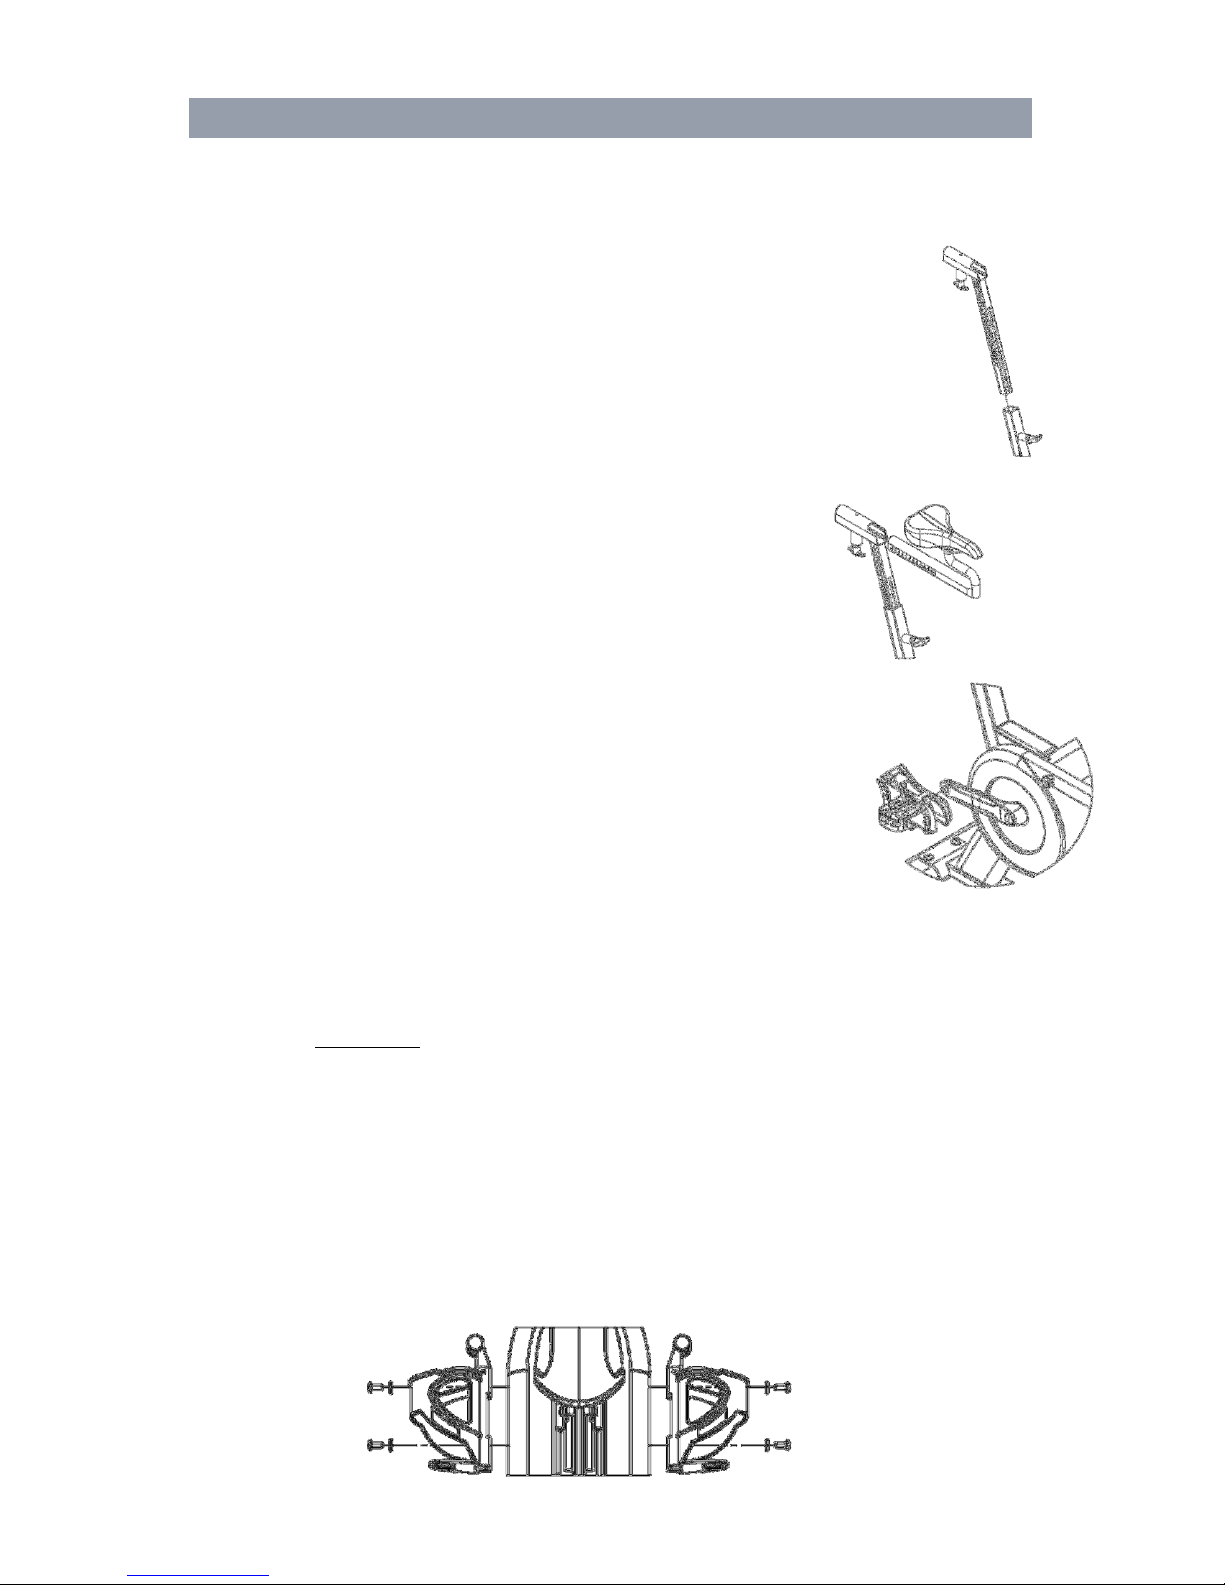
1) Loosen and then pull the T handle on the frame while
inserting the seat post as shown. Tighten the T handle.
2) Loosen and then pull down the T handle on the seat post
while inserting the seat slider assembly as shown.
Tighten the T handle.
PEDALS
PEDALSPEDALS
PEDALS
1) The pedals are marked as if you are seated
on the bike, “R” for right, and “L” for left
2) Carefully thread the right pedal into the
crank arm with your fingers - do
dodo
do not
notnot
not ccccrrrross
ossoss
oss
th
thth
thrrrread
eadead
ead the
thethe
the pedal
pedalpedal
pedal in
inin
in the
thethe
the ccccrrrrank
ankank
ank arm!
arm!arm!
arm!
3)
Use the wrench tool to strongly tighten the
pedal. Torque pedals to 47 Nm (35 ft-lb)
4)
4)4)
4) Repeat this step for the left pedal - NOTE: The LEFT PEDAL
NOTE: The LEFT PEDAL NOTE: The LEFT PEDAL
NOTE: The LEFT PEDAL
is
is is
is REVERSE
REVERSEREVERSE
REVERSE THREADED
THREADEDTHREADED
THREADED
WATER BOTTLE HOLDER
WATER BOTTLE HOLDERWATER BOTTLE HOLDER
WATER BOTTLE HOLDERSSSS
1) To install the water bottle holders to the side of the frame
near the flywheel, insert the two screws with washers as
shown.
2) Tighten the screws with a Hex key to secure the holders to the
frame.
Page 16
Page | 17
OPERATING INSTRUCTIONS
OPERATING INSTRUCTIONSOPERATING INSTRUCTIONS
OPERATING INSTRUCTIONS
1) Obtain a complete physical examination from your medical
doctor and enlist a health/fitness professional’s aid in
developing an exercise program suitable for your current health
status.
2) When working out for the first time, start out slowly for a
minimum of five minutes. After your muscles are warmed up,
gradually increase the pedaling rate and/or resistance to a
speed that allows you to attain your target heart rate zone.
3) The speed and duration of your exercise program should
always be subject to how you feel. Never permit peer pressure
to exceed your personal judgment while exercising.
4) Overweight or severely unconditioned individuals should be
particularly cautious when using the equipment for the first
time. Even though such individuals may not have histories of
serious physical problems, they may perceive the exercise to be
far less intense than it really is, resulting in the possibility of
overexertion or injury.
5) Although all equipment manufactured by Cascade Health and
Fitness has been thoroughly inspected by the manufacturing
facility prior to shipment, proper installation and regular
maintenance are
required to ensure safety. Maintenance is the
sole responsibility of the owner.
WARNING
WARNINGWARNING
WARNING
THESE GUIDELINES ARE DIRECTED TO YOU,
AS THE OWNER OF THIS EXERCISE
EQUIPMENT. YOU SHOULD INSIST THAT ALL
USERS FOLLOW THE SAME GUIDELINES.
YOU SHOULD MAKE THIS MANUAL
AVAILABLE TO ALL USERS.
Page 17

Page | 18
GUIDELINES FOR SAFE
GUIDELINES FOR SAFE GUIDELINES FOR SAFE
GUIDELINES FOR SAFE OPERATI
OPERATIOPERATI
OPERATIOOOONNNN
ADJUSTING THE FIT
ADJUSTING THE FITADJUSTING THE FIT
ADJUSTING THE FIT
Take a moment to learn how to properly fit your CMX Pro to your
body; it will make your workouts a more pleasant and safer
experience.
The CMX Pro provides more seat and handlebar adjustability than
other indoor group cycles, and each adjustment is numbered so
you can quickly return the adjustments to your specific settings.
Making full use of these features will give you the most comfortable
ride possible and allow you to exercise efficiently. Using the bike
when it is incorrectly adjusted can result in unnecessary discomfort
and increase your risk of injury.
WARNING
WARNINGWARNING
WARNING
DO NOT ATTEMPT TO MAKE ANY
ADJUSTMENTS TO THIS EQUIPMENT
WHILE SITTING OR STANDING ON THE
BIKE. DISMOUNT THE BIKE PRIOR TO
MAKING ALL ADJUSTMENTS.
Page 18
Page | 19
GUIDELINES FOR SAFE OPERATION
GUIDELINES FOR SAFE OPERATIONGUIDELINES FOR SAFE OPERATION
GUIDELINES FOR SAFE OPERATION
SEAT ADJUSTMENT
SEAT ADJUSTMENTSEAT ADJUSTMENT
SEAT ADJUSTMENT
Adjusting the Seat Height
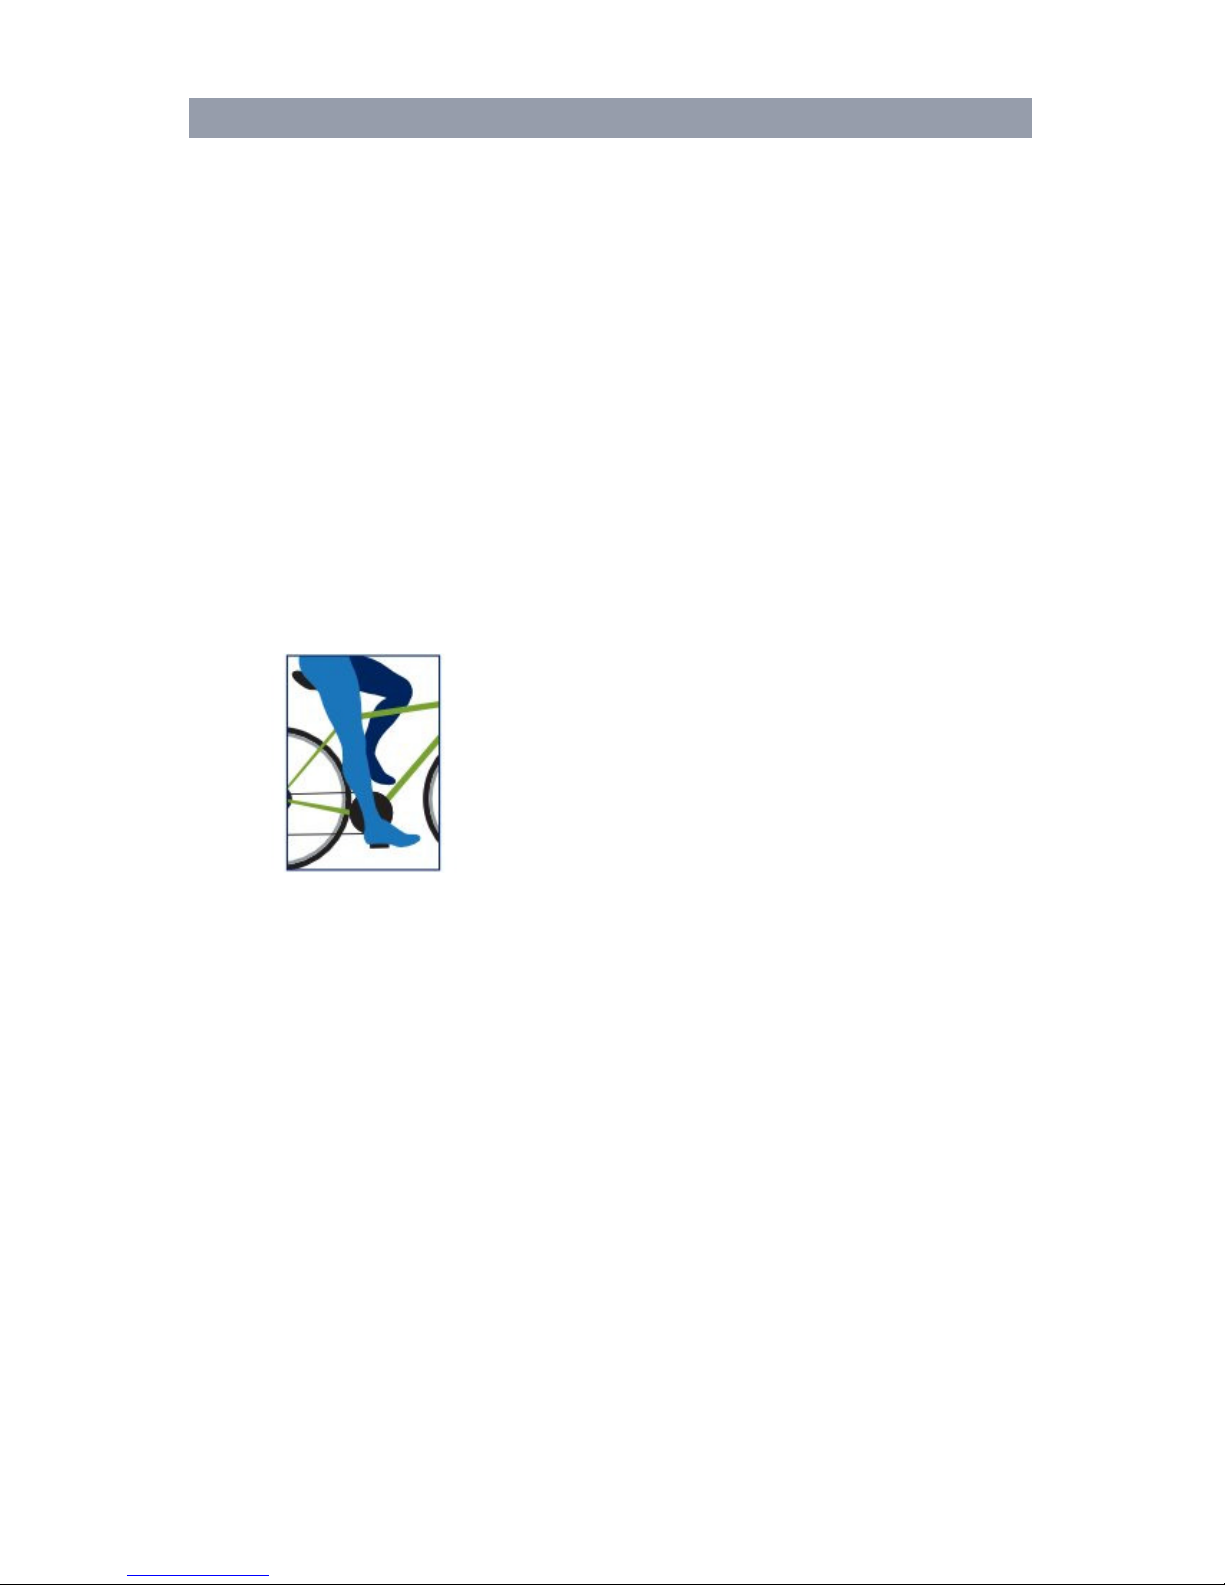
1) Stand next to the Seat Post and adjust the seat to Hip height
2) Rotate the crank so that the pedals are
in the vertical position (12 & 6 o’clock)
3) Place your foot in the toe cage of the
pedal closest to the floor and mount the
bike
4) With one pedal at the 6 o’clock position you should just be
able to scrape the bottom of your heel on the top of the pedal
– this will allow for a slight bent to your knee when pedaling.
a) If your leg is too straight or your foot
cannot touch the pedal, you will need to lower the seat
b) If your leg is too bent, you will need to raise the seat
6) Dismount the bike and pull out the pop pin on the seat post
7) Slide the seat post up or down as necessary
8) When the seat is in the desired position, insert the pin into
the desired hole to secure the seat post and tighten the T
handle
9) Make note of the final position mark on the seat post for
future reference
Page 19
Page | 20
GUIDELINES FOR SAFE OPERATION
GUIDELINES FOR SAFE OPERATIONGUIDELINES FOR SAFE OPERATION
GUIDELINES FOR SAFE OPERATION
ADJUSTING THE SEAT’S FORE/AFT POSITION
ADJUSTING THE SEAT’S FORE/AFT POSITIONADJUSTING THE SEAT’S FORE/AFT POSITION
ADJUSTING THE SEAT’S FORE/AFT POSITION
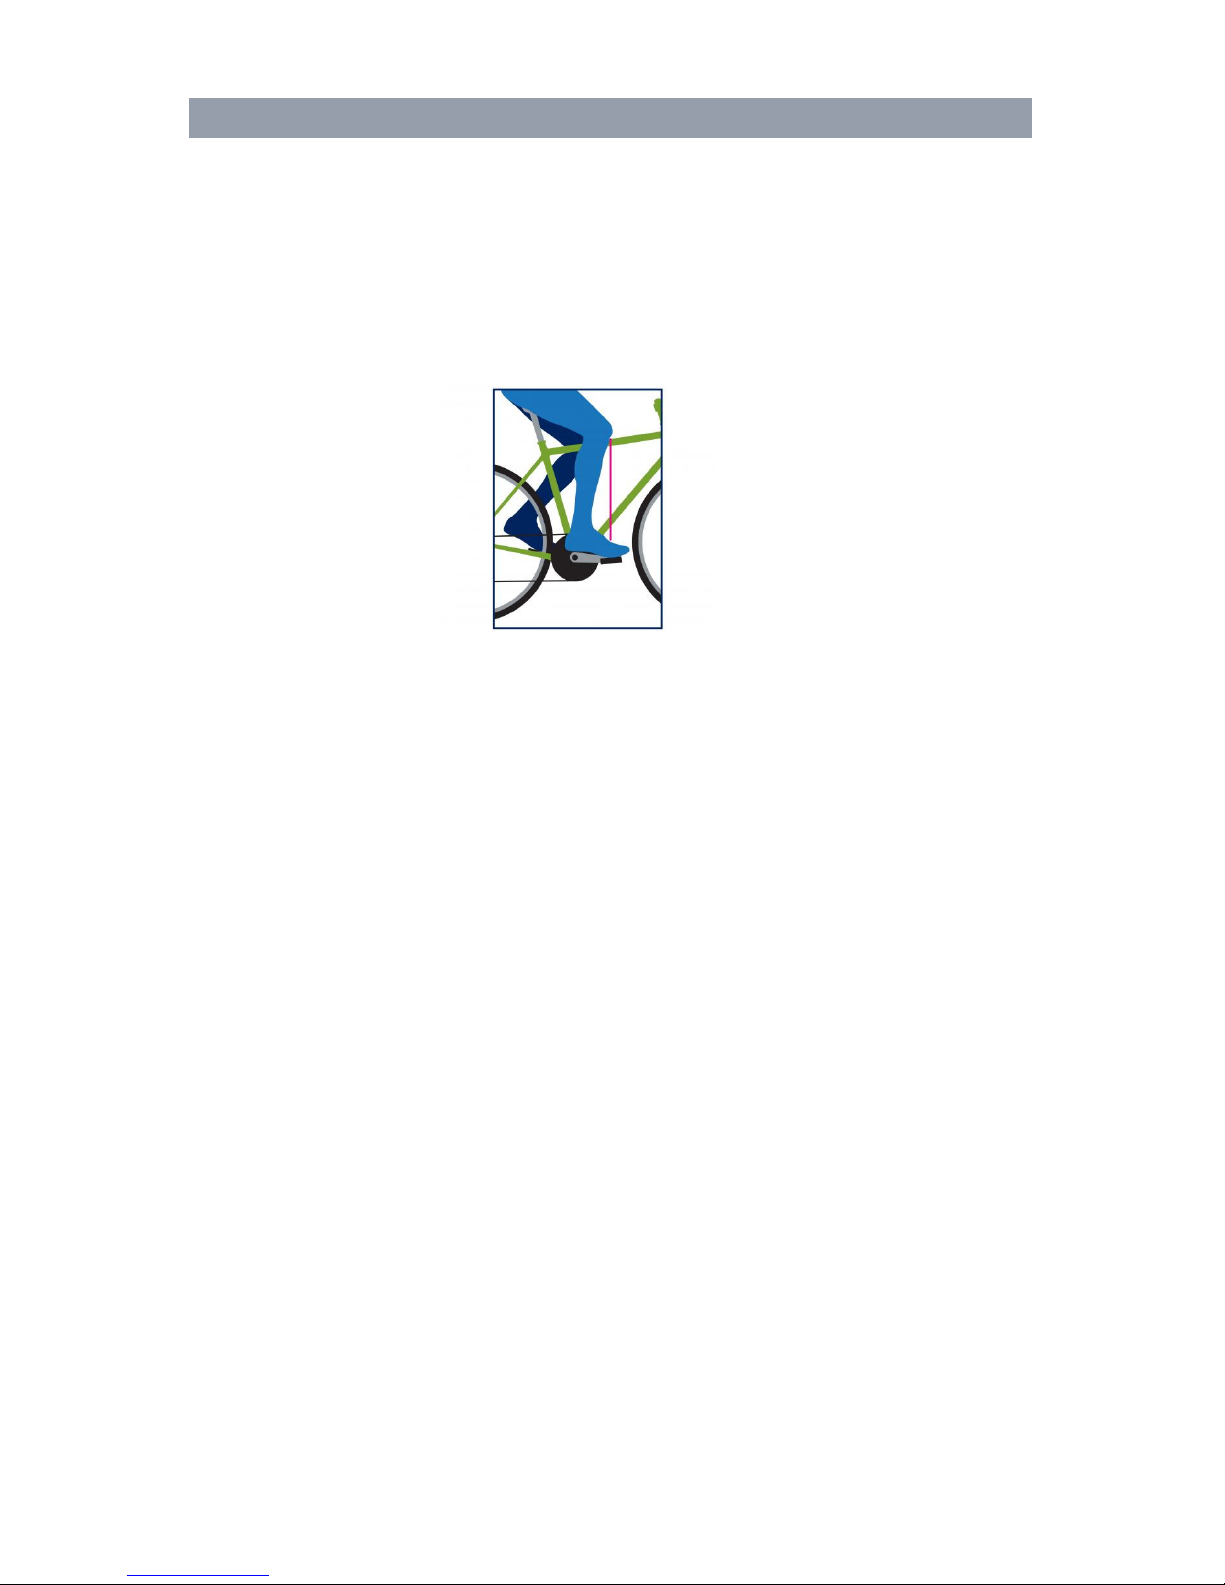
1) Sit on your bike with the cranks in the 3 & 9 o’clock
positions. A proper fore/aft position of the seat is achieved
when the small bump at the top of the shin on your forward
leg, directly below the knee cap (tibial tuberosity), is above
the pedal axle
2) Dismount to adjust the seat fore or aft for a better fit
3) Loosen the seat adjustment lever and slide the seat forward
or backward as desired; then tighten.
4) Note the final position mark under the seat for future
reference. (Repeat steps for seat height if necessary)
HANDLEBAR ADJUSTMENT
HANDLEBAR ADJUSTMENTHANDLEBAR ADJUSTMENT
HANDLEBAR ADJUSTMENT
Adjusting the Handlebar height
1) Handlebar height is matter of preference. Start with the
handlebars at the same height as the seat.
2) Adjusting the handlebars higher will give the rider a more
upright position; lowering them will result in a more prone
position.
3) Dismount the bike and pull out the pop pin on the handlebar
post.
4) Raise or lower the handlebar by pulling up on the handlebar
and sliding the handlebar post up or down as desired. When
the handlebar is in the desired position, insert the pin into
the desired hole to
secure the seat post and tighten the T
handle
5) Note the final position mark on the handlebar post for future
reference.
Page 20

Page | 21
GUIDELINES FOR SAFE OPERATION
GUIDELINES FOR SAFE OPERATIONGUIDELINES FOR SAFE OPERATION
GUIDELINES FOR SAFE OPERATION
Adjusting the handlebar’s Fore/Aft Position
1) Dismount the bike and loosen the handlebar forward/aft
adjustment lever and slide the handlebars either forward or aft
as desired. The forward/aft position should be set to allow
the rider to comfortably grasp the handlebars with a slight
bend at the elbow.
2) Tighten the adjustment lever clockwise to secure the
handlebar assembly. (Remember to use the ratchet feature of
the adjustment lever as necessary)
3) Note the final position mark for future reference
Pedal Strap Adjustment
1) Place the ball of each foot on the pedal and in the toe cage
such that the ball of the foot is centered over the pedal
spindle and under the strap
2) Rotate the cranks until one foot is in a position closest to you
3) To tighten the strap, pull up on the end of the strap until it fits
snugly over your shoe. Make sure that the strap is secure, but
not overly tight or pressing uncomfortably on your foot.
4) Repeat for the other foot
5) To loosen he pedal strap, press down on the clip that holds
the strap secure, and pull slightly outward
6) Release the clip to lock the strap into place
Now that you have established a riding position, take a few
minutes to ride the bike and determine that your position is
comfortable. Start pedaling at a slow pace with your toes and
knees pointed directly forward. Hold the grips lightly and in a
position that allows your shoulders and upper body to relax.
Pedal easily, at a low resistance, until you feel confident that you
could ride in that position for the duration of your workout.
Page 21
Page | 22
BASIC OPERATION
BASIC OPERATIONBASIC OPERATION
BASIC OPERATION
1) Pedaling resistance is controlled by the tension knob located
beneath the handlebar, on the main part of the frame.
Resistance may be changed at any time by turning the tension
knob; clockwise for more resistance, or clockwise for less
resistance
2) To apply the brake, press down on the tension knob
3) Before dismounting, apply the brake to stop the flywheel, or
increase the resistance and let the flywheel come to a stop
4) To dismount the bike, first loosen each toe cage strap and
remove your feet from the pedals, then step off the bike
WARNING
WARNINGWARNING
WARNING
IF AT ANY TIME DURING YOUR
WORKOUT, YOU FEEL CHEST PAIN,
EXPERIENCE SEVERE MUSCULAR
DISCOMFORT, FEEL FAINT, OR ARE
SHORT OF BREATH, STOP EXERCISING
IMMEDIATELY. IF THE CONDITION
PERSISTS, YOU SHOULD CONSULT YOUR
MEDICAL DOCTOR IMMEDIATELY.
Page 22

Page | 23
GENERAL EXERCISE
GENERAL EXERCISE GENERAL EXERCISE
GENERAL EXERCISE GUIDELINES
GUIDELINESGUIDELINES
GUIDELINES
SETTING A GOAL
SETTING A GOALSETTING A GOAL
SETTING A GOAL
The first step to a successful exercise program is to set realistic
goals and objectives. Do you want an exercise program that is
geared to build muscle, maintain muscle tone, increase aerobic
capacity, or lose weight? In order to ensure that you fully receive
all the benefits of a sound exercise program, you need to first
identify the existence (if any) of risk factors that may influence
the design of your exercise program. Based upon a
comprehensive analysis of your personal exercise needs and
interests, you should then develop (or have developed for you by
a competent or trained professional) an individualized program
of exercise that is enjoyable, easy, and yet challenging. Your
greatest health benefit will come from a lifestyle change that
encourages a lifetime of physical activity.
One way to guarantee success in reaching your goal is to eat
correctly. A well-rounded diet provides the proteins,
carbohydrates, fats, vitamins, minerals, and water necessary for
good health. If you are unsure of your dietary needs, seek the
advice of your physician, an exercise professional, or visit your
local bookstore for more information on nutrition.
Flexibility Training
1
Achieving and maintaining an adequate range of motion should
always be objectives of a comprehensive exercise program. The
warm-up phase of your exercise session should include some type
of light warm-up activity to increase both your heart rate and your
body temperature, which is then followed by flexibility exercises
that are specifically designed to stretch the musculature around
your body’s major skeletal joints. Attempting to stretch a cold
muscle can be dangerous to the soft tissues surrounding the
muscle. No matter how controlled the movement, forcing a muscle
through a full range of motion (and
beyond) without appropriately
warming up is both unsafe and counterproductive.
Page 23
Page | 24
GENERAL EXERCISE GUIDELINES
GENERAL EXERCISE GUIDELINESGENERAL EXERCISE GUIDELINES
GENERAL EXERCISE GUIDELINES
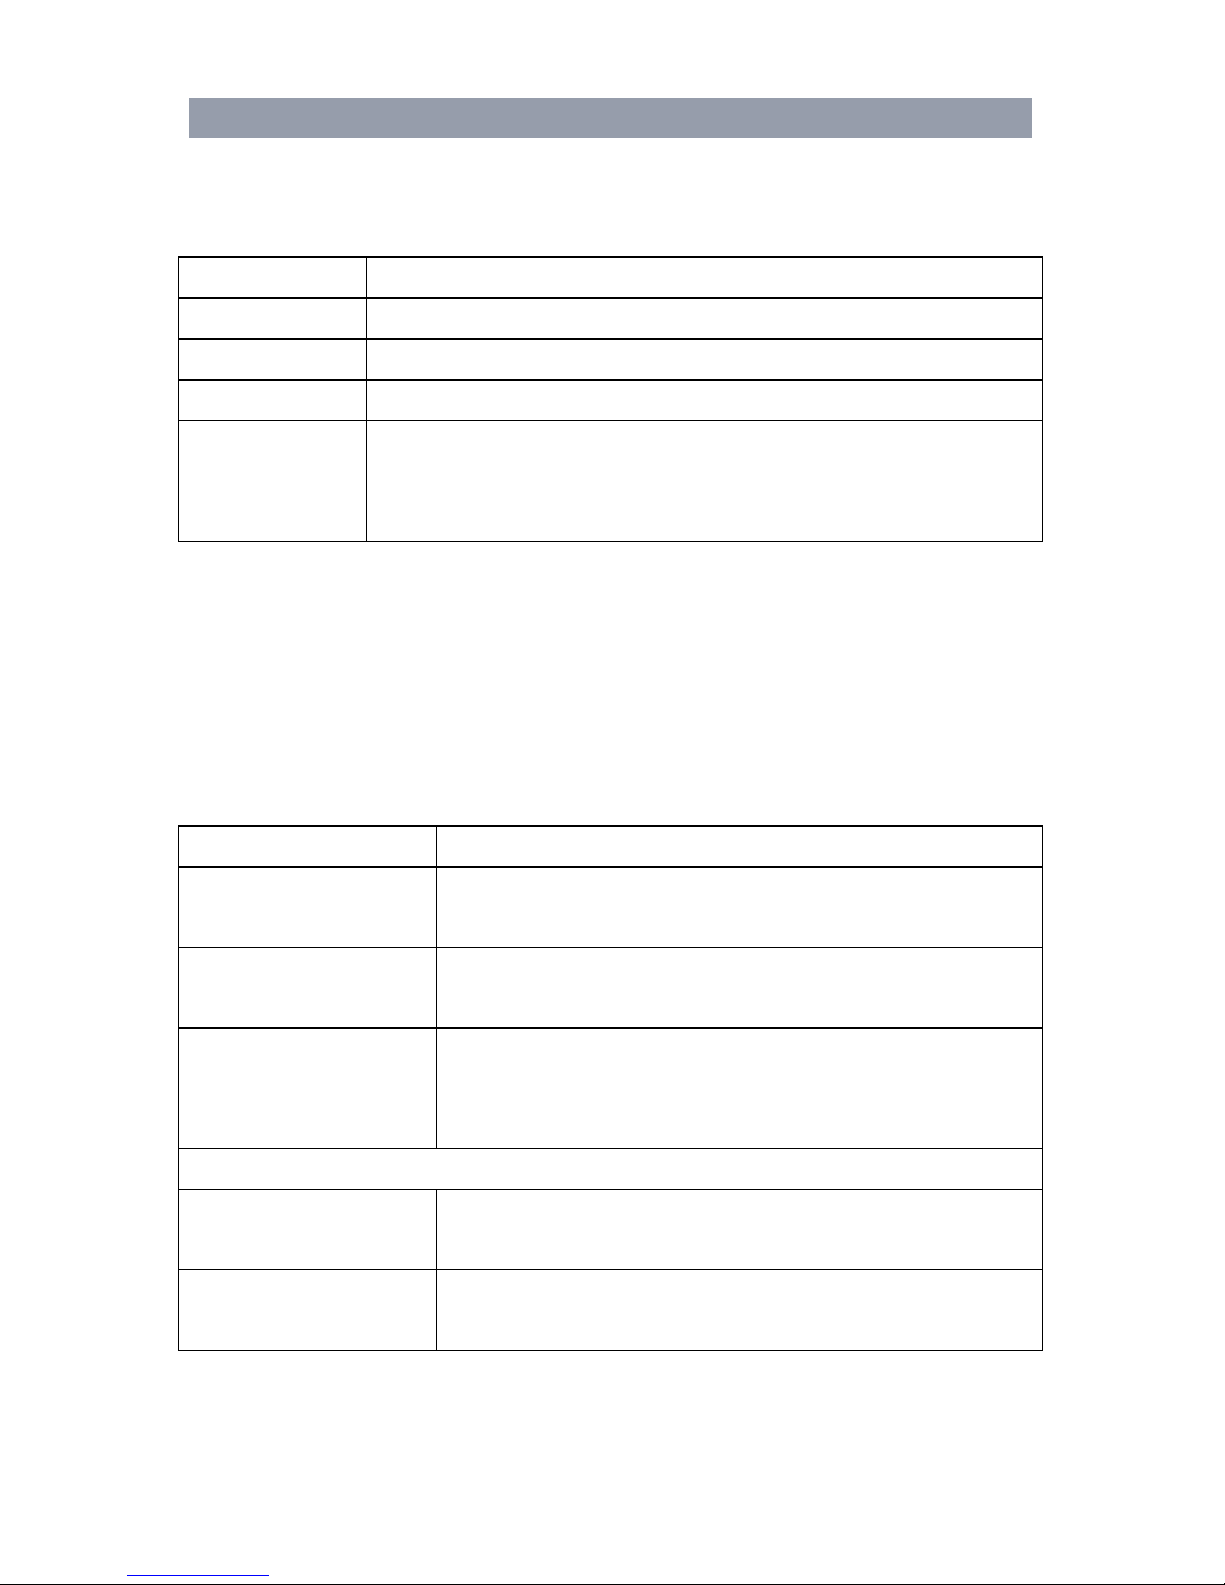
A general exercise program for achieving and maintaining
flexibility should adhere to the following guidelines:
Frequency Daily
Intensity To a position of mild discomfort
Duration 10-30 seconds for each stretch
Repetitions 2-6 for each stretch
Type Static, with a major emphasis on the low back and
hamstrings area because of the high prevalence of
low-back pain syndrome in our society
Exercise Principles
1
The American College of Sports Medicine has developed a
position paper concerning exercise programs for healthy adults
and the need for guidelines. The following recommendations
concern the quantity and quality of (exercise) training for
developing and maintaining cardiovascular fitness in a healthy
adult:
Frequency 3-5 days per week
Intensity 50% - 85% of maximum oxygen uptake
(VO2 max)
Duration 20 to 60 minutes of continuous aerobic
activity
Mode of Activity Any activity that uses the large muscle
groups, that can be maintained continuously,
and is rhythmical and aerobic in nature
Rate of Progression
Initial Conditions 4-6 weeks: low end intensity
(40% - 60% VO2 max)
Improvement
Stage
6 weeks to 6 months: moderate intensity,
moderate duration
1
Some of the material contained in this section was adapted
from “The StairMaster® Fitness Handbook, 2nd Ed”, by James
A.Peterson and Cedric X. Bryant (editors), Sagamore Publishing,
1995.
Page 24

Page | 25
MAINTENANCE
MAINTENANCEMAINTENANCE
MAINTENANCE
MAINTENANC
MAINTENANCMAINTENANC
MAINTENANCE
E E
E INST
INSTINST
INSTRRRRUUUUCCCCTIONS
TIONSTIONS
TIONS
Helpful Hints
The safety level given by the design of this equipment can only be
maintained when the equipment is regularly examined for
damage and wear. Inoperable components should be replaced
immediately or the equipment should be put out of use until it is
repaired. Read all maintenance instructions thoroughly before
beginning work.
All references to the right or left side and to the front or back are
made as if you were on the exercise equipment ready to exercise.
For example, the belt is on the right side of the bike.
INITIAL SERVICE
Upon receiving your equipment, use a soft clean cloth to wipe
off the dust that may have accumulated during shipping. Your
equipment will need minor assembly. Refer to the “Assembly
Instructions” section of this manual for details.
MAINTANCE SCHEDULE
Part
Recommended
Action
Frequency Cleaner
2
Lubricant
2
Pedals1
Ensure that the
pedals are tight in
crank arms and not
cross- threaded, all
screws on pedals ar
e
tight, and pedal
straps are not frayed
Befor
e each
use
N/A N/A
WWWWARNIN
ARNINARNIN
ARNINGGGG: WHEN USED IN A CLUB SETTING IT IS CRITICAL THAT THE PEDALS BE
CHECKED AFTER EACH CLASS TO ENSURE PROPER INSTALLATION. FAILURE TO DO
SO MAY RESULT IN PROPERTY DAMAGE AND/OR RIDER INJURY.
TORQUE PEDALS TO
47 Nm (35 FT-LB)
Page 25

Page | 26
Frame Wipe down Daily
Soap &
water; or,
diluted
nonabrasive
cleaning
solution
N/A
Flywheel Wipe down Weekly
WD-40®
spray.
Spray on
rag &
apply
light coat
to sides
of
flywheel.
N/A
Crank Bolts Inspect for
looseness
Weekly N/A
If loose,
remove bolt,
apply Loctite®
242 on bolt
threads and
reinstall.
Tighten to 48
ft-lbs or 575
in-lbs
Belt
Inspect for
correct tension;
replace cracked,
frayed, or
otherwise nonuniform belt
Monthly N/A N/A
1
Cascade does not recommend attempting to service the
internal parts of the pedals. If pedals are internally worn it is
recommended that they be replaced.
2
Use of lubricants or cleaning solutions other than those so
specified will result in diminished performance and a
shorter life
span for that part.
Page 26

Page | 27
TROUBLESHOOTING
TROUBLESHOOTINGTROUBLESHOOTING
TROUBLESHOOTING
SYMPTOM:
SYMPTOM:SYMPTOM:
SYMPTOM: SSSSEEEEAAAATTTT OR
OROR
OR HANDLEBAR
HANDLEBARHANDLEBAR
HANDLEBAR POST
POSTPOST
POST MMMMOOOOVVVVEEEE AAAAFFFFTTTTER
ERER
ER LOC
LOCLOC
LOCKKKKED
EDED
ED IIIINT
NTNT
NTOOOO
POSITION
POSITIONPOSITION
POSITION
1)
Make sure the T handle is tightened.
SYMPTOM
SYMPTOMSYMPTOM
SYMPTOM:::: CCCCLIC
LICLIC
LICKKKKING
INGING
ING NOISE
NOISENOISE
NOISE WITH
WITHWITH
WITH EACH
EACHEACH
EACH PEDAL
PEDALPEDAL
PEDAL RE
RERE
REVVVVOLUTION
OLUTIONOLUTION
OLUTION
1)
Check shoelaces to make sure the aglet is not tapping the bike
as the pedals turn
2)
Assure pedal straps are tight and that no excess strap on inner
part of pedal is catching on the crank arm as it turns
3)
Assure that pedals are tight on crank arms
SYMPTOM:
SYMPTOM:SYMPTOM:
SYMPTOM: CCCCLIC
LICLIC
LICKKKKING
INGING
ING NOISE
NOISENOISE
NOISE WHEN
WHENWHEN
WHEN FL
FLFL
FLYYYYWHEEL
WHEELWHEEL
WHEEL RRRROT
OTOT
OTAT
ATAT
ATEEEESSSS
1)
Check for noisy flywheel bearings.
2)
If flywheel bearings are noisy or rough have authorized service
technician replace flywheel hub assembly.
SYMPTOM:
SYMPTOM:SYMPTOM:
SYMPTOM: DRI
DRIDRI
DRIVVVVEEEE BELT
BELTBELT
BELT IS
ISIS
IS SLIPPIN
SLIPPINSLIPPIN
SLIPPINGGGG
1) Remove small access cover on belt cover
No
NoNo
Notttte:
e:e:
e: Use caution around belt when cover is removed
2) Loosen idler and tighten tensioner bolt 2-3 turns with hex
wrench
3) Tighten idler and test belt
4) If belt still slips repeat process until belt no longer slips
5) Reinstall small access cover on belt cover
Page 27

Page | 28
TROUBLESHOOTING
TROUBLESHOOTINGTROUBLESHOOTING
TROUBLESHOOTING
SYMPTOM:
SYMPTOM:SYMPTOM:
SYMPTOM: KNOC
KNOCKNOC
KNOCKKKKING
INGING
ING NOISE
NOISENOISE
NOISE OR
OROR
OR PL
PLPL
PLAAAAYYYY FFFFELT
ELTELT
ELT IN
ININ
IN PEDALS/C
PEDALS/CPEDALS/C
PEDALS/CRRRRANK
ANKANK
ANKSSSS
1) Make sure pedals are tight on crank arms
2) Make sure crank bolts are tight. If loose, apply blue Loctite
242 to threads and tighten crank bolts with 8mm hex
wrench
3) If problem persists check the bottom bracket for looseness.
4) If bottom bracket is loose contact authorized service
technician for replacement of bottom bracket bearings.
SYMPTOM:
SYMPTOM:SYMPTOM:
SYMPTOM: ROC
ROCROC
ROCKKKKING
INGING
ING OR
OROR
OR MMMMOOOOVVVVEME
EMEEME
EMENNNNTTTT FFFFRRRROM
OMOM
OM CMX
CMX CMX
CMX PRO
PRO PRO
PRO WHILE
WHILEWHILE
WHILE
IN
ININ
IN US
USUS
USEEEE
1) Using a hex wrench, check the attachment bolts on the
front and rear stabilizers and make sure they are tight (2
bolts on each stabilizer)
2) Assure the bike is level by checking the leveling feet on the
bottom of the front and rear stabilizers
Page 28

Page | 29
SPECIFICATIONS
SPECIFICATIONSSPECIFICATIONS
SPECIFICATIONS
PHYSICAL DIMENSIONS
SHIPPING CARTON DIMENSIONS
Length: 45in (114 cm)
Height: 38 in (96.5cm)
Width: 12 in (30.5 cm)
Weight: 110 lbs (50 kg)
FRAME
ED and Powder Coated Finish
23 inch wide base with large diameter adjustable levelers
FLYWHEEL
Precision Anodized Aluminum Machined Flywheel
BRAKING AND RESISTANCE MECHANISM
Turn-knob design for tension; push down for braking
Magnetic Resistance
CRANK SET
Forged Cranks (170 mm)
Oversized and hardened Cr-Moly bracket spindle
Press fit style bottom bracket with oversized bearings
Length: 42 in (107 cm)
Height: 42 in (107 cm)
Width: 23in (59 cm)
Weight: 96 lbs (44 kgs)
Page 29

Page | 30
SPECIFICATIONS
SPECIFICATIONSSPECIFICATIONS
SPECIFICATIONS
HANDLEBARS
Biomechanically correct with anatomical bend
Adjustable up/down and fore/aft
Over molded grip for greater comfort
Adjustment marks for up/down and fore/aft adjustments
STRETCH PADS
Foot pads on base of rear stabilizer for stretching
SEAT
Seat slider allows for extended fore/aft adjustment
Adjustment marks for up/down and fore/aft
TRANSPORTATION WHEELS
Extra Large In-Line skate wheels
DRIVE TRAIN
Reinforced Poly-V Drive Belt
Precision Drive Pulleys
Page 30
Page | 31
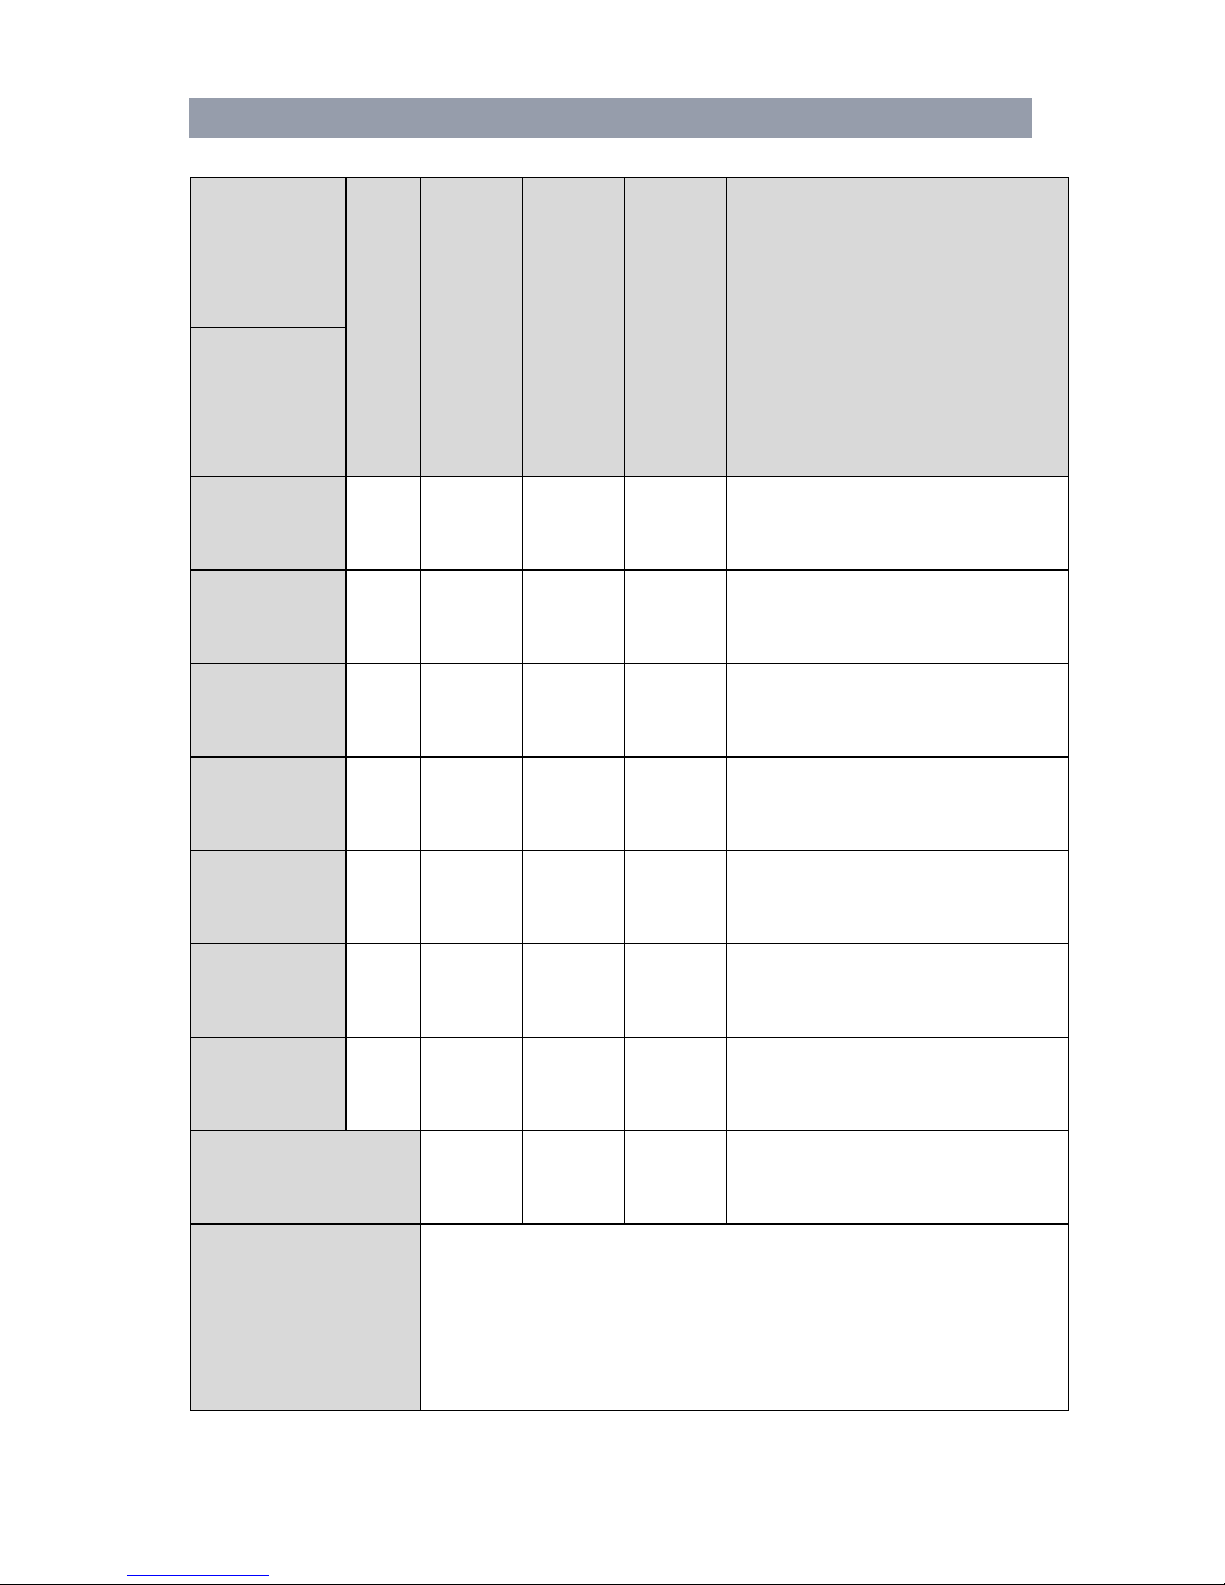
EXERCISE LOG
EXERCISE LOGEXERCISE LOG
EXERCISE LOG
Week #:
Monday
Tuesday
Wednesday
Thursday
Friday
Saturday
Sunday
Weekly Totals
Weekly Goals:
Page 31
Page | 32
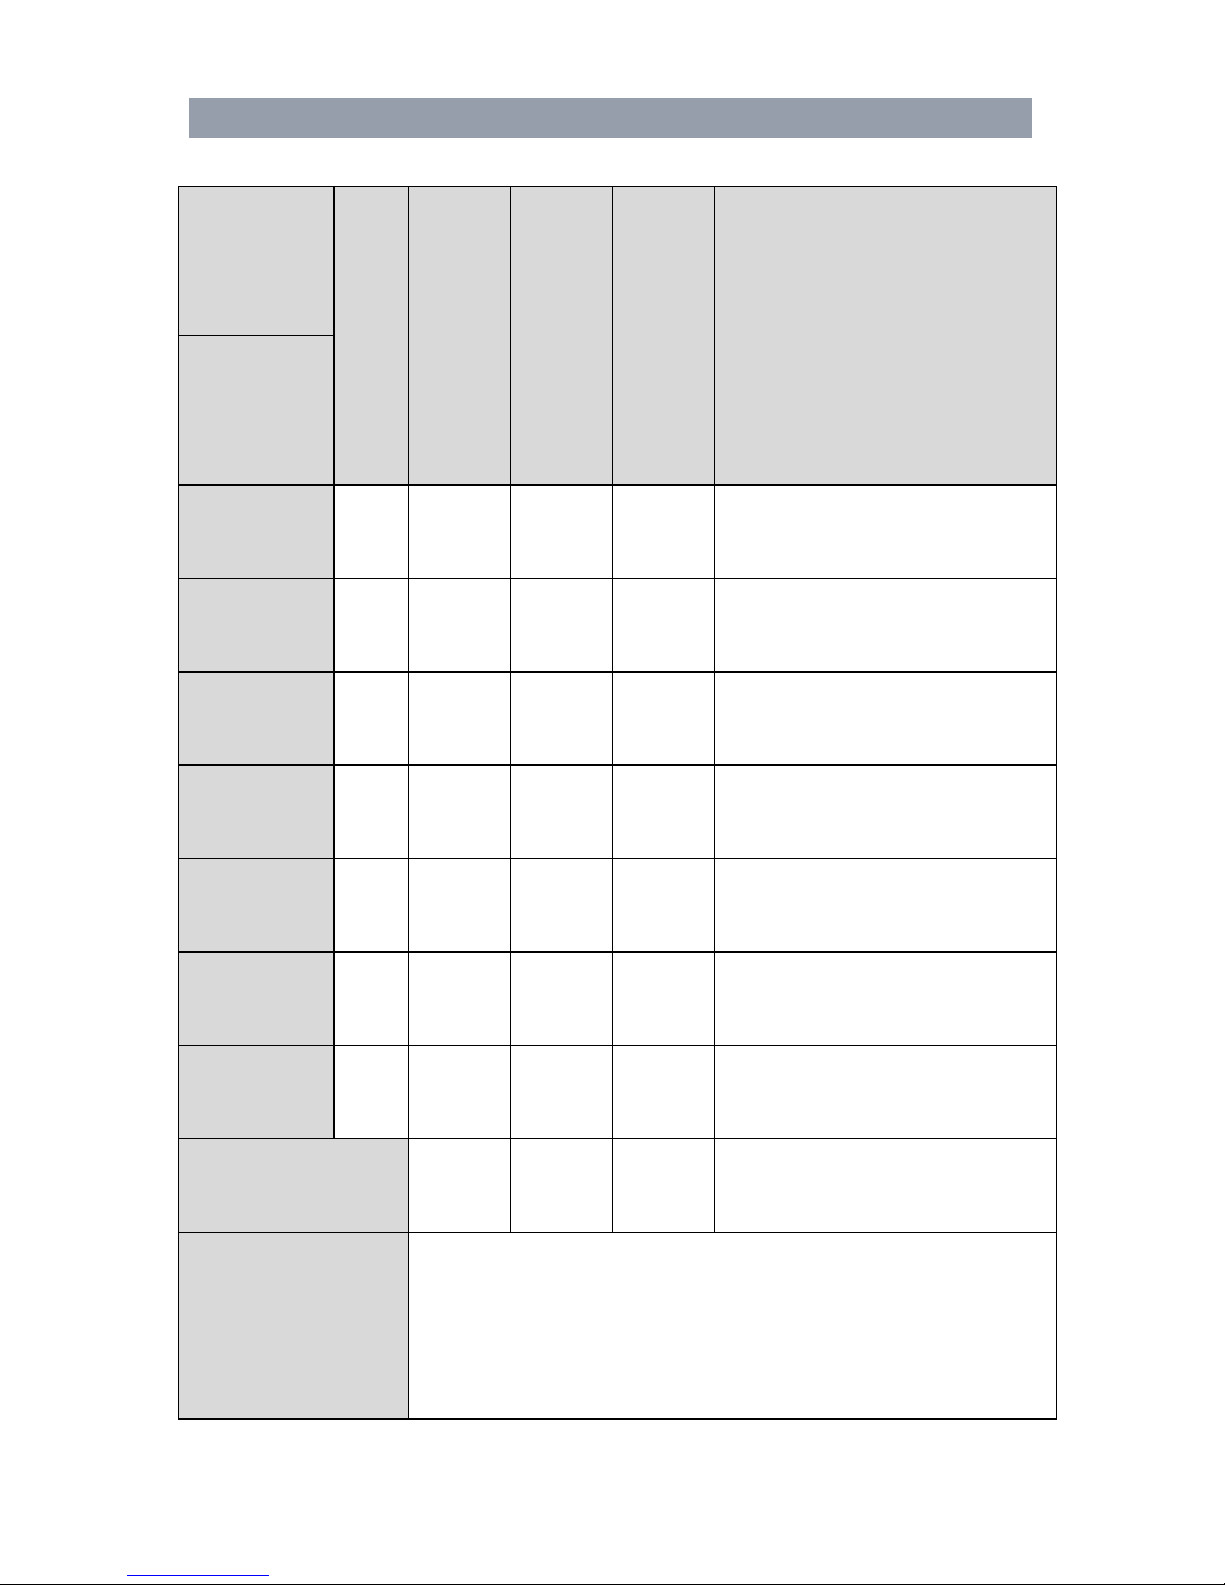
EXERCISE LOG
EXERCISE LOGEXERCISE LOG
EXERCISE LOG
Week #:
Monday
Tuesday
Wednesday
Thursday
Friday
Saturday
Sunday
Weekly Totals
Weekly Goals:
Page 32
Page | 33
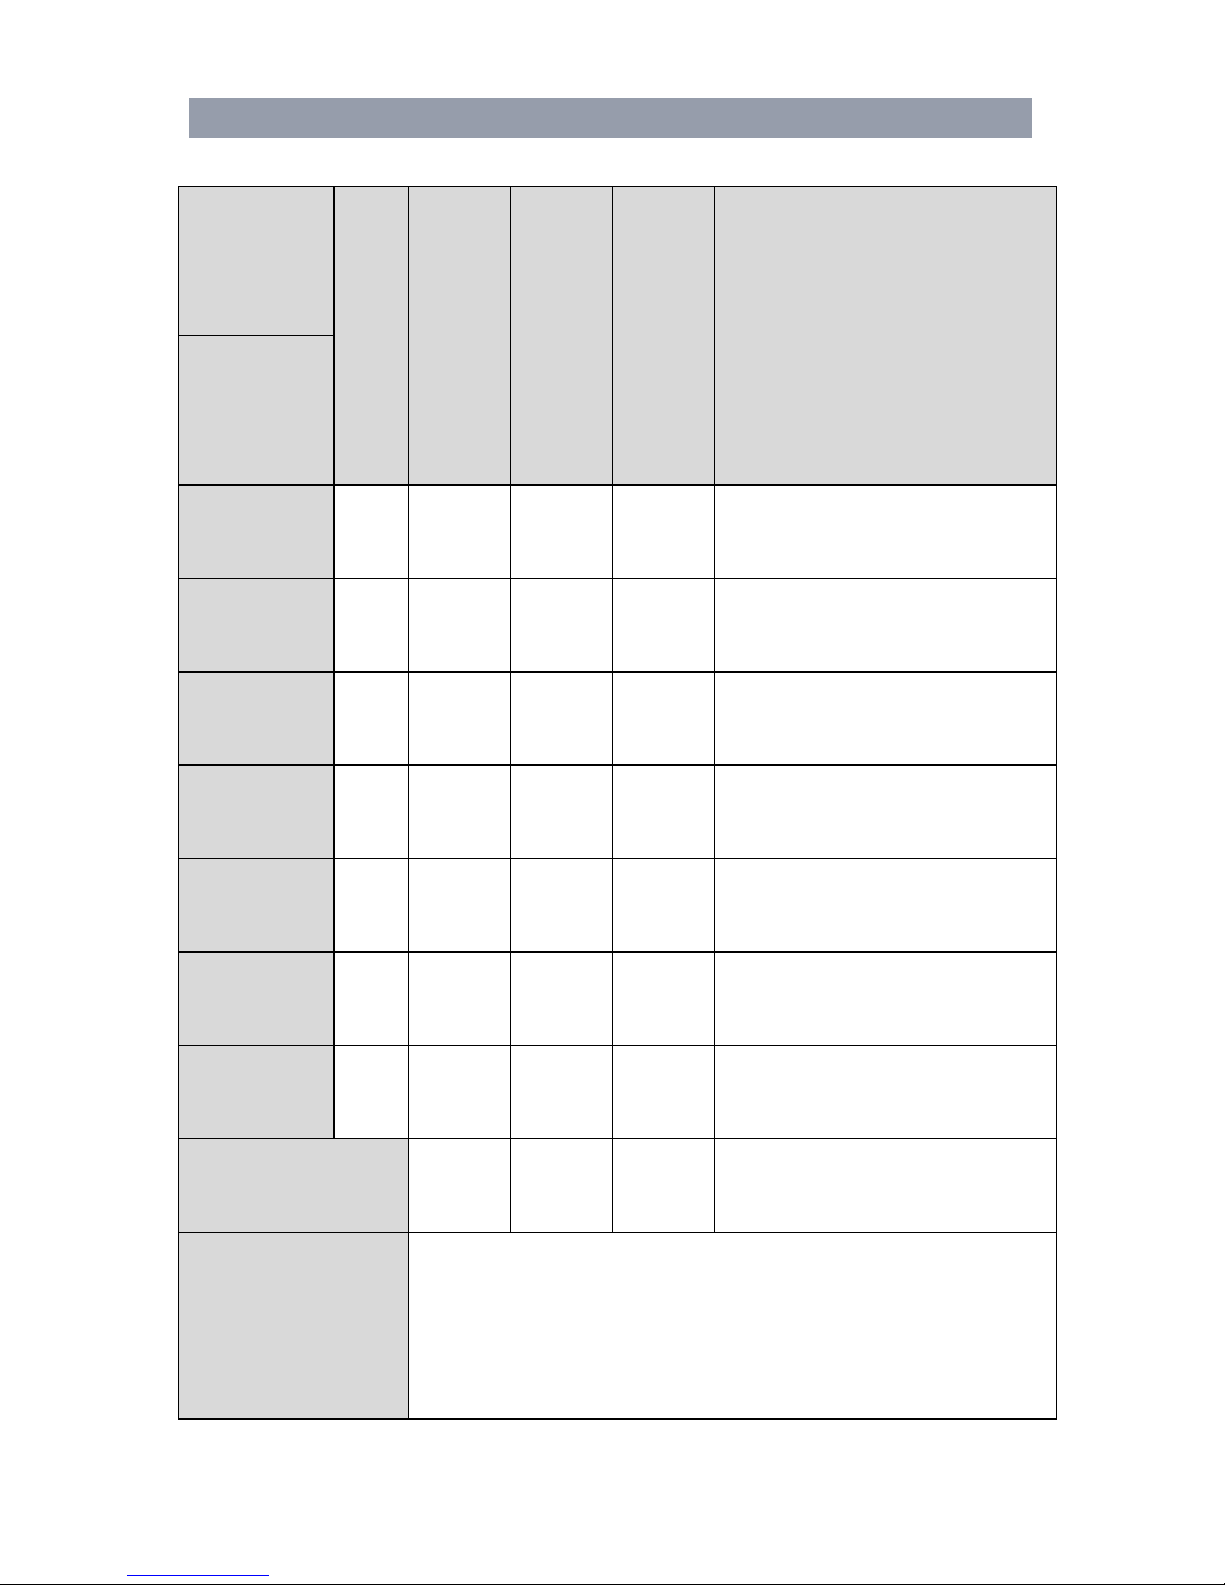
EXERCISE LOG
EXERCISE LOGEXERCISE LOG
EXERCISE LOG
Week #:
Monday
Tuesday
Wednesday
Thursday
Friday
Saturday
Sunday
Weekly Totals
Weekly Goals:
 Loading...