

Cart-Tek GRX-950, GRX-950 Li User Manual

Page%1%of%17%
%
User%Manual%%
GRX.950%and$$
GRX.950%Li%
%
%
%
%
%

Page%2%of%17%
%
!"#$%&'(&)'*!%*!+&
%
!"#$%&'(#!%") *%
+,-!()-.#/'0) 1%
#'$"!"2)%")3%'$)2$4/567) 8%
0$.(,'#!%"-) 9%
:$..);<..=)>%&.) 5%
2.".$,=)+,##.$3)(,$.) ?7%
+,##.$3)!":%$>,#!%"):%$)2$4/567)=!)%"=3) ?@%
+,##.$3)!":%$>,#!%"):%$)#<.)2$4/567)-.,=.&)=.,&),(!&)
+,##.$3)%"=3) ?*%
,=!2">."#)-3-#.>) ?1%
%A.$,==)#$%==.3)>,!"#.","(.) ?6%
#$%'+=.)-<%%#!"2) ?6%
;,$$,"#3B-0,$.)0,$#-B(%"#,(#)(,$##.C) ?8%
%
% %

Page%3%of%17%
%
,*!-'./)!,'*&
Thank%you%for%purchasing%the%Cart%Tek%GRX<950%golf%trolley.%
Your%Cart%Tek%trolley%cart%was%thoroughly%quality%control%
checked%and%road%tested%before%being%shipped%to%your%address.%
We%do%everything%possible%to%assure%that%your%trolley%is%in%
perfect%working%order%upon%arrival.%Should%you%have%any%issues%
or%questions%about%the%performance%of%your%trolley,%please%
contact%us%at%sales@carttek.com%or%541<633<4308.%
Please%read%this%manual%carefully%before%use.%%After%unpacking%
please%keep%the%carton%and%all%internal%sections%in%safe%storage.%
In%the%unlikely%possibility%that%you%need%to%return%the%whole%
unit%due%to%a%defective%component,%you%will%need%to%repack%the%
unit%in%the%original%manner%to%ensure%safe%and%secure%transit.%
Check%that%all%components%are%included%in%the%package%–%
• Main%Trolley%frame%
• Drive%wheels%
• Battery,%complete%with%battery%bag%and%cable%
• Battery%charger%
• Accessories%
• User%Manual%
%
Please%note%that%our%design%and%manufacturing%policy%is%aimed%
at%continuous%improvement,%this%can%result%in%changes%without%
notice%to%the%specifications%contained%in%our%websites%and%in%
this%manual.%
) )
Page%4%of%17%
D'!(C)#!0)
&
#"+,)&+%!0/1&
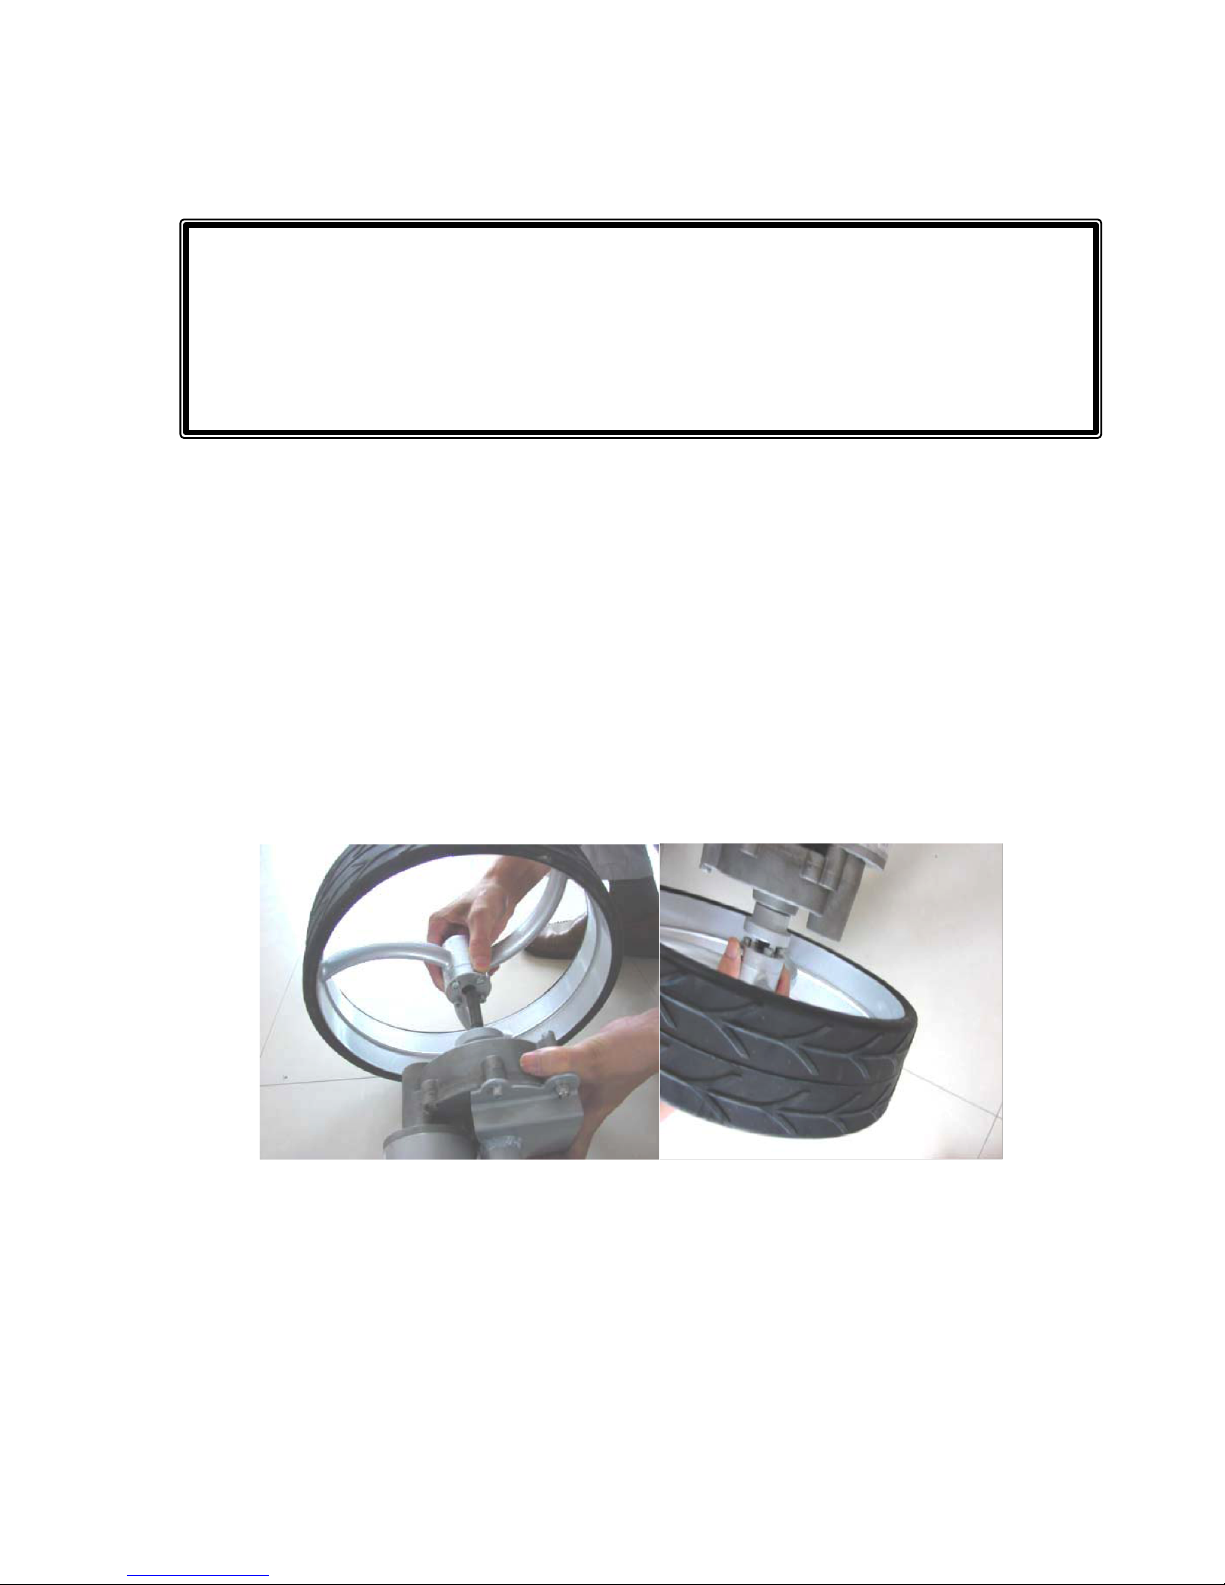
• Remove%all%components%from%carton.%Note%any%damage%
with%carrier.%
• Install%the%two%large%drive%wheels.%The%arrow%design%on%
the%tires%should%face%forward.%Depress%knob%on%inside%
wheel%hub%to%fully%seat%wheel%onto%axle%drive%collars.%%The%
4%metal%studs%should%fully%insert%into%the%holes%on%the%
drive%collar.%%% %
%
% %
%
%
• Arrange%Axle%assembly%with%drive%motor%to%your%left.%%%
After&unpacking&the&trolley&an d &while&reading&this&manual,&pl ac e&
the&battery&on&charge&while&you&assemble&the &un it.&&&Plug&battery&
into&charger&and&charger&into&power&source.&The&battery&may&be&
delivered&with&a&charge&but&you&should&verify&a&full&charge&before&
using&the&trolley&for&the&first&time.&&
Page%5%of%17%
%
%
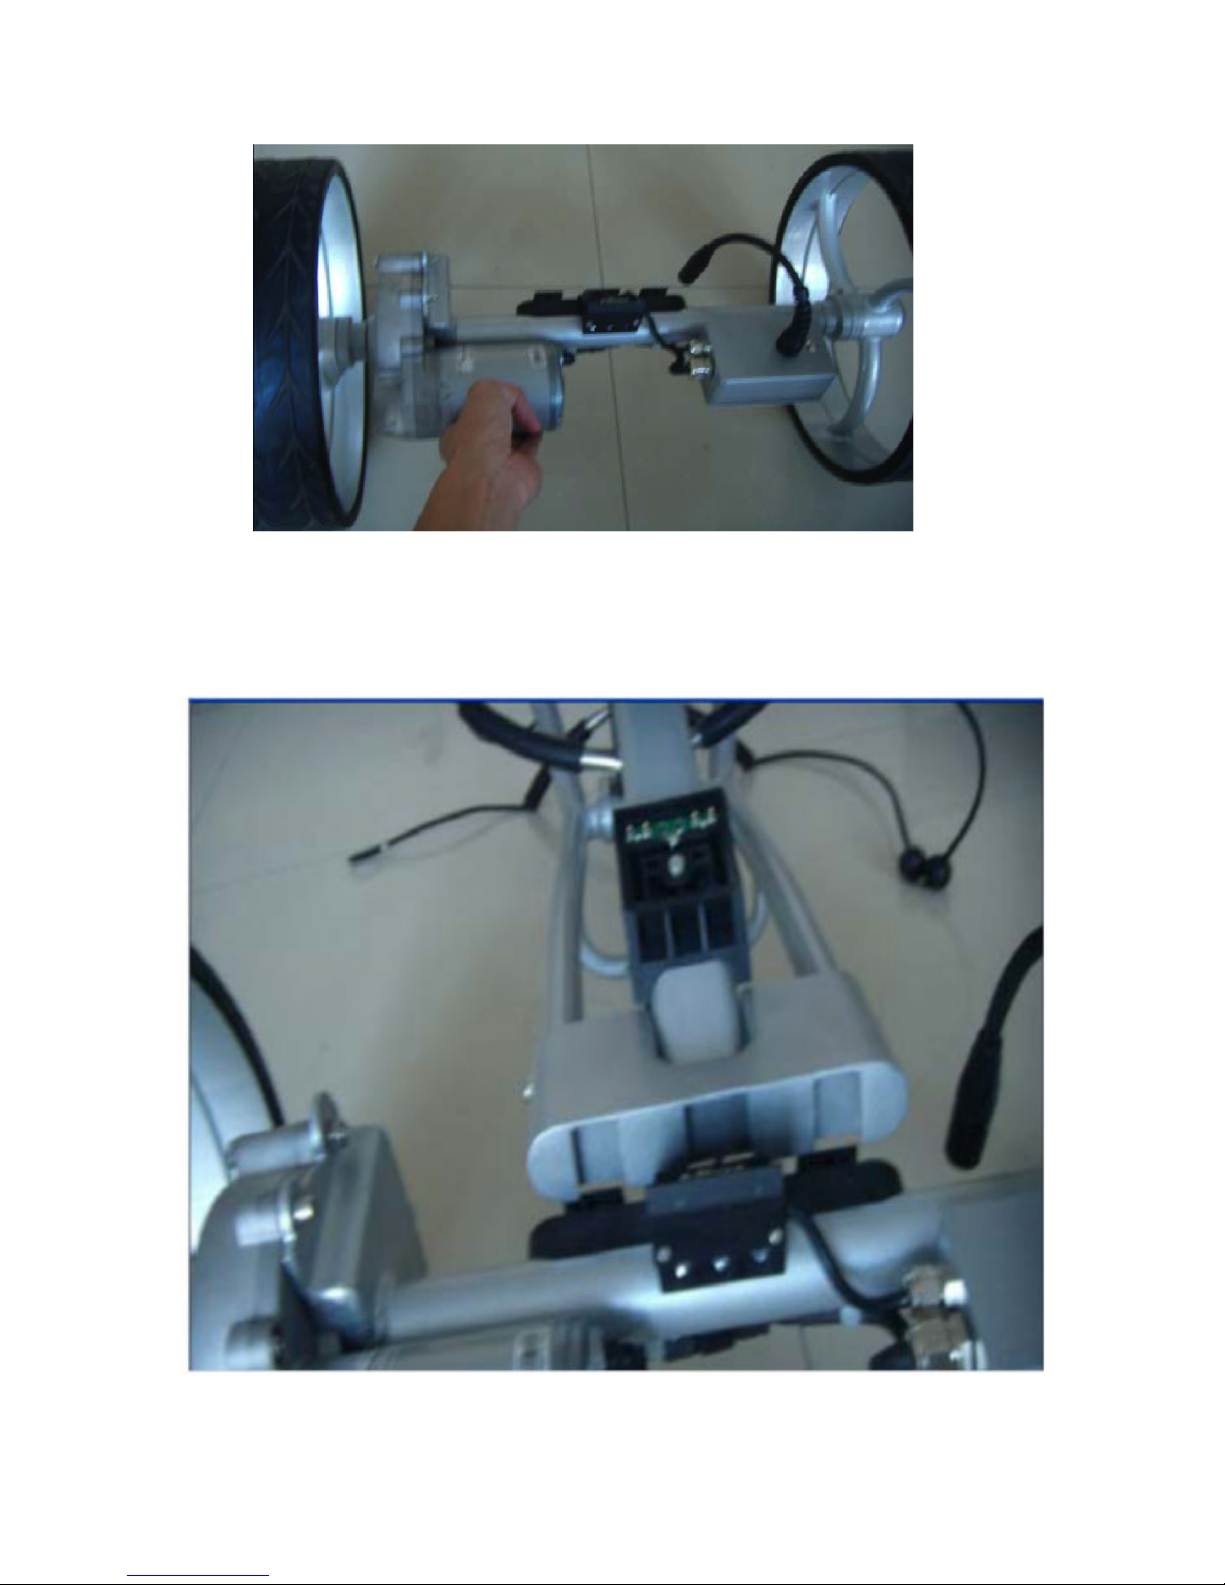
• Place%trolley%frame%forward%of%the%axle%assembly%as%
shown.%%%Align%mounting%grooves%and%slide%frame%onto%
axle%assembly.%%%
%
Page%6%of%17%
%
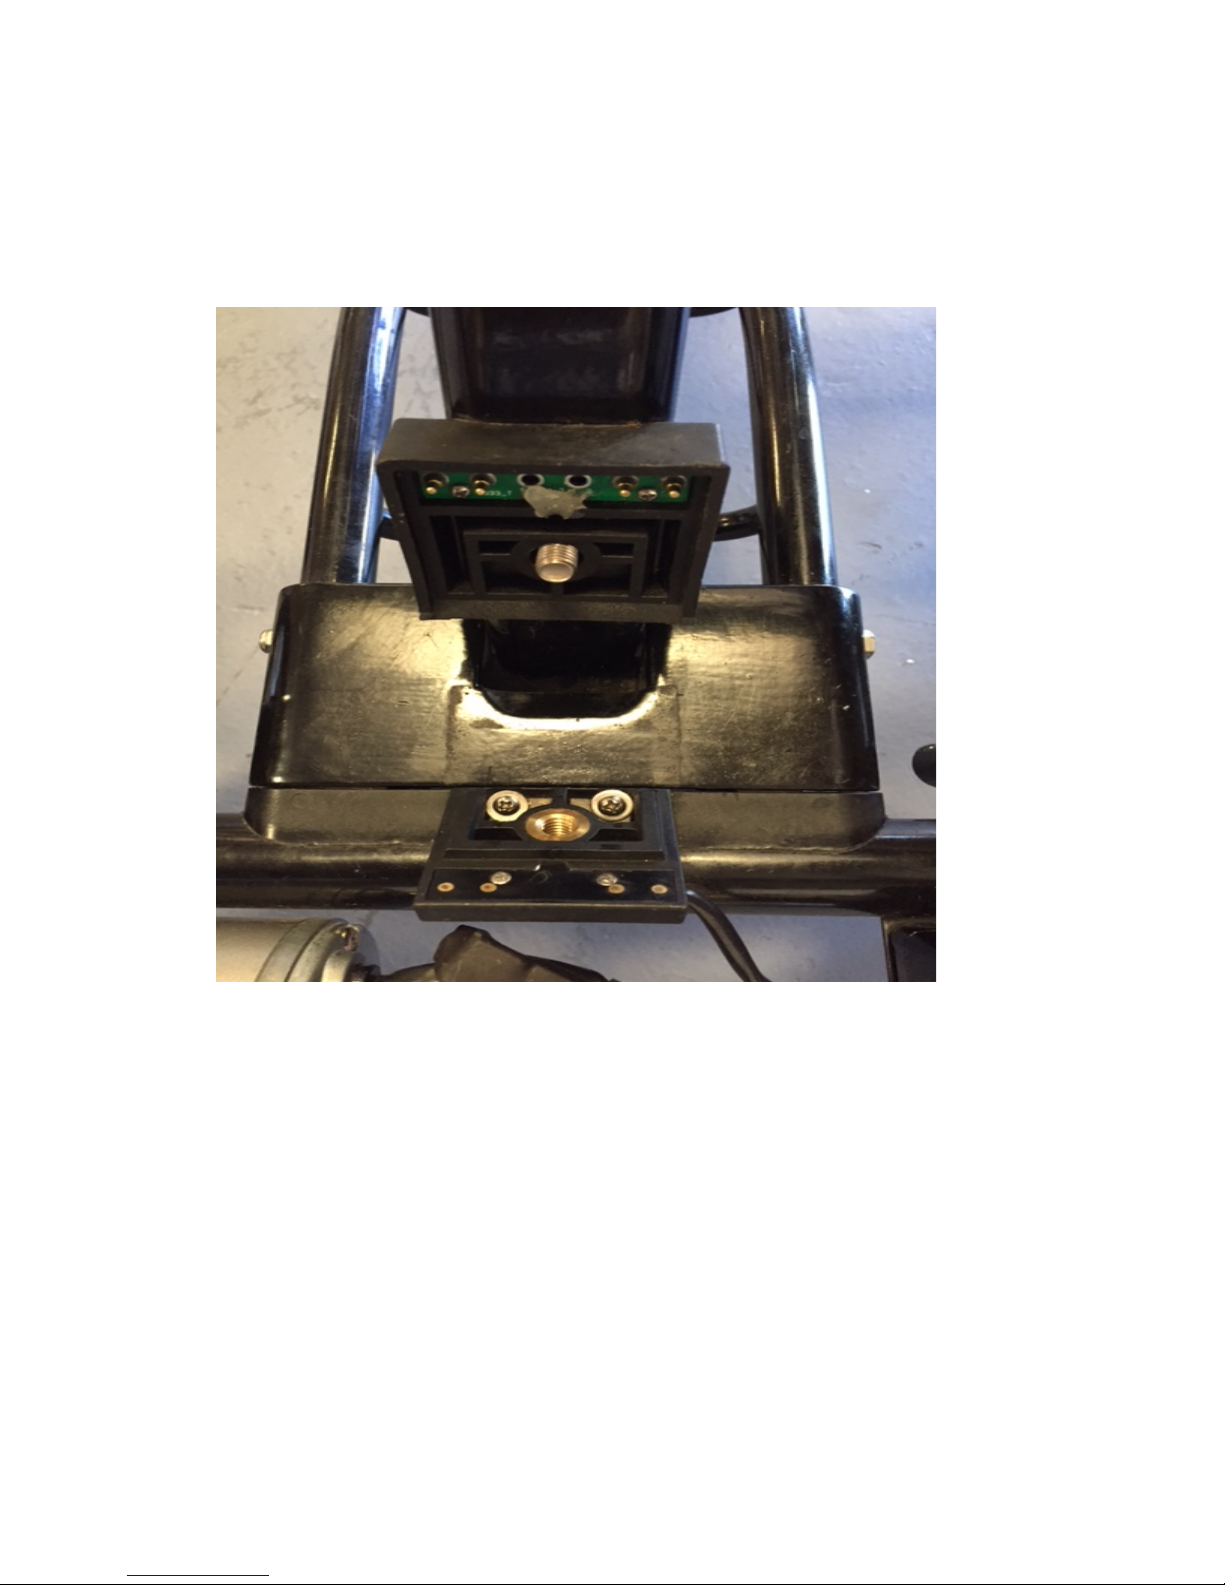
• Raise%Handle%base%to%engage%electric%contacts%with%axle%
assembly.%%%Tighten%locking%nut%(black%ball).%%The%locking%
nut%must%be%tightened%before%every%round.%%
%
• Place%golf%bag%onto%the%trolley,%making%sure%to%balance%the%
weight%of%your%golf%bag%equally%“side%to%side”.%%
• Secure%golf%bag%with%bungees.%%It%is%important%that%both%
top%and%bottom%bag%straps%are%tight%and%your%bag%is%firmly%
secured%in%the%bag%rests.%%
• Place%SLA%or%LI%battery%in%trolley%frame.%
• Adjust%upper%handle%to%desired%height.%%Tighten%locking%
nut%(black%ball)%to%secure%handle%in%upright%position.%%The%
locking%nut%must%be%tightened%before%every%round.%%
&
 Loading...