

Cartft CALU-MC Assembly Manual
Assembling Tutorial: CALU-MC
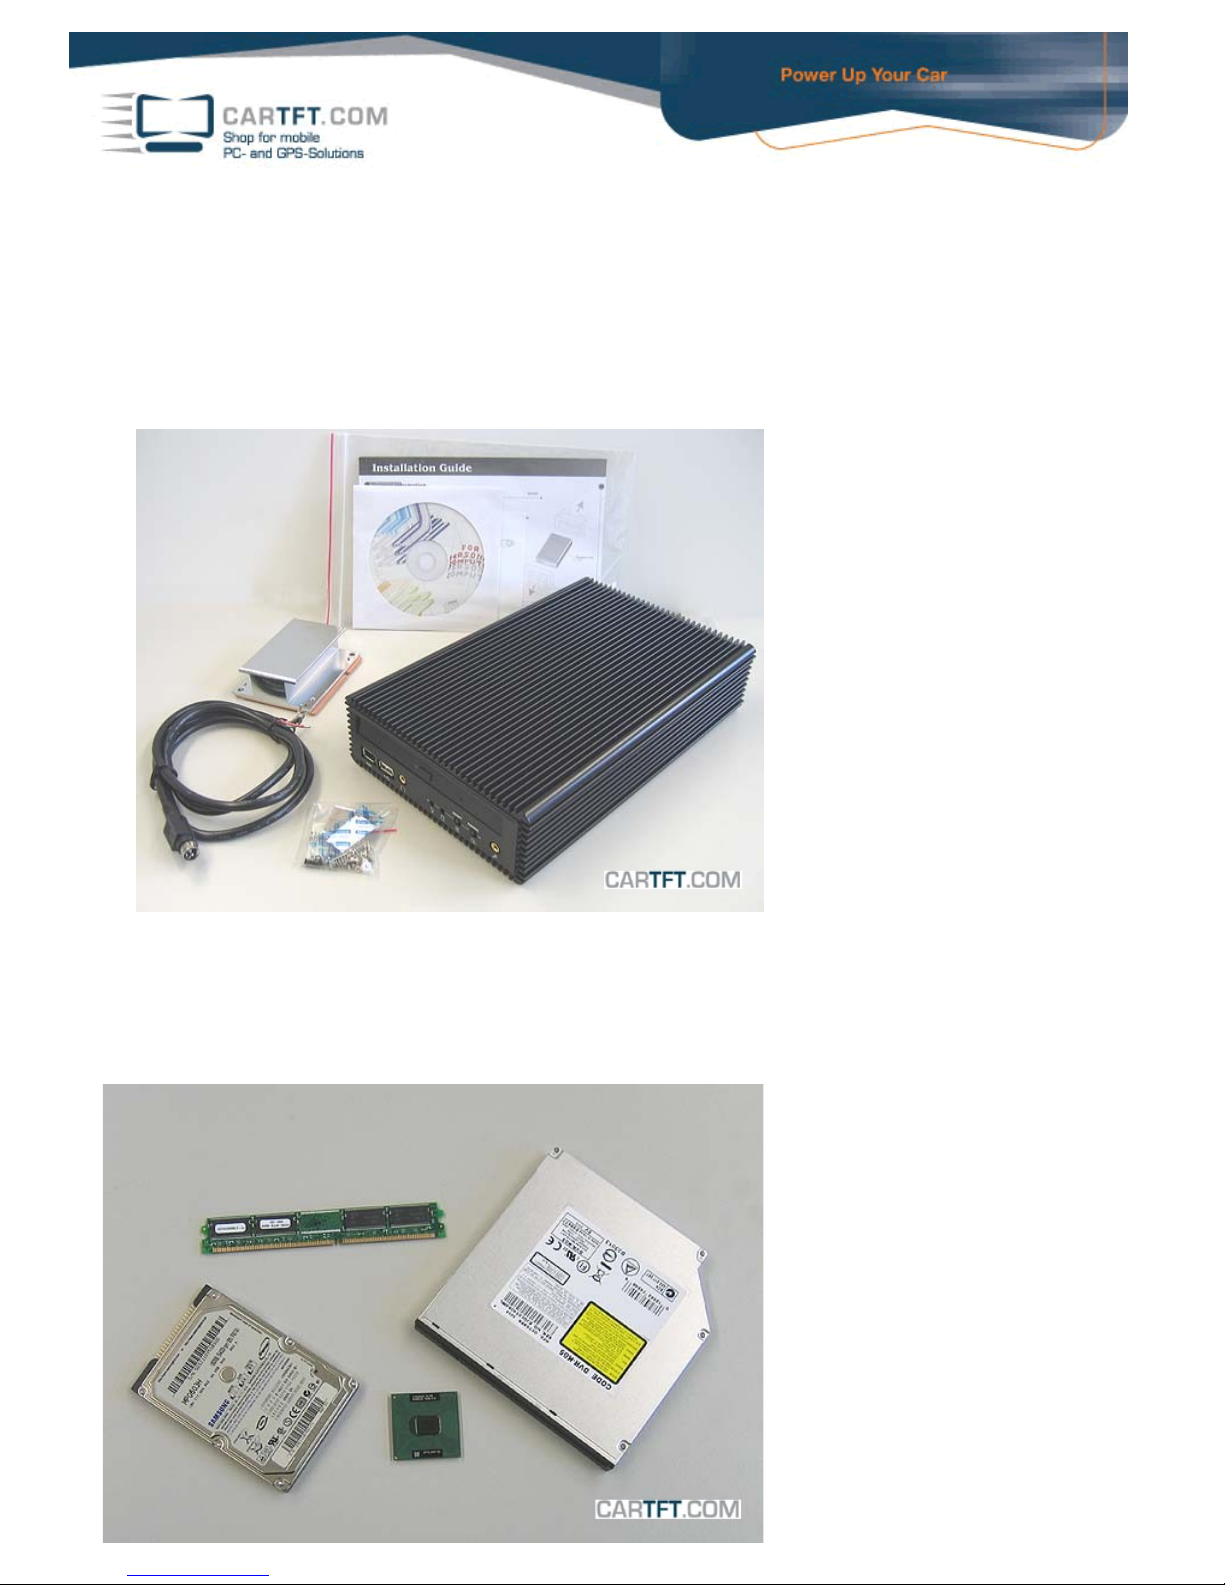
The following components are lying on the table:
- Calu MC CarPC Barebone
- Power connector cable
- CPU heatsink
- Screws (for HDD, CD-ROM Adapter, CD-ROM, CPU cooler) + heatsink compound + EMI Sticker
- Installation guide and Motherboard driver CD
On the table are also lying example components, which will be mounted into the case afterwards:
- Slimline CD/DVD-ROM
- 80 GB 2,5“ HDD
- 512 MB DDR 0.8“ UltraSlim RAM
- CPU Celeron-M 1,5 GHz Dothan

The case gets opened:
The motherboard gets pulled out:
Now the motherboard is lying in front of you…
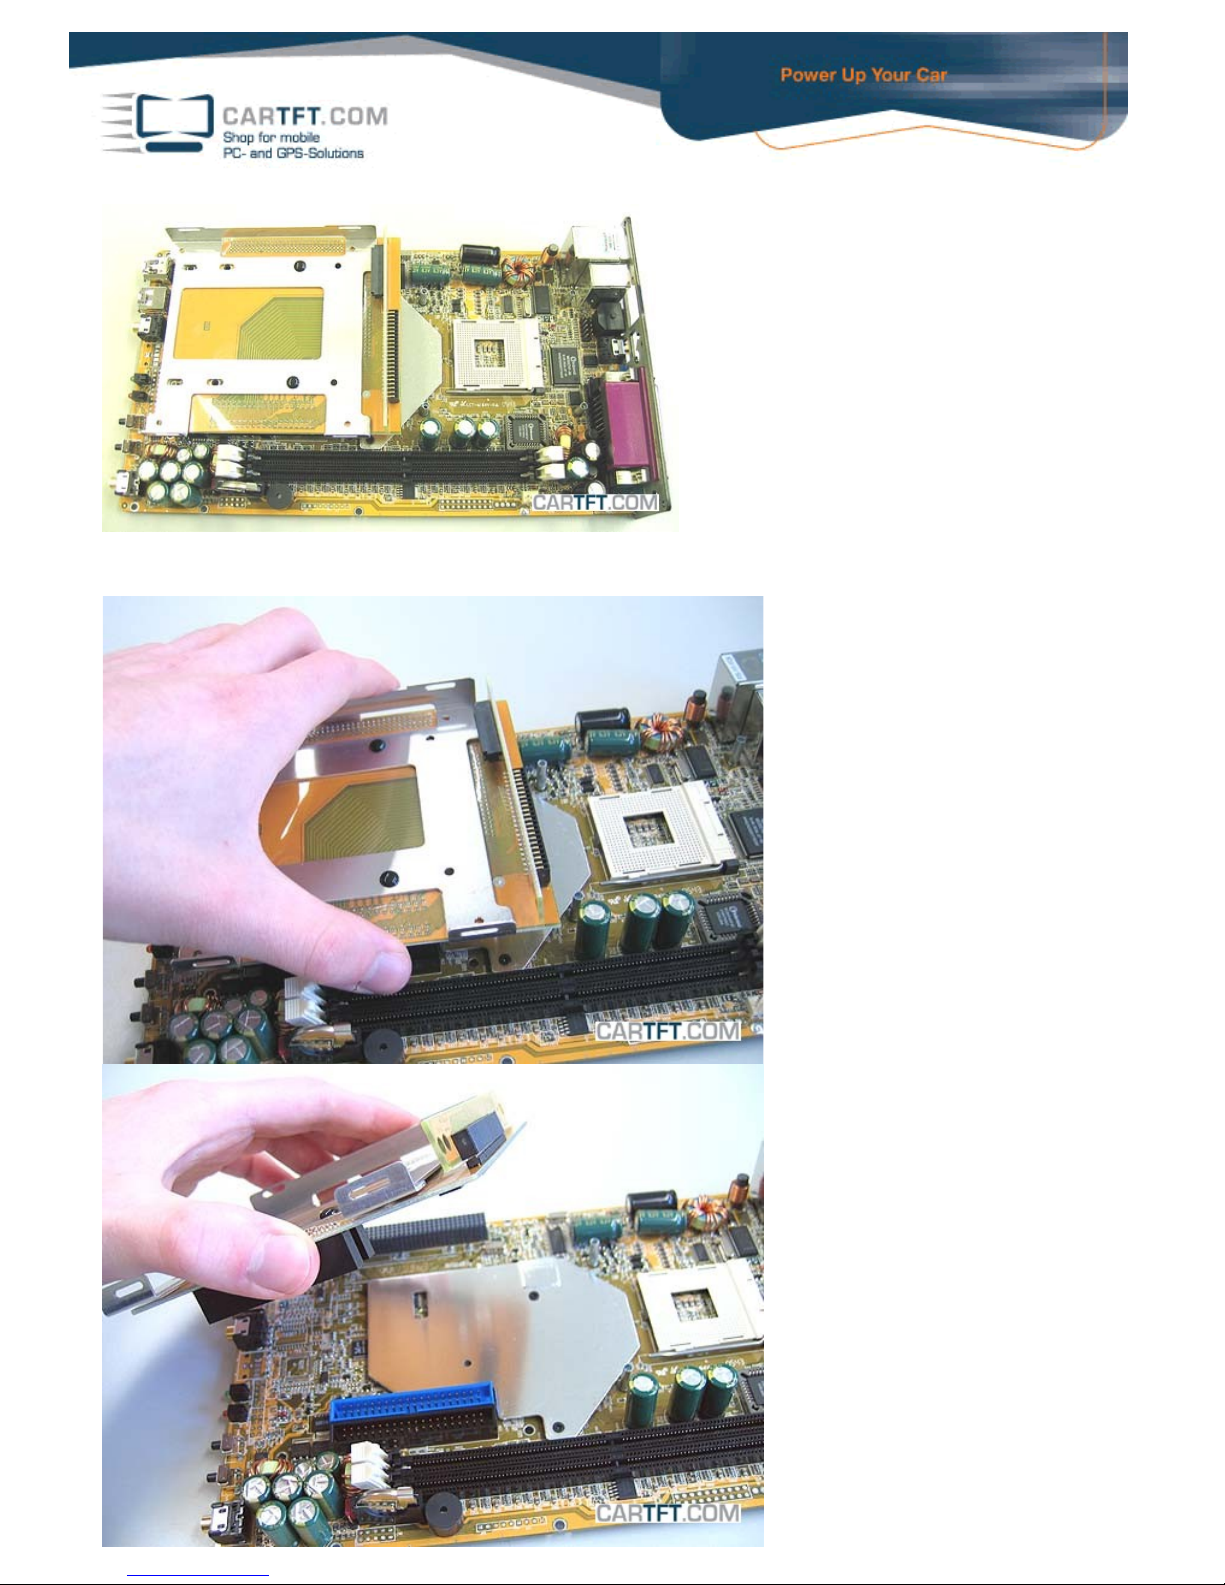
…and you have to uninstall the Drive Adapter from it:
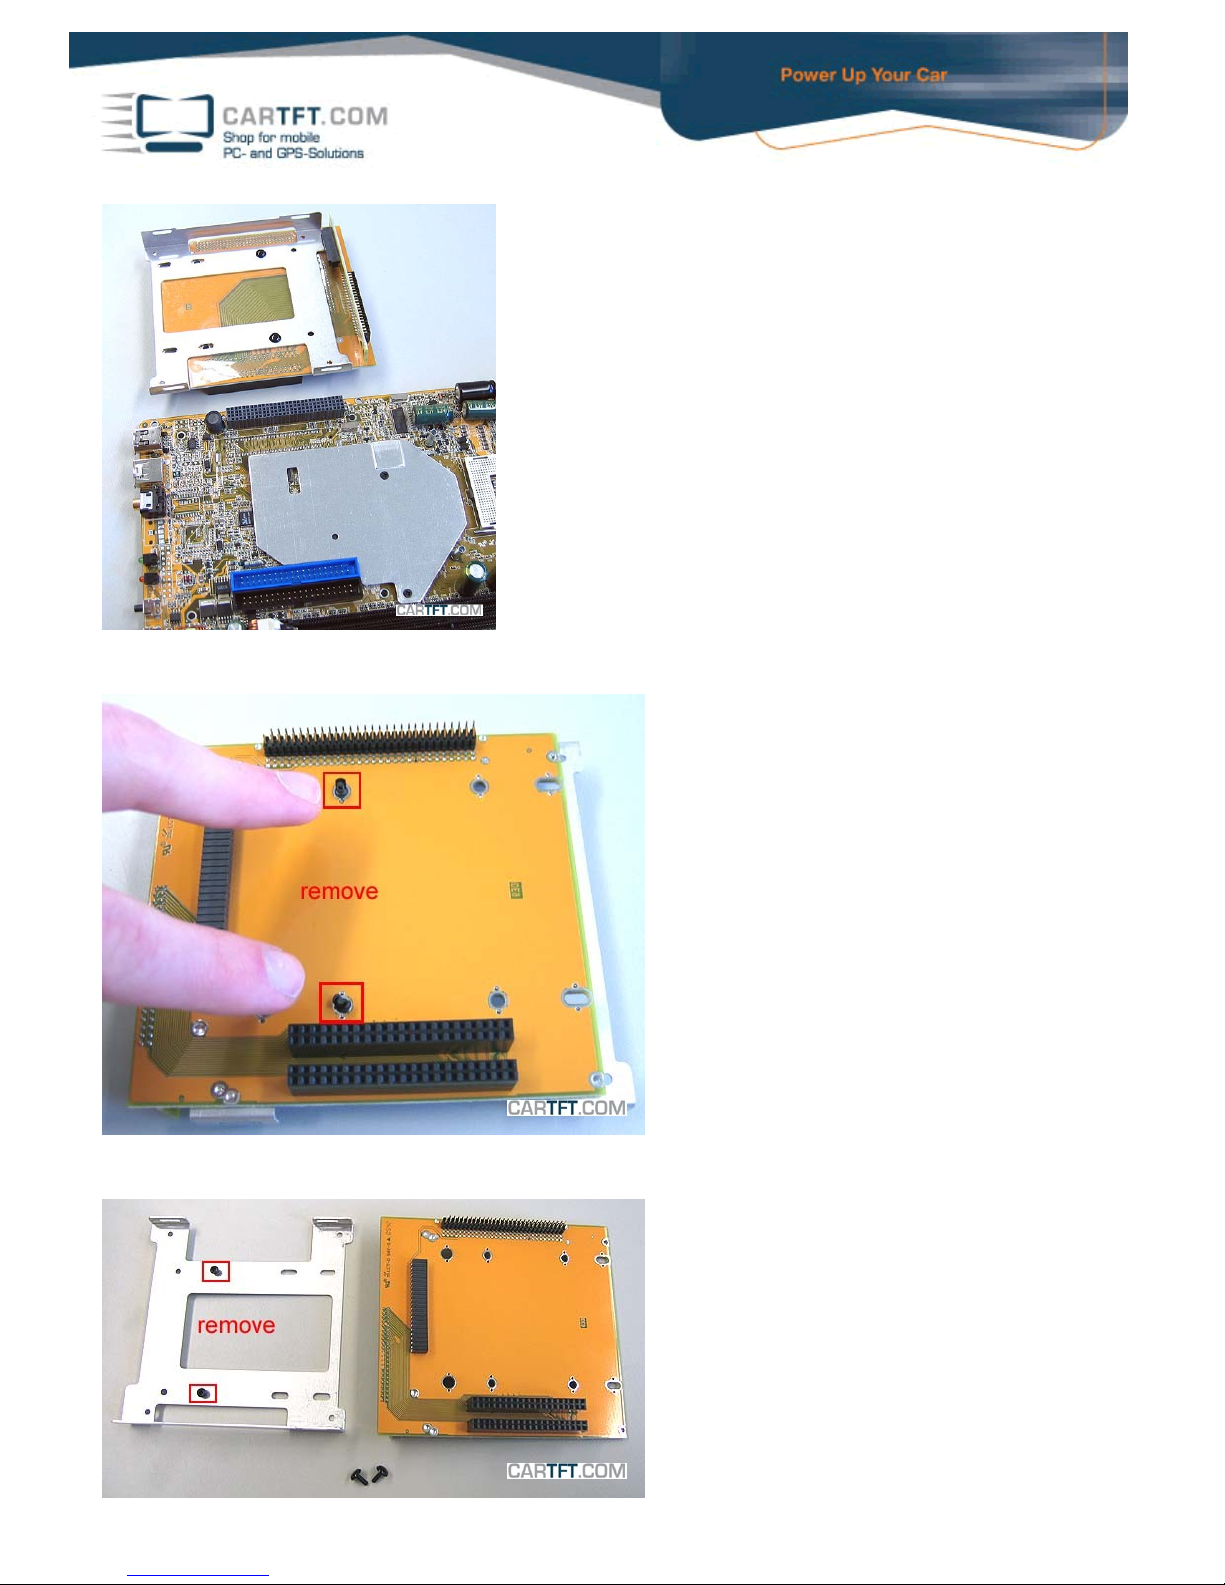
The Drive Adapter gets turned over, for removing the little, black plastic fastener:
The other little, black plastic fasteners can be removed on the other side now, too:
The HDD gets mounted onto the Drive Adapter:
 Loading...