

Page 1
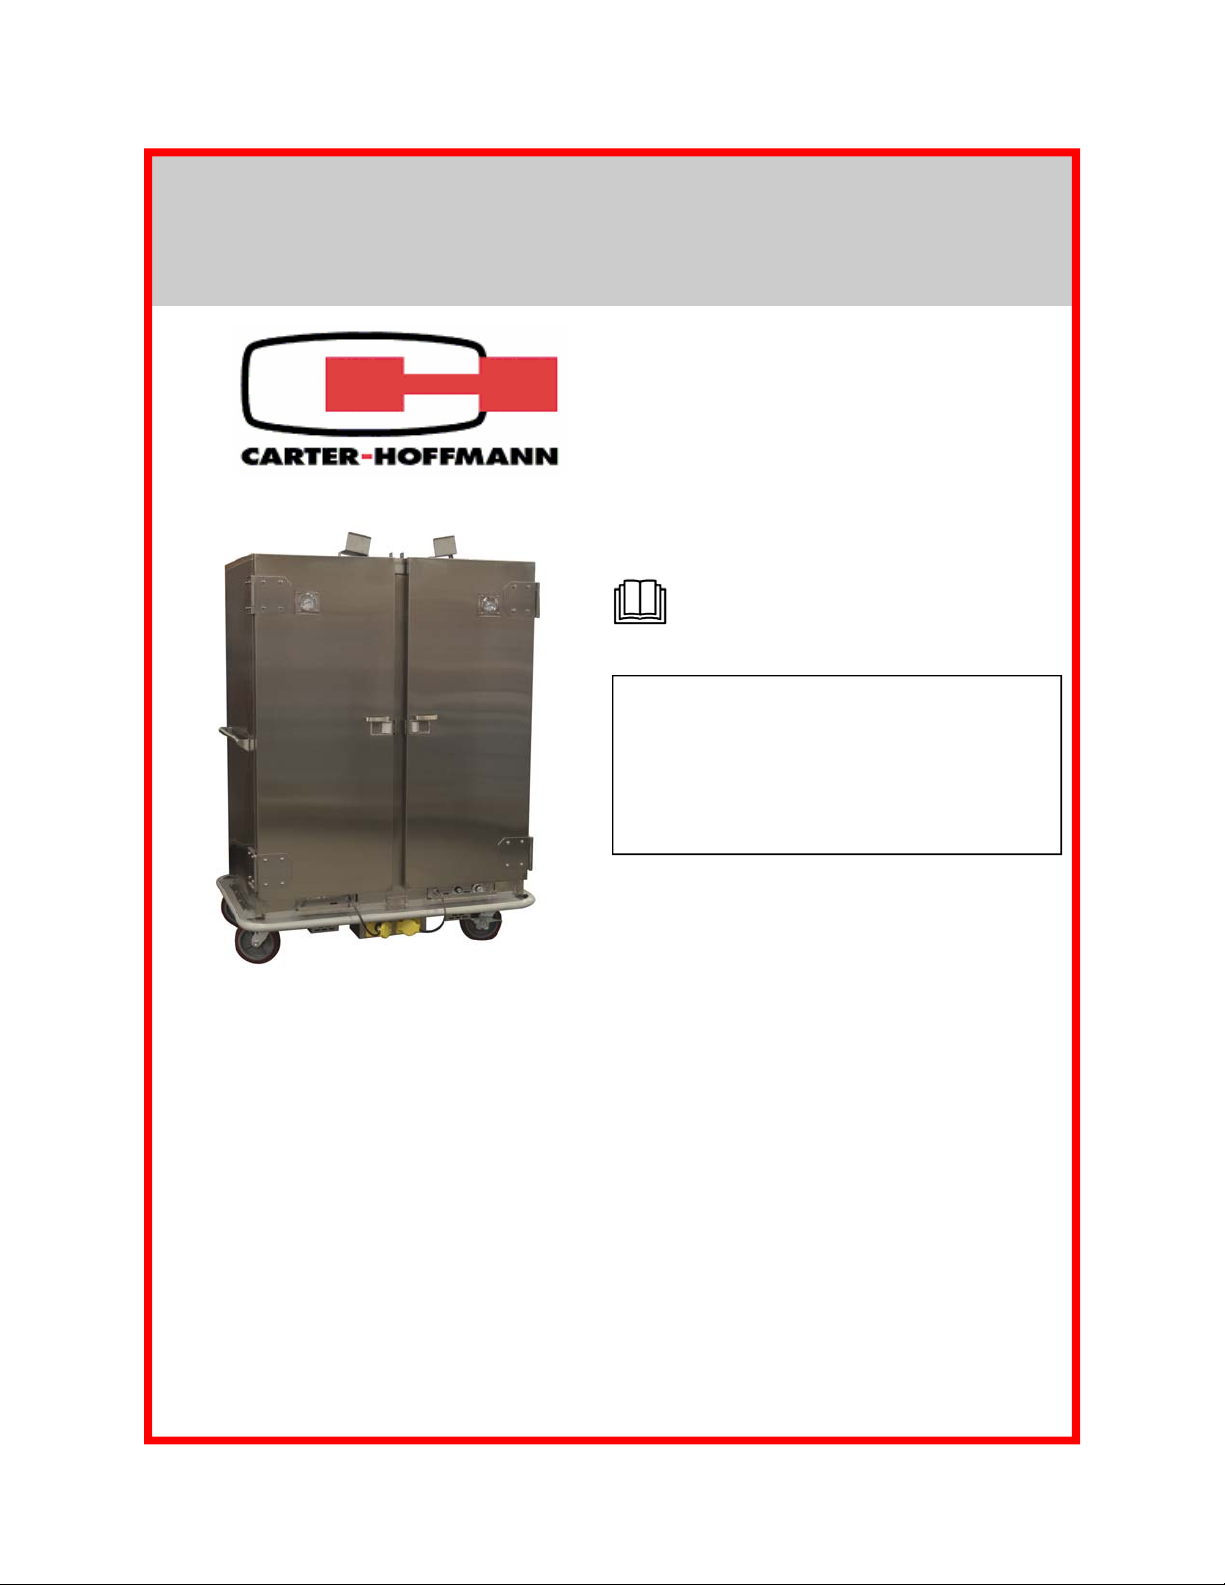
HEATED HUMIDIFIED TRANSPORT CART
Model PHW1822
OWNERS / OPERATORS MANUAL
MANUFACTURED BY:
CARTER-HOFFMANN
1551 McCormick Avenue
Mundelein, IL 60060 U.S.A.
Phone: 847-362-5500
Fax: 847-367-8981
Toll Free: 800-323-9793
Email: Service@Carter-Hoffmann.com
READ THIS MANUAL COMPLETELY
BEFORE OPERATING THIS
APPLIANCE
IMPORTANT: DO NOT DISCARD THIS MANUAL
This manual is considered to be part of the appliance and is
to be given to the OWNER of MANAGER, or to the person
responsible for training operators of this appliance.
THIS MANUAL IS TO BE UNDERSTOOD BY ALL
PERSONS USING OR INSTALLING THIS APPLIANCE.
Contact Carter-Hoffmann if you have questions regarding
installation, operation or maintenance of this equipment.
TABLE OF CONTENTS
UNPACKING, INSPECTION & FREIGHT DAMAGE…………………. 2
SAFETY PRECAUTIONS……………………………………………….. 3
SPECIFICATIONS……………………………………………………….. 4
LOCATION & INSTALLATION…………………………………………. 5
START UP………………………………………………………………… 6
OPERATION……………………………………………………………… 7-8
THERMOMETER & THERMOSTAT CALIBRATION………………… 9
FOOD HOLDING GUIDE……………………………………………….. 10
DAILY CLEANING PROCEDURES...………………..………………... 11
CLEANING TIPS…………………………………………………………. 12
MAINTENANCE ……………………………………………………….…. 13
REPLACEMENT PARTS & WIRING DIAGRAMS……………………. 14-15
WARRANTY STATEMENT……….……………….……………………. 16
Part Number: 18400-3157 Printed in The United States of America Rev: KBA062411
Page 2
This appliance
should be
thoroughly
cleaned prior to use.
See the CLEANING
INSTRUCTIONS in
this manual.
NOTE: DO NOT discard
the carton or other
packing materials until
you have inspected the
appliance for hidden
damage and checked it
for proper operation.
Refer to SHIPPING
DAMAGE CLAIM
PROCEDURE on
bottom of this page.
UNPACKING AND INSPECTION
1. Remove the cabinet from shipping carton, ensuring that all packing materials and protective plastic has been removed from the
unit.
2. Inspect all components for completeness and condition.
3. If any freight damage is present, a freight claim must be filed immediately with the shipping company.
4. Freight damage is not covered under warranty.
5. Check to insure all components are included: cabinet, instruction
packet and additional accessories, if ordered.
6. Read operation instructions completely.
7. Appliance should be thoroughly cleaned before use. See
CLEANING INSTRUCTIONS in this manual.
NOTE: For your protection, please note that equipment in this shipment was carefully ins pected and packaged
by skilled personnel before leaving the factory. Upon acceptance of this shipment, the transportatio n company
assumes full responsibility for its safe delivery.
IF SHIPMENT ARRIVES DAMAGED:
1. VISIBLE LOSS OR DAMAGE: Be certain that any visible loss or damage is noted on the freight bill or
express receipt, and that the note of loss or damage is signed by the delivery person.
2. FILE CLAIM FOR DAMAGE IMMEDIATELY
immediately.
3. CONCEALED DAMAGE: If damage is unnoticed until the merchandise is unpacked, notify the transportation company or carrier immediately, and then file a “CONCEALED DAMAGE” claim with them. This
should be done within fifteen (15) days from the date the delivery was made to you. Be sure to retain the
container for inspection.
Carter-Hoffmann cannot assume liability for damage or loss incurred in transit, freight damage is not covered
under warranty. We will, however, at your request, supply you with the necessary docu ments to support your
claim.
FREIGHT DAMAGE PROCEDURE
: Regardless of the extent of damage. Contact your dealer
2
Page 3
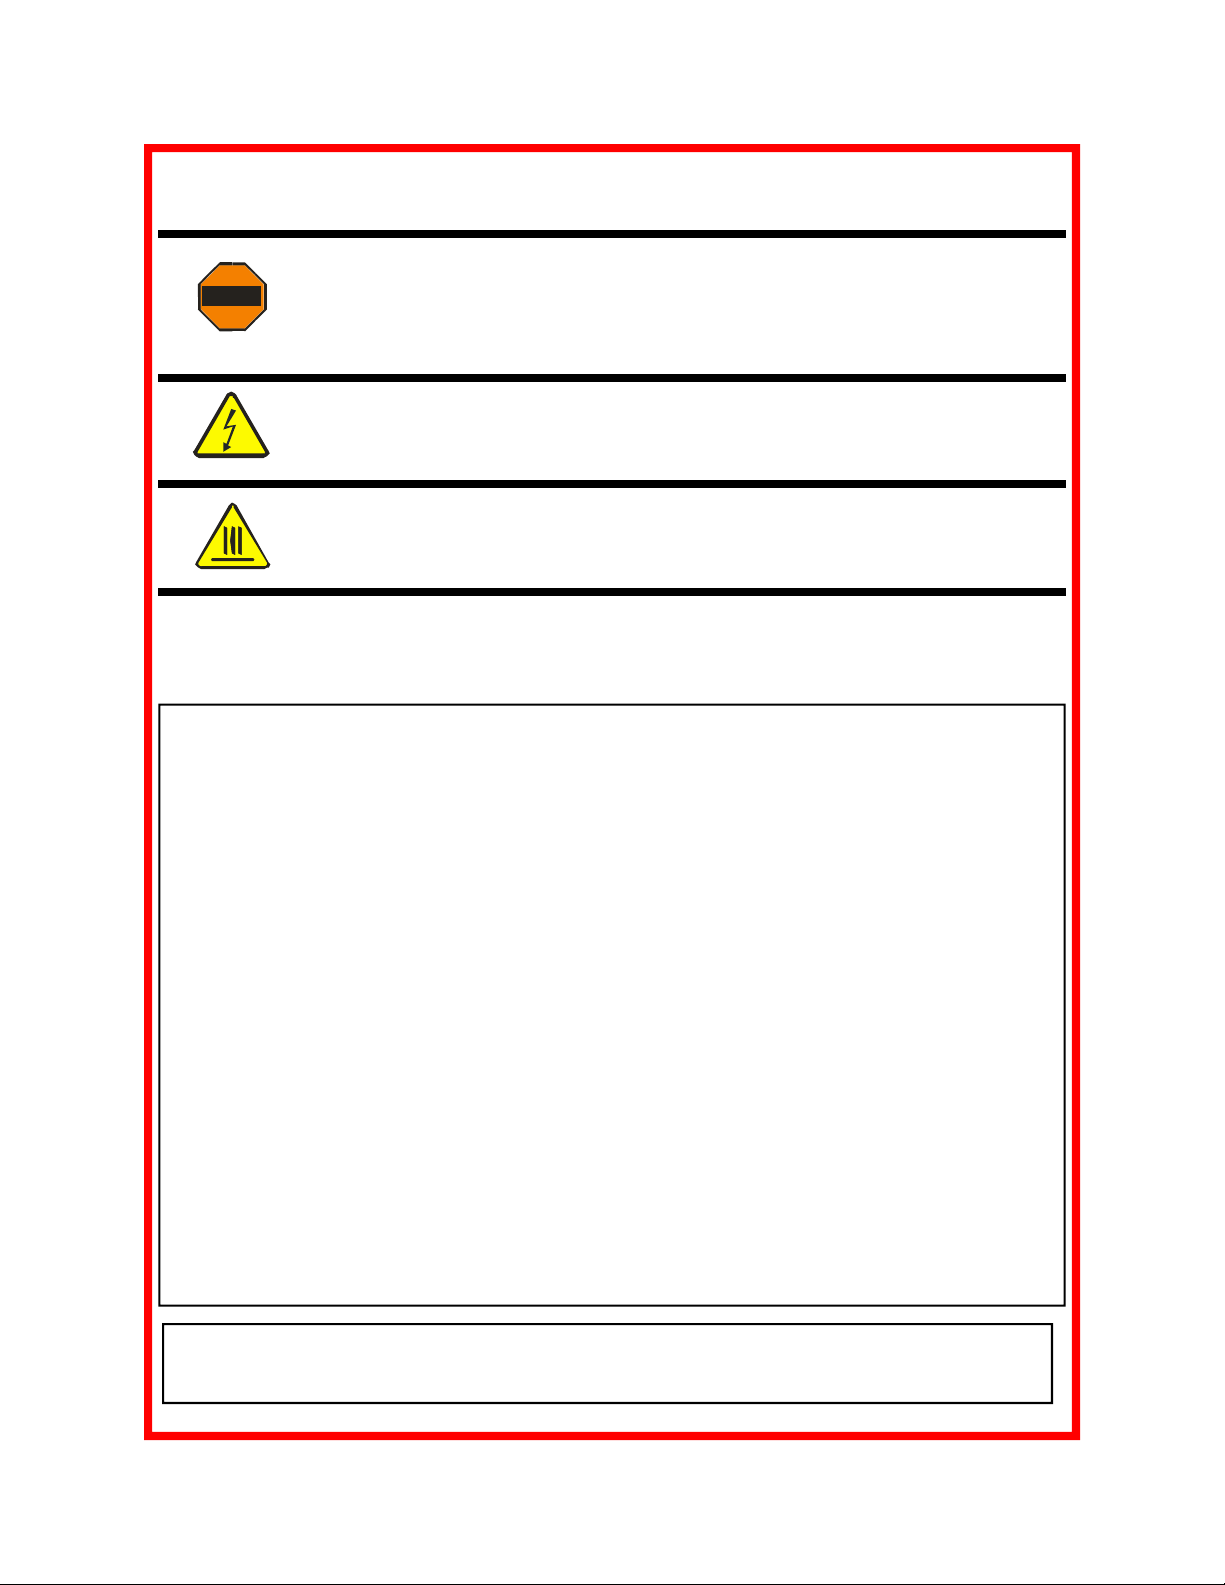
SAFETY PRECAUTIONS
WARNING: ELECTRIC SHOCK HAZARD
WARNING
All service requiring access to non-insulated components must be performed by
qualified service personnel. Failure to heed this warning may result in severe
electric shock.
CAUTION: ELECTRIC SHOCK HAZARD
Disconnect this appliance from electrical power before performing any
maintenance or service.
CAUTION: BURN HAZARD
Exposed metal surfaces can be hot to the touch and may cause burns.
IMPORTANT SAFETY INSTRUCTIONS
When using electrical appliances basic safety precautions should be followed, including the following:
1) Be familiar with the appliance use, limitations and associated restrictions. Operating instructions must be
read and understood by all persons using or i nstalling this appliance.
2) This appliance must be grounded. Connect only to properly grounded outle t.
3) Use this appliance only for its intended purpose as described in the manual.
a. This equipment is specifical ly designed to hold pre-cooked food at temperature.
b.
c. This equipment is not designed for industrial or laboratory use.
4) Cleanliness of this appliance and its accessories is essential to good sanitation.
This equipment is intended for use in commercial establishments only.
5) DO NOT submerge this appliance in water. This appliance is not jet stream approved. DO NOT direct
water jet or steam jet at this appliance, or at any control panel or wiring. DO NOT splash or pour water on,
in or over any controls, control panel or wiring. DO NOT use corrosive chemicals or vap ors in this appliance.
6) DO NOT store this appliance outdoors. DO NOT use this product near water – for example, near a kitchen
sink, in a wet basement, or near a swimming pool, and the like.
7) DO NOT operate this appliance if it has a damaged cord or plug, if it is not working properly, or if it has been
damaged or dropped. Do not immerse cord or plug in water, keep cord away from heated surfaces,
and do not let cord hang over edge of table or counter.
8) DO NOT cover or block any openings on the appliance.
9) Only qualified service personnel should service this appliance.
NOTE:
The technical content of this manual, including any wiring diagrams, schem atics, parts breakdown
illustrations and/or adjustment procedures, is intended for use by qualified technical personnel and is
subject to change without notice.
3 3
Page 4
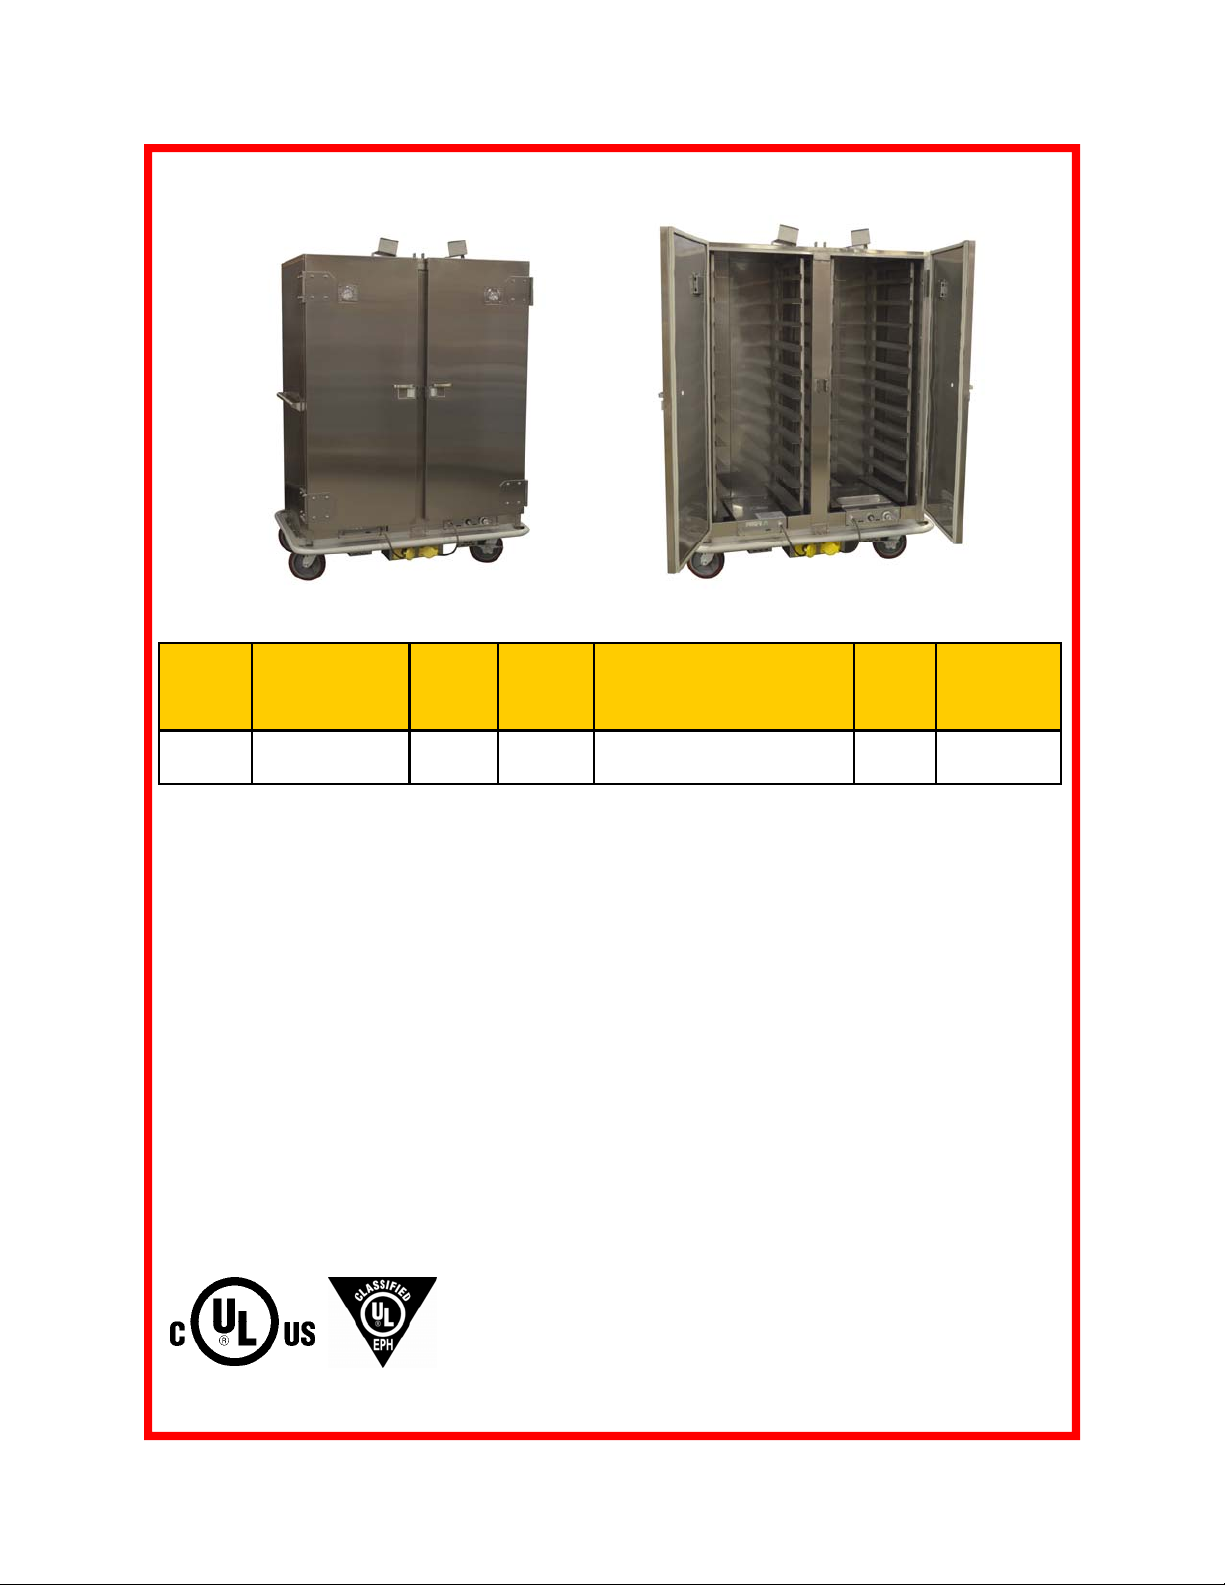
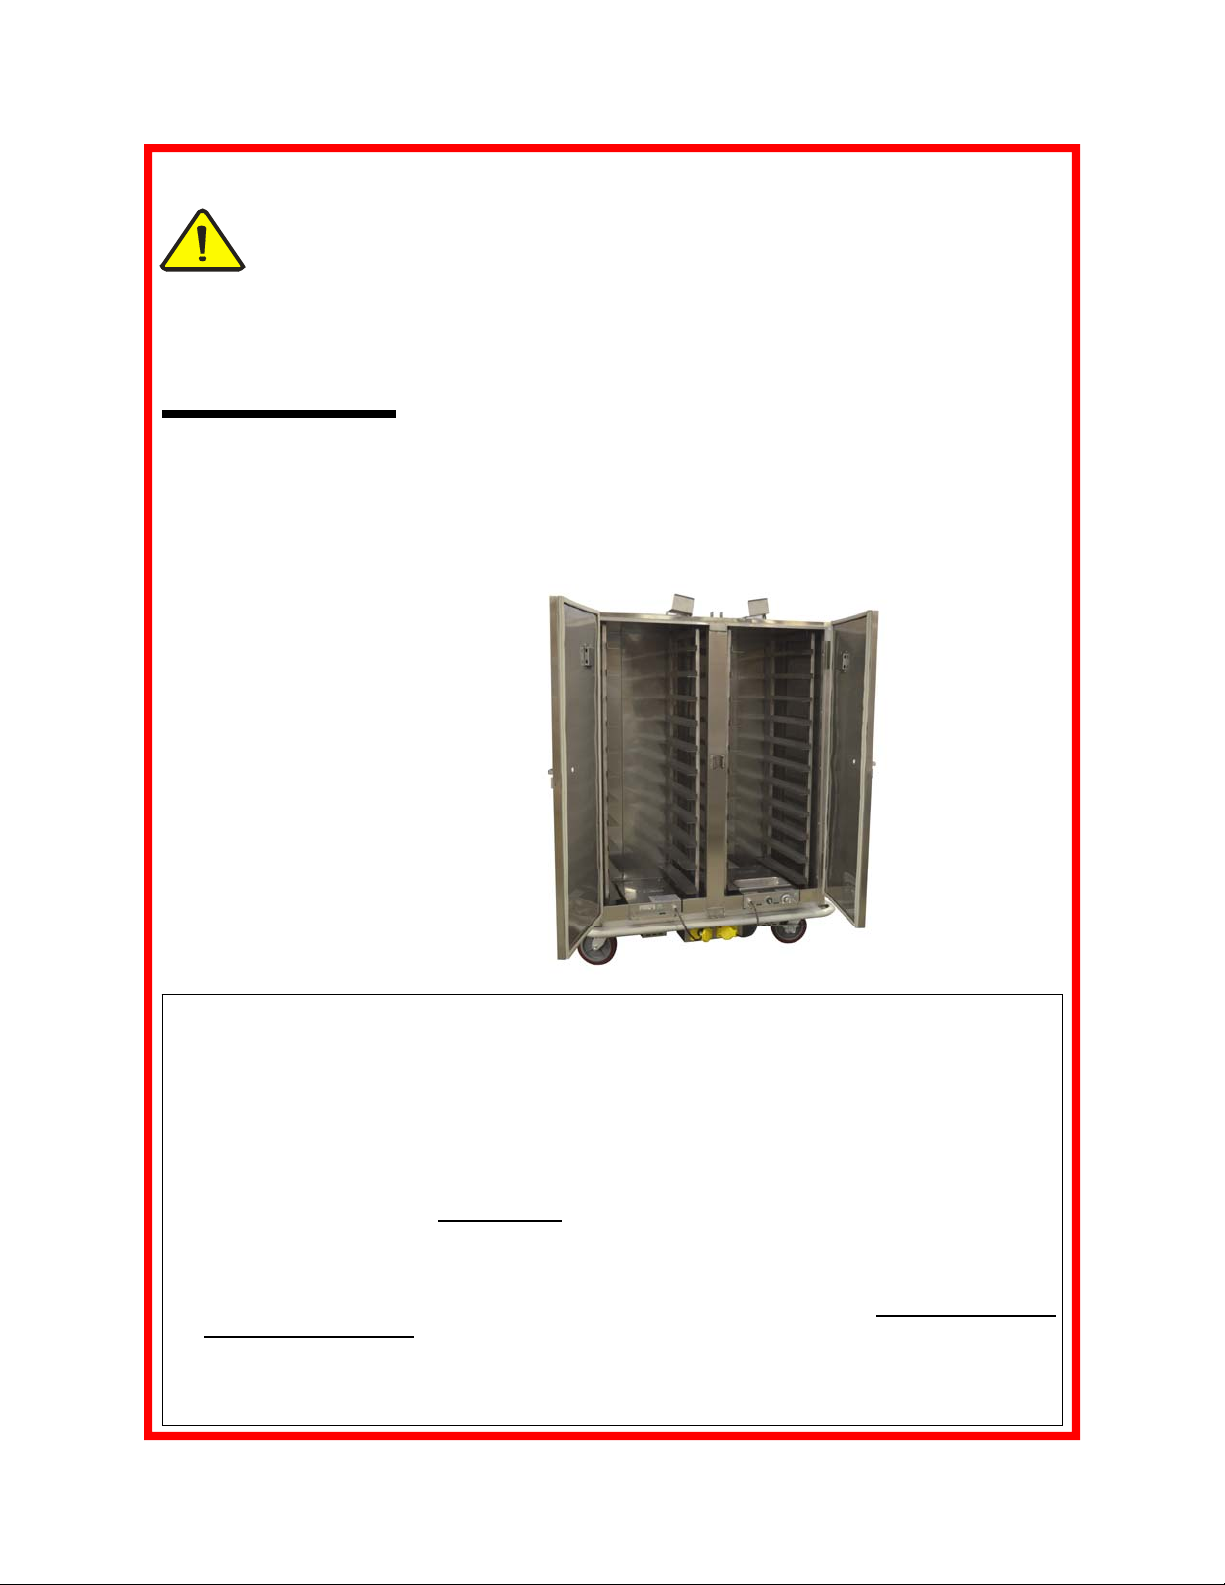
PHW1822 SPECIFICATIONS
Heated & Humidified Transport Cart for 18”x26” Trays
Model
Number
18”x 26” Tray
Capacity*
Heated Htd/
Humidified
Slide
Pairs
Provided
PHW1822 11 11 22 55
*Wlill accommodate trays up to 4” deep. Capacity shown at 5” spacing. 11 pairs of slides in each compartment. Will accommodate Gastronorm 2/1 pans (1 per slide),
Inside
Working
Height
in (mm)
(1397)
Overall Dimensions
Height Depth Width
in (mm)
Caster
Diameter
in (mm)
72-1/8 35-3/4 55-3/4
(1832) (908) (1416) 8 (203)
Class 100
Shipping
Weight
lbs (kg)
598
(271)
Features & Benefits
• Heaviest-duty for correctional environment, with welded-on transport latches with padlock provision, tamperresistant fasteners, reinforced full-perimeter bumper
• Completely covered cabinet bottom to eliminate concealment of contraband; no open crevices or holes
• Flush mounted door design with welded-on heavy-duty strap hinges; flush-mounted sliding door latches
• Stainless steel tubular push handles
• Heated (right side) and heated/humidified (left side) sections; water reservoir in humidified side provides
passive humidity
• Insulated divider between heated and heated/humidified sections
• Removable tray rack assemblies with slides welded to channels; tamper resistant rack hold down device
• All welded turned-in seam stainless steel construction with welded-in-place reinforced mullion
• 8” polyurethane casters mounted in wheel-ahead pattern for easy movement over uneven surfaces; two rigid
and 2 swivel with brakes
• Recessed heater controls with protective control covers; 208 volts, 3063 watts, 60 Hz, single phase, 15 Amps,
NEMA L6-20P plug
• Preheat to 160°F in 40 minutes; temperature range 80°F to 200°F
4
Page 5
LOCATION & INSTALLATION
WARNING:
Risk of personal injury
Installation procedures must be
performed by a qualified technician
with full knowledge of all applicable
electrical codes. Failure could
result in personal injury and property damage.
IMPORTANT:
If necessary, contact a licensed
electrician to install an appropriate
208 volt, 60 Hz, 3063 watt, 15
Amp circuit. NEMA L6-20P plug.
DO NOT use an extension cord.
CAUTION:
Electrical Shock Hazard
T
he ground prong of the power
cord is part of a system designed to
protect you from electric shock in
the event of internal damage.
DO NOT cut off the large round
ground prong or twist a blade to fit
an existing receptacle.
LOCATION
For proper operation and maximum performance, locate the
unit in an ambient air temperature of 70ºF (21ºC).
Avoid placement in areas near exhaust fans or where there
are active air movements.
For safe operation and maximum performance, locate the
unit at least 2” from any wall or combustible material.
Unit must be on a solid level surface.
GROUNDING INSTRUCTIONS
This appliance is equipped with a cord having a grounding wire with
a grounding plug which must be plugged into an outlet that is properly installed and grounded. In the event of an electrical short circuit, grounding reduces the risk of electric shock by providing an
escape wire for the electric current.
WARNING—Improper use of the grounding can result in a risk
of electric shock. Consult a qualified electrician or service agent if
the grounding instructions are not completely understood, or if doubt
exists as to whether the appliance is properly grounded.
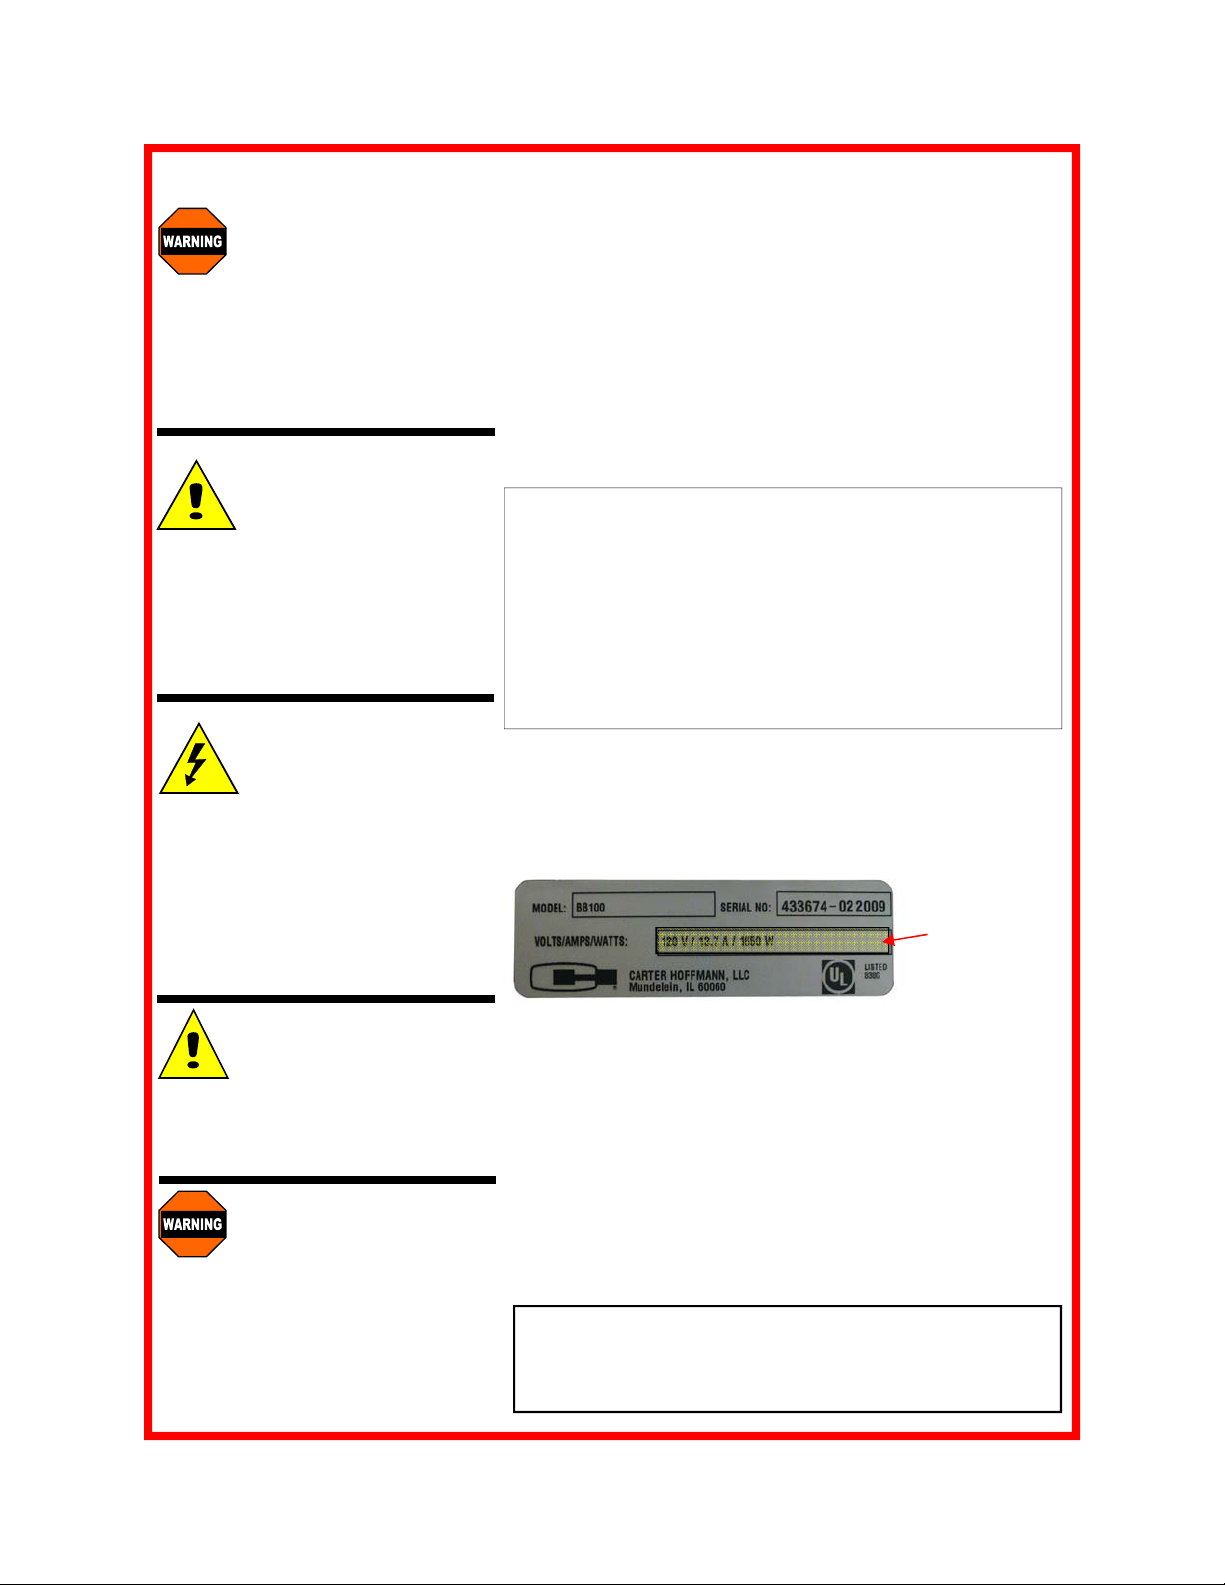
1. Check for proper voltage and circuit breaker size. Cabinet requires 208 volt, 60 Hz, 3063 watt, 15 Amp circuit.
NEMA L6-20P plug. Verify electrical requirements by
referring to the serial tag on the cabinet.
Sample serial tag
location of electrical
specs
IMPORTANT:
Not under warranty
Damage to unit due to being
connected to the wrong voltage or
phase is NOT covered by warranty.
WARNING:
Risk of personal injury
Unit is not waterproof, to avoid
electrical shock, keep unit from being submerged in water. Do not
operate if unit has been in contact
with water.
2. Ensure receptacle is correctly installed and operating
safely. Requires grounded NEMA L6-20R receptacle.
3. Position cabinet on table or counter top. Maintain 2” of
clearance on each side to allow for adequate cooling.
NOTE: The technical content of this manual, including any
wiring diagrams, schematics, parts breakdown illustrations
and/or adjustment procedures, is intended for use ONLY
by qualified technical personnel.
5
Page 6

START UP
WARNING:
Risk of personal injury
Installation procedures must be
performed by a qualified technician
with full knowledge of all applicable
electrical codes. Failure could
result in personal injury and property damage.
IMPORTANT:
If necessary, contact a licensed
electrician to install an appropriate
208 volt, 60 Hz, 3063 watt, 15
Amp circuit. NEMA L6-20P plug.
DO NOT use an extension cord.
CAUTION:
Electrical Shock Hazard
T
he ground prong of the power
cord is part of a system designed to
protect you from electric shock in
the event of internal damage.
DO NOT cut off the large round
ground prong or twist a blade to fit
an existing receptacle.
1. Prior to use, thoroughly clean the interior of the unit, per
the instructions in this manual (see page 11). Familiarize
yourself with the controls.
2. The cabinet is equipped with two heating systems, one
for each side, that are then plugged into a single junction
box at the base of the cabinet. Make sure the individual
heaters are plugged into the junction box prior to plugging
in the cabinet.
3. The power cord for the cabinet is located at the rear of
the cabinet and exits at the top of a raceway in the center
of the back panel. Plug the power cord of the cabinet into
a grounded outlet with the appropriate electrical service
DO NOT MODIFY CORD PLUG.
4. Turn temperature dial to highest setting (210°F).
5. Do not load product into the cabinet. Allow the heat to
remove any residual oils which may adhere to inside
metal surfaces. A slight emission of smoke is common
during the first few hours of operation.
IMPORTANT:
Not under warranty
Damage to unit due to being
connected to the wrong voltage or
phase is NOT covered by warranty.
WARNING:
Risk of personal injury
Unit is not waterproof, to avoid
electrical shock, keep unit from being submerged in water. Do not
operate if unit has been in contact
with water.
Raceway located at
back of cabinet.
Cord exits from the
top.
6
Page 7

NORMAL OPERATION
CAUTION:
HOT SURFACE
Inner and outer surfaces of
the unit will be very hot during and after operation.
Avoid touching the cabinet
when loading or removing
Operating ranges:
- air temp: 80ºF-210ºF
*For food safety reasons,
it is recommended that
the food be held at 140°F
or higher.
This cabinet is not intended to reheat food.
Food must be cooked and
at safe serving temperature prior to being placed
in the cabinet.
See page 10 for food
holding guidelines.
FIRST USE
Before using the cabinet, familiarize yourself with the heater controls. Plug the cabinet into a proven power source. The power indicator lamp and fan will operate continuously whenever the heater is
plugged in. This unit operates on 208 volt, 60 Hz, 3063 watt, 15
Amp circuit. NEMA L6-20P plug.
HEATER OPERATION—LEFT SIDE (non-humidified)
1. Allow cabinet to preheat for at least 40 minutes. Be sure cabinet
door remains closed during preheat time. Dial thermometer will
display actual cabinet temperature.
2. Food serving temperature will vary with the mass, type & quantity of food (see FOOD HOLDING GUIDE on page 10). To adjust
the temperature setting, rotate the HEAT dial clockwise to increase temperature and counter-clockwise to decrease temperature to the desired set point. Dial settings range from 80°F to
210°F. HEAT cycle light will turn on and off as the heat thermostat cycles.
3. Load food pans into cabinet. NOTE: Follow all food safety guidelines. Put hot, cooked food into the cabinet. This cabinet is not
intended to reheat food. Food must be cooked and at safe serving temperature prior to being placed in the cabinet.
5. During loading, the cabinet temperature will drop. Close door
and allow the cabinet to recover for 10-15 minutes before moving the cabinet.
FH90Y Heating System located on left
side of cabinet
If you are using both
sides of the cabinet, both
heaters must be operating. Make sure both are
plugged into the junction
box at the base of the
cabinet.
See next page for heater
operation for right side of
cabinet.
7
Page 8

NORMAL OPERATION
CAUTION:
HOT SURFACE
Inner and outer surfaces of
the unit will be very hot during and after operation.
Avoid touching the cabinet
when loading or removing
Operating ranges:
- air temp: 80ºF-210ºF
*For food safety reasons,
it is recommended that
the food be held at 140°F
or higher.
This cabinet is not intended to reheat food.
Food must be cooked and
at safe serving temperature prior to being placed
in the cabinet.
See page 10 for food
holding guidelines.
If you are using both sides
of the cabinet, both heaters
must be operating. Make
sure both are plugged into
the junction box at the base
of the cabinet.
See previous page for
heater operation for left
side of cabinet.
HEATER OPERATION—RIGHT SIDE (humidified)
1. Turn the heater on using the left temperature dial. Adjust the
temperature to your desired setting (80°-210°F). To adjust the
temperature setting, rotate the heat dial clockwise to increase
the temperature and counter-clockwise to decrease the temperature.
2. If humidity is desired, turn the right know to the desired setting
(1-7; 1 being lowest humidity, 7 being highest humidity) Fill the
pan with clean warm water. Check water level every 2 hours and
refill as needed. This step is optional; cabinet be also be operated without water in the pan.
FH90YH Heating System located on right side of cabinet
Water reservoir—monitor water
level every 2 hours
Right knob: water pan (1-7)
Left knob: air temperature (80°-210°F)
Heat cycling lights for each knob (green)
3. Wait approximately 40 minutes for the cabinet to preheat.
4. Load food pans into cabinet. NOTE: Follow all food safety
guidelines. Put hot, cooked food into the cabinet.
5. When removing items, start at the bottom and work up. This will
keep food hotter and eliminate spillage onto lower items.
6. After loading food, move the cabinet to the service area as
quickly as possible.
7. Upon reaching the service area, reconnect the heater as soon
as possible. Wait 5-10 minutes for the cabinet to recover
temperature (check the thermometer to see if the temperature is
at the desired level). Adjust thermostat as needed.
8. When removing items, start at the bottom and work up. This will
keep food hotter and eliminate spillage onto lower items.
8
Page 9

CALIBRATION PROCEDURES
CAUTION:
HOT SURFACE
Inner and outer surfaces of
the unit will be very hot during and after operation.
Operating ranges:
- air temp: 80ºF-210ºF
THERMOMETER CALIBRATION
Place an oven thermometer in the center of the cabinet. Turn heater
on; turn thermostat to maximum setting and wit approximately 45
minutes. Open the door and check inside thermometer temperature.
If recalibration is required, pry the plastic cover off the dial body and
with a small flat blade screwdriver, insert into the pointer as shown.
Carefully turn the pointer with your finger to the correct setting. Be
careful not to bend the pointer, as it is very fragile.
THERMOSTAT CALIBRATION
If additional heat range is desired, unplug unit, remove black thermostat knob, insert small straight blade screwdriver into opening and
turn limit control set screw counterclockwise one full turn (see diagram). Replace the thermostat knob and turn clockwise to reach new
maximum temperature. Repeat procedure until desired temperature
is reached. Each 1/4 turn of the calibration set screw will raise the
element heating capacity by 25°F to 35°F degrees.
If a reduction of heat is desired, turn limit control set screw clockwise
one full turn. Hold the door open allowing the cabinet to cool until
inside temperature is below the temperature desired. Close the door
and allow unit to rise to new maximum temperature. Repeat procedure until desired temperature is reached.
THERMOMETER CALIBRATION
THERMOSTAT CALIBRATION
9
Page 10

FOOD HOLDING GUIDE
CAUTION: SAFE
FOOD HOLDING
PRACTICES
RECOMMENDED
Cooking food to a safe temperature, holding at a temperature of at least 140°F is
critical in the prevention of
foodborne illness. Hold only
cooked, hot food at 140°F
or higher. This cabinet is
not intended to cook or reheat food. Food must be at
appropriate temperature
before being placed into
cabinet.
COOK TO AT LEAST
165°F Destruction of
165°F
140°F
41°F
NOTE: Times and temperatures
observed in a test kitchen environment. Times and temperatures
may vary, depending on initial food
quality, initial cooked temperature
and user expectations of acceptable food quality.
most bacteria
HOLD at 140°F or higher
DANGER ZONE: 41°F
to 140°F Bacteria
grow rapidly
PRODUCT SET TEMPERATURE
Bacon, Canadian 180°F / 82°C 30
Bacon, Crisp (uncovered) 180°F / 82°C 30
Baked Potato 180°F / 82°C 60
Biscuits 170°F / 77°C 60
Casseroles 175°F / 79°C 90
Chops, Sliced Meats 160°F / 71°C 60
Chicken, Fried (uncovered) 170°F / 77°C 30
Chicken, Boneless Breasts 175°F / 79°C 60
Chicken Nuggets, Deep Fried (uncovered) 190°F / 88°C 25
Chicken, Pre-Cooked Grilled Boneless Patties 150°F / 66°C 90
Coffee Cakes (uncovered) 170°F / 77°C 60
Cookies (uncovered) 175°F / 79°C 90
Crab Legs 160°F / 71°C 45
Croissants 170°F / 77°C 45
Eggs 160°F / 71°C 45
Fish, Deep-Fried (uncovered) 170°F / 77°C 30
Fish, Baked 155°F / 68°C 45
Fish, Broiled 155°F / 68°C 45
French Toast 165°F / 74°C 60
Gravies / Sauces 170°F / 77°C 45
Hamburgers / Ground Meat Patties 180°F / 82°C 45
Hot Dogs 180°F / 82°C 90
Muffins 170°F / 77°C 60
Omelets 160°F / 71°C 30
Pancakes 180°F / 82°C 30
Pasta 175°F / 79°C 60
Pastries 165°F / 74°C 30
Pizza (uncovered) 180°F / 82°C 15
Pizza (boxed) 180°F / 82°C 60
Poppers, Deep Fried (uncovered) 190°F / 88°C 25
Poultry, Whole, bone-in 175°F / 79°C 60
Poultry, Cut-up, bone-in 175°F / 79°C 60
Ribs 175°F / 79°C 90
Rice 175°F / 79°C 30
Roasts / Bone-in Meats 165°F / 74°C 90
Sausage 180°F / 82°C 90
Shrimp / Shellfish 150°F / 66°C 60
Soups (broth) 185°F / 85°C 90
Tortillas (soft) 180°F / 82°C 60
Vegetables 175°F / 79°C 45
(°F /°C)
MAXIMUM TIME
(MINUTES)
10
Page 11

DAILY CLEANING PROCEDURES
CAUTION:
ELECTRIC SHOCK
HAZARD
Disconnect appliance from
electric power before cleaning.
CAUTION:
HOT SURFACE
Exposed surfaces can
be hot to the touch and may
cause burns. Allow appliance
to cool before cleaning.
IMPORTANT:
DO NOT spill or pour
water into controls,
control panel or wiring. Water
damage is not covered by warranty.
CAUTION
of sharp edges with
sheet metal during
cleaning process.
:
Beware
1. Clean cabinet regularly, using the following procedure:
2. Unplug cabinet and allow to completely before cleaning.
3. Each entire heating unit can be lifted out of
the cabinet prior to cleaning. Unplug the
heating units from the junction box. Grasp
the heater handle with one hand and the
rear of the heater unit with the other. Lift
heater up and then out. Do the same with
the other heater.
4. Racks or shelves may be removed for cleaning. Tools are required to removed the bolts at the top and bottom of each
rack. After removing the fasteners, simply lift up and pull out.
Hand wash the tray slides..
5. Vinyl trim should be washed with a chlorine-free detergent and
water. Rinse thoroughly with clear water and allow to dry.
Never use abrasive cleaners, waxes, car polish, or substances
containing strong aromatic solvents or alcohol. Use of direct
steam/hot water cleaning at temperatures above 190°F (88°C)
may result in bubbling or loosening of vinyl adhesive.
6. To clean stainless steel surfaces use only cleansers, detergents, degreasers, or sanitizers that are certified to be
“chloride-free” and “phosphate-free”. DO NOT exceed recommended concentrations or mixing ratios. After cleaning and
sanitizing, rinse all exposed surfaces thoroughly with large
amounts of clear water; since heaters have been removed,
cart may be rinsed with a hose. Wipe off any standing liquid or
residue from all horizontal surfaces, in corners, or near edges.
DO NOT TIP CABINET ONTO THE DOORS TO EMPTY EXCESS WATER.
7. Wipe dry with a clean soft cloth.
CAUTION
use steel wool pads
as they will result in
rusting from the ferrous metal
in the pads.
Water reservoir for humidified heater (right side) may be cleaned with mild detergent and water. Hard water
spots may be cleaned with vinegar. Rise with clean water and wipe dry. DO NOT IMMERSE HEATER IN WA-
TER OR SPRAY WATER ONTO THE HEATER. Water damage is not covered by the warranty.
Electrical connection
to junction box at
base of cabinet.
Unplug and remove
heaters prior to
cleaning.
:
Do not
8. After cabinet is completely dry, replace heating units and reestablish electrical connection to the junction box.
11
Page 12

CLEANING TIPS
RECOMMENDED TIPS FOR CLEANING STAINLESS STEEL
Purpose Frequency Cleaning Agent Method of Application
Routine Cleaning Daily Soap, ammonia detergent & water Sponge with cloth, rinse with clear water and
Smears/fingerprints As Needed Stainless steel cleaner or similar
Stubborn spots & stains Daily
As Needed
Hard water spots Daily
As Needed
products
Any chloride-free or phosphate-free
cleaner
Vinegar Swab with cloth. Rise with water & wipe dry.
CAUTION:
Cleansers, detergents, degreasers, sanitizers, or bleaching agents that contain chlori des
or phosphates will cause permanent damage to stainless steel products. The damage appears as pits, eruptions, voids, small holes, cracks, severe discoloration, or dulling of the metal finish. Water with high chloride content can also damage stainless steel. If unsure of your water quality, we recommend you have it tested.
Use of cleaning agents that are not recommended for stainless steel may cause permanent damage
to the cabinet. THIS DAMAGE IS PERMANENT, COSTLY TO REPAIR AND IS NOT COVERED
BY THE WARRANTY.
wipe dry
Rub with cloth as directed on package. Rub in
direction of stainless steel grain. Do not use on
vinyl trim.
Apply with damp sponge or cloth. Rub in direction of stainless steel grain. Rinse thoroughly.
Do not use on vinyl trim.
12
Page 13

MAINTENANCE
CAUTION:
Do not move cabinet
unless door is securely closed. Serious damage to hinges and door may
result if bumped into tables,
walls, or other equipment when
the doors are open.
CASTERS
Some cabinets may have caster bearings that are equipped with
Zerk grease fittings so that they may be easily lubricated with a
grease gun. Lubricate bearings at least once every six months.
Lubrication will be required more often if cabinet is cleaned with a
hot water or steam cleaning system. Casters with special sealed
bearings are recommended for frequent cart wash or steam cleaning systems.
LATCHES & HINGES
Make sure all joints remain sealed and door latches do not stick. If
necessary, use WD-40, silicone spray, graphite or other commercial lubricants for aluminum products, to keep door latches &
hinges from sticking. Do not use oil.
FOR CABINETS WITH PERIMETER BUMPERS
Vinyl which has been dislodged from the channel due to severe
bumping or scraping can be pried back into place with a common
screwdriver.
13
Page 14

REPLACEMENT PARTS & WIRING DIAGRAMS
FH90Y HEATER COMPONENTS 208V, 1400W, 7.0A
Part Number Description
18600-0016 Thermostat (255°F)
18600-0053 Thermostat snap disc (400°F)
18601-1185 Indicator lamp (green)
18605-0030 16/3 HSJO cord
18606-0624 NEMA L6-15P 250 volt twist lock plug
18612-0405 208 volt, 1400w heating element
18614-0304 Inlet ring
18614-0306 Housing
Part Number Description
18614-0360 Motor 115/230 volt
18614-0321 Fan blade
18617-0007 Cord grip
16502-5631 Aluminum handle
18617-0850 Handle spacer
Item Number Description Qty
1 120/208/220/230/240 50/60 Hz Motor 1
2 Regulating Thermostat 1
3 230v 2400w Tubular Heat Element 1
4 Snap Disc 1
5 Indicator Lamp 1
6 Strain relief 1
7 Power Supply Cord 1
8 Splice Cap 5
9 Splice Cap Copper 5
10 Splice Cap 2
11 High Temp Eyelet 2
14
Page 15

REPLACEMENT PARTS & WIRING DIAGRAMS
FH90YH HEATER COMPONENTS 208V, 1663W, 8.0A
Part Number Description
18600-0016 Thermostat (255°F)
18600-0017 Thermostat (200°F)
18600-0046 Hi limit switch auto
18600-0053 Thermostat snap disc (400°F)
18601-1185 Indicator lamp (green)
18606-0624 NEMA L6-15P 250 volt twist lock plug
18614-0360 Fan motor
18614-0321 Fan blade
18608-0013 Knob (humidity pan, 1-7)
18608-0013 Thermostat knob (heater, 80°-210°F)
18612-0137 240 volt, 350 watt element (humidity pan)
18612-0405 208 volt, 1400 watt element (heater)
Part Number Description
18614-0304 Inlet ring
18614-0306 Housing
18617-0007 Cord grip
16502-5631 Aluminum handle
18617-0850 Handle spacer
CABINET PARTS
Part Number Description
16090-0403 Sliding latch assy.
18303-0085 Stainless steel grip handle
18616-0010 Dial thermometer
29038-0005 Thermometer cover
17020-2210 Vinyl door gasket
16090-0003 Top mount transport latch (right side)
16090-0009 Top mount transport latch (left side)
16501-8838 Strike plate/catch for latch
18301-8323 8” polyurethane swivel caster with brake
18301-8319 8” polyurethane rigid caster
29034-0095 Gray vinyl bumper insert
15
Page 16

WARRANTY
Carter-Hoffmann Warranty:
Carter-Hoffmann (“CARTER-HOFFMANN”) warrants to the initial purchaser of its standard Carter
Line Products that CARTER-HOFFMANN will, at its option, repair or replace, during the warran ty
period set forth below, any part of such products made necessary due to a defect in material or workmanship which is present when the product leaves its factory and which man ifests itself du ring th e warranty period under normal use and service.
This warranty applies only to original equipment owned and possessed by the initial purchaser and the
warranty period begins on the date of original shipment from the CARTER-HOFFMANN factory and
extends as follows: to component parts and labor for 12 months; to refrigeration compressor unit for
one year (limited to replacement only - not to include labor for removal, repa ir or replacement).
Repair or replacements under this warranty will be performed, unless otherwise authorized in writing
by CARTER-HOFFMANN, at its factory. All parts or components to be repaired or replaced under this
warranty are to be shipped prepaid to CARTER-HOFFMANN, with reimbursement credit for such part
or component to be given if found by CARTER-HOFFMANN to be defective.
CARTER-HOFFMANN neither makes nor assumes and does not authorize any other person to make or
assume any obligation or liability in connection with its products other than that covered in this wa rranty. This warranty applies only within the continental United States and Canada. In Alaska and Hawaii, this warranty applies only to and is limited to the supply of replacement parts.
Warranty Exclusions and Limitations:
Any implied warranty of merchantability or fitness for a particular purpos e is hereby specifically dis-
claimed by CARTER-HOFFMANN. There are no warranties, expressed or implied, which extend be-
yond the description on the face hereof. This warranty does not cover and CARTER-HOFFMANN shall
not under any circumstances be liable for any incidental, consequential or other damages (such as in-
jury to persons or property, loss of time, inconvenience, loss of business or profits, or other matters not
specifically covered) arising in connection with the use of, inability to use, or failure of these products.
Specifications subject to change through product improvement and innovation.
Carter-Hoffmann
1551 McCormick Ave.
Mundelein, Illinois, 60060 USA
Phone: 847-362-5500 Toll free: 800-323-9793 Fax: 847-367-8981
Sales and Marketing E-mail: sales@carter-hoffmann.com
Service E-mail: service@carter-hoffmann.com
Company Website: www.carter-hoffmann.com
16
 Loading...