

Car Show CS700DVD Owner's Manual
™
Car Show
CS700DVD
7.0” All-In-One System
OWNER’S MANUAL
Car Show™
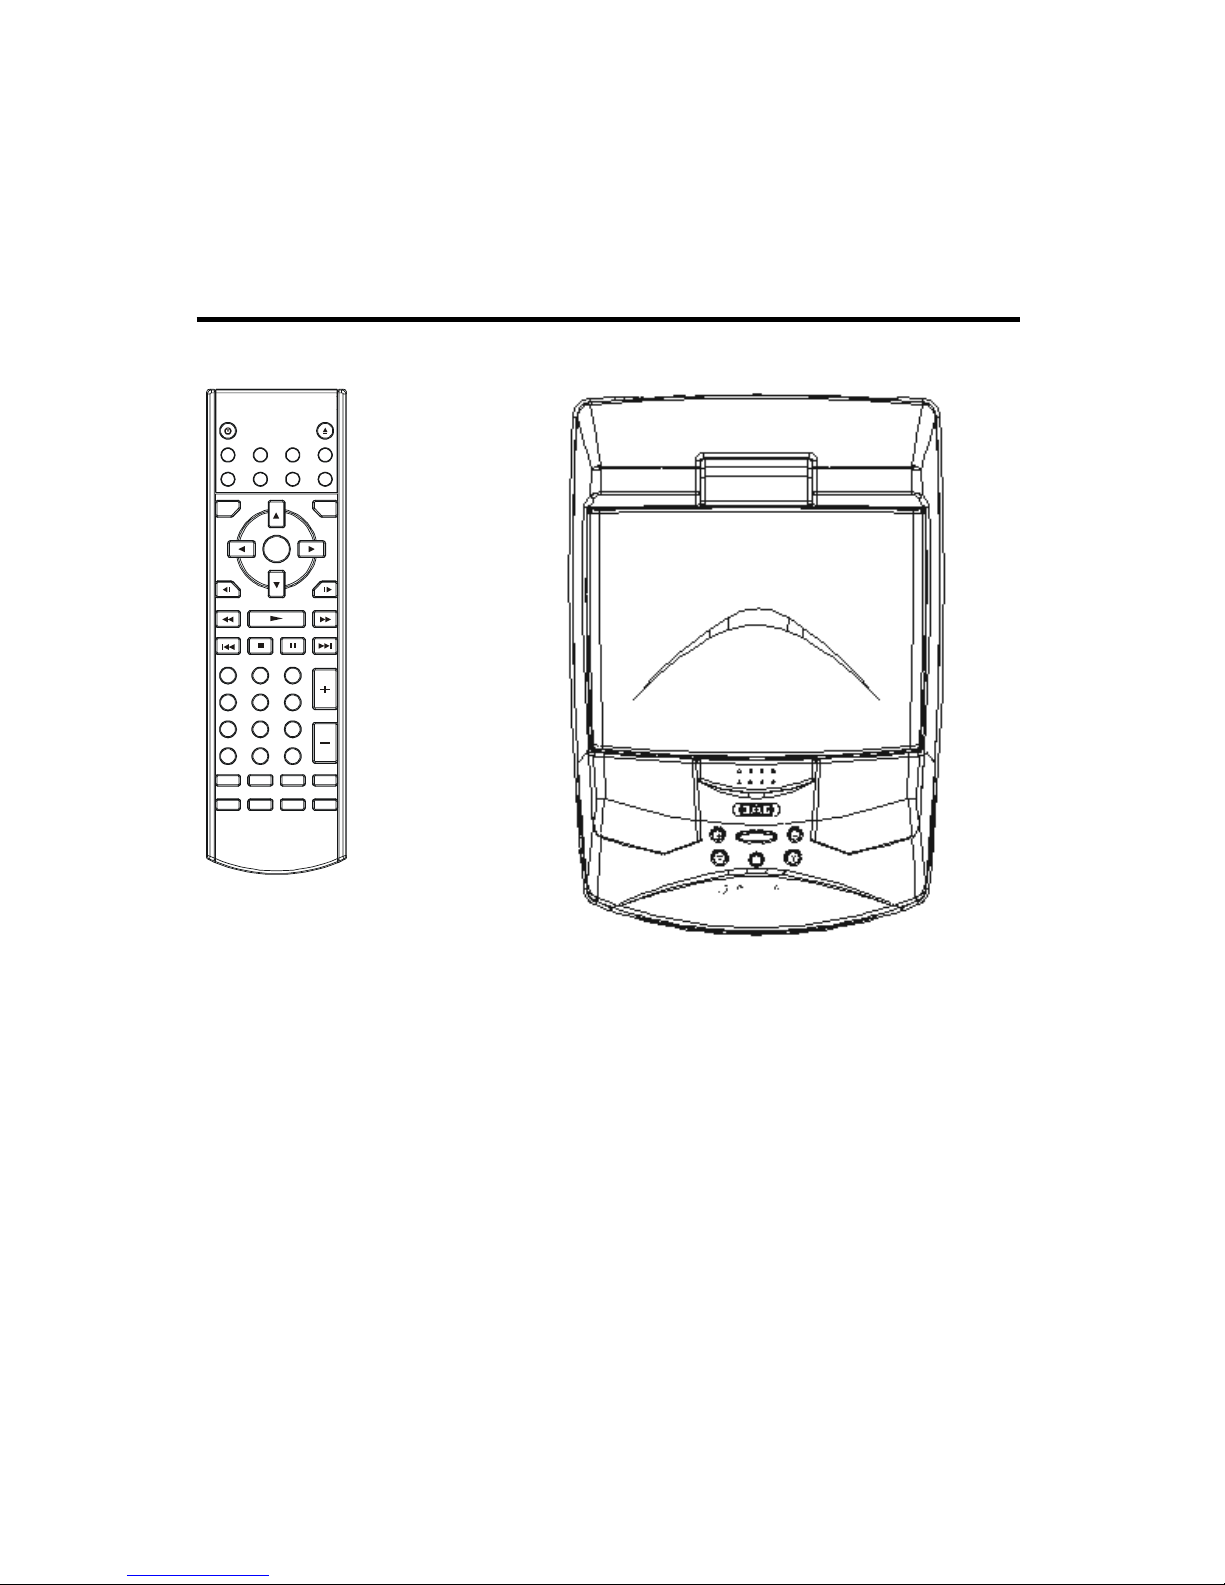
Color 7.0” Wide-Screen 16:9 LCD Monitor
Integr ated DVD Pla yer
• Plays DVD/CD/CDR/CDRW/MP3 Discs
Las t Ch apte r Mem ory
Adjustable Screen Angle & 30o Degree L/R Swivel
IR Transmitter For Wireless Headphones
AV Input & Output
Wireless Remote Control
Built-In Dome Lights
2 Wired Headphone Jacks With Volume Control
NTSC/PAL Compatible
1

Features
Compatible with NTSC DVD (Video
CD) and PAL DVD (Video CD)
This player can play discs recorded in
either NTSC or PAL format.
A single LSI chip now integrates all
major DVD playback circuit functions
including MPEG2 decoder, video D/A
converter, and audio decoders.
L/R stereo analog audio outputs for
connection to existing head unit aux
inputs. Video output is composite
video.
Supplied remote handles
multi-function software
(multi-language audio-track/subtitle,
multi-angle, multi-story, etc.), plus all
basic functions.
Use This Product Safely
When Driving
Keep the volume level low enough to be
aware of road a nd tra ffi c condi t ions.
When Car Washing
Do not expose the product to water or
excessive moisture. This could cause
elect r i cal sh o r ts , fire or other d a mage.
When Parked
Parking in direct sunlight can produce
very high temperatures inside your
vehic le. Giv e the int erior a chance to
cool down before starting playback.
Use the Proper Power Supply
This product is designed to operate with
a 12 volt DC, negative ground battery
system the regular system in a North
American car).
Protect the Disc Mechanism
Avoid inserting any foreign objects into
the slot of this player.
Failure to observe this may cause
malfunction due to the precise
mechanism of this unit.
Use Authorized Service Centers
Do not attempt to disassemble or adjust
this precision product as it will void the
warranty. Please contact your Car Show
Authorized Dealer directly for service
assistance.
For Installation
The unit should be installed in a
horizontal position with the front end up
at a convenient angle, but not more
than 30
NOTICE OF INTENDED USE
ROSEN ENTERTAINMENT SYSTEMS ARE DESIGNED
TOENABLE VIEWING OF VIDEO RECO RDINGS ONLY
FOR REAR-SEATOCCUPANTS. M O BILE VIDEO
PRODUCTS ARE NOT INTENDED FOR VIEW-ING BY
THE DRIVER WHILE THE VEHICLE IS IN MOTION.
SUCH USE MAY DISTRACT THE DRIVE R O R
INTERFERE WITH THE DRIVER’S SAFE OPERATION OF
THE VEHICLE, AND THUS RESULT IN SERIOUS INJURY
OR DEATH. SUCH USE MAY ALSO VIOLATE S TATE
LAW. ROSEN ENTERTAINMENT SYSTEMS DISCLAIMS
ANY LIABIL-ITY FOR ANY BODILY INJURY OR
PROPERTY DAMAGE THAT MAY RESULT FROM ANY
IMPROPER OR UNINTENDED USE.
About the Registered Marks Th is product incorporates
copyright protection technology that isprotected by method
claims of certain U.S. patents and otherintellectual property
rights owned by Macrovision Corporation andother rights
owners. Use of this copyright protection technology mustbe
authorized by Macrovision Corporation, and is intended for
home and other limited viewing uses only unless otherwise
authorized byMacrovision Corporation. Reverse engineering
or disassembly is prohibited.
0
.
2

CONTENTS
Safety Information ...............................................................................4
Disc Notes ............................................................................................5
The Player ............................................................................................7
Installation.............................................................................................9
Replacing the Dome Light Bulbs .......................................................10
Electrical Connection..........................................................................11
Remote Control ...................................................................................12
Location and Function of Keys ...................... ... ... ... ................... ... ... .................. 12
Preparing the Remote Control ........................................................................... 14
Loading/Eje cting a disc......................................................................15
Loading a disc.................................................................................................... 15
Ejecting a disc.................................................................................................... 15
Operation.............................................................................................16
Basic Play....... ... ... ... .... ... ... ................... ... ... ... ... ... ... ................... ... ... ... ... .... ........ 16
Menu Function................................................................................................... 18
On-Screen Display Function.............................................................................. 19
Multi-audio Language Function.......................................................................... 20
Title Menu Function..... ... ... ... ... ... ... ................... ... ... ... ................... ... ... ............... 20
Multi-Subtitle Language Function ........ .... .................. ... .... .................. ... .... ........ 20
Multi-angle Function .......................................................................................... 20
MP3 Disc Play ................................................................................................... 21
Setup....................................................................................................22
Initial Setup........................................................................................................ 22
General Setup.................................................................................................... 22
Speaker Setup................................................................................................... 24
Audio Setup....................................................................................................... 24
Preferences Setup............................................................................................. 25
Defaults Table.................................................................................................... 27
Trouble Shooting.................................................................................28
Specifications......................................................................................29
3

SAFETY INFORMATION
CAUTION:
MOBILE DVD PLAYER IS A CLASS I
LASER PRODUCT. HOWEVER THIS
MOBILE DVD PLAYER USES A
VISIBLE/INVISIBLE LASER BEAM
WHICH COULD CAUSE HAZARDOUS
RADIATION EXPOS URE IF DIREC TED.
BE SURE TO OPERATE THE MOBILE
DVD PLAYER CORRECTLY AS
INSTRUCTED.
USE OF CONTROLS OR
ADJUSTMENTS OR PERFORM ANCE
OF PROCEDURES OTHER THAN
THOSE SPECIFIED HEREIN MAY
RESULT IN HAZARDOUS RADIATION
EXPOSURE.
DO NOT OPEN COVERS AND - DO
NOT REPAIR YOURSELF. REFER
SERVICING TO QUALIFIED
PERSONNEL.
WARNING:
TO REDUCE THE RISK OF FIRE
OR ELECTRIC SHOCK, DO NOT
EXPOSE THIS EQUIPMENT T O
RAIN OR MOISTURE.
TO REDUCE THE RISK OF FIRE
OR ELECTRIC SHOCK, AND
ANNOYING INTERFERENCE, USE
ONL Y THE RECOMMENDED
ACCESSORIES.
THIS DEVICE IS INTENDED FOR
CONTINUOUS OPERATION.
This product incorporates copyright
protection technology that is protected
by method claims of certain U.S.
patents and other intellectual property
rights owned by Macrovision
Corporation and other rights owners.
Use of this copyright protection
techno logy m u s t be aut h orize d by
Macrovision Corporation, and is
intended for home and other limited
viewing uses only unless otherwise
authorized by Macrovision Corporation.
Reverse engineering or disassembly is
prohibited.
Region Management Information
Region Management Information: This
Mobile DVD Player is designed and
manufactured to respond to the Region
Management Information that is
recorded on a DVD disc. If the Region
number described on the DVD disc
does not correspond to the Region
number of this Mobile DVD Player, this
Mobile DVD Player cannot play this
disc.
4
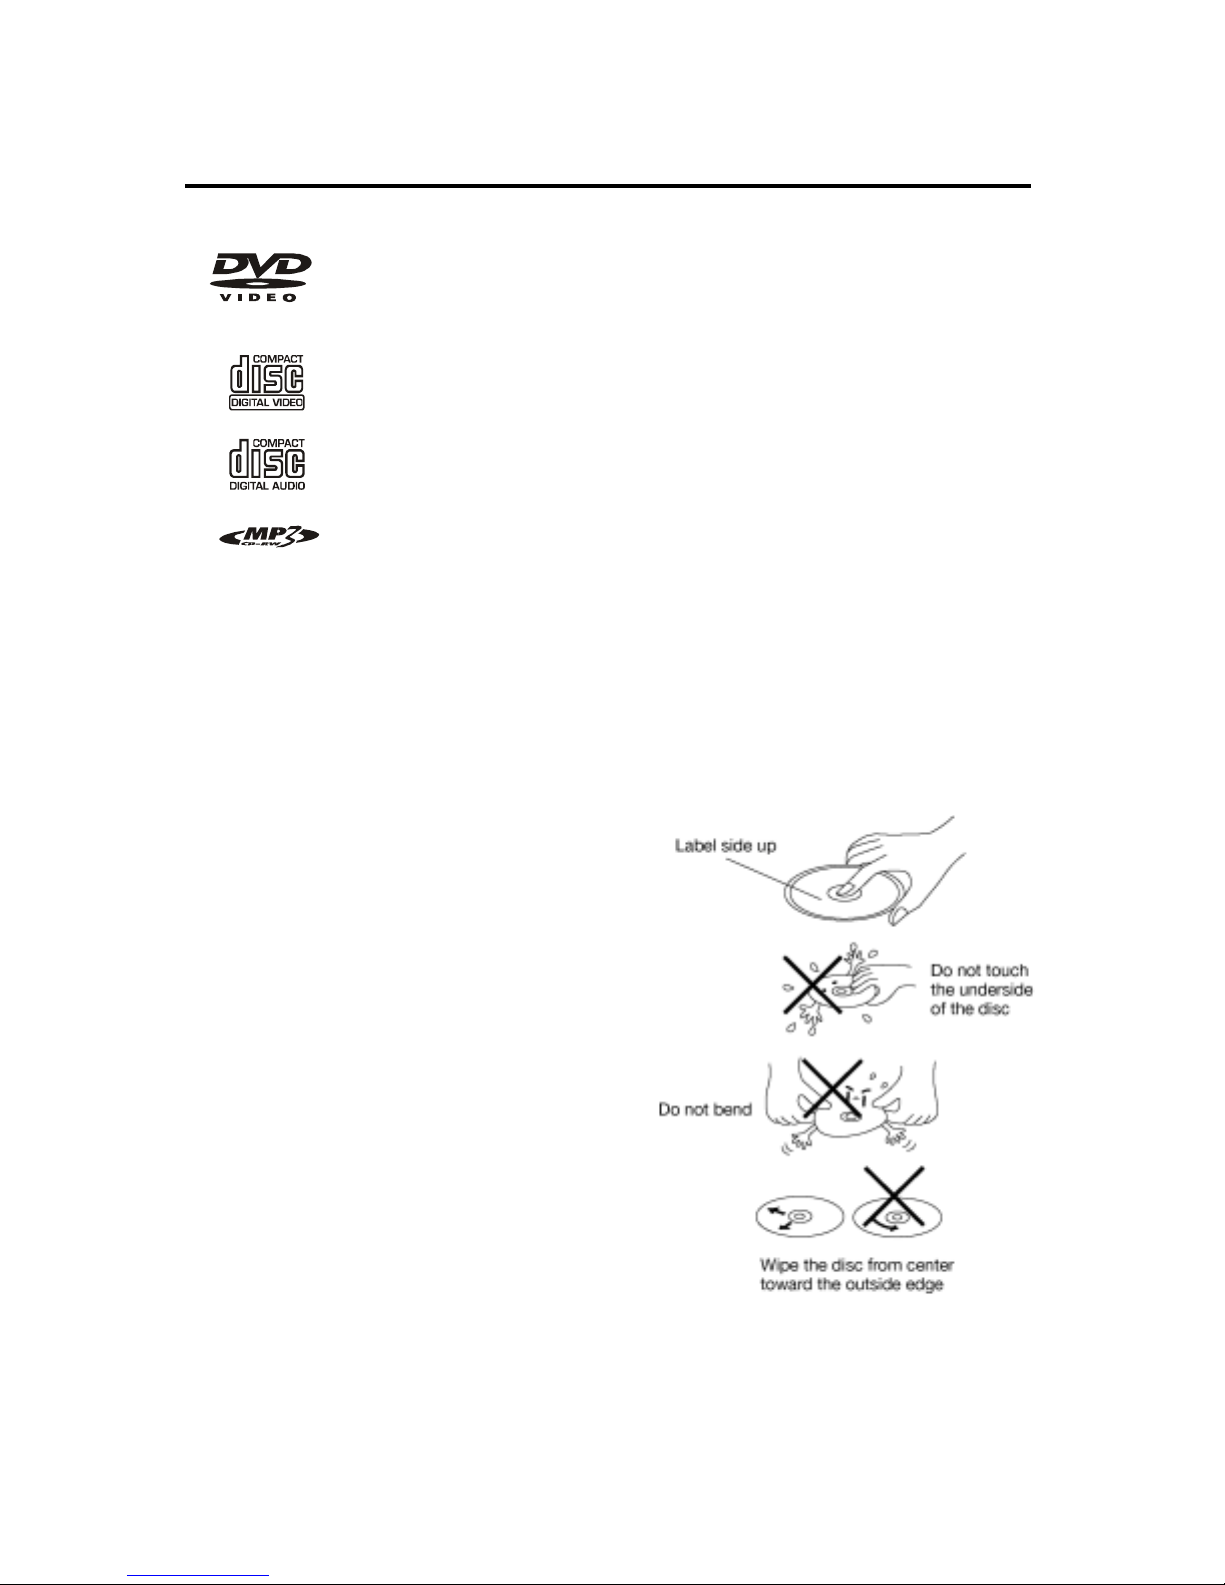
DISC NOTES
Disc formats supported by this player
DVD
12 cm disc
(Single-sided disc only)
12 cm disc
CD
Video CD
12 cm disc
Disc Cleaning
Use a dry soft cloth to wipe the
surface. If the disc is quite dirty, use a
soft cl oth slig htly moistu red wit h
isopropyl (rubbing) alcohol. Never use
solvents such as benzine, thinner or
conventional record cleaners as they
may mar the surface of the disc.
MP3
12 cm disc
Discs which cannot be played with
this player
DVD-ROM
DVD-R/ DVD-RAM
CDV
CD-G
Handling and Cleaning
Dirt, dust, scratches and warping
discs will cause misoperation.
Do not place stickers or make
scratches on discs.
Do not warp discs.
A disc should always be kept in its
case when not in use to prevent from
damage.
Do not place discs in the following
places:
1. Direct sunlight.
2. Dirty, dusty and damp areas.
3. Near car heaters.
4. On the seats or dashboard.
Note:
A disc may become somewhat
scratched (although not enough to
make it unusable) depending on the
way it is handled and conditions in the
usage environment. Note these
scratches are not an indication of any
probl e m with th e player.
5
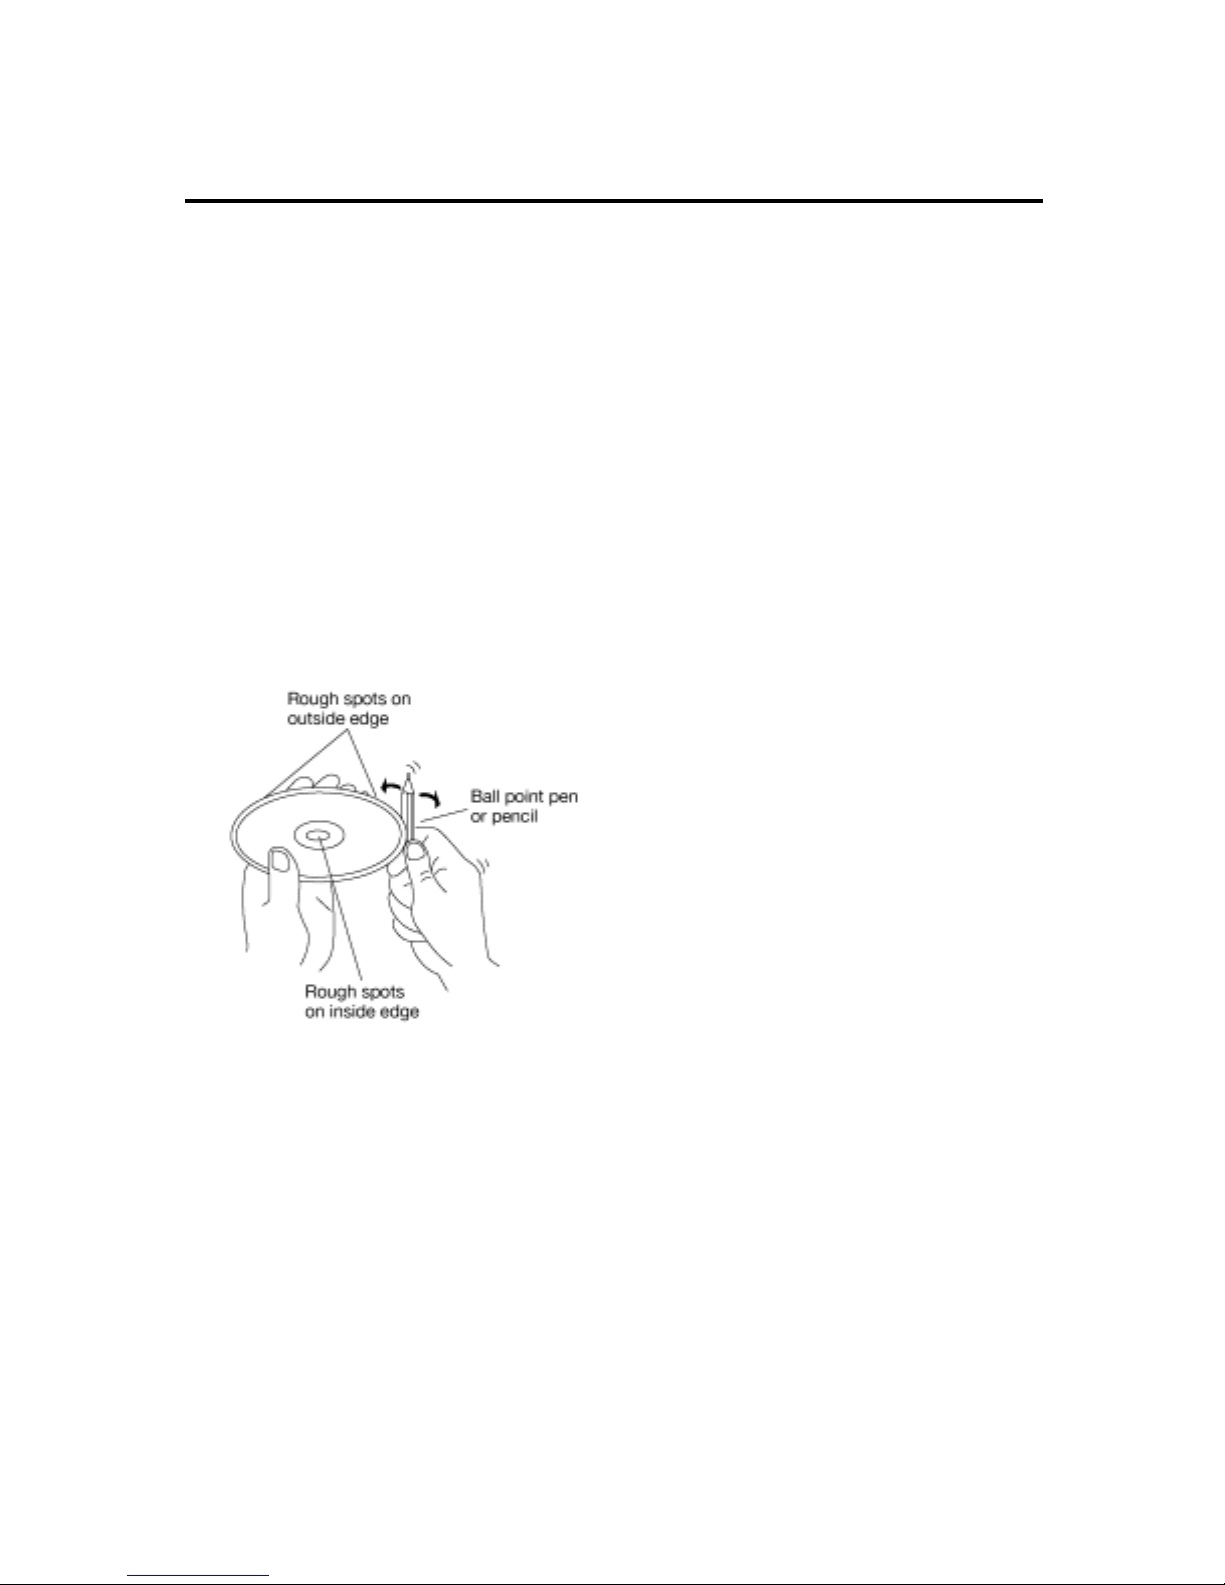
DISC NOTES
Preparing New Discs with
Rough Spots
A new disc may have rough edges
on its inside and outside edges. If a
disc with rough edges is used, the
proper setting will not be performed
and the pl a ye r wi ll not pl a y the dis c.
Therefore, remove the rough edges
in advance by using a ba llpoint pen
or pencil as shown on the right. To
remov e the ro u gh edges, press the
side of the pen or pencil against the
inside and outside edges of the disc.
6
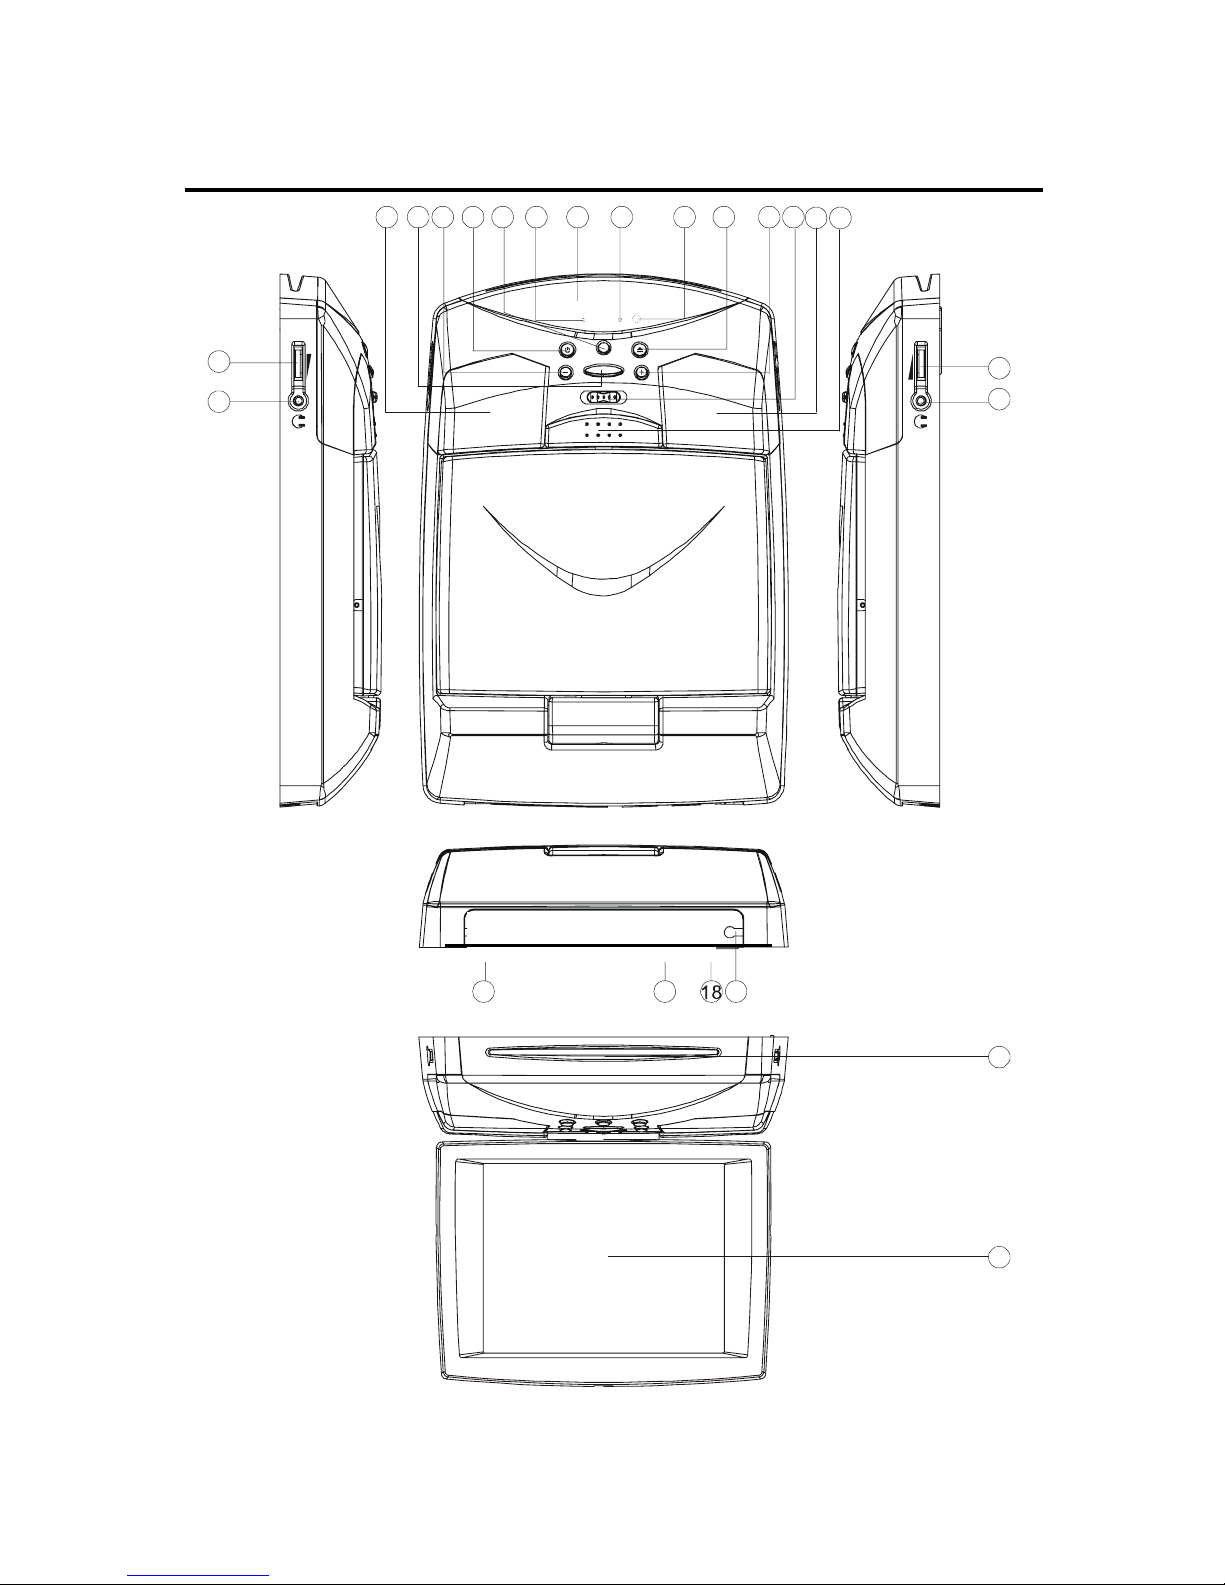
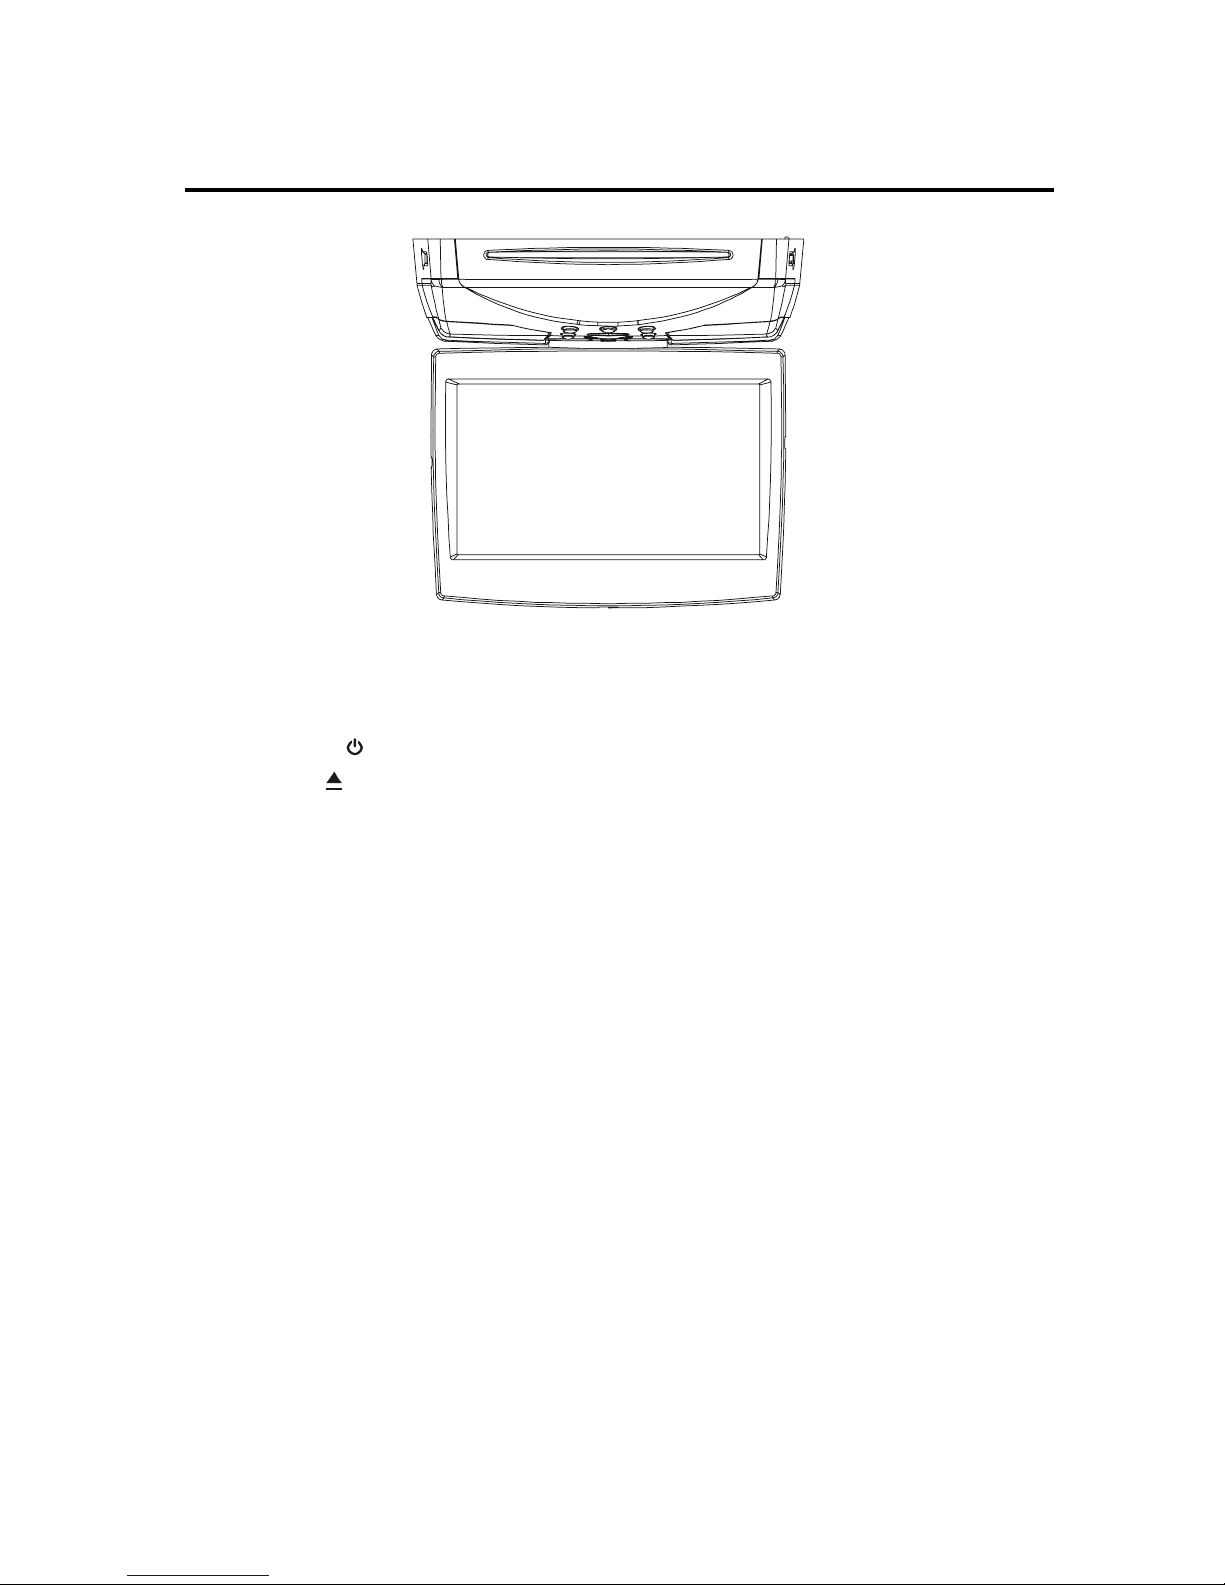
THE PLAYER
14
15
20
10
41835
11
2 79
6
22
5
14
15
FIG.A 7.0 INCH LCD COLOR MONITOR
Car Show™
17
1916
12
13
7
™
THE PLAYER
FIG.B 7.0 INCH LCD COLOR MONITOR
1. POWER ( )
2. EJECT(
)
3. MENU
4. MOD
5. Car Dome Lamp
6. Light Switch
7. VOLUME+
8. VOLUME-
9. IR
10. Indicator Light for DVD
11. Indicator Light for AV
Car Show
12. Disc slot
13. 7.0 inch LCD Color Monitor
14. Earphone volume control knob
15. Jacks for Earphone
16. DC 12V IN (top of unit)
17. AV IN (top of unit)
18. AV OUT (top of unit)
19. DIGITAL AUDIO
20. INFRARED TRANSMITTING WINDOW
(For the unit with infrared transmitting
function only)
21. Open button: Press the button to eject the
screen display from the base at a little
angle.
8
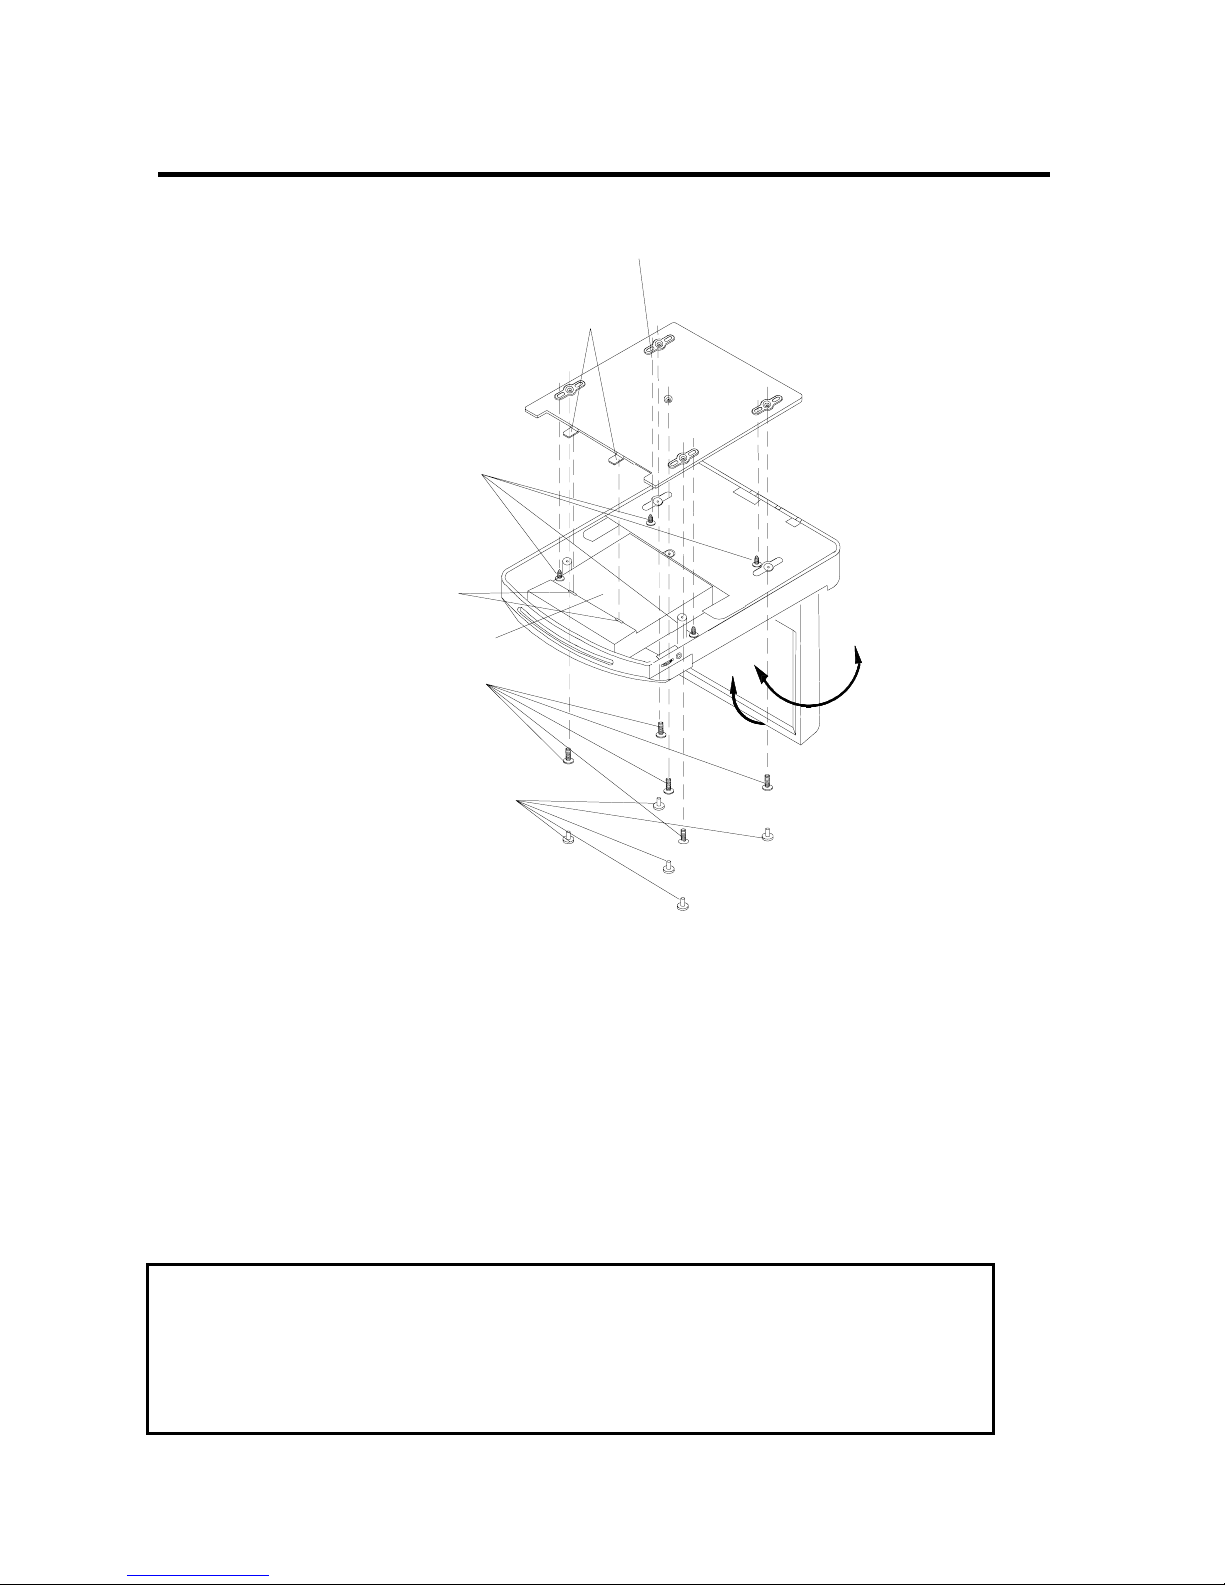
INSTALLATION
Tapping Screw (ø4x10)
Mounting Bolts (M3.5x10)
Mounting Bracket
Levers
Slots
DVD Bracket
Rubber Caps
1. Determine the mounting location and secure bracket. (See Notes Below)
2. Attach the mounting bracket with the included screws. (See Notes Below)
3. Insert the two levers of the mounting bracket into the slots on the DVD pod to fix the
display unit when using this installation method. (See Notes Below)
4. Open the monitor to display the five screw holes.
5. Attach the unit to the bracket with the supplied mounting bolts.
6. Insert five rubber caps to hide the screw holes.
7. When the installation has completed, you can also move the display upward or
downward, left or right to adjust the viewing angle.
NOTE: We have included additional hardware to provide maximum
installation flexibil ity and the ability to separate the bracket from the
overhead pod. This will allow you to fasten the mounting bracket
firmly to the vehicles structural roof beam for a more rigid installation.
9
 Loading...