

Carrier 7G24H22 User Manual
Opcional Comunicaciones y reloj
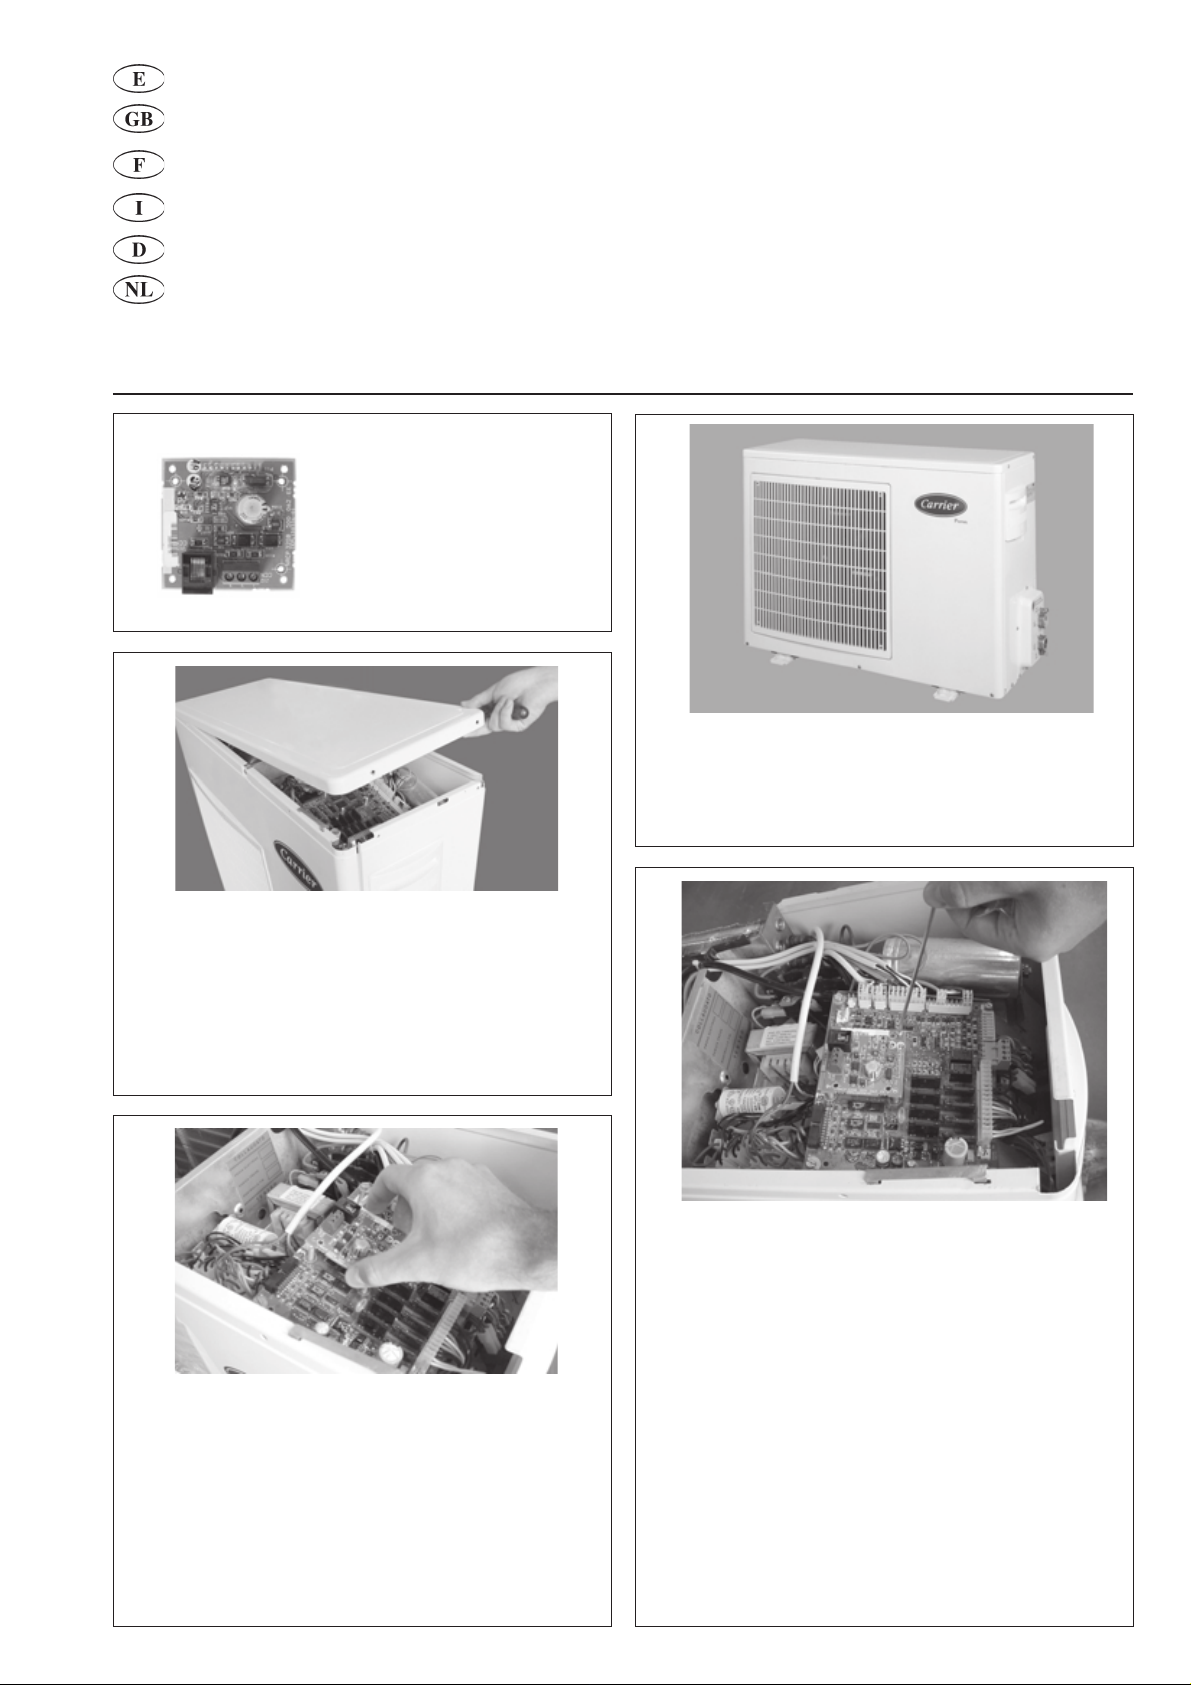
X30RA20J010
Optional Communication and operating time board
Communication optionnelle et horloge en fonctionnement
Opzione Scheda comunicazione e tempistiche funzionamento
Wahlweise Kommunikations- und Betriebszeit-Platine
CCN klokprint (accessoire)
Instrucciones de instalación /
Istruzioni di installazione /
1
• Opcional Comunicaciones y reloj.
• Optional Communication and
operating time board.
• Communication optionnelle et
horloge en fonctionnement.
• Opzione Scheda comunicazione e
tempistiche funzionamento.
• Wahlweise Kommunikations- und
Betriebszeit-Platine.
• CCN klokprint (accessoire).
Installation instructions /
Installationsanweisungen /
3
A
• Quitar tension del interruptor general y quitar panel (A).
• Switch the mains power supply OFF and remove the panel (A).
• Coupez l’alimentation principale et ôtez le panneau (A).
• Posizionare l’interruttore generale su OFF e togliere il
pannello (A).
• Die Netzstromversorgung abschalten und Blech (A)
entfernen.
• Schakel de hoofdstroom UIT en verwijder het afdekpaneel
van de schakelkast (A).
Instruction d’installation /
Montage- instructies
2
• Unidad mod. 005 - 013
• Unit mod. 005 - 013
• Unité mod. 005 - 013
• Unità mod. 005 - 013
• Gerät mod. 005 - 013
• Unit type 005 - 013
5
4
• Abrir caja electrica e insertar opcional en su alojamiento de
la placa principal.
• Open the electrical panel and insert the board into its position
on the main board.
• Ouvrez le panneau électrique et placez l’horloge sur le
panneau principal.
• Aprire il quadro elettrico e inserire la scheda nell’apposita
sede sulla scheda principale.
• Regelabteil öffnen und die Platine in ihre Position auf der
Hauptplatine einsetzen.
• Open de schakelkast en steek de printplaat op zijn plaats op
de hoofdprint.
• Atornillar los taladros y conectar según esquema eléctrico.
Colocar el painel (A) y rearmar tension del interruptor general.
• Fix the board with the screws and connect according to wiring
diagram.
Replace the panel (A) and switch the mains power supply ON.
• Vissez l’horloge et reliez-la à l’alimentation en suivant le
schéma électrique de connexions.
Replacez le panneau (A) et remettez l’alimentation principale
en marche.
• Fissare la scheda con le viti e collegare secondo lo schema
elettrico.
Riposizionare il pannello (A) e ruotare l’interruttore generale
su ON.
• Die Platine mit den Schrauben befestigen und entsprechend
dem Schaltplan anschließen.
Blech (A) wieder anbringen und die Netzstromversorgung
EINschalten.
• Bevestig de printplaat met de schroeven en sluit hem aan
volgens het elektrisch schema.
Sluit de schakelkast, breng het afdekpaneel weer op zijn
plaats en schakel de hoofdstroom AAN.

L010124H22 - 0900
1
• Opcional Comunicaciones y reloj.
• Optional Communication board and
operating time board.
• Communication optionnelle et
horloge en fonctionnement.
• Opzione Scheda comunicazione e
tempistiche funzionamento.
• Wahlweise Kommunikations- und
Betriebszeit-Platine.
• CCN klokprint (accessoire).
3
• Quitar tension del interruptor general y quitar panel (A).
• Switch the mains power supply OFF and remove the panel (A).
• Coupez l’alimentation principale et ôtez le panneau (A).
• Posizionare l’interruttore generale su OFF e togliere il
pannello (A).
• Die Netzstromversorgung abschalten und Blech (A)
entfernen.
• Schakel de hoofdstroom UIT en verwijder het afdekpaneel
van de schakelkast (A).
2
A
• Unidad mod. 017 - 033
• Unit mod. 017 - 033
• Unité mod. 017 - 033
• Unità mod. 017 - 033
• Gerät mod. 017 - 033
• Unit type 017 - 033
5
4
• Atornillar los taladros y conectar según esquema eléctrico.
Colocar el painel (A) y rearmar tension del interruptor general.
• Fix the board with the screws and connect according to wiring
diagram.
Replace the panel (A) and switch the mains power supply ON.
• Vissez l’horloge et reliez-la à l’alimentation en suivant le
schéma électrique de connexions.
Replacez le panneau (A) et remettez l’alimentation principale
en marche.
• Abrir caja electrica e insertar opcional en su alojamiento de
la placa principal.
• Open the electrical panel and insert the board into its position
on the main board.
• Ouvrez le panneau électrique et placez l’horloge sur le
panneau principal.
• Aprire il quadro elettrico e inserire la scheda nell’apposita
sede sulla scheda principale.
• Regelabteil öffnen und die Platine in ihre Position auf der
Hauptplatine einsetzen.
• Open de schakelkast en steek de printplaat op zijn plaats op
de hoofdprint.
Carrier S.p.A. - Via R. Sanzio, 9 - 20058 Villasanta (MI) Italy
El fabricante se reserva el derecho de cambiar algunas especificaciones de los productos sin previo avíso.
The manufacturer reserves the right to change any product specifications without notice.
Le fabricant se réserve le droit de procéder à toute modification sans préavis.
Il costruttore si riserva il diritto di cambiare senza preavviso i dati pubblicati.
Nachdruck verboten. Änderungen vorbehalten.
Wijzigingen voorbehouden.
Order No. 13019-74, September 2000. Supersedes Order No. (new) Printed in Italy
• Fissare la scheda con le viti e collegare secondo lo schema
elettrico.
Riposizionare il pannello (A) e ruotare l’interruttore generale
su ON.
• Die Platine mit den Schrauben befestigen und entsprechend
dem Schaltplan anschließen.
Blech (A) wieder anbringen und die Netzstromversorgung
EINschalten.
• Bevestig de printplaat met de schroeven en sluit hem aan
volgens het elektrisch schema.
Sluit de schakelkast, breng het afdekpaneel weer op zijn
plaats en schakel de hoofdstroom AAN.
 Loading...