

Page 1
Made in China, Huizhou.
Montage- und Betriebsanleitung
Assembly and operating instructions
Instructions de montage et d’utilisation
Instrucciones de montaje y de servicio
Istruzioni per il montaggio e l’uso
Montage- en gebruiksaanwijzing
Instruções de montagem e modo de utilização
Monterings- och bruksanvisning
Asennus- ja käyttöohje
Instrukcja montażu i obsługi
Szerelési és használati utasítás
Navodila za montažo in uporabo
Návod k montáži a obsluze
Montajse- og bruksanvisning
Monterings- og driftsvejledning
Οδηγίες συναρμολόγησης και λειτουργίας
Red Hunter
Big Mamba
# 142007
# 142008
Page 2
ALKALINE
ALKALINE
2
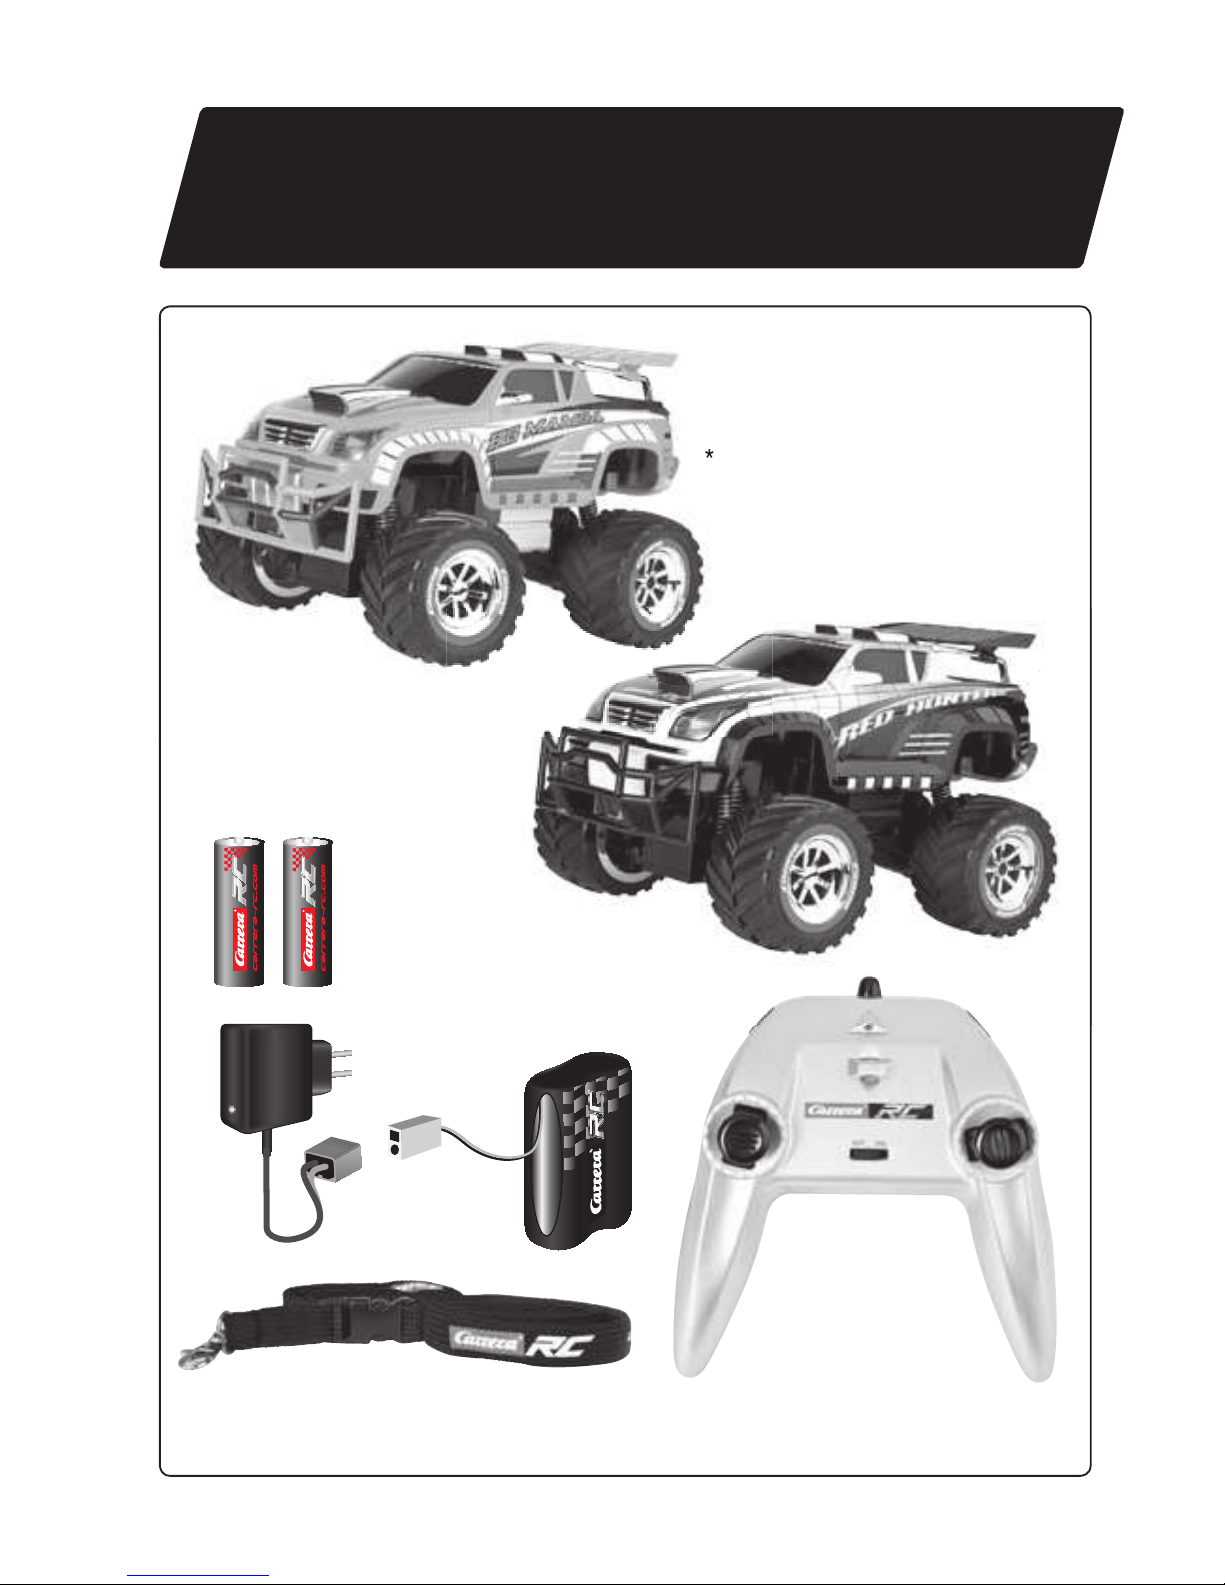
Lieferumfang · Contents of package · Fournitures · Contenido del embalaje
Contenuto della fornitura · Inhoud van de levering · Volume de fornecimento
Leveransomfattning · Toimituslaajuus · Zakres dostawy · Szállítási terjedelem
Vsebina pakiranja · Rozsah dodávky · Leveringsomfang
Leveringsomfang · Παραδοτέος εξοπλισμός
*
* Nur ein Modell enthalten · Contains only one model · contient un seul modèle · Contiene sólo un modelo · Contiene un solo modellino · Bevat slechts één model
Contém só uma miniatura · Endast en modell · Sisältää vain yhden radio-ohjattavan · Zawiera tylko jeden model · Csak egy modellt tartalmaz · Vključen samo en model
Obsahuje pouze jeden model. · Inneholder kun samme modell · Indeholder kun én model · Περιέχεται μόνο ένα μον τέλο
*
Page 3
Montage- und Betriebsanleitung 4
Technische und designbedingte Änderungen vorbehalten
Assembly and operating instructions 8
Subject to technical or design-related modification
Instructions de montage et d’utilisation 12
Sous réserve de modifications techniques et des véhicules
Instrucciones de montaje y de servicio 16
Reservado el derecho a modificaciones técnicas o debidas al diseño
Istruzioni per il montaggio e l’uso 20
Con riser va di modifiche tecniche e dovute al design
Montage- en gebruiksaanwijzing 24
Technische en door het design bepaalde wijzigingen voorbehouden
Instruções de montagem e modo de utilização 28
Sujeito a alterações de design e técnicas
Monterings- och bruksanvisning 32
Tekniska och designrelaterade ändringar förbehållna
Asennus- ja käyttöohje 36
Oikeud et teknisiin ja muotoilumuutosten aiheut tamiin muutoksiin pidätetään
Instrukcja montażu i obsługi 40
Zastrzega się prawo do zmian technicznych oraz uwarunkowanych wzornictwem
Szerelési és használati utasítás 44
A műszaki és formatervezésből eredő módosítások joga fenntartva
Navodila za montažo in uporabo 48
Tehnično in oblikovno pogojene spremembe pridržane
Návod k montáži a obsluze 52
Technické a designem podmíněné změny vyhrazeny
Montajse- og bruksanvisning 56
Det tas forbehold om endringer i teknikk og design
Monterings- og driftsvejledning 60
Tekniske og designmæssige ændringer forbeholdes
Οδηγίες συναρμολόγησης και λειτουργίας 64
Με την επιφύλαξη τεχνικών και σχεδιαστικών αλλαγών
07/2012 · 1
Page 4
4
ALKALINE
ALKALINE
Sehr geehrter Kunde
Wir beglückwünschen Sie zum Kauf Ihres Carrera RC-Modellautos, das nach dem
heutigen Stand der Technik gefertigt wurde. Da wir stets um Weiterentwicklung und
Verbesserung unserer Produkte bemüht sind, behalten wir uns eine Änderung in technischer Hinsicht und in Bezug auf Ausstattung, Materialien und Design jederzeit und
ohne Ankündigung vor. Aus geringfügigen Abweichungen des Ihnen vorliegenden
Produkts gegenüber Daten und Abbildungen dieser Anleitung können daher keinerlei
Ansprüche abgeleitet werden. Diese Bedienungs- und Montageanleitung ist Bestandteil des Produkts. Bei Nichtbeachtung der Bedienungsanleitung und der enthaltenen
Sicherheitsanweisungen erlischt der Garantieanspruch. Bewahren Sie diese Anleitung zum Nachlesen und für die eventuelle Weitergabe des Modells an Dritte auf.
Garantiebedingungen
Bei den Carrera-Produkten handelt es sich um technisch hochwertige Spielzeuge, die
sorgfältig behandelt werden sollten. Beachten Sie bitte unbedingt die Hinweise in der
Bedienungsanleitung. Alle Teile werden einer sorgfältigen Prüfung unterzogen (technische Änderungen und Modelländerungen, die der Verbesserung des Produktes
dienen, sind vorbehalten).
Sollten dennoch Fehler auftreten, wird eine Garantie im Rahmen der nachstehenden Garantie- Bedingung gewährt:
Die Garantie umfasst nachweisliche Material- oder Fabrikationsfehler, die zum Zeitpunkt des Kaufes des Carrera-Produkts vorhanden waren. Die Garantiefrist beträgt
vom Verkaufsdatum an gerechnet 24 Monate. Ausgeschlossen ist der Garantieanspruch auf Verschleißteile, Schäden durch unsachgemäße Behandlung/Nutzung oder
bei Fremdeingriffen. Die Reparatur darf nur durch die Firma Stadlbauer Marketing +
Vertrieb GmbH oder ein von dieser autorisiertes Unternehmen ausgeführt werden. Im
Rahmen dieser Garantie wird nach Wahl der Stadlbauer Marketing + Vertrieb GmbH
das Carrera-Produkt als Ganzes oder nur die defekten Teile ausgetauscht oder
gleichwertiger Ersatz gewährt. Von der Garantie ausgeschlossen sind Transport-,
Verpackungs- und Fahrt kosten sowie vom Käufer zu vertretende Schäden. Diese sind
vom Käufer zu tragen. Die Garantieansprüche können ausschließlich vom Ersterwerber des Carrera-Produkts in Anspruch genommen werden.
Anspruch auf die Garantieleistung besteht nur dann, wenn
• die ordnungsgemäß ausgefüllte Karte zusammen mit dem defekten Carrera Produkt, der Kaufquittung / der Rechnung / dem Kassenzettel eingesandt wird.
• keine eigenmächtigen Änderungen an der Garantiekarte vorgenommen wurden.
• das Spielzeug gemäß der Bedienungsanleitung behandelt und bestimmungsgemäß
genutzt wurde.
• die Schäden / Fehlfunktionen nicht auf höhere Gewalt oder betriebsbedingten
Verschleiß zurückzuführen sind.
Garantiekarten können nicht ersetzt werden.
Hinweis für EU-Staaten: Es wird auf die gesetzliche Gewährleistungspflicht des Verkäufers hingewiesen, dass nämlich diese Gewährleistungspflicht durch gegenständliche Garantie nicht eingeschränkt wird.
Bitte senden Sie die vollständig ausgefüllte Garantiekarte, die Ware und die Kaufquittung frei Haus an folgende Adressen (die Versendung erfolgt auf Risiko des Käufers):
Stadlbauer Marketing + Vertrieb GmbH
Chiemseestraße 200 • D- 83278 Traunstein
Innerhalb Österreichs an:
Stadlbauer Marketing + Vertrieb GmbH
Handelszentrum 6 • A-5101 Bergheim
Konformitätserklärung
Hiermit erklärt Stadlbauer Marketing + Vertrieb GmbH, dass sich dieses Modell einschließlich Controller in Übereinstimmung mit den grundlegenden Anforderungen folgender EG-Richtlinien:
EG Richtlinien 2009/48 und 2004/108/EG über die elektromangetische Verträglichkeit und den anderen relevanten Vorschrif ten der Richtlinie
1999/5/EG (R&TTE) befindet.
Die Original-Konformitätserklärung kann unter carrera-rc.com
angefordert werden.
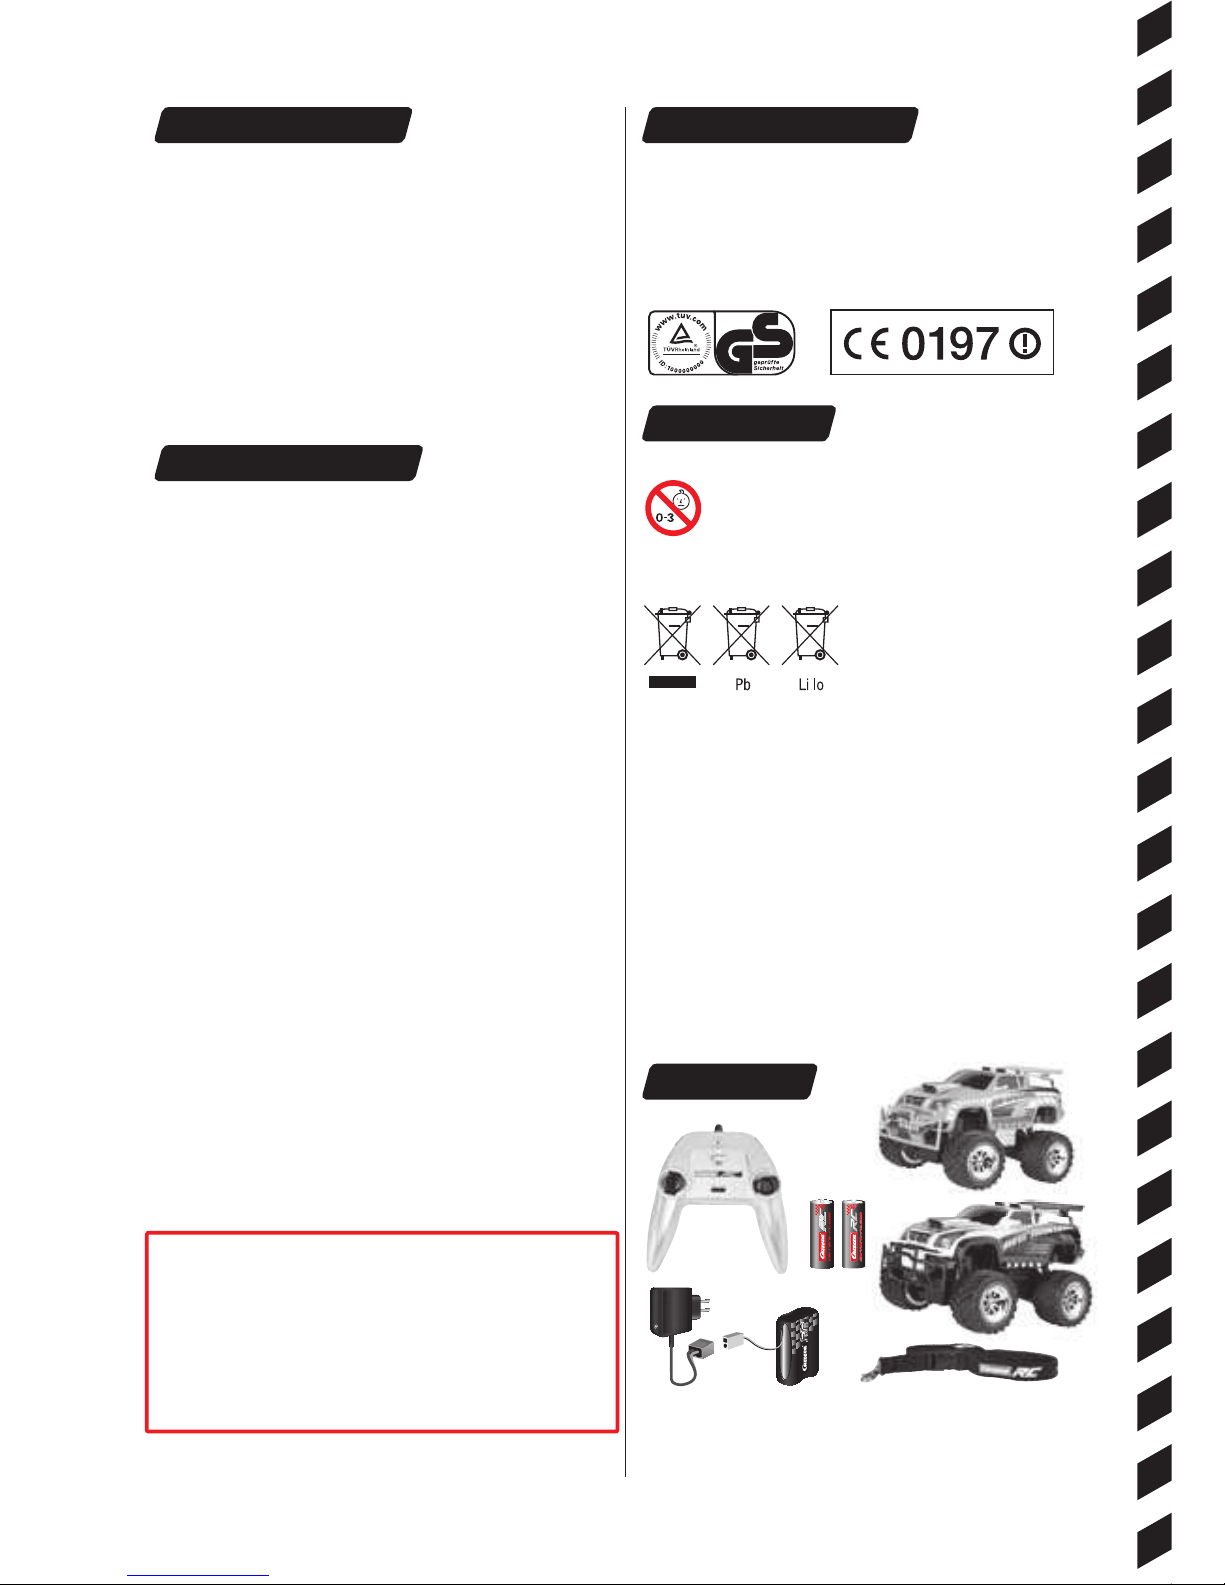
Warnhinweise!
ACHTUNG! Dieses Spielzeug ist nicht geeignet für Kinder unter 3
Jahren, wegen verschluckbarer Kleinteile. ACHTUNG! Funk tionsbe-
dingte Klemmgefahr! Entfernen Sie alle Verpackungsmaterialien und
Befestigungsdrähte, bevor Sie dieses Spielzeug dem Kind übergeben. Für Informationen und etwaige Fragen, bewahren Sie bitte Verpackung und Adresse auf.
Das hier abgebildete Symbol der durchgestrichenen Mülltonnen soll Sie darauf hinweisen,
dass leere Batterien, Akkumulatoren, Knopfzellen, Akku packs, Geräte batterien, elektri-
sche Altgeräte etc. nicht in den Hausmüll
gehören, da sie der Umwelt und Gesundheit schaden. Helfen Sie bitte mit, Umwelt
und Gesundheit zu erhalten und sprechen Sie auch mit Ihren Kindern über die ordentliche Entsorgung gebrauchter Batterien und elektrischer Altgeräte. Batterien und
elektrische Altgeräte sollen bei den bekannten Sammelstellen abgegeben werden.
So werden sie ordnungsgemäßem Recycling zugeführt.
Ungleiche Batterietypen oder neue und gebrauchte Batterien dürfen nicht zusammen
verwendet werden. Leere Batterien aus dem Spielzeug herausnehmen. Nicht aufladbare Batterien dürfen nicht geladen werden. Aufladbare Batterien sind nur unter Aufsicht von Erwachsenen zu laden. Aufladbare Batterien vor dem Laden aus dem
Spielzeug nehmen. Anschlussklemmen dürfen nicht kurzgeschlossen werden. Es
dürfen nur die empfohlenen Batterien oder die eines gleichwertigen Typs verwendet
werden.
Bei regelmäßigem Gebrauch des Ladegräts, muss dieses am Kabel, Anschluss,
Abdeckungen und anderen Teilen kontrolliert werden. Im Schadensfall darf das Ladegerät erst nach einer Reparatur wieder in Betrieb genommen werden.
Lieferumfang
*
* Nur ein Model l entha lten
*
1 x Red Hunter
Big Mamba
1 x Controller
1 x Lanyard
1 x Ladegerät
1 x Akku
2 x 1,5 V Mignon AA Batterien
(nicht wiederaufladbar)
ALKALINE
*
Page 5

1 8
5
2
3
4
7
11
13
10
> 15cm
9
10
6
5 12
GRÜN =Ber eitROT= Laden
Sicherheitsbestimmungen
Ein Carrera RC-Fahrzeug ist ein ferngesteuertes, mit speziellen Fahr akkus
betriebenes Modell auto. Es dürfen nur
die original Carrera RC Li-Ion-Akkus
verwendet werden.
Entfernen Sie den Akku aus dem Fahrzeug bevor Sie diesen aufladen.
Stellen Sie das Fahrzeug immer von
Hand auf dem Boden ab. Werfen Sie
das Fahrzeug niemals aus dem Stand
auf den Boden.
Setzen Sie das Carrera RC-Fahrzeug
niemals permanenten Lastwechsel,
d.h. ständigem Vor- und Zurückfahren,
aus.
Vermeiden Sie Sprünge von Schanzen
oder Rampen mit Höhen über 15 cm.
Das Carrera RC-Fahrzeug ist ausschließlich für Hobbyzwecke aus gelegt
und darf nur auf dafür vor gesehenen
Bahnen und Plätzen gefahren werden.
ACHTUN G! Verwenden Sie das
Carrera RC-Fahrzeug nicht im Straßenverkehr.
Verwenden Sie niemals scharfe
Lösungsmittel zur Reinigung Ihres
Modells.
Fahren Sie auch nicht unter Hochspannungsleitungen oder Funk masten oder
bei Gewitter! Atmosphärische Störungen
können zu einer Funktionsstörung führen.
Bitte warten Sie bei großen Temperaturunterschieden zwischen Lagerraum und
Fahrplatz bis sich das Fahrzeug akklimatisiert hat, um die Bildung von Kondenswasser und daraus resultierende Funktionsstörungen zu vermeiden.
Um zu vermeiden, dass das Carrera
RC-Fahrzeug mit Störungen im Steuerungssystem und dadurch unkon trolliert
fährt, sind die Batterien des Controllers
und des Fahrzeugakkus auf einwandfreien Ladezustand hin zu überprüfen.
Ladegeräte und Netzteile nicht kurzschließen.
Fahren Sie mit diesem Produkt niemals
auf Grasflächen. Sich fest wickelndes
Gras kann die Achsendrehung behindern und den Motor erhitzen. Mit einem
Carrera RC- Fahrzeug dürfen keine
Güter, Personen oder Tiere transportiert werden.
Die korrekte Montage des Carrera RCFahrzeugs muss stets vor und nach
jeder Fahrt überprüft werden, gegebenenfalls Schrauben und Muttern nachziehen.
Fahren Sie mit dem Carrera RC- Fahrzeug niemals bei Regen oder Schnee
im Freien.
Das Fahrzeug darf nicht durch Wasser,
Pfützen oder Schnee fahren und muss
im trockenen gelagert werden.
Benutzen Sie das Fahrzeug niemals in
der Nähe von Flüssen, Teichen oder
Seen, damit das Carrera RC-Fahrzeug
nicht ins Wasser fällt.
Vermeiden Sie das Fahren auf Strecken,
die ausschließlich aus Sand bestehen.
Setzen Sie das Carrera RC- Fahrzeug
keiner direkten Sonneneinstrahlung
aus.
Um Überhitzungen der Elektronik im
Fahrzeug zu vermeiden, müssen bei
einer Temperatur von über 35°C regelmäßig kurze Ruhepausen eingelegt
werden.
Page 6

6
1
3
41
2
1
ALKALINE
ALKALINE
2
2
18km/h
1
Laden Sie den Akku unbedingt nach Gebrauch wieder auf, um eine sog. Tiefenentladung des Akkus zu vermeiden. Laden Sie den Akku von Zeit zu Zeit (ca. alle 2-3
Monate) auf.
Eine Nichtbeachtung der o.g. Handhabung des Akkus kann zu einem
Defekt führen
. Das Aufladen des Akkus hat unter Aufsicht eines Erwachsenen zu
erfolgen! Akkus dürfen nur von Erwachsenen oder von Kindern die mindestens
8 Jahre alt sind aufgeladen werden.
1
2
ON
ONOFF
GRÜN= BereitROT=Lad en
Entfernen Sie mit einem Schraubenzieher
den Deckel des Akkufachs beim Carrera
RC-Fahrzeug.
Verbinden Sie das Kabelende des Carrera
RC-Fahrzeugs mit dem des Akkus. Akku
einlegen. Deckel mit einem Schraubenzieher
zuschrauben.
Öffnen sie das Batteriefach mit einem
Schraubendreher und setzen Sie die Batterien in den Controller ein. Achten Sie auf die
richtige Polarität. Verwenden Sie nie neue
und alte Batterien oder von unter schiedlichen Herstellern gemeinsam. Nach dem
verschließen des Faches können sie die
Funktionalität des Controllers mit Hilfe des
Powerschalters auf der Vorderseite prüfen.
Bei ON-Stellung des Powerschalters und
ordnungsgemäßer Funktion sollte die LED
oben in der Mitte des Controllers rot aufleuchten.
Achtung dieses Fahrzeug erreicht
Geschwindigkeiten von bis zu
18km/h.
Bitte üben Sie auf einer leeren
Fläche mit mind. 2,5x2,5 Metern Größe.
Bedienen Sie beim ersten Mal sehr
vorsichtig den Gashebel, da das
Fahrzeug sensibel reagiert. Üben Sie
das Langsamfahren mind. 2-3 Akkufüllungen, bevor Sie zu schnelleren Manövern übergehen.
Aufladen des Akkus Jetzt kann die Fahrt losgehen
Einsetzen des Akkus
Einsetzen der Batterien
Lass uns üben!
Bitte verbinden Sie zuerst den Carrera RCAkku mit dem beiliegenden Ladegerät.
Das Verbindungsstück bzw. der Anschluss
zwischen Akku und Ladegerät sind so
hergestellt, dass verkehrte Polarität ausgeschlossen ist. Schließen Sie das Ladegerät
an eine Energiequelle an.
Wenn der Akku richtig angeschlossen wurde
und der Aufladungs prozess normal erfolgt,
leuchtet das rote LED-Lämpchen konstant.
Wenn der Akku voll aufgeladen ist, schaltet
das rote LED-Lämpchen auf grün um. Der
Akku kann entfernt und in Ihrem Carrera
RC-Fahrzeug installiert werden und ist nun
bereit zum Fahren. Der Akku muss nach
Gebrauch mind. 20 Minuten abkühlen, bevor
er wieder vollständig geladen werden darf.
Eine Nichtbeachtung dieser Pause kann zu
einem defekten Akku führen.
Das Carrera RC Fahrzeug und der Controller sind werkseitig gebunden.
1.Schalten Sie das Fahrzeug am ON-/
OFF-Schalter ein. Die LED auf der
Oberseite des Fahrzeugs blinkt rythmisch.
2.Schalten Sie den Controller ein. Die
LED am Controller blinkt rhythmisch.
Nach ein paar Sekunden leuchten die
LED am Fahrzeug und am Controller
permanent. Die Bindung ist abgeschlossen.
Justieren der Lenkung
Stellt sich beim Betrieb des Carrera RCFahrzeugs heraus, dass das Fahrzeug
nach rechts oder links zieht, kann durch
den auf der Zeichnung ersichtlichen
Justierungsschalter die Fahrspur korrigiert werden.
Bauen Sie mit Eckbegrenzungen oder
leeren Büchsen usw. eine Carrera RCFahrzeug Rennstrecke auf einer
großen, freien Fläche. Die grundlegende Steuertechnik beim Fahren mit
einem Carrera RC-Fahrzeugs ist: auf
Geraden schnell fahren und in den
Kurven abbremsen.
2
Page 7

3
4
5
7
1
Controller-Funktionen
Problemlösungen
SERVO TRONIC
Mit den Joysticks können Sie präzise
Lenk- und Fahrmanöver durchführen.
Joystick links: Vorwärtsfahrt und
Rückwärtsfahrt in unterschiedlichen
Geschwindigkeiten
Das Fahrzeug kann alternativ mit den
Steuerwippen gesteuert werden.
Auf der Controller-Rückseite im dafür
vorgesehenen Fach können
die Joysticks verstaut werden.
Das Umhängeband mit dem Kara biner
an der Öse des Controllers befestigen
und um den Hals hängen.
Achtung! Strangulationsgefahr!
Problem Ursache Lösung
Modell fährt nicht
Schalter am Controller oder/und Modell steht/stehen auf „OFF“ Einschalten
Schwacher oder gar kein Akku im Modell Geladenen Akku einlegen
Das Auto ist an einem Hindernis stehen geblieben.
Der Überspannungsschutz hat das Auto abgeschaltet.
ON/OFF Schalter am Fahrzeug einmal auf OFF, dann wieder auf ON
schalten und auf einer freien Fläche platzieren.
Schwacher Akku/Batterie im Controller oder Modell Geladenen Akku oder Batterie einlegen
Der Controller ist ggf. nicht richtig mit dem Empfänger im Modell
gebunden.
Stellen Sie wie unter “Jetzt kann die Fahrt losgehen”
beschrieben eine Bindung zwischen Modell und Controller her.
Der Sender hat sich nach 30 Minuten selbst ausgeschaltet.
Zum erneuten Gebrauch bitte den ON/OFF Schalter an Controller &
Fahrzeug einmal auf OFF und anschließend wieder auf ON schalten.
Das Fahrzeug ist sehr warm.
Fahrzeug und Controller ausschalten und das Fahrzeug etwa 30
Minuten abkühlen lassen.
Der Überhitzungsschutz hat das Auto wegen zu starker
Erwärmung angehalten
Den Empfänger ausschalten
Das RC-Fahrzeug etwa 30 Minuten abkühlen lassen
Keine Kontrolle
Fahrzeug setzt sich ungewollt in Bewegung Zuerst Controller einschalten, dann erst das Fahrzeug.
Irrtum und Änderungen vorbehalten
Farben / endgültiges Design – Änderungen vorb ehalten
Technische und designbedingte Änderungen vorbehalten
Piktogramme = Symbolfotos
Die aktuellste Version dieser Bedienungsanleitung und Informationen zu erhältlichen Ersatzteilen finden Sie auf carrera-rc.com im Servicebereich.
2
Joystick rechts: Lenken nach Rechts
und Links mit unterschiedlichem Lenkeinschlag für präzises Lenken
• Beim Wechsel vom ersten zum zweiten Akku muss eine Fahrpause von
mindestens 10 Minuten eingehalten werden. Beim darauf folgenden Wechsel
muss unbedingt eine Ruhepause von mindestens 20 Minuten eingehalten
werden.
• Permanenten Motoreinsatz vermeiden.
• Schaltet sich das Fahrzeug mehrmals kurz hinter einander von selbst ab,
ist der Akku leer. Bitte laden Sie den Akku.
• Nach 30 Minuten Stillstand schalten sich Controller und Fahrzeug von selbst
aus. Zum erneuten Gebrauch bitte den ON/OFF Schalter an Controller & Fahr-
zeug einmal auf OFF und anschließend wieder auf ON schalten.
• Zum Ausschalten nach der Fahrt umgekehrte Reihenfolge einhalten.
• Nach der Fahrt den Akku herausnehmen bzw. abklemmen.
Laden Sie den Akku unbedingt nach Gebrauch wieder auf, um eine sog. Tie-
fenentladung des Akkus zu vermeiden.
• Lagern Sie den Akku immer außerhalb des Fahrzeuges.
• Das Carrera RC-Fahrzeug nach der Fahrt säubern.
1
Wheelyfunktion
Mit etwas Übung bringen Sie die Wheely Funktion zustande. Fahren Sie dazu schnell
rückwärts und dann sofort wieder schnell vorwärts.
Page 8

8
ALKALINE
ALKALINE
*
*
Dear customer
Congratulations on purchasing a Carrera RC model car, manufactured in accordance
with the latest technology. As it is our constant endeavour to develop and improve our
products, we reserve the right to make modifications, either of a technical nature or
with respect to features, materials, and design, at any time, and without prior notice.
For this reason, no claims will be accepted for any slight deviations in your product
from the data and illustrations contained in these instructions. These operating and
assembly instructions are an integral part of the product. Non-observance of these
operating instructions and the safety instructions they contain will render the guarantee null and void. These instructions are to be kept for future reference and in the
event that the product is passed on to a third party.
Guarantee conditions
A Carrera product is built to high technical standards and is to be treated with care.
Please ensure that you observe all the instructions contained in this guide. All components have been subjected to careful inspection (technical modifications and alterations to the model for the purpose of product improvement are reserved).
Should any faults nevertheless occur, guarantee is assumed within the scope
of the following conditions:
The guarantee covers demonstrable material or manufacturing defects that existed at
the time that the Carrera product was purchased. The guarantee period is 24 months
beginning with the date of purchase. The guarantee does not extend to wearing parts,
damage caused by improper treatment or use, or unauthorised intervention. Repair
may only be performed by Stadlbauer Marketing + Vertrieb GmbH itself or by a company it has authorised to do so. Within the scope of this guarantee, either the product
as a whole or only the defective components will be replaced or equivalent substitution performed, as deemed appropriate by Stadlbauer Marketing + Vertrieb GmbH
The guarantee does not cover transport, packaging or travel costs or any damage for
which the buyer is responsible. These costs are to be covered by the buyer. Guarantee
claims will only be accepted from the original purchaser of the Carrera product.
Guarantee claims can only be accepted when:
• The card has been filled in properly and sent in together with the defective Carrera
product and the purchase receipt/invoice/cash-register receipt.
• No unauthorised alterations have been made by the buyer to the guarantee card.
• The toy has been treated in accordance with the operating instructions and
subjected to its intended use.
• The damage/faulty operation is not due to acts of God or normal wear and tear.
Guarantee cards cannot be replaced.
Note for EU countries: Reference is hereby made to the seller’s statutory guarantee
obligation, to the extent that this guarantee obligation is not restricted by the product
guarantee.
Declaration of conformity
Stadlbauer Marketing + Vertrieb GmbH hereby declares that this model including the
controller conforms with the fundamental requirements of the following EC directives:
EC Directives 2009/48 and 2004/108/EC regarding electromagnetic compatibility and
the other relevant regulations of Directive 1999/5/EC (R&TTE).
The original declaration of conformity can be requested from carrera-rc.com.
Warning!
WARNING! This toy contains small parts which can be swallowed
and is therefore not suitable for children under 3 years of age.
WARNING! danger of pinching during operation! Remove all packaging materials and wire fastenings before handing the toy over to the child.
Please retain the packaging and address for information and in the event of any
questions.
This symbol, showing refuse bins with a cross
through them, denotes that empty batteries,
rechargeable batteries, button cells, rechargeable battery packs, equipment batteries, dis-
used electrical equipment, etc. should not be
disposed of in domestic refuse, as they are harmful to the environment and health.
Please help to preserve environment and health and talk to your children about the
correct disposal of used batteries and disused electrical equipment. Batteries and
disused electrical equipment should be handed in to the usual collection points where
they can be properly recycled. Do not mix dissimilar battery types or employ new and
used batteries together. Empty batteries should be removed from the product. Do not
attempt to recharge non-rechargeable batteries. Rechargeable batteries should only
be charged under adult super vision. Exhausted batteries are to be removed from the
toy. Rechargeable batteries should be removed from the product before charging.
Supply terminal are not to be short-circuited. Only use the batteries recommended or
equivalent types. If in regular use the charger must be examined for damage to the
cord, plug, covers and all other parts. If any signs of damage are found the charger
may only be used again after repair work has been completed.
Requirement for FCC Part 15
Warning: Changes or modifications not expressly approved by the party
responsible for compliance could void the user’s authority to operate the equipment.
Note: This equipment has been tested and found to comply with the limits for a Class
B digital device, pursuant to Part 15 of the FCC Rules. These limits are designed to
provide reasonable protection against harmful interference in a residential installation. This equipment generates, uses and can radiate radio frequency energy and, if
not installed and used in accordance with the instructions, may cause harmful interference to radio communications.
However, there is no guarantee that interference will not occur in a particular installation. If this equipment does cause harmful interference to radio or tele vision reception,
which can be determined by turning the equipment off and on, the user is encouraged
to try to correct the interference by one or more of the following measures:
• Reorient or relocate the receiving antenna.
• Increase the separation between the equipment and receiver,
• Connect the equipment into an outlet on a circuit different from that to which
the receiver is connected.
• Consult the dealer or an experienced radio/ TV technician for help.
Contents of package
1 x Battery Charger
1 x Rechargeable Battery
2x 1.5 V Mignon AA batteries
(non-rechargeable)
1 x Red Hunter
Big Mamba
1 x Controller
1 x Lanyard
* Contain s only one mo del
Battery
Charger
Page 9

1 8
9
2
3
4
7
11
13
10
> 15cm
9
10
6
5 12
GREEN = Rea dyRED = Chargi ng
A Carrera RC vehicle is a remotecontrolled model car that uses special
rechargeable batteries for this purpose.
Only original Carrera RC Li-Ion
rechargeable batteries may be used.
Rechargeable batteries are to be
removed from the toy before being
charged.
The Carrera RC vehicle is designed for
hobby use only and may only be operated on tracks and in spaces especially
intended for this purpose.
CAUTION! Do not use the Carrera RC
vehicle in road traffic.
Do not operate the car beneath overhead
high-voltage cables or broadcasting masts
or during a storm! Atmospheric disturbances can affect the operation of the
vehicle. When there a large temperature
differences between your car’s garage and
the running track, please wait until the
vehicle has had time to acclimatise. This
will help prevent condensation forming and
the possibility of malfunctions resulting.
Never operate the product on grass
surfaces. There is the risk of grass hindering the movement of the axles,
which can lead to the motor overheating. Do not use the Carrera RC vehicle
for transporting goods, persons or animals.
Never use the Carrera RC vehicle outdoors during rain or snowfall.
The car must not be run through water,
puddles and snow, and must always be
kept stored in a dry place.
Never operate the vehicle near rivers,
ponds or lakes, to avoid the risk of the
Carrera RC car falling into the water.
Avoid running on courses which are laid
exclusively with sand.
Do not expose the Carrera RC vehicle
to direct sunlight.
To avoid the electronics in the car overheating, when temperatures are above
35 °C, regular short pauses in operation
are essential.
Safety instructions
Never subject the Carrera car to repeated changes of load - that means continuously reversing it.
Avoid jumping from jumps or ramps
higher than 15 cm (0.49 ft.).
Always place the car on the floor by
hand. Never throw the car on the floor
from a standing position.
Never use strong solvents for cleaning
the car.
To avoid malfunctions to the control
system resulting in uncontrolled operation of the Carrera RC vehicle, check
that the controller batteries and the
rechargeable batteries in the vehicle
have sufficient charge. Supply terminals
are not to be short-circuited.
The Carrera RC vehicle must be
inspected before and after operation,
each time it is used, to ensure that it has
not become disassembled. Any screws
or nuts that may have become loosened
during operation must be tightened.
Page 10

10
1
3
41
2
1
ALKALINE
ALKALINE
2
2
18km/h
1
1
2
ON
ONOFF
2
CAUTION! This vehicle reaches
speeds up to 18 km/h (13 mph). Prac-
tice on an empty sur face at least 2.5
metres (8.2’) square. When operating
the model for the first time, be careful with the accelerator, as the car
reacts very sensitively. You should
practice slow running for at least two or
three full battery charges before going
on to faster manoeuvres.
Let’s practise!
Now it’s time to practise! Set up a Carrera RC vehicle racing track in a large
empty area, using cornerposts, empty
cans, or similar objects. The basic technique to adopt when operating a Carrera
RC is to drive fast on the straight sections and to slow down in the curves.
Always recharge the battery immediately after use to prevent its becoming deep
discharged. Recharge the battery occasionally (suggested every 2-3 months).
Failure to treat the battery as described above can lead to its becoming defective
.
Rechargeable batteries are only to be charged under adult supervision! Rechargeable batteries are only to be charged by adults or by children at least 8 years old.
GREEN = Rea dyRED = Chargi ng
Now you can drive the car
Installing the rechargeable battery
Inserting the batteries
Using a screwdriver, remove the cover of the
battery compartment in the Carrera RC car.
Connect the end of the cable from the
Carrera RC vehicle with the charged battery.
Put the battery in place.
Replace the compartment cover using
a screwdriver.
Open the battery compartment with a
screwdriver and insert the batteries in
the remote control. Please keep in mind
the correct polarity. Different types of batteries or new and used batteries are not to be
mixed. After having closed the compartment
you can check all functions of the remote
control with the help of the power-switch on
the front.
With the power-switch turned ON and
proper functioning, the top center LED
on the remote control will light up red.
First connect the Carrera RC rechargeable
battery to the battery charger supplied. The
connection terminals between the battery
and the charger are designed to prevent
connection with the wrong polarit y. Connect
the charger to a power source.
When the battery is properly connected and
charging normally, the red LED is constantly
lit. Once the battery is fully charged, the red
LED switches to green.
The battery can now be disconnected and
installed in the Carrera RC car.
The car is now ready for use.
After use, the battery must be allowed to cool
down for at least 20 minutes before it can be
fully recharged. Failure to observe this
pause may damage the battery.
Charging the rechargeable battery
The Carrera RC car and the remote
control are bound as a factory setting.
2. Switch on the controller. The LED on
top of the controller will flash rhythmically.
After a few seconds, the LEDs on the
car and on the controller will light continuously, meaning the bind has been
made.
Adjusting the steering
If the Carrera RC vehicle is found to pull
towards the left or right while moving,
use the adjuster control shown in the
illustration to adjust the car’s track precision.
1. Switch the car ON at the ON/OFF
switch. The LED on top of the car will
flash rhythmically.
Page 11

3
4
5
11
1
2 1
Wheelyfunktion
For the latest version of these operating instructions and information on replacement and spare parts available, please visit carrera-rc.com in the service area.
Right joystick: steering right and left
with variable lock for precise steering
Controller functions
SERVO TRONIC
You can use the joysticks to carry out
precise steering and driving manoeuvres.
Left joystick: forwards and backwards
at different speeds
Troubleshooting
Errors and ch anges excepted
Colour s / final desi gn – chang es excepted
Technical chang es and design-r elated chang es excepted
Pictogr ams = symbolic photo s
Problem Cause Solution
Car does not move
Either the switch on the controller or the car is set to OFF. Switch on.
There is no rechargeable battery in the car or the battery is too weak. Insert charged battery.
The car has come to a stop at an obstacle.
The voltage surge protector has switched the car off.
Turn the ON/OFF switch on the car to OFF, then back to ON, and
place the car on a clear surface.
The battery or rechargeable battery in the transmitter or model is too
weak.
Insert new battery or recharged battery.
The remote control is possibly not correctly frequency bound with the
receiver on the model
Carry out a frequency bind between the model and the remote control
as described in “Now you can drive the car ”
The transmitter has switched itself off after 30 minutes.
To restart, switch the ON/OFF switch on both controller & vehicle to
OFF and then back to ON..
The vehicle is very warm.
Switch both car and controller off and allow the car to cool down for
about 30 minutes.
The overheat protection has caused the car’s motor to cut out due to
excess temperature.
Switch off the receiver.
Leave the RC car to cool down for approx. 30 minutes.
Car cannot be controlled
Vehicle starts moving unintentionally. First turn on the transmitter, only then the vehicle.
• When changing from the first battery to the second battery, you must stop run-
ning for at least ten minutes. At the next change, a pause of at least 20 minutes
is absolutely essential.
•
Avoid constant motor operation.
•
If the car switches itself off several times one after another, the battery is dead.
Please recharge the battery.
•
After 30 minutes inactivity, the controller and vehicle switch off automatically.
To restart, switch the ON/OFF switch on the controller & the car to OFF and
then back to ON.
•
To switch off after use, follow the steps in the reverse order.
• After use, remove or disconnect the battery. Always recharge the battery
immediately after use to prevent its becoming deep discharged.
• Always keep the rechargeable battery stored outside the vehicle.
•
Clean the Carrera RC car after use.
With a little bit of practice, you can carry out the wheelie function. Drive fast in reverse
for this, and then immediately switch over to fast forwards.
Wheely function
Attach the lanyard to the eyelet on the
controller and let the controller hang
from your neck.
CAUTION! Danger of strangulation!
The joysticks are removable.
Alternatively, the vehicle can be
controlled with a rocker.
The joysticks can be stored in the special compartment at the back of the
controller.
Page 12

12
ALKALINE
ALKALINE
*
*
* Contien t un seul mod èle
Chère cliente ! Cher client !
Félicitations pour l’achat de votre véhicule radiocommandé Carrera RC fabriqué selon
des critères récents des plus exigeants. Nous avons toujours pour ambition d’améliorer et de perfectionner nos produits et nous réser vons la possibilité de réaliser des
modifications techniques relatives à la présentation et design de nos produits. Les
divergences de faible importance du produit, que vous avez acheté, par rapport aux
données et illustrations de ces instructions de montage et d’utilisation ne sauraient
donner lieu à des réclamations de ce fait. Ces instructions de montage et d’utilisation
forment partie intégrale du produit. Le fabricant décline toute responsabilité en cas
d’inobservation des instructions de montage et d’utilisation et des consignes de sécurité y figurant. Veuillez conserver ces instructions de montage et d’utilisation, afin que
vous puissiez les consulter ultérieurement et et les remettre à tout utilisateur de ce
véhicule si besoin est.
Conditions de garantie
Les produits Carrera sont des jouets d’une technique haut de gamme, qu’il est toujours recommandé de traiter avec soin. Respectez impérativement les informations
contenues dans les instructions d’utilisation. Tous les éléments sont soumis à des
contrôles approfondis (sous réserve de modifications techniques et des véhicules
destinées au perfectionnement du produit).
La responsabilité du fabricant est cependant engagée aux termes des conditions de garantie ci-après à supposer que le produit présente des défauts :
La garantie s’applique aux défauts matériels ou de fabrication effectivement existants
au moment de l’achat du produit Carrera. La garantie du fabricant s’élève à 24 mois à
partir de la date d’achat. Le recours à la garantie du fabricant est exclue pour les
pièces d’usure, les dommages causés par un traitement / une utilisation non conforme
à l’usage prévu ou les interventions de tiers. La réparation demeure réservée au
domaine de compétence de la société Stadlbauer Marketing + Vertrieb GmbH ou
d’une entreprise dûment autorisée par cette dernière. Dans le cadre de cette garantie,
la société Stadlbauer Marketing + Vertrieb GmbH décide au choix du remplacement
du produit Carrera complet ou des éléments défectueux ou du remplacement par un
produit équivalent. La garantie ne s’applique pas aux frais de transport, d’emballage
et de voyage, de même qu’aux dommages découlant de la responsabilité de l’acheteur. Ceux-ci sont à la charge de l’acheteur. Le recours à la garantie est exclusivement
réservé au premier acheteur du produit Carrera.
Le recours à la garantie du fabricant est uniquement possible si
• le produit Carrera défectueux est envoyé avec la carte de garantie dûment remplie
et le reçu / la facture / le ticket de caisse respectif.
• l’acheteur n’a effectué aucune modification sur la carte de garantie.
• le jouet a été traité dans le respect des instructions de montage et d’utilisation et
utilisé de manière conforme à l’usage prévu.
• les dommages / dysfonctionnements n’ont pas été causés par une force majeure ou
une usure liée à l’utilisation du produit.
Les cartes de garantie ne sont pas remplaçables.
Avis destinés aux États de l’Union européenne : nous attirons l’attention sur l’obli-
gation de garantie légale du vendeur, pour autant que cette obligation de garantie ne
soit pas restreinte par les conditions de la présente garantie.
Déclaration de conformité
Par la présente la société Stadlbauer Marketing + Vertrieb GmbH déclare que ce
modèle y compris le contrôleur est conforme aux exigences essentielles des directives européennes suivantes : Directives européennes 2009/48 et 2004/108/CE relatives à la comptabilité électromagnétique et aux autres prescriptions importantes de la
Directive 1999/5/CE (R&TTE (pour Radio & Telecommunication Terminal Equipment
= Directive concernant les équipements hertziens et les équipements terminaux de
télécommunications)). L’original de la déclaration de conformité est à votre disposition
sur le site internet
carrera-rc.com
.
Avertissements !
ATTENTION! Ce jouet n’est pas approprié aux enfants de moins de
3 ans en raison de petites pièces avalables. ATTENTION ! Danger
d’écrase ment en cours de fonctionnement ! Supprimez tous les
matériaux d’emballage et fils de fixation avant de remettre ce jouet à l’enfant.
Veuillez conserver le conditionnement et l’adresse pour votre information et
d’éventuelles questions.
Le pictogramme ci-contre des poubelles sur
roues barrées est destiné à attirer votre attention sur le fait qu’il est interdit de jeter les piles,
accumulateurs, piles rondes, packs d’accus,
batteries d’appareils, appareils électriques
usagés etc. dans les ordures ménagères, étant donné que ces produits nuisent à
l’environnement et à la santé. Veuillez nous aider à sauvegarder l’environnement et la
santé et attirez aussi l’attention de vos enfants sur une élimination correcte des batteries, piles et appareils électriques usagés. Remettez les batteries, piles et appareils
électriques usagés aux postes de collecte respectifs. Ces postes veilleront à leur
recyclage aux termes des réglementations en vigueur.
Il est strictement interdit d’utiliser des types différents de batteries ou des piles neuves
avec des piles usagées. Retirez toujours les batteries et piles vides du jouet. Ne
jamais recharger des piles, non rechargeables. Le chargement des accumulateurs
doit impérativement se faire sous la surveillance des adultes. Retirez les accumulateurs du jouet avant de les recharger. Il est interdit de court-circuiter les bornes de
raccordement. Servez-vous exclusivement du type de pile ou d’accumulateur recommandé ou d’un type de pile ou d’accumulateur équivalent.
En cas d’emploi régulier du chargeur, il faut contrôler le câble, le raccord, les couvercles et les autres pièces de ce chargeur. En cas de dommage, le chargeur ne doit
être remis en service qu’après avoir subi une réparation.
Fournitures
1 x Red Hunter
Big Mamba
1 x Contrôleur
1 x Cordon tour de cou
1 x Chargeur
1 x Accu
2 x accus 1, 5V mignon AA
(non rechargeable)
ALKALINE
*
Page 13

1 8
13
2
3
4
7
11
13
10
> 15cm
9
10
6
5 12
VERT = prêtROUGE = char ger
Ne soumettez jamais la voiture Carrera
RC à des changements de charge
répétés, c.-à- d. à des inversions permanentes.
Consignes de sécurité
Votre véhicule radiocommandé Carrera
RC a été conçu pour ne fonctionner
qu’avec les batteries Lithiums-ions
livrées avec le véhicule. Ne pas utiliser
d’autres types de batterie.
Retirez la batterie du véhicule avant de
la charger.
Le véhicule Carrera RC est exclusivement destiné à un usage loisir et son
utilisation est limitée aux voies et lieux
prévus à cet usage.
ATTENTION !!! Il est strictement interdit d’utiliser un véhicule Carrera RC sur
une voie destinée à la circulation routière.
Ne vous servez pas du véhicule sous des
lignes à haute tension ou des pylônesantennes ou lors d’un orage ! Les perturba-
tions atmosphériques risquent de provoquer
des dysfonctionnements. Si les différences
de température entre l’entrepôt et le lieu de
fonctionnement sont grandes, attendez
jusqu’à ce que le véhicule se soit acclimaté
afin d’éviter la formation d’eau de condensation et les dysfonctions en résultant.
L’utilisation du véhicule est interdite sur
pelouse et gazon. L’herbe pouvant s’enrouler autour des axes des roues
empêchant leur bon fonctionnement et
entrainant une surchauffe du moteur. Il
est interdit de transporter des marchandises, personnes ou des animaux avec
un véhicule Carrera RC.
Ne vous servez jamais du véhicule
Carrera RC en plein air en cas de pluie
ou de neige.
Le véhicule ne doit pas rouler dans de
l’eau, des flaques d’eau ou de la neige
et doit être entreposé au sec.
Ne vous servez jamais du véhicule à
proximité directe des rivières, fleuves,
étangs ou lacs afin que le Carrera RC ne
risque pas de tomber dans l’eau. Évitez
de rouler sur des parcours qui sont
exclusivement en sable.
N’exposez pas le véhicule Carrera RC
directement aux rayons du soleil.
Pour éviter la surchauffe de l’électronique dans le véhicule, il faut intercaler
régulièrement de courtes pauses lorsque la température extérieure est supérieure à 35 °C.
Évitez les sauts de tremplins ou de
rampes à des hauteurs supérieures à
15 cm.
Déposez toujours le véhicule sur le sol
avec les mains. Ne jetez jamais le véhicule au pied levé sur le sol.
Ne vous servez jamais de solvants
agressifs pour le nettoyage de votre
maquette.
Controlez la charge de la batterie du
véhicule et de la pile de la télécommande afin d’éviter tout dysfonctionnement pouvant entrainés des déplacements incontrolés du véhicule.
Ne mettez jamais les chargeurs et les
blocs d‘alimentation en court-circuit.
Contrôlez le montage correct du
véhicule Carrera RC avant et après
chaque course et resserrez les vis et
écrous si besoin est.
Page 14

14
1
3
41
2
1
ALKALINE
ALKALINE
2
2
18km/h
1
1
2
ON
ONOFF
2
Attention, ce véhicule atteint des
vitesses de 18km/h maximum.
Veuillez vous exercer sur une sur face
vide d‘une superficie minimum de 2,5 x
2,5 mètres. Utilisez le levier d’accélé-
ration avec beaucoup de précaution
la première fois, car le véhicule réagit
avec sensibilité. Entraînez-vous en
conduisant d’abord lentement au moins
pendant 2 à 3 charges de batterie, avant
de passer aux manœuvres plus rapides.
Construisez un circuit pour votre véhicule Carrera RC sur un grand espace
libre en vous servant d’objets de délimitation des virages ou de boîtes vides etc.
La technique fondamentale pour
conduire un véhicule Carrera RC
consiste à accélérer sur les droites et à
freiner dans les virages.
Entraînons-nous !
Rechargez votre accu après utilisation afin d‘éviter une décharge profonde de celuici. Chargez votre accu de temps en temps (environ tous les 2 à 3 mois).
La non-observation de l‘utilisation mentionnée précédemment peut provoquer une
détérioration de l‘accu. Le chargement de la batterie doit être effectué sous la
surveillance d‘un adulte ! Les piles doivent être chargées uniquement par des adultes ou des enfants de 8 ans ou plus.
Insertion des piles
Insertion de la batterie
Servez-vous d’un tournevis pour retirer le
couvercle du compartiment de la batterie du
véhicule Carrera RC.
Branchez le câble du véhicule à la batterie.
Insérez la batterie dans son compartiment
avant de remettre le couvercle et de la visser
à l’aide d’un tournevis.
La course peut démarrer maintenantChargement de la batterie
VERT = prêtROUGE = char ger
Reliez dans un premier temps la batterie
Carrera RC au chargeur fourni. La prise de
raccordement entre la batterie et le chargeur
a été conçue de sorte à éviter toute inversion
de polarité. Raccordez ensuite le chargeur à
une prise de courant.
Le voyant à LED s’allumera en rouge dès
lors que le branchement a été réalisé
correctement et que la charge s’effectue
correctement. Le voyant passe au vert dès la
charge maximale atteinte. Débranchez la
batterie et installez-la dans votre véhicule
Carrera RC. L’accu doit se refroidir après
emploi durant 20 minutes au moins avant de
pouvoir être rechargé complètement. Le
non-respect de cette pause peut entraîner la
défaillance de l’accu.
Ouvrir le compartiment à accu avec un tournevis et insérer les accus dans le contrôleur.
Respecter la bonne polarité. N‘utilisez
jamais de piles de différents fabricants ou de
piles usagées et neuves ensemble. Après la
fermeture du compartiment, vous pouvez
vérifier la fonctionnalité du contrôleur à l’aide
du commutateur puissance sur le devant. En
position ON du commutateur puissance et si
le fonctionnement est correct, la DEL devrait
s’allumer en rouge en haut au milieu du
contrôleur.
Le véhicule Carrera RC et le contrôleur
sont reliés en usine.
1. Allumez le véhicule sur le commutateur ON/OFF. La DEL sur le haut du
véhicule clignote régulièrement.
2. Allumez le contrôleur. La DEL du
contrôleur clignote régulièrement.
Après quelques secondes, les DEL du
véhicule et du contrôleur restent allumées. La liaison est établie.
Ajustage de la direction
Si le véhicule a tendance a tiré à gauche
ou a droite, vous pouvez
corriger ce défaut grâce à la pièce de
réglage situé en dessous du véhicule
(cf dessin)
Page 15

3
4
5
15
1
2 1
Wheelyfunktion
Vous trouverez la version la plus actuelle de ce mode d‘emploi et les informations sur les pièces de rechange disponibles sur carrera-rc.com dans la zone de service.
Sous réser ve d´erreur s et de modi fications
Couleu rs / desig n final – sous rés erve de modificat ions
Sous réser ve de modificati ons techniques et rel atives au design
Pictogr ammes = photos symbo liques
Problème Cause Remède
Le véhicule
ne roule pas
L’interrupteur de la télécommande ou du véhicule sont en position « OFF »
Mettre en position « ON »
Batterie faible ou absence de batterie dans le véhicule Insérer une batterie chargée
La voiture s’est immobilisée devant un obstacle.
Le coupe-circuit de surtension a débranché la voiture.
Commuter le commutateur ON/OFF sur le véhicule une fois sur OFF,
puis à nouveau sur ON et le placer sur une surface libre.
Batterie ou pile trop faible dans le véhicule ou la télécommande Insérez une batterie ou une pile neuve
Le contrôleur n’est éventuellement pas relié correctement au
récepteur du modèle
Etablissez une liaison, tel qu’il est décrit sous « La course peut
démarrer maintenant » entre le modèle et le contrôleur.
L’émetteur s’est débranché de soi-même après 30 minutes.
Pour l’utiliser à nouveau, brancher le commutateur ON/OFF sur le
contrôleur et le véhicule une fois sur OFF et ensuite à nouveau sur ON.
Le véhicule est très chaud.
Débrancher le véhicule et le contrôleur et laisser refroidir le véhicule
durant 30 minutes env.
Le système de sécurité lié à une surchauffe c’est enclenché
Mettre en position « OFF »
Laissez refroidir le véhicule 30 minutes environ
Contrôle du véhicule
Le véhicule démarre intempestivement. Enclencher tout d‘abord l‘émetteur puis le véhicule.
Solutions aux problèmes
Fonctions de la télécommande
• Lors du changement de la première à la deuxième batterie, observer un arrêt de
conduite d‘au moins 10 minutes. Lors du changement suivant, observer impérativement un arrêt de conduite d‘au moins 20 minutes.
• Évitez toute mise en action ininterrompue du moteur.
• Si le véhicule se débranche plusieurs fois à brefs intervalles de soi-même, ceci
signifie que l’accu est vide. Chargez l’accu.
• Après un temps d’arrêt de 30 minutes, le contrôleur et le véhicule se débranchent
automatiquement. Pour les utiliser à nouveau, brancher le commutateur ON/OFF
sur le contrôleur et le véhicule une fois sur OFF et ensuite à nouveau sur ON.
• Mettez le véhicule hors circuit dans le sens inverse de la mise en circuit après la
course.
• Retirez l’accu après la course ou déconnectez-le.
Rechargez votre accu après utilisation afin d‘éviter une décharge profonde de
celui- ci.
• Veuillez toujours conserver la batterie à l’extérieur du véhicule.
• Nettoyez le véhicule Carrera RC après la course.
Fonction Wheely
Avec un peu d‘exercice, vous réussirez à réaliser la fonction Wheely. Pour cela, faites
marche arrière rapidement puis commutez aussitôt après dans la marche avant.
Levier de commande de droite : pilotage vers la droite et la gauche à des
angles de braquage divers pour une
conduite précise
SERVO TRONIC
Avec les leviers de commande, vous
pouvez effectuer des manœuvres de
direction et de conduite précises.
Levier de commande de gauche :
marche avant et marche arrière à
diverses vitesses
Fixer le mousqueton du cordon à
l’anneau de la télécommande et
suspendez le autour du cou.
Attention ! Danger d’étranglement !
Les joysticks de la télécommande sont
amovibles. Les commandes sont alors
identiques à une télécommandes traditionelles.
Vous pouvez ranger les joysticks dans
le compartiment prévu à cet effet dans
le dos des poignées de la télécommande.
 Loading...