

CARPOD M2205 Assembly And Operating Instructions Manual

. Make sure all hardware connections are secure before each use.
. Never exceed receiver hitch manufacturer’s tongue weight rating.
. Do NOT allow exhaust fumes to blow on loaded cargo – It’s a re
hazard.
. Never exceed maximum static BASE LOAD capacity of 450 Lbs.
(evenly distributed).
. Do NOT transport ammable items such as gas, propane, etc.
. Carpod is not intended for transporting humans or live stock.
. Never exceed maximum SIDEWALL pressure load of 150 Lbs. (evenly
distributed).
. Never load cargo on top of the sidewalls in folded position.
. Bouncing or rapid stopping of the vehicle will increase the load
weight and may reduce rated capacity substantially.
. Accessory tail light kit must be used if Cargo Carrier covers vehicle
taillights.
. When erecting/opening sidewalls DO NOT release them to free-fall.
. CARPOD Inc. will NOT be responsible for any damage if warnings
have not been heeded.
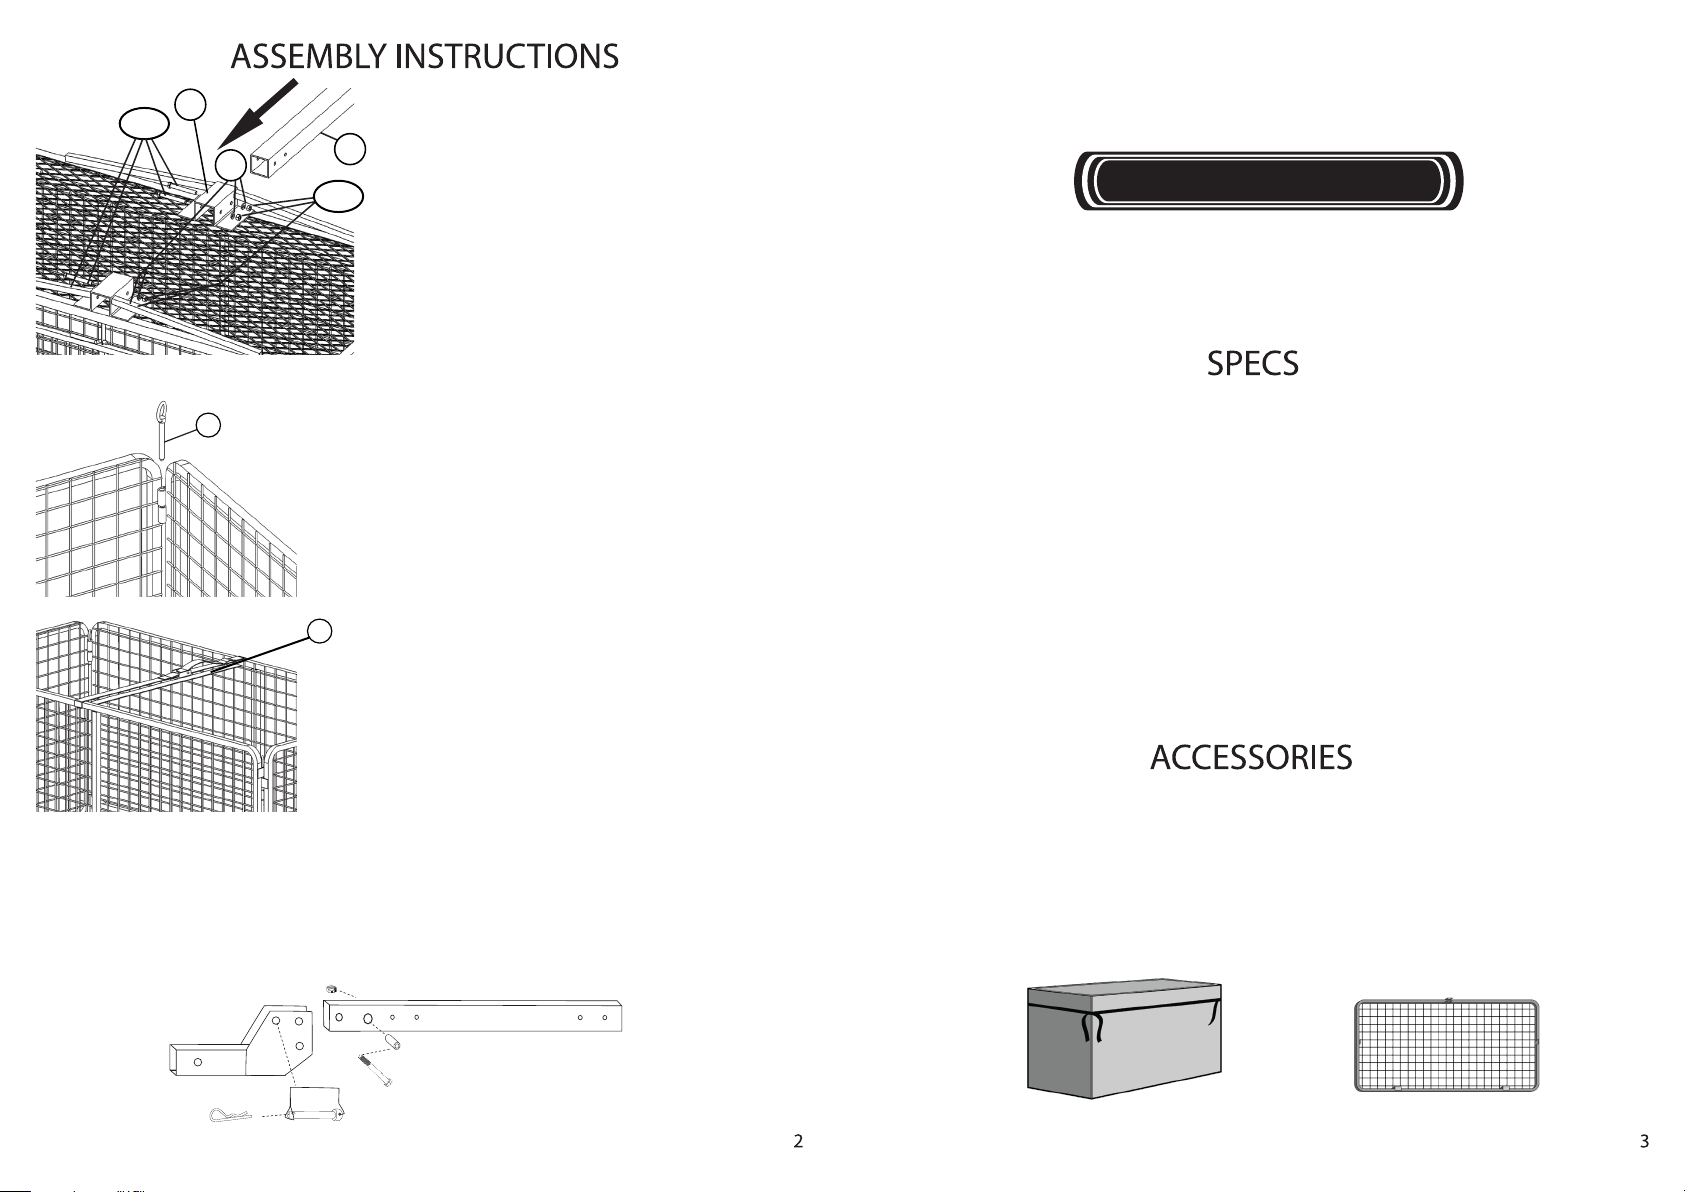
ASSEMBLY AND OPERATING INSTRUCTIONS
Patent No.: US 8,061,571
(H)
Receiver Bar
qty-1
HARDWARE LIST
A1 and A2 : A1 Hex Nylon Lock Nut qty 4 - A2 qty 1
B: Lock Washer qty-4
C1 and C2: C1 Hex Bolt qty 4 - C2 qty 1
D: Cotterless Pin qty 4
E: Top Belt qty-1
F: Hairpin Cotter qty-1
G: Assembly Pin qty-1
H: Sleeve qty-1
4
Item# M2205
1
C1 qty4
I
1) Rotate the receiver bar so that the short end is
H
B
facing away from the top of the basket. Insert the
Receiver Bar (H) into the carrier’s Angle Plate (I)
A1 qty4
from the opposite end of the CARPOD® sticker.
2) Align the carrier Angle Plate holes with the
Receiver Bar holes.
3) Insert the four Hex Bolts (C1) through the carrier
Angle Plate and the Receiver Bar.
4) Slide the Lock washer (B) over the Hex Bolt.
IMPORTANT NOTICE
If exhaust heat blows directly onto cargo, position load away from it. Be aware of the
possible risk of re and damage to property resulting from the vehicle’s exhaust pipe
pointing at the cargo. Flammable cargo can ignite from exposure to heat. Always be aware
of this potential danger, and never use the Cargo Carrier if this risk exists. An extension or
lift kit may be required.
5) Place the Hex Nylon Lock Nut (A1) on Hex Bolts
(C1) and tighten.
Open position 22” H, 48 3/4“ W, 24” D ... Folds to a height of 5 1/4”... Weight 52 Lbs
D
1) One by one open sidewalls to a vertical or open
Maximum Base Load Capacity 450 Lbs ... Cargo Capacity 13 1/4 cubic feet
position.
2) Insert all four Cotterless Pins (D) into corner
hinges.
4) When closing the sidewalls reverse the opening
process.
CAUTION: When opening or closing sidewalls DO
NOT release them to free-fall.
E
Wrap the Top Belt (E) around the top center part of
the two large sidewalls and tighten slightly until
Carpod Inc. Warrants all parts of Carpod® Cargo Carrier product to be free from defects in material
and workmanship for a period of 90 days from date of purchase. Within this period, Carpod Inc.
shall correct any defect by repairing or replacing any defective parts of the equipment, or making
available parts thereof, FOB Los Angles, CA. Carpod Inc. has the sole responsibility to verify and
conrm if a part is defective. Carpod Inc. shall not be obligated to repair or replace equipment
which has been repaired by others, abused, altered or misused. We further state that we shall not
be held liable for any losses due to neglectful use on the part of the operator. Upon expiration of
such warranty, all liability shall terminate. No other warranties are expressed or implied. NOTE:
Paint nish will scratch and chip under normal use, and therefore will not be covered under the
warranty policy.
WARRANTY
snug.
Assemble folding shank using Hex bolt (C2) qty 1 and Hex Lock Nut (A2) Assembly Pin (G) and Hairpin Cotter (F) Sleeve (H)
Tighten hex bolt to 75 LB-FT if shank is not moveing freely, slightly loosen hex
locknut
Cargo Bag
Item Number:
M2202
Sold Separately
Lockable Top Lid
Item Number:
M2201
 Loading...