

Page 1
Experiment Manual
Page 2
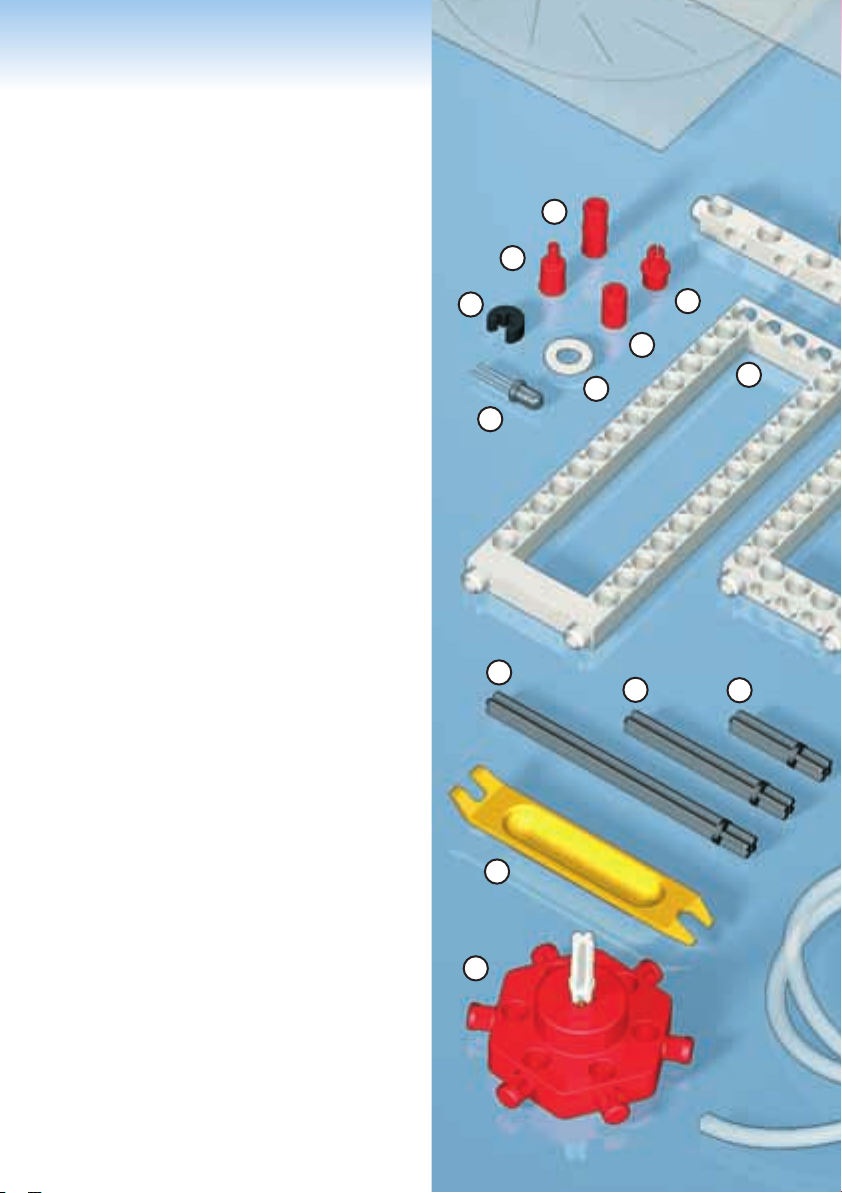
Kit Contents
2
No. Name Quantity Part No.
1 Joint pin 1 702524
2 Shaft plugs 2 705525
3 Shaft pin 1 702526
4 Anchor pins 26 702527
5 Axle locks 5 702813
6 Washers 6 703242
7 LED, red 1 704072
8 3-hole rods 2 705015
9 5-hole rods 4 704063
10 Short rod 1 703233
11 Long rods 4 703235
12 5-hole frames 2 705016
13 Small frames 2 703232
14 Large frames 2 703239
15 Small gear
wheels (20 teeth) 3 702504
16 Large gear
wheels (60 teeth) 5 702506
17 Short axle 1 703236
18 Medium axle 1 703238
19 Long axles 2 703234
20 Anchor pin lever 1 702590
21 Universal adapter
w/ motor and axle 1 704068
22 Tubing,
2.5 mm ID by 120 cm 1 707144
23 Red straw, 2 mm OD 1 703513
24 Tubing,
2 mm ID by 5 cm 1 707142
25 Plastic sheet 1 707141
26 Experiment book 1 707131
1
3
5
2
4
6
14
7
19
18
17
20
21
Additional items needed: scissors, tape, large
shallow basin, pitcher or watering can, two plastic
bottles (1 L water or soda bottles), drinking glass,
plate, and towels.
We reserve the right to make technical changes.
Page 3

Table of Contents
3
A Word to Parents .............inside front cover
25
8
9
10
11
13
12
Safety Information .............inside front cover
Kit Contents ............................... 3
The Story of Hydropower .................... 4
Your First Water Wheel ...................... 6
Hydropower Sawmill ........................ 8
The Surface Tension of Water ............... 13
Water Column ............................ 14
Water Tower ............................. 15
Communicating Vessels . . . . . . . . . . . . . . . . . . . . . 17
Fountain ................................. 18
Hammer Mill .............................. 21
From Water to Electricity .................... 26
Water Wheel with Generator ................ 27
Power from the Sea ........................ 32
Hydropower Quiz ....................back cover
Building Projects
Water Wheel .............................. 6
Sawmill ................................... 8
Water Tower .............................. 15
Fountain ................................. 18
Hammer Mill .............................. 21
Water Wheel with Generator ................ 27
15
16
Universal adapter
(21) with LED (7):
Attach the LED to the
connection socket of
the universal adapter
with the two wires.
The anchor pin lever (20)
is for removing anchor
23
pins (4).
22
24
Page 4

Hydropower Sawmill
02
8
Workshop
Sawmill
You will need:
1 water inlet (plastic sheet)
2 water wheel disks (plastic sheet)
12 water wheel paddles (plastic sheet)
1 plastic strip to make a ring (plastic sheet)
4 large gear wheels (16)
3 small gear wheels (15)
1 long axle (19)
1 medium axle (18)
2 large frames (14)
2 small frames (13)
1 short rod (10)
4 long rods (11)
4 5-hole rods (9)
2 3-hole rods (8)
1 washer (6)
2 shaft plugs (2)
1 shaft pin (3)
1 joint pin (1)
19 anchor pins (4)
Tape
Separate the water inlet
section from the plastic sheet.
Form a chute out of the
flat plastic section.
Tape
Use tape to secure the two flaps on the long
edge to the sides of the chute, and to secure
the two flaps on the narrow edge to each
other, as shown here.
Tape
Page 5

You can pull the
9
b
assembled water
wheel off the axle
and stick it back
on again. You
may have
to do this if
the paddle
direction is
wrong.
When removing the water wheel, press the two
gear wheels tightly together so that the paddles
don’t fall out. Then carefully remove the axle.
Be careful not to twist the water wheel disks and
gears, or to crush them.
If the water wheel falls apart, you will have to
reassemble it with the instructions on page 6.
b
 Loading...