

Carlisle XT1400 Installation Manual
INSTRUCTIONS FOR CATERAIDE™
SLIDE 'N SEAL™ INSULATED FOOD PAN CARRIERS
Worldwide Headquarters:
P.O. Box 53006
Oklahoma City, Oklahoma 73152-3006
(405) 475-5600 • FAX (405) 475-5607
1-800-654-8210
www.carlislefsp.com
European Distribution Center:
Edisonstraat 84, P.O. Box 110
6900 AC Zevenaar, The Netherlands
Tel +31/(0)316-596550 • Telex 45642
FAX +31/(0)316-340168
#104803350
OPENING AND CLOSING INSTRUCTIONS FOR MODELS
XT1400, XT1600 AND XT1800
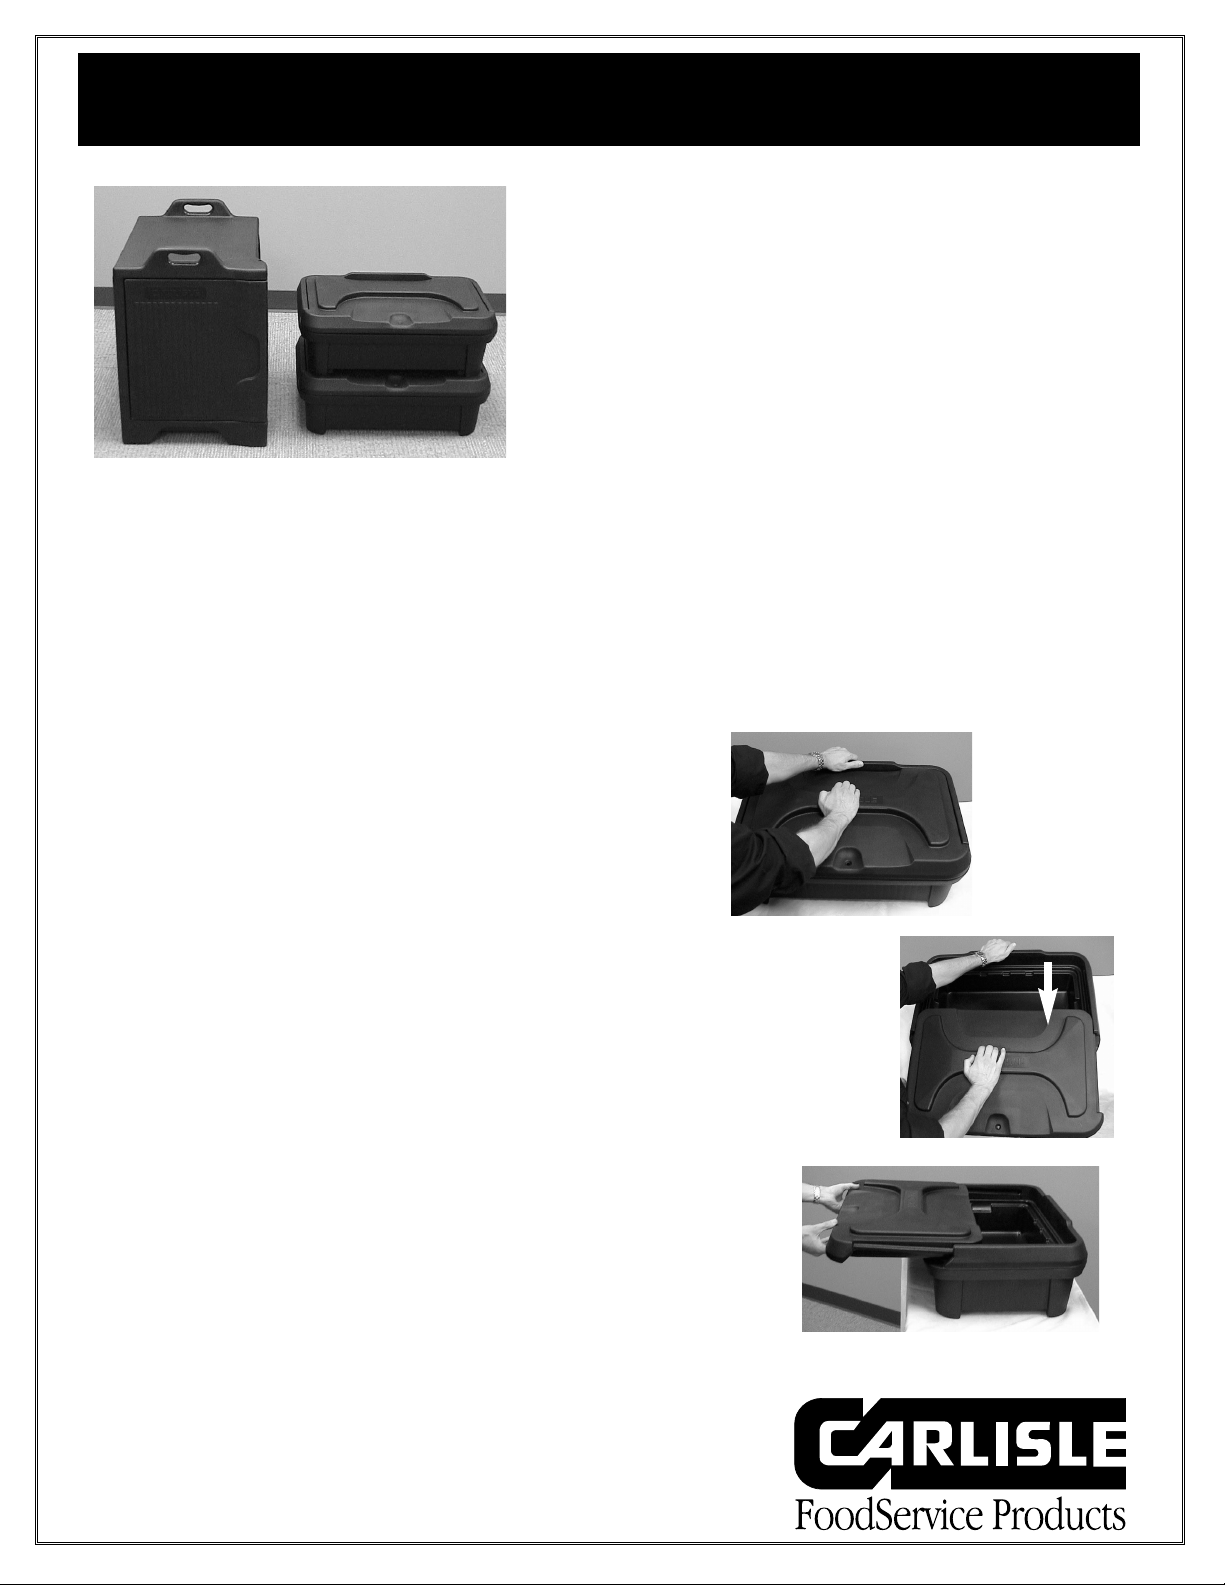
To Remove Lid and/or Open Unit:
1. Place one hand firmly on the back ledge of the unit (Photo A).
With other hand placed on the CARLISLE handle in the middle
of the lid, pull handle firmly towards you.
2. Continue pulling lid towards your body until it slides completely
away from the base unit (Photo B).
To Replace Lid and/or Close Unit:
1. Place lid at front opening of unit, lining up outer front edge with
the recessed track on base unit (Photo C).
2. Place one hand firmly on the back ledge of unit, and the other hand
placed on the CARLISLE handle in the middle.
3. Push lid firmly back away from your body, until lid is firmly locked
into position. A firm snap closure should be heard.
PRODUCT NUMBERS: XT1400, XT1600, XT1800 and XT3000
Photo A
Photo B
Photo C
Proper Use of Your Cateraide™ Slide 'N Seal™
Insulated Food Pan Carrier Product
1. Wash, rinse and dry the unit prior to its use.
2. Pre-heating interior with hot water will improve heat retention.
3. Pre-chilling entire unit will improve cold retention.
4. Load container to its maximum capacity. Replace lid/door and
lock into position.
5. See opening and closing instructions, below.
See back page for XT3000 operating instructions and general care instructions for all models.
ZIP TIES USAGE FOR ALL MODELS
Zip ties are recommended for added security during transport of your catered food items.
On all models, thread the tapered zip tie end through the molded tag hole on the front of the pan carrier unit. Put
pointed zip tie end through the locking mechanism at other end of zip tie and pull until securely fastened into place.
When unit is ready to open, cut or break open the zip tie seal with scissors or cutting instrument. The zip ties can be
used for date, job or content identification. Trial samples have been provided for your convenience with the purchase
of your new Carlisle insulated pan carrier. Replacement zip tie parts can be ordered from Carlisle FoodService
Products or your preferred FoodService supplier.
INSTRUCTIONS FOR FOOD PAN CARRIERS
Worldwide Headquarters:
P.O. Box 53006
Oklahoma City, Oklahoma 73152-3006
(405) 475-5600 • FAX (405) 475-5607
1-800-654-8210
www.carlislefsp.com
European Distribution Center:
Edisonstraat 84, P.O. Box 110
6900 AC Zevenaar, The Netherlands
Tel +31/(0)316-596550 • Telex 45642
FAX +31/(0)316-340168
#104803350
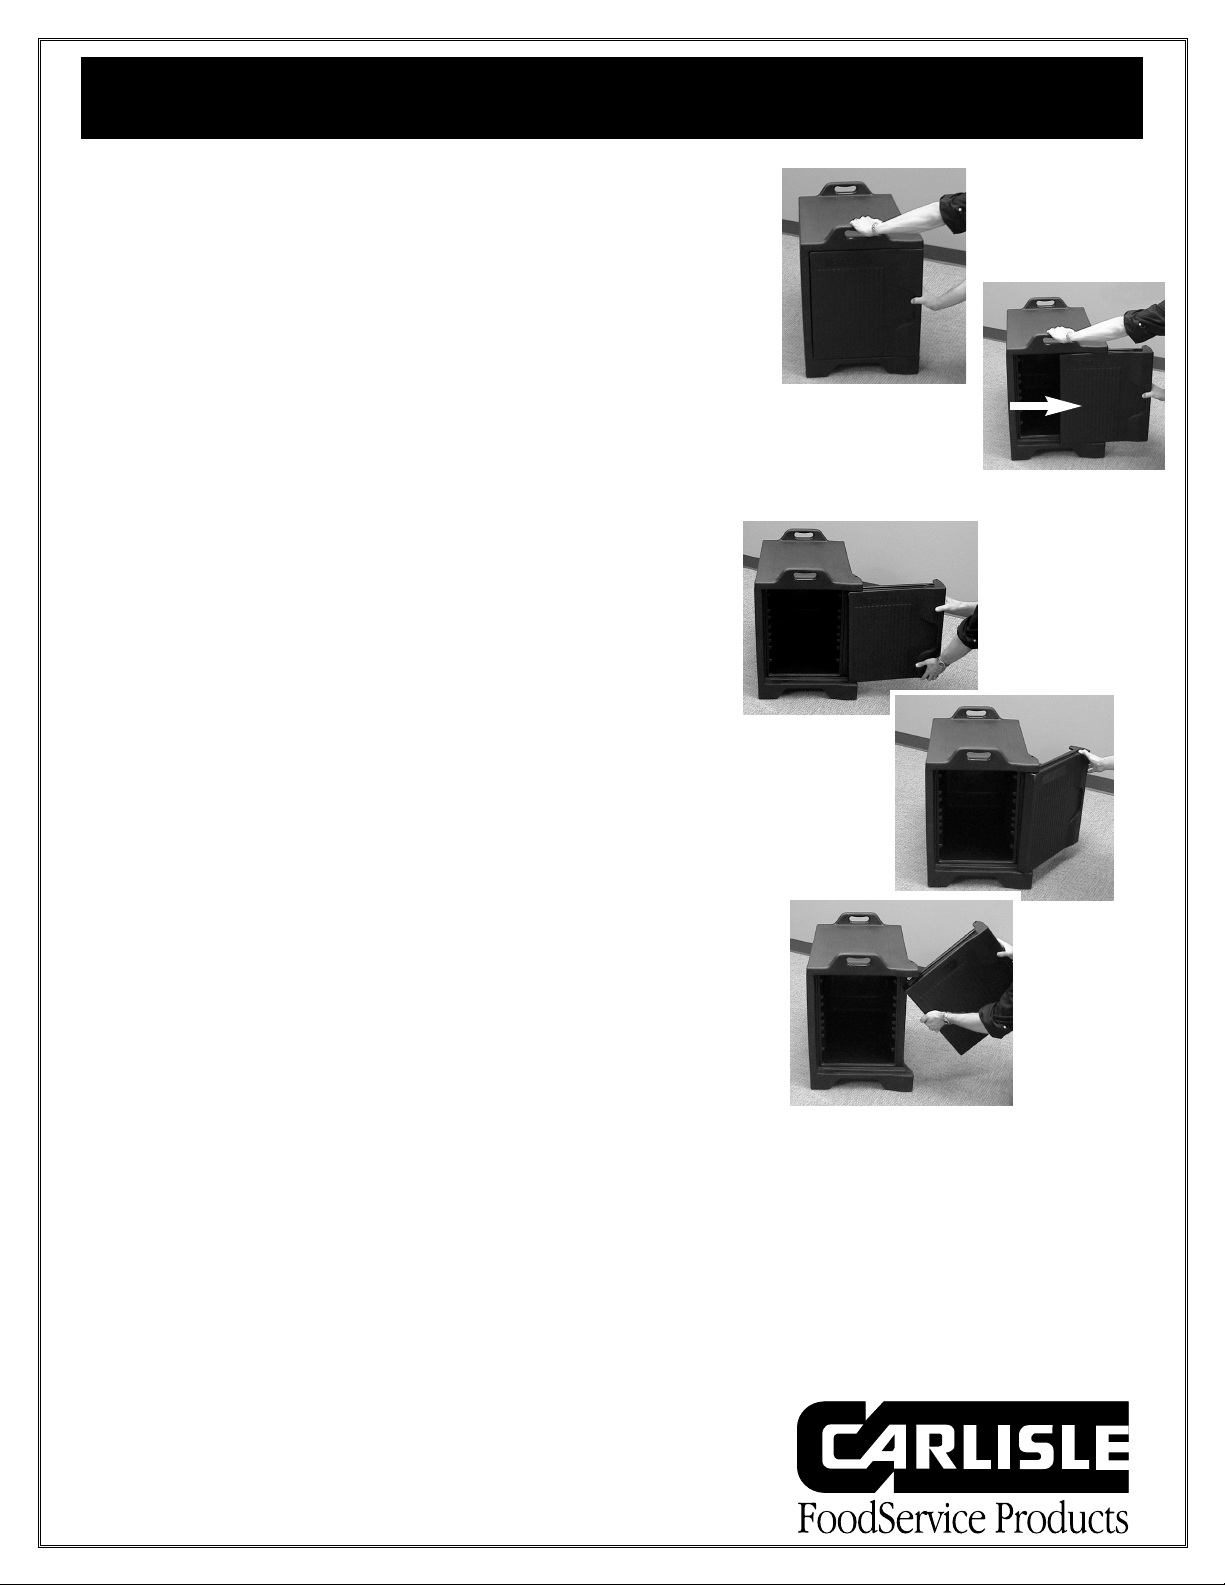
OPENING AND CLOSING INSTRUCTIONS FOR MODELS XT3000
To Open Unit:
1. Place one hand firmly on the handle at front of the unit.
With other hand, grasp recessed handgrip on right side
of door (Photo D), and pull door handle firmly to the right,
(or away from your body).
2. Continue sliding door to the right until it won’t slide any further (Photo E).
Push door around corner, until it rests up against the side of unit.
To Remove/Replace Door and/or Close Unit:
1. To remove door for cleaning purposes, slide door to furthest right
hand position (Photo F). Move door 1/4 turn towards side of unit
(Photo G). Lift up on bottom of door panel in a swing motion, until
door is released.
2. To put door on unit, place raised knob at left top of door panel into
track at front top of base unit (Photo H). Turn door slightly. Hold in place.
3. Keep top portion of door in track firm, while placing raised knob at
bottom left side of door panel into track at bottom front of unit.
4. To close door, slide door panel to the left. A firm snap closure
should be heard.
Easy Care and Cleaning for Your Insulated Container
1. Clean unit and lid/door after every use. Dry unit/lid/door thoroughly.
2. Remove Lid from XT1400, XT1600 and XT1800 models. Remove door from the XT3000 model. (See opening and
closing instructions on inside page)
3. Hosing or hand washing with mild detergents and hot water is the recommended method of cleaning. Safe for use in
commercial dishwashers.
4. De-staining compounds approved for food and beverage contact may be used. Ask you detergent supplier for
proper compound.
Photo D
Photo F
Photo G
Photo H
Photo E
 Loading...