

Page 1
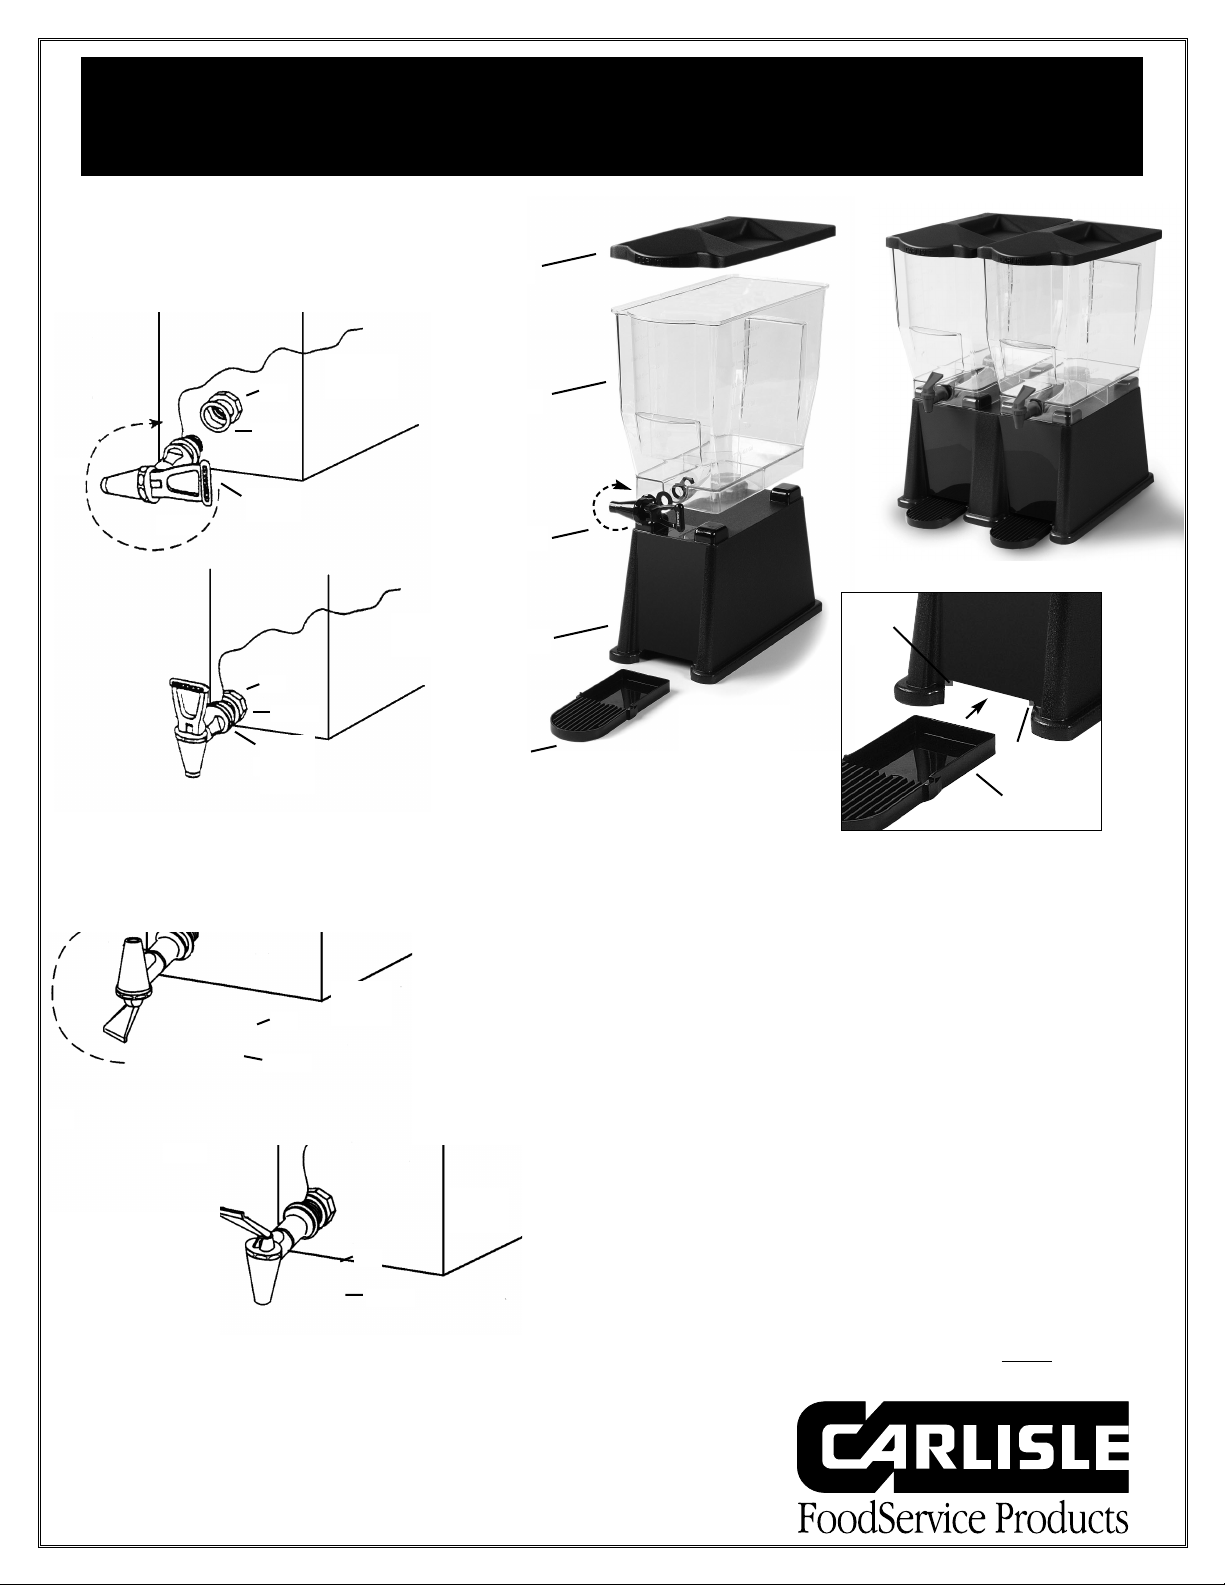
Fig. 3
Single Base
Lid
Reservoir
Base
INSTRUCTIONS FOR TRIMLINE
TM
RECTANGULAR BEVERAGE DISPENSERS
Worldwide Headquarters:
P.O. Box 53006
Oklahoma City, Oklahoma 73152-3006
(405) 475-5600 • FAX (405) 475-5607
1-800-654-8210
www.carlislefsp.com
European Distribution Center:
Edisonstraat 84, P.O. Box 110
6900 AC Zevenaar, The Netherlands
Tel +31/(0)316-596550 • Telex 45642
FAX +31/(0)316-340168
#104803312 Rev. 4/03
1. Make sure the Faucet Installation with washer is flush
with the unit. Position the faucet upside down. Take
nut with washer and screw on the end of the shank until
hand tight. Continue to hold nut and turn faucet to the
right until it is in its normal vertical position (270°
Premium faucet, Fig. 1 - 180° Economy Faucet, Fig. 2).
2. Position Reservoir on base unit (Fig. 3). On double base
unit, position both reservoirs on double base (Fig. 4).
Position Lid as indicated.
3. With base on counter, slide the drip tray into the base
opening until the tabs on the top of the drip tray touch
the base tabs (Fig. 5).
4. Note: Polypropylene Lids (replace with part #10860)
and Polypropylene drip trays (replace with part number
#10861) work with both Polycarbonate and
Polypropylene dispensers. Reservoirs must
be ordered
in the same material as the base.
Fig. 2
Economy Faucet: 10852, 10856, 10853, 10857
Fig. 1
Premium Faucet: 10850, 10854, 10851, 10855
Faucet
270°
Washer
Thin
Washer
Cut Away
Showing
Detail
Nut
Base
Tab
Base
Tab
PRODUCT NUMBERS: 10850,10852,10854,10856,10851,10853,10855,10857
Drip Tray
Fig. 5 Enlarged view of Figure 3.
Faucet
Fig. 4
Dual Base
Washer
Thin
Washer
Cut Away
Showing
Detail
Nut
Faucet
180°
Washer
Cut Away
Showing
Detail
Nut
Faucet
Washer
Cut Away
Showing
Detail
Nut
Drip
Tray
Page 2
INSTRUCTIONS FOR TRIMLINE
TM
RECTANGULAR BEVERAGE DISPENSERS
Worldwide Headquarters:
P.O. Box 53006
Oklahoma City, Oklahoma 73152-3006
(405) 475-5600 • FAX (405) 475-5607
1-800-654-8210
www.carlislefsp.com
European Distribution Center:
Edisonstraat 84, P.O. Box 110
6900 AC Zevenaar, The Netherlands
Tel +31/(0)316-596550 • Telex 45642
FAX +31/(0)316-340168
#104803312 Rev. 4/03
CARE AND CLEANING OF THE CONTAINER
1. Clean after every use with hot water and mild detergents
or dishwasher. De-staining compounds approved for
food or beverage contact may be used. Ask your detergent supplier for the proper compound.
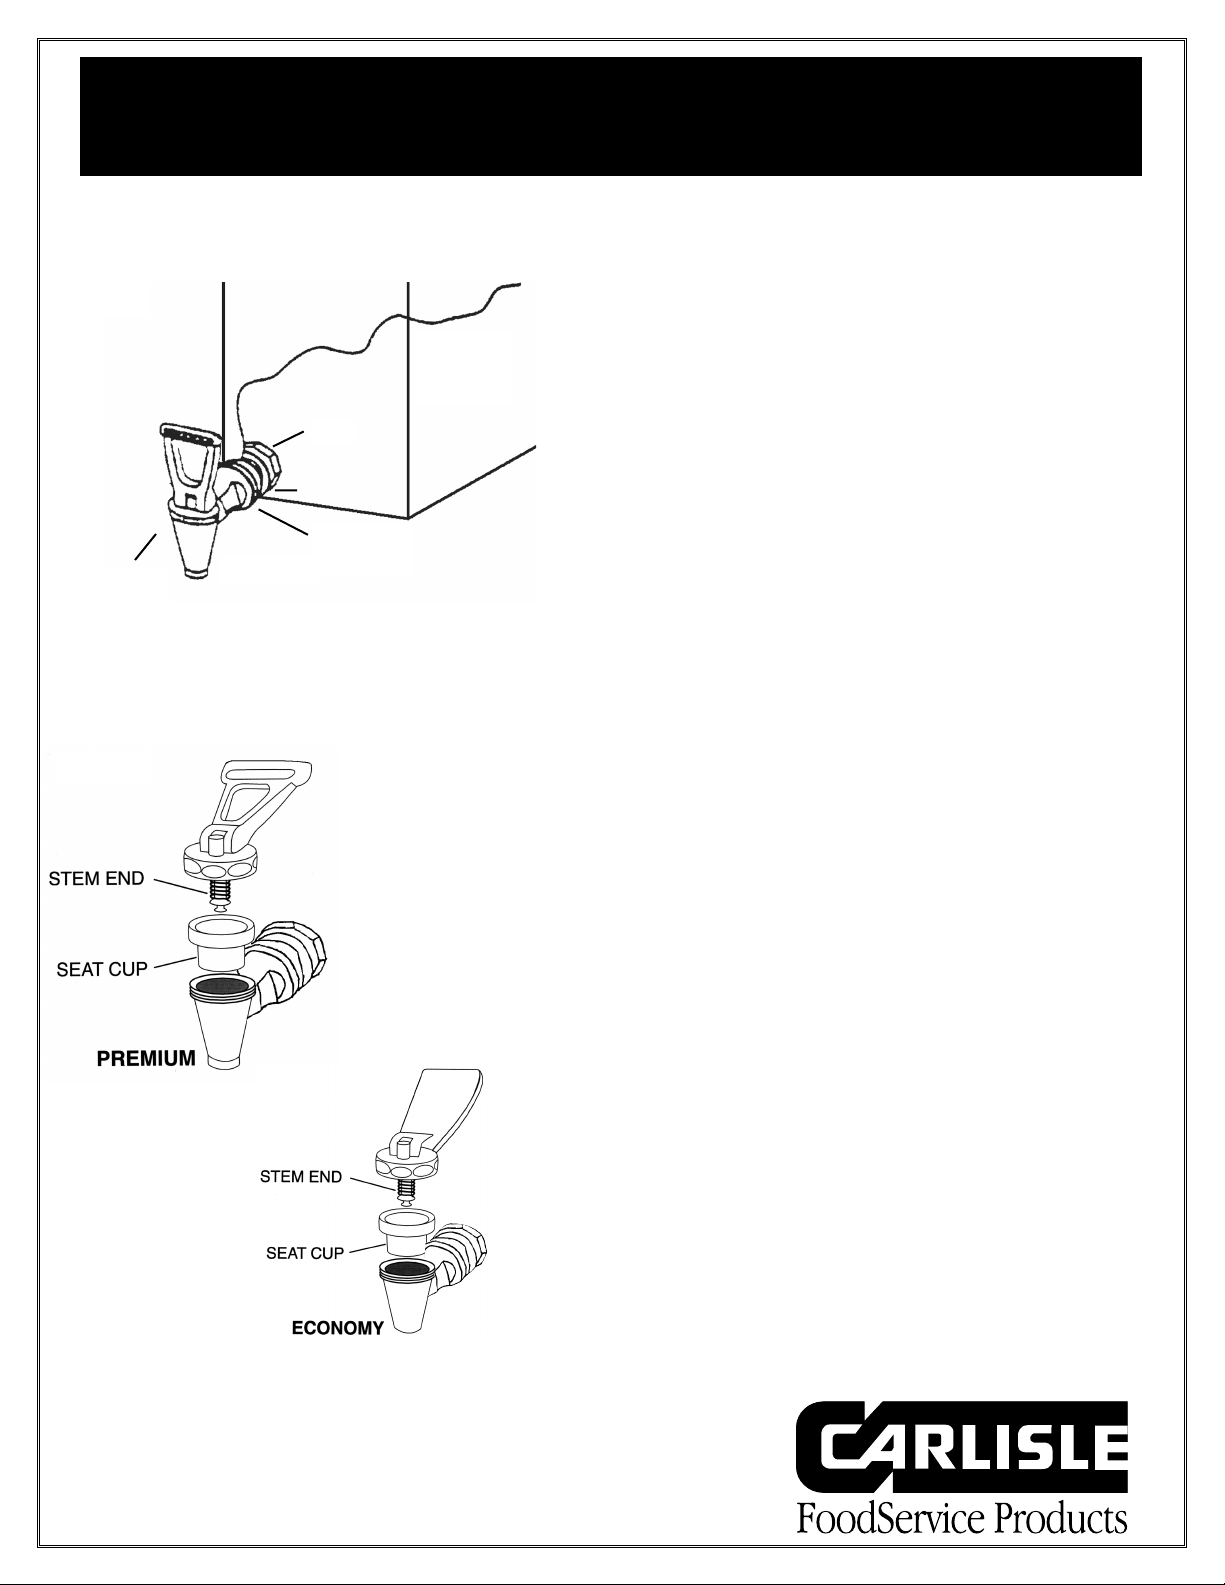
CARE AND CLEANING OF THE FAUCET
1. Loosen Faucet in a counter clockwise direction to
remove faucet from unit (Fig. 1). Remove washer and
nut for complete disassembly.
2. Remove entire upper assembly by unscrewing Bonnet
(Fig. 2).
3. Pull Seat cup to remove. Clean all parts in a solution of
hot water and urn cleaner. Wipe inside body with clean
damp cloth and then rinse with hot water.
Note: Clean faucet periodically with a faucet brush such
as a #40166 Sparta
®
4" Utility Tube Brush.
4. Depress handle in ‘lock open’ position. Clean top of
Bonnet thoroughly. Snap on Seat Cup over Stem End
by applying direct pressure against bottom. This is a
good time to replace Seat Cup if necessary.
5. Screw upper assembly back on body.
6. Reattach faucet to unit.
BONNET
Faucet
Thin
Washer
Fig. 1
Fig. 2
Washer
Cut Away
Showing
Detail
Nut
 Loading...