

Page 1
Small Cradle
Arm (x2)
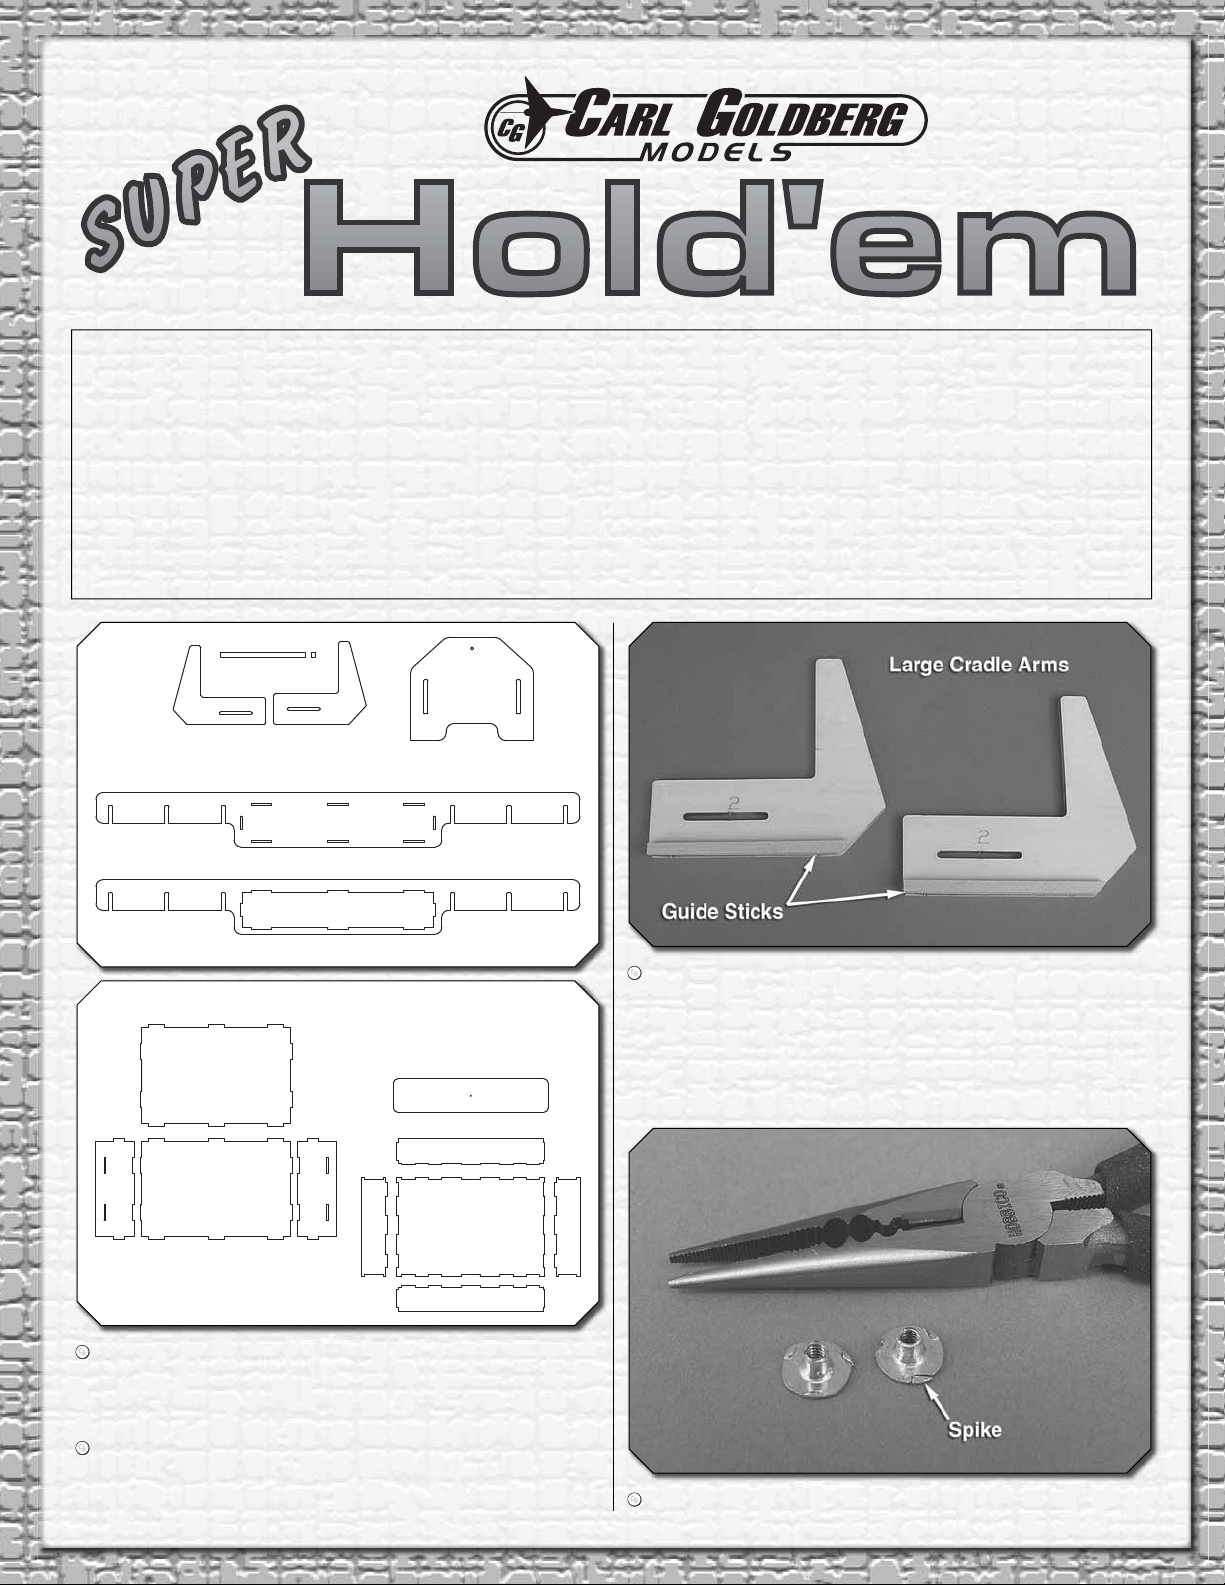
Guide Stick (x4)
1/4"x1/4"x4-1/2"
[6x6x115mm]
Large Cradle
Arm (x2)
Cradle (x2)
Rear Cross Bar
Front Cross Bar
Drawer Box Parts
Drawer Parts
™
An airplane cradle is indispensable for holding the fuselage during assembly, maintenance, or simply
while attaching the wings when you get to the fl ying fi eld. With its adjustable arms and cradle bases,
the Carl Goldberg Super Hold’em suits this purpose for most models up to “giant-scale.” And the
storage drawer and tool tray convert your Super Hold’em into a miniature, remote work bench for
working on your plane at the fi eld. The Super Hold’em can be assembled as-is, or fi nished with clear
varnish or paint. If applying a fi nish, note that the parts fi t is tight, so the notches in the cradle bases
and cross bars will have to be widened accordingly. This can be done with a strip of coarse sandpaper
glued to a sheet of plywood, but use care not to widen the notches too much. Otherwise, the parts will
fi t loosely and the stand may not be rigid.
1. Remove all the parts from their laser-cut blank sheets.
For the best fi nish, take your time to cut around each part
with a hobby knife where necessary.
2. With the exception of notches and slots where the parts
fi t together, sand the edges of all the parts smooth.
3. Glue the guide sticks to the large cradle arms with the
bottom of each stick even with the bottom of each arm (be
certain you have selected the large arms, not the small
arms). And it doesn’t matter which side of the arms you
glue the sticks to—there isn’t a right or a left. Optional:
Sand the sticks even with the beveled edge of the arms.
4. Use pliers to fl atten the spikes in both 6-32 blind nuts.
Page 2
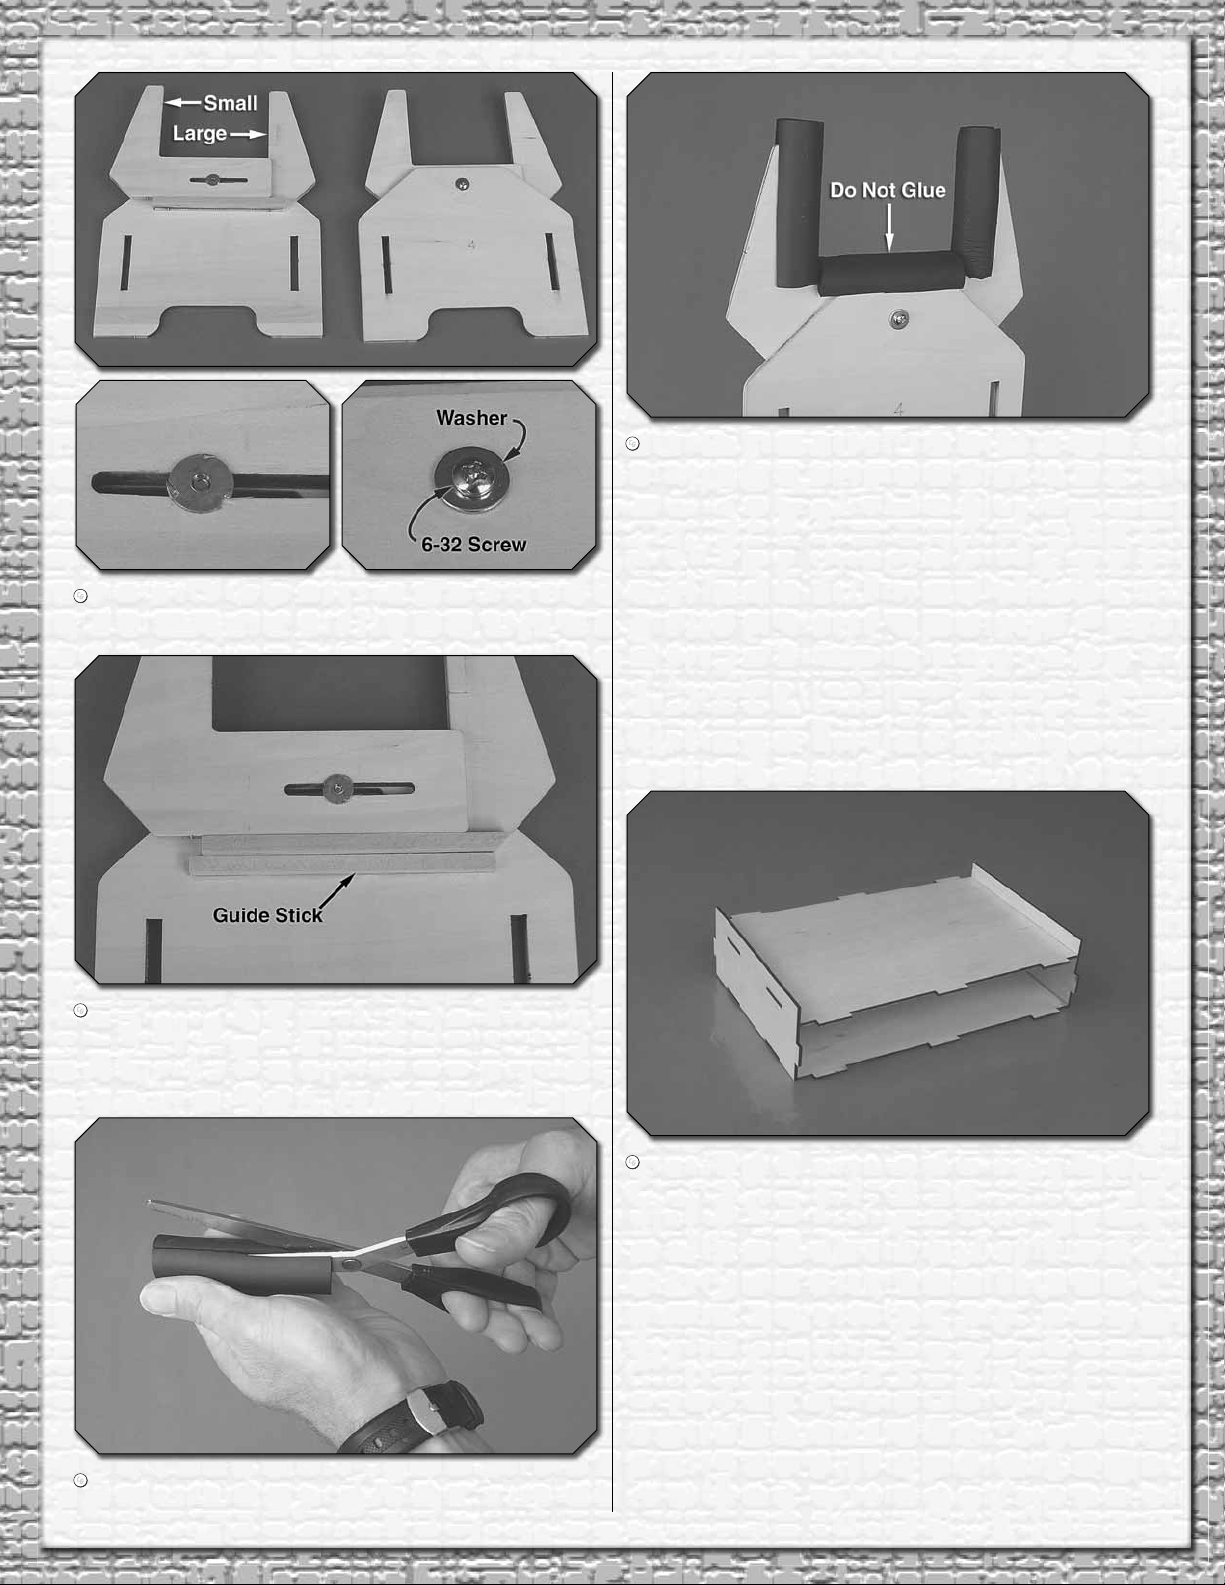
5. Mount a large arm and a small arm to each cradle base
with a 6-32 screw, a washer and the blind nut.
6. Optional: If you prefer the arms to remain level (without
the ability to tilt), glue the remaining two guide sticks to
the cradle bases even with the arms—be certain not to
inadvertently get any glue on the arms.
8. Glue one tube to each of the four vertical arms. Fit the
remaining two tubes over the horizontal portions of the
arms, but do not glue these tubes on. Note: If using your
cradle for a large model and spreading the arms wide,
longer pieces of horizontal tubing may be used. These will
have to be purchased separately.
Set the cradles aside while assembling
the cross bars and drawer.
7. Cut the foam cushion tubing into six 3-1/2" [90mm]
pieces. Slit each one all the way down.
9. Working over your workbench protected with a sheet of
clear sandwich wrap, a plastic bag or Top Flite® MonoKote®
backing (so glue won’t stick), assemble the “box” that will
contain the drawer. Glue the parts together. For now, don’t
build up large fi llets of glue–use just enough glue to hold
the parts together for handling during assembly. Later, more
glue may be added for reinforcement. Also, don’t worry
about getting the assembly perfectly “square.” Everything
will true up when you join the box to the cross bars.
Page 3

10. Fit the box to the cross bars with the “tray” on top. Make
certain everything is tightly pressed together and there are
no gaps. Then securely glue the assembly together.
11. Same as you assembled the drawer box, test fi t, then
glue together the parts of the drawer. After the glue has
hardened, sand the outside surfaces fl at and smooth.
13. Install the drawer and fi t the cradle bases to the cross
bars where desired. Adjust the spacing between the cradle
arms to fi t your model.
Questions or comments? Please contact us at:
12. Using the lines laser-cut around the edges of the
drawer front as a guide for alignment, glue the drawer
front to the drawer with the lines on the back. Mount the
knob to the drawer with the screw and washer.
Carl Goldberg Products Product Support
3002 N. Apollo Drive, Suite #1
Champaign IL 61822
airsupport@greatplanes.com
www.carlgoldbergproducts.com
Telephone: 1-217-398-8970
Monday-Friday, 8am-5pm U.S. Central Time.
FAX: 1-217-398-7721
Please be sure to include a daytime telephone number or
return fax number so that we can contact you.
Page 4

MORE ITEMS FOR USE IN THE
SHOP AND AT THE FIELD.
ElectriFly™ Triton™2 Charger
ElectriFly™ Equinox™
LiPo Battery Balancer
A balanced LiPo pack is one way to ensure
maximum voltage. The Equinox is the other. Connect
it to a balanced pack, and it gently discharges cells
until they’re within a few millivolts of each other.
Connect it between a pack and a LiPo charger,
and it keeps cells equalized so they can achieve
maximum voltage simultaneously. Ideal for use with
ElectriFly Triton2, Hobbico® Accu-Cycle™ and the
DuraTrax® ICE™ chargers. GPMM3160
This powerful cleaner can be used safely on
plastic covering materials and most painted
surfaces. You can easily wipe away smudges
and fuel. It’s anti-static, non-flammable
and resists fingerprints. Each spray bottle
contains 8 fluid ounces. TOPR2500
DC Computerized Peak Charger, Discharger & Cycler
The Triton2 DC computerized charger has the versatility
to handle NiCd, NiMH, lithium and lead-acid cells alike. It
can charge LiPo packs with up to 5 cells in series, and the
adjustable charge current is boosted to 7.0A maximum. A
blue backlight allows for easy viewing of the 2 x 16 LCD
screen. GPMM3153
Top Flite
®
MonoKote®
Cleaner Polish
Goldberg
™
Mini Hold’em
Cradle
™
Constructed from 1/4" ply, the Mini Hold’em kit
–designed specifically for electric models–has a
foam-cushioned cradle that adjusts from 7"-20"
to fit most fuselages. It comes with hardware,
decals, fuel tubing and instructions. Measures
22.5" long x 9.25" tall x 7" wide. GBGP0103
Copyright © 2008 GBGP0108Instr
 Loading...