

Cardo Systems ER07 Users Manual

scala-rider FM
User Manual
Page 1 of 20
Introduction
Congratulations and thank you for purchasing
the scala-rider FM™ Bluetooth headset for
motorcycle helmets. Now you can wear your
helmet while talking hands-free on your
Bluetooth enabled mobile phone, made possible by the short-range wireless
connection between your
If you are using a standard non-Bluetooth mobile phone, you can still enjoy the
headset’s advantages by connecting our optional BT Adapter to your mobile phone
(purchased separately).
The scala-rider FM headset is compatible with the latest Bluetooth ver. 1.2
specifications, and works equally well with Bluetooth ver. 1.1.
Please read and familiarize yourself with all the instructions, components and
controls of your headset prior to first use.
We wish you a great scala-rider FM experience.
CARDO SYSTEMS, Inc.
cell phone and the scala-rider FM headset.
Page 2 of 20
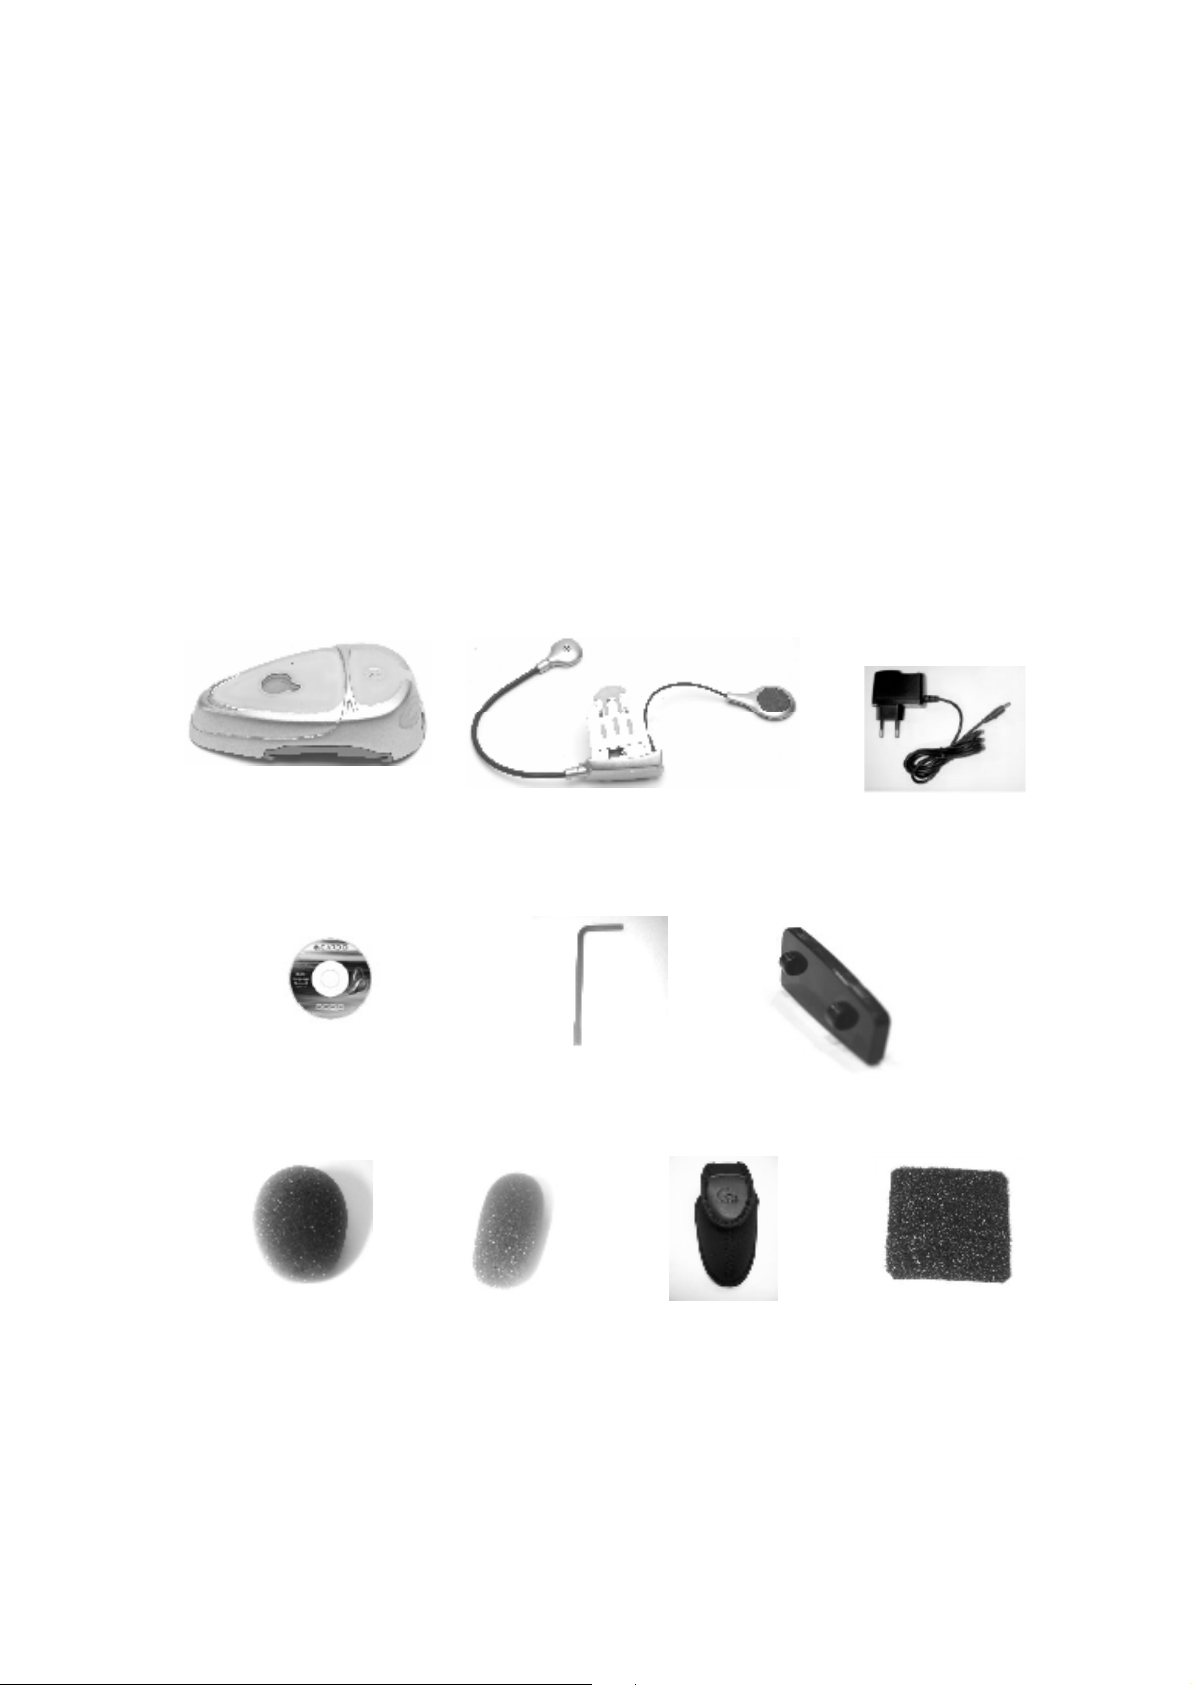
Retail Package Contents.
Travel Pouch
Your retail package contains the following items:
• Headset
• Clamp
• Large sponge for microphone (for 3/4 helmets)
• Small sponge for microphone (for full-faced helmets)
• extension pad for the helmet unit
• Allen wrench
• Wall Charger (universal travel version)
• CD-Manual & Quick Start Guide
• Warranty + Registration Card
• Velcro for speaker (needed only for certain helmet types).
Headset
Clamp
Printed Quick Guide and
multilingual manual on mini-CD
Allen wrench
Large microphone
sponge
Small microphone
sponge
Wall Charger (dual voltage)
Optional extension pad for
Clamp Base.
Velcro to place the
Page 3 of 20

3 Before using the headset
in
Read and familiarize yourself with all instructions, components and controls of your scalarider FM headset prior to first use.
CTRL (control button) –
Press
CTRL button to
• Accept or initiate calls
• Turn power ON/OFF
• Pair
Redial/Reject/End button –
• End/Reject calls (*)
• Redial function
Regarding call terminations, see NOTE
*
section 6.4
Volume down button –
Press to decrease the
volume
Volume Up button –
Press to increase the volume
Charging socket
Microphone
Press on arc to
release
Speaker
Charge the headset by inserting the
wall-charger into the charging socket
(lift the rubber cover to insert the plug)
Sliding-Plate of the clamp
Page 4 of 20
3.1 Charging Battery
FIG 2
FIG 1
Make sure the headset is fully charged prior to initial use. Allow at
least Four hours for a full charge before using for the first time. Normally 2-3 hours
will suffice for complete charge. The headset should be off the helmet when being
charged (solely for purposes of convenience)
• Plug the Wall Charger into the charging socket of the headset and connect it to an
electrical outlet.
• The Red Light Indicator (LED) on the scala-rider FM will turn on when charging
begins. Allow the headset to charge until the Red LED turns off.
• When charging is complete, release the headset from the charger.
NOTE: You may leave the unit connected even if charging is completed. There is no
danger of over-charging.
3.2 Attaching and removing the scala-rider FM from your helmet
4.2.1 First installation
Once the headset is fully charged you should pair it to your mobile
phone. You cannot operate the headset prior to successful pairing
(see section 5 below). When done, proceed with attaching the unit to your helmet
as follows: back plate
• The clamp serves as the base for the headset and must be attached to your
helmet before using the headset
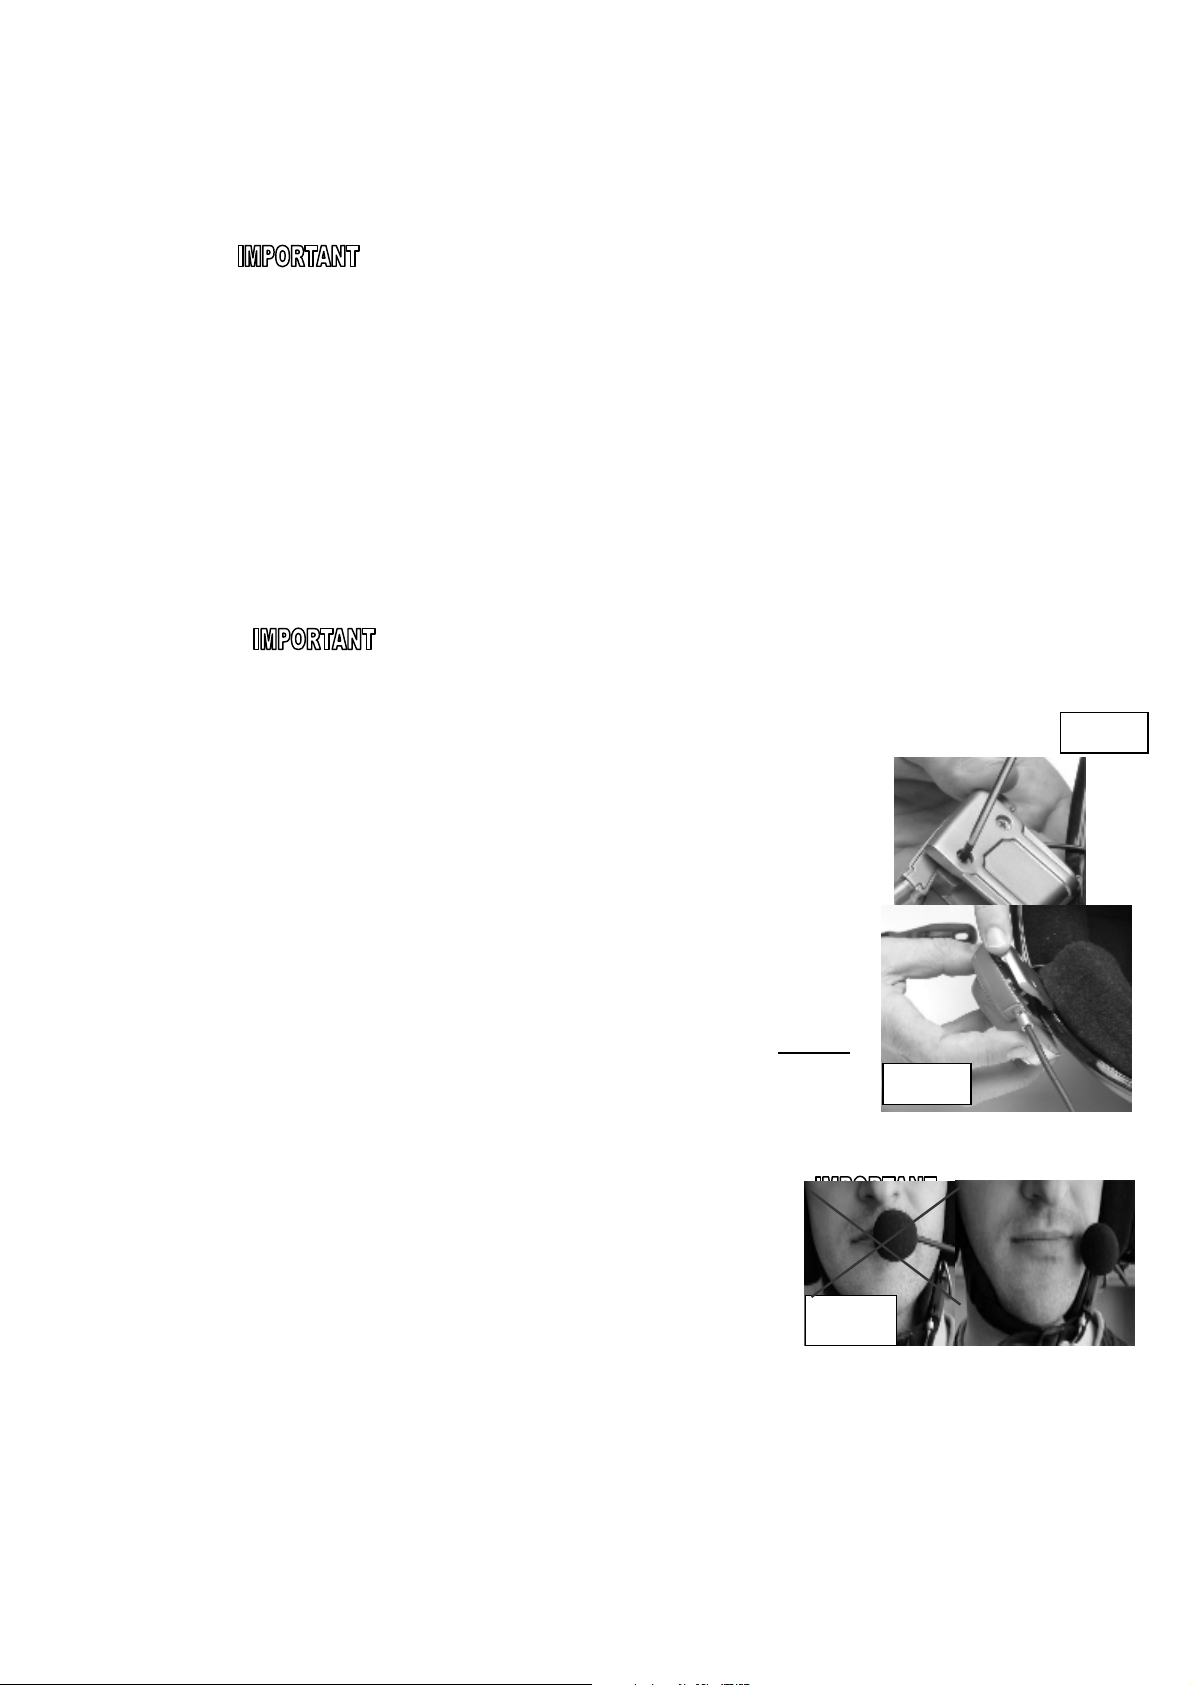
• Use the enclosed Allen Wrench to loosen the two
screws of the clamp (FIG. 1). Then slide the backplate of the clamp between the internal padding and
the external shell of the helmet (FIG. 2).
(In case the external shell of the helmet is too wide,
use the optional extension pad)
• Before fastening the screws, make sure to adjust the
clamp’s location to an ideal position, i.e. to the spot
where the attached speaker sits opposite your ear
and the microphone is located slightly off the corner
of your mouth (FIG. 3). You may need to re-position
the clamp repeatedly until you identify the ideal spot.
The speaker can be easily placed into position and
removed by means of the Velcro layer that
attaches to the inner padding of your helmet.
(Velcro pad included in your retail box).
• Once you have identified the ideal position for
The microphone and speaker, use the Allen
Wrench to fasten the clamp.
• Now slide the scala-rider FM headset downwards along the Sliding-Panel of
the clamp (FIG. 4) until a light clicking sound indicates that the
FIG 3
Microphone should be placed just slightly off
the corner of your mouth and not at the center
headset has reached its proper operational position.
• Turn on the headset by pressing and holding CTRL for at least 6 seconds
until the Blue LED flashes three times and an ascending alert tone is heard.
Page 5 of 20

Quickly release the button.
FIG 4
Press against the
arc,
FIG 5
4.2.2 Removing the headset from the helmet.
The clamp usually stays attached to the helmet, but you can also easily remove it
by proceeding in the reverse order of the attachment procedure (see 4.2.1 above).
• To remove the headset from the clamp, press your finger firmly against the
arched tip of the sliding-panel (FIG. 5) and use the other hand to slide the
headset upwards along the Sliding-Panel (FIG. 5).
then slide the headset
unit upwards.
4.2.3 Re-attaching the headset to the helmet.
• To re-attach the headset, simply slide it downwards along the Sliding-Panel
of the clamp (FIG. 4) until a light clicking sound indicates that the headset
has reached its proper operational position.
4 Getting Started with the scala-rider FM headset
Before you can use your headset for the first time, the pairing process
between your headset and mobile phone must be completed. Pairing is the required
process of mutual recognition between your headset and mobile phone.
Please note: Your headset will not work prior to successful completion of the pairing
process!
4.1 Pairing process
4.1.1 Turn on the phone and activate its Bluetooth function.
4.1.2 Press and hold the CTRL button until the red and blue LEDs begin flashing rapidly
Page 6 of 20
 Loading...