

Page 1

HOME HEART MONITORING
Patient Education Guide
Page 2

DRAFT
TABLE OF CONTENTS
1. INTRODUCTION ...................................................................................... 1
How the CardioNet Service Works ............................................................ 2
The CardioNet Monitoring Kit ................................................................... 4
Who to Call for Help ................................................................................... 8
2. SETTING UP ............................................................................................ 9
Connecting At Home ............................................................................... 10
Setting Up the Base .................................................................................. 11
Checking Battery Power ........................................................................... 12
Staying in Range ........................................................................................ 12
Limitations of Cell Phone Coverage ....................................................... 12
Wearing the CardioNet Sensor................................................................ 14
Placement of Lead Wires and Pads ......................................................... 15
3. USING THE MONITOR .......................................................................... 17
Monitor On and Off .................................................................................. 18
Using the Touch Screen............................................................................ 20
Recording a Symptom .............................................................................. 23
When You Are Without Cell Phone Coverage ....................................... 27
Changing Monitor Options...................................................................... 28
Checking Monitor Status .......................................................................... 30
Viewing the Cell Signal Status.................................................................. 32
Warnings and Alarms ................................................................................ 33
4. SENSOR CARE ....................................................................................... 35
Changing Electrode Pads......................................................................... 36
Placing the Leads and Pads .................................................................... 39
Showering or Bathing ............................................................................... 40
Changing the Battery ................................................................................ 42
5. TROUBLE SHOOTING ........................................................................... 43
Responding to Warnings and Alarms ..................................................... 44
Cautions ..................................................................................................... 56
6. SPECIFICATIONS, COMPLIANCE AND SYMBOLS ................................ 59
Contents i
Page 3

DRAFT
Caution:Caution:
Caution: Federal law restricts this device
Caution:Caution:
to sale by or on the order of a physician.
Copyright 2004
All rights reserved
Model Number 1001
Lit Number - 100526
ii
!!
!
Revision B
!!
!!
! February 2004
!!
Page 4

1
INTRODUCTION
We Help Find Answers
The CardioNet
Service monitors
your heart rhythms
continuously. This
helps your doctor
detect problems
that occur
infrequently, even
while you sleep.
CardioNet works
with you and your
physician.
The CardioNet Service was developed to help doctors
detect and treat heart problems that may not happen
often enough to be found during a routine ECG in the
physician’s office. CardioNet monitors heart rhythm
continuously, while people go about their normal daily
activities. We can help physicians detect problems that
may occur infrequently, whether you feel them or not,
even while you are sleeping.
Our goal at CardioNet is to work as a team with patients
and physicians to help people receive the best possible
care. We are honored that we were chosen to serve you.
Introduction 1
Page 5
1. Introduction
HOW THE CARDIONET SERVICE WORKS
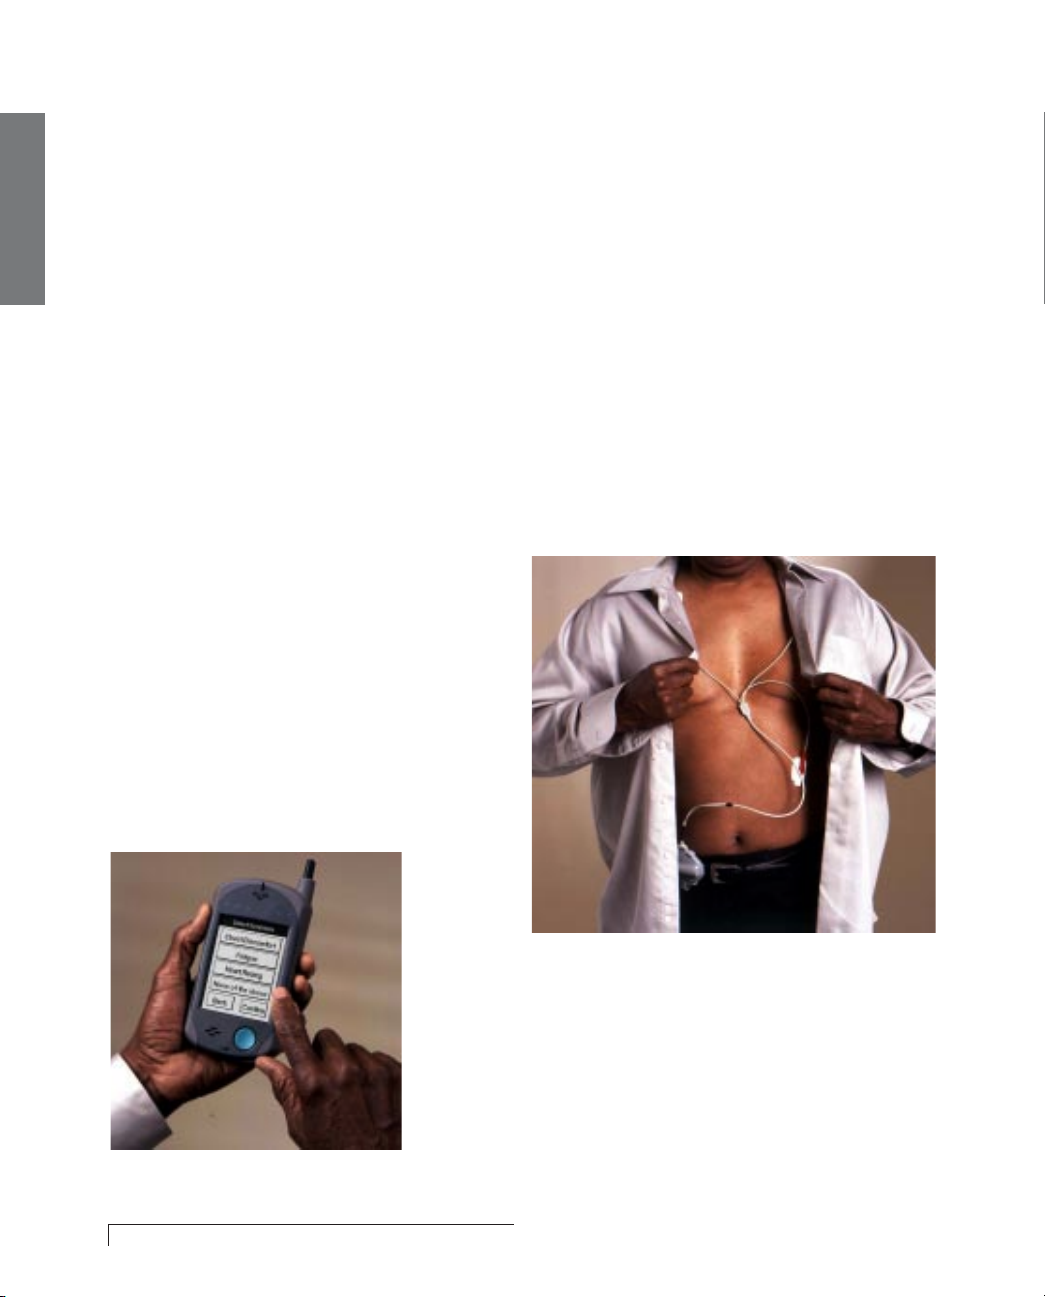
When you’re using the CardioNet Service, you’ll
wear a small, lightweight sensor. The sensor monitors
each heartbeat and sends data to the portable
CardioNet monitor.
The CardioNet monitor can be tucked away in a pocket
or purse. It sends wireless communications to the
CardioNet Center automatically when it detects an
event, or when you report an event using the touch
screen on the monitor.
Lightweight sensor monitors each heartbeat.
CardioNet monitor sends your
information to the CardioNet Center
2 Introduction
Sensor with lead Wires
Page 6

CardioNet Patient Service Center
Monitors Heart Rhythms
The CardioNet Patient Service Center operates 24 hours
a day, seven days a week. At the Center, specially
trained cardiac technicians analyze your heart rhythms
and report results to your physician.
1. Introduction
Your physician reviews the results,
discusses results with you and prescribes
or adjusts treatment.
Physician Reviews Results
Introduction 3
Page 7
THE CARDIONET MONITORING KIT
Avoid extra
charges. Return all
kit items except
used batteries and
used electrode
1. Introduction
pads to CardioNet
when service is
completed.
You might receive
the latest version of
the CardioNet
Monitor, which has
a color screen.
The CardioNet Monitoring Kit contains the supplies you
will need while you are on the CardioNet Monitoring
Service. If any items are missing or broken, or if you
have any questions about how to use them, please call
the CardioNet Patient Service Center at 1-866-426-4401.
When service is ended, please return all the items to
their labeled slots and send the kit back to the
monitoring center, following the directions on the
enclosed return address label.
It is important to return the patient supply kit no later
than the very next day. Other patients may need to use
the equipment.
YOUR SERVICE KIT CONTAINS
1.1.
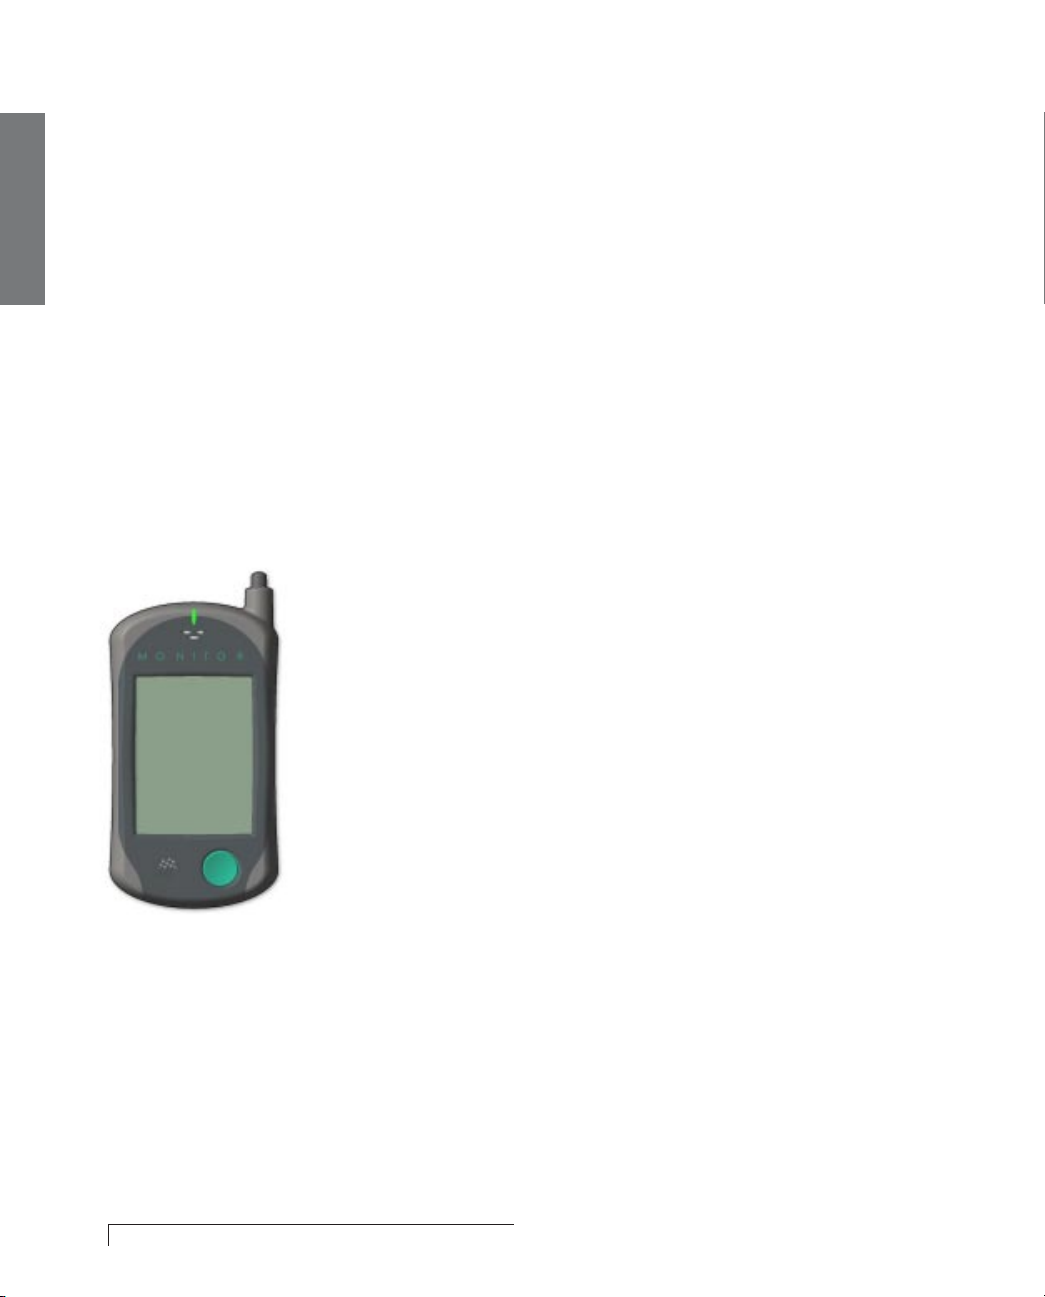
The CardioNet MonitorThe CardioNet Monitor
1.
The CardioNet Monitor
1.1.
The CardioNet MonitorThe CardioNet Monitor
This portable device constantly monitors your
heartbeat and sends information to the CardioNet
Patient Service Center. The CardioNet monitor uses
wireless communication when you are away from
home. It uses the regular phone system when the
monitor is placed in the CardioNet base station. You
will not be charged by the telephone company for
calls made by your monitor.
1. CardioNet Monitor
4 Introduction
Please handle the CardioNet monitor with
care – don’t drop it, lose it, or get it wet.
Page 8
2. CardioNet Base Station
2.2.
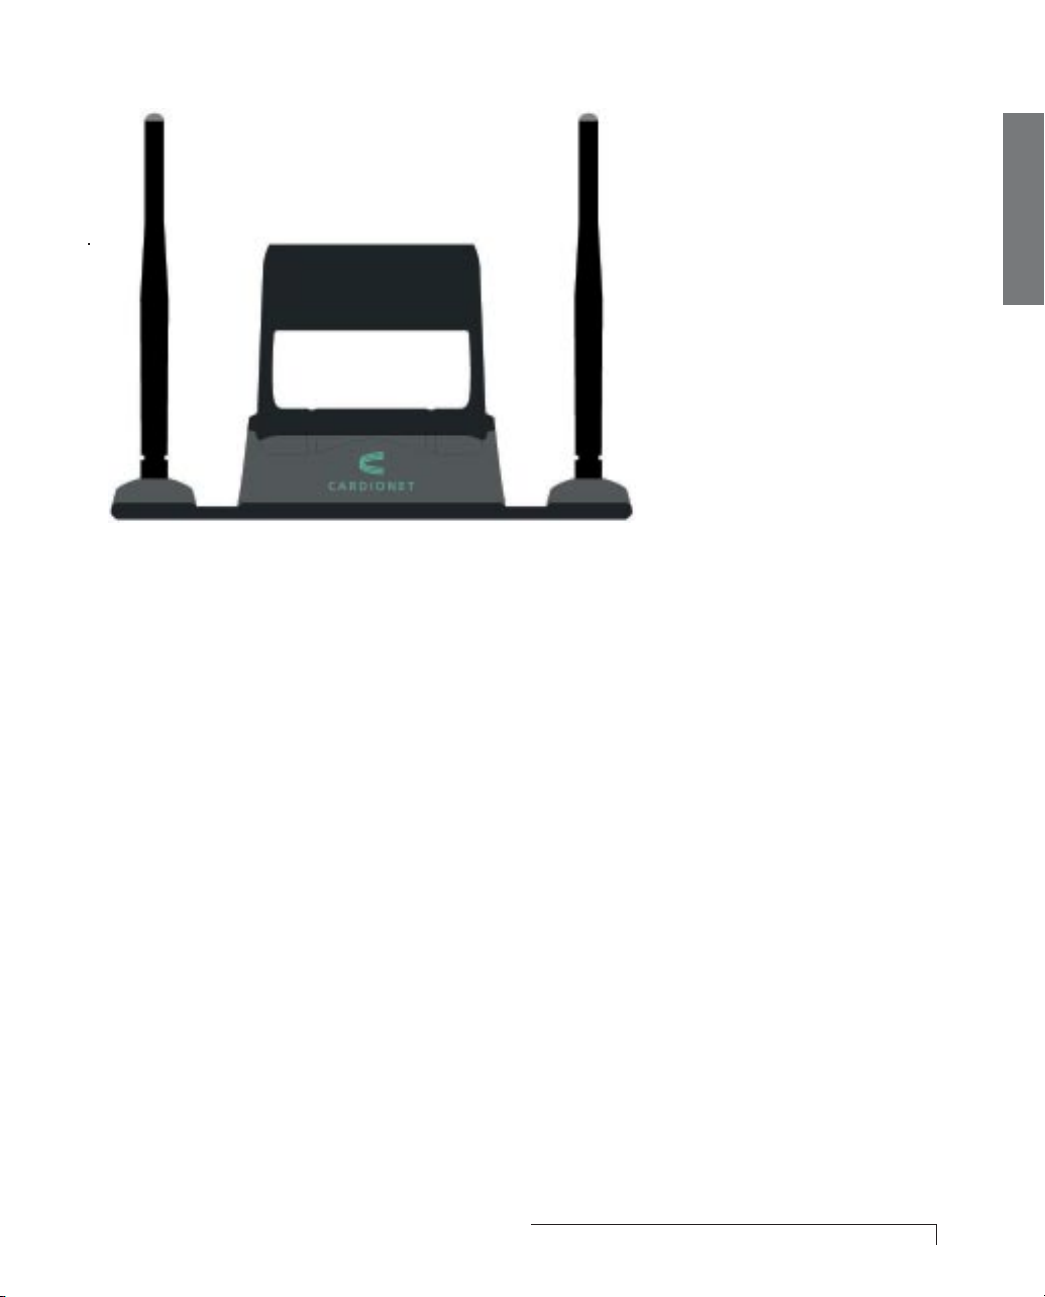
The CardioNet Base StationThe CardioNet Base Station
2.
The CardioNet Base Station
2.2.
The CardioNet Base StationThe CardioNet Base Station
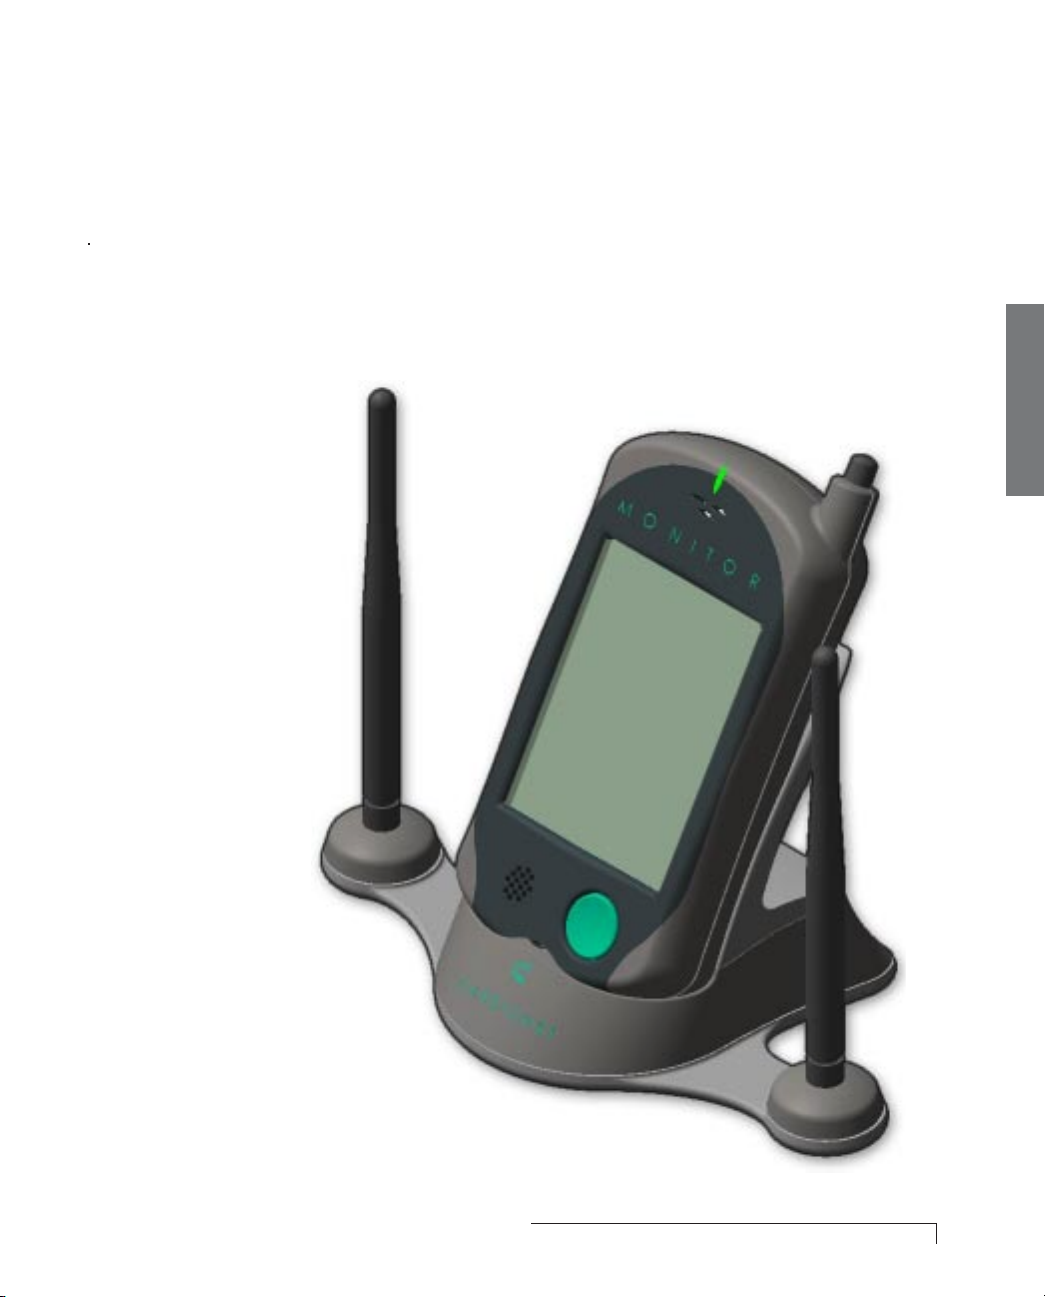
The CardioNet base station is connected to your
home telephone line and plugged into an electrical
outlet in the bedroom or a central location in your
house. The base station recharges the CardioNet
monitor overnight and allows the CardioNet monitor
to communicate with the monitoring center through
the regular phone system. You will not be charged
by the telephone company for calls made by
your monitor.
1. Introduction
Please put the CardioNet monitor in the base station
whenever you are at home. In larger homes, two
base stations may be required, so you can keep your
sensor and monitor in contact as you walk around
the house.
Introduction 5
Page 9
1. Introduction
3. CardioNet Sensor
3.3.
The CarThe Car
3.
The Car
3.3.
The CarThe Car
dioNet Sensor and Lead WdioNet Sensor and Lead W
dioNet Sensor and Lead W
dioNet Sensor and Lead WdioNet Sensor and Lead W
irir
ir
irir
eses
es
eses
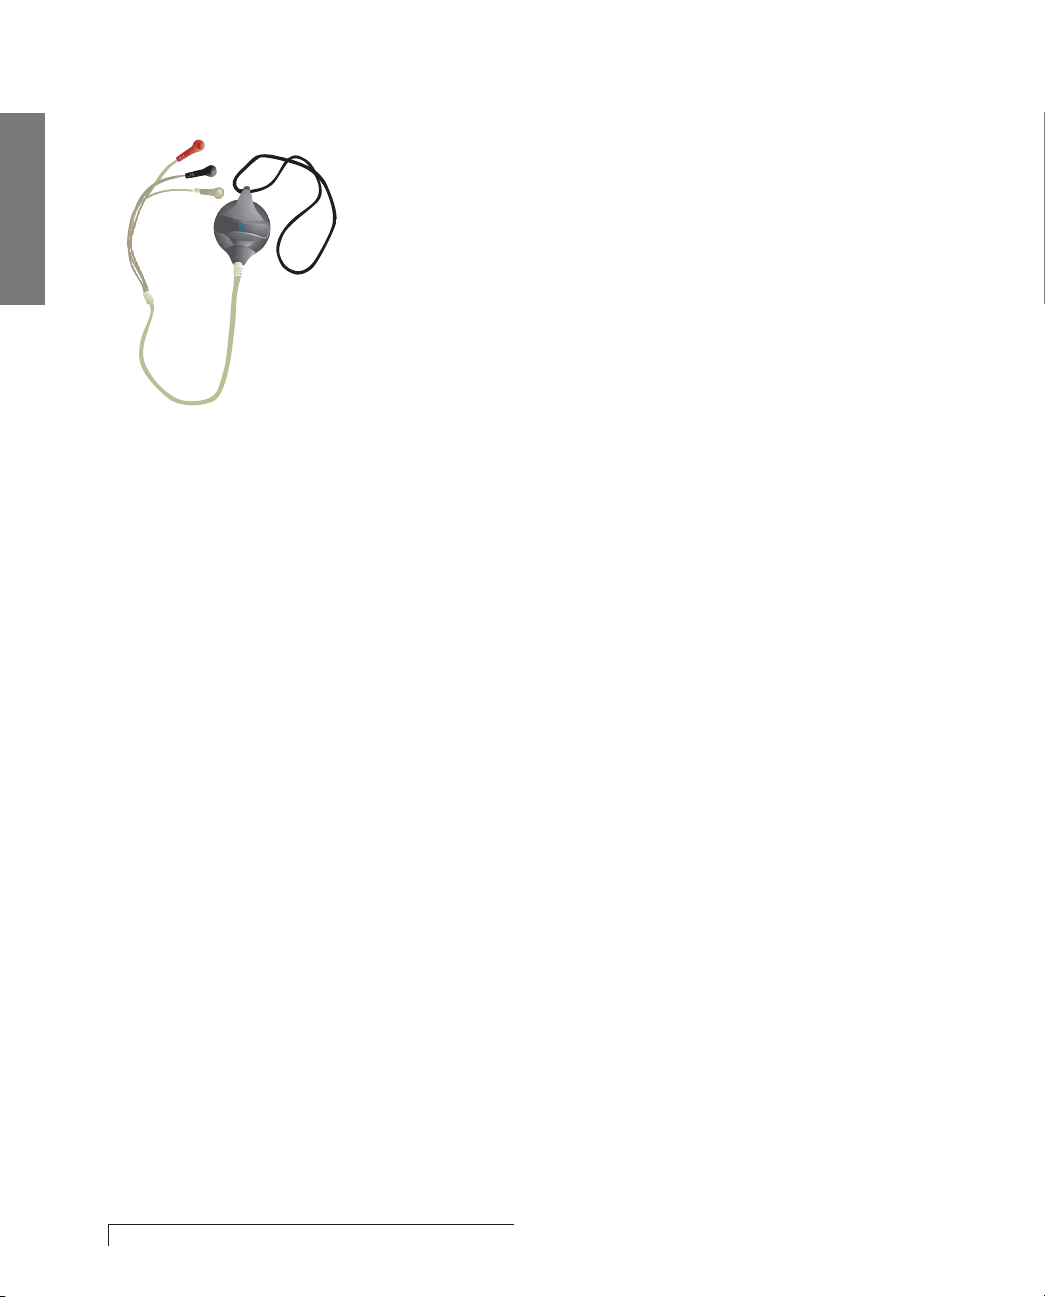
The CardioNet sensor, which can be worn around the
neck or on a belt, senses each heartbeat and
constantly sends the information to the CardioNet
monitor. To communicate with the monitor, the sensor
must remain within 30 feet of the monitor. Walls and
other obstructions can reduce the range. If you go out
of communication range, the sensor will beep to alert
you – to either move back within range or to pick up
the monitor and take it with you.
4.4.
Electrode PadsElectrode Pads
4.
Electrode Pads
4.4.
Electrode PadsElectrode Pads
These sticky disposable pads snap onto the three
electrode leads on the CardioNet sensor. You remove
the backing and stick them onto your skin.
5.5.
BatteriesBatteries
5.
Batteries
5.5.
BatteriesBatteries
These batteries are for the CardioNet sensor. The
sensor battery must be replaced each day. Any new
commercially available AA battery can be used with
the CardioNet sensor.
6.6.
Sensor Neck StrapSensor Neck Strap
6.
Sensor Neck Strap
6.6.
Sensor Neck StrapSensor Neck Strap
Use if you prefer to wear the sensor around your neck.
6 Introduction
7.7.
Sensor Belt ClipSensor Belt Clip
7.
Sensor Belt Clip
7.7.
Sensor Belt ClipSensor Belt Clip
Use if you prefer to wear the sensor on your belt.
8.8.
TT
elephone Line In/Outelephone Line In/Out
8.
T
elephone Line In/Out
8.8.
TT
elephone Line In/Outelephone Line In/Out
Use to plug your CardioNet base station into the
telephone wall jack.
9.9.
Base Power PlugBase Power Plug
9.
Base Power Plug
9.9.
Base Power PlugBase Power Plug
Use to plug your CardioNet base station into an
electrical outlet.
10.10.
Patient Education Guide & Pocket Reference CardPatient Education Guide & Pocket Reference Card
10.
Patient Education Guide & Pocket Reference Card
10.10.
Patient Education Guide & Pocket Reference CardPatient Education Guide & Pocket Reference Card
These guides contain helpful information about the
CardioNet service and important contact numbers.
11.11.
Patient InforPatient Infor
11.
Patient Infor
11.11.
Patient InforPatient Infor
mation Vmation V
mation V
mation Vmation V
ideoideo
ideo
ideoideo
This ten-minute video contains helpful information
about the CardioNet Monitoring Service.
12.12.
12.
12.12.
ReturRetur
Retur
ReturRetur
n Addrn Addr
n Addr
n Addrn Addr
ess Label and Shipping Foress Label and Shipping For
ess Label and Shipping For
ess Label and Shipping Foress Label and Shipping For
mm
m
mm
Use the label and prepaid shipping form to return the
kit after monitoring is finished.
Page 10

PATIENT RIGHTS
1. You have the right to be treated with dignity,
courtesy and respect
2. You have the right to high quality service
3. You have the right to excellent training on how to use
the CardioNet technology and service
4. You have the right to receive high quality service
regardless of race, religion, political belief, sex, sexual
preference or source of payment
5. You have the right to complain or suggest
improvements in service without worrying that we
will stop providing service or provide poorer quality
of service
6. You have the right to refuse service
7. By federal law (the HIPAA act) you have the right to
privacy with regard to your medical information and
to control the use of that information
The HIPAA act also provides that you have the right to
request copies of your medical records and to have
corrections made if there are errors in your records
Remember: Avoid
additional charges.
All kit items, except
used batteries and
used electrode pads
must be immediately
returned to
CardioNet once
service is completed,
or you will be
charged for them.
1. Introduction
PATIENT RESPONSIBILITIES
1. Use the CardioNet equipment with care
2. Return equipment to CardioNet immediately, when
monitoring is completed
3. Provide CardioNet with the information we need to
provide you with quality care
4. Treat CardioNet employees with respect
Introduction 7
Page 11

1. Introduction
WHO TO CALL FOR HELP
If you have any questions about your monitoring service
or billing, please call one of our toll free numbers.
Customer service is available 24 hours a day,
7 days a week.
MONITORING QUESTIONS: (866) 426-4401
BILLING QUESTIONS: (866) 426-4402
IMPORTANT INFORMATION
CardioNet home monitoring is a service used to help
doctors diagnose and treat rhythm problems, not an
emergency response service. If you require immediate
medical assistance, you should contact Emergency
Medical Services (9-1-1 in most communities).
It is possible that CardioNet could detect a problem
that needs immediate attention while a patient is being
monitored. If we do detect a problem that needs
immediate attention, we will attempt to notify you so
that you can obtain assistance from Emergency Medical
Services. Our ability to contact and assist patients is
limited by several factors such as cell phone coverage,
our ability to determine patient location and differing
Emergency Medical Services policies and systems in
local communities.
8 Introduction
Page 12

2
SETTING UP
This section describes:
Connecting the CardioNet Base
"
Recharging the Battery
"
Staying in Communications Range
"
Wearing the Sensor
"
Setting Up 9
Page 13

2. Set Up
CONNECTING AT HOME
To connect the CardioNet base, find an electrical outlet
and phone jack in a central location, preferably in your
bedroom. As long as you are within range of the
CardioNet monitor, your CardioNet sensor can continue
sending heartbeats to the monitor. If you go out of range,
the sensor beeps to alert you.
When you go to any area in your house where your sensor
is out of communications range with your monitor, simply
take the CardioNet monitor out of the recharging base
and bring it with you.
In larger houses, a second base station is often used so
that you can stay within range without carrying your
monitor around.
At night, keep the CardioNet monitor in the recharging
base near your bed. If you sleep on your stomach, your
body may block communications between the monitor
and the sensor and you may need to put the sensor next
to your pillow. Whenever possible keep the monitor in
the base. It takes around four hours in the base station to
completely recharge the monitor battery.
10 Setting Up
Page 14
PHONE IN PHONE OUT
2. Set Up
PC
POWER
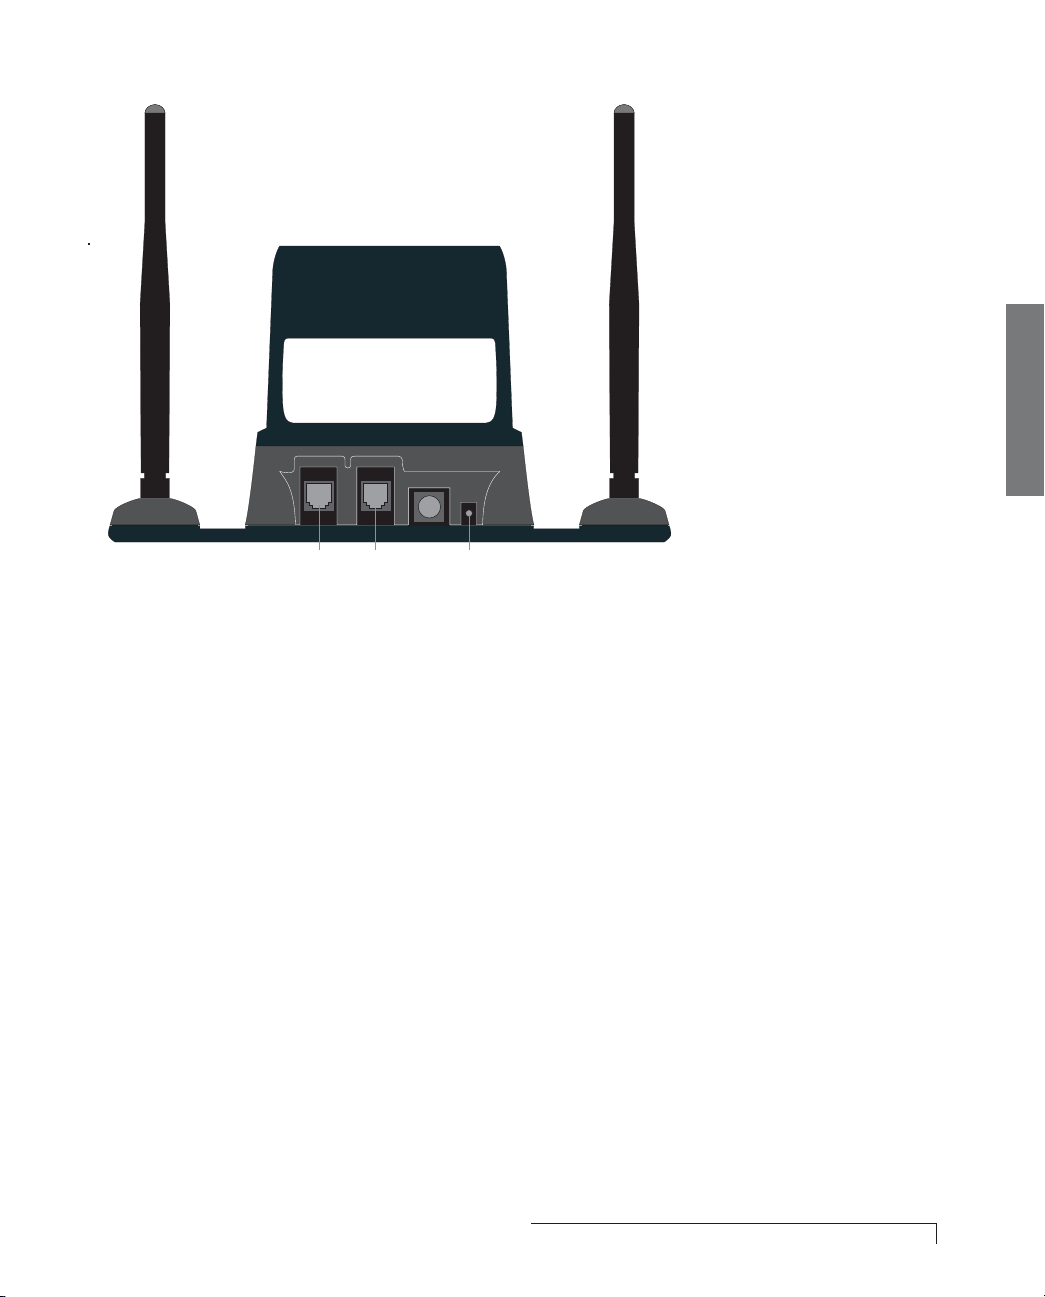
Phone In
(your
phone
line)
SETTING UP THE BASE
11
1. Find an electrical outlet located close to a phone jack,
11
Line Out
(phone
line from
Service
Kit)
Power
(Insert
power
line)
preferably in your bedroom.
22
2. Unplug the telephone line from the back of
22
your telephone.
3. Take the telephone line that you just unplugged
and plug that line into the slot on the base
labeled “Phone In”.
4. Locate the second telephone line included in your
CardioNet Service Kit. Plug one end of this line into the
slot on the base labeled “Line Out”. Plug the other end
of this line into the back of your telephone.
5. Locate the power cord in your CardioNet Service Kit.
Insert the small, round end of this line into the slot on
the base labeled “Power”. Plug the other end into
an outlet.
Setting Up 11
Page 15

CHECKING BATTERY POWER
2. Set Up
See Page 20 for
more details about
checking battery
power.
At home, leave the
monitor in the base
whenever possible.
When your monitor is in the base, touch the battery
symbol on the screen and the unit will tell you if the
battery is fully charged. If the battery is not fully charged,
leave the monitor in the base for a full recharge, which
takes four hours.
STAYING IN RANGE
The monitor’s rechargeable battery provides between 12
and 16 hours of use for each four hours of recharging. If
your battery indicator is low and it is still early in the day,
we recommend you place the monitor in the base for
recharging. When you are at home, leave the monitor in
the base, unless you go to a part of the house where the
sensor and monitor would be out of communications
range. Whenever you begin to go out of communications
range, the sensor will beep to alert you – reminding you
either return within range or take your monitor with you.
LIMITATIONS OF CELL PHONE COVERAGE
12 Setting Up
When your CardioNet monitor is in the base station, it
uses the regular telephone system for communications
with the CardioNet center. When you are away from
home – or whenever your CardioNet monitor is out of the
base station – the monitor uses cell phone technology to
contact the CardioNet center and transmit ECG data.
As with consumer cell phones, calls can sometimes be
delayed or blocked by coverage problems, heavy traffic
on cell phone networks, or physical obstructions such as
buildings or mountains.
Page 16
When the CardioNet monitor has data to transmit and is
unable to communicate with the CardioNet center through
cell phone communications, it will save the data and
transmit it to the Center through the phone line when it is
replaced in the base.
2. Set Up
Place Monitor in Base to Recharge
Setting Up 13
Page 17
2. Set Up
WEARING THE CARDIONET SENSOR
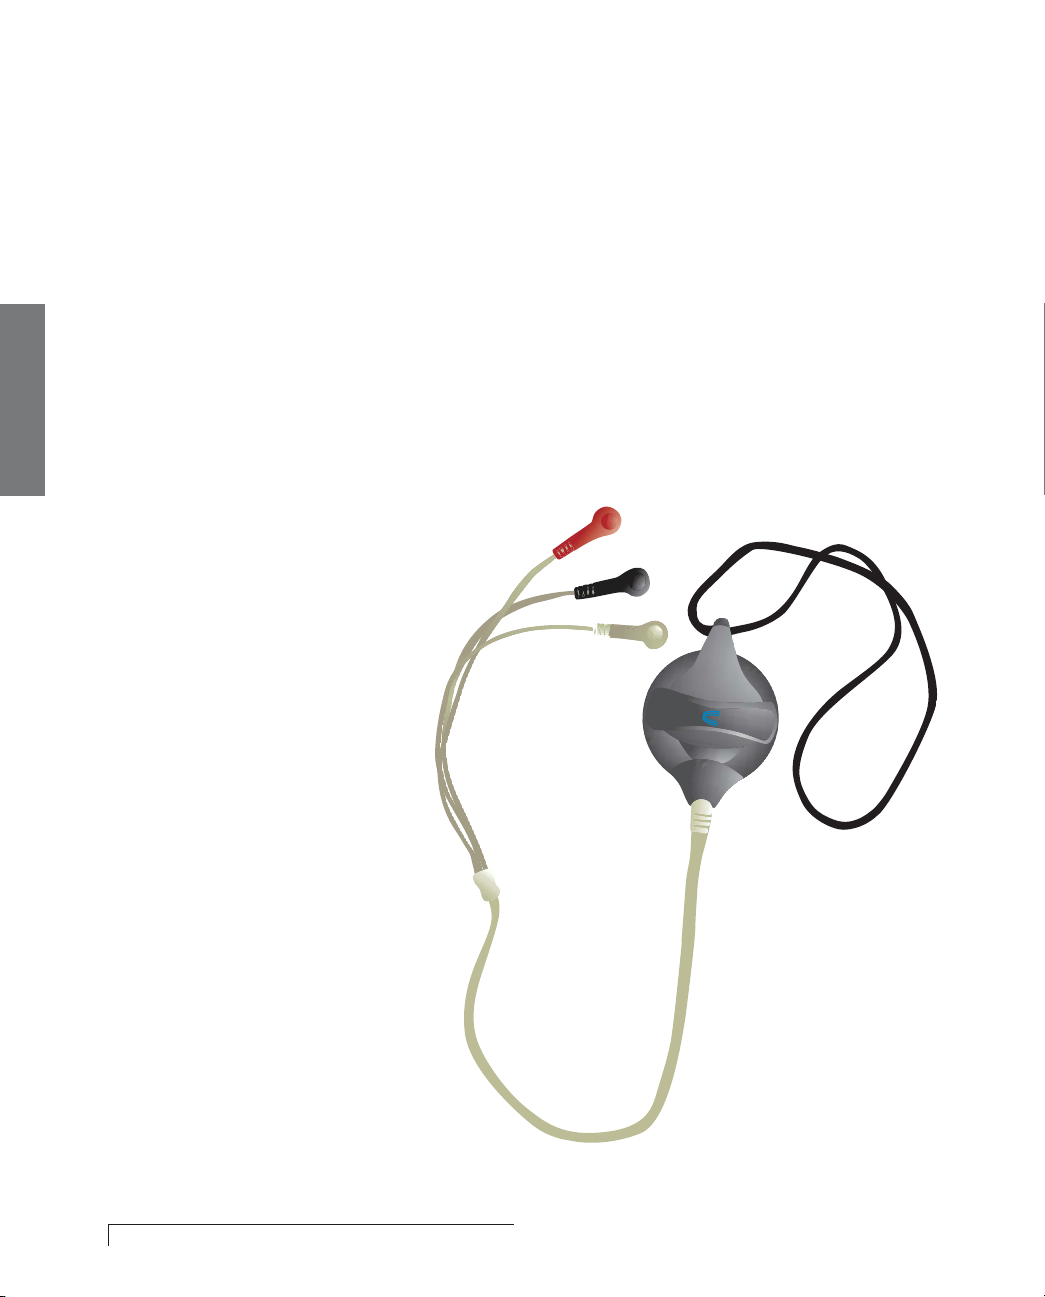
The CardioNet sensor uses three electrode pads,
carefully placed on your body to detect heartbeats by
sensing electrical changes on the surface of your skin. The
electrode pads are attached to the sensor by three lead
wires: a white wire, a black wire and a red wire. The lead
wires can be snapped on and off the electrodes. This
allows you to take off the lead wires and attached sensor
before showering – without removing the electrodes.
See Page 36 for more details about
removing your sensor while showering.
If you notice an irritation or a
rash developing where you
place the electrode pads,
please call us. You may need
to use a different type of
electrode pad.
14 Setting Up
Sensor with Lead Wires
Page 18
Placement of Lead Wires and Pads
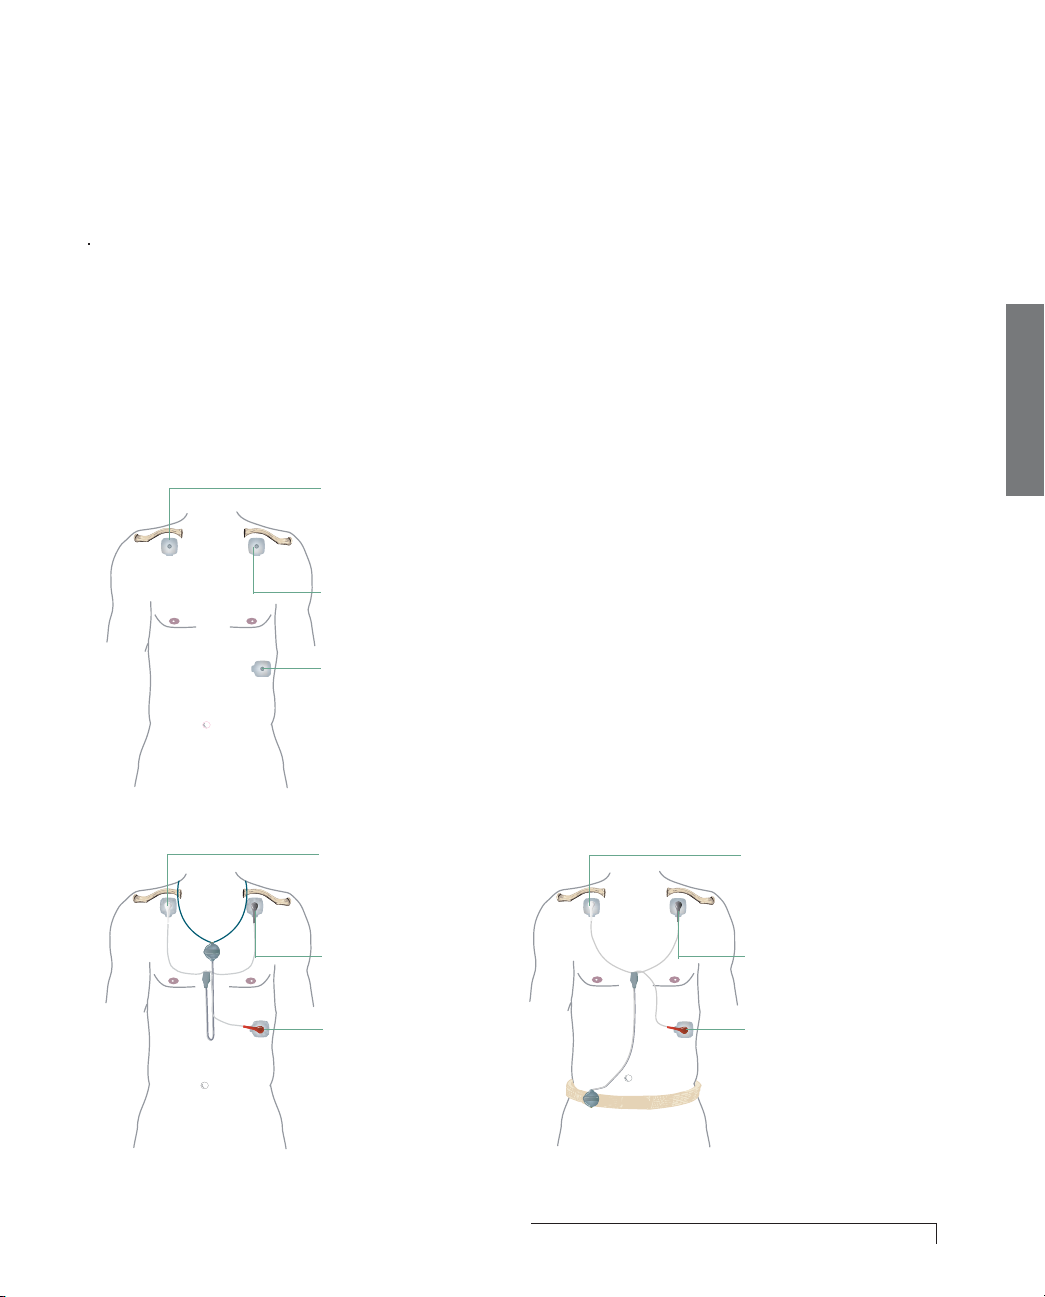
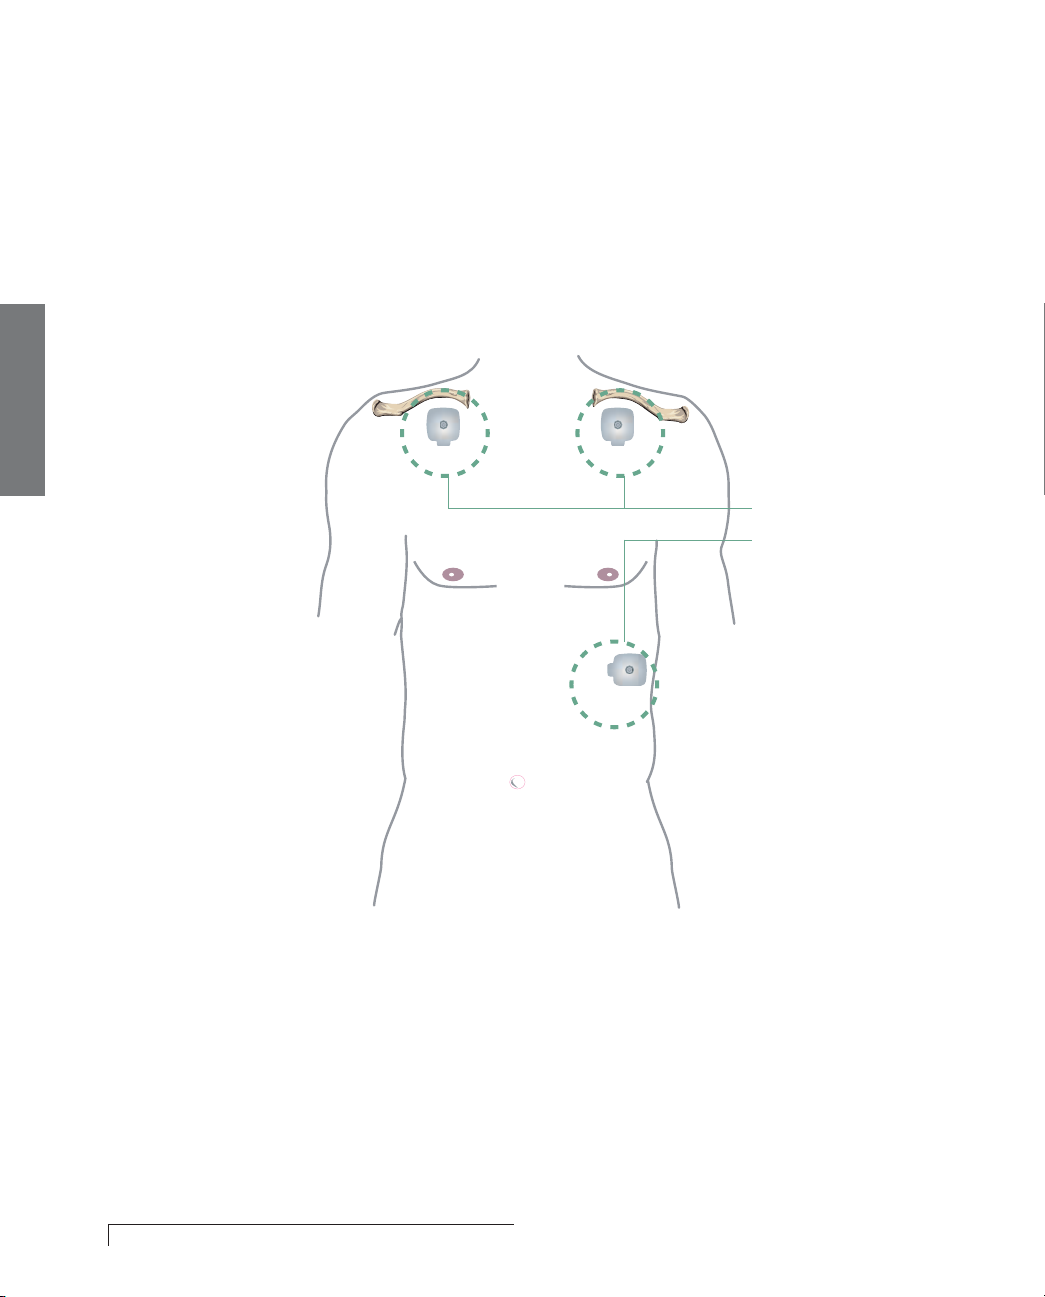
The electrode pads are placed as shown in the
diagram below.
White lead – snaps on an electrode pad placed just below
the center of your right collarbone.
Black lead – snaps on an electrode pad placed just below
the center of your left collarbone.
Red lead – snaps on an electrode pad placed just on your
left side, on the lower part of your rib cage.
Upper Right Chest
Upper Left Chest
Lower Left Rib Cage
When you enroll in the CardioNet
System, you will be shown the best
locations for the electrode pads to
detect changes in heart rhythms.
Placement of Pads
Upper Right Chest
White Lead
2. Set Up
Upper Right Chest
White Lead
Upper Left Chest
Black Lead
Lower Left Rib Cage
Red Lead
Placement of Leads Shown with
Neck Strap
Upper Left Chest
Black Lead
Lower Left Rib Cage
Red Lead
Placement of Leads Shown with
Belt Buckle
Setting Up 15
Page 19
2. Set Up
SKIN PREP
This is a protective barrier for patients with known
sensitivity or adhesion difficulties. Apply to clean, dry skin
before electrode placement and allow to dry completely.
Use one skin prep pad for all 3 electrodes.
Alternate
Placement Areas
16 Setting Up
Alternate Placement for Pads
If redness or irritation develops, you can place the
electrode pad at another location near the original site.
If redness or irritation develops at the alternate site,
please call the CardioNet center immediately.
Page 20

3
USING THE MONITOR
This sectiondescribes:
Monitor On and OFF
"
Using the Touch Screen
"
Recording a Symptom
"
Cell Phone Coverage
"
Changing Monitor Options
"
Checking Monitor Status
"
Warnings and Alarms
"
The CardioNet monitor is your link with the CardioNet
Patient Service Center. The CardioNet sensor sends each
heartbeat to the monitor. When the monitor detects a
targeted change in rhythm, or when you detect a
symptom and enter your information, the monitor will
establish a communications link with the CardioNet
Patient Service Center. The monitor sends your ECG
data, as well as any symptoms and activity information
you have entered using the monitor’s touch screen.
Using Your CardioNet Monitor 17
Page 21
See pages 38 - 41 for more information
about how to remove the sensor while
bathing or showering.
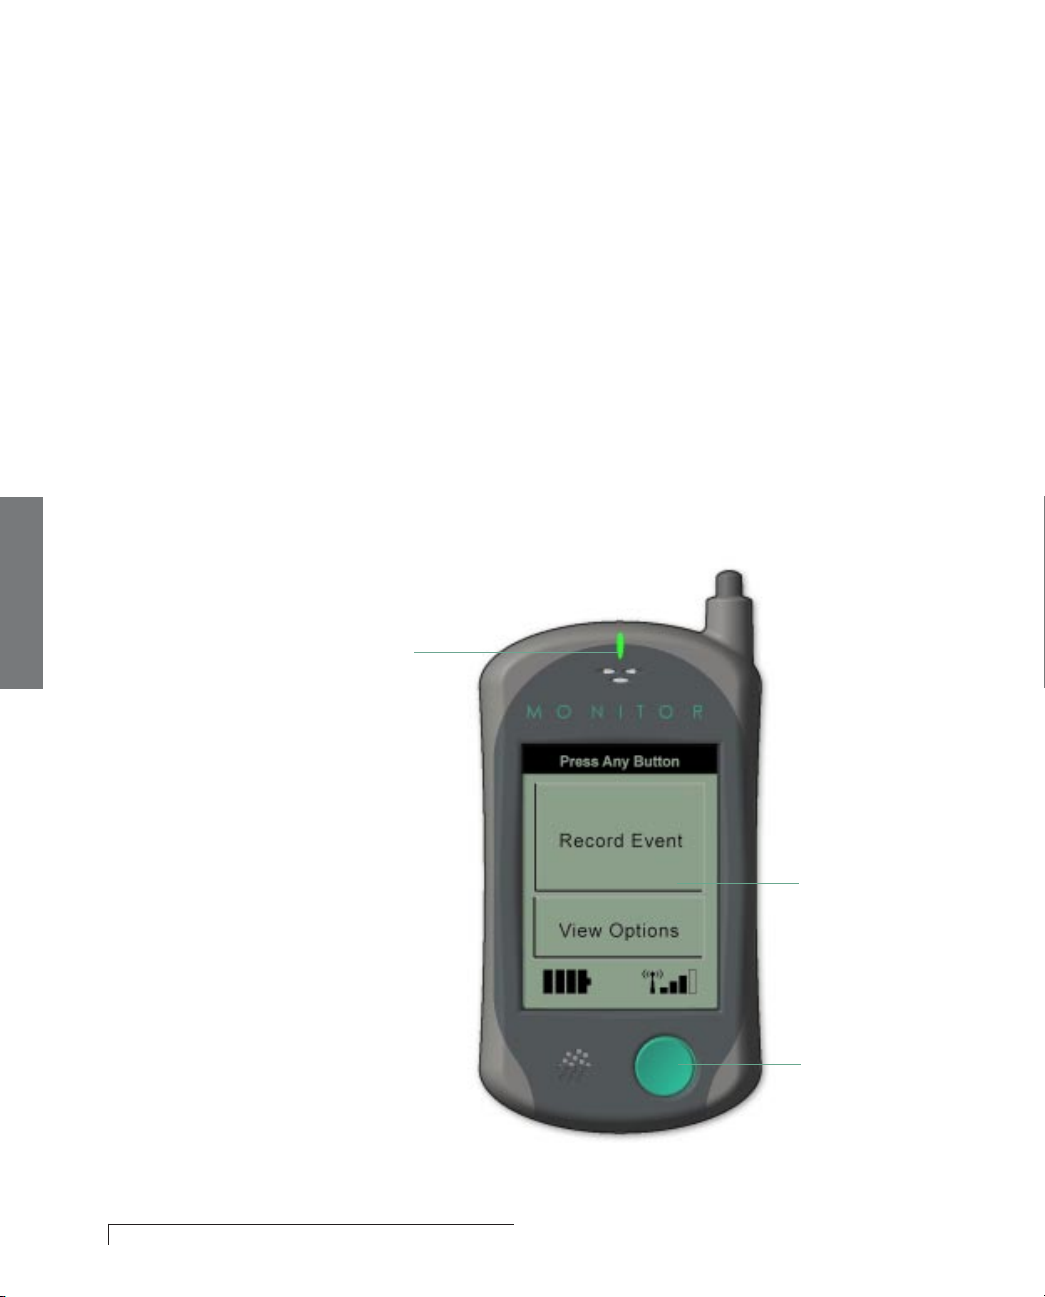
When the monitor
is awake you see
the main menu.
When off or asleep,
the screen is blank.
Touch the button
3. Monitor
to wake it up.
MONITOR ON AND OFF
Keep the monitor on at all times while you are on the
CardioNet Service, unless you are changing the sensor
batteries or not wearing the sensor – for example, when
you take a shower.
The green button at the bottom of the monitor turns it
on or off and wakes it up. To turn the monitor off, you
must also use the touch screen to confirm that you want to
turn the monitor off.
LED Light
The CardioNet monitor
uses cellular communications to transmit data
when you are away from
home. If you have an
implanted pacemaker
or defibrillator, please
follow the manufacturer’s
instructions regarding
the use of cell phones.
(See page 55 for
more information.)
18 Using Your CardioNet Monitor
Touch Screen
On/Off Button
Page 22
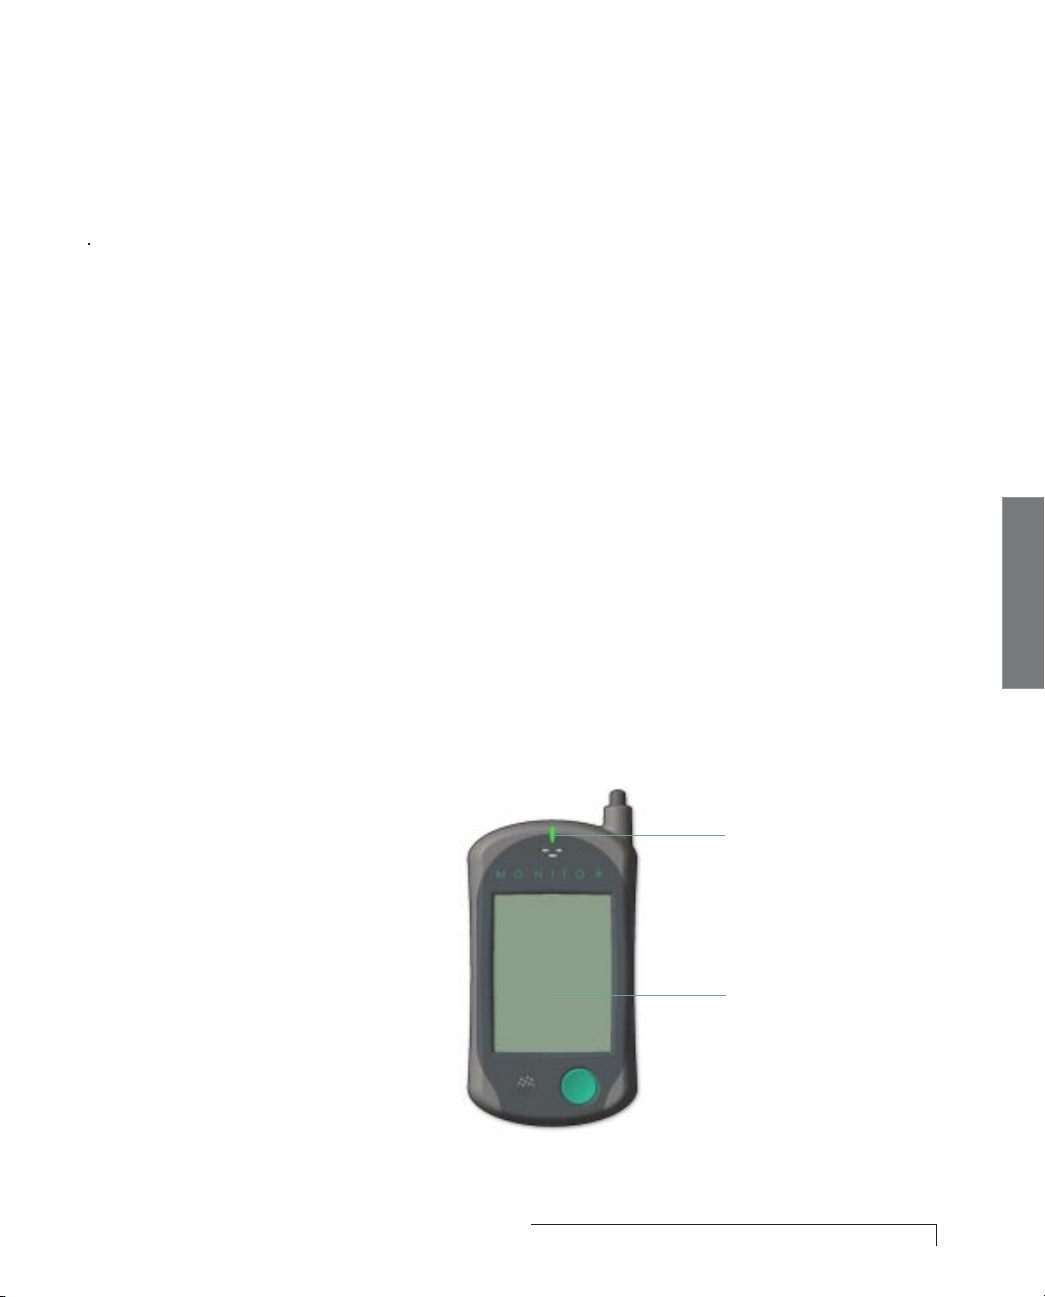
MONITOR IS ON
The LED indicator light flashes green when you are
being actively monitored. When the light flashes red,
the monitor is trying to get your attention. An alert
screen will appear with help or information.
MONITOR SCREEN IS ASLEEP
To save on battery power, the monitor screen
becomes blank while you are not using the touch
screen menus. You can tell that the monitor is still on
because the LED indicator light will be flashing.
To wake the monitor up press the On/Off button. The
screen information will appear.
MONITOR IS OFF
When you turn the monitor off, the screen is blank and
the LED indicator light is not lit.
3. Monitor
The LED light still
flashes when the
monitor is asleep.
It goes off when
the monitor is
turned off.
The screen is
blank when the
monitor is asleep
or turned off.
Using Your CardioNet Monitor 19
Page 23
MAIN MENU
3. Monitor
Press Any Button
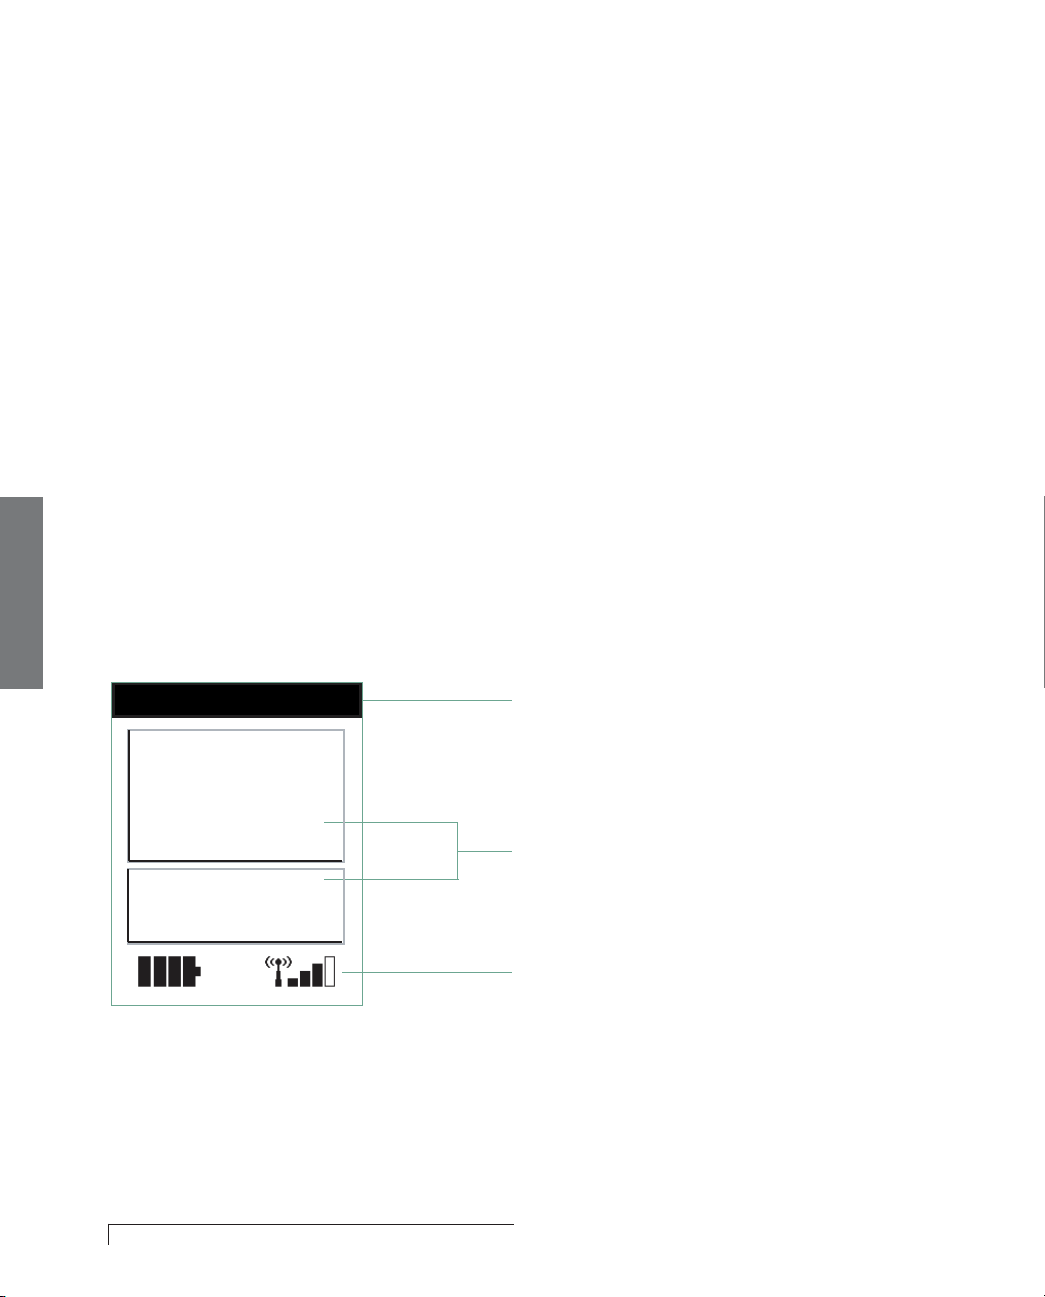
USING THE TOUCH SCREEN
The CardioNet monitor has a simple touch screen
that is easy to view and use. To make selections, lightly
touch the screen with your finger. Each screen that
appears will guide you through the next step, using
menus – choices you select.
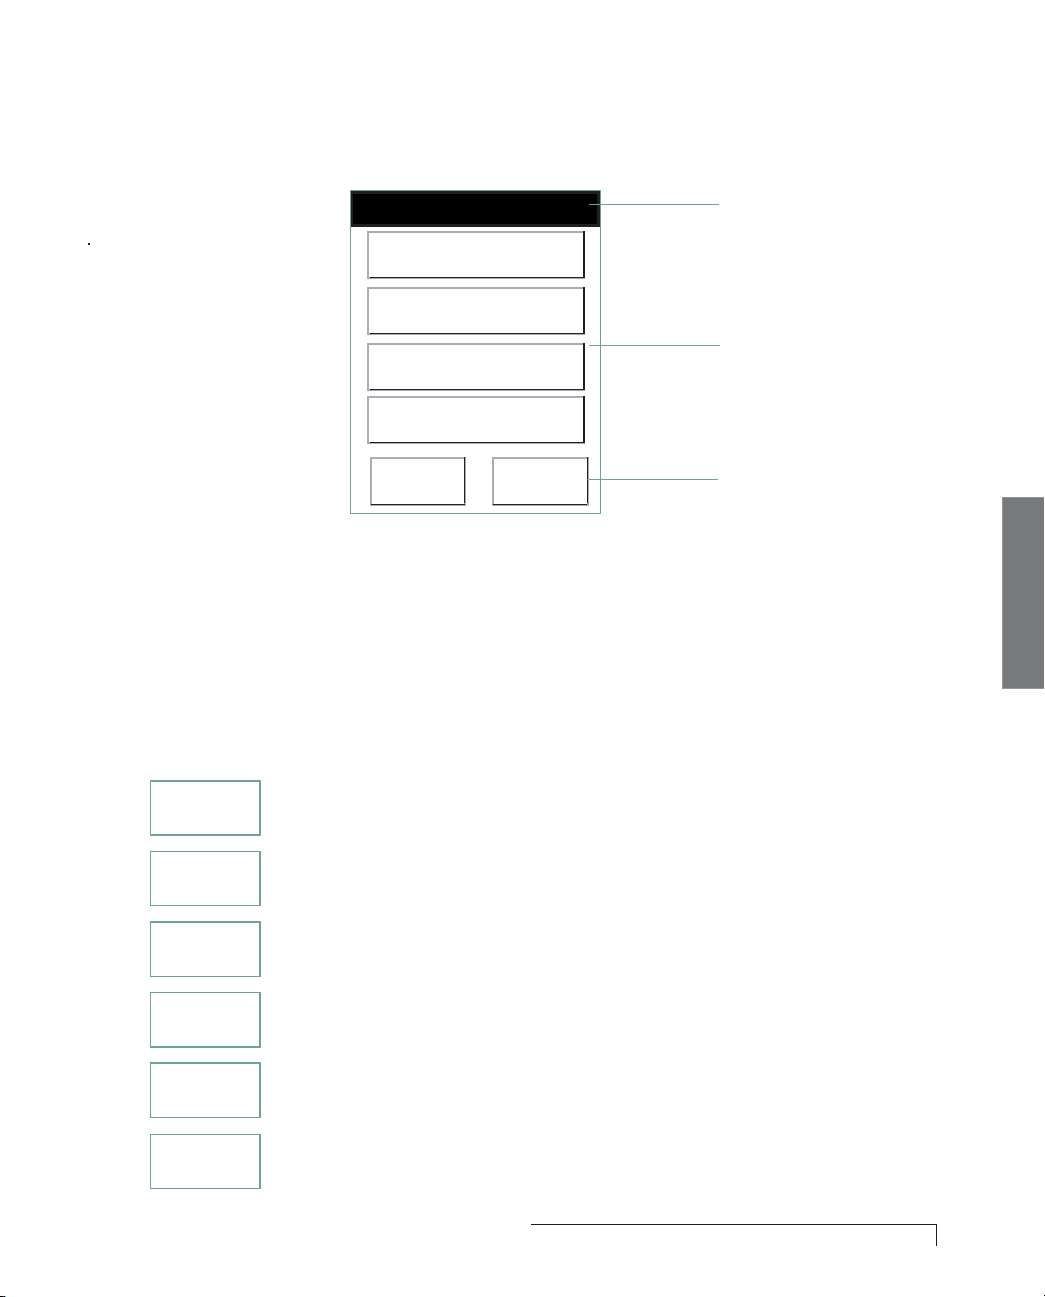
Most screen menus follow a simple pattern. At the top of
each there is a prompt line that tells you the next step to
take. The midsection lists options that you can choose. At
the bottom of most menus are navigation buttons that
allow you to move from screen to screen.
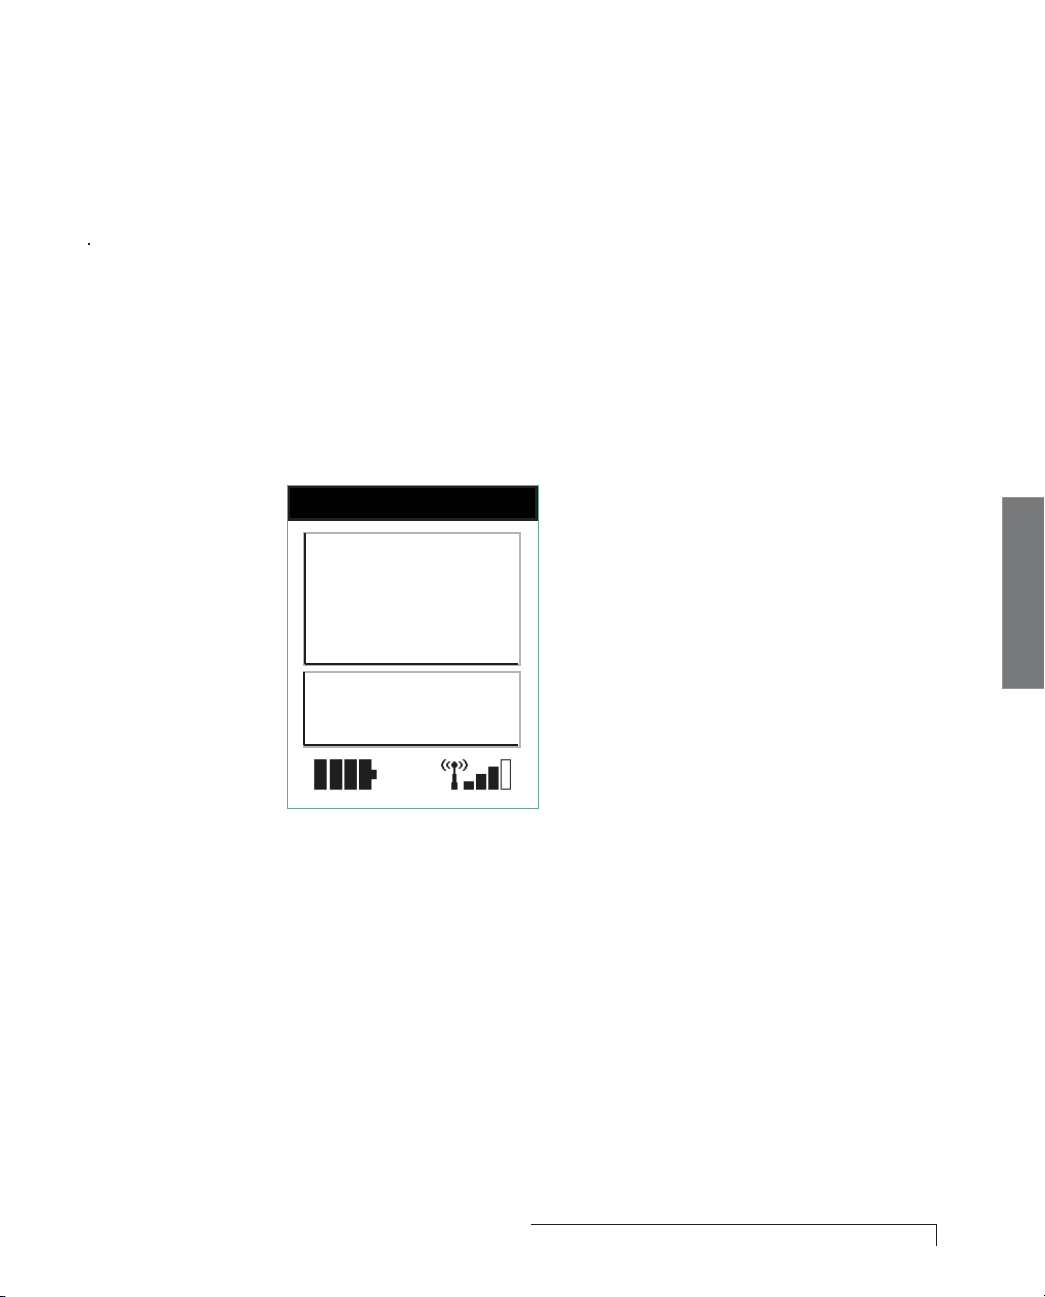
The two symbols at the bottom of the main menu let you
check battery power and the strength of the cell signal.
Prompt Line
Record Event
View Options
20 Using Your CardioNet Monitor
Selection Options
Check Battery and Cell
Phone Coverage
Black = Full or Strong
White = Getting Weaker
Page 24
SYMPTOMS MENU
Select Symptoms
Skipped Beat
Light Headed
Fainted/Fell
Short of Breath
Back
NAVIGATION BUTTONS
Next
The navigation buttons at the bottom of each menu
move you from screen to screen. Here’s what the
buttons do:
Prompt Line
Selection Options
Navigation Buttons
3. Monitor
Confirm
OK
Back
Next
Silence
Help
Confirm accepts your selection and moves
to the next menu.
OK acknowledges you have read the information
on the screen and closes the current menu.
Back moves backward to the previous menu.
Next moves forward to the next menu.
Silence turns off the audio alarm.
Help moves to a helpful information screen.
Using Your CardioNet Monitor 21
Page 25

HELP MENU
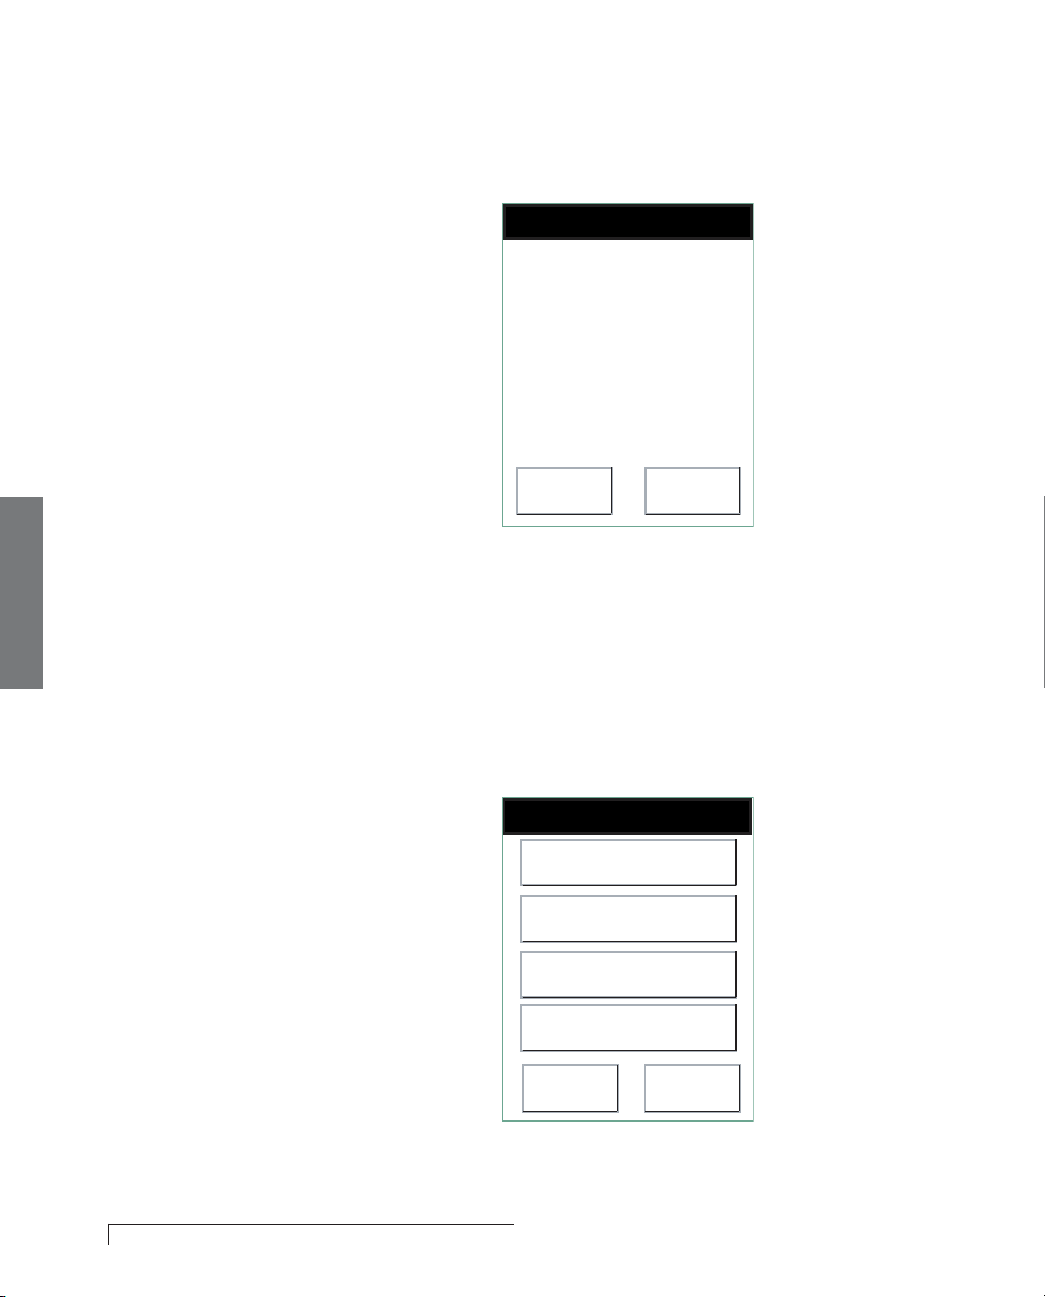
The help and alert screens are slightly different in that the
middle section provides additional information.
3. Monitor
Press Back
To recharge Monitor
battery:
A) Place Monitor in Base
OR
B) Insert the charger cord
into the bottom of your
Monitor.
Back
Prompt Line
Helpful Information
Navigation Button
to Close Screen
22 Using Your CardioNet Monitor
Page 26
RECORDING AN EVENT
Your symptom and activity data is very important
information that helps your physician treat or manage
your condition. By entering your symptoms and activities
each time you have an event, you will assist your
physician in determining the best treatment.
To Record a Symptom
1
. Make sure the monitor is on. If the screen is blank,
press the On/Off button to turn on the monitor. The
Main menu appears.
Press Any Button
Record Event
To turn your
monitor screen
on, either touch
the blank screen
or press the
On/Off button.
3. Monitor
View Options
2. On the Main menu touch Record Event.
Using Your CardioNet Monitor 23
Page 27
A confirmation screen appears asking if you want to
report an event.
Remember that
there are two
Symptoms menus.
3. Monitor
Press Yes or No
Do you want to
report an event?
Yes No
3. Touch Yes. If you have touched the Record Event screen by
accident and do not wish to report an event, touch NO and you will
return to the Main Menu.
The
first first
first of
first first
two two
two Symptoms menus appears.
two two
24 Using Your CardioNet Monitor
Select Symptoms
Skipped Beat
Light Headed
Fainted/Fell
Short of Breath
Back
Next
Page 28
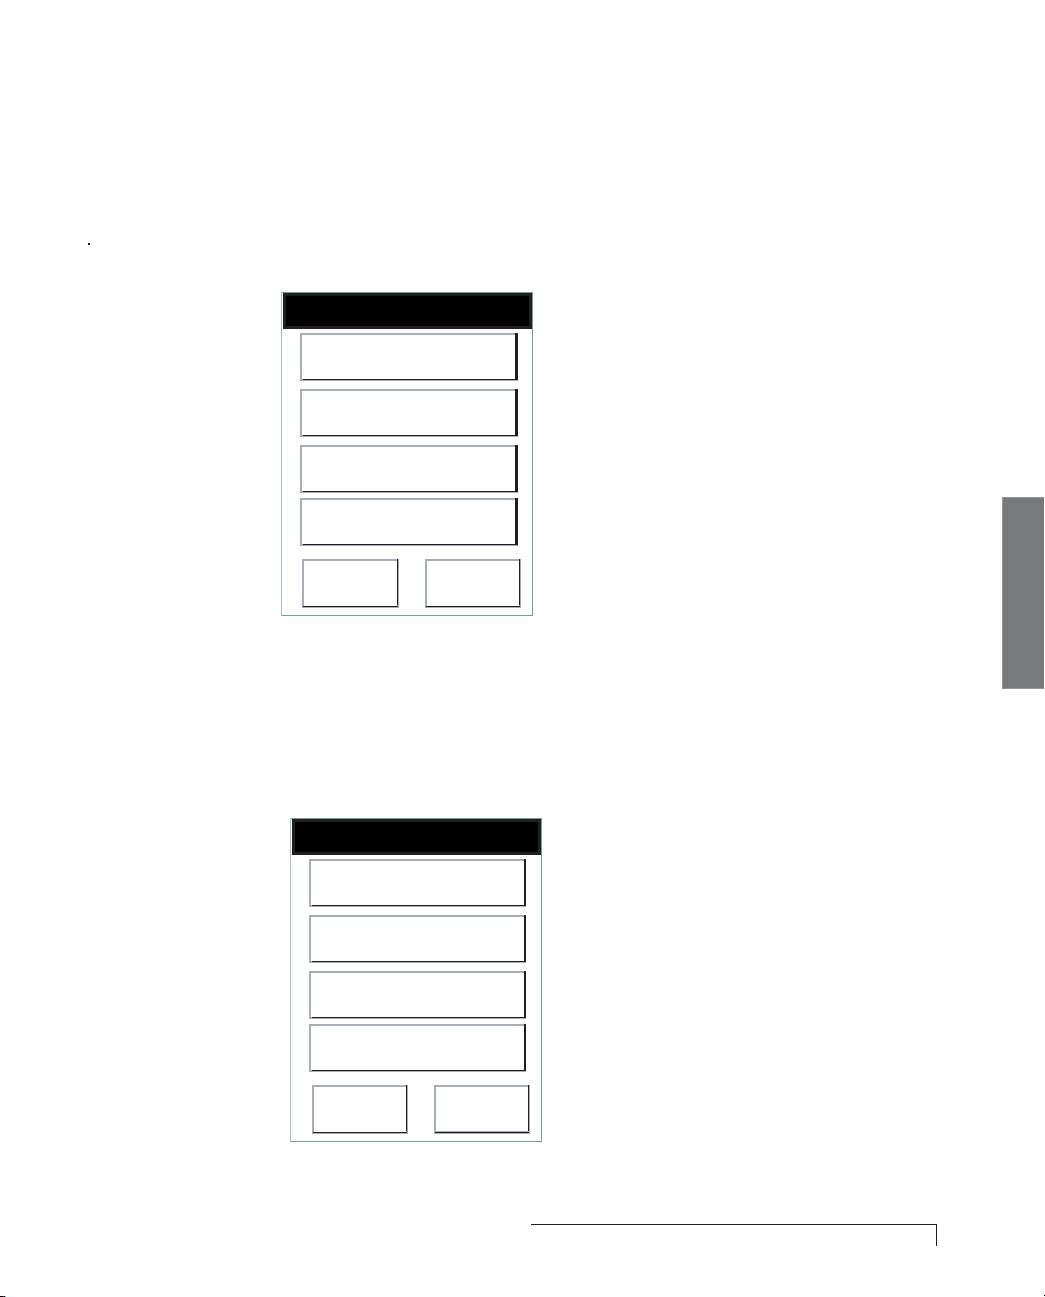
Select, one by one, each and every symptom that you
feel. A check mark will appear next to symptoms you
select. Touch Next.
second second
The
second Symptoms menu appears.
second second
Select Symptoms
Chest Discomfort
Fatigue
Heart Racing
None of the above
3. Monitor
Back
Confirm
Select any or all symptoms or touch
None of the above. When done, touch
Confirm to move to the Activities menu.
The Activities menu appears.
Select Activity
Resting
Light Activity
Moderate Activity
Heavy Activity
Back
Confirm
Using Your CardioNet Monitor 25
Page 29
3. Monitor
4. Choose the activity that best reflects your level of
exertion when you felt the symptom. When done,
touch Confirm.
The following screen appears.
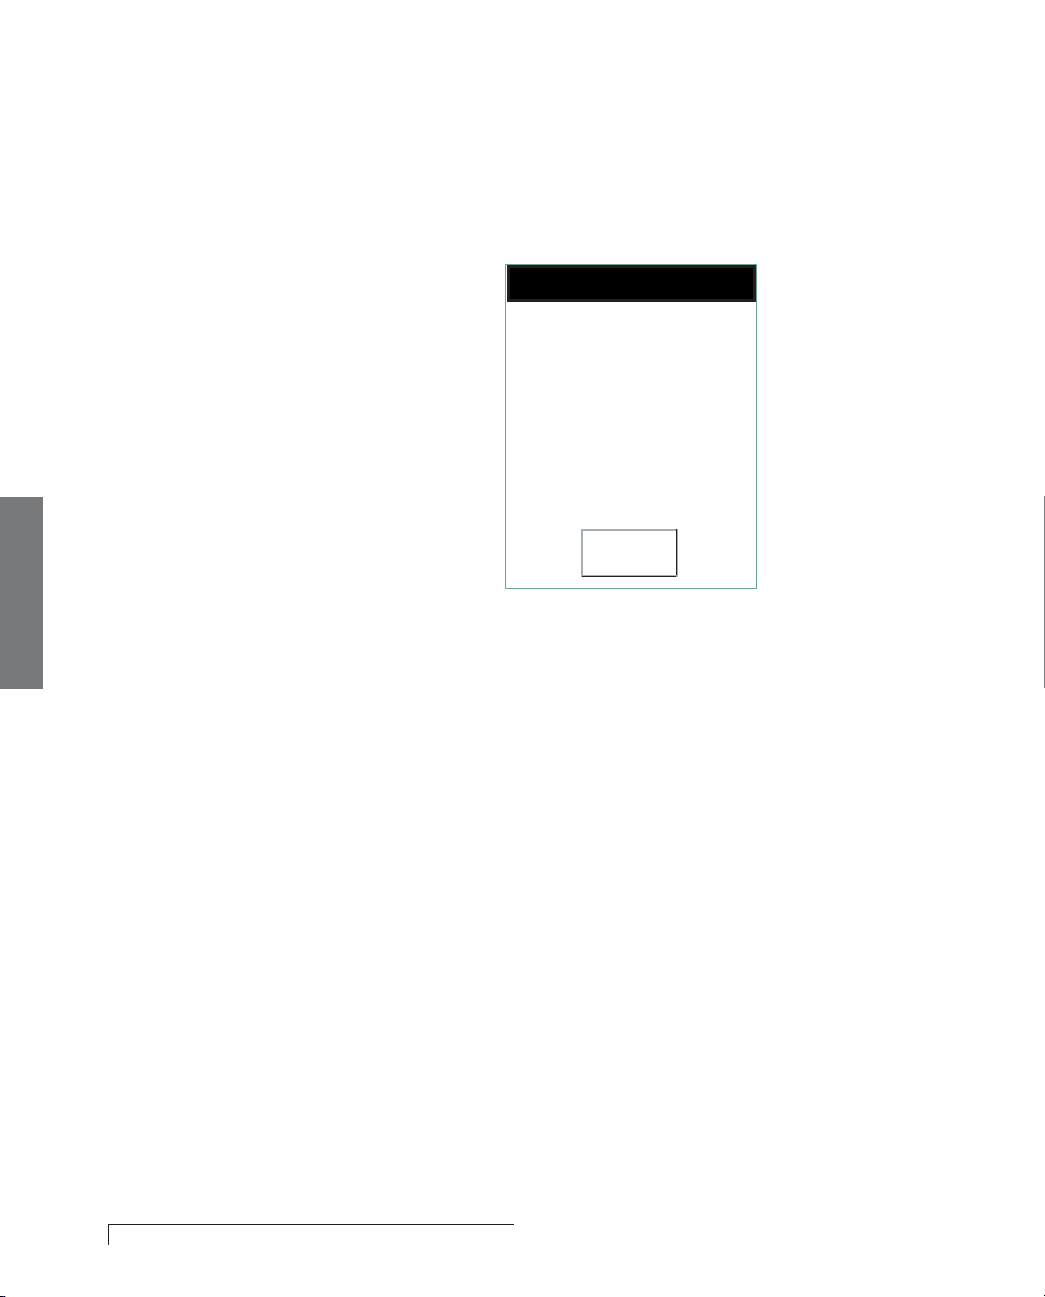
Press OK for Main Menu
Selections recorded.
Attempting to connect to
the CardioNet Center.
OK
5. Touch OK. The monitor then attempts to send your
activity information and your ECG data to the
CardioNet Patient Service Center.
26 Using Your CardioNet Monitor
Page 30
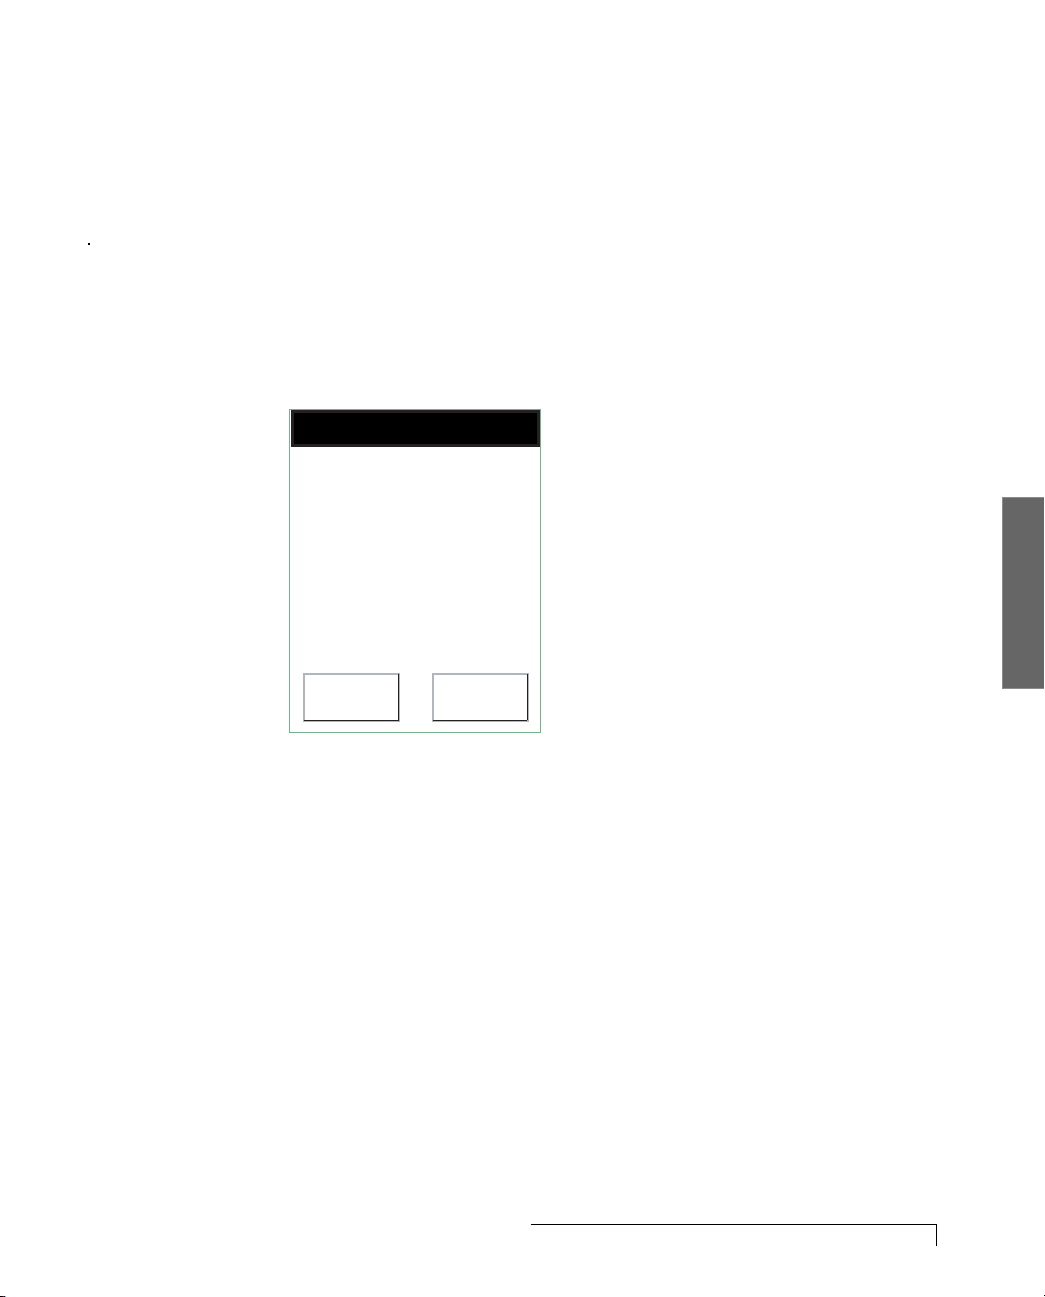
WHEN YOU ARE WITHOUT CELL PHONE COVERAGE
When the CardioNet monitor is not in its base station, it
uses wireless telecommunications to communicate with
the CardioNet Patient Service Center. If you are in an area
without cell phone coverage and the monitor is unable
to establish a connection with the Patient Service Center,
the monitor stores the information it has collected and
sends it later.
Press Help or OK
Cell phone unable to
connect.
Your Monitior will
continue to redial.
Press Help for options.
Help OK
3. Monitor
Monitor Cannot Establish Connection
Using Your CardioNet Monitor 27
Page 31
3. Monitor
CHANGING MONITOR OPTIONS
Your CardioNet monitor lets you make adjustments to suit
your needs. Adjustable features include:
! Volume
! Contrast
! Cellular Power (on or off)
! Manual Transmission
Adjust Features
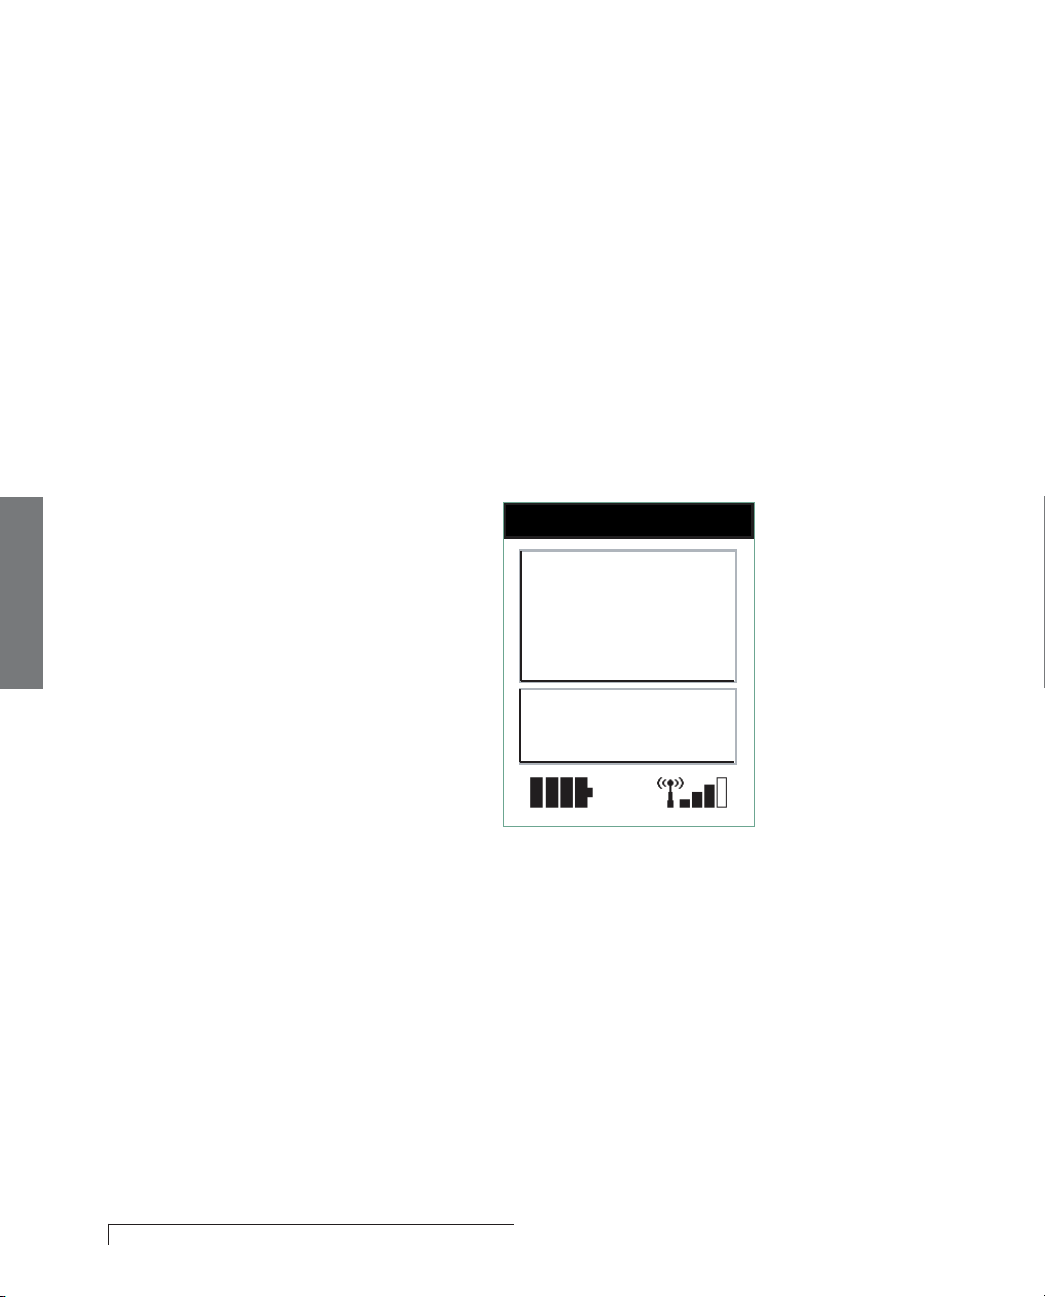
. Make sure the monitor is on. The Main menu appears.
1
Press Any Button
Record Event
28 Using Your CardioNet Monitor
View Options
Page 32
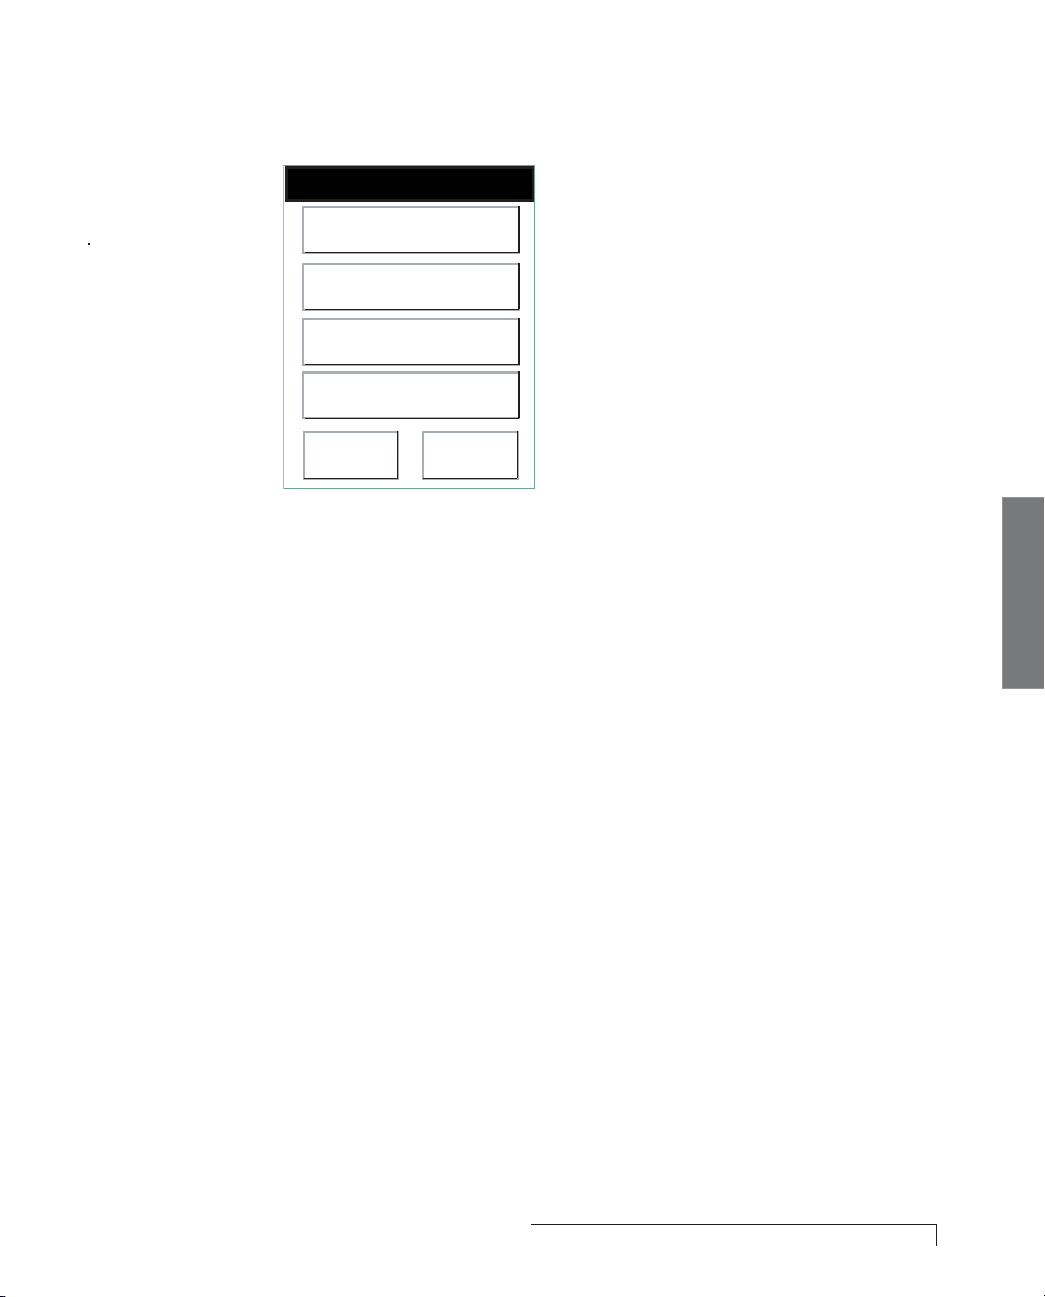
2. Touch View Options. The Options menu appears.
Select Option
Volume
Contrast
Cell Phone
Manual Transmission
Back
More ...
3. Choose any of the following options.
Volume adjusts the alarm tone to high, medium, low or
vibrate. After making your selection, you’ll hear the
volume you have chosen. For Vibrate, you can feel the
monitor vibrating.
Contrast adjusts the screen contrast to high, medium
or low. After you make your selection the screen will
adjust to the new brightness setting. You might find
you need a different setting when you are outdoors
rather than indoors.
Cell Phone
turns the cell phone in the monitor OFF or
ON. When the cell phone is off, the monitor is still
recording heartbeats, but no data can be sent to the
CardioNet Patient Service Center until the monitor is
placed in the base.
Manual Transmission
is currently not available.
3. Monitor
Back returns to the Main menu.
More ... allows authorized technicians to check the
monitor setup and modify landline dial parameters. See
page 30 for more information.
4. After you make your selections, a screen will appear to
ask you to confirm the selected option. Touch Confirm.
Using Your CardioNet Monitor 29
Page 33
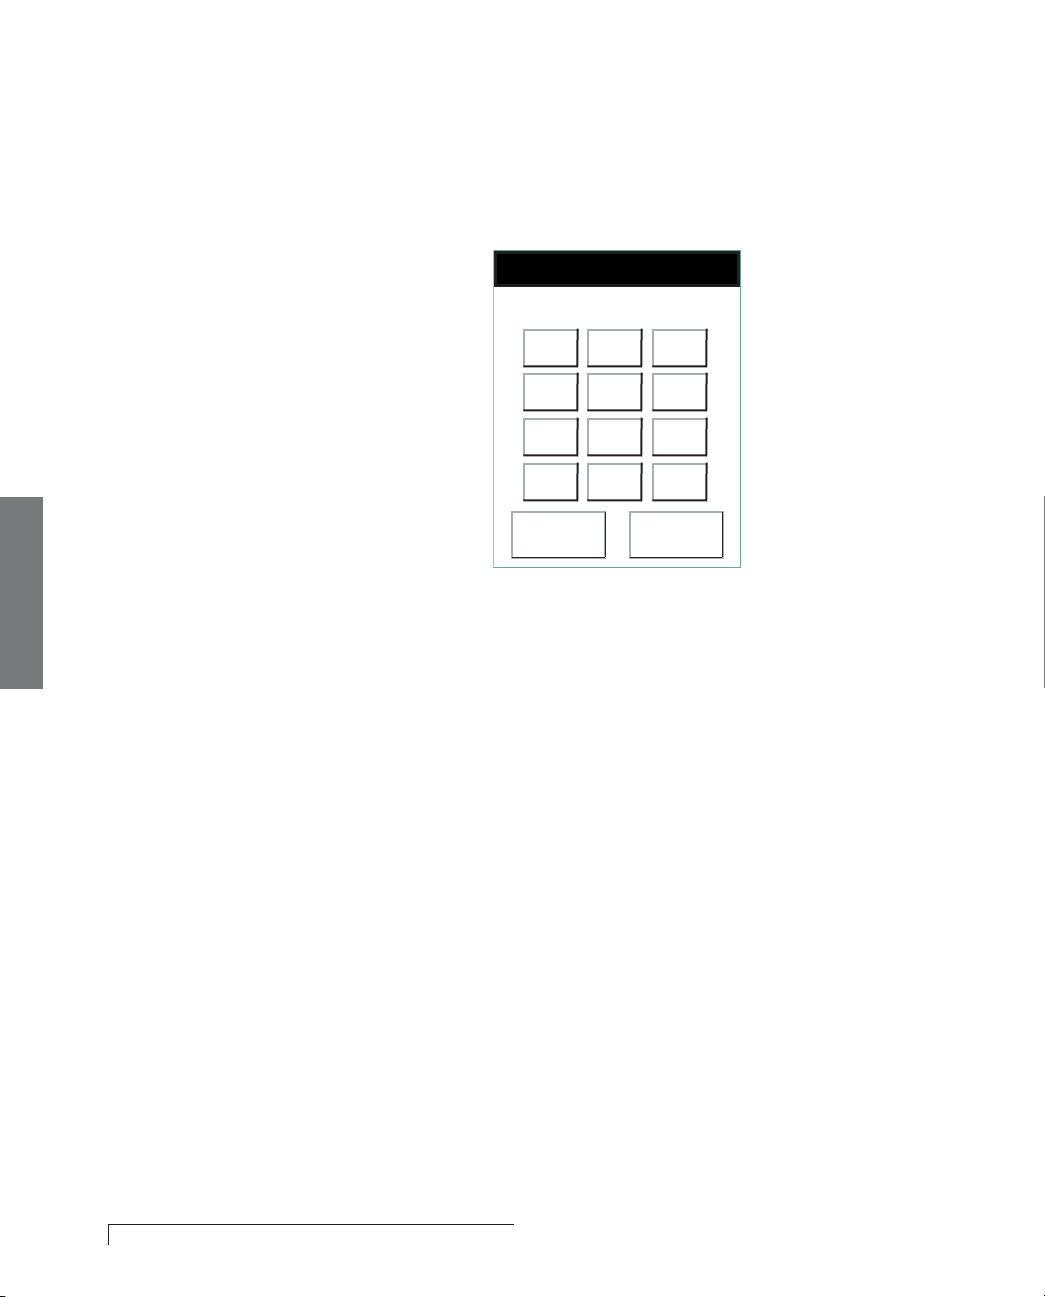
3. Monitor
VERIFYING MONITOR SETUP
1. From the Options menu, touch More ... The Password
menu appears.
Enter Password
* * * *
1 2 3
4 5 6
7 8 9
* 0 #
Clear Enter
2. Enter the password. The options to verify the monitor
setup appear. The following landline dial conditions
can be modified.
Pulse dialing vs. Tone dialing
Dial prefix (For example, 9 to dial out, or *70 to
disable call waiting.)
30 Using Your CardioNet Monitor
Page 34
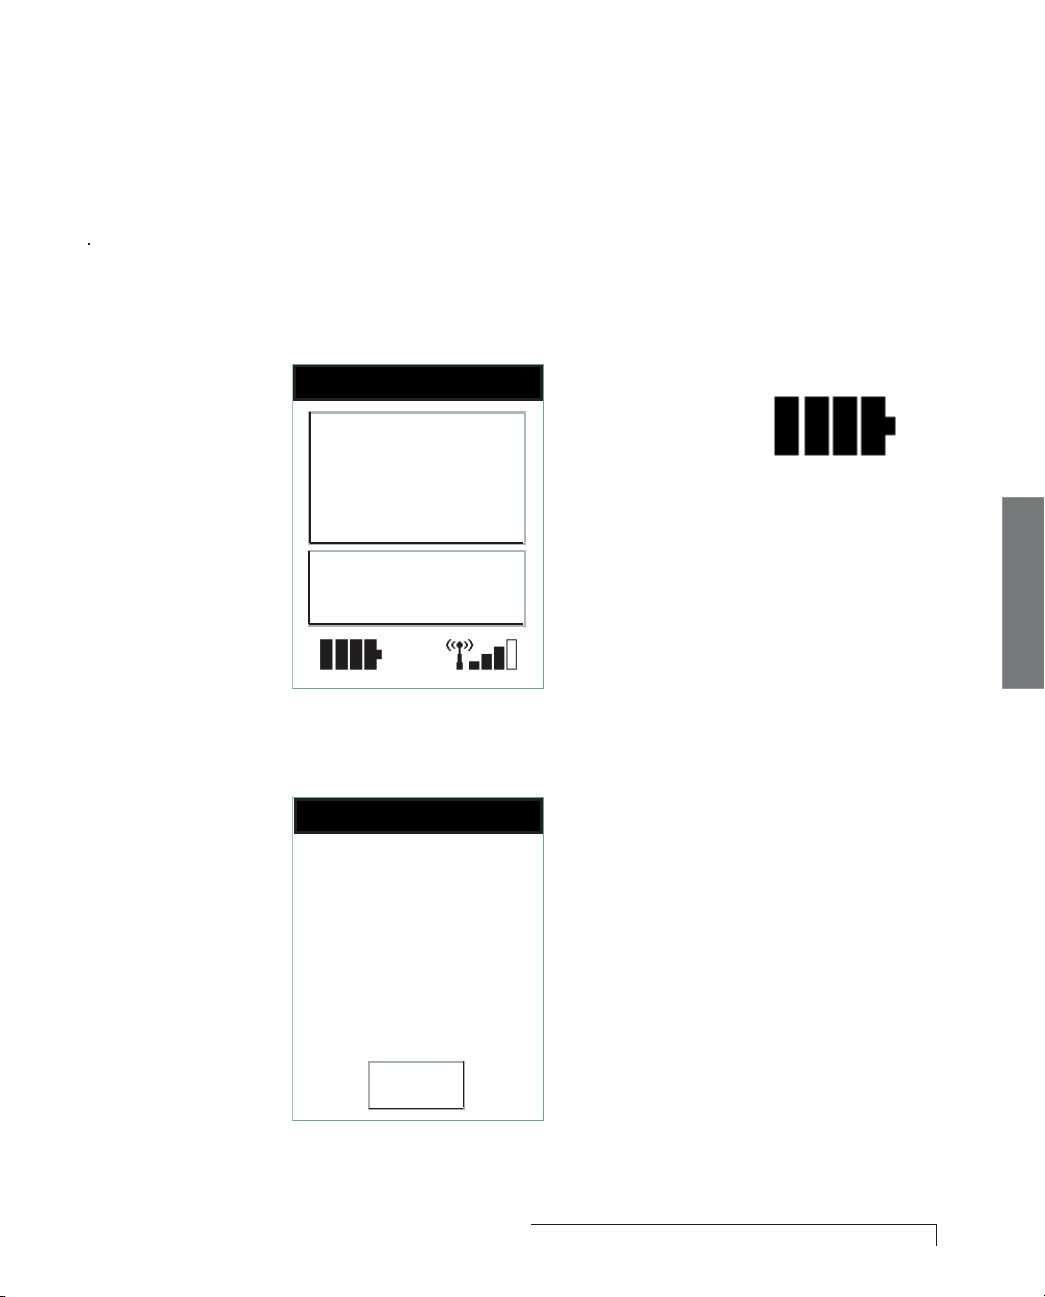
CHECKING MONITOR STATUS
By touching either the battery or the cell signal icon on
the Main menu, you can easily view more information
about both.
View the Battery Status
1
. From the Main menu, touch the Battery icon.
Press Any Button
Record Event
View Options
2. The Battery Information menu appears.
Press OK
Battery time remaining
Sensor: 80%
Monitor: 75%
Choose the Battery
icon to check the
power level of the
monitor battery.
The monitor’s
rechargeable
battery provides
between 12 and 16
hours of use for
every four hours of
recharging. See
Setting Up
(Page 12) for
more information.
3. Monitor
OK
3. The screen tells you about sensor and monitor power
levels. Touch OK to return to the Main menu.
Using Your CardioNet Monitor 31
Page 35
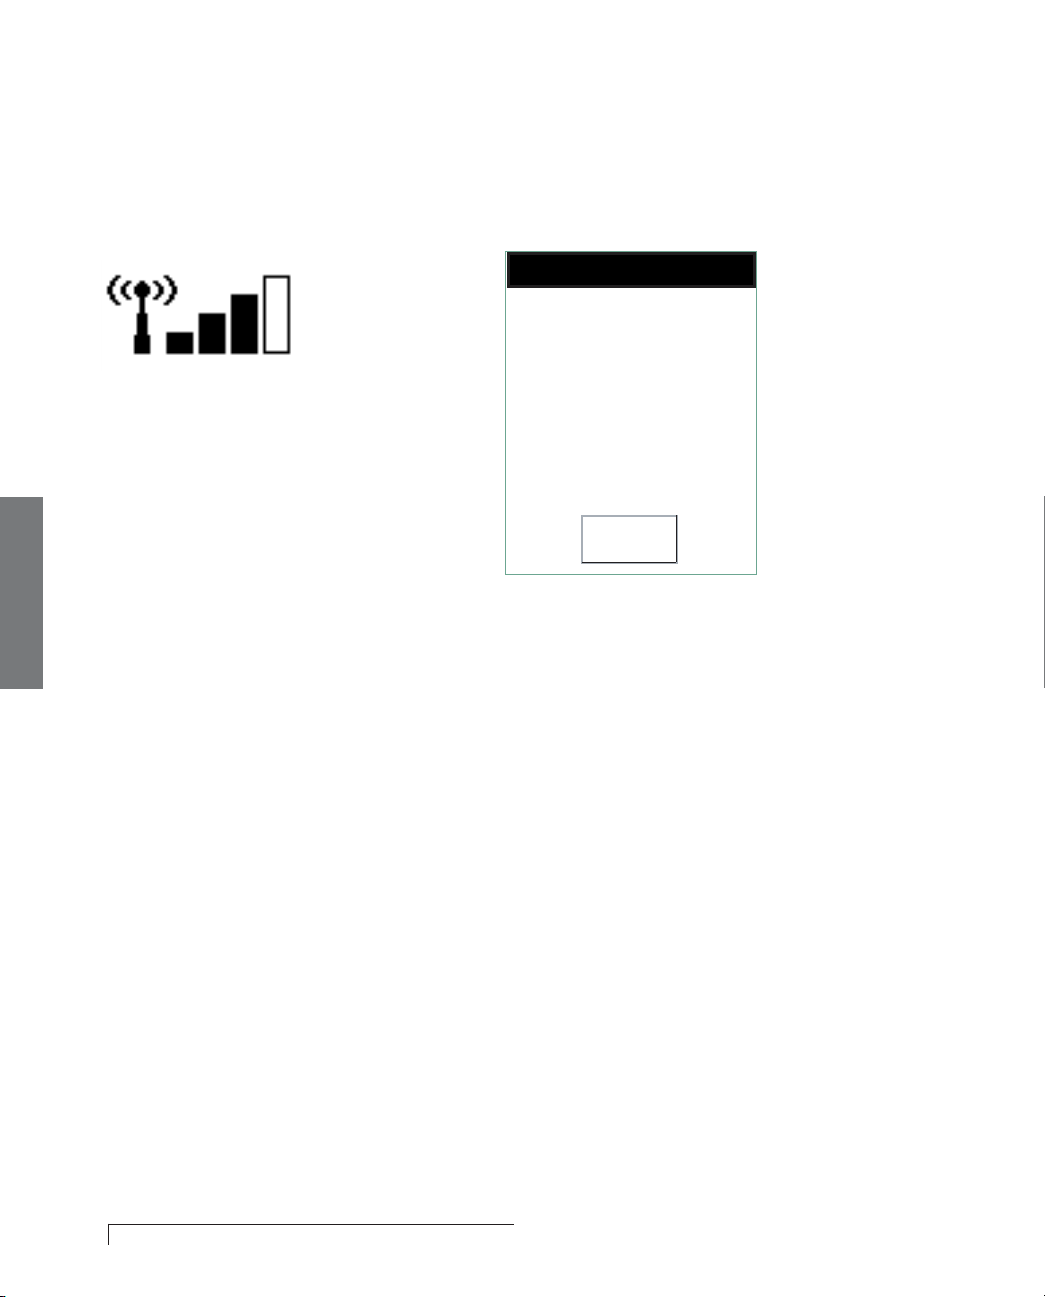
VIEWING THE CELL SIGNAL STATUS
1. From the Main menu, touch the Cell Signal icon. The
Signal Information menu appears.
Press OK
Cellular signal strength:
Choose the Cell
Signal icon to
check the strength
of the cellular
signal in your
current location.
3. Monitor
Strong
OK
2. This menu tells you how strong the cellular signal is in
your current location.
When done, touch OK to return to the Main menu.
32 Using Your CardioNet Monitor
Page 36
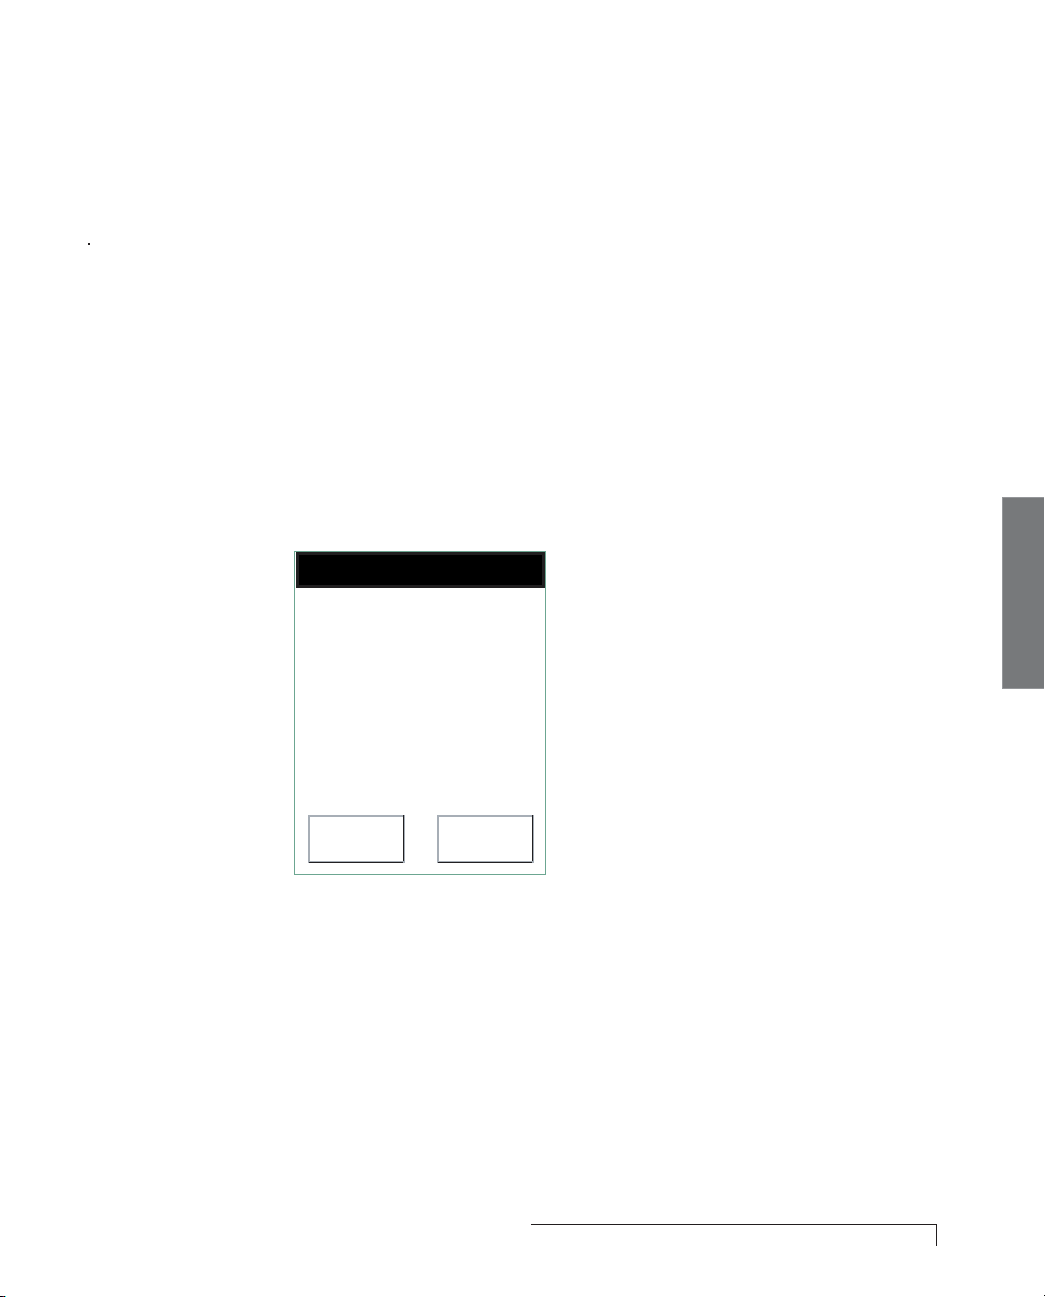
WARNINGS AND ALARMS
The monitor will beep to alert you when it is not able to
function properly. The screen display will explain exactly
how to respond.
Warnings are brief beeps. Alarms last longer and grow
louder. Warnings can sometimes resolve themselves, but
alarms always require action on your part. With alarms,
you can immediately silence the audio tones by touching
the Silence button on the touch screen. For both
warnings and alarms you can also touch the Help button
for more information on resolving the problem.
See Trouble Shooting
(Pages 44 - 58), for
more information
about warnings
and alarms.
Below are examples of warnings and alarms.
Press Help or OK
Your Monitor battery
power is low. Recharge
battery soon to ensure
continuous monitoring!
Press Help for
instructions.
.
Help OK
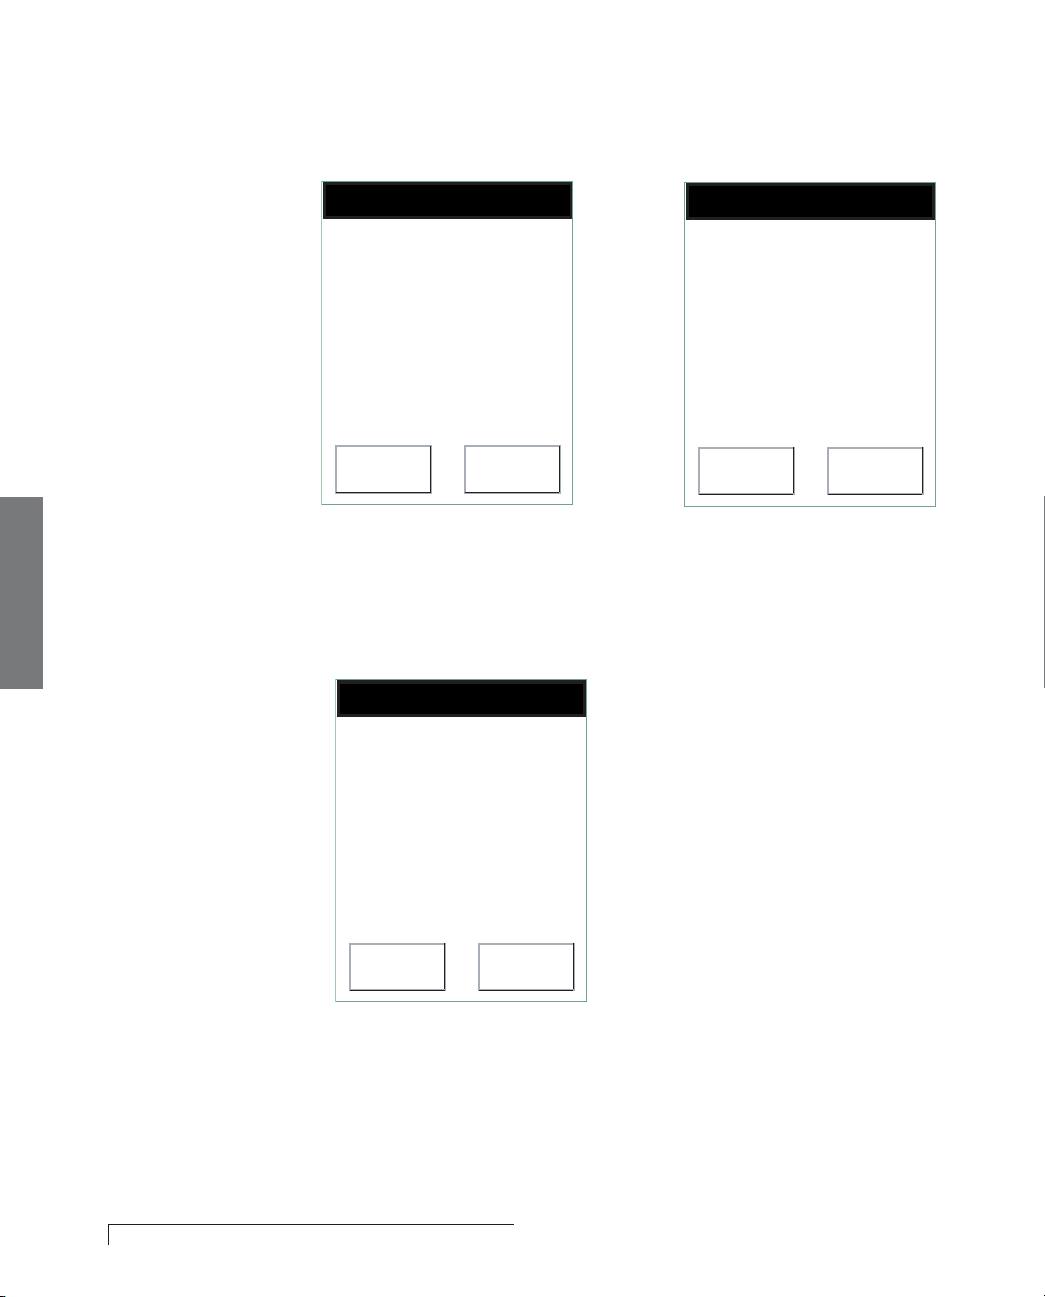
“Low Monitor Battery” Warning
3. Monitor
Using Your CardioNet Monitor 33
Page 37
WARNINGS AND ALARMS CONTINUED
3. Monitor
Press Help or OK
Cell phone unable to
connect.
Your Monitior will
continue to redial.
Press Help for options.
Help OK
“Cannot Establish Phone
Connection” Warning
Press Help or OK
Your Monitor can not
detect a dial tone.
Press Help or OK
Sensor lead wire
disconnected.
Press Help for
instructions.
Help OK
“Sensor Lead Wire
Disconnected” Warning
Press Help for
instructions.
Help OK
“No Dial Tone” Warning
34 Using Your CardioNet Monitor
Page 38

4
SENSOR CARE
This section describes:
Connecting the CardioNet Base
"
Recharging the Battery
"
Staying in Communications Range
"
Wearing the Sensor
"
The CardioNet sensor is comfortable, easy to wear, and
only requires a small amount of care. We recommend
that you change the electrode pads every two days.
When you shower or bathe you don’t have to remove
the electrode pads, but you must remove the sensor
and electrode leads.
Taking Care of the CardioNet Sensor 35
Page 39

CHANGING ELECTRODE PADS
We recommend that you change your electrode pads
every two days. Changing the electrode pads more
frequently may cause irritation to the skin. Changing
electrode pads less frequently may cause the electrode
pads to wear down and weaken the heartbeat signal
to the sensor.
Any time you change your electrode pads you should
turn your monitor off first, using the On/Off button and
the confirmation on the touch screen. This prevents the
monitor from signaling an alarm because it cannot detect
your heartbeats. Next, remove the sensor and old
electrode pads. Then, apply new pads.
When you enrolled in the CardioNet System, you were
shown the locations for the electrode pads that would
provide the best possible measurements of changes
in heart rhythms.
When you replace electrode pads, it is important to put
the new electrode pads in the right spots. It is also very
important to connect the right color lead to the right
electrode – so the CardioNet monitoring center receives
accurate heartbeat information.
4. Sensor
36 Taking Care of the CardioNet Sensor
Page 40
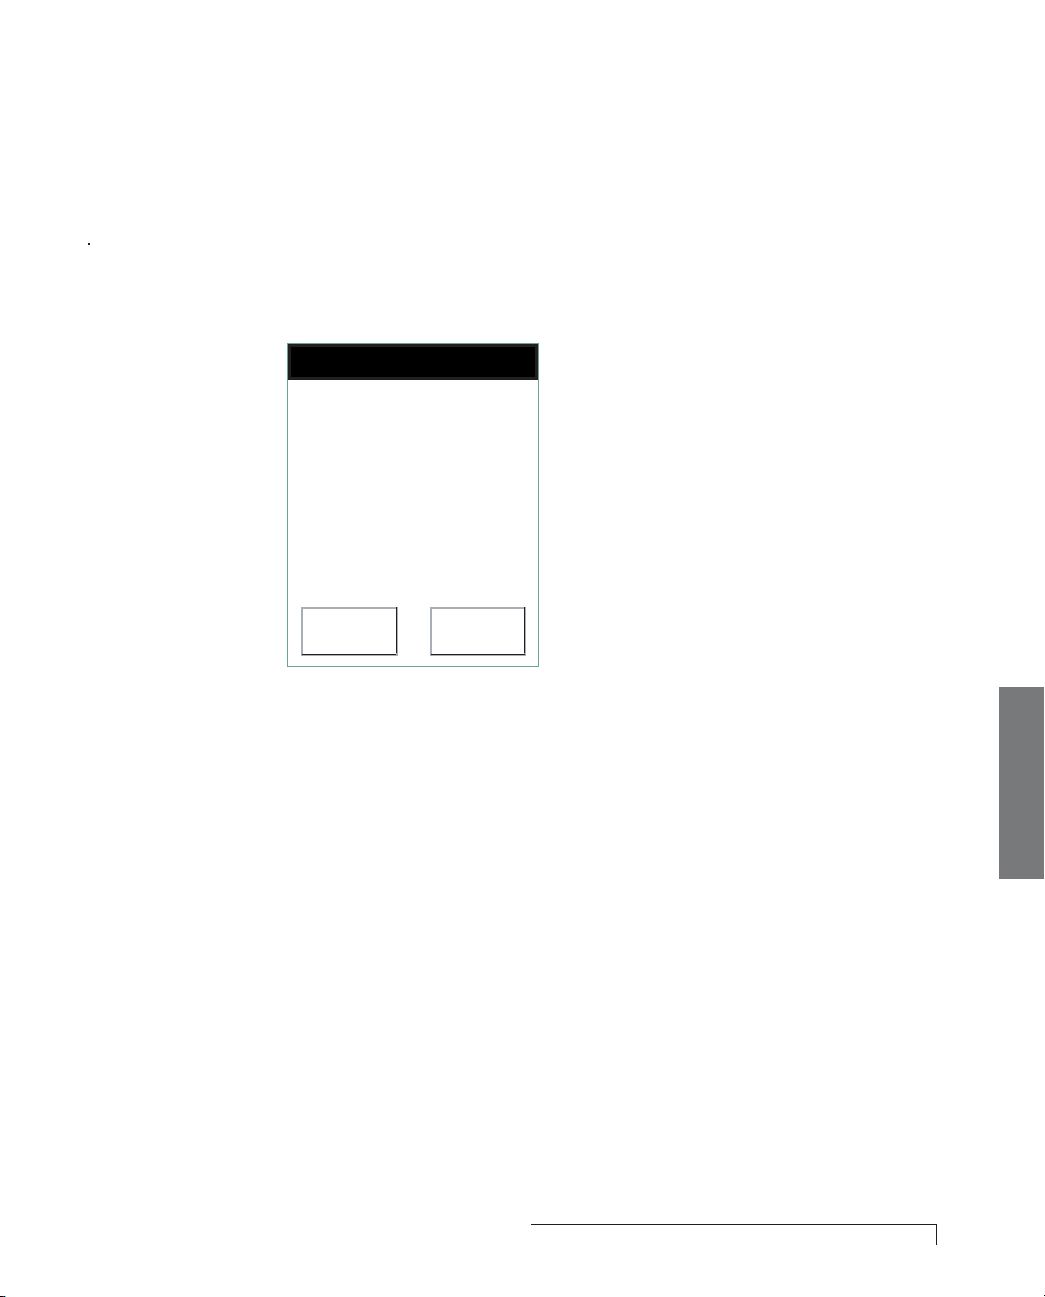
Turn off the Monitor
If the screen is blank, touch it to wake up the monitor.
1.
2. Press the On/Off button located on the front of
the monitor.
A warning appears and asks if you really want to
power down.
Press Yes or No
Warning:
Monitoring will stop!
Are you sure you want to
turn the Monitor off?
Yes No
3. Touch Yes to confirm. A message briefly appears to let
you know that the monitor is powering down. Wait for
the monitor to completely power down. The touch
screen will become blank.
4. Sensor
Taking Care of the CardioNet Sensor 37
Page 41
Remove Sensor and Pads
1.
Tip:
If you need to
change your
electrode pads,
it’s best to do
so after showering
or bathing.
Unsnap the sensor leads from the electrodes.
2. Remove the electrode pads from your skin.
Throw them away.
Apply the New Pad
1.
Snap a new electrode pad onto the lead.
2. Peel off the paper in the back of the electrode pad.
3. Check the new electrode pad to make sure the gel on
the back has not dried out. Electrodes with dried gel
should be thrown away.
4. Apply pad to the same spot. If the skin is irritated,
move the electrode to another location near the
original site.
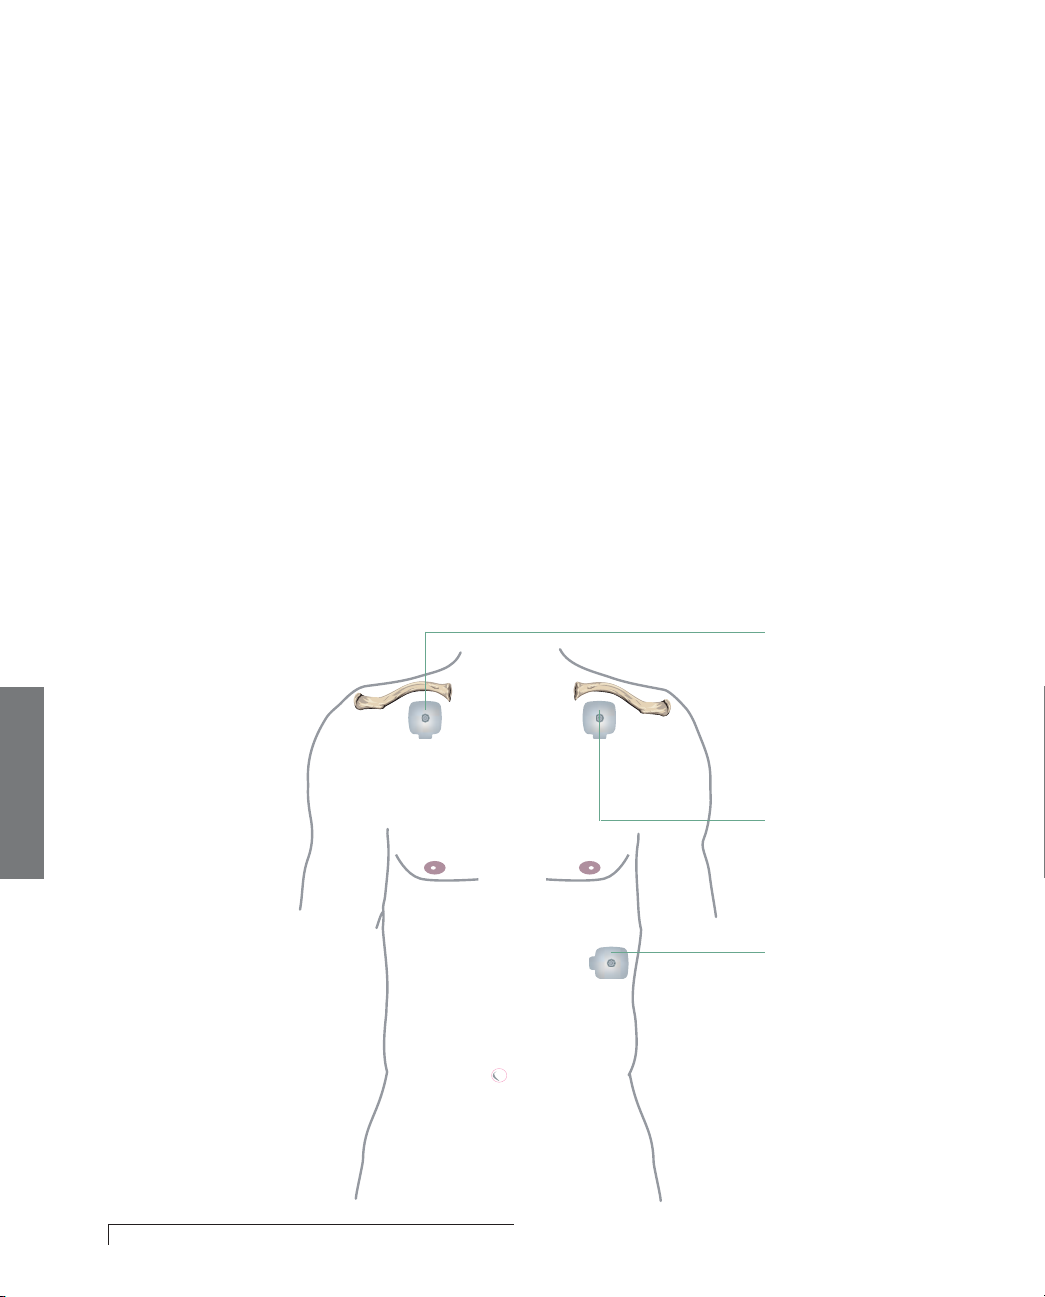
Place the new pads in the locations you were shown when you
enrolled in the CardioNet System. If redness or irritation
develops, you can choose another location near the original
site. (See page 16.)
Upper Right Chest
4. Sensor
38 Taking Care of the CardioNet Sensor
Upper Left Chest
Lower Left Rib Cage
Placement for Pads
Page 42
PLACING THE LEADS AND PADS
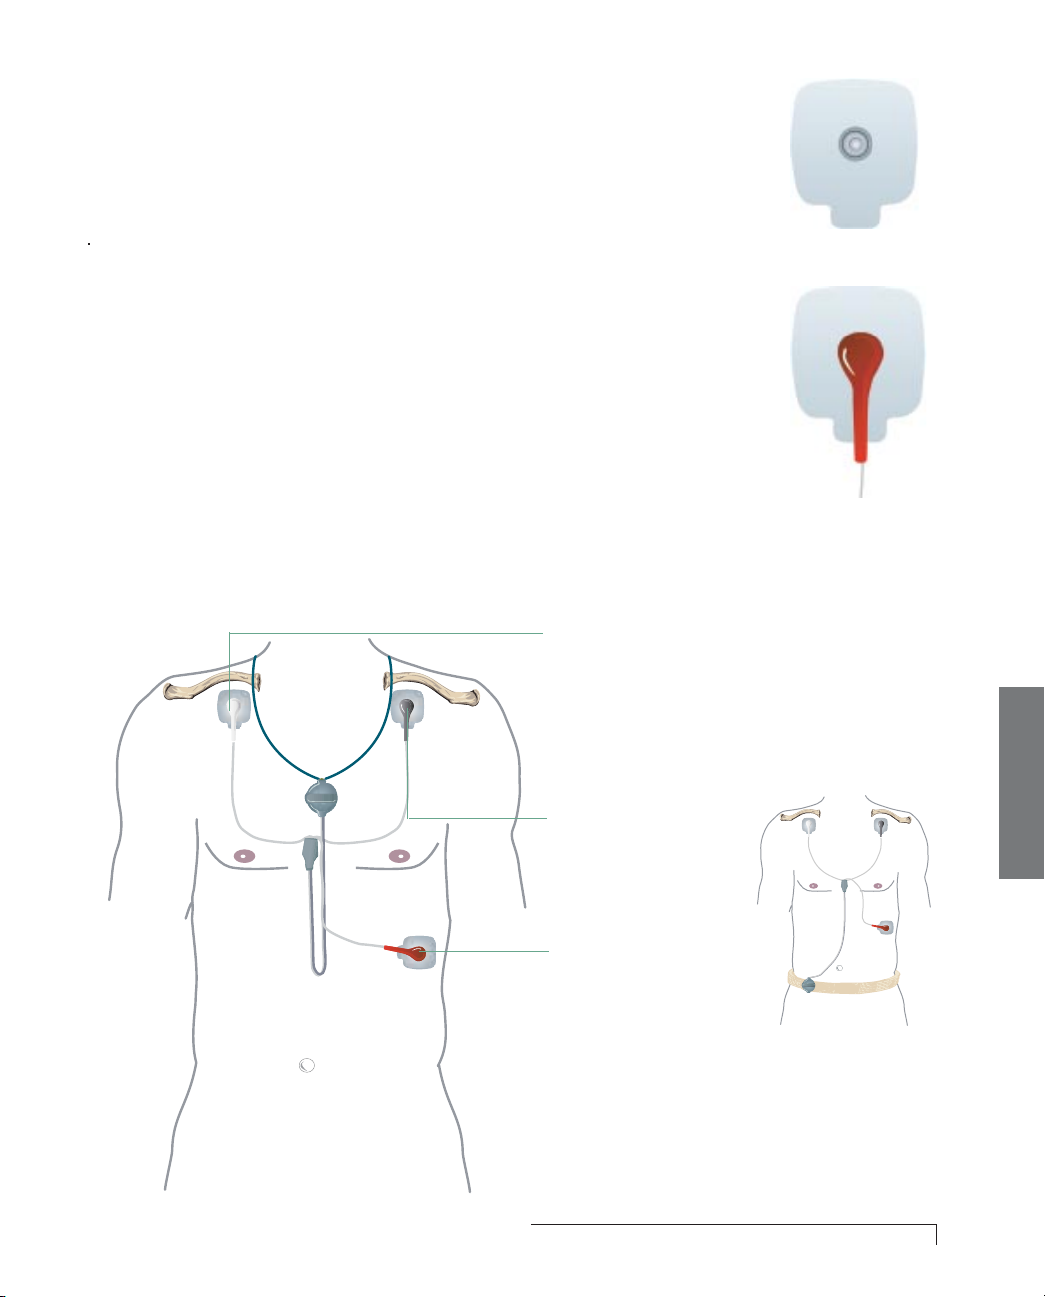
Remember that it is important to place the new electrode
pads in the right spots, as close as possible to the original
pad locations. It is also very important to connect the right
color lead to each electrode – so the CardioNet Patient
Service Center receives accurate heartbeat information.
White lead – snaps on an electrode pad placed just below
the center of your right collarbone.
Black lead – snaps on an electrode pad placed just below
the center of your left collarbone.
Red lead – snaps on an electrode pad placed just on your
left side, on the lower part of your rib cage.
Upper Right Chest
White Lead
Electrode Pad
The sensor leads
easily snap on
and off the
electrode pads.
4. Sensor
Placement for Leads
Upper Left Chest
Black Lead
Lower Left Rib Cage
Red Lead
When you’re
wearing the
sensor on a belt
clip, the sensor is
upside down.
Taking Care of the CardioNet Sensor 39
Page 43

SHOWERING OR BATHING
You can wear your
electrode pads
while showering
or bathing. But
be sure you
remove the sensor
and electrode
leads. After
showering, press
the pads to the
skin to assure tight
surface contact.
You’ll need to remove your sensor and electrode leads
before taking a bath or shower, but you can keep the
electrode pads on.
Before removing the sensor, turn off the monitor. Remove
the sensor and leads, but leave the pads in place.
To keep them from falling off, try to avoid getting the
electrode pads soaked with water.
Gently wash the skin around the electrodes. After drying,
press the pads to the skin.
Turn Off the Monitor
1.
Press the On/Off button located on the front of the
monitor. A warning appears and asks if you really want
to power down.
2. Touch Yes to confirm. A message briefly appears to let
you know that the monitor is powering down. Wait for
the monitor to completely power down. The touch
screen will become blank.
4. Sensor
40 Taking Care of the CardioNet Sensor
Page 44

Remove the Sensor
1.
Remove the sensor leads from the electrodes.
2. Leave the sensor electrode pads in place if you are not
going to change them.
3. If you are going to change the pads, remove them and
apply a new set after your shower or bath.
After showering
1.
Press electrode pads worn during showering to the
skin or apply new pads.
2. Reattach the sensor lead wires to the correct electrode
pads.
3. Press the On/Off button to turn the monitor on and
resume monitoring.
4. Sensor
Taking Care of the CardioNet Sensor 41
Page 45
CHANGING THE BATTERY
Call the CardioNet
Patient Service
Center’s toll free
number if you are
getting low on
replacement
batteries. Call:
(866) 426-4401
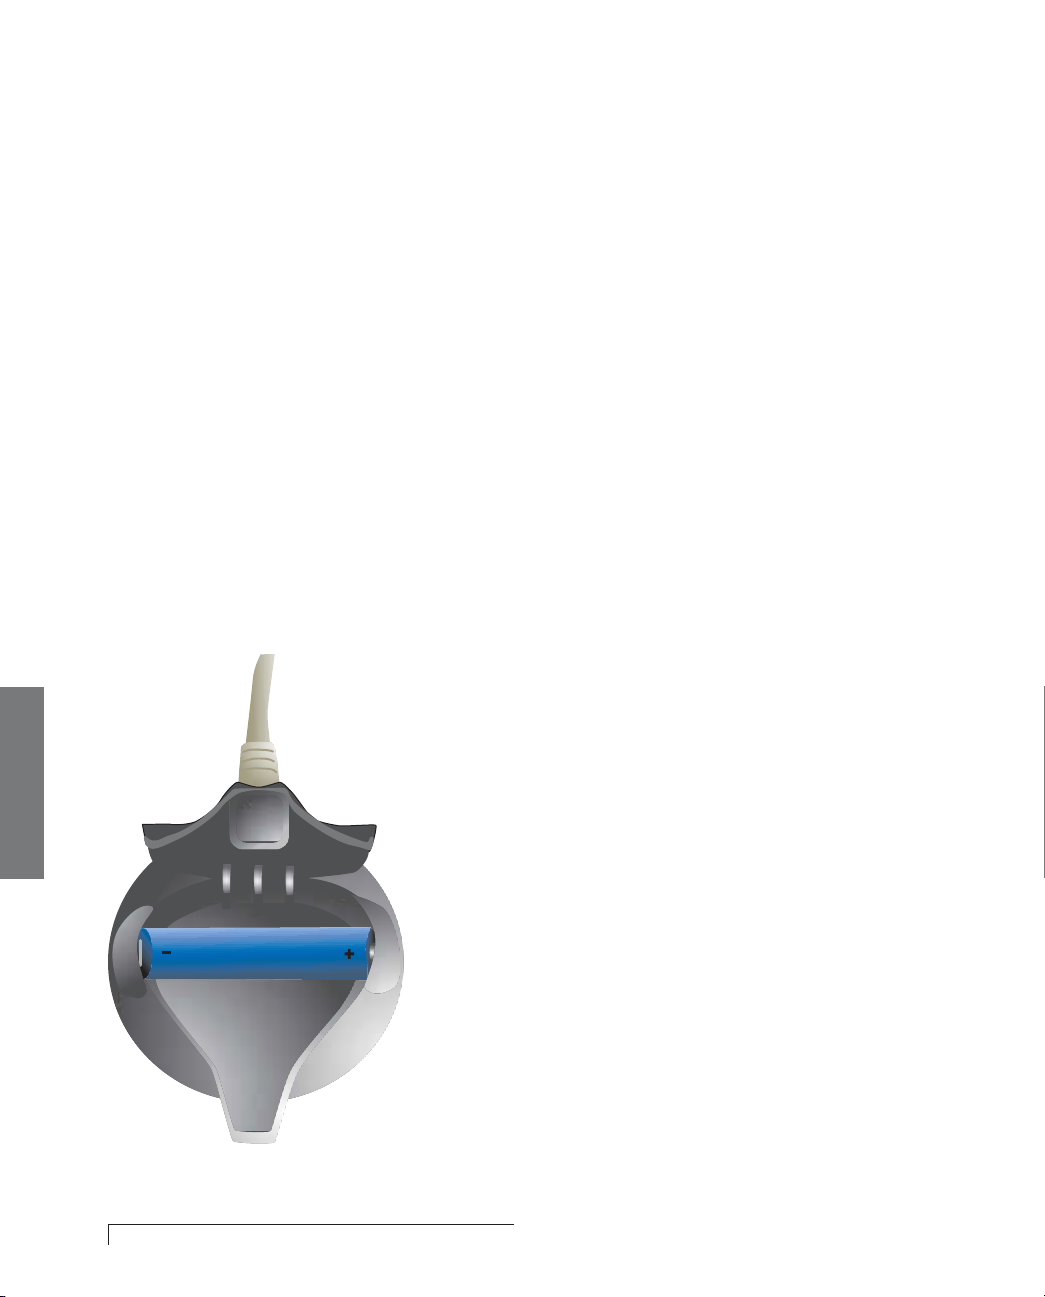
The AA battery in the sensor must be replaced with a
new, unused battery every 24 hours. We recommend you
turn your monitor off before changing your sensor
battery. This prevents the monitor from signaling an
alarm because it cannot detect your heartbeats.
Replace the Battery
1.
Pull open the battery door.
2. Remove the old battery and dispose of it in
accordance with local regulations and EPA guidelines.
3. Put in a new AA battery, included in your CardioNet
Service Kit. Insert the positive end as shown. The
sensor chimes when the battery is correctly placed.
4. Close the cover.
If you are getting low on replacement batteries, contact
the CardioNet Patient Service Center and ask for
additional batteries. In an emergency, any available
AA battery can be used with the CardioNet sensor.
4. Sensor
42 Taking Care of the CardioNet Sensor
Pull the top edge of the battery
door to open it.
Insert the positive end as shown.
The sensor chimes when the
battery clicks in correctly. If there’s
no chime, you probably have the
battery backwards.
Page 46

5
TROUBLE SHOOTING
This section describes:
Responding to Warnings and Alarms
"
Trouble Shooting
"
Precautions and Cautions
"
Cleaning
"
Service
"
Trouble Shooting 43
Page 47
RESPONDING TO WARNINGS AND ALARMS
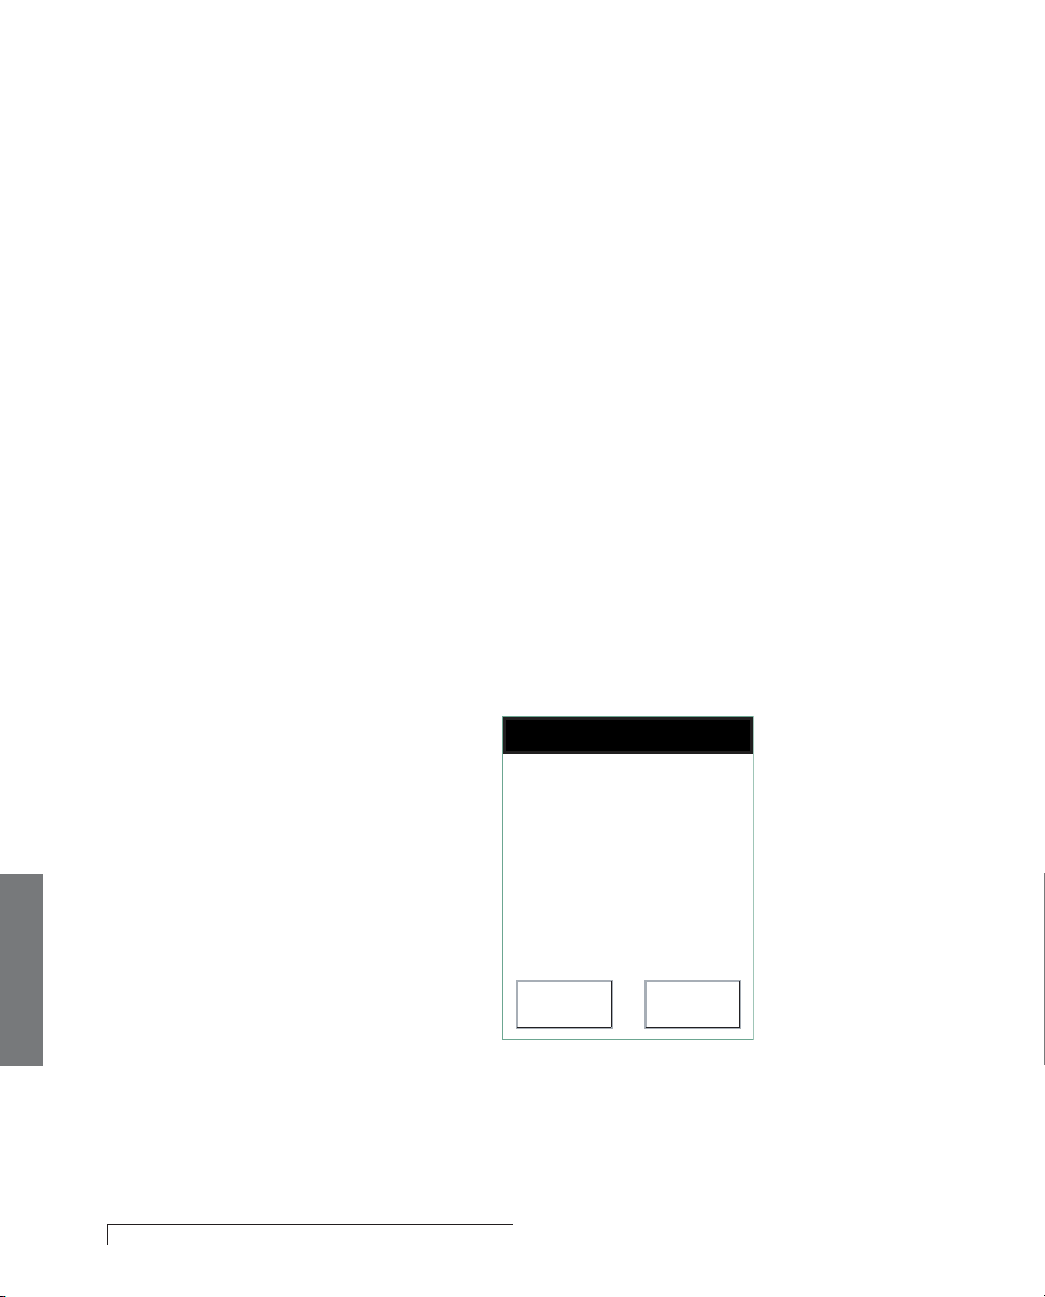
The monitor will beep to alert you when it is unable
to function properly. The touch screen will explain
what to do.
Warnings are brief beeps. Alarms last longer and grow
louder. Warnings can sometimes fix themselves, but
alarms always require action on your part. For alarms,
you can immediately silence the audio tones by touching
the Silence button on the touch screen. With both
warnings and alarms you can also touch the Help button
for more information.
The following examples of alarms and warnings show
what appears on your screen and advise you on how to
solve the problem.
LOW MONITOR BATTERY WARNING
Problem: Monitor battery is low.
Solution: Return the monitor to the base for recharging.
5. Troubleshoot
44 Trouble Shooting
Press Help or OK
Your Monitor battery
power is low. Recharge
battery soon to ensure
continuous monitoring!
Press Help for
instructions.
Help OK
Page 48
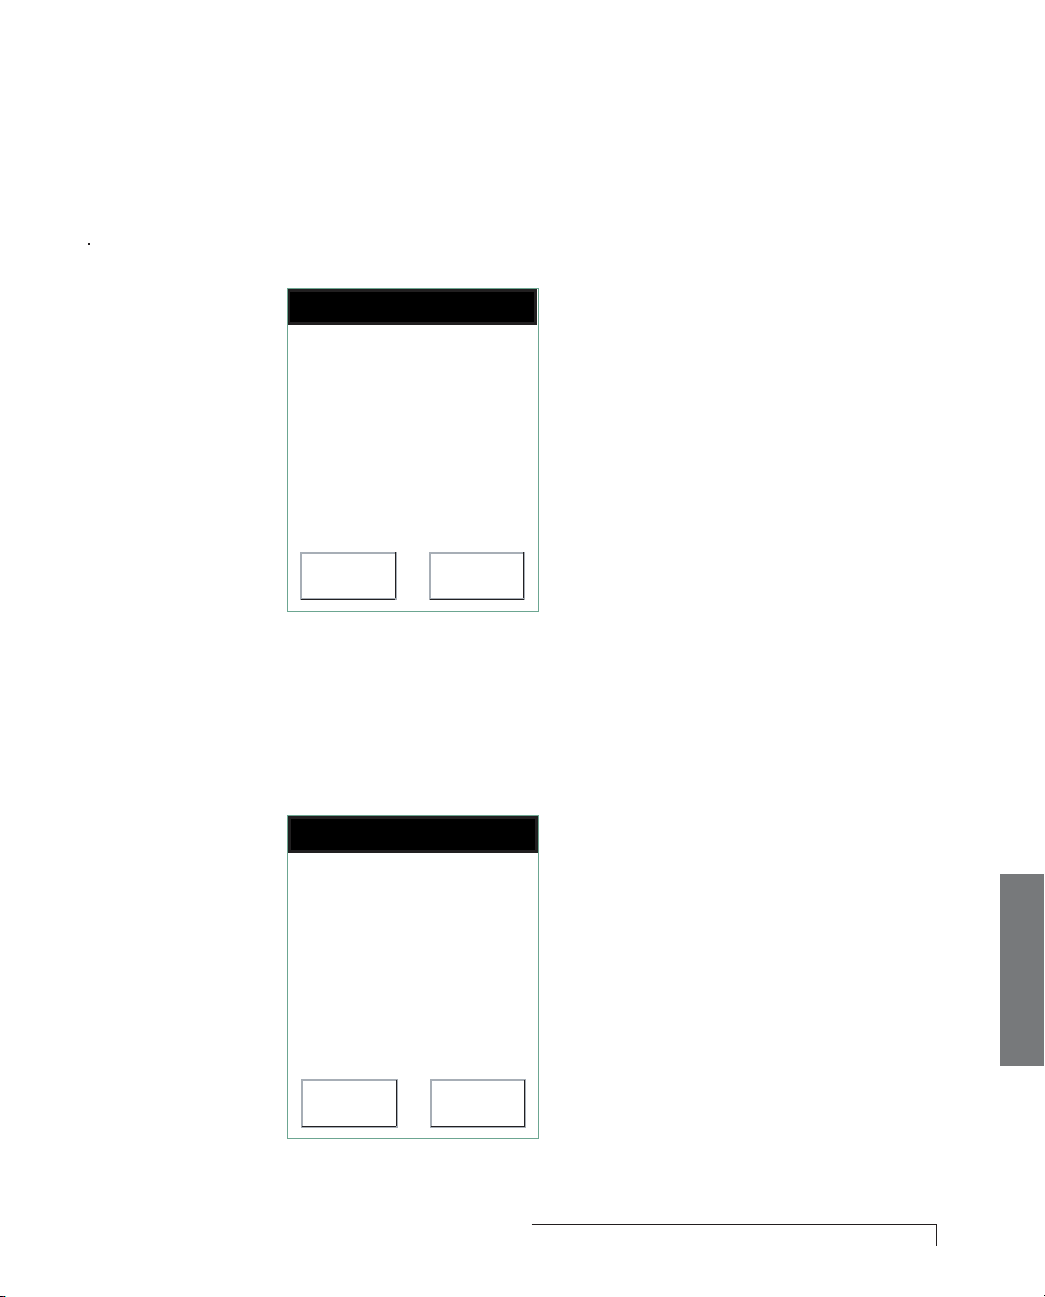
LOW SENSOR BATTERY WARNING
Problem: Sensor battery is low.
Solution: Install new battery. Or, if the battery is
new, inspect battery compartment and clean contacts
if necessary.
Press Help or OK
Your Sensor battery
power is low. Replace
battery soon to ensure
continuous monitoring!
Press Help for
instructions.
Help OK
NO POWER IN BASE WARNING
Problem: Power cord is disconnected.
Solution: Reinsert the power cable into the base and
into the wall outlet.
Press Help or OK
No power to Base
Press Help for
instructions.
Help OK
5.Troubleshoot
Trouble Shooting 45
Page 49
If the electrode
pad loses contact
or dries out you
need to replace it
immediately. The
monitor detects
when leads are
disconnected and
will alert you.
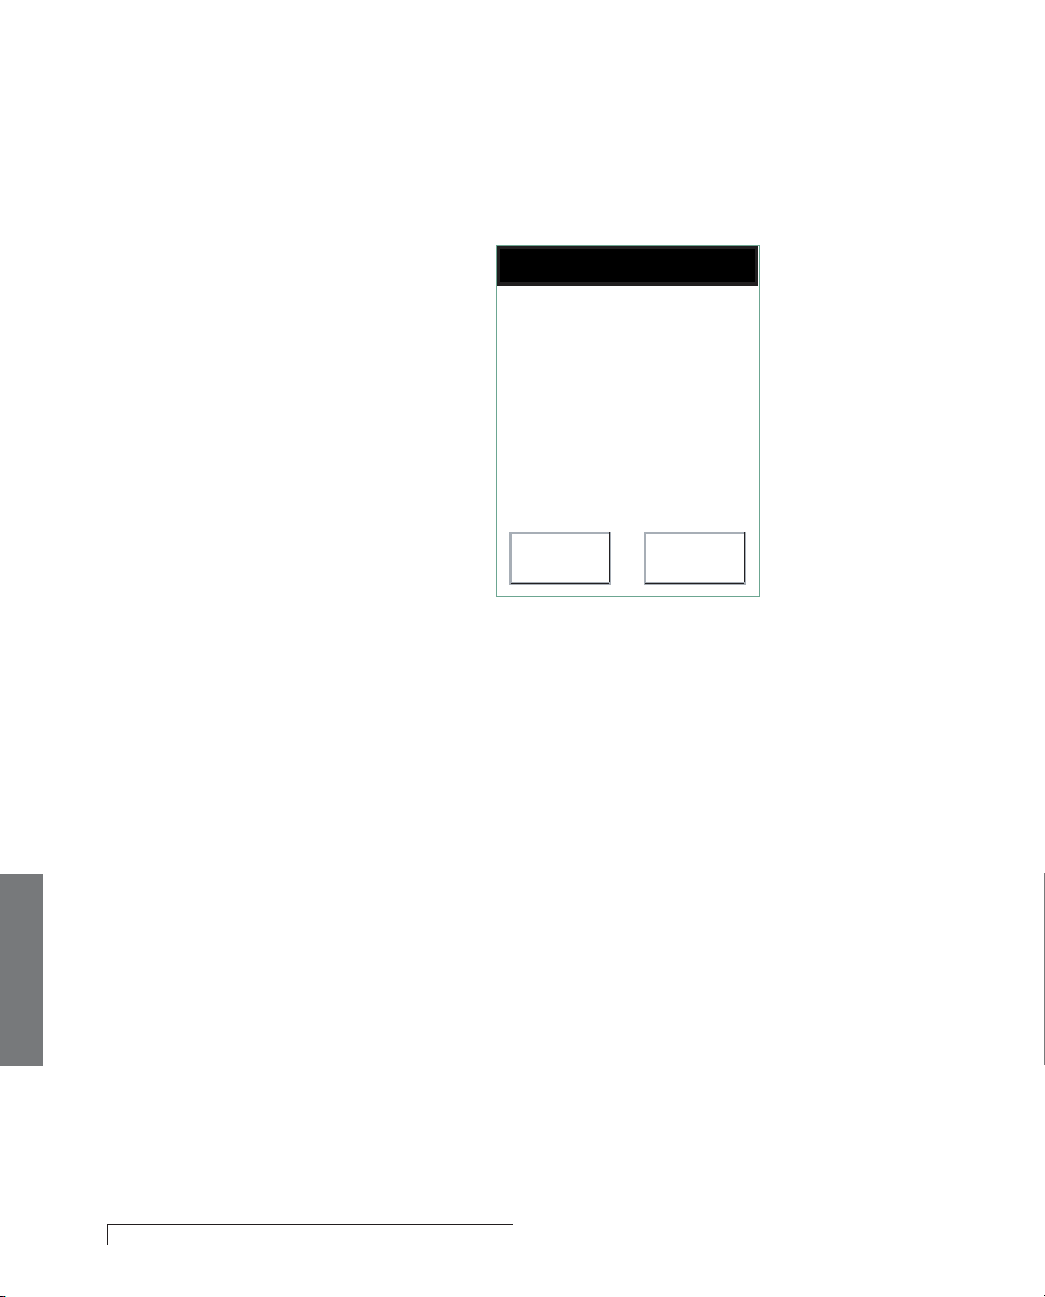
SENSOR LEAD WIRE DISCONNECTED WARNING
Problem: Either leads or pads are loose.
Solution: Make sure the electrode pads are pressed onto
your skin. Check all the lead wire attachments.
Press Help or OK
Sensor lead wire
disconnected.
Press Help for
instructions.
Help OK
5. Troubleshoot
46 Trouble Shooting
Page 50
POOR SENSOR COMMUNICATION WARNING
Problem: Sensor and monitor are having
trouble communicating.
Solution: Move closer to your monitor or move the
monitor closer to you. The monitor and sensor need to be
in closer range to communicate.
Press Help or OK
Poor communications
between your Monitor
and your Sensor.
Press Help for more
information.
Help OK
Trouble Shooting 47
5.Troubleshoot
Page 51
SCHEDULED UPLOAD FAILED WARNING
Problem: Monitor needs to transmit data but can’t
establish a connection.
Solution: Put the monitor in the base.
Press Help or OK
Your Monitor is trying to
send data automatically
and can not establish a
phone connection.
Press Help for options.
Help OK
5. Troubleshoot
48 Trouble Shooting
Page 52
POOR SENSOR COMMUNICATION ALARM
Problem: Sensor and monitor are not communicating.
Solution: Check for causes. Is there too much distance
between them? Are there battery problems with either
the sensor or monitor?
Press Help or Silence
No communications
between your Monitor
and Sensor.
Press Help for more
information.
Help Silence
Trouble Shooting 49
5.Troubleshoot
Page 53
EVENT TRANSMISSION ALARM
Problem: Monitor has stored ECG data to transmit, but
can’t establish a connection.
Solution: Move to an area that has cellular coverage
or put the monitor in the base. If you still are unable
to establish a connection, call the CardioNet Patient
Service Center for instructions.
Telephone – (866) 426-4401.
Press Help or Silence
Your Monitor has
detected an event and
can not establish a phone
connection.
Press Help for options.
5. Troubleshoot
50 Trouble Shooting
Help Silence
Page 54
EMPTY MONITOR BATTERY ALARM
Problem: Monitor is out of power.
Solution: Place the monitor in the base.
Press Help or Silence
Your Monitor battery is
empty. Recharge your
Monitor immediately.
Press Help for
instructions.
Help Silence
EMPTY SENSOR BATTERY ALARM
Problem: Sensor battery is out of power.
Solution: Install a new AA battery.
Press Help or Silence
Your Sensor battery is
empty. Replace Sensor
battery immediately.
Press Help for
instructions.
Help Silence
5.Troubleshoot
Trouble Shooting 51
Page 55
INTERNAL MONITOR ALARM
Problem: Monitor is not functioning.
Solution: Call the CardioNet Patient Service
Center for help.
Telephone – (866) 426-4401.
Press Help or Silence
Internal Monitor Error
Call CardioNet at
1-866-426-4401 for
technical assistance.
Press Help for more
information.
Help Silence
5. Troubleshoot
52 Trouble Shooting
Page 56

TROUBLE SHOOTING
Trouble shooting sometimes involves a bit of detective
work, but usually the monitor detects problems for you.
The monitor beeps to let you know there is a problem
and explains on the touch screen exactly how to respond
on the touch screen.
A warning prompts you to resolve a problem by displaying an alert screen and beeping an audio tone. With
some warnings the problem can fix itself and you won’t
need to take any action. With other warnings you will
need to take some action, which will be described on the
touch screen. An alarm lets you know that a problem has
not been fixed and you must take action.
MONITOR BATTERY PROBLEMS
Ensure battery is being recharged for at least four hours
per day. If you find the monitor is not holding its charge
long enough, you may not have left it in the base long
enough to fully recharge. The monitor must be left in its
base for four hours to fully recharge.
NO DISPLAY ON MONITOR
First, ensure the monitor is turned on. If it is on, the LED
will be flashing and the monitor may be low on power.
Return monitor to base for recharging.
BEEPS IN BED
If you wear the sensor around your neck and sleep on
your stomach, or if you wear it at your waist and sleep
with your sensor side down, you may block
communications between the sensor and the base
station. This will cause warning beeps. To avoid beeps
and maintain the vital communications link, try placing
the sensor next to your pillow if you usually sleep on
your stomach. If you normally sleep on your side and
wear the sensor with a belt clip, make sure you place the
sensor on your “up” side.
5.Troubleshoot
Trouble Shooting 53
Page 57

PHONE BUSY?
When the monitor is in the base station and has
information to send to the CardioNet Patient Service
Center, it will use your telephone line to transmit ECG data.
You will not be charged by the telephone company for
these calls. If someone calls you while the monitor is using
the line, they will get a busy signal. If you try to place a call
while the monitor is transmitting data, you will hear a high-
pitched sound. This is the sound of ECG data being
transmitted.
If you are expecting a critically important call, or need to
place an urgent call while the monitor is transmitting data,
you can temporarily remove the monitor from the base. It
will either use wireless communications to transmit data to
the CardioNet Center or use your telephone line to
transmit the data once it is replaced in its base. Please
remember to put the monitor back in the base station after
you receive or place the telephone call.
You should not interrupt an ECG transmission for routine
calls. The data that your monitor is sending might need
immediate review and response.
5. Troubleshoot
54 Trouble Shooting
SKIN IRRITATION
If you notice that the skin under or around your electrode
pads is becoming sensitive, irritated or painful, or if you
develop a rash, please call the CardioNet Patient Service
Center. Some people are especially sensitive to different
gels and adhesives. You may need to use another type of
electrode pad.
SENSOR BELT CLIP DIFFICULT TO PUT ON
If you’re wearing a thicker belt and finding that it is difficult
to slide on the Sensor Belt Clip, first remove the CardioNet
Sensor from the clip. Slide just the clip onto your belt and
then reposition the sensor on the clip.
Page 58

PRECAUTIONS
DISPOSE OF BATTERIES PROPERLY
Observe all local laws for the disposal of
alkaline batteries.
WHEN NOT IN USE, REMOVE SENSOR BATTERY
Do not leave the battery in the sensor when it is not in
use. Damage from corrosion could result.
AVOID ELECTROMAGNETIC INTERFERENCE
For the best recording results, you should avoid close
proximity to heavy equipment or other sources of
electromagnetic interference such as electric blankets,
heating pads, water beds, etc.
POTENTIAL FOR ELECTROMAGNETIC INTERFERENCE
There is a potential for electromagnetic interference to
other devices while using the CardioNet Service.
THE CARDIONET SYSTEM WITH IMPLANTED PACEMAKERS
AND ICDS (DEFIBRILLATORS)
If you have an implanted pacemaker or defibrillator (ICD),
the manufacturer may have recommended you take
certain precautions when using a cellular phone. Since
the CardioNet monitor contains a cellular phone, you
should take the same precautions when carrying and
using the monitor. In general, most manufacturers
recommend the following:
5.Troubleshoot
! Keep a distance of at least six inches (15 cm) between
the cellular phone and a pacemaker or defibrillator.
! Hold the cellular phone on the opposite side of the
body from the pacemaker or defibrillator.
! Don’t carry a cellular phone in a breast pocket or on a
belt if that would place the phone within six inches of
the pacemaker or defibrillator.
Trouble Shooting 55
Page 59

CAUTIONS
CAUTION: POWER DOWN AND REMOVE SENSOR
BEFORE SHOWERING
Power down the monitor and remove the sensor
before showering. While the CardioNet sensor and
monitor are water resistant, they are not waterproof.
Refer to the section: Care for the Sensor (Page 35) for
complete instruction on removal and reapplication
before showering.
CAUTION: DO NOT GET THE MONITOR AND SENSOR WET
Make sure the monitor and sensor stay dry at all times.
WARNING: FOR ADULT USE ONLY
The CardioNet Monitoring System is intended for Adult
use only. It shall not be used on infants weighing less
than 22 lbs.
WARNING: USE WITH TELEPHONE SYSTEM
Any patient whose life may be put at significant risk by
the unavailability of the telephone system should not be
monitored by the CardioNet System.
5. Troubleshoot
56 Trouble Shooting
WARNING: NOT AN APNEA MONITOR
The CardioNet monitor is not to be used as an
apnea monitor.
WARNING: USE ONLY CARDIONET ELECTRODES
While wearing the CardioNet sensor, use only electrodes
provided by CardioNet.
WARNING: DO NOT TAMPER
There are no serviceable parts in the CardioNet
System. Removing the cover of any component
may alter performance.
Page 60

WARNING: DO NOT TAMPER WITH MONITOR BATTERY
The monitor battery can present a fire or chemical burn
hazard if mistreated. Do not disassemble, heat above
80C (176 F), incinerate, or recharge using any device
other than the base.
WARNING: USE ONLY CARDIONET WALL ADAPTER
Do not use any wall adapter for the base other than the
one provided in the CardioNet Service Kit.
WARNING: DO NOT CONNECT ANY DEVICE TO THE PC PORT
ON THE BACK OF THE BASE
The PC port is to be used only by CardioNet personnel.
WARNING: DO NOT USE NEAR FLAMMABLE ANESTHETIC
The CardioNet System is not to be used in the presence
of flammable anesthetic.
CLEANING
Clean the plastic case of the monitor and the sensor with
a soft cloth dampened with soapy water. Wipe the external surfaces of the sensor, monitor and base.
Do NOT use soapy water on the touch screen. Clean the
screen of the monitor with the screen cloth or cleaning
tissues provided with the patient monitoring kit.
5.Troubleshoot
Trouble Shooting 57
Page 61

Do not spray or submerge any component with liquid or
foam. Each component should be wiped with a soft damp
cloth after cleaning to ensure no fluid has pooled on
external surfaces.
SERVICE
If you experience additional problems with any components of the CardioNet Monitoring System, review the
problems and solutions listed in the trouble shooting
section. If additional assistance is required contact customer support.
Telephone: (866) 426-4401.
Before returning the CardioNet Monitoring System, call
customer service to make shipping arrangements.
5. Troubleshoot
58 Trouble Shooting
Page 62

6
SPECIFICATIONS,
COMPLIANCE
AND SYMBOLS
This section describes:
Specifications
"
Symbols
"
Hardware Requirements
"
FCC Compliance
"
Specifications 59
Page 63

SPECIFICATIONS
PHYSICAL
SENSOR
2.7 in. x 0.9 in height
Weight: 2.2 oz
SENSOR NECK STRAP
24 in.
MONITOR
5.8 in x 3.0 in x 1.1 in
Weight: 12.8 oz
LCD
3.0 x 2.3, touch screen, monochrome, backlight
BASE
7.8 in x 4.3 in x 6.1 in
Weight: 13.3 oz
60 Specifications
FUNCTIONAL
Sample Rate 250 samples per second
Resolution 12 bits
Dynamic Range + / -5 mV
Bandwidth 0.5 to 40 Hz
Channels 2
Battery Life Monitor: (12-16 hours average with cleared
memory and fully recharged battery),
rechargeable
Leakage current
Sensor: (24 hr) AA Alkaline
Less than .1
µ V Electrodes
)
Page 64

TRANSMISSION
Sensor to Monitor 900 MHz ISM band RF transmission, digital
error corrected. 30 foot range, retransmission if
data is corrupted.
Monitor to Center CDMA (PCS & cellular) wireless, digital error
corrected. Telephone line modem, digital error
corrected. Acoustic transmission, 1500 Hz center
frequency, 8 bits resolution, 5 mV dynamic range.
ECG recording intervals vary by type of event; the
minimum is 15 seconds pre-event and 45
seconds post event. Wireless transmission
subject to coverage of cellular network. Data
received at Monitoring Center within minutes with
good wireless coverage and/or modem
communications. Urgent reports processed at
time of data receipt. Daily reports processed once
a day, by 3 PM.
OPERATING CONDITIONS
Operating temperature 20 - 45
o
C
Operating humidity 10% - 95%, noncondensing
o
Storage temperature -20 - 55
C, noncondensing
Storage humidity 5% - 95%, noncondensing
Operation altitude 700-1060 millibars
Fluid Ingress Rating IPX1
Note: Please protect the monitor and sensor from water and other fluids.
CONNECTORS
Base Power in (15V, 1.2A max)
Phone in (RJ-11)
Phone out (RJ-11)
Monitor Power in (15V, 1.2A max)
WALL ADAPTER
Manufacturer Friwo, Inc. (15V, 1.0A)
Model number FW7555M/15
Note: Both the Monitor and Sensor are internally powered
continuous operation devices.
Specifications 61
Page 65

STANDARDS COMPLIANCE
Monitor EN60601-1
AAMI EC-38
FCC parts 2, 15, 22, 24
Sensor EN60601-1
AAMI EC-38
FCC part 15
Base EN60950
AAMI EC-38
FCC part 15, 68
AECG Equipment Class II
Note: This equipment has been tested and found to comply
with the limits for medical devices to the IEC 601-1-2:1993,
EN60601-1-2:1994, Medical Device Directive 93/42/EEC or
the Electromagnetic Compatibility Directive 89/336/EEC (use
applicable directive). These limits are designed to provide
reasonable protection against harmful interference in a
typical medical installation. This equipment generates, uses
and can radiate radio frequency energy and, if not installed
and used in accordance with the instructions, may cause
harmful interference to other devices in the vicinity. However,
there is no guarantee that interference will not occur in a
particular installation. If this equipment does cause harmful
interference to other devices, which can be determined by
turning the equipment off and on, the user is encouraged to
try to correct the interference by one or more of the following
measures:
62 Specifications
! Reorient or relocate the receiving device.
! Increase the separation between the equipment.
! Connect the equipment into an outlet on a circuit
different from that to which the other device(s)
are connected.
! Consult the manufacturer or field service technician
for help
Page 66
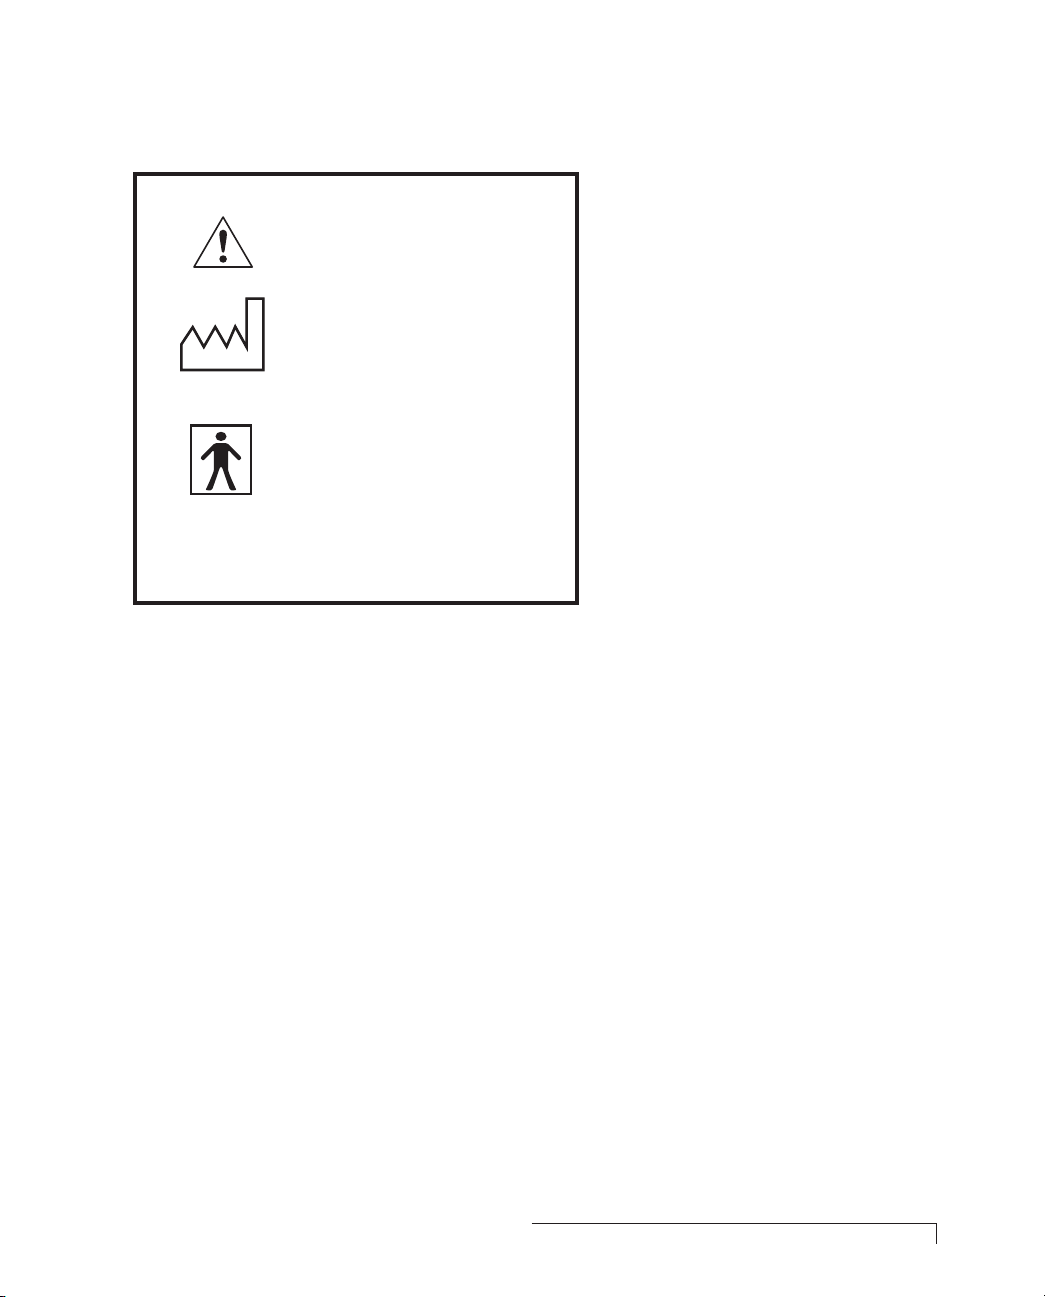
EQUIPMENT SYMBOLS
Consult Manual
Year of Manufacture
2000
Type BF Equipment
SN
Serial Number
Specifications 63
Page 67

HARDWARE REQUIREMENTS
IN HOME REQUIREMENTS
Touch tone or pulse telephone or good wireless coverage
AC powered electrical outlet with 120 VAC
FCC ID
Sensor QBI-1007
Monitor Monitor QBI-1006
Monitor CDMA N7NSB555
Base CARDT00B42061
64 Specifications
Page 68

FCC AND INDUSTRY CANADA (CS-03)
COMPLIANCE
This device complies with part 15 and 68 of the FCC Rules.
Operation is subject to the following two conditions: (1) This
device may not cause harmful interference and, (2) This device
must accept interference received including interference that
may cause undesired operation.
FCC RULES PART 15
The Model 1001 has been tested and complies with the limits
for a class B digital device, pursuant to Part 15 of the FCC
Rules. These limits are designed to provide reasonable protection against harmful interference when the equipment is
operated in a residential environment. This equipment generates, uses, and can radiate radio frequency energy and, if not
installed and used in accordance with the instruction manual,
can cause harmful interference to radio communications.
CHANGES OR MODIFICATIONS NOT EXPRESSLY
APPROVED BY C
AUTHORITY TO OPERATE THE EQUIPMENT.
ARDIONET INC. COULD VOID THE USER’S
FCC RULES PART 68
FCC Part 68 Registration
The Model 1001 complies with FCC Rules, Part 68. On this
equipment is a label that contains, among other information,
the FCC Part 68 registration number.
REN
The ringer equivalence number (REN) is used to determine
the quality of devices that may be connected to the telephone
line. Excessive RENs on the telephone line may result in the
devices not ringing in response to an incoming call. In most,
but not all areas, the sum of RENs should not exceed five
(5.0). To be certain of the number of devices that may be
connected to a line, as determined by the total RENs, contact
the local telephone company.
Specifications 65
Page 69

NOTE: RENs are associated with loop-start and ground-start
ports. It is not used for E&M and digital ports. The REN
assigned to the Model 1001 is 0.01 B. If requested, this information must be given to the telephone company.
SERVICE
In the event of equipment malfunction, all repairs should be
performed by CardioNet Inc. or an authorized agent. It is the
responsibility of users requiring service to report the need for
service to CardioNet Inc. or to one of our authorized agents.
Service can be facilitated through our office at:
CardioNet Inc.
510 Market St.
San Diego,CA 92101
619-243-7500
The telephone company can ask you to disconnect the equipment from the network until the problem is corrected or until
you are sure that the equipment is not malfunctioning.
The Model 1001 interface connects to the Public Switched
Telephone Network through a FCC registered NCTE which
specifies the type of network jack to be used.
66 Specifications
DISRUPTION OF THE NETWORK
If the Model 1001 disrupts the telephone network, the telephone company can discontinue your service temporarily. If
possible, the telephone company will notify you in advance. If
advance notice is not practical, they will notify you as soon as
possible. You are also informed of your right to file a com-
plaint with the FCC.
TELEPHONE COMPANY FACILITY CHANGES
The telephone company can make changes in its facilities,
equipment, operations, or procedures that can affect the
operation of your equipment. If they do, you should be notified in advance so you have an opportunity to maintain
uninterrupted telephone service.
Page 70

FCC RADIO FREQUENCY EXPOSURE INFORMATION
In August 1996, the Federal Communications Commission
(FCC) of the United States, with its action in Report and
Order FCC 96-326, adopted an updated safety standard
for human exposure to radio frequency (RF) electromagnetic energy emitted by FCC regulated transmitters. Those
guidelines are consistent with the safety standard previously set by both U.S. and international standards bodies.
The design of this device complies with the FCC guidelines and these international standards.
Use only the supplied antenna. Unauthorized antennas,
damaged antennas, modifications, or attachments could
impair call quality, damage the device, or result in violation
of FCC regulations. Please contact CardioNet if damage to
the unit is apparent.
Specifications 67
Page 71

BODY-WORN OPERATION
This device was tested with the softcase supplied by CardioNet as an accessory to this
device and was found to comply with the
FCC exposure requirements.
When operating this device, a minimum separation
distance of 1.5 cm must be maintained between the
users body and the monitor, including its antenna, to
comply with the FCC exposure limits.
To maintain compliance with FCC RF exposure
requirement, use only carrying accessories that
maintain a 1.5 cm separation distance between the
user’s body and the device, including the antenna.
These carrying accessories should not contain
metallic components in its assembly. The use of
carrying accessories that do not satisfy these
requirements may not comply with FCC RF
exposure requirements, and should be avoided.
68 Specifications
This particular device has not been designed for heldto-ear use and should never be used against the ear.
For more information about RF exposure, please visit
the FCC website at www.fcc.gov.
Page 72

CardioNet Ambulatory ECG System
and Arrhythmia Detector
Manufactured by CardioNet Inc.
510 Market Street
San Diego, CA 92101
Copyright 2002 - 2003
All rights reserved.
 Loading...