

Capstone 10016 Assembly Manual
THIS INSTRUCTION BOOKLET CONTAINS
IMPORTANT SAFETY INFORMATION. PLEASE
READ AND KEEP FOR FUTURE REFERENCE.
TWO ARM HITCH MOUNTED BIKE RACK
ASSEMBLY MANUAL
Part No.: #10016

FOR SERVICE ASSISTANCE
CALL TOLL FREE 1.800.451.5368
Monday - Friday 8:00 a.m. to 4:00 p.m. Eastern Standard Time
Thank you for purchasing the CAPSTONE two arm hitch mounted bike rack. Please check all components according to drawing
included. If anything is missing, please contact an authorized dealer.
IMPORTANT:
Carefully read and follow this manual (and any other materials included) before using. Please retain this manual for future use.
This manual is provided to assist you and is not intended to be a comprehensive manual covering all aspects of maintenance.
The carrier you have purchased is a complex piece of equipment that must be properly assembled and maintained in order for proper
usage. If you have any doubts about the assembly or your ability to properly assemble and maintain the carrier, you must have
it assembled and maintained by a professional.
DANGER! Failure to properly assemble and maintain this product could result in serious injury or death.

PARTS IDENTIFICATION
x1
x8
x1
D x1
E x2
x1 x4
x1
x1
x1
x1
x1
x1
J x5
K x1
I x3
x1
ASSEMBLY INSTRUCTIONS
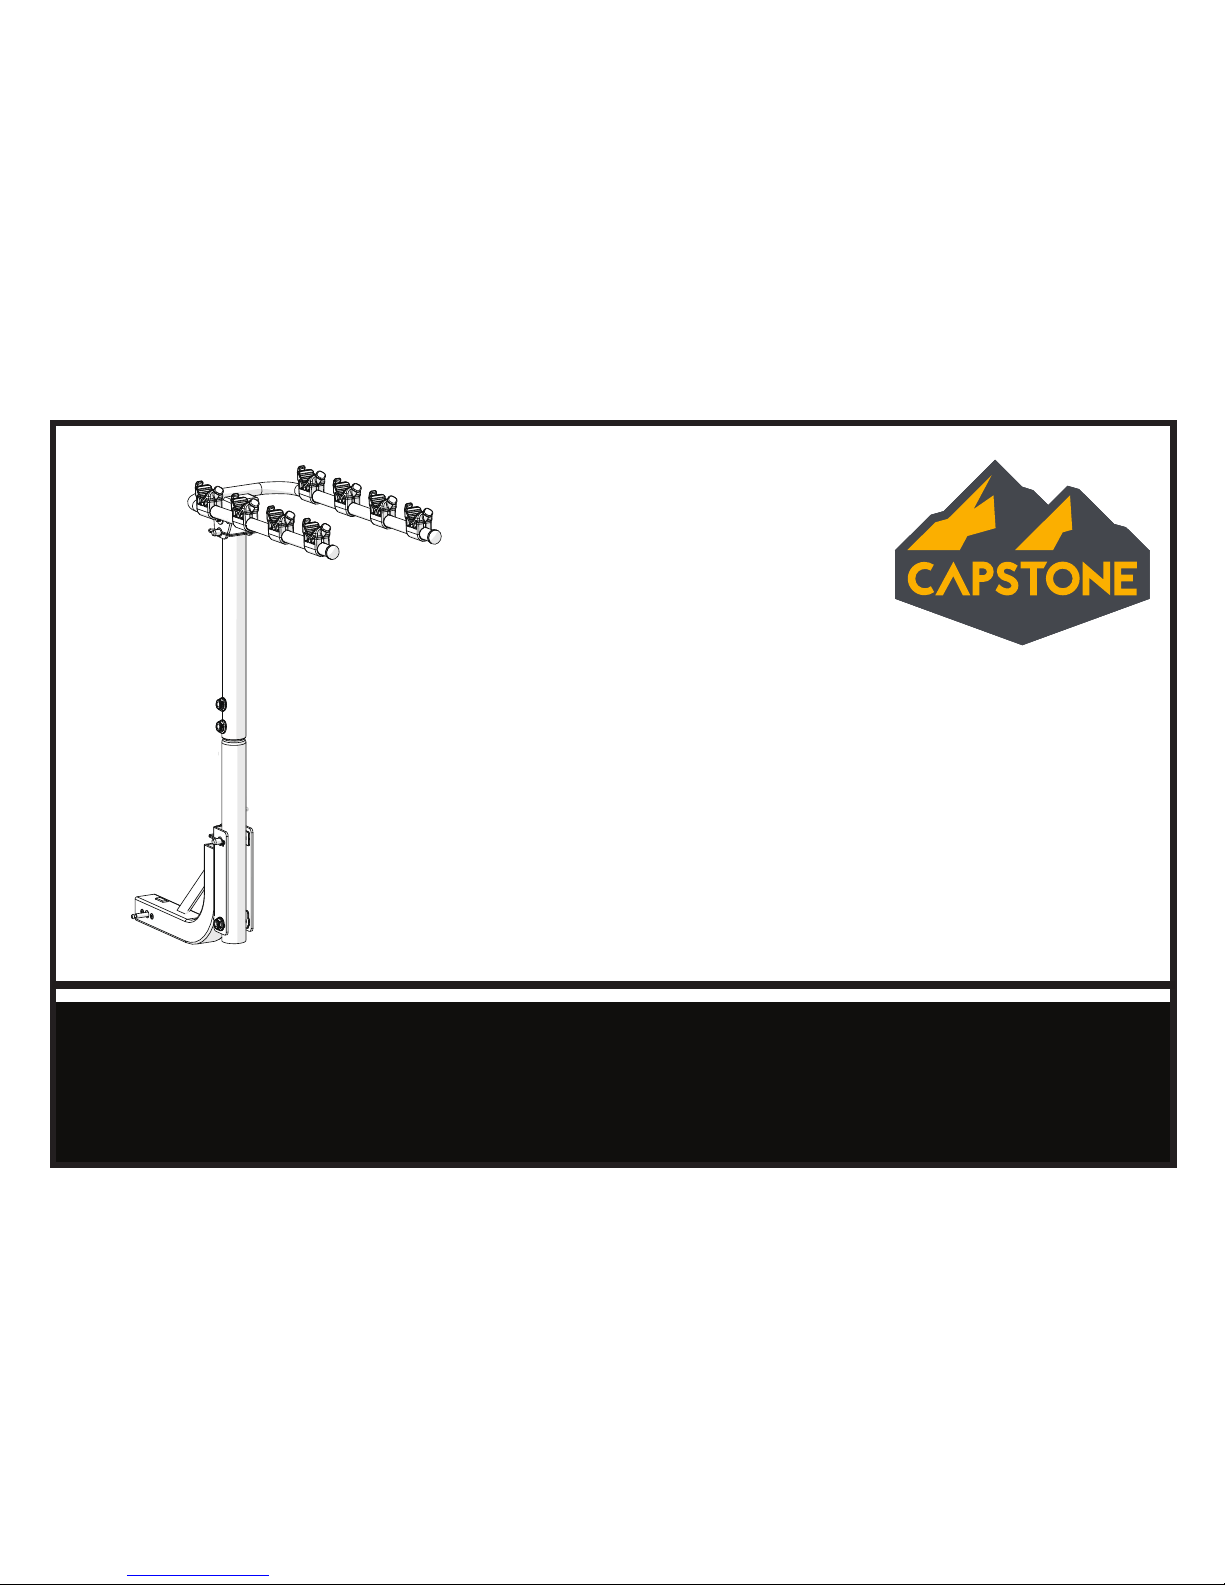
Step 1:
Connect upper frame to lower frame
by using carriage bolts, washers and nuts.
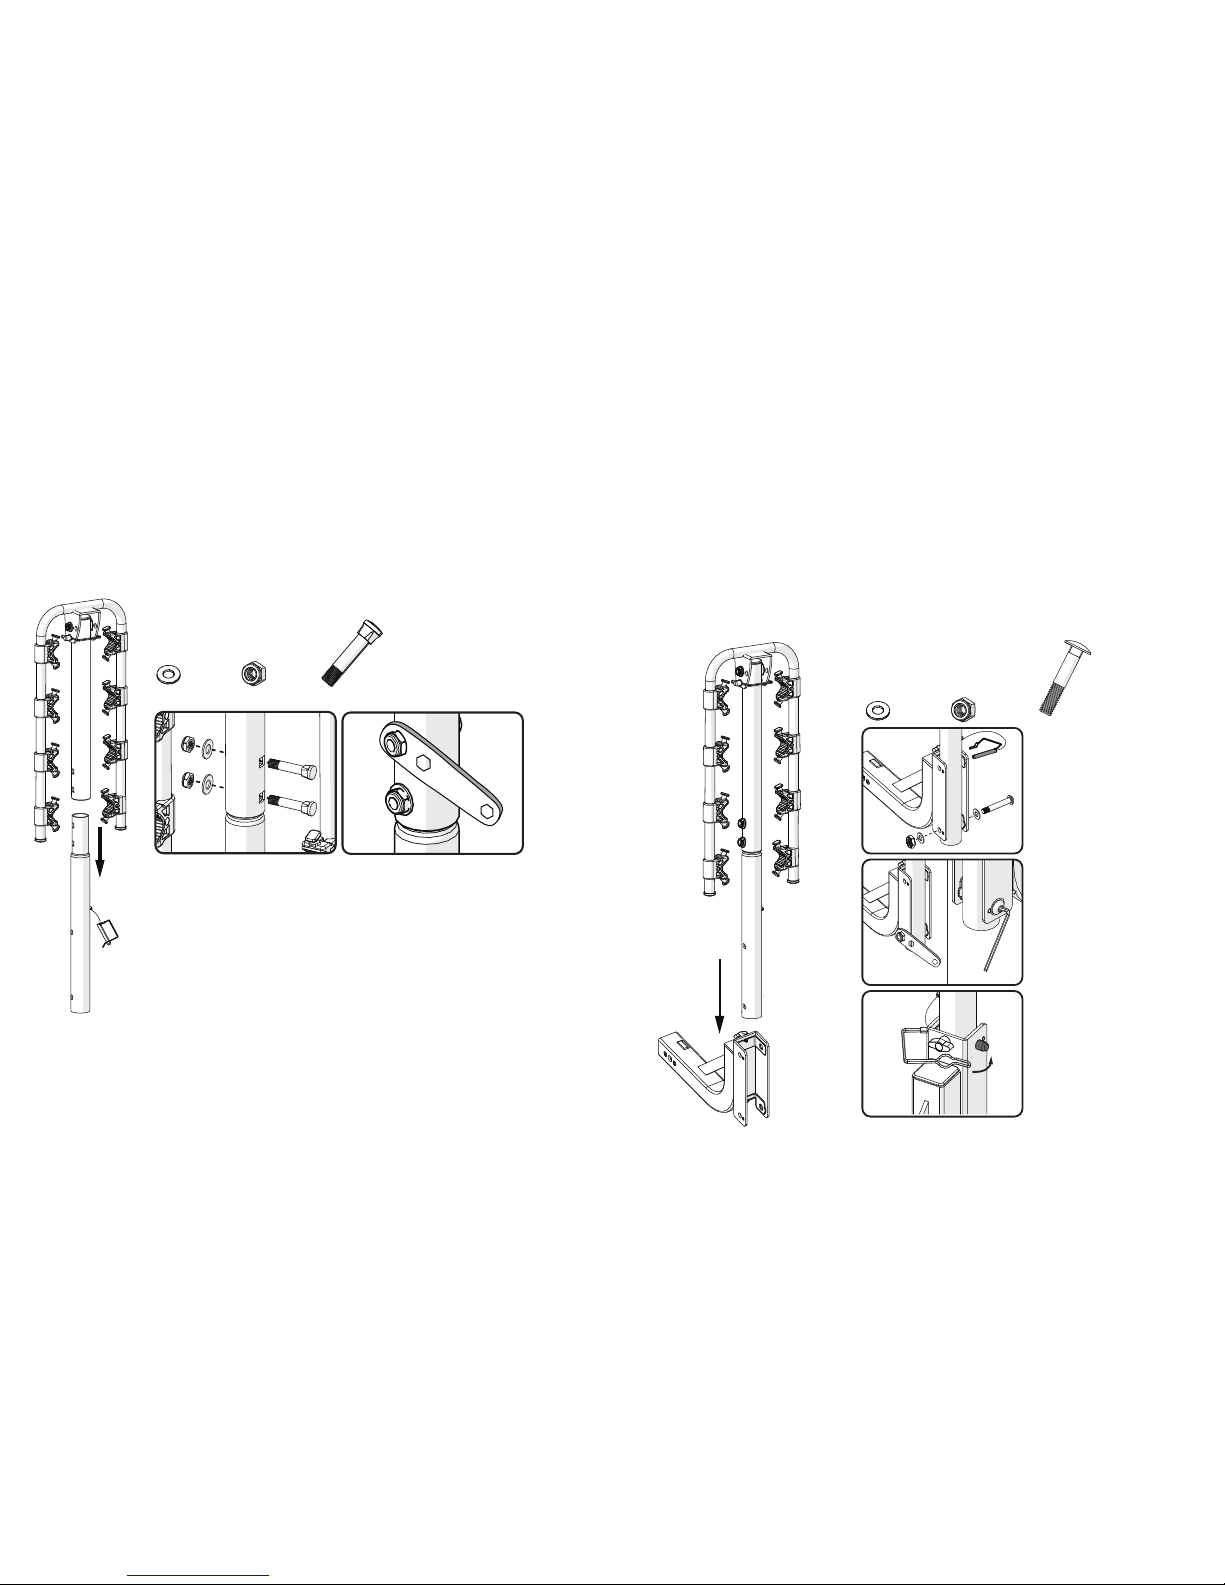
Step 2:
Connect main frame to the base by using
carriage bolt , washers and nuts on the lower
hole of the base. Then secure the main frame
with safety pin in the upper hole of the base.
Jx2 Ix2 Ex2
D x1
Jx2 Ix1
 Loading...