

Page 1
Di476
Contact Caple on 0117 938 7420 or for spare parts www.caple.co.uk
Page 2
Review the section on troubleshooting tips to
help you to solve some common problems.
Dear Custo m er ,
Passitontoanysubsequent owner of theappliance.
This manual contains sections on safety instructions,
operating instructions, installation instructions
and troubleshooting tips, etc.
As we follow a policy of constant development
and product improvement,
we may make
modifications without giving prior notice.
An electronic version of this manual is
available from www.caple.co.uk.
Please carefully read this manual before using
the dishwasher, it will help you to use and
maintain your Caple dishwasher correctly.
Keep it t o refer to it at a later date.
If you cannot solve the problems by yourself,
please contact the Caple Service department
either by telephone 0844 800 3830 or email
service@caple.co.uk.
Dishwasher features.......................................3
A Water softener..............................................4
Before or after loading the dishwasher
baskets........................................................9
Filtering system.............................................13
Caring for the dishwasher...................................14
B Loading the salt into the softener.................5
C Filling the rinse aid dispenser.........................5
D The function of detergent................................6
Loading the upper basket.................................10
Loading the lower basket...............................10
Wash cycle table...........................................11
Turning on the appliance...................................11
Change the programme.................................12
At the end of the wash cycle...........................12
Before contacting Caple Service....................22
Errorcodes.................................... ..............23.
Technicalinformation.............................. .....24..
Control panel..................................................3
..................................15Installati o n p repara tion
Furniture door dimensions and installation.........16
..............18Tension a djus tment ofthe doorspring
Drain hose connection................................. 18
.........................19Dishw a sher installat io n step s
Electrical connection....................................20
Cold water connection.................................. 21
Before contacting Caple Service
Read this manual before use
Note
Page 3

Thisapplianceis intended to beused in household
andsimilarapplicationssuch as:
-staff kitch en areas inshops, office s and oth er
worki ng env ironmen ts;
-farm house s;
-byclientsin hotels,motelsand other residentialtype
environments;
-bedandbreakfasttypeenvironments.
Thisappliancecan be used by childrenaged from8
yearsandabove and personswith reducedphysical,
sensory or mental capabilitie s or l ack of ex perience
andknowledgeiftheyhavebeengivensupervision
or instruction concerning use of the applianceina
safe way and understandthe hazardsinvolved.
Children shall not playwiththe appliance.Cleaning
andusermaintenanceshall notbemadebychildren
withoutsupervision. ForEN60335-1
This appliance is not inte nded for useby pe rsons
(including children )withreducedphysical, sensory
or ment a l c ap abi l it ie s, or lack of exp eri enc e and
knowled ge ,unles s they h ave been given su pervision
or instruction concerning use of the appliancebya
personresponsiblefor their safety. ForIEC60335-1
Thisapplianceis forindooruse only, for household
useonly.
To pr otect against the risk of e lectri cal s hock, do not
immerse theunit,cordorpluginwateror other liquid.
Pleaseunplug before cleaningandmaintenancethe
appliance.
Use a soft clothmoistenwith mild soap, and then use
adryclothtowipeitagain.
()
()
When using you r dishwasher,
follow the precautions listed below:
Page 4

This appliance must be earthed. In the event of a
malfunction or breakdown, earthing will reduce the risk
of anelectric shock by providing a path of least
resistance of electric current. This appliance is equipped
with a cord having an equipment-earthing conductor
and a grounding plug.
The plug must be plugged into an appropriate outlet that
is installed and earthed in accordance with all local
codes and ordinances.
Improper connection of the equipment-earthing
conductor can result in the risk of an electric shock.
Check with a qualified electrician or service
representative if you are in doubt whether the appliance
is properly grounded.
Do not modify the plug provided with the appliance;
If it does not fit the outlet.
Have a proper outlet installed by a qualified electrician.
Do not abuse, sit on, or stand on the door or dish rack of
the dishwasher.
Do not operate your dishwasher unless all enclosure
panels are properly in place.
Open the door very carefully if the dishwasher is
operating, there is a risk of water squirting out.
Do not place any heavy objects on or stand on the door
when it is open. The appliance could tip forward.
When loading items to be washed:
1) Locate sharp items so that they are not likely to
damage the door seal;
Page 5

2) Warning: Knives and other utensils with sharp points
must be loaded in the basket with their points down or
placed in a horizontal position.
Check that the detergent powder is empty after
completion of the wash cycle.
Do not wash plastic items unless they are marked
dishwasher safe or the equivalent.
For plastic items n
ot so marked,
check the manufacturer's
recommendations.
Use only detergent and rinse additives designed for
an automatic dishwasher.
Never use soap, laundry detergent, or hand washing
detergent in your dishwasher.
Children should be supervised to ensure that they do not
play with the appliance.
The door should not be left open, since this could increase
the risk of tripping.
If the supply cord is damaged, it must be replaced by the
manufacturer or its service agent or a similarly qualified
person in order to avoid a hazard.
During installation, the power supply must not be
excessively or dangerously bent or flattened.
Do not tamper with controls.
The appliance is to be connected to the water mains using
new hose sets and that old hose-sets should not be reused.
The maximum number of place settings to be washed
is 9.
The maximum permissible inlet water pressure is 1MPa.
The minimum permissible inlet water pressure is 0.04MPa.
Page 6
Dispose of the dishwasher packaging material
correctly.
All packagingmaterialscanbe recycled.
Plasticparts are markedwiththestandard
international abbreviations:
PE forpolyethylene,e.g. sheet wrappingmaterial
PS for polystyrene , e.g. p adding m aterial
POM polyox ymethylene, e.g. plastic clips
PP poly propyl ene, e.g. Sa lt fill er
ABS AcrylonitrileButadieneStyrene,e.g.C ontrol
Panel.
Packaging material could be dangerous for children!
For disposal of the packaging and of the appliance
please go to a recycling centre. Also cut off the
power supply cable and make the door closing device
unusab le.
Cardboard p a c kaging is manufactured from recycled
paper and s hou ld be dispose d in the waste pa per
collection for recycli ng.
By ensu ring this product is dispose d of correctly, you
will help prevent potential negativ e consequences
for the environment and human health, which could
otherwise be caused by inappropriate wa s te handli ng
of this p roduct.
For more detaile d information about recycling of this
product, please contact your local city office and y our
household waste dis posal serv ice.
DISPOSAL : Do not dispose this product as unsorted
municipal waste. Collection of such waste separately
for special treatmen t is necessary.
Page 7
Witheachwashcycle.
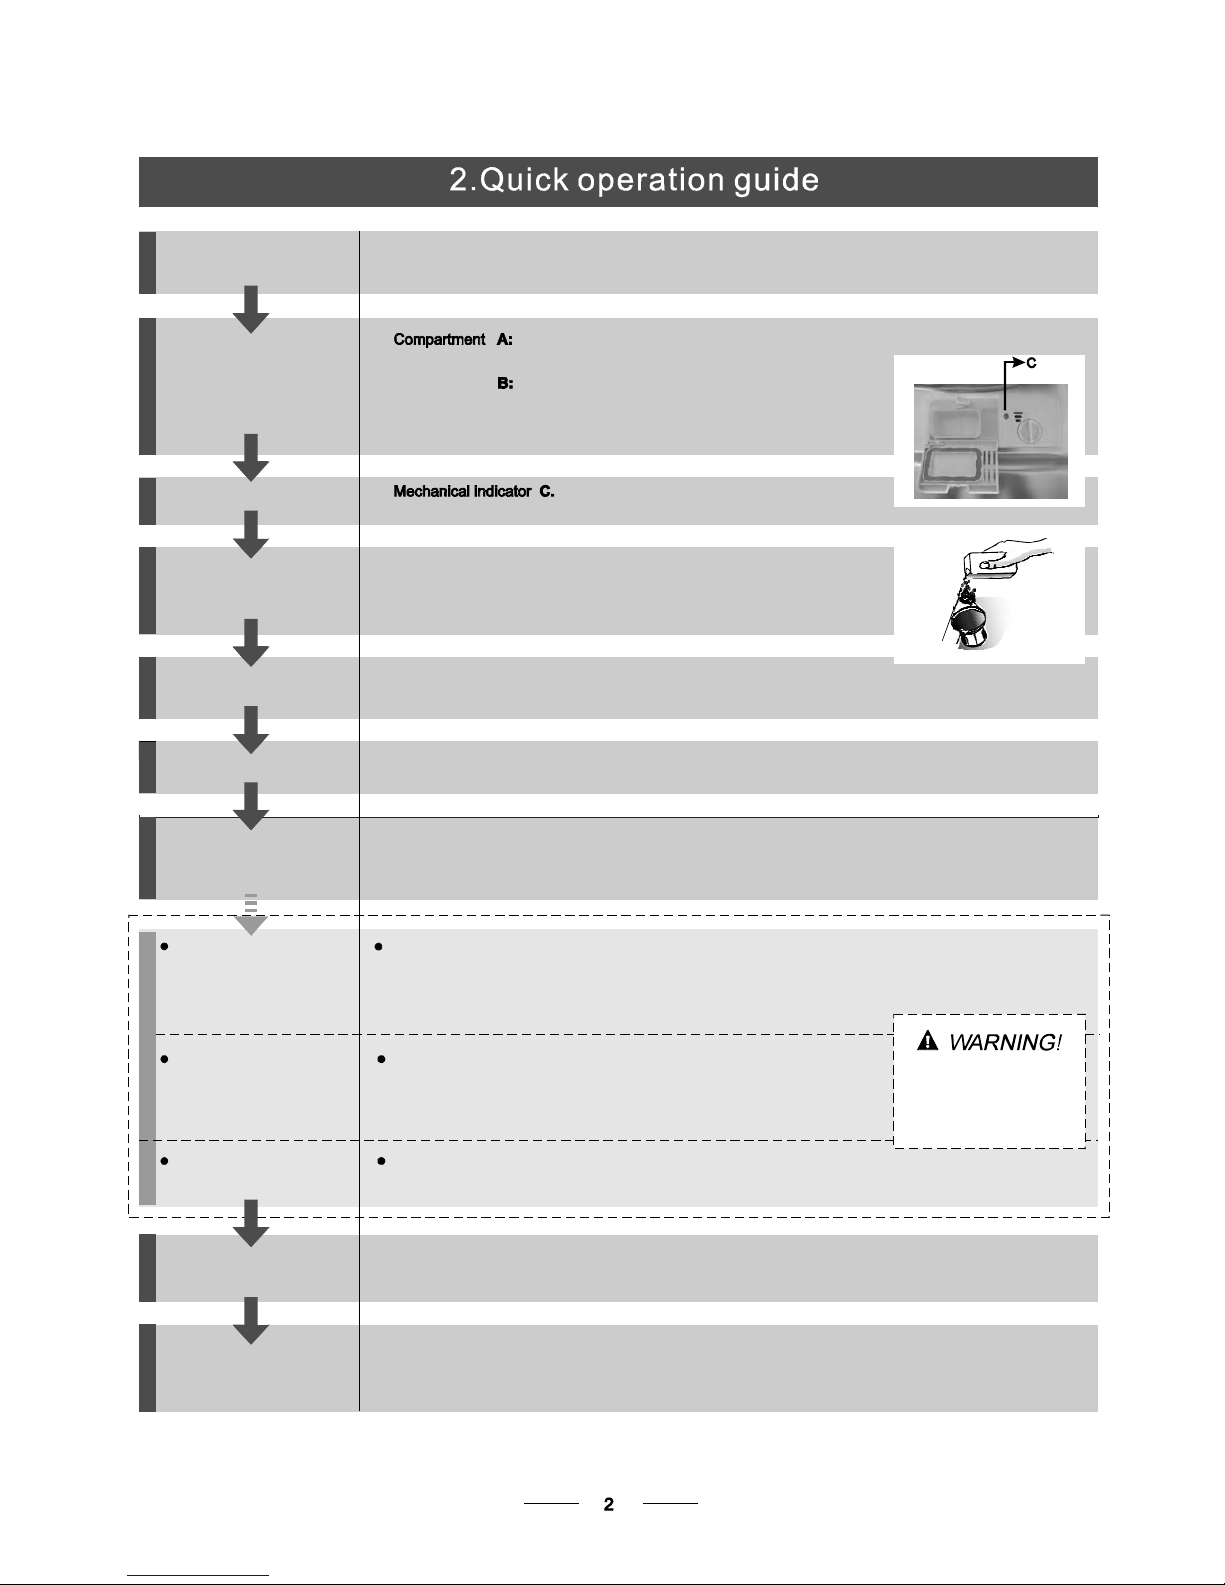
Compartment
For programmes with pre-wash only.
(Follow the user instructions!)
Electric indicatoron controlpanel (if provided).
Check the rinse aid level
Use the electric indicator on control panel.
Add salt if required.
Checkthe regeneration
salt level
Load the baskets
Select a programme
Turnonthewatertap,closethedoor.Themachinewillstartworkingafterabout10seconds.
Running the dishwasher
Switch off the appliance
Turn off the water
supply and unload the
baskets
Fill the detergent dispenser
Warning: wait a few minutes (about 15 minutes) before unloading the dishwasher to avoid handling
the dishes and utensils while they are still hot and more susceptible to breaking.
They will also dry better.Unload the appliance, sta rti ng f r om the lower basket.
Changing theprogramme
Add forgottendishes in the
dishwasher.
Scrape off any large amounts of leftover food. Soften remnants of burnt food in
pans, then load the baskets. Refer to the dishwasher loading instructions.
Press the programme button until the required programme indicator lights up.
( See the section entitled "Operation instructions")
When the working cycle has finished, the buzzer of the
dishwasher will sound 8 times, then stop.
Turn off the appliance using the On/Off button.
If the appliance is switched
off during a wash cycle.
Open the door caref ull y.
Hotsteam may escape
when the dooris opened!
If the appliance is switched off durin g a wash cycle, w hen switched
on again, please re-select the washing cycle and operate the dishwasher
according to the original programme selection).
For detailed operating method read the corresponding content on the instruction manual.
Switch on the appliance Open the door, press the On/Off button to switch on the appliance .
1.Open the door a littleto sto p the dishwasher.
2.After the spray arms stop working, you can open the door completely.
3.Add the forgotten dishes.
4.Close the door, the dishwasher will start running again after 10 seconds.
1.A runningcycle can onlybe modified if it has been running for a short time. Otherwise the detergent
may have already been released and the water already dr ained. If this is the case, the detergent
dispenser must be refilled.
2.
Press and hold the programme button
for more than 3 seconds to cancel the running programme.
3. Select a new programme.
4. Restart thedishwasher.
AB
Page 8
3
before using itforthe firsttime.
To getthe bestperformancefromyourdishwasher,r ead all operatinginstructions
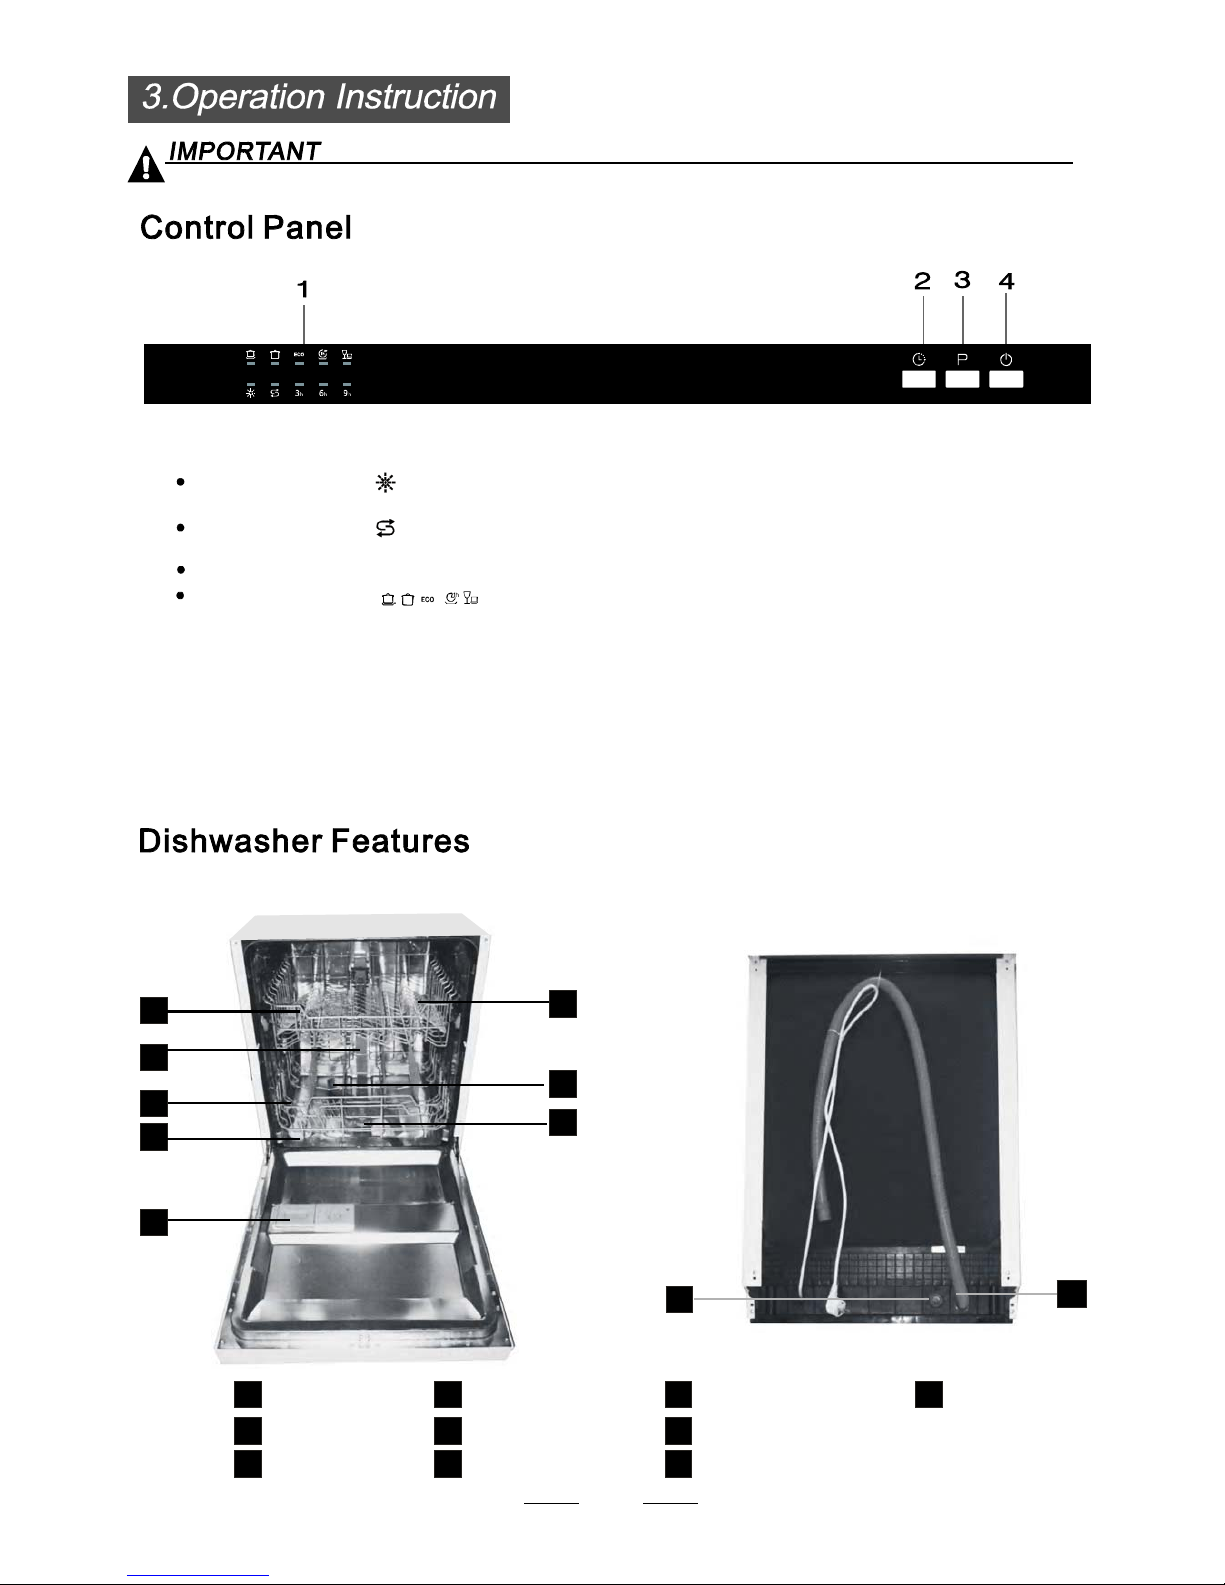
2.
Delay button : To press the button to delay.
3.
Programme button : To press the button to select a
wash programme.
4.On/off Bu tton:
To turn on/off the power supply.
1. indicators:Display to show theerror code,
Programme indicators:
Dela y t ime : 3/6 / 9 hours option
delay time etc.
Rinse aid indicator:
Indicates when the dispenser needs to be refilled.
Add salt indicator:
Indicates when the salt needs to be added.
9
Back View
1
2
3
4
5
6
7
8
Front view
Dispenser
CupShelf
Spra y arms
Filter assembly
Inletp ipeconnector
Drain pipe
Lower Basket
Innerpipe
Upper Basket
1
Salt Contai ner
5
6
7
8
9
10
3
2
4
10
Delay timer
The Delay timer allows the user to select the start time by 3, 6 or 9 hours to most efficiently take advantage of convenient times and
energy saving windows.
Page 9
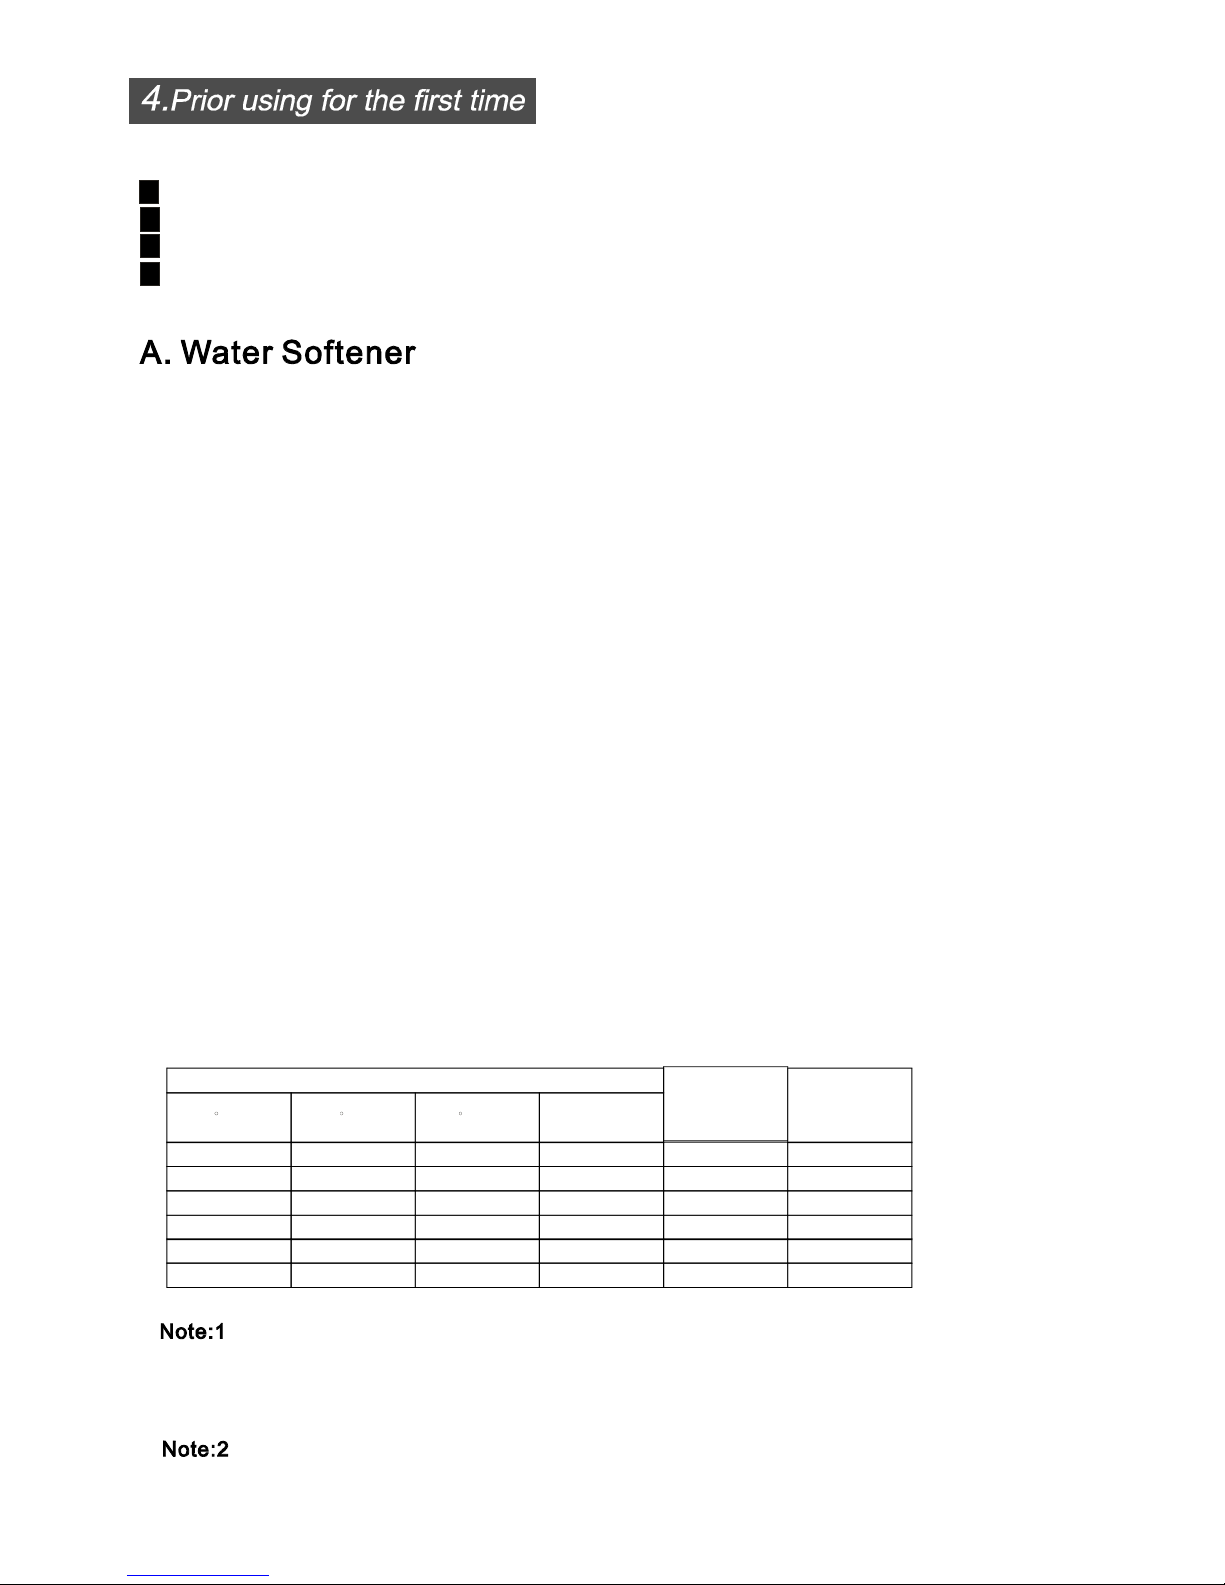
The water softener must be set manually, using the water hardness table below.
The water softener is designed to remove minerals and salts from the water, which would h ave
a detrimental or advers e effect on the ope ration of the app liance.
The higher the content of the se miner als and salts, the har der your water is.
The softener should be adjusted according to the hardness of the water in your area. Your local W ater Authority
can advise you on the hard ness of the water in your area.
AdjustingS altConsumption
The dishwasher is designed to allow
for adjustment in the amount of salt consumed based on the hardness
of the water used. This is intended to optimise and customise the level of salt consumption.
What is a water softener for?
The hardness of the water varies from place to place. If hard water is used in the dishwasher, deposits will
form on the dishes and utensils.
The appliance is equipped with a special softener that uses a salt container specifically designed to
eliminate lime and minerals from the water.
The factory setting is: H4 (EN 50242)
Contact your local water board for information on the hardness of your water supply.
4
°
Clark:British degree
°
fH: French degree
°
dH: German degree
dH=1.25 Clark=1.78 fH=0.178mmol/l
°
°
°
1
Bef
ore using your dishwasher forthe first time:
A. Set the water softener
B. Add 1.5Kg dishwasher salt and then fill the salt container with water
C. Fill the rinse aid dispenser
D. Add the detergent
dH
mmol/l
0~90~5
0~0.94
H1(Rapid)
0
10-20
6-11
1.0-2.0 H2 1hour)( 9
21-30
12-17 2.1-3.0
H3(Rapid+1hour)
12
H4(ECO)
20
FH
0~6
7-14
15-21
Clark
WATERHARDNESS
Selector Position
Salt consumption
(gram/cycle)
18-22 31-40 22- 28 3.1- 4.0
41-60
23-34 4.1-6.0
H5(rapid+ECO)
30
H6(1hour+ECO)
60
29-42
35-55 61-98 43- 69 6.1- 9.8
1.
Open the door
and switch on
the
appliance;
2.
Press the program
me button for more than 5 seconds to start the water softener
setting mode within 60 seconds after the appliance was switched on (The salt and rinse
aid warning lights will be on periodically when it gets into the setting mode );
3.
Press the p
rogramme button to select the correct setting according to your local environment,
the s ets wil l chang e in thefollowing sequence:H1->H2->H3- >H4->H5 ->H6;
4.
Press the power button to end the set up model.
Please follow thestepsbelow foradjustmentin saltconsumption.
Page 10
1.The salt container must onl y be refilled when thesalt warn ing ligh t in the control pan el com es on.
Depending on howwell t he salt dissolves, th e sa lt warnin g light maystill be on even tho ugh the
salt container isfilled.
If there i s no saltwarning lightin the con trol panel (for some Mode ls),you canestimate wh en to fill
the salt i nto thesoftener by thecycles that thedishwasher hasrun.
2.
If there are spills of the salt, a soak or a rapid programme should be run to remove the excessive salt.
Always use thesalt int ended f or u se wi th di shwasher.
The salt c ont ainer i s l ocated beneath the l ower bas ket andshould be filledas expla ined
inthe following:
Important!
Only use salt s
pecifically designed for the use in dishwashers! Every oth er type of
salt not specifically designed for the use in a dishwasher, esp ecially table salt, will
damage the water softener. In case of damages caused by the use of unsuitable
salt the m anufacturer does not give any warranty nor is liable for any damages caused.
Only fill wi th sal t ju st b efore star ting one of the co mplete washingprograms.
This will prevent any g rains ofs alt orsalty wate r,which may have been spilled,
remaining on the bottom o f the machine for anyperiod of t ime, which may cau se
corros ion.
5
The rinse aid dispenser
The ri nse a id is released during the final rinse to prevent water fro m f ormin g dr op lets on your dishes, wh ich can
leave spots and streaks. It a lso improves drying by allowing water to roll off the dishes. Your dishwasher i s
designed to use liquid ri nse aids. The rinse aid dispenser is located inside the door next to the det er ge nt dispenser.
To fill the dispenser, open the cap and po ur the rinse aid into the disp enser until the level in di cat or turns c omplet el y
black. The vol ume of the rinse aid container is about 110ml.
The function of rinse aid
Rinse aid is automatically added to the wash during the last rinse, ensuring thorou gh rinsing , and spot and streak free drying.
Important!
Only use b
randed rinse aid for dishwasher. Never fill the rinse aid dispenser with any other substances
(e.g. Dishwasher cleaning agent, liqu id d eterge nt). Th is woulddamage the appliance.
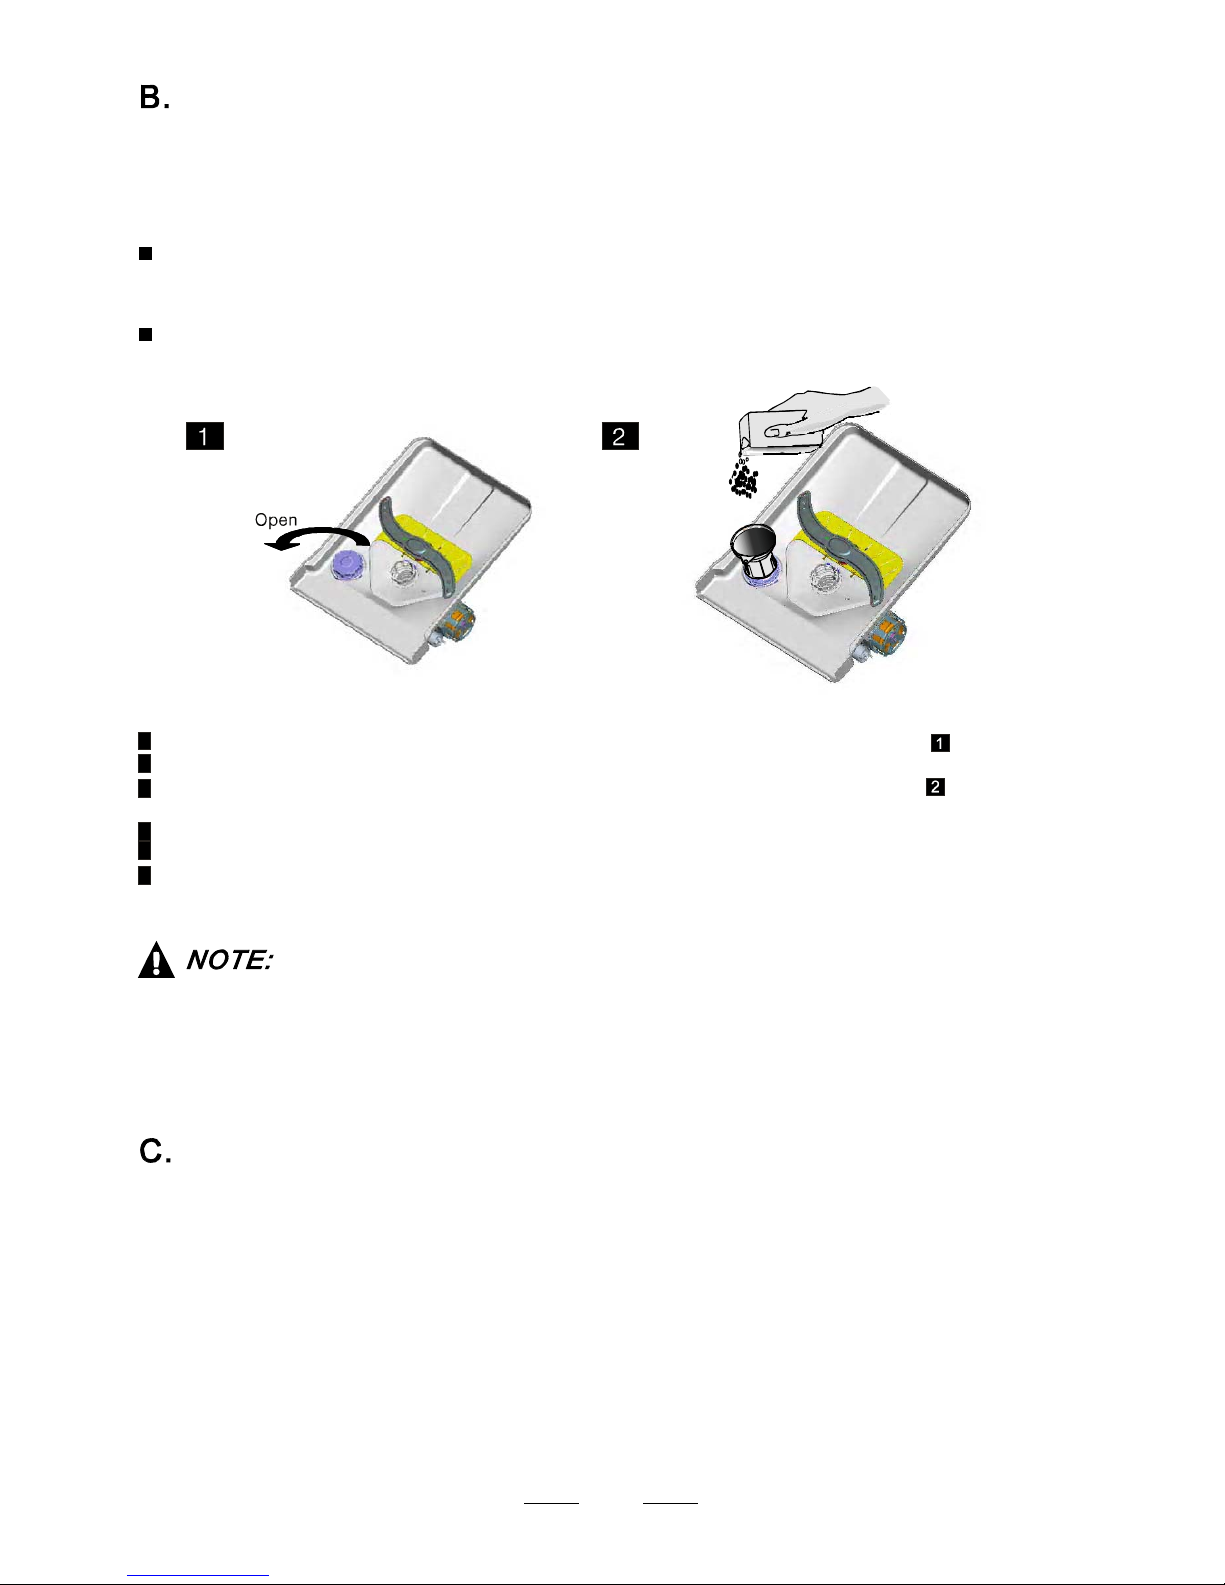
Fill the salt container with water,It is norm a l for a small amount of water to come out of the
salt container.
A After the lower basket has been remo v e d , u ns c r e w a nd re move the c ap from the salt container.
B Place the end of the funnel (supplied) into the hole and introduce about 1.5kg of dis hwasher salt.
C
D After f illing thecontainer , screw the captightly back clockwise .
E Thesalt warning lightwill stopbeing afterthesalt containerhas beenfilled with salt.
F Immediately a fter filling the salt into the salt container, a washing programme should be started
programme). Otherwise the filter system, pump or other important parts of the machine may be damaged
bysalty water. This isout of warranty.
(We suggest a short
Loading salt into the softener
Fill the rinse aid dispenser
Page 11

6
Toop en t he dispenser, tur n the cap to the "ope n" ( le ft) a rrow and l ift it out.
Pour t he rinse aid into the dispenser, be ing careful n ot tooverfill .
Replace the capby inserting italigned with "open" arrow and turningit to t he cl osed (righ t) arrow.
Adjusting the rinse aid dispe nser
The rinse aid dispenser hassix or foursettings. Always start with thedispenser
set on " 4". Ifspots and p oor dryingare a problem, increa se the amount of r inse
aid dispensed by removing thedispenser l id an d r otating thedial to "5".If the
dishes st ill ar e not d ryi ng pr operly o r areshow spots, adjustthe di al to thenext
higher lev er un til y our dishesare spot-fr ee. The recommended set ting is"4".
(Factoryvalueis"4".)
Increasethedoseiftherearedrops of water or lime spotsonthe dishes afterwashing.
Reduce i tiftherearesticky whitish stainsonyour disheso r a bluishfilmonglasswareo r
knifeblades.
1
2
3
Asthe ri nse aid diminishes, the sizeof the blackdot
on the rinse aid levelindicatorchanges, as illustrated below.
Full
3/4full
1/2full
1/4full - Shouldrefill to eliminatespotting
Emp ty
When to refi
ll the rinse aid dispen ser
If there i s no rinse-aid warning light in the control panel, you can estimate the amount from the colour
ofthe opt ical levelindicator C located ne xt to thecap. When therinse-aid c ontainer isfull, the whole
indicator wil l be d ark . As t he r inse-aid di minishes, thesize of the dark dot de creases. You should neve r let
the rins e aid level fall 1 / 4 full.
during the next wash.
Don't forget to replace the cap before you close dishwasher door.
Clean up any rinse aid spilled during filling with an absorbent cloth to avoid excessive foaming
Detergents with its chem ical ingredients a re ne cessary toremove dirt, c rus h dirt and transport itout of thedishwasher.
Mostof thecommercialqu ality d etergentsare suitable for thispurpose.
""
Correct use of detergent
Use only detergent specifically made for the use in dishwashers. Keep your detergent fr esh and dry.
Don't put p owdered dete rg e nt into the dispenser u
ntil you're ready to wash dishes.
Important !
The function of detergent
Page 12

7
Amount of detergent to use
Concentrated detergent
Based on their chemical com position, deterg en t s can be split in two basic types:
Detergent tablets
Detergent tablets of different brands dissolve at different speeds. For this reason some
detergent tablets cannot dissolve and develop their full cleaning power during short
programmes. Therefore please use long programmes when using detergent tablets, to
ensure the complete remov a l of det erg e n t res i du al s.
Detergent dispenser
The dispenser must be refilled before the start of each wash cy cle f ollowi ng the inst ructions
provided in the wash cycle table . Your dishwasher uses less detergent and rinse aid than
Conventi onal d i sh w as h er. Generally, only one tablespoon of detergent is needed for
a normal wash load. Mor e heavily s oiled items need more det erg ent . Always add the
detergent just b efore starting the d ishwasher, otherwise it could get da mp a nd will not
dissol v e pr oper ly.
conventional,alkaline detergents withcaustic components
lo w alk aline c onc entr at ed det erge nt s with natura l enzym es
Normally new powder detergent is produced without phosphate. Thus the water softener function of
phosphate is not given. In this case we recommend to fill salt in the salt container even when the
hardness of water is only 6 °dH. If detergents without phosphate are used in the case of hard water
often white spot s app ear on dishes and glasses. In this case please add more d eter gent to reach
better results. Detergents without chlorine do only bleach a little. Strong and coloured spots will not be
removed completely. In this case
please choose a programme with a higher temperature.
Deterg ents
There ar e 3 s orts of det er ge nts
1.With phosphateand with chlorine
2.Withphosphate and withoutchlorine
3.Withoutphosphate and with out chlorine
If the lid is closed: press release butto and the lid will spring open.
Always add the detergent just before starting each wash cycle.
Only use branded detergent aid for dishwasher.
Dishwasherdetergent is corrosive!
Take caretokeepitoutofreach of children.
Page 13

Fillthe de tergent dispenserwith d etergent.
The mar king indicate s the dosi ng le vels , a s
illus t rated on the righ t:
For main wash cycle detergent to be added
.
For pre-wash cycle detergent or 3in1 tablets.
Pleaseobserve themanufacturers dosingand storage
Recommendations as stated onthedetergentpackaging.
Closethelidandpressuntilit locks in place.
If the dishes are heavily soiled, place an additional detergent dose in the pre-wash detergent chamber. This
detergent will take effect during the pre-wash phase.
A
B
Adding detergent
You will find information about the amount of detergent for the single programme on the last page.
Please aware, that according to the level so iling and the specific hardness of water differences are possible.
Please obser ve t he manufacturer's recommendations on the detergent packaging.
8
A
B
Page 14

Below are not suitable
Cutlery with wooden, horn china or motherof-pearl handles
Plastic items that are not heat resistant Older
cutlery with glued parts
that
are
not
temperature
resistant
Bonded cutlery items or dishes
Pewter or cooper items
Crystal glass
Steel items subject to rusting
Wooden platters
Items made from synthetic fibres
Below are of limited suitability
Some types
of
glasses
can
become
dull after a large number of washes
Silver an d aluminum parts have a
tendency to discolour duringwashing
Glazedpatternsmay fadeif machine
washed frequent ly
Dishes anditemsofcutlery mustnotlie insideone another, or covereachother.
Toavoid da mage toglasses, th ey mus t nottouch.
Load largeitems which aremost difficult toclean into th e lowerbasket.
The uppe r basket isdesigned to holdmore deli cate andlighter dishwa re such asglasses, coffee
and t eacups
Long bladedknives sto red in an upright po sition are apotential hazard!
Long and/orsharp item s of cutlery such as carving knives must be positi oned
horizon tally in the upper b asket .
Please donot overload your dishwashe r. This is important for g ood resultsand fo r
reasonab le consu mption o f en ergy.
Load items such as cups, glasses, pans
etc. With the opening facing downwards so that water
cannot collect in the container or a deep base.
Consider b uyin g ut ensils which are identified as dishwasher-proof.
Use a mild det e rg e nt t ha t is des c ribed as 'kind to dishes'. If necessary, seek further
information from the detergent manufacturers.
For particular items, select
a programme with as low a temperature as possible.
To prevent damage, do not take glass and cutl e r y out of the dishwasher immediat el y
after the programme has ende d.
(For best performance of the dishwasher,follow the se loading guidelines.
Features and appearance of baske ts and cutlery basket s may varyfrom your m odel.)
Scrape off anylarge amounts ofleftover fo od. Sof ten rem nants ofburnt food inpans.
It is no t necess ary torinse t hedishes u nder running water.
Place obje cts i n the dishwasher in following way:
1.Itemssuch as cups, glasses, pots /pans, etc. a re fa ced dow nwards.
2.Curveditems, or oneswith recess es, shoul d be loadedaslant s o th at water canrun off.
3.Allutensils are stacked securely andcan not ti p ov er.
4.Allutensils a re placed inthe way thatthe spray armscan rotate freely during w ashin g.
Very sm all items s hould n ot b e washe d in the dishwasher as theycould ea sily fal l out of the basket.
To prevent water dripping from the upper basket into
the lower basket, we recommend that
you empty the lower basket and then the upper basket. This will reduce water dripping from
the upper basket on to the contents of the lower basket.
9
Suitability of cutlery and dish types
Before and after loading the dishwasher baskets
Removing dishes
Page 15

10
The u pper bas ket isdesignedto ho ld m ore delicate
and lighter d ishware s uch as gl asses, coffee and
teacupsand saucers,aswellasplates, small bowls
and s hallow pans (aslong asthey arenottoo dirty).
Positionthedishesandco okwaresothattheywill
notget movedby t hespray ofw ater.
We sug gest that you place large items andthe most
difficult to clean items are to beplaced intothe lower
basket: su ch a s pots, pans, lids, se rving d ishes and
bowls, as shown in the f igu r e below. It is pref er able to
pla ce ser vi n g dish es a nd lids on the s i d e of the racks
in order toavoidblocking t he ro tation ofthe top spray
arm .
Pots,servingbowls,etc,mustalwaysbeplacedtopdown.
D eep pot s sh oul d be slant ed to a ll ow water to fl ow out.
Please be r eminded that:
The Bottom basket features folding spikes so that larger or more pots and pans can be loaded.
Folding spikes of lower basket
For better stacking of pots and pans, the spikes can be folded
down as show in the picture below.
Adjusting the upper basket
The height of the upper basket can be adjusted in order to
create more space for large utensils both for the upper
/lower basket. The height of the upper basket can be
adjusted by placing the wheels on different height of the
rails. Long items, serving cutlery, salad servers and knives
should be placed on the shelf so that they do not
obstruct the rotation of the spray arms.
Folding back the cup shelves
For better stacking of pots and pans, the spikes can be
folded down as show in the pictures below.
Cutlery shoul d be placedin the cutlery basket wit h the handlesat the bottom.If the r ack ha s si de bask ets, th e
spoons should be loaded sep arately into the appr opriate sl ots, especially longutensils sh ould b e place d in the
horizontal p osition atthe front ofthe upper basketas shown inthe picture.
Do not let anyitemextendthroughthe b ottom.
Always lo ad sharp utensils withthe sha rp
pointdown!
The method for loading normal dishware
Loading the upper basket Loading the lower basket
Page 16

11
*EN 50242 : This programme isthe te st cycle. T he i nfor mat ion for comp arabi li ty test
in accordance withEN 50242, asfollows:
Capaci t y: 9 set ting
Position Upper basket:upper wheels o n rai ls
Rinse aid s etti ng: 6
Pl: 0.4 9 w ; Po:0.45w.
Starting a cyclewash
1 Draw outthe lowerand upper basket, loadthe dishes and pushthem back.
It is recommended to load the lower basket first, then the upper one (see the section
entitled "Loading the dishwasher").
2 Pour in the detergent (see the section entitled "Salt, detergent and rinse aid").
3 Insert the plug into the socket. The power supply is 220-240 VAC /50 HZ, the specification
of the socket is 10A 250VAC. Make sure that the water supply is turned on to full pressure.
4. Open the door, press the ON/OFF button.
5
the programme button , the wash programme will be changed as follows direction:Press
Intensive->Normal->ECO->1Hour->Rapid;
If a programme is selected, the icon of display will illuminate. Then close the door, the
dishwasher begins to start.
Means: you need to add rinse into the rinse aid dispenser.
()
Normal
5/22g
5/22g
5/22g
For normally soiled loads,
such as pots,plates,
glasses and lightly soiled
pans.
For heaviest soiled
crockery, and normally
soiled pots, pans, dishes etc
with dried on soiling.
Ashorter washfor lightly
soiled loads and qu ick
was h.
Pre-wash(50 )
Wash (65 )
Rinse
Rinse
Rinse(65 )
Dryin g
℃
℃
℃
Pre-wash(4 5 )
Wash (55 )
Rinse
Rinse ( 65 )
Drying
℃
℃
℃
Pre- w ash
Wash (50 )
Rinse(65 )
Dry in g
℃
℃
Wash (40 )
Rin se
Rin se (45 )
℃
℃
155
175
135
40
1.07
0.78
1.3
0.45
16
13
9
10
(50 )
Wash(60 )
Rinse (55 )
Drying
Pre-wash
℃
℃
℃
60 9.00.85
5/22g
20g
For lightly soiled loads that
do not need excellent drying
efficiency.
Intensive
1Hour
ECO
(*EN50242)
This is standard progr amme , it i s
suitable to clean normally soiled
tablew are anditis the m ost efficient
progra mme in terms of its combined
energy a nd wat er consumption for
that type of tableware .
Rapid
Wash cycle table
Switching on the dishwasher
Page 17

12
When the wo rking cyc l e has finished, the buz zer of t h e dis hwashe r wil l sound for 8 secon d s , the n sto p. Turn off
the a ppliance usi ng th e O N/OFF b utton, sh ut o ff the watersupply and open the d oor of the dishwasher.
Wait for a f ew mi nutes b ef ore unlo ading th e dis hwasher t o avoi d ha ndling th e dishes and utensils whilethey
are s till h ot and m ore susceptible to br eakage. The y wil l als o dry be tter.
Switching off the dishwasher
When t
he programme light is off, only then has the programme ended.
1.Switch off the dishwasher by pressing the ON/OFF button.
2.Turn off the water supply.
Open the door carefully.
Hot dishes are sensitive to knocks. The dishes should therefore be allowed to cool d own arou nd 15 mi nutes
before removing from the appliance.
Open the dishwasher's door, leave it ajar and wait a few minutes before removing the dishes. This way they
will be cooler and the drying will be improved.
Unloading the dishwasher
It is normal that the dishwasher is wet inside.
Empty the lower basket first followed by the upper one. This will help to avoid water dripping from the upper
basket onto the dishes in the lower basket.
Ifyou open the door
, the machine will pause. The programme light will
stop flashing and the buzzer will sound every minute unless you close the door .
After you close the door, the machine will continue to wash after 10 seconds.
duringawashcycle
A cycle that is underway can only be modified if it has only been running for a short time. Otherwis e, the
detergent may have already been released, and the appliance may have already drained the wash water.
If this is the case, the detergent dispenser must be refilled (see the section entitled " Loading the
detergent " ).
Open the door, press the programme button for more than 3 seconds , the machine will go to standby
state, then you can change the programme to the desired cycle setting (see the section entitled " Starting
a wash cycle" ).
1
2
Aforgotten dish can be added any time before the detergent cup opens.
After the spray arms stop working, you can open the door
completely.
Add the forgotten dishes.
Close the door
2
3
Open the door a little .
1
4
5
The dishwasher will run after 10seconds.
It is dangerous toopen the door when wash ing,
beca use the hot water m ay sc ald you.
Changing the programme
Forgot to add a dish?
At the end of a wash cycle
Page 18

The filter prevents larger remnants of food or other objects from getting inside the pump. The wash
residue may block the filter from time to time, in this case they must be removed.
Filterassembly
Thefilterefficiently
For best performance and results, the filtermust be cleanedregularly. this r eason, it isa goo d idea to
remove t he la rger foodparticles trapp ed in thefilter aft er e ach wash cyc le b y rin sing thesemicircular filterand
cup unde r runnin g wa ter.Toremove th e filt er device , pull thecup handle inthe upwa rd d irection.
removes food particles from th e wa sh w ater,allowing it tobe rec ycled du ring t he cycl e.
For
The dis h washer mus t never be u sed without th e fil t er s.
Improper replacementof the filter may reduce theperformance level ofthe appliance
anddamagedishesand utensils.
When following this procedure from step1 to step 2, the filter system will be removed;
when following it in reverse from Step 2 to Step 1, the filter system will be installed.
13
1
2
Step 1 Turnthe filter inanti-clockwise direction,:
Step 2:lift the filter assembly up
The filter system consists of a coarse filter,a flat (main
filter) and a microfilter (fine filter).
Foodand soilparticlestrapped inthis filterare pulverized by a
special jet onthe l ower spr ay ar m and w ashed d own tod rain.
Coarse filter
2
Larger items, s uc h as pieces o f bones or glass, that could b lock
the drain are trapped in the coarse filter. To remove the
items caught by the filter, gently squeeze the top of this filter
and lift out.
This filterholdssoiland food residues in the sump areaand
prevents it frombeingredepositonthe dishesduringwashcycle.
Main filter
1
Fine filter
3
2
3
1
The filter system
2
Page 19

The control panel can be cleaned by using a slightly damp cloth.
After cleaning, make sure you dry it thoroughly.
For the ext e ri or, use agood appl ia nc e polis h wax.
Neveruse shar p obj ects, sco uring pa ds o r har sh c leaners ona ny p art o f the dishwasher.
Protection against freezing
1.Cutofftheelectricalpower tothedishwasher.
2.Turnoff the water supply and d isconnect thewater inl et pipe from the wate r valve.
3.Drain the w ater f rom the inlet pipe an d wat er va lve. (Use apan to gather the water )
4.Reconnect the waterinlet pipe tothe water valve.
5.Remove the f ilter at the bottom of thetub and usea sponge tosoak up waterin the s ump.
fter washi ng cycles ,timea
Please take frost protection measures on the dishwasher in winter. Every
please operate as follows
:
Cleaning the filter
Cleaningthe Door
To cle an the coars e fi l ter and the fin e filter, use ac lean i n g bru sh. Reas sembl e the filter part s as shown i n the fi gures
on the last page and reins ert the enti re assembly in the dis hwa sher, po sitio nin g itin i ts s eat and press ing downwards .
When cleaning the filters, pay attention not to knock. They are fragile
, the
filters could be contorted and the performance of the dishwasher could
be decreased.
Toclean the e dge aroundthe door, you shoulduse only asoft warm, dampcloth.
Toavoid pene tration o f wa ter into thedoor lock andelectrical com ponents, d o not
usea spr ay cle aner ofanykind.
Never use a spray cleaner toclean the door panel as it may damage thedoor lock
andelectricalcomponents.
Abrasive agent s or somepaper towels shouldnot be u sed b ecause of therisk of
scra t ching or l eavi ng spots on the stainless ste el s ur fa ce.
Cleaning the spray arms
If your dishwasher will not work due to ice,
please contact professional Caple Service.
It is n e ces s ary to cle an the spray arms re gula rly for h ard
water chemicals willclog the spray armjets a ndbearings.
- Inspect thefilters for blockingafter e very time thedishwasher hasbeen used .
- By uns crewing thecoarse fil ter,you can removethe filter system. Remov e any foo d re mna nts and
cleanthe filtersunder running water.
Remarks:
Theentirefilter assemblyshould becleanedonce aweek.
To removethe lower sprayarm,pull out the sprayarm u pward.
Tor e move the upper spra y a rm , hold the n ut, rotate th e arm
clockwiseto remove it.
Washthe arms insoapy and w arm w ater an d use asoft brush to
clean the j ets. Replacethem after rinsing them thoroughly.
14
Caring for the dishwasher
Page 20

When not in use for a long time
It is recommend that you run a wash cycle with the
dishwasher empty and then remove the plug from the
socket, turn off the water supply and leave the door of
the appl ian ce slightl y open. This will help the door
sea ls to last longer and prevent odours from forming
within the appliance.
If the appliance must be moved,try to keepit in t he
vertical position.If absolutelynecessary,it can be
positioned on its back.
Oneofthefactorsthatcauseodourstoforminthe
dishwasher is foodthat remain s tr apped in theseals.
Periodic cleaning with a d amp spongewill prev ent t his
fro m occ urring.
Before cleani ng or performing mainten ance, always
remove the p lug fr om the socket.
To clean the exterior and rubber partsof thedishwasher,
donotuse solvents or abrasive cleaning products.
Only use a cloth w ith warm soapy water.
Tore m ove spotsor stains f rom the surf ace ofthe
interi or, use a cloth dampened withwater an a little
vinegar,or a cleaningproduct mad e sp ecifically f or
dishwashers.
Remove the plug
No solvents or abrasive
cleaning
Moving the appliance
Seals
After ever y wa sh, turn offthe water supplyto the
appliance andleave the doorslightly op en so th at
moisture a nd odou rs a re no t tra pped in side.
After every w
ash
15
The installat ion ofthe pipes
and electrical equipments
shouldbedonebyprofessionals.
Electrical Shock Hazard
Disconnect elec trical power before
installing dishwasher.
Failuretodosocanresultindeathor
electrical shock.
The installation position of dishwasher should be near the existing inlet and drain hoses
and power supply.
One side of the sink cabinet should be chosen to facilitate the connection of drain hoses
of the dishwasher.
Installationpreparation
Note: please check the accompanying installation accessorie s(hook for furniture door panel, screw)
●
How to keep your dishwasher in good working order
Page 21

Please carefullyread theinstallationinstruction.
Illustrations o f cabinetdimensions an dinstallation positionof the dishwasher
Preparations shouldbe made beforemoving thedishwasher tot he ins tallatio n pla ce.
Choose a place near th e si nk to facilitate the installation of in let a nd d rain hoses
(see figu re 1).
If dishwas her isinstalled at t he cor ner o f the cabinet, there sh oul d be somespace
(illustrated in figure 2) whenthe doorisopened.
2
1
Minimumspacewhen
the door is opened
【】Figure2
Cabinetdimensions
【】Figure1
Cabinet
Dishwasher
Door of
dishwasher
Minimum space of 50mm
1
The furniture door panel should be fitted in according to Figure 3.
The door panel should be
processed in accordance with
the illustrated dimensions
【】Figure 3
●
Furniture door panel dimensions and installation
Lessthan 5mm
between the top
ofdishwasherand
cabinetandthe
outer dooraligned
tocabinet.
90 °
90 °
450 mm
820mm
100
580mm
80
Spacebetweencabinet
bottom and floor
Electrical, drain and
watersupplyline
entrances
(Unit: mm)
16
dp8
439
416 0.2±
390 0.2±
287.5 0.2±
286
38
8- 2
dp8
4- 2
dp8
2- 2
20 MAX()
5
Page 22

Installation of the furniture door
Note: the max. door weight is 5kg
【】Figure 4a
2 Install the hook on the furniture door and put the hook into the slot of the outer door of
dishwasher(see figure 4a). After positioning of the panel , fix the panel onto the outer door
using the screws and bolts(See figure 4b) .
Installation of the furniture door
【】Figure4b
.take awaythe four
short sc r e ws
. Fix the four long
screw s
1
2
17
Remove the small screws install the four long screws and fix into the
furniture door.
Page 23

Tension adjustment
ofthe doorspring
【】Figure5
Tension adjustment of the doorspring
●
Connect ing
the drain hoses
●
The door springs are set at the factory to the proper tension for the outer door.
When the furniture door is installed, you will have to adjust the door spring tension.
Rotate the adjusting screw to drive the adjustor to strain or relax the steel cable
(see figure 5).
Doo r spri ng tension is c orr ect when
the doorremainshorizontali nt he
fullyo penedposition yetrises
toaclosewiththeslightliftofa
finger.
,
18
Insert the drain hose into a drain pipe with a minimum diameter of 40mm, or let it run into the sink, making sure
you avoid bending or crimping it. The top of the hose must be less than 1000mm.
A
Worktop
Front
Drain pipe
NOTE
The top of the hose
must be less than
1000mm.
φ 40m m
B
Page 24

19
【】Figure7
Dishwash er installat ion steps
●
1
2
.
3.
4.
5.
6
7
8
Install t he fu rniture d oor tothe ou ter doorof th e di shwasher using the brackets provi ded. Re fer
to thetemplate forpositioning o f thebracket s.
Adjustthe tension of the door springs by using anAllen key turning ina clockwisemotion to
tightentheleftandrightdoor springs. Failure to dothiscould cause damagetoyour dishwasher
(Illustr ation 2)
Connect the inlet hos e to the c old wat er s upply
Connect the drain hose. Refer to diagram (Figure 6)
Connect the powercord
Affix the condensation st rip u nder thework su rface ofcabinet. Please ensu re th e co ndensation
strip is flushwith edge ofworksurface.
Place the dishwasher int o po sition.(Ill ustration 4)
Level the dishwasher. The rear feet can be adjusted from the front of the dishwasher by turning
theAllen s crew inthe m iddle ofthe b ase ofdishwasher useanAllen key(Illustratio n 5A ). Toa djust
thefrontfeet, use a flatscrew driver andturn the frontfeetuntilthedishwasherislevel (Illustration5B).
9 Thedishwasher must be secured in place. There aretwo waysto do this:
A. Nor ma l wor k su rfac e:P u t the ins ta lla ti on hoo k int o th e slo t of th e si de plane and secure it to the
work surface with the wood screws (Illustration 6).
B. Marble or granite work top: Fix through the side of the dishwasher using the screws. (Illustration 7).
Page 25

The dishwasher must be level for the correct dish rack operation and wash performance.
Placea spiritlevel ondoor andrack trackinside thetub asshown tocheck thatthe
dishwasheris level.
level the dishwasher by adjusting the three levelling legs individually.
When levelling the dishwasher, please pay attention not to let the dishwasher
tip over.
1
2
3
Illustra tion of feet adjustment
【】Figu re 8
NOTE:
Themaximumadjustment
heightof thefeet is50 mm.
20
Check level side to side
Spirit le vel
Check leve l Front to Back
Ensure the voltage and frequency of the power being corresponds to match
those on the rating plate. Only insert the plug into an electrical socket which is earthed
properly. If the electrical socket to which the appliance must be connected is not
appropriate for the plug, replace the socket, rather than using a adaptor or the like
as they could cause overheating and burns.
Please look at the rating label to confirm the rating voltage and connect the dishwasher to the appropriate power
supply. Use the required fuse 10 amp, time delay fuse or circuit breaker recommended and provide separate circuit
serving only this appliance.
For personal safety:
Do not use an extension cord or an adapter plug
with this appliance.
Do not, under any circumstances, cut or remove the
earthing
Connection from the power cord.
Electrical connection
Electrical requirements
Electrical connection
Ensure the correct
earthing is present
before use
Page 26

Positioning the appliance
How to drain excess water from the hoses
If the sink is 1000mm above the floor, the excess water in the hose cannot be drained
directly into the sink. It will be necessary to drain excess water from hose into a bowl or
suitable container that is held outside and lower than the sink.
Water outlet
Connect the waterdrain hose.The drainhosemustbecorrectlyfi ttedto avoid waterleaks.
Ensure that the waterinlet h ose i s no t kin ked or s quashed.
Thefollowingthingsshould be checked before startingthe dishwasher.
Syphon connection
Insert the drain hose into a drain pipe with a minimum diameter of 40mm, or let it run into the sink, making sure
you avoid bending or crimping it. The top of the hose must be less than 1000mm above the floor.
The content of this manual is very helpful to all future users.
After installation, please make sure you keep this manual.
Extension hose
If you need a drain hose extension, make sure to use a similar drain hose.
It must be no longer than 4 metres; otherwise the cleaning performance of the dishwasher could be reduced.
1 The dishwasher is level and fixed properly
2 The inlet valve is open
3 There is no leakage at any connections
4 The wires are tightly connected
5 The power is switched on
6 The inlet and drain hoses are knotted or kinked
7 All packing materials and printings have be taken out of the dishwasher
Position the appliance in the desired location. The back should rest against the wall behind it, and the sides
along the adjacent cabinets or walls. The dishwasher is equipped with water supply and drain hoses that can
be positioned either to the right or the left sid es to facilitate pr oper installation.
21
Connect the cold water supply h o se to a threaded 3/4(i nch) con nec tor and make sure
that it is fastened tightly in place.
If the water pipes ar e ne w or hav e not bee n used fo r an ext e n de d period of time, let th e
water run to make sure that the water is clear. This
precaution is needed to avoid
the risk of the water inlet becoming blocked and causing damage to the appliance.
Please switch off the water supply after use.
Cold water connection
Starting the dishwasher
Page 27

22
Fuse blown, or the circuit
breaker tripped
Replace fuse or reset circuitbreaker. Remove any other
appliances sharing the same circuit with the dishwasher
Spilled rinse-aid
Always wipe up rinse-aid spills immediately.
Hard water minerals
The affected items are
notcorrosion resistant.
The lid of the softer
is loose
Aspayarmis
knocking against
an itemin a basket
r
Items of crockery
are loose inthe
wash cabinet
This may be caused
by on-site installation
or the cross-section of
the piping.
A programme was not
run after dishwasher
salt was added.
Traces of salt have got
into the wash cycle.
To clean the interior, use a damp spongewith
dishwasher detergent and wear rubber gloves.
Never use any other cleaner than dishwasher
detergent for the risk of foaming or suds.
Always run the quick wash programme .
without any crockery in the dishwasher and
without selecting the Turbo function (if present),
after adding dishwasher salt.
Check the lip .Ensure the fix is fine.
Interrupt the programme, and rearrange the items
which are obstructing the sp ay arm.r
Interrupt the programme,
and rearrange the items of crockery.
This has no influence on the dishwasher function.
if in doubt, contact a suitably qualified plumber.
Detergent with
colourant was used
Make sure that the detergent is the one without
colourant.
Improper detergent
Make sure the dishwasher isturned on and thedoor is
closed securely.
Check that the water supply is connected properly and
the water is turned on.
Make sure to close the door properly and latch it.
Make sure the power cord is properlyplugged into the
wall socket.
Power supply is not
turned on
Water pressure is low
Dishwasher is not
properly closed.
Kink in drain hose
Filter clogged
Kitchen sink clogged
Check drain hose.
Check the filter
(see section titled " Cleaning the filter ")
Check the kitchen sink to make sure it is draining well.
If the problem is the kitchen sink not draining ,you may
need a plumber rat herthan a serviceman for dishw ashers.
Use only the special dis hwasher detergent to avoid suds.
If this oc curs, open the dishwasher and let suds evaporate.
Add 1 gallon of cold water to the tub. Close and latch the
dishwasher, then select any cycle. D i sh washe r wi ll drain
out the water at the first step.Open the door after
draining is stop and
check if the suds have disappeared.
Repeat if necessary.
Before contacting the Caple service department
from
Page 28

23
The dishes were not
loaded correctly.
See notes in " Loading the dishwasher baskets ".
Select a more intensive programme.
See" Wash cycle table ".
Use more detergent,or changeyour det ergent.
Rearrange the items so that the sp ay can rotate freely.r
Clean and/or fit the filtercombination correctly.
Clean the spray arm jets. See "Cleaning the spray
arms".
Use less detergent if you have soft water and select
a shortest cycle to wash the glassware and to get
them clean.
Use a mild abrasive cleaner to eliminate those marks.
Re-loading the dishesproperly.
Load the dishwasher as suggested inthe directions.
Increase the amountof rinse-aid/refill the rinse-aid
dispenser.
Do not empty your dishwasher immediately after
washing. Open the door slightly so that the steam can
escape. Begin unloading the dishwasher only once
the dishes are barely warm to the touch.
Empty the
low basket first. This prevents water form dropping off
dishes in the upper basket.
In short programmes the washing temperature is
lower. This also lowers cleaning performance.
Choose a programme with a long washing time.
Water drainage is more difficult with these items.
Cutlery or dishes of this type are not suitable for
washing in the dishwasher.
Theprogramme was
notpowerful enough.
Not enough detergent
wasdispensed.
Items are blocking
the path of sp ay arms.r
The filter combination
inthebaseofwash
cabinet is not clean or
is not correctly fitted.
This may cause
the sp ay arm jets
to get blocked.
r
Combination of soft
water and too much
detergent.
Aluminum utensils
have rubbed against
dishes.
Dishes have blocked
detergent cups.
Improper loading
Too little rinse-aid
Dishes are removed
too soon
Wrong programme has
been selected
Useof cutlery with
a low-quality coating
Overflow.
If a malfunction is present, the appliance will display error codes to warn you:
Longer inlet time.
The water is not switched on, or the water intake
is restricted,or the water pressure is too low.
Some element of the dishwasher is leaking.
If overflow occurs, turn off the main water supply before calling Caple service.
If there is water in the base pan because of an overfill or small leak, the water
should be removed before restarting the dishwasher.
The Rapid light flashes quickly
The ECO light flashes quickly
Page 29

24
Height: 815mm
Width : 448mm
Depth: 550mm
()
with the door closed
Pow er sup pl y: see r at i ng label
Capacity: 9place settings
Page 30

Loading the baskets according to En50242: Loading the baskets according to En50242:
6
Large serving bowl
Small serving bowl
4
5
Medium serving bowl
3
Glasses
Saucers
2
1
Cups
10
Oval platter
8
Dinner plates
9
Soup plates
Dessert dishes
7
T easpoons
4
Soup spoons2Forks
1
Serving forks
8
Serving spoons
6
Knives
5
3
Dessert spoons
7
Gravy ladles
1.Upper basket:1.Upper basket:
2.Low
er basket:2.Low
er basket:
3.Cutterly basket:3.Cutterly basket:
Information for
compara
bility tests i
n a
ccordance
with EN 5024
2
Information for
compara
bility tests i
n a
ccordance
with EN 5024
2
Capacity: 9 place setti
ngsCapacity: 9 place setti
ngs
Position of
the
upper basket: lower
positi
onPosition of
the
upper basket: lower
positi
on
Programme: ECOProgramme: ECO
Ri
nse a
id setting:
6Ri
nse a
id setting:
6
Softener
setting: H4
Softener
setting: H4
8
8
7
7
9
9
1010
77
IN
1
3
5
22
6 6
33 33
1
3
1
4
8
8
7
7
7
9
10
25
Page 31

9
A+
222 kWh
0.7 8 kWh
0.4 5 W
0.4 9 W
2520litre
A
175 min
81. 5 cm
44. 8 cm
55 cm
193 0 W
Sheet of householddishwash er ac cording toEUDirecti ve 1059 /2010:
Manufacturer
Type/ Descrip tion
Standard place settings
En er gy efficien cy cl a s s
Annualenergyconsumption
En erg y cons u m p ti o n of the stan da rd clean in g cycle
Power consumption of off-mode
Power consumption of left-onmode
Annualwaterconsumption
Dr yi n g efficie ncy clas s
Standard cleaning cycle
Noise level
Mounting
Height
Width
De pth (wit h conn ec t o r s)
Powe r consum ptio n
Rated voltage /frequency
A+ + + ( highest efficiency) to D (lowest efficiency)
Energy consumpt ion 222 kWh peryear,based on 280standard c leaning c ycles us ing coldwater fill a nd
the co nsumption ofthe low pow er mode s. Actual energy consumptio n will depend on howthe appliance isused.
“”
Waterconsumption 2520 litres p er y ear,based on 280standard cleaning cycles.A ctual w ater con sumption
will de pend on howthe app liance is used.
“”
A(highest efficiency) to G(lowest efficiency)
This p rogramme is suitable for cl eaning normally soiled t ableware a nd thatit is th e
most efficient programme in ter ms of itscombined ener gy an d water consumption for
th at ty pe of tableware.
The devic e me ets the European standards andthe direc tives inthecurrent versionat delivery :
- LVD2006/95/EC
-EMC2004/108/EC
- ErP 2009 /125/EC
The above values have be en m easured inaccordance w ith s tandards underspecified oper ating c onditions .
Results may varygreatly a ccording toquantity and pollution of t he dis hes, wat er ha rdness,
amount of detergent, etc.
The manual is based on theEuropean U nion's standardsand ru les.
Technical Data Sheet
NOTE:
ECO 50
℃
52 dB(A) r e 1pW
Buildunder
230 V~ 50 Hz
Waterpressure(flowp ressure)
0.4-10bar= 0.04-1MPa
Could bebuilt-in
Yes
CAPLE
Di476
26
Programmeduration of the standard cleaningcycle
Page 32

 Loading...