

Page 1
Induction Downdraft Extractor
Instruction Manual
DD940BK
Contact Caple on 0117 938 7420 for spare parts or www.caple.co.uk
Page 2

CONTENTS
Introduction 3
Safety Instructions 4
Appliance Description 10
Operating the Hob 11
Operating the Downdraft 27
Care and Maintenance 29
Troubleshooting 31
Installation 34
Installation of the Plinth Motor 42
Plasma Filtration 46
2
Instruction manual DD940BK
Please keep this instruction manual for future reference
Page 3

INTRODUCTION
Thank you for choosing this Caple induction
downdraft extractor.
To ensure that you get the best results from your new
induction downdraft extractor, we strongly suggest that
you read this instruction manual thoroughly before use.
If treated with care, your Caple product should give you
years of trouble-free use.
To register ownership, please ensure you complete and
return the guarantee card supplied with the appliance or
visit www.caple.co.uk and register here.
This instruction manual is designed to provide you with
all the required information related to the installation, use
and maintenance of the appliance.
This induction downdraft extractor is designed to extract
unpleasant odours and cooking vapours from the kitchen.
In order to operate the unit correctly and safely, please
read this instruction manual carefully before installation
and use.
Please read this manual carefully before using your
appliance. It contains important safety advice; it explains
how to use and look after your appliance so that it will
provide you with many years of reliable service.
Should a fault arise, please first consult the
“Troubleshooting” section. You can often rectify minor
problems yourself, thus saving unnecessary service costs.
Please keep this manual in a safe place and pass it on to
new owners for their information and safety.
Please keep this instruction manual for future reference
Instruction manual DD940BK 3
Page 4

SAFETY INSTRUCTIONS
AND WARNINGS:
- The appliances are constructed in accordance with the
relevant safety regulations.
- Connecting the appliances to the mains and repairing
and servicing the appliances may only be carried out by
a qualified electrician according to currently-valid safety
regulations. For your own safety, do not allow anyone
other than a qualified service technician to install, service
or repair the product.
- If the mains cable of this appliance is damaged, it has to
be replaced by the manufacturer, the Customer Service
Department of the manufacturer or by another qualified
person to avoid danger.
- The appliance may not be operated with an external
timer or an external telecontrol system.
GENERAL INFORMATION ON
THE HOB:
- Never allow the induction hob to operate unattended, as
the high power setting results in extremely fast reactions.
- When cooking, pay attention to the heat-up speed of the
cooking zones. Avoid boiling the pans dry as there is a
risk of the pans overheating.
- Do not place empty pots and pans on cooking zones
which have been switched on.
4
Instruction manual DD940BK
Please keep this instruction manual for future reference
Page 5

- Take care when using simmering pans as simmering
water may dry up unnoticed, resulting in damage to the
pan and to the hob for which no liability will
be assumed.
- It is essential that after using a cooking zone you switch
it off with the respective minus key and not just with the
pan recognition device.
- Overheated fats and oils may spontaneously ignite.
Always supervise the preparation of food with fats and
oils. Never extinguish ignited fats and oils with water.
Switch the appliance off and then carefully cover the
flame, for example with a lid or an extinguisher blanket.
- The glass ceramic surface of the hob is extremely robust.
You should, however, avoid dropping hard objects onto
the glass ceramic hob. Sharp objects which fall onto your
hob might break it.
- There is a risk of electric shock if the glass ceramic hob
develops fractures, cracks, tears or damage of any other
kind. Immediately switch off the appliance. Disconnect
the fuse immediately and call Caple Service.
- If the hob cannot be switched off due to a defect in the
sensor control, immediately disconnect your appliance
and call Caple Service.
- Take care when working with home appliances.
Connecting cables must not come into contact with hot
cooking zones.
- Risk of fire: never store items on the hob.
Please keep this instruction manual for future reference
Instruction manual DD940BK 5
Page 6

- The glass ceramic hob should not be used as a
storage area.
- Do not put aluminium foil or plastic onto the cooking
zones. Keep everything which could melt, such as
plastics, foil and in particular sugar and sugary foods
away from hot cooking zones. Use a special glass scraper
to immediately remove any sugar from the ceramic hob
(when it is still hot) in order to avoid damaging the hob.
- Metal items (pots and pans, cutlery, etc.) must never be
put down on the induction hob since they may become
hot. Risk of burning.
- Do not place combustible, inflammable or heat
deformable objects directly underneath the hob.
- Metal items worn on your body may become hot in the
immediate vicinity of the induction hob. Caution: Risk
of burns. Non-magnetisable objects (e.g. gold or silver
rings) are not affected.
- Never use the cooking zones to heat up unopened tins
of food or packaging made of material compounds. The
power supply may cause them to burst.
- Keep the sensor keys clean since the appliance may
consider dirt to be finger contact. Never put anything
(pans, tea towels etc.) onto the sensor keys. If food boils
over onto the sensor keys, we advise you to activate the
OFF key.
- Hot pans should not cover the sensor keys, since this will
cause the appliance to switch off automatically.
6
Instruction manual DD940BK
Please keep this instruction manual for future reference
Page 7

- Whenever possible, use the back cooking zones for large
pans so that the sensor keys are not heated up too much
(touch control overheating; error message E2).
- Activate the childproof lock if there are any pets in the
home which could make contact with the hob.
- Never clean the glass ceramic hob with a steam cleaner
or similar appliance.
- Make sure there are no items (e.g. cleaning cloths) right
next to the hob extractor. They could be sucked in by the
air current. Liquids and small items must always be kept
away from the appliance.
- Do not operate the appliance without grease
filters fitted.
- Grease filters with too much fat deposits are a
fire hazard.
- Constant supervision is essential when deep-frying;
flambéing is not permitted.
- A sufficient supply of inlet air must be provided when
operating wood, coal, gas or oil heaters requiring a
chimney. The permissible negative pressure which results
from the hood in the location of the heaters requiring a
chimney may not exceed 4 Pa (0.04 mbar) as this results
in a risk of poisoning.
- Vapour also emits moisture into the air in the kitchen
during the cooking process.
- Only a little moisture is removed from the vapours in the
convection air mode. This is why a sufficient supply of
fresh air must always be provided, e.g. by opening the
window or using a domestic ventilation systems.
Please keep this instruction manual for future reference
Instruction manual DD940BK 7
Page 8

- Always make sure that the indoor climate is normal and
comfortable (45 - 60 % humidity).
- Switch the hob extractor down to a lower setting for
around 20 minutes or activate the automatic delayed
stop function every time the hob extractor is used in the
convection air mode.
WARNINGS:
- These appliances may be used by children aged 8 years
and over and by persons with physical, sensory or mental
impairments or by persons who lack experience and/
or know-how, provided they are supervised or have
been instructed in the safe use of the appliance and
have understood the risks relating to the appliance.
Children may not play with the appliance. Cleaning and
maintenance by the user may only be carried out by
children when they are supervised.
- The surfaces of the heating and cooking zones become
hot during use. Keep small children away at all times.
- Only hob protective grids and hob covers produced or
recommenced by the hob manufacturer or recommended
may be used. The use of unsuitable hob protective grids
and hob covers may result in accidents.
- Persons with cardiac pacemakers or implanted insulin
pumps must make sure that their implants are not
affected by the induction hob (the frequency range of the
induction hob is 20-50 kHz).
8
Instruction manual DD940BK
Please keep this instruction manual for future reference
Page 9

APPROPRIATE USE
This product is not designed for commercial use, it is a
household appliance only. It is not intended to be used in:
- Staff kitchen areas in shops, offices and other
working environments.
- Bed and breakfast type environments.
- By clients in hotels and other residential
type environments.
ENVIRONMENTAL PROTECTION
Waste electrical products should not be disposed of with household waste. Please recycle where
facilities exist. Check with your Local Authority or retailer for recycling advice. This appliance is
marked according to the European directive on Waste Electrical and Electronic Equipment (WEEE).
By ensuring this product is disposed of correctly, you will help prevent potential negative
consequences for the environment and human health, which could otherwise be caused by
inappropriate waste handling of this product. The symbol on the product indicates that this
product may not be treated as household waste. Instead it shall be handed over to the applicable
collection point for the recycling of electrical and electronic equipment. Disposal must be carried
out in accordance with local environmental regulations for waste disposal.
For more detailed information about treatment, recovery and recycling of this product, please
contact your local council, your household waste disposal service or the retailer where you
purchased the product.
CE DECLARATIONS OF CONFORMITY
This appliance has been manufactured to the strictest standards and complies with all applicable
legislation, Low Voltage Directive (LVD) and Electromagnetic Compatibility (EMC).
Please keep this instruction manual for future reference
Instruction manual DD940BK 9
Page 10

APPLIANCE DESCRIPTION
3
2
1
MIN MAX MIN MAX
Made in Germany
4 45 6
1. Induction cooking zone front
2. Induction cooking zone back
3. Glass ceramic surface
7. Standby key
8. ON/OFF key (hob)
9. Touch control
10. Power setting display
11. Lock key
12. Pre set temperatures
MIN MAX MIN MAX
4. Touch-control operating panel for hob
5. Standby key and downdraft control
6. Downdraft
13. Display of keep-warm
function (3 levels)
14. Stop/Pause key
(interval sign)
15. Minus-/Plus Timer key
16. Timer display
17. Symbol egg timer
18. Display cooking zone timer
19. Bridge function
20. Minus-/Plus+ fan key
21. Fan display
10
Instruction manual DD940BK
Please keep this instruction manual for future reference
Page 11
OPERATING THE HOB
The hob is operated with touch control sensor keys. The sensor keys are operated as follows:
Lightly touch a symbol on the surface of the ceramic glass plate. A buzzer will indicate when the
controls have been operated correctly.
The touch control sensor key will then be indicated as “key”.
STANDBY KEY:
(7)
With this key, the downdraft extractor is switched operational. The key is like the main switch. After
switching off using this button the unit remains on for about 120min in standby mode.
NOTE: If the device is switched off completely, no residual heat indicator is displayed.
ON/OFF KEY:
(8) COOKING ZONES LEFT OR RIGHT
This key is used to switch the left or right hob on and off.
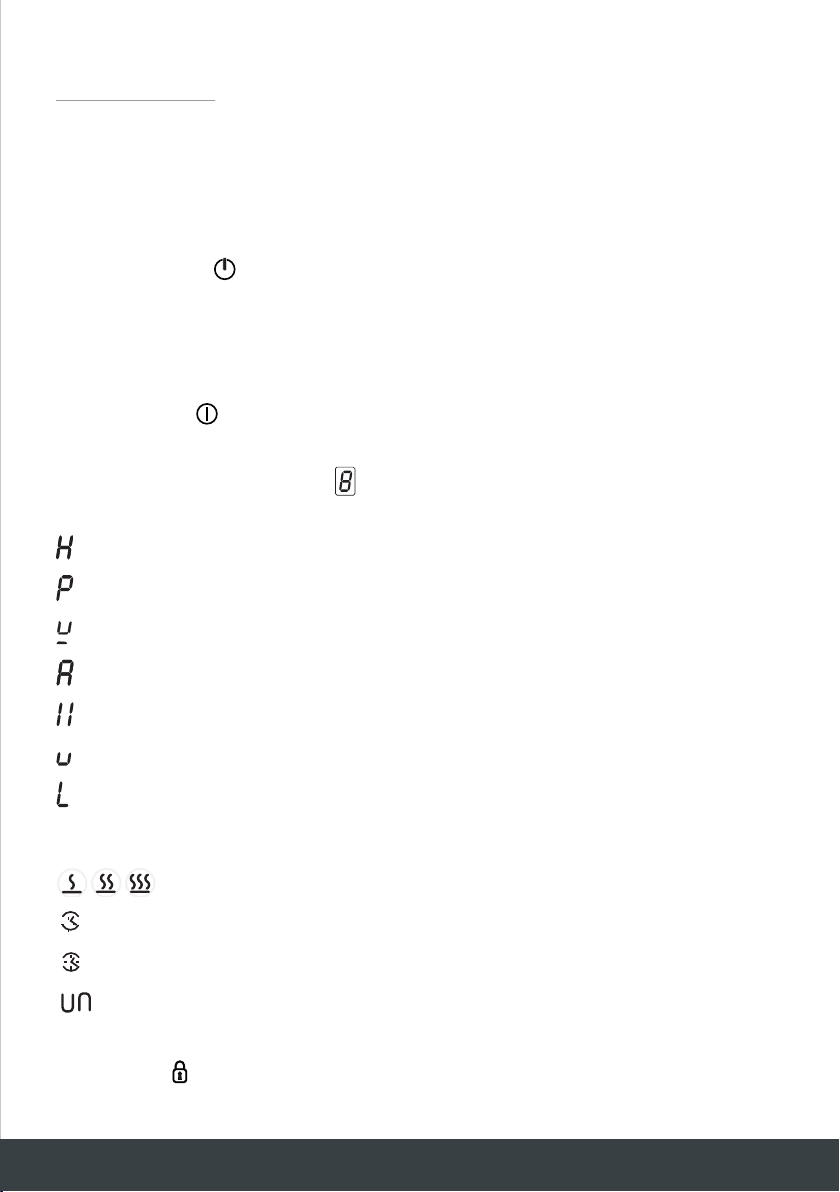
POWER SETTING DISPLAY:
(12)
The power setting display shows the power setting which has been selected, or:
Residual heat
Power boost function
Pan recognition
Automatic boost function
Stop/Pause function
Keep-warm function
Lock
SYMBOLS:
Preset temperature 42°C (Bake) 70°C (keep warm) 92°C (Boil control)
Timer function
Minute minder
Bridging function (operating cooking zones simultaneously)
LOCK KEY:
(11)
The lock key can be used to lock all of the keys.
Please keep this instruction manual for future reference
Instruction manual DD940BK 11
Page 12

PRE-SET TEMPERATURE: (12)
For Bake (40°C), keep warm (70°C) and boil control (92°C)
POWER LEVEL IN THE SENSOR FIELD:
The power boost setting makes additional power available for induction
cooking zones.
STOP/PAUSE KEY:
(14)
The STOP/PAUSE function can be used to briefly stop the cooking process.
RECALL FUNCTION:
(14)
(Recovery function)
The most recent setting can be recovered if the hob is switched off unintentionally.
MINUS -/+ PLUS FAN KEY: (20)
With these keys the power levels of the extractor are selected and the fan run is set.
12
Instruction manual DD940BK
Please keep this instruction manual for future reference
Page 13

THE SLIDER (TOUCH CONTROL)
D
Wissenswertes zum Slider (Sensorfeld)
Der Slider funktioniert grundsätzlich wie die Sensortasten, mit
dem Unterschied, dass der Finger auf der Glaskeramikoberä-
che aufgesetzt und dann verschoben werden kann. Das Sensor-
f
eld erkennt diese Bewegung und erhöht oder verringert den
Anzeigewert (Kochstufe) entsprechend der Bewegung.
Der Begri „slider” [engl. „slide”: schieben, gleiten lassen] wird
nachfolgend mit Sensorfeld gleichgesetzt.
Was muss bei der Bedienung beachtet werden?
Der Finger sollte nicht zu ach auf die Glaskeramikoberäche
aufgesetzt werden, damit nicht benachbarte Tasten/ Sensorfel-
der versehentlich reagieren.
Touch Control
Min Max
D
Wissenswertes zum Slider (Sensorfeld)
Der Slider funktioniert grundsätzlich wie die Sensortasten, mit
dem Unterschied, dass der Finger auf der Glaskeramikoberä-
che aufgesetzt und dann verschoben werden kann. Das Sensor-
f
eld erkennt diese Bewegung und erhöht oder verringert den
Anzeigewert (Kochstufe) entsprechend der Bewegung.
Der Begri „slider” [engl. „slide”: schieben, gleiten lassen] wird
nachfolgend mit Sensorfeld gleichgesetzt.
Was muss bei der Bedienung beachtet werden?
Der Finger sollte nicht zu ach auf die Glaskeramikoberäche
aufgesetzt werden, damit nicht benachbarte Tasten/ Sensorfel-
der versehentlich reagieren.
Sensorfeld antippen oder den aufgesetzten Finger verschie-
ben
Das Sensorfeld kann mit dem Finger angetippt werden, dann
ändert sich die Anzeigewert (Kochstufe) schrittweise.
Wenn der Finger auf das Sensorfeld aufgesetzt und dann nach
links oder rechts verschoben wird, ändert sich der Anzeigewert
fortlaufend.
Je schneller die Bewegung, desto schneller die Anzeigeände-
rung.
Touch Control
Min Max
Finger
Vitroceramic
Sensor Sensor
Unsuitable
Vitroceramic
Sensor Sensor
Finger
Right
In principle, the slider functions the same as the touch controls; the only difference is that you can
put your finger on the glass ceramic surface and then move it around. The touch control recognises
this movement and raises or lowers the display setting (power level) in accordance with
the movement.
The term touch control is used to mean slider from now on.
WHAT MUST BE OBSERVED WHEN OPERATING TOUCH CONTROLS?
Min Max
Touch Control
Your finger should not be placed flat onto the glass ceramic surface in order to avoid adjacent
keys/touch controls from reacting by mistake.
PRESS THE TOUCH CONTROL LIGHTLY OR MOVE YOUR
FINGER AROUND
You can press the touch control very lightly with your finger; when this is done the setting on the
display (power level) will gradually change. Move to the right to Increase the power level.
When you put your finger on the touch control and then move it to the left or right, the display
setting will change progressively. The faster the movement, the faster the change in the display.
NOTE:
Pressing a sensor key and keeping it pressed (for approx. 3 seconds) may activate the automatic
boost function A. See the section on Automatic boost function.
Min
Vitroceramic
Sensor Sensor
Unsuitable
Incorrect
Touch Move
Finger
Max
Min
Finger
Vitroceramic
Sensor Sensor
Correct
Right
Max
Please keep this instruction manual for future reference
Instruction manual DD940BK 13
Page 14
THE HOB
The hob is equipped with an induction cooking mode. An induction coil underneath the glass
ceramic hob generates an electromagnetic alternating field which penetrates the glass ceramic and
induces the heat-generating current in the pan base. With an induction cooking zone the heat is
no longer transferred from a heating element through the pan into the food being cooked; instead
the necessary heat is generated directly in the container by means of induction currents.
ADVANTAGES OF THE INDUCTION HOB:
» Energy-saving cooking through the direct transfer of energy to the pan (suitable pots/pans
made of magnetisable material are required).
» Increased safety as the energy is only transferred when a pan is placed on the hob.
» Highly effective energy transfer between an induction cooking zone and the base of a pan.
» Rapid heat-up.
» The risk of burns is low as the cooking area is only heated through the pan base; food which
boils over does not stick to the surface.
» Rapid, sensitive control of the energy supply.
PAN RECOGNITION:
If a cooking zone is switched on and there is no pan on the zone or if the pan is too small, there
will be no transmission of power. A blinking in the cooking level display points this out.
If a suitable pot or pan is placed on the cooking zone, the power setting will switch on and the
power setting display will light up. The power supply will be cut off when the pan is removed and
the power setting display will indicate a blinking
.
If a pot or pan placed on a cooking zone is smaller than the cooking zone and the pan recognition
still switches on, only the amount of power needed will be supplied.
COOKING ZONE DIMENSION (MM) RECOMMENDED PAN BASE MINIMUM
DIAMETER (MM)
220 x 190 115
The base of pots and pans must be of a certain diameter; if it is not, the induction heat will not be
switched on.
Always place pots and pans in the middle of a cooking zone in order to achieve the best efficiency.
A pan must always cover the centre of a zone marked +.
14
Instruction manual DD940BK
Please keep this instruction manual for future reference
Page 15
IMPORTANT:
The minimum diameter required to activate the pan recognition device may vary according to
the type of pot or pan used.
OPERATION TIME LIMIT:
The induction hob has an automatic time limit function.
The duration of continuous use of each cooking zone depends on the cooking level selected
(see chart).
This requires that the setting of a respective cooking zone is not adjusted during use.
If the operation time limit has been activated, the cooking zone will switch off,
a short signal will sound and an H will appear in the display.
The automatic switch-off function overrules the operation time limit, i.e. the cooking zone is only
switched off when the period of time of the automatic switch-off device has expired
(e.g. automatic switch-off after 99 minutes and cooking level 9 is possible).
SELECTED COOKING LEVEL OPERATION TIME LIMIT IN MINUTES
120
1 520
2 402
3 318
4 260
5 212
6 170
7 139
8 113
9 90
P 10
OTHER FUNCTIONS:
If two or more sensor keys are pressed at the same time (e.g. when a pan is mistakenly put onto a
sensor key) no function will be activated.
symbol will blink and a time-limited continuous signal will sound. After a few seconds the
The
appliance will switch off. Please remove the item located in front of the sensor keys. To delete the
symbol press the same key or switch the hob off and on.
Please keep this instruction manual for future reference
Instruction manual DD940BK 15
Page 16

PROTECTION AGAINST OVERHEATING (INDUCTION):
Bedienung
D
Geschirr für Induktionskochfeld
Das für die Induktionskochfläche benutzte Kochgefäß muss aus
Metall sein, magnetische Eigenschaften haben und eine ausrei-
chende Bodenfläche besitzen.
Benutzen Sie nur Töpfe mit induktionsgeeignetem Boden.
So können Sie die Eignung des Gefäßes feststellen:
Führen Sie den nachfolgend beschriebenen Magnettest durch
oder vergewissern Sie sich, dass das Gefäß das Zeichen für die
Eignung zum Kochen mit Induktionsstrom trägt.
Magnettest:
Führen Sie einen Magneten an den Boden Ihres Kochgefäßes
heran. Wird er angezogen, so können Sie das Kochgefäß auf der
Induktionskochfläche benutzen.
Energiespartipps
Nachfolgend finden Sie einige wichtige Hinweise, um energie-
sparend und effizient mit Ihrem neuen Induktionskochfeld und
dem Kochgeschirr umzugehen.
• Der Topfbodendurchmesser sollte gleich groß sein wie der
Kochzonendurchmesser.
• Beim Kauf von Töpfen darauf achten, dass häufig der obere
Topfdurchmesser angegeben wird. Dieser ist meistens größer
als der Topfboden.
• Schnellkochtöpfe sind durch den geschlossenen Garraum und
den Überdruck besonders zeit- und energiesparend. Durch
kurze Gardauer werden Vitamine geschont.
• Immer auf eine ausreichende Menge Flüssigkeit im Schnell-
kochtopf achten, da bei leergekochtem Topf die Kochzone und
der Topf durch Überhitzung beschädigt werden können.
• Kochtöpfe nach Möglichkeit immer mit einem passenden
Deckel verschließen.
• Zu jeder Speisemenge sollte der richtige Topf verwendet wer-
den. Ein großer kaum gefüllter Topf benötigt viel Energie.
Kochstufen
Die Heizleistung der Kochzonen kann in mehreren Stufen einge-
stellt werden. In der Tabelle finden Sie Anwendungsbeispiele für
die einzelnen Stufen.
Geeignete Kochgefäße Ungeeignete Kochgefäße
Emaillierte Stahlgefäße mit star-
kem Boden
Gefäße aus Kupfer, rost-
freiem Stahl, Aluminium,
feuerfestem Glas, Holz,
Keramik bzw. Terrakotta
Gusseiserne Gefäße mit email-
lierten Boden
Gefäße aus rostfreiem Mehr-
schichten-Stahl, rostfreiem
Ferritstahl bzw. Aluminium mit
Spezialboden
Kochstufe Geeignet für
0
Aus-Stellung, Nachwärmenutzung
Schmelzen 42°C
Warmhalten 70°C
Köcheln 92°C
If the hob is used at full power for a longer period, it will not be possible to cool down the
electronics system as required at a high room temperature.
In order to ensure that no excessive temperatures occur in the electronics system, the power of the
cooking zones may be reduced automatically.
Should E2 be displayed frequently during normal use of the hob and at normal room temperature,
it is likely that cooling is not sufficient.
This may occur if kitchen units have no openings. The installation may have to be checked.
COOKWARE FOR INDUCTION HOBS:
Cookware for induction cooking zones must be made of metal and have magnetic properties. The
base must be sufficiently large.
Only use pans with a base suitable for induction.
SUITABLE COOKWARE UNSUITABLE COOKWARE
Enamelled steel pans with a thick base.
Cast iron pans with an enamelled base.
Pans made of multi-layer stainless steel, stainless ferrite steel
and aluminium with special base.
HOW TO ESTABLISH THE SUITABILITY OF A POT:
Conduct the magnet test described below or make sure that the pot bears the symbol for
suitability for cooking with induction current.
MAGNET TEST:
Move the magnet towards the base of your cookware.
If it is attracted, you can use the cookware on the induction hob.
16
Instruction manual DD940BK
Please keep this instruction manual for future reference
Pans made of copper, stainless steel,
aluminium, oven-proof glass, wood,
ceramic and terracotta.
Page 17

NOTE:
Bedienung
D
Geschirr für Induktionskochfeld
Das für die Induktionskochfläche benutzte Kochgefäß muss aus
Metall sein, magnetische Eigenschaften haben und eine ausrei-
chende Bodenfläche besitzen.
Benutzen Sie nur Töpfe mit induktionsgeeignetem Boden.
So können Sie die Eignung des Gefäßes feststellen:
Führen Sie den nachfolgend beschriebenen Magnettest durch
oder vergewissern Sie sich, dass das Gefäß das Zeichen für die
Eignung zum Kochen mit Induktionsstrom trägt.
Magnettest:
Führen Sie einen Magneten an den Boden Ihres Kochgefäßes
heran. Wird er angezogen, so können Sie das Kochgefäß auf der
Induktionskochfläche benutzen.
Hinweis:
Beim Gebrauch induktionsgeeigneter Töpfe einiger Hersteller
können Geräusche auftreten, die auf die Bauart dieser Töpfe
zurückzuführen sind.
Energiespartipps
Nachfolgend finden Sie einige wichtige Hinweise, um energie-
sparend und effizient mit Ihrem neuen Induktionskochfeld und
dem Kochgeschirr umzugehen.
• Der Topfbodendurchmesser sollte gleich groß sein wie der
Kochzonendurchmesser.
• Beim Kauf von Töpfen darauf achten, dass häufig der obere
Topfdurchmesser angegeben wird. Dieser ist meistens größer
als der Topfboden.
• Schnellkochtöpfe sind durch den geschlossenen Garraum und
den Überdruck besonders zeit- und energiesparend. Durch
kurze Gardauer werden Vitamine geschont.
• Immer auf eine ausreichende Menge Flüssigkeit im Schnell-
kochtopf achten, da bei leergekochtem Topf die Kochzone und
der Topf durch Überhitzung beschädigt werden können.
• Kochtöpfe nach Möglichkeit immer mit einem passenden
Deckel verschließen.
• Zu jeder Speisemenge sollte der richtige Topf verwendet wer-
den. Ein großer kaum gefüllter Topf benötigt viel Energie.
Kochstufen
Die Heizleistung der Kochzonen kann in mehreren Stufen einge-
stellt werden. In der Tabelle finden Sie Anwendungsbeispiele für
die einzelnen Stufen.
Bei Kochtöpfen ohne Deckel muss evtl. eine höhere Kochstufe
gewählt werden.
Restwärmeanzeige
Geeignete Kochgefäße Ungeeignete Kochgefäße
Emaillierte Stahlgefäße mit star-
kem Boden
Gefäße aus Kupfer, rost-
freiem Stahl, Aluminium,
feuerfestem Glas, Holz,
Keramik bzw. Terrakotta
Gusseiserne Gefäße mit email-
lierten Boden
Gefäße aus rostfreiem Mehr-
schichten-Stahl, rostfreiem
Ferritstahl bzw. Aluminium mit
Spezialboden
Kochstufe Geeignet für
0
1-2
3
4-5
6
7-8
9
P
Aus-Stellung, Nachwärmenutzung
Schmelzen 42°C
Warmhalten 70°C
Köcheln 92°C
Fortkochen kleiner Mengen
(niedrigste Leistung)
Fortkochen
Fortkochen großer Mengen, Weiter-
braten größerer Stücke
Braten, Einbrenne herstellen
Braten
Ankochen, Anbraten, Braten
Powerstufe
(höchste Leistung)
Bedienung
D
Geschirr für Induktionskochfeld
Das für die Induktionskochfläche benutzte Kochgefäß muss aus
Metall sein, magnetische Eigenschaften haben und eine ausrei-
chende Bodenfläche besitzen.
Benutzen Sie nur Töpfe mit induktionsgeeignetem Boden.
So können Sie die Eignung des Gefäßes feststellen:
Führen Sie den nachfolgend beschriebenen Magnettest durch
oder vergewissern Sie sich, dass das Gefäß das Zeichen für die
Eignung zum Kochen mit Induktionsstrom trägt.
Magnettest:
Führen Sie einen Magneten an den Boden Ihres Kochgefäßes
heran. Wird er angezogen, so können Sie das Kochgefäß auf der
Induktionskochfläche benutzen.
Hinweis:
Beim Gebrauch induktionsgeeigneter Töpfe einiger Hersteller
können Geräusche auftreten, die auf die Bauart dieser Töpfe
zurückzuführen sind.
Falsch: der Geschirrboden ist gewölbt. Die Temperatur kann von
der Elektronik nicht korrekt ermittelt werden.
Energiespartipps
Nachfolgend finden Sie einige wichtige Hinweise, um energie-
sparend und effizient mit Ihrem neuen Induktionskochfeld und
dem Kochgeschirr umzugehen.
• Der Topfbodendurchmesser sollte gleich groß sein wie der
Kochzonendurchmesser.
• Beim Kauf von Töpfen darauf achten, dass häufig der obere
Topfdurchmesser angegeben wird. Dieser ist meistens größer
als der Topfboden.
• Schnellkochtöpfe sind durch den geschlossenen Garraum und
den Überdruck besonders zeit- und energiesparend. Durch
kurze Gardauer werden Vitamine geschont.
• Immer auf eine ausreichende Menge Flüssigkeit im Schnell-
kochtopf achten, da bei leergekochtem Topf die Kochzone und
der Topf durch Überhitzung beschädigt werden können.
• Kochtöpfe nach Möglichkeit immer mit einem passenden
Deckel verschließen.
• Zu jeder Speisemenge sollte der richtige Topf verwendet wer-
den. Ein großer kaum gefüllter Topf benötigt viel Energie.
Kochstufen
Die Heizleistung der Kochzonen kann in mehreren Stufen einge-
stellt werden. In der Tabelle finden Sie Anwendungsbeispiele für
die einzelnen Stufen.
Bei Kochtöpfen ohne Deckel muss evtl. eine höhere Kochstufe
gewählt werden.
Restwärmeanzeige
Das Glaskeramik-Kochfeld ist mit einer Restwärmean-
zeige H ausgestattet.
Solange das H nach dem Ausschalten leuchtet, kann die
Restwärme zum Schmelzen und Warmhalten von Speisen
genutzt werden.
Nach dem Erlöschen des Buchstabens H kann die Kochzone
noch heiß sein. Es besteht Verbrennungsgefahr!
Bei einer Induktionskochzone erhitzt sich die Glaskeramik nicht
Geeignete Kochgefäße Ungeeignete Kochgefäße
Emaillierte Stahlgefäße mit star-
kem Boden
Gefäße aus Kupfer, rost-
freiem Stahl, Aluminium,
feuerfestem Glas, Holz,
Keramik bzw. Terrakotta
Gusseiserne Gefäße mit email-
lierten Boden
Gefäße aus rostfreiem Mehr-
schichten-Stahl, rostfreiem
Ferritstahl bzw. Aluminium mit
Spezialboden
falsch
falsch
falsch
Kochstufe Geeignet für
0
1-2
3
4-5
6
7-8
9
P
Aus-Stellung, Nachwärmenutzung
Schmelzen 42°C
Warmhalten 70°C
Köcheln 92°C
Fortkochen kleiner Mengen
(niedrigste Leistung)
Fortkochen
Fortkochen großer Mengen, Weiter-
braten größerer Stücke
Braten, Einbrenne herstellen
Braten
Ankochen, Anbraten, Braten
Powerstufe
(höchste Leistung)
When using pans suitable for induction from certain manufacturers, noises may occur which are
attributable to the design of these pans.
UNSUITABLE COOKWARE:
The base of the pan is curved.
The electronic unit cannot determine the temperature correctly.
SUITABLE COOKWARE:
The base of the pan must be flat and smooth.
ENERGY SAVING TIPS:
The following are a few useful hints to help you cut your consumption of energy and use your new
induction hob and the cookware efficiently.
falsch
falsch
» The base of your cooking pans should be the same size as the cooking zone.
» When buying cooking pans, note that it is frequently the diameter of the top of the pan that it
indicated. This is usually larger than the base of a pan.
» Pressure cookers are particularly low on energy and time cooking required, thanks to the
pressure and the fact that they are tightly closed. Short cooking times mean that vitamins
are preserved.
» Always make sure that there is sufficient fluid in your pressure cooker since the cooking zone
and the cooker may be damaged as a result of overheating if the pressure cooker boils dry.
» Always close cooking pots with a suitable lid.
» Use the right sized pan for the quantity of food you are cooking. A large pan which is hardly
filled will use up a lot of energy.
falsch
optimal
Please keep this instruction manual for future reference
Instruction manual DD940BK 17
Page 18

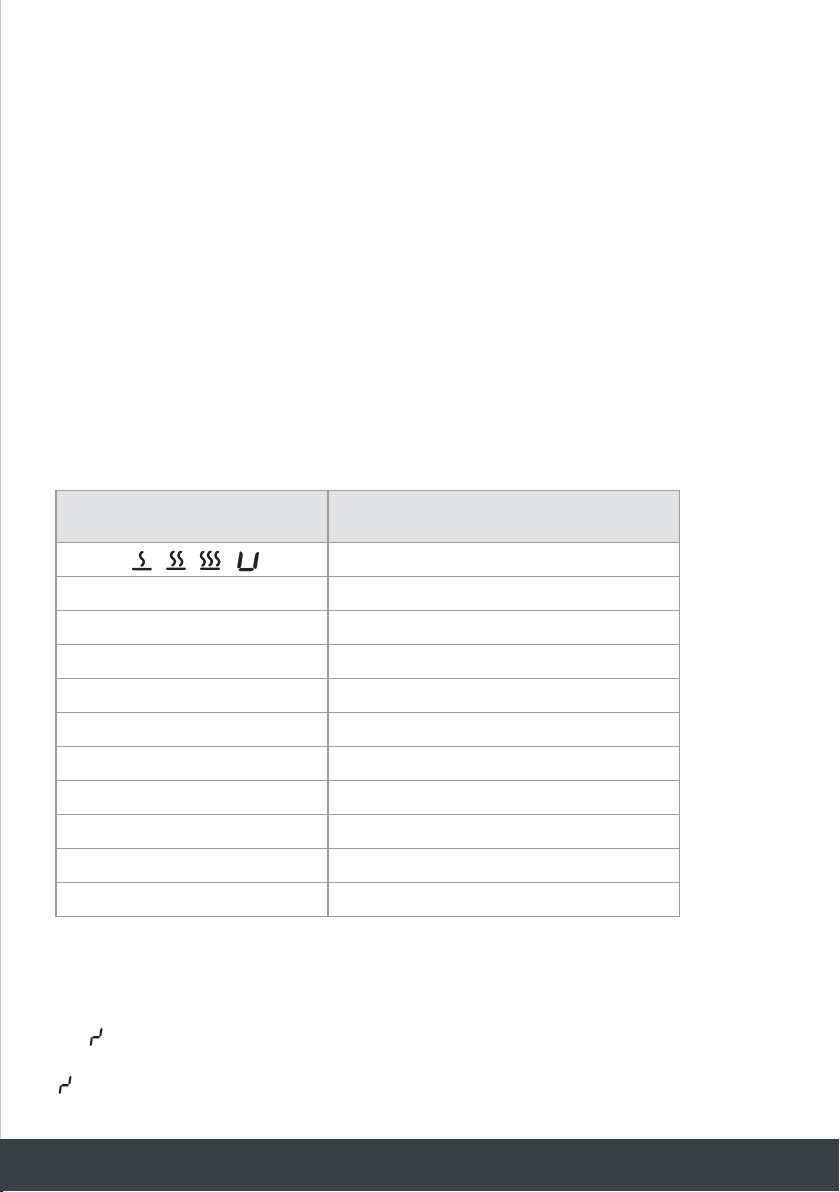
POWER SETTINGS
The heating power of the cooking zones can be set at various power levels. In the chart you will
find examples of how to use each setting.
SETTING SUITABLE FOR
0 Off, using remaining heat
42°C
Bake
Keep warm
Boil control
1-2 Simmering small quantities (lowest power setting)
3 Simmering
4-5
6 Roasting, getting juices
7-8 Roasting
9 Bringing to the boil, browning, roasting
P Power setting (highest power output)
Simmering larger quantities or roasting larger pieces of
meat until they are cooked through
70°C
92°C
RESIDUAL HEAT DISPLAY:
The glass ceramic hob is equipped with a as a residual heat display.
As long as the H lights up after the cooking zone has been switched off, the residual heat can be
used for melting food or for keeping food warm.
The cooking zone may still be hot when the letter H no longer lights up.
There is a risk of burns.
The glass ceramic is not directly heated in the case of an induction cooking zone; it is only heated
up by heat reflected by the pan.
NOTE: If the device is switched off completely, no residual heat is displayed.
STOP/PAUSE FUNCTION:
The cooking process can be briefly interrupted with the STOP/PAUSE function, e.g. if the
doorbell rings. The STOP/PAUSE function must be released in order to continue cooking at the
same power level. If a timer has been set it will pause and will then continue.
This function is only available for 10 minutes for reasons of safety.
The hob will then be switched off.
18
Instruction manual DD940BK
Please keep this instruction manual for future reference
Page 19

1. Pots and pans are on the cooking zones and the
Bedienung
D
STOP-Funktion
Der Kochvorgang kann kurzzeitig durch die STOP-Funktion unterbrochen
werden, z.B. wenn es an der Haustüre klingelt. Um den Kochvorgang mit den
gleichen Kochstufen fortzusetzen, muss die STOP-Funktion aufgehoben wer-
den. Ein evtl. eingestellter Timer wird angehalten und läuft danach weiter.
Aus Sicherheitsgründen steht diese Funktion nur 10 Minuten zur Verfügung.
Danach wird das Kochfeld ausgeschaltet.
1. Das Kochgeschirr steht auf den Kochzonen und die gewünschten Koch-
stufen sind eingestellt.
2.
STOP-Taste
betätigen. Anstelle der gewählten Kochstufen, leuchtet
das Pausenzeichen auf.
3. Die Unterbrechung wird beendet, indem zuerst die
STOP-Taste
und
danach das
blinkende Sensorfeld
links neben der STOP-
Taste betätigt wird.
Beim Betätigen des Sensorfeldes über
das ganze Sensorfeld gleiten
(sliden).
Die Betätigung der zweiten Taste muss innerhalb von 10 Sekunden erfol-
gen, ansonsten bleibt die STOP-Funktion aktiv.
Recall-Funktion
(Wiederherstellungsfunktion)
Nach versehentlichem Ausschalten des Kochfeldes kann die letzte Einstel-
lung wieder hergestellt werden.
Bedienung
D
STOP-Funktion
Der Kochvorgang kann kurzzeitig durch die STOP-Funktion unterbrochen
werden, z.B. wenn es an der Haustüre klingelt. Um den Kochvorgang mit den
gleichen Kochstufen fortzusetzen, muss die STOP-Funktion aufgehoben wer-
den. Ein evtl. eingestellter Timer wird angehalten und läuft danach weiter.
Aus Sicherheitsgründen steht diese Funktion nur 10 Minuten zur Verfügung.
Danach wird das Kochfeld ausgeschaltet.
1. Das Kochgeschirr steht auf den Kochzonen und die gewünschten Koch-
stufen sind eingestellt.
2.
STOP-Taste
betätigen. Anstelle der gewählten Kochstufen, leuchtet
das Pausenzeichen auf.
3. Die Unterbrechung wird beendet, indem zuerst die
STOP-Taste
und
danach das
blinkende Sensorfeld
links neben der STOP-
Taste betätigt wird.
Beim Betätigen des Sensorfeldes über
das ganze Sensorfeld gleiten
(sliden).
Die Betätigung der zweiten Taste muss innerhalb von 10 Sekunden erfol-
gen, ansonsten bleibt die STOP-Funktion aktiv.
Recall-Funktion
(Wiederherstellungsfunktion)
Nach versehentlichem Ausschalten des Kochfeldes kann die letzte Einstel-
lung wieder hergestellt werden.
Die Recall-Funktion funktioniert nur, wenn mindestens eine Kochzone einge-
schaltet ist.
1. Das Kochfeld wurde versehentlich durch die
Ein-/Aus-Taste Kochfeld
ausgeschaltet.
2. Innerhalb von 6 Sek. nach dem Ausschalten, die
Ein-/Aus-Taste Koch-
feld
erneut betätigen. Die LED der STOP-Taste blinkt.
Gleich anschließend die
STOP-Taste
Die ursprünglichen Kochstufen sind wiederhergestellt. Der Kochvorgang
wird fortgesetzt.
Wiederhergestellt werden:
- Kochstufen aller Kochzonen
- Minuten und Sekunden von programmierten kochstellenbezogenen Timern
- Ankochautomatik
- Powerstufe
Nicht wiederhergestellt werden:
required power levels have been set.
2. Press the STOP/PAUSE key instead of the
selected power settings, the interval sign will
light up.
3. The interruption is ended by firstly pressing the
STOP/PAUSE key and then the flashing
sensorfield left of the
STOP/PAUSE key. When operating the sensor field
slide over the complete sensor field. The second key
must be pressed within 10 seconds as otherwise the
stop function remains.
RECALL FUNCTION:
After inadvertently switching the hob off the last setting can be restored.
The Recall function only works if at least one cooking zone is switched on.
1. The hob is inadvertently turned off by
the ON/OFF key hob
2. Within 6 seconds after turning it off,
press the ON/OFF key hob
The LED on the STOP/PAUSE button
flashes. Then immediately press the
STOP/PAUSE key .
The original cooking levels are
restored. The cooking process is continued.
WHAT CAN BE RESTORED:
» Cooking levels of all cooking zones
» Minutes and seconds of programmed timer functions
» Automatic boost function
» Power level
WHAT CANNOT BE RESTORED:
» Operation time limit (it is counted from 0)
.
again.
Please keep this instruction manual for future reference
6 sec
6 sec
Instruction manual DD940BK 19
Page 20

CHILD LOCK
Bedienung
D
Kindersicherung
Die Kindersicherung soll verhindern, dass Kinder versehentlich oder absicht-
lich das Induktionskochfeld einschalten. Dazu wird die Bedienung gesperrt.
Bedienung
D
Kindersicherung
Die Kindersicherung soll verhindern, dass Kinder versehentlich oder absicht-
lich das Induktionskochfeld einschalten. Dazu wird die Bedienung gesperrt.
Kindersicherung einschalten
1. Die
Ein-/Aus-Taste Kochfeld
betätigen (ca. 1 Sek.), um das gesamte
Kochfeld einzuschalten.
2. Gleich darauf die
Verriegelungs-Taste
und die
STOP-Taste
gleichzeitig betätigen.
3. Anschließend die
Verriegelungs-Taste
betätigen, um die Kindersi-
cherung zu aktivieren. In den Kochstufen-Anzeigen erscheint ein L für
Child-Lock; die Bedienung ist gesperrt und das Kochfeld schaltet ab.
Kindersicherung ausschalten
4. Die
Ein-/Aus-Taste Kochfeld
betätigen.
5. Gleich darauf die
Verriegelungs-Taste
und die
STOP-Taste
gleichzeitig betätigen.
6. Anschließend die
STOP-Taste
betätigen, um die Kindersicherung
auszuschalten. Das L erlischt.
Kindersicherung nur für einen Kochvorgang aufheben
Voraussetzung: Die Kindersicherung ist nach Punkt 1-3 eingeschaltet.
• Die
Ein-/Aus-Taste Kochfeld
betätigen.
• Gleich darauf die
Verriegelungs-Taste
und die
STOP-Taste
gleichzeitig betätigen.
Jetzt kann vom Benutzer eine Kochzone eingeschaltet werden.
Nach dem Ausschalten des Kochfeldes ist die Kindersicherung wieder
aktiv (eingeschaltet).
Hinweise
• Bei Netzausfall wird die eingeschaltete Kindersicherung aufgehoben, d.h.
The childproof lock is to prevent children from accidentally or intentionally turning on the
induction hob. The controls are locked.
ACTIVATING THE CHILD LOCK:
1. Press the ON/OFF key hob
(approx. 1 sec)
until the power setting shows 0.
2. Immediately afterwards press the Lock key
and
the stop key simultaneously.
3. Subsequently press the Lock key
to activate the
child lock. The power setting displays an L for child
lock; operation is locked and the hob will
switch off.
SWITCHING OFF THE CHILD LOCK:
4. Press the ON/OFF key hob
5. Immediately afterwards press the Lock key and
the stop key simultaneously.
6. Then press the stop key to turn off the child lock.
The L disappears.
CANCEL THE CHILD LOCK ONLY FOR A COOKING PROCESS:
Prerequisite: The childproof lock is turned on to step 1 - 3.
» Press the ON/OFF key hob
» Immediately afterwards press the Lock key and the stop key simultaneously. Now the user
can turn on a cooking zone. After switching off the hob the lock is activated again (switched
on).
NOTE:
In case of a power cut the child lock will be cancelled, i.e. deactivated.
20
Instruction manual DD940BK
Please keep this instruction manual for future reference
Page 21

Bedienung
D
Kindersicherung
Die Kindersicherung soll verhindern, dass Kinder versehentlich oder absicht-
lich das Induktionskochfeld einschalten. Dazu wird die Bedienung gesperrt.
Kindersicherung einschalten
1. Die
Ein-/Aus-Taste Kochfeld
betätigen (ca. 1 Sek.), um das gesamte
Kochfeld einzuschalten.
2. Gleich darauf die
Verriegelungs-Taste
und die
STOP-Taste
gleichzeitig betätigen.
3. Anschließend die
Verriegelungs-Taste
betätigen, um die Kindersi-
cherung zu aktivieren. In den Kochstufen-Anzeigen erscheint ein L für
Child-Lock; die Bedienung ist gesperrt und das Kochfeld schaltet ab.
Kindersicherung ausschalten
4. Die
Ein-/Aus-Taste Kochfeld
betätigen.
5. Gleich darauf die
Verriegelungs-Taste
und die
STOP-Taste
gleichzeitig betätigen.
6. Anschließend die
STOP-Taste
betätigen, um die Kindersicherung
auszuschalten. Das L erlischt.
Kindersicherung nur für einen Kochvorgang aufheben
Voraussetzung: Die Kindersicherung ist nach Punkt 1-3 eingeschaltet.
• Die
Ein-/Aus-Taste Kochfeld
betätigen.
• Gleich darauf die
Verriegelungs-Taste
und die
STOP-Taste
gleichzeitig betätigen.
Jetzt kann vom Benutzer eine Kochzone eingeschaltet werden.
Nach dem Ausschalten des Kochfeldes ist die Kindersicherung wieder
aktiv (eingeschaltet).
Hinweise
• Bei Netzausfall wird die eingeschaltete Kindersicherung aufgehoben, d.h.
deaktiviert.
Brückenfunktion
Die vordere und die hintere Kochzone können für einen Kochvorgang zusam-
men geschaltet werden (Brückenfunktion). Dadurch kann großes Geschirr
verwendet werden.
1. Das Kochfeld einschalten.
2. Zum Einschalten der Brückenfunktion
das Sensorfeld
der
vorderen und hinteren Kochzone
gleichzeitig berühren.
Die Brückenfunktion ist eingeschaltet, es erscheint das Symbol .
Die Bedienung erfolgt durch das
Sensorfeld
der vorderen
Kochzone.
3. Zum Deaktivieren die beiden
Sensorfelder
erneut gleichzeitig
betätigen oder das Kochfeld ausschalten.
Hinweise
Damit der Bräter bzw. Topf von der Topferkennung erkannt wird, muss er die
verwendeten Kochzonen mindestens bis zur Hälfte abdecken!
MinMin
Min
Max
Max
BRIDGING FUNCTION:
The front and the rear cooking zones may be activated together for a cooking process (bridging
function). This enables larger cookware to be used.
1. Switch on the hob.
2. Press the touch control
front cooking zones simultaneously to activate
the bridging function. The bridging function is
activated, the symbol appears. Operation is
carried out with the touch control of
the front cooking zone.
3. To deactivate the two touch controls
press them simultaneously again or switch off
the hob.
NOTE:
The pan will need to cover at least half of the cooking zones used in order to be recognised by the
pan recognition device.
Please keep this instruction manual for future reference
of the rear and
MinMin
Min
Instruction manual DD940BK 21
Min
Min
Max
Max
Max
Max
Page 22

Bedienung
D
Abschaltautomatik (Timer)
Durch die Abschaltautomatik wird jede eingeschaltete Kochzone nach einer
einstellbaren Zeit automatisch abgeschaltet. Es können Kochzeiten von 10
Sek. (0.10) bis 1 Std. 59 Min. (1.59) eingestellt werden.
1. Das Kochfeld einschalten. Eine oder mehrere Kochzonen einschalten
und gewünschte Kochstufen wählen.
AUTOMATIC SWITCH-OFF (TIMER):
Bedienung
D
Abschaltautomatik (Timer)
Durch die Abschaltautomatik wird jede eingeschaltete Kochzone nach einer
einstellbaren Zeit automatisch abgeschaltet. Es können Kochzeiten von 10
Sek. (0.10) bis 1 Std. 59 Min. (1.59) eingestellt werden.
1. Das Kochfeld einschalten. Eine oder mehrere Kochzonen einschalten
und gewünschte Kochstufen wählen.
2. Die
Plus- und Minus-Taste
gleichzeitig betätigen, bis das Sym-
bol für die gewünschte Kochzone aufleuchtet.
3. Zum Einstellen der Zeit die
Plus- oder Minus-Taste
betätigen.
Nach wenigen Sekunden wird die Eingabe übernommen, der Ablauf hat
begonnen. Der Dezimalpunkt blinkt.
4. Nach Ablauf der Zeit wird die Kochzone ausgeschaltet. Es ertönt ein zeit-
lich begrenzter Signalton, der durch Betätigung der oder Taste
abgeschaltet werden kann.
Hinweise
• Zur Programmierung der Abschaltautomatik für eine weitere Kochzone, die
Min
Max
1x, 2x, 3x
Bedienung
D
Abschaltautomatik (Timer)
Durch die Abschaltautomatik wird jede eingeschaltete Kochzone nach einer
einstellbaren Zeit automatisch abgeschaltet. Es können Kochzeiten von 10
Sek. (0.10) bis 1 Std. 59 Min. (1.59) eingestellt werden.
1. Das Kochfeld einschalten. Eine oder mehrere Kochzonen einschalten
und gewünschte Kochstufen wählen.
2. Die
Plus- und Minus-Taste
gleichzeitig betätigen, bis das Sym-
bol für die gewünschte Kochzone aufleuchtet.
3. Zum Einstellen der Zeit die
Plus- oder Minus-Taste
betätigen.
Nach wenigen Sekunden wird die Eingabe übernommen, der Ablauf hat
begonnen. Der Dezimalpunkt blinkt.
4. Nach Ablauf der Zeit wird die Kochzone ausgeschaltet. Es ertönt ein zeit-
lich begrenzter Signalton, der durch Betätigung der oder Taste
abgeschaltet werden kann.
Hinweise
• Zur Programmierung der Abschaltautomatik für eine weitere Kochzone, die
Schritte 2 bis 3 wiederholen.
• Zur Kontrolle der abgelaufenen Zeit (Abschaltautomatik) die
Plus- und
Minus-Taste
gleichzeitig so oft beätitigen, bis das entsprechende
Symbol für die gewünschte Kochzone aufleuchtet. Der Anzeigewert
Min
Max
1x, 2x, 3x
The automatic switch-off device is used to automatically switch off any cooking zone after an
adjustable period of time. Cooking times ranging from 10 sec (0.10) to 1 h 59 min (1.59) can
be set.
1. Switch on the hob. Switch on one or more cooking
zones and select the required power settings.
2. Press the Plus
simultaneously until the symbol for
and Minus key
1x, 2x, 3x
the desired cooking zone lights up.
3. To set the time press the Plus
or Minus key .
After a few seconds your input will be assumed and
the procedure will have commenced. The decimal
point flashes.
4. The cooking zone will be switched off when the
time has lapsed. A signal will sound for a while and
can be switched off by pressing the
Plus
or Minus key .
NOTE:
» Repeat steps 2 to 4 to program the automatic switch-off device for another cooking zone.
» To check the time that has lapsed (automatic switch-off) push the Plus
simultaneously until the symbol for the desired cooking zone lights up. The setting
displayed can be read and changed.
» Terminating the function of the timer: select the cooking zone by pressing the
Plus
and Minus key simultaneously until the symbol for the desired cooking zone
lights up and press the Minus key to delete the time (0).
» If several cooking zones have been programmed with the automatic
switch-off function, the timer display will always show the cooking zone
with the shortest time.
22
Instruction manual DD940BK
Please keep this instruction manual for future reference
and Minus key
Min
Max
Page 23

MINUTE MINDER (EGG TIMER):
Bedienung
D
Abschaltautomatik (Timer)
Durch die Abschaltautomatik wird jede eingeschaltete Kochzone nach einer
einstellbaren Zeit automatisch abgeschaltet. Es können Kochzeiten von 10
Sek. (0.10) bis 1 Std. 59 Min. (1.59) eingestellt werden.
1. Das Kochfeld einschalten. Eine oder mehrere Kochzonen einschalten
und gewünschte Kochstufen wählen.
2. Die
Plus- und Minus-Taste
gleichzeitig betätigen, bis das Sym-
bol für die gewünschte Kochzone aufleuchtet.
3. Zum Einstellen der Zeit die
Plus- oder Minus-Taste
betätigen.
Nach wenigen Sekunden wird die Eingabe übernommen, der Ablauf hat
begonnen. Der Dezimalpunkt blinkt.
4. Nach Ablauf der Zeit wird die Kochzone ausgeschaltet. Es ertönt ein zeit-
lich begrenzter Signalton, der durch Betätigung der oder Taste
abgeschaltet werden kann.
Hinweise
• Zur Programmierung der Abschaltautomatik für eine weitere Kochzone, die
Schritte 2 bis 3 wiederholen.
• Zur Kontrolle der abgelaufenen Zeit (Abschaltautomatik) die
Plus- und
Minus-Taste
gleichzeitig so oft beätitigen, bis das entsprechende
Symbol für die gewünschte Kochzone aufleuchtet. Der Anzeigewert
kann abgelesen und verändert werden.
• Abschaltautomatik vorzeitig löschen: Durch gleichzeitiges Betätigen der
Plus- und Minus-Taste
die jeweilige Kochzone anwählen und die
Zeit durch Betätigen der
Minus-Taste
löschen („0”).
• Wenn mehrere Kochzonen mit Abschaltautomatik programmiert sind, wird
in der Timer-Anzeige stets die Kochzone mit der kürzesten Zeit angezeigt.
Kurzzeitwecker (Eier-Uhr)
Die Kochzonen sind ausgeschaltet
Min
Max
1x, 2x, 3x
Bedienung
D
Abschaltautomatik (Timer)
Durch die Abschaltautomatik wird jede eingeschaltete Kochzone nach einer
einstellbaren Zeit automatisch abgeschaltet. Es können Kochzeiten von 10
Sek. (0.10) bis 1 Std. 59 Min. (1.59) eingestellt werden.
1. Das Kochfeld einschalten. Eine oder mehrere Kochzonen einschalten
und gewünschte Kochstufen wählen.
2. Die
Plus- und Minus-Taste
gleichzeitig betätigen, bis das Sym-
bol für die gewünschte Kochzone aufleuchtet.
3. Zum Einstellen der Zeit die
Plus- oder Minus-Taste
betätigen.
Nach wenigen Sekunden wird die Eingabe übernommen, der Ablauf hat
begonnen. Der Dezimalpunkt blinkt.
4. Nach Ablauf der Zeit wird die Kochzone ausgeschaltet. Es ertönt ein zeit-
lich begrenzter Signalton, der durch Betätigung der oder Taste
abgeschaltet werden kann.
Hinweise
• Zur Programmierung der Abschaltautomatik für eine weitere Kochzone, die
Schritte 2 bis 3 wiederholen.
• Zur Kontrolle der abgelaufenen Zeit (Abschaltautomatik) die
Plus- und
Minus-Taste
gleichzeitig so oft beätitigen, bis das entsprechende
Symbol für die gewünschte Kochzone aufleuchtet. Der Anzeigewert
kann abgelesen und verändert werden.
• Abschaltautomatik vorzeitig löschen: Durch gleichzeitiges Betätigen der
Plus- und Minus-Taste
die jeweilige Kochzone anwählen und die
Zeit durch Betätigen der
Minus-Taste
löschen („0”).
• Wenn mehrere Kochzonen mit Abschaltautomatik programmiert sind, wird
in der Timer-Anzeige stets die Kochzone mit der kürzesten Zeit angezeigt.
Kurzzeitwecker (Eier-Uhr)
Die Kochzonen sind ausgeschaltet
1. Das Kochfeld einschalten.
2. Die
Plus- und Minus-Taste
gleichzeitig betätigen, bis unter der
Timeranzeige das Symbol aufleuchtet.
3. Zum Einstellen der Zeit die
Plus-
oder
Minus-Taste
betätigen.
Nach wenigen Sekunden wird die Eingabe übernommen, der Ablauf hat
begonnen. Der Dezimalpunkt blinkt.
4. Nach Ablauf der Zeit ertönt ein zeitlich begrenzter Signalton, der durch
Betätigung der oder Taste abgeschaltet werden kann.
Kurzzeitweckereinstellung falls bereits Kochzonen in Betrieb sind
• Die
Plus- und Minus-Taste
gleichzeitig so oft betätigen, bis unter
Min
Max
1x, 2x, 3x
1x, 2x, 3x
Bedienung
D
Abschaltautomatik (Timer)
Durch die Abschaltautomatik wird jede eingeschaltete Kochzone nach einer
einstellbaren Zeit automatisch abgeschaltet. Es können Kochzeiten von 10
Sek. (0.10) bis 1 Std. 59 Min. (1.59) eingestellt werden.
1. Das Kochfeld einschalten. Eine oder mehrere Kochzonen einschalten
und gewünschte Kochstufen wählen.
2. Die
Plus- und Minus-Taste
gleichzeitig betätigen, bis das Sym-
bol für die gewünschte Kochzone aufleuchtet.
3. Zum Einstellen der Zeit die
Plus- oder Minus-Taste
betätigen.
Nach wenigen Sekunden wird die Eingabe übernommen, der Ablauf hat
begonnen. Der Dezimalpunkt blinkt.
4. Nach Ablauf der Zeit wird die Kochzone ausgeschaltet. Es ertönt ein zeit-
lich begrenzter Signalton, der durch Betätigung der oder Taste
abgeschaltet werden kann.
Hinweise
• Zur Programmierung der Abschaltautomatik für eine weitere Kochzone, die
Schritte 2 bis 3 wiederholen.
• Zur Kontrolle der abgelaufenen Zeit (Abschaltautomatik) die
Plus- und
Minus-Taste
gleichzeitig so oft beätitigen, bis das entsprechende
Symbol für die gewünschte Kochzone aufleuchtet. Der Anzeigewert
kann abgelesen und verändert werden.
• Abschaltautomatik vorzeitig löschen: Durch gleichzeitiges Betätigen der
Plus- und Minus-Taste
die jeweilige Kochzone anwählen und die
Zeit durch Betätigen der
Minus-Taste
löschen („0”).
• Wenn mehrere Kochzonen mit Abschaltautomatik programmiert sind, wird
in der Timer-Anzeige stets die Kochzone mit der kürzesten Zeit angezeigt.
Kurzzeitwecker (Eier-Uhr)
Die Kochzonen sind ausgeschaltet
1. Das Kochfeld einschalten.
2. Die
Plus- und Minus-Taste
gleichzeitig betätigen, bis unter der
Timeranzeige das Symbol aufleuchtet.
3. Zum Einstellen der Zeit die
Plus-
oder
Minus-Taste
betätigen.
Nach wenigen Sekunden wird die Eingabe übernommen, der Ablauf hat
begonnen. Der Dezimalpunkt blinkt.
4. Nach Ablauf der Zeit ertönt ein zeitlich begrenzter Signalton, der durch
Betätigung der oder Taste abgeschaltet werden kann.
Kurzzeitweckereinstellung falls bereits Kochzonen in Betrieb sind
• Die
Plus- und Minus-Taste
gleichzeitig so oft betätigen, bis unter
der Timeranzeige das Symbol aufleuchtet.
• Zum Einstellen der Zeit die
Plus-
oder
Minus-Taste
betätigen.
• Nach Ablauf der Zeit ertönt ein zeitlich begrenzter Signalton, der durch
Betätigung der oder Taste abgeschaltet werden kann.
Min
Max
1x, 2x, 3x
1x, 2x, 3x
1. Switch on the hob.
2. Press the Plus
and Minus key simultaneously
until the symbol under the timer display
1x, 2x, 3x
lights up.
3. To set the time press the Plus
After a few seconds your input will be assumed and
the procedure will have commenced. The decimal
point flashes.
4. Once the time has lapsed a signal will sound for a
while and can be switched off by pressing the Plus
or Minus key .
SETTING TIMER IF COOKING ZONES ARE IN OPERATION:
» Press the Plus
display lights up.
and Minus key simultaneously until the symbol under the timer
» To set the time press the Plus
» Once the time has lapsed a signal will sound for a while and can be switched off by pressing
the Plus
or Minus key .
NOTE:
The minute minder remains in operation when the left or right hob is switched off. Switch the left
or right hob on to adjust the time.
or Minus key .
Please keep this instruction manual for future reference
or Minus key .
Instruction manual DD940BK 23
Page 24

AUTOMATIC BOOST FUNCTION:
Bedienung
D
Ankochautomatik
Bei der Ankochautomatik erfolgt das Ankochen mit Kochstufe 9. Nach einer
bestimmten Zeit wird automatisch auf eine geringere Fortkochstufe (1 bis 8)
zurückgeschaltet.
Bei Anwendung der Ankochautomatik muss lediglich die Fortkochstufe
gewählt werden, mit der das Gargut weitergegart werden soll, weil die Elek-
tronik selbständig zurückschaltet.
Die Ankochautomatik ist geeignet für Gerichte, die kalt aufgesetzt, mit hoher
Leistung erhitzt und auf der Fortkochstufe nicht ständig beobachtet werden
müssen (z.B. das Kochen von Suppenfleisch).
1. Das Kochfeld einschalten.
Kochstufe
Zeit
Verminderung
Bedienung
D
Ankochautomatik
Bei der Ankochautomatik erfolgt das Ankochen mit Kochstufe 9. Nach einer
bestimmten Zeit wird automatisch auf eine geringere Fortkochstufe (1 bis 8)
zurückgeschaltet.
Bei Anwendung der Ankochautomatik muss lediglich die Fortkochstufe
gewählt werden, mit der das Gargut weitergegart werden soll, weil die Elek-
tronik selbständig zurückschaltet.
Die Ankochautomatik ist geeignet für Gerichte, die kalt aufgesetzt, mit hoher
Leistung erhitzt und auf der Fortkochstufe nicht ständig beobachtet werden
müssen (z.B. das Kochen von Suppenfleisch).
1. Das Kochfeld einschalten.
2. Das
Sensorfeld
lange drücken (ca. 3 Sek.)
, um die Funk-
tion zu aktivieren und gleich eine bestimmte Fortkochstufe zu wählen.
........ links........................ Fortkochstufe 1
........ Mitte....................... Fortkochstufe 6
........ rechts..................... Fortkochstufe 8
A und die gewählte Fortkochstufe blinken abwechselnd.
3. Die Ankochautomatik läuft programmgemäß ab. Nach einer bestimmten
Zeit (siehe Tabelle) wird der Kochvorgang mit der Fortkochstufe fortge-
führt. Das Symbol A erlischt.
lange drücken (ca. 3 Sek)
Kochstufe
Zeit
Verminderung
Min
Max
D
Ankochautomatik
Bei der Ankochautomatik erfolgt das Ankochen mit Kochstufe 9. Nach einer
bestimmten Zeit wird automatisch auf eine geringere Fortkochstufe (1 bis 8)
zurückgeschaltet.
Bei Anwendung der Ankochautomatik muss lediglich die Fortkochstufe
gewählt werden, mit der das Gargut weitergegart werden soll, weil die Elek-
tronik selbständig zurückschaltet.
Die Ankochautomatik ist geeignet für Gerichte, die kalt aufgesetzt, mit hoher
Leistung erhitzt und auf der Fortkochstufe nicht ständig beobachtet werden
müssen (z.B. das Kochen von Suppenfleisch).
1. Das Kochfeld einschalten.
2. Das
Sensorfeld
lange drücken (ca. 3 Sek.)
, um die Funk-
tion zu aktivieren und gleich eine bestimmte Fortkochstufe zu wählen.
........ links........................ Fortkochstufe 1
Zeit
When the automatic boost function is selected, food
is part-boiled at power setting 9. After a certain time
(see chart), the power level will switch down
automatically to a lower simmering setting (1 to 8).
When using the automatic boost function only the
power setting with which the food is to be cooked
through needs to be selected since the electronic
unit switches down automatically.
The automatic boost function is suitable for dishes
which are cold initially and are then heated up at high
power. These dishes do not need to be
constantly monitored when cooking (e.g. boiling
meat for soups).
1. Switch on the hob.
SELECTED
POWER
LEVEL
1 0:40
2 1:12
3 2:00
4 2:56
5 4:16
6 7:12
7 2:00
8 3:12
9 -
AUTOMATIC
BOOST FUNCTION
TIME (MIN:SEC)
2. Press the touch control and keep it pressed (for
approx. 3 seconds) to activate the function and
Min
Press and hold for
approx 3 seconds
Max
immediately select a specific power setting:
Left Power setting 1
Centre Power setting 6
Right Power setting 8
The symbol will light up. This will activate the automatic boost function. and the selected
simmering setting will blink alternately.
3. The automatic boost function will operate as
programmed. After a certain time (see chart) the
cooking process will be continued with the power
setting. The symbol will go off.
NOTE:
The power setting can be raised while the automatic boost function is in operation. A reduction in
the power setting will switch off the automatic boost function.
24
Instruction manual DD940BK
Please keep this instruction manual for future reference
Page 25

PRE SET TEMPERATURES
Bedienung
D
Ankochautomatik
Bei der Ankochautomatik erfolgt das Ankochen mit Kochstufe 9. Nach einer
bestimmten Zeit wird automatisch auf eine geringere Fortkochstufe (1 bis 8)
zurückgeschaltet.
Bei Anwendung der Ankochautomatik muss lediglich die Fortkochstufe
gewählt werden, mit der das Gargut weitergegart werden soll, weil die Elek-
tronik selbständig zurückschaltet.
Die Ankochautomatik ist geeignet für Gerichte, die kalt aufgesetzt, mit hoher
Leistung erhitzt und auf der Fortkochstufe nicht ständig beobachtet werden
müssen (z.B. das Kochen von Suppenfleisch).
1. Das Kochfeld einschalten.
2. Das
Sensorfeld
lange drücken (ca. 3 Sek.)
, um die Funk-
tion zu aktivieren und gleich eine bestimmte Fortkochstufe zu wählen.
........ links........................ Fortkochstufe 1
........ Mitte....................... Fortkochstufe 6
........ rechts..................... Fortkochstufe 8
A und die gewählte Fortkochstufe blinken abwechselnd.
3. Die Ankochautomatik läuft programmgemäß ab. Nach einer bestimmten
Zeit (siehe Tabelle) wird der Kochvorgang mit der Fortkochstufe fortge-
führt. Das Symbol A erlischt.
Hinweise
• Während der Ankochautomatik kann die Fortkochstufe erhöht werden. Die
Verringerung der Fortkochstufe schaltet die Ankochautomatik ab.
Warmhaltefunktion
Durch die Warmhaltefunktion können fertige Speisen mit einer bestimm-
ten Temperatur warm gehalten werden. Die Kochzone wird mit geringer Leis-
tung betrieben.
1. Kochgeschirr steht auf einer Kochzone und eine Kochstufe (z.B. 3) ist
gewählt.
2. Durch mehrmaliges Betätigen der
Warmhalte-Taste
die gewünschte
Warmhaltestufe wählen:
entspricht ca. 42°C
entspricht ca. 70°C
entspricht ca. 92°C
3. Zum Ausschalten das
Sensorfeld
links betätigen oder die
Warmhalte-Taste
betätigen.
Die Warmhaltefunktion steht 120 Minuten zur Verfügung, danach wird die
Kochzone ausgeschaltet.
lange drücken (ca. 3 Sek)
Kochstufe
Zeit
Verminderung
Eingestellte
Kochstufe
Ankochautomatik
Zeit (Min:Sek)
1
2
3
4
5
6
7
8
9
0:40
1:12
2:00
2:56
4:16
7:12
2:00
3:12
-
Min
Max
Bedienung
D
Verriegelung
Durch die Verriegelung kann die Bedienung der Tasten und die Einstellung
einer Kochstufe gesperrt werden. Lediglich die Ein-/Aus-Taste bleibt zum
Ausschalten des Kochfeldes bedienbar.
Verriegelung einschalten
1. Die
Verriegelungs-Taste
betätigen. Die LED über der Verriegelungs-
taste leuchtet.
Verriegelung ausschalten
2. Die
Verriegelungs-Taste
betätigen. Die LED über der Verriegelungs-
taste erlischt.
With this function
or control the boiling. The respective cooking zone is operated at a low power level.
you can use one of the cooking zones to keep food warm, help with baking
1. Cookware is placed on a cooking zone and
a power level (e.g. 3) is selected.
2. By repeatedly pressing the pre set
temperature key
corresponds to about 42°C - bake
select the setting:
corresponds to about 70°C - keep warm
corresponds to about 92°C - boil control
3. To switch off the function press the
touch control
the far left or press the key .
The keep-warm function is available for 120 minutes,
on
after which the cooking zone will be switched off.
LOCKING
1x, 2x, 3x
Min
Max
The lock can be used to lock key operation and cooking level settings.
Only the ON/OFF key can be used to switch the hob off.
ACTIVATING THE LOCK:
1. Press the Lock key
function. The control lamp above the Lock
key will light up. The controls are locked.
SWITCHING OFF THE LOCK:
2. Press the Lock key
to activate the
to deactivate the
function. The control lamp above the Lock
key will go off.
NOTE:
» An activated lock will remain activated even if the hob is switched off. It must therefore be de-
activated when cooking is re-commenced.
» In the event of a power cut the lock will be cancelled, i.e. deactivated.
Please keep this instruction manual for future reference
Instruction manual DD940BK 25
Page 26

POWER BOOST
Bedienung
D
Verriegelung
Durch die Verriegelung kann die Bedienung der Tasten und die Einstellung
einer Kochstufe gesperrt werden. Lediglich die Ein-/Aus-Taste bleibt zum
Ausschalten des Kochfeldes bedienbar.
Verriegelung einschalten
1. Die
Verriegelungs-Taste
betätigen. Die LED über der Verriegelungs-
taste leuchtet.
Verriegelung ausschalten
2. Die
Verriegelungs-Taste
betätigen. Die LED über der Verriegelungs-
taste erlischt.
Hinweise
• Die aktivierte Verriegelung bleibt auch bei ausgeschaltetem Kochfeld
erhalten. Zum nächsten Kochvorgang muss sie deshalb zuerst aufgeho-
ben werden!
• Bei Netzausfall wird die eingeschaltete Verriegelung aufgehoben, d.h.
deaktiviert.
Powerstufe
Die Powerstufe stellt den Induktionskochzonen zusätzliche Leistung zur Ver-
fügung. Eine große Menge Wasser kann schnell zum Kochen gebracht wer-
den.
1. Das Kochfeld einschalten.
2. Das
Sensorfeld ganz rechts bei max.
der gewünschten
Kochzone betätigen. Die Kochstufen-Anzeige zeigt ein . Die Power-
stufe ist eingeschaltet.
3. Nach 10 Minuten wird die Powerstufe automatisch abgeschaltet. Das
erlischt und es wird auf Kochstufe 9 zurückgeschaltet.
Hinweis:
Zum vorzeitigen Abschalten der Powerstufe das jeweilige
Sensorfeld
betätigen.
The power boost setting makes additional power available for induction cooking zones. A large
quantity of water can be brought to the boil very quickly.
1. Switch on the hob.
2. Press the respective touch control
far right to allocate it to a specific cooking zone. The
power setting display shows and the power boost
setting has been switched on.
3. After 10 minutes the power boost setting will switch off
automatically. The
will go off and power setting 9
will be reset.
NOTE:
Press the respective touch control
POWER MANAGEMENT:
For technical reasons two cooking zones always
to prematurely switch off the power boost setting.
comprise a module and have a maximum
power level.
If this power range is exceeded when a higher power
setting level or the power boost function is switched
on the power management system will reduce the
power setting of the corresponding cooking zone of
the module. The display for this cooking zone will
initially blink, after which the highest possible power
setting will be consistently displayed.
on the
Min
10 Min.
Modules (power management)
Max
26
Instruction manual DD940BK
Please keep this instruction manual for future reference
Page 27

OPERATING THE DOWNDRAFT:
Bedienung
D
Lüfter verwenden
In der Mitte des Kochfelds befindet sich der Lüfter mit dem Abzug nach
unten.
Vor Inbetriebnahme des Lüfters Abdeckung vollständig abnehmen.
Lüfter ein- und ausschalten
1.
Stand-by Taste
betätigen (ca. 1 Sek.), bis das Gerät auf Betriebsbe-
reitschaft schaltet.
2. Die
Plus-Taste vom Lüfter
betätigen.
Danach kann durch die
Plus- oder Minus-Taste
eine
gewünschte Leistungsstufe 1, 2, 3 oder 4 gewählt werden. Es leuchtet
das Symbol für den Lüfter .
Abdeckung
Bedienung
D
Lüfter verwenden
In der Mitte des Kochfelds befindet sich der Lüfter mit dem Abzug nach
unten.
Vor Inbetriebnahme des Lüfters Abdeckung vollständig abnehmen.
Lüfter ein- und ausschalten
1.
Stand-by Taste
betätigen (ca. 1 Sek.), bis das Gerät auf Betriebsbe-
reitschaft schaltet.
2. Die
Plus-Taste vom Lüfter
betätigen.
Danach kann durch die
Plus- oder Minus-Taste
eine
gewünschte Leistungsstufe 1, 2, 3 oder 4 gewählt werden. Es leuchtet
das Symbol für den Lüfter .
Die Intensivstufe 4 bleibt für 10 Minuten eingeschaltet, danach wird auto-
matisch auf Stufe 3 zurückgeschaltet.
3. Zum Ausschalten die
Minus-Taste
vom Lüfter betätigen bis 0 ange-
zeigt wird.
Lüfternachlauf
Der Lüfternachlauf wird nach dem Kochen verwendet, um Kochgerüche zu
beseitigen. Außerdem werden die Filter im Lüfter getrocknet.
Lüfternachlauf einstellen
Abdeckung
Min
Bedienung
D
Lüfter verwenden
In der Mitte des Kochfelds befindet sich der Lüfter mit dem Abzug nach
unten.
Vor Inbetriebnahme des Lüfters Abdeckung vollständig abnehmen.
Lüfter ein- und ausschalten
1.
Stand-by Taste
betätigen (ca. 1 Sek.), bis das Gerät auf Betriebsbe-
reitschaft schaltet.
2. Die
Plus-Taste vom Lüfter
betätigen.
Danach kann durch die
Plus- oder Minus-Taste
eine
gewünschte Leistungsstufe 1, 2, 3 oder 4 gewählt werden. Es leuchtet
das Symbol für den Lüfter .
Die Intensivstufe 4 bleibt für 10 Minuten eingeschaltet, danach wird auto-
matisch auf Stufe 3 zurückgeschaltet.
3. Zum Ausschalten die
Minus-Taste
vom Lüfter betätigen bis 0 ange-
zeigt wird.
Lüfternachlauf
Der Lüfternachlauf wird nach dem Kochen verwendet, um Kochgerüche zu
beseitigen. Außerdem werden die Filter im Lüfter getrocknet.
Lüfternachlauf einstellen
1. Die
Plus- und Minus-Taste
vom Lüfter gleichzeitig betätigen. Der
Lüfternachlauf von 10 Minuten ist eingestellt. Es leuchtet das Symbol für
Nachlauf .
2. Durch erneutes gleichzeitiges Betätigen der
Plus- und Minus-Taste
werden 60 Minuten eingestellt.
3. Durch erneutes gleichzeitiges Betätigen wird der Nachlauf ausgeschaltet.
Abdeckung
Min
Min
In the centre of the hob, the fan is positioned with the air
exhaust downward.
Remove the glass cover completely before using the fan.
The S/S grill cover does not have to be removed.
SWITCHING THE FAN ON AND OFF:
1. Press the Standby key
into standby mode.
2. Press the plus key
with the plus or minus key a desired power level 1,
2, 3 or 4. The symbol for the fan
level 4 remains for 10 minutes, then it will automatically
switch back to level 3.
3. To switch off the fan press the minus key
is displayed.
FAN TIMER:
The fan timer is used after cooking to completely eliminate cooking odours.
In addition, the filters are dried in the fan timer.
SETTING THE FAN TIMER:
1. Press the plus
simultaneously. The fan timer is set for 10 minutes. It lights
up the symbol min for fan timer.
2. Press the plus
to set the fan timer for 60 minutes.
3. By pressing the keys again simultaneously, the fan timer will
switch off.
from the fan. Then you can choose
and minus key from the fan
and minus key again simultaneously
(about 1 sec.) until the unit goes
lights up. The intensive
Please keep this instruction manual for future reference
until 0
Instruction manual DD940BK 27
Stainless Steel Grille GRILLE/DD940BK
(Grille not included, please go to
www.caple.co.uk
for more details)
Page 28

STOP DELAY TIME:
The fan motor should continue operating for another 10-20 minutes every time the hob has been
used for cooking. When the fan is switched offffafter having been in operation for at least 15
minutes, an automatic time lag at a low setting will follow for around 15 minutes.
This guarantees optimal functioning and the removal of remaining cooking steam.
When using a recirculating air filter, please always allow for a stop delay time of 10 - 60 minutes
in order to optimally remove cooking odours.
When the fan is switched on again, in rare cases the odour molecules present in the filter may
be combined with steam so that they are detected again. These remaining odours will disappear
when the fan continues to operate.
IMPORTANT:
When the convection air mode is in operation, ventilation must be sufficient in order for the air
humidity to be removed.
28
Instruction manual DD940BK
Please keep this instruction manual for future reference
Page 29

CARE AND MAINTENANCE
D
Spezielle Verschmutzungen
Starke Verschmutzungen
und Flecken (Kalkflecken, perlmut-
tartig glänzende Flecken) sind am besten zu beseitigen, wenn
das Kochfeld noch handwarm ist. Benutzen Sie dazu handelsüb-
liche Reinigungsmittel. Gehen Sie dabei so vor, wie unter Punkt
2 beschrieben.
Übergekochte Speisen
zuerst mit einem nassen Tuch aufwei-
chen und anschließend die Schmutzreste mit einem speziellen
Glasschaber für Glaskeramik-Kochfelder entfernen. Danach die
Fläche wie unter Punkt 2 beschrieben reinigen.
» Switch the hob off and let it cool down before you clean it.
» Never clean the glass ceramic hob with a steam cleaner or similar appliance.
» When cleaning make sure that you only wipe lightly over the ON/OFF KEY. The hob may
otherwise be accidentally switched on.
GLASS CERAMIC HOB IMPORTANT NOTE:
Never use aggressive cleaning agents such as rough scouring agent, abrasive saucepan cleaners,
rust and stain removers etc.
Cleaning after use:
» Always clean the entire hob when it has become soiled. It is recommended that you do so every
time the hob is used. Use a damp cloth and a little washing up liquid for cleaning. Then dry the
hob with a clean dry cloth to ensure that there is no detergent left on the surface of the hob.
Weekly cleaning:
» Clean the entire hob thoroughly once a week with commercial glass ceramic cleaning agents.
Please follow the manufacturer’s instructions carefully. When applied, the cleaning agent will
coat the hob in a protective film which is resistant to water and dirt. All the dirt will remain on
the film and can then easily be removed. Then rub the hob dry with a clean cloth. Make sure
that no cleaning agent remains on the surface of the hob since this will react aggressively when
the hob is heated up and will change the surface.
GREASE FILTER:
After a period of time, the grease filters will start to become saturated
in fat and grease. Because of this, these should be washed regularly
(roughly once every 2 months). The grease filters can be washed by
hand with warm soapy water or in the dishwasher. These filters need to
be cleaned on a regular basis, because otherwise they may represent
a fire risk. Once cleaned, refit to the downdraft, and reapply the glass
top. Please note that some dishwasher detergents can cause the
grease filter to discolour, this is normal and is not a fault.
Please keep this instruction manual for future reference
Instruction manual DD940BK 29
Page 30

SPECIFIC SOILING:
Heavy soiling and stains like limescale and shiny, mother-of-pearl type stains are best removed
when the hob is still slightly warm. Use commercial cleaning agents to clean the hob. Proceed as
outlined under Care and Maintenance.
First soak food which has boiled over with a wet cloth and then remove remaining soiling with
a special glass scraper for glass ceramic hobs. Then clean the hob again as described
under Care and Maintenance.
Burnt sugar and melted plastic must be removed immediately, when they are still hot with a glass
scraper. Then clean the hob again as described under Care and Maintenance.
Grains of dirt which may get onto the hob when you peel potatoes or clean lettuce may scratch
the surface of the hob when you move pots around. Make sure that no grains of dirt are left on
the hob.
Changes in the colour of the hob will not affect the function and the stability of the glass ceramic
material. These colour changes are not changes in the material but food residues which were not
removed and which have burnt into the surface.
Shiny spots result when the base of the cookware rubs on the surface of the hob, particularly
when cookware with an aluminium base or unsuitable cleaning agents are used. They are difficult
to remove with standard cleaning agents. You may need to repeat the cleaning process several
times. In time, the decoration will wear off and dark stains will appear as a result of using
aggressive cleaning agents and faulty pan bases.
30
Instruction manual DD940BK
Please keep this instruction manual for future reference
Page 31

TROUBLESHOOTING
Interference with and repairs to the appliance by unqualified persons are dangerous as they can
result in an electric shock or a short circuit. Do not interfere with or try to repair the appliance;
this could cause injury to persons and damage to the appliance. Always have such work done by a
Caple approved engineer or similar qualified persons.
PLEASE NOTE:
If your appliance is faulty, please check whether you can rectify the problem yourself by consulting
these instructions for use.
You may be able to rectify some problems yourself. They are described below.
THE FUSES BLOW REGULARLY?
Contact Caple Service or an electrician.
YOU CAN’T SWITCH YOUR INDUCTION HOB ON?
» Has the wiring system (fuse box) in the house blown a fuse?
» Has the hob been connected to the mains?
» Are the sensor keys locked (childproof lock)?
» Are the sensor keys partly covered by a damp cloth, fluid or a metallic object? Please rectify.
» Are you using unsuitable cookware? See the section on “Cookware for induction hobs”
THE SYMBOL
WILL BLINK AND A TIME-LIMITED CONTINUOUS SIGNAL
WILL SOUND.
Food which has boiled over, cookware or other items are causing the touch control sensor keys to
be consistently operated.
Clean the surface or remove the item.
To delete the
symbol, press the same key or switch the hob off and on.
Please keep this instruction manual for future reference
Instruction manual DD940BK 31
Page 32

ERROR CODE E2 IS INDICATED?
The electronic unit is too hot. Check the installation of the hob.
Make sure that there is sufficient ventilation.
See the section on “Protection against overheating”.
See the section on “Ventilation”.
ERROR CODE E8 IS INDICATED?
Fault on the left or right fan.
The suction opening is blocked or covered or the fan is defect.
Check the installation of the hob. Make sure that there is sufficient ventilation.
See the section on “Ventilation”.
ERROR CODE U400 IS INDICATED?
The hob has been incorrectly connected. The controls will switch off after 1 second and a
continuous signal will sound. Connect the appliance to the appropriate power supply.
AN ERROR CODE (ERXX OR EX) IS INDICATED?
The appliance has developed a technical defect. Please call Caple Service.
THE POT SIGN
APPEARS?
A cooking zone has been switched on and the hob is expecting a suitable pot or pan to be placed
on the cooking zone (pan recognition). Only when a pot has been placed on the cooking zone will
power be supplied.
THE POT SIGN
STILL APPEARS, EVEN THOUGH A POT OR PAN WAS
PLACED ON THE HOB?
The cookware is unsuitable for induction cooking or the pot or pan is too small.
IS THE COOKWARE YOU ARE USING MAKING NOISES?
This is due to technical reasons and perfectly normal; the induction hob and the pan are not
at risk.
DOES THE COOLING FAN STILL OPERATE AFTER IT HAS BEEN
SWITCHED OFF?
This is normal since the electronic unit is being cooled down.
IS THE HOB MAKING NOISES (CLICKING OR CRACKING SOUNDS)?
This is for technical reasons and cannot be avoided.
DOES THE HOB HAVE TEARS OR CRACKS?
There is a risk of electric shocks if the glass ceramic hob develops fractures, cracks, tears or
damage of any other kind. Immediately switch off the appliance. Disconnect the fuse immediately
and call Customer Service.
32
Instruction manual DD940BK
Please keep this instruction manual for future reference
Page 33

• Furniere, Kleber bzw. Kunststoffbeläge der angrenzenden
Möbel müssen temperaturbeständig sein (>75°C). Sind die
Furniere und Beläge nicht genügend temperaturbeständig,
können sie sich verformen.
• Der Berührungsschutz muss durch den Einbau gewährleistet
sein.
• Die Verwendung von Wandabschlussleisten aus Massivholz
auf der Arbeitsplatte hinter dem Kochfeld ist zulässig, sofern
die Mindestabstände gemäß den Einbauskizzen eingehalten
werden.
• Die Mindestabstände der Muldenausschnitte nach hinten
gemäß der Einbauskizze sind einzuhalten.
• Bei Einbau direkt neben einem Hochschrank ist ein Sicher-
heitsabstand von mindestens 50 mm einzuhalten. Die Seiten-
fläche des Hochschrankes muss mit wärmefestem Material
verkleidet werden. Aus arbeitstechnischen Gründen sollte der
Abstand jedoch mindestens 300 mm betragen.
• Die Verpackungsmaterialien (Plastikfolien, Styropor, Nägel,
etc.) müssen aus der Reichweite von Kindern gebracht wer-
den, da diese Teile mögliche Gefahrenquellen darstellen.
Kleinteile könnten verschluckt werden und von Folien geht
Erstickungsgefahr aus.
Belüftung
• Das Induktionskochfeld verfügt über einen Lüfter der automa-
tisch ein- und abschaltet. Wenn die Temperaturwerte der Elek-
tronik eine gewisse Schwelle überschreiten startet der Lüfter
mit kleiner Geschwindigkeit. Wird das Induktionskochfeld
intensiv benutzt schaltet der Lüfter auf eine höhere Geschwin-
digkeit. Ist die Elektronik ausreichend abgekühlt reduziert der
Lüfter seine Geschwindigkeit und schaltet wieder automatisch
ab.
• Der Abstand zwischen Induktionskochfeld und Küchenmöbel
bzw. Einbaugeräten muss so gewählt werden, dass eine aus-
reichende Be- und Entlüftung der Induktion gewährleistet ist.
• Schaltet sich häufig die Leistung einer Kochzone selbsttätig
herunter oder ab (siehe Kapitel Überhitzungsschutz) so ist ver-
mutlich die Kühlung nicht ausreichend. In diesem Fall ist es
empfehlenswert die Rückwand des Unterschranks im Bereich
des Arbeitsplattenausschnitts zu öffnen sowie die vordere Tra-
versleiste des Möbels über die gesamte Breite des Kochfeldes
zu entfernen damit ein besserer Luftaustausch gegeben ist.
• Eventuelle Traversleisten unterhalb der Arbeitsplatte müssen
mindestens im Bereich des Arbeitsplattenausschnittes entfernt
werden.
• Bei Einbau über einer Schublade ist darauf zu achten dass,
möglichst keine spitzen Gegenstände in der Schublade gela-
gert werden. Diese könnten sich an der Unterseite des Koch-
feldes verkanten und die Schublade blockieren.
• Befindet sich ein Zwischenboden unterhalb des Kochfeldes,
muss der Mindestabstand zur Kochfeldunterseite 20 mm
betragen, um eine ausreichende Belüftung des Kochfeldes zu
gewährleisten.
• Es ist dafür zu sorgen, dass wegen Brandgefahr keine feuer-
gefährlichen, leicht entzündbaren oder durch Wärme verform-
baren Gegenstände direkt neben oder unter dem Kochfeld
angeordnet bzw. gelegt werden.
Kochfelddichtung
Vor dem Einbau ist die beiliegende Kochfelddichtung lückenlos
einzulegen.
• Es muss verhindert werden, dass Flüssigkeiten zwischen
Kochfeldrand und Arbeitsplatte oder zwischen Arbeitsplatte
und Wand in evtl. darunter eingebaute Elektrogeräte eindrin-
gen können.
• Bei Einbau des Kochfeldes in eine unebene Arbeitsplatte, z.B.
mit einem keramischen oder ähnlichem Belag (Kacheln etc.)
ist die evtl. an dem Kochfeld befindliche Dichtung zu entfernen
und die Abdichtung der Kochfläche gegenüber der Arbeits-
platte durch plastische Dichtungsmaterialien (Kitt) vorzuneh-
men.
•
Das Kochfeld auf keinen Fall mit Silikon einkleben!
späterer zerstörungsfreier Ausbau des Kochfeldes ist dann
nicht mehr möglich.
Arbeitsplattenausschnitt
Der Ausschnitt in der Arbeitsplatte sollte möglichst exakt mit
einem guten, geraden Sägeblatt oder einer Oberfräse vorgenom-
men werden. Die Schnittflächen sollten danach versiegelt wer-
den, damit keine Feuchtigkeit eindringen kann.
Der Kochfeldausschnitt wird entsprechend den Abbildungen
angefertigt. Die Glaskeramik-Kochfläche muss unbedingt eben
und bündig aufliegen. Ein Verspannen kann zum Bruch der Glas-
platte führen. Die Dichtung der Kochfläche auf einwandfreien Sitz
und lückenlose Auflage prüfen.
SAFETY INSTRUCTIONS FOR KITCHEN UNIT FITTERS:
» Veneers, adhesives and plastic surfaces of surrounding furniture must be temperature resistant
(>75°C). If the veneers and surfaces are not sufficiently heat resistant they may
become deformed.
» Ensure that all live connections are safely insulated when installing the hob.
» Cover Strips between the wall and the worktop behind the hob which are made of solid wood
are permissible as long as minimum clearances in accordance with the installation diagrams
are maintained.
» Minimum clearances of the hob cut-out towards the rear are to be maintained in accordance
with the installation diagram.
» For installation directly next to a tall cupboard, a safety distance of at least 50 mm must be
ensured. The side surface of the tall cupboard should be fitted with heat resistant material.
Due to working requirements, however, the distance should be at least 300 mm.
» The packaging materials (plastic foil, polystyrene, nails etc.) must be kept out of reach of
children as these parts are potentially dangerous. Small parts can be swallowed and there is a
danger of plastic sheeting causing suffocation.
VENTILATION:
» The induction hob is equipped with a ventilator. The ventilator switches on or off automatically.
If the temperature produced by the electronic device exceeds a certain level, the ventilator
turns on in low speed. In case the induction hob is being used intensively, the ventilator
switches to a higher speed. If the electronics are cooled sufficiently, the ventilator reduces the
speed and switches off automatically.
» Clearance between the induction hob and kitchen furniture or built-in units must provide for
sufficient ventilation of the induction hob.
» If the power level of a cooking zone is automatically raised or lowered (see section on thermal
cut-off device) it is likely that the cooling system does not cool sufficiently. In this case we
recommend that the back wall of the bottom kitchen unit in the area of the worktop cut-out
be opened and that the front transverse strip of the unit be removed over the entire width of
the appliance in order to promote the circulation of air.
In order to better ventilate the
hob, an air gap of 5mm should
be left at the front.
Please keep this instruction manual for future reference
Instruction manual DD940BK 33
Page 34

D
Einbau
Wichtige Hinweise
• Eventuelle Traversleisten unterhalb der Arbeitsplatte müssen
mindestens im Bereich des Arbeitsplattenausschnittes entfernt
werden.
• Bei Einbau über einer Schublade ist darauf zu achten dass,
möglichst keine spitzen Gegenstände in der Schublade gela-
gert werden. Diese könnten sich an der Unterseite des Koch-
feldes verkanten und die Schublade blockieren.
• Befindet sich ein Zwischenboden unterhalb des Kochfeldes,
muss der Mindestabstand zur Kochfeldunterseite 20 mm
betragen, um eine ausreichende Belüftung des Kochfeldes zu
gewährleisten.
• Es ist dafür zu sorgen, dass wegen Brandgefahr keine feuer-
gefährlichen, leicht entzündbaren oder durch Wärme verform-
baren Gegenstände direkt neben oder unter dem Kochfeld
angeordnet bzw. gelegt werden.
Kochfelddichtung
Vor dem Einbau ist die beiliegende Kochfelddichtung lückenlos
einzulegen.
INSTALLATION
IMPORTANT INFORMATION:
» Remove any transverse strips underneath the worktop at least in the area of the
worktop cut-out.
» When installing the appliance on top of a drawer it is essential to ensure that no sharp items
are stored in the drawer since these could become bent on the underside of the hob and
prevent the drawer from being opened and closed.
» If a shelf has been inserted underneath the hob, there must be a clearance of at least 20 mm
to the underside of the hob in order to ensure that the hob is sufficiently ventilated.
» To avoid danger of fire, make sure that no combustible objects which could easily catch fire or
become deformed on exposure to heat are directly next to or under the surface.
SEALING OF THE HOB
Before installation, correctly insert the sealing unit
delivered with the hob.
» No liquids may penetrate between the edge of the hob and the worktop or between the hob
and the wall and come into contact with any electrical appliances.
» When installing a hob into an uneven worktop, e.g. with a ceramic or similar covering (tiles
etc.), the seal on the hob is to be removed and the seal between the hob and worktop made
with plastic sealing materials (putty).
» The hob must under no circumstances be sealed with silicone sealant. This would make it
impossible to remove the hob at a later date without damaging it.
34
Instruction manual DD940BK
Please keep this instruction manual for future reference
Page 35

D
WORK SURFACE CUT-OUT:
Cut out the worktop recess accurately with
a good, straight saw blade or recessing
machine. The cut edges should then be
sealed so that no moisture can penetrate.
The area is cut out as illustrated. The glass
ceramic hob must have a level and flush
bearing. Any distortion may lead to fracture
of the glass panel. Make sure that the
sealing of the hob is properly seated.
If fitting flush, an expansion gap of 2mm
should be left around the hob top (904 x 584mm).
FLUSH INSTALLATION
Glue the sealing tape onto the corner of the
supporting edge of the worktop so that no
silicone adhesive can be pressed under
the hob.
Place the hob into the worktop cut-out
without any adhesi ve and align it. Use shims
if necessary.
900
50
200
560
50
580
880
Fill the gap between the hob and the worktop
with heat-re sistant silicone adhesive.
IMPORTANT:
Silicone adhesive must not get under the
support surface. If this occurs it will not be
possible to remove the hob again at a later
stage. No liability will be assumed in the case
of failure to observe these instructions.
Please keep this instruction manual for future reference
Instruction manual DD940BK 35
Page 36

MAKING THE WORKTOP RECESS
The cut-out is produced in two work steps:
1. Making the opening for the base trough.
2. Making the recess for the support of the glass
ceramic hob. (For this recess at least a recessing
machine with guide strip is required.)
The outside dimension of the recess should always be about 6 mm longer than the outside
dimension of the glass ceramic hob so that a seal can be provided (see: “Gluing in the hob”).
Alternatively, instead of carrying out the second
stage, the support of the glass ceramic hob can be
cut out com pletely and then glued in again with
the height adjusted. It is also possible to install
strips of wood or stone as well as steel angles.
1. Make the opening for the hob.
2. Fix the strip of wood or stone or the
supporting angle onto the worktop.
NOTE:
In order to ensure that it is exactly flush with the stone worktop, the recess may have to be
modified accordingly.
36
Instruction manual DD940BK
Please keep this instruction manual for future reference
Page 37

SILICONING THE HOB
In order to avoid damage to the worktop and the hob, it is necessary to silicone the system
worktop/hob with a permanent seal so that it is water-proof.
» The parts to be siliconed together must be dry and free from grease.
» To silicone the hob, a water-proof wash primer and the heat and moisture-resistant silicone
adhesive (150 °C) is required. It is absolutely necessary to observe the remarks con cerning
these two products.
» There you will also find a calculation formula for the hardening of the silicone adhesive. Do not
operate the cooking zone before the hardening process is over, otherwise the silicone adhesive
can be damaged.
» Only silicone the hob on its outer edges.
» With stone worktops installation is to be flush, with he at-sensitive worktops (e.g. wood) the
hob must project about 1 mm.
» Never place the hob with the glass ceramic surface un protected on the worktop or the floor.
Dirt (metal chips, small pieces of stone etc.) can cause scratches in the surface of the glass
ceramic hob. Please always place it on cardboard or a wool rug.
PROCEDURE:
1. Glue the sealing tape onto the corner of the suppor ting edge of the worktop so that no
silicone adhesive can be pressed under the hob.
IMPORTANT:
Only use the sealing tape that is supplied with the hob. Should you use any other sealing there is
no guarantee that the hob will not sink down
after installation.
2. Insert the hob without adhesive into the worktop opening and check the height. If necessary,
place the shims on the support edge for the hob at equal distan ces to adjust the height.
3. Remove the hob again.
4. Use the wash primer to pre-treat the outer edges of the hob and the side cut surfaces of the
worktop where they have been glued.
Apply a thick coat of the primer with a brush on highly absorbent surfaces (e.g. chipboard).
With less absor bent surfaces (e.g. marble or granite) it is sufficient to apply the primer with a
felt cloth.
IMPORTANT:
After application, the primer must be left for about 30 minutes.
Please keep this instruction manual for future reference
Instruction manual DD940BK 37
Page 38

1. Now insert the hob and align.
2. Finally, fill the gap between the hob and the worktop with silicone adhesive .
3. Smooth the joint with a spatula and water containing a little washing-up liquid.
ATTENTION:
Sealing tape and silicone adhesive should not
be pressed anywhere under the supporting surface,
otherwise it will no longer be possible to remove the
hob at a later stage. No liability will be assumed in the
case of failure to observe these instructions.
38
Instruction manual DD940BK
Please keep this instruction manual for future reference
Page 39

ELECTRICAL CONNECTION
» The electrical connection must be carried out by a qualified electrician who is authorised to
carry out such work.
» Statutory regulations and the connection specifications issued by the local power supply
company must be strictly observed.
» When connecting the appliance it must be ensured that there is a device which makes it
possible to disconnect it from the mains at all poles with a contact opening width of at
least 3mm. Line-protecting switches, fuses or contactors are suitable cut-out devices. When
connecting and repairing the appliance, disconnect it from the electricity supply with one of
these devices.
» The earth wire must be sufficiently long so that if the strain relief fails, the live wires of the
connecting cable are subjected to tension before the earth wire.
» Any unnecessary cable must be removed from the installation area beneath
the appliance.
» Make sure that the local mains voltage is the same as the voltage on the
rating label.
» Full protection against accidental contact must be ensured on installation.
ATTENTION:
Incorrect connection may result in the power electronics unit being destroyed.
Power supply -Mains voltage: 380-415V 3N~, 50/60Hz
Component rated voltage: 220-240V
Fuse rating: 32amp
Please keep this instruction manual for future reference
Instruction manual DD940BK 39
Page 40

MAINS CABLE
GB
Mains cable available in the factory
• The hob has been fitted with a temperature-resistant
connection cable in the factory.
• Connection to the mains is carried out in accordance with the
circuit diagram, unless the connection cable is already fitted
with a plug.
• If the mains cable of this appliance is damaged it will need to
be replaced with a special connection cable. In order to avoid
any risks, this must be carried out by the manufacturer or his
Customer Service.
Electrical connections
Montageanleitung
D
Technical Data
Inbetriebnahme
Nach dem Einbau des Feldes und nach dem Anlegen der Versor-
gungsspannung (Netzanschluss) erfolgt zuerst ein Selbst-Test
der Steuerung und es wird eine Serviceinformation für den Kun-
dendienst angezeigt.
Wichtig: Zum Netzanschluss dürfen keine Gegenstände auf den
Touch-Control Sensortasten vorhanden sein!
» The hob has been fitted with a temperature-resistant connection cable.
» Connection to the mains is carried out in accordance with the circuit diagram, unless the
connection cable is already fitted with a plug.
» If the mains cable of this appliance is damaged it will need to be replaced with a special
connection cable. In order to avoid any risks, this must be carried out by Caple Service or
an approved engineer.
ELECTRICAL CONNECTIONS
black
brown
blue
white
grey
green-yellow
green-yellow
grey
black
brown
blue
white
TECHNICAL DATA
Hob Dimensions
Height/ Width/ Depth. . . . . . . . mm 200 x 900 x 580
Cooking Zones
All . . . . . . . . . . . . . . . . . cm / kW
Fan . . . . . . . . . . . . . . . . . . . kW
Hob,
total . . . . . . . . . kW
19x22/ 2,2 (3,7)*
0,3
7,7
* Power when the power boost function is activated
green-yellow
green-yellow
40
Instruction manual DD940BK
Please keep this instruction manual for future reference
Page 41

PUTTING THE APPLIANCE INTO OPERATION
D
Once the hob has been installed and the power supply has been provided (mains connected) an
automatic test of the controls will be carried out and service information will be indicated.
IMPORTANT:
No items may be on the touch control sensor keys when the appliance is being connected.
Briefly wipe over the surface of the hob with a sponge and soapy water and then dry with a
clean cloth.
Please keep this instruction manual for future reference
Instruction manual DD940BK 41
Page 42

INSTALLATION OF THE PLINTH MOTOR
The motor supplied with your downdraft induction hob is designed to be installed below the
kitchen cabinets behind the plinth. It can be used to either duct to the outside via an external wall
or recirculate the air back into the room.
MOTOR ELECTRICAL CONNECTION
Ensure the hob is not connected to the mains while connecting the motor. The motor unit does not
require a separate mains supply, you simply plug in the 7pin cable supplied into the induction hob
to power the unit.
The motor does not need to be fixed into position with screws or other fixings. To avoid excessive
noise we recommend positioning the motor onto a noise and vibration reducing base.
The direction of airflow is as shown below:
CONNECTING THE DUCTING TO THE MOTOR
The below components are supplied in the box to allow you to connect the downdraft hob to your
plinth motor:
42
Instruction manual DD940BK
Please keep this instruction manual for future reference
Page 43

DIMENSIONS
The ducting must be connected to the right hand side of the downdraft in the centre of the hob:
You can then use the supplied ducting sections to connect to the motor in the most suitable
location. There are various options including going straight down in the below cabinet or
extending the duct channel to the right into an adjacent 300mm cabinet, which can house the
round 150mm tube. The latter method allows the most use in the cabinet below the hob as the
main part of the ducting is housed in a 300mm wide cabinet to the right of the product.
1000mm
If you choose to run the ducting inside the cabinet directly below the hob, you can still achieve
the use of full depth drawers and full width drawer fronts by installing a divider inside the main
carcase as pictured below (the drawer boxes must be reduced in width to allow for the divider):
Full depth drawer
700 / 800 / 1000
Please keep this instruction manual for future reference
Instruction manual DD940BK 43
300mm
Page 44

The divider must allow a 200mm wide space for the ducting to be housed in, the remaining room
can then be used for the drawers. For example with a 1000mm wide base unit, you would install
a 200mm divider, which would allow for 800mm wide drawer boxes. These drawers would still
use full width 1000mm wide drawer fronts, therefore when closed you have the appearance of a
standard drawer set.
44
Instruction manual DD940BK
Please keep this instruction manual for future reference
Page 45

NOTE:
The above installation would allow for two full depth drawers.
DUCTING TO THE OUTSIDE
When ducting to the outside, 150mm solid rigid (220mm x 90mm flat channel) must be used and
the length should be kept to a minimum. We recommend no more than 3 meters with two 90
degree bends. If the flat channel duct is completely straight up to 5 meters is acceptable. Any more
than this will begin to effect the efficiency of the motor.
Avoid unnecessary bends, if bends are required use high efficiency corners (for example the Caple
950GL 150mm) to reduce the impact on performance.
RECIRCULATION MODE
The product can be recirculated by two methods:
» Plasma filtration
» Charcoal filter only
Please keep this instruction manual for future reference
Instruction manual DD940BK 45
Page 46

PLASMA FILTRATION
With this product, you have the option to use our new Plasma technology. This allows you to
recirculate the air with a very efficient odour removal process. The optional plasma filter (code
PLASMABOX) and charcoal filter (code: CAP57CF) are cleverly hidden away in the plinth below
the cabinets, so there is no need to duct the product to the outside wall. You can also install
all the pipework into a 300mm wide carcase space allowing for a lot more use of the kitchen
cupboard when compared to a conventional downdraft. The Plasma technology also extends the
life of the charcoal filter from around 6 months to 5 years, 1 filter will last the equivalent of 10
without the Plasmabox.
For more information on the Plasma technology please visit our website www.caple.co.uk to view
our informative video, this can also be found on our YouTube channel CapleTV.
The plasma box simply connects to the motor outlet and is powered by the electrical cable
supplied with the hob. When using the plasma filter, a charcoal filter (CAP57CF) must also be
installed. This simply slots into the opposite end of the plasma box.
580mm
900mm
205mm
Charcoal Filter
55mm
830mm
Plasmabox
390mm
30mm
335mm
1295mm
465mm
The Plasmafilter required on ambient temperature of 0˚c - 40˚C.
46
Instruction manual DD940BK
Please keep this instruction manual for future reference
300mm
95mm
370mm
Page 47

CHARCOAL FILTER ONLY
When using the charcoal filter (CAP57CF) only to recirculate the air, this connects directly to the
motor in the same location as the plasmabox pictured above. The charcoal filter must be replaced
at least every 6 months to ensure it remains effective. Replacement filters can be purchased from
www.caple.co.uk or via our national sales office tel: 0117 938 1900.
GREASE FILTER
The grease filter is located in the downdraft hob top (refer to earlier section in the manual),
this must be cleaned at least every two months. We recommend cleaning it in warm water with
washing up liquid, ensuring it is thoroughly dried before placing back into the downdraft. The
grease filter can also be cleaned in a dishwasher, if this method is used it should be washed on its
own to prevent food becoming trapped in the mesh. Please note that some dishwasher detergents
can cause the grease filter to discolour, this is normal and is not a fault.
Please keep this instruction manual for future reference
Instruction manual DD940BK 47
Page 48

Caple Service
Fourth Way
Avonmouth
Bristol
BS11 8DW
T: 0117 938 1900
E: service@caple.co.uk
www.caple.co.uk
 Loading...