

Page 1

S-CM3
ISTRUZIONI DI USO E DI MANUTENZIONE
USE AND ASSEMBLY INSTRUCTION
Romantica
Page 2

Page 3
1
I
Rel. A - 2008
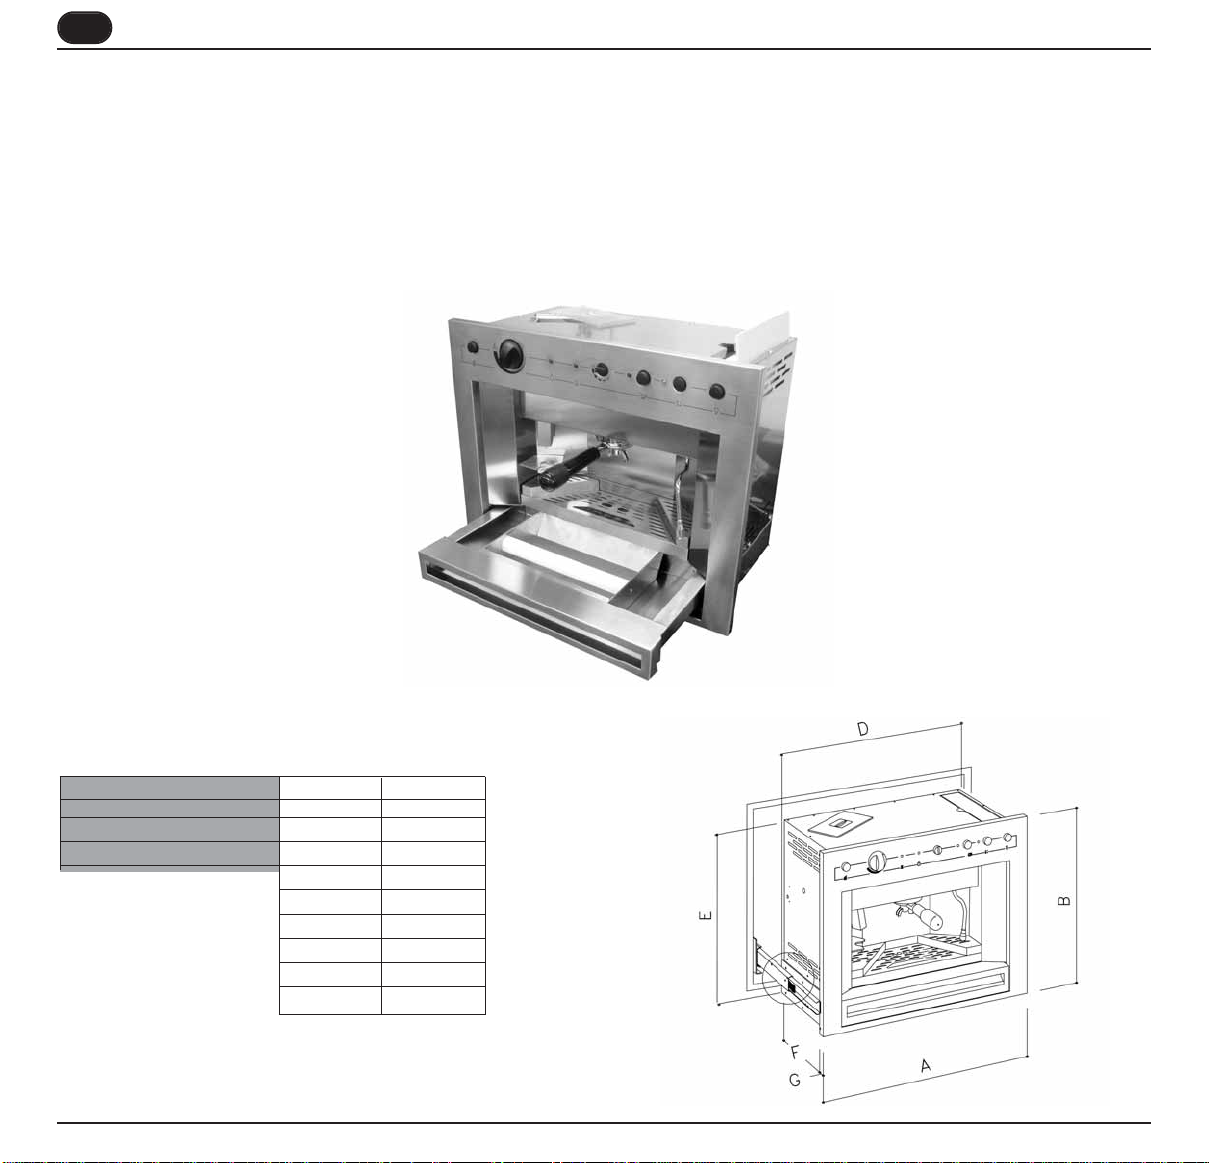
CARATTERISTICHE TECNICHE
PESO NETTO 52 Kg 114 Lb
PESO LORDO 63 Kg 139 Lb
POT. TERMICA 1400 W 1400 W
DIMENSIONI A 596 mm
A
23,47 inc
B 462 mm
B
18,19 inc
C 442 mm
C
17,4 inc
D 562 mm
D
22,13 inc
E 445 mm
E
17,52 inc
F 546,5 mmF21,52inc
G 20 mm
E
0,08inc
Complimenti,
con l'acquisto del modello S-CM3 “Romantica” lei ha fatto un'ottima scelta.
Siete pregati di leggere attentamente le informazioni contenute nel presente manuale prima di mettere in funzione la macchina da caffè.
Qui troverete importanti indicazioni relative alla vostra sicurezza, all’uso, alla cura ed alla manutenzione dell’apparecchio, in modo da ricavarne soddisfazione a lungo. Se mai dovesse verificarsi un guasto, consultare innanzitutto il capitolo “Cosa fare in caso di mancato funzionamento?”. Spesso è
possibile riparare piccoli guasti in modo autonomo evitando così i costi che si devono normalmente sostenere per le riparazioni.
Questa macchina è stata costruita seguendo le direttive CEE 89/392, CEE 89/336, CEE 73/23, CEE 89/109 e successive modifiche.
La qualità e l’affidabilità del prodotto è garantita dalla progettazione e costruzione secondo il SISTEMA QUALITA’ AZIENDALE UNI EN ISO 9001: 2000
Cordialmente.
Sirius
Romantica
Page 4

2
I
Romantica
Indice
CARATTERISTICHE TECNICHE............................. Pag. 1
1 DESCRIZIONE............................................ pag. 3
1.1 Note generali alla consegna........................ pag. 4
2 PRESCRIZIONI DI SICUREZZA................. pag. 5
3 TRASPORTO E MOVIMENTAZIONE......... pag. 7
3.1 Identificazione Macchina.............................. pag. 7
3.2 Trasporto...................................................... pag. 7
3.3 Movimentzazione......................................... pag. 7
4 OPERAZIONI PRELIMINARI...................... pag. 8
4.1 Riempimento dell’apparecchio .................... pag. 8
4.2 Predisposizione macchina versione
ad allaccio diretto..........................................pag. 8
5 ISTRUZIONI DI MONTAGGIO
PER PERSONALE SPECIALIZZATO......... pag. 10
5.1 Istruzioni di montaggio per l’incasso............ pag. 10
5.2 Dimensioni di incasso S-CM3.......................pag. 10
5.3 Incasso..........................................................pag. 10
5.4 Numero delle piaste distanziatrice................pag. 11
5.5 Smontaggio ..................................................pag. 11
5.6 Dati tecnici.....................................................pag. 12
6 COME PREPARARE LA MACCHINA
E MESSA APUNTO..................................... pag. 13
6.1 Predisposizione al funzionamento ............... pag. 13
6.2 Illuminazione..................................................pag. 13
6.3 Predisposizione accessori.............................pag. 13
7 EROGAZIONI............................................. pag. 14
7.1 Preparazione di uno o due caffè espresso..pag. 14
7.2 Erogazione Vapore..................... ............... pag. 14
7.3 Regolazione grado di macinatura
e quantità caffè .......................................... pag. 15
8 PULIZIA E MANUTENZIONE...................... pag. 16
8.1 Pulizia della lancia........................................ pag. 16
8.2 Pulizia del filtro e del portafiltro.................... pag. 16
8.3 Pulizia della superficie
esterna della macchina................................ pag. 16
8.4 Pulizia vaschetta porta liquidi....................... pag. 16
8.5 Pulizia serbatoio acqua................................ pag. 16
8.6 Pulizia gruppo erogazione ,
doccia e guarnizione.................................... pag. 16
8.7 Manutenzione............................................... pag. 16
9 SE QUALCOSA NON FUNZIONA.............. pag. 16
10 SCHEMA ELETTRICO............................... pag. 16
Page 5

Fig. 1
LEGENDA
A Tasto macinatura caffè
B Manopola regolazione vapore
C Contenitore caffè in grani
D Spia accensione resistenza
E Spia mancanza acqua in vaschetta
F Manopola regolazione quantità caffè
G Spia erogazione caffè
H Tasto erogazione caffè
I Spia accenzione macchina
L Contenitore tanica
M Interruttore generale ON/OFF
N Interruttore ON/OFF luci
O Gruppo erogatore
P Lancia vapore
Q Vaschetta Raccogli liquidi
1.
DESCRIZIONE
3
I
R Vaschetta raccogli fondif
S Battifondi
T Cassetto porta accessori
U Porta filtro
V Supporto macinatura caffè
Z Erogatore caffè macinato
Y Regolatore grado caffè
K Regolatore tempo di macinatura
A E HD
U
F
K
Y
V
M
L
P
Q
Z
T
R
B C
O
G
I
N
S
Romantica
Page 6

4
I
1.1
NOTE GENERALI ALLA
CONSEGNA
Fig. 2
La macchina e le sue parti vengono consegnate in appositi imballi. In ogni caso al ricevimento controllare che:
- L’imballo sia integro e la macchina non presenti difettosità esterne.
- L’imballo contenga:
a) Macchina da caffè
b) Scatola accessori
1 Becco erogazione 5 Filtro Singolo
2 Porta Filtro 6 Pressa Caffè
3 Molla Filtro 7 Dosatore
4 Filtro doppio
8 Assieme guide di sostegno 12 Supporto aggancio macchina
9 Spessori guide 13 Spazzolino
10 Protezione ignifuga 14 Utensile togli filtro
11 Chiave a brugola 15 Becco erogazione 1 caffè
7
1
2
3
4
5
11
12
13
8
9
6
10
14
Romantica
Page 7
5
I
Le parti dell’imballaggio possono
risultare pericolose per i bambini. Vi
è pericolo di soffocamento! Tenga le
parti dell’imballaggio fuori dalla portata dei bambini.
☞
Dopo aver tolto l’imballaggio assicurarsi dell’integrità dell’apparecchio.
In caso di dubbio non utilizzare l’apparecchio e rivolgersi a personale
professionalmente qualificato.
☞
PERICOLO DI INQUINAMENTO
Prima di collegare l’apparecchio
accertarsi che i dati di targa siano
rispondenti a quelli della rete di distribuzione elettrica. La targa è situata
nella parte interna della macchina .
L’installazione deve essere effettuata
in ottemperanza alle norme vigenti,
secondo le istruzioni del costruttore e
da personale qualificato.
Il costruttore non può essere considerato responsabile per eventuali
danni causati dalla mancanza di
☞
In particolare dovrà anche accertare
che la sezione dei cavi dell’impianto
sia idonea alla potenza assorbita dall’apparecchio.
È vietato l’uso di adattatori, prese
multiple e prolunghe. Qualora il loro
uso si rendesse indispensabile è
necessario chiamare un elettricista
munito di patentino.
☞
La macchina deve essere installata in
accordo alle normative sanitarie locali vigenti per gli impianti idraulici.
Quindi per l’impianto idraulico rivolgersi ad un tecnico autorizzato.
☞
Questo apparecchio dovrà essere
destinato solo all’uso descritto in
questo manuale. Il costruttore non
può essere considerato responsabile
per eventuali danni causati da usi
impropri, erronei ed irragionevoli.
☞
Fig. 3
Fig. 4
2.
PRESCRIZIONI DI SICUREZZA
messa a terra dell’impianto. Per la
sicurezza elettrica di questo apparecchio è obbligatorio predisporre l’impianto di messa a terra, rivolgendosi
ad un elettricista munito di patentino,
che dovrà verificare che la portata
elettrica dell’impianto sia adeguata
alla potenza massima dell’apparecchio indicata in targa.
L’uso di un qualsiasi apparecchio
elettrico comporta l’osservanza di
alcune regole fondamentali.
In particolare:
• non toccare l’apparecchio con
mani o piedi bagnati;
• non usare l’apparecchio a piedi
nudi;
• non usare, prolunghe in locali adibiti a bagno o doccia;
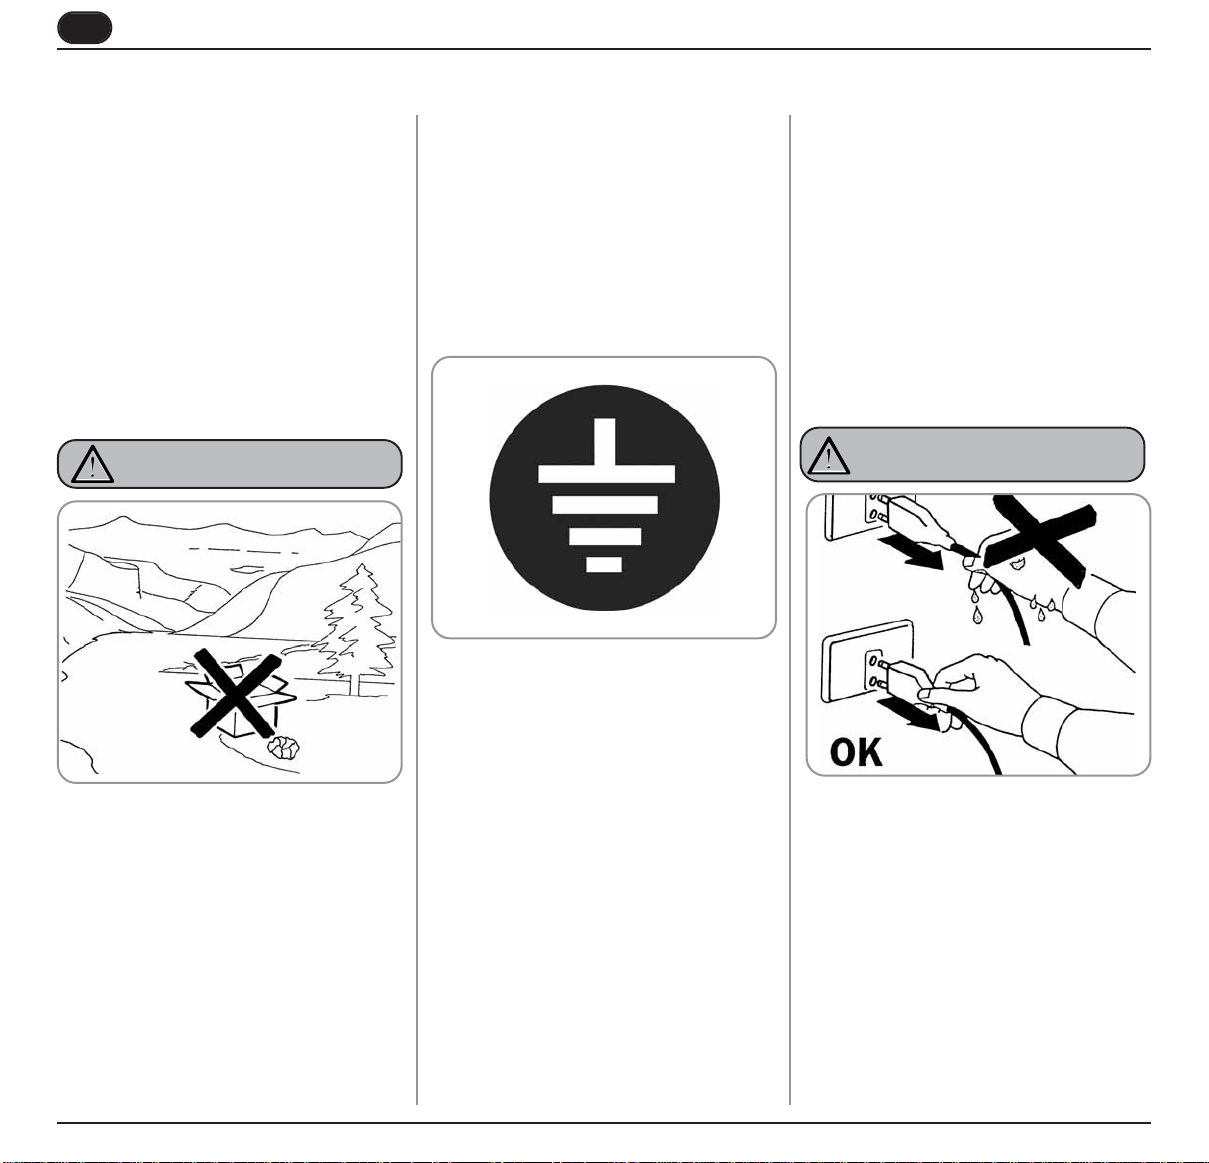
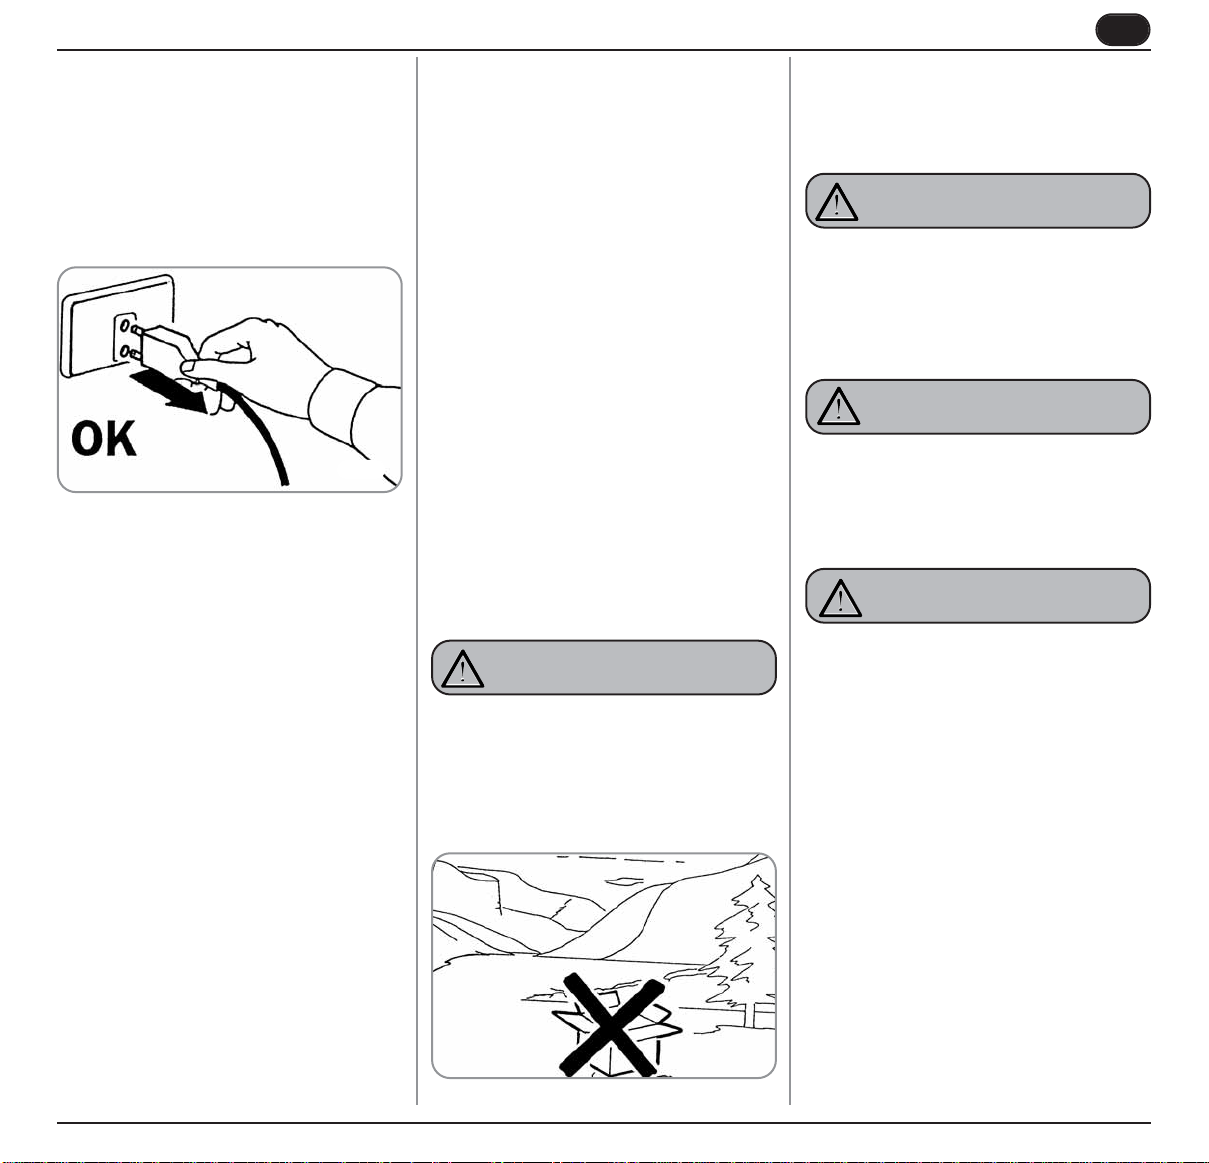
• non tirare il cavo di alimentazione,
per scollegare l’apparecchio dalla
rete di alimentazione;
• non lasciare esposto l’apparecchio ad agenti atmosferici (pioggia, sole, ecc.);
• non permettere che l’apparecchio
sia usato da bambini, o da personale non autorizzato e che non
☞
ATTENZIONE
PERICOLO DI SCOSSA ELETTRICA
Fig. 5
Romantica
Page 8
6
I
ATTENZIONE
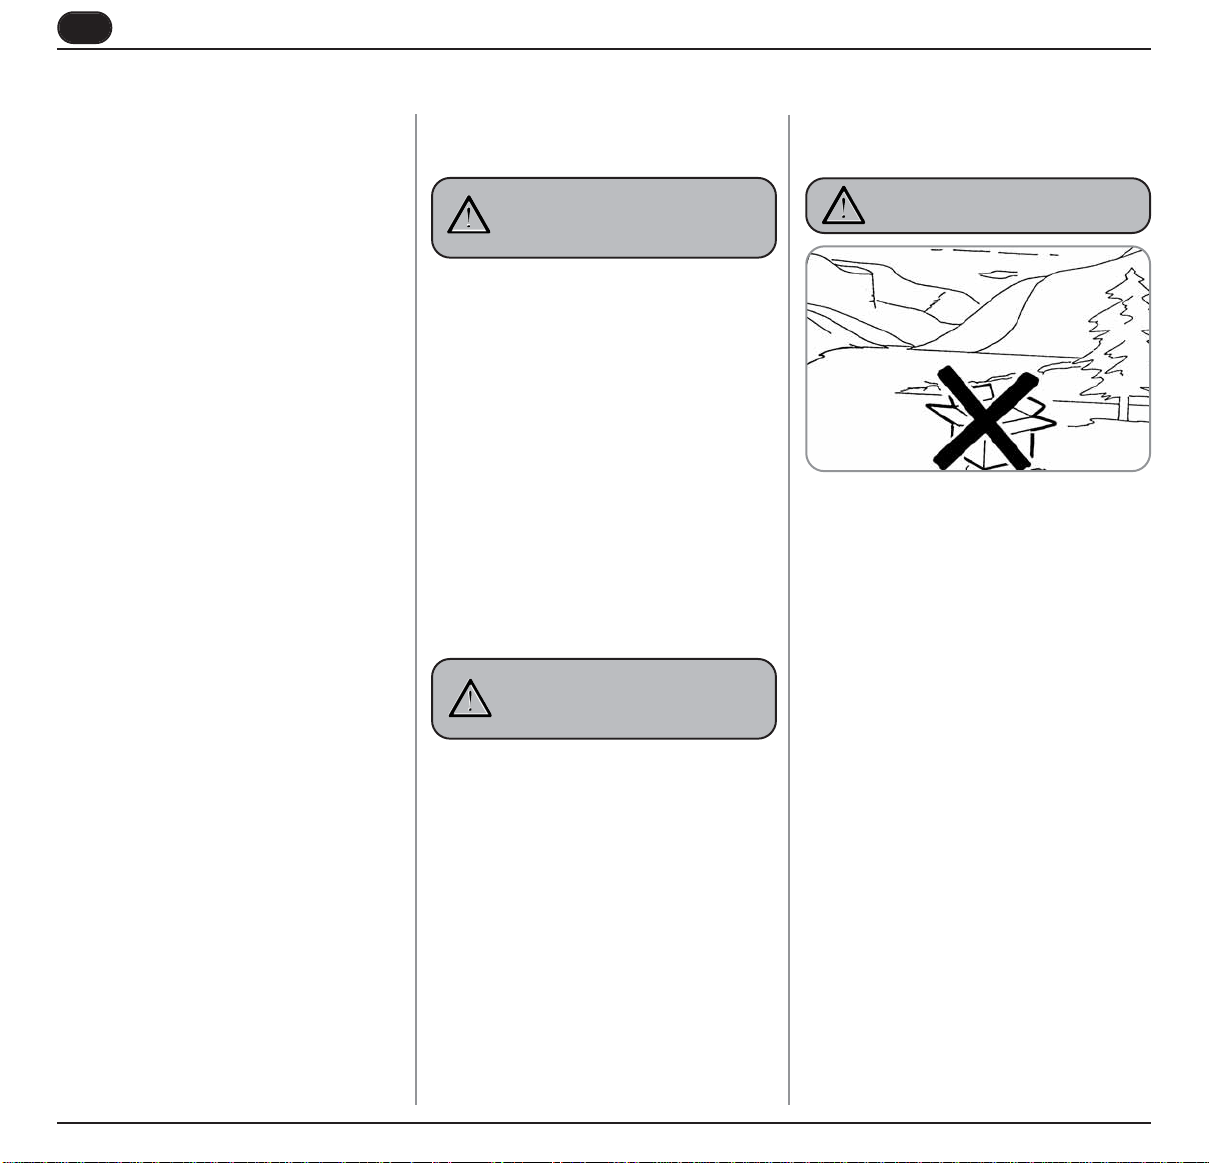
PERICOLO DI INQUINAMENTO
Non disperdere la macchina nell’ambiente: per lo smaltimento rivolgersi
ad un centro autorizzato o contattare
il costruttore che darà indicazioni in
merito.
☞
Per favorire l’areazione della maccchina realizzare nella parte posteriore
della sede un apertura di almeno
300x100mm.
☞
Una volta iniziato il lavaggio della
macchina, non interromperlo, possono rimanere dei residui di detergente
all’interno del gruppo erogazione.
☞
ATTENZIONE
PERICOLO DI INTOSSICAZIONE
Durante l’uso della lancia del vapore,
prestare molta attenzione e non mettere le mani sotto di esso e non toccarla subito dopo l’uso.
☞
ATTENZIONE
PERICOLO DI USTIONE
L’operatore nel momento dell’aggiunta del caffè, non deve mettere le mani
all’interno del contenitore.
☞
ATTENZIONE
PERICOLO DI CESOIAMENTO
Fig. 7
Il tecnico autorizzato deve, prima di
effettuare qualsiasi operazione di
manutenzione, staccare la spina e
spegnere l’interruttore della macchina.
☞
Per le operazioni di pulizia portare la
macchina a stato energetico “O”,
cioè “INTERRUTTORE MACCHINA
SPENTO E SPINA STACCATA” ed
attenersi esclusivamente a quanto
previsto nel presente libretto.
☞
In caso di guasto o di cattivo funzionamento dell’apparecchio, spegnerlo. È severamente vietato intervenire.
Rivolgersi esclusivamente a personale professionalmente qualificato.
L’eventuale riparazione dei prodotti
dovrà essere effettuata solamente
dalla casa costruttrice o da centro di
assistenza autorizzato utilizzando
esclusivamente ricambi originali.
Il mancato rispetto di quanto sopra
può compromettere la sicurezza dell’apparecchio.
☞
All’installazione, l’elettricista munito
di patentino dovrà prevedere un
interruttore onnipolare come previsto
dalle normative di sicurezza vigenti
☞
Per evitare surriscaldamenti pericolosi si raccomanda di svolgere per
tutta la sua lunghezza il cavo di alimentazione.
☞
Non ostruire le griglie di aspirazione
e/o di dissipazione
☞
Il cavo di alimentazione di questo
apparecchio non deve essere sostituito dall’utente. In caso di danneggiamento, spegnere l’apparecchio e
per la sua sostituzione rivolgersi
esclusivamente a personale professionalmente qualificato.
☞
Allorché si decida di non utilizzare
più un apparecchio di questo tipo si
raccomanda di renderlo inoperante
dopo aver staccato la spina, tagliare
il cavo di alimentazione.
☞
Fig. 6
abbia letto e ben compreso questo
manuale.
con distanza di apertura dei contratti
uguale o superiore a 3 mm.
Romantica
Page 9
7
I
Per qualsiasi comunicazione con il costruttore
Sirius, citare sempre il numero di matricola
della macchina.
La macchina viene imballata con appositi cartoni e basamenti in legno.
Prima di procedere a qualsiasi operazione di
trasporto o movimentazione, l’operatore deve:
• indossare guanti e scarpe antinfortunistici
ed una tuta con elastici alle estremità.
Il trasporto del pallett deve essere effettuato
con un mezzo di sollevamento adeguato
(tipo muletto).
ATTENZIONE
PERICOLO DI URTO
O SCHIACCIAMENTO
L’operatore durante tutta la movimentazione, deve avere l’attenzione che non ci siano
persone, cose od oggetti nell’area di operazione.
Sollevare lentamente il pallett a circa 30 cm
da terra e raggiungere la zona di carico.
Dopo aver verificato che non ci siano ostacoli, cose o persone, procedere al carico.
Una volta arrivati a destinazione, sempre
con un mezzo di sollevamento adeguato
(es. muletto), dopo essersi assicurati che
non ci siano cose o persone nell’area di
scarico, portare il pallett a terra e movimentarlo a circa 30 cm da terra, fino all’area di
immagazzinamento.
Prima della seguente operazione verificare
che il carico sia a posto e che con il taglio
delle centine non cada.
L’operatore con guanti e scarpe antinfortunistiche, deve procedere al taglio delle centine e allo stoccaggio del prodotto, in questa operazione consultare le caratteristiche
tecniche del prodotto per vedere il peso
della macchina da immagazzinare e potersi
regolare di conseguenza.
ATTENZIONE
PERICOLO DI INQUINAMENTO
Fig. 8
3.
TRASPORTO E MOVIMENTAZIONE
3.1
IDENTIFICAZIONE
MACCHINA
3.2
TRASPORTO
3.3
MOVIMENTAZIONE
ATTENZIONE
PERICOLO DI URTO
O SCHIACCIAMENTO
Romantica
Page 10

I
8
ATTENZIONE
PERICOLO DI INQUINAMENTO
Non disperdere l’imballo nell’ambiente.
Prima di procedere a qualsiasi operazione
di installazione e regolazione, devono essere lette e ben comprese le PRESCRIZIONI DI
SICUREZZA di questo manuale.
L'azienda non risponde di alcun danno a
cose o a persone derivante da una mancata
osservanza delle prescrizioni di sicurezza,
installazione e manutenzione, di questo
manuale.
ATTENZIONE
PERICOLO DI CORTOCIRCUITO
Prima di collegare la macchina alla rete elettrica, verificare che ci sia corrispondenza
tra il voltaggio per cui essa è stata predisposta e quello dell'impianto.
Spengere la macchina prima di riempire o
estrarre il serbatoio.
• estrarre parzialmente la macchina dalla sua
sede.
• Estrarre l’apparecchio molto lentamente evitando accuratamente che al di sotto dello
stesso vengano a trovarsi persone o cose in
modo da garantire la massima sicurezza.
• Tirare in alto il serbatoio dell’acqua, specialmente la prima volta, lavare con acqua e
sapone il serbatoio stesso e risciacquare
accuratamente avendo cura di rimuovere
ogni residuo di sapone.
• Riempire di acqua il serbatoio (non vale per
la versione con allacciamento idrico).
• Analogamente aprire anche il contenitore
del caffè in grani e versare il caffè senza
raggiungere la massima capienza quindi
ripristinare il tappo del contenitore caffè.
Fig. 9
4.
OPERAZIONI PRELIMINARI
4.1
RIEMPIMENTO
DELL’APPARECCHIO
4.2
PREDISPOSIZIONE
MACCHINA VERSIONE
AD ALLACCIO DIRETTO
Fig. 12
La durezza dell’acqua deve essere inferiore
ai 4° - 6° fr (gradi francesi).
Il contenuto di cloro non deve superare i
100 mg per litro.
Altrimenti verranno a decadere le condizioni di Garanzia della macchina.
ATTENZIONE
ATTENZIONE
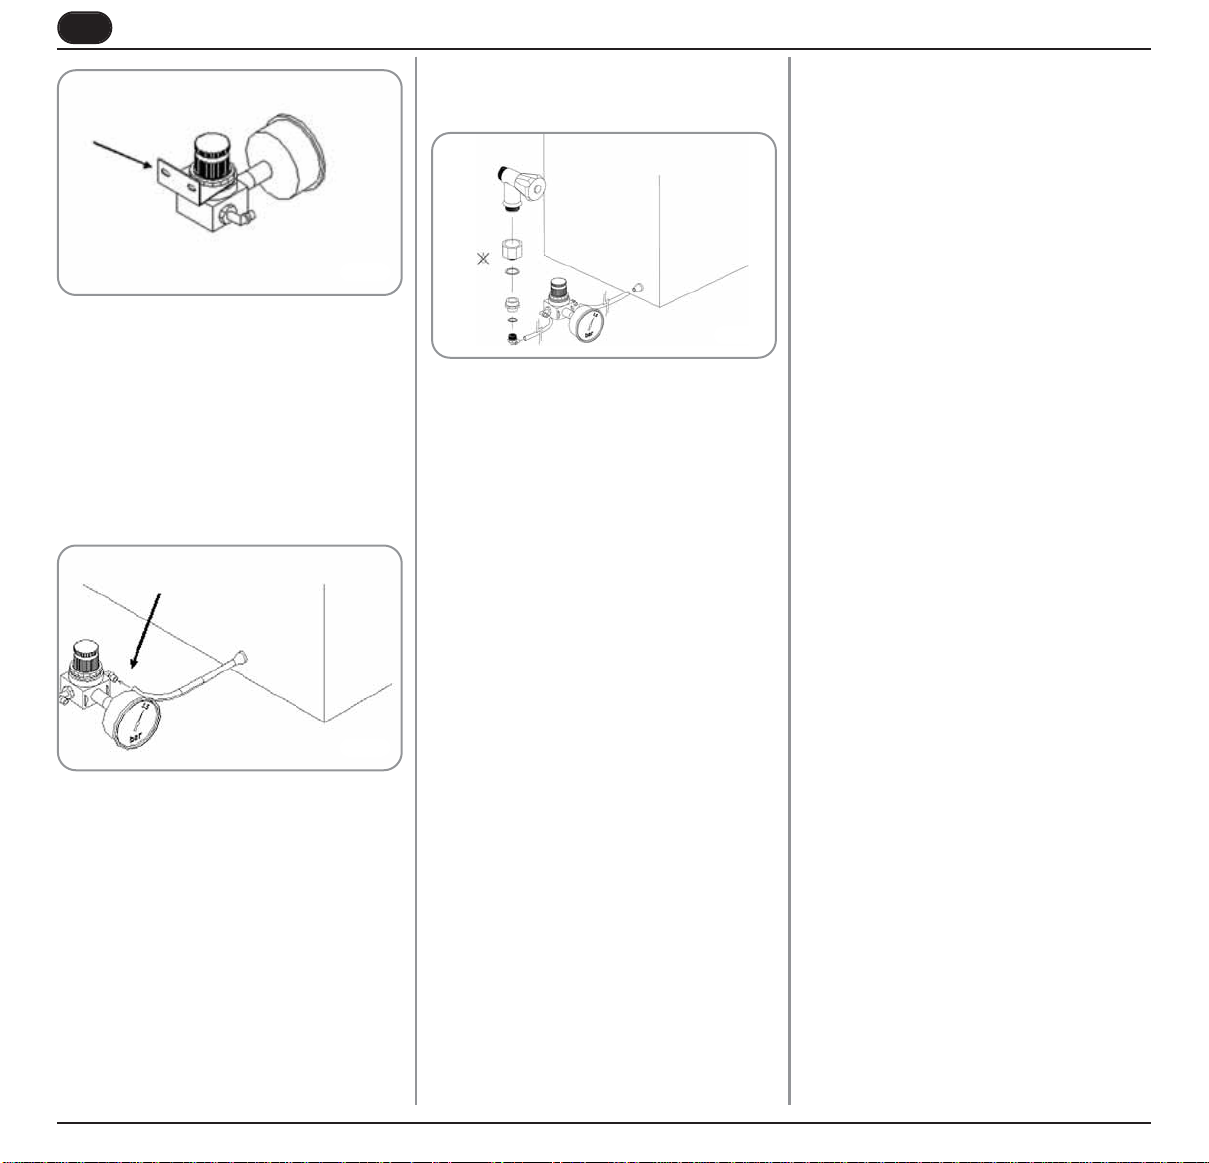
• Estrarre tutti i componenti dalla scatola
accessori (tubi in teflon Ø 4mm, 1 riduttore
di pressione, 3 raccordi rapidi, 1 manometro, 1 staffa di fissaggio, 2 raccordi filettati e
due guarnizioni). Montare il manometro e 2
raccordi al riduttore di pressione come indicato nel disegno sottostante.
• Installare, tramite l'apposita staffa, il riduttore di pressione precedentemente assemblato nel punto più vicino alla rete idrica (vedi
disegno sottostante).
Fig. 10
Fig. 11
Romantica
Page 11
9
Fig. 13
Fig. 15
NOTA: La pressione massima in uscita dal
riduttore NON DEVE superare 1,5 Bar.
• Collegare un estremità del tubo in teflon
diam. 4mm alla macchina, inserendolo con
forza nella connessione rapida. Per assicurarsi che la connessione sia efficace tirare il
tubo verso l’esterno (vedi disegno).
• Tagliare l’altra estremità del tubo assicurandosi prima che la lunghezza sia sufficiente
per effettuare il collegamento al riduttore di
pressione.
• Dopo aver individuato le frecce che indicano
la direzione dell’acqua nel riduttore di pressione, collegare il tubo all’uscita dell’acqua.
Collegare un estremità del restante tubo
nell’altro raccordo (ingresso acqua) del
riduttore di pressione. Dopo essersi assicurati di aver chiuso il rubinetto generale dell’acqua, procedere all'installazione dei raccordi e relative guarnizioni alla rete.
Collegare l’estremità libera del tubo al raccordo rapido precedentemente montato.
Fig. 14
I
Romantica
Page 12
10
I
Per conseguenze o danni derivati da una cattiva installazione, carente e/o assente manutenzione e utilizzo improprio dell’apparecchio, la
ditta fornitrice non risponderà di alcuna garanzia o indennizzi.
• Devono essere osservate le norme di legge
e le disposizioni di collegamento dell’azienda elettrica locale.
• Prima del collegamento elettrico verificare
che la portata elettrica dell’impianto sia adeguata alla potenza massima dell’apparecchio indicata nella targa dati tecnici.
• All’atto del collegamento e delle riparazioni
è necessario disconnettere l’apparecchio
dalla rete elettrica.
• Quando l’apparecchio è montato non deve
essere possibile toccare alcun cavo isolato
che permetta il funzionamento dell’apparecchio.
• L’apparecchio è predisposto per essere collegato unicamente ad una presa montata
nel pieno rispetto delle regole vigenti.
L’installazione di una presa di corrente o la
sostituzione del cavo di collegamento possono essere effettuate unicamente da un
elettricista, nel pieno rispetto della norma
vigente.
• Se, dopo il collegamento, la presa non è più
raggiungibile, per rispettare le norme di
sicurezza vigenti, deve essere disponibile
un separatore a più poli con una distanza di
contatto di almeno 3 mm.
• Rimuovere la macchina da caffè dall’imballo
e assicurarsi che non sia danneggiata, nel
caso contrario non procedere nell’installazione ma contattare il rivenditore.
5.
ISTRUZIONI DI MONTAGGIO PER PERSONALE SPECIALIZZATO
5.1
ISTRUZIONI DI MONTAGGIO PER L’INCASSO
• Il mobile di alloggio della macchina da caffè
da incasso deve essere adeguatamente fissato al pavimento o alle pareti della stanza.
• Per garantire la sicurezza nell’uso della
macchina, il mobile di alloggio deve essere
strutturalmente adeguato e consentire di
sopportare in fase di estrazione, nei punti di
aggancio delle guide, un peso pari a tre
volte il peso della macchina da caffè.
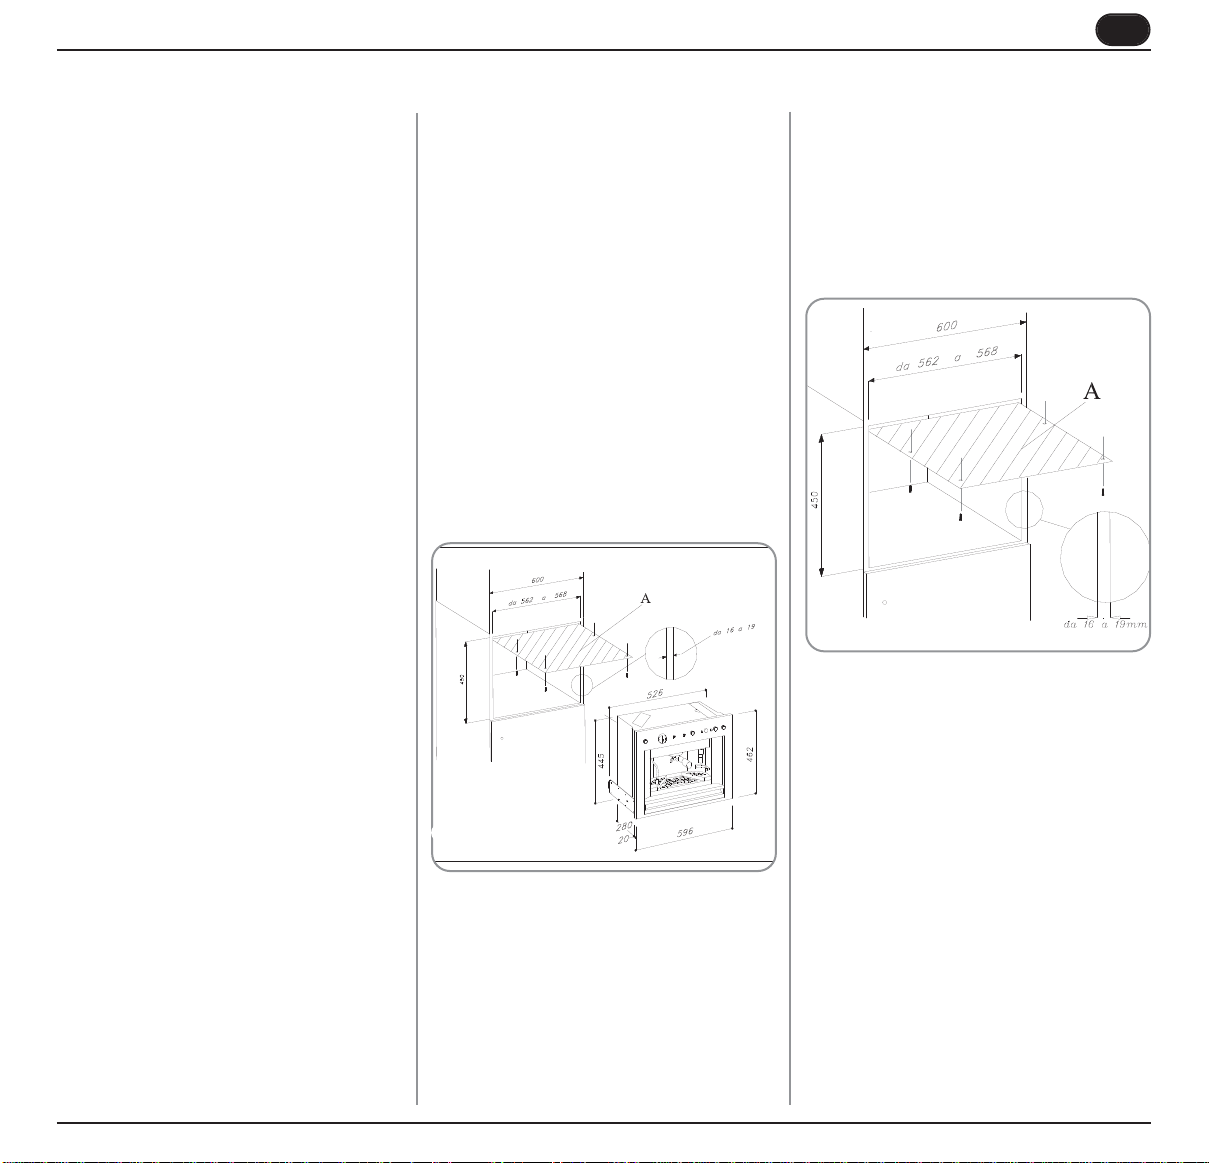
5.2
DIMENSIONI DI INCASSO S-CM3
Fig. 16
5.3
INCASSO
Fig. 17
• Serrare le 4 Viti.
• Montare le guide nella parete del mobile,
assicurandosi che coincidano esattamente
con il bordo esterno della sede.
• Fissare le cerniere con le 4 viti fornite in
dotazione nella parte interna ad una distanza di 200 mm dalla base e assicurarsi che
coincidano con il bordo esterno della sede.
• Far scorrere la macchina sulle guide, ma
prima di inserirla completamente nel mobile
accertarsi che le cerniere precedentemente
montate coincidano con i perni fissati sulla
macchina.
• In caso contrario rimuovere la macchina,
allentare le viti e far scorrere leggermente i
blocchi in basso o in alto a seconda del
caso.
Romantica
• Posizionare la piastra in metallo nella parte
superiore della sede della macchina da
caffè, facendola combaciare con la parte
posteriore del mobile.
Page 13

11
I
• In corrispondenza dei fori degli angoli inserire, senza serrare, le viti.
• In dotazione all’apparecchio sono presenti 6
piastre in metallo dello spessore di 1mm
ciascuna, da posizionare tra la guida e le
pareti del mobile; in modo da colmare lo
spazio in eccesso nel caso in cui questo sia
superiore a 562mm di larghezza.
5.4
NUMERO DELLE PIASTRE DISTANZIATRICI
• Inserire se necessario, le piastre come
sopra descritto.
• Verificare che tra gli angolari vi sia una
distanza pari a 558mm (distanza B).
Nel caso si desideri rimuovere la macchina da
caffè dalla relativa sede, occorre in primo luogo
staccare l’apparecchio dalla rete elettrica, disinserendo la spina.
Successivamente occorre premere gli appositi
incastri posti nelle guide (B), quindi rimuovere
l’apparecchio sorreggendo dalla parte inferiore
la macchina.
Fig. 19
• Fissare le guide alla sede della macchina da
caffè serrando tutte le viti.
• Assicurare l’uscita del cavo alimentazione
della macchina da caffè nella parte posteriore della sede.
• Al fine di evitare surriscaldamenti della macchina da caffè realizzare, nella parte posteriore-superiore della sede, un apertura
delle dimensioni di almeno 300mmx100mm
per permettere il ricircolo dell’aria.(figuraxx)
Inserire la macchina da caffè nel mobile
facendo coincidere le guide precedentemente fissate a quelle già presenti nell’apparecchio. Le guide dovranno scorrere telescopicamentecon una leggera pressione
nella parte anteriore della macchina da
caffè; se così non fosse occorre verificare
nuovamente la distanza trà le guide.
• Durante l’incasso l’apparecchio si aggancia
automaticamente ai punti A nelle guide.
Fig. 20
Aprire il coperchio nella parte superiore, rimuovere e riempire il serbatoio acqua e chiudere il
coperchio.
ATTENZIONE
Versare nel contenitore solamente caffè in
chicchi. Quasiasi altro genere di caffè ad
esempio già macinato, danneggia il macinatore.
5.5
SMONTAGGIO
Fig. 22
SEDE DI INCASSO
N°
PIASTRE
Larghezza
(mm/inc)
Spess.
(mm/inc)
562 / 22,13 19 / 0,748 0
564 / 22,2 18 / 0,708 1+1
566 / 22,28 17 / 0,669 2+2
568 / 22,36 16 / 0,629 3+3
Fig. 21
B
Romantica
Fig. 18
Page 14

12
I
• Classificazione del dispositivo di comando
secondo la protezione contro le scosse elettriche: incorporato in apparecchiatura di
classe I.
• Situazione di polluzione del dispositivo di
comando: adatto per l’uso in un ambiente di
polluzione ordinaria o normale.
• Categoria (Immunità contro le sovratensioni) CATEGORIA I.
• Classe e struttura del software CLASSE A
• Circuito stampato unità di controllo
100x180mm.
La scheda è costruita per l’impiego nel campo
di temperatura indicato nelle caratteristiche
elettriche. Il funzionamento a temp. superiori
non è previsto per i componenti logici che
caratterizzano l’unità di controllo e può quindi
dare adito a malfunzionamenti.
Il funzionamento a tensioni al di fuori di tale
campo non è quindi garantito.
5.6
DATI TECNICI
MACCHINA DA
CAFFÈ
CLASSE I
TENSIONE NOMINALE
230V 50hz
POTENZA ASSORBITA
1200W
ALLACCIAMENTO
1.8KW (predisposto
per essere collegato)
CAVO ALLACCIAMENTO
1.2m / 47,24 inc
DIMENSIONI APPARECCHIO (LXPXH)
596X280X462mm
23,39X17,32X18,27inc
DIMENSIONI NICCHIA (LXPXH)
560X550X450mm
22,05X21,65X17,72inc
PESO NETTO 52Kg / 114Lb.
PESO LORDO 63KG / 139Lb.
QUANTITÀ ACQUA 5 Lt / 1,321gal.
Romantica
Page 15

13
I
6.
COME PREPARARE LA MACCHINA E MESSA A PUNTO
6.1
PREDISPOSIZIONE AL
FUNZIONAMENTO
ATTENZIONE
ATTENZIONE: Nell'eseguire le operazioni di
pulizia e riempimento della macchina da
caffè, che richiedono l'estrazione anche
solo parziale della macchina stessa, è
importante estrarre l'apparecchio molto lentamente evitando accuratamente che al di
sotto dello stesso vengano a trovarsi persone o cose in modo da garantire la massima
sicurezza.
Nel caso la sequenza qui sotto descritta non si
verifichi consultare il capitolo “Anomalie e rimedi”
ATTENZIONE: Analogamente aprire lo sportello della sede serbatoio acqua, posto nella
parte superiore della macchine ed estrarre il
serbatoio tirandolo verso l'alto, quindi
lavarlo con acqua e sapone avendo cura di
risciacquarlo accuratamente rimuovendo
ogni traccia di sapone, riempire il serbatoio
con acqua fredda e asciugare la parte esterna, riporre il serbatoio nella sede chiudendo lo sportello.
Dopo aver terminato le operazioni preliminari,
1)Aprire la manopola del vapore (B).
2)Premere l’interruttore macchina (M), la spia
di accenzione (I) si accende; la macchina carica automaticamente l’acqua in caldaia (tempo
iniziale circa 3min). Raggiunto il livello inizia il
riscaldamento segnalato dall’accenzione della
spia resistenza (D) che si spegne ad avvenuto
riscaldamento.
Nota:La macchina è dotata di un sistema di
sicurezza che dopo 1.5minuti circa di funzionamento continuo della pompa arresta la macchina.
(Per evitare il surriscaldamento della pompa
stessa). In questo caso, spegnere la macchina
con l’interruttore generale(M) e riaccenderla.
Durante il funzionamento la spia di accenzione(I) e la spia resistenza(D) si accenderanno.
3) Attendere che la spia resistenza(D) si spenga, questo vuol dire che l’acqua è in temperatura. Chiudere la manopola vapore.
4) Nota: Se la spia acqua (E) dovesse accendersi vuol dire che il serbatoio dell’acqua (L) è
vuoto o sta per svuotarsi.
A
B
D
E
F
G
H
I
M
N
6.2
ILLUMINAZIONE
La SCM3 (Romantica) è dotata di un sistema di
illuminazione a led che illumina la zona di erogazione caffè che si attiva premendo l’apposito
tasto (N)
6.3
PREDISPOSIZIONE
ACCESSORI
I componenti posti a corredo della macchina necessitano di una piccola predisposizione che permette il loro funzionamento:
A)Inserire la MOLLA FILTRO (3) all'interno del PORTA FILTRO (2).
per sostituire il portafiltro utilizzare l’apposito utensile in dotazione (14)
B)Successivamente inserire uno dei
due filtri (4 o 5) all'interno del PORTA
FILTRO (2) sopra alla molla filtro.
C)Estrarre parzialmente la macchina ed
aprire lo sportello acqua ( L ), estrarre il
serbatoio acqua e lavare accuratamente
con acqua e sapone.
D) Riempire di acqua il serbatoio
E) Assicurarsi che l'esterno del serba-
toio sia asciutto.
F) Reinserire il serbatoio nel proprio
alloggio.
G) Chiudere lo sportello dell'alloggio
srbatoio.
H) Aprire lo sportello caffè in grani (C)
I) Pulire il vanno vanno caffè in grani
L) Riempire il vano solo con caffè in
grani.
M) Chiudere lo sportello caffè in grani
N) Rinserire la macchina all'interno del
mobile.
O) Assicurarsi che la vaschetta raccogli
liquidi ( Q ) sia ben inserita.
1
2
3
4
5
Romantica
14
Page 16

14
I
7.
EROGAZIONI
7.1
PPRREEPPAARRAAZZIIOONNEE DDII UUNNOO OO DDUUEE CCAAFFFFèè
EESSPPRREESSSSII
1) Dopoaver messo a punto la macchina
osservare che nel portafiltro (2) ci sia il filtro singolo (5) o doppio (4) a seconda del
numero di caffè da erogare.. utilizzare l’apposito utensile in dotazione (14)
Nel manovrare la lancia di erogazione vapore è obbligatorio utilizzare l’ apposota presa
isolante vedi fig.
7.2
EERROOGGAAZZIIOONNEE VVAAPPOORREE
2) Posizionare il portafiltro con il filtro inserito,
nell’apposita sede per la macinatura (c.1
V).
3) Mantenendo il portafiltro sul relativo appog-
gio pigiare una sola volta il tasto (A)
“Macinatura caffè” per ottenere il quantitativo per un solo caffè e due volte per due
caffè.
4) Utilizzando il pressacaffè (Cap.1.1 N°6)
pressare uniformemente il caffè nel portafiltro e pulire il bordo.
5) inserire, ruotando il porta filtro nell’attacco
fino al sicuro serraggio.
6) Posizionare una o due tazzine sotto i bec-
cucci in base al numero di caffè
7) Ruotare la manopola (F) per regolare la
quantità di caffè desiderato, ruotare in
senso orario per aumentare la quantità di
caffè da erogare e in senso antiorario per
diminuirla.
Fig. 25
8) Premere il pulsante di erogazione caffè (H),
la spia (G) si accende e dai beccucci inizia
a fuoriuscire il caffè.
Fig.23
Fig. 24
F
G
10) Una volta raggiunta la quantità impostata
la macchina si ferma automaticamente, se
si vuole interrompere il flusso di caffè prima
del tempo impostato ruotare la manopola
(F) in senso antiorario fino al minimo e il
caffè smetterà di fuoriuscire. al termine dell’erogazione del caffè la spia (G) si spegne.
11) Nota: se si prevedono usi frequenti è pos-
sibile lasciare il caffè già utilizzato nel filtro
altrimenti svuotare e pulire il filtro.
ATTENZIONE
Fig. 26
1) Dopo aver messo a punto la macchina,
pulire la lancia di erogazione con un panno
inumidito di acqua calda.
2) Accertarsi che il beccuccio della lancia sia
all’interno della vaschetta raccogli liquidi.(Q)
3) Gradualmente e con attenzione girare la
manopola del vapore (B) , dopo aver fatto
fuoriuscire eventuali gocce d'acqua presenti all'interno della lancia, immergerla nel
liquido da riscaldare.
4) Agendo sulla manopola (B) regolare le
quantità del vapore secondo le necessità.
5) Ottenuto il riscaldamento del liquido, chiu-
dere la manopola del vapore ( B) e togliere
il contenitore del liquido riscaldato.
6) Sempre con un panno leggermente imbe-
vuto d'acqua calda, pulire il beccuccio della
lancia.
Romantica
Page 17

15
I
7.3
REGOLAZIONE GRADO E
QUANTITA’ DI MACINA-
TURA CAFFE’
1)La macchina è dotata di un macina caffè
professionale, provvisto di macine da Ø 50
mm, la bassa velocità e la macinatura
omogenea evita che il caffè bruci.
Nel caso in cui il caffè non risulti di proprio
gradimento è possibile modificare il grado
di macinatura e la quantità mediante le
regolazioni poste nella parte laterale sinistra (K e Y ) della macchina. vedi fig.
Fig. 27
Y
K
Per effettuare le regolazioni procedere come
segue:
" Estrarre la macchina;
" Utilizzando la chiave a brucola, in
dotazione, agire nella vite di regolazione Y ,
per modificare il grado di macinatura, girando in senso orario per ottenere una macinatura più spessa e in senso antiorario per
una macinatura più fine.
Fig. 28
Fig. 29
Il livello della quantità di caffè macinato,
necessario per una o due dosi, è indicato
dalla scanalatura all'interno dei filtri, (vedi fig
filtro singolo - Fig 2 filtro doppio);"
Mediante il pomello K ruotare in senso orario per diminuire la quantità di caffè macinato, girare in senso antiorario per aumentarla.
Al termine delle regolazione rinserire la macchina nella sede.
Romantica
Page 18

16
I
8.
PULIZIA E MANUTENZIONE
ATTENZIONE
Prima di effettuare qualsiasi tipo di pulizia, tranne il che per il gruppo erogatore e per la lan-
cia vapore, togliere alimentazione alla macchina agendo sull’interruttore generale.
8.1
Pulizia della lancia
Utilizzare un panno leggermente imbevuto di acqua calda e/o detergente neutro
8.2
Pulizia del filtro e del portafiltro
1) separare il filtro (Pag.4 n°4 - 5) dal portafiltro (Pag.4 n°2)
2) Pulire con un getto d’acqua e asciugare.
3) All’occorrenza con uno spazzolino pulire il filtro.
8.3
Pulizia della superficie esterna della macchina
ATTENZIONE
Prima di effettuare qualsiasi tipo di pulizia, tranne il che per il gruppo erogatore e per la
lancia vapore, togliere alimentazione alla macchina agendo sull’interruttore generale.
Per la pulizia dell'acciaio non utilizzare prodotti aggressivi o abrasivi che possono cor-
rodere o graffiare il metallo.
Per i particolari in plastica non utilizzare solventi, prodotti a base di cloro o abrasivi.
La pulizia va eseguita con un panno umido e sapone neutro facendo attenzione a non
graffiare l'acciaio.
8.4
Pulizia Vaschetta portaliquidi
1) Pulire la vaschetta porta liquidi con acqua
calda e sapone neutro
2) NOTA: la vaschetta portaliquidi può essere
messa in lavastoviglie.
3) ATTENZIONE: non utilizzare nessun tipo di
solvente.
8.5
Pulizia serbatoio acqua
Utilizzare acqua, sapone e risciacquare accu-
ratamente
8.6
Pulizia gruppo erogazione , doccia e guarnizione
PERICOLO DI USTIONE: Operazione ese-
guita a macchina accesa, quindi prestare la massima attenzione.
1)Rimuovere il portafiltro dalla relativa sede;
2)Pulire i fori della doccia e la guarnizione
posta nel gruppo erogatore (Pag.4 n°3))
utilizzando uno spazzolino a setole leggermente rigide;
3)Premere il pulsante di erogazione in modo
da far passare acqua all'interno della doccia per circa 20 secondi, al termine dei
quali pigiare nuovamente il tasto .
4)Asciugare la doccia e il gruppo erogatore.
ATTENZIONE
8.7
Manutenzione
Se vengono eseguite le pulizie descritte nella
parte precedente non vi è nessuna operazione
di manutenzione particolare da fare. Per qualsiasi intervento tecnico di assistenza sulla
macchina chiamare il rivenditore
N°
TIPI DI PULIZIA
N° PARTE
FREQUENZA
SUBITO DOPO L’USO
GIORNALMENTE
SETTIMANALMENTE
1
Pulizia lancia
pag.3 P ♦
2
Pulizia filtro e porta filtro
Pag.4
2, 4, 5
♦
♦
3
Pulizia esterna macchina
♦
4
Pulizia griglia
pag. 3 Q
♦
♦
5
Pulizia vaschetta porta
liquidi
pag. 3 Q
♦ ♦ ♦
6
Pulizia serbatoio acqua
pag. 3 L
♦
7
Pulizia guarnizione
gruppo erogatore
pag. 4 n°3
♦
♦
8
Pulizia gruppo erogatore
e doccia
pag. 4
n°1-2
♦ ♦♦
9
Pulizia cassetto e
vaschetta fondi
pag. 3 n°R
♦ ♦♦
Romantica
Page 19

17
I
9.
SE QUALCOSA NON FUNZIONA....
Se la vostra macchina per caffè espresso non stà funzionando correttamente provate a vedere
fra le cause e rimedi qui sotto elencati. Riguardate anche le corrispondenti sezioni del manuale
d'uso.
ANOMALIE
RIMEDI
Verificare se è accesa la spia mancanza acqua : manca acqua
nel serbatoio o il serbatoio no n è inserito correttamente.
Il caffè è stato macinato troppo fino o è sta to troppo pressato.
La doccia erogazione acqua
la macchina non prepara
l’espresso
La macchina deve essere decalcificata.
Il portafiltro non è stato inserito correttam ente
Il portafiltro non è stato stretto abbastanza .
Bisogna pulire da depositi di caffè la guarni zione (vedi sez.
pulizia)
Il caffè esce dai lati del
portafiltro
Verificare la dose di caffè
La macchina non è calda : la spia resistenza si è spenta?
Il caffè macinato ha una gr ana troppo grossa
Il caffè non è stato pressato bene nel filtro
Il caffè non è fresco
La crema è troppo poca o
manca del tutto
Il caffè è macinato troppo fino
Il caffè è stato pressato troppo
La dose di caffè è eccessiva.
La crema è troppo scura
e/o il caffè ha un sapore
di bruciato
L’acqua calda passa attraverso il filtro troppo velocemente. Per
fare 2 tazze di caffè occorrono 25 -40 secondi.
Il caffè nel filtro non è stato pressato corr ettamente
Il caffè è stato macinato troppo grosso.
Il portafiltro è freddo: Il portafiltro va se mpre lasciato inserito
nella macchina durante il riscaldamento e l ’uso per mantenerlo
caldo.
Anomalie nel termostato di sicurezza calda ia: rivolgersi al
centro assistenza più vic ino.
Il caffè non è abbastanza
caldo
Aprire la lancia vapore ( P ) e agire ripetutamente
sull’interruttore caffè
La pompa non pesca
acqua dal serbatoio
Romantica
Page 20

18
I
10.
SCHEMA ELETTRICO
Romantica
Page 21

19
Romantica
UK
Rel. B - 2008
TECHNICAL CHARACTERISTICS
NET WEIGHT 52 Kg 114 Lb
GROS WEIGHT 63 Kg 139 Lb
POWER 1400 W 1400 W
DIMENSIONS A 596 mm
A
23.47 in
B 462 mm
B
18.19 in
C 442 mm
C
17.4 in
D 562 mm
D
22.13 in
E 445 mm
E
17.52 in
F 546,5 mmF21.52in
G 20 mm
E
0.08in
Congratulations ,
upon the wise choice you have made by purchasing the S-CM3 “
Romantica
” model.
Please read the information in this manual carefully before you operate the coffee machine.
Here you will find important indications regarding your safety and the care and maintenance of the appliance that will allow you satisfactory use over a
long term. Should any breakdown occur, first see the section entitled “Troubleshooting”. Often it is possible to repair small failures independently, thereby avoiding the costs of repairs.
This machine has been built in conformity with the directives EEC 89/392, EEC 89/336, EEC 73/23, EEC 89/109 and subsequent amendments.
The quality and reliability of this product are guaranteed by the fact that it has been built according to the UNI EN ISO 9001: 2000 COMPANY QUALITY SYSTEM.
With best wishes.
Sirius
Page 22

20
Romantica
UK
Contents
TECHNICAL CHARACTERISTICS........................... Pag.19
1 DESCRIPTION............................................ pag. 21
1.1 General notes about delivery........................ pag. 22
2 SAFETY INSTRUCTIONS............................ pag.23
3 TRANSPORT AND HANDLING.................. pag. 25
3.1 Machine identification................................... pag. 25
3.2 Transport...................................................... pag. 25
3.3 Handling....................................................... pag. 25
4 PRELIMINARY OPERATIONS..................... pag.26
4.1 Filling the appliance................ .................... pag. 26
4.2 Machineinstallation version for
direct connection............................................pag. 26
5 ASSEMBLY INSTRUCTIONS FOR QUALIFIED
PERSONS................................................... pag. 28
5.1 Instructions for built-in assembly.................. pag.28
5.2 S-CM3 built-in unit dimensions......................pag. 28
5.3 Built-in installation..........................................pag. 28
5.4 Number of spacer plates................................pag.29
5.5 Disassembly ..................................................pag.29
5.6 Technical data................................................pag. 30
6 PREPARING AND SETTING UP
THE MACHINE............................................. pag.31
6.1 Preparing the machine for operation ........... pag. 31
6.2 Lighting...........................................................pag.31
6.3 Preparing the accessories.............................pag. 31
7 DISPENSING.............................................. pag. 32
7.1 Preparing one or two espresso coffees .....pag. 32
7.2 Steam dispensing....................... ............... pag. 32
7.3 Adjusting the fineness and amount
of ground coffee ......................................... pag. 33
8 CLEANING AND MAINTENANCE............... pag.34
8.1 Cleaning the nozzle...................................... pag. 34
8.2 Cleaning the filter and filter holder................ pag. 34
8.3 Cleaning the outside
of the machine.............................................. pag. 34
8.4 Cleaning the drip tray................................... pag. 34
8.5 Cleaning the water tank............................... pag. 34
8.6 Cleaning the dispensing unit, spray
and gaske..................................................... pag. 34
8.7 Maintenance................................................. pag. 34
9 TROUBLESHOOTING............................... pag. 35
10 WIRING DIAGRAM.................................... pag. 36
Page 23

21
Romantica
UK
Fig. 1
KEY
A Coffee grinding button
B Steam regulation dial
C Coffee bean container
D Heating elements on indicator light
E Indicator light for lack of water in the tray
F Dial to regulate amount of coffee
G Coffee dispensing indicator light
H Coffee dispensing button
I Machine on indicator light
L Tank container
M Main ON/OFF switch
1.
DESCRIPTION
T Accessories drawer
U Filter holder
V Coffee grinding support
Z Ground coffee dispenser
Y Coffee fineness regulator
K Grinding time regulator
A E HD
U
F
K
Y
V
M
L
P
Q
Z
T
R
B C
O
G
I
N
S
N Lights ON/OFF switch
O Dispensing unit
P Steam nozzle
Q Drip tray
R Coffee grounds tray
S Grounds beater
Page 24

22
Romantica
UK
1.1
GENERAL NOTES ABOUT DELIVERY
Fig. 2
The machine and its parts are delivered in special packing. Nevertheless, when you receive it, make sure that:
• The packing is undamaged and that there are no defects to the machine exterior.
• The packing contains:
a) Coffee machine
b) Box of accessories:
1 Dispensing nozzle
2 Filter holder
3 Filter spring
4 Double filter
5 Single filter
6 Coffee presser
7 Doser
7
1
2
3
4
5
11
12
13
8
9
6
1
14
8 Support guides assembly
9 Guide shims
10 Fireproof protections
11 Allen wrench
12 Machine hook-on support
13 Brush
14 Filter removal tool
15 1 coffe dispensing nozzle
Page 25

2.
SAFETY INSTRUCTIONS
23
Romantica
UK
Parts of the packaging can be harmful to children. Danger of suffocation!
Keep packaging out of the reach of
children.
☞
After unpacking, make sure the appliance is complete. In case of doubts,
do not use the appliance, but consult
a qualified technician.
☞
RISK OF POLLUTION
Before connecting the appliance make
sure the rating plate data correspond
with the mains. This plate is on the
front panel at the top right hand side
of the appliance. The appliance must
be installed by qualified technicians in
accordance with current standards
and manufacturer’s instructions.
The manufacturer is not liable for any
damage caused due to failure to
ground the system. For the electrical
safety of the appliance, it is necessary
to equip the system with the proper
grounding. This must be carried out
☞
In particular you must ensure that the
size of the wiring cables is sufficient
to absorb power input.
The use of adapters, multiple sockets
or extensions is strictly forbidden. If
they prove necessary, call a fully
qualified electrician.
☞
The machine must be installed
according to the local standards in
force with regard to plumbing systems. For this reason, the plumbing
connections must be carried out by a
qualified technician.
☞
This appliance must only be used as
described in this handbook. The
manufacturer shall not be liable for
any damage caused due to improper,
incorrect and unreasonable use.
☞
Fig. 3
Fig. 4
by a qualified electrician who must
ensure that the electric power of the
system is sufficient to absorb the
maximum power input stated on the
plate.
Basic rules must be observed when
using any electric appliance.
In particular:
• do not touch the appliance when
hands or feet are wet;
• do not use the appliance when
barefoot;
• do not use extensions in bath or
shower rooms;
• do not pull the supply cord out of
the socket to disconnect it from
the mains;
• do not leave the appliance
exposed to atmospheric agents
(rain, sun, etc.);
• do not let the appliance be used
by children, unauthorised staff or
staff who have not read and fully
understood the contents of this
handbook.
☞
CAUTION
RISK OF ELECTRIC SHOCK
Fig. 5
Page 26

24
Romantica
UK
CAUTION
RISK OF POLLUTION
Do not dispose of the machine in the
environment: to dispose of the
machine, use an authorised centre,
or contact the manufacturer for relative information.
☞
To increase ventilation to the
machine, make an opening of at least
300 mm x 100 mm (11.82 in x 3.94 in)
in the back of the housing.
☞
Once a machine wash cycle has been
started, do not interrupt it, as detergent residues may then be left inside
the delivery group.
☞
CAUTION
RISK OF INTOXICATION
Use the steam nozzle with care and
never place hands below the jet of
steam. Do not touch the nozzle immediately after use.
☞
CAUTION
RISK OF BURNS OR SCALDING
When adding coffee beans, the
machine operator must not place
his/her hands inside the container.
☞
CAUTION
RISK OF CUTTING
Fig. 7
Before servicing the appliance, the
authorised technician must first
switch off the appliance and remove
the plug.
☞
To clean the appliance, set the
machine to the “0” energy level, that
is, “WITH THE MACHINE SWITCHED
OFF AND THE PLUG REMOVED
FROM THE MAINS” and follow the
instructions in this handbook.
☞
If the appliance breaks down or fails
to work properly, switch it off. Any
intervention is strictly forbidden.
Contact qualified experts only.
Repairs should only be made by the
manufacturer or authorized service
centres. Only original spare parts
must be used. Failure to observe the
above, could make the appliance
unsafe.
☞
For installation, the qualified electrician must fit an omnipolar switch in
accordance with the safety regulations in force and with 3 (0,12) or
more mm (in) between contacts.
☞
To avoid dangerous overheating,
make sure the supply cord is fully
uncoiled.
☞
Do not obstruct the suction and/or
dissipation grilles.
☞
The user must not replace the appliance supply cord. If the cord is damaged, switch off the appliance and
have a qualified technician change
the cord.
☞
If no longer using the appliance, we
recommend making it inoperative;
after removing the plug from the
mains electricity, cut the power supply cable.
☞
Fig. 6
Fig. 8
Page 27

3.
TRANSPORT AND HANDLING
25
Romantica
UK
Always quote the machine serial number in all
communications to the manufacturer, Sirius.
The machine is transported on a pallet, inside
boxes which are secured to the pallet with ribs.
Prior to carrying out any transport or handling
operation, the operator must:
• put on work gloves and protective footwear,
as well as a set of overalls which must be
elasticated at the wrists and ankles.
The pallet must be transported using a suitable means for lifting (e.g., forklift).
CAUTION
RISK OF IMPACT
OR CRASHING
During all handling operations, the operator
must ensure that there are no persons,
objects or property in the handling area.
The pallet must be slowly raised to a height
of 30 cm (11.82 in) and moved to the loading
area. After first ensuring that there are no
persons, objects or property, loading operations can be carried out.
Upon arrival at the destination and after
ensuring that there are no persons, objects
or property in the unloading area, the proper lifting equipment (e.g. forklift) should be
used to lower the pallet to the ground and
then to move it (at approx. 30 cm (11.82 in)
from ground level), to the storage area.
Before carrying out the following operation,
the load must be checked to ensure that it is
in the correct position and that, when the
supports are cut, it will not fall.
The operator, who must first put on work
gloves and protective footwear, will proceed
to cut the supports and to storing the product. To carry out this operation, the technical characteristics of the product
must be consulted in order to know the
weight of the machine and to store it
accordingly.
CAUTION
RISK OF POLLUTION
Fig. 9
3.1
MACHINE
IDENTIFICATION
3.2
TRANSPORT
3.3
HANDLING
CAUTION
RISK OF IMPACT
OR CRASHING
Page 28

4.
PRELIMINARY OPERATIONS
26
Romantica
UK
• Partially remove the machine from its seating.
• Take the appliance out very slowly and in
order to guarantee maximum safety, make
sure that no people or things are below it.
• Pull the water tank up and especially the
first time, wash it with soapy water; then
rinse it carefully, taking care to remove all
soap residues.
• Fill the tank with water (this does not apply
to the version connected to the water mains)
• In the same way, open the coffee bean container and pour in the coffee without reaching the maximum level; then refit the coffee
container lid.
4.1
FILLING THE APPLIANCE
Fig. 11
Fig. 12
CAUTION
RISK OF POLLUTION
Do not dispose of packaging in the environment.
Before carrying out any installation and
adjustment operations you must read and
fully understand the SAFETY INSTRUCTIONS of this handbook.
The company cannot be held responsible
for damage to things or injury to persons
caused by failure to comply with the safety
instructions and installation and maintenance instructions contained in this handbook.
CAUTION
RISK OF SHORT CIRCUITS
Before connecting the machine to the mains
power supply, please check that the supply
voltage corresponds to the machine voltage.
Fig. 10
CAUTION
Switch off the machine before filling or
removing the water tank.
The water hardness must be less then
4° - 6° fr (french degree).
The chlorine contents is max 100 mg per
litre (0.00000361 lb/cu in).
Otherwise the conditions of guarantee of
the machine will expire.
WARNING
4.2
MACHINEINSTALLATION
VERSION FORDIRECT
CONNECTION
• Remove all parts from the box of accessories (Teflon tubes Ø 4 mm (Ø 0.16 in), 1
pressure reducing valve, 3 snap-on connectors, 1 pressure gauge, 1 fastening bracket,
2 threaded connectors and two gaskets). Fit
the pressure gauge and 2 connectors to the
pressure reducing valve, as illustrated in the
drawing here below.
• Use the relevant bracket to fit the previously assembled pressure reducing valve to the
nearest point to the water mains (see drawing below).
Fig. 13
Page 29

27
Romantica
UK
• Connect one end of the Teflon pipe (diam. 4
mm) to the machine, inserting it firmly into
the snap-on connector. To make sure that
the connection has been made properly, pull
the tube outwards (see drawing).
• Cut the other end of the tube, first making
sure that the length is sufficient to connect it
to the pressure reducing valve.
Fig. 14
• After finding the arrows that indicate the
direction of the water flow in the pressure
reducing valve, connect the tube to the
water outlet. Connect the remaining end of
the tube to the other connector (water inlet)
of the pressure reducing valve. After making
sure that you have shut off the stopcock,
proceed to install the connectors and the
relevant gaskets in the mains system.
Connect the free end of the tube to the previously fitted snap-on connector.
NOTE: The maximum outlet pressure from the
pressure reducing valve MUST NOT
exceed 1.5 bars.
Fig. 16
Fig. 15
Page 30

5.
ASSEMBLY INSTRUCTIONS FOR QUALIFIED PERSONS
28
Romantica
UK
5.2
S-CM3 BUILT-IN UNIT
DIMENSIONS
Fig. 17
Fig. 18
The company supplying this machine cannot
be held liable for any damage arising from
incorrect installation, insufficient or lack of
maintenance, or improper use of the appliance.
• Legal standards and connection instructions
from the local electricity supplier must be
respected.
• Before making electrical connections, make
sure that the electrical capacity of the system is suitable for the maximum power of
the appliance, as indicated on the rating
plate.
• When making connections or repairs, it is
necessary to disconnect the appliance from
the mains electricity.
• When the appliance is assembled, it must
not be possible to touch any insulated
cables enabling appliance operation.
• The appliance is equipped to be connected
to a single plug socket, which must be fitted
in full compliance with the standards in
force. Only a qualified electrician may install
a plug socket or replace the power cord,
which must be performed in full respect of
the standards in force.
• If, after connection, it is no longer possible
to reach the plug, a separator with more
than one pole and a contact distance of at
least 3 mm (0.12 in) must be fitted in order
to comply with safety regulations.
5.1
INSTRUCTIONS FOR
BUILT-IN ASSEMBLY
• The unit housing the built-in coffee machine
must be suitably fixed to the floor or wall in
the room.
• To guarantee safe machine use, the unit
housing the machine must be structurally
sound and its guide attachment points must
be able to sustain a weight of three times
that of the coffee machine during the
removal phase.
• Remove the coffee machine from its packaging and make sure that it is not damaged
in any way. Should the machine show any
signs of damage, do not proceed with installation and contact the retailer.
5.3
BUILT-IN
INSTALLATION
• Place the metal plate in position in the top
part of the coffee machine housing so that it
meets with the back section of the unit.
• Tighten the four screws.
• Install the slides on the internal side of the
vabinet, making sure that they coiincide
esactly with the external edge of the cabinet.
• Than fix the hinges on the internal side of
the cabinet at 200 mm from the bottom
using the 4 screws supplied. Please make
sure that the hinges concide exactly with the
external edge of the cabinet.
• Run the machine into the slides but befor
inserting it completely make sure that the
hinges previusly fixed coincide exactly with
the hinge pins mounted on the machine.
• Otherwise remove the machine, loosen the
screws and leave the hinges slightly play on
the holes.
Page 31

29
Romantica
UK
• Fix the guides to the coffee machine housing, tightening all of the screws.
• Make sure that the power cord comes out
from the rear of the housing.
To remove the coffee machine from its seating,
first of all unplug it from the mains electricity.
Then press the special joints inside the guides
(B) and remove the machine, supporting it on
the bottom.
Fig. 20
• To prevent the machine from overheating,
make an opening in the back of the unit of at
least 300 mm x 100 mm (11.82 in x 3.94 in),
to allow air to circulate.
• Insert the coffee machine into the unit, fitting
the guides on the machine level into the
guides previously fixed on the unit.
The guides should slide telescopically when
a light pressure is exerted on the front of the
coffee machine; if this is not the case, it is
necessary to check the distance between
the guides again.
• When fitting into the unit, the appliance will
automatically hook onto the points (A) on
the guides.
Fig. 21
5.5
DISASSEMBLY
Fig. 23
BUILT-IN HOUSING
N°
PLATES
Width
(mm/inc)
Thick.
(mm/inc)
562 / 22.13 19 / 0.748 0
564 / 22.2 18 / 0.708 1+1
566 / 22.28 17 / 0.669 2+2
568 / 22.36 16 / 0.629 3+3
Fig. 19
Fig. 22
• Insert the screws into the holes of the corner
pieces, but do not tighten them.
• The machine is supplied with 6 metal plates
(thickness 1 mm (0.04 in)) that are to be
placed between the guide and the sides of
the unit. This is to fill any excess space in
the event that the unit is more than 562 mm
(22.13 in) wide.
5.4
NUMBER OF SPACER
PLATES
• If necessary, insert the plates as described
above.
• Make sure that there is a distance (distance
B) of 558 mm (21.97 in ) between the corner
pieces.
Open the lid in the top part; then remove and fill
the water tank and close the lid.
WARNING
Only pour coffee beans into the container.
Any other type of coffee - ready ground for
example – will damage the grinder.
B
Page 32

30
Romantica
UK
5.6
TECHNICAL DATA
COFFEE MACHINE CLASS I
RATED VOLTAGE
120V 60hz
ELECTRICAL
INPUT
1200W
CONNECTION
1.8KW
(READY FOR CONNECTION
)
POWER CORD
1,2m / 47.24 in
APPLIANCE DIMENSIONS (LXPXH)
596 X 280 X 462mm
23.39 X17.32 X 18.27in
COMPARTMENT
DIMENSIONS (LXPXH)
560X550X450mm
22.05 X 21.65 X 17.72in
NET WEIGHT
52Kg / 114Lb
GROSS WEIGHT
63KG / 139Lb
AMOUNT OF
WATER
5 Lt / 1.321gal
• Classification of the control device according to protection against electrical shocks:
incorporated into Class I equipment.
• Control device pollution levels: suitable for
use in ordinary or normal pollution environments.
• Category (Immunity against excess voltage)
CATEGORY I.
• Class and structure of software CLASS A.
• Control unit printed circuit:
100 mm x 180 mm (3.94 in x 7.09 in).
The card is built for use in temperature ranges
as indicated in the electrical characteristics.
Operation at temperatures over these levels is
not foreseen for the logic components in the
control unit and can therefore lead to malfunctioning.
Operation at voltages outside this range cannot
be guaranteed.
Page 33

Fig. 24
6.
PREPARING AND SETTING UP THE MACHINE
31
Romantica
UK
6.1
PREPARING THE MACHINE FOR OPERATION
WARNING
When performing coffee machine cleaning
and filling operations – operations that
require the extraction, even if only partial, of
the machine itself - it is important to remove
the machine very slowly, taking care to
ensure that no persons or property are to be
found underneath it so as to guarantee
maximum safety.
If the sequence described here below does not
occur, see the “Troubleshooting” section. After
completing the preliminary operations,
In the same way, open the door to the water
tank housing on the top of the machine and
remove the tank, pulling it upwards before
washing it with soapy water, taking care to
rinse it thoroughly to remove all traces of
soap. Fill the tank with cold water and dry
the outside before returning it to its housing
and closing the door.
1) Turn on the steam knob (B).
2) Press the machine switch (M); the on indi-
cator light (I) will switch on and the machine will automatically load the water into the
boiler tank (initial time, approx. 3 min).
Once the required water level has been
reached, the machine will begin heating the
water; this is shown by the indicator light for
the heating element (D), which will switch
on and then off again when the heating process is complete.
NOTE: The machine is equipped with a
safety system that will stop the machine
after approximately 1.5 minutes of continued pump operation. (to prevent the
6.2
LIGHTING
The S-CM3
Romantica
is equipped with a
LED lighting system that lights up the coffee
dispensing area and is switched on using the
relevant button (N).
6.3
PREPARING THE
ACCESSORIES
The parts supplied together with the machine
require a small amount of preparation before
they can be used:
A) Insert the FILTER SPRING (3) inside the
FILTER HOLDER (2).
To replace the filter holder, use the special
tool supplied (14)
B) Then place one of the two filters (4 or 5)
inside the FILTER HOLDER (2) above the
filter spring.
1
2
3
4
5
14
WARNING
C) Partly pull out the machine and open the
water door ( L ); remove the water tank and
wash it carefully with soapy water.
D) Fill the tank with water
E) Make sure that the outside of the water
tank is dry.
F) Fit the tank back into its housing.
G) Close the tank housing door.
H) Open the coffee bean door (C).
I) Clean the coffee bean compartment.
L) Fill the compartment with coffee beans
only.
M) Close the door to the coffee bean compart-
ment.
N) Refit the machine inside the unit.
O) Make sure that the drip tray (Q) is properly
inserted.
pump from overheating). In this case,
switch off the machine with the main switch
(M) and switch it on again. During operation, the on indicator (I) and the heating element (D) indicator light will switch on.
3) Wait for the heating element indicator light
(D) to switch off; this means that the water
has reached the correct temperature. Turn
off the steam knob.
4) Note: If the water indicator (E) should
switch on, this means that the water tank
(L) is empty or nearly empty.
A
B
D E F GHI
M
N
Fig. 25
Page 34

7.
DISPENSING
32
Romantica
UK
7.1
PPRREEPPAARRIINNGG OONNEE OORR
TTWWOO EESSPPRREESSSSOO
CCOOFFFFEEEESS
1) After setting up the machine, make sure
that the filter holder (2) has a single (5) or
double (4) filter inside it, according to the
number of coffees to be dispensed. Use
the special tool supplied (14).
When moving the steam nozzle, it is obligatory to use the special heatproof holder (see
fig. 29).
7.2
SSTTEEAAMM DDIISSPPEENNSSIINNGG
2) Place the filter holder, with the filter inser-
ted, into the special grinder seat
(Fig. 1 “V”).
3) Keeping the filter holder in its rest, press
the button (A) “Coffee grinding” once to get
the amount of coffee required for one cup
and press it twice for two cups.
4) Use the coffee presser (Fig. 2 “6”) to press
the coffee down evenly into the filter and
then clean the edges.
5) Insert the filter into the opening, turning it
slightly until it is tightly in place.
6) Place one or two cups beneath the pouring
nozzles (according to the number of coffees required)
7) Turn the knob (F) to regulate the amount of
coffee required; turn it clockwise to increase the amount of coffee to be poured and
anticlockwise to reduce it.
Fig. 28
8) Press the coffee dispensing button (H); the
indicator light (G) will switch on and coffee
will start to come out of the pouring nozzles.
Fig.26
Fig. 27
9) Once the set amount has been poured, the
machine will stop automatically; to stop the
flow of coffee before the set time, anticlockwise rotate the knob (F) until minimum
and pouring will stop. When the coffee has
been dispensed, the indicator light (G) will
switch off.
10) NOTE: if the machine is to be used fre-
quently, it is possible to leave the used coffee in the filter; if not, the filter must be
emptied and cleaned.
WARNING
Fig. 29
1) After setting up the machine, clean the
steam nozzle with a cloth dampened with
hot water.
2) Make sure that the tip of the nozzle is insi-
de the drip tray.(Q)
3) Gradually and carefully turn the steam
knob (B), and after waiting for any drops of
water there may be to come out, immerse
the nozzle in the liquid to be heated.
4) Use the knob (B) to adjust the amount of
steam as required.
5) Once the liquid has been heated, turn off
the steam knob (B) and remove the container of heated liquid from below it.
6) Use a cloth dampened in hot water to wipe
the steam nozzle clean.
G
F
Page 35

33
Romantica
UK
7.3
ADJUSTING THE FINENESS AND AMOUNT OF
GROUND COFFEE
1) The machine is equipped with a professio-
nal coffee grinder with Ø 50 mm (Ø 1.97 in)
grinding wheels; its slow speed and even
grinding consistency prevent the coffee
from burning. If the ground coffee is not as
required, it is possible to change the grinding fineness and amount using the regulators in the left rear side of the machine (K
and Y) (see Fig. 30).
Fig. 30
To adjust grinding fineness, proceed as follows:
• Pull out the machine
• Use the Allen wrench (supplied) to move
the adjustment screw Y and change the
grinding fineness: turning the screw clockwise will mean coarser grinding, while
anticlockwise will mean finer grinding.
Fig. 31
Fig. 32
The level of the amount of coffee that will be
ground – as required for one or two doses –
is indicated in the grooves inside the filters
(see Fig. 31 – Fig. 32 2 double filter)
Turn the knob K clockwise to reduce the
amount of ground coffee dispensed and turn
it anticlockwise to increase it.
At the end of these adjustment steps, return
the machine to its housing.
K
Y
Page 36

34
Romantica
UK
8.
CLEANING AND MAINTENANCE
WARNING
Before performing any type of cleaning operation, except that for the dispensing unit or
steam nozzle, switch off the power to the machine using the main switch.
8.1
CLEANING THE NOZZLE
Use a cloth dampened with hot water and/or a mild detergent
8.2
CLEANING THE FILTER AND FILTER HOLDER
1) Separate the filter (Fig. 2 “4 - 5”) from the filter holder (Fig.2 “2”)
2) Clean with a jet of water and dry.
3) If necessary, use a brush to clean the filter.
8.3
CLEANING THE OUTSIDE OF THE MACHINE
WARNING
• Before performing any type of cleaning operation, except that for the dispensing unit or
steam nozzle, switch off the power to the machine using the main switch.
• Do not use abrasive or aggressive products to clean the steel, as these may corrode or
scratch the metal.
• Do not use solvents, chlorine-based or abrasive products to clean plastic parts. Cleaning
must be carried out with a damp cloth and a mild detergent, taking care not to scratch
the steel.
8.4
CLEANING THE DRIP
TRAY
1) Clean the drip tray with warm water and a
mild soap.
2) NOTE: the drip tray is dishwasher safe.
3) WARNING: never use solvents of any type.
8.5
CLEANING THE WATER
TANK
Use soapy water and rinse thoroughly.
8.6
CLEANING THE DISPENSING UNIT, SPRAY AND
GASKET
RISK OF SCALDS: This operation is performed with the machine switched on, therefore it requires the utmost care.
1) Remove the filter holder from its seating;
2) Clean the holes in the spray and the gasket
in the dispensing unit (Fig. 2 “3”) using a
brush with medium hard bristles;
3) Press the dispensing button to pass water
through the spray for about 20 seconds and
then press the button again.
4) Dry the spray and dispensing unit.
WARNING
8.7
MAINTENANCE
If the cleaning operations described in the previous section are carried out as stated, no
specific maintenance will be necessary. For
any assistance operations of a technical nature, call your dealer.
N°
TYPES OF CLEANING
PART No.
FREQUENCY
IMMEDIATELY AFTER USE
DAILY
WEEKLY
1
Cleaning the nozzle
Fig.1 “P” ♦
2
Cleaning the filter and filter
holder
Fig.2
“2, 4, 5”
♦
♦
3
Cleaning the outside of the
machine
♦
4
Grille cleaning
Fig.1 “Q”
♦
♦
5
Cleaning the drip tray
Fig.1 “Q”
♦ ♦ ♦
6
Cleaning the water tank
Fig.1 “L”
♦
7
Cleaning the dispensing
unit gasket
Fig.2 “3”
♦
♦
8
Cleaning the dispensing
unit and spray
Fig.2 “1-2”
♦ ♦♦
9
Cleaning the grounds
drawer and tray
Fig.1 “R”
♦ ♦♦
Page 37

35
Romantica
UK
9.
TROUBLESHOOTING....
If your espresso machine is not working correctly, try looking through the causes and solutions
listed here below. Also refer to the corresponding sections in the users’ manual.
PROBLEM
SOLUTION
Check to see whether or not the indicator light to show
insufficient water is switched on: this means there is not
enough water in the tank or that the tank has been inserted
incorrectly.
The coffee has been too finely ground or overly pressed.
Check the water dispenser spray
The machine is not
preparing espresso
coffees
Scale needs to be removed from the machine.
The filter holder has been inserted incorrectly
The filter holder has not been sufficiently tightened.
It is necessary to clean the coffee deposits on the gasket (see
cleaning section)
The coffee comes out
from the sides of the filter
holder
Check the coffee dose
The machine is not hot: has the heating element indicato r light
switched off?
The coffee is too coarsely ground
The coffee has not been properly pressed in the filter
The coffee is stale
There is insufficient foam
or no foam at all
The coffee is too finely ground
The coffee has been ove rly pressed
The coffee dose is excessive.
The foam is too dark
and/or the coffee has a
burnt taste
The hot water is passing too quickly through the filter. It should
take 25 -40 seconds to make two cups of coffee.
The coffee has not been properly pressed in the filter
The coffee is too coarsely ground.
The filter holder is cold. To keep it warm, the filter holder must
always be left in the machine during the heating stage and use.
There is a problem with the boiler tank safety thermostat:
contact your nearest as sistance centre.
The coffee is not hot
enough
Turn on the steam nozzle (P) and press the coffee switch
repeatedly.
The pump is not taking
water from the tank
Page 38

10.
WIRING DIAGRAM
36
Romantica
UK
Fig. 33
Page 39

Page 40

90000404133 Rev. B
La Sirius si riserva di apportare tutte le modifiche ritenute necessarie.
Sirius S.p.A.
Zona industriale Berbentina 6/a
60041 Sassoferrato (AN)
http://www.siriuscappe.com
Tel.++39 0732/97171
Fax: ++390732/95493
Graphics and printing by: X Type Engineering S.r.l
 Loading...