

Page 1
Model code:CAFF205SS
Page 2
Warning
Caution:r isk of fire(R60 0a)
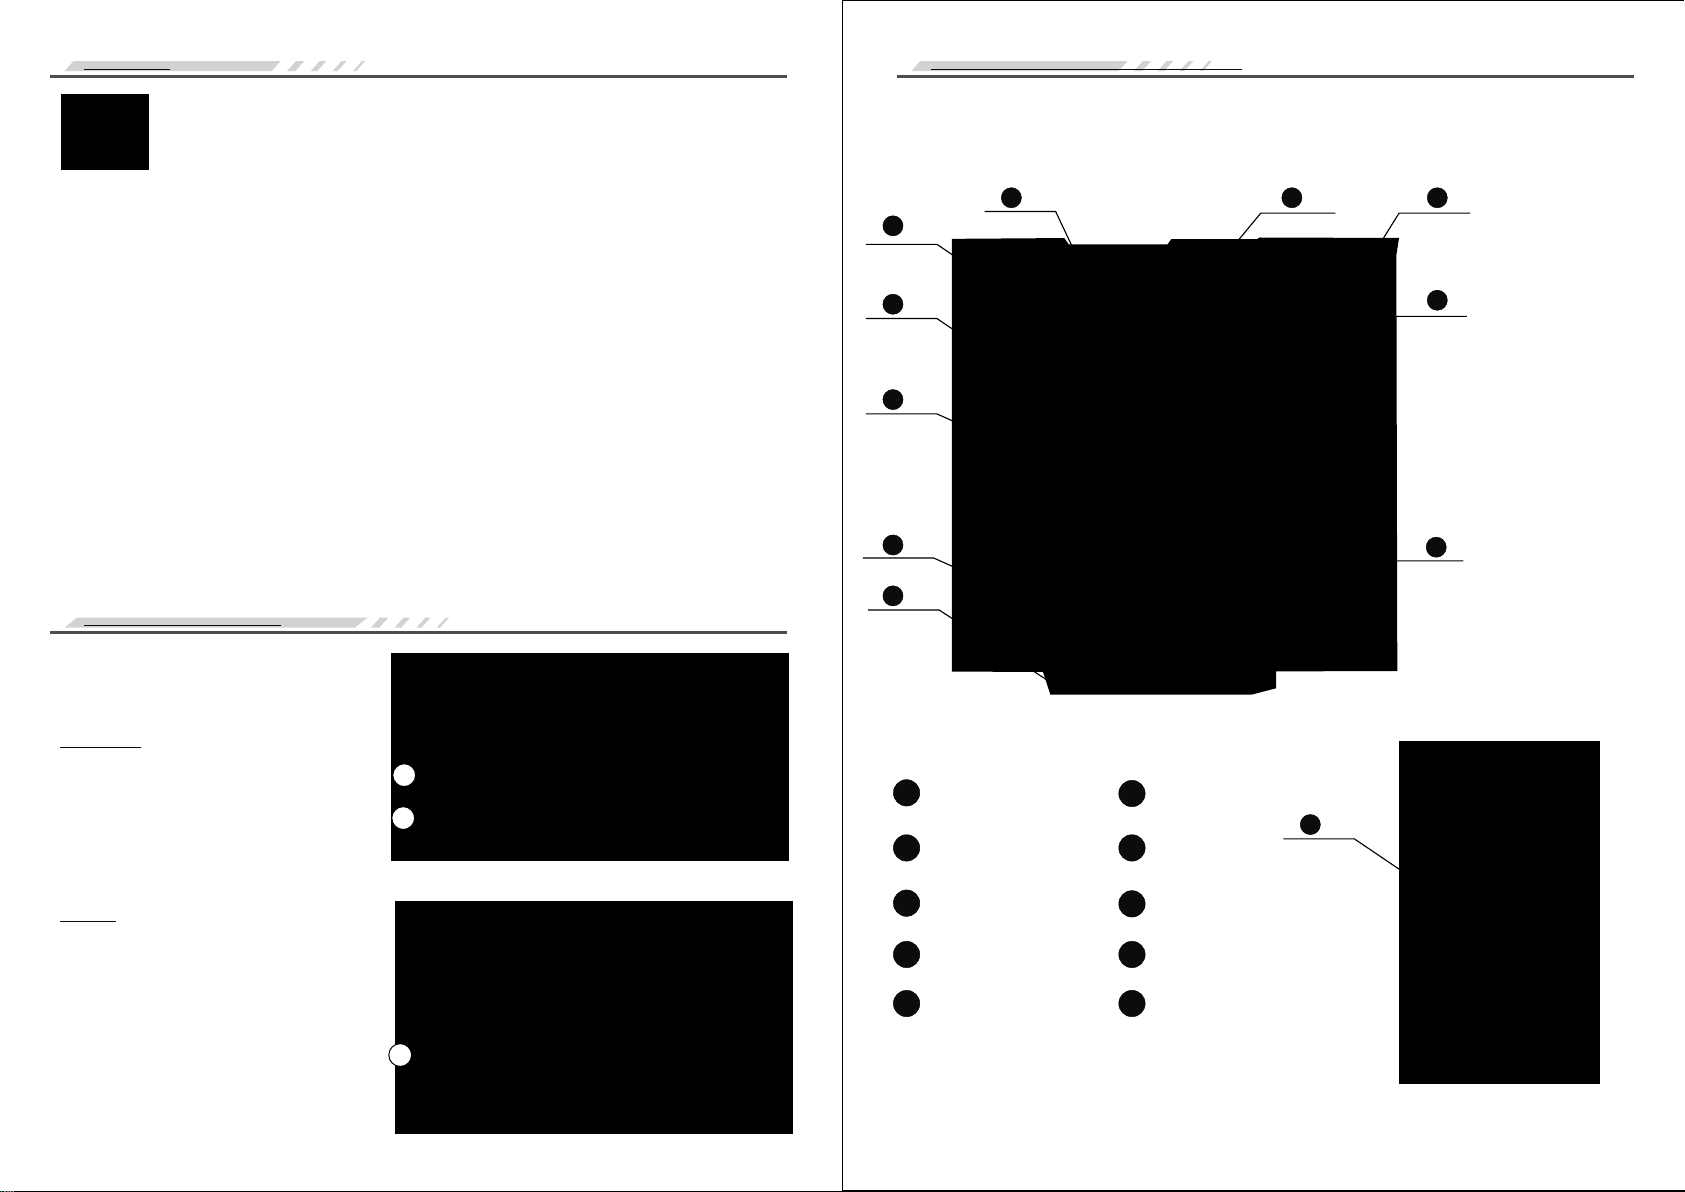
Description of all components
Some features and compo nents of the fridge freezer you bought may not be exactly
the same as the legend here, but in accordance with the packing list in the fridge
freezer.
War ning:connec t to the mains co ld water supply o nly.
When food needs to be frozen quickly, we recommend cooling
the food to room temperature first. Set the freezer to -24℃.
Select the quick freeze option and then add the fresh food.
Ic e-make r in sta llation
Un install
Lift the ice- make r up in the ① direct ion,
and pull i t out i n the direc tion ②, then t ake it o ut.
1
2
6 7 8
1
2
3
4
5
1
Freezer Door Tray
3 4
Freezer Shelf
2
Ice outlet
Freezer Drawer
9
10
2
In sta ll
Install the ic e-m aker , p ush it to the e nd
in the ① dir ection.
Pulley
5
Refrigerator Lamp
7 8
Refrigerator Shelf
9
1
1
Ice Maker
6
Refrigerator Door Tray
Crisper
10
2
Page 3
Preparation before use
Proper use of refrigerator
Features
lConstant- temperature p reservati on technology
The freezer has a s pecific air del ivery and cir culation syst em. It can contro l temperatu re
separately, so that the s torage temper ature is stab le and foods can be s aved longer.
lPre-cooli ng before defro sting
It can judge th e temperature i n the fridge fr eezer before de frosting an d do precooling t o
benefit the p re serving of th e foods with li ttle temperat ure change in t he fridge freez er
before and afte r defrostin g.
lIntellige nt defrost
According to ac tual use freq uency and fro sting speed, th e intelligent d efrost is ado pted
to save energ y.
lUltrathin , and luxury desi gn
It has ultrathin size, gr eat volum e, and la rge refri gerator a nd freeze r capabil ities. The
refrigera to r is made o f high-g rade tempered gla ss shelves and provided with a large
fruit and veg etable chambe r.
lFluorine-fr ee, frost-f ree and ful l air-coole d refrigerati on system provides qui ck
refrigera ti on and quick fr eezing.
lFun ction of automa tic default d isplay.
lIt is provi ded with a c ondensing unit and a fan for heat emi ssion, so that cooling
effect is p referable and t he life span of t he compress or is long.
lDoo r alarm.
lThe advised sto rage area for various foo ds in the refrigerato r (see the
Diagram on P1 )
lThe g lass shelf of the r efrigerat or: flour-bas ed foods, can s, milk, fast foo d,
dairy product s, cooked mea t, sausage an d so on.
lCri sper: fruits, v egetables a nd so on.
lSto rage box: eggs, b utter, chees e and so on.
lRef rigerator doo r tray: tear- off tins, c ans, condimen t, drinks and v arious
bottled foo ds .
Freezer
The tempera ture in the freez er is very low, so t hat the foods can b e stored fres hly for a
long time. Therefore, food can be store d a long time in th is place. But, th e storage tim e
on the food packa ge must be obse rved.
lThe advised s torage area for v arious food s in the freezer (s ee the Diagra m on
P1)
lFre ezer door tray (t wo star level ) is used for short -term reser vation of food.
lFre ezer door tray is u sed to store fr ozen food.
lFre ezer glass shel f is used to stor e frozen food, su ch as fish, mea t, ice cream
and so on.
lThe i ce maker is used to m ake ice.
lFre ezer drawer is us ed to store fis h, meat and packa ged poultry m eat.
3
Warning
lExcept the ma nners recomme nded by the man ufacturer, no ot her equipme nt
and manners can b e used to speed u p the process of de frost.
lExcept the ty pes recommend ed by the manuf acturer, no othe r electric ap pliances
can be used in the fo od refriger ator.
lR600a refrige rant and cycl opentane foam m aterials us ed in CAFF205SS a re
flammable. The waste ref rigerator ies need to be isol ated from fir e and cannot be
burnt.
Your new fridge fre ezer
lBefore the us e of the fridge fre ezer, remove a ll packages, in cluding bottom
cushion and foa m pads and rubb er belts in the fri dge freezer ;
lClear the outsi de and inside o f the fridge free zer
with a piece of warm wet cloth (li ttle deterg ent can be
added into the wa rm water. Clea n the fridge free zer with
fresh water l ast);
lPrepare a separ ate two-pol e grounding rec eptacle.
Do not share a mu lti-socket wi th other elec tric applianc es.
l The groun d wire must be well c onnected an d the
grounding pol e of the recept acle should be gr ounded
reliably.
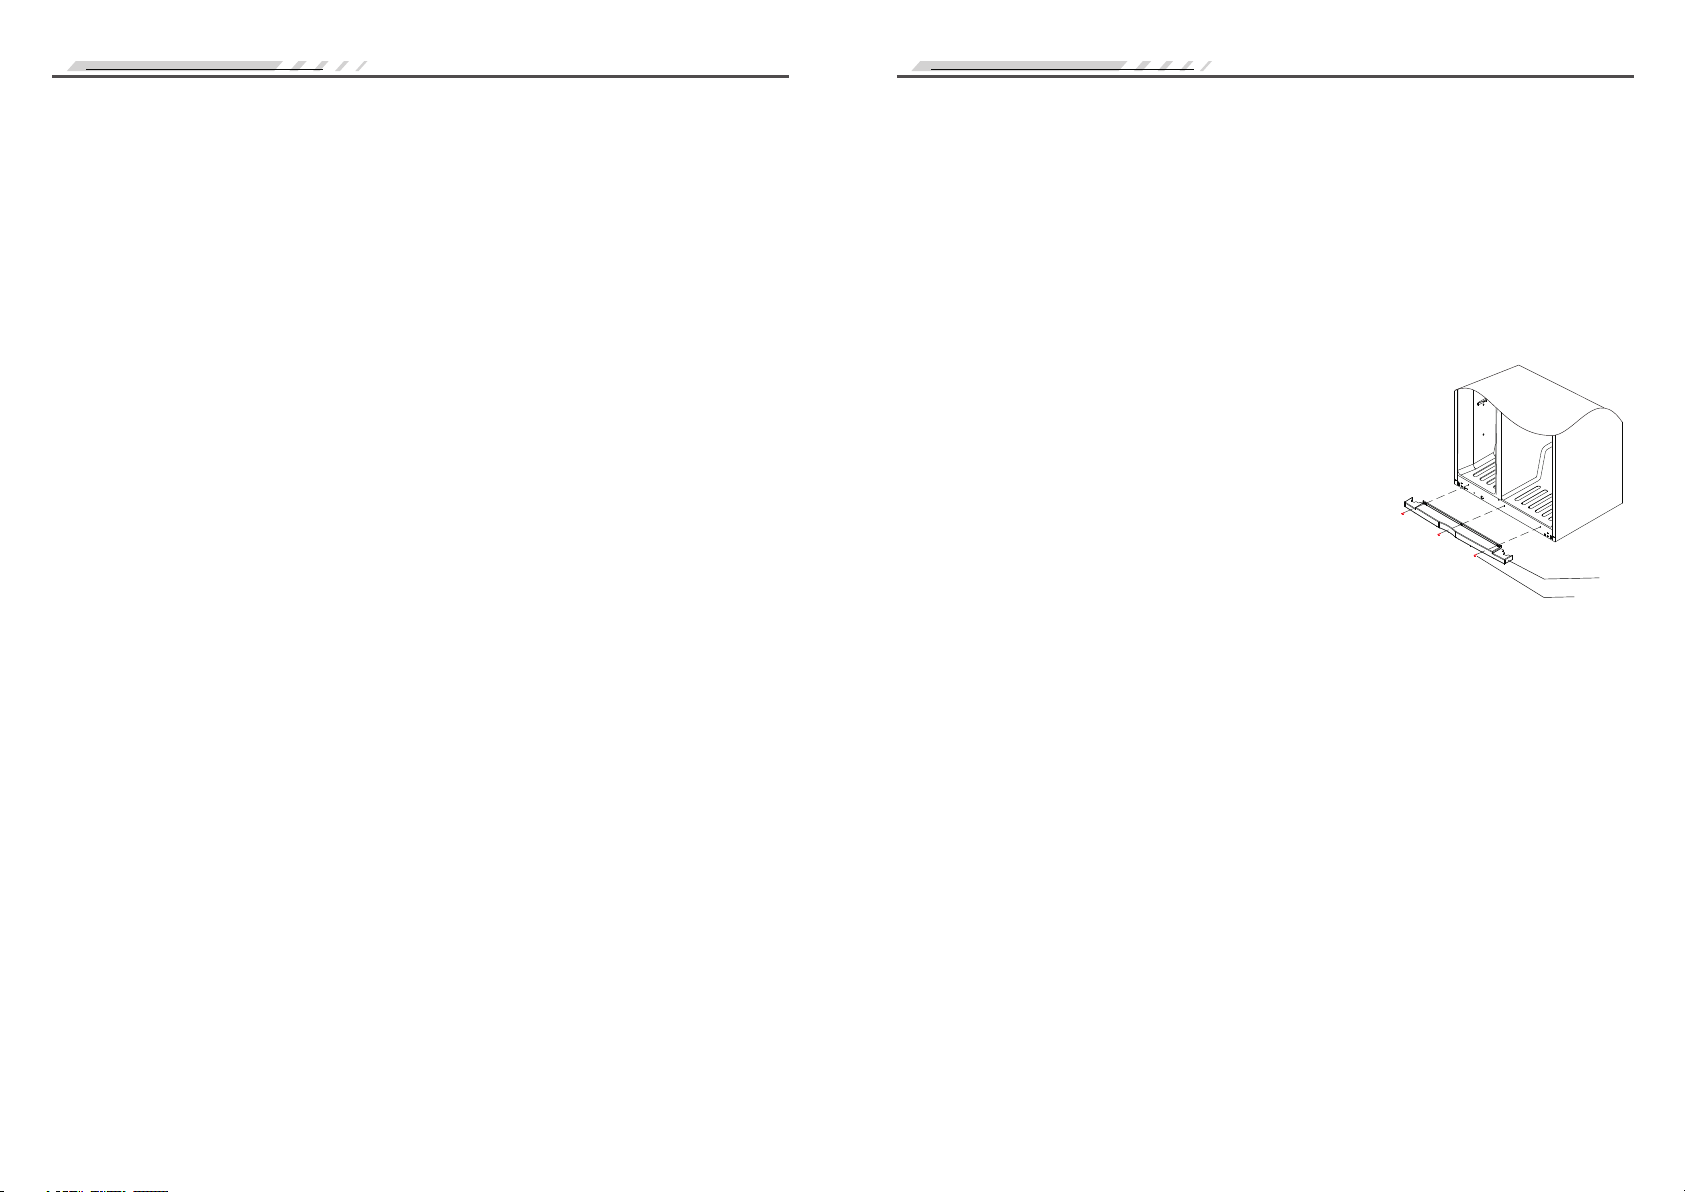
lOpen the door, tak e out the attac hments (the b ottom
decorative co ver), and thr ee setscrew s in the bag of the
Instructi on. And install it o nto the botto m beam of the fridg e freezer. For o peration
method, see t he right diagra m.
Bot tom-m ounte d
dec orati ve cove r
Scr ew
Transport and placement of refrige rator
Transport
lDo not invert, place horizon tally, squ eeze or shock the fridge freez er. And the
declination a ngle of the fri dge freezer mus t be no more than 4 5 when moving.
lWhen moving, do n ot force too mu ch on the door or t op for fear of defo rmation.
Placement
lPlace the fri dg e freezer at a we ll-ventil ated place and ke ep it away from hea t
and direct suns hine. Never p ut it at a damp or wa tery place, for f ear of rustin g or
weakening the i nsulation .
lThe top clearan ce outside th e fridge free zer must be no less t han 30cm, and t he
clearance fro m both sides an d back to the wal ls must be no less th an 10cm for the
convenience o f opening and h eat emission.
lPut the fridg e freezer on the fl at and solid gr ound. (adjust t he adjustab le legs to
get balance if un stable).
Switching on for the first time
lDo not switch o n the fridge free zer immedia tely after vert ical placem ent. Only
switch it on af ter 12 hours' sta nding to ensu re its proper ope ration.
Notice
To prevent damage t o the power cor d and any consequ ent inciden ts, the power cor d
should not be cov ered by the fri dge freezer or other objects .
Before swit ching on the refr igerator, pl ea se check the vo ltage range c arefully of the
fridge free ze r is the same as th at of the power s upply.
4
Page 4

Proper use of refrigerator
Proper use of refrigerator
Begin to use
Make sure the is located prop erly and stab ly and understa nd all safety
considerati ons.
After unsea li ng the refrig erator, to fix l ower cover on the r efrigerat or
1. Unpacking ( if the door heigh t is uneven, ad just it accordi ng to the
adjustmen t instruction a t the lower lef t corner of the fri dge freezer 's right side
plate)
After unpac king, install t he bottom dec oration cover o nto the refri gerator.
2. Switch-o n
automatic al ly. This has the power- down memory funct ion. After
the f irst switch- on, t he wil l operate as per the settings at last
power-down.
3. Storing fo ods.
summer), th e the is full y cool. The n, foods can be put i n and the
fridge free ze r
been put in, th e inner tempera ture of the fri dge freezer can r each a balance
after a peri od of ti me. And the length of the period is de te rmined by th e
cha n ging of tem p erat ure s e tti n g, a m bien t t emp e ratu re, o p eni n g
frequency, amount of fo od in the fridge fr eezer, etc.
fridge free zer
When switch ing-on, the enters th e state of fa ctory setti ngs
fridge free zer
fridge freeze r
fridge fre ezer
After switc hing on and opera ting for a peri od o f time (about 3 -5 hours in
fridge free zer
can be used forma lly.
Tips: after the temperature setti ng has been change d or new fo od has
Refrigerator
Though mos t places in the refrig erator can be kept at
2-8℃ aver agely by a djusting temper ature setting , the food
in th e refrigerator cann ot be ke pt fr esh for a lon g time.
Therefore , the refrigerat or can only serve to store food i n
short term.
Adjustment of shelf
According to the n eed of the food t o be stored, the shelf
can be adjusted t o a proper heig ht.
To ease the u se or adjus tment of th e shelf, it is designe d
for sliding; when cleanin g the glass sh elf, please p ull
the gla ss shel f in the direction 1 and turn it in the
direction 2 at t he s ame ti me unt il i t is perpe ndicular to
the original posi tion, and then take it out at 90° in
the directi on 3 .
Adjustment and cleaning of door tray
Hold two sides of the tray, lift it up in the ① dire ction, and
pull it out in th e di rection ②.
After clean in g, install th e tray in oppos ite
directions.
The installat ion place can b e adjusted acco rding to the
height of the f ood.
1
1
2
3
2
Operation and precautions for ice maker
Note:
Connection of w ater p ipes: ple ase contact the after-sales Se rvice Dep artme nt of the Compan y
or professio nals to i nstall to avoi d any risk.
Warning!
The wate r pipe s must be connected w hile t he mac hine is s witch ed off. Electric s hock m ay
cause serious injury or death.
Notices!
The w ater pipe can not be u sed where env ironm ental temperature is under 0℃ , Or it may
lead to freezi ng.
The water pipe cannot be connected to h ot wate r, which may lead to deformatio n.
The water pipe should be used in the pressure range 30-100psi.
Lower p ressu re may ca use sma ller ic e pieces and longer water exiting time.
But hig her pressure may damage the fi lter.
The pipe cannot be connected to drinks, alco hol or other liquids except for water.
1.Turn off t he water-ta p.
2.Connect wat er p ipe onto the water- tap. The water pipe s hould be long enoug h
to preven t the dro p-off of the water pipe cau sed by re moving of fridge
freezer.
3.Turn off t he fridge fre ezer.
4.Use a co nnecting pipe to connec t the wate r pi pes be hind the f ridge freezer
and on the wate r-tap.
5.To preve nt the drop-off o r leaking of the wa ter pipes, they m ust be fixed by
fixed pins.
6.Turn on th e water tap to ch eck leakage.
7.The refri gerator is conn ected to the po wer supply and
used normal ly.
Using the Automatic ice maker/water dispenser
Notices!
The water pipes are used in the pressure range of 30-100psi.
Wat er soft eners m ay dama ge the ic e maker a nd must n ot be
used.
Please check the ice pieces in the stor age box when poweroff abo ve 1h. If t he ice pi eces ar e thawi ng and bi nding t ogeth er,
please empty them, be cause t he bound ice pieces may cause
Failure of the i ce syst em.
When the ic e piece s in the stor age box are bind ing together, It is better to me lt it wit h warm
water rat her than smas h an d take out them wit h a sharp tool, whi ch m ay d amage the f ridge
freez er.
Ice maker
A. Supply of cold water
1. Choose the ice/wa ter button on the displ ay board, and make sure the wat er
indicator tur ns on.
2. When the wate r switch plate is p ressed by the c up, the cold wate r comes out.
3. When usin g the f ridge freezer the first time, wat er does not come out befo re
the water tank in the frid ge freezer is fil led up. The nor mal manner to get water is
pushing and hol ding the swit ch plate for 2-3 mi nutes.
4. After the water c omes out, plea se discharge w ater for about 3 min utes to
purge the air and s mell of plast ic in the water pip e.
5. When cold water i s required, i t's better to g et some ice befor e getting wat er.
6. When gettin g wa ter, it is norma l for noise of va lve to be heard.
5
6
Page 5

Proper use of refrigerator Proper use of refrigerator
A.Operation of automatic ice maker
1.Automat ic ic e m aker operates when the free zer reaches the requir ed temperature
below 0℃ a fter a period of time when th e fridge free zer is ener gized. Under
normal tem perature, the time be tween the refrigerat or's first energizin g and fir st
making of ice is ab out 6 hours.
2.The ice firstly made after the ins tallation of the fridg e f reezer should be thrown
away because of p lastic smel l and impuritie s.
3.The time interval of ice making is about 2 hour s, an d the am ount of the ice is
differe nt according to d ifferen t service con ditions.
4.When the ice stora ge is full, the i ce mak er wil l stop automat ically, and when the ic e
storage is empty, the ice m aker will make ic e again autom atically.
5.The n oises for de -icing, motor operati on, dro pping of ice into the ice storage, and
operation of wa ter supply va lve may not happe n periodica lly. The y are not error s.
6.Please use th e bu tton on/off on the distrib utor to turn off th e ice-making fu nction
when i t is not required. The ice maker is sold under ON state. If u nnecessary,
please turn off this functio n timely after in stallation of the fridge free zer. When
the ice-making fu nction is turned on witho ut connection of water ways, there are
operational n oises of wate r supply valve.
7.When th e ice p iece is smaller than us ual in a certa in period of tim e, please verify
the replacemen t fre quency of the filter. When the filter reaches its opera tion
time, the wat er supply press ure is lower an d the ice piece is sm aller.
8.When cleaning the i ce stor age b ox, tur n off the ice-mak ing fun ction o n the
distributor before detac hing the ice st orage box.
Please do not twist or turn the internal workings of the i ce dispenser when
9.
re-installing the ice storage box, this is to ensure the Helix is not
damaged. If it has moved out of line p le as e ge nt ly t ur n it l ef t or right to
allow the ice storage box to be installed.
How to replace the water filter
1.The filter installed in this fridg e freezer i s refined by N SF42, which c an filter t he
smell, chlori ne and so on in run ning water.
2.The re placement cycle of the filter i s abou t 6 m ouths. When a replac ement is
needed, the indi cator on the display board will tur n on. The replacemen t cycle
may be shorte ne d according t o operating env ironment.
3.With the function of BY-PASS, it can supp ly water no rmally with out the f ilter. If
necessary, additional fil ter can be installed and use d o ut of th e f ridge freezer
by yourself.
4.During replacem ent, l ittle water in the connect ion part may drop out, a contai ner
can be located un der it to recei ve the drops.
5.The filter is insta lled in the liner of the refriger ator. You c an s eize the lower bugle
and turn it leftw ard to take it out. W hen it is difficult to take ou t, you can detach
the lampshade i n the refrige rator before de taching the f ilter.
6.The assem bling is in opposite o rder. Push i t upwards and turn it to the right at
the same time .
Operating instruction for the display and control panel
B.Supply of ice
1.Choose th e ic e/ water butt on on the displ ay
board, sele ct entire or crus hed ice piece s and
make sure the r elevant indic ator turns on .
2.Use the con tainer to push an d hold the switch
plate to get ic e.
3.Accordi ng to the water sup ply conditi on , some
mixed small i ce pieces may com e out when gett ing
the entire ic e pieces..
4.When crus he d ice pieces ar e required, ple ase
press the con tainer most clo se to the ice dis charging
outlet to pre vent the crushe d ice from drop ping out.
5.When gett ing ice, the nois es of the motor a re heard,
crushing ice an d so on are norma l.
6.To protect th e motor, the fridg e freezer wil l stop when
the switch pl ate is pushed for 1 m inute or more . Then,
releasing the switch plate a nd waiting a mome nt, you
can get ice nor mally again. Wh en large amount o f
entire ice pi eces are requir ed, please open t he door
Of freezer, ta ke the ice storag e box out and use t he ice in it.
7 8
Button setting
When p ower-on, the will operate in t he intel ligent mode. The system
automatical ly sets the refriger ator temper ature at 5℃ ,and that o f the freez er at 18℃.
fridge freezer
Refrigerator temperature sett ing
Function:
A. Set the tempe rature of the in the followin g range: 02℃- 08℃.
1℃changes with ev ery button pr ess.
B. Achieve the turn-on and turn -off of the r efrigerat or.
fridge free ze r
Operation:
Temperature adjus ting: push t he button “ REF.TEMP.” , a nd the i con of the
refrigerato r flashes. A nd pus h the but ton once ag ain, to adjust the t emperature
(the cy cle of the adj ustment o rder is 08-02-08 ), and the set ting co mes into effec t
after 5 secon ds.
Page 6

Proper use of refrigerator Proper use of refrigerator
Tur ning off the refriger ator: when the ref rigerator is the ON , pu sh and hold the
button“ RE F.TEMP.” for 3 se conds, th e refrigera tor is turned off with a beep.
Adjust the te mperature to ca ncel the func tion of turn-off.
When closi ng the re frigerato r, the ico n of the r efrigerat or turns on. The d ouble
8 shows “- -”, and the r elevant icon of t he refriger ator turns off.
Freezer temperature setting
Function:
Set the tempera ture of the freeze r i n t he following ra nge: -16℃- -24℃. 1℃ changes
with every press.
Operation:
Temperature adjus ting: push t he button “ FRZ.TEMP.” once, and the ic on of the
freezer fla shes. Pus h the butto n again to adjust temp erature. (T he cycle of the
adjustment order i s the pre sent tempe rature- -1 6- … …- -24 - -16) The sett ing comes
into effe ct after 5 seco nds of temperat ure adjusti ng.
Vacation mode
Push t he button “ VACATIO N” , "VACATION" icon turns on, to enter the v acation
mode. Push th is button again t o exit this mod e.
The system ca n close the re frigerator a utomaticall y. Th e r efrigerat or temperatu re is
set a t -15℃. The closed compar tments will not c ool. The cooling compart ments will
operate at th e set temperatu re.
Energy-saving mode
In the mode of energy saving, the ref rigerator and freezer ope rate at the set
temperatu re Trs= 7℃ and Trs= -15℃ re spectivel y.
QUICK REF.: push this button , an d the indi cator of quick cooling flas hes, which
indicates t he quic k-cooling mode. The releva nt icon s and w ords fl ash. Pu sh th e
unlock button to confirm it.
QUICK FRZ.: push th is button, and the i ndicator o f quick-fr eeze flashes, which
indicates the q ui ck-freeze m ode. The rele vant icons and word s fl ash. Push the
unlock button to confirm it.
Push the button “QUICK FRZ”again whe n th e qu ic k-freeze icon fla shes, the quickfreeze time shown by the freeze r ch anges in the cycle of 6h-8h-12h -24h-48h- exit the
quick-fre ez e mode. Push the butto n of “ L OCK/UNLOCK” to confirm it and t he
flashing stop s.
Quick FRZ. func tion is a design aim to maintain the nu tritional val ue o f frozen
food. It can be thoroug hly froz en in t he short est time . If yo u need to freez e a lot
of food in on e time , we recommend setting fast freezing feature 12h in advan ce,
so the fr eezer coul d turn to a low t emperatur e, and th en put the food in . At that
time, the freezing ca pability speeds up in freezer, freezin g foods quickly and
effecti vely lock the foo ds’ nutritio n.
Unlock
Under th e lock st ate, p ush and hold th e button “ LOCK /UNLOCK” for 3
seconds, the display p anel unlocks. If time is less than 3 seconds the unl ock
icon flashes, which means un lock failed.
Under the unlock s tate, push a nd ho ld the button “ LOCK/UNLO CK” for 3
seconds, it wil l be locked man ually, and t he lock icon turn s on.
Every time th e operation but ton is pushed , it sets off a b eep. Do not pus h any
button after continuou s 60 seconds, it will be l ocked automa tically, and the lock
icon turns on .
All o perations (excep t the ice- water s elector key and the filter reset key) under
the unlock state are avail able. Unde r the lock state, the lock icons flash with
beep alarm when p ushing othe r buttons.
Switch key for the ice maker
Choose th e switch key of ice mak er, push to sta rt ice-ma king func tion unti l the
ice sto rage box is full, after remov ing the ice c ubes th e ice storag e wil l be filled
automaticll y, and push this button aga in to cancel th e ice-making fu nction.
Key of ice water selecting: (available in the key lock state) push
this button a nd g et water, ice, c rushed ice ac cording to the fo llowing cyc le .
water ---- cr ushed ice ---- ic e
Reset of the filter
Push and hold the f ilter reset b utton for 3 sec onds to reset the f ilter.
Memory of the first energized state a fter power cut
The control le r has the funct ion of power cu t memory.
Memory cont en ts:
Mode (quick-f reeze time an d quick cool ti me w ill be retime d after power-u p)
The setting t emperature of r efrigerat or and freezer
Accumulatio n time of defrost ( time accuracy : 1h ) (if the tempera ture of the
defrost sen sor > 2℃, the defrost t ime accurac y is 0.)
The firs t power- up sta te: the default state (setting tempera ture: re frigerator 5℃/
Freezer-1 8℃) (the factory st ate of the cont roller)
9
10
Page 7

Care an d maintena nce of the ref rigerato r
Cleaning
Clean the dust on the back of the re frigerato r and the floor reg ularly.
Clean t he inner side of the refriger ator usually to prevent peculi ar smell. Ple ase
unplug the power cord during cleaning. Use soft towel and neut ral de tergent, and
clean it with f resh water last ly.
Please do not use the followin g objects to cl ean the inner sid e of the refrig erator:
● Alkaline or strongly alkaline detergen t (may make th e liner an d plastic
components crack);
● S oap powde r, benzine , banana oil, sp irit and so on (may damag e the pla stic
components) ;
● Plea se remove quick ly oils and condiment (may m ake the plastic co mponents
crack).
Lamp and its replacement
The paramet ers of the lamps of r efrigerat or,
freezer and d is tributor an d the replace ment
lamps are direc t current (DC ) 12V, LED .
When the lamp s are replaced:
●Unplug the plug t o cut off the power.
●Push and remove the lampshad e
according t o the direction i n the attache d
drawing. Re move the screws a nd the LED lamp .
●Reassemble th em in the oppos ite process .
●Replacement s hould be done b y a professiona l.
Freezer lam p
Lamp
Sha de
Lamp bas e
Annou ncements
uses
are
sound.
become trapped
Shade
Arr ow indi cates t he
dir ectio n of dism antle .
Downtime
When the frid ge freezer is not u sed for a long ti me,
●Turn off the power to prevent ele ctric shock and accidents cause d by aging pow er
cord.
●Clean the inner s ide of the frid ge freezer .
●Ope n the door for a time, and close it with a sma ll ga p aft er th e inn er si de of the
fridge free zer is dry to preve nt bad smells .
Power-off
●Re duce the opening times as much as possi ble.
It i s best not to add food to the
fridge freezer when the power is off to prevent the loss of temperature.
Disposing of your fridge freezer
●Remov e the d oor of the r efrigerator when the wast e one is dis carded to preven t
the accident
of a child becoming stuck in the fridge freezer
11
if
12
Page 8

Simpl e trouble an alyzing an d sho oting
the
prevent
climbing
This applia nce is not intended for use by persons (including children) with
reduced phy sical, sensory or mental capabilities, or lack of experience and
knowledge , unless they have been given su pervision or instruction concerning
use of the appl iance by a person responsibl e for their safety.
Children sh ould be supervised to ensure t hat they do not play with the
appliance .
If the supply c ord is damaged, it must be replaced by the manufacturer, its service
agent or simi larly qualified persons in order to avoid a hazard.
– WARNING: Kee p ventilation openings, in the applianc e enclosure or in the
built-in st ructure, clear of obstruction.
– WARNING: Do no t use mechanical devices or other means to ac celerate the
defrostin g process, other than those re commended by the manufacturer.
– WARNING: Do no t damage the refrigerant circuit.
– WARNING: Do no t use electrical appliances inside the fo od storage
compartme nts of the appliance, unless they are of the type recommended by
the manufac turer.
Do not store ex plosive substances such as a erosol cans with a flammable
propellan t in this appliance.
This applia nce is intended to be used in household and similar applications such
as
– staff kitchen areas in shops, offices and other working environments;
– farm houses a nd by clients in hotels, motels and other residential type
environme nts;
– bed and break fast type environments;
– The product i s not designed to be used in a commercial appli cation.
Simpl e trouble an alyzing an d sho oting
not cooling c orrectl y
Food stored in fridge
compartme nt is froze n
Odour
does not improve
Make sure the p roduct is connected to
the power sup ply and it is switched on.
Is the temper ature adjusted correctly,
lower if requ ired.
Is too much foo d being stored?
Has hot or warm f ood been recently added?
Are the doors b eing opened too frequently ?
Is the produc t located near a heat source?
Is the produc t on a level floor?
Has it been cor rectly levelled ?
Please chec k if food was stored
close to the ai r flue outlet.
Food with str ong odours should be
packed well .
Has the food be ing stored gone off?
Clean the fri dge freezer
13
14
Page 9
Energy sa ving tips
Energy Saving Tips
· The appliance should be located in the coolest area of the room, away
from heat pro ducing appliances or heating ducts, and out of the direct
sunlight.
· Let hot foods c ool to room temperature before placing in the appliance.
Overloadi ng the appliance forces the compressor to run longer. Foods that
freeze too sl owly may lose quality, or spoil.
· Be sure to wrap f oods properly, and wipe containers dry b efore placing
them in the app liance. This cuts down on frost build-up inside the ap pliance.
· Appliance storage bin sho uld not be lined with aluminum foil, wax paper,
or paper towe ling. Liners interfere with cold air circulation, making the
appliance l ess efficient.
· Organize and label food to reduce door openings and extended sear ches.
Remove as man y items as needed at one time, and close the door as soon as
possible.
Note: Figures in the user manual are only for reference. The actual product
may differ slig htly.
15
 Loading...