

Page 1
Instruction manual for integrated hood
Model code: 1MINCH7 & 2MINCH7
Contact Caple on 0844 800 3830 or for spare parts www.4caple.co.uk
Page 2

Warning
Your cooker hood is for domestic use only, not suitable commercial use.
Keep children from using the cooker hood.
Any installation work must be carried out by a qualified electrician or competent person.
The cooker hood and its filter mesh should be cleaned regularly in order to keep in good
working order.
Before cleaning, always ensure that you have switched your cooker hood off.
Clean the cooker hood according to the instruction manual and keep the cooker hood from the
danger of burning.
Do not use fire for drying your cooker hood.
If there is any fault with your cooker hood, please call the service department appointed by
Caple.
Please keep the room ventilated when your cooker hood and gas hob are working.
Do not exhaust the cooker hood through the same heated flue which is used for the gas hob or
other kitchen appliances.
Thank you for purchasing this Caple cooker hood. Please read the instruction manual carefully
before you use the hood, and keep it in a safe place.
· The installation work must be carried out by a qualified electrician or competent person. Before
you use the cooker hood, make sure that the voltage (V) and the frequency (Hz) indicated on the
cooker hood are exactly the same as the voltage (V) and the frequency (Hz) in your home.
· The manufacturer and the agent will not bear any responsibility for the damage caused by
inappropriate installation and usage.
Function and Feature
1. The cooker hood is made of high quality materials perfect your kitchen.
2. Equipped with a high power low noise electric motor and centrifugal leaf, it produces strong
suction, low noise, non stick grease filter which is easy to clean.
3. The grease filter is easy to remove and clean, only wipe the motor and other interior parts lightly.
4. A special wind tunnel construction and oil collector design has been used, avoiding redundant
grease left in the flue.
Page 3
Use
◆ When cooking, pull up the covering metal board, turn on the cooker hood, and then choose the
speed.
◆ When you finish cooking, push down the covering metal board, and turn off the cooker hood.
.
◆ When you turn on the cooker hood again, the speed of the cooker hood remains the same as last
time you used it.
◆ Whether the covering metal board is open or not, you can turn on the light. Also you can turn
on the light, when the speed is at 0.
◆ You can turn off the cooker hood in two ways:
1. Turn off the speed.
2. Push down the covering metal board (The speed is still on.)
When you pull up the covering metal board again, the speed of the cooker hood remains the
same as last time you used it.
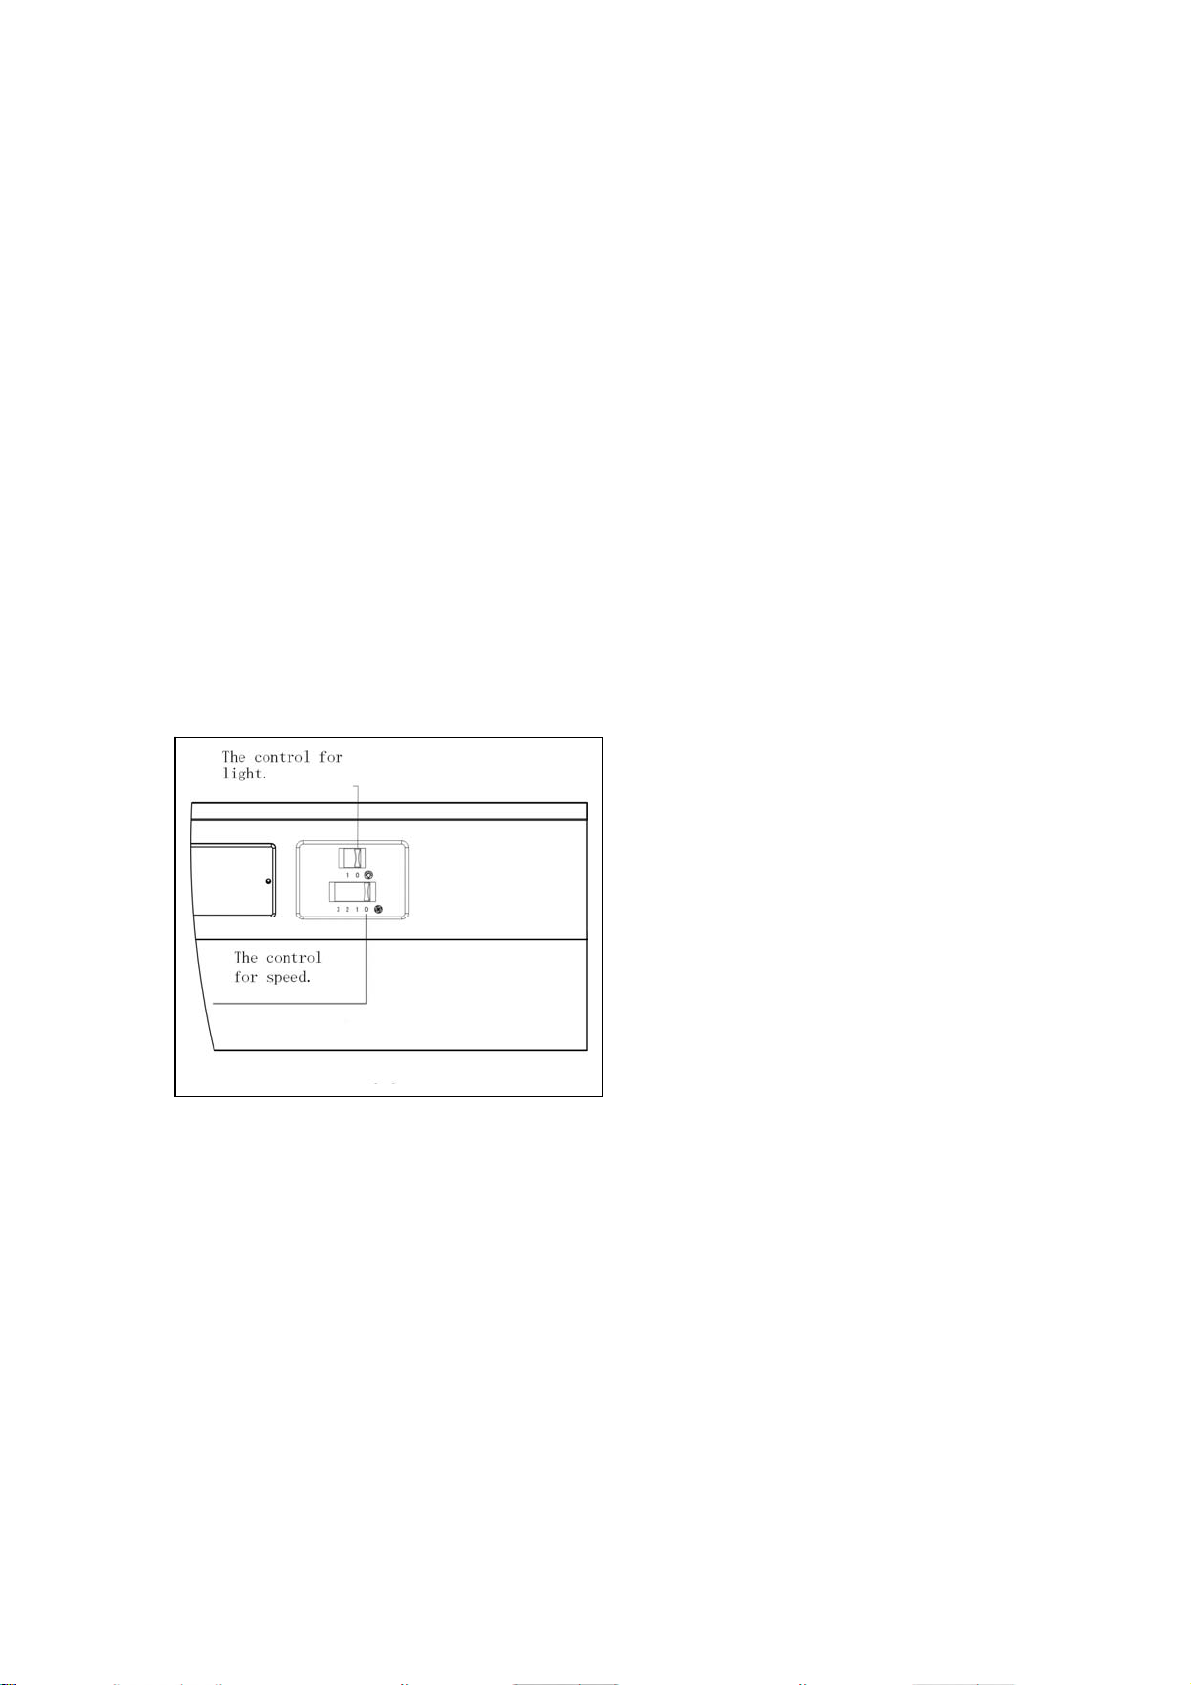
How to use the control panel: See Pic 2
a. Press the button “Stop” to stop the motor working.
b. Press the button “Low” to make the motor run at low speed
c. Press the button “Mid” to make the motor run at medium speed.
d. Press the button “High” to make the motor run at high speed.
e. Press the button “Light”, both lights are on. Press it again, both are off.
Page 4

Page 5

Installation
1. The cooker hood should be placed at a distance of 65-75cm (26-30inch) from the cooking
surface for the best effect. See Pic 3.
2. Install the cooker hood between two cupboards. Drill and screw on the side boards of the
cupboards (the holes≤2mm).The distance between the head of the screw and the side board
should be 5mm, and the distance between the screw and the cooking surface should no less
than 1040mm. If there is not enough room, you can place it higher or lower. See Pic 4
3. Hang the cooker hood on the screws between the two cupboards. See Pic 5
4. Push the fan-shaped door frames to the end, in order to make the outer edges of the door
frames at the same
5. Mark the positions where you install the lower screws. Drill the upper hole and fix the screws.
Make sure all four screws are well fixed. See Pic 6
6. Connect the air-outlet board and the air-outlet tube.
7. Door installation: The door should be no less than 16mm thick, 385-700mm high, and weigh
no more than 7KG. Pull out the movable fan-shaped door frames by the plastic handle, and
place the fan-shaped door frames one on left and one on right. See Pic 8
8. Mark the installation position of the door and the size of the fixed screws. If the upper edge of
the door is not as high as the upper edge of the cupboards, please adjust the size accordingly.
Mark the positions of the screws on the door, and make sure the size is as
Pic 9
9. Fix the fan-shaped door frames on the door with screws. Make sure the frames are
Install the door into the cooker hood, the two sides of the door can be pulled to the end and the door can be safely
locked. If the door can not be safely locked, you can release
10. The two screws on both sides of the cooker hood can adjust the sliding of the door, according
to the weight of the door. See Pic 11
11. Install the adjusting plate, in order to cover the gap between the wall and the bottom of the
cooker hood. See Pic 12
vertical level as the outer edge of the cupboards. See Pic 6
accurate as 569±1. See
symmetrical.
the plastic handle. See Pic 10
Page 6

Pic 3 Pic 4
Pic 5 Pic 6
Pic 7 Pic 8
Page 7

Pic 9 Pic 10
Pic 11 Pic 12
Cleaning and Maintenance
Change and clean the grease filter:
You can remove the grease filters following the instruction of Pic 13 and Pic 14, and clean the filters
as below:
1. Put the filter in the water(40℃-50℃), pour in some grease-loosening detergent, soak it for
about 2-3 minutes and then clean it with a soft brush. Do not brush too hard, in case to damage
the filter.
2. Also can put the filter into a dishwasher with detergent for cleaning. Set the temperature at
around 60℃.
If the cooker hood works for 1-2 hours at average per day, change the filter cloth every 8-10 weeks.
Because the grease filters are made of metal, do not clean the filters with detergents that will
corrode metal products.
Page 8

NOTE: make sure the cooker hood is shut off before cleaning
Pic 13 Pic 14
Change the Lamp
Remove the panel to change the lamp.
See Pic 15.
NOTE: Make sure the cooker hood is shut
off before you change the lamp.
Pic 15
Page 9

GUARANTEE CONDITIONS
Caple undertake that if within twelve months of the date of the purchase this built-in appliance or
any part thereof that is proved to be defective by reason only of faulty workmanship or materials,
the company will, at our option repair or replace the same FREE OF ANY CHARGE for labour,
materials or carriage on condition that:
Documentation must be provided BEFORE a guarantee repair is commenced that the extractor is
within the 12 month guarantee period.
The appliance has been correctly installed and used only on the electrical supply stated on the
rating plate.
The appliance has been used for normal domestic purposes only, and in accordance with the
manufacturer’s operating and maintenance instructions.
The appliance has not been serviced, maintained, repaired, taken apart or tampered with by any
person not authorised by us.
All service work under this guarantee must be undertaken by Caple Service Centre.
Any appliance or defective part replaced shall become the property of this company.
Home visits are made between 8.30am and 5.30pm Monday to Friday.
If a service call is made and it is found that the installation has not been carried out correctly or
customer misuse/abuse is involved THE COST OF THE SERVICE CALL HAS TO BE PAID FOR BY THE
USER BEFORE ANY SERVICE WORK IS CARRIED OUT.
EXCLUSIONS
This Guarantee does not cover:
Damage or calls resulting from transportation, improper use or neglect, the replacement of any
light bulbs or removable parts of glass or plastic.
Costs incurred for calls to put right appliances improperly installed or calls to appliances outside
the United Kingdom.
Appliances found to be in use within a commercial environment, plus those which are the subject
of rental agreements.
This guarantee is in addition to your statutory and legal rights.
Page 10

www.caple.co.uk
Caple service 0844 800 3830
 Loading...