

Capital SIRIUS TRADITIONAL Installation And Operating Instructions Manual
SIRIUS TRADITIONAL Clean Burn
CAST-IRON MULTI-FUEL STOVE
INSTALLATION AND OPERATING INSTRUCTIONS
document v177 of 16/02/2012 (Sirius Traditional)
LEAVE THIS DOCUMENT WITH THE HOUSEHOLDER !
THE INSTALLATION AND SERVICING OF THIS APPLIANCE MUST BE SUPERVISED BY A
QUALIFIED SOLID FUEL ENGINEER. THE SUPPLIERS WILL ACCEPT NO RESPONSIBILITY
WHATEVER FOR APPLIANCES NOT SO INSTALLED. A register of qualified engineers is available from:
UK: The Solid Fuel Association, 7 Swanwick Court Alfreton Derbyshire DE55 7AS Tel:0845-601-4406 www.solidfuel.co.uk
RoI: Irish Nationwide Fireplace Organisation, 162 Capel Street, Dublin 1 Tel:01-801-5959 www.fireplace.ie
Building rules and regulations for the UK, RoI and IoM can be found at
www.soliftec.com
ASBESTOS: This product does not contain asbestos, but you should be
careful to avoid disturbing any asbestos when removing an old installation.
FIRE CEMENT is caustic - wash your hands thoroughly after using it.
WEIGHT Protect your spine by moving the stove only with assistance.
FUME EMISSION: Properly installed and operated this appliance will not
emit fumes into the dwelling. Occasional fumes from de-ashing and refuelling
may occur. However, persistent fume emission is potentially dangerous and
must not be tolerated. If fume emission persists, then the following immediate
action should be taken:
(a) open doors and windows to ventilate the room. (b) let the fire go out or
eject and safely dispose of fuel from the appliance. (c) check the flue or
chimney for blockage and clean if required. (d) do not attempt to re-light the
fire until the cause of the fume emission has been identified and corrected. If
necessary seek expert advice
BEFORE YOU BEGIN
YOUR CHIMNEY creates the draught which makes your stove work - it must:
Generate a draught in use of at least 12Pa (0.05ins wg)
Be capable of withstanding the temperatures generated.
Be incapable of leaking fumes into the dwelling
This will commonly be achieved by it:
Being at least 5m high.
Terminating at least 1m above any roof ridge.
Having an internal cross-section not less than 0.018m² (eg 150mm dia) and never more than 0.14m² (eg 375 x 375mm)
Being free from even the slightest crack or source of leakage.
Having no bends sharper than 45º.
Being entirely free of obstructions and swept by a qualified chimney sweep.
Being connected only to this one appliance.
Being of thick (150mm+) masonry or of proprietor twin-wall construction or otherwise adequately insulated.
Conforming to local building regulations.
Special rules apply where the flue passes through timber, thatch or other vulnerable materials- take specialist advice.
Twin-walled chimney options are available to suit houses without conventional chimneys.
INSTALLATION CLEARANCES The stove must be placed on a solid non-combustible hearth conforming to building regulations.
There must be no combustible material, including fuel, within: Rear 30cm, sides 30cm. When fitted with the underneath heat shields
supplied, or with the 'Europa' high-leg kit, the hearth temperature will not exceed 100ºC, and light duty hearth may be used. If the
Europa Hi-Leg unit is used as a log store, logs must not be placed higher than the central 'bridging' member.
LOAD BEARING This appliance is heavy - take care to ensure that the floor has adequate load-bearing capacity and consider fitting
a load distributing plate if necessary
SIRIUS TRADITIONAL Clean Burn Stoves may be used in smoke control areas strictly in accordance with these
instructions and with the Soliftec Smoke Advice Sheet No1 (www.soliftec.com/smokeadvice.htm), when burning:
UK: Untreated wood logs, natural anthracite or smokeless fuels (s21 of the Clean Air Act 1993)
RoI: Wood logs, smokeless fuels or peat briquettes, not petroleum coke (Control of Atmospheric Pollution Regulations, 1970)
1
Conforms to
EN 13240:2001+A2 2004
Independently tested in 2010 by SGS
Approved Laboratory No 0608
Intermittent burning solid fuel roomheater for
installation with a single dedicated chimney
Fuel
Wood (Beech)
Efficiency
74%
Rated Output
5 kW
CO (at 13% O2)
0.15 %
Mean Flue
Temperature
320º C
Clearance to
combustibles
30cm
Smoke Emission
78 mg/m³
Gas flow
4.9 g/sec
Flue Draught
Minimum 12 Pa
Mass
96 kg
Other fuels: Anthracite, peat and smokeless fuels
I declare that this information
is true, these products meet
the requirements of
Harmonised Standards and are fit for sale. Signed on
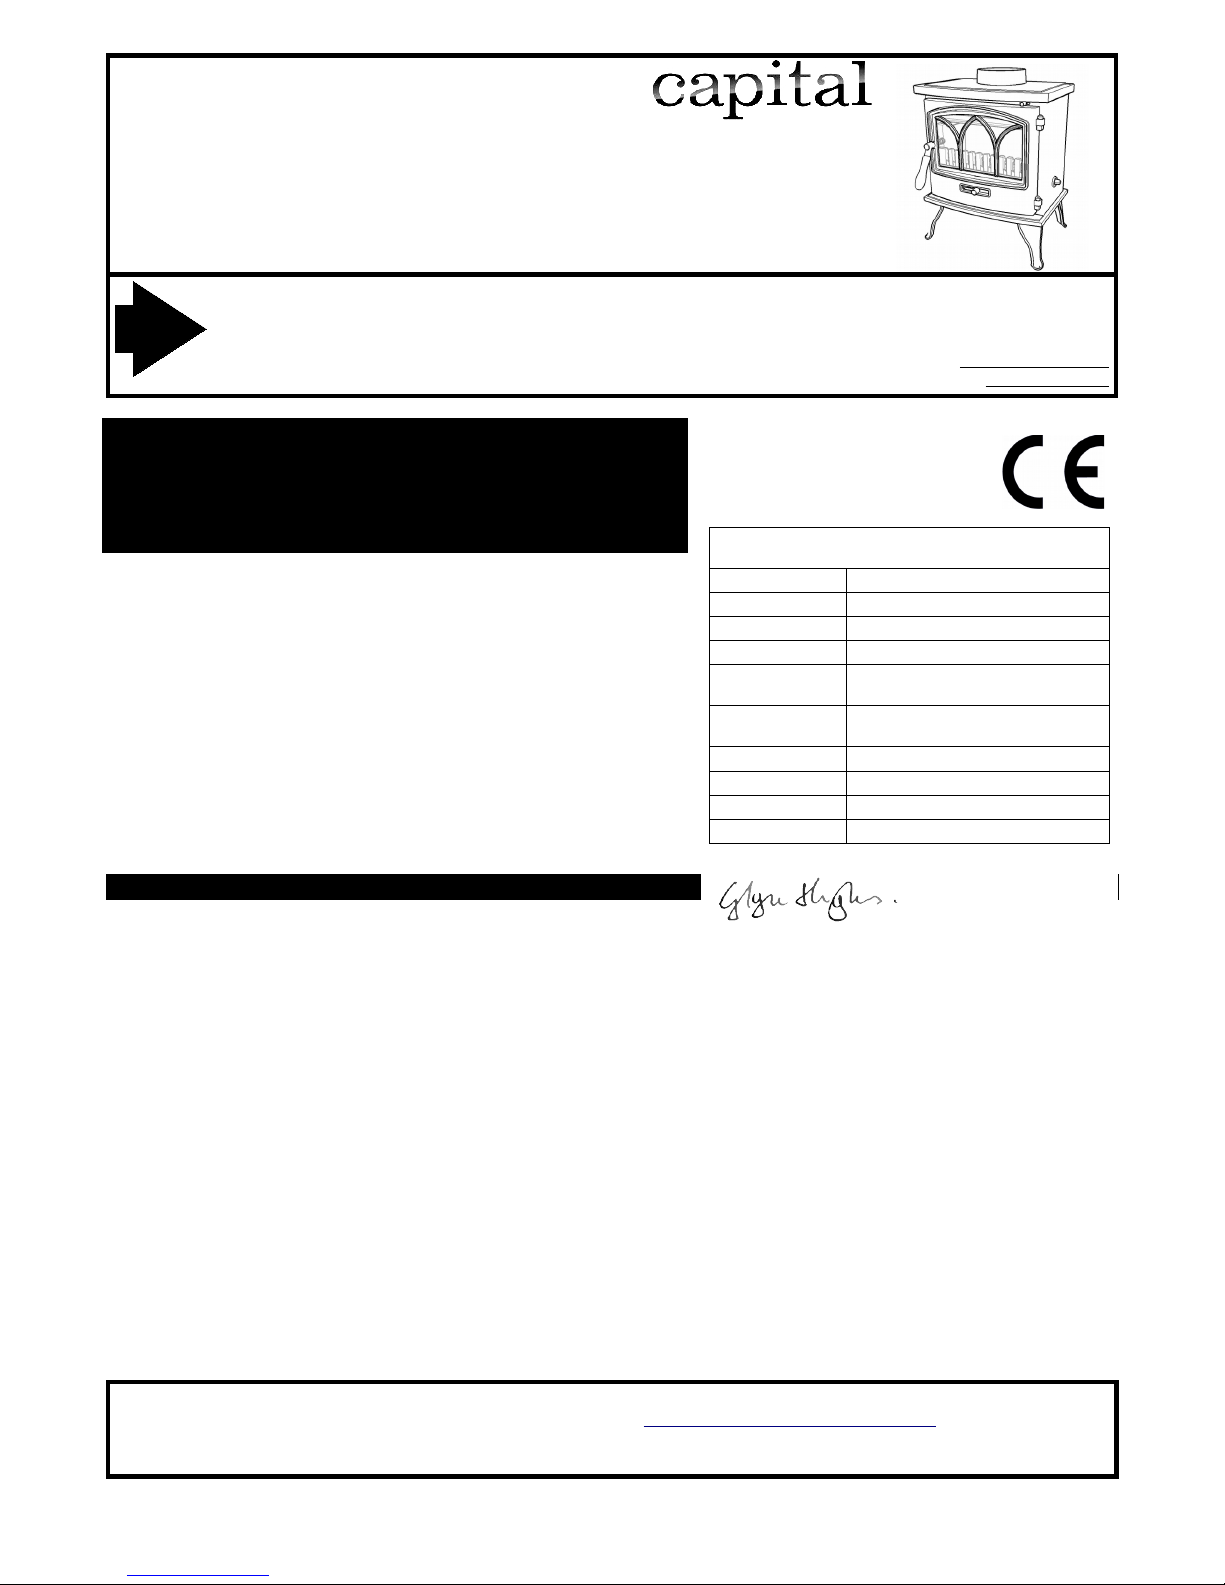
behalf of the manufacturer by Glyn Hughes, Design
Engineer, at Winster, Derbyshire, England 4. Aug. 2014
THIS APPLIANCE BECOMES EXTREMELY HOT
AND CAN PRODUCE POISONOUS GASES.
A fire-guard should be used if children or the infirm are present. The
installer is required to EXACTLY follow these instructions and to
completely comply with all local, national and international standards.
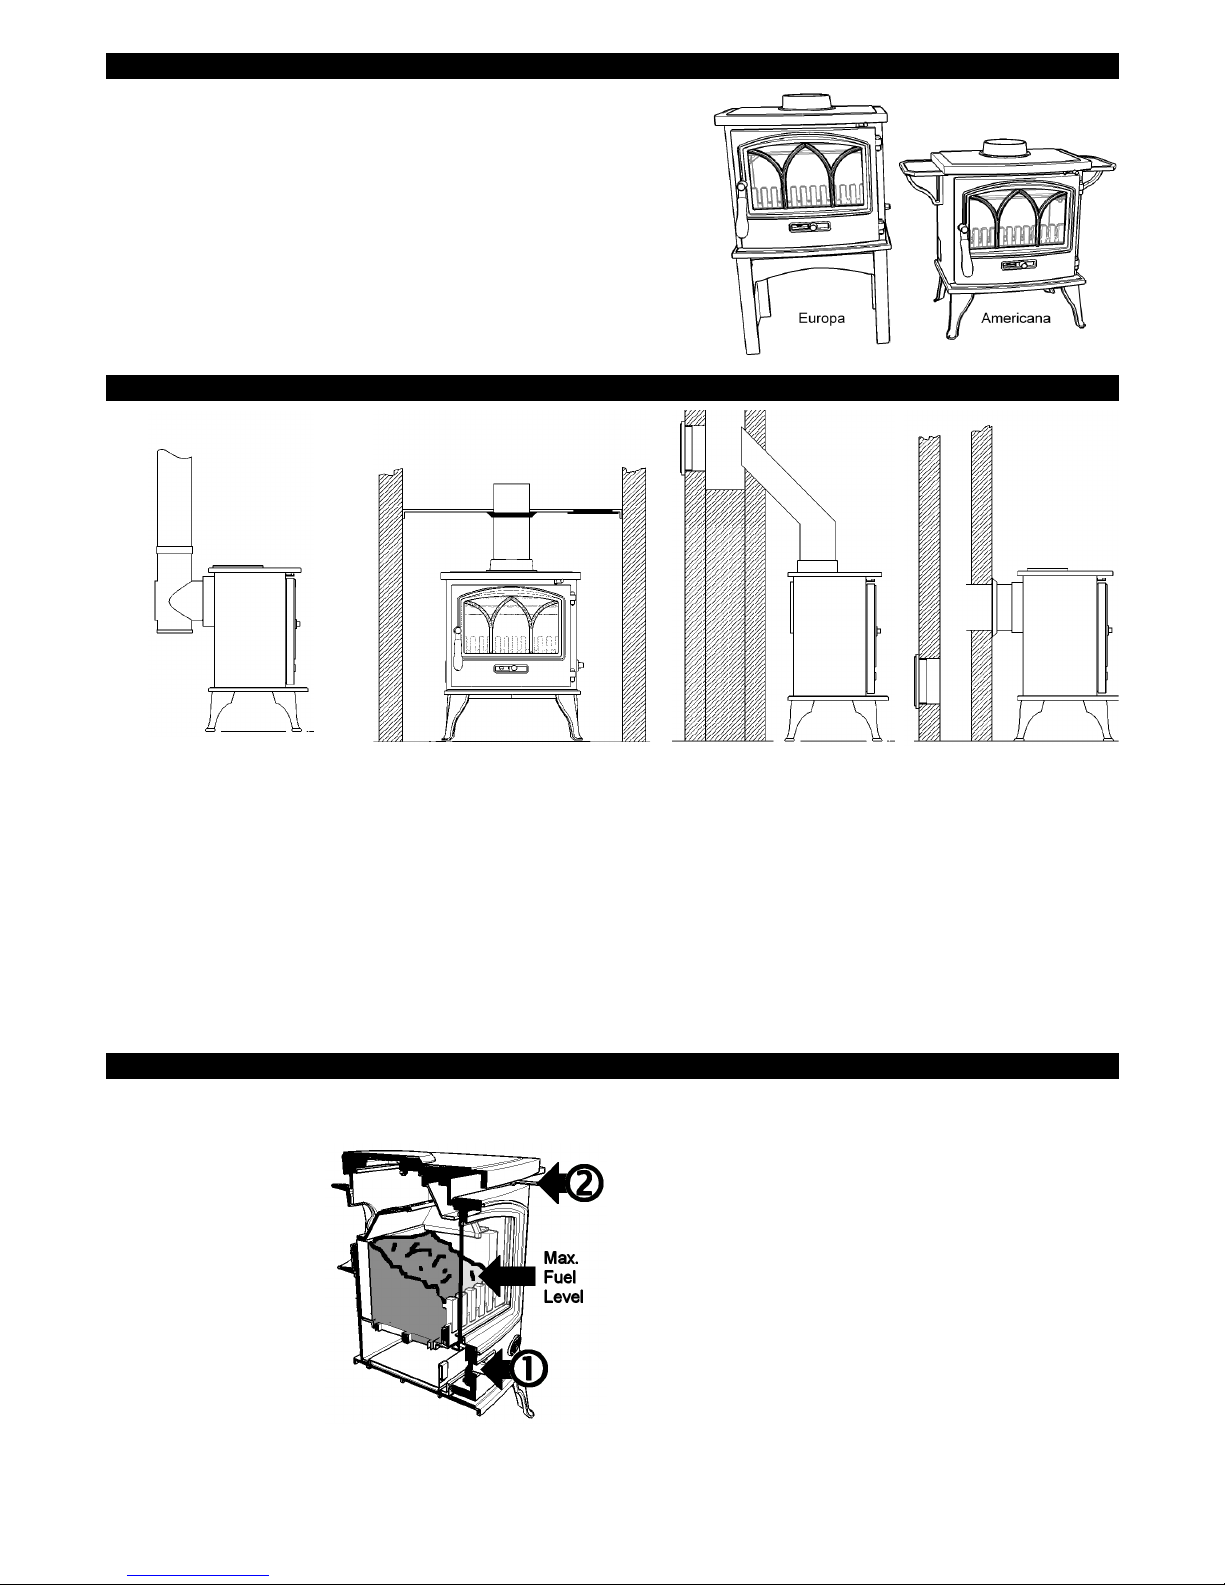
ASSEMBLY
STANDARD LEGS: Attach the legs if required. We suggest that the two legs
with fixing holes be fitted to the back of the stove, for neater appearance. If the
hearth is uneven, fit one or more washers between any leg and the stove body
to lengthen it. Fix the stove down to the hearth, through the legs, using the
screws and plugs provided.
'AMERICANA' COOKTOP KIT OPTION (supplied separately): Remove the two
bolts located to the left and right inside the underneath of the standard top.
Remove and discard the standard top, taking care not to damage the fibre seal.
Fit the 'wings' to the cooktop and bolt the whole assembly back onto the stove
body. Do not over tighten.
'EUROPA' HI-LEG KIT OPTION (supplied separately): Assemble the left, and
right hi-legs loosely to the central bridging member. Attach to the underside of
the stove using the bolts supplied before fully tightening. Note the 'Installation
Clearances' on page 1. When used as a log store, logs must not be placed
higher than the central 'bridging' member.
FITTING
Rear outlet connected to top
outlet by 'T' piece with cleaning
door. This is the preferred
method of installation.
Top outlet through fully-sealed steel
closure plate (fitted with cleaning door)
into old, oversized, chimney with steel
sealing collar.
Top outlet with 45 degree
bend sealed into masonry
chimney with cleaning door
on opposite side.
Rear flue connection into
chimney with sealing collar.
Cleaning door on opposite
side.
FLUE CONNECTION: Fasten the flue outlet and blanking plate to the top or back flue outlet with screws and nuts provided. The stove
can be connected to the chimney (using approved flue pipe components) in several ways, four of which are shown above. Whichever
method is used it is imperative that: (1) The route for gases from the stove to the chimney terminal is completely air-tight; seal all joins
with fireproof cement and/or heatproof rope. (2) It is possible to sweep the entire length- access doors may be required. (3) The entire
construction is of durable fireproof materials- composite board is not a suitable material for closure plates, which should be of steel or
concrete. The stove should be secured to the hearth by screwing through the fixing holes drilled in the legs.
AIR SUPPLY The stove needs air to breathe - there must be a permanent air supply into the room in which the fire is installed equal
to at least 5.5cm² per kW heat output. While it is commonly accepted that this air for an appliance below about 5kW in an older
(before c1980) property can often be supplied by air naturally leaking around windows etc, in any case of doubt fit a fixed air vent. An
extractor fan, or another fireplace or heater can remove this air, even if fitted in a different room.
CO DETECTOR Carbon Monoxide is a poisonous gas, produced by this stove. It is a requirement to fit a CO alarm near the stove.
LIVING WITH A SIRIUS TRADITIONAL Clean Burn Stove
LIGHTING Empty the ashes. Place two or three firelighters close
together, or screwed-up paper covered with dry sticks, at the back
of the grate and light them. When they are burning well gently fill
the fire very full with dry fuel,
close the door and set the
air control slide to the 'high'
(right) position.
FILLING: Don't fill with fuel
above the level of the lining
bricks.
CONTROL How fast the fire
burns depends on how much
air reaches the fuel. The
stove has two air controls,
one below the window
('primary' ) and one above
('airwash control' ). Move
the slides to the right for
highest output, to the left for 'low'.
Our tests indicate highest efficiency on wood with the primary
control all but closed and the airwash 2/3 open. Anthracite works
best with the airwash closed and the primary 1/3 open. But the
best settings will depend on your fuel, air supply and flue draught
and can only be found from experience. To prevent castings from
cracking, the first fire lit in your stove should be small- made with
little fuel and the air slide set to 'low'.
EMPTYING ASHES Operate the de-ashing mechanism by
locating the operating tool onto the boss on the right-hand side of
the stove and moving it backwards and forwards a few times. Use
the tool to open the door and lift out the ashpan. Remember to let
ash cool before disposing in plastic sacks or dustbins. There is no
need to empty every last speck, but ash should never be allowed
to build up so that it comes into contact with the underside of the
grate.
EXTENDED BURNING Allow the fire to burn down to a low, hot
firebed. Set the air control to 'low', empty the ash and fully fill with
hard fuel such as anthracite (smaller sizes are best).
CLEANING Wipe the stove body with a slightly damp cloth when it
is cool, don't use abrasives, metal polish or 'cream' cleansers as
they can scratch the surface. Polished parts can be brightened
using wire wool. Operating the stove for a few minutes at high
2
 Loading...