

Capital GSCR604GW, GSCR604QW, GSCR606QG, GSCR606W, GSCR604QG Use And Installation Manual
...
60”
G a s S e l f C l e a n w i t h C o n v e c t i o n
™
R a n g e
U S E A N D C A R E / I N S TA L L AT I O N G U I D E

Dear Valued Customer,
Congratulations on making a smart choice! You have joined an elite group of cooking enthusiasts who demand only the very best from their
appliances. A Capital Cooking appliance promises years of enjoyment and maximum pleasure, allowing cooks everywhere to create culinary
memories that last a lifetime.
Be cau se of th e u niq ue fe atu res fo un d i n o ur ap pli anc es, w e u rge yo u to rea d t hi s m anu al thoroughly before installation and use.
And please retain this manual for future ref erence; i t is an in v alu a ble gu i de t o h elp yo u be t ter un d ers t and yo u r Capit al C ooking
ap pl ia nce.
Since your satisfaction is our topmost priority, please feel free to contact our service experts. You may reach us toll free at 866.402.4600,
or dial the factory direct at 562.903-1168. You can fax us a list of your concerns, comments, and/or compliments at 562.903-1167, or drop
us an email at customerservice@capital-cooking.com. Feel free to also write us at 13211 East Florence Ave. Santa Fe Springs, CA 90670.
Our produ cts are prou dly designed and manu factured in A merica, and we trust that o ur strict adherence to the highest quality
assurance standards will provide you with years of trouble free, gourmet cooking.
Happy Cooking!
Capital Cooking Test Kitchen Specialists
A S P E C I A L M E S S A G E T O O U R C U S T O M E R S
1

2
T A B L E O F C O N T E N T S
60” Precision Features 3
60” Models 4
Warnings 5
Safety Practices / Electrical, General 6
Safety Practices / Cooking 7
Range Parts Identification 9
Using The Range-top / Power-flo™ Burners 10
Using The Rangetop 11
Using Your Oven 13
Self-Clean Mode / 24” Baker’s Oven 18
24” Baker’s Oven / Care and Maintenance 19
Care And Maintenance 20
Troubleshooting 21
Installation Instructions 23
Service / Warranty 35
CERTIFIED FOR USA AND C ANADA
60 ” P R EC I SI O N G AS RA N GE S
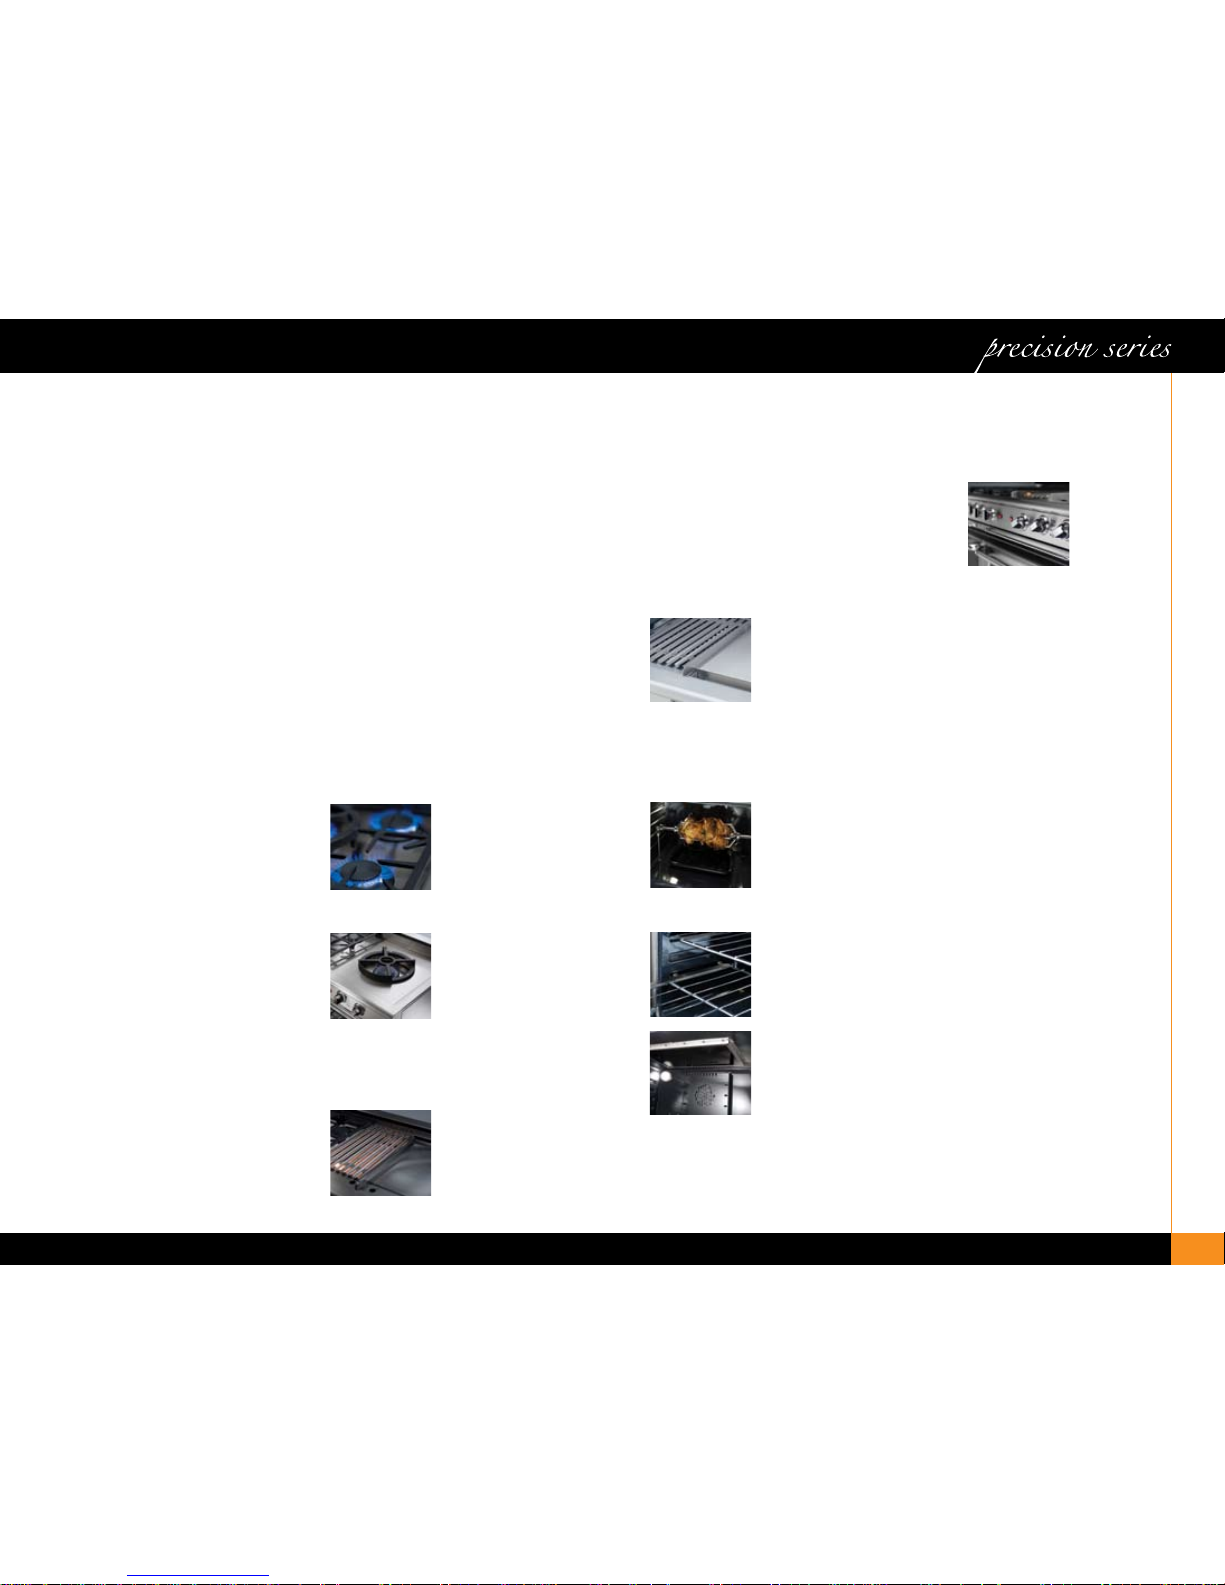
FE AT URE S/B ENE FIT S:
WHY GAS SELF CLEAN?
Because the benefits are boundless! Natural gas
and LPG are “clean and green” being a readily
available natural resource that is energy efficient
and environmentally friendly. In fact, we have
enough of this natural resource to power the world
for hundreds of years. And did you know that gas
powered ovens are less expensive to operate than
electric ovens?
POWER-FLO™ BURNERS
These versatile burners are the most advanced
burners available in the industry. They allow
simmering from 140 degrees to a powerful 19,000
BTUs. Not only are they powerful, but they are
energy efficient, and environmentally conscious.
The Power-Flo™ burners use
LESS gas at higher BTUs, thus
saving on precious natural
resources, while delivering
astounding levels of power and
control.
POWER-WOK BURNER
Our incredibly powerful wok
burner generates 30,000 BTUs.
A cast iron, porcelain coated
two piece wok grate allows you
to accommodate a variety of
Wok sizes or stock pots.
INFRA-Q™
Now you can have true re stau rant quality steaks
a n d s ea re d Ahi i n the c om f o rt o f yo ur
own kitchen. Capital’s exclusive
Infra-Q™ infrared-BBQ Grill
system utilizes 18,000 BTUs
and sear s up to 1800 degrees ,
whil e allowing yo u the con trol
to safel y c ook vege tabl es,
and fis h all on the same burner. Features our
excl usiv e Tru-Sid e™ gra tes that help reduce
flar e-up s, and channel gr ease away from the
burn er.
THERMO-GRIDDLE™
Our so lid stainless steel thermostatically
cont roll ed griddle plat e gives yo u price control
over the griddle ar ea. Fro m
18,0 00 BTUs on 12” grid dle
sect ions and 3 0,00 0 BTU s
on 24” griddle se ctio ns, our
grid dle plates provide precise
co nt rol an d p er fo rma nc e.
An d it wi ll ne ve r r us t! Gu ar ant ee d!
ROTISSERIE
Ever y Precision Series ga self clean ran ge (GSCR)
feat ures the first ever, motor ized rotisserie system
in a professional style range.
What ’ more the rotisserie,
comp lete with rod, heavy
duty cast stai nles s steel
pron gs an d bas ting pan c ome
STANDARD!
FLEX-ROLL™ OVEN RACKS
Our patent pending Flex Roll™
oven racks provide the smoothest,
most effortless range of motion in
any oven EVER manufactured!
INFRA-BROIL™
Our gas infrared broiler beneath
glass generates 18,000 BTUS
of power. And the radiant glass
makes clean-ups a snap! (Note:
24” range does not feature
glass infrared broil.)
STAY-KOOL™ KNOBS
Our restaurant grade, die cast
chrome plated metal knobs
feature bold red graphics for
easy readings of settings, and
plastic inserts that stay cooler
to the touch when using your range.
\(Available in Black or Red.)
WHY GAS SELF CLEAN?
Because the major by-product of burning gas is
water (H2O). Our gas ovens, therefore, naturally
create a moisture laden cooking environment which
is why roasts, cakes, cookies and desserts retain
their moisture during the cooking process. The result
is more flavorful, moist AND healthier cuisine.
Cooking with gas...
What a Capital idea!
6 0 ” P R E C I S I O N F E A T U R E S
3

6 0 ” P R E C I S I O N S E R I E S M O D E L S ( S E L F C L E A N )
4
GSCR604GW
GSCR604QW
GSCR606G
GSCR606QG
GSCR606W
GSCR604GW
In the commonwealth of massachusetts, gas connection must be performed by a licensed plumber or gas fitter.
GSCR604QG

WARNING! If the information in this manual is
not followed exactly, a fire or explosion may
result causing property damage, personal injury
or death.
WHAT TO DO IF YOU SMELL GAS
• Do not try to light any appliance
• Do not touch any electrical switch
• Do not use any phone in your building
•
Immediately call your gas supplier from a neighbors
phone. Follow the gas supplier’s instructions.
• If you can not reach your gas supplier, call the
fire department.
Ins tal lat ion and se rvi ce must be performed by a
qualified installer, service agency or the gas supplier.
The appliance and its individual shutoff valve must
be disconnected from the gas su ppl y piping
system during any pressure testing of that system
test pre ssur es i n ex cess of 5 ps i (3 5 kp a).
The appliance must be isolated from the gas supply
piping system by closing its individual manual
shutoff valve during any pressure testing of the
gas supply piping system at test pressures equal
or less than 5 psi (35 kpa).
WARNING! Disconnect Power before installing.
Bef ore turni ng power ON, be sure that all
controls are in the OFF.
IMPORTANT! Installation must conform with local
codes or, in the absence of local codes, with the
National fuel Gas Code, ANSI Z223.1/NFPA 54.
• Smother flames with a close fitting lid, or any
metal tray.
•
Turn OFF the burner. Be careful to prevent burns.
If the flames do not extinguish, immediately
evacuate and call the fire department.
• NEVER pick up a flaming pan. By doing so, you
may be burned.
• DO N OT u se w ater or a we t di shcl oth on f ire.
A violent steam explosion will result. Use a fire
extinguisher only if:
• You have CLASS ABC extinguisher and
you know how to operate it.
• The fire is small and contained in the
area where it started.
•
The fire department has been called.
•
You can fight the fire with your back to
the exit.
FOR YOUR SAFETY! If You Smell Gas:
Shut off gas to the appliance. Extinguish any
open flames. If odor persists, immediately call
your gas supplier.
This appliance was designed for ease of installation
and operation. However, we recommend that you
read all sections of this manual before beginning
installation and that your range is installed by an
approved gas installation technician capable of reviewing
and performing the manufacturers installation
checklist included in your information packet.
The installation of appliances assigned for
manufactured (mobile) home installation must
conform
with the Manufactured Home Construction
and
Safety and Safety Standard, Title 24 CFR, Part 3280
or, when such standard is not applicable, the Standard
for Manufactured Home Installations, ANSI/NCSBCS
A225.1, or with local codes as applicable.
The installation of appliances designed for Recreation
Park Trailers must conform with state or other codes
or, in the absence of such codes, with the standard
for Recreational Park Trailers, ANSI A119.5.
The appliance, when installed, must be electrically
grounded in accordance with local codes or, in
the abs en ce of lo ca l codes, wi th th e N at io na l
Electrical Code, ANSI/NFPA 70
WARNING! If the information in this manual is
not followed exactly, a fire or explosion may
result, causing property damage, personal injury
or death. Please read the installation, operating
and
maintenance instructions thoroughly before use.
IMPORTANT! All ranges must b e installed
wit h a ba ck- gua rd. On e o f t hre e a vai lab le
bac k-g uar ds must b e ordered se par ate ly and
ins tal led at the back of the ra nge . The three
bac k-g uar d choices include Island Trim , Low
Bac k or High-Shelf. Before usi ng th e range
ins ure that it is equipped w ith a pr ope r backgua rd. R efe r to the Inst all ati on Ins tru cti ons
acc omp any ing th is app lia nce .
CAUTION! When connecting the unit to
propane gas, make certain the propane tank is
equipped with its own high-pressure regulator
in addition to the pressure regulator supplied
with the range. The pressure of the gas
supplied to the appliance must not exceed 14”
(34.57 mB) water column from the propane
gas tank to the pressure regulator.
CAUTION! Do not store or use gasoline or any
other flammable liquids in the vicinity of this or
any other appliance.
PLEASE RETAIN THIS MANUAL
FOR FUTURE REFERENCE!
PLEASE NOTE:
In the Commonwealth of Massachusetts, gas
connection must be performed by a licensed
plumber or licensed gas fitter.
W A R N I N G S !
5

ELECTRICAL SAFETY:
Electrical Requirements and Grounding Instructions
CAUTION: ALL MODELS
IN CASE OF AN ELECTRICAL FAILURE
If for any reason a gas control knob is turned ON and
there is no electric power to operate the electronic
igniters on the range burners, turn OFF the gas
control knob and wait 5 minutes for the gas to
dissipate before lighting the range burner manually.
To light the range burners, carefully hold a lighted
match to the burner ports and turn the gas control
knob to HI. During a power failure, you can manually
light the standard range burners only, but each must
be lit with a match.
Note: For Precision Gas Ranges, the gas oven, grill,
Thermo-griddle™ and infrared oven broiler burners
CANNOT be lit manually during a power failure.
WARNING! Do not under any circumstances cut
or remove the separate ground wire or the third
(ground) prong from the power cord plug.
PLEASE READ CAREFULLY:
All gas self clean range models require an electrical
circuit rated at 120 volts, 60 Hz., and 20 Amps.
(VERIFY) For personal safety, this appliance must
be connected to a properly grounded and polarized
electrical power supply. Always disconnect the
electrical plug from the wall receptacle before
servicing this unit. See Installation Instructions for
electrical requirements and grounding instructions.
It is the personal responsibility and obligation of
you, the user, to have this appliance connected to
the electrical power supply in accordance with the
National Electrical Code and/or applicable local
codes and ordinances by a qualified electrician.
*It is recommended that a dedicated circuit servicing
this appliance be provided.
GENERAL SAFETY:
Your new range has been designed to be a
safe, reliable appliance when properly used and
maintained. If not properly used, it could be
dangerous. Read ALL the instructions in this Use
and Care Guide carefully before using this range.
WARNING! These precautions will reduce the risk
of burns, electric shock, fire, and injury to persons.
Use extreme care when using this restaurant
caliber range as this appliance provides intense
heat and can increase accident potential.
• Safety precautions must be followed when using
any kitchen appliance.
• Insure proper installation and servicing. Follow
the installation instructions provided with this
product. Have the range installed and grounded
by a qualified technician.
• Have the installer show you where the gas supply
shut off valve is located so that you know how and
where to turn off the gas to the range.
•
If you smell gas, your installer has not done a proper
job of checking for leaks. If the connections
are not perfectly tight, you can have a small
leak and therefore a smell a faint gas odor.
Finding a
gas leak is not a “do-it-yourself”
procedure. Some
leaks can only be found with
the burner control in
the “ON”
position and
a qualified service technician must do this.
• In the event a burner goes out and gas escapes,
open a window or door immediately. DO NOT
attempt to use the range until the gas has had time
to dissipate. Wait at least 5 minutes before using
the range.
•
DO NOT repair or replace any part of the appliance
unless specifically recommended in this manual.
All other servicing should be referred to a
qualified technician.
•
Children SHOULD NOT be left alone or unattended
in an area where appliances are in use. They
should never be allowed to sit or stand on any part
of the appliance.
CAUTION! Do not store items of interest to children
above the range or behind it. If children should
climb onto the appliance to reach these items,
they could be seriously injured.
• NEVER use any part of the range for storage.
Flammable materials can catch fire and plastic
items may melt or ignite.
• If the range is near a window, be certain the
curtains do not blow over or near the range burners,
griddle or broiler section; they could catch fire and
cause serious injury.
• DO NOT USE WATER ON GREASE FIRES! Turn
appliance off and smother fire with baking soda or
use a dry chemical or foam-type extinguisher.
S A F E T Y P R A C T I C E S / E L E C T R I C A L , G E N E R A L
6

•
NEVER let clothing, potholders, or other flammable
materials come into contact with or too close to any
element, burner, or burner grate until it has cooled.
Fabric may ignite and result in personal injury.
COOKING SAFETY:
• USE ONLY DRY POTHOLDERS. Moist or damp
potholders on hot surfaces may cause burns from
the steam. Do not use a towel or other bulky cloth
in place of potholders. Do not let potholders touch
hot elements, hot burners, or burner grates.
• FOR PERSONAL SAFETY, wear proper apparel.
Loose fitting garments or hanging sleeves should
never be worn while using this appliance. Some
synthetic fabrics are highly flammable and should
not be worn while cooking.
• DO NOT use aluminum foil as a shield against
food spills or drippings around the burners or
control panel area. This could obstruct the flow of
combustion and ventilated air. This can damage
the finish of the range.
WARNING! This appliance is for cooking! Based
on safety considerations, never use the range to
warm or heat a room. Such use can damage the range.
• DO NOT TOUCH THE BURNER GRATES OR THE
IMMEDIATE SURROUNDING AREAS adjacent to
the burners. When in use these areas may become
hot enough to cause burns.
• NEVER leave the range unattended when using
high flame settings. Boil-overs cause smoking
and greasy spills that may ignite. More importantly,
if the burner flames are smothered, unburned
gas will escape into the room. See inside front
cover regarding gas leaks.
• ONLY certain types of glass, heat proof glassceramic, ceramic, earthenware or other glazed
utensils are suitable for range use. This type
of utensil may break with sudden temperature
changes. Use only on low or medium heat settings
according to the utensil manufacturer’s directions.
• DO NOT HEAT UNOPENED FOOD CONTAINERS.
A buildup of pressure may cause the container to burst.
• DURING COOKING, set the burner control so that
the flame heats only the bottom of the pan and
does not extend beyond the bottom of the pan.
• USE CAUTION to ensure that drafts like those
from forced air vents or fans do not blow flammable
materials toward the flames or push the flames so
that they extend beyond the edges of the pot.
• ALWAYS use utensils that have flat bottoms, large
enough to cover the burner. The use of undersized
utensils could expose a portion of the flame and
may result in ignition of clothing.
• TO MINIMIZE BURNS, ignition of flammable
materials and unintentional spills, position handles
of utensil inward so that it does not extend over
adjacent work areas, cooking areas or the edge
of the range.
• HOLD THE HANDLE of the pan to prevent
movement of the utensil when stirring food.
• DO NOT USE the Infra-grill™ BBQ top section
for cooking excessively fatty meats or products
that promote flare-ups.
• GREASE IS FLAMMABLE. Let hot grease to cool
before attempting to handle it. Avoid letting grease
deposits to collect. Clean after each use.
• KEEP BURNER PORTS CLEAN. This is essential
for proper lighting and maintenance of the burners.
It is necessary to clean the burner ports when
there is a boil over or when the burner does
not light though the electronic igniters click.
•
CLEAN THE RANGE-TOP SECTION WITH CAUTION.
Avoid steam burns; do not use a wet sponge or cloth to
clean the range while it is hot. Some
cleaners produce
noxious fumes if applied to a hot
surface. Follow
directions provided by the cleaner manufacturer.
•
BE SURE ALL RANGE CONTROLS ARE TURNED OFF
and the range is cool before using any type of aerosol
cleaner on or around the range. The chemical that
produces the spraying action could, in the presence
of heat, ignite or cause metal parts to corrode. Only
an authorized service technician should perform
Service. Technicians must disconnect the power
supply before servicing this unit.
•
CLEAN THE VENTILATOR HOOD and filters
above
the range frequently so grease deposits
from cooking vapors do not accumulate on them.
• IN CASE OF FIRE or when intentionally “flaming”
liquor or other spirits on the range, follow hood
manufacturer’s instructions.
•
INSTALL A SMOKE DETECTOR in or near the kitchen.
• TURN THE KNOB CONTROL TO OFF if a burner
goes out and gas escapes. Open a window or door.
DO NOT attempt to use the range until the gas has
had time to dissipate.
WARNING! To reduce the risk of tipping of the
appliance, it must be secured by a properly installed
anti-tip device. Verify that the anti-tip device is
engaged per installation instructions (note: anti-tip
device is required on all gas self-clean ranges.)
• When using the oven: DO NOT touch the interior
surfaces of the oven or the exterior area
immediately surrounding the door. Interior oven
surfaces become hot enough to cause burns. The
heat deflector, which deflects heat away from the
range and the trim on the top and sides of the
oven door, will also be hot when the oven is in use.
S A F E T Y P R A C T I C E S / C O O K I N G
7

• Place oven racks in desired position while oven is
cool. If a rack must be moved while the oven is
hot, do not let the potholders contact the hot
infrared burner.
• Use care when opening the oven door; let
hot steam or air escape before removing or
rep lac ing foods.
• DO NOT rub move, or remove the door gasket.
It is essential for a good seal during baking.
• BE CAREFUL not to damage the screen covering
the infrared broiler of the gas oven. If the screen is
damaged, air can enter the distribution box behind
the screen, possibly resulting in an explosion.
• In the event that personal clothing catches fire,
DROP AND ROLL immediately to extinguish flames.
• DO NOT obstruct the flow of combustion or
ventilation air.
•
For safety reasons and to avoid equipment damage,
never sit, stand, or lean on either oven door.
• Service should only be performed by a
qualified, Factory Authorized Service Technician.
Technicians must disconnect the power supply
before servicing this unit.
CAL IFO RNI A PRO POS ITI ON 65 WARN ING :
The burning of gas cooking fuel generates some
by products which are on the list of substances
which are known by the State of California to
cause Cancer or reproductive harm. California law
requires business to warn customers of potential
exposure to these substances. To minimize
exposure to these substances, always operate this
unit according to the instructions contained in this
booklet and provide good ventilation to the room
when cooking with gas.
1. Remove all packing materials and labels from
your
appliance. If the installer has not set up your
appliance,
please do it now.
2. Place the oven racks in the proper position
before turning on the oven.
For correct rack position, check your recipe.
The most frequently used position is number 2.
The rack positions are numbered from the bottom
to the top as in the floors of a building.
CAUTION! Do not use aluminum foil to cover
the oven racks or to line the oven. Heat can be
trapped beneath the foil, this can cause damage
to the oven and food may not cook correctly.
3. Before BAKING and BROILING:
Turn on the oven and broiler burners one at a
time for
20 to 30 minutes each. This burns off the
manufacturing
oils used by the factory. Turn the
oven burner on to 450°F and then the broiler
burner on to “Broil”. Be sure to turn on the
ventilator above your range while these burners
are on, as there will be an odor.
S A F E T Y P R A C T I C E S / C O O K I N G
8

60” Model Stove, model # GSCR604GW
R A N G E P A R T S I D E N T I F I C A T I O N
OVEN PARTS IDENTIFICATION
1. Small Oven
2. Large Oven
3. Vertical Rod Support
4. Rotisserie Rod
5. Meat Holder
6. Broiler Burner (behind glass)
7. Oven Light
8. Oven Thermostat Sensing Bulb
9. Convection Baffle
10. Convection Fan (center back wall of oven can
behind baffle)
11. Oven Gasket
12. Door Lock
13. Heat Shield
RANGE PARTS IDENTIFICATION
1. Large Oven
2. Small Oven
3. Kick Plate
4. 4. Door Handle
5. 5. Drip pan handle
6. Oven Light
7. Convection (small oven)
8. Rotisserie
9. Convection (large oven)
10. Adjustable Legs
11. Indicating Lights
12. Large Power Flo Burner
13. Two Piece Cast Iron Wok Grate
14. Infra BBQ
15. Standard Power Flo Burner
16. Cast Iron Grate
17. Island Trim
1. Adjustable Feet
2. Adjustable Casters
RANGE SIDE IDENTIFICATION
9
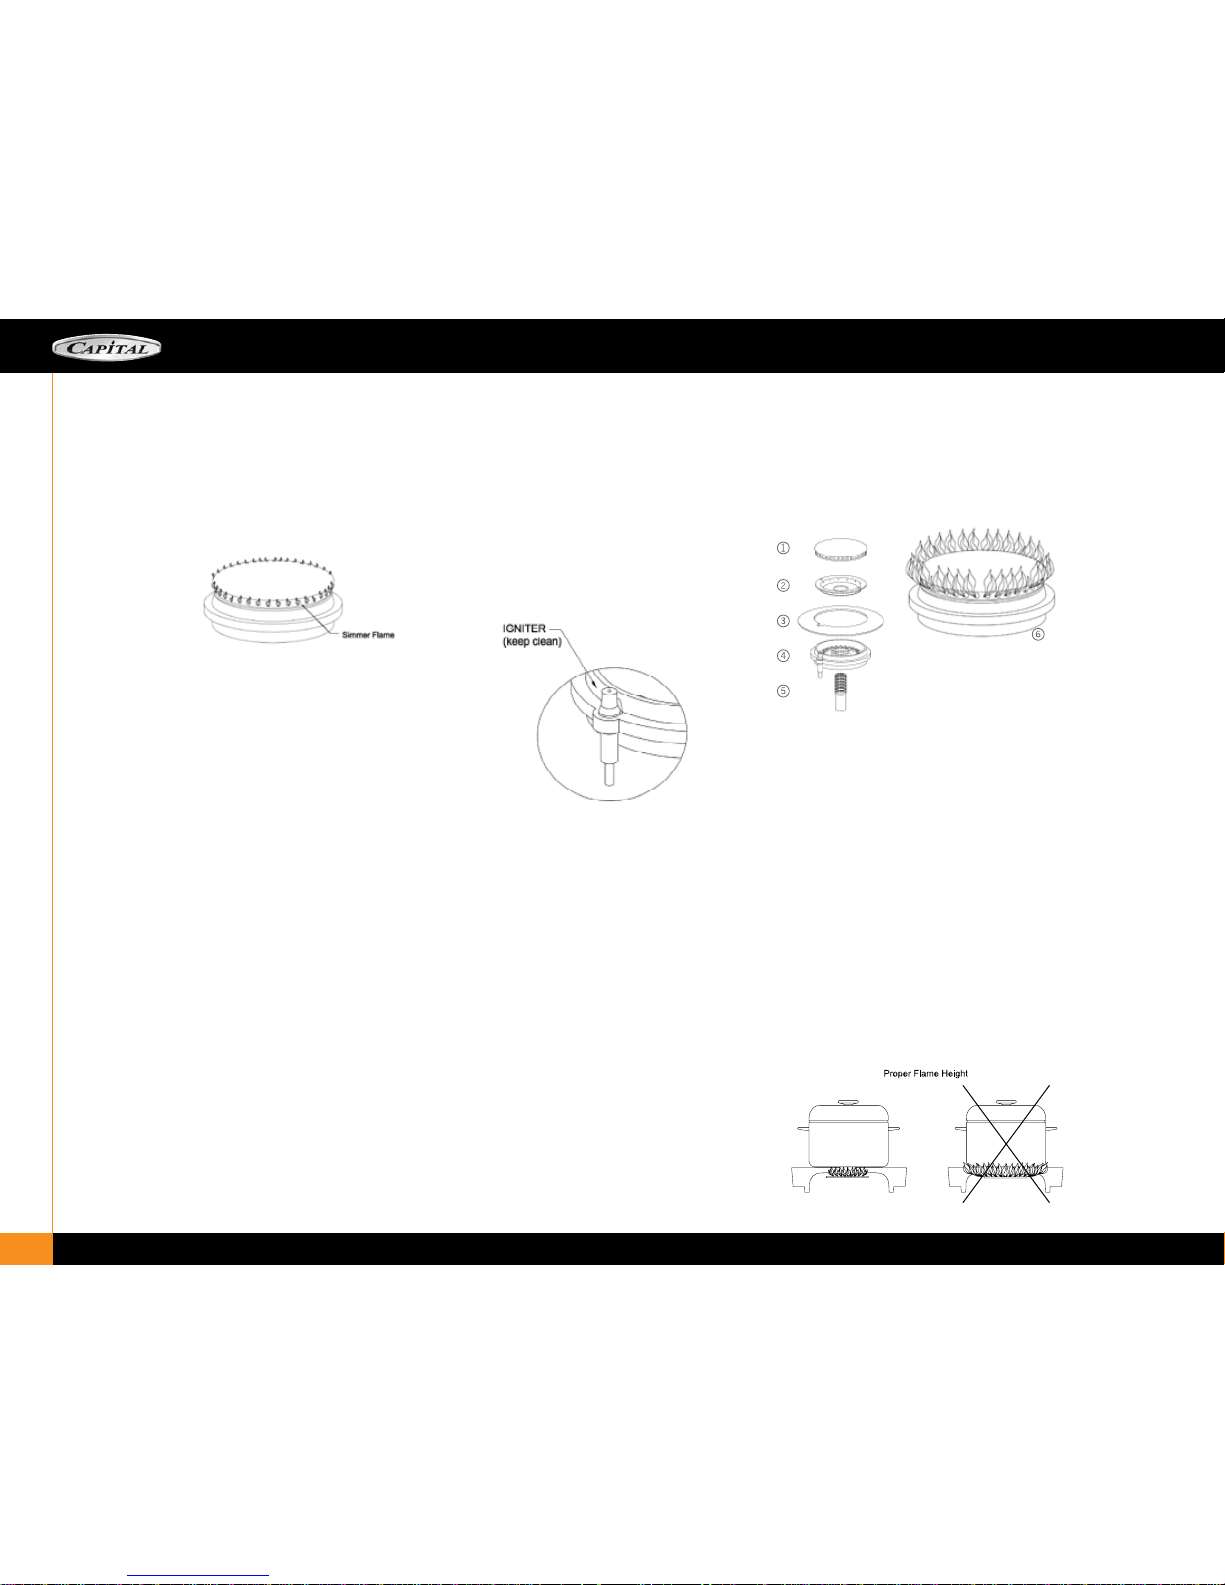
POWER-FLO™ BURNERS
Your new gas range is equipped with the latest in
burner technology. The Power-Flo™ burners are
designed for maximum control and the precise use
of heat where it matters most. The large top-cap
spreads the simmer flame over the bottom of a pot
to avoid too much heat being concentrated in the
center, thus avoiding burning of delicate sauces.
The flame ring at the bottom stabilizes the main
ports so as to achieve higher heat and maintain
proper combustion of the burners, leading to greater
efficiency and no yellow tips. It is always ON when
the burner is in use. The burner should never be
operated if the cap is not in place.
All the range-top burners have electronic spark
ignition to eliminate continuously burning pilots.
When the main burner flame is blown out, it will relight.
SIMMERING
Your new range-top has exceptionally low simmering
capabilities. The large cap serves as a heat diffuser to
spread out the heat to avoid having a center hot spot.
keep in mind that because of the high heat capacity
of the outer burner, and the mass of the burner grates
(they retain heat longer than lighter, conventional
grates), some foods may continue to cook by retained
heat after the burner has been turned off.
When using the simmer, turn the main burner knob
down to the simmer position. Should a strong draft
or boil over extinguish the simmer flame it will relight
automatically as the main burner would.
ELECTRONIC IGNITERS
If a burner does not ignite, listen for the clicking
sound. If the burner does not click, TURN OFF
BURNER. Check the circuit breaker for a blown
fuse or a tripped circuit brea ker. If the igniter still
fails to operate, see page 19 “Troubleshooting”,
“Before calling For Service”.
NOTE: If you are using propane gas, a slight pop
flash may occur at the burner ports a few seconds
after the burner has been turned “off”. This
“extinction pop” is normal for propane gas.
BURNER EFFICIENCY AND
FLAME CHARACTERISTICS
It is necessary to keep the burner ports and the
igniters clean for proper lighting and efficient
performance of the range-top burners.
The burner flame should burn completely around
the burner with no excessive noise or lifting. The
flame should be blue in color and stable with no
yellow tips.
An improper air–gas mixture may cause either a
burner flutter or a yellow tipped flame. A technician
should adjust the flame. During initial use, foreign
particles in the gas line, or dust in the air around
the appliance may cause an orange flame. This will
disappear with use.
FLAME HEIGHT
The correct height of the flame mainly depends on
the size of the bottom of the cooking utensil, the
material of the cooking utensil, the amount and
type of food and the amount of liquid in the utensil.
Fol low ing are some ba sic ru les for selecting
fla me hei ght .
For safety reasons the flame must never
extend beyond the bottom of the cooking
utensil. Never allow flames to curl up the
of the pan.
Utensils which conduct heat slowly (such
as glass-ceramic) should be used with
medium to low flames. If you are cooking
with a large amount of liquid, a larger flame
can be used.
U S I N G T H E R A N G E - T O P / P O W E R - F L O ™ B U R N E R S
1. Burner Cap
2. Flame Ring
3. Beauty Ring
4. Burner Base
5. Igniter
6. Venturi
10
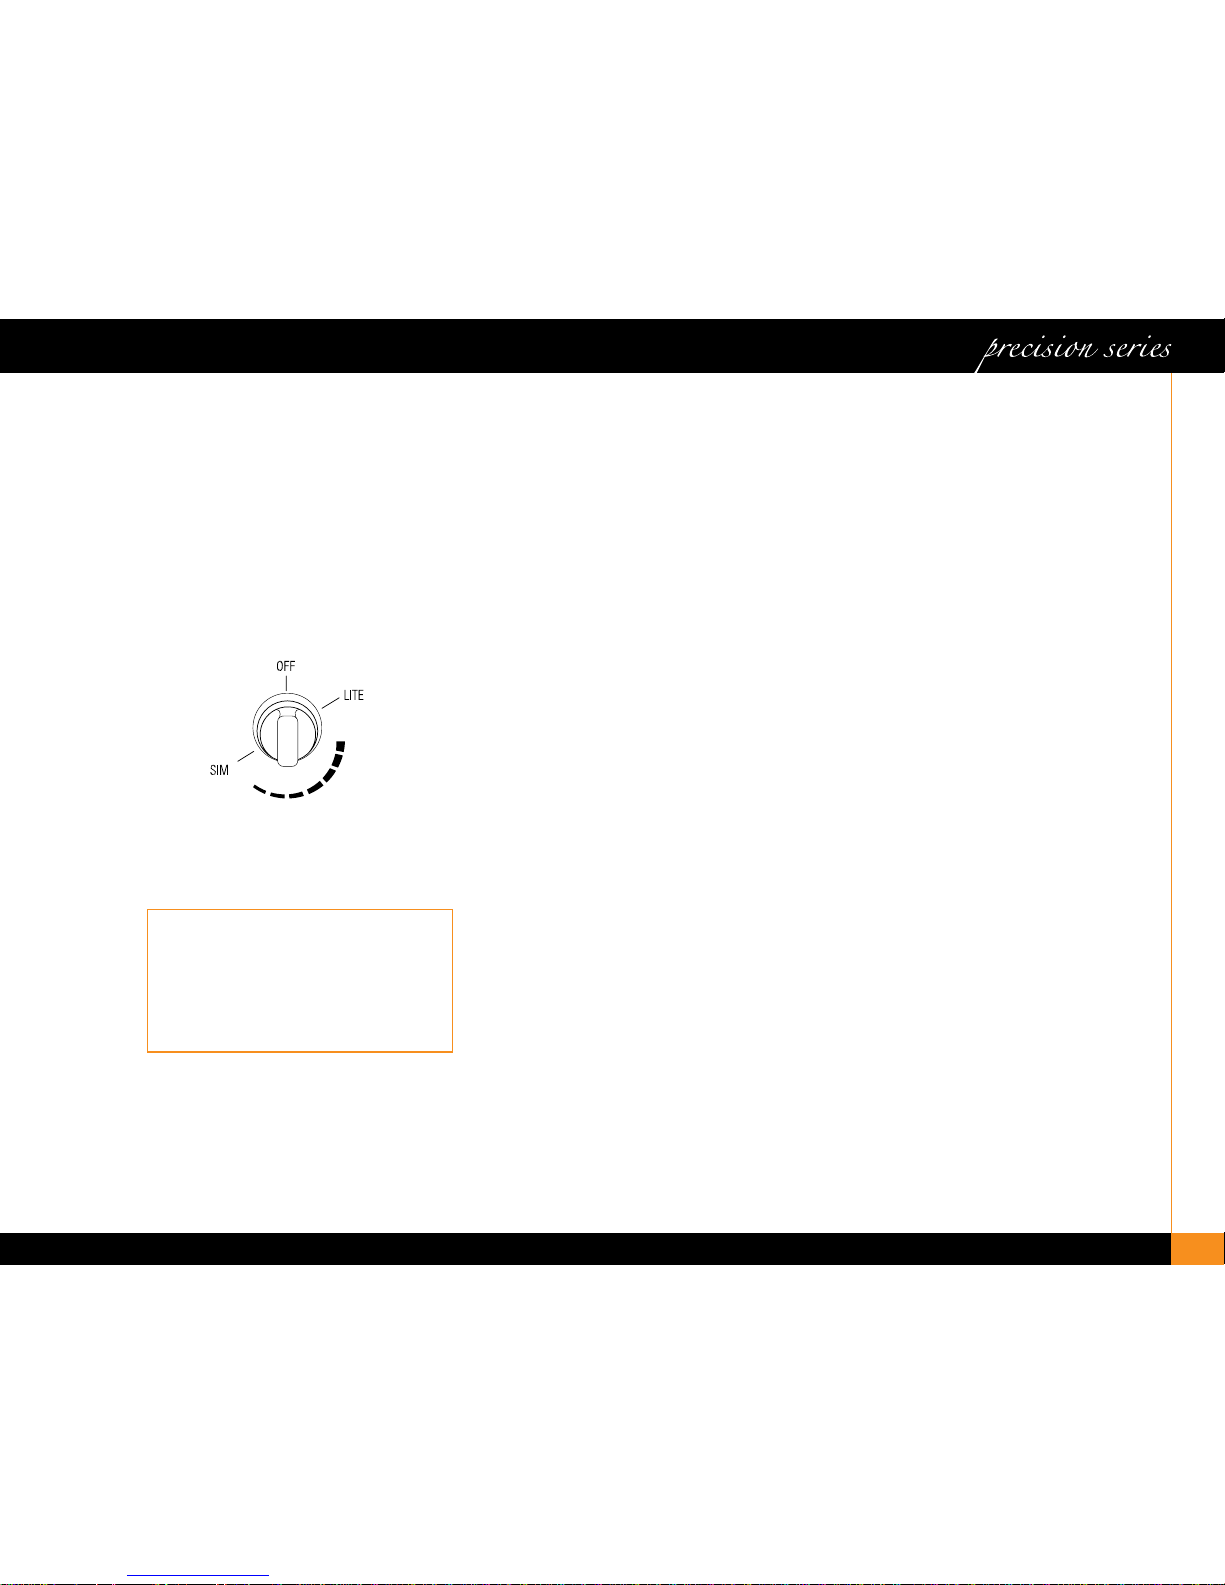
BURNER SETTINGS
The rangetop burners have an infinite number of
heat setting and there are no fixed positions on the
control knobs between HI and SIMMER. To turn the
rangetop burner on, push in on the control knob and
turn it counterclockwise to the “LITE” position. An
audible clicking sound will be heard. When the gas
has been ignited by the electronic spark igniter, turn
the knob to the desired setting.
Note: If the Igniter continues to click after the
burner has been lit, turn the knob to a setting other
than LITE, or HI. If the problem still persists,
please call our Service Hotline at 866-402-4600.
CAUTION! When turning on any RANGETOP
burner, be sure to stop at the “LITE” position
before turning the burner to a flame setting for
cooking. If the burner is not lit and it is turned
beyond the “LITE” position, to HI, MEDIUM, or
LO, there will be a burst of flame when the burner
does light. This could cause burns or damage to
the surrounding counter top.
BURNER GRATES
The burner grates are a heavy cast iron. They were
designed in sections to make them easier to remove
and clean.
PROPER COOKING UTENSILS
For best results we recommend using Professional
Cookware. This type of utensil can be found at your
finer department stores, specialty cooking shops, or
restaurant supply stores. If using regular cookware
be very careful if pans have plastic handles, as our
Power-Flo™ burners can flame up on the outside of
the pan and melt or bubble the handles.
THE CONTROL KNOBS
The control knobs are readily associated with the
burners they control. The RANGETOP control knobs
are labeled and in front of the burners. The oven
control is placed slightly higher than the other
control knobs. This is due to the physical size of the
commercial type thermostats used on the product.
CAUTION!
• Use ex tr em e care wh en pl ac ing th e gr ill
components into the grill compartment Avoid
contacting the ceramic igniter that could break,
preventing operation of the grill.
• Do not leave the grill unattended while in use.
• Do not use charcoal briquettes, ceramic plates, or
coals of any kind.
Afte r removing all packaging mate rial s, chec k to
be certain that th e grill components are corr ectl y
asse mble d in the gri ll box. The grill grates and
the burner are assembled in the grill box from
the fact ory.
Note: Your grill racks are constructed from stainless
steel and electro-polished to achieve a brilliant
finish. After the first use, discoloration will occur.
This is natural and unavoidable.
USING THE POWER-FLO™ WOK SECTION
Depending on your model size, your Precision Series
Self Clean Ranges are equipped with a Power-Flo™ wok
burner. On the 36”, 48” and 60” models the BTU rating
for this burner is 30,000 BTU’s. On the 30” five burner
model, the BTU rating is 25,000 BTU’s.
Wok cooking, or stir-fry cooking, requires intense,
searing heat for cooking. The Power-Flo™ Wok system
is perfectly designed to deliver high intense heat, by
spreading the flame under the diameter of the wok pan.
The flame ring at the bottom stabilizes the main burner
ports so as to achieve higher heat and maintain proper
combustion of the burners, leading to greater efficiency
and no yellow tips. It is always ON when the burner is
in use. The burner should never be operated if the cap
is not in place.
All the range-top burners have electronic spark ignition
to eliminate continuously burning pilots. When the main
burner flame is blown out, it will relight.
If a burner does not ignite, listen for the clicking
sound. If the burner does not click, TURN OFF
BURNER. Check the circuit breaker for a blown
fuse or a tripped circuit breaker. If the igniter still
fails to operate, please call our customer service
department at 1-866-402-4600.
Note: If you using propane gas, a slight pop or flash
may occur at the burner ports a few seconds after
the burner has been turned “off”. This “extinction
pop” is normal for propane gas.
COOKING ON THE INFRA-Q™ (infrared BBQ Grill)
FOR GSCR AND GRT ONLY
The burner should light within approximately 5 seconds.
• Pre heat the grill for approximately 5 min utes
minimum. The hot grill sears the food, sealing in the juices.
• The longer the preheat time, the faster the meat
browns and the darker the brand marks.
• Grilling requires high heat for optimum results.
High heat is necessary for searing and proper
browning. Most foods are cooked at medium
heat settings for most of the cooking time However,
when grilling large pieces of meat or poultry, it may
be necessary to turn the heat to a lower setting
11
U S I N G T H E R A N G E T O P

after the initial browning. This cooks the food
through without burning the outside.
• Foods cooked for a long period of time or basted
with a sugary marinade may need a lower heat
setting near the end of the cooking time.
• After grilling and the food has been removed, turn
the knob to HI and burn off any excess grease that
may have accumulated on the burner.
• Use a brass wire brush, dipped in hot water, to
loosen food particles from the grate.
• When the grill has cooled, clean the drip tray,
and compartment.
• If a layer of ash has deposited on the ceramic burner
plates, simply brush ash to the back. It will collect
into the drip pan tray for safe and easy clean-ups.
• If ash is particularly thick and impedes the airflow
of the burner and prevents safe and efficient lighting
of the burner, when burner is cool, use a handheld
vacuum cleaner and quickly vacuum away the ash.
Note: The Standard BBQ is only available on GCR
or Non Self Clean Ranges.
Note: Your grill racks are constructed from stainless
steel and electro-polished to achieve a brilliant finish.
After the first use, discoloration will occur. This is
natural and unavoidable.
GRILLING SUGGESTIONS
• Trim any excess fat from the meat before cooking.
FATTY MEATS increase the likelihood of flare-ups.
Cut slits in the remaining fat around the edges at
2” (51 mm) intervals.
• Brush on basting sauces towards the end of cooking.
• Add seasoning or salt after grilling. Early salting
dries out meat.
• Use a spatula or tongs instead of a fork to turn the
meat. A fork punctures the meat and lets the
juices flow out.
• After the juices begin to bubble to the surface,
turn the meat only once. This helps keep the
juices in the meat.
• Some pieces of meat and poultry cook faster than
others. Move those pieces to the cooler area of the
grill until the rest have finished.
• The doneness of meat is affected by the thickness
of the cut. Chefs say it is impossible to have a rare
doneness with a thin cut.
TRU-SIDE ™ GRILL RACKS
• The grill racks are double sided, two position
grates, constructed of pure stainless steel. Us
the concave side (channels up) for meats of
higher fat content (Steaks, hamburgers, sausage
patties, etc.); use the convex side (channels
down) with foods of lesser fat content (fish,
vegetables, fruits, etc.)
WARNING! Do not leave the BBQ section
unattended while cooking!
HANDLING EXCESSIVE FLARE-UPS
• The intense heat needed for grilling may also
cause flare-ups, due to grease and basting
sauces dripping on the ceramic burner plates.
• If flare-ups occur, use a long handled spatula to
move the food to another area of the grill.
• Should flare-ups become excessive, remove the
food from the grill and turn off the burner.
• Excessive flames occur when cooking meat with
high fat concentration, i.e. 30% ground beef,
untrimmed steaks, lamb chops, etc.
• Be cautious when turning meat over, and never
PLOP the meat on the grates.
COOKING ON THE THERMO-GRIDDLE™
Description:
• The built in griddle is made of restaurant quality
3/8” thick stainless steel. This produces a surface
with even heat that is easy to clean.
• The griddle has a stainless steel straight tube burner
that is lit by a spark igniter. The griddle should
light with 4 clicks of the igniter. This eliminates the
need for a continuous burning pilot lighter.
• A chopping block is available as an accessory and
purchased separately. It is sized to fit on top of
the griddle surface when griddle is not in use.
• The burner is rated at 18,000 BTU/HR.
CONTROL KNOB
• The griddle is electronically controlled with
temperatures marked on the knob from 150
degrees F to 500 degrees F.
• There are no fixed settings on the knob.
• Press and turn the knob counter-clockwise to the
temperature setting.
PREPARING THE GRIDDLE
• The griddle must be level or tilted slightly forward
for optimum performance. The griddle should
have been leveled during installation.
• PRIOR TO USE, It is NECESSARY to wash the
griddle plate with warm soapy water then rinsed
with clear water. The griddle may be used without
butter, margarine, or oil. However, a very small
amount may be used to flavor foods.
U S I N G T H E R A N G E T O P
12

OVEN USE
GENERAL
Your large new oven can be used in 6 cooking modes;
convection bake, regular bake, convection broil,
regular broil, convection-broil rotisserie, regular-broil
rotisserie. To help you decide which way to cook your
food read this information first. Remember this is a
new oven and the thermostat has been checked for
accuracy. Your old oven had a thermostat that over
the years got a little cold. Check your recipes for the
correct time and temperature and don’t use the old
time or temperature you were using to compensate
for your old oven being off temperature.
BURNERS
Your n ew Precision Series™ ra nge is eq uip ped
wit h bake and br oil bu rne rs ty pic al of those
use d in r est aur ant s. The ove n broiler bu rne r is
18, 000 Btu/h r and the oven baking burner is
30, 000 Bt u/h r.
ELECTRIC GLOW IGNITER
The oven bake and broil burners are equipped with
an electric glow igniter and safety system which
lights the gas. There will be a delay after the control
knob has been turned on to when you actually hear
gas arrive at the burner. The burner will ignite after
the gas reaches the burner, sometimes this can take
as long as 45 seconds.
USING CONVECTION BAKE AND REGULAR BAKE
TO SET THE OVEN FOR CONVECTION BAKE
AND REGULAR BAKE
Decide if you are going to use CONVECTION BAKE or
REGULAR BAKE. These cooking modes are for baking
or warming: using one, two, three or four racks. If you
are going to use Regular Bake turn the oven control
knob to the temperature used in the recipe. The Regular
BAKE light will stay ON. To use Convection Bake, simply
press the CONVECTION Button located on the front
panel to start the Convection Fan.
CONDENSATION
During any cooking process there is a certain
amount of moisture that evaporates from the food.
The amount of moisture that condenses on the
oven depends on the moisture content of the food.
The moisture will condense on any surface that
is cooler than the inside of the oven, such as the
control panel or the top of the door.
CONVECTION BAKE
Convection Bake is baking with a fan at the back
of the oven circulating the hot air in a continuous
pattern around the food. This circulating hot air
heats and browns the surface of the food more
effectively than in a standard oven. This allows
most foods to be cooked at lower oven temperature
or in less time, if baked at the regular temp eratur e.
The air is re-cir culate d and reheated. Uncovered,
longer cooking foods such as large pieces of meat
or other foods that can be cooked in low sided
baking utensils or air leavened foods, are where
you will see the most savings in cooking time.
Using multiple rack at the same time wi ll achieve
a good time saving, as y ou can cook more food at
the same time. The number of recipes requiring
preheating of the oven is reduced considerably
because the heat reaches the food faster as the
hot air circulates around the food.
FOODS SUITABLE FOR CONVECTION BAKE
Air Leavened Foods (angel food cake, soufflés,
cream puffs, meringue shells)
Appetizers
Breads
Main Dishes
Oven Meals (1 to 4 racks)
Cookies
Pies
Poultry
Roasts
CONVERTING RECIPES TO CONVECTION BAKE
Low sided baking utensils will provide the best results,
as the hot air can reach all sides of the utensil easier.
The oven temperature can be left the same as the
recipe and the food cooked a shorter period of time.
The temperature can be lowered 25°F to 50°F and
the food will probably take the same length of time
to cook as the recipe states. If you find that food is
adequately browned on the outside, but not done in
the center, lower the temperature another 25°F and
add to baking time. When reducing the temperature
always check the food for doneness, a minute or
two before the minimum time stated in the recipe,
as time can always be added. Some recipes will
cook faster than others. There is no way to predict
exactly how long each recipe will take when you
convert it to convection.
Convection will be easier to use after you have used
it a few times as you will begin to understand the
way it bakes.
SELECTING UTENSILS FOR CONVECTION BAKE
Cooking by convection does not require any specially
designed baking utensils. You probably have many
utensils in your kitchen that are suitable to use. When
choosing a baking utensil, consider the material, the
size and shape as they all affect the baking time, the
appearance of the finished product.
Metal bake ware (aluminum, steel and cast iron)
all result in the fastest cooking time and the best
end product. Aluminum pans work best for all
types of baked goods. For the best browning,
use a pan with a dark or dull finish tha t absorbs
heat, when baking pies and breads. A shiny finish
works best for cakes and cookies, since it reflects
some of the heat and provides a tenderer surface.
Cookie s heets with only one lip will give the best
results, as the heated air can circulate all around
the sides of the food.
U S I N G Y O U R O V E N
13
 Loading...