

Canyon Urban User Manual
PURE CYCLING
B C
MANUAL URBAN BIKE
10
12
1
13
14
2
15
16
3
a
f
17
18
4
5
5
6
e
7
8
d
c
b
23
19
20
21
22
24
25
26
9
27
28
11
Important: Assembly instructions page 11. Before your first ride read pages 4-10.
Your bicycle and this bicycle manual comply with the safety requirements laid down in the EN
!
standard 14764 as well as in the ISO standards 4210:2014 Cycles - Safety requirements for bicycles.
D 1
MANUAL URBAN BIKE TABLE OF CONTENTS
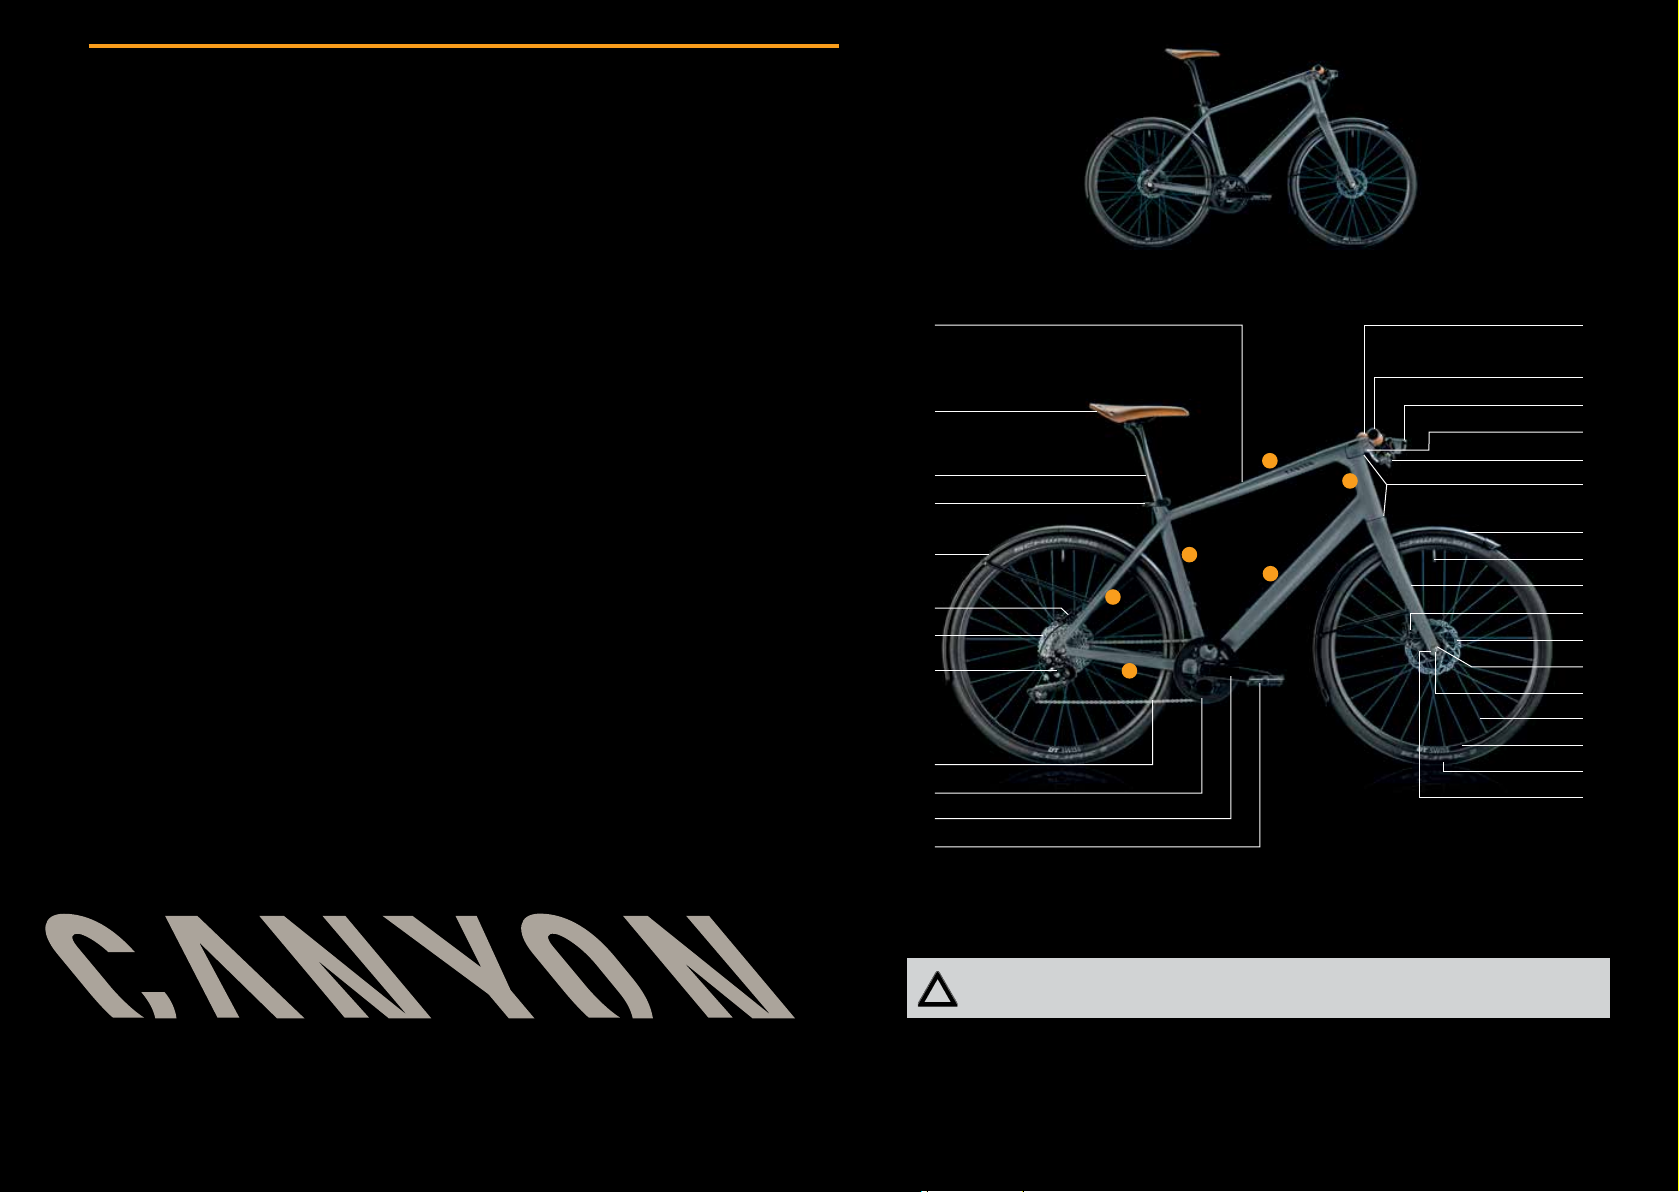
COMPONENTS
1 Frame:
a Top tube
b Down tube
c Seat tube
d Chainstay
e Rear stay
f Head tube
2 Saddle
3 Seat post
4 Seat post clamp/
Wheelguard with rear light
5 Mudguard
6 Rear brake
7 Cassette sprockets
8 Rear derailleur
9 Chain
10 Chainring
11 Crank set
12 Pedal
13 Stem
14 Handlebars
15 Front lamp
16 Shift lever
17 Brake lever
18 Headset
19 Fork
20 Front brake
21 Rotor
22 Drop-out
Wheel:
23 Valve
24 Wheelguard
25 Spoke
26 Rim
27 Tyr e
28 Hub
GENERAL NOTES ON THIS MANUAL
PAY PARTICULAR ATTENTION TO THE FOLLOWING SYMBOLS:
Please note that the aforementioned consequences
will not be repeated each time the symbols appear in
the manual.
This symbol warns you about actions that
!
could lead to damage to property or the
environment.
2 Welcome
4 Intended use
6 Before your first ride
9 Before every ride
11 Assembly from the BikeGuard
30 Packing your Urban bike
31 How to use the Wheelguard
31 Notes on mounting wheels with Wheelguard
Allure Gravity
31 How to securely mount the wheel with the
Wheelguard
33 What to bear in mind when adding components or
making changes
34 Special characteristics of carbon
35 Care instructions
36 After an accident
38 Adjusting the Urban bike to the rider
39 Adjusting the saddle to the correct height
41 Fore-to-aft-position and saddle tilt
42 Adjusting saddle position and tilt
44 Shifter and brake lever adjustment
46 Adjusting the brake lever reach
47 The brake system
48 The gears
49 GATES belt drive
50 Readjusting the tension on Canyon Urban
bikes with eccentric bearing
52 Lighting
53 General notes on care and inspection
53 Washing and cleaning your Canyon
55 Safekeeping and storing your Canyon
56 Servicing and inspection
57 Service and maintenance schedule
59 Recommended torque values
63 Legal requirements for riding on public roads
64 Warranty
65 Guarantee
66 Crash replacement
This symbol indicates an imminent risk to
your life or health unless you comply with
the instructions given or take preventive measures.
This symbol signifies information about
i
how to handle the product or refers to a
passage in the operating instructions that deserves your special attention.
Important: Assembly instructions page 11. Before your first ride read pages 4-10.
WELCOME
WELCOME
2 3
DEAR CANYON CUSTOMER,
In this manual we have compiled for you lots of tips on
how to use your Canyon bike, instructions for maintenance and care plus a wealth of things worth knowing
on bicycle technology. Read this manual thoroughly.
You will find it worth your while; even if you have cycled all your life and feel like a veteran with your new
bike. Bicycle technology has developed tremendously
over the past few years.
For your enjoyment and safety when cycling on your
Canyon, read the complete first part of this manual
thoroughly and
strictly follow the assembly instructions given in
chapter “Assembly from the BikeGuard“,
read chapter “Before your first ride“,
see chapter “Intended use“ to read up on how to use
your new bike and on the permitted overall weight
(rider, clothing and baggage) and
carry out the minimum functional check before
every ride. For more details on how to proceed, read
chapter “Before every ride“ of this manual. Do not
ride your bike unless it has passed the functional
check one hundred per cent!
Note that the instructions and tips may require further explanation depending on various factors, such
as the experience and skills of the person doing the
work or the tools being used, and some jobs may require additional (special) tools or measures not described in the manual.
Furthermore, you will find numerous service movies
on our website www.canyon.com that will help you
carry out small repair and maintenance works.
For your own safety, never do work on your bicycle
unless you feel absolutely sure about it. If you are in
doubt or if you have any questions, contact our service hotline +44 208 5496001!
Note: This manual cannot teach you the skills of a bicycle mechanic. Even a manual as big as an encyclopaedia could not describe every possible combination
of available bicycles and components. For this reason
this manual focuses on your newly purchased bike
and standard components by drawing your attention
to important notes and warnings. It does, however,
not teach you the basic skills of a bike mechanic or
help you assemble a complete bike from the Canyon
frameset!
Observe the road traffic rules in the country where
you use your Canyon Urban bike. Therefore, always
ride carefully and respect the other traffic participants.
Never ride under drugs, alcohol or when you are tired.
Do not ride with a second person on your bike and
never ride without having your hands on the handlebars.
Before you set off note: Always ride carefully so as not
to endanger yourself or others. Respect nature when
touring through forests and meadows. Make it a habit
to only ride with appropriate equipment. At least you
should wear a properly adjusted bike helmet, sturdy
shoes and suitable, bright coloured clothing.
Your Canyon team wishes you lots of fun and enjoyment with your bike!
This manual does not help you to assemble a bicycle
from individual parts or to repair it! Technical details
in the text and illustrations of this manual are subject
to change. This manual complies with the requirements of the EN standard 14764 as well as ISO stand-
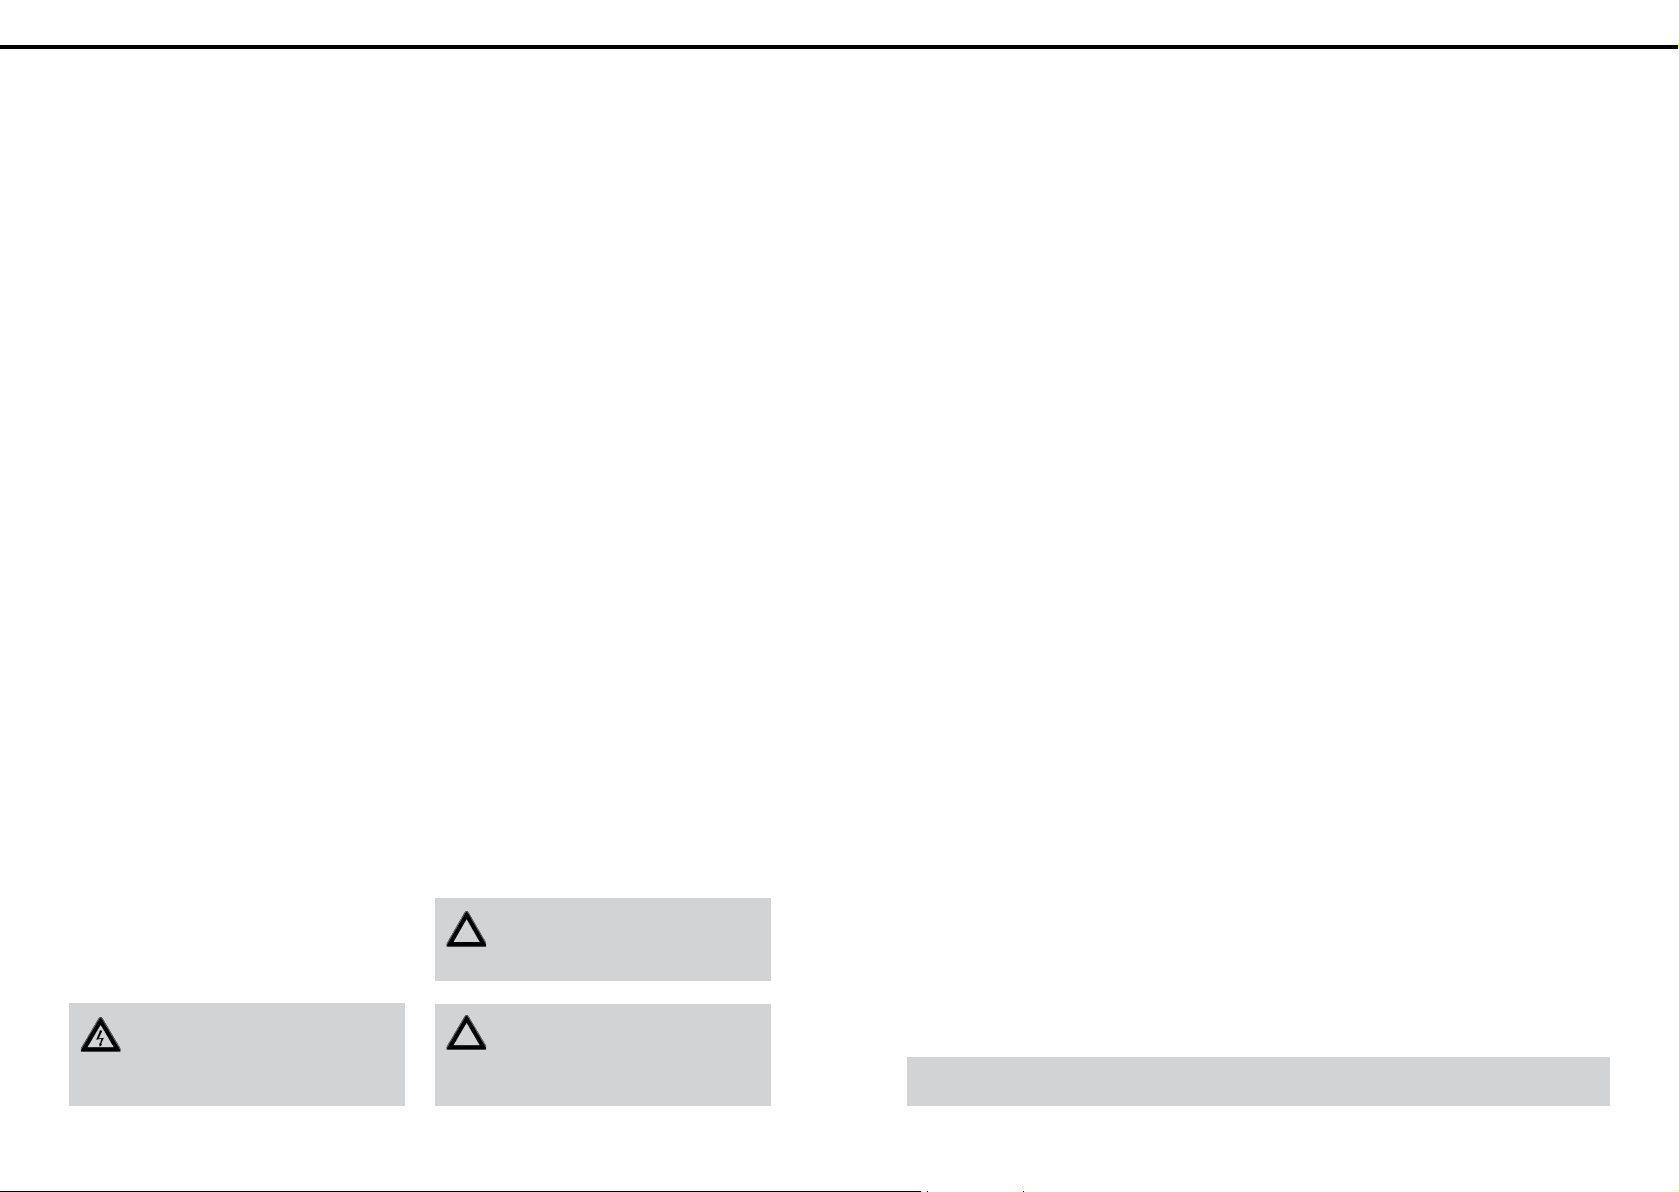
On the road
WELCOME
ard 4210:2014. This manual is subject to European
On the digital data medium enclosed with this manual
you will find a number of maintenance and repair routines in detail. When carrying out these routines, be
aware that the instructions and information provided
in your manual only refer to this Canyon bike and that
they do not necessarily apply to other bikes. Due to
numerous designs and model changes, it may be that
some of the routines are not described in every detail.
For this reason be sure to also observe the operating
instructions of our component suppliers enclosed
with the BikeGuard.
This manual cannot teach you how to ride. For this
reason this manual focuses on your newly purchased
bike by drawing your attention to the most important
notes and warnings. This manual cannot teach you
riding a bike or make you familiar with the traffic
rules.
Be aware that cycling is a hazardous activity that requires that the rider stays in control of his or her bike
at all times.
Like any sport, bicycling involves the risk of injury
and damage. By choosing to ride a bike, you assume
the responsibility for the risk. Always keep in mind
that you have no protection technique around you,
which could avoid injuries, such as e.g. the bodywork
or the airbag of a car.
legislation.
On delivery of the bike, the manufacturer has to at-
tach additional manuals. Visit www.canyon.com for
supplementary manuals.
Concept, text, photos and graphic design:
Zedler – Institut für Fahrradtechnik
und -Sicherheit GmbH
www.zedler.de
Last update: February 2015, edition 1
© No part of this manual may be published, reprint-
ed, translated or reproduced in extracts or with elec-
tronical systems or used for other business purposes
without prior written permission of the author.
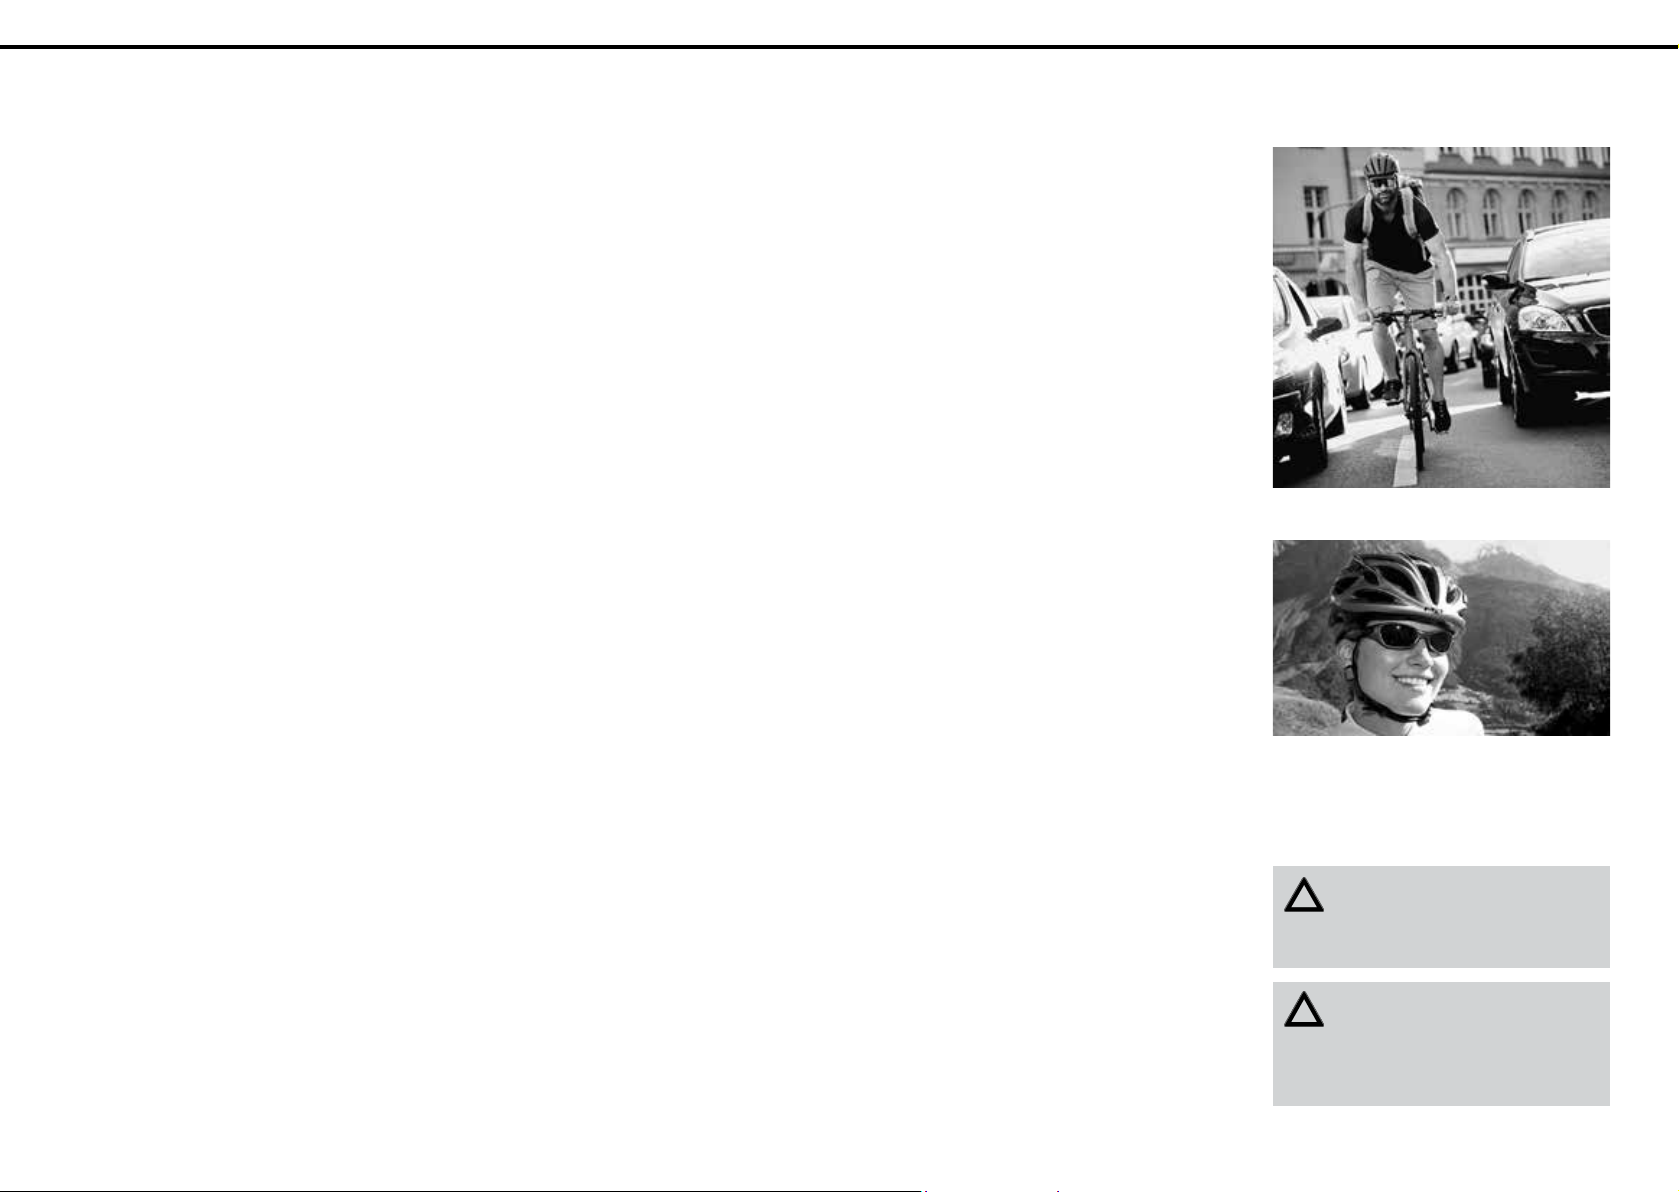
Always with helmet and glasses
Visit our website at www.canyon.com.
i
There you will find the latest news, useful
tips as well as the addresses of our distribution
partners.
For your own safety, never do any assem-
!
bly or adjusting work on your bike, unless
you feel absolutely sure about it. If you are unsure
about anything, call our service hotline +44 208
5496001. E-mail: uk@canyon.com
INTENDED USE
4 5
INTENDED USE
INTENDED USE
To define the intended purposes for the different types of bicycles, we have classified our bikes in different
categories. The purpose of this classification is to define the test requirements complying with the respective
stress as early as during the development of our bikes. This is to ensure the highest possible level of safety for
the use of our bikes.
It is therefore of major importance that the bikes are not used under conditions beyond the intended use, as this
bears the risk that the bikes’ maximum load is exceeded and the frame or other components are damaged. This
can result in severe crashes.
The rider’s maximum weight incl. baggage must not exceed 120 kg. Under certain circumstances this permissible maximum weight can be further limited by the component manufacturers’ recommendations for use.
The frame of your bike is marked according to one of the following symbols indicating the category your bike
belongs to. If you are not sure about the category your bike belongs to, contact our service centre.
Condition 0
This category is intended for children’s bicycles. Children should not ride near precipices, staircases or
swimming pools nor on paths used by automotive mobiles. In general, this applies to bicycles with wheel
sizes of 12 to 24 inches.
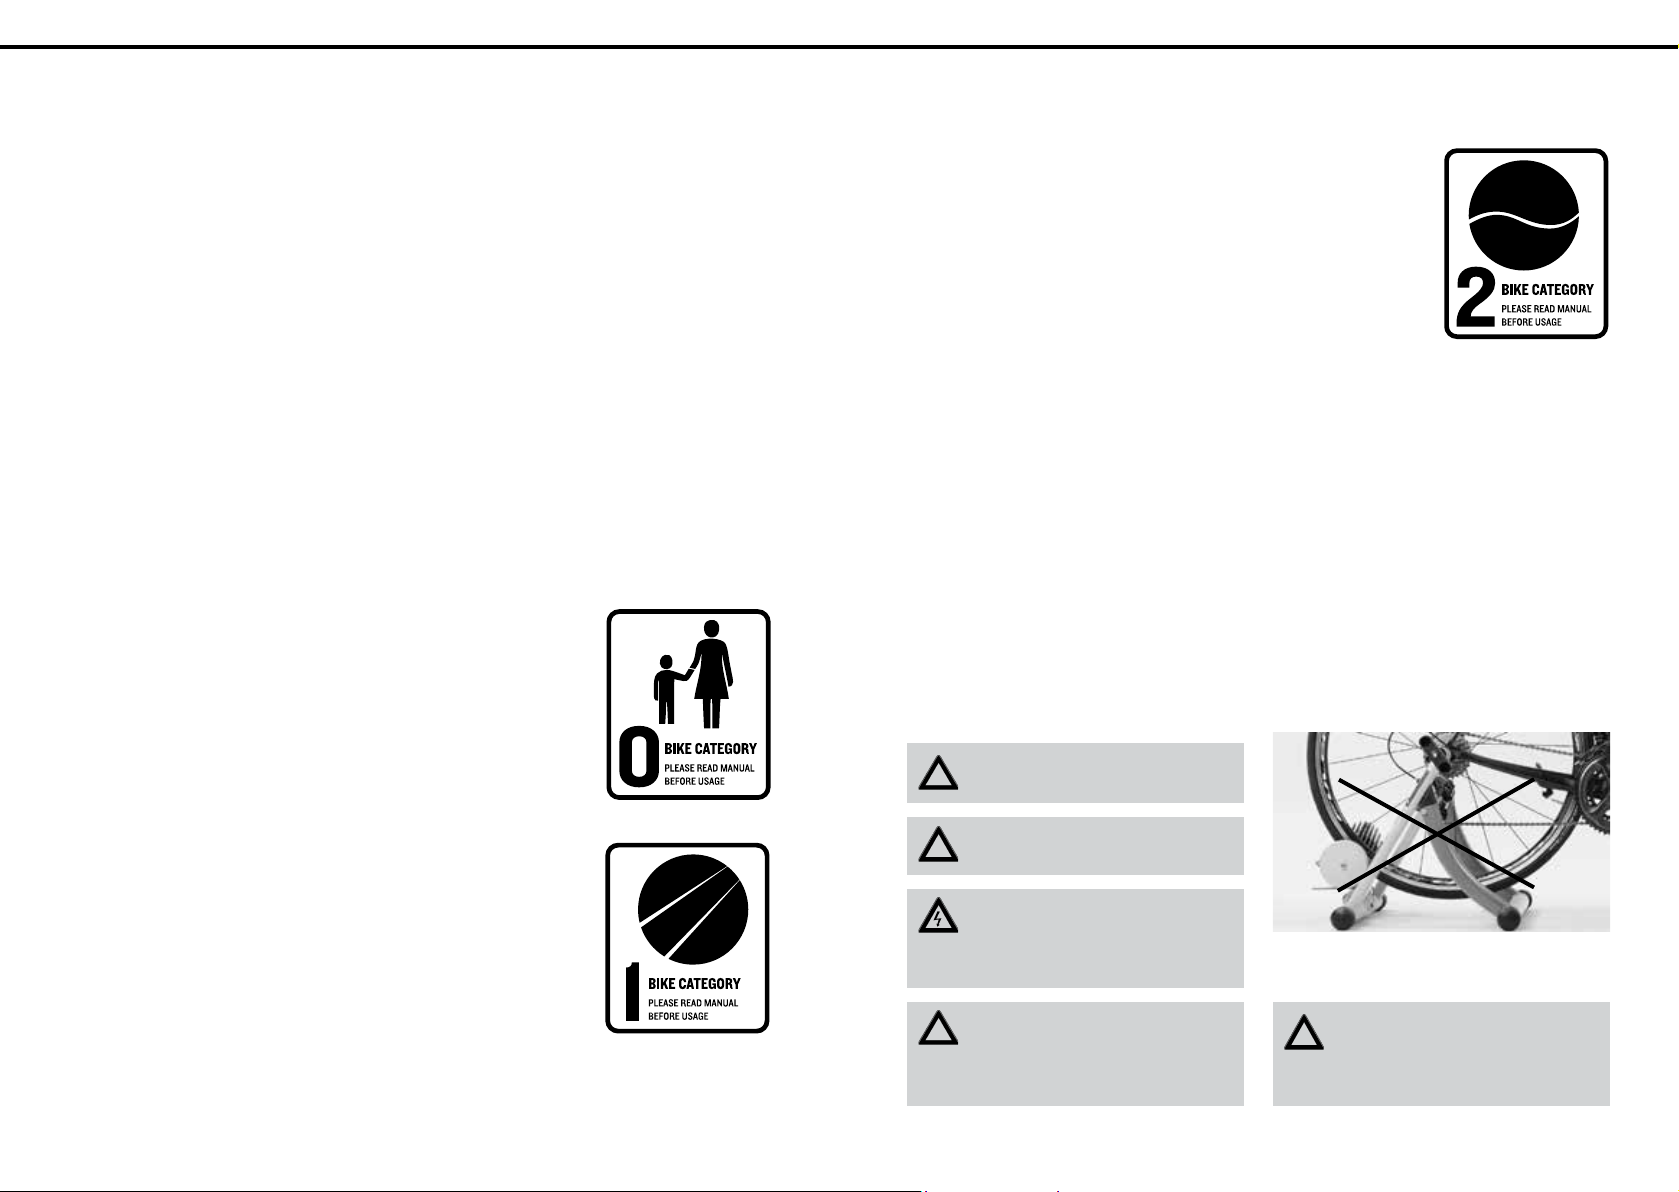
Condition 2
Bicycles of category 1 and bicycles designed for well
paved gravel paths and off-road trails with a slight
slope where a short loss of tyre contact with the
ground due to small steps can occur. This condition
comprises urban and city bikes as well as cyclocross
bikes with road racing handlebars and cantilever or
disc brakes.
Condition 1
Bikes of this category are designed for riding on
hard-surface roads where the wheels remain in
permanent contact to the ground. These are in general road racing bicycles with racing handlebars or
straight handlebars, triathlon or time trial bicycles.
The rider’s maximum weight incl. baggage should
not exceed 120 kg. Under certain circumstances this
permissible maximum weight can be further limited
by the component manufacturers’ recommendations
for use.
Canyon bikes are not approved in general
!
for mounting child carriers.
Canyon bikes are not approved for towing
!
(kids) trailers.
Mounting a pannier rack to the carbon
seat post of your Urban bike is not permitted. The only way of riding with baggage is by using a special bicycle backpack.
Keep yourself informed by visiting our con-
i
stantly updated website at www.canyon.com.
There you will find an illustration showing in
graphic form the intended use of all Canyon bikes.
Do not use the Canyon bike on a bicycle trainer to which it is attached
in any way
Canyon bikes are intended to be only used
!
on free rollers (bicycle rollers without
brake). Do not use the Canyon bike on a bicycle
trainer to which it is attached in any way.
BEFORE YOUR FIRST RIDE
6 7
BEFORE YOUR FIRST RIDE
BEFORE YOUR FIRST
RIDE
1. Have you ever ridden an Urban bike? Observe
that riding on field and forest tracks as well as
in the city requires a special amount of concentration, fitness and practice. Make yourself
gradually familiar with your new Urban bike in
an unfrequented area and slowly get used to the
road conditions where you are riding on. Attend
a riding technique course. For more information
visit www.canyon.com
2. Are you familiar with the brake system? Canyon
bikes are normally delivered with the left brake lever operating the front brake. Check whether the
lever of the front brake is in the position you are
used to. If it is not, you will need to train to get used
to the new configuration, as inadvertent use of the
front brake can throw you off your bike. Have the
lever-to-brake assignment changed by an expert,
if necessary.
Your new bike is equipped with modern brakes
which may be far more powerful than those you
are used to!
Be sure to first practise using the brakes off public
roads! Do approach the maximum possible deceleration gradually. For more information about the
brakes, read chapter “The brake system“.
3. Are you familiar with the type and functioning of the
gears? If not, make yourself familiar with the gears
in a place clear of traffic. Make sure not to shift
gears on the front and rear derailleur at the same
time and not to pedal with too much force when
shifting. For more information about the gears,
read chapter “The gears“.
Too hard braking with front brake; do not imitate
Note that the assignment of brake lever to
!
brake calliper can vary from country to
country! Check the brake assignment. If it does
not comply with your habits, we recommend you
having an expert change the lever-to-brake assignment!
Gates belt drive with gear hub
Derailleur gears
4. Are frame size, saddle and handlebars properly
adjusted? Stand over the top tube of your bike
and check whether there is enough clearance
between the top tube and your crotch (at least
one handbreadth). If there is not, you will find
more information under “Service” at our website
www.canyon.com or contact our service hotline
at +44 208 5496001.
Riding with a too big frame may cause injuries,
when getting off your bike quickly! The saddle of
your Urban bike should be set to a height from
which you can just reach the pedal in its lowest
position with your heel. Check whether your toes
reach to the floor when you are sitting on the saddle. For more information about the saddle position, read chapter “Adjusting the Urban bike to the
rider”.
5. Have you ever tried clipless or step-in pedals and
the shoes they go with? Before setting off with
clipless pedals for the first time, carefully practise
locking one shoe onto a pedal and disengaging it
while the bike is stationary. Lean against a wall
when practising so that you do not topple over.
Adjust the locking and release mechanism, if necessary. For more information on the pedal systems
read the notes under “Service” at our website
www.canyon.com or contact our service hotline at
+44 208 5496001.
Checking the clearance between top tube and crotch
Shoes for step-in pedals
Step-in pedal
A lack of practice when using clipless ped-
als or too much spring tension in the
mechanism can lead to a very firm connection,
from which you cannot quickly step out! Risk of a
fall!
BEFORE YOUR FIRST RIDE
8 9
BEFORE EVERY RIDE
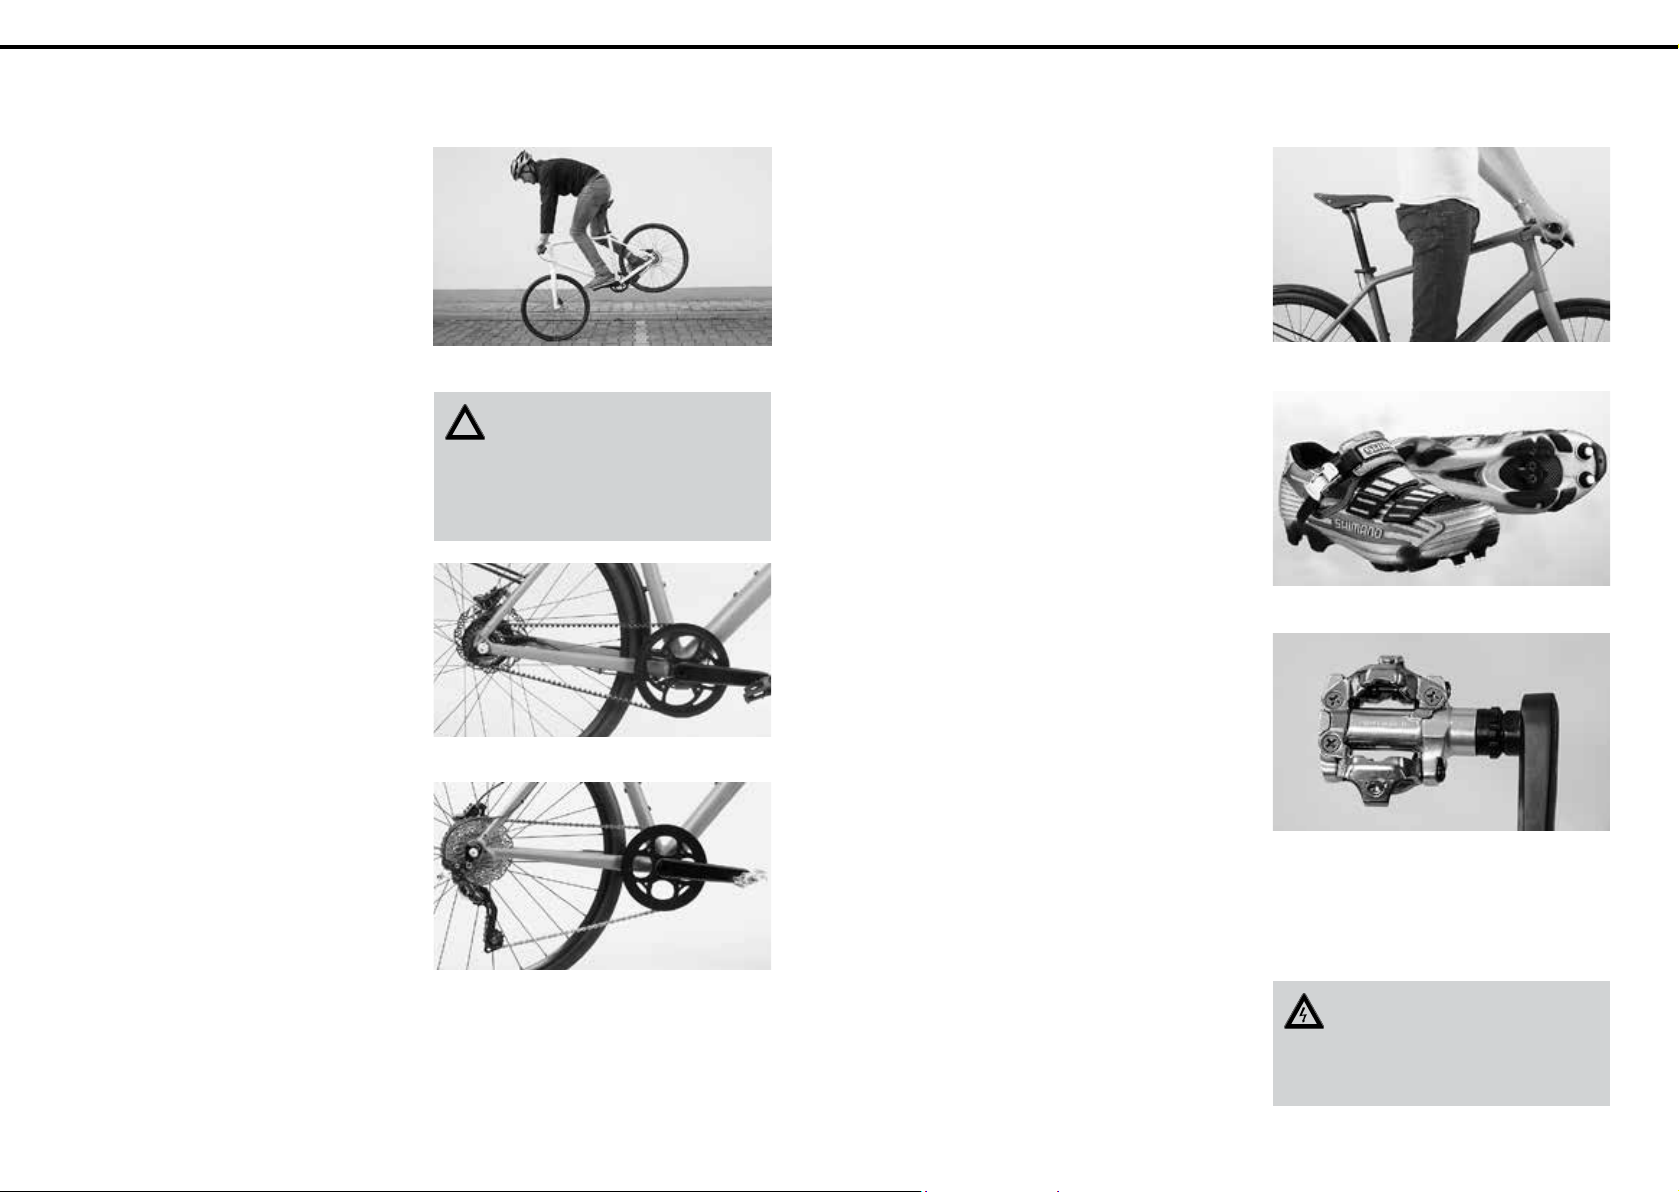
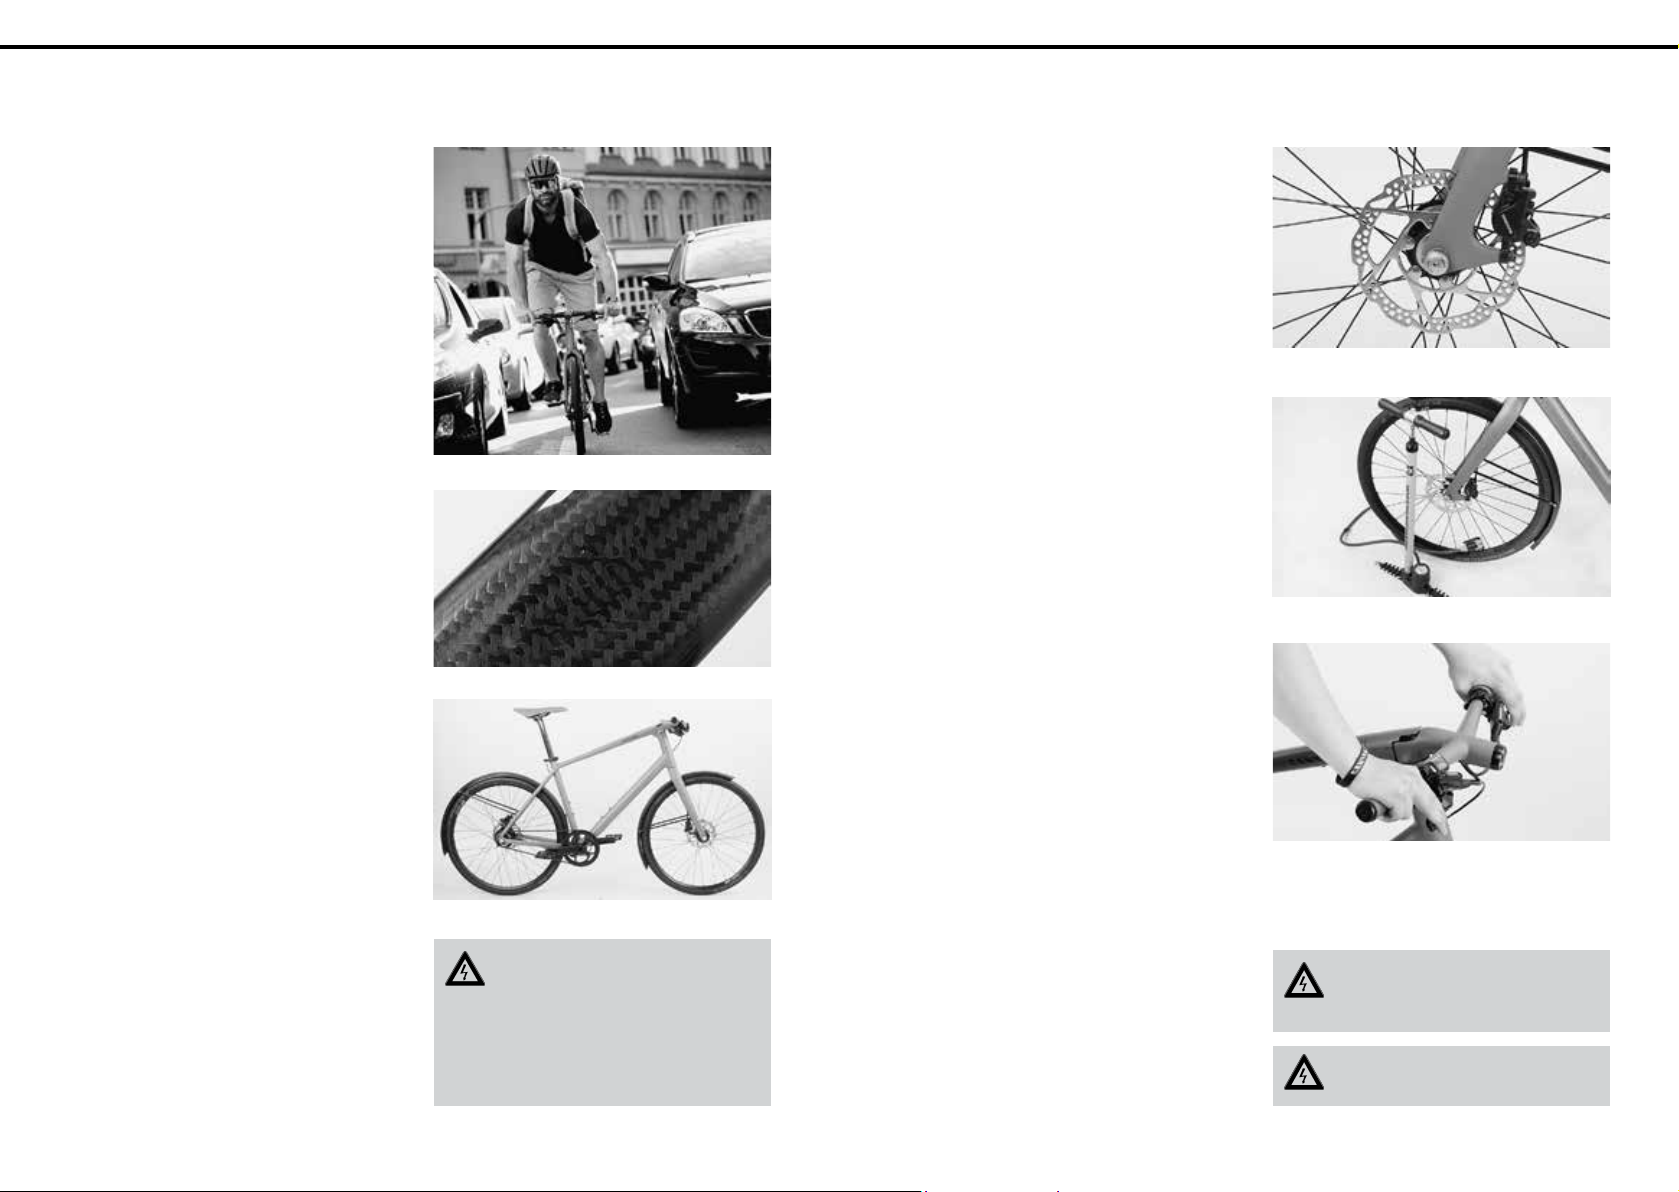
6. Note that you should only use your Canyon for its
intended purpose! Urban bikes are not suitable
for off-road use, hard downhill rides over blocked
terrain or for jumps etc. Keep in mind that though
looking easy the tricks of a professional actually
require a lot of training and experience. For your
own safety, do not overestimate your riding abilities. In general, Canyon bikes are designed for an
overall load (rider and baggage) of 120 kg. Make
sure not to exceed this limit. For more information
about the use, read chapter “Intended use”.
7. Are parts of your Canyon bike made of carbon? Note
that this material requires special care and careful
use. In any case, be sure to read chapter “Special
characteristics of carbon”.
8. Is your Urban bike equipped with a Gates belt drive?
Make sure the belt is always correctly tightened
and runs properly over the front and rear belt
wheels. Be sure to read chapter “The gears” in any
case.
Riding in the city
Carbon
BEFORE EVERY RIDE
CHECK THE FOLLOWING POINTS BEFORE EVERY
RIDE:
1. Are the Wheelguards or axle nuts of the front and
rear wheel or at the seat post properly closed? For
more information, read chapter “How to use the
Wheelguard”.
2. Are the tyres in good condition and do both tyres
have sufficient pressure? A higher pressure gives
a better riding stability and reduces the risk of a
puncture. The minimum and maximum pressure
(in bar or PSI) is indicated on the tyre side. For
more information on tyres, tubes and air pressure
read the notes under “Service” at our website
www.canyon.com or contact our service hotline at
+44 208 5496001.
3. Test the brakes while standing by firmly pulling
brake levers towards the handlebars. A pressure
point should be reached after the lever has only
travelled a short distance; the lever must, however, not touch the handlebars! Make sure no liquid
leaks out from hydraulic (disc) brakes. For more
information on the brakes read the notes under
“Service” at our website www.canyon.com or contact our service hotline at +44 208 5496001.
Wheelguard
Check the tyre pressure
Canyon Commuter with Gates belt drive
Canyon Urban bikes are high-end bikes,
representing lightweight construction as
pinnacle of engineering. Also be a professional
when it comes to handling of the material. Misuse,
unprofessional assembly or insufficient maintenance can render the Urban bike unsafe. Risk of
an accident!
You should not be able to pull the brake lever all the way to the handlebars
Improperly closed Wheelguards or axle
nuts can cause bicycle components to
come loose. Risk of a fall!
Do not use your Urban bike, if it fails on
one of these points!
BEFORE EVERY RIDE
10 11
ASSEMBLY FROM THE BIKEGUARD
4. If you want to ride on public roads or in the dark,
check the lighting set, see chapters “Lighting” and
“Legal requirements for riding on public roads”.
5. Let your Urban bike bounce on the ground from a
small height. If there is any rattling, see where it
comes from. Check the bearings and bolted connections, if necessary.
6. The major accessory for a successful cycling tour
is a small tool bag fitted underneath the saddle.
The tool kit should include two plastic tyre levers,
the most commonly used Allen keys, a spare tube,
a tyre repair kit, your mobile phone and a little
cash. Do not forget a tyre pump mounted to the
frame.
7. Take a sturdy lock with you, if you intend to leave
your Urban bike in a public area. The only way
to protect your Urban bike as much as possible
against theft in a public area is to lock it to an immovable object.
Never ride without lighting in the dark
Emergency kit
ASSEMBLY FROM THE
BIKEGUARD
Assembling the bike from the BikeGuard is no witchcraft, but you should proceed with care and deliberation. Unprofessional assembly can render the bike
unsafe.
First we would like to make you familiar with the various components of your Canyon.
Unfold the front cover of your bicycle manual Urban.
Here you will find the illustration of a Canyon Urban
bike showing all the essential components. Keep this
page folded out while you are reading. This means
that you can quickly find the component that is being
referred to in the text.
The illustration shows an arbitrary Canyon Urban
bike – this is not what every bike will look like.
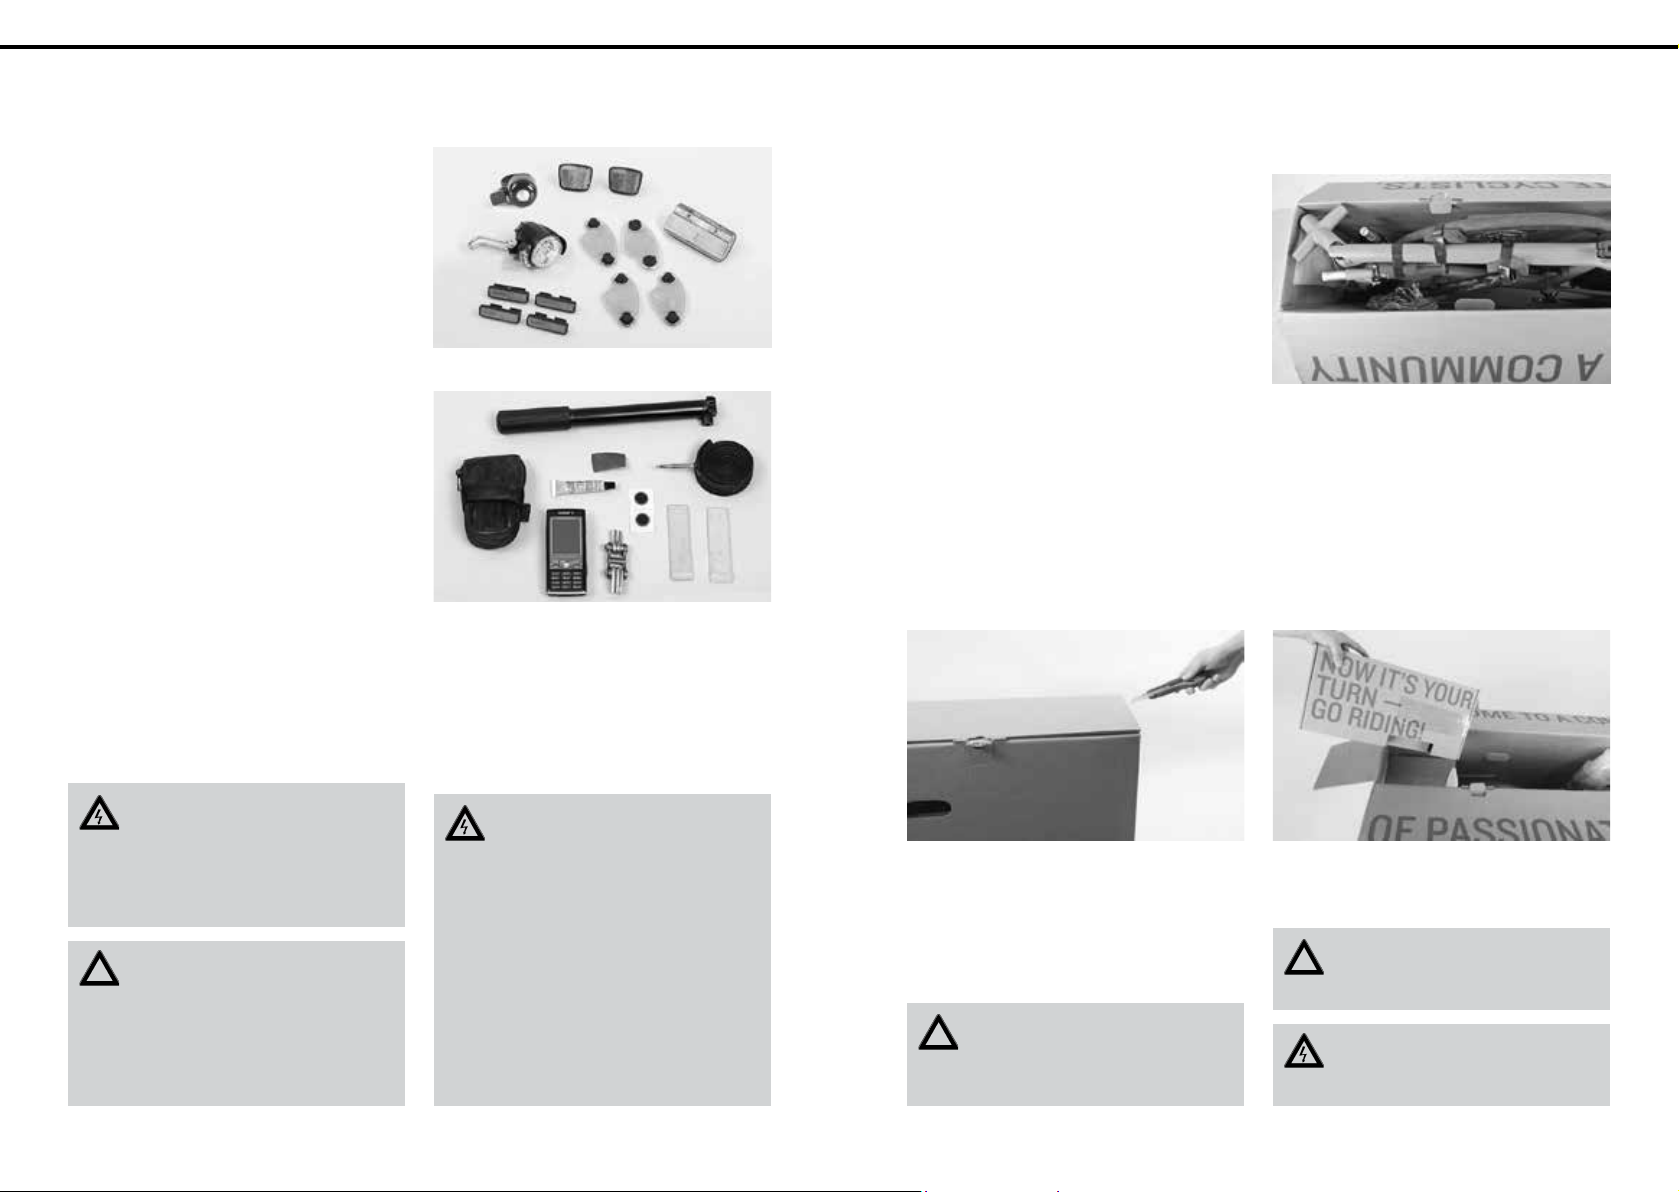
CHECKING THE CONTENTS OF THE BIKEGUARD
The BikeGuard contains the assembled frameset with
the rear wheel mounted and all add-on parts as well
as the front wheel which is sometimes packed separately in a wheel bag and the saddle with seat post.
In addition, the BikeGuard contains a box with small
parts (e.g. Wheelguard, reflectors, possibly pedals)
and the toolcase with Canyon torque wrench incl.
bits, Canyon assembly paste and the bicycle manual
Urban.
Always wear suitable, bright clothing; as a
minimum you should wear straight-cut
trousers or use leg bands or the like. This is to
make sure your trousers do not get caught in the
chain or the chainrings. Risk of a fall! In addition,
wear shoes fitting the pedal system of your bike.
To safe your Urban bike from damage, ob-
!
serve the maximum overall load and the
regulations regarding the transport of baggage
and children given in chapter “Intended use”. Furthermore, before transporting the bike by car or
plane you should read the information under “Service” at our website www.canyon.com
During use your Urban bike is undergoing
stress resulting from the surface of the
road and through the rider’s action. Due to these
dynamic loads, the different parts of your bike react with wear. Check your Canyon regularly for
wear marks as well as for scratches, dents, bent
parts and incipient cracking. Components that
have passed their normal service life may suddenly fail. Have your Canyon inspected regularly so
that components can be replaced, if necessary.
For more information on maintenance and operational safety, read chapters “General notes on
care and inspection”, “Recommended torque values” and “Service and maintenance schedule”.
First, open the BikeGuard.
To do this, only use a box cutter or a similar knife with
a very short blade. Never use any kind of knife on the
bicycle itself.
Share the pleasure that your new Canyon
i
brings and ask a helper to assist you in
unpacking it from the BikeGuard and in assembling it.
The easiest and safest way to assemble
i
the bike is when you use a workstand or
ask someone to help you.
Do not work on your Canyon with a box cutter. You may damage the component or hurt
yourself. Be sure to use scissors where needed.
ASSEMBLY FROM THE BIKEGUARD
12 13
ASSEMBLY FROM THE BIKEGUARD
GENERAL INFORMATION ON URBAN BIKE ASSEMBLY
Your Canyon had been fully assembled at the factory
and given a test run. The bicycle is fully functional
without any further adjustments being made once the
assembly steps explained below have been completed. After carrying out assembly work, always do a test
ride in an unfrequented place or on a quiet road.
The following section gives you a concise description of the assembly. If you are not skilled in bike
assembly or have no experience in this field, you will
find more information under “Service” at our website www.canyon.com. Also read the manuals of the
component manufacturers.
Before your first ride, carry out the checks described
in chapter “Before every ride”.
It is best to use a workstand that holds the frame from
inside at three points or to ask a helper to hold your
Canyon while you assemble it.
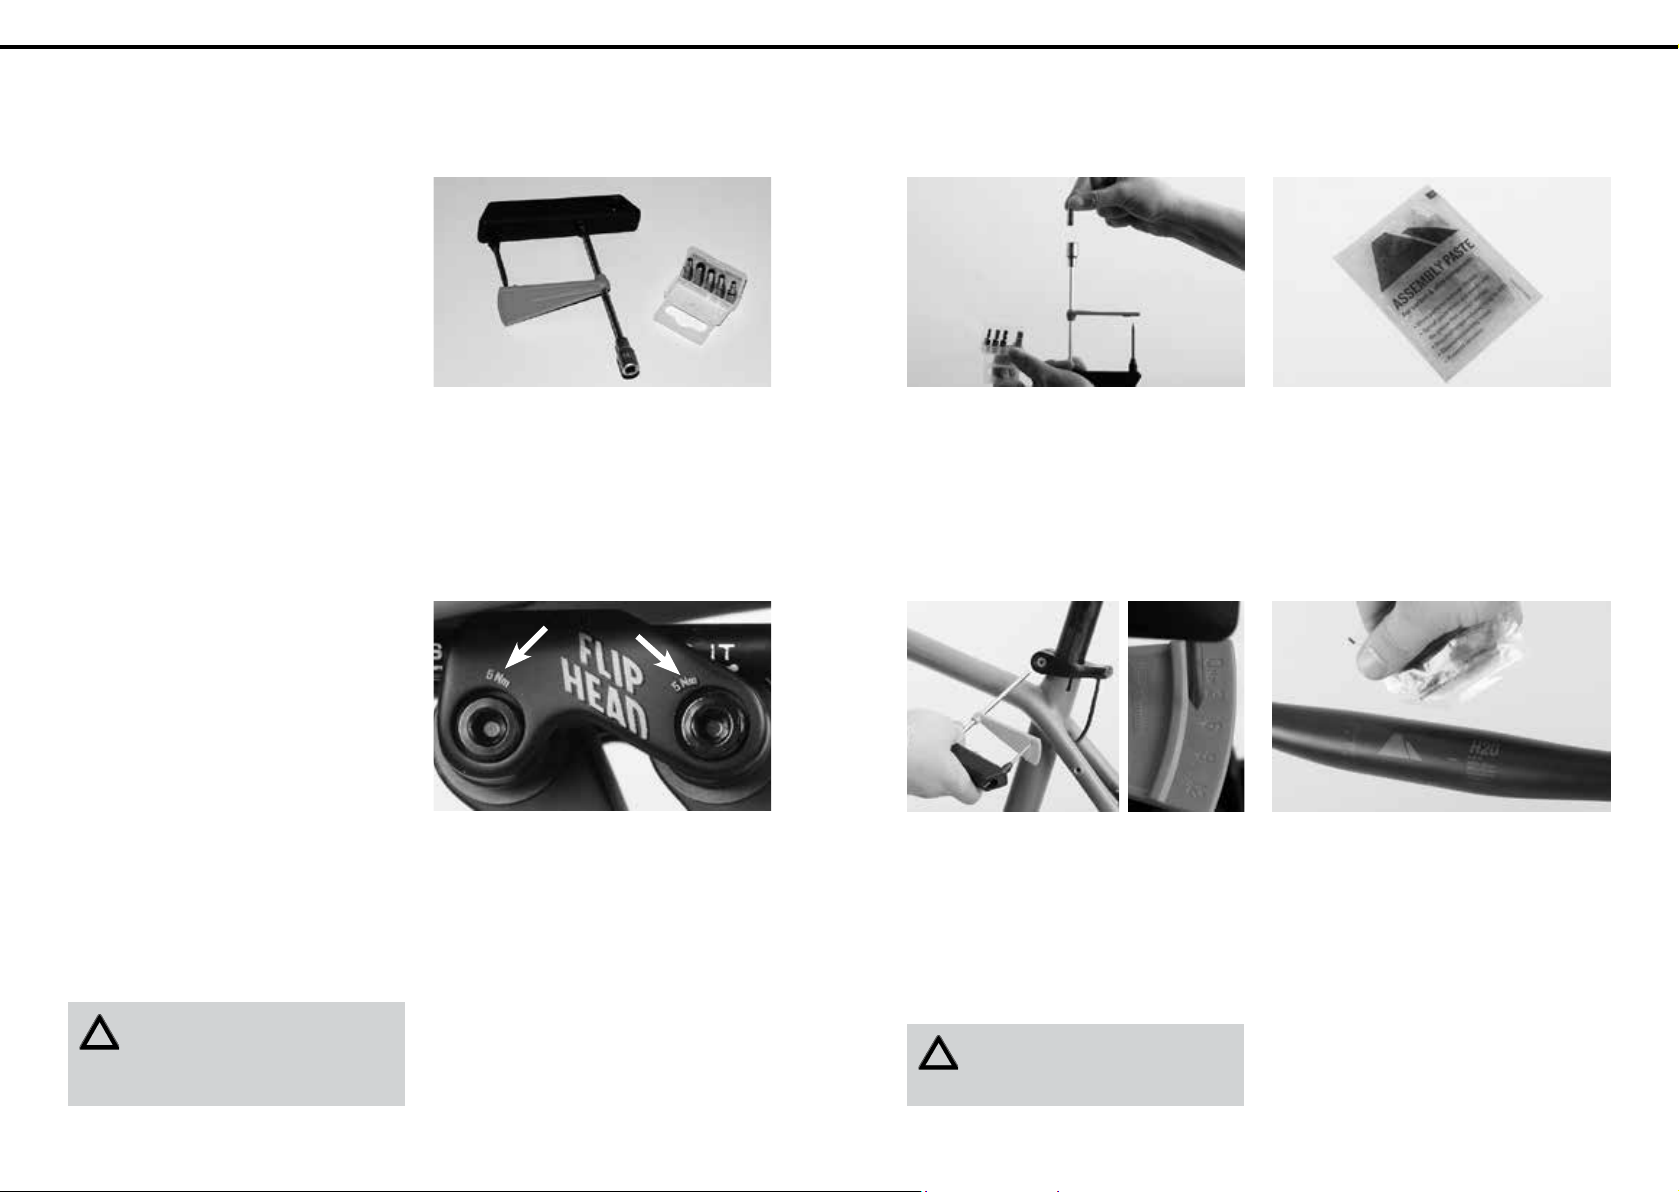
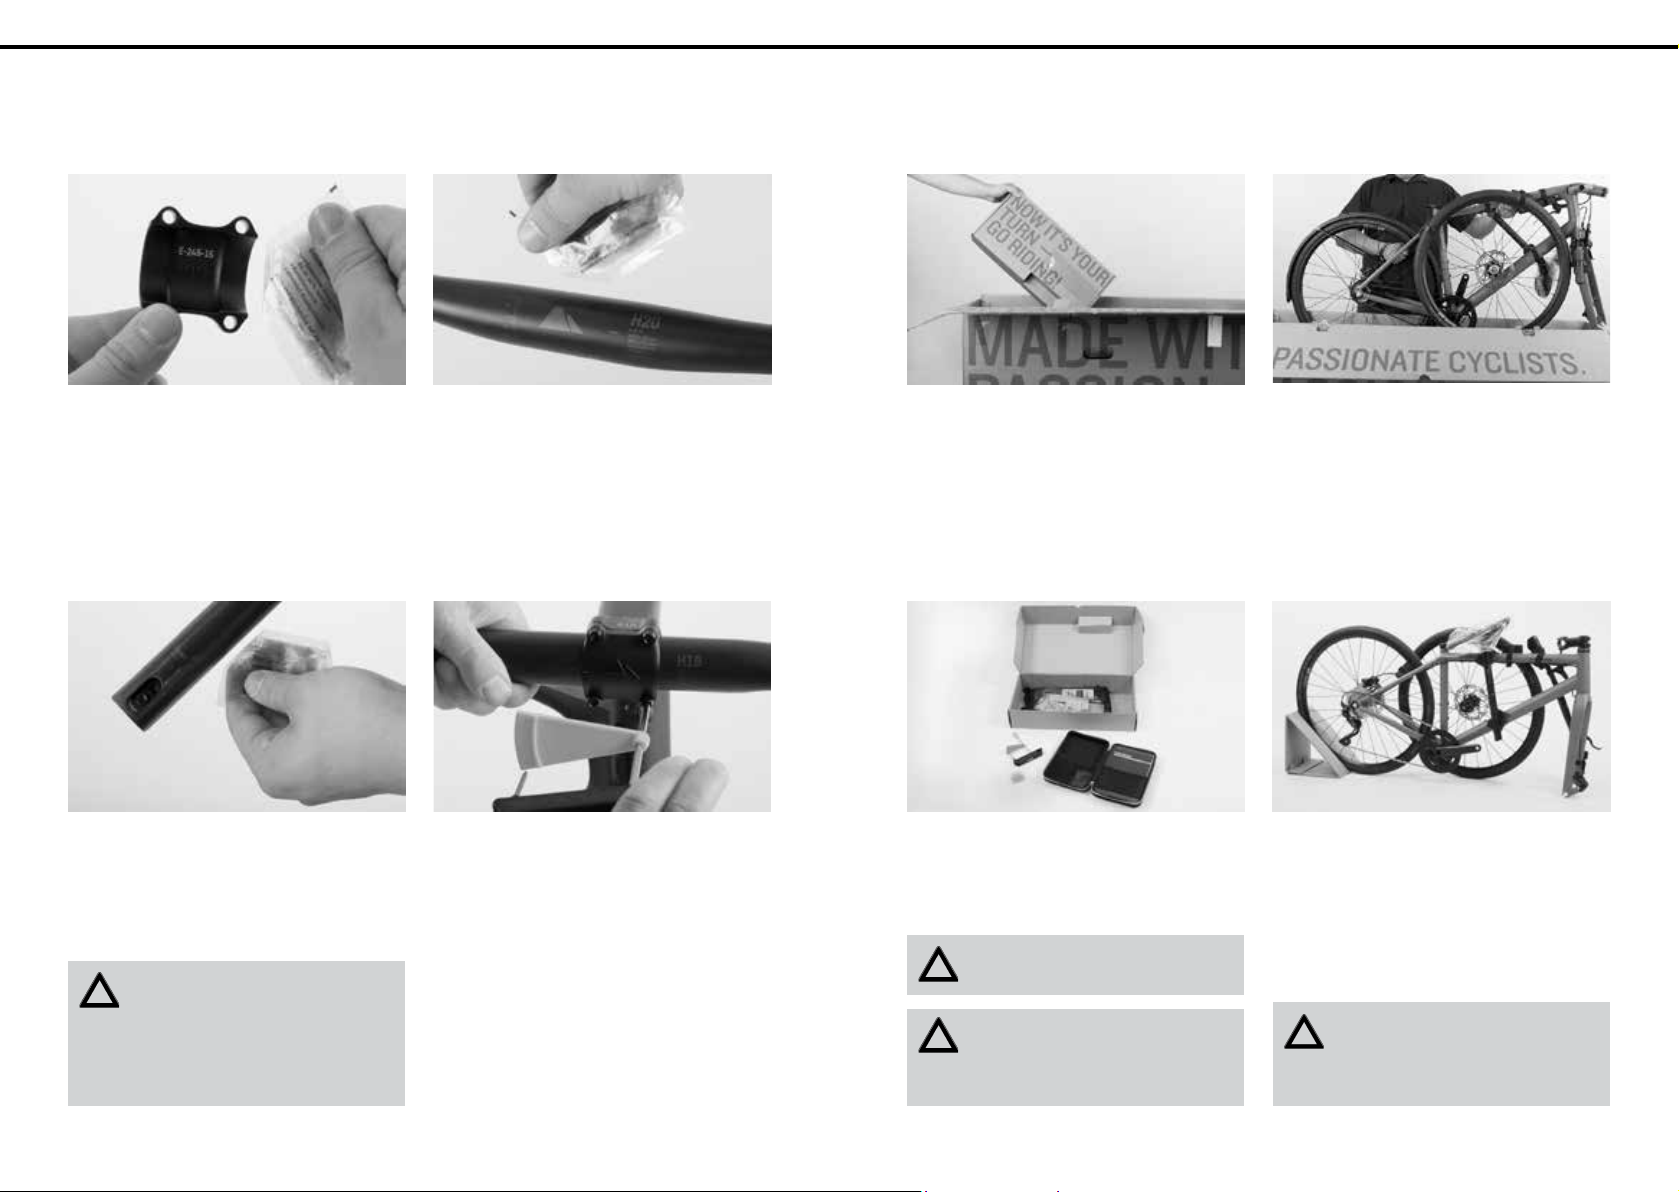
USING THE CANYON TORQUE WRENCH
We from Canyon regard the use of a torque wrench as
essential so as to ensure that two parts can be fixed
together securely and safely.
Put the matching bit into the holder of the Canyon
torque wrench.
Insert the Allen key fully into the screw head.
USING THE CANYON ASSEMBLY PASTE
Carbon fibre components are particularly vulnerable to damage caused by excessive clamping force.
Canyon assembly paste creates extra friction between two surfaces, allowing the necessary torque
value to be reduced by up to 30 %.
Do not clamp a frame tube or a carbon seat
!
post of your Canyon in the holding jaws of
the workstand! Use a suitable aluminium seat
post for clamping instead.
Exceeding the maximum torque value at the clamping
bolts (e.g. at the stem, seat post or seat post clamp)
leads to an excessively high clamping force. This
can cause the component to fail and hence there is
a high associated risk of accidents. In addition, the
product guarantee would be null and void in such a
case. Screws or bolts that are too loose or are done
up too tightly can cause a failure and hence lead to
an accident. Always observe strictly the torque values
indicated by Canyon.
Slowly turn the handle of the Canyon torque wrench.
Once the bolt is getting tight, the pointer moves over
the scale. Stop the turning movement as soon as the
pointer reaches the number of the prescribed torque
value.
Assemble your Canyon using the Canyon
i
torque wrench enclosed with the Bike-
Guard.
This is especially useful in the clamping areas of
handlebars and stem, steerer tube and stem and seat
post and seat tube, i.e. three areas where too much
clamping force can damage either component, causing component failure or voiding the warranty.
By reducing the clamping force, Canyon assembly
paste relieves stress on sensitive carbon surfaces,
preventing damage to fibres or the cracking of the
carbon substructure.
ASSEMBLY FROM THE BIKEGUARD
14 15
UNPACKING
ASSEMBLY FROM THE BIKEGUARD
It also retains its effectiveness in wet conditions and
provides maximum protection against corrosion.
Canyon assembly paste can be used for all carbon
and aluminium connections. It’s ideal for this purpose, as it does not harden.
Make it a rule to use assembly paste on
i
seat posts of Urban bikes to achieve a firm
seat of the seat posts. If the height of the seat
post is often changed, the surface is at risk of being scratched. This is normal wear and no reason
for complaint.
Prior to applying Canyon assembly paste, remove dirt
particles and lubricant residues from the surfaces to
be treated. Apply a thin and even film of Canyon assembly paste to the cleaned surfaces using a brush
or a chamois.
Mount the components, as specified.
Use the Canyon torque wrench and never exceed the
prescribed maximum torque value. Remove excessive
Canyon assembly paste and re-seal the small sachet
after use.
Take out the box with the small parts and put it aside.
Remove the protective cardboard, if available.
Remove the toolcase with the bicycle manual Urban
and the tools from the small parts box.
Make sure the saddle and the seat post
i
are fastened to the frame.
Keep the entire packaging material as well
i
as the BikeGuard in a dry place. If you intend to ship your Canyon or to take it with you on
a trip, you will have everything at hand.
Carefully lift the frame to which the front wheel as
well as the saddle and the seat post are fastened
together with the components and the mounted rear
wheel out of the BikeGuard.
Safely place down the partly assembled Urban bike
with the triangular wheel support cardboard. Ask
your helper, if necessary, to hold the bike.
When lifting out the frame, hold tight the
!
front wheel as well as the saddle and the
seat post to make sure they do not fall down and
get damaged.
ASSEMBLY FROM THE BIKEGUARD
16 17
MOUNTING THE SADDLE AND THE SEAT POST
ASSEMBLY FROM THE BIKEGUARD
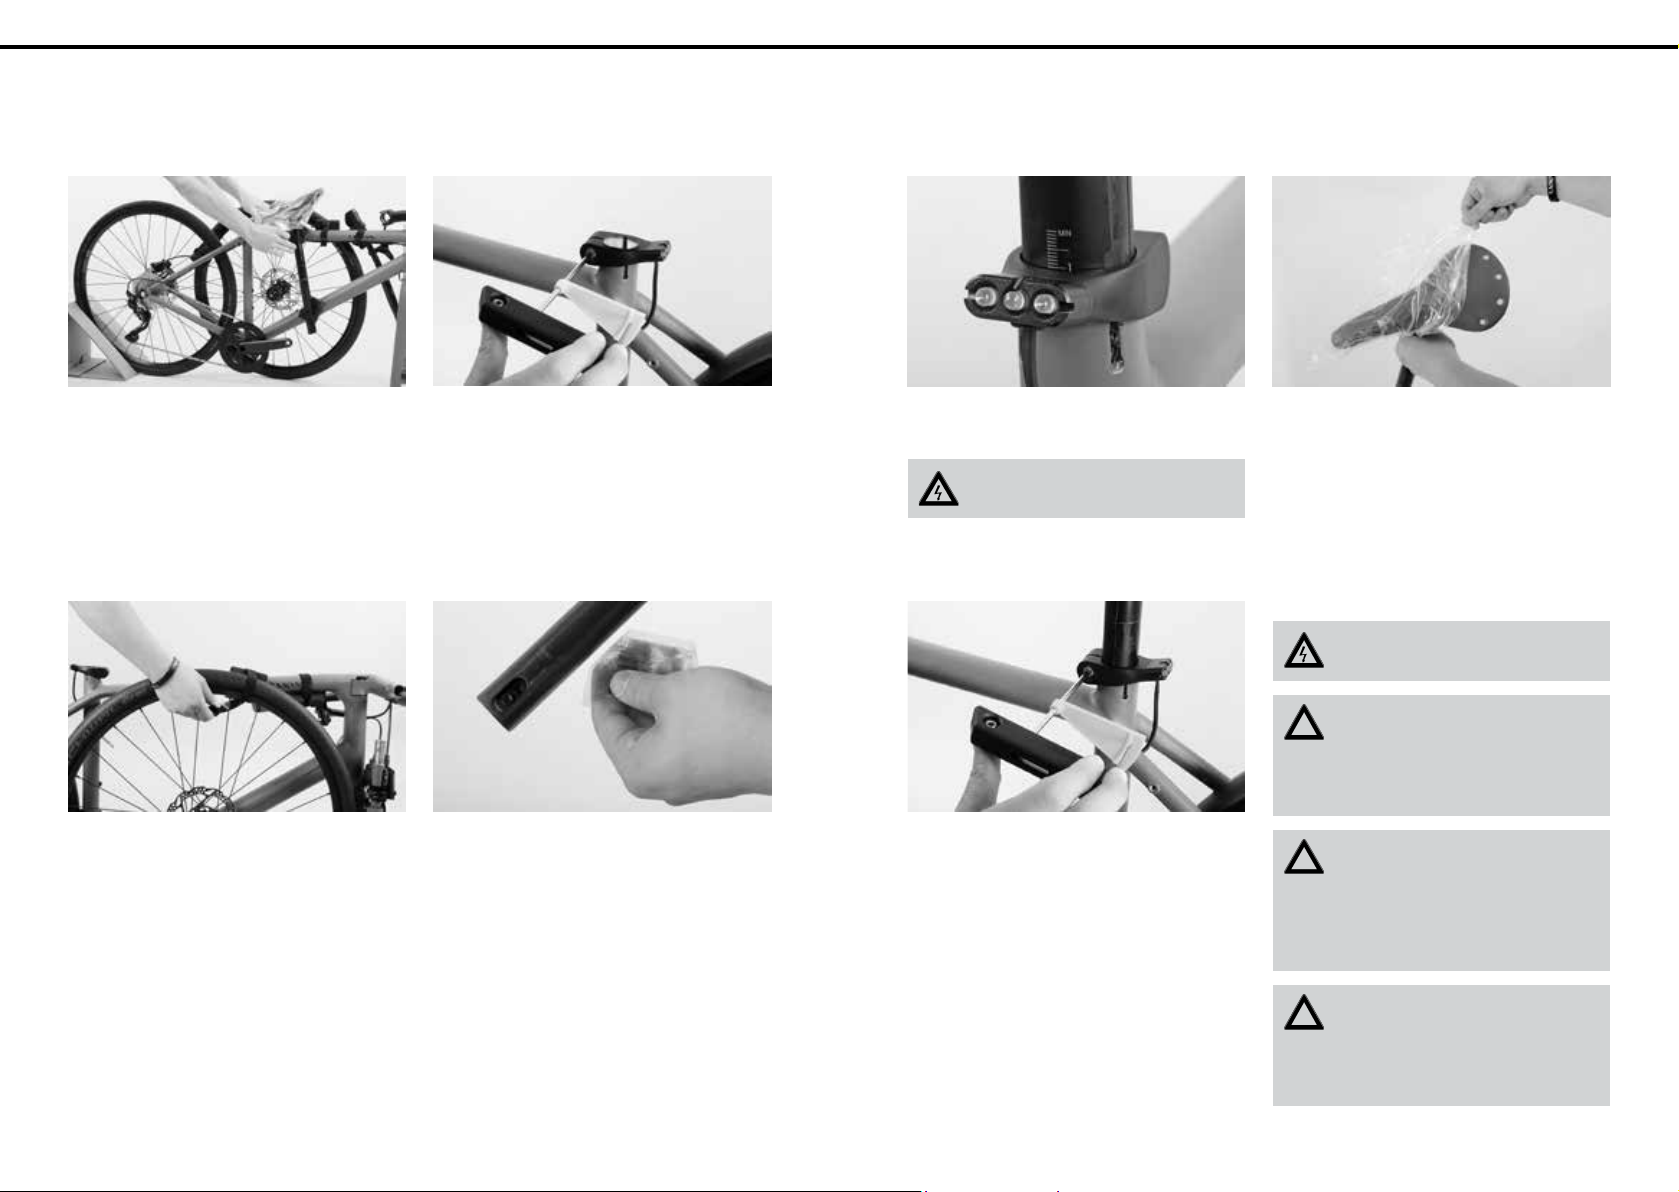
Carefully undo the band with Velcro fastener fixing
the saddle and the seat post to the frame and put
these parts aside.
Carefully undo the band with Velcro fastener fixing
the front wheel to the frame and put the front wheel
carefully aside.
Measure the saddle height of your previous bicycle
from the middle of the bottom bracket up to the top
edge of the saddle in the middle of the saddle. Then
transfer the saddle height to your new Urban bike.
Release the seat post binder bolt at the seat tube.
Read beforehand chapter “How to use the Wheel-
guard“ and „Adjusting the Urban bike to the rider“.
You should be able to insert the seat post easily into
the frame without pressing or turning. If you are not,
loosen the seat post binder bolt a little more.
Pull the seat post out again. Apply a little Canyon assembly paste to the bottom part of the seat post and
inside the seat tube or in the marked clamping area
of the seat post.
Slide the seat post into the seat tube to the desired
saddle height.
Never ride your Canyon if the MAX marking of the seat post is visible.
Bring the saddle into alignment and do not overtighten the seat post binder bolt or the Wheelguard, i.e. do
not exceed the permissible maximum torque value of
8 Nm. Use the Canyon torque wrench.
Remove the protective film from the saddle, if available.
Never apply any grease or oil to clamping
areas made of carbon!
Do not exceed the maximum torque values!
!
You will find the prescribed values in chapter “Recommended torque values”, directly on the
components and/or in the manuals of the component manufacturers.
Observe the instructions in chapter “Ad -
!
justing the saddle to the correct height“ as
well as the permissible torque values in chapter
“General notes on care and inspection“. Also observe the instructions of the component manufacturer.
The Canyon Perfect Position System
!
(PPS) offers you the possibility to select
your Canyon perfectly tuned to your body without
a test ride. For more details on the PPS visit our
website at www.canyon.com
ASSEMBLY FROM THE BIKEGUARD
18 19
MOUNTING THE HANDLEBARS
ASSEMBLY FROM THE BIKEGUARD
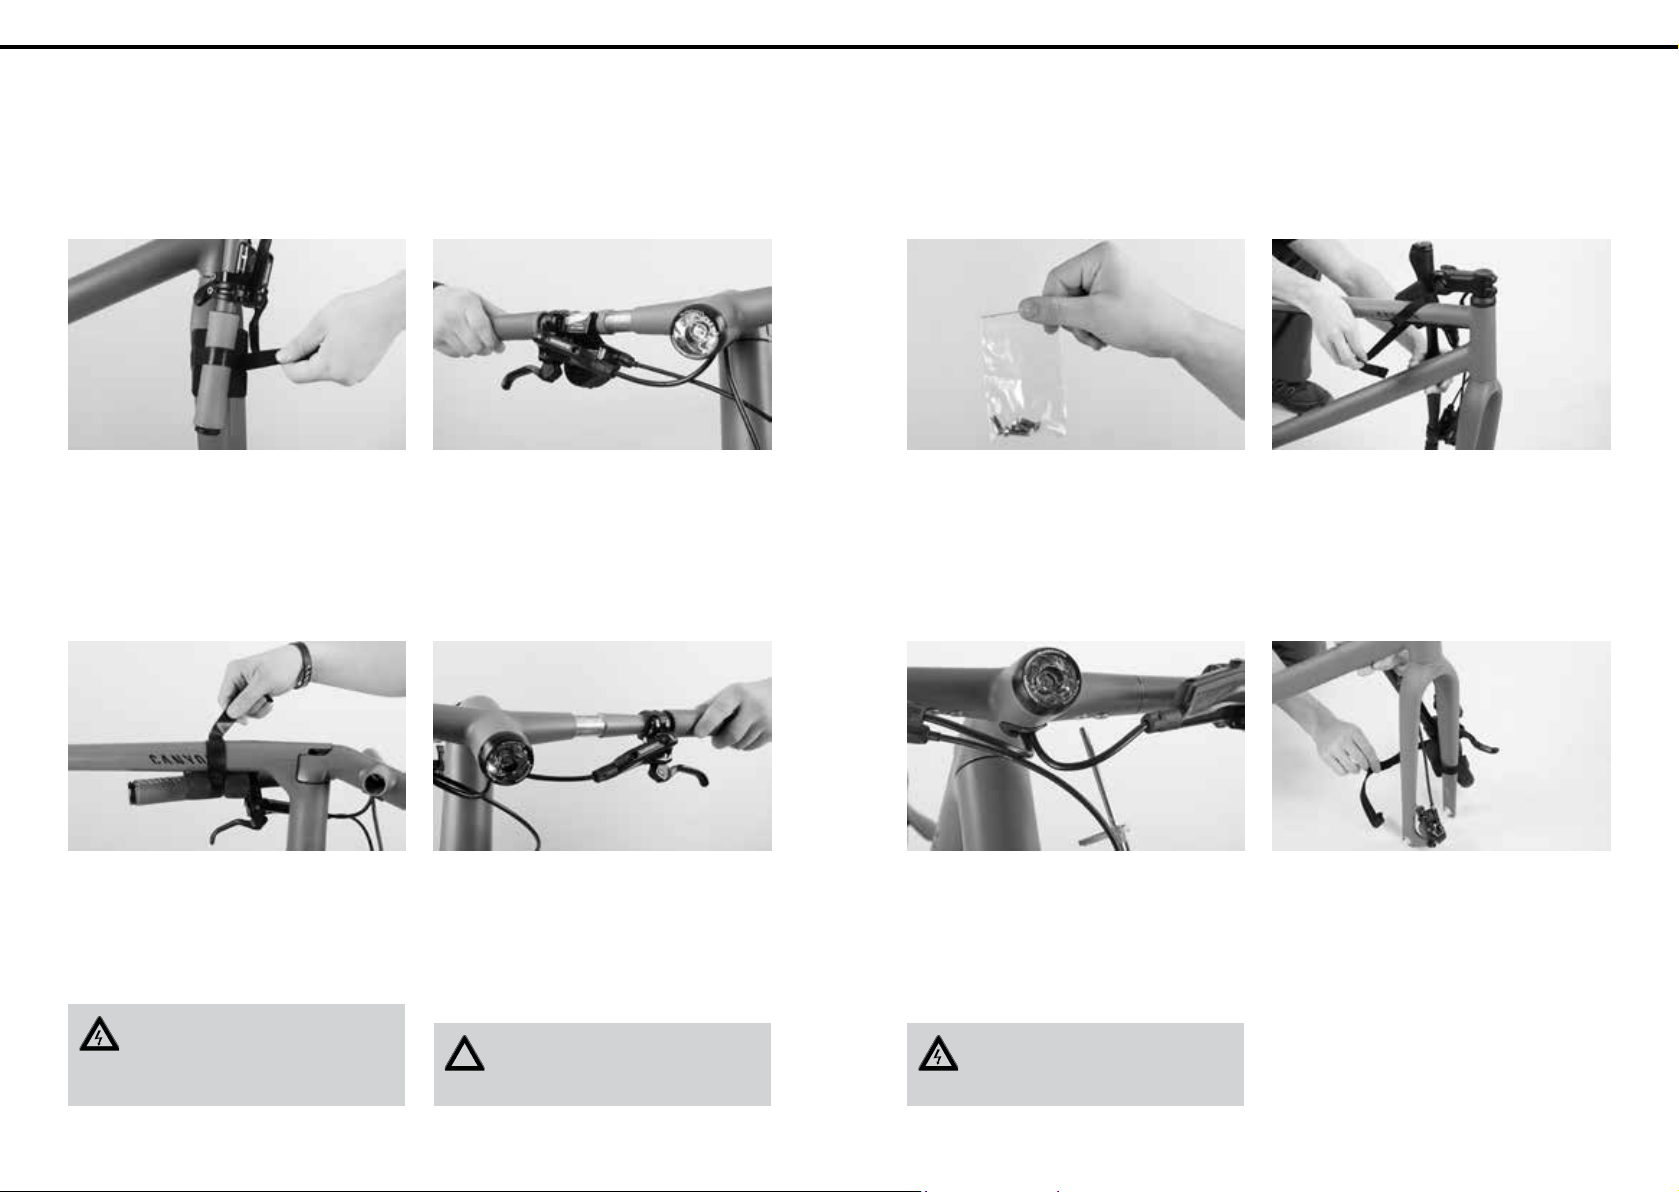
Mounting the handlebars to the Canyon Commuter
(Canyon H18 Flat Extensions)
Hold both fixed handlebar extensions tight. Start by
undoing the band with Velcro fastener fastening the
right-hand handlebar extension to the fork.
Slide the right-hand handlebar extension on the
handle bar/stem combination.
Take the bag with the four handlebar bolts out of the
small parts box.
Take the Canyon torque wrench and put the bit matching the handlebar bolts into the holder.
Mounting the handlebars to the Canyon Urban
(Canyon H27 Flat AL)
Hold the flat handlebars which are fastened to the
fork tight and undo the band with Velcro fastener
which is fastened to the top tube.
Undo the band with Velcro fastener fastening the lefthand handlebar extension to the top tube.
The fork is fixed by means of the headset itself and
cannot slip out.
In packed condition the handlebars are
not assembled, the stem is however assembled accurately. Do not make any changes to
the stem.
Slide the left-hand handlebar extension on the handlebar/stem combination.
Make sure the bowden cables and the
!
lines are not twisted or bent, but run in a
smooth curve to the cable stops or brakes.
Slightly tighten the two handlebar bolts evenly on
each bottom side of the handlebar by using the
Canyon torque wrench to a maximum torque of 4 Nm.
Do not exceed the maximum torque values!
At this stage the Urban bike is not yet
ready-for-use. Carry out the final adjust-
ment and check of the handlebars.
Undo the band with Velcro fastener in the bottom
area of the fork. Hold the handlebars tight while doing
this so that they cannot drop and get damaged.
Take the Canyon torque wrench and put the bit
matching the faceplate bolts into the holder.
 Loading...