

Canon Powershot SD430 Digital ELPH Wireless, Digital ELPH, Digital IXUS User Manual

Canon Digital Camera
User Guide for Camera-to-Camera Data Transfer
Table of Contents
Introduction . . . . . . . . . . . . . . . . . . . . . . . . . . . . . . . . . . . . 1
Transferring Images via a Wireless Connection . . . . . . . . 2
Registering Your Camera Name . . . . . . . . . . . . . . . . . . . . . . . . . . . . . . . 2
Registering Target Camera . . . . . . . . . . . . . . . . . . . . . . . . . . . . . . . . . . . 2
Connecting Cameras via a Wireless Connection . . . . . . . . . . . . . . . . . . 3
Transferring Images One by One . . . . . . . . . . . . . . . . . . . . . . . . . . . . . . 4
Transferring Ordered Images . . . . . . . . . . . . . . . . . . . . . . . . . . . . . . . . . 4
Ending the Wireless Connection . . . . . . . . . . . . . . . . . . . . . . . . . . . . . . . 5
Troubleshooting . . . . . . . . . . . . . . . . . . . . . . . . . . . . . . . . . 6
Trademark Acknowledgments . . . . . . . . . . . . . . . . . . . . . . 6
Introduction
If you upgrade the firmware of your PowerShot SD430 DIGITAL ELPH WIRELESS/DIGITAL
IXUS WIRELESS camera, it will be possible to transfer images between cameras* via a wireless
connection without using a PC.
This guide will explain procedures for transferring images via a wireless connection. For
guidance in the use of the camera, safety precautions and radio wave warning, please refer to
the Camera User Guide.
* Image transfer is only possible between PowerShot SD430 DIGITAL ELPH WIRELESS/DIGITAL IXUS WIRELESS cameras
with upgraded firmware.
* Images are transferred from one camera to another camera. Images cannot be transferred between more than 2 cameras.
1
Transferring Images via a Wireless Connectio
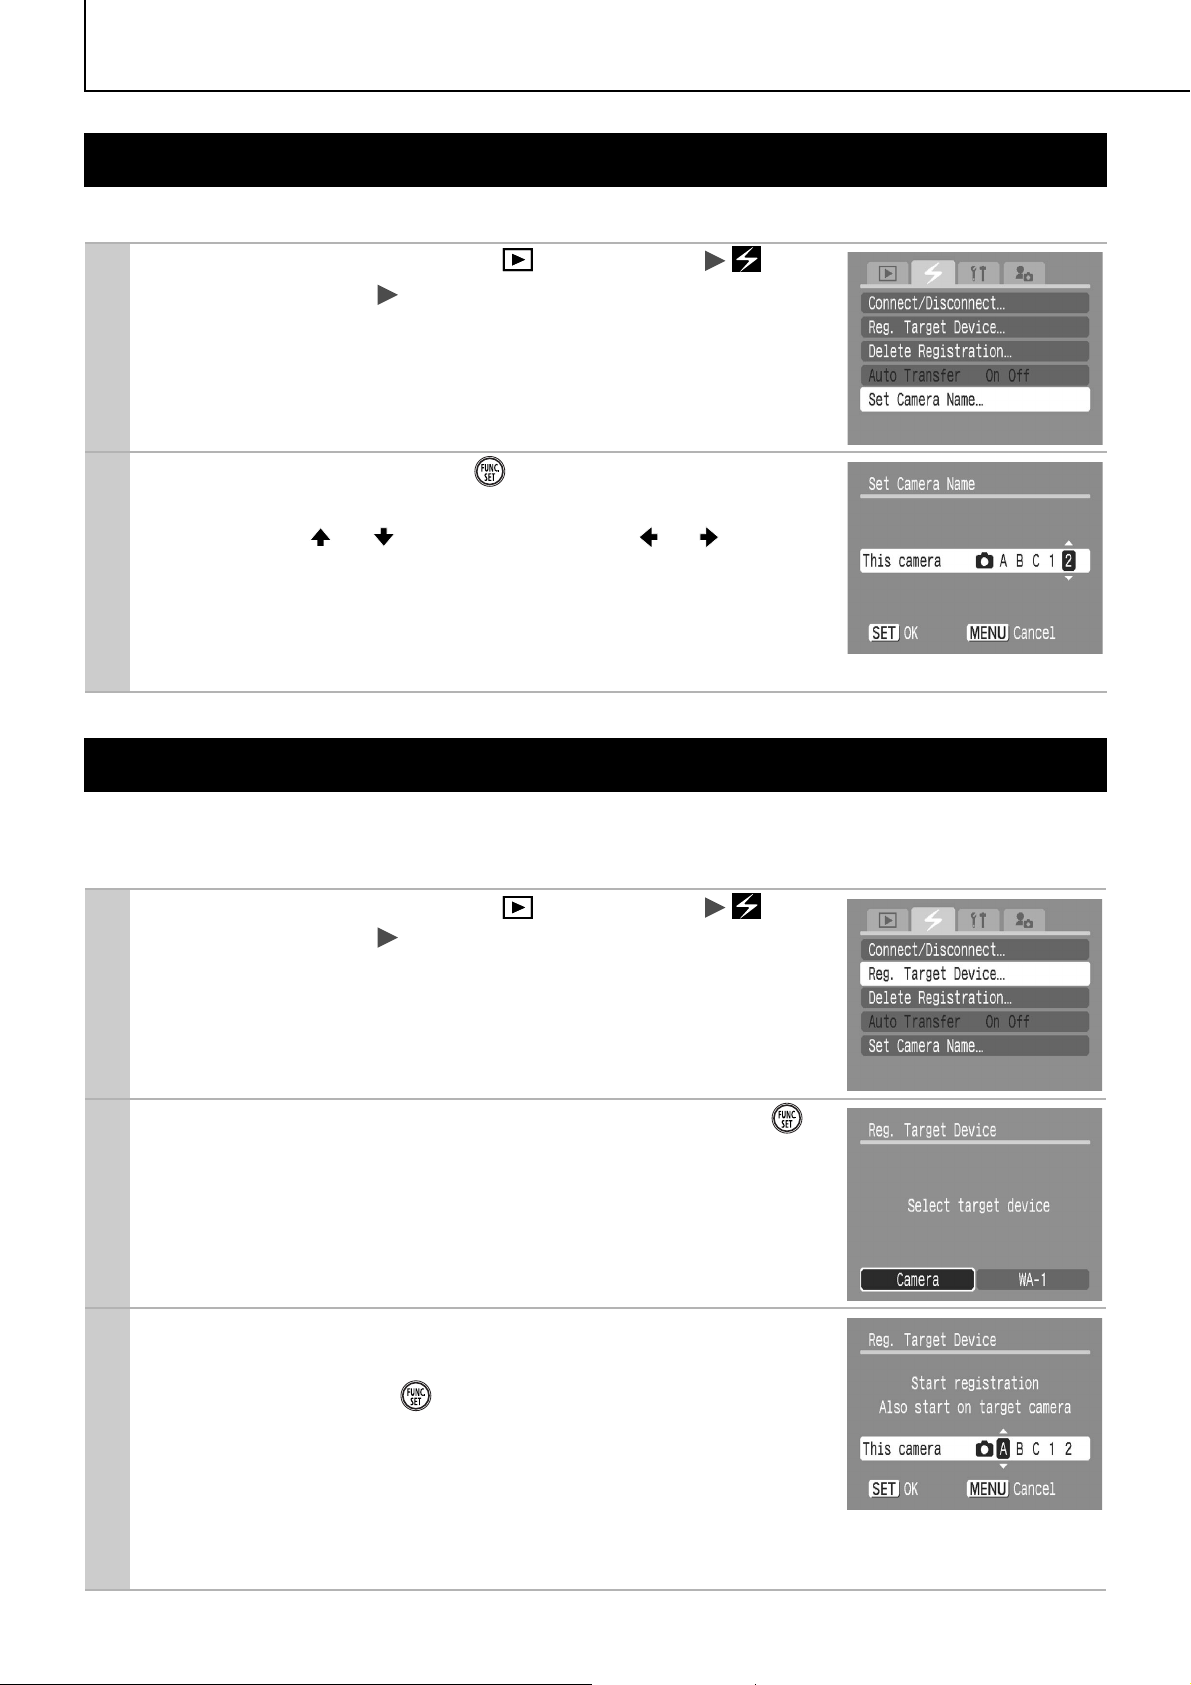
Registering Your Camera Name
First, select a name for your camera and register it.
Slide the mode switch to (Playback)
1
(Wireless) Menu [Set Camera Name]
z Refer to the Camera User Guide for your camera for details on
Menu operation.
Set up name and press .
2
z You can set up the camera name with up to 5 letters. Select let-
ters using the or button, and press the or button to
move forward or backward. Capital letters and numbers can be
used for the camera name.
z The default setting is [AAAAA].
n
z If you do not wish to register a name, press the MENU button.
Registering Target Camera
Register the name of the camera you wish to connect to your camera via a wireless connection.
z You must follow the following procedures for both your own and the target camera.
Slide the mode switch to (Playback)
1
(Wireless) Menu [Reg. Target Device]
Select [Camera] for target device and press .
2
Make sure that your camera displays your camera’s
3
name and that the target camera displays its camera
name and press the on both cameras simultaneously (within approximately 10 seconds).
z
This step connects your camera to the target camera and registers
each camera's name in the other camera as a target device.
z When the wireless connection starts, the wireless lamp will begin to blink blue.
z
When you wish to change the name, follow Step 2 in Registering Your Camera Name (p. 2).
2
When the name of the target camera and [Registration completed]
4
are displayed, press .
z If the name is already registered, [Already registered] will be displayed.
z If you have failed to register, go back to Step 1 and repeat the procedure.
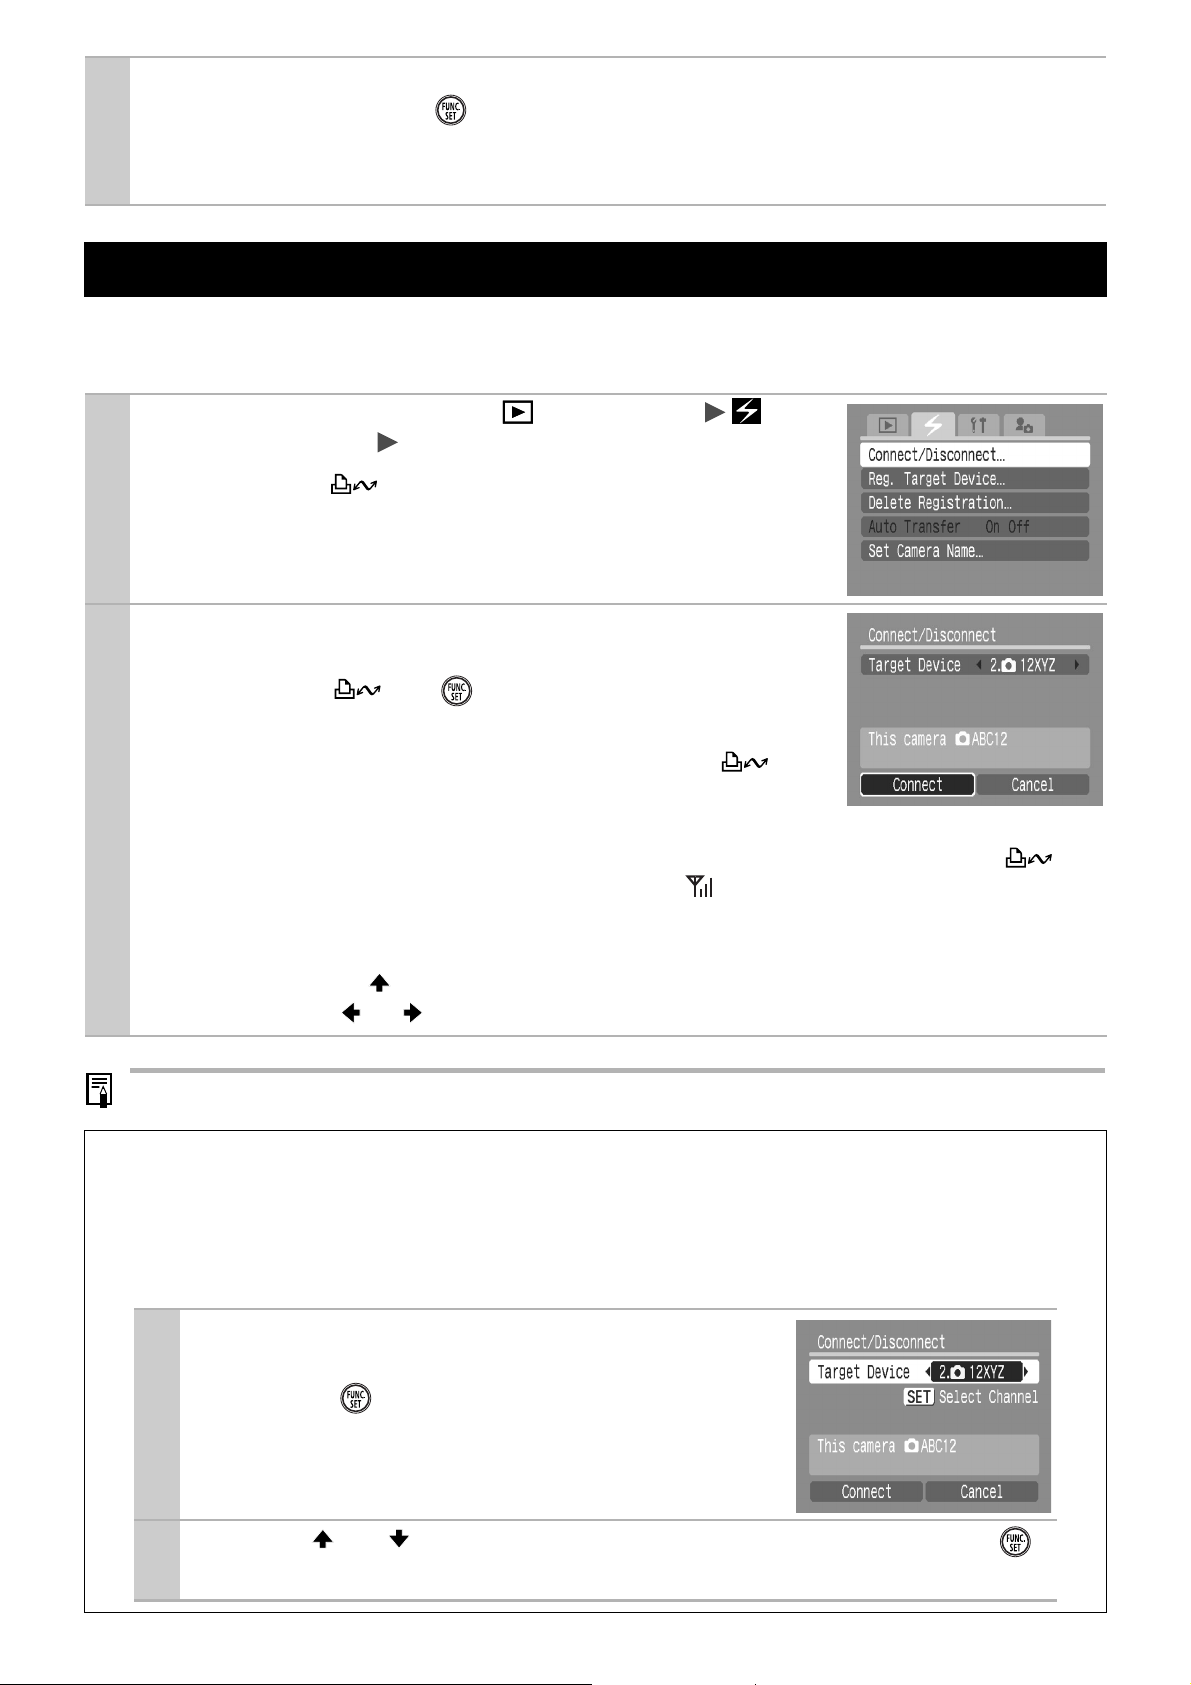
Connecting Cameras via a Wireless Connection
Connect your camera to the registered target camera via wireless.
z You must follow the following procedures for both your and the target camera.
Slide the mode switch to (Playback)
1
(Wireless) Menu [Connect/Disconnect]
z If you press the button without displaying the Menu in the
playback mode for both cameras simultaneously (within
approximately 30 seconds), the wireless connection will start.
After confirming that the name of the target camera
2
is selected as the [Target Device], select [Connect]
and press the (or ) for both cameras simultaneously (within approximately 30 seconds).
z Wireless connection will start and wireless lamp and but-
ton will both blink blue. If you press the FUNC./SET button while
the light is blinking, the connection will be canceled.
z When the connection has been completed, the camera’s wireless lamp and the but-
ton will remain on (without blinking), and the icon will be displayed on the playback
screen, showing the connection’s signal strength.
z If a camera name other than the one you would like to connect to is displayed as the tar-
get device, use the button to select the [Target Device], and then select the camera of
your choice with or button.
z Wireless connection is not possible without memory cards inserted in the cameras.
Changing the Wireless Channel
If the channel (useful frequency) is already in use by another device, change the
channel on one of the cameras making the wireless connection to avoid interference
from radio waves. Channel changes on one camera will automatically be reflected on
the other camera.
Select [Target Device], confirm that the
1
name of the target camera is displayed
and press .
Use the or button to change the channel and press .
2
z Press the MENU button to return to Step 1 without changing the channel.
3
 Loading...