

Canon PowerShot SD1400IS IXUS130, PowerShot SD1400 IS Digital Elph, IXUS 130 User Manual
CaHOH
_owerShet -_D 7500/-_ i % /
D|OiT_L GLPH "_US ]30
Camera User Guide
.....Make sure you read this guide before using the camera.
.....Store this guide safely so that you can use it in the future.
Youcanmakethemainsubject,suchaspeople,appearbrightbyhavingthe
cameraprovidetheappropriateillumination with the flash. At the same time,
you can use a slow shutter speed to brighten the background that the light
from the flash cannot reach.
Choose _*.
After pressing the ), button, press the ,_),
buttons to choose _*, then press the @
button again.
Once set, _* will appear on the screen.
2 Shoot.
Even if the flash fires, ensure that the
subject does not move until the shutter
sound ends.
90
Correcting th_
{i,Contrast)
The camera can detect areas in the scene, such as faces or backgrounds,
that are too bright or dark and automatically adjust them to the optimum
brightness when shooting. Also, when the overall image is lacking in
contrast, the camera will automatically correct the image for a sharper
impression when shooting.
Choose [i=Contrast].
Press the MENUbutton, choose the 0
tab, and then choose the [i-Contrast]
menu item. Press the ,_ buttons to
choose [Auto].
Once set, Cl will appear on the screen.
91
You can automatically correct red-eye that occurs in images taken with the
flash.
i:] Choose [Flash Settings].
Press the MENU button to choose [Flash
Settings] in the O tab, then press the @
button.
_ Adjust the setting.
Press the Av buttons to choose [Red-
Eye Corr.] and press the 4_ buttons to
choose [On].
Once set, @ will appear on the screen.
92
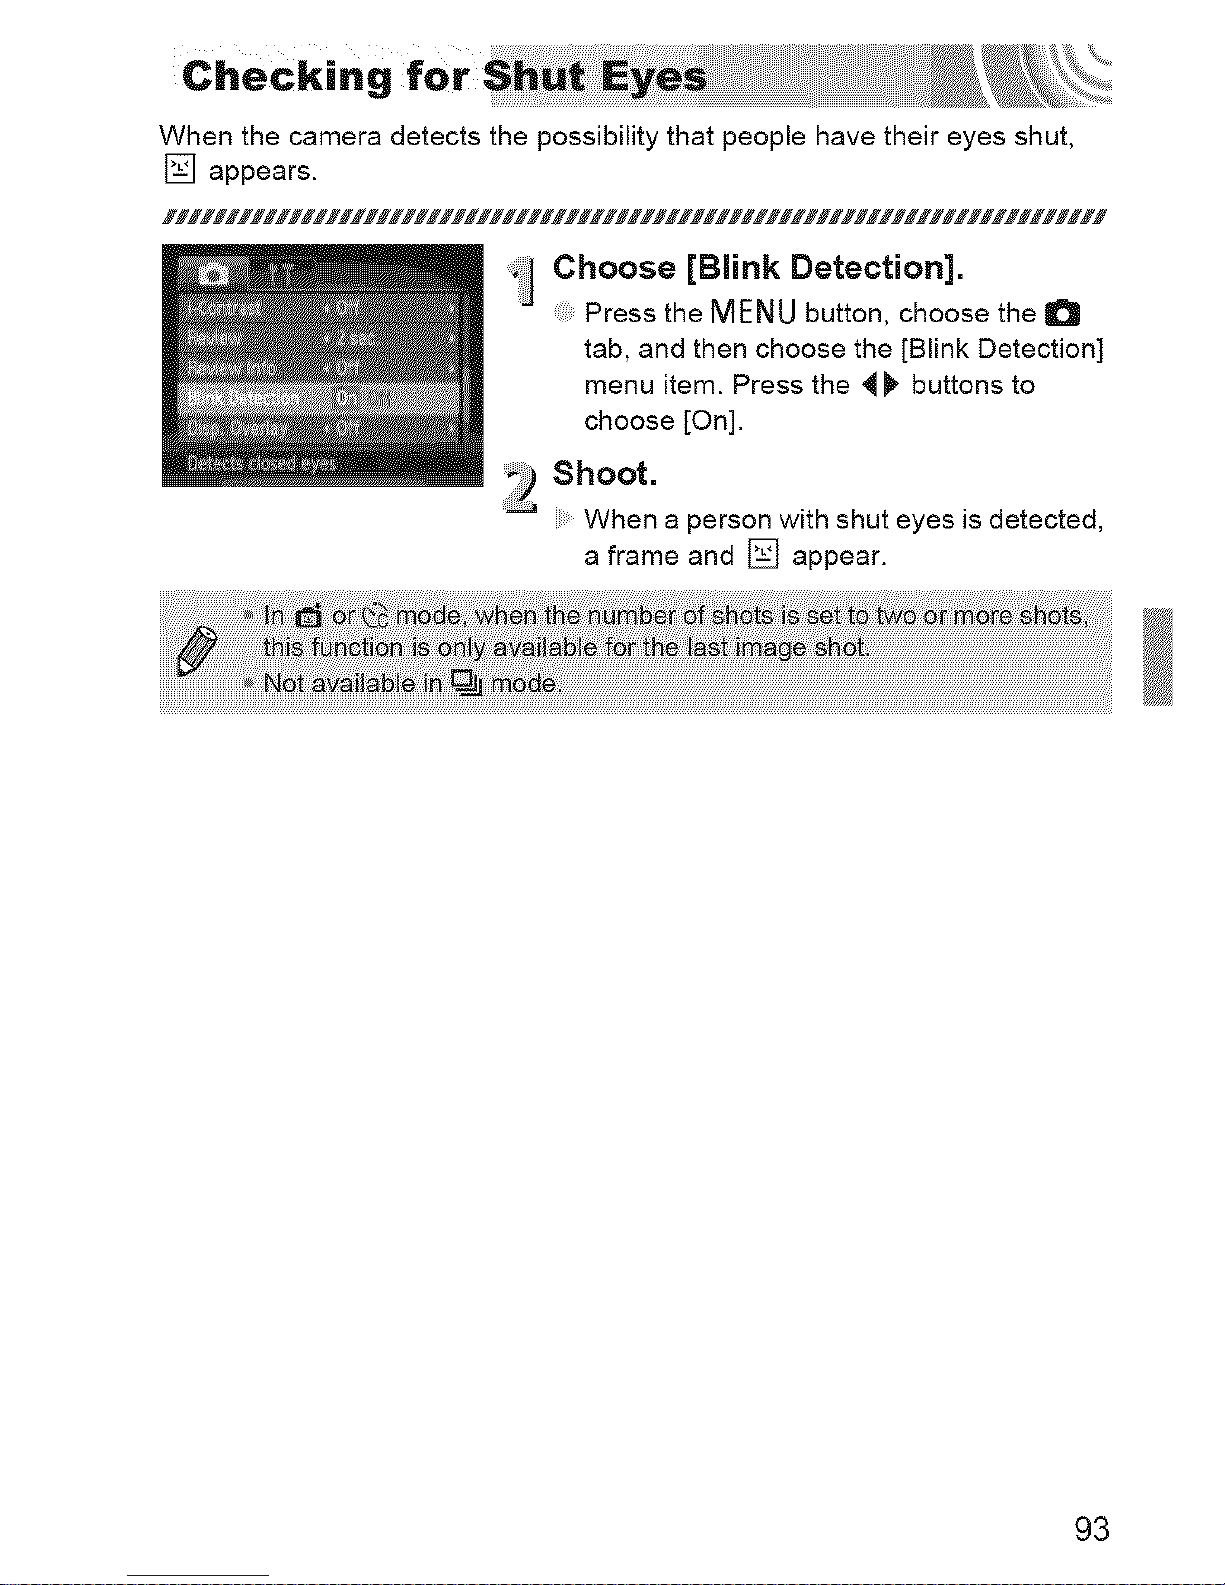
When the camera detects the possibility that people have their eyes shut,
[] appears.
Choose [Blink Detection].
Press the MENUbutton, choose the 0
tab, and then choose the [Blink Detection]
menu item. Press the ,_ buttons to
choose [On].
2 Shoot.
.... When a person with shut eyes is detected,
a frame and [] appear.
93
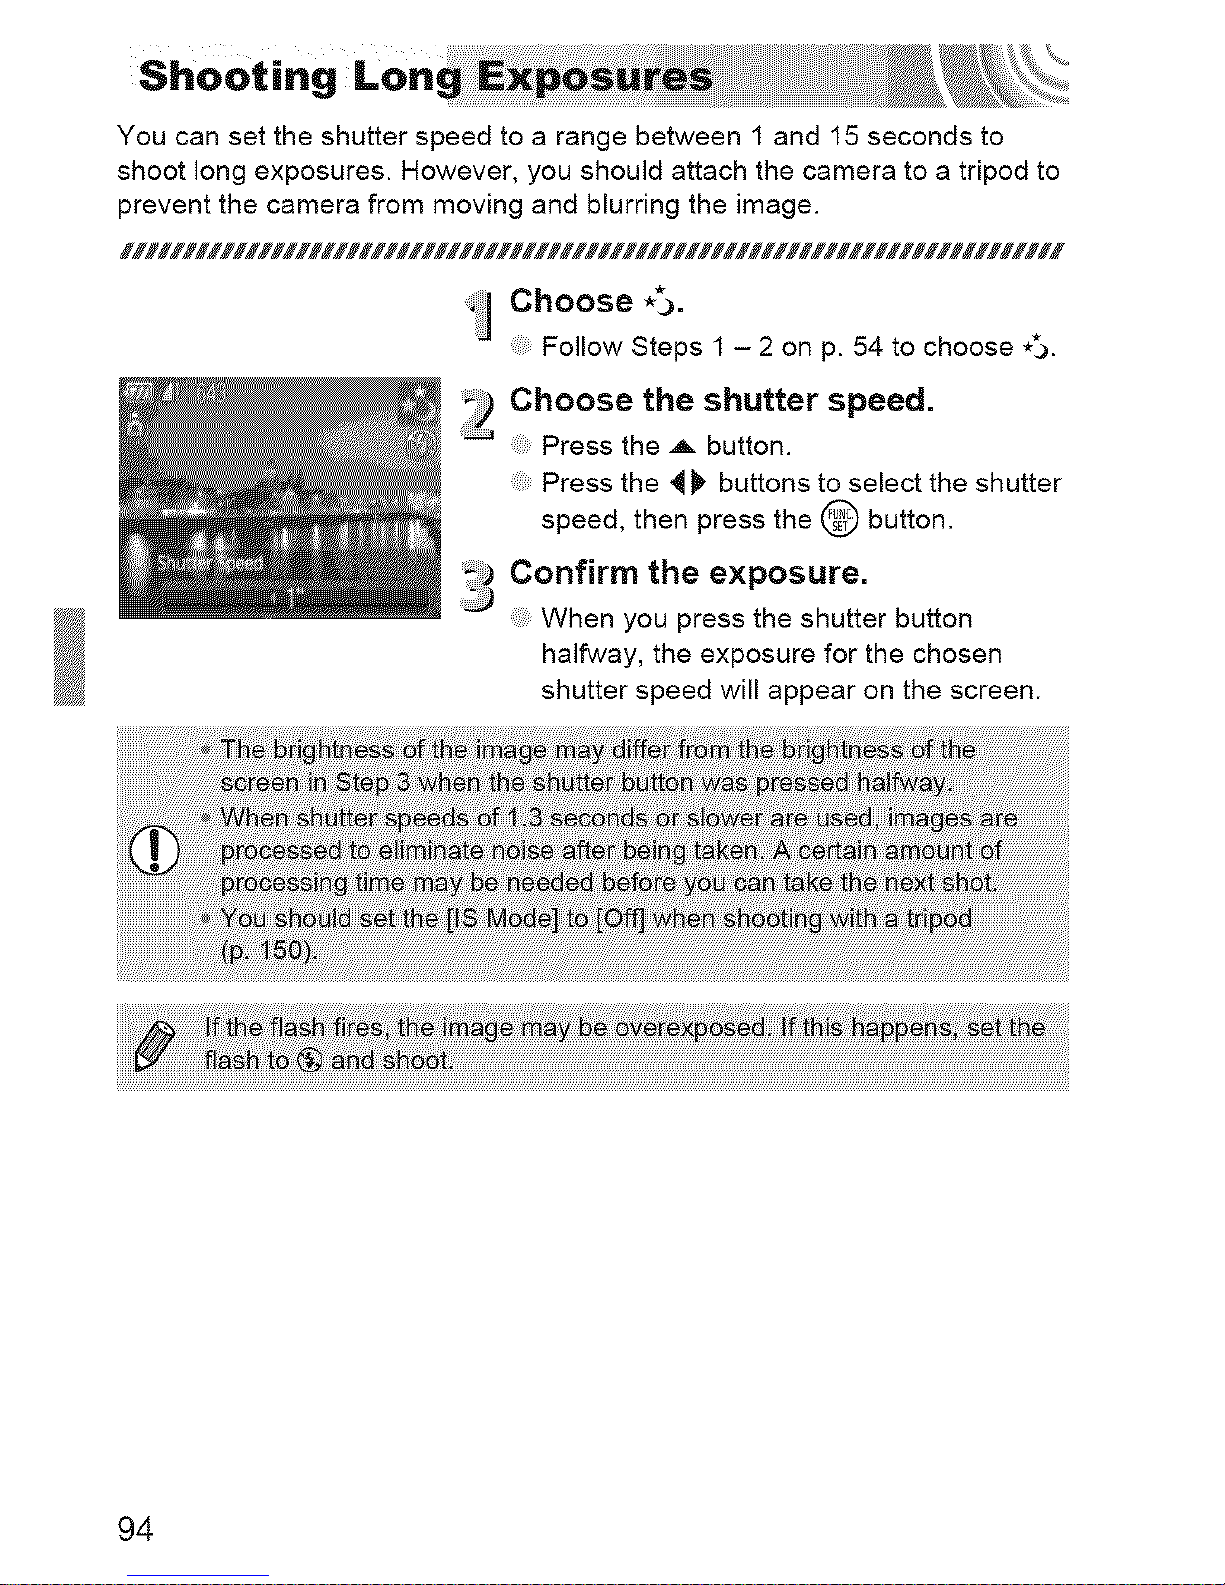
You can set the shutter speed to a range between 1 and 15 seconds to
shoot long exposures. However, you should attach the camera to a tripod to
prevent the camera from moving and blurring the image.
Choose **__.
Follow Steps 1 - 2 on p. 54 to choose *_.
Choose the shutter speed.
Press the A button.
Press the 4 _ buttons to select the shutter
speed, then press the @ button.
__dConfirm the exposure.
When you press the shutter button
halfway, the exposure for the chosen
shutter speed will appear on the screen.
94

You can change the look of an image when shooting. However, depending
on shooting conditions the image may become coarse, or the colors may not
come out as expected.
You can choose to retain a single color and change the rest to black and
white in a composition.
Choose!A.
Follow Steps 1 - 2 on p. 54 to choose ,fA.
_2 Press the DISP. button.
...............The unchanged image and the Color
Accent image will both display.
The color for default settings is green.
Specify the color.
Position the center frame so it is filled with
the color you want and press the 4 button.
The specified color will be recorded.
Speoi t.er nge oolors.
Press the Av buttonsto change the
range of colors to be retained.
Choose a negative value to limit the range
of colors. Choose a positive value to
extend the range of colors to similar
colors.
Pressing the DISR button accepts the
setting and restores the shooting screen.
Recorded color
95
Changing the Color and Shooting
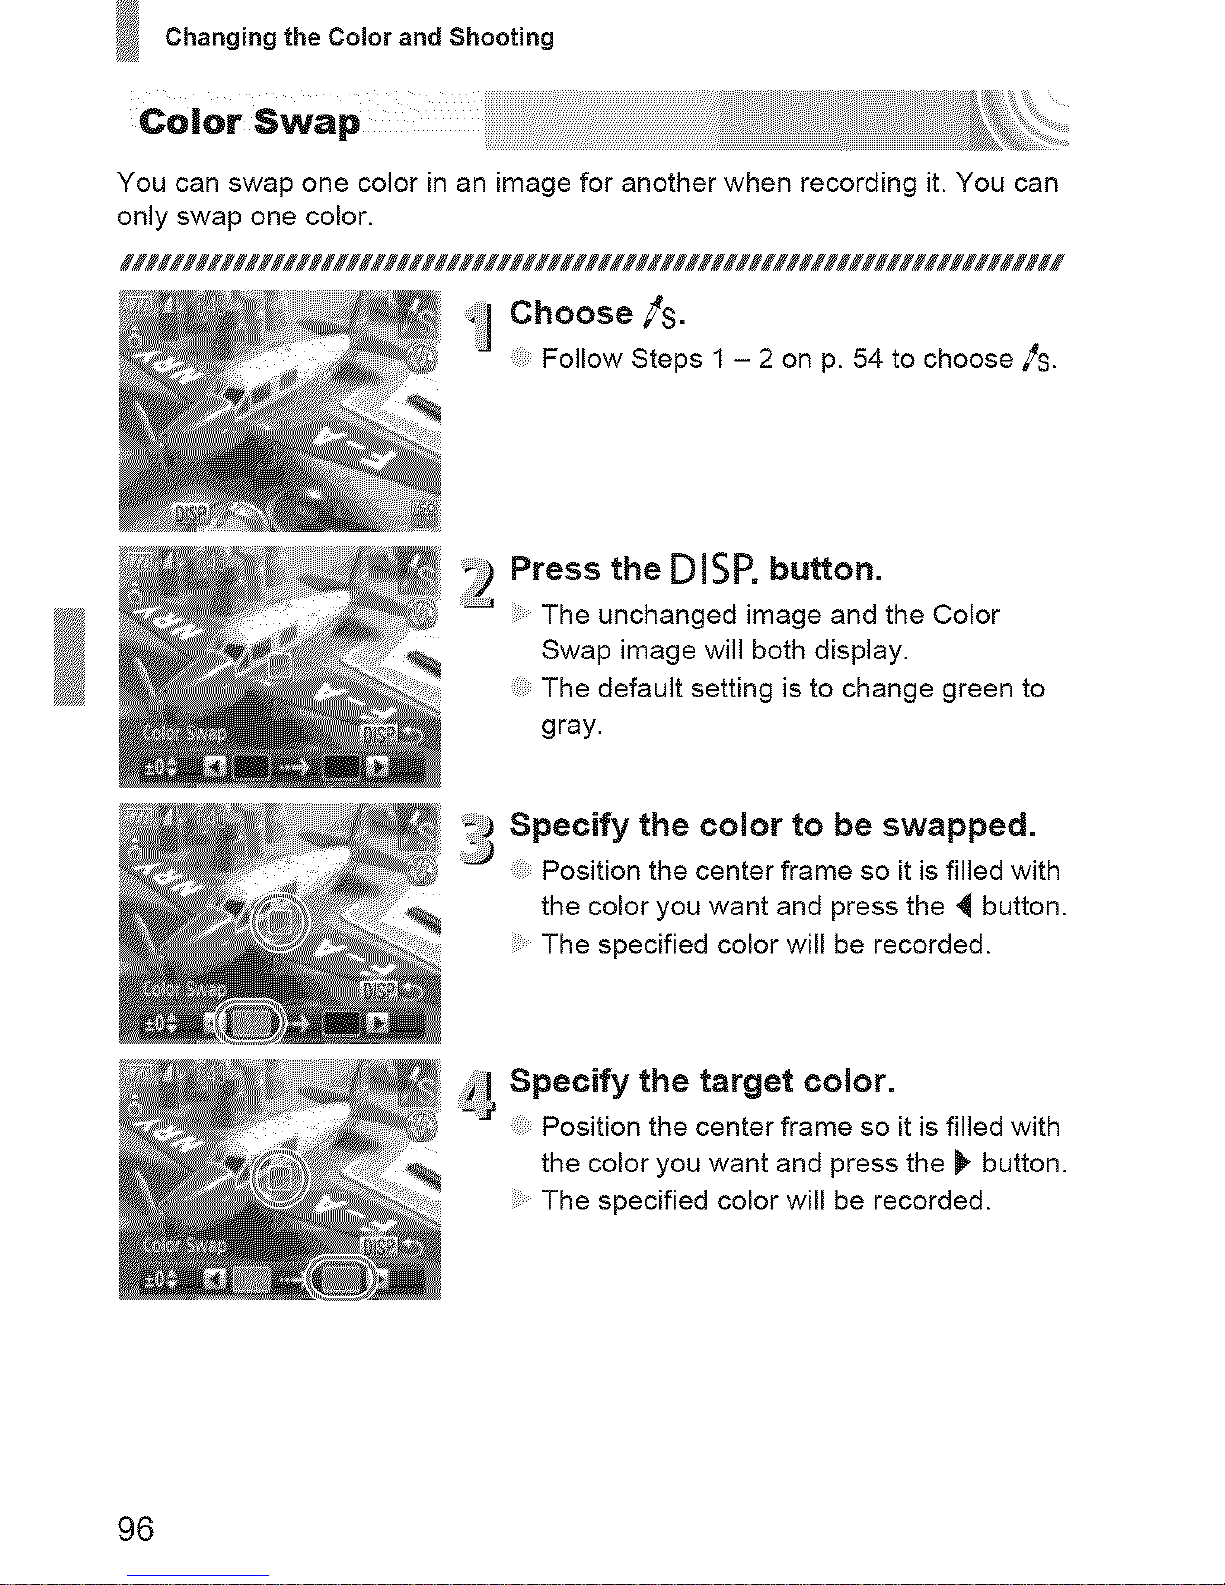
You can swap one color in an image for another when recording it. You can
only swap one color.
iJ Choose _S.
Follow Steps 1 - 2 on p. 54 to choose ,_S.
_) Press the DISP. button.
.... The unchanged image and the Color
Swap image will both display.
:: The default setting is to change green to
gray.
_ Specify the color to be swapped.
Position the center frame so it is filled with
the color you want and press the ,_ button.
The specified color will be recorded.
:_i:l.Specify the target color.
Position the center frame so it is filled with
the color you want and press the ), button.
The specified color will be recorded.
96
Changing the Color and Shooting
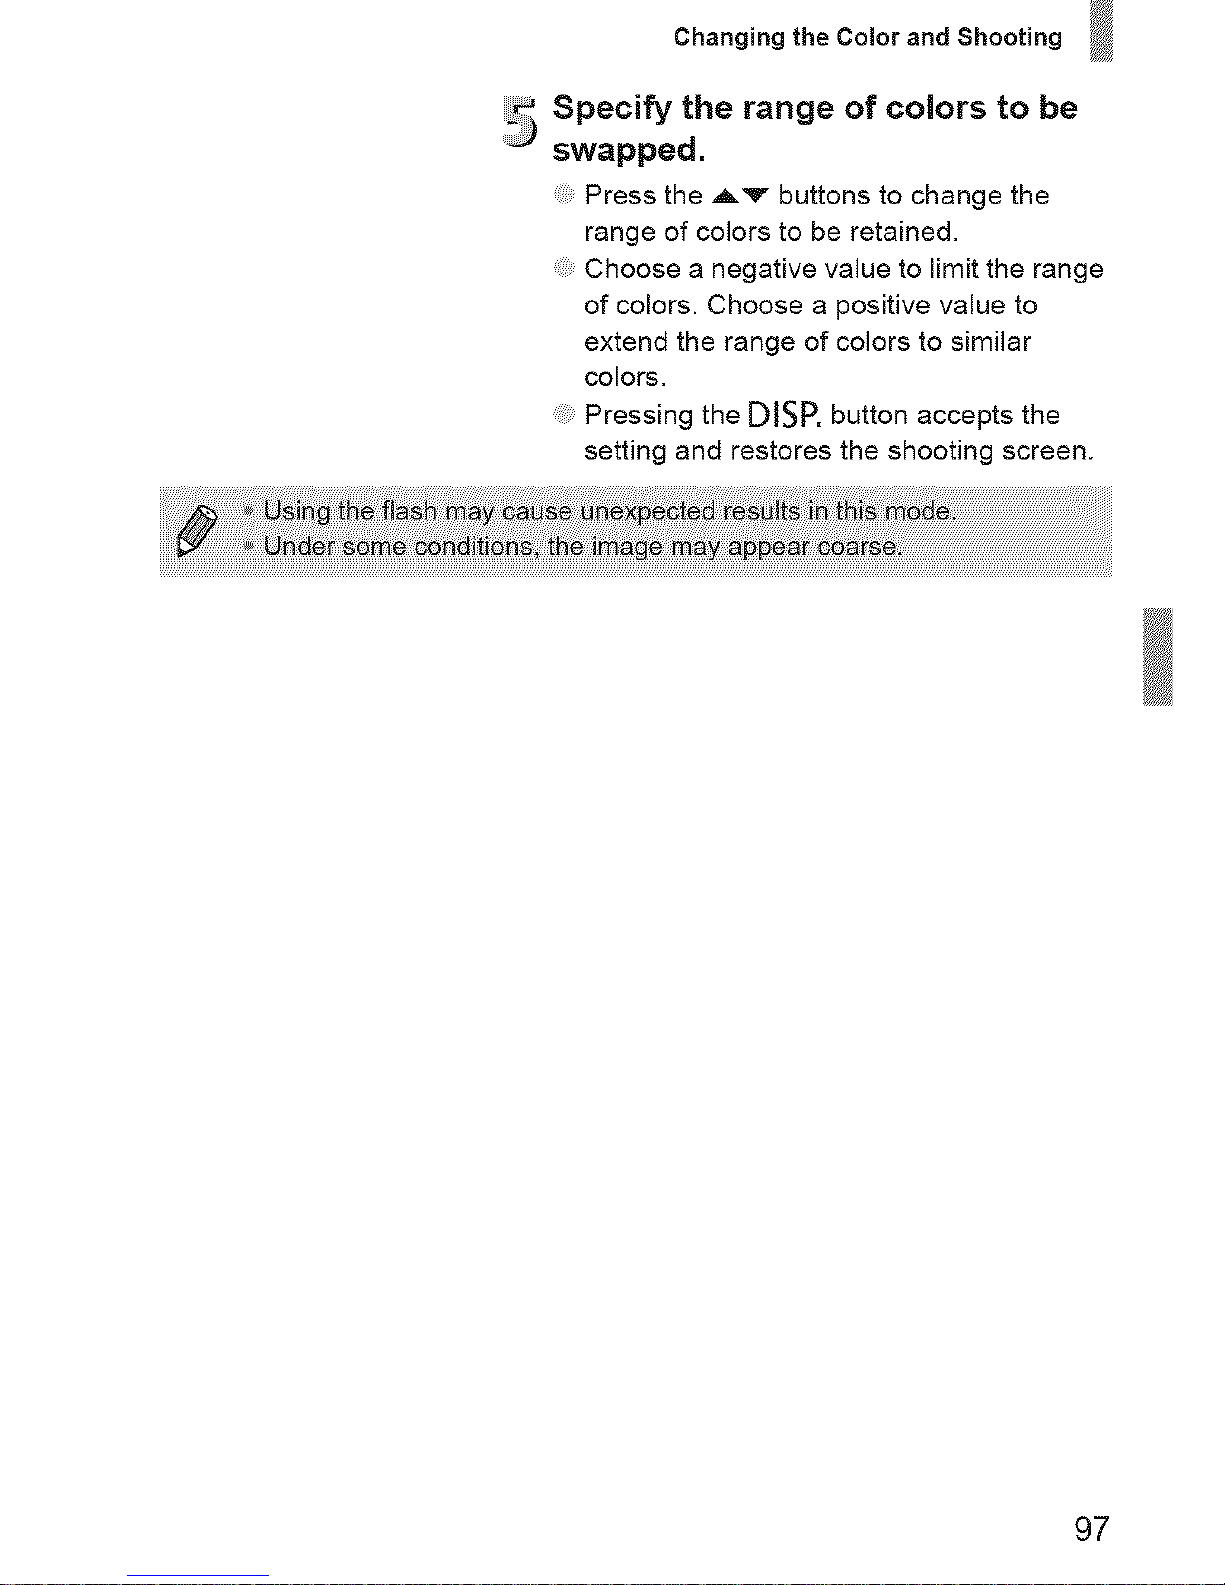
=,_Specify the range of colors to be
swapped.
Press the A'_ buttons to change the
range of colors to be retained,
Choose a negative value to limit the range
of colors. Choose a positive value to
extend the range of colors to similar
colors.
Pressing the DISP.button accepts the
setting and restores the shooting screen.
97
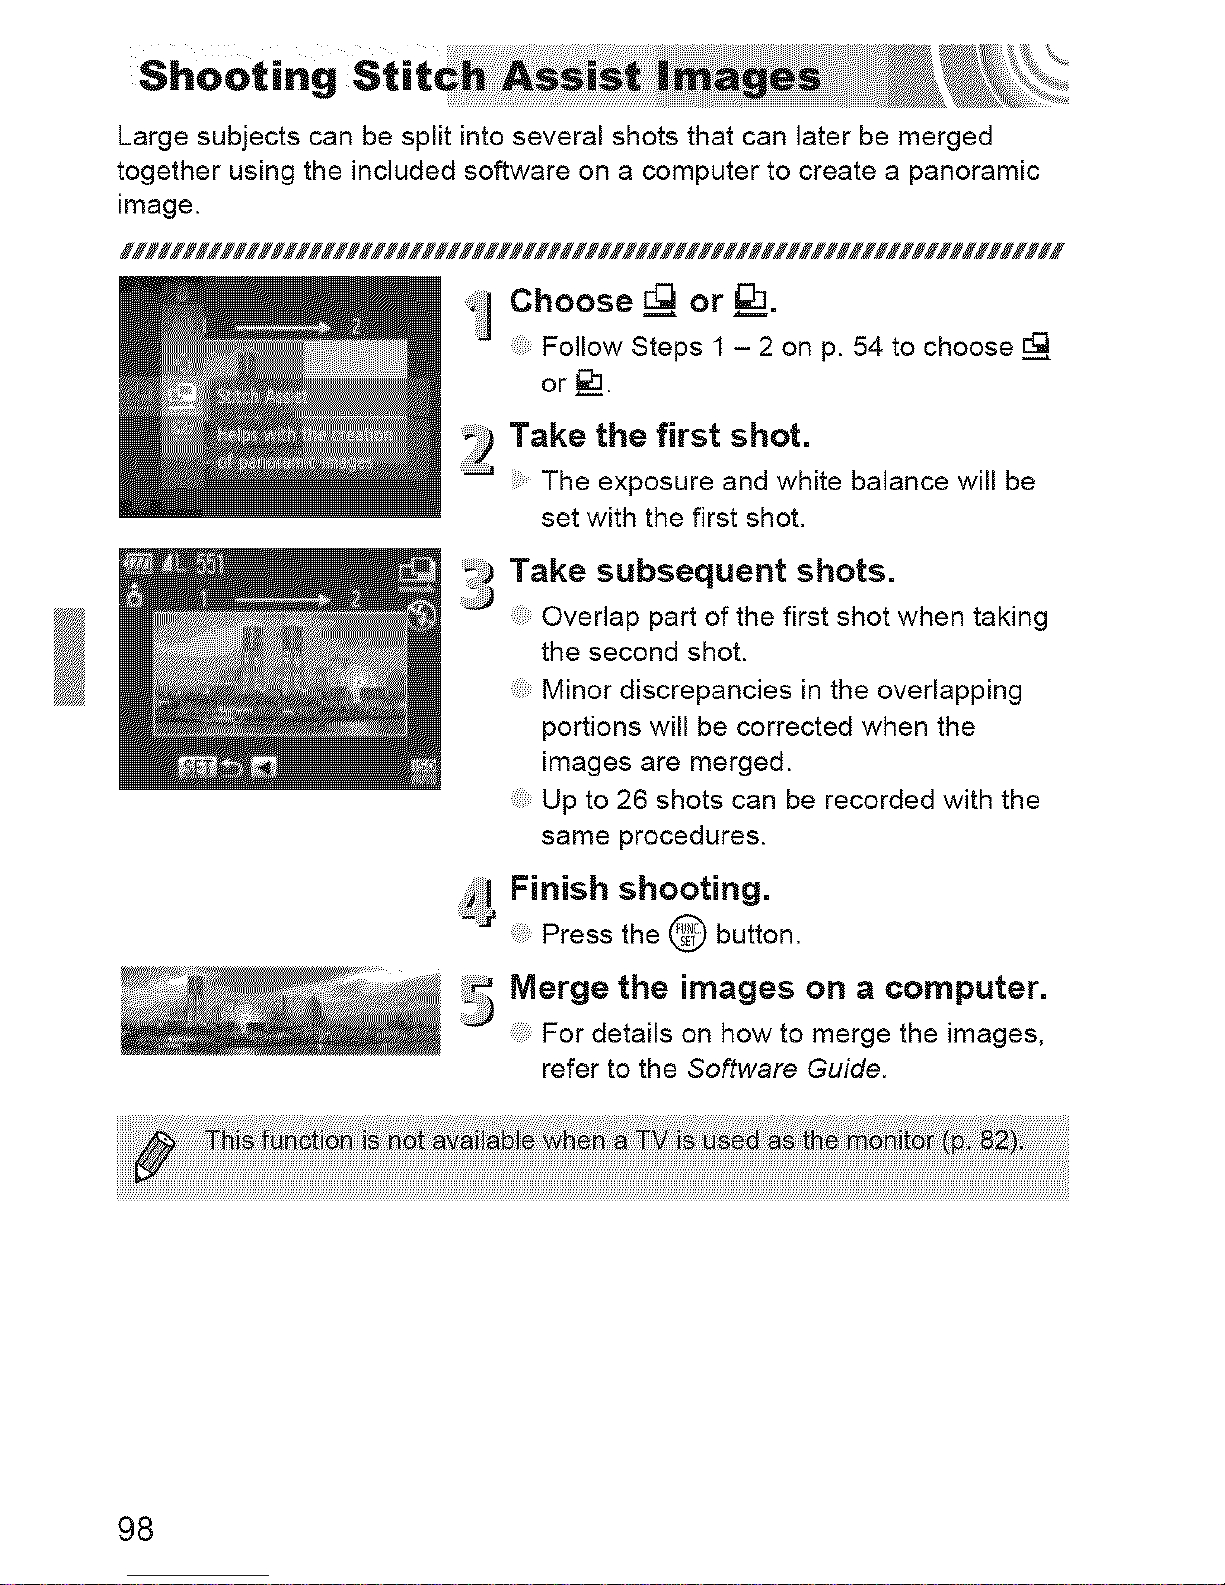
Large subjects can be split into several shots that can later be merged
together using the included software on a computer to create a panoramic
image.
';:1 Choose r_ or I_.
Follow Steps 1 - 2 on p. 54 to choose rQ
or _L1.
2 Take the first shot.
...............The exposure and white balance will be
set with the first shot,
_i_Take subsequent shots.
Overlap part of the first shot when taking
the second shot.
Minor discrepancies in the overlapping
portions will be corrected when the
images are merged.
Up to 26 shots can be recorded with the
same procedures.
_ Finish shooting.
Press the @ button,
_ Merge the images on a computer.
........ For details on how to merge the images,
refer to the Software Guide.
98
This chapter provides more advanced information than the "Shooting
Movies" and "Viewing Movies" sections of Chapter 1.
This chapter assumes that the mode switch is set to ,Ira.
Press the [] button to enter Playback mode before playing back or
editing movies.
99
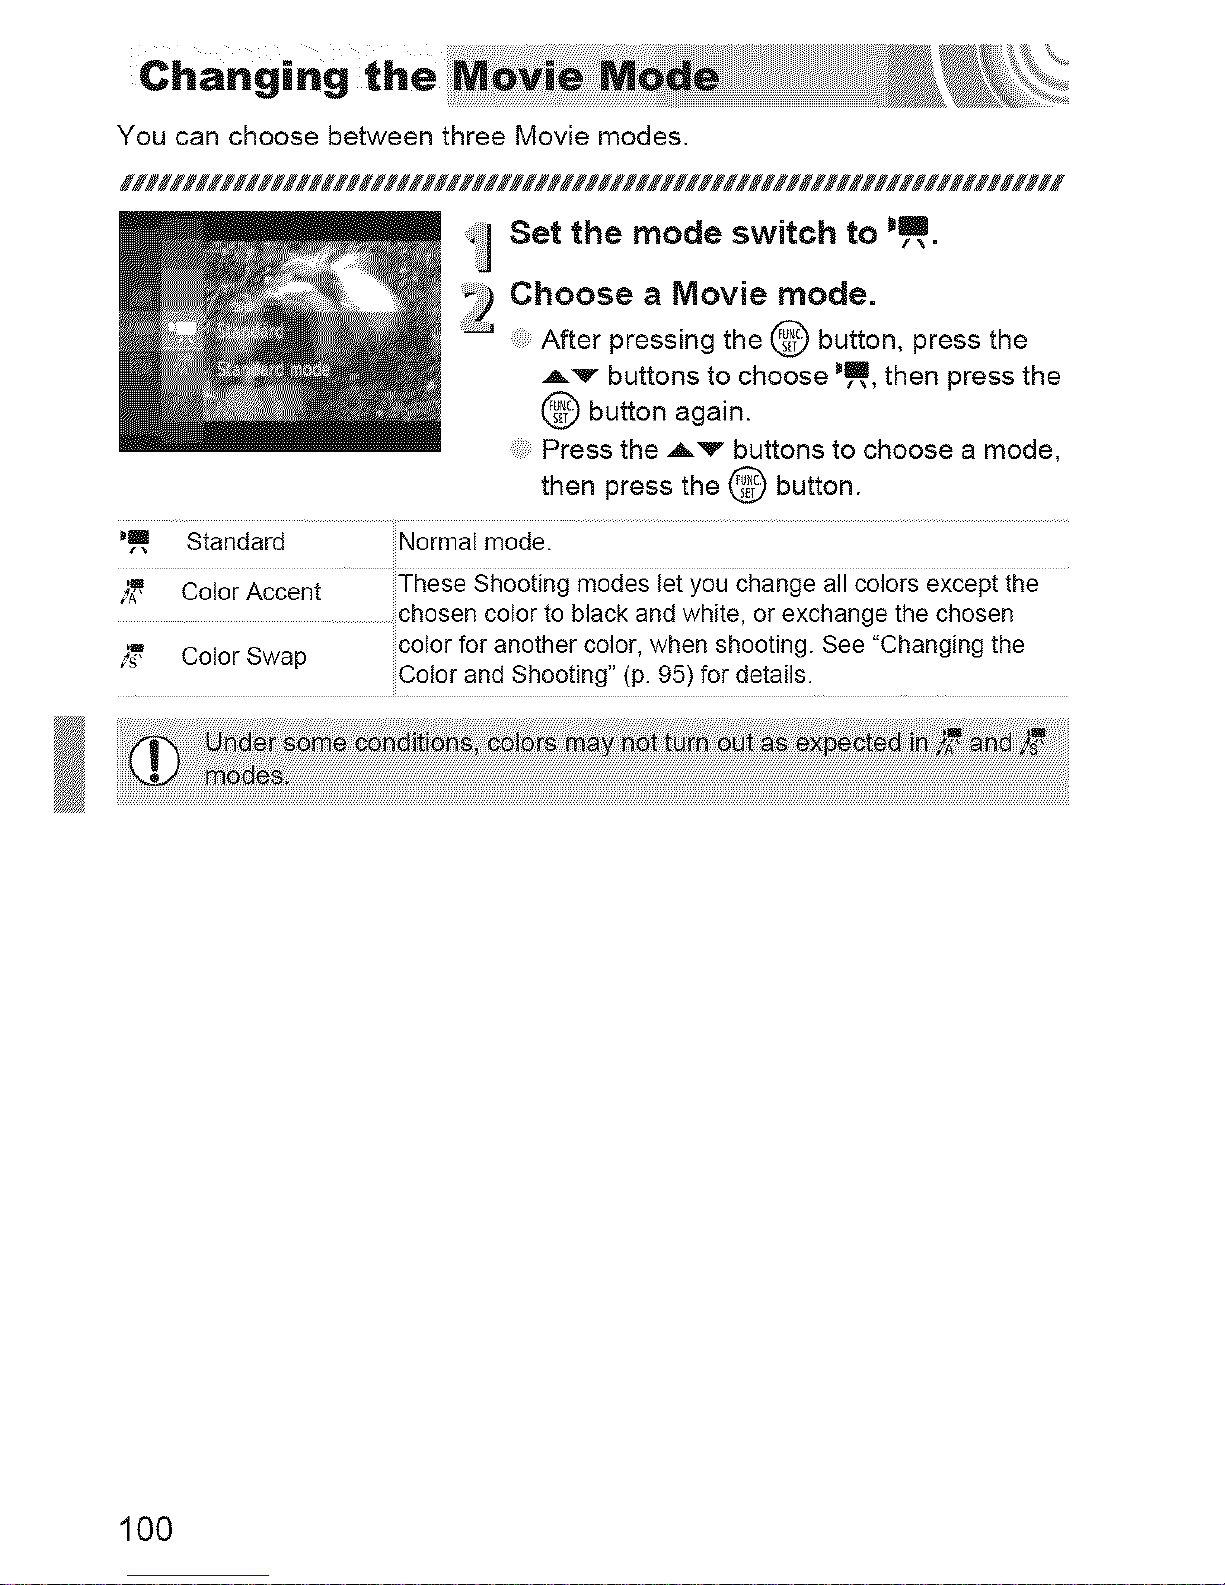
You can choose between three Movie modes.
Set the mode switch to =all
/\.
:_) Choose a Movie mode.
After pressing the @ button, press the
A.v buttons to choose _,lm then press the
button again.
Press the ._.'_" buttons to choose a mode,
then press the @ button.
_ Standard Normal mode.
,_ coJorAooent TheseShootin_moaesieiyouohangea"ooiorsexoeptthe
chosen color to black and white, or exchange the chosen
)_, Color Swap color for another color, when shooting. See "Changing the
Color and Shooting" (p. 95) for details.
;i;;iiii{ii_i!_il¸:!;_i_#i!iiiiiiiii!i!!!}iiiil¸i_i;;ii;i_i¸I¸_ii!;ii_ii!iiii!iiii{iiii:i¸i_i{{i_ii_i(;i¸ii;i;¸i¸il;_;_!i:_;ii¸i¸¸¸_iil;i!ili_ii!;i_ii!iiiiii;i_¸;;_,ii_;_ii_!{;i¸;!iiiii;il_ii:!!_i!i_i¸i!i;i¸i_{i_ii¸iiiiii{{_i_¸ili¸¸¸!_;iii_il¸;i@i_ill¸(i_i_i_ii_i_¸_iiiiiii:i_i!_iiii!;i_¸i¸i!iiiil¸i!ii¸!!_i_;i¸;_II¸;;_iiil¸¸¸;;iiJi;_i_ii¸;i;i¸ii_iil_!i_i_};iii_!i;iiii_i¸iil;iii;_i¸I¸II¸¸i;;;;_!;_i
col:rs _;
100
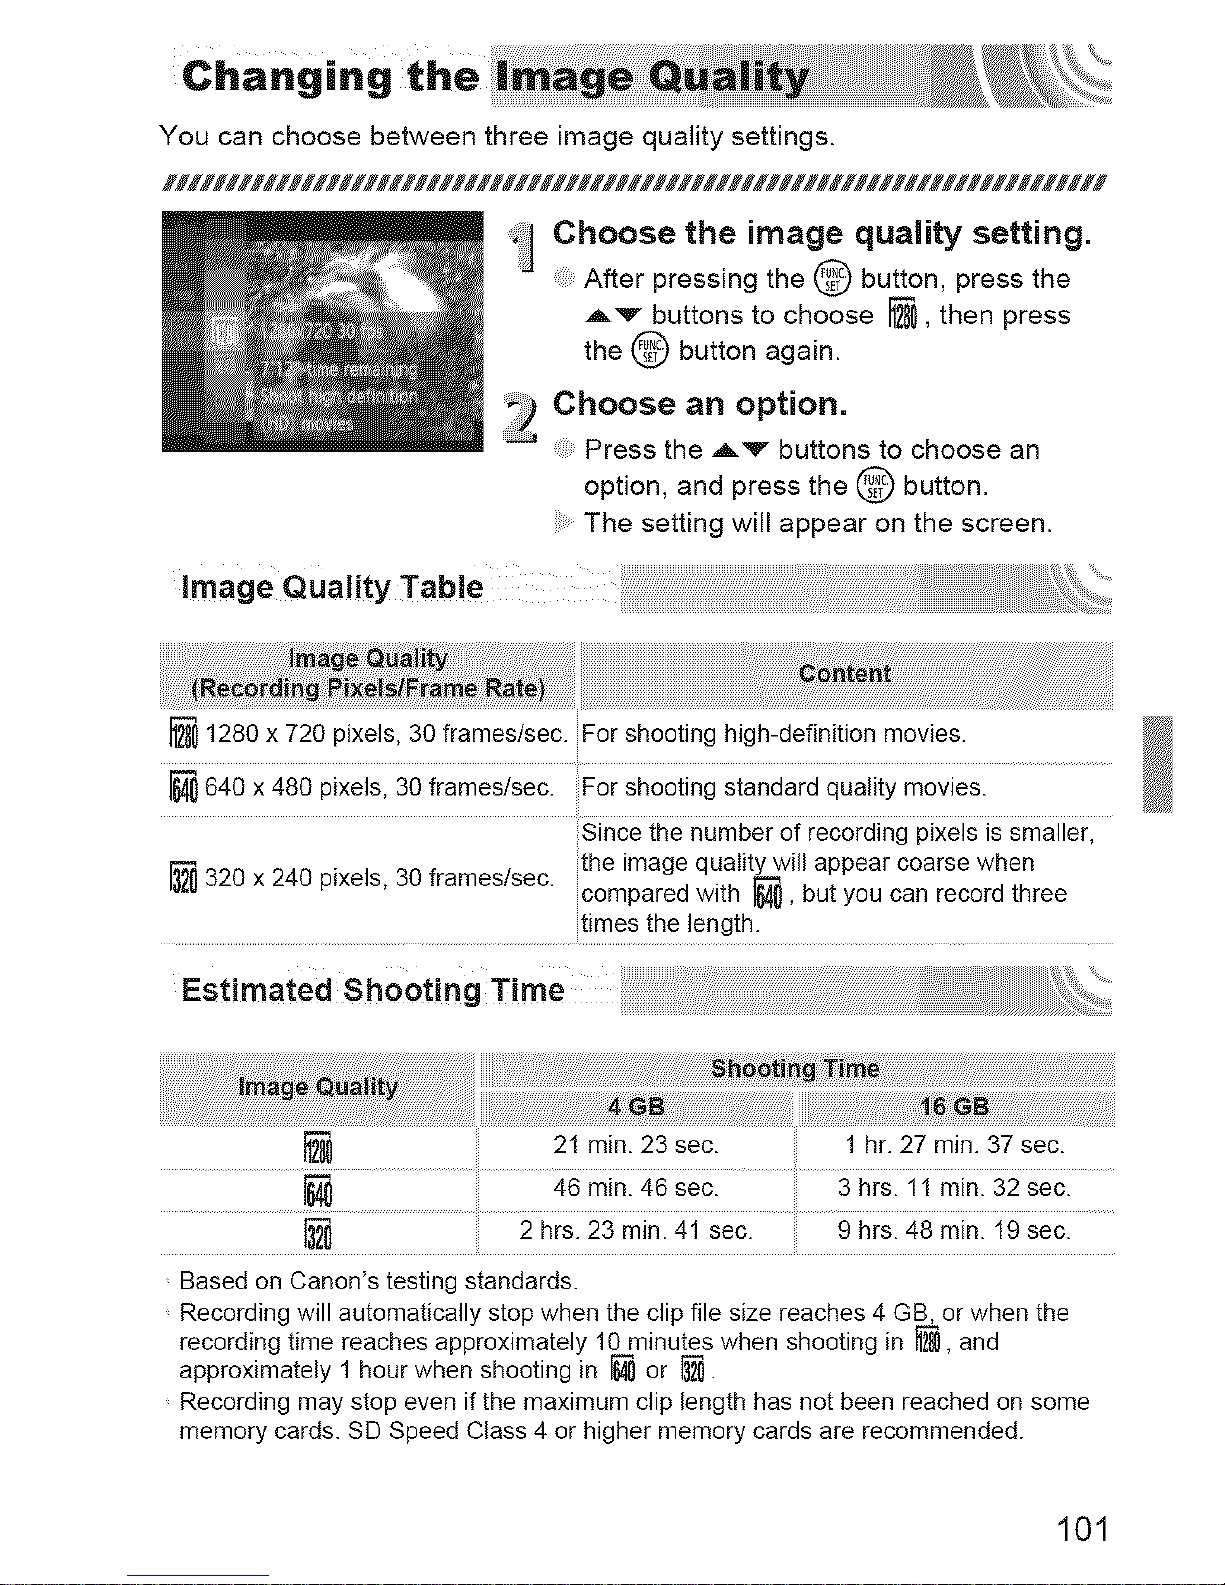
You can choose between three image quality settings.
;_ Choose the image quality setting.
After pressing the @ button, press the
A'_- buttons to choose _'_, then press
the @ button again.
_) Choose an option.
Press the Av buttons to choose an
option, and press the @ button,
The setting will appear on the screen.
1280 x 720 pixels, 30 frames/sec. For shooting high-definition movies.
[_ 640 x 480 pixels, 30 frames/sec. For shooting standard quality movies.
Since the number of recording pixels is smaller,
the image quaIity will appear coarse when
320 x 240 pixels, 30 frames/sec, compared with _, but you can record three
times the length.
21 min. 23 sec. 1 hr. 27 min. 37 sec.
46 min. 46 sec. 3 hrs. 11 min. 32 sec.
[_ 2 hrs. 23 min. 41 sec. 9 hrs. 48 rain. 19 sec.
Based on Canon's testing standards.
Recording will automatically stop when the clip file size reaches 4 GB, or when the
recording time reaches approximately 10minutes when shooting in _, and
approximately 1 hour when shooting in _ or _.
Recording may stop even if the maximum clip length has not been reached on some
memory cards. SD Speed Class 4 or higher memory cards are recommended.
101
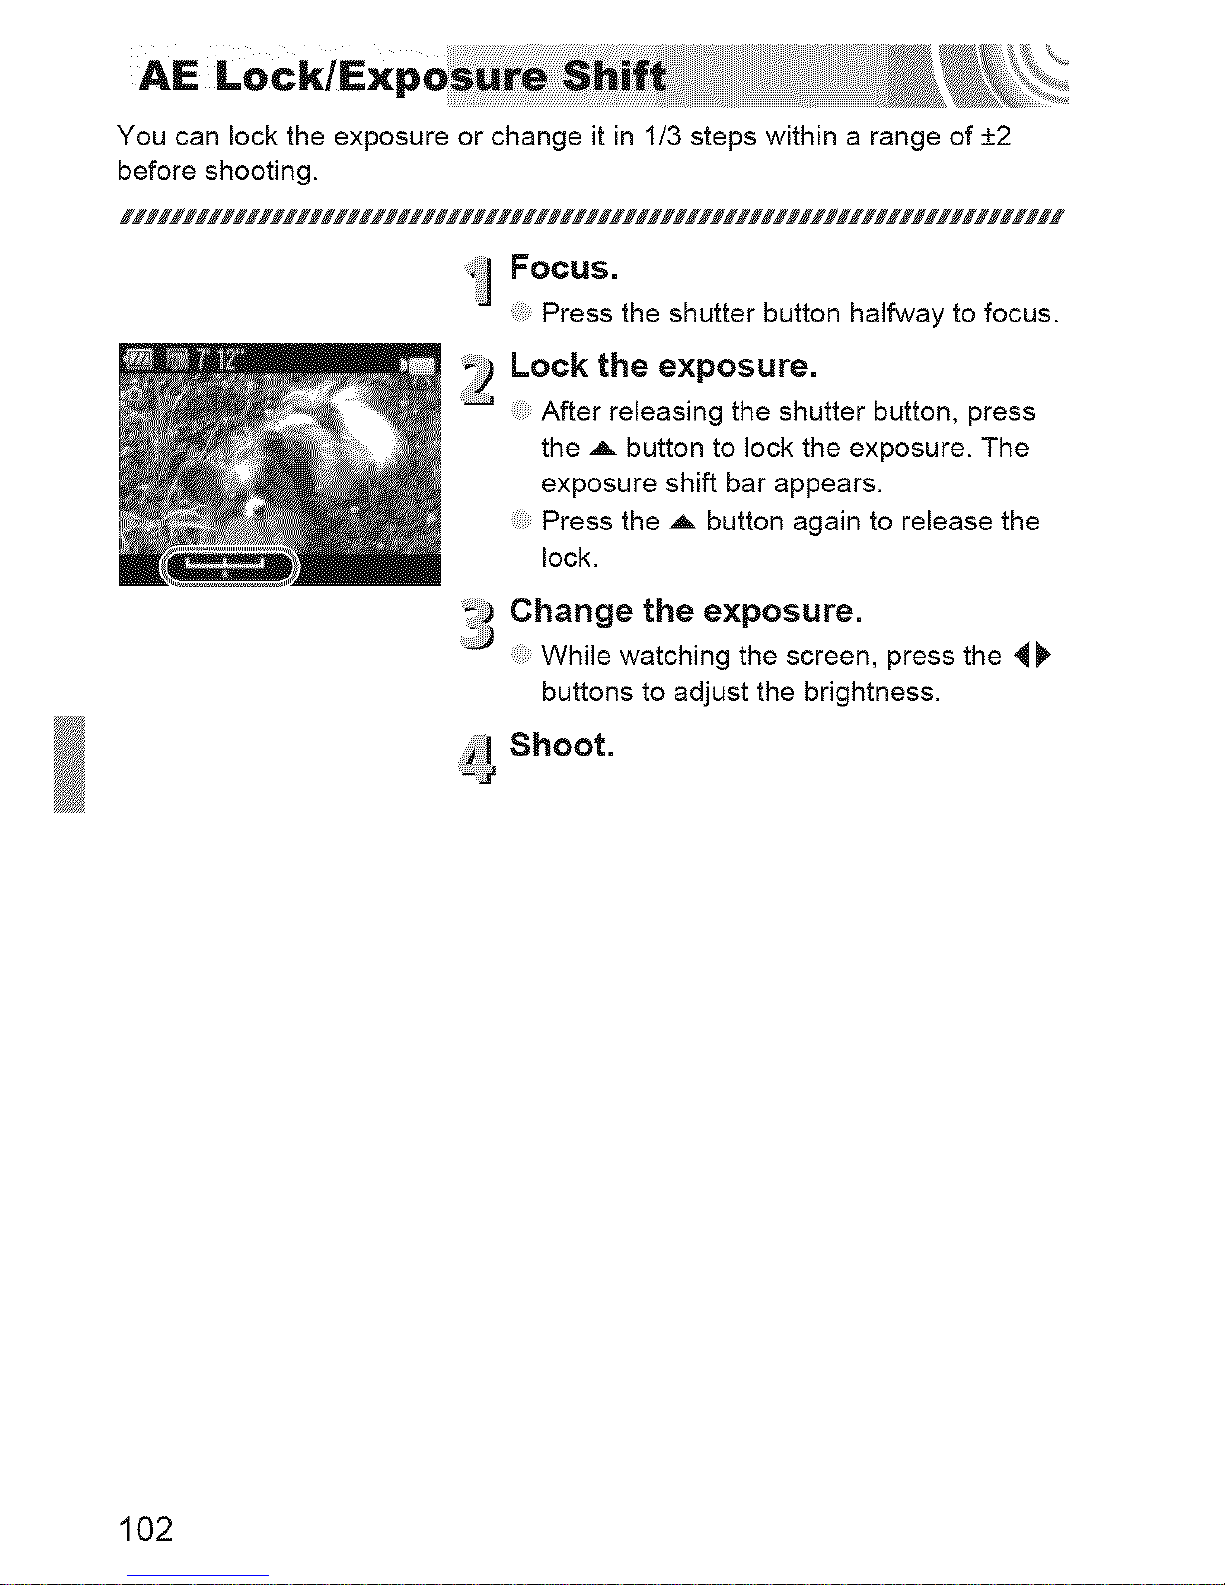
You can lock the exposure or change it in 1/3 steps within a range of +2
before shooting.
Focus.
Press the shutter button halfway to focus.
_) Lock the exposure.
...............After releasing the shutter button, press
the A button to lock the exposure. The
exposure shift bar appears.
Press the ,_ button again to release the
lock.
3 Change the exposure.
:: While watching the screen, press the ,_
buttons to adjust the brightness.
Shoot.
102

The following functions can be used in the same way as for still images.
Functions marked with a * can be used in the same way as for still images
when in _ or )_.
Zooming in Closely on Subjects (Digital Zoom) (p. 64)
You can use the digital zoom while shooting, but the optical zoom cannot be
used.
If you want to shoot at the maximum zoom factor, you should adjust the optical
zoom to the maximum before shooting.
The sound of the zoom will be recorded.
Using the Self-Timer (p. 67)*
Shooting Close-ups (Macro) (p. 72)*
Shooting Far Away Subjects (infinity) (p. 72)*
Adjusting the White Balance (p. 78)
Changing the Tone of an Image (My Colors) (p. 79)
Shooting Using the Two Second Self-Timer (p. 80)*
Shooting Using a TV Monitor (p. 82)*
Shooting with the AF Lock (p. 88)
Turning off the AF Assist Beam (p. 148)*
Displaying the Overlay (p. 180)*
[3:2 Guide] is not available.
Changing the IS=Mode Settings (p. 180)*
You can switch between [Continuous] and [Off].
103
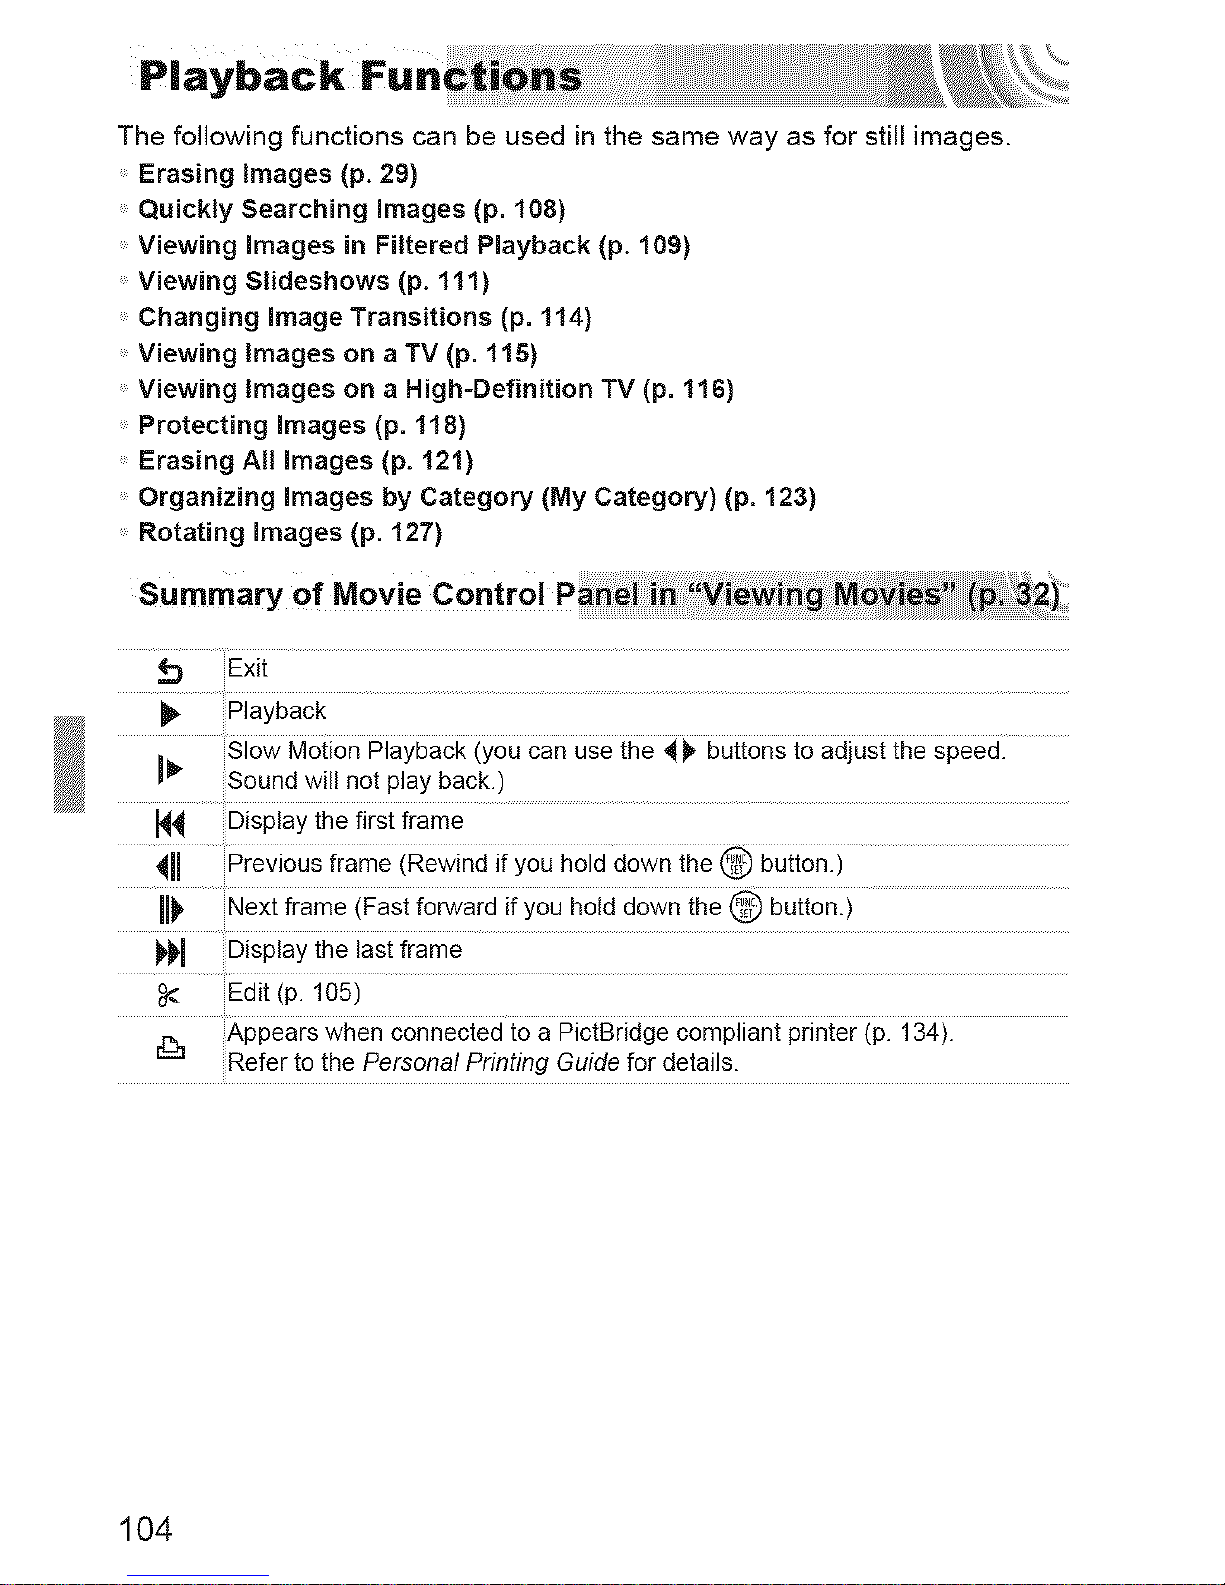
The following functions can be used in the same way as for still images.
Erasing Images (p. 29)
Quickly Searching images (p. 108)
Viewing images in Filtered Playback (p. 109)
Viewing Slideshows (p. 111)
Changing image Transitions (p. 114)
Viewing Images on a TV (p. 115)
Viewing images on a High-Definition TV (p. 116)
Protecting Images (p. 118)
Erasing All images (p. 121)
Organizing images by Category (My Category} (p. 123}
Rotating images (p. 127)
Exit
Slow Motion Playback (you can use the d_, buttons to adjust the speed.
I _ Sound will not play back.)
_ Display the first frame
I1_ Next frame (Fast forward ifyou bold down the @ button.)
Edit(p.105)
Appearswben conneciedioa #iciBridgecompiiantprinieriPli 34.}i
Refer to the Personal Printing Guide for deta s.
104
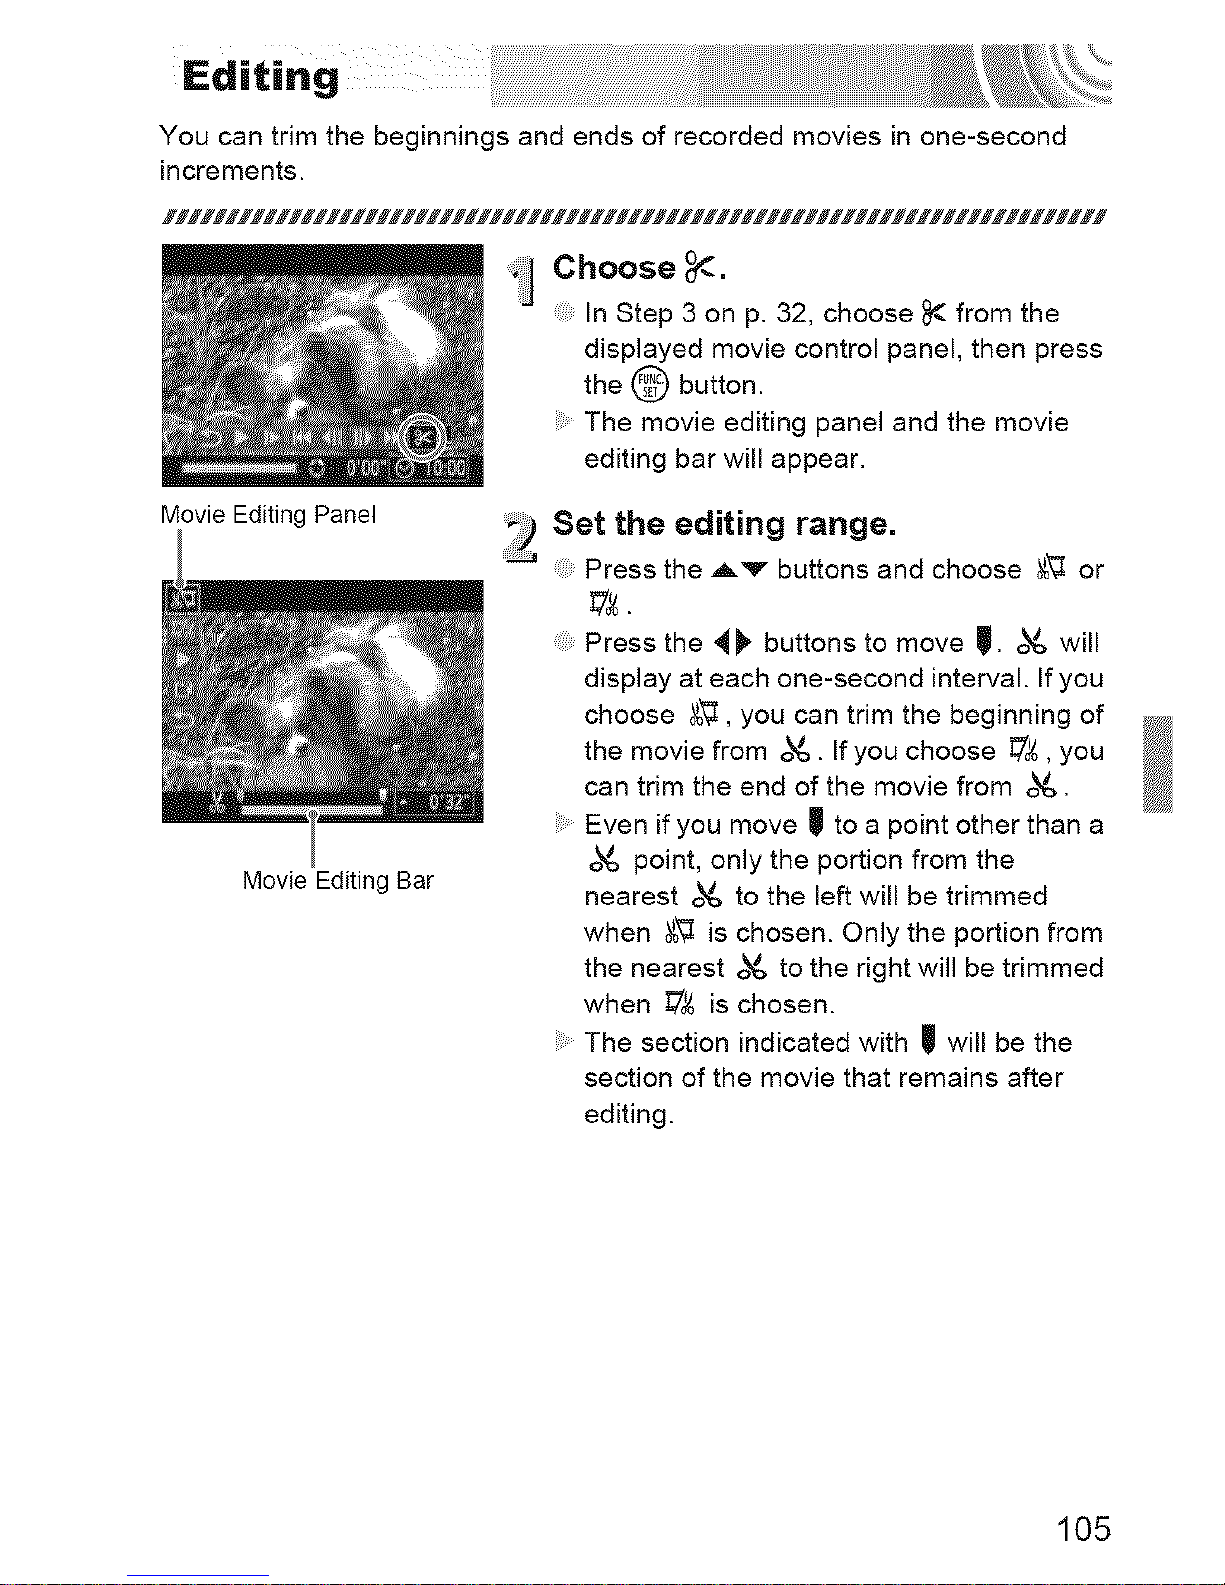
You can trim the beginnings and ends of recorded movies in one-second
increments.
_J Choose _.
In Step 3 on p. 32, choose _ from the
displayed movie control panel, then press
the @ button.
The movie editing panel and the movie
editing bar will appear.
Movie Editing Panel
Movie Editing Bar
;;) Set the editing range.
Press the Av buttons and choose _ or
Press the 4)' buttons to move _. ok& will
display at each one-second interval. If you
choose _, you can trim the beginning of
the movie from ok&. If you choose _, you
can trim the end of the movie from ok&.
Even if you move _ to a point other than a
ok& point, only the portion from the
nearest ok& to the left will be trimmed
when _,_ is chosen. Only the portion from
the nearest ok& to the right will be trimmed
when _ is chosen.
The section indicated with I_ will be the
section of the movie that remains after
editing.
105

Editing
3 Check the edited movie.
Press the ,,Lv buttons to choose
_' (Play), then press the @ button. The
edited movie will play.
To edit the movie again, repeat Step 2.
To cancel editing, press the ,_'v- buttons,
and choose _D. After pressing the @
button, press the _ _ buttons to choose
[OK], and press the @ button again.
_l Save the edited movie.
:: Press the Av buttons to choose ['._,
then press the @ button.
Press the ,_v _), buttons to choose
[New File], then press the @ button.
The movie will be saved as a new file.
106
This chapter explains various ways to play back and edit images.
.....Press the [] button to enter Playback mode before operating the camera.
107
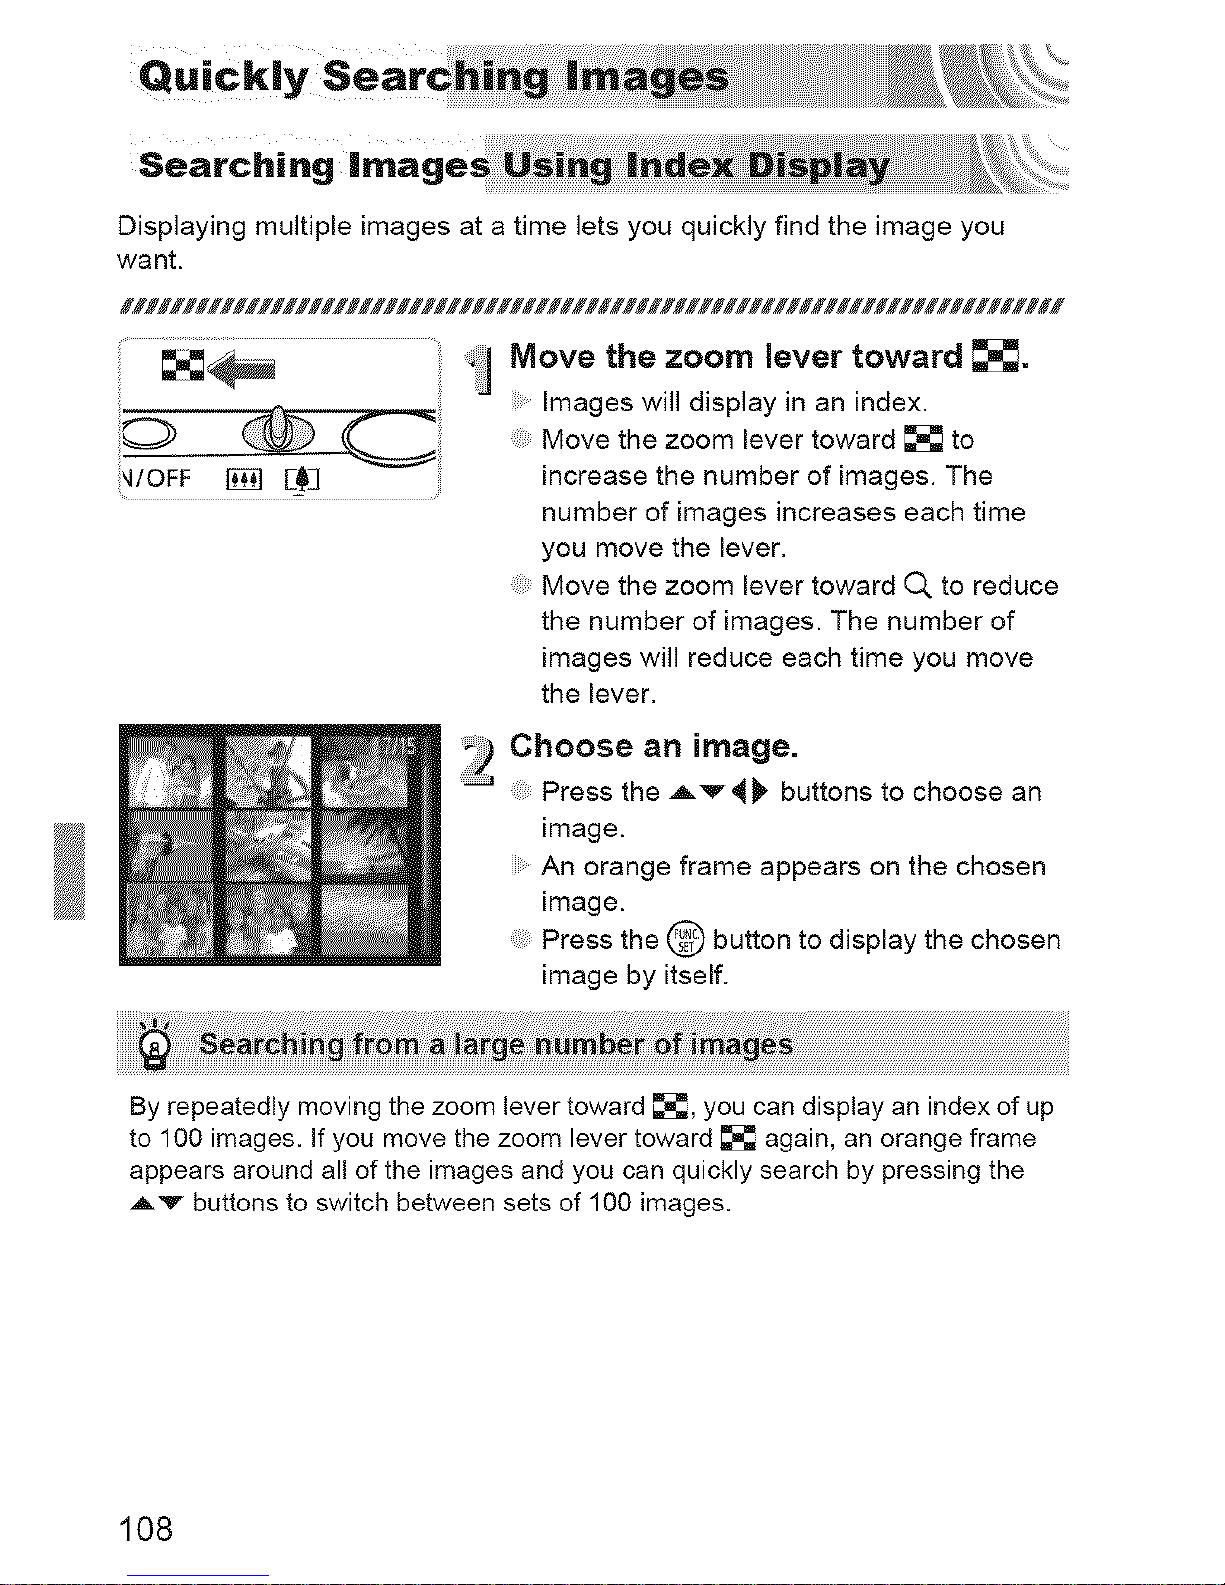
Displaying multiple images at a time lets you quickly find the image you
want.
Move the zoom lever toward _.
Images will display in an index.
Move the zoom lever toward _ to
_I/OFF _ E_] increase the number of images. The
number of images increases each time
you move the lever.
Move the zoom lever toward O, to reduce
the number of images. The number of
images will reduce each time you move
the lever.
2 Choose an image.
...............Press the Av 4)' buttons to choose an
image.
An orange frame appears on the chosen
image.
Press the @ button to display the chosen
image by itself.
By repeatedly moving the zoom lever toward _, you can display an index of up
to 100 images. If you move the zoom lever toward _ again, an orange frame
appears around all of the images and you can quickly search by pressing the
_.v buttons to switch between sets of 100 images.
108
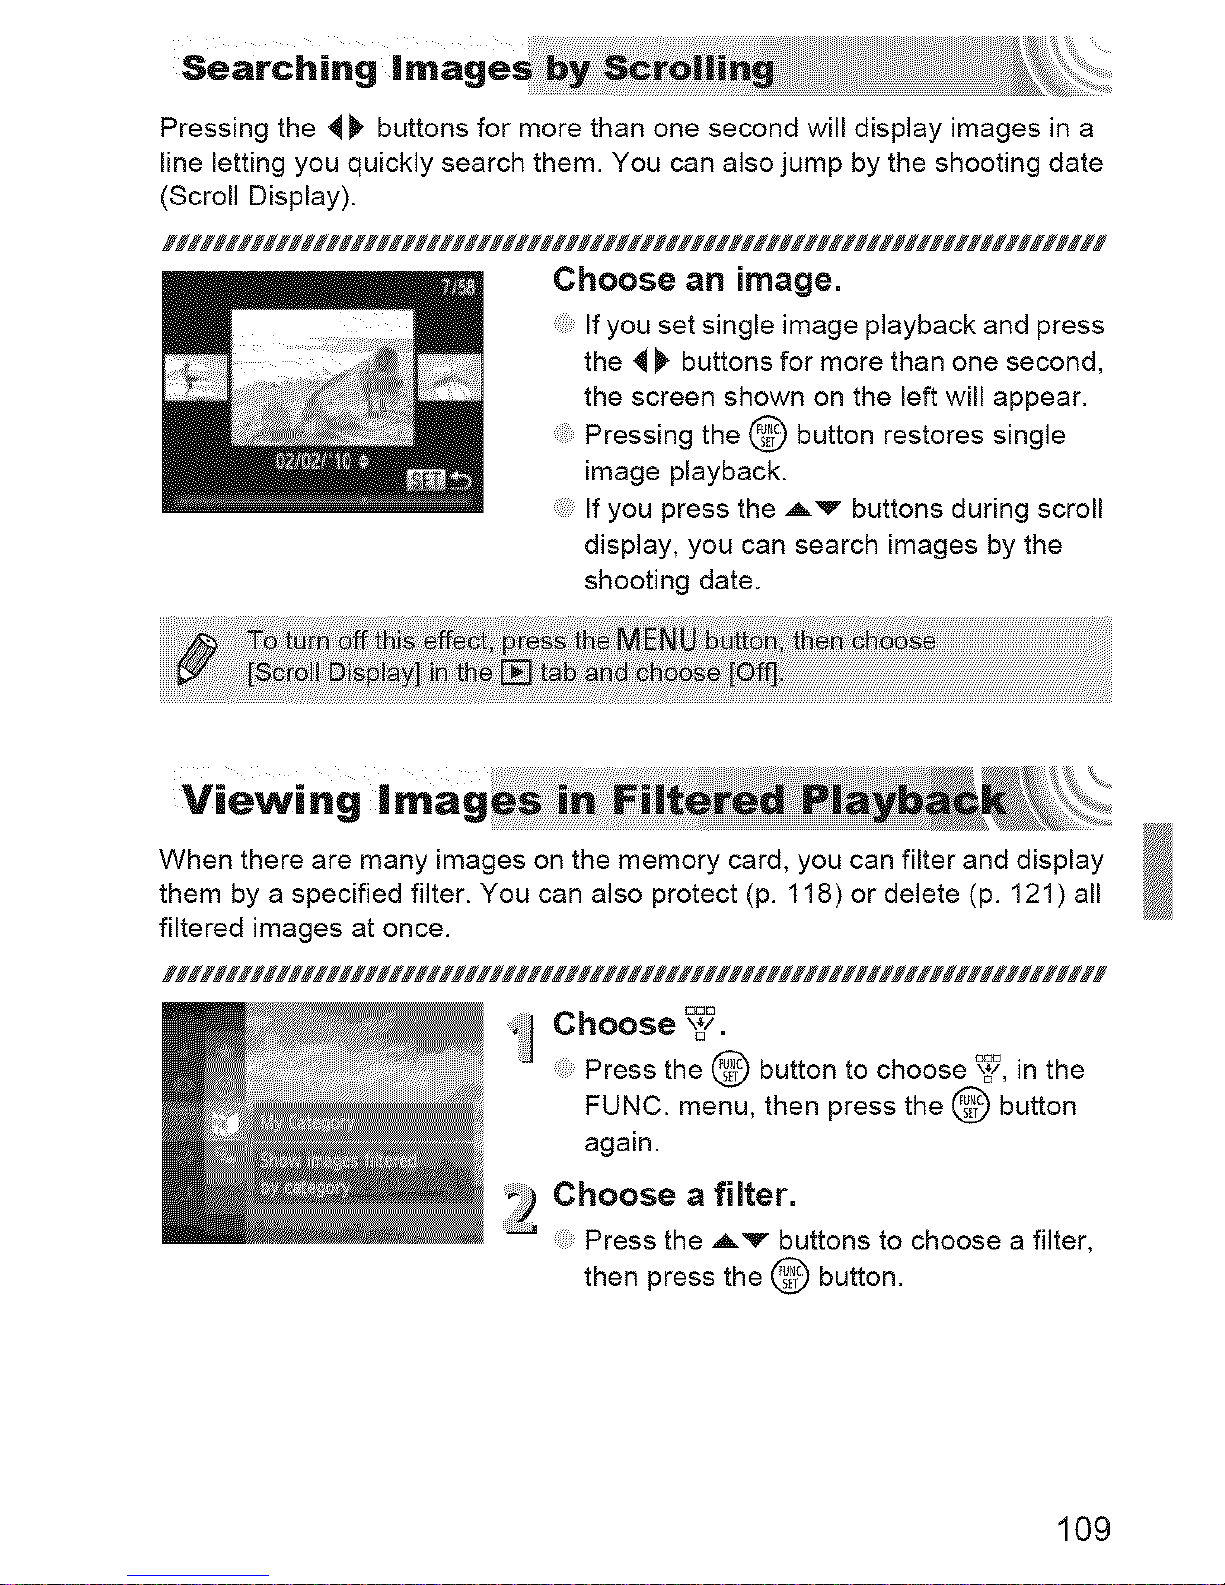
Pressing the _, buttons for more than one second will display images in a
line letting you quickly search them. You can also jump by the shooting date
(Scroll Display).
Choose an image.
If you set single image playback and press
the 4)' buttons for more than one second,
the screen shown on the left will appear.
Pressing the @ button restores single
image playback.
If you press the Av buttons during scroll
display, you can search images by the
shooting date.
When there are many images on the memory card, you can filter and display
them by a specified filter. You can also protect (p. 118) or delete (p. 121 ) all
filtered images at once.
i Choose _?.
Press the Q button to choose _, in the
FUNC. menu, then press the Q button
again.
_# Choose a filter.
....... Press the A'v" buttons to choose a filter,
then press the _ button.
109
Viewing Images in Filtered Playback
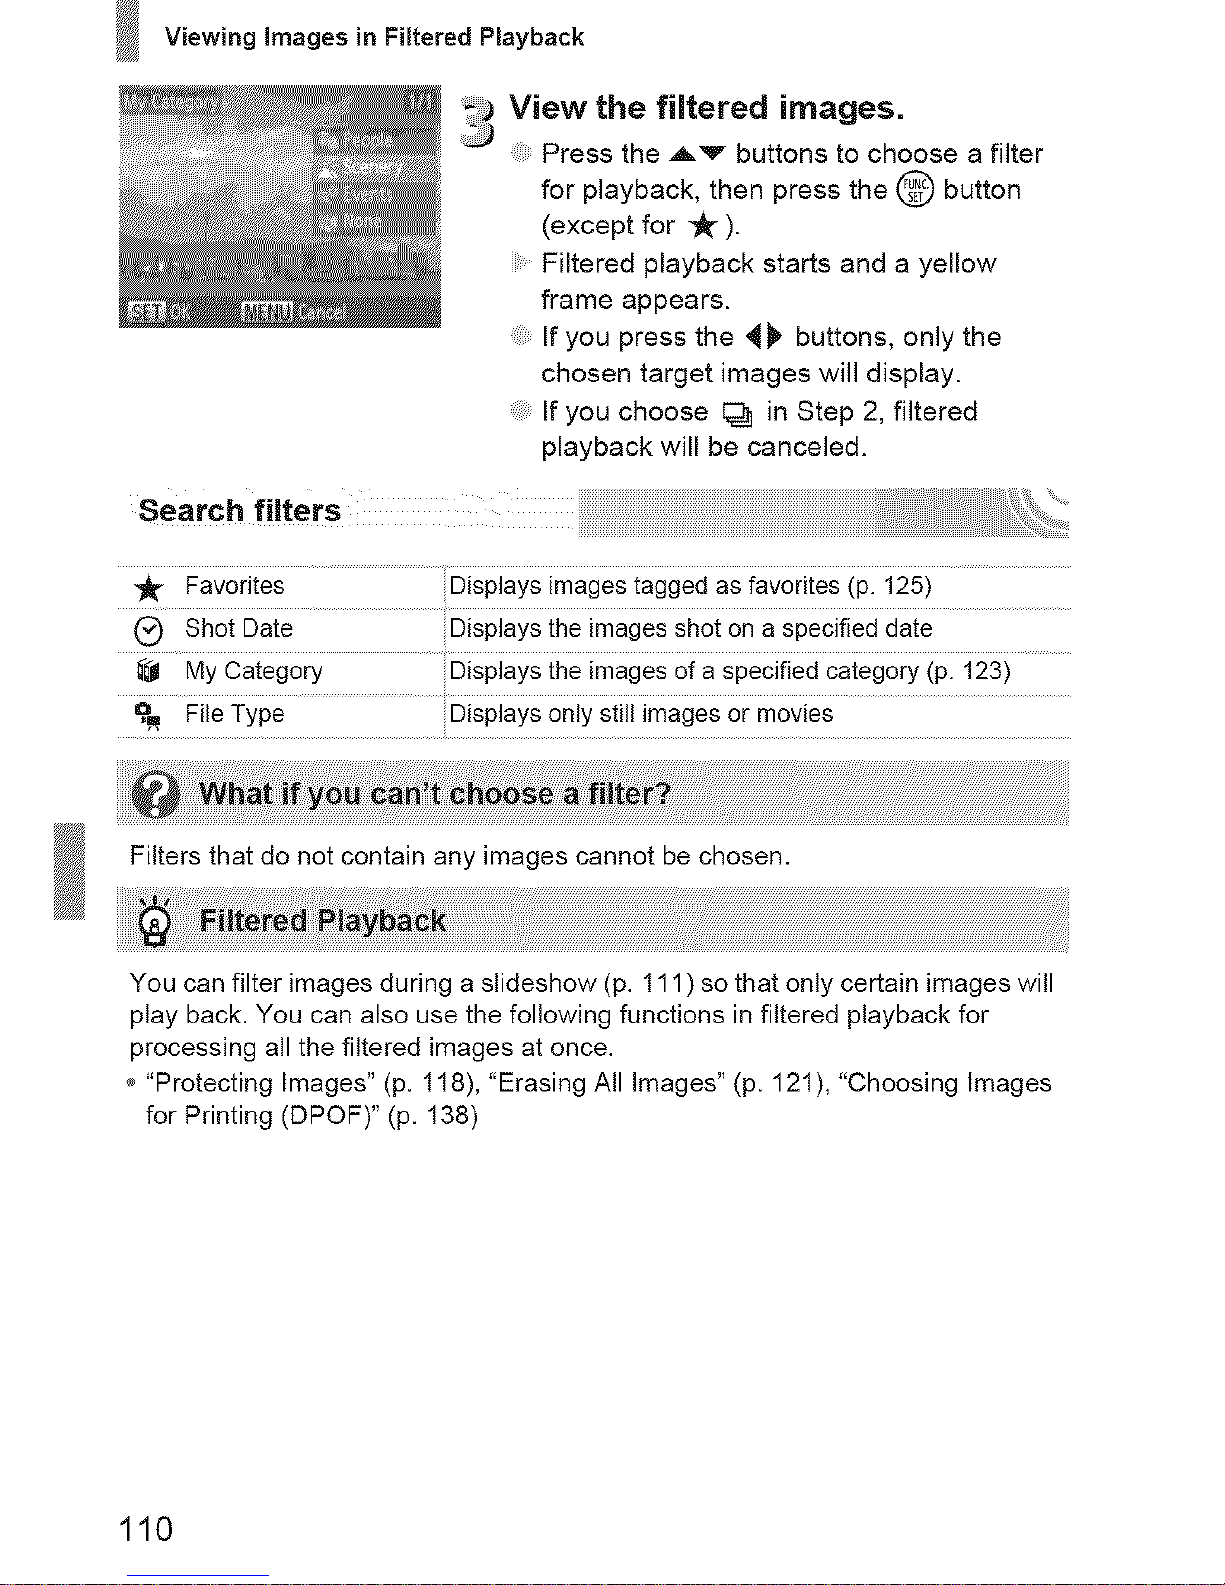
View the filtered images.
Press the Av buttons to choose a filter
for playback, then press the @ button
(except for _ ).
Filtered playback starts and a yellow
frame appears.
If you press the 41t, buttons, only the
chosen target images will display.
If you choose I;_ in Step 2, filtered
playback will be canceled.
Favorites DisPiaysimages iagged as favoiiiesil:)ii25)
Shoi Da{e DisPiays the images shot on a SPecified daie
_'_ My Categoiy Dispiays the images of a specified caiegory ipl i23)
o,, #iieType Displaysoniystiiiimagesor movies
Filters that do not contain any images cannot be chosen.
You can filter images during a slideshow (p. 111 )so that only certain images will
play back. You can also use the following functions in filtered playback for
processing all the filtered images at once.
"Protecting Images" (p. 118), "Erasing All Images" (p. 121 ), "Choosing Images
for Printing (DPOF)" (p. 138)
110
You can automatically play back images recorded to a memory card. Each
image displays for approximately 3 seconds.
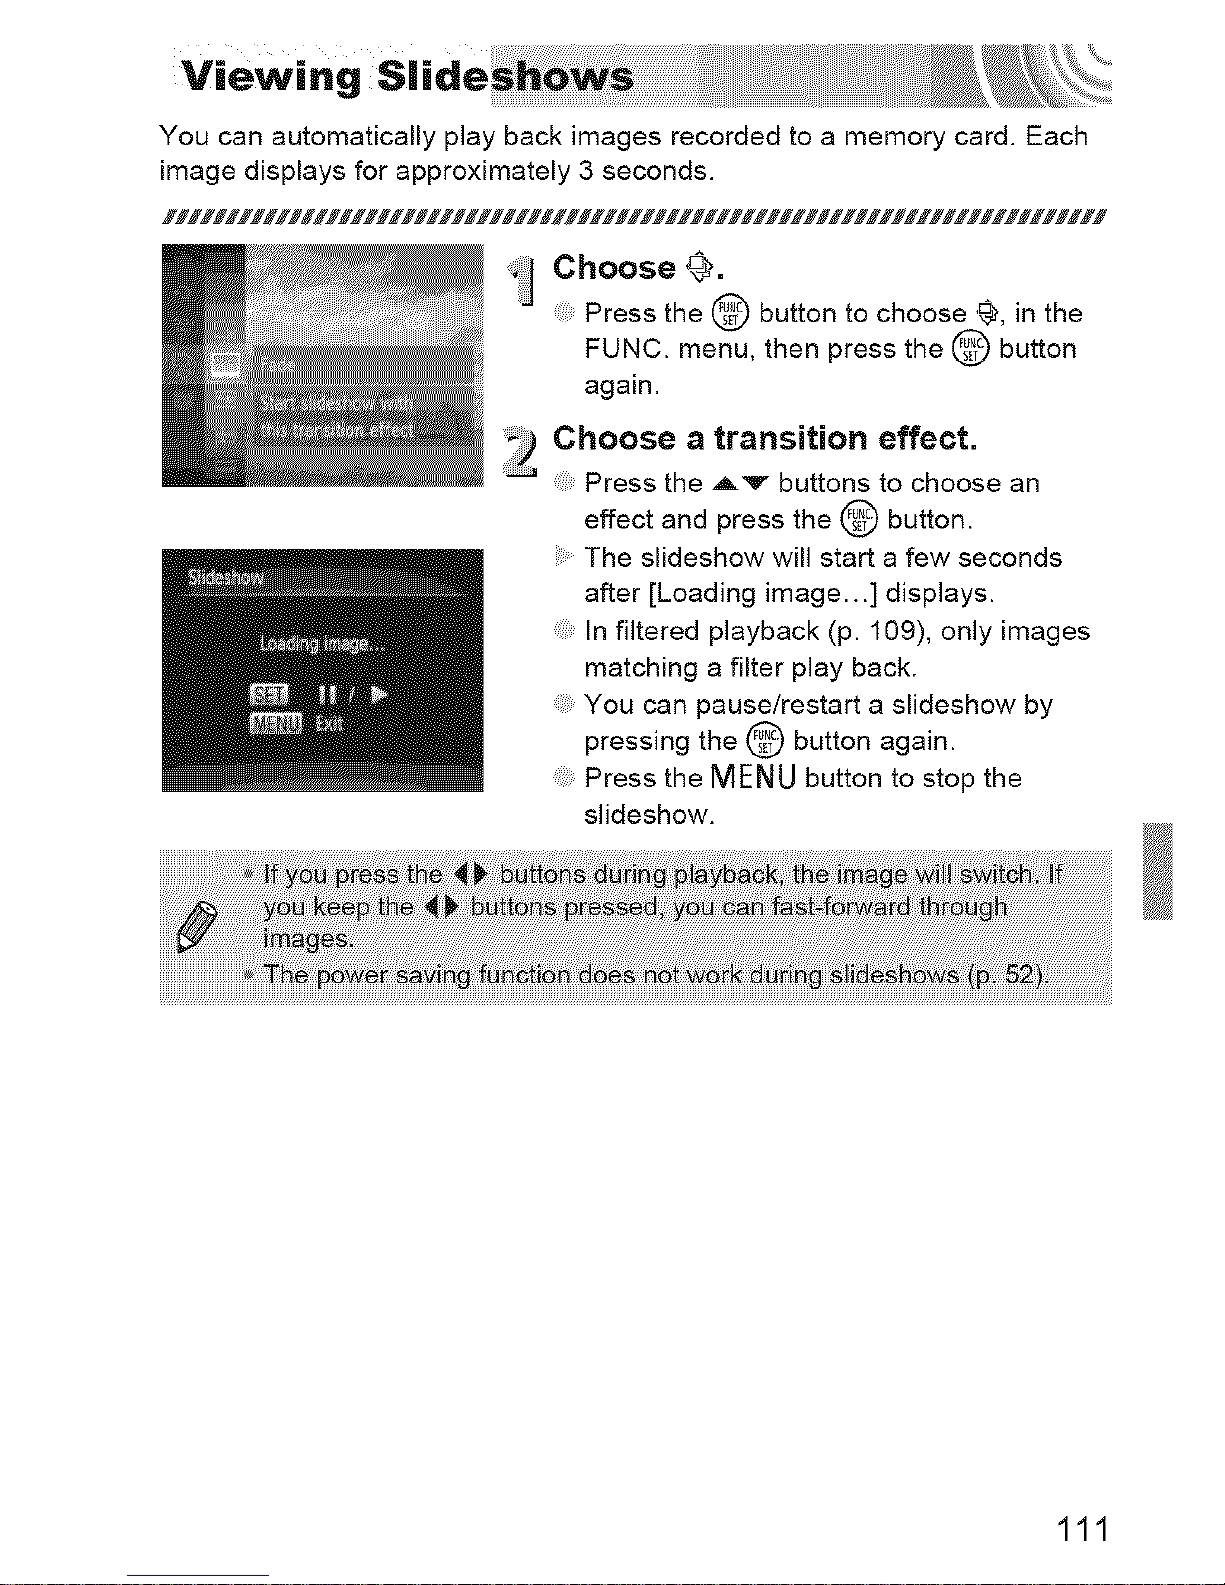
J Choose _.
Press the @ button to choose '% in the
FUNC. menu, then press the @ button
again.
Choose a transition effect.
..... Press the A'_- buttons to choose an
effect and press the @ button.
The slideshow will start a few seconds
after [Leading image...] displays.
In filtered playback (p. 109), only images
matching a filter play back.
You can pause/restart a slideshow by
pressing the @ button again.
Press the MENUbutton to stop the
slideshow.
111
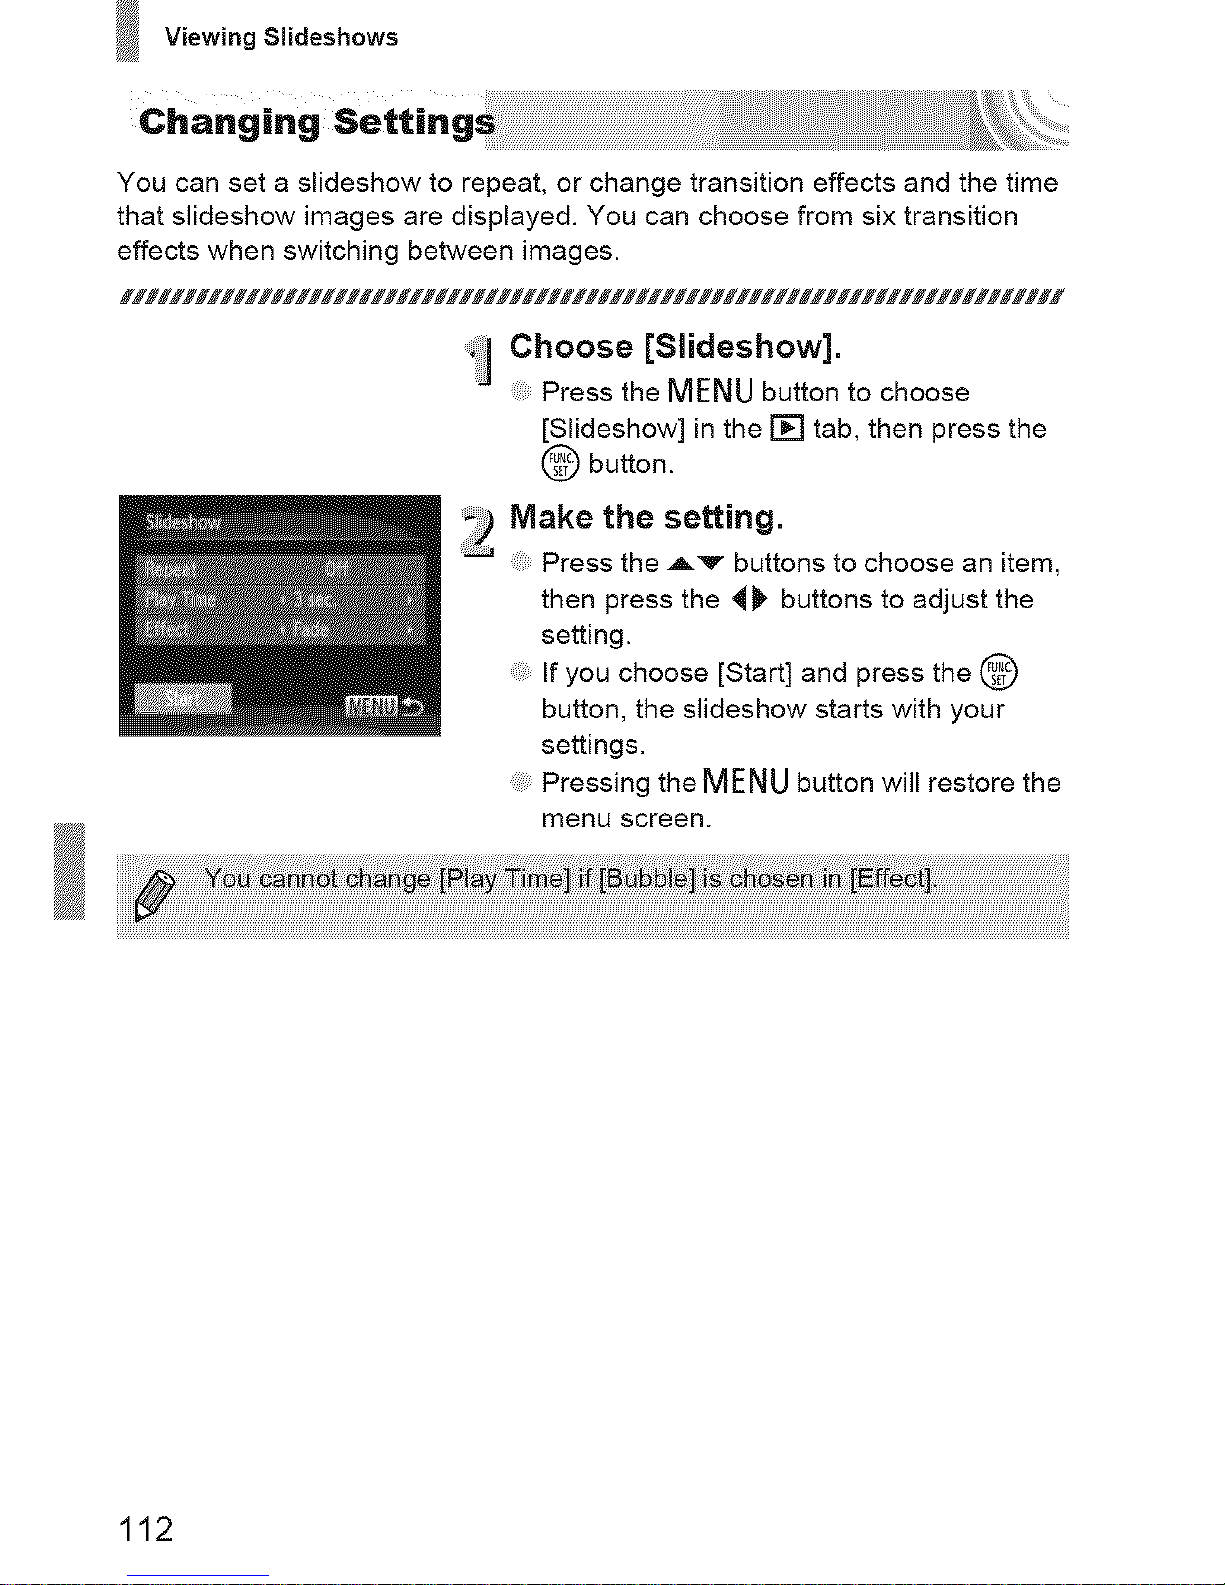
Viewing Slideshows
You can set a slideshow to repeat, or change transition effects and the time
that slideshow images are displayed. You can choose from six transition
effects when switching between images.
C.oo,eI:Slide,how:].
Press the MENU button to choose
[Slideshow] in the [] tab, then press the
@ button.
'i) Make the setting.
Press the Av buttons to choose an item,
then press the ,_ buttons to adjust the
setting.
If you choose [Start] and press the @
button, the slideshow starts with your
settings.
Pressing the MENU button will restore the
menu screen.
112
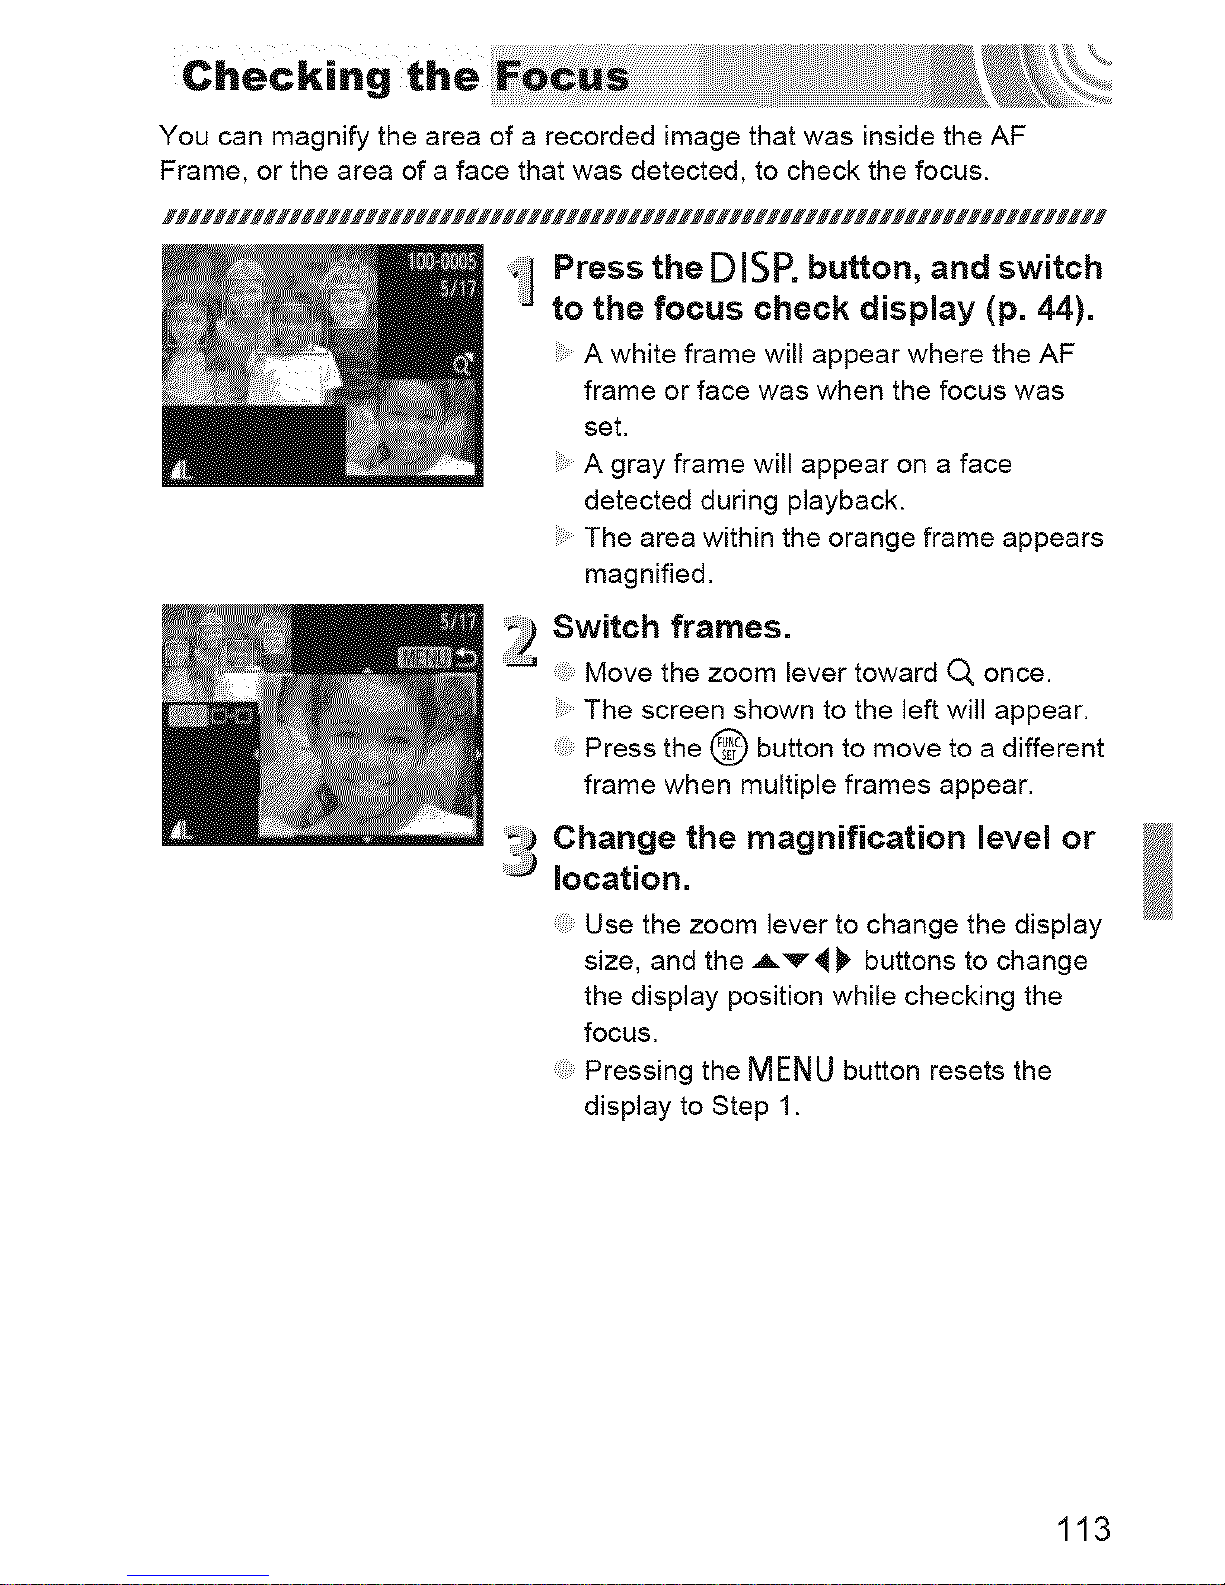
You can magnify the area of a recorded image that was inside the AF
Frame, or the area of a face that was detected, to check the focus.
Press the DISP. button, and switch
to the focus check display (p. 44).
A white frame will appear where the AF
frame or face was when the focus was
set.
A gray frame will appear on a face
detected during playback.
The area within the orange frame appears
magnified.
2 Switch frames.
Move the zoom lever toward O, once.
The screen shown to the left will appear.
Press the @ button to move to a different
frame when multiple frames appear.
Change the magnification level or
location.
Use the zoom lever to change the display
size, and the Av4), buttons to change
the display position while checking the
focus.
Pressing the MENUbutton resets the
display to Step 1.
113
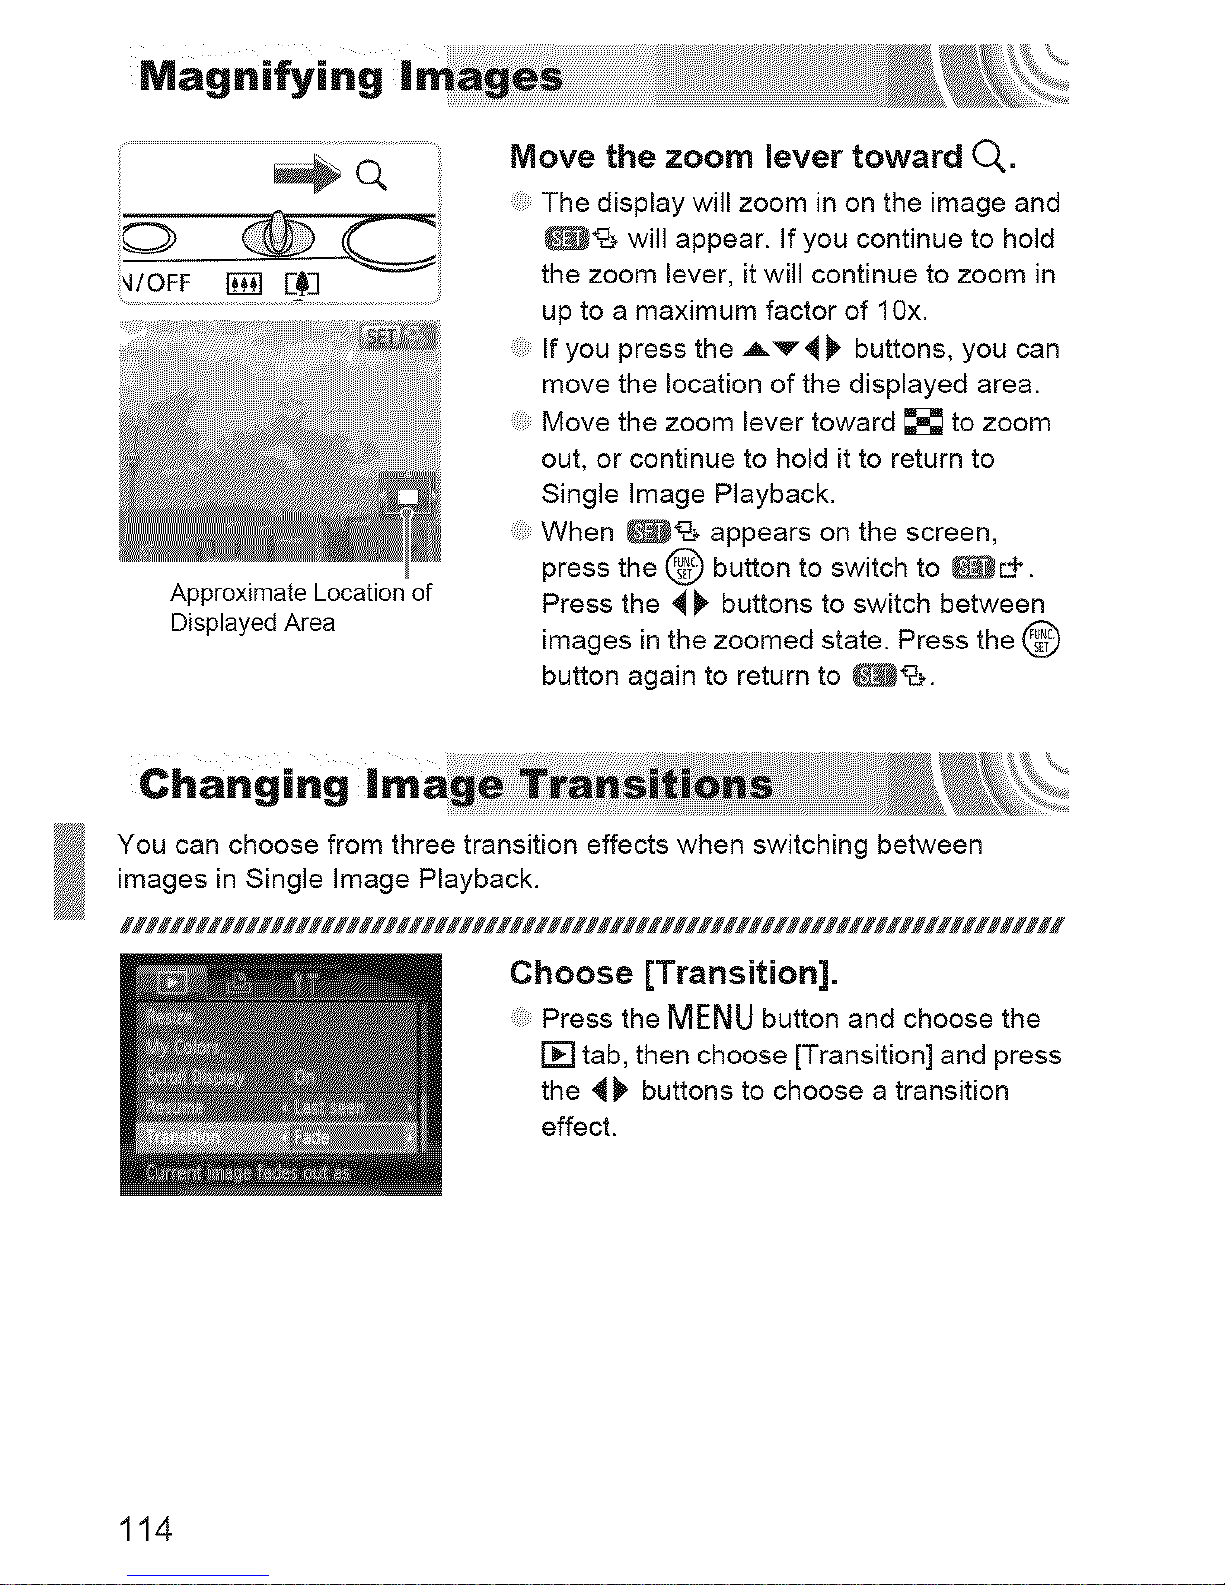
Approximate Location of
Displayed Area
Move the zoom lever toward 0,.
The display will zoom in on the image and
@*-% will appear. If you continue to hold
the zoom lever, it will continue to zoom in
up to a maximum factor of 10x.
If you press the A'v'4_ buttons, you can
move the location of the displayed area.
Move the zoom lever toward _ to zoom
out, or continue to hold it to return to
Single Image Playback.
When _% appears on the screen,
press the @ button to switch to _L+.
Press the 4_ buttons to switch between
images in the zoomed state. Press the @
button again to return to _%.
You can choose from three transition effects when switching between
images in Single Image Playback.
Choose [Transition].
Press the MENU button and choose the
[] tab, then choose [Transition] and press
the 4_ buttons to choose a transition
effect.
114
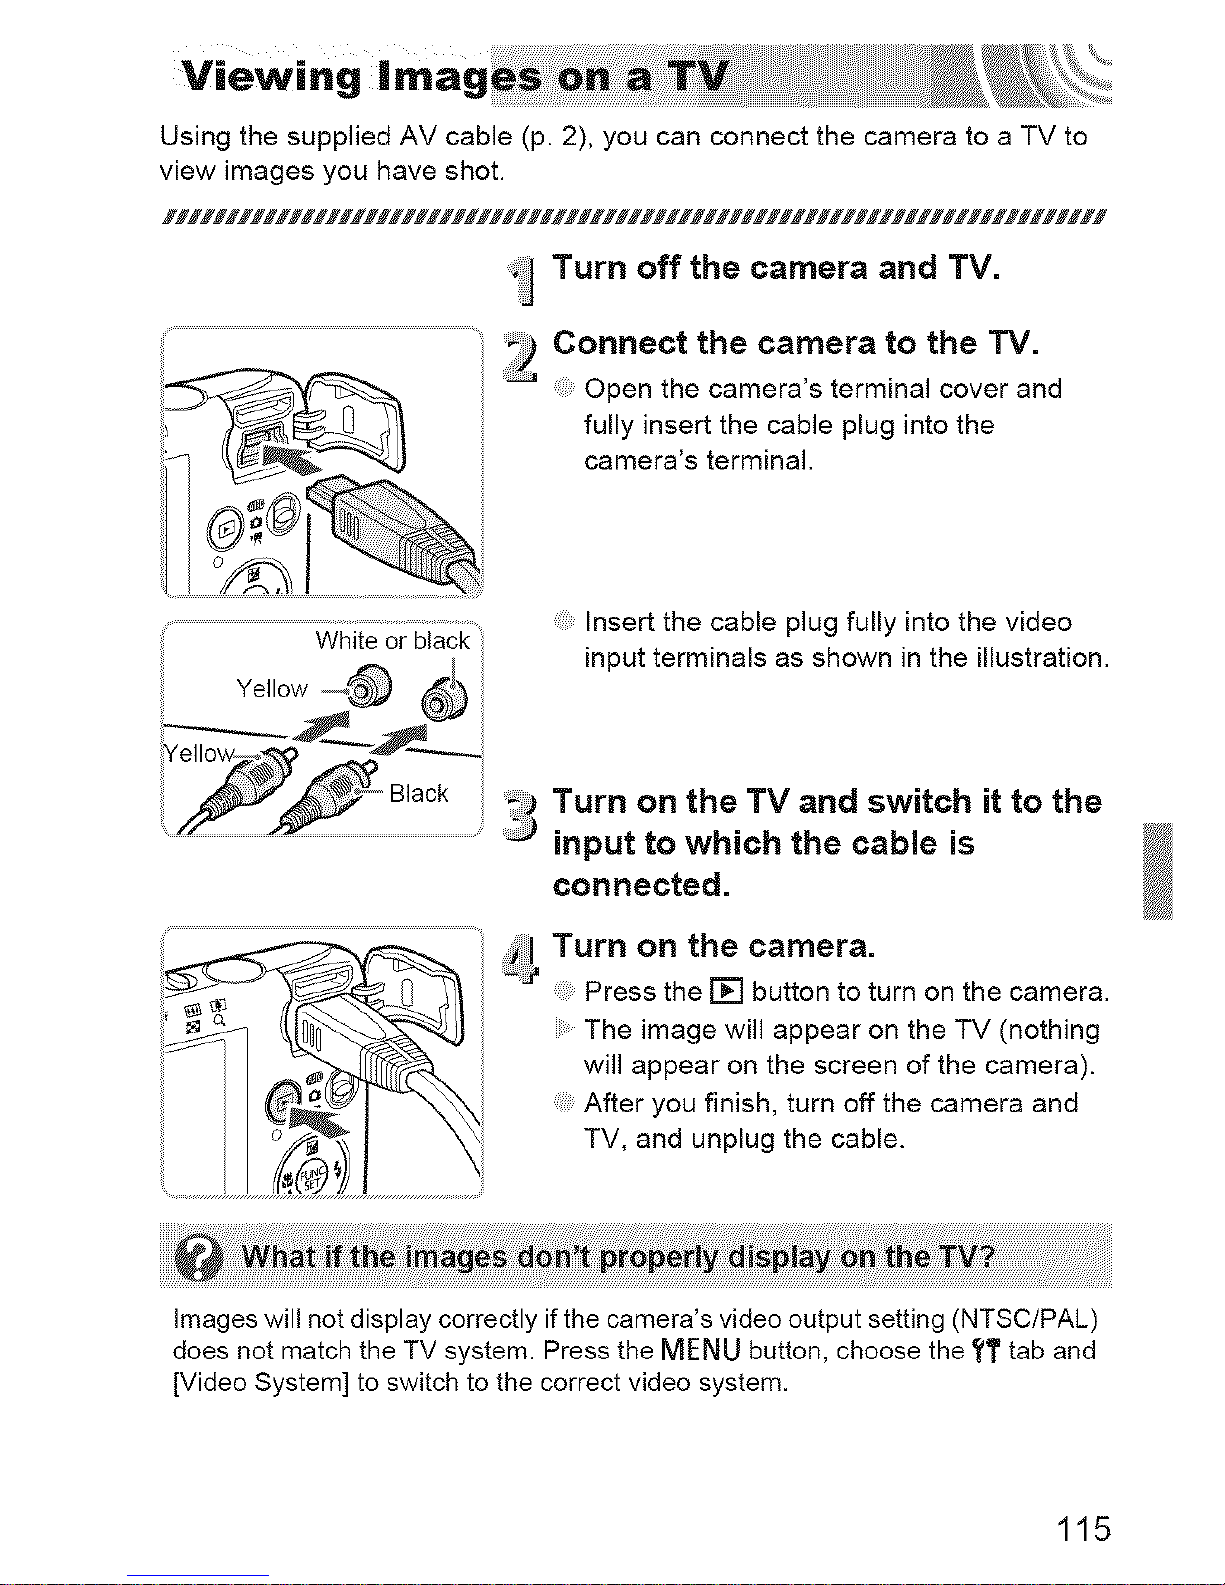
Using the supplied AV cable (p. 2), you can connect the camera to a TV to
view images you have shot.
iii
Ye,,ow @j
:J Turn off the camera and TV.
_) Connect the camera to the TV.
......... Open the camera's terminal cover and
fully insert the cable plug into the
camera's terminal.
Insert the cable plug fully into the video
input terminals as shown in the illustration.
Turn on the TV and switch it to the
input to which the cable is
connected.
;_l Turn on the camera.
Press the [] button to turn on the camera.
The image will appear on the TV (nothing
will appear on the screen of the camera).
After you finish, turn off the camera and
TV, and unplug the cable.
images will not display correctly if the camera's video output setting (NTSC/PAL)
does not match the TV system. Press the MENU button, choose the ?T tab and
[Video System] to switch to the correct video system.
115
 Loading...