

Page 1
Camera User Guide
ENGLISH
Before Use
Basic Guide
Advanced Guide
Camera Basics
Auto Mode /
Hybrid Auto Mode
Other Shooting Modes
P Mode
Playback Mode
Wi-Fi Functions
● Make sure you read this guide, including the “Safety Precautions”
(=
12) section, before using the camera.
● Reading this guide will help you learn to use the camera properly.
● Store this guide safely so that you can use it in the future.
● Click the buttons in the lower right to access other pages.
: Next page
: Previous page
: Page before you clicked a link
● To jump to the beginning of a chapter, click the chapter title at right.
© CANON INC. 2016 CT0-D041-000-F101-C
Setting Menu
Accessories
Appendix
Index
1
Page 2
Before Use
Initial Information
Package Contents
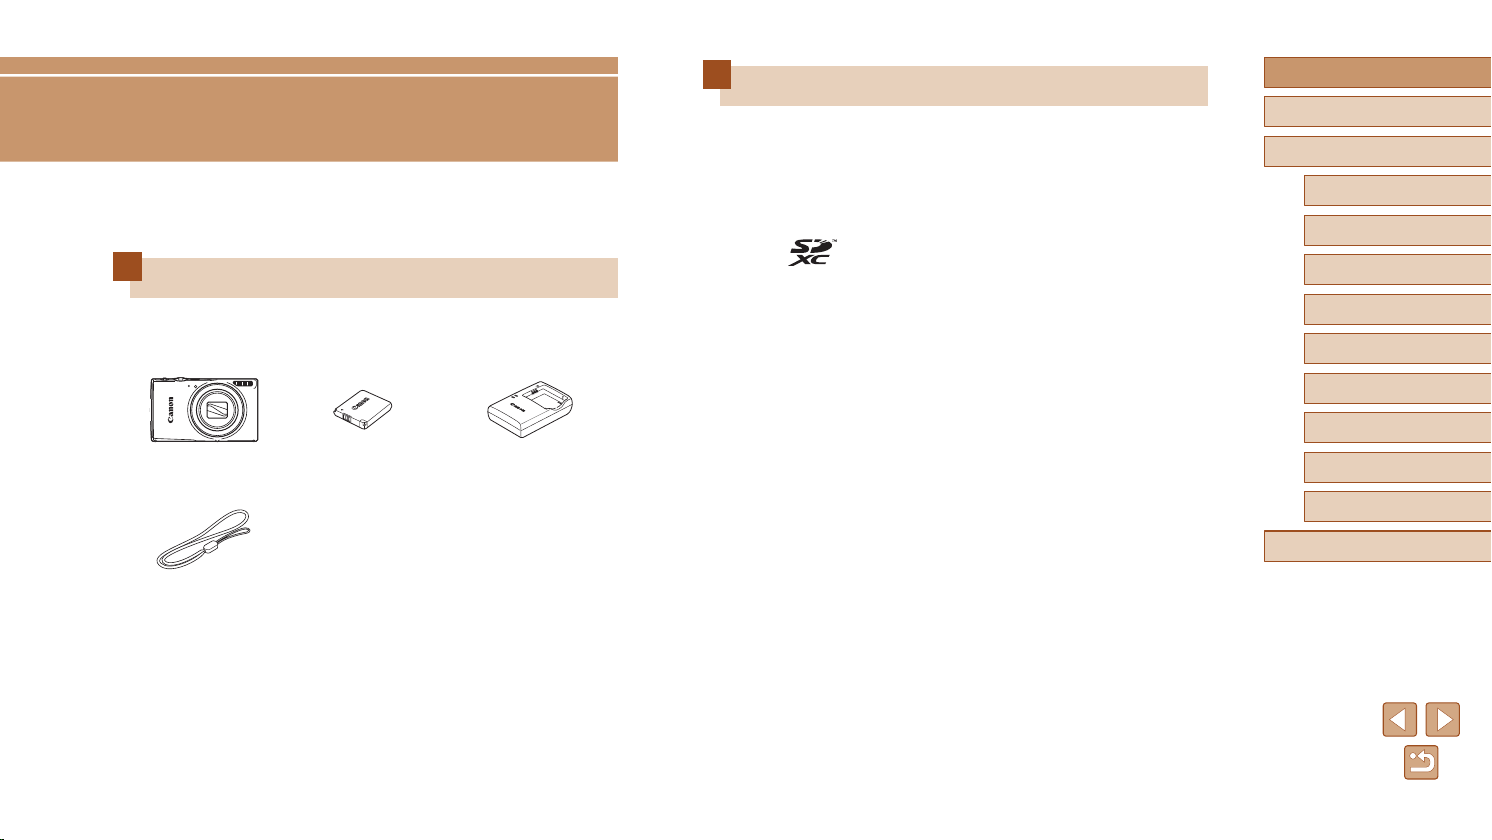
Before use, make sure the following items are included in the package.
If anything is missing, contact your camera retailer.
Camera
Wrist Strap
* Do not peel off the adhesive covering from a battery pack.
● Printed matter is also included.
● A memory card is not included (
Battery Pack
NB-11LH*
=
2).
Battery Charger
CB-2LF/CB-2LFE
Compatible Memory Cards
The following memory cards (sold separately) can be used, regardless of
capacity.
● SD memory cards*
● SDHC memory cards*
● SDXC memory cards*
* Cards conforming to SD standards. However, not all memory cards have been
veried to work with the camera.
Before Use
Basic Guide
Advanced Guide
Camera Basics
Auto Mode /
Hybrid Auto Mode
Other Shooting Modes
P Mode
Playback Mode
Wi-Fi Functions
Setting Menu
Accessories
Appendix
Index
2
Page 3
Preliminary Notes and Legal
Information
● Take and review some test shots initially to make sure the images
were recorded correctly. Please note that Canon Inc., its subsidiaries
and afliates, and its distributors are not liable for any consequential
damages arising from any malfunction of a camera or accessory,
including memory cards, that result in the failure of an image to be
recorded or to be recorded in a way that is machine readable.
● Images recorded by the camera shall be for personal use. Refrain
from unauthorized recording that infringes on copyright law, and note
that even for personal use, photography may contravene copyright
or other legal rights at some performances or exhibitions, or in some
commercial settings.
● The camera warranty is valid only in the area of purchase. In case of
camera problems while abroad, return to the area of purchase before
contacting a Canon Customer Support Help Desk.
● Although the screen (monitor) is produced under extremely high-
precision manufacturing conditions and more than 99.99% of the
pixels meet design specications, in rare cases some pixels may be
defective or may appear as red or black dots. This does not indicate
camera damage or affect recorded images.
● When the camera is used over an extended period, it may become
warm. This does not indicate damage.
Conventions in This Guide
● In this guide, icons are used to represent the corresponding camera
buttons and switches on which they appear or which they resemble.
● The following camera buttons and controls are represented by icons.
Numbers in parentheses indicate the numbers of corresponding
controls in “Part Names” (
[ ] Up button ( ) on back
[ ] Left button ( ) on back
[ ] Right button ( ) on back
[ ] Down button ( ) on back
● Shooting modes and on-screen icons and text are indicated in
brackets.
: Important information you should know
●
: Notes and tips for expert camera use
●
=
xx: Pages with related information (in this example, “xx” represents
●
a page number)
● Instructions in this guide apply to the camera under default settings.
● For convenience, all supported memory cards are simply referred to as
the “memory card”.
● The symbols “
how the function is used—whether for still images or movies.
Still Images” and “ Movies” below titles indicate
=
4).
Before Use
Basic Guide
Advanced Guide
Camera Basics
Auto Mode /
Hybrid Auto Mode
Other Shooting Modes
P Mode
Playback Mode
Wi-Fi Functions
Setting Menu
Accessories
Appendix
Index
3
Page 4
Part Names
Before Use
Basic Guide
Advanced Guide
Camera Basics
Auto Mode /
Hybrid Auto Mode
Other Shooting Modes
P Mode
Playback Mode
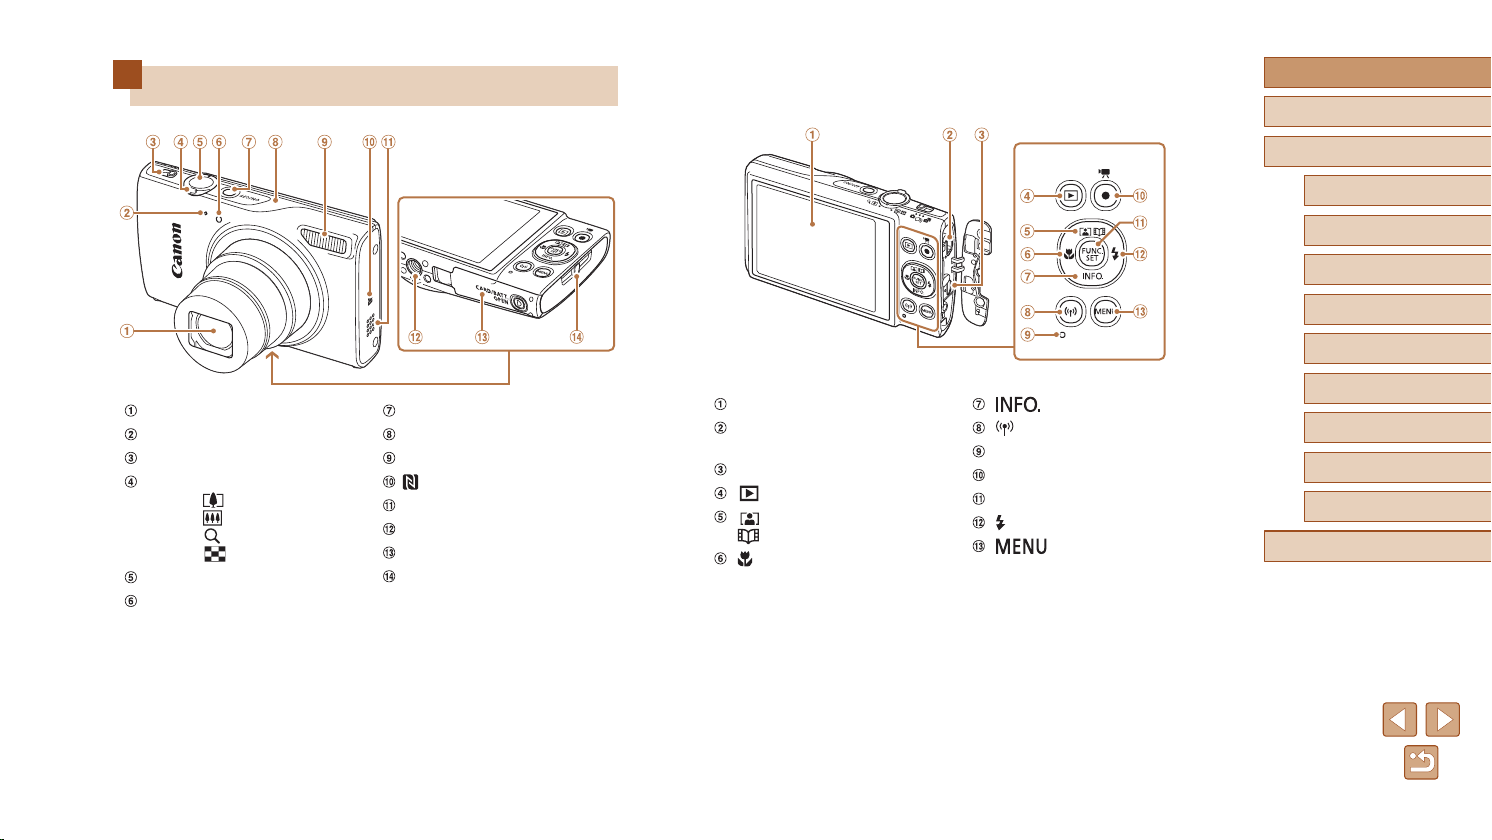
Lens
Microphone
Mode switch
Zoom lever
Shooting: [
Playback: [
Shutter button
Lamp
* Used with NFC features (=
(telephoto)] /
(wide angle)]
[
(magnify)] /
(index)]
[
88).
Power button
Wi-Fi antenna area
Flash
(N-Mark)*
Speaker
Tripod socket
Memory card/battery cover
Strap mount
Screen (monitor)
AV OUT (Audio/video output) /
DIGITAL terminal
HDMITM terminal
[ (Playback)] button
[ (Auto Zoom)] /
(Story Highlights)] / Up button
[
[ (Macro)] / Left button
[ (Information)] / Down button
[ (Wi-Fi)] button
Indicator
Movie button
FUNC. (Function) / SET button
[ (Flash)] / Right button
[ ] button
Wi-Fi Functions
Setting Menu
Accessories
Appendix
Index
4
Page 5

Table of Contents
Before Use
Initial Information .............................................................. 2
Package Contents .................................................................... 2
Compatible Memory Cards....................................................... 2
Preliminary Notes and Legal Information ................................. 3
Conventions in This Guide ....................................................... 3
Part Names .............................................................................. 4
Common Camera Operations .................................................11
Safety Precautions ................................................................. 12
Basic Guide
Basic Operations............................................................. 15
Initial Preparations.................................................................. 15
Attaching the Strap ....................................................................15
Holding the Camera ...................................................................15
Charging the Battery Pack .........................................................16
Inserting the Battery Pack and Memory Card ............................ 16
Removing the Battery Pack and Memory Card ..................... 17
Setting the Date and Time .........................................................17
Changing the Date and Time .................................................18
Display Language ......................................................................19
Trying the Camera Out ........................................................... 19
Shooting (Smart Auto) ............................................................... 19
Viewing ......................................................................................21
Erasing Images .....................................................................21
Advanced Guide
Camera Basics ................................................................ 22
On/Off ..................................................................................... 22
Power-Saving Features (Auto Power Down) ............................. 23
Power Saving in Shooting Mode ...........................................23
Power Saving in Playback Mode ........................................... 23
Shutter Button ........................................................................ 23
Shooting Display Options ....................................................... 24
Using the FUNC. Menu .......................................................... 24
Using the Menu Screen .......................................................... 25
On-Screen Keyboard.............................................................. 26
Indicator Display ..................................................................... 27
Clock ...................................................................................... 27
Auto Mode / Hybrid Auto Mode ...................................... 28
Shooting with Camera-Determined Settings .......................... 28
Shooting (Smart Auto) ............................................................... 28
Shooting in Hybrid Auto Mode ...................................................30
Digest Movie Playback ..........................................................31
Still Images/Movies ...............................................................31
Still Images ............................................................................31
Movies ...................................................................................32
Scene Icons ...............................................................................32
Image Stabilization Icons ...........................................................33
On-Screen Frames ....................................................................34
Common, Convenient Features ............................................. 34
Zooming In Closer on Subjects (Digital Zoom) .......................... 34
Auto Zooming in Response to Subject Movement
(Auto Zoom) ...............................................................................35
Before Use
Basic Guide
Advanced Guide
Camera Basics
Auto Mode /
Hybrid Auto Mode
Other Shooting Modes
P Mode
Playback Mode
Wi-Fi Functions
Setting Menu
Accessories
Appendix
Index
5
Page 6

Using the Self-Timer ..................................................................36
Using the Self-Timer to Avoid Camera Shake ....................... 36
Customizing the Self-Timer ...................................................36
Deactivating the Flash ...............................................................37
Adding a Date Stamp ................................................................37
Continuous Shooting .................................................................38
Image Customization Features .............................................. 38
Changing the Aspect Ratio ........................................................38
Changing the Number of Recording Pixels (Image Size) .......... 39
Guidelines for Choosing Recording Pixel Setting Based on
Paper Size (for 4:3 Images) ..................................................39
Changing Movie Image Quality .................................................39
Helpful Shooting Features ...................................................... 40
Displaying Grid Lines .................................................................40
Magnifying the Area in Focus ....................................................40
Changing the IS Mode Settings ................................................. 41
Deactivating Image Stabilization ...........................................41
Recording Movies with Subjects at the Same Size Shown
before Shooting .....................................................................41
Customizing Camera Operation ............................................. 42
Deactivating the AF-Assist Beam ..............................................42
Deactivating the Red-Eye Reduction Lamp ...............................42
Changing the Image Display Style after Shots .......................... 43
Changing the Image Display Period after Shots ...................43
Changing the Screen Displayed after Shots .........................43
Other Shooting Modes .................................................... 44
Enjoying a Variety of Images from Each Shot
(Creative Shot) ....................................................................... 44
Image Display during Playback ................................................. 45
Choosing Effects .......................................................................45
Specic Scenes ...................................................................... 46
Applying Special Effects ......................................................... 47
Shooting with a Fish-Eye Lens Effect (Fish-Eye Effect) ............47
Shots Resembling Miniature Models (Miniature Effect) .............48
Playback Speed and Estimated Playback Time
(for One-Minute Clips) ...........................................................48
Shooting with a Toy Camera Effect (Toy Camera Effect) ...........49
Shooting in Monochrome ...........................................................49
Special Modes for Other Purposes ........................................ 50
Auto Shooting after Face Detection (Smart Shutter) ................. 50
Auto Shooting after Smile Detection (Smile) ......................... 50
Auto Shooting after Wink Detection (Wink Self-Timer) ..........50
Auto Shooting after Detecting New Person
(Face Self-Timer) ...................................................................51
Shooting Long Exposures (Long Shutter) .................................52
High-Speed Continuous Shooting (High-Speed Burst) .............52
P Mode ............................................................................. 53
Shooting in Program AE ([P] Mode) ....................................... 53
Image Brightness (Exposure) ................................................. 54
Adjusting Image Brightness (Exposure Compensation) ............ 54
Changing the Metering Method ................................................. 54
Changing the ISO Speed ...........................................................55
Correcting Image Brightness (i-Contrast) .................................. 55
Image Colors .......................................................................... 56
Adjusting White Balance ............................................................56
Custom White Balance ..........................................................56
Changing Image Color Tones (My Colors) ................................56
Custom Color.........................................................................57
Shooting Range and Focusing ............................................... 58
Shooting Close-Ups (Macro) ..................................................... 58
Before Use
Basic Guide
Advanced Guide
Camera Basics
Auto Mode /
Hybrid Auto Mode
Other Shooting Modes
P Mode
Playback Mode
Wi-Fi Functions
Setting Menu
Accessories
Appendix
Index
6
Page 7

Shooting Distant Subjects (Innity) ............................................ 58
Digital Tele-Converter ................................................................59
Changing the AF Frame Mode ..................................................59
Face AiAF ..............................................................................59
Choosing Subjects to Focus On (Tracking AF) .....................60
Center ....................................................................................61
Shooting with Servo AF .........................................................61
Changing the Focus Setting ...................................................... 62
Flash....................................................................................... 62
Changing the Flash Mode .........................................................62
Auto .......................................................................................62
On ..........................................................................................62
Slow Synchro ........................................................................62
Off .......................................................................................... 63
Other Settings ........................................................................ 63
Changing the Compression Ratio (Image Quality) .................... 63
Changing the IS Mode Settings ................................................. 63
Playback Mode ................................................................ 64
Viewing ................................................................................... 64
Switching Display Modes ...........................................................65
Overexposure Warning (for Image Highlights) ......................66
Histogram ..............................................................................66
GPS Information Display ....................................................... 66
Viewing Short Movies Created When Shooting Still Images
(Digest Movies) ..........................................................................66
Viewing by Date .....................................................................67
Browsing and Filtering Images ............................................... 67
Navigating through Images in an Index ..................................... 67
Finding Images Matching Specied Conditions .........................68
Viewing Individual Images in a Group .......................................69
Image Viewing Options .......................................................... 70
Magnifying Images ....................................................................70
Viewing Slideshows ...................................................................70
Changing Slideshow Settings ................................................ 71
Auto Playback of Related Images (Smart Shufe) .................... 71
Protecting Images .................................................................. 72
Using the Menu .........................................................................72
Choosing Images Individually .................................................... 73
Selecting a Range .....................................................................73
Protecting All Images at Once ...................................................74
Clearing All Protection at Once .............................................74
Erasing Images ...................................................................... 74
Erasing Multiple Images at Once ............................................... 75
Choosing a Selection Method ...............................................75
Choosing Images Individually ................................................ 75
Selecting a Range .................................................................76
Specifying All Images at Once ...............................................76
Rotating Images ..................................................................... 76
Using the Menu .........................................................................77
Deactivating Auto Rotation ........................................................ 77
Tagging Images as Favorites ................................................. 78
Using the Menu .........................................................................78
Editing Still Images ................................................................. 79
Resizing Images ........................................................................79
Cropping ....................................................................................79
Changing Image Color Tones (My Colors) ................................80
Correcting Image Brightness (i-Contrast) .................................. 81
Correcting Red-Eye ...................................................................81
Editing Movies ........................................................................ 82
Editing Digest Movies ................................................................83
Before Use
Basic Guide
Advanced Guide
Camera Basics
Auto Mode /
Hybrid Auto Mode
Other Shooting Modes
P Mode
Playback Mode
Wi-Fi Functions
Setting Menu
Accessories
Appendix
Index
7
Page 8

Viewing Albums (Story Highlights) ......................................... 84
Choosing Themes for Albums ...............................................84
Adding Background Music to Albums ........................................85
Creating Your Own Albums ........................................................85
Wi-Fi Functions ............................................................... 87
Available Wi-Fi Features ........................................................ 87
Sending Images to a Smartphone .......................................... 88
Sending Images to an NFC-Compatible Smartphone ............... 88
Connecting via NFC When Camera Is Off or in Shooting
Mode .....................................................................................88
Connecting via NFC When Camera Is in Playback Mode ..... 90
Adding a Smartphone ................................................................91
Using Another Access Point ...................................................... 93
Previous Access Points ............................................................. 93
Saving Images to a Computer ................................................ 94
Preparing to Register a Computer ............................................. 94
Installing the Software ...........................................................94
Conguring the Computer for a Wi-Fi Connection
(Windows Only) .....................................................................95
Saving Images to a Connected Computer .................................95
Conrming Access Point Compatibility ..................................95
Using WPS-Compatible Access Points .................................96
Connecting to Listed Access Points ......................................98
Previous Access Points ......................................................... 99
Sending Images to a Registered Web Service ....................... 99
Registering Web Services .........................................................99
Registering CANON iMAGE GATEWAY .............................. 100
Registering Other Web Services .........................................101
Uploading Images to Web Services ........................................102
Printing Images Wirelessly from a Connected Printer .......... 103
Sending Images to Another Camera .................................... 104
Image Sending Options ........................................................ 105
Sending Multiple Images .........................................................105
Selecting a Range ...............................................................105
Sending Favorite Images ....................................................106
Notes on Sending Images .......................................................106
Choosing the Number of Recording Pixels (Image Size) ........ 107
Adding Comments ...................................................................107
Sending Images Automatically (Image Sync) ....................... 108
Initial Preparations ...................................................................108
Preparing the Camera .........................................................108
Preparing the Computer ......................................................108
Sending Images .......................................................................109
Viewing Images Sent via Image Sync on a Smartphone.....109
Using a Smartphone to View Camera Images and Control
the Camera............................................................................11 0
Geotagging Images on the Camera ........................................ 110
Shooting Remotely .................................................................. 110
Editing or Erasing Wi-Fi Settings........................................... 111
Editing Connection Information ............................................... 111
Changing a Device Nickname ............................................. 112
Erasing Connection Information .......................................... 112
Changing the Camera Nickname ............................................ 112
Returning the Wi-Fi Settings to Default ................................... 113
Setting Menu .................................................................. 114
Adjusting Basic Camera Functions .......................................11 4
Silencing Camera Operations .................................................. 11 4
Adjusting the Volume ............................................................... 11 4
Hiding Hints and Tips ...............................................................115
Date and Time ......................................................................... 115
World Clock ............................................................................. 115
Lens Retraction Timing ............................................................ 11 6
Using Eco Mode ...................................................................... 116
Before Use
Basic Guide
Advanced Guide
Camera Basics
Auto Mode /
Hybrid Auto Mode
Other Shooting Modes
P Mode
Playback Mode
Wi-Fi Functions
Setting Menu
Accessories
Appendix
Index
8
Page 9

Power-Saving Adjustment ....................................................... 116
Screen Brightness ................................................................... 117
Hiding the Start-Up Screen ...................................................... 11 7
Formatting Memory Cards ....................................................... 11 7
Low-Level Formatting .......................................................... 11 8
File Numbering ........................................................................ 118
Date-Based Image Storage ..................................................... 11 9
Metric / Non-Metric Display ..................................................... 119
Checking Certication Logos ................................................... 11 9
Display Language .................................................................... 11 9
Adjusting Other Settings ..........................................................120
Restoring Default Camera Settings ......................................... 120
Accessories ................................................................... 121
System Map ......................................................................... 121
Optional Accessories ............................................................ 122
Power Supplies ........................................................................122
Flash Unit ................................................................................122
Other Accessories ...................................................................123
Printers ....................................................................................123
Photo and Movie Storage ........................................................123
Using Optional Accessories.................................................. 123
Playback on a TV ....................................................................123
Playback on a High-Denition TV ........................................123
Playback on a Standard-Denition TV.................................124
Using the Software ............................................................... 125
Computer Connections via a Cable ......................................... 125
Checking Your Computer Environment ...............................125
Installing the Software .............................................................125
Saving Images to a Computer ................................................. 126
Printing Images .................................................................... 127
Easy Print ................................................................................127
Conguring Print Settings ........................................................128
Cropping Images before Printing ......................................... 129
Choosing Paper Size and Layout before Printing ...............129
Available Layout Options .....................................................130
Printing ID Photos ...............................................................130
Printing Movie Scenes .............................................................130
Movie Printing Options ........................................................130
Adding Images to the Print List (DPOF) .................................. 131
Conguring Print Settings .................................................... 131
Setting Up Printing for Individual Images ............................131
Setting Up Printing for a Range of Images .......................... 132
Setting Up Printing for All Images ........................................132
Clearing All Images from the Print List ................................132
Printing Images Added to the Print List (DPOF) ..................132
Adding Images to a Photobook ...............................................133
Choosing a Selection Method .............................................133
Adding Images Individually .................................................. 133
Adding All Images to a Photobook ......................................133
Removing All Images from a Photobook .............................133
Appendix ........................................................................ 134
Troubleshooting .................................................................... 134
On-Screen Messages........................................................... 138
On-Screen Information ......................................................... 140
Shooting (Information Display) ................................................ 140
Battery Level .......................................................................140
Playback (Detailed Information Display) .................................. 141
Summary of Movie Control Panel ........................................ 141
Before Use
Basic Guide
Advanced Guide
Camera Basics
Auto Mode /
Hybrid Auto Mode
Other Shooting Modes
P Mode
Playback Mode
Wi-Fi Functions
Setting Menu
Accessories
Appendix
Index
9
Page 10

Functions and Menu Tables ................................................. 142
Functions Available in Each Shooting Mode ...........................142
FUNC. Menu ............................................................................143
Shooting Tab ............................................................................145
Set Up Tab ............................................................................... 147
Playback Tab ...........................................................................147
Print Tab ..................................................................................148
Playback Mode FUNC. Menu .................................................. 148
Handling Precautions ........................................................... 148
Specications ....................................................................... 149
Camera ................................................................................149
Number of Shots/Recording Time, Playback Time .............. 150
Shooting Range ...................................................................150
Number of Shots per Memory Card ....................................151
Recording Time per Memory Card ......................................151
Battery Pack NB-11LH .........................................................152
Battery Charger CB-2LF/CB-2LFE ...................................... 152
Index..................................................................................... 153
Wi-Fi (Wireless LAN) Precautions ........................................ 155
Radio Wave Interference Precautions .....................................155
Security Precautions ................................................................155
Trademarks and Licensing ..................................................156
Disclaimer ............................................................................157
Before Use
Basic Guide
Advanced Guide
Camera Basics
Auto Mode /
Hybrid Auto Mode
Other Shooting Modes
P Mode
Playback Mode
Wi-Fi Functions
Setting Menu
Accessories
Appendix
Index
10
Page 11
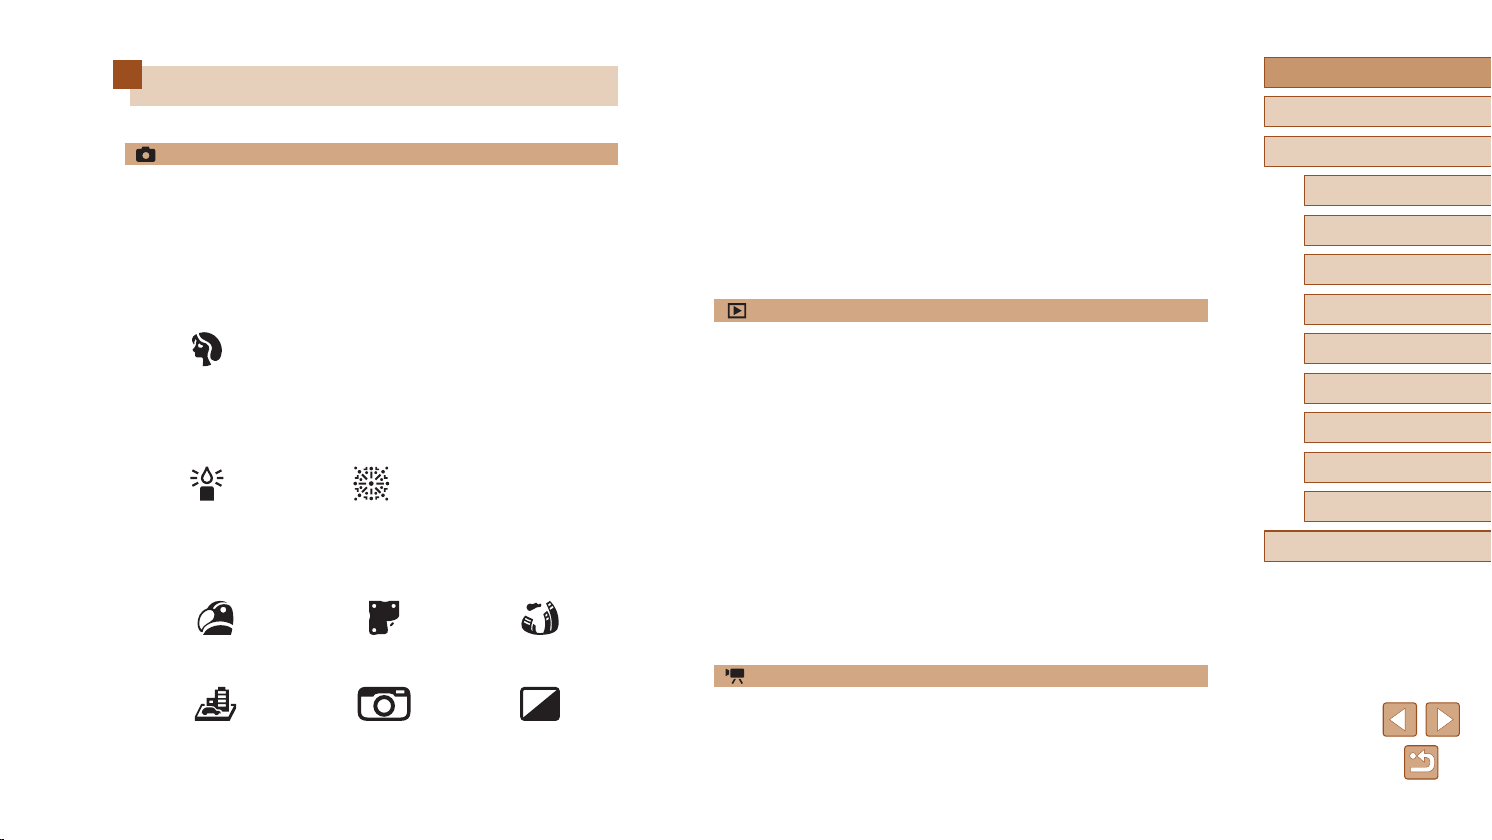
Common Camera Operations
Shoot
● Use camera-determined settings (Auto Mode, Hybrid Auto Mode)
=
-
28, =
30
● See several effects applied to each shot, using camera-determined
settings (Creative Shot Mode)
=
44
-
● Focus on faces
=
28, =
46, =
-
59
● Without using the ash (Flash Off)
=
37, =
-
63
● Include yourself in the shot (Self-Timer)
=
36, =
-
51
● Add a date stamp
=
37
-
● Movie clips and photos together (Movie Digest)
=
30
-
Before Use
Basic Guide
Advanced Guide
Camera Basics
Auto Mode /
Hybrid Auto Mode
Other Shooting Modes
Shooting people well
Portraits
(=
46)
Matching specic scenes
Low Light
(=
46)
Applying special effects
Vivid Colors
(=
47)
Miniature Effect
(=
48)
Fireworks
(=
46)
Poster Effect
(=
47)
Toy Camera Effect
(=
49)
Fish-Eye Effect
(=
47)
Monochrome
(=
49)
View
● View images (Playback Mode)
=
-
64
● Automatic playback (Slideshow)
=
70
-
● On a TV
=
123
-
● On a computer
=
125
-
● Browse through images quickly
=
67
-
● Erase images
=
74
-
● Create an album automatically
=
84
-
Record/View Movies
● Record movies
=
-
28
● View movies (Playback Mode)
=
64
-
P Mode
Playback Mode
Wi-Fi Functions
Setting Menu
Accessories
Appendix
Index
11
Page 12
Print
● Print pictures
=
-
127
Save
● Save images to a computer via a cable
=
-
126
Use Wi-Fi Functions
● Send images to a smartphone
=
-
88
● Share images online
=
99
-
● Send images to a computer
=
94
-
Safety Precautions
● Before using the product, ensure that you read the safety precautions
described below. Always ensure that the product is used correctly.
● The safety precautions noted here are intended to prevent you and
other persons from being injured or incurring property damage.
● Be sure to also check the guides included with any separately sold
accessories you use.
Warning
● Do not trigger the ash in close proximity to people’s eyes.
Exposure to the intense light produced by the ash could damage
eyesight. In particular, remain at least 1 meter (3.3 feet) away from infants
when using the ash.
● Store this equipment out of the reach of children and infants.
A strap wound around a child’s neck may result in asphyxiation.
If your product uses a power cord, mistakenly winding the cord around a
child’s neck may result in asphyxiation.
● Use only recommended power sources.
● Do not disassemble, alter, or apply heat to the product.
● Do not peel off the adhesive covering, if the battery pack has it.
● Avoid dropping or subjecting the product to severe impacts.
● Do not touch the interior of the product if it is broken, such as when
dropped.
● Stop using the product immediately if it emits smoke or a strange
smell, or otherwise behaves abnormally.
● Do not use organic solvents such as alcohol, benzine, or thinner to
clean the product.
Denotes the possibility of serious injury or death.
Before Use
Basic Guide
Advanced Guide
Camera Basics
Auto Mode /
Hybrid Auto Mode
Other Shooting Modes
P Mode
Playback Mode
Wi-Fi Functions
Setting Menu
Accessories
Appendix
Index
12
Page 13
● Avoid contact with liquid, and do not allow liquid or foreign objects
inside.
This could result in electrical shock or re.
If the product gets wet, or if liquid or foreign objects get inside, remove the
battery pack/batteries or unplug immediately.
● If your model has a viewnder or interchangeable lens, do not look
through the viewnder or lens at bright light sources (such as the sun
on a clear day, or a bright articial light source).
This may damage your eyesight.
● If your model has an interchangeable lens, do not leave the lens (or
the camera with the lens attached) in the sun without the lens cap on.
This could result in a re.
● Do not touch the product during thunderstorms if it is plugged in.
This could result in electrical shock or re. Immediately stop using the
product and distance yourself from it.
● Use only the recommended battery pack/batteries.
● Do not place the battery pack/batteries near or in direct ame.
This may cause the battery pack/batteries to explode or leak, resulting in
electrical shock, re, or injuries. If leaking battery electrolyte comes into
contact with eyes, mouth, skin, or clothing, immediately ush with water.
● If the product uses a battery charger, note the following precautions.
- Remove the plug periodically and, using a dry cloth, wipe away any
dust and dirt that has collected on the plug, the exterior of the power
outlet, and the surrounding area.
- Do not insert or remove the plug with wet hands.
- Do not use the equipment in a manner that exceeds the rated
capacity of the electrical outlet or wiring accessories. Do not use if
the plug is damaged or not fully inserted in the outlet.
- Do not allow dust or metal objects (such as pins or keys) to contact
the terminals or plug.
- Do not cut, damage, alter, or place heavy items on the power cord, if
your product uses one.
This could result in electrical shock or re.
● Turn the camera off in places where camera use is prohibited.
The electromagnetic waves emitted by the camera may interfere with the
operation of electronic instruments and other devices. Exercise adequate
caution when using the product in places where use of electronic devices
is restricted, such as inside airplanes and medical facilities.
● Do not allow the camera to maintain contact with skin for extended
periods.
Even if the camera does not feel hot, this may cause low-temperature
burns, manifested in redness of the skin or blistering. Use a tripod in hot
places, or if you have poor circulation or insensitive skin.
Caution
Denotes the possibility of injury.
● When carrying the product by the strap, be careful not to bang it,
subject it to strong impacts or shocks, or let it get caught on other
objects.
● Be careful not to bump or push strongly on the lens.
This could lead to injury or damage the camera.
● Be careful not to subject the screen to strong impacts.
If the screen cracks, injury may result from the broken fragments.
● When using the ash, be careful not to cover it with your ngers or
clothing.
This could result in burns or damage to the ash.
● Avoid using, placing, or storing the product in the following places:
- Places subject to direct sunlight
- Places subject to temperatures above 40 °C (104 °F)
- Humid or dusty places
These could cause leakage, overheating, or an explosion of the battery
pack/batteries, resulting in electrical shock, re, burns, or other injuries.
Overheating and damage may result in electrical shock, re, burns, or
other injuries.
● The slideshow transition effects may cause discomfort when viewed
for prolonged periods.
Before Use
Basic Guide
Advanced Guide
Camera Basics
Auto Mode /
Hybrid Auto Mode
Other Shooting Modes
P Mode
Playback Mode
Wi-Fi Functions
Setting Menu
Accessories
Appendix
Index
13
Page 14
● When using optional lenses, lens lters, or lter adapters (if
applicable), be sure to attach these accessories rmly.
If the lens accessory becomes loose and falls off, it may crack, and the
shards of glass may lead to cuts.
● On products that raise and lower the ash automatically, make sure to
avoid pinching your ngers with the lowering ash.
This could result in injury.
Caution
Denotes the possibility of property damage.
● Do not aim the camera at intense light sources, such as the sun on a
clear day or an intense articial light source.
Doing so may damage the image sensor or other internal components.
● When using the camera on a sandy beach or at a windy location, be
careful not to allow dust or sand to enter the camera.
● On products that raise and lower the ash automatically, do not push
the ash down or pry it open.
This may cause the product to malfunction.
● Wipe off any dust, grime, or other foreign matter on the ash with a
cotton swab or cloth.
The heat emitted from the ash may cause foreign matter to smoke or the
product to malfunction.
● Remove and store the battery pack/batteries when you are not using
the product.
Any battery leakage that occurs may cause product damage.
● Before you discard the battery pack/batteries, cover the terminals with
tape or other insulators.
Contacting other metal materials may lead to re or explosions.
● Do not leave any dedicated battery packs near pets.
Pets biting the battery pack could cause leakage, overheating, or
explosion, resulting in product damage or re.
● If your product uses multiple batteries, do not use batteries that
have different levels of charge together, and do not use old and
new batteries together. Do not insert the batteries with the + and –
terminals reversed.
This may cause the product to malfunction.
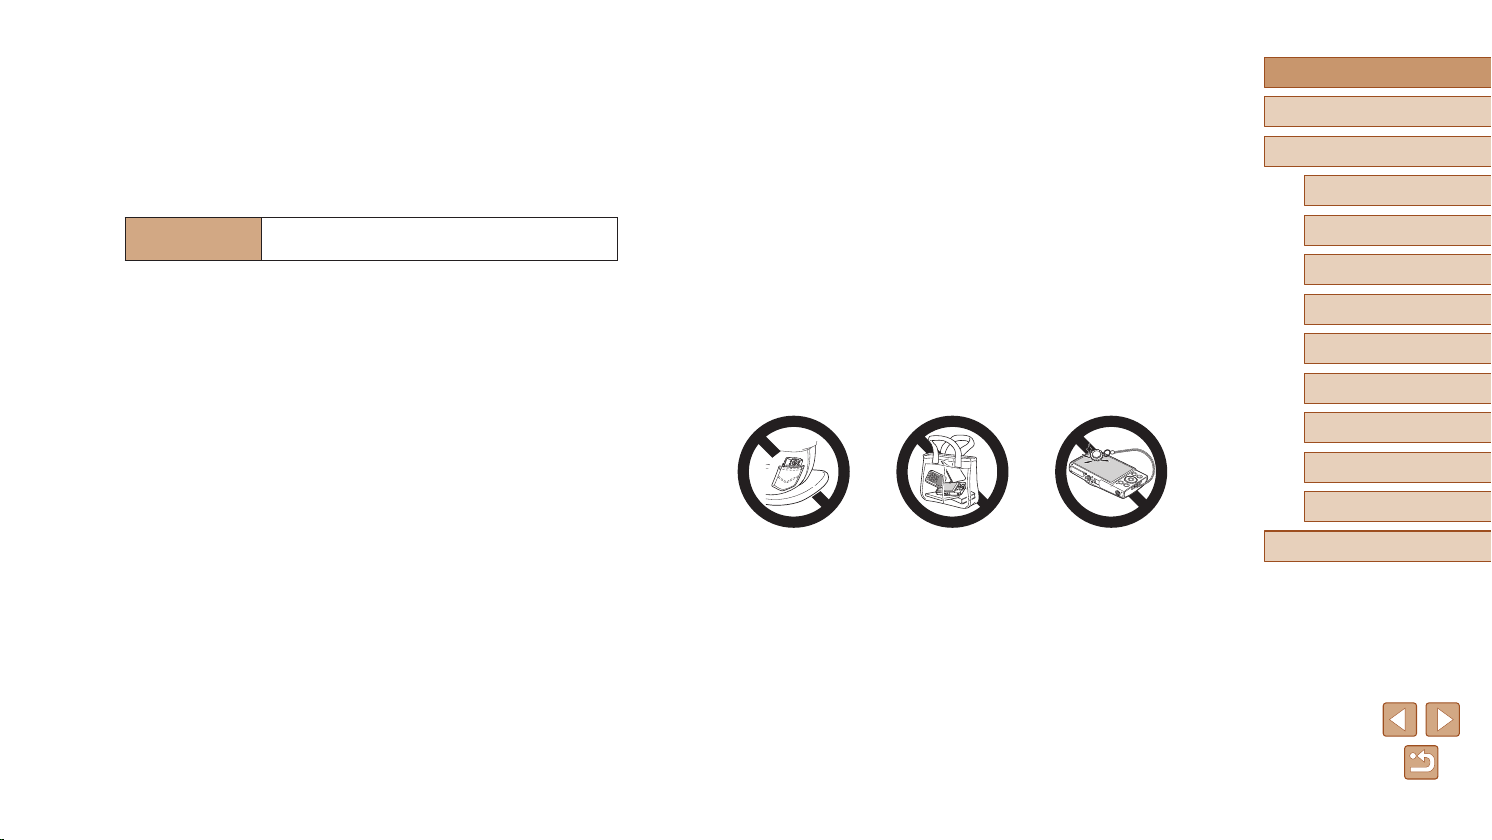
● Do not sit down with the camera in your pant pocket.
Doing so may cause malfunctions or damage the screen.
● When putting the camera in your bag, ensure that hard objects do not
come into contact with the screen. Also close the screen (so that it
faces the body), if your product’s screen closes.
● Do not attach any hard objects to the product.
Doing so may cause malfunctions or damage the screen.
Before Use
Basic Guide
Advanced Guide
Camera Basics
Auto Mode /
Hybrid Auto Mode
Other Shooting Modes
P Mode
Playback Mode
Wi-Fi Functions
Setting Menu
Accessories
Appendix
Index
● Unplug any battery charger used with the product when not in use. Do
not cover with a cloth or other objects when in use.
Leaving the unit plugged in for a long period of time may cause it to
overheat and distort, resulting in re.
14
Page 15
Basic Guide
Basic Operations
Basic information and instructions, from initial preparations to shooting
and playback
Initial Preparations
Prepare for shooting as follows.
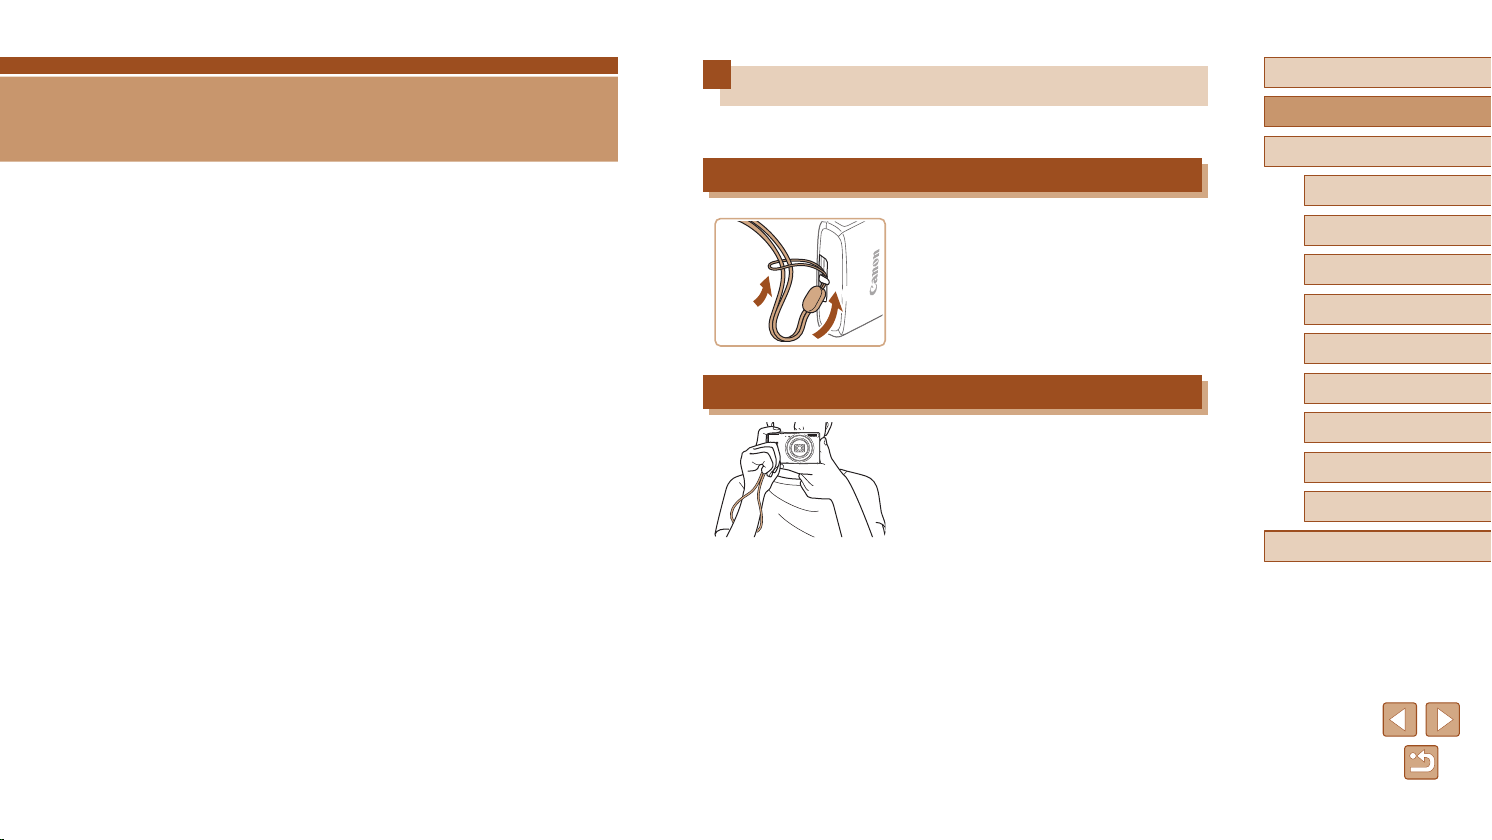
Attaching the Strap
(2)
(1)
● Thread the end of the strap through the
strap mount (1), and then pull the other
end of the strap through the loop on the
threaded end (2).
Before Use
Basic Guide
Advanced Guide
Camera Basics
Auto Mode /
Hybrid Auto Mode
Other Shooting Modes
P Mode
Playback Mode
Holding the Camera
● Place the strap around your wrist.
● When shooting, keep your arms close to
your body and hold the camera securely
to prevent it from moving. Do not rest
your ngers on the ash.
Wi-Fi Functions
Setting Menu
Accessories
Appendix
Index
15
Page 16
(1)
(2)
Charging the Battery Pack
Before use, charge the battery pack with the included charger. Be sure to
charge the battery pack initially, because the camera is not sold with the
battery pack charged.
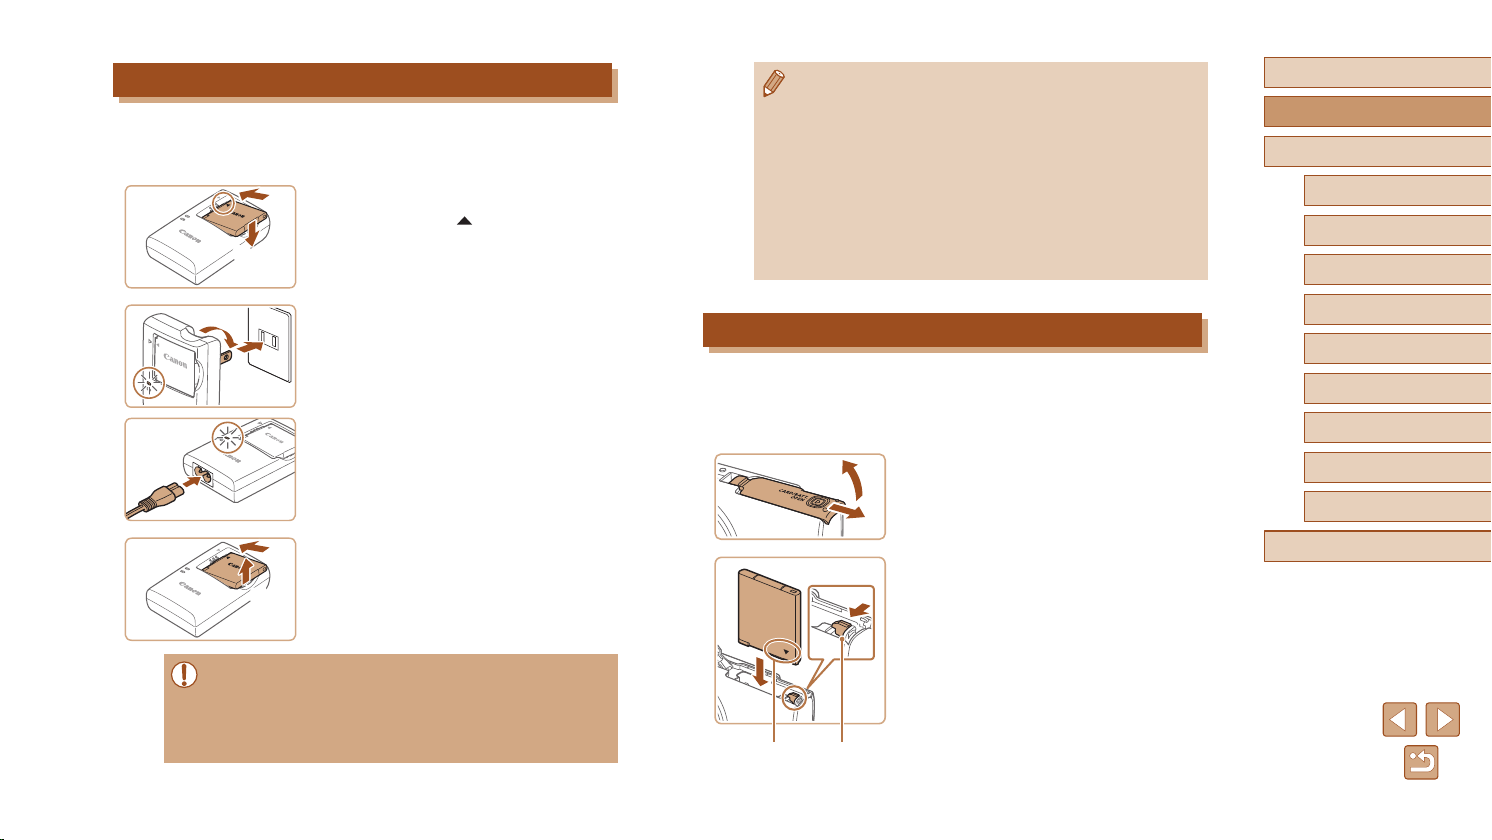
Insert the battery pack.
1
(1)
(2)
● After aligning the marks on the battery
pack and charger, insert the battery pack
by pushing it in (1) and down (2).
● For details on charging time and the number of shots and
recording time possible with a fully charged battery pack, see
“Number of Shots/Recording Time, Playback Time” (
● Charged battery packs gradually lose their charge, even when
they are not used. Charge the battery pack on (or immediately
before) the day of use.
● The charger can be used in areas with 100 – 240 V AC power
(50/60 Hz). For power outlets in a different format, use a
commercially available adapter for the plug. Never use an
electrical transformer designed for traveling, which may damage
the battery pack.
=
150).
Before Use
Basic Guide
Advanced Guide
Camera Basics
Auto Mode /
Hybrid Auto Mode
Other Shooting Modes
Charge the battery pack.
(2)
(1)
2
● CB-2LF: Flip out the plug (1) and plug the
charger into a power outlet (2).
● CB-2LFE: Plug the power cord into the
charger, then plug the other end into a
power outlet.
● The charging lamp turns orange, and
charging begins.
● When charging is nished, the lamp turns
green.
Remove the battery pack.
3
● After unplugging the battery charger,
remove the battery pack by pushing it in
(1) and up (2).
(1)
CB-2LF
CB-2LFE
(2)
● To protect the battery pack and keep it in optimal condition, do not
charge it continuously for more than 24 hours.
● For battery chargers that use a power cord, do not attach
the charger or cord to other objects. Doing so could result in
malfunction or damage to the product.
Inserting the Battery Pack and Memory Card
Insert the included battery pack and a memory card (sold separately).
Note that before using a memory card that is new or has been formatted
in another device, you should format the memory card with this camera
(=
117).
Open the cover.
(1)
1
● Slide the cover (1) and open it (2).
Insert the battery pack.
2
● Holding the battery pack with the
terminals (1) facing as shown, press the
battery lock (2) in the direction of the
arrow and insert the battery pack until the
lock clicks shut.
● If you insert the battery pack facing the
wrong way, it cannot be locked into the
correct position. Always conrm that the
battery pack is facing the right way and
locks when inserted.
(2)
P Mode
Playback Mode
Wi-Fi Functions
Setting Menu
Accessories
Appendix
Index
16
Page 17
(1)
(2)
(1)
(2)
● For guidelines on how many shots or hours of recording can be
saved on one memory card, see “Number of Shots per Memory
=
Card” (
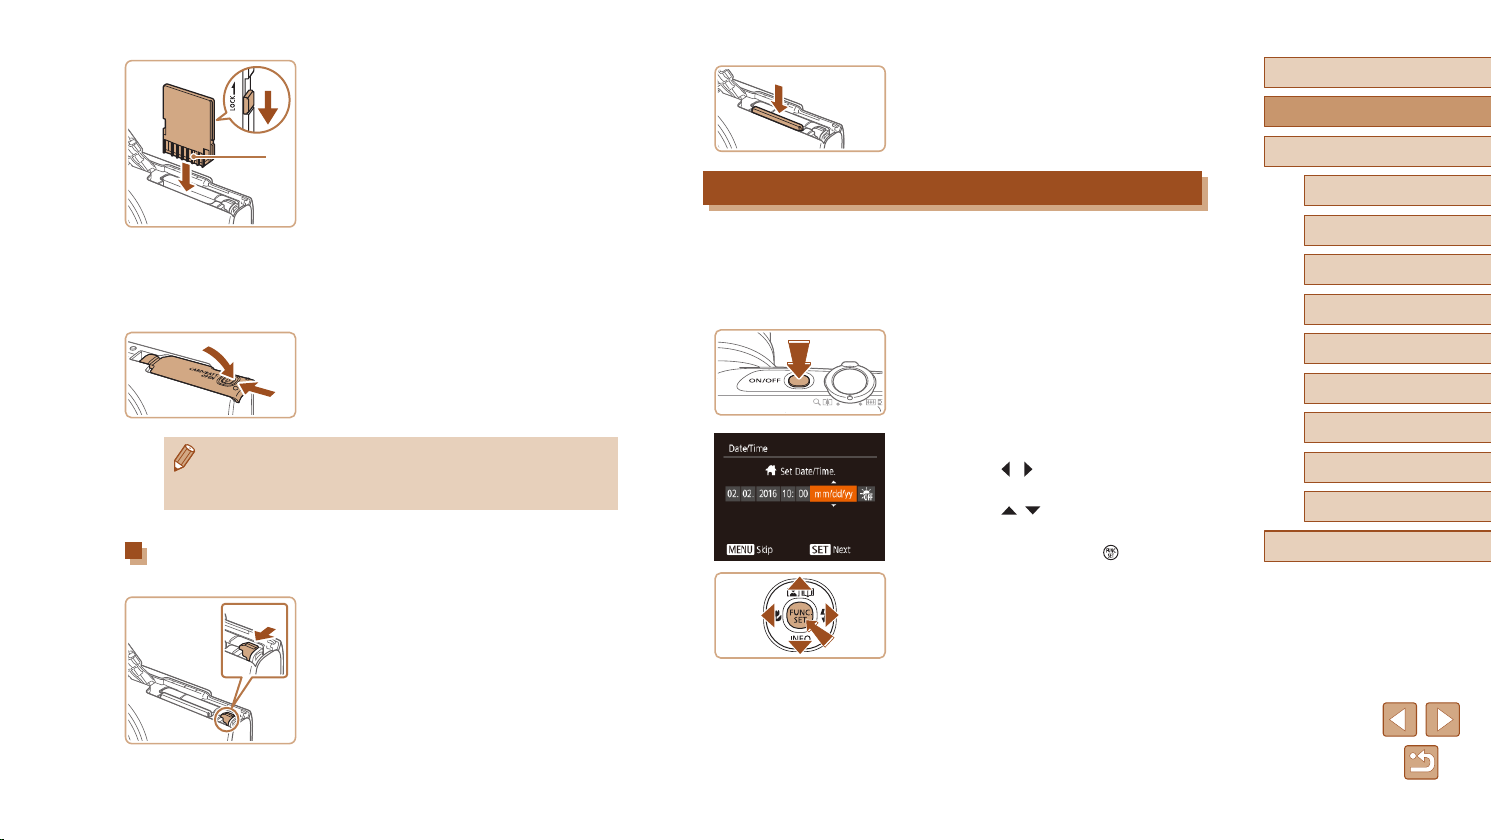
switch and insert the memory card.
● Recording is not possible on memory
cards with a write-protect switch when the
switch is in the locked position. Move the
switch toward (1).
● Insert the memory card with the terminals
(2) facing as shown until it clicks into
place.
● Make sure the memory card is facing the
right way when you insert it. Inserting
memory cards facing the wrong way may
damage the camera.
Close the cover.
4
● Lower the cover (1) and hold it down as
you slide it, until it clicks into the closed
position (2).
151).
Check your card’s write-protect
3
Removing the Battery Pack and Memory Card
Remove the battery pack.
● Open the cover and press the battery
lock in the direction of the arrow.
● The battery pack will pop up.
Remove the memory card.
● Push the memory card in until it clicks,
and then slowly release it.
● The memory card will pop up.
Setting the Date and Time
Set the current date and time correctly as follows if the [Date/Time] screen
is displayed when you turn the camera on. Information you specify this
way is recorded in image properties when you shoot, and it is used when
you manage images by shooting date or print images showing the date.
You can also add a date stamp to shots, if you wish (=
Turn the camera on.
1
● Press the power button.
● The [Date/Time] screen is displayed.
Set the date and time.
2
● Press the [ ][ ] buttons to choose an
item.
● Press the [
date and time.
● When nished, press the [
][ ] buttons to specify the
37).
] button.
Before Use
Basic Guide
Advanced Guide
Camera Basics
Auto Mode /
Hybrid Auto Mode
Other Shooting Modes
P Mode
Playback Mode
Wi-Fi Functions
Setting Menu
Accessories
Appendix
Index
17
Page 18
Specify your home time zone.
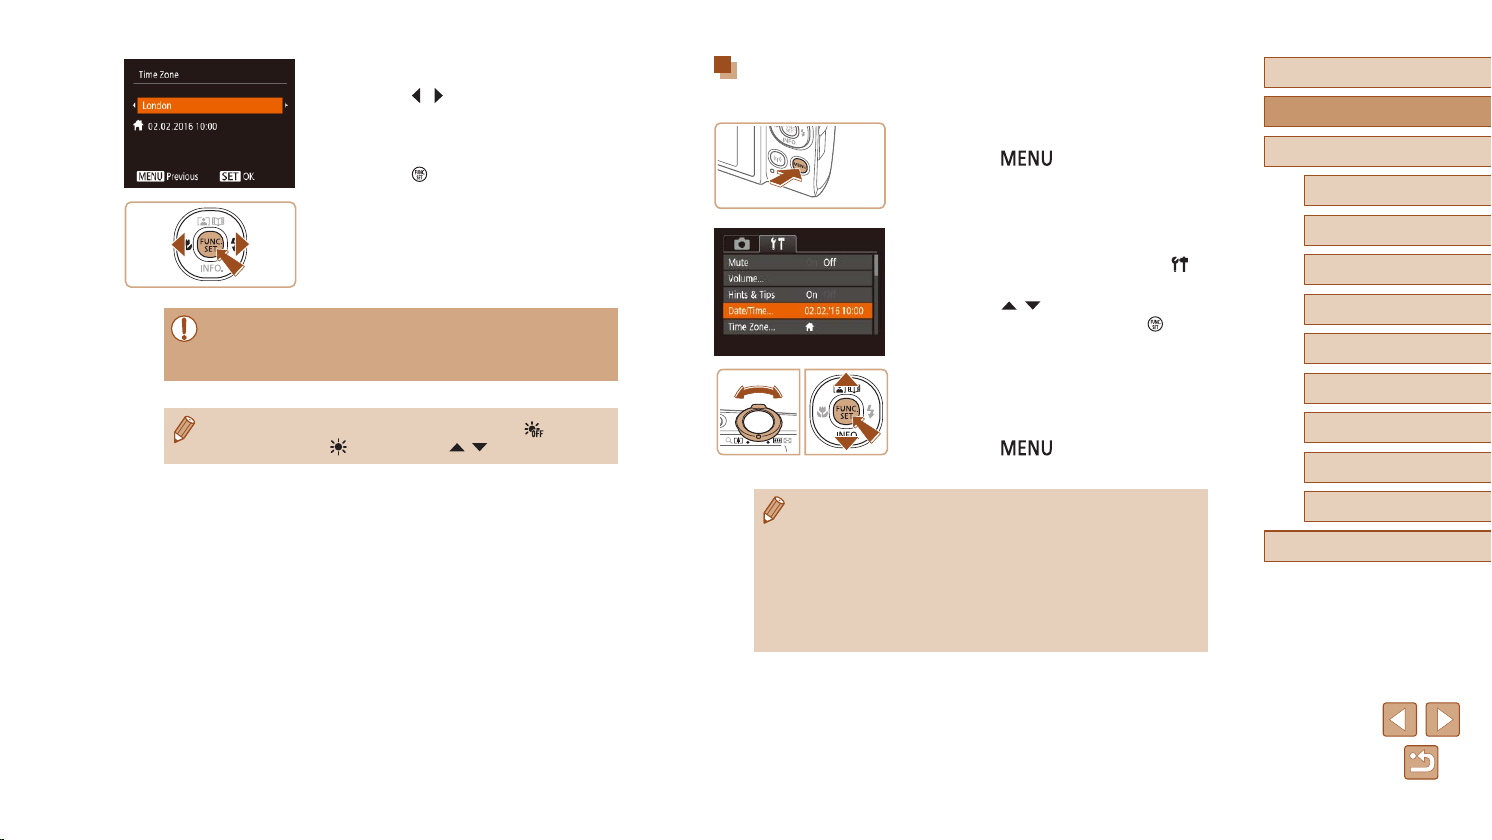
3
● Press the [ ][ ] buttons to choose your
home time zone.
Finish the setup process.
4
● Press the [ ] button when nished.
After a conrmation message, the setting
screen is no longer displayed.
● To turn off the camera, press the power
button.
● Unless you set the date, time, and home time zone, the [Date/
Time] screen will be displayed each time you turn the camera on.
Specify the correct information.
● To set daylight saving time (1 hour ahead), choose [ ] in step 2
and then choose [
] by pressing the [ ][ ] buttons.
Changing the Date and Time
Adjust the date and time as follows.
Access the menu screen.
1
● Press the [ ] button.
Choose [Date/Time].
2
● Move the zoom lever to choose the [ ]
tab.
● Press the [
[Date/Time], and then press the [ ]
button.
Change the date and time.
3
● Follow step 2 in “Setting the Date and
Time” (=
● Press the [
menu screen.
][ ] buttons to choose
17) to adjust the settings.
] button to close the
Before Use
Basic Guide
Advanced Guide
Camera Basics
Auto Mode /
Hybrid Auto Mode
Other Shooting Modes
P Mode
Playback Mode
Wi-Fi Functions
Setting Menu
Accessories
● Date/time settings can be retained for about 3 weeks by the
camera’s built-in date/time battery (backup battery) after the
battery pack is removed.
● The date/time battery will be charged in about 4 hours once you
insert a charged battery pack, even if the camera is left off.
● Once the date/time battery is depleted, the [Date/Time] screen will
be displayed when you turn the camera on. Set the correct date
and time as described in “Setting the Date and Time” (
=
17).
Appendix
Index
18
Page 19
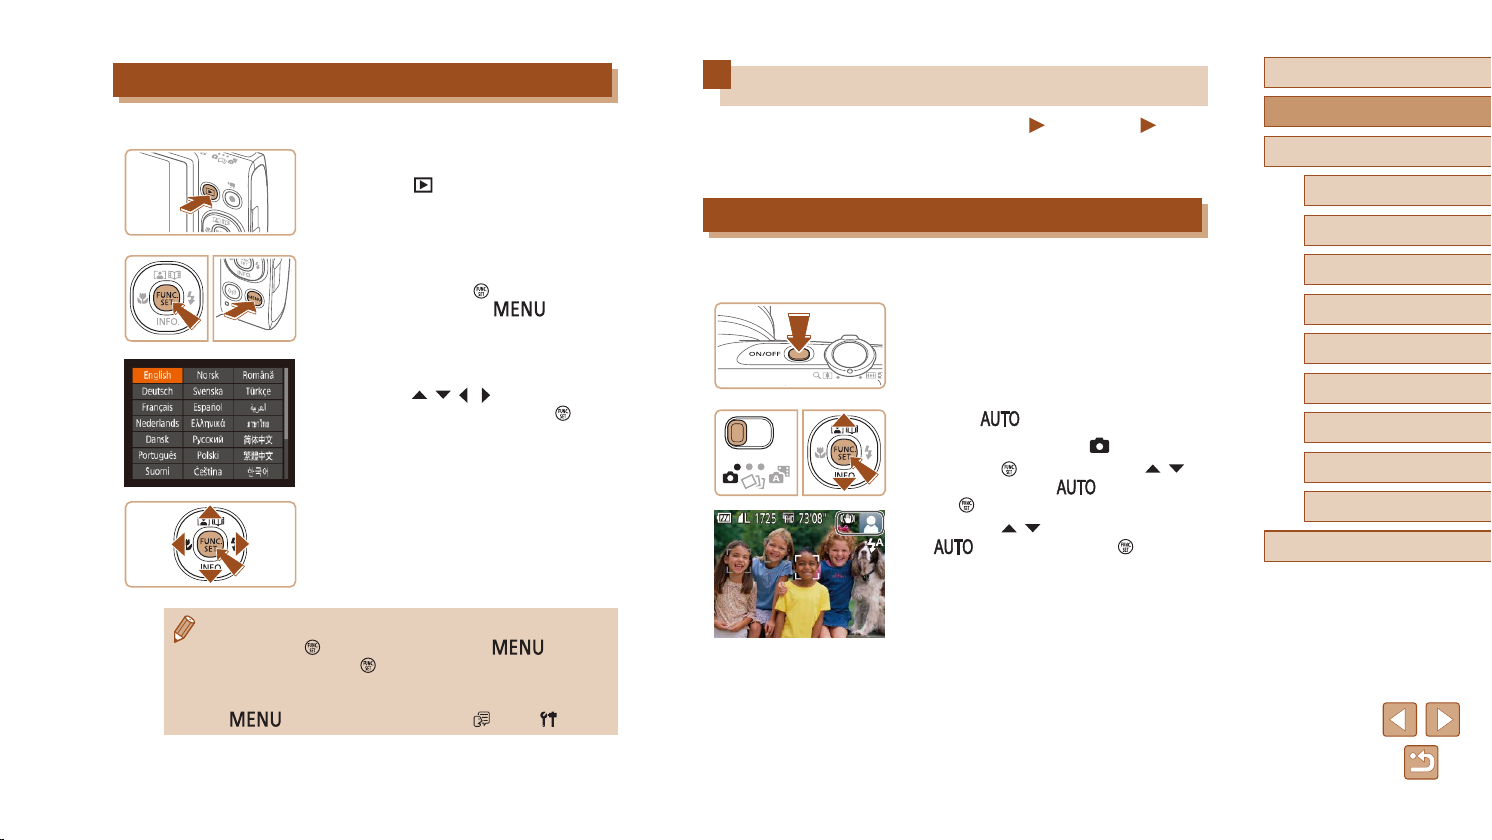
Display Language
Change the display language as needed.
Enter Playback mode.
1
● Press the [ ] button.
Access the setting screen.
2
● Press and hold the [ ] button, and then
immediately press the [ ] button.
Set the display language.
3
● Press the [ ][ ][ ][ ] buttons to choose
a language, and then press the [ ]
button.
● Once the display language has been set,
the setting screen is no longer displayed.
● The current time is displayed if you wait too long in step 2 after
pressing the [
In this case, press the [
repeat step 2.
● You can also change the display language by pressing the
[
] button before you press the [ ] button.
] button to dismiss the time display and
] button and choosing [Language ] on the [ ] tab.
Trying the Camera Out
Still Images
Follow these instructions to turn the camera on, shoot still images or
movies, and then view them.
Shooting (Smart Auto)
For fully automatic selection of the optimal settings for specic scenes,
simply let the camera determine the subject and shooting conditions.
Turn the camera on.
1
● Press the power button.
● The startup screen is displayed.
Enter [ ] mode.
2
● Set the mode switch to [ ].
● Press the [
buttons to choose [ ], and then press
the [ ] button again.
● Press the [
[ ], and then press the [ ] button.
● Aim the camera at the subject. The
camera will make a slight clicking noise
as it determines the scene.
● Icons representing the scene and image
stabilization mode are displayed in the
upper right of the screen.
● Frames displayed around any detected
subjects indicate that they are in focus.
] button, press the [ ][ ]
][ ] buttons to choose
Movies
Before Use
Basic Guide
Advanced Guide
Camera Basics
Auto Mode /
Hybrid Auto Mode
Other Shooting Modes
P Mode
Playback Mode
Wi-Fi Functions
Setting Menu
Accessories
Appendix
Index
19
Page 20
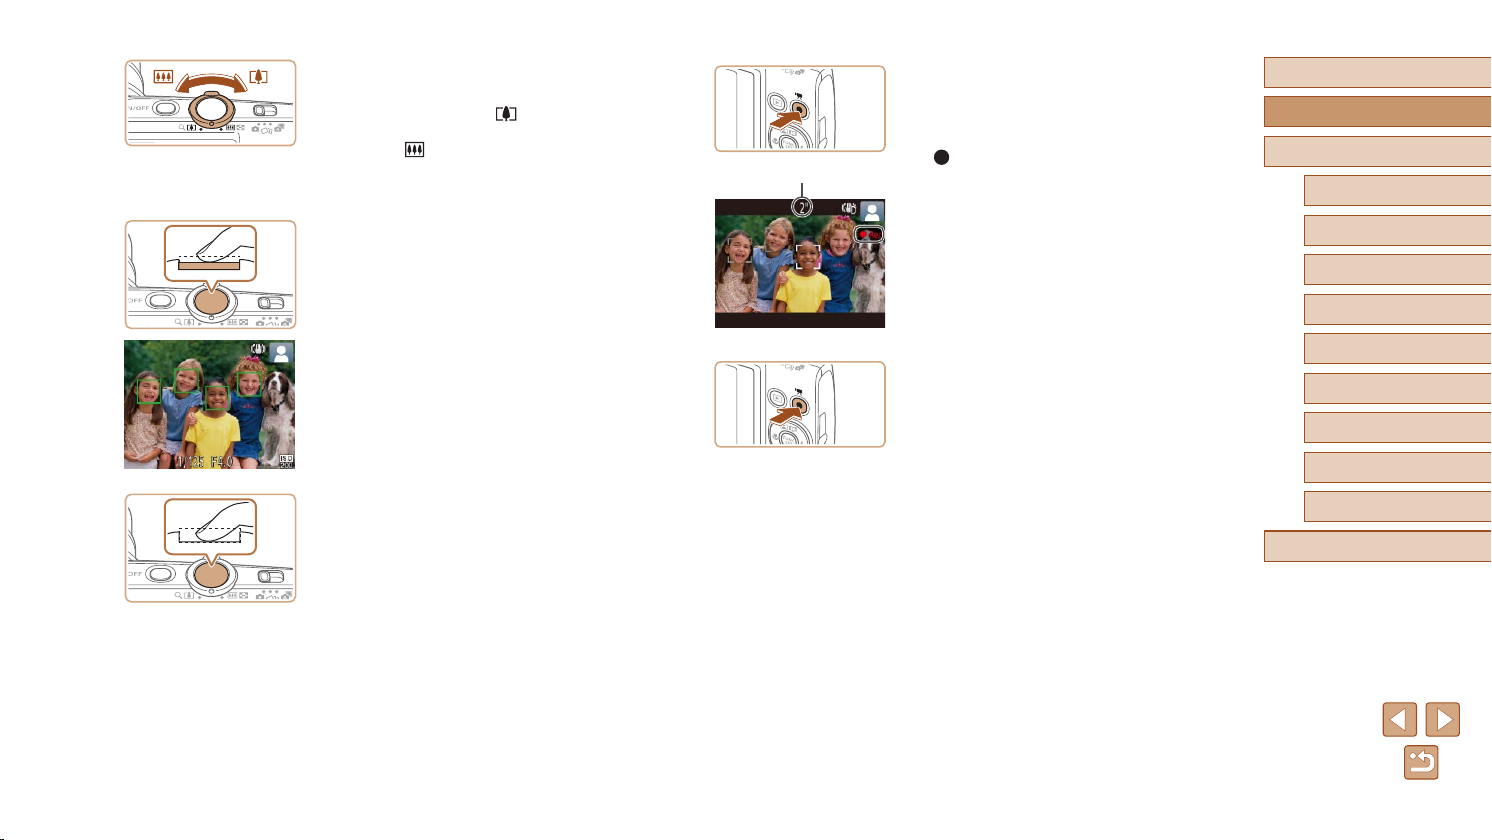
(1)
Compose the shot.
3
● To zoom in and enlarge the subject, move
the zoom lever toward [ ] (telephoto),
and to zoom away from the subject, move
it toward [ ] (wide angle).
Shoot.
4
Shooting Still Images
1) Focus.
● Press the shutter button lightly, halfway
down. The camera beeps twice after
focusing, and frames are displayed to
indicate image areas in focus.
Recording Movies
1) Start recording.
● Press the movie button. The camera
beeps once as recording begins, and
[ Rec] is displayed with the elapsed
time (1).
● Black bars are displayed on the top and
bottom edges of the screen, and the
subject is slightly enlarged. The black
bars indicate image areas not recorded.
● Frames displayed around any detected
faces indicate that they are in focus.
● Once recording begins, take your nger
off the movie button.
2) Finish recording.
● Press the movie button again to stop
recording. The camera beeps twice as
recording stops.
Before Use
Basic Guide
Advanced Guide
Camera Basics
Auto Mode /
Hybrid Auto Mode
Other Shooting Modes
P Mode
Playback Mode
Wi-Fi Functions
Setting Menu
Accessories
2) Shoot.
● Press the shutter button all the way
down.
● As the camera shoots, a shutter sound
is played, and in low-light conditions, the
ash res automatically.
● Keep the camera still until the shutter
sound ends.
● After displaying your shot, the camera will
revert to the shooting screen.
Appendix
Index
20
Page 21
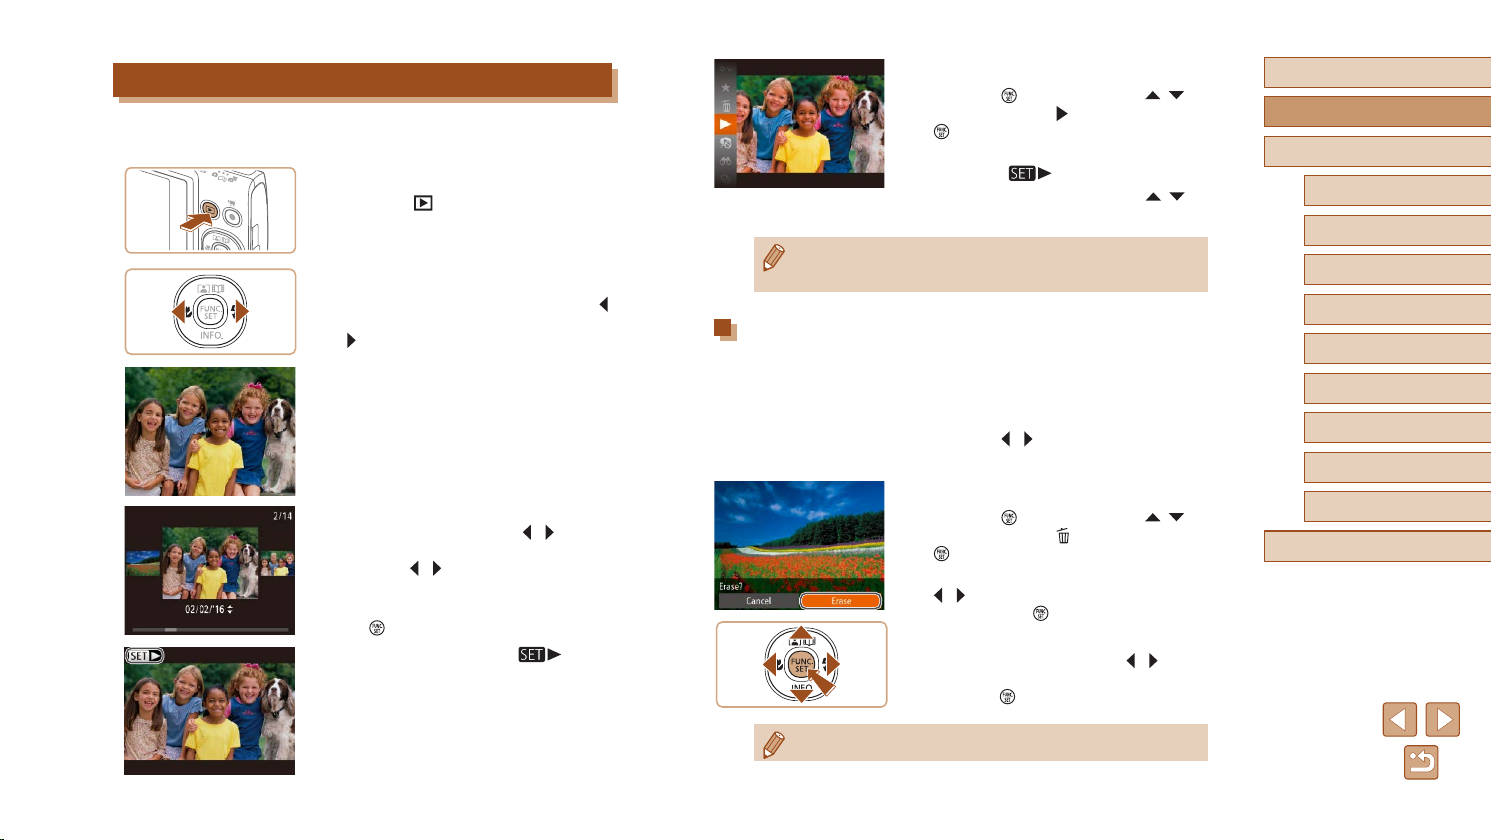
Viewing
After shooting images or movies, you can view them on the screen as
follows.
Enter Playback mode.
1
● Press the [ ] button.
● Your last shot is displayed.
Choose images.
2
● To view the previous image, press the [ ]
button. To view the next image, press the
[ ] button.
● To access this screen (Scroll Display
mode), press and hold the [
for at least one second. In this mode,
press the [ ][ ] buttons to browse
through images.
● To return to single-image display, press
] button.
the [
● Movies are identied by a [
To play movies, go to step 3.
][ ] buttons
] icon.
Play movies.
3
● Press the [ ] button, press the [ ][ ]
buttons to choose [ ], and then press the
[ ] button again.
● Playback now begins, and after the movie
is nished, [
● To adjust the volume, press the [
buttons during playback.
● To switch to Shooting mode from Playback mode, press the
shutter button halfway.
] is displayed.
Erasing Images
You can choose and erase unneeded images one by one. Be careful
when erasing images, because they cannot be recovered.
Choose an image to erase.
1
● Press the [ ][ ] buttons to choose an
image.
Erase the image.
2
● Press the [ ] button, press the [ ][ ]
buttons to choose [ ], and then press the
[ ] button again.
● After [Erase?] is displayed, press the
][ ] buttons to choose [Erase], and
[
then press the [ ] button.
● The current image is now erased.
● To cancel erasure, press the [
buttons to choose [Cancel], and then
press the [ ] button.
][ ]
][ ]
Before Use
Basic Guide
Advanced Guide
Camera Basics
Auto Mode /
Hybrid Auto Mode
Other Shooting Modes
P Mode
Playback Mode
Wi-Fi Functions
Setting Menu
Accessories
Appendix
Index
● You can choose multiple images to erase at once (=
75).
21
Page 22
Advanced Guide
Camera Basics
Other basic operations and more ways to enjoy your camera, including
shooting and playback options
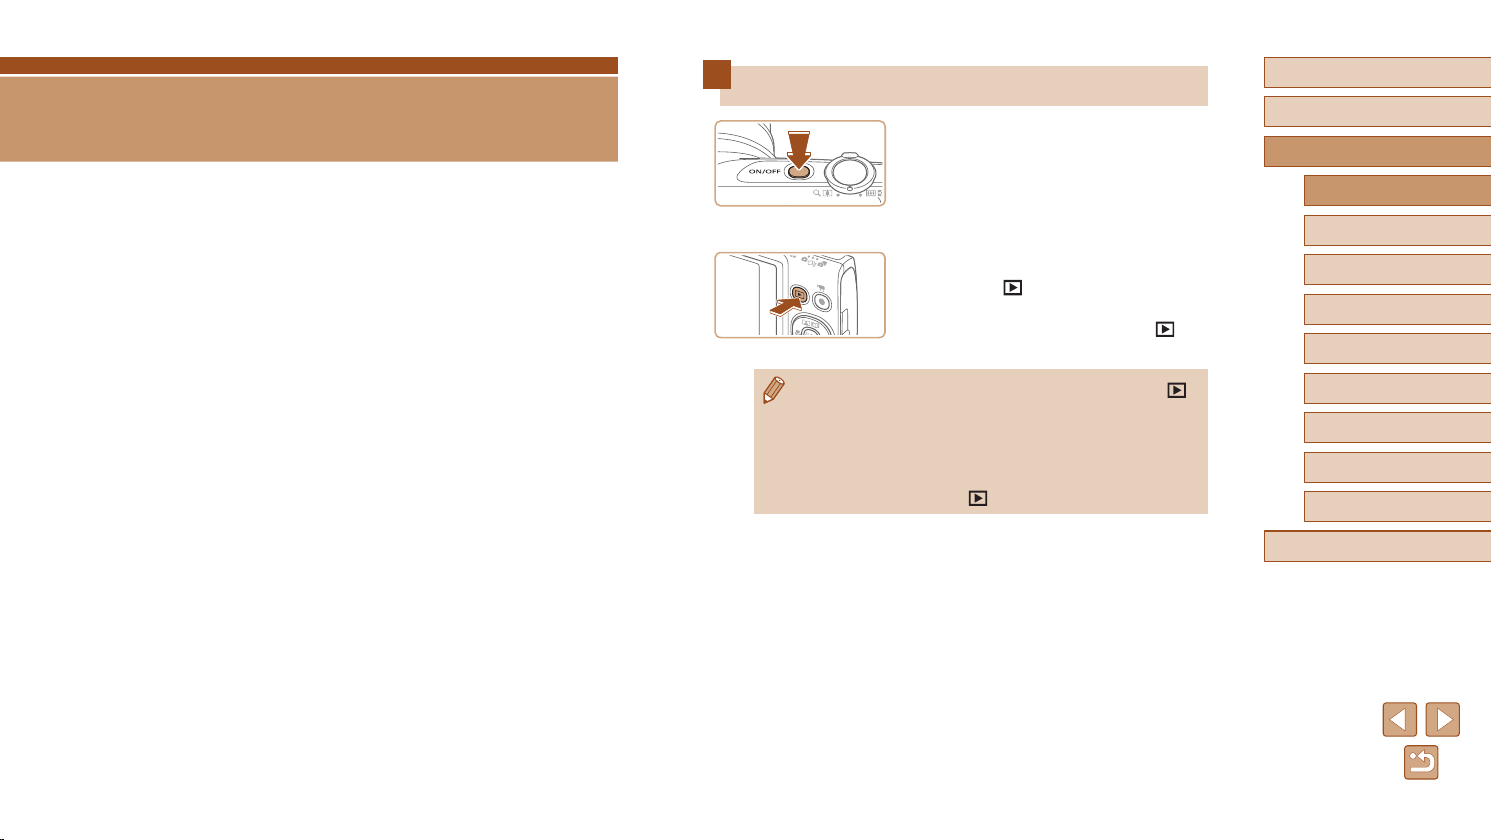
On/Off
Shooting Mode
● Press the power button to turn the
camera on and prepare for shooting.
● To turn the camera off, press the power
button again.
Playback Mode
● Press the [ ] button to turn the camera
on and view your shots.
● To turn the camera off, press the [
button again.
Before Use
Basic Guide
Advanced Guide
Camera Basics
Auto Mode /
Hybrid Auto Mode
Other Shooting Modes
P Mode
]
Playback Mode
● To switch to Playback mode from Shooting mode, press the [ ]
button.
● To switch to Shooting mode from Playback mode, press the
shutter button halfway (
● The lens will be retracted after about one minute once the camera
is in Playback mode. You can turn the camera off when the lens is
retracted by pressing the [
=
23).
] button.
Wi-Fi Functions
Setting Menu
Accessories
Appendix
Index
22
Page 23

Power-Saving Features (Auto Power Down)
As a way to conserve battery power, the camera automatically deactivates
the screen (Display Off) and then turns itself off after a specic period of
inactivity.
Power Saving in Shooting Mode
The screen is automatically deactivated after about one minute of
inactivity. In about two more minutes, the lens is retracted and the camera
turns itself off. To activate the screen and prepare for shooting when
the screen is off but the lens is still out, press the shutter button halfway
(=
23).
Power Saving in Playback Mode
The camera turns itself off automatically after about ve minutes of
inactivity.
● You can deactivate Auto Power Down and adjust the timing of
Display Off, if you prefer (
● Power saving is not active while the camera is connected to other
devices via Wi-Fi (
=
126).
(
=
116).
=
87), or when connected to a computer
Shutter Button
To ensure your shots are in focus, always begin by holding the shutter
button halfway down, and once the subject is in focus, press the button all
the way down to shoot.
In this manual, shutter button operations are described as pressing the
button halfway or all the way down.
Press halfway. (Press lightly to
1
focus.)
● Press the shutter button halfway. The
camera beeps twice, and frames are
displayed around image areas in focus.
Press all the way down. (From the
2
halfway position, press fully to shoot.)
● The camera shoots, as a shutter sound
is played.
● Keep the camera still until the shutter
sound ends.
● Images may be out of focus if you shoot without initially pressing
the shutter button halfway.
● Length of shutter sound playback varies depending on the time
required for the shot. It may take longer in some shooting scenes,
and images will be blurry if you move the camera (or the subject
moves) before the shutter sound ends.
Before Use
Basic Guide
Advanced Guide
Camera Basics
Auto Mode /
Hybrid Auto Mode
Other Shooting Modes
P Mode
Playback Mode
Wi-Fi Functions
Setting Menu
Accessories
Appendix
Index
23
Page 24
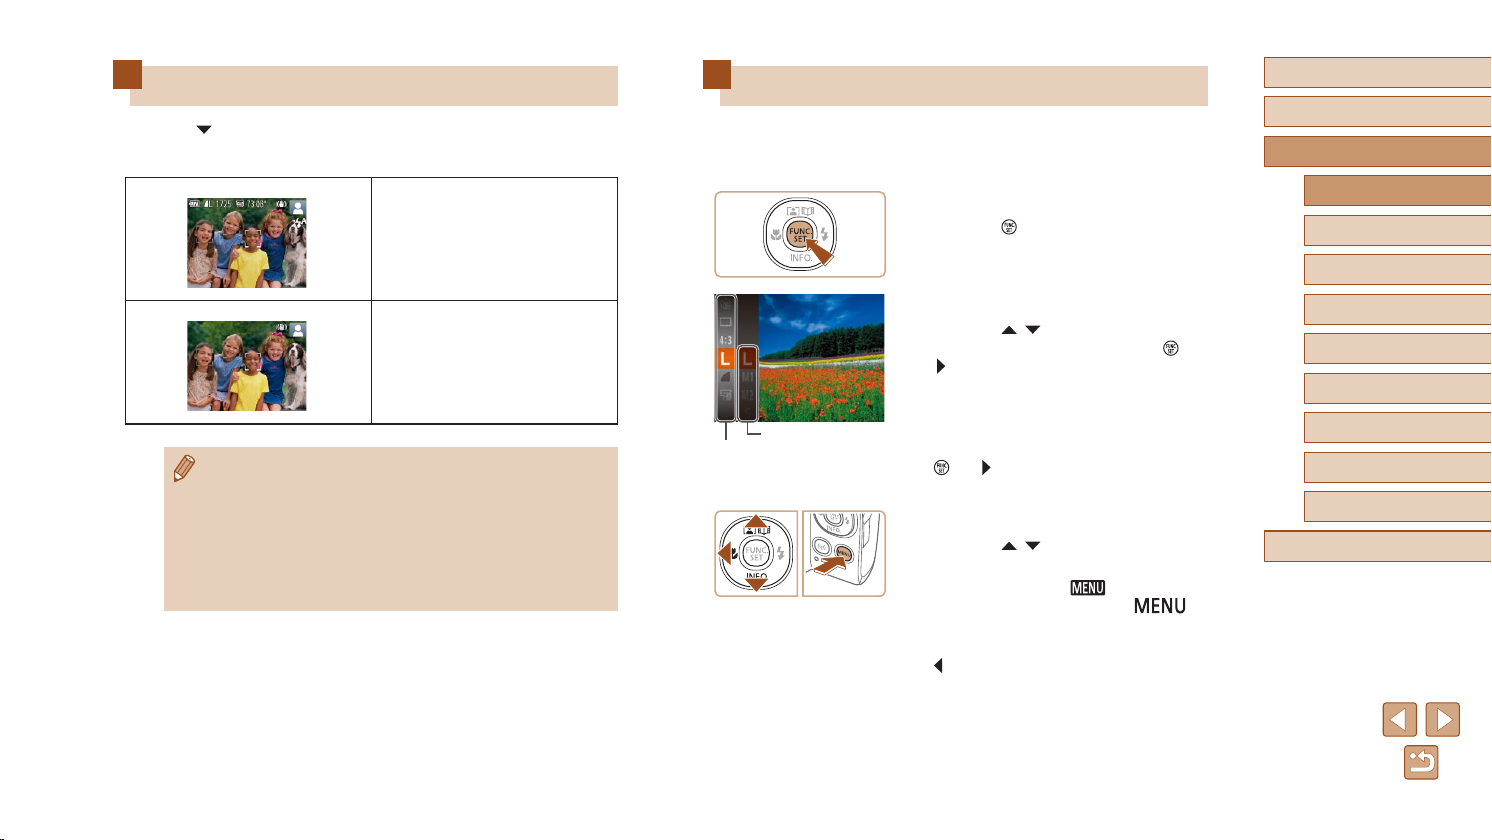
(1)
Shooting Display Options
Press the [ ] button to view other information on the screen, or to hide
the information. For details on the information displayed, see “On-Screen
Information” (=
140).
Information is displayed
No information is displayed
● Screen brightness is automatically increased by the night view
function when you are shooting under low light, making it easier
to check how shots are composed. However, on-screen image
brightness may not match the brightness of your shots. Note that
any on-screen image distortion or jerky subject motion will not
affect recorded images.
● For playback display options, see “Switching Display Modes”
=
65).
(
Using the FUNC. Menu
Congure commonly used functions through the FUNC. menu as follows.
Note that menu items and options vary depending on the shooting mode
(=
143) or playback mode (=
(2)
148).
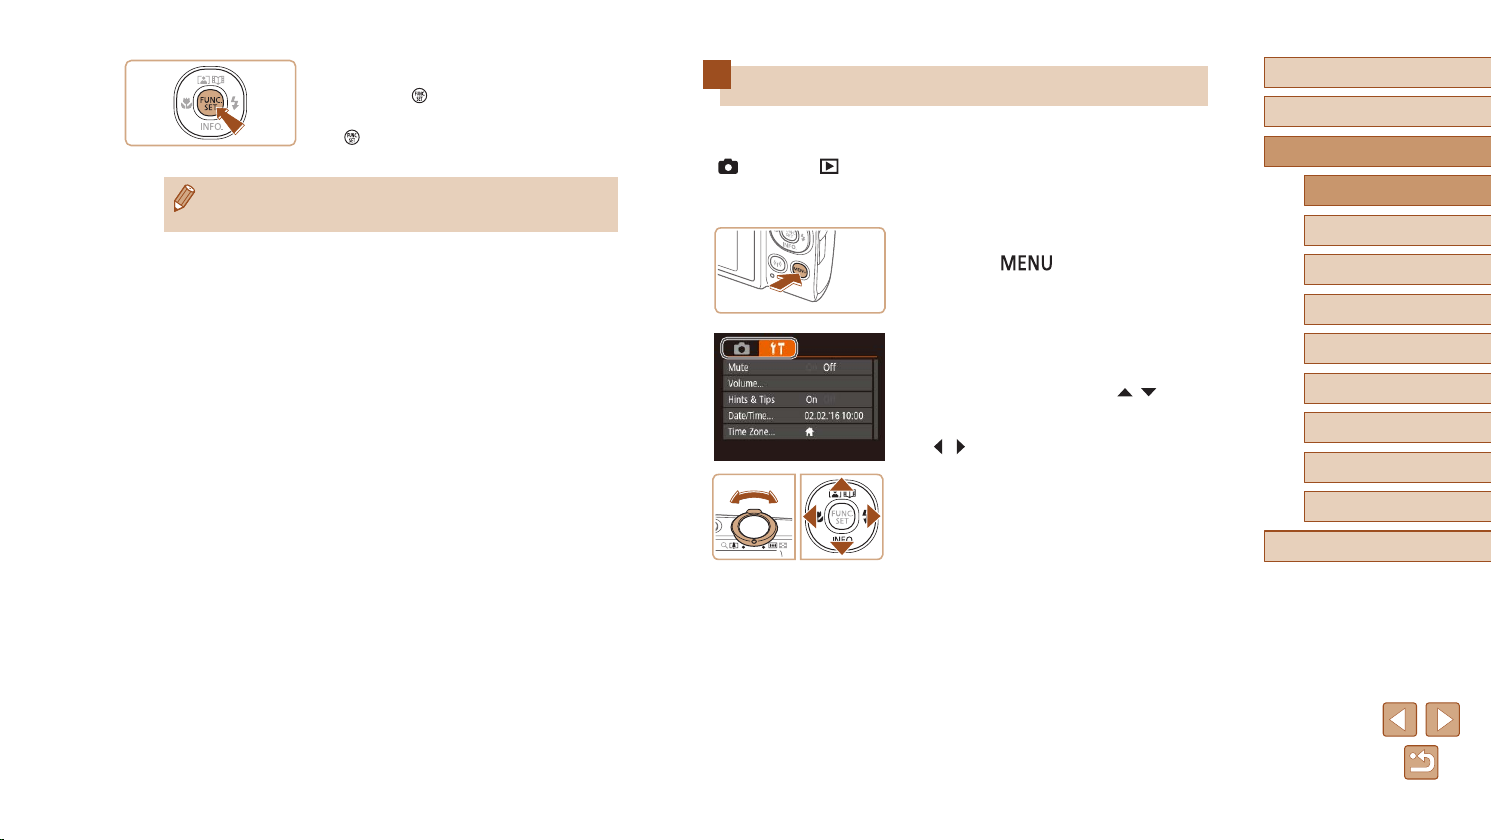
Access the FUNC. menu.
1
● Press the [ ] button.
Choose a menu item.
2
● Press the [ ][ ] buttons to choose a
menu item (1), and then press the [ ] or
[ ] button.
● Available options (2) are listed next to
menu items, on the right.
● Depending on the menu item, functions
can be specied simply by pressing the
] or [ ] button, or another screen is
[
displayed for conguring the function.
Choose an option.
3
● Press the [ ][ ] buttons to choose an
option.
● Items labeled with a [
be congured by pressing the [ ]
button.
● To return to the menu items, press the
] button.
[
] icon can
Before Use
Basic Guide
Advanced Guide
Camera Basics
Auto Mode /
Hybrid Auto Mode
Other Shooting Modes
P Mode
Playback Mode
Wi-Fi Functions
Setting Menu
Accessories
Appendix
Index
24
Page 25
Conrm your choice and exit.
4
● Press the [ ] button.
● The screen before you pressed the
] button in step 1 is displayed again,
[
showing the option you congured.
● To undo any accidental setting changes, you can restore the
camera’s default settings (
=
120).
Using the Menu Screen
Congure a variety of camera functions through the menu screen as
follows. Menu items are grouped by purpose on tabs, such as shooting
[ ], playback [ ], and so on. Note that available menu items vary
depending on the selected shooting or playback mode (=
=
148).
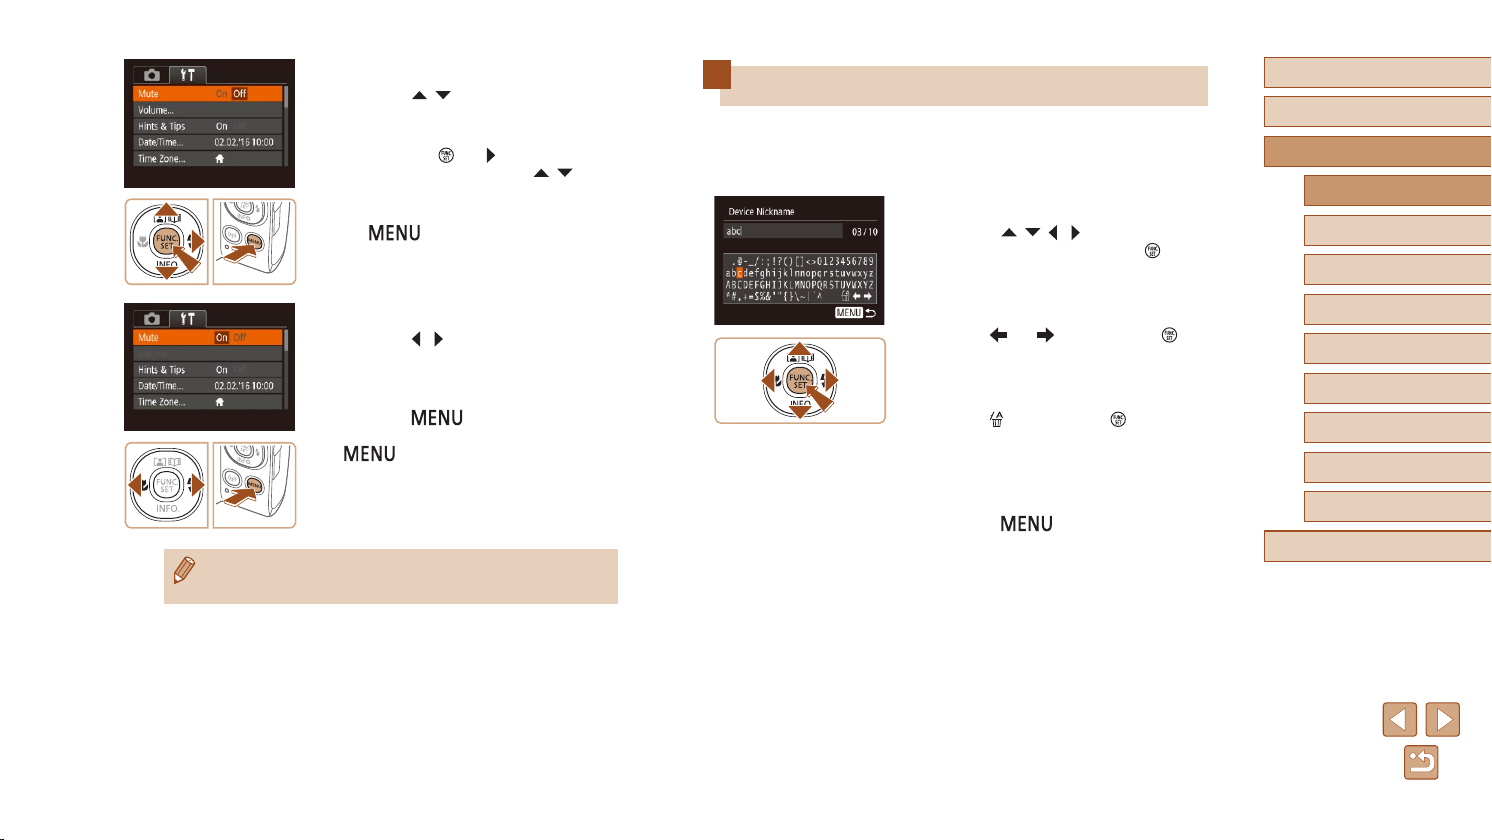
Access the menu screen.
1
● Press the [ ] button.
Choose a tab.
2
● Move the zoom lever to choose a tab.
● After you have pressed the [
buttons to choose a tab initially, you can
switch between tabs by pressing the
[ ][ ] buttons.
145 –
][ ]
Before Use
Basic Guide
Advanced Guide
Camera Basics
Auto Mode /
Hybrid Auto Mode
Other Shooting Modes
P Mode
Playback Mode
Wi-Fi Functions
Setting Menu
Accessories
Appendix
Index
25
Page 26
Choose a menu item.
3
● Press the [ ][ ] buttons to choose a
menu item.
● For menu items with options not shown,
rst press the [
screens, and then press the [ ][ ]
buttons to select the menu item.
● To return to the previous screen, press
the [
] or [ ] button to switch
] button.
On-Screen Keyboard
Use the on-screen keyboard to enter information for Wi-Fi connections
(=
88). Note that the length and type of information you can enter
varies depending on the function you are using.
Entering Characters
● Press the [ ][ ][ ][ ] buttons to choose
a character, and then press the [ ]
button to enter it.
Before Use
Basic Guide
Advanced Guide
Camera Basics
Auto Mode /
Hybrid Auto Mode
Other Shooting Modes
Choose an option.
4
● Press the [ ][ ] buttons to choose an
option.
Conrm your choice and exit.
5
● Press the [ ] button to return to the
screen displayed before you pressed the
[ ] button in step 1.
● To undo any accidental setting changes, you can restore the
camera’s default settings (
=
120).
Moving the Cursor
● Choose [ ] or [ ] and press the [ ]
button.
Deleting Characters
● Choose [ ] and press the [ ] button.
The previous character will be deleted.
Conrming Input and Returning to the
Previous Screen
● Press the [ ] button.
P Mode
Playback Mode
Wi-Fi Functions
Setting Menu
Accessories
Appendix
Index
26
Page 27
Indicator Display
The indicator on the back of the camera (=
times.
=
116)
=
126)
52)
- Connected to a computer (
=
- Display off (
23, =
- Starting up, recording, or reading
- Communicating with other devices
- Shooting long exposures (
- Connecting/transmitting via Wi-Fi
● When the indicator blinks green, do not turn the camera off, or
open the memory card/battery cover, or shake or hit the camera.
This may corrupt images or damage the camera or memory card.
4) blinks in green at these
Clock
You can check the current time.
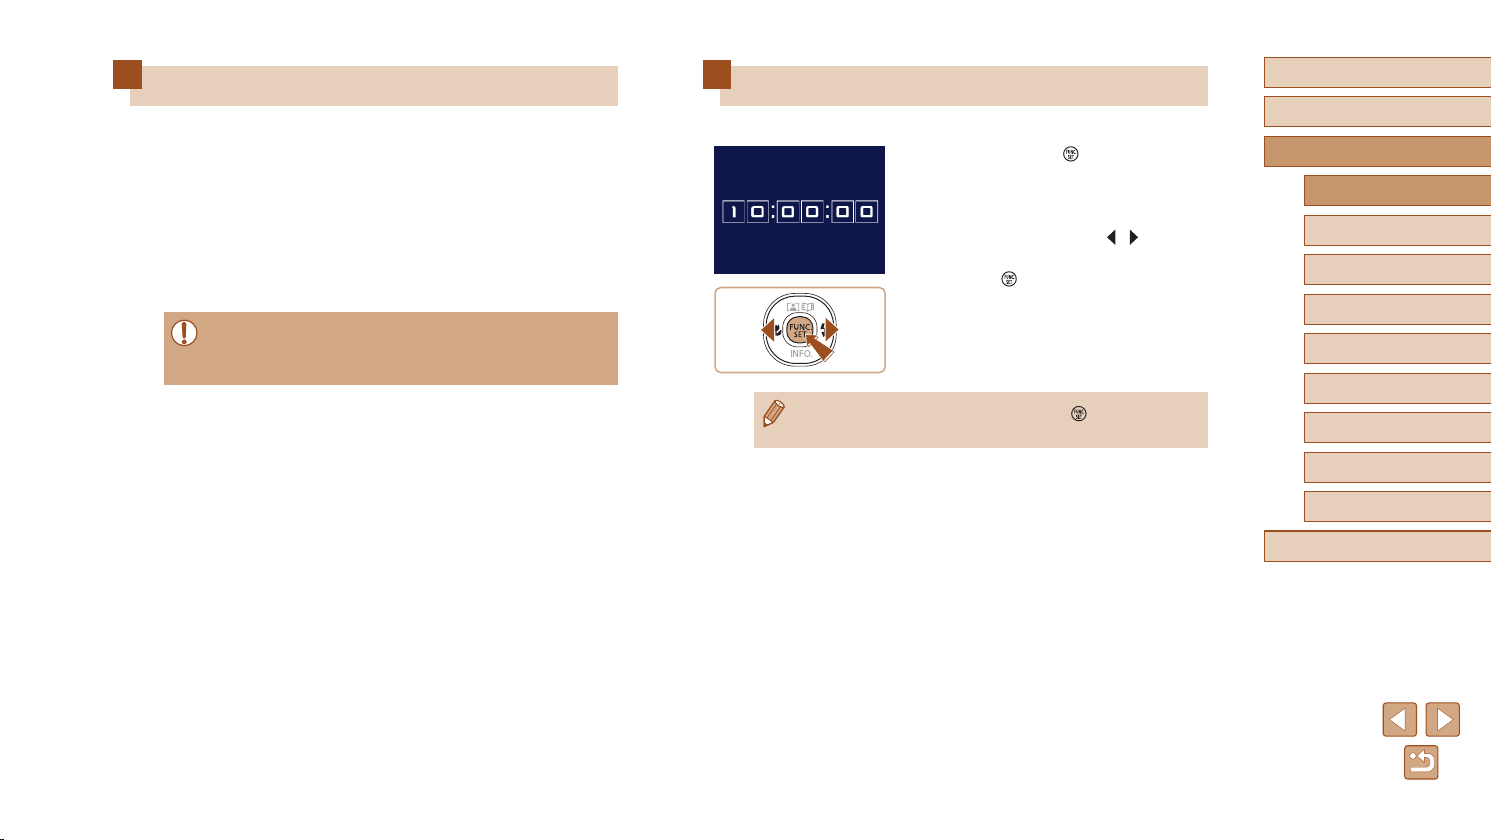
● When the camera is off, press and hold the [ ] button, then
press the power button to display the clock.
● Press and hold the [
] button.
● The current time appears.
● If you hold the camera vertically while
using the clock function, it will switch to
vertical display. Press the [
][ ] buttons
to change the display color.
● Press the [
] button again to cancel the
clock display.
Before Use
Basic Guide
Advanced Guide
Camera Basics
Auto Mode /
Hybrid Auto Mode
Other Shooting Modes
P Mode
Playback Mode
Wi-Fi Functions
Setting Menu
Accessories
Appendix
Index
27
Page 28
Auto Mode /
Hybrid Auto Mode
Shooting with Camera-Determined
Settings
For fully automatic selection of the optimal settings for specic scenes,
simply let the camera determine the subject and shooting conditions.
Shooting (Smart Auto)
Still Images
Movies
Before Use
Basic Guide
Advanced Guide
Camera Basics
Auto Mode /
Hybrid Auto Mode
Other Shooting Modes
Convenient mode for easy shots with greater control over shooting
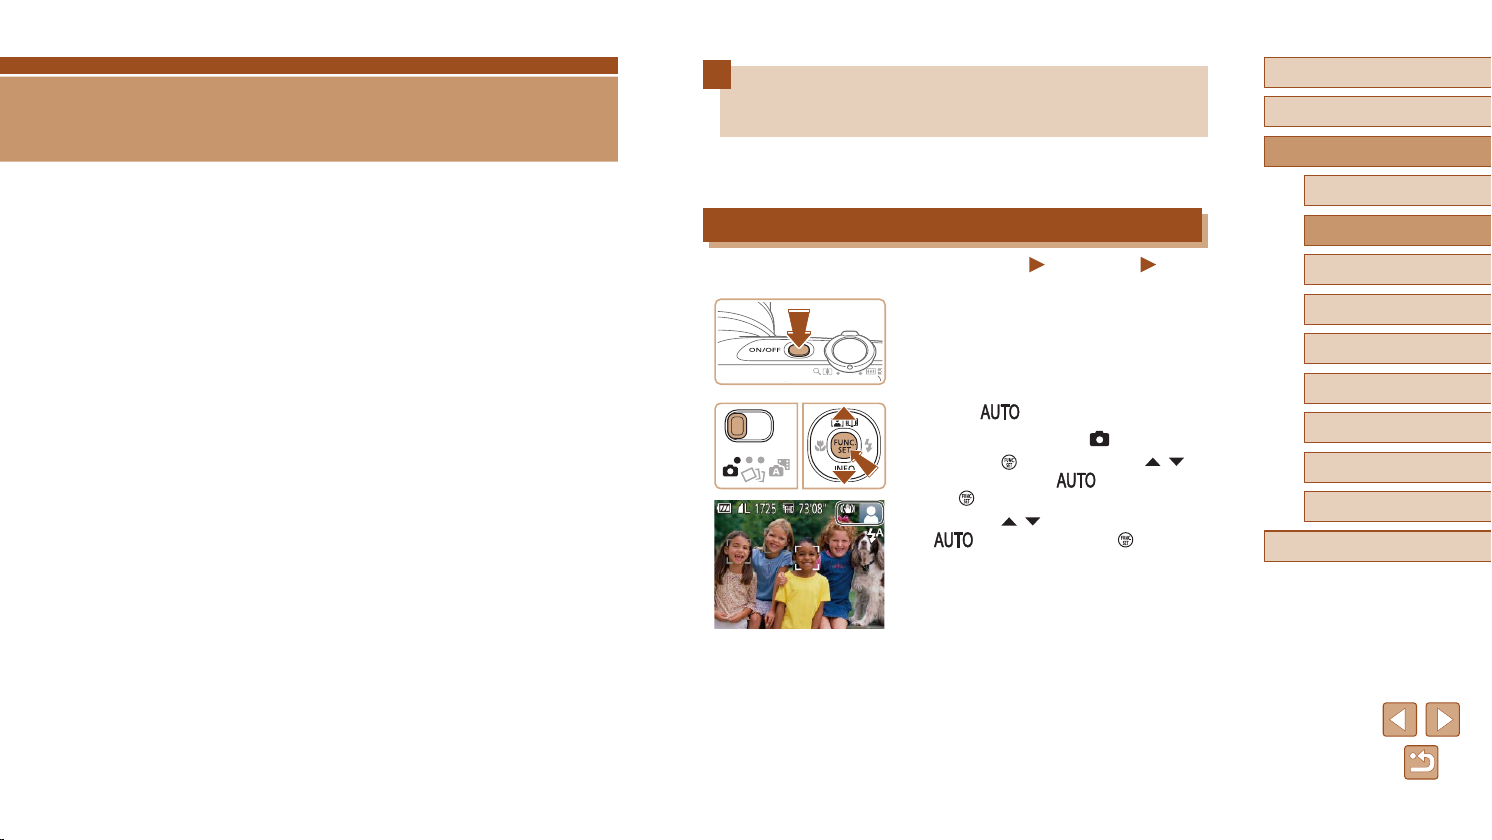
Turn the camera on.
1
● Press the power button.
● The startup screen is displayed.
Enter [ ] mode.
2
● Set the mode switch to [ ].
● Press the [
buttons to choose [ ], and then press
the [ ] button again.
● Press the [
[ ], and then press the [ ] button.
● Aim the camera at the subject. The
camera will make a slight clicking noise
as it determines the scene.
● Icons representing the scene and
image stabilization mode are displayed
in the upper right of the screen
=
32, =
(
● Frames displayed around any detected
subjects indicate that they are in focus.
] button, press the [ ][ ]
][ ] buttons to choose
33).
P Mode
Playback Mode
Wi-Fi Functions
Setting Menu
Accessories
Appendix
Index
28
Page 29

(1)
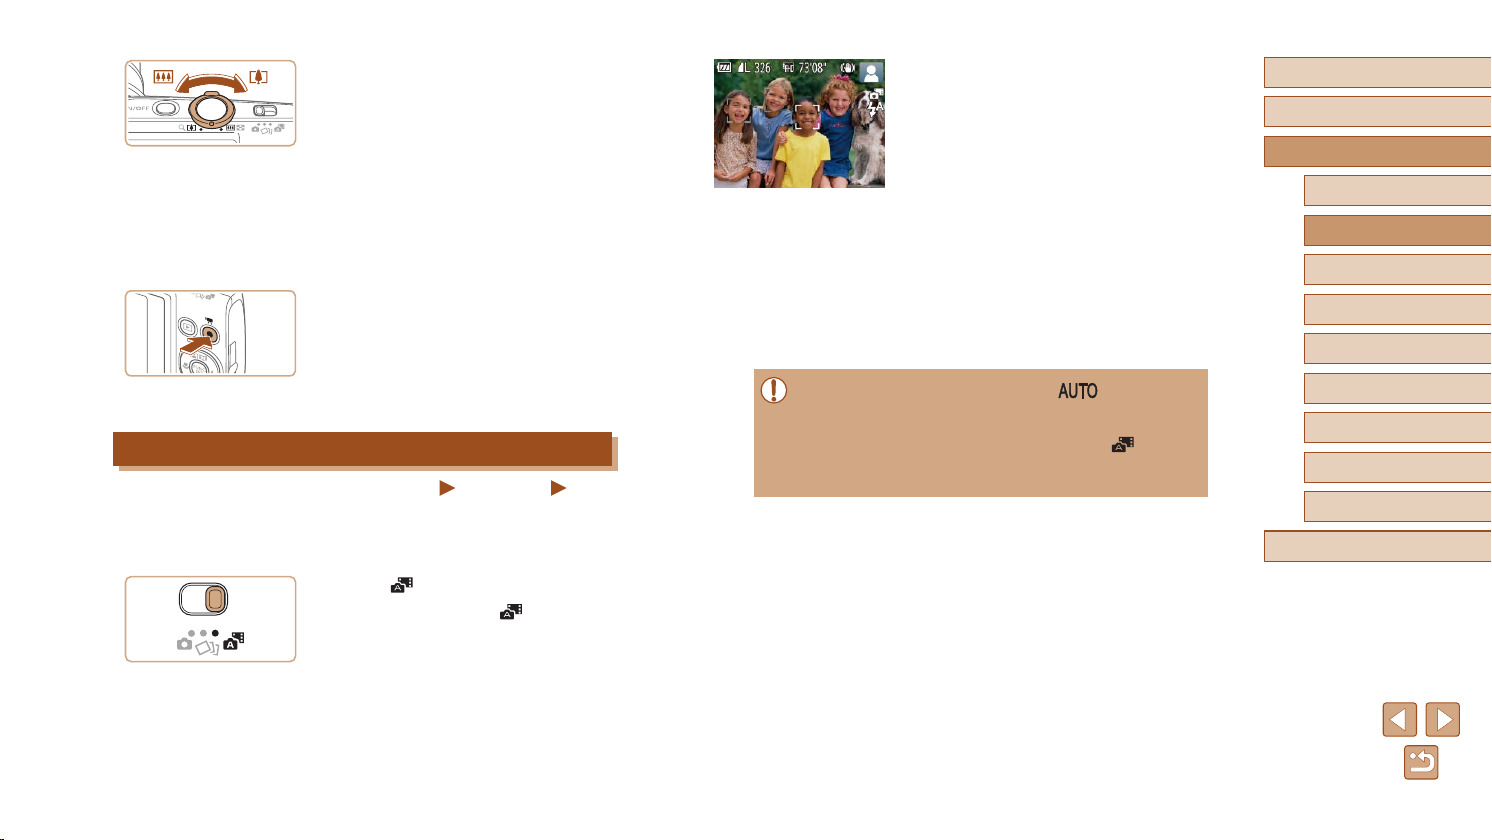
Compose the shot.
(1)
3
● To zoom in and enlarge the subject, move
the zoom lever toward [ ] (telephoto),
and to zoom away from the subject, move
it toward [ ] (wide angle). (A zoom
bar (1) showing the zoom position is
displayed.)
● To zoom in or out quickly, move the zoom
lever all the way toward [
or [ ] (wide angle), and to zoom in
or out slowly, move it just a little in the
desired direction.
Shoot.
4
] (telephoto)
Shooting Still Images
1) Focus.
● Press the shutter button halfway. The
camera beeps twice after focusing, and
frames are displayed to indicate image
areas in focus.
● Several AF frames are displayed when
multiple areas are in focus.
2) Shoot.
● Press the shutter button all the way
down.
● As the camera shoots, a shutter sound
is played, and in low-light conditions, the
ash res automatically.
● Keep the camera still until the shutter
sound ends.
● After displaying your shot, the camera will
revert to the shooting screen.
Recording Movies
1) Start recording.
● Press the movie button. The camera
beeps once as recording begins, and
[ Rec] is displayed with the elapsed
time (1).
● Black bars are displayed on the top and
bottom edges of the screen, and the
subject is slightly enlarged. The black
bars indicate image areas not recorded.
● Frames displayed around any detected
faces indicate that they are in focus.
● Once recording begins, take your nger
off the movie button.
Before Use
Basic Guide
Advanced Guide
Camera Basics
Auto Mode /
Hybrid Auto Mode
Other Shooting Modes
P Mode
Playback Mode
Wi-Fi Functions
Setting Menu
Accessories
Appendix
Index
29
Page 30
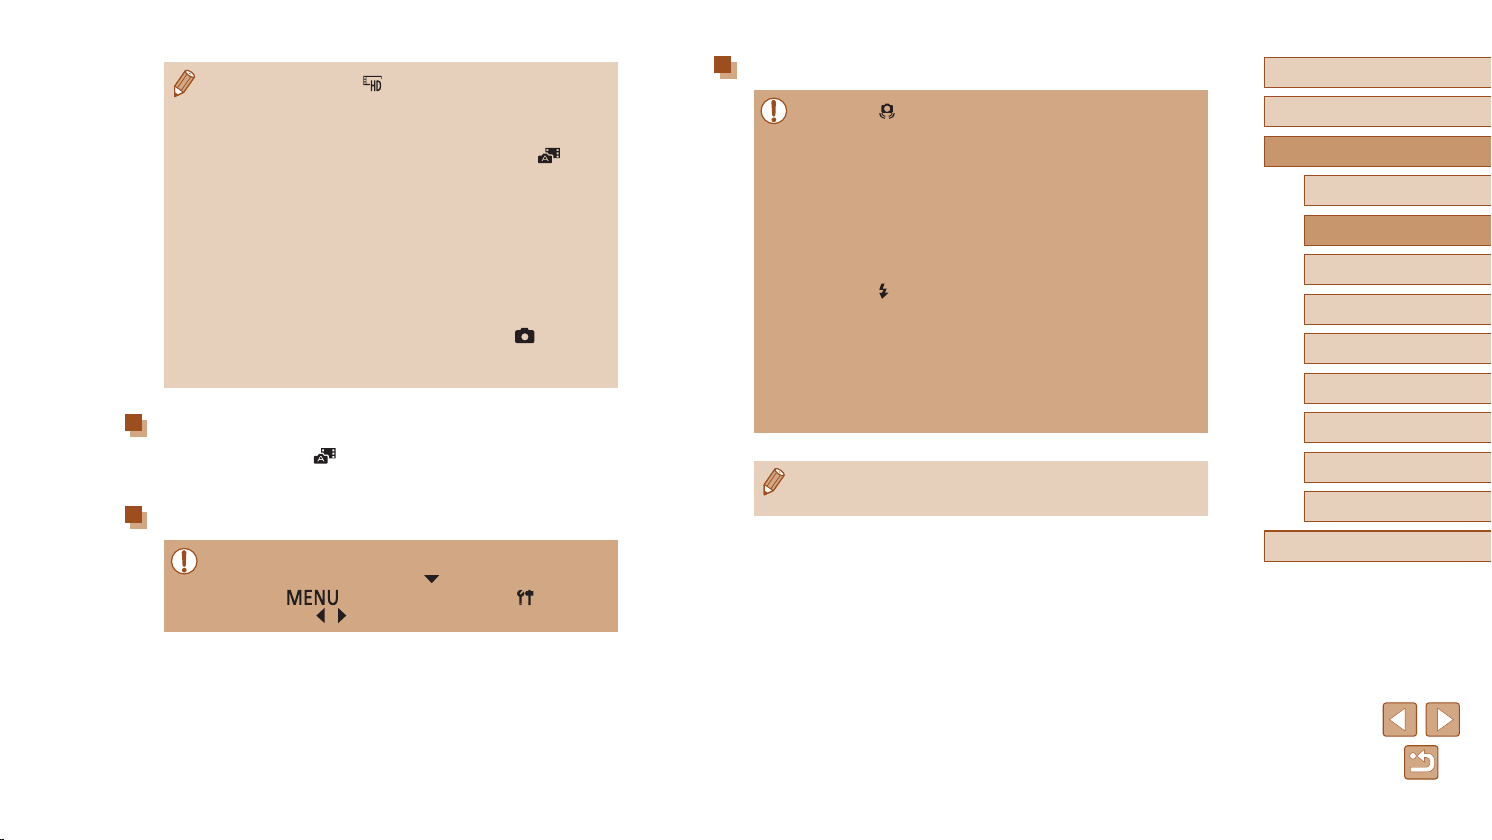
2) Resize the subject and recompose
the shot as needed.
● To resize the subject, repeat the
operations in step 3.
However, note that the sound of camera
operations will be recorded. Note that
movies shot at zoom factors shown in
blue will look grainy.
● When you recompose shots, the
focus, brightness, and colors will be
automatically adjusted.
3) Finish recording.
● Press the movie button again to stop
recording. The camera beeps twice as
recording stops.
● Recording will stop automatically when
the memory card becomes full.
Shooting in Hybrid Auto Mode
Still Images
You can make a short movie of the day just by shooting still images. The
camera records 2 – 4-second clips of scenes before each shot, which are
later combined in a digest movie.
Enter [ ] mode.
1
● Set the mode switch to [ ].
Movies
Compose the shot.
2
● Follow steps 3 – 4 in “Shooting (Smart
Auto)” (=
focus.
● For more impressive digest movies,
aim the camera at subjects about four
seconds before shooting still images.
Shoot.
3
● Follow step 4 in “Shooting (Smart Auto)”
(=
● The camera records both a still image
and movie clip. The clip, which ends with
the still image and a shutter sound, forms
a single chapter in the digest movie.
● Battery life is shorter in this mode than in [ ] mode, because
digest movies are recorded for each shot.
● A digest movie may not be recorded if you shoot a still image
immediately after turning the camera on, choosing [
operating the camera in other ways.
● Camera operating sounds will be recorded in digest movies.
28) to compose the shot and
28) to shoot a still image.
] mode, or
Before Use
Basic Guide
Advanced Guide
Camera Basics
Auto Mode /
Hybrid Auto Mode
Other Shooting Modes
P Mode
Playback Mode
Wi-Fi Functions
Setting Menu
Accessories
Appendix
Index
30
Page 31
● Digest movie quality is [ ] and cannot be changed.
● Sounds are not played when you press the shutter button halfway
or trigger the self-timer.
● Digest movies are saved as separate movie les in the following
cases even if they were recorded on the same day in [
- The digest movie le size reaches approximately 4 GB, or the
total recording time reaches approximately 29 minutes and
59 seconds.
- The digest movie is protected (
- Daylight saving time (
are changed.
- A new folder is created (
● Recorded shutter sounds cannot be modied or erased.
● If you prefer to record digest movies without still images, adjust
the setting in advance. Choose MENU (
[Digest Type] ► [No Stills] (
● Individual chapters can be edited (
=
=
72).
17) or time zone (=
=
119).
=
25).
=
83).
115) settings
=
25) ► [ ] tab ►
] mode.
Digest Movie Playback
Display a still image shot in [ ] mode to play the digest movie created
on the same day, or specify the date of the digest movie to play (=
66).
Still Images/Movies
● If the camera makes no operating sounds, it may have been
turned on while holding down the [
press the [
then press the [
] button, choose [Mute] on the [ ] tab, and
][ ] buttons to choose [Off].
] button. To activate sounds,
Still Images
● A blinking [ ] icon warns that images are more likely to be
blurred by camera shake. In this case, mount the camera on a
tripod or take other measures to keep it still.
● If your shots are dark despite the ash ring, move closer to the
subject. For details on the ash range, see “Camera” (
● The subject may be too close if the camera only beeps once
when you press the shutter button halfway. For details on the
range of focus (shooting range), see “Shooting Range” (
● To reduce red-eye and to assist in focusing, the lamp may be lit
when shooting in low-light conditions.
● A blinking [
indicates that shooting is not possible until the ash has nished
recharging. Shooting can resume as soon as the ash is ready,
so either press the shutter button all the way down and wait, or
release it and press it again.
● Although you can shoot again before the shooting screen
is displayed, your previous shot may determine the focus,
brightness, and colors used.
● You can change how long images are displayed after shots
=
(
] icon displayed when you attempt to shoot
43).
=
149).
=
150).
Before Use
Basic Guide
Advanced Guide
Camera Basics
Auto Mode /
Hybrid Auto Mode
Other Shooting Modes
P Mode
Playback Mode
Wi-Fi Functions
Setting Menu
Accessories
Appendix
Index
31
Page 32
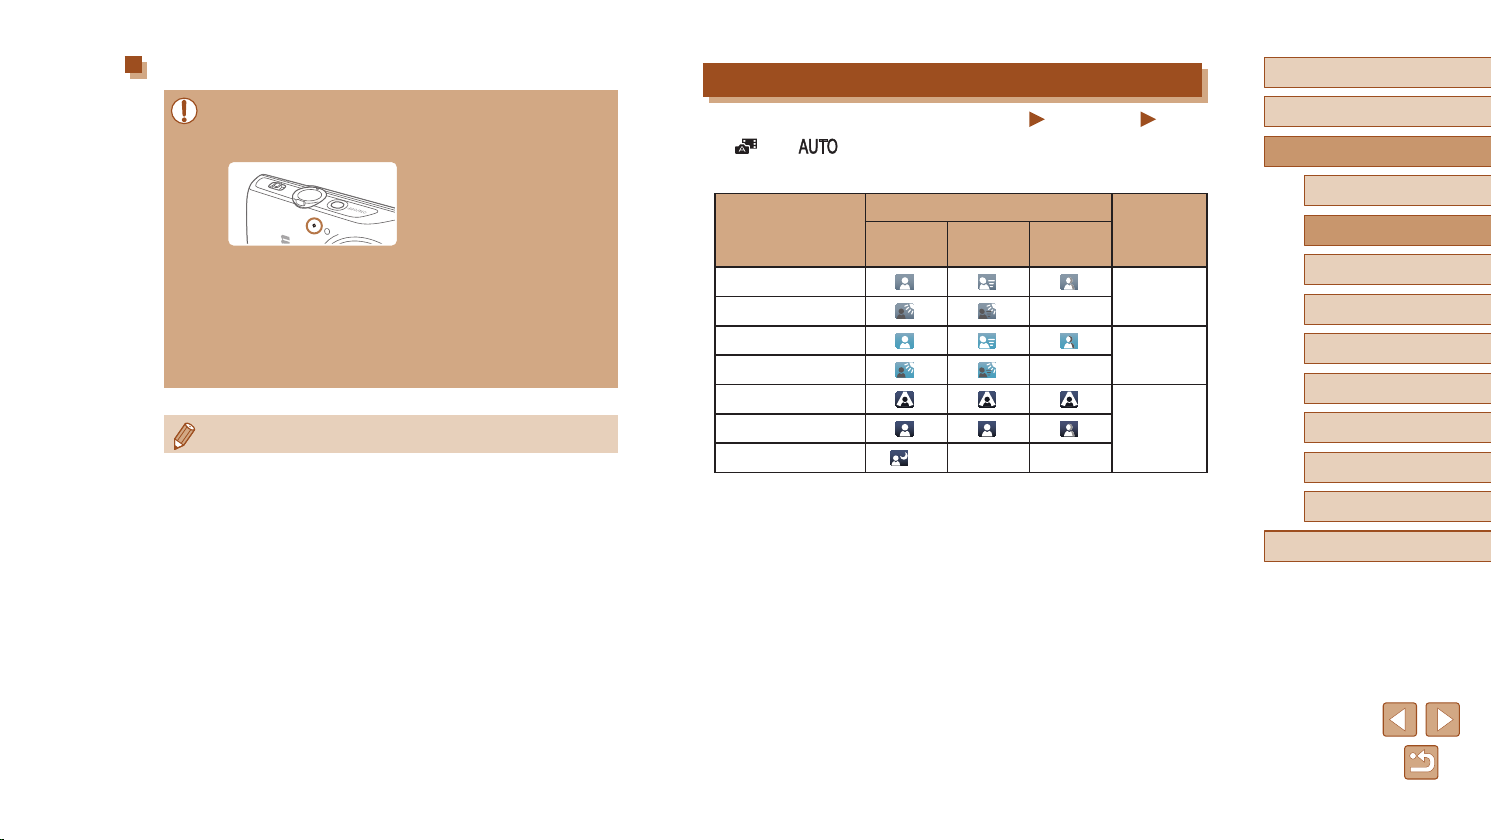
Movies
● Keep your ngers away from the microphone while recording
movies. Blocking the microphone may prevent audio from being
recorded or may cause the recording to sound mufed.
● Avoid touching camera controls other than the movie button when
recording movies, because sounds made by the camera will be
recorded.
● Once movie recording begins, the image display area changes
and subjects are enlarged to allow for correction of signicant
camera shake. To shoot subjects at the same size shown before
shooting, adjust the image stabilization setting (
● Audio recording is monaural.
=
41).
Scene Icons
Still Images
In [ ] and [ ] modes, shooting scenes determined by the camera
are indicated by the icon displayed, and corresponding settings are
automatically selected for optimal focusing, subject brightness, and color.
When Shooting People
Background
People In Motion*
Shadows
1
on Face*
1
Bright
Bright and Backlit
–
With Blue Sky
Blue Sky and Backlit
–
Spotlights
2
Dark, Using Tripod
*
– –
Movies
Icon
Background
Color
Gray
Light Blue
Dark BlueDark
Before Use
Basic Guide
Advanced Guide
Camera Basics
Auto Mode /
Hybrid Auto Mode
Other Shooting Modes
P Mode
Playback Mode
Wi-Fi Functions
Setting Menu
Accessories
Appendix
Index
32
Page 33
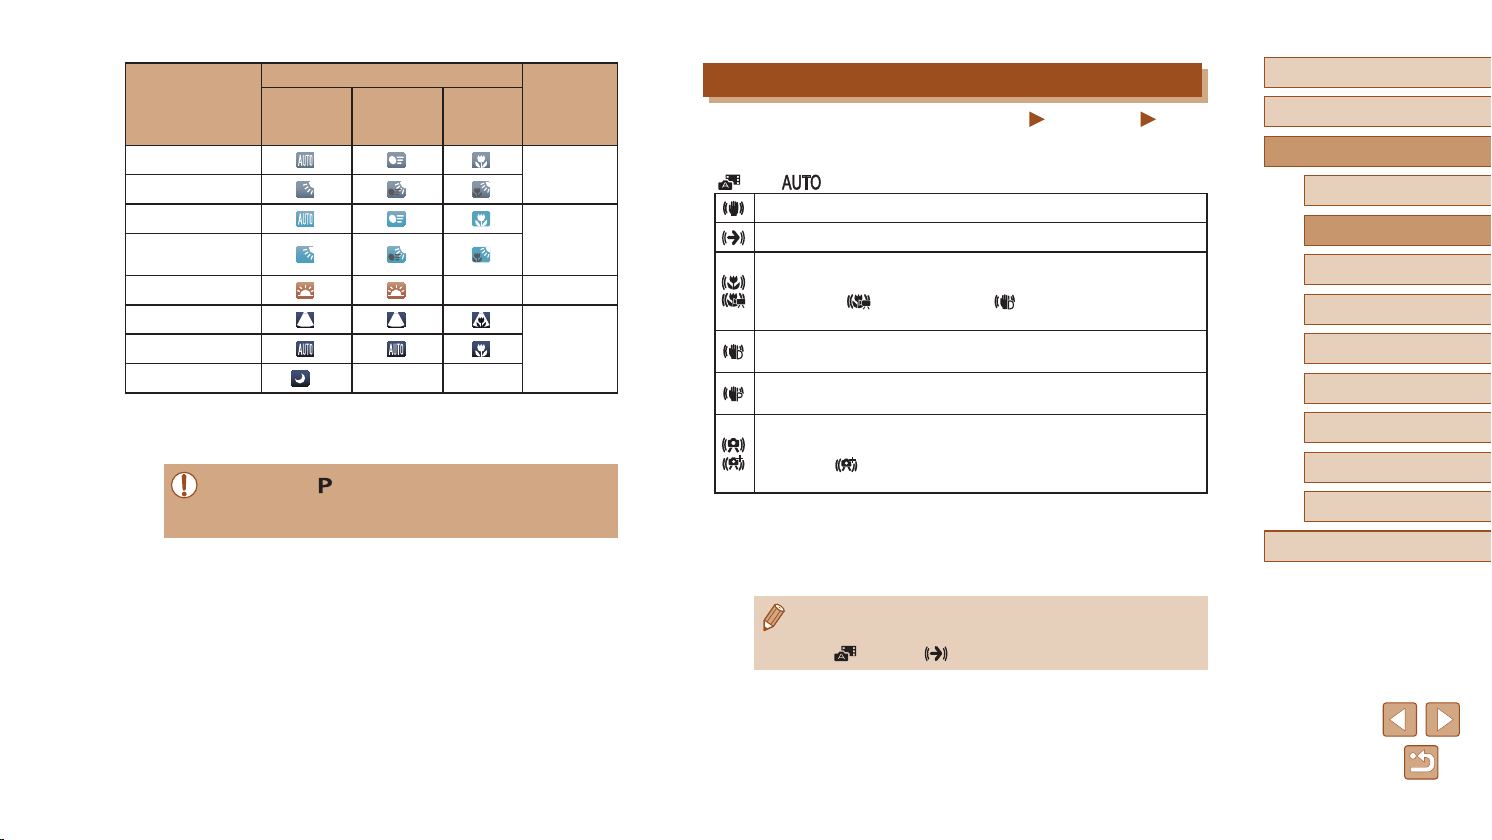
Background
Bright
Bright and Backlit
When Shooting Other Subjects
Other
Subjects
In Motion*
1
At Close
Range
Icon
Background
Color
Gray
With Blue Sky
Blue Sky and
Light Blue
Backlit
Sunsets – Orange
Spotlights
Dark BlueDark
2
Dark, Using Tripod
*1 Not displayed for movies.
*2 Displayed in dark scenes when the camera is held still, as when mounted on a
tripod.
● Try shooting in [ ] mode (=
match actual shooting conditions, or if it is not possible to shoot
with your expected effect, color, or brightness.
*
– –
53) if the scene icon does not
Image Stabilization Icons
Still Images
Optimal image stabilization for the shooting conditions is automatically
applied (Intelligent IS). Additionally, the following icons are displayed in
[ ] and [ ] modes.
Image stabilization for still images (Normal)
Image stabilization for still images when panning (Panning)*
Image stabilization for angular camera shake and shift-shake in
macro shots (Hybrid IS).
For movies, [ ] is displayed and [ ] image stabilization is also
applied.
Image stabilization for movies, reducing strong camera shake, as
when recording while walking (Dynamic)
Image stabilization for slow camera shake, such as when
recording movies at telephoto (Powered)
No image stabilization, because the camera is mounted on
a tripod or held still by other means. However, during movie
recording, [ ] is displayed, and image stabilization to counteract
wind or other sources of vibration is used (Tripod IS).
* Displayed when you pan, following moving subjects with the camera. When you
follow subjects moving horizontally, image stabilization only counteracts vertical
camera shake, and horizontal stabilization stops. Similarly, when you follow
subjects moving vertically, image stabilization only counteracts horizontal camera
shake.
Movies
Before Use
Basic Guide
Advanced Guide
Camera Basics
Auto Mode /
Hybrid Auto Mode
Other Shooting Modes
P Mode
Playback Mode
Wi-Fi Functions
Setting Menu
Accessories
Appendix
Index
● To cancel image stabilization, set [IS Mode] to [Off] (=
this case, an IS icon is not displayed.
] mode, no [ ] icon is displayed.
● In [
41). In
33
Page 34
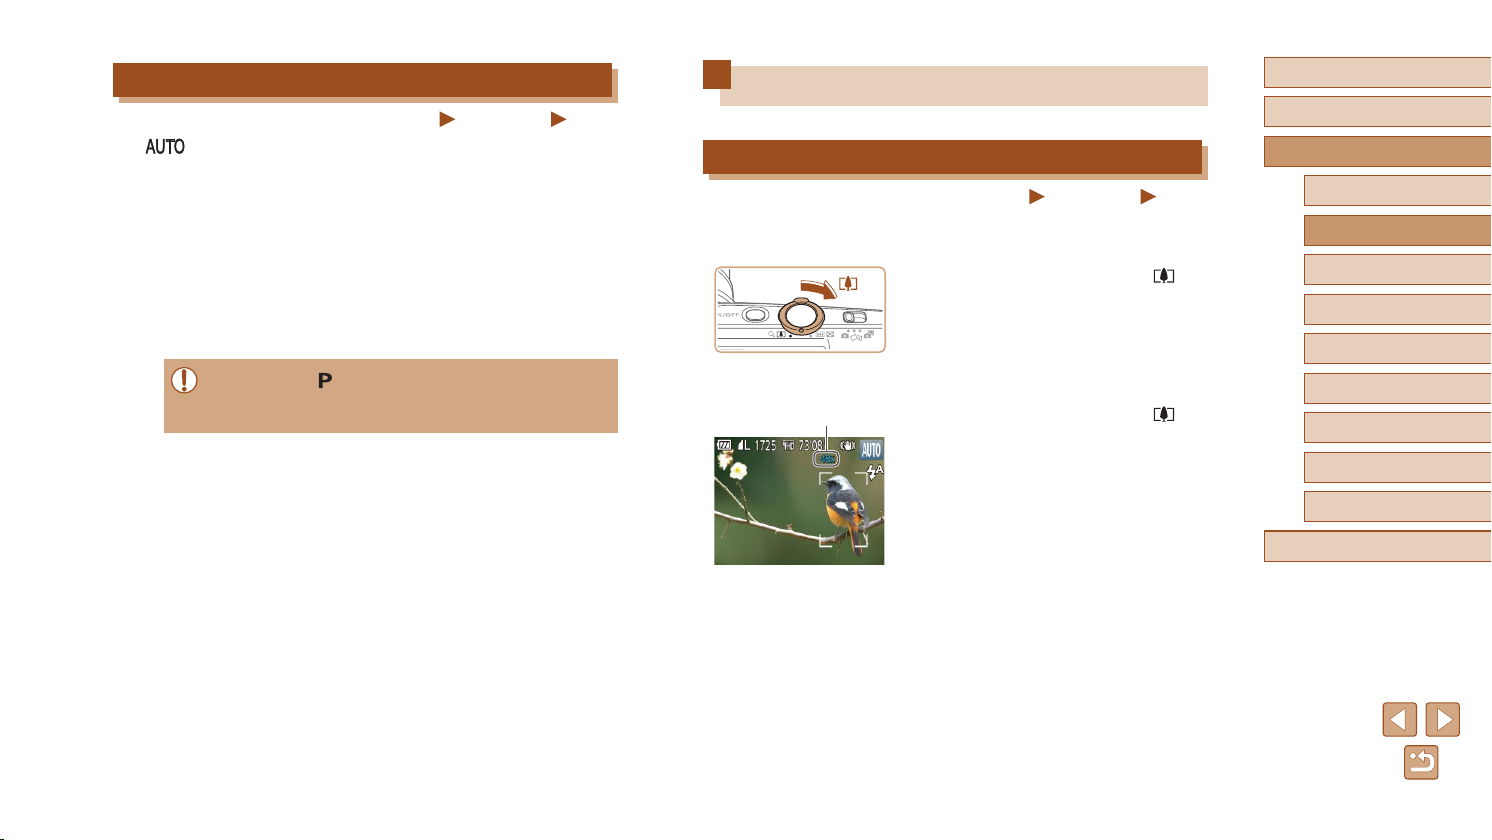
(1)
On-Screen Frames
Still Images
In [ ] mode, a variety of frames are displayed once the camera
detects subjects you are aiming the camera at.
● A white frame is displayed around the subject (or person’s face)
determined by the camera to be the main subject, and gray frames are
displayed around other detected faces. Frames follow moving subjects
within a certain range to keep them in focus.
However, if the camera detects subject movement, only the white
frame will remain on the screen.
● When you are pressing the shutter button halfway and the camera
detects subject movement, a blue frame is displayed, and the focus
and image brightness are constantly adjusted (Servo AF).
● Try shooting in [ ] mode (=
frames are not displayed around desired subjects, or if frames are
displayed on the background or similar areas.
53) if no frames are displayed, if
Movies
Common, Convenient Features
Zooming In Closer on Subjects (Digital Zoom)
Still Images
When distant subjects are too far away to enlarge using optical zoom, use
digital zoom for up to about 48x enlargement.
Move the zoom lever toward [ ].
1
● Hold the lever until zooming stops.
● Zooming stops at the largest zoom factor
before the image becomes noticeably
grainy, which is then indicated on the
screen.
Move the zoom lever toward [ ]
2
again.
● (1) is the current zoom factor.
● The camera zooms in even closer on the
subject.
Movies
Before Use
Basic Guide
Advanced Guide
Camera Basics
Auto Mode /
Hybrid Auto Mode
Other Shooting Modes
P Mode
Playback Mode
Wi-Fi Functions
Setting Menu
Accessories
Appendix
Index
34
Page 35
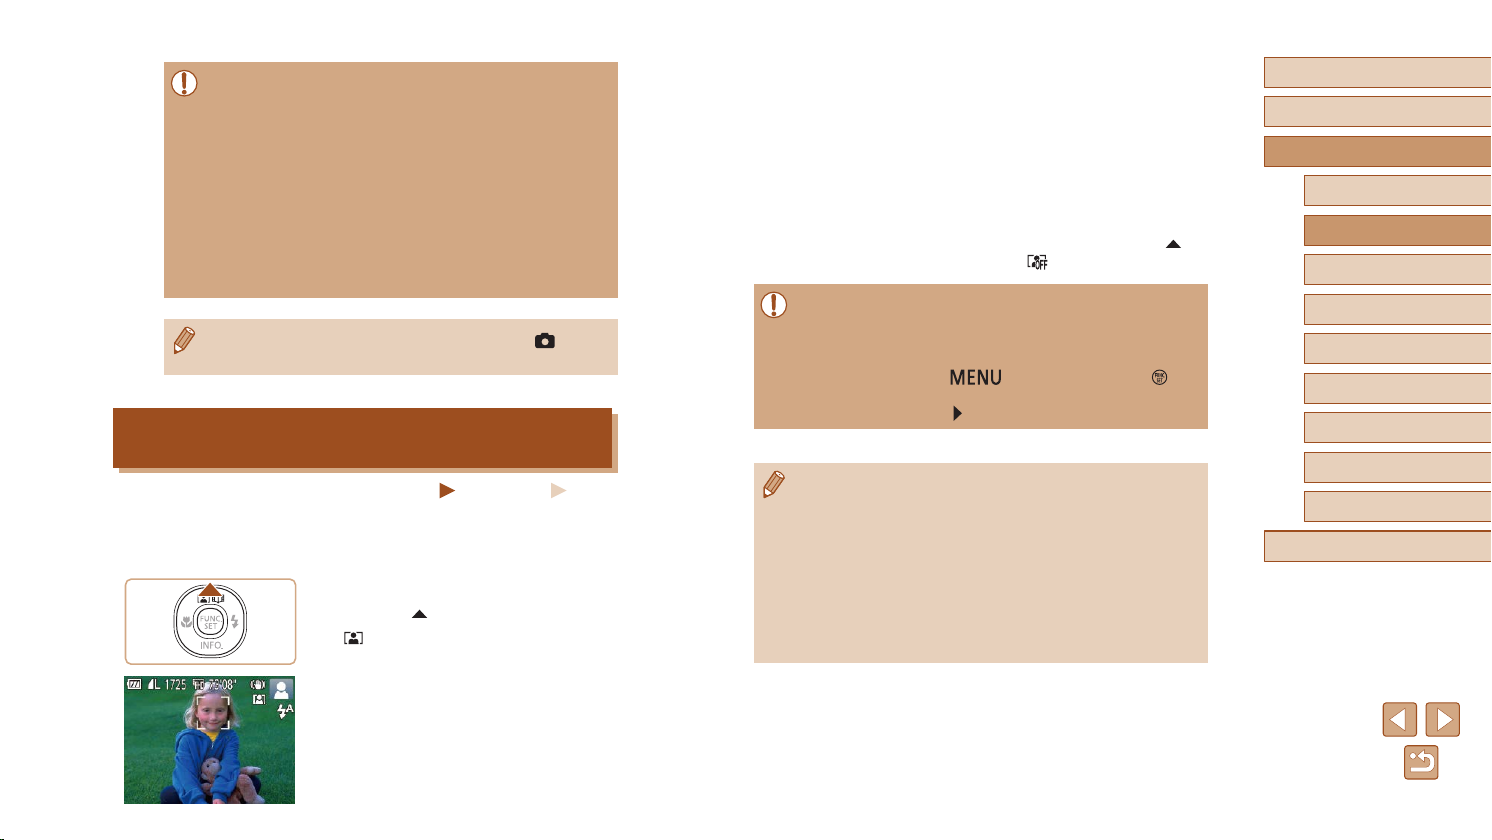
● Moving the zoom lever will display the zoom bar (which indicates
the zoom position). The zoom bar is color-coded to indicate the
zoom range.
- White range: optical zoom range where the image will not
appear grainy.
- Yellow range: digital zoom range where the image is not
noticeably grainy (ZoomPlus).
- Blue range: digital zoom range where the image will appear
grainy.
● Because the blue range will not be available at some recording
pixel settings (
achieved by following step 1.
● To deactivate digital zoom, choose MENU (=
► [Digital Zoom] ► [Off].
=
39), the maximum zoom factor can be
25) ► [ ] tab
Auto Zooming in Response to Subject Movement
(Auto Zoom)
Still Images
The camera automatically zooms in and out to keep a detected face
(=
28) at a constant size. If the person moves closer, the camera
automatically zooms out, and vice versa.
Enter Auto Zoom mode.
1
● Press the [ ] button.
] is displayed.
● [
● A white frame is displayed around the
detected face, and the camera zooms
in and out to keep the subject on the
screen.
Movies
● When multiple faces are detected, a
white frame is displayed around the main
subject’s face and up to two gray frames
around other faces, as the camera zooms
to keep these subjects on the screen.
Shoot.
2
● Auto zooming continues even after you
shoot, and the frames are still displayed.
● To cancel auto zooming, press the [
button again. [ ] is displayed.
● Faces may not be detected at some zoom factors, or if the
subject’s head is tilted or facing the camera indirectly.
● Auto zooming is deactivated in the following situations.
- When you change the shooting mode
- When you press the [
button
- When you press the [
● When a detected subject moves toward the edge of the screen,
the camera zooms out to keep the subject on the screen.
● The zoom factor cannot be changed after you press the shutter
button all the way down in self-timer mode (
● The camera prioritizes zooming to keep subjects on the screen.
For this reason, it may not be possible to maintain a constant
face display size, depending on subject movement and shooting
conditions.
● When no face is detected, the camera zooms to a certain level
and stops zooming until a face is detected.
] button, movie button, or [ ]
] button
=
36).
Before Use
Basic Guide
Advanced Guide
Camera Basics
Auto Mode /
]
Hybrid Auto Mode
Other Shooting Modes
P Mode
Playback Mode
Wi-Fi Functions
Setting Menu
Accessories
Appendix
Index
35
Page 36
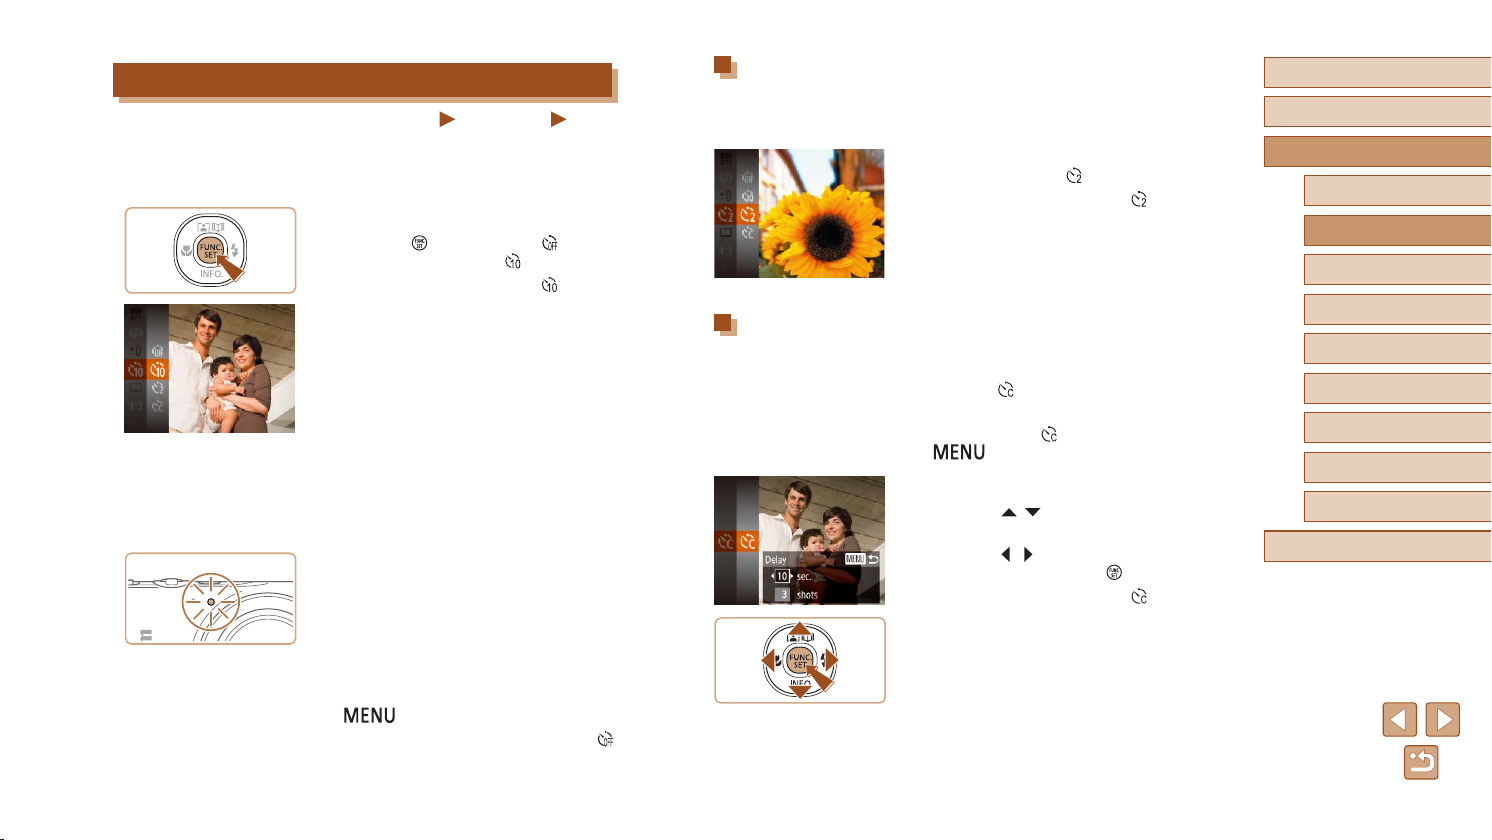
Using the Self-Timer
Still Images
With the self-timer, you can include yourself in group photos or other
timed shots. The camera will shoot about 10 seconds after you press the
shutter button.
Congure the setting.
1
● Press the [ ] button, choose [ ] in the
menu, and then choose [ ] (=
● Once the setting is complete, [
displayed.
Shoot.
2
● For Still Images: Press the shutter button
halfway to focus on the subject, and then
press it all the way down.
● For Movies: Press the movie button.
● Once you start the self-timer, the lamp
will blink and the camera will play a
self-timer sound.
● Two seconds before the shot, the blinking
and sound will speed up. (The lamp will
remain lit in case the ash res.)
● To cancel shooting after you have
triggered the self-timer, press the
[
] button.
● To restore the original setting, choose [
in step 1.
24).
Movies
] is
Using the Self-Timer to Avoid Camera Shake
This option delays shutter release until about two seconds after you
have pressed the shutter button. If the camera is unsteady while you are
pressing the shutter button, it will not affect your shot.
● Follow step 1 in “Using the Self-Timer”
=
(
36) and choose [ ].
● Once the setting is complete, [
displayed.
● Follow step 2 in “Using the Self-Timer”
=
36) to shoot.
(
] is
Before Use
Basic Guide
Advanced Guide
Camera Basics
Auto Mode /
Hybrid Auto Mode
Other Shooting Modes
P Mode
Customizing the Self-Timer
You can specify the delay (0 – 30 seconds) and number of shots (1 – 10).
Choose [ ].
1
● Following step 1 in “Using the Self-Timer”
(=
36), choose [ ] and press the
[ ] button.
Congure the setting.
2
● Press the [ ][ ] buttons to choose the
delay time or number of shots.
● Press the [
value, and then press the [ ] button.
● Once the setting is complete, [
displayed.
● Follow step 2 in “Using the Self-Timer”
=
(
]
][ ] buttons to choose a
36) to shoot.
] is
Playback Mode
Wi-Fi Functions
Setting Menu
Accessories
Appendix
Index
36
Page 37
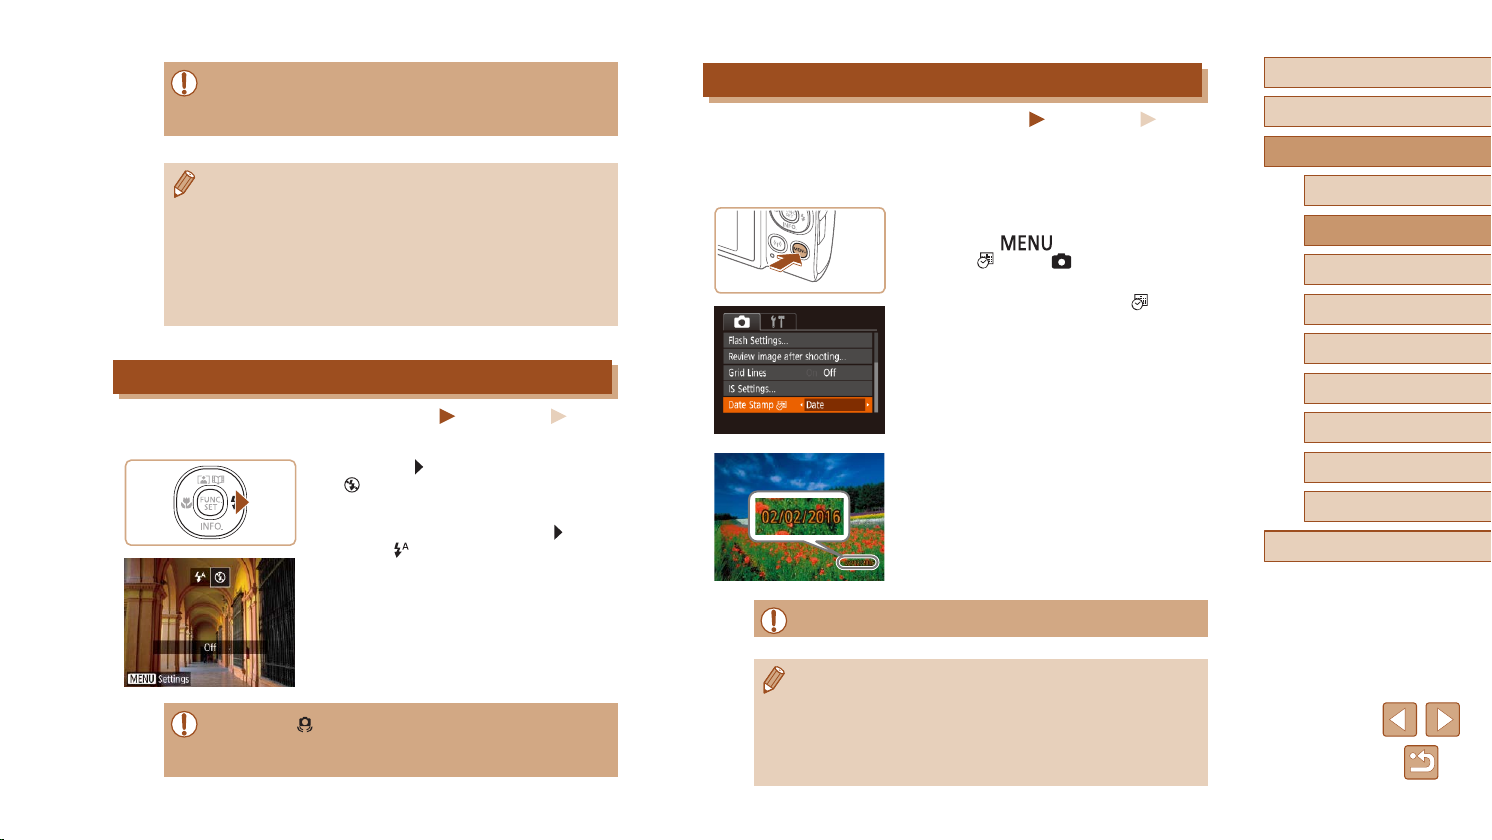
● For movies recorded using the self-timer, recording begins after
your specied delay time, but specifying the number of shots has
no effect.
● When you specify multiple shots, image brightness and white
balance are determined by the rst shot. More time is required
between shots when the ash res or when you have specied
to take many shots. Shooting will stop automatically when the
memory card becomes full.
● When a delay longer than two seconds is specied, two seconds
before the shot, the lamp blinking and self-timer sound will speed
up. (The lamp will remain lit in case the ash res.)
Deactivating the Flash
Still Images
Prepare the camera for shooting without the ash as follows.
● Press the [
[ ] is displayed.
● The ash will no longer be activated.
● To activate the ash, press the [
again. ([ ] is displayed.) The ash will
automatically re in low-light conditions.
] button several times until
Movies
] button
Adding a Date Stamp
Still Images
The camera can add the shooting date to images, in the lower-right corner.
However, note that date stamps cannot be edited or removed, so conrm
beforehand that the date and time are correct (=
Congure the setting.
1
17).
● Press the [ ] button, choose [Date
Stamp ] on the [ ] tab, and then
choose the desired option (=
● Once the setting is complete, [
displayed.
Shoot.
2
● As you take shots, the camera adds the
shooting date or time to the lower-right
corner of images.
● To restore the original setting, choose
[Off] in step 1.
● Date stamps cannot be edited or removed.
25).
Movies
] is
Before Use
Basic Guide
Advanced Guide
Camera Basics
Auto Mode /
Hybrid Auto Mode
Other Shooting Modes
P Mode
Playback Mode
Wi-Fi Functions
Setting Menu
Accessories
Appendix
Index
● If a blinking [ ] icon is displayed when you press the shutter button
halfway in camera-shake inducing, low-light conditions, mount the
camera on a tripod or take other measures to keep it still.
● Shots taken without adding a date stamp can be printed with one
as follows.
However, adding a date stamp this way to images that already
have one may cause it to be printed twice.
- Print using printer functions (
- Use camera DPOF print settings (
=
127)
=
131) to print
37
Page 38
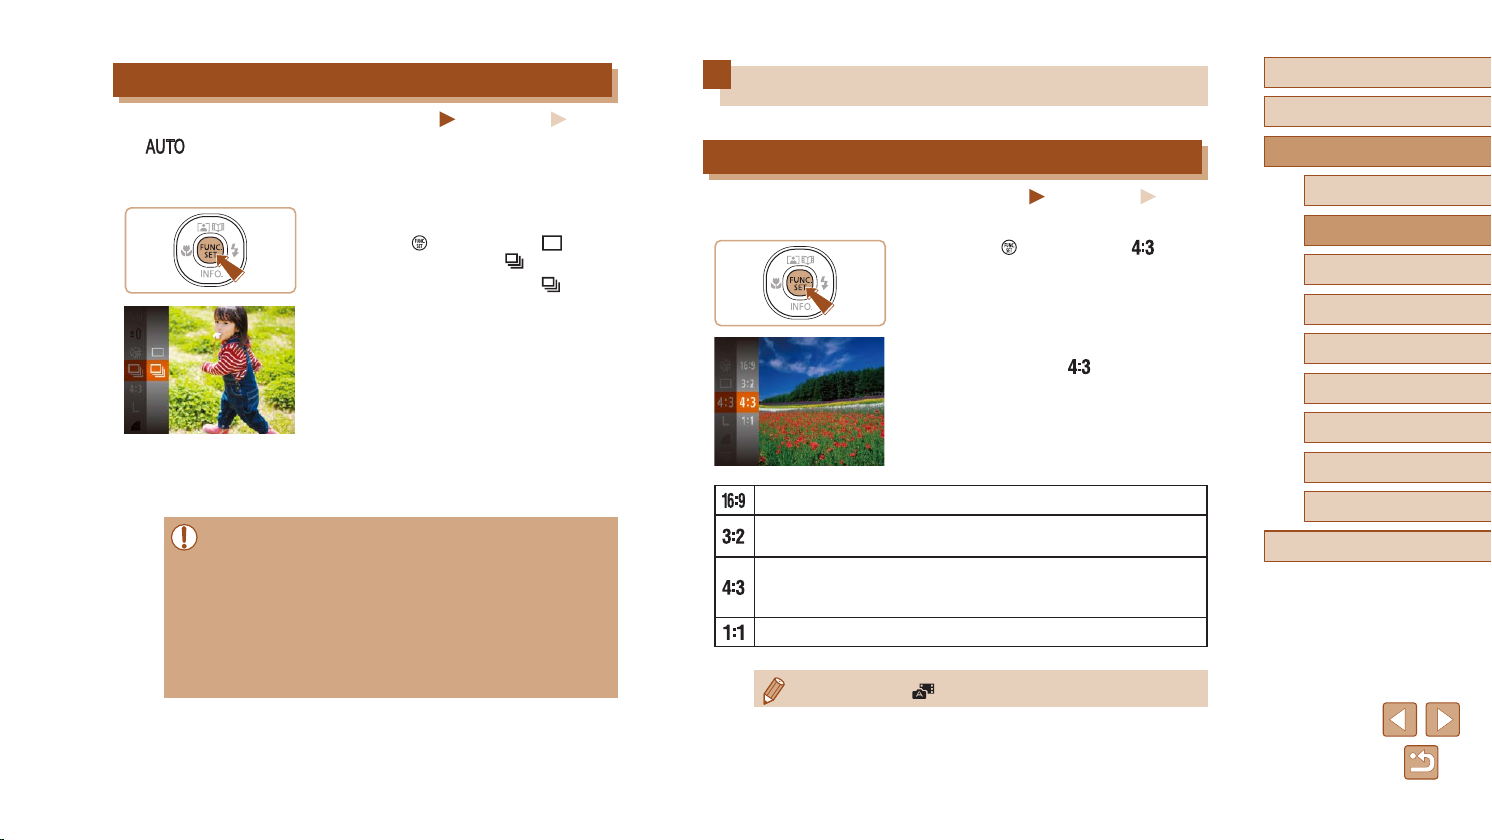
Continuous Shooting
Still Images
In [ ] mode, hold the shutter button all the way down to shoot
continuously.
For details on the continuous shooting speed, see “Camera” (=
Congure the setting.
1
● Press the [ ] button, choose [ ] in the
menu, and then choose [ ] (=
● Once the setting is complete, [
displayed.
Shoot.
2
● Hold the shutter button all the way down
to shoot continuously.
● During continuous shooting, the focus, exposure, and colors are
locked at the position/level determined when you pressed the
shutter button halfway.
● Cannot be used with the self-timer (
● Shooting may stop momentarily or continuous shooting may slow
down depending on shooting conditions, camera settings, and the
zoom position.
● As more shots are taken, shooting may slow down.
● Shooting may slow down if the ash res.
=
36).
Movies
149).
24).
] is
Image Customization Features
Changing the Aspect Ratio
Still Images
Change the image aspect ratio (ratio of width to height) as follows.
● Press the [
] button, choose [ ] in the
menu, and choose the desired option
(=
24).
● Once the setting is complete, the screen
aspect ratio will be updated.
● To restore the original setting, repeat this
process but choose [
Used for display on widescreen HDTVs or similar display devices.
Same aspect ratio as 35mm lm, used for printing images at
5 x 7-inch or postcard sizes.
Native aspect ratio of the camera screen. Used for display on
standard-denition televisions or similar display devices. Also
used for printing images at 3.5 x 5-inch or A-series sizes.
Square aspect ratio.
● Not available in [ ] mode.
].
Movies
Before Use
Basic Guide
Advanced Guide
Camera Basics
Auto Mode /
Hybrid Auto Mode
Other Shooting Modes
P Mode
Playback Mode
Wi-Fi Functions
Setting Menu
Accessories
Appendix
Index
38
Page 39
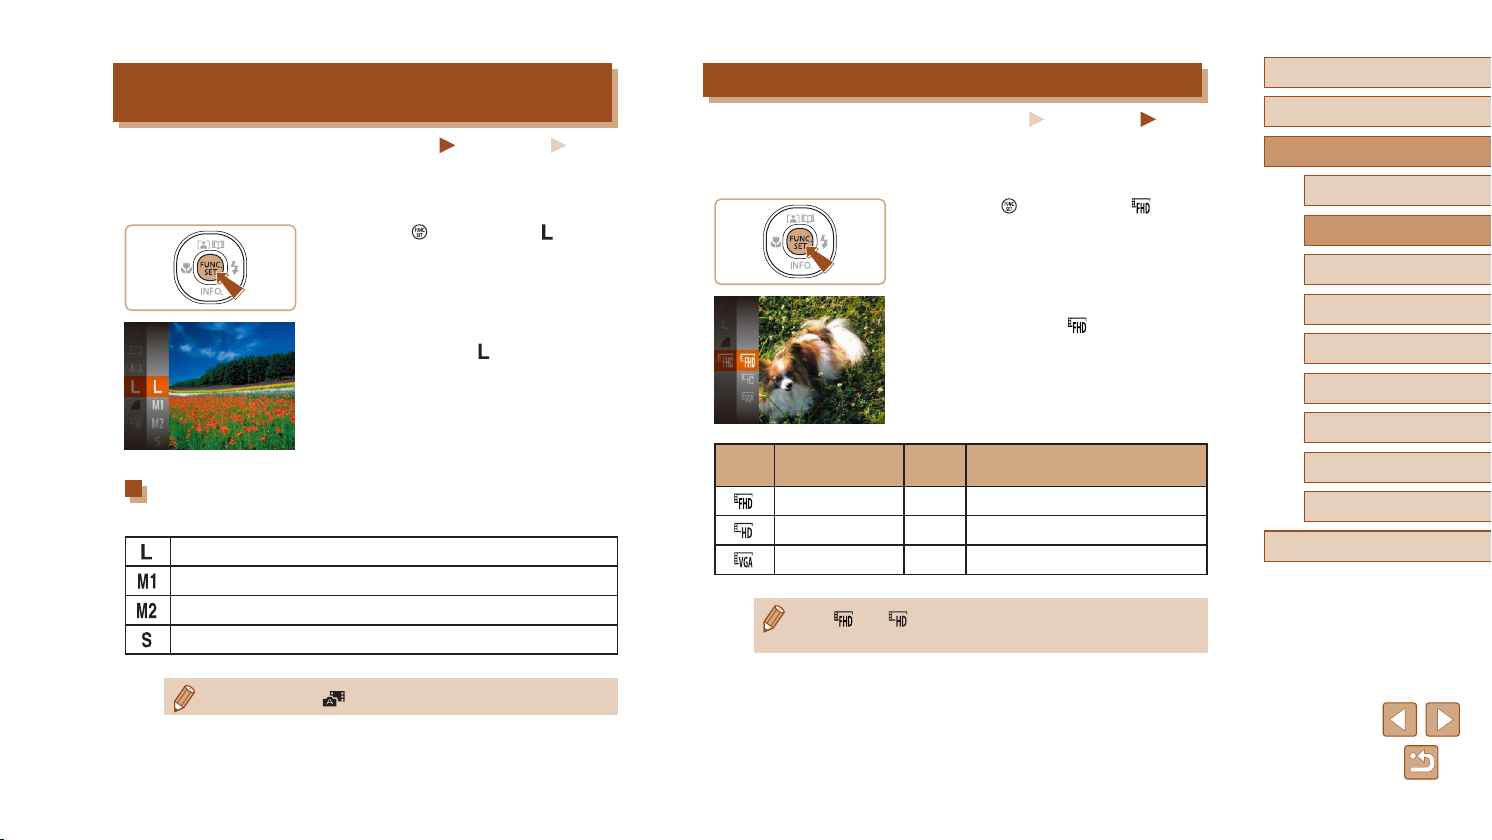
Changing the Number of Recording Pixels
(Image Size)
Still Images
Choose the image’s number of recording pixels from 4 levels, as follows.
For guidelines on how many shots at each recording pixel setting can t
on a memory card, see “Number of Shots per Memory Card” (=
● Press the [
] button, choose [ ] in the
menu, and choose the desired option
(=
24).
● The option you congured is now
displayed.
● To restore the original setting, repeat this
process but choose [
].
Guidelines for Choosing Recording Pixel Setting
Based on Paper Size (for 4:3 Images)
A2 (16.5 x 23.4 in.)
A3 – A5 (11.7 x 16.5 – 5.8 x 8.3 in.)
3.5 x 5 in., 5 x 7 in., Postcard
For e-mailing and similar purposes
Movies
151).
Changing Movie Image Quality
Still Images
Three image quality settings are available. For guidelines on the total
recording time for movies at each level of image quality that will t on a
memory card, see “Recording Time per Memory Card” (=
● Press the [
] button, choose [ ] in the
menu, and choose the desired option
(=
24).
● The option you congured is now
displayed.
● To restore the original setting, repeat this
].
Details
Image
Quality
Number of
Recording Pixels
process but choose [
Frame
Rate
1920 x 1080 30 fps For shooting in Full HD.
1280 x 720 30 fps For shooting in HD.
640 x 480 30 fps For shooting in standard denition.
● In [ ] and [ ] modes, black bars displayed on the top and
bottom edges of the screen indicate image areas not recorded.
151).
Movies
Before Use
Basic Guide
Advanced Guide
Camera Basics
Auto Mode /
Hybrid Auto Mode
Other Shooting Modes
P Mode
Playback Mode
Wi-Fi Functions
Setting Menu
Accessories
Appendix
Index
● Not available in [ ] mode.
39
Page 40
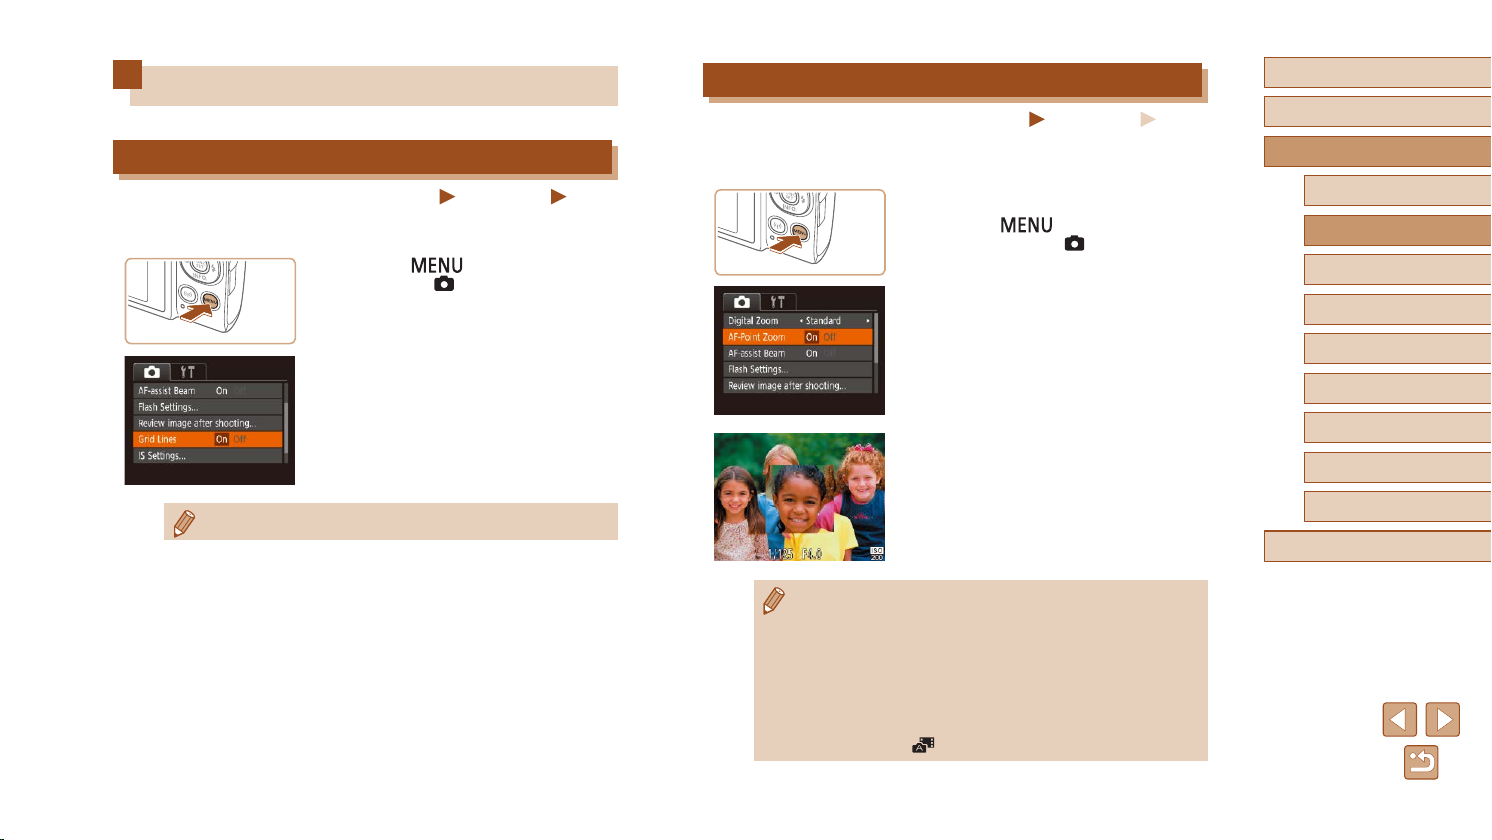
Helpful Shooting Features
Displaying Grid Lines
Still Images
Grid lines can be displayed on the screen for vertical and horizontal
reference while shooting.
● Press the [
] button, choose [Grid
Lines] on the [ ] tab, and then choose
[On] (=
25).
● Once the setting is complete, grid lines
are displayed on the screen.
● To restore the original setting, repeat this
process but choose [Off].
Movies
Magnifying the Area in Focus
Still Images
You can check the focus by pressing the shutter button halfway, which will
enlarge the portion of the image in focus in the AF frame.
Congure the setting.
1
● Press the [ ] button, choose [AF-
Point Zoom] on the [ ] tab, and then
choose [On] (=
25).
Movies
Before Use
Basic Guide
Advanced Guide
Camera Basics
Auto Mode /
Hybrid Auto Mode
Other Shooting Modes
P Mode
Playback Mode
Wi-Fi Functions
● Grid lines are not recorded in your shots.
Check the focus.
2
● Press the shutter button halfway. The
face detected as the main subject is now
magnied.
● To restore the original setting, choose
[Off] in step 1.
● The area in focus is not magnied in the following cases when the
shutter button is pressed halfway.
- If a face was not detected, if the person is too close to the
camera and their face is too large for the screen, or if the
camera detects subject movement
- When digital zoom is used (
- When Tracking AF is used (
- When a TV is used as a display (
● Not available in [
] mode.
=
=
34)
60)
=
123)
Setting Menu
Accessories
Appendix
Index
40
Page 41
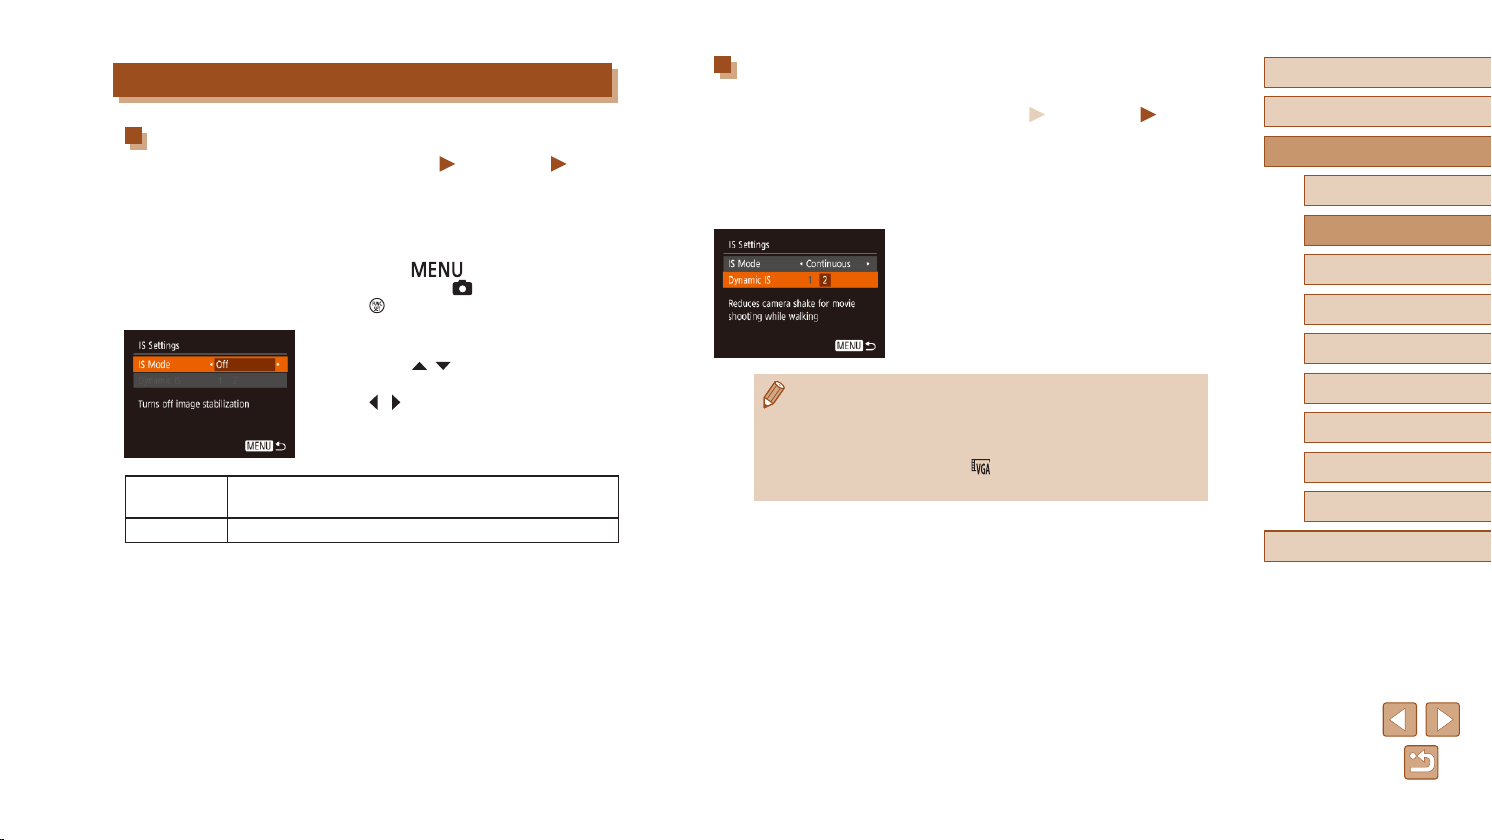
Changing the IS Mode Settings
Deactivating Image Stabilization
Still Images
When the camera is held still (as when shooting from a tripod), you should
set image stabilization to [Off] to deactivate it.
Access the setting screen.
1
● Press the [ ] button, choose [IS
Settings] on the [ ] tab, and then press
the [ ] button (=
Congure the setting.
2
25).
● Press the [ ][ ] buttons to choose [IS
Mode], and then choose [Off] by pressing
the [ ][ ] buttons.
Continuous
Optimal image stabilization for the shooting conditions is
automatically applied (Intelligent IS) (=
33).
Off Deactivates image stabilization.
Movies
Recording Movies with Subjects at the Same Size
Shown before Shooting
Still Images
Normally, once movie recording begins, the image display area changes
and subjects are enlarged to allow for correction of signicant camera
shake.
To record movies with subjects at the same size shown before shooting,
you can reduce image stabilization.
● Follow the steps in “Deactivating Image
Stabilization” (
=
41) to access the [IS
Settings] screen.
● Choose [Dynamic IS], and then choose
=
25).
[2] (
● You can also set [IS Mode] to [Off], so that subjects are recorded
at the same size shown before shooting.
● [Dynamic IS] is not available when [IS Mode] is set to [Off]
=
41).
(
● When the movie quality is [
changed.
], Dynamic IS is [1] and cannot be
Movies
Before Use
Basic Guide
Advanced Guide
Camera Basics
Auto Mode /
Hybrid Auto Mode
Other Shooting Modes
P Mode
Playback Mode
Wi-Fi Functions
Setting Menu
Accessories
Appendix
Index
41
Page 42
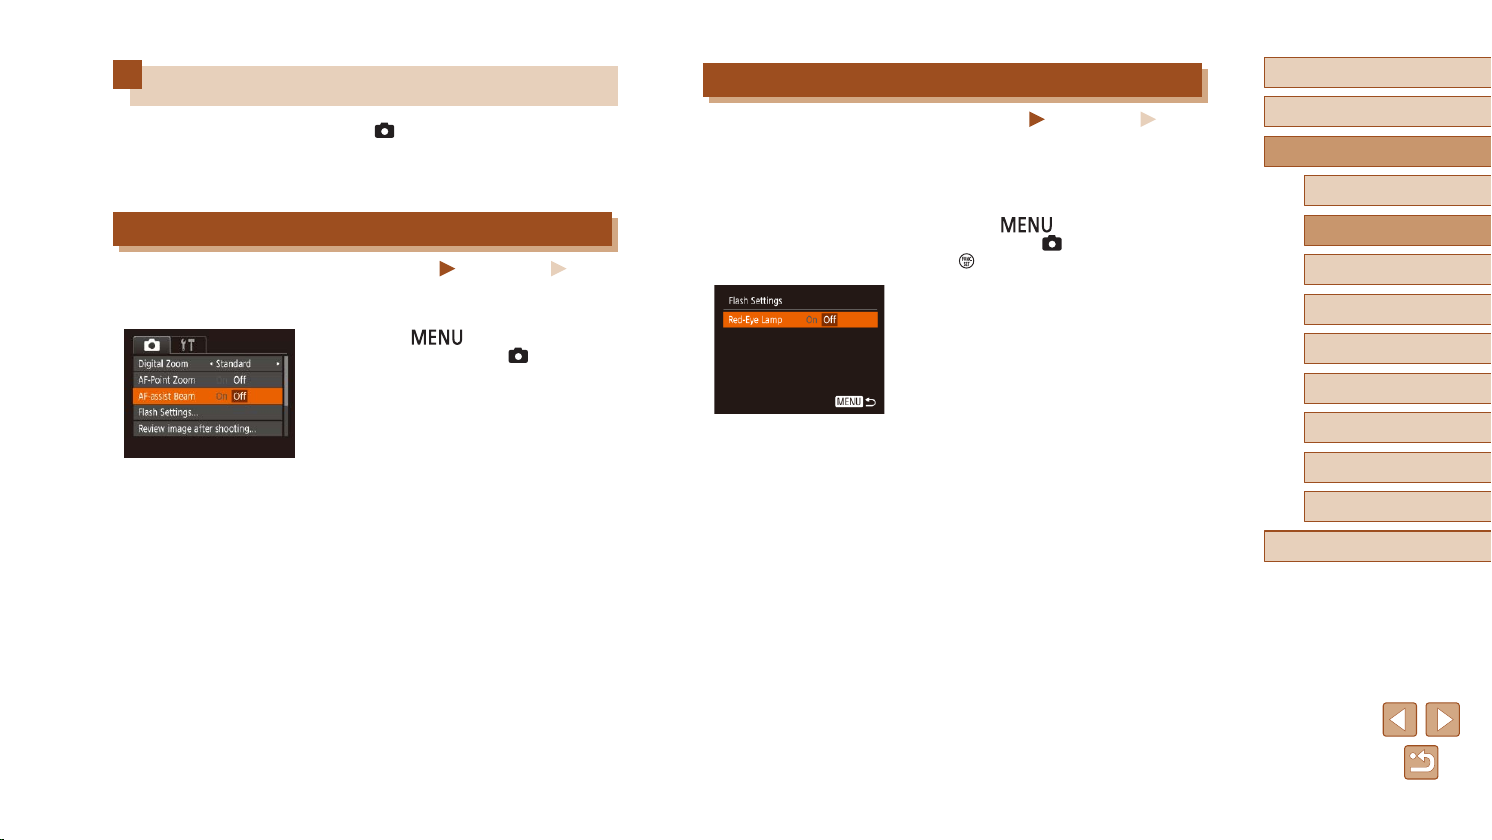
Customizing Camera Operation
Customize shooting functions on the [ ] tab of the menu screen as
follows.
For instructions on menu functions, see “Using the Menu Screen”
(=
25).
Deactivating the AF-Assist Beam
Still Images
You can deactivate the lamp that normally lights up to help you focus
when you press the shutter button halfway in low-light conditions.
● Press the [
[AF-assist Beam] on the [ ] tab, and
then choose [Off].
● To restore the original setting, repeat this
process but choose [On].
] button, choose
Movies
Deactivating the Red-Eye Reduction Lamp
Still Images
You can deactivate the red-eye reduction lamp that lights up to reduce
red-eye when the ash is used in low-light shots.
Access the [Flash Settings] screen.
1
● Press the [ ] button, choose [Flash
Settings] on the [ ] tab, and then press
the [ ] button.
Congure the setting.
2
● Set [Red-Eye Lamp] to [Off].
● To restore the original setting, repeat this
process but choose [On].
Movies
Before Use
Basic Guide
Advanced Guide
Camera Basics
Auto Mode /
Hybrid Auto Mode
Other Shooting Modes
P Mode
Playback Mode
Wi-Fi Functions
Setting Menu
Accessories
Appendix
Index
42
Page 43
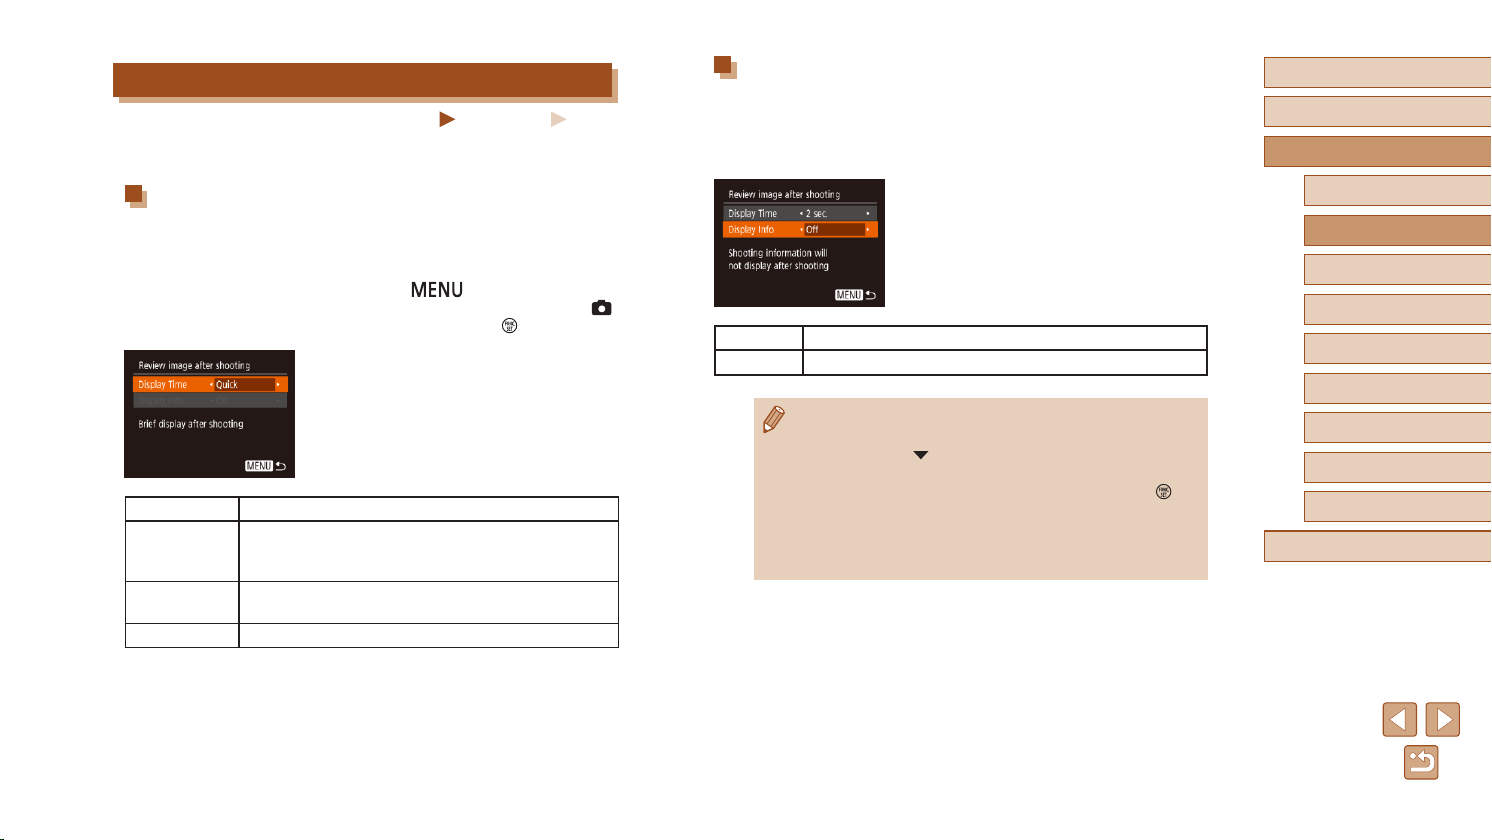
Changing the Image Display Style after Shots
Still Images
You can change how long images are displayed and what information is
displayed immediately after shooting.
Changing the Image Display Period after Shots
Access the [Review image after
1
shooting] screen.
● Press the [ ] button, choose
[Review image after shooting] on the [ ]
tab, and then press the [ ] button.
Congure the setting.
2
● Choose [Display Time], and then choose
the desired option.
● To restore the original setting, repeat this
process but choose [Quick].
Quick Displays images only until you can shoot again.
2 sec., 4 sec.,
8 sec.
Hold
Off No image display after shots.
Displays images for the specied time. Even while
the shot is displayed, you can take another shot by
pressing the shutter button halfway again.
Displays images until you press the shutter button
halfway.
Movies
Changing the Screen Displayed after Shots
Change the way images are displayed after shots as follows.
Set [Display Time] to [2 sec.],
1
[4 sec.], [8 sec.], or [Hold] (= 43).
Congure the setting.
2
● Choose [Display Info], and then choose
the desired option.
● To restore the original setting, repeat this
process but choose [Off].
Off Displays only the image.
Detailed
Displays shooting details (
● When [Display Time] (=
Info] is set to [Off] and cannot be changed.
● By pressing the [
shooting, you can switch the display information. Note that the
settings of [Display Info] are not changed. By pressing the [
button, you can do the following operations.
- Protect (
- Favorites (
=
- Erase (
] button while an image is displayed after
=
72)
=
78)
74)
=
141).
43) is set to [Off] or [Quick], [Display
Before Use
Basic Guide
Advanced Guide
Camera Basics
Auto Mode /
Hybrid Auto Mode
Other Shooting Modes
P Mode
Playback Mode
Wi-Fi Functions
Setting Menu
Accessories
]
Appendix
Index
43
Page 44
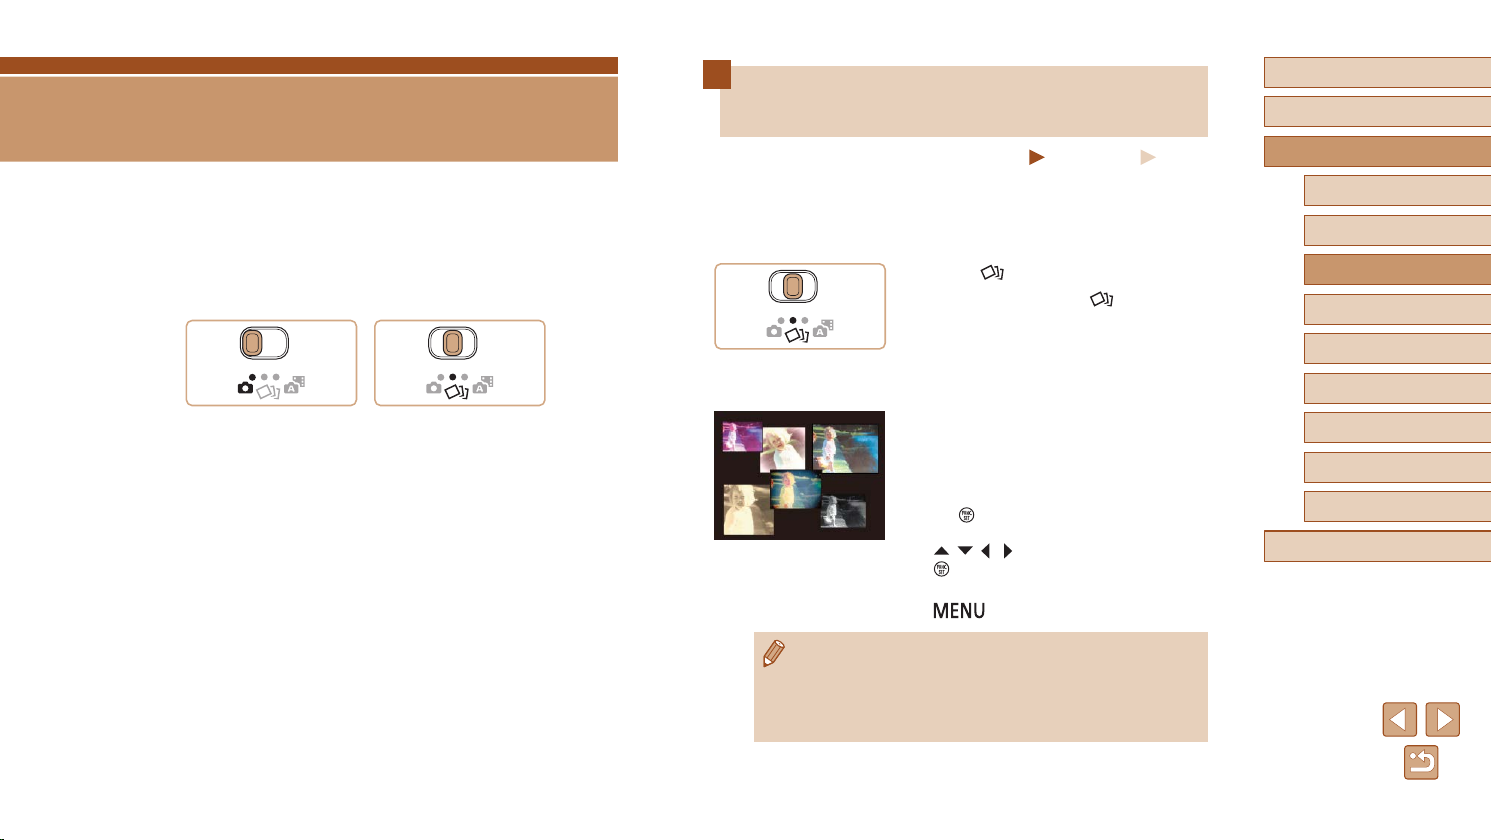
Other Shooting Modes
Shoot more effectively in various scenes, and take shots enhanced with
unique image effects or captured using special functions
Enjoying a Variety of Images from
Each Shot (Creative Shot)
Still Images
The camera determines the subject and shooting conditions, automatically
applying special effects and recomposing the shot to emphasize the
subject. Six still images are recorded for each shot. You can capture
multiple still images with effects using camera-determined settings.
Enter [ ] mode.
1
● Set the mode switch to [ ].
Shoot.
2
● Press the shutter button all the way
down. As you shoot, the shutter sound is
played three times.
● After the six images are displayed
in succession, they are displayed
simultaneously for about two seconds.
● To keep the images displayed until you
press the shutter button halfway, press
the [
] button. You can choose an image
for full-screen display by pressing the
[ ][ ][ ][ ] buttons, and then press the
[ ] button.
● To return to the original display, press the
] button.
[
Movies
Before Use
Basic Guide
Advanced Guide
Camera Basics
Auto Mode /
Hybrid Auto Mode
Other Shooting Modes
P Mode
Playback Mode
Wi-Fi Functions
Setting Menu
Accessories
Appendix
Index
● Shooting will take some time when the ash res, but hold the
camera steady until the shutter sound is played three times.
● The six images are managed together as a group (
● Simultaneous display of the six images as shown in step 2 is only
available immediately after you shoot.
=
69).
44
Page 45
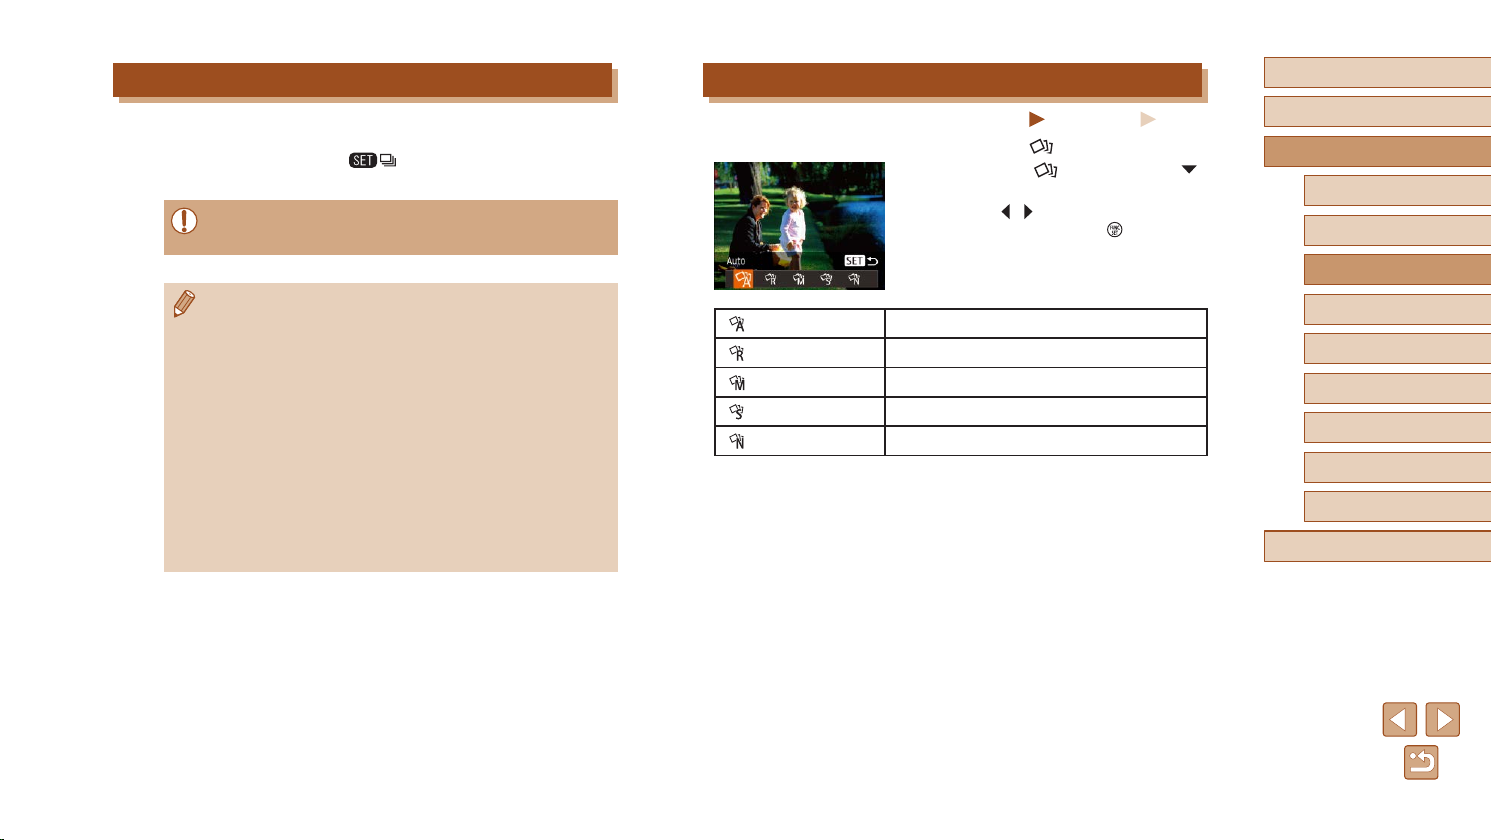
Image Display during Playback
The six images from each shot are managed together as a group, and
only the rst image in the series is displayed during playback. To indicate
that the image is part of a group, [ ] is displayed in the upper left of
the screen.
● If you erase a grouped image (=
are also erased. Be careful when erasing images.
74), all images in the group
Choosing Effects
Still Images
You can choose effects for images captured in [ ] mode.
● After choosing [
button.
● Press the [
effect, and then press the [ ] button.
] mode, press the [ ]
][ ] buttons to choose an
Movies
Before Use
Basic Guide
Advanced Guide
Camera Basics
Auto Mode /
Hybrid Auto Mode
Other Shooting Modes
● Grouped images can be played back individually (=
ungrouped (
● Protecting (
the group.
● Grouped images can be viewed individually when played back
using Image Search (
case, images are temporarily ungrouped.
● The following actions are not available for grouped images:
magnifying (
=
(
=
(
things, either view grouped images individually (
cancel grouping (
● Simultaneous display as shown in step 2 is only available
immediately after you shoot.
=
69).
=
72) a grouped image will protect all images in
=
67) or Smart Shufe (=
=
79), printing (=
131), or adding to a photobook (=
70), tagging as favorites (=
127), setting up individual image printing
=
69) rst.
133). To do these
71). In this
78), editing
=
69) or
69) and
Auto
Retro
Monochrome
Special
Natural
All effects
Images resemble old photos
Images are generated in one color
Bold, distinctive-looking images
Subdued, natural-looking images
P Mode
Playback Mode
Wi-Fi Functions
Setting Menu
Accessories
Appendix
Index
45
Page 46
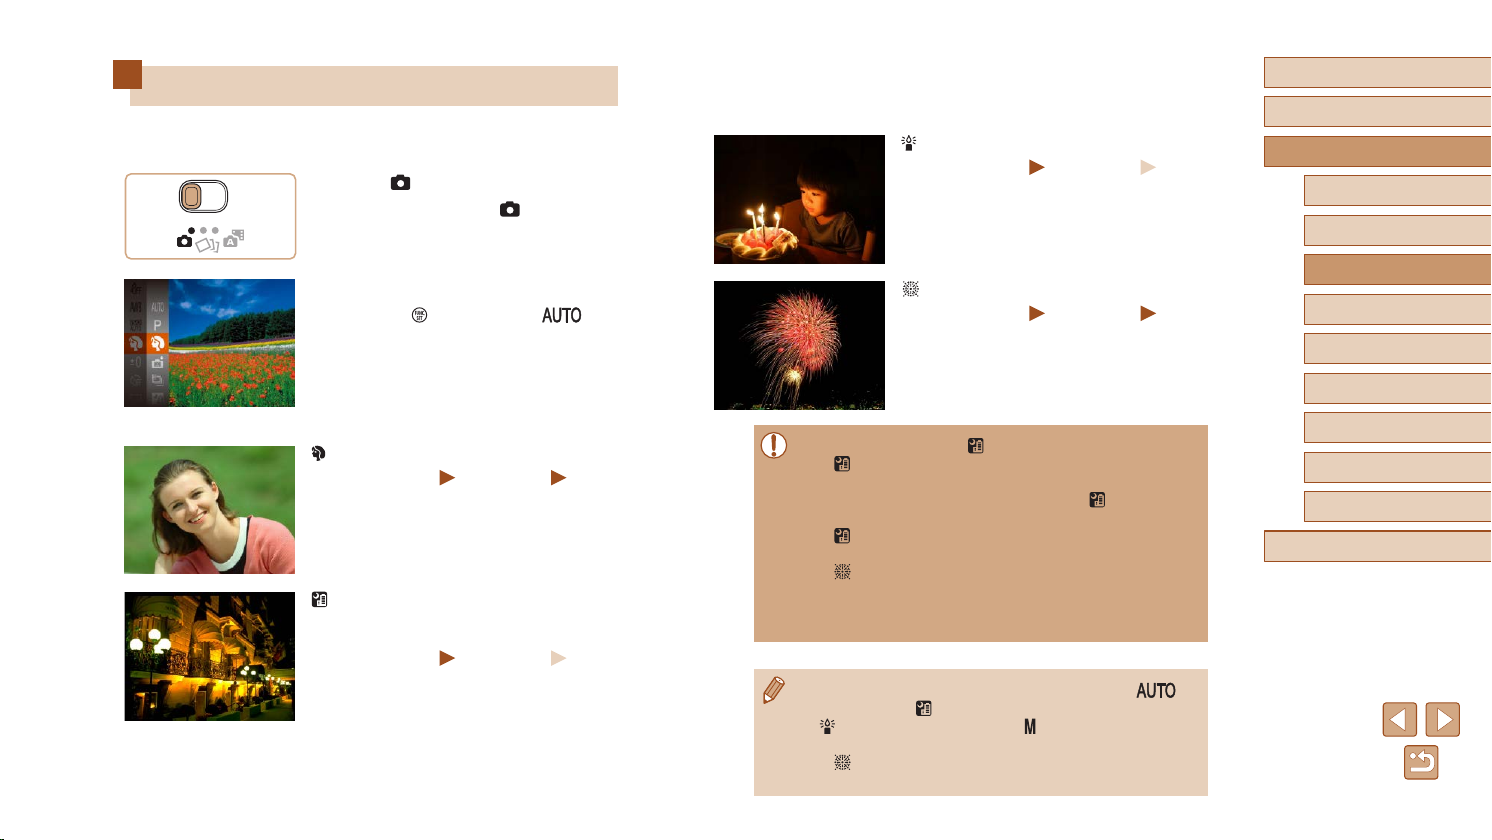
Specic Scenes
Choose a mode matching the shooting scene, and the camera will
automatically congure the settings for optimal shots.
Enter [ ] mode.
1
● Set the mode switch to [ ].
Choose a shooting mode.
2
● Press the [ ] button, choose [ ] in
the menu, and then choose a shooting
mode (=
24).
● A single image is created by combining
consecutive shots, reducing camera
shake and image noise.
Shooting under Low Light (Low Light)
Still Images
Movies
● Shoot with minimal camera and subject
shake even in low-light conditions.
Shooting Fireworks (Fireworks)
Still Images
Movies
● Vivid shots of reworks.
Before Use
Basic Guide
Advanced Guide
Camera Basics
Auto Mode /
Hybrid Auto Mode
Other Shooting Modes
P Mode
Playback Mode
Shoot.
3
Shooting Portraits (Portrait)
Still Images
● Take shots of people with a softening
effect.
Shooting Evening Scenes
without Using a Tripod
(Handheld Night Scene)
Still Images
● Beautiful shots of evening scenes or
portraits with evening scenery in the
background, without the need to hold the
camera very still (as with a tripod).
Movies
Movies
● Subjects appear larger in [ ] mode compared to other modes.
] mode, shots may look grainy because the ISO speed
● In [
=
55) is increased to suit the shooting conditions.
(
● Because the camera will shoot continuously in [
steady while shooting.
] mode, excessive motion blur or certain shooting conditions
● In [
may prevent you from obtaining the desired results.
] mode, mount the camera on a tripod or take other
● In [
measures to keep it still and prevent camera shake. Additionally,
you should set [IS Mode] to [Off] when using a tripod or other
means to secure the camera (
● When you use a tripod for evening scenes, shooting in [ ]
mode instead of [
] mode recording pixel setting is [ ] (2592 x 1944) and cannot
● [
be changed.
] mode, although no frames are displayed when you press
● In [
the shutter button halfway, optimal focus is still determined.
=
41).
] mode will give better results (=
] mode, hold it
28).
Wi-Fi Functions
Setting Menu
Accessories
Appendix
Index
46
Page 47
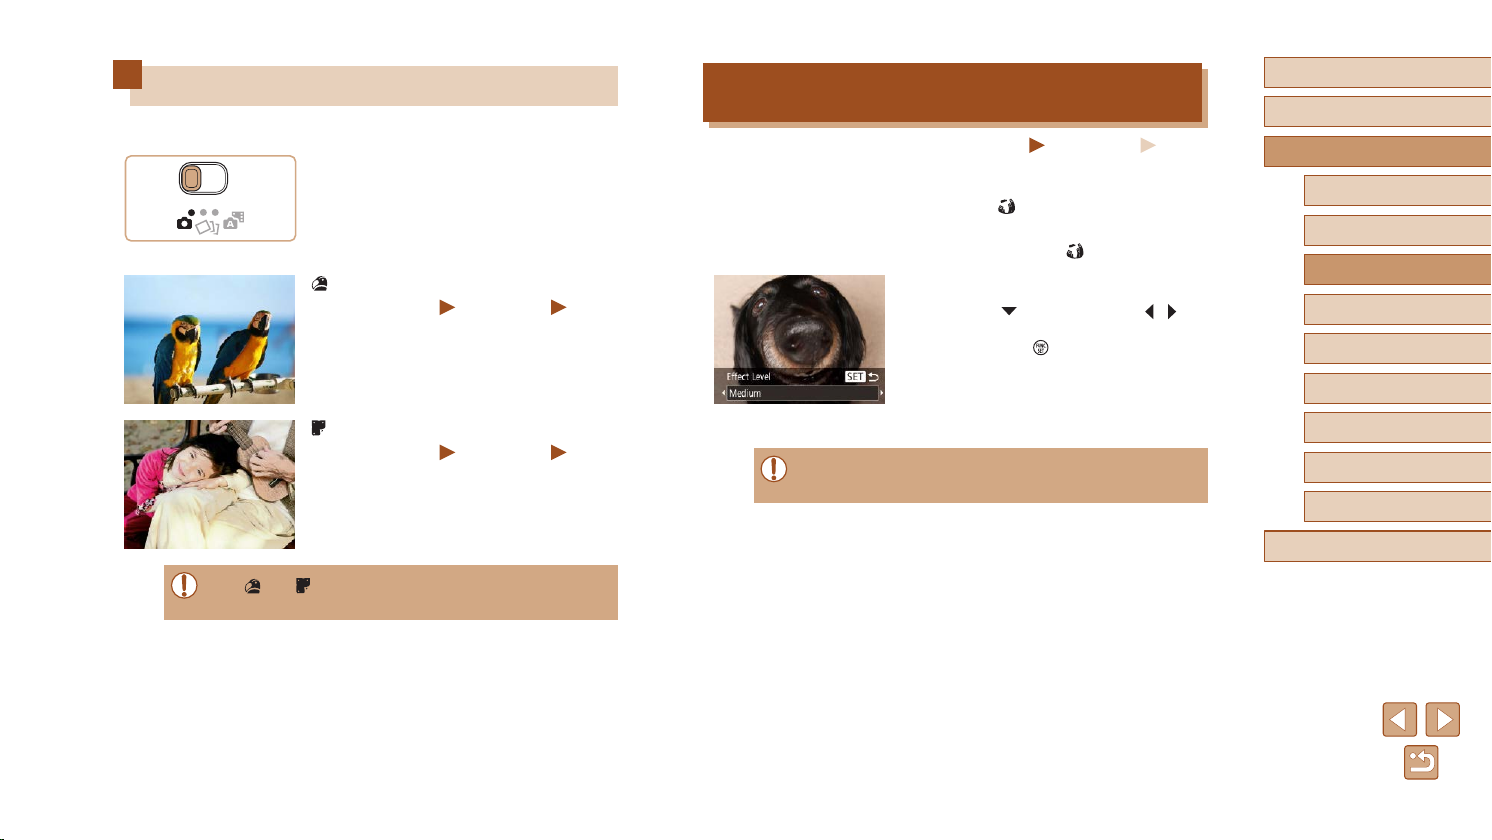
Applying Special Effects
Add a variety of effects to images when shooting.
Choose a shooting mode.
1
● Follow steps 1 – 2 in “Specic Scenes”
(=
46) to choose a shooting mode.
Shoot.
2
Shooting in Vivid Colors (Super Vivid)
● Shots in rich, vivid colors.
Posterized Shots (Poster Effect)
● Shots that resemble an old poster or
illustration.
● In [ ] and [ ] modes, try taking some test shots rst, to make
sure you obtain the desired results.
Still Images
Still Images
Movies
Movies
Shooting with a Fish-Eye Lens Effect
(Fish-Eye Effect)
Still Images
Shoot with the distorting effect of a sh-eye lens.
Choose [ ].
1
● Follow steps 1 – 2 in “Specic Scenes”
(=
46) and choose [ ].
Choose an effect level.
2
● Press the [ ] button, press the [ ][ ]
buttons to choose an effect level, and
then press the [ ] button.
● A preview is shown of how your shot will
look with the effect applied.
Shoot.
3
● Try taking some test shots rst, to make sure you obtain the
desired results.
Movies
Before Use
Basic Guide
Advanced Guide
Camera Basics
Auto Mode /
Hybrid Auto Mode
Other Shooting Modes
P Mode
Playback Mode
Wi-Fi Functions
Setting Menu
Accessories
Appendix
Index
47
Page 48
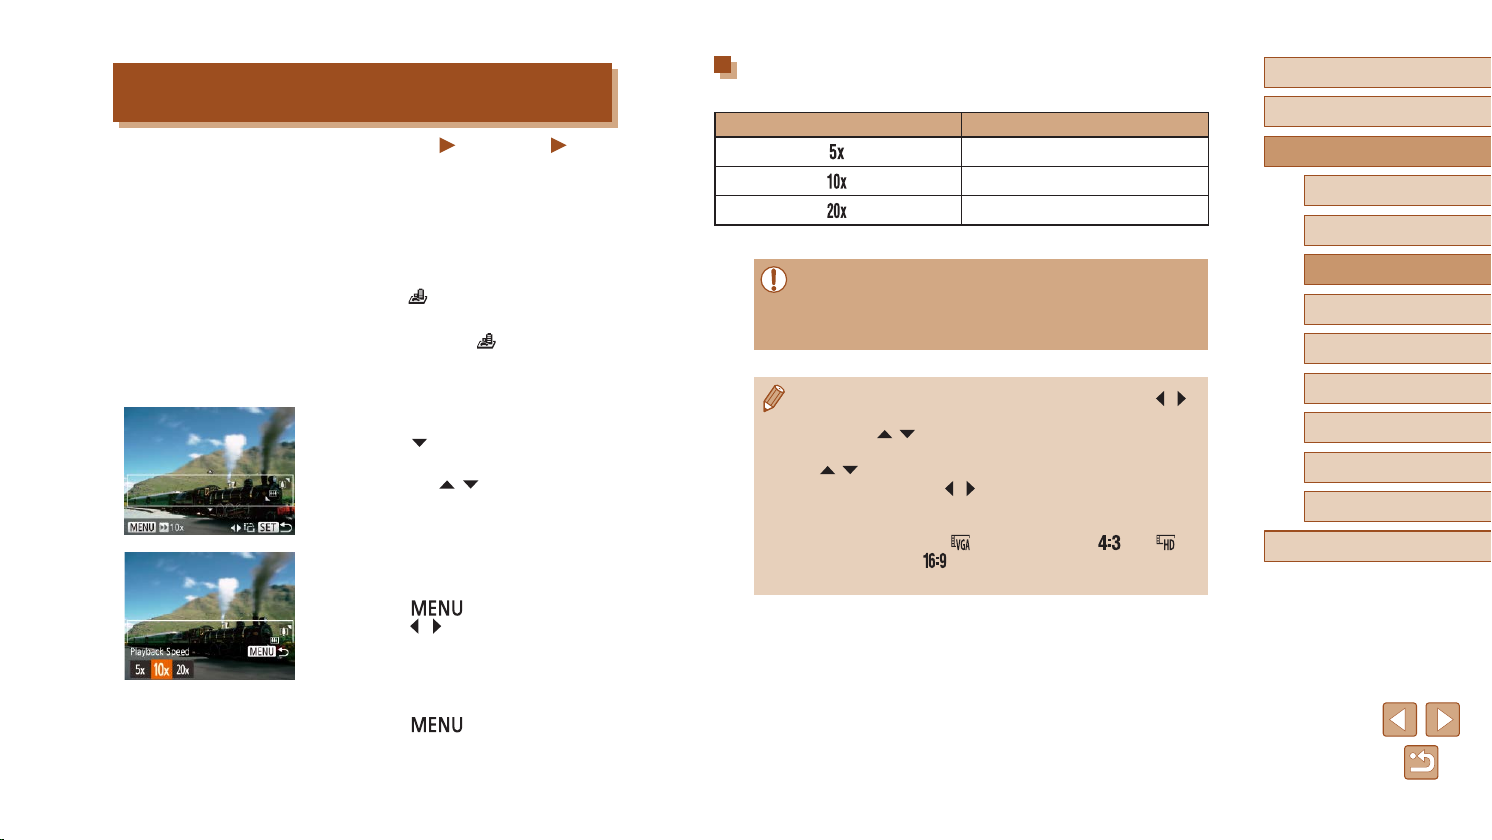
Shots Resembling Miniature Models
(Miniature Effect)
Still Images
Creates the effect of a miniature model, by blurring image areas above
and below your selected area.
You can also make movies that look like scenes in miniature models by
choosing the playback speed before the movie is recorded. People and
objects in the scene will move quickly during playback. Note that sound is
not recorded.
Choose [ ].
1
● Follow steps 1 – 2 in “Specic Scenes”
(=
46) and choose [ ].
● A white frame is displayed, indicating the
image area that will not be blurred.
Choose the area to keep in focus.
2
● Press the [ ] button.
● Move the zoom lever to resize the frame,
and press the [
For movies, choose the movie
3
][ ] buttons to move it.
playback speed.
● Press the [ ] button, and then
press the [ ][ ] buttons to choose the
speed.
Movies
Playback Speed and Estimated Playback Time
(for One-Minute Clips)
Speed Playback Time
Approx. 12 sec.
Approx. 6 sec.
Approx. 3 sec.
Movies are played back at 30 fps.
● The zoom is not available when shooting movies. Be sure to set
the zoom before shooting.
● Try taking some test shots rst, to make sure you obtain the
desired results.
● To switch the orientation of the frame to vertical, press the [ ][ ]
buttons in step 2. To return the frame to horizontal orientation,
press the [
● To move the frame when it is in horizontal orientation, press the
[
orientation, press the [
● Holding the camera vertically will change the orientation of the
frame.
● Movie image quality is [
an aspect ratio of [
be changed.
][ ] buttons.
][ ] buttons, and to move the frame when it is in vertical
][ ] buttons.
] at an aspect ratio of [ ] and [ ] at
] (=
38). These quality settings cannot
Before Use
Basic Guide
Advanced Guide
Camera Basics
Auto Mode /
Hybrid Auto Mode
Other Shooting Modes
P Mode
Playback Mode
Wi-Fi Functions
Setting Menu
Accessories
Appendix
Index
Return to the shooting screen and
4
shoot.
● Press the [ ] button to return to the
shooting screen, and then shoot.
48
Page 49
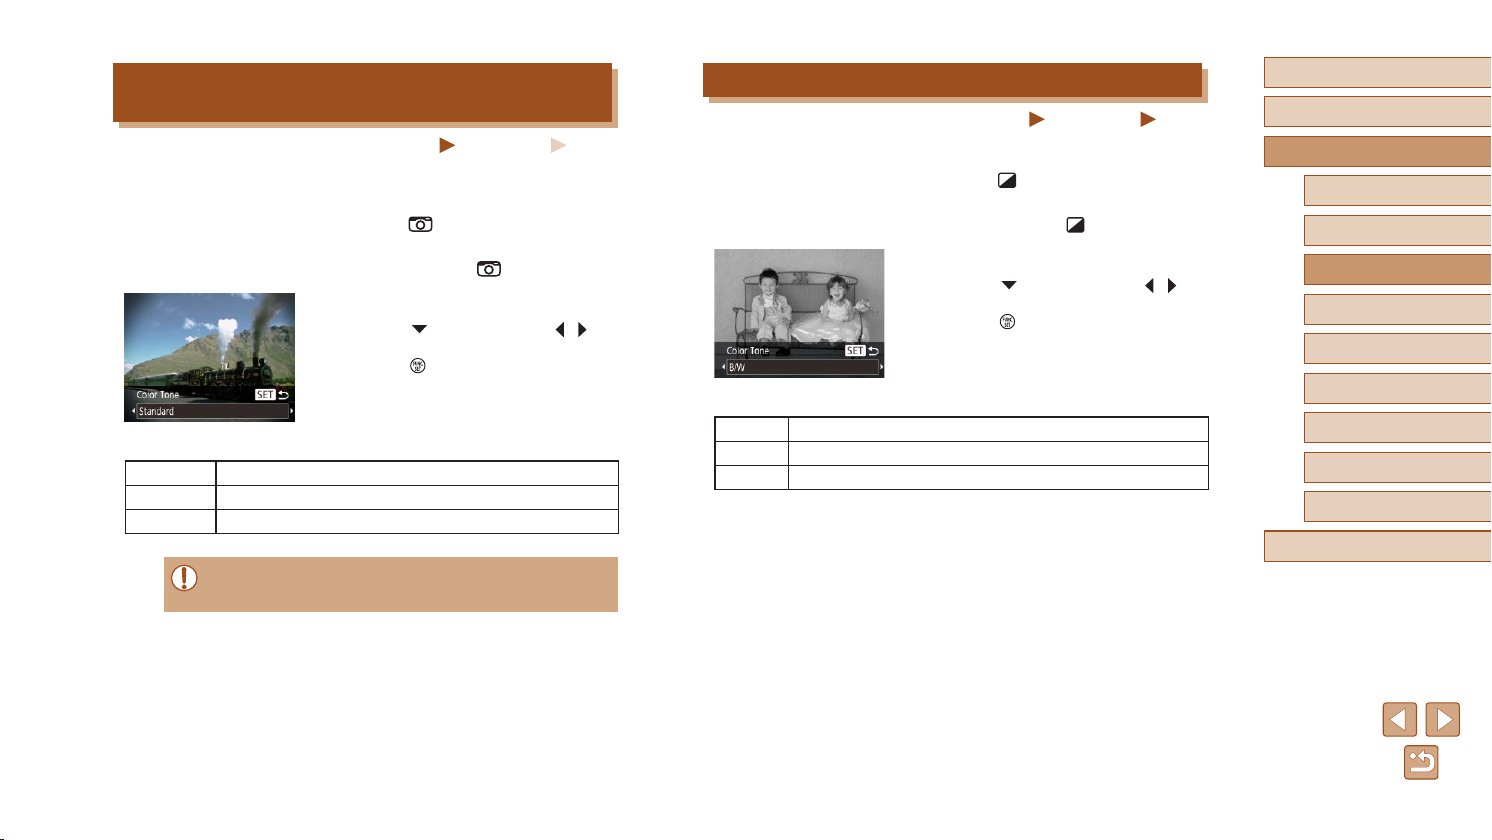
Shooting with a Toy Camera Effect
(Toy Camera Effect)
Still Images
This effect makes images resemble shots from a toy camera by vignetting
(darker, blurred image corners) and changing the overall color.
Choose [ ].
1
● Follow steps 1 – 2 in “Specic Scenes”
(=
46) and choose [ ].
Choose a color tone.
2
● Press the [ ] button, press the [ ][ ]
buttons to choose a color tone, and then
press the [ ] button.
● A preview is shown of how your shot will
look with the effect applied.
Shoot.
3
Standard Shots resemble toy camera images.
Warm Images have a warmer tone than with [Standard].
Cool Images have a cooler tone than with [Standard].
● Try taking some test shots rst, to make sure you obtain the
desired results.
Movies
Shooting in Monochrome
Still Images
Shoot images in black and white, sepia, or blue and white.
Choose [ ].
1
● Follow steps 1 – 2 in “Specic Scenes”
(=
46) and choose [ ].
Choose a color tone.
2
● Press the [ ] button, press the [ ][ ]
buttons to choose a color tone, and then
press the [ ] button.
● A preview is shown of how your shot will
look with the effect applied.
Shoot.
3
B/W Black and white shots.
Sepia Sepia tone shots.
Blue Blue and white shots.
Movies
Before Use
Basic Guide
Advanced Guide
Camera Basics
Auto Mode /
Hybrid Auto Mode
Other Shooting Modes
P Mode
Playback Mode
Wi-Fi Functions
Setting Menu
Accessories
Appendix
Index
49
Page 50
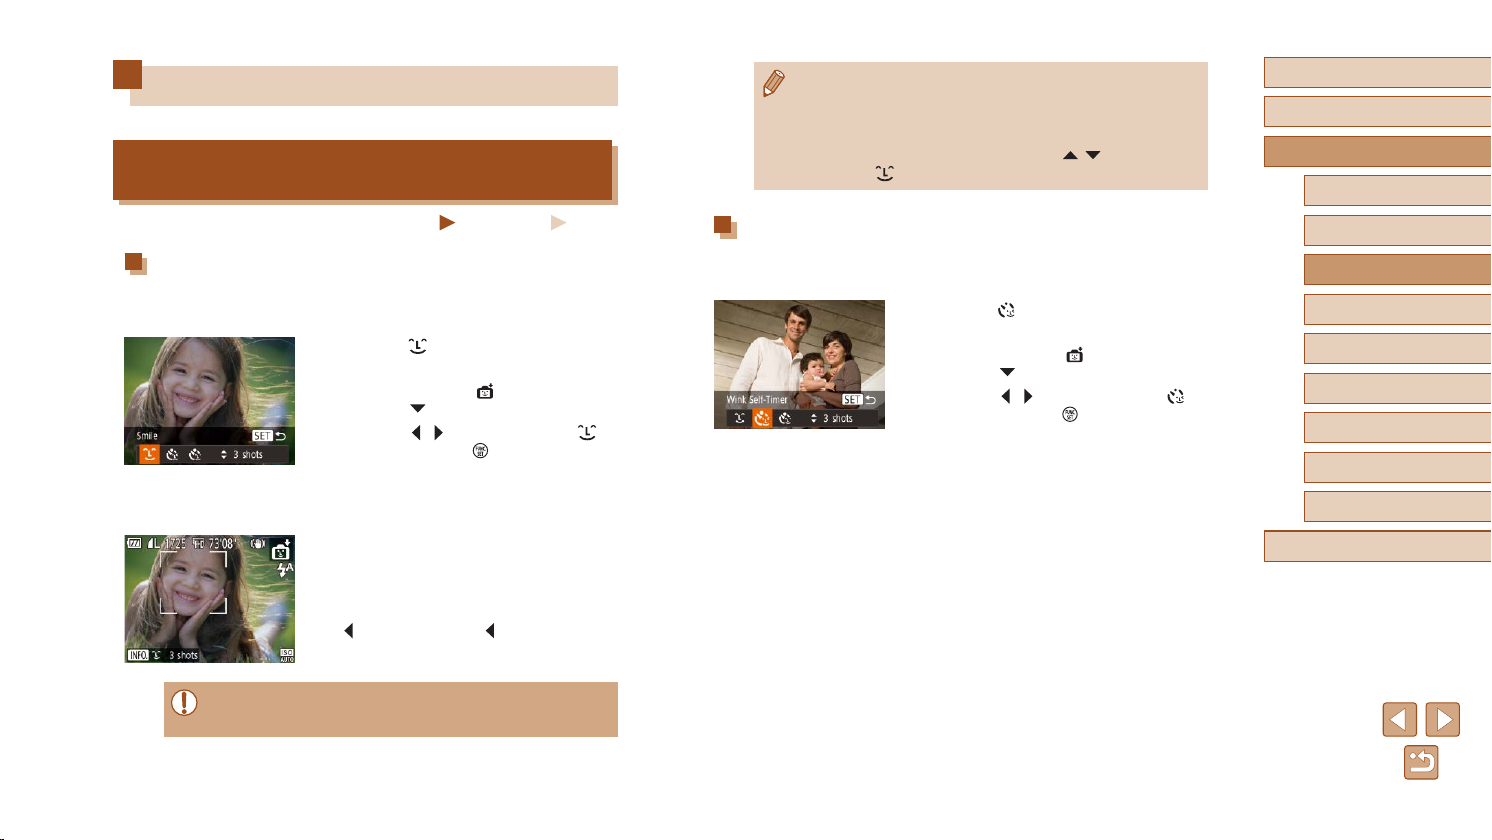
Special Modes for Other Purposes
Auto Shooting after Face Detection
(Smart Shutter)
Still Images
Auto Shooting after Smile Detection (Smile)
The camera shoots automatically after detecting a smile, even without you
pressing the shutter button.
Choose [ ].
1
● Follow steps 1 – 2 in “Specic Scenes”
(=
46) and choose [ ], and then
press the [ ] button.
● Press the [
and then press the [ ] button.
● The camera now enters shooting standby
mode, and [Smile Detection on] is
displayed.
Aim the camera at a person.
2
● Each time the camera detects a smile, it
will shoot after the lamp lights up.
● To pause smile detection, press the
] button. Press the [ ] button again to
[
resume detection.
● Switch to another mode when you nish shooting, or the camera
will continue shooting each time a smile is detected.
][ ] buttons to choose [ ],
Movies
● You can also shoot as usual by pressing the shutter button.
● The camera can detect smiles more easily when subjects face
the camera and open their mouth wide enough so that teeth are
visible.
● To change the number of shots, press the [
choosing [
] in step 1.
][ ] buttons after
Auto Shooting after Wink Detection (Wink Self-Timer)
Aim the camera at a person and press the shutter button all the way
down. The camera will shoot about two seconds after a wink is detected.
Choose [ ].
1
● Follow steps 1 – 2 in “Specic Scenes”
(=
46) and choose [ ], and then
press the [ ] button.
● Press the [
and then press the [ ] button.
Compose the shot and press the
2
shutter button halfway.
● Make sure a green frame is displayed
around the face of the person who will
wink.
Press the shutter button all the way
3
down.
● The camera now enters shooting standby
mode, and [Wink to take picture] is
displayed.
● The lamp blinks and the self-timer sound
is played.
][ ] buttons to choose [ ],
Before Use
Basic Guide
Advanced Guide
Camera Basics
Auto Mode /
Hybrid Auto Mode
Other Shooting Modes
P Mode
Playback Mode
Wi-Fi Functions
Setting Menu
Accessories
Appendix
Index
50
Page 51
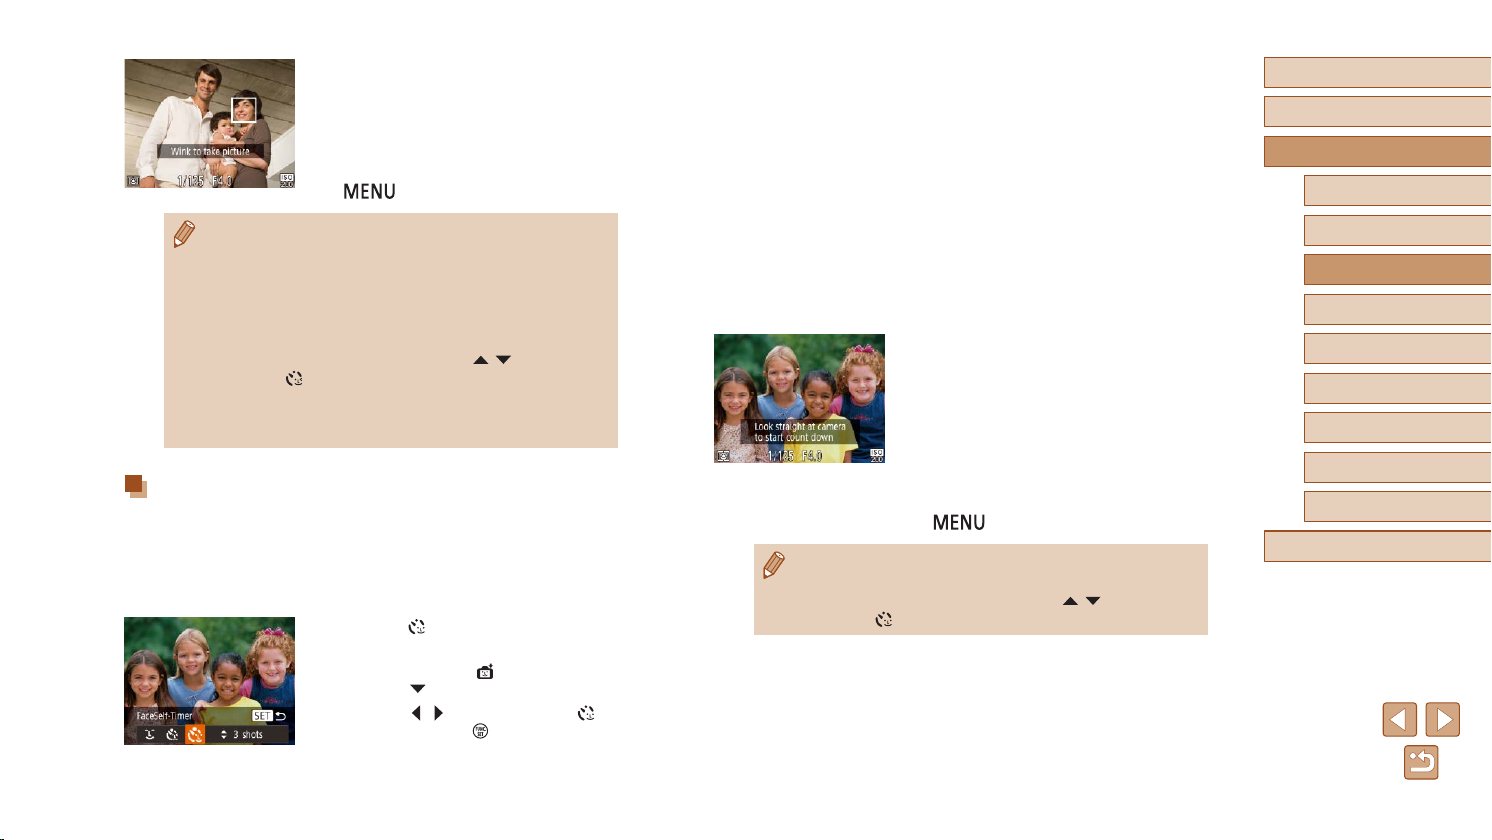
Face the camera and wink.
4
● The camera will shoot about two seconds
after detecting a wink by the person
whose face is inside the frame.
● To cancel shooting after you have
triggered the self-timer, press the
] button.
[
● If the wink is not detected, wink again slowly and deliberately.
● Winking may not be detected if eyes are obscured by hair, a hat,
or glasses.
● Closing and opening both eyes at once will also be detected as
a wink.
● If winking is not detected, the camera will shoot about 15 seconds
later.
● To change the number of shots, press the [
choosing [
● If no one is in the shooting area when the shutter button is
pressed all the way down, the camera will shoot after a person
enters the shooting area and winks.
] in step 1.
][ ] buttons after
Auto Shooting after Detecting New Person
(Face Self-Timer)
The camera will shoot about two seconds after detecting that the face of
another person (such as the photographer) has entered the shooting area
(=
59). This is useful when including yourself in group photos or similar
shots.
Choose [ ].
1
● Follow steps 1 – 2 in “Specic Scenes”
(=
46) and choose [ ], and then
press the [ ] button.
● Press the [
and then press the [ ] button.
][ ] buttons to choose [ ],
Compose the shot and press the
2
shutter button halfway.
● Make sure a green frame is displayed
around the face you focus on and white
frames around other faces.
Press the shutter button all the way
3
down.
● The camera now enters shooting standby
mode, and [Look straight at camera to
start count down] is displayed.
● The lamp blinks and the self-timer sound
is played.
Join the subjects in the shooting
4
area and look at the camera.
● After the camera detects a new face, the
lamp blinking and self-timer sound will
speed up. (When the ash res, the lamp
will remain lit.) About two seconds later,
the camera will shoot.
● To cancel shooting after you have
triggered the self-timer, press the
] button.
[
● Even if your face is not detected after you join the others in the
shooting area, the camera will shoot about 15 seconds later.
● To change the number of shots, press the [
choosing [
] in step 1.
][ ] buttons after
Before Use
Basic Guide
Advanced Guide
Camera Basics
Auto Mode /
Hybrid Auto Mode
Other Shooting Modes
P Mode
Playback Mode
Wi-Fi Functions
Setting Menu
Accessories
Appendix
Index
51
Page 52
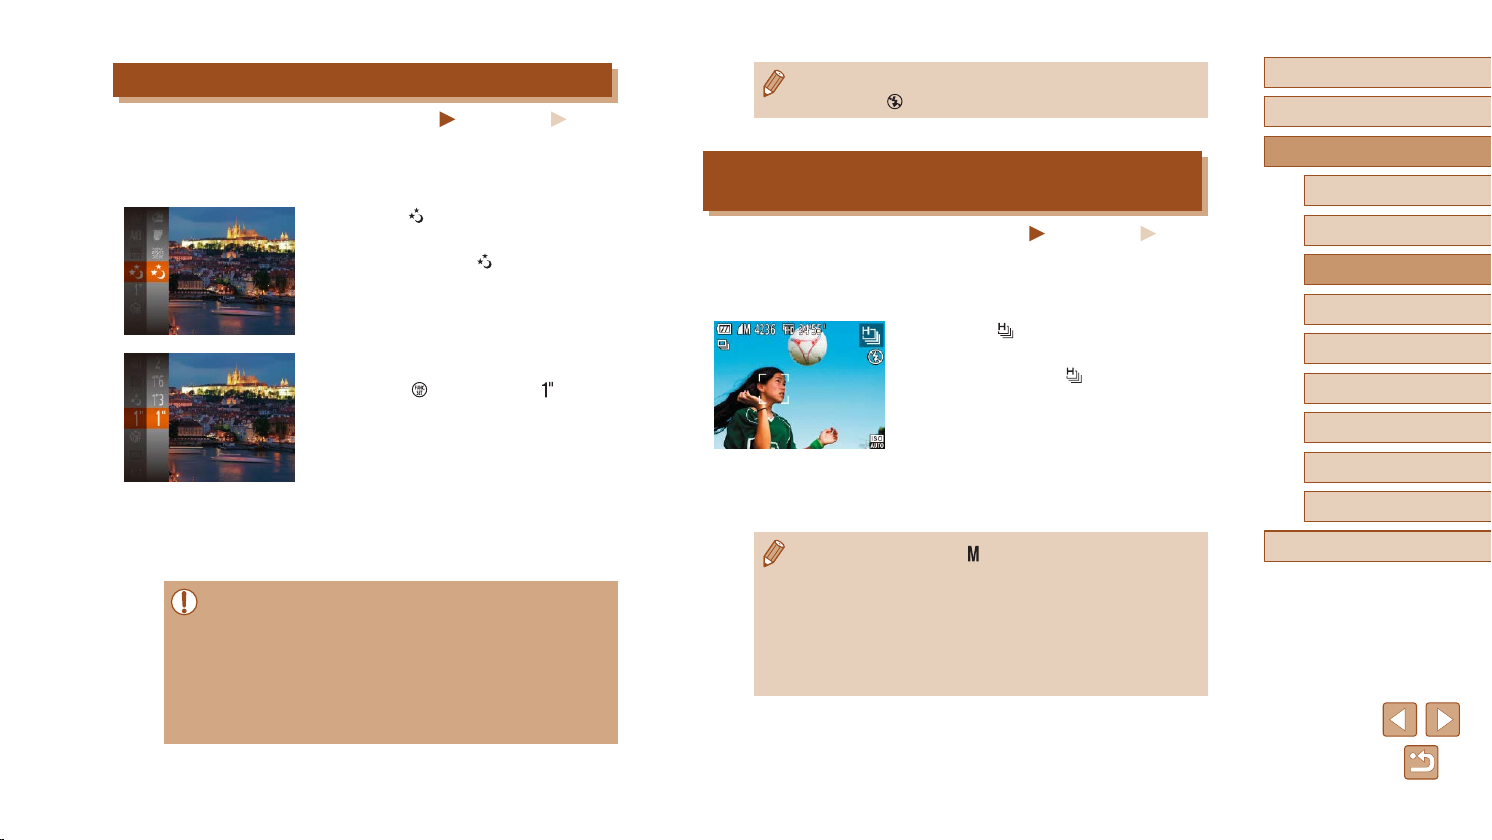
Shooting Long Exposures (Long Shutter)
Still Images
Specify a shutter speed of 1 – 15 seconds to shoot long exposures. In this
case, mount the camera on a tripod or take other measures to prevent
camera shake.
Choose [ ].
1
● Follow steps 1 – 2 in “Specic Scenes”
(=
46) and choose [ ].
Choose the shutter speed.
2
● Press the [ ] button, choose [ ] in the
menu, and choose the desired shutter
speed (=
Check the exposure.
3
● Press the shutter button halfway to view
the exposure for your selected shutter
speed.
Shoot.
4
● On-screen image brightness in step 3, when you pressed the
shutter button halfway, may not match the brightness of your
shots.
● With shutter speeds of 1.3 seconds or slower, there will be a
delay before you can shoot again, as the camera processes
images to reduce noise.
● Set [IS Mode] to [Off] when using a tripod or other means to
secure the camera (
=
41).
24).
Movies
● If the ash res, your shot may be overexposed. In this case, set
the ash to [
] and shoot again (=
62).
High-Speed Continuous Shooting
(High-Speed Burst)
Still Images
You can shoot a series of shots in rapid succession by holding the shutter
button all the way down. For details on the continuous shooting speed,
see “Camera” (=
149).
Choose [ ].
1
● Follow steps 1 – 2 in “Specic Scenes”
(=
46) and choose [ ].
Shoot.
2
● Hold the shutter button all the way down
to shoot continuously.
● Recording pixel setting is [ ] (2592 x 1944) and cannot be
changed.
● Focus, image brightness, and color are determined by the rst
shot.
● Shooting may stop momentarily or continuous shooting may slow
down depending on shooting conditions, camera settings, and the
zoom position.
● As more shots are taken, shooting may slow down.
Movies
Before Use
Basic Guide
Advanced Guide
Camera Basics
Auto Mode /
Hybrid Auto Mode
Other Shooting Modes
P Mode
Playback Mode
Wi-Fi Functions
Setting Menu
Accessories
Appendix
Index
52
Page 53
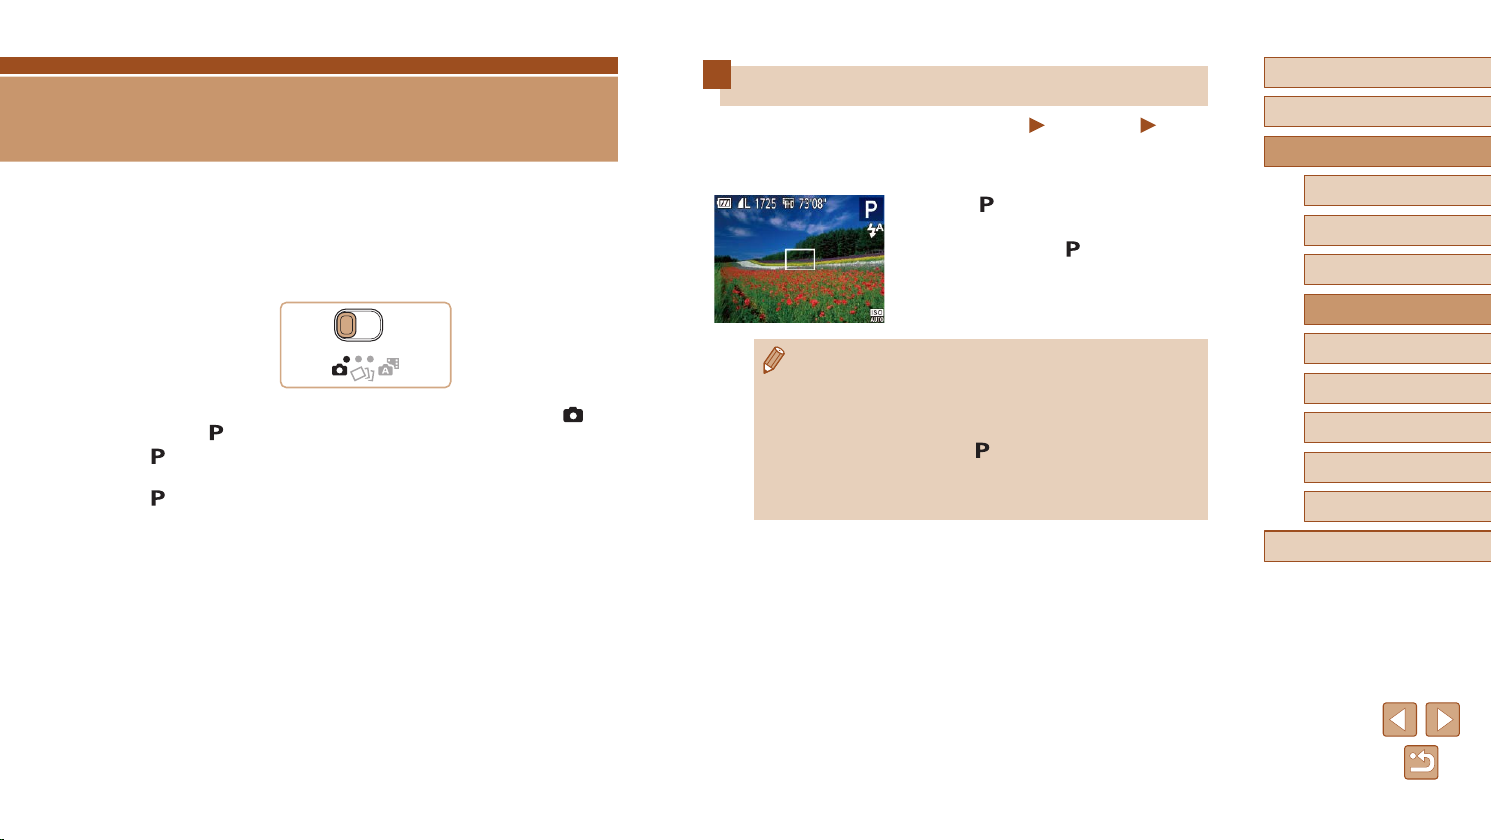
P Mode
More discerning shots, in your preferred shooting style
Shooting in Program AE ([P] Mode)
Still Images
You can customize many function settings to suit your preferred shooting
style.
Enter [ ] mode.
1
● Follow steps 1 – 2 in “Specic Scenes”
(=
46) and choose [ ].
Customize the settings as desired
2
(= 54 – = 63), and then shoot.
Movies
Before Use
Basic Guide
Advanced Guide
Camera Basics
Auto Mode /
Hybrid Auto Mode
Other Shooting Modes
P Mode
● Instructions in this chapter apply when the mode switch set to [ ] and
mode to [ ].
]: Program AE; AE: Auto Exposure
● [
● Before using a function introduced in this chapter in modes other than
], make sure the function is available in that mode (=
[
142).
● If the optimum exposure cannot be obtained when you press the
shutter button halfway, the shutter speed and aperture value are
displayed in orange. In this case, try adjusting the ISO speed
=
55) or activating the ash (if subjects are dark, =
(
which may enable optimum exposure.
● Movies can be recorded in [
movie button. However, some FUNC. (
=
25) settings may be automatically adjusted for movie
(
recording.
] mode as well, by pressing the
=
24) and MENU
62),
Playback Mode
Wi-Fi Functions
Setting Menu
Accessories
Appendix
Index
53
Page 54
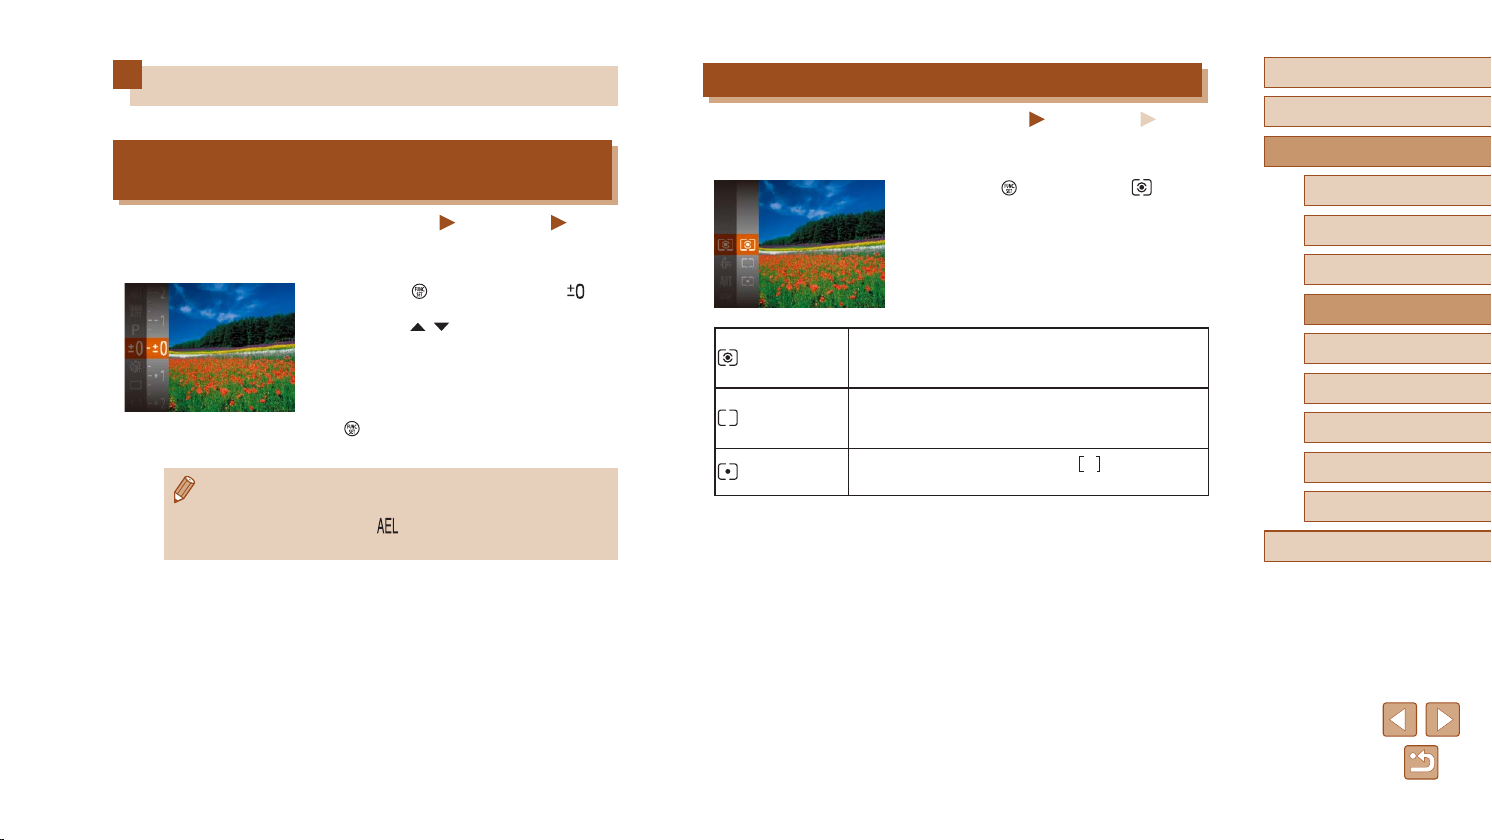
Image Brightness (Exposure)
Adjusting Image Brightness
(Exposure Compensation)
Still Images
The standard exposure set by the camera can be adjusted in 1/3-stop
increments, in a range of -2 to +2.
● Press the [
] button and choose [ ]
in the menu. As you watch the screen,
press the [ ][ ] buttons to adjust
brightness (=
24).
● When shooting movies, shoot with the
exposure compensation bar displayed.
● When shooting still images, press the
] button to display the set exposure
[
compensation amount, and then shoot.
● You can also shoot still images with exposure compensation bar
displayed.
● While recording a movie, [
locked.
] is displayed, and the exposure is
Movies
Changing the Metering Method
Still Images
Adjust the metering method (how brightness is measured) to suit shooting
conditions as follows.
● Press the [
] button, choose [ ] in the
menu, and choose the desired option
(=
24).
● The option you congured is now
displayed.
For typical shooting conditions, including backlit
Evaluative
shots. Automatically adjusts exposure to match the
shooting conditions.
Center
Weighted Avg.
Spot
Determines the average brightness of light across
the entire image area, calculated by treating
brightness in the central area as more important.
Metering restricted to within the [
Point frame), displayed in the center of the screen.
] (Spot AE
Movies
Before Use
Basic Guide
Advanced Guide
Camera Basics
Auto Mode /
Hybrid Auto Mode
Other Shooting Modes
P Mode
Playback Mode
Wi-Fi Functions
Setting Menu
Accessories
Appendix
Index
54
Page 55
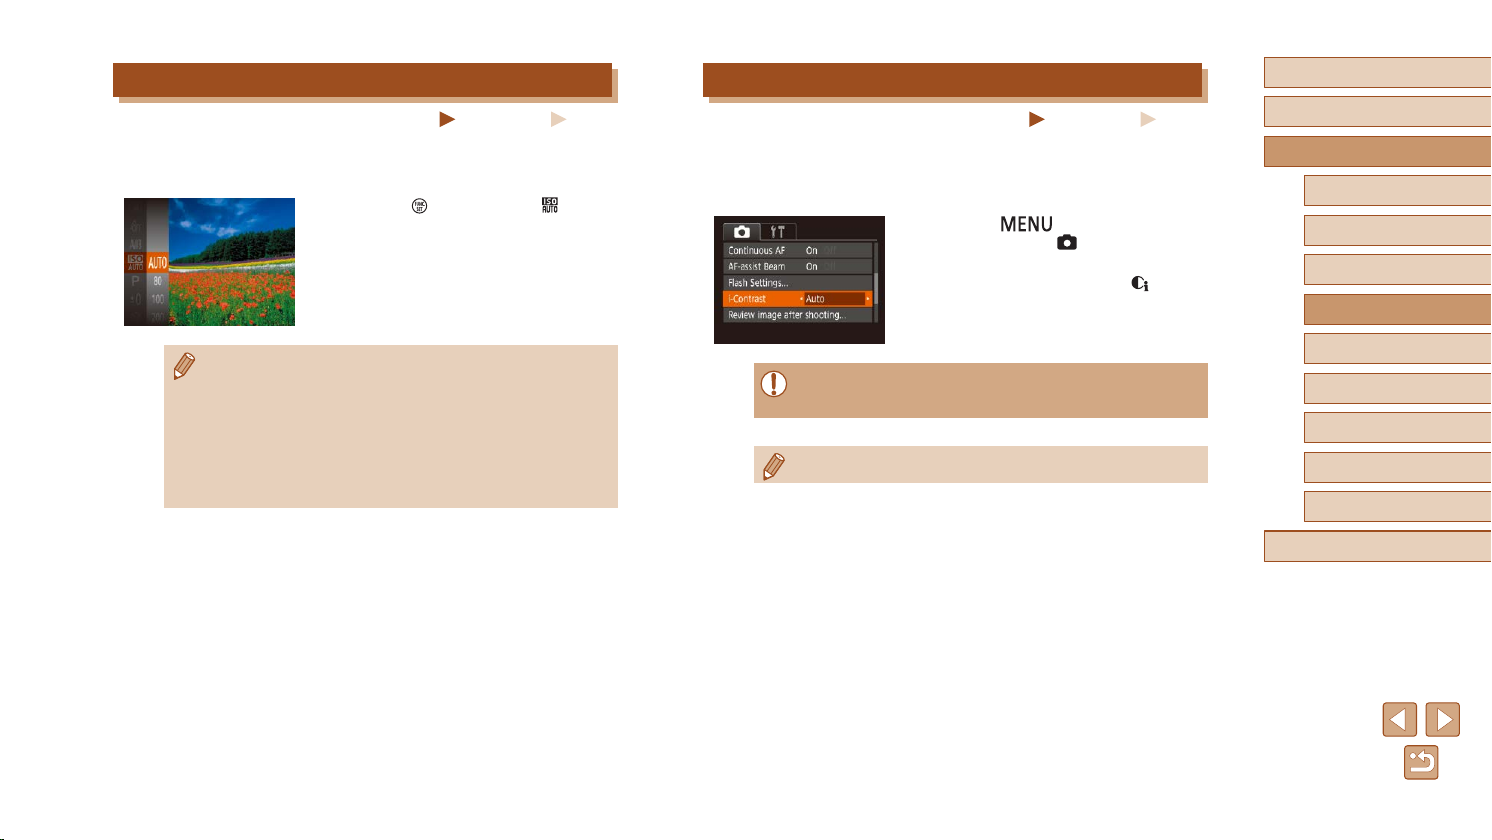
Changing the ISO Speed
Still Images
Set the ISO speed to [AUTO] for automatic adjustment to suit the shooting
mode and conditions. Otherwise, set a higher ISO speed for higher
sensitivity, or a lower value for lower sensitivity.
● Press the [
] button, choose [ ] in the
menu, and choose the desired option
(=
24).
● The option you congured is now
displayed.
Movies
Correcting Image Brightness (i-Contrast)
Still Images
Before shooting, excessively bright or dark image areas (such as faces or
backgrounds) can be detected and automatically adjusted to the optimal
brightness. Insufcient overall image contrast can also be automatically
corrected before shooting to make subjects stand out better.
● Press the [
] button, choose
[i-Contrast] on the [ ] tab, and then
choose [Auto] (=
25).
● Once the setting is complete, [
displayed.
Movies
] is
Before Use
Basic Guide
Advanced Guide
Camera Basics
Auto Mode /
Hybrid Auto Mode
Other Shooting Modes
P Mode
● To view the automatically determined ISO speed when you have
set the ISO speed to [AUTO], press the shutter button halfway.
● Although choosing a lower ISO speed may reduce image
graininess, there may be a greater risk of subject and camera
shake in some shooting conditions.
● The faster shutter speed used at higher ISO speeds reduces
subject and camera shake and increases the ash range.
However, shots may look grainy.
● Under some shooting conditions, correction may be inaccurate or
may cause images to appear grainy.
● You can also correct existing images (=
81).
Playback Mode
Wi-Fi Functions
Setting Menu
Accessories
Appendix
Index
55
Page 56
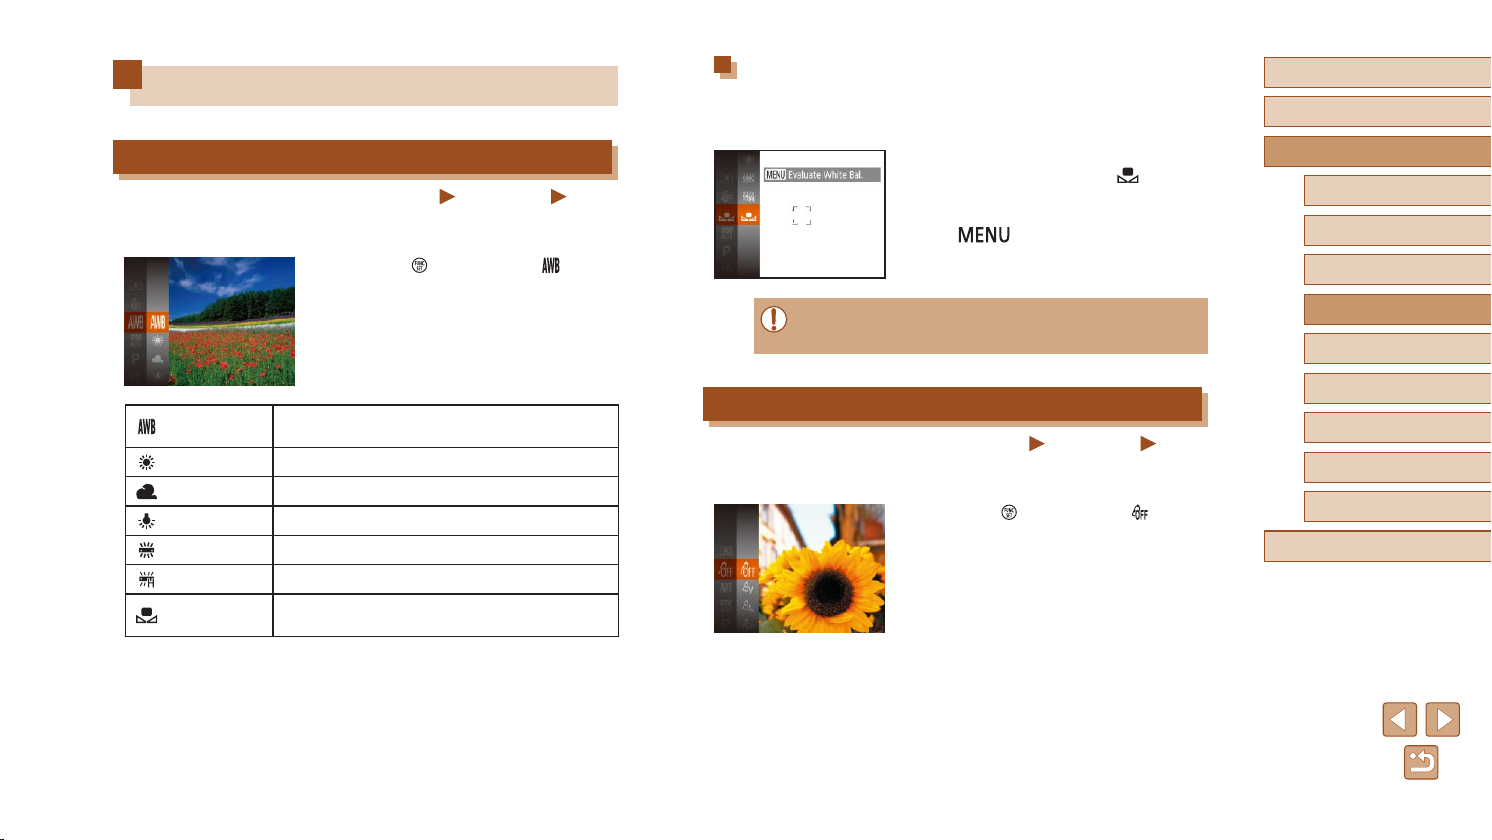
Image Colors
Adjusting White Balance
Still Images
By adjusting white balance (WB), you can make image colors look more
natural for the scene you are shooting.
● Press the [
] button, choose [ ] in the
menu, and choose the desired option
(=
24).
● The option you congured is now
displayed.
Movies
Custom White Balance
For image colors that look natural under the light in your shot, adjust white
balance to suit the light source where you are shooting. Set the white
balance under the same light source that will illuminate your shot.
● Follow the steps in “Adjusting White
Balance” (
● Aim the camera at a plain white subject,
so that the entire screen is white. Press
the [
● The tint of the screen changes once the
white balance data has been recorded.
● Colors may look unnatural if you change camera settings after
recording white balance data.
=
56) to choose [ ].
] button.
Before Use
Basic Guide
Advanced Guide
Camera Basics
Auto Mode /
Hybrid Auto Mode
Other Shooting Modes
P Mode
Playback Mode
Auto
Automatically sets the optimal white balance for
the shooting conditions.
Day Light For shooting outdoors in fair weather.
Cloudy For shooting in cloudy weather or at twilight.
Tungsten For shooting under ordinary incandescent lighting.
Fluorescent For shooting under white uorescent lighting.
Fluorescent H For shooting under daylight uorescent lighting.
Custom
For manually setting a custom white balance
(=
56).
Changing Image Color Tones (My Colors)
Still Images
Change image color tones as desired, such as converting images to sepia
or black and white.
● Press the [
] button, choose [ ] in the
menu, and choose the desired option
(=
24).
● The option you congured is now
displayed.
Movies
Wi-Fi Functions
Setting Menu
Accessories
Appendix
Index
56
Page 57
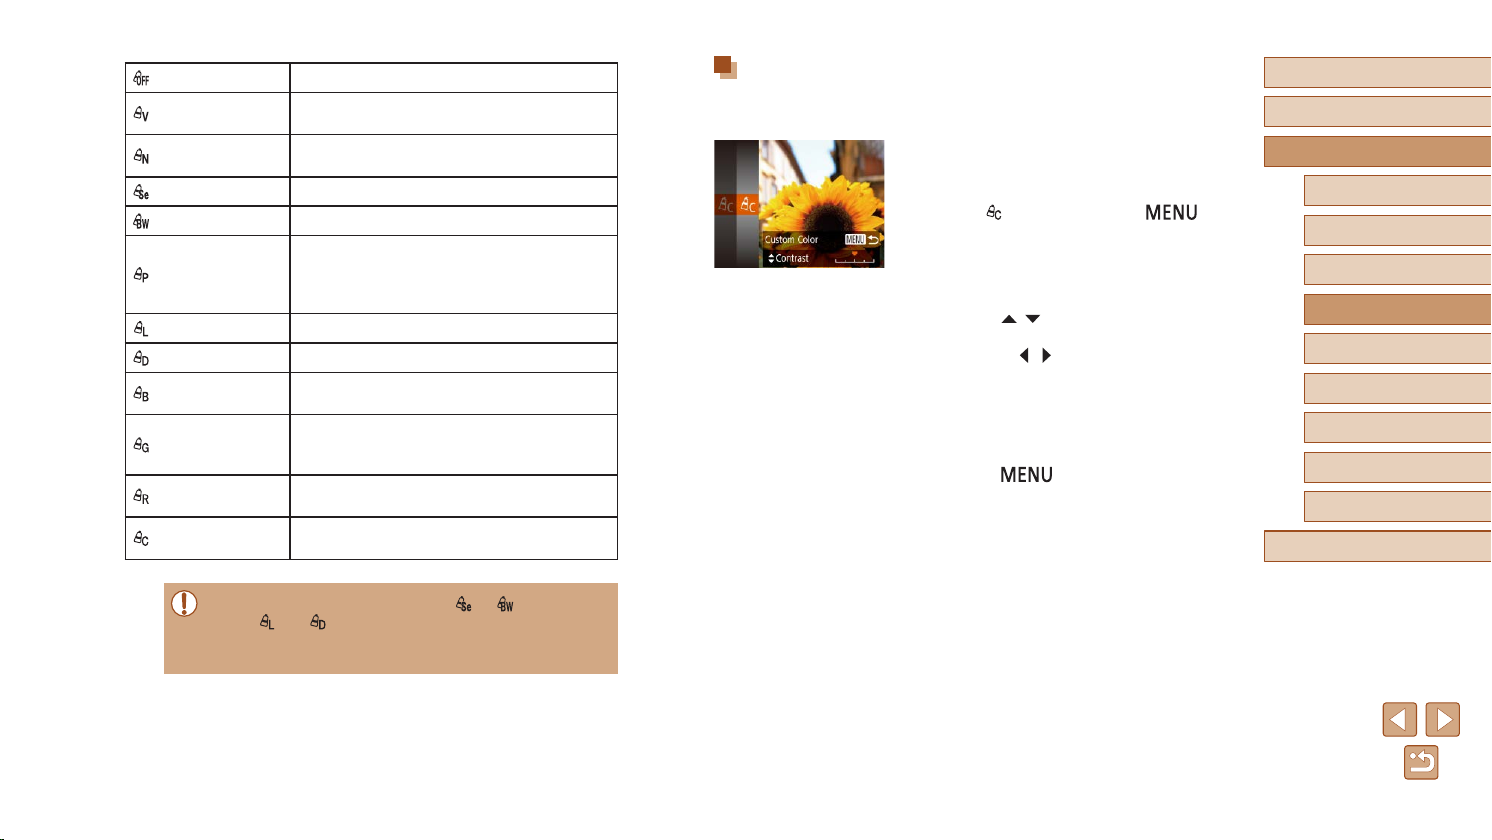
My Colors Off
Vivid
Neutral
Emphasizes contrast and color saturation,
making images sharper.
Tones down contrast and color saturation for
subdued images.
–
Sepia Creates sepia tone images.
B/W Creates black and white images.
Combines the effects of Vivid Blue, Vivid
Positive Film
Green, and Vivid Red to produce intense yet
natural-looking colors resembling images on
positive lm.
Lighter Skin Tone Lightens skin tones.
Darker Skin Tone Darkens skin tones.
Vivid Blue
Emphasizes blues in images. Makes the sky,
ocean, and other blue subjects more vivid.
Emphasizes greens in images. Makes
Vivid Green
mountains, foliage, and other green subjects
more vivid.
Vivid Red
Custom Color
Emphasizes reds in images. Makes red
subjects more vivid.
Adjust contrast, sharpness, color saturation,
and other qualities as desired (=
57).
Custom Color
Choose the desired level of image contrast, sharpness, color saturation,
red, green, blue, and skin tones in a range of 1 – 5.
Access the setting screen.
1
● Follow the steps in “Changing Image
Color Tones (My Colors)” (=
choose [ ], and then press the [ ]
button.
Congure the setting.
2
● Press the [ ][ ] buttons to choose
an item, and then specify the value by
pressing the [ ][ ] buttons.
● For stronger/more intense effects (or
darker skin tones), adjust the value to
the right, and for weaker/lighter effects
(or lighter skin tones), adjust the value to
the left.
● Press the [
] button to complete
the setting.
56) to
Before Use
Basic Guide
Advanced Guide
Camera Basics
Auto Mode /
Hybrid Auto Mode
Other Shooting Modes
P Mode
Playback Mode
Wi-Fi Functions
Setting Menu
Accessories
Appendix
Index
● White balance (=
] and [ ] modes, colors other than people’s skin tone
● With [
may change. These settings may not produce the expected
results with some skin tones.
56) cannot be set in [ ] or [ ] modes.
57
Page 58
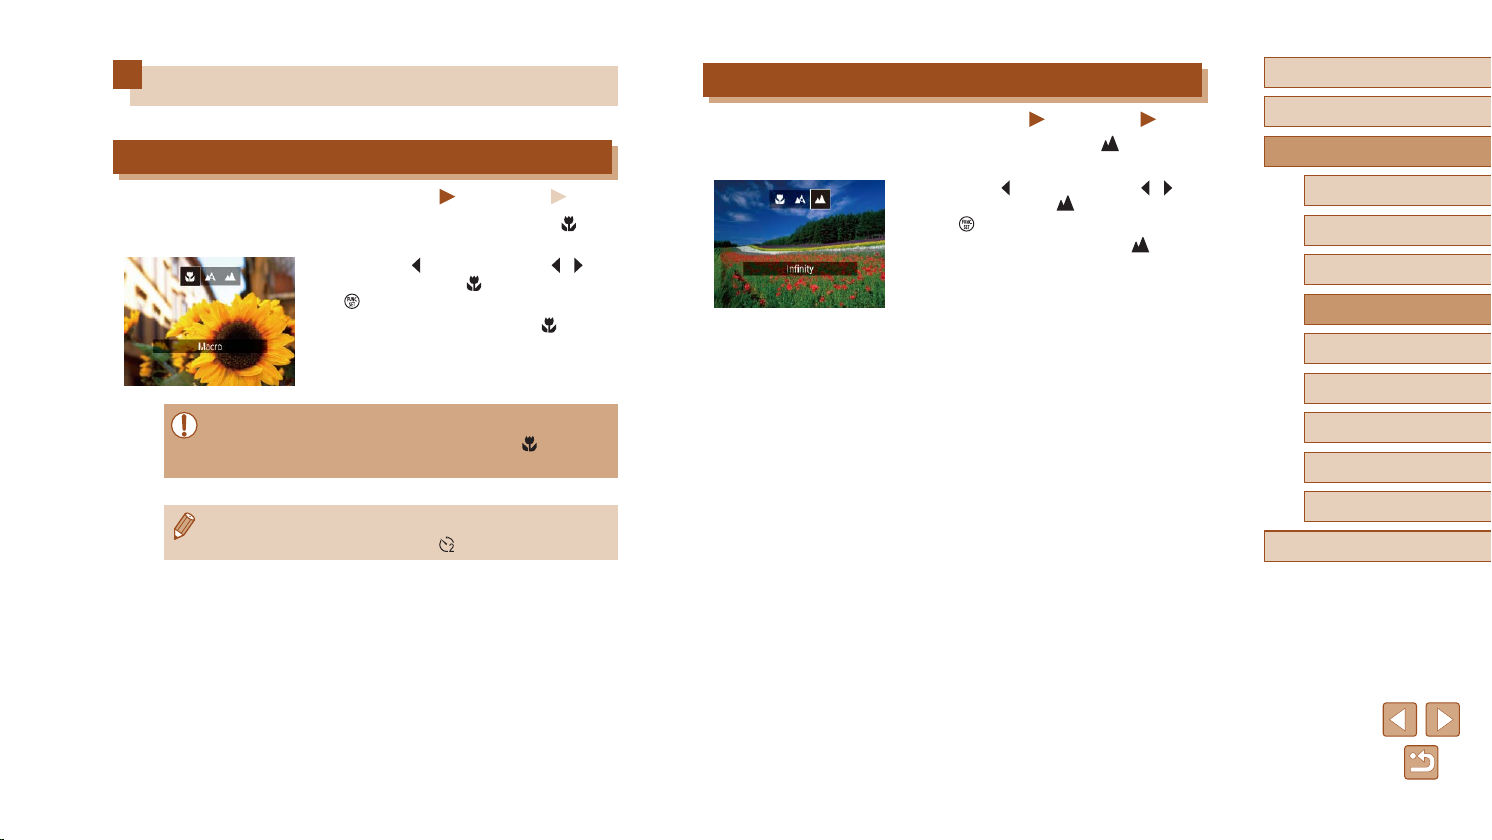
Shooting Range and Focusing
Shooting Close-Ups (Macro)
Still Images
To restrict the focus to subjects at close range, set the camera to [ ]. For
details on the range of focus, see “Shooting Range” (=
● Press the [
] button, press the [ ][ ]
150).
buttons to choose [ ], and then press the
[ ] button.
● Once the setting is complete, [
displayed.
Movies
] is
Shooting Distant Subjects (Innity)
Still Images
To restrict the focus to distant subjects, set the camera to [ ]. For details
on the range of focus, see “Shooting Range” (=
● Press the [
150).
] button, press the [ ][ ]
buttons to choose [ ], and then press
the [ ] button.
● Once the setting is complete, [
displayed.
Movies
] is
Before Use
Basic Guide
Advanced Guide
Camera Basics
Auto Mode /
Hybrid Auto Mode
Other Shooting Modes
P Mode
Playback Mode
Wi-Fi Functions
● If the ash res, vignetting may occur.
● In the yellow bar display area below the zoom bar, [
gray and the camera will not focus.
● To prevent camera shake, try mounting the camera on a tripod
and shooting with the camera set to [
] (=
] will turn
36).
Setting Menu
Accessories
Appendix
Index
58
Page 59
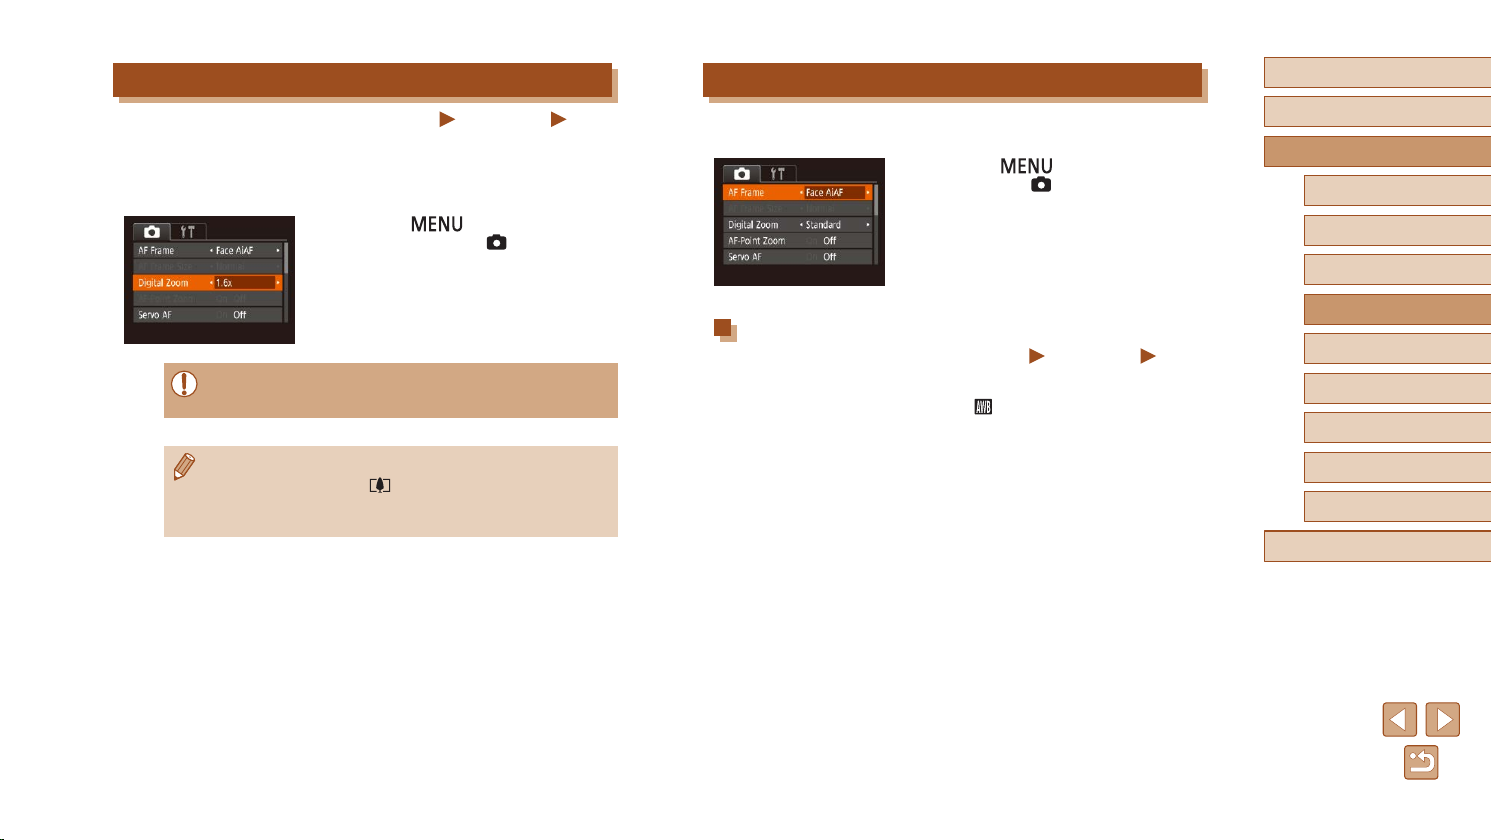
Digital Tele-Converter
Still Images
The focal length of the lens can be increased by approximately 1.6x or
2.0x. This can reduce camera shake because the shutter speed is faster
than it would be if you zoomed (including using digital zoom) in to the
same zoom factor.
● Press the [
] button, choose
[Digital Zoom] on the [ ] tab, and then
choose the desired option (=
● The view is enlarged and the zoom factor
is displayed on the screen.
● The digital tele-converter cannot be used with digital zoom
=
34) or AF-point zoom (=
(
● The shutter speed may be equivalent when you move the zoom
lever all the way toward [
you zoom in to enlarge the subject to the same size following step
2 in “Zooming In Closer on Subjects (Digital Zoom)” (
40).
] for maximum telephoto, and when
=
25).
34).
Movies
Changing the AF Frame Mode
Change the AF (auto focus) frame mode to suit the shooting conditions as
follows.
● Press the [
Frame] on the [ ] tab, and then choose
the desired option (=
Face AiAF
● Detects people’s faces, and then sets the focus, exposure (evaluative
metering only), and white balance ([ ] only).
● After you aim the camera at the subject, a white frame is displayed
around the person’s face determined by the camera to be the main
subject, and up to two gray frames are displayed around other
detected faces.
● When the camera detects movement, frames will follow moving
subjects, within a certain range.
● After you press the shutter button halfway, up to nine green frames are
displayed around faces in focus.
] button, choose [AF
25).
Still Images
Movies
Before Use
Basic Guide
Advanced Guide
Camera Basics
Auto Mode /
Hybrid Auto Mode
Other Shooting Modes
P Mode
Playback Mode
Wi-Fi Functions
Setting Menu
Accessories
Appendix
Index
59
Page 60
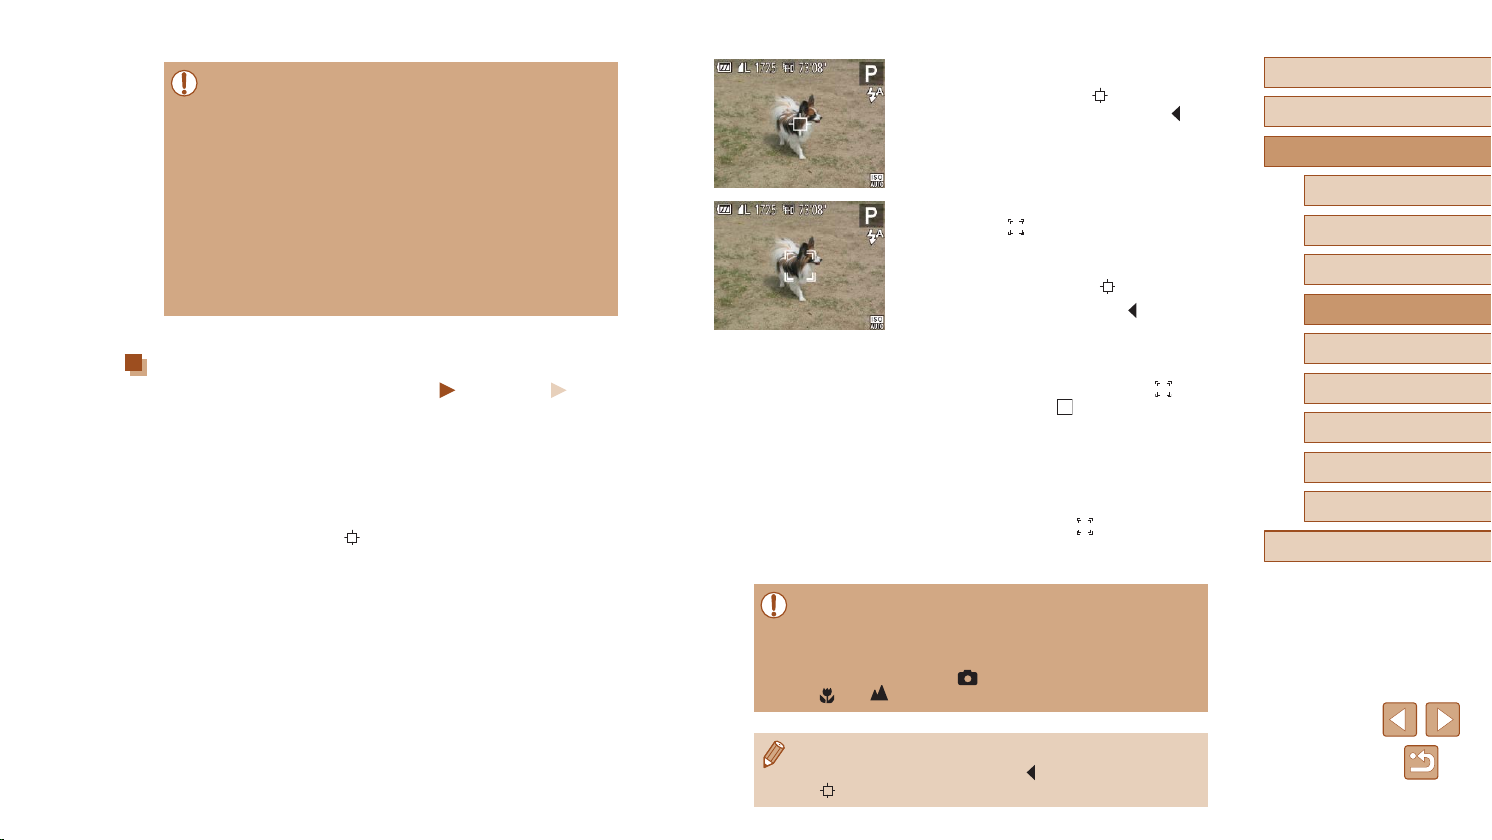
● If faces are not detected, or when only gray frames are displayed
(without a white frame), up to nine green frames are displayed in
the areas in focus when you press the shutter button halfway.
● If faces are not detected when Servo AF (
the AF frame is displayed in the center of the screen when you
press the shutter button halfway.
● Examples of faces that cannot be detected:
- Subjects that are distant or extremely close
- Subjects that are dark or light
- Faces in prole, at an angle, or partly hidden
● The camera may misinterpret non-human subjects as faces.
● No AF frames are displayed if the camera cannot focus when you
press the shutter button halfway.
=
Choosing Subjects to Focus On (Tracking AF)
Still Images
Shoot after choosing a subject to focus on as follows.
Choose [Tracking AF].
1
● Follow the steps in “Changing the AF
Frame Mode” (=
[Tracking AF].
] is displayed in the center of the
● [
screen.
59) to choose
61) is set to [On],
Movies
Choose a subject to focus on.
2
● Aim the camera so that [ ] is on the
desired subject, and then press the [ ]
button.
● When the subject is detected, the camera
beeps and [
] is displayed. Even if the
subject moves, the camera will continue
to track the subject within a certain range.
● If no subject is detected, [
● To cancel tracking, press the [
] is displayed.
] button
again.
Shoot.
3
● Press the shutter button halfway. [ ]
changes to a blue [ ], which follows
the subject as the camera continues to
adjust the focus and exposure (Servo AF)
(=
61).
● Press the shutter button all the way down
to shoot.
● Even after your shot, [
] is still displayed
and the camera continues to track the
subject.
Before Use
Basic Guide
Advanced Guide
Camera Basics
Auto Mode /
Hybrid Auto Mode
Other Shooting Modes
P Mode
Playback Mode
Wi-Fi Functions
Setting Menu
Accessories
Appendix
Index
● [Servo AF] (=
● Tracking may not be possible when subjects are too small or
move too rapidly, or when subject color or brightness matches
that of the background too closely.
● [AF-Point Zoom] on the [
] and [ ] are not available.
● [
● The camera can detect subjects even if you press the shutter
button halfway without pressing the [
] is displayed in the center of the screen.
[
61) is set to [On] and cannot be changed.
] tab is not available.
] button. After your shot,
60
Page 61
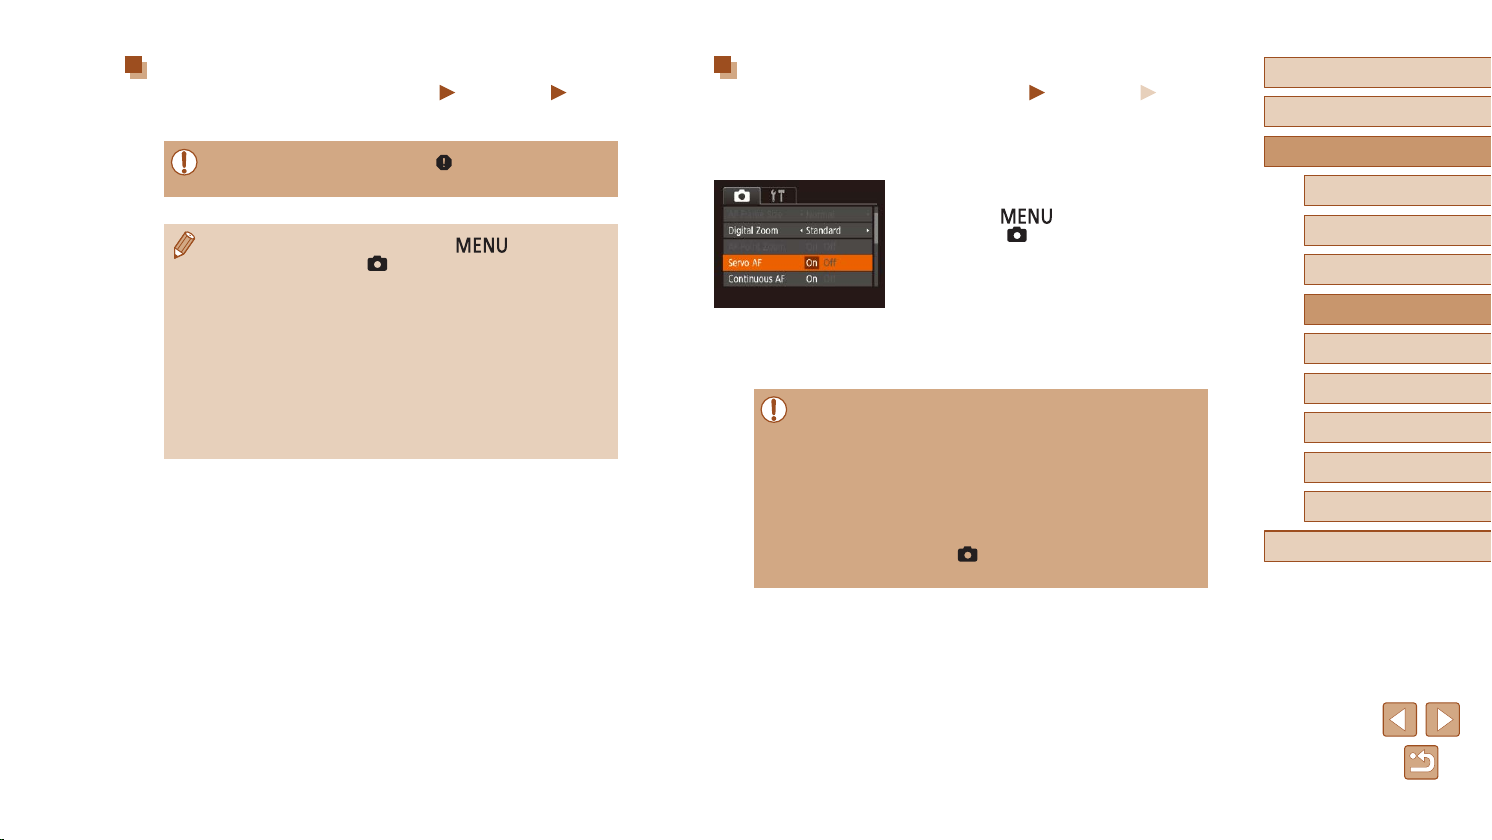
Center
Still Images
One AF frame is displayed in the center. Effective for reliable focusing.
● A yellow AF frame is displayed with [ ] if the camera cannot
focus when you press the shutter button halfway.
● To reduce the AF frame size, press the [ ] button and set
[AF Frame Size] on the [
● The AF frame size is set to [Normal] when you use the digital
=
34) or digital tele-converter (=
zoom (
● To compose shots so that subjects are positioned at the edge or
in a corner, rst aim the camera to capture the subject in an AF
frame, and then hold the shutter button halfway down. As you
continue to hold the shutter button halfway, recompose the shot
as desired, and then press the shutter button all the way down
(Focus Lock).
● The AF frame position is enlarged when you press the shutter
button halfway with [AF-Point Zoom] (
] tab to [Small] (=
59).
=
40) set to [On].
25).
Movies
Shooting with Servo AF
Still Images
This mode helps avoid missing shots of subjects in motion, because the
camera continues to focus on the subject and adjust the exposure as long
as you press the shutter button halfway.
Congure the setting.
1
● Press the [ ] button, choose [Servo
AF] on the [ ] tab, and then choose [On]
(=
25).
Focus.
2
● The focus and exposure are maintained
where the blue AF frame is displayed
while you are pressing the shutter button
halfway.
● Focusing may not be possible in some shooting conditions.
● In low-light conditions, Servo AF may not be activated (AF frames
may not turn blue) when you press the shutter button halfway.
In this case, the focus and exposure are set according to the
specied AF frame mode.
● If optimum exposure cannot be obtained, the shutter speed and
aperture value are displayed in orange. Release the shutter
button, and then press it halfway again.
● [AF-Point Zoom] on the [
● Not available when using the self-timer (
] tab (=
25) is not available.
=
36).
Movies
Before Use
Basic Guide
Advanced Guide
Camera Basics
Auto Mode /
Hybrid Auto Mode
Other Shooting Modes
P Mode
Playback Mode
Wi-Fi Functions
Setting Menu
Accessories
Appendix
Index
61
Page 62
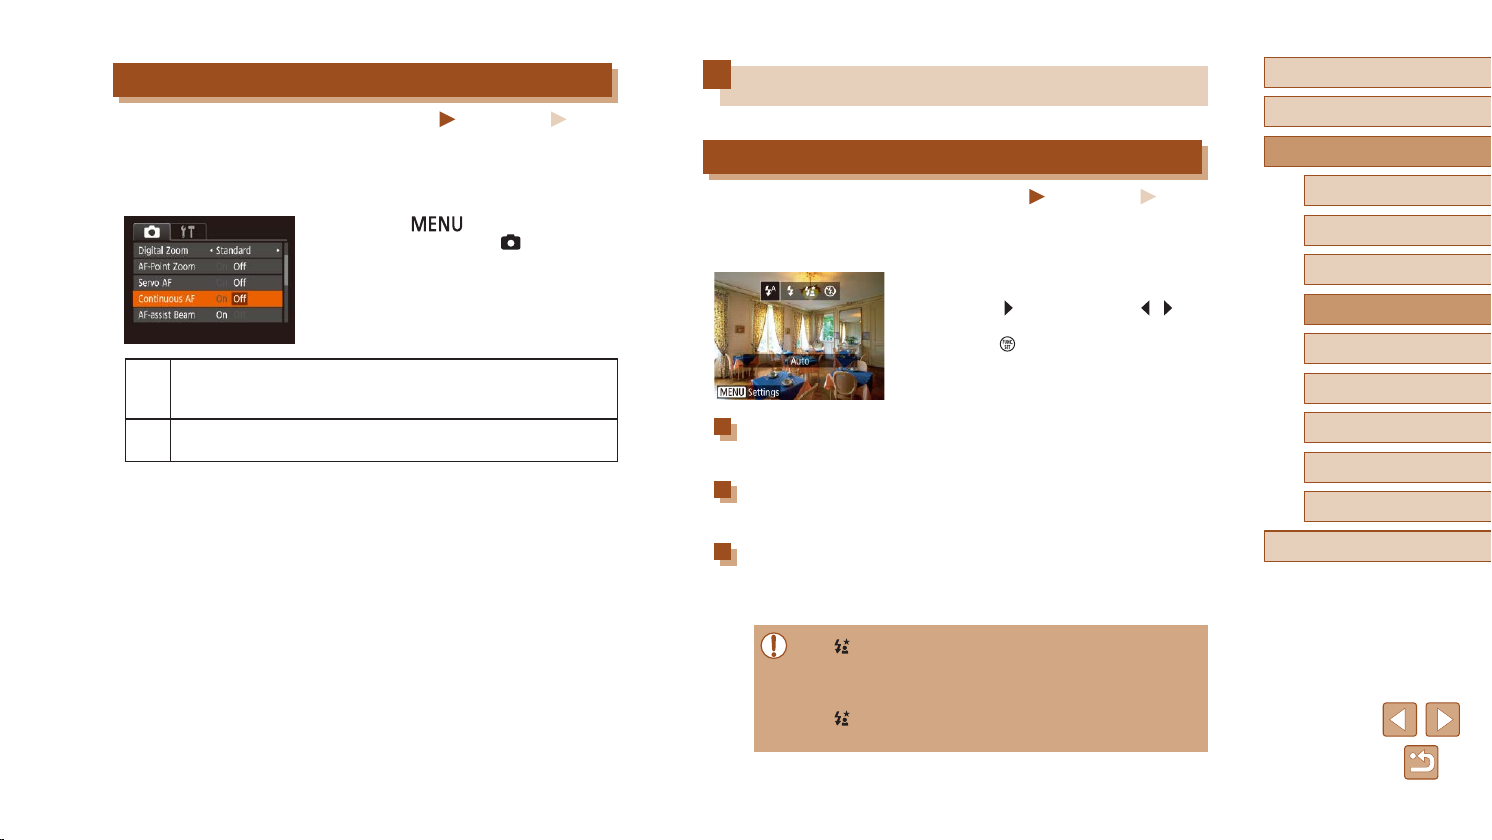
Changing the Focus Setting
Still Images
You can change default camera operation of constantly focusing on
subjects it is aimed at, even when the shutter button is not pressed.
Instead, you can limit camera focusing to the moment you press the
shutter button halfway.
● Press the [
] button, choose
[Continuous AF] on the [ ] tab, and then
choose [Off] (=
25).
Helps avoid missing sudden photo opportunities, because
On
the camera constantly focuses on subjects until you press the
shutter button halfway.
Conserves battery power, because the camera does not focus
Off
constantly.
Movies
Flash
Changing the Flash Mode
Still Images
You can change the ash mode to match the shooting scene. For details
on the ash range, see “Camera” (=
149).
Congure the setting.
● Press the [ ] button, press the [ ][ ]
buttons to choose a ash mode, and then
press the [ ] button.
● The option you congured is now
displayed.
Auto
Fires automatically in low-light conditions.
On
Fires for each shot.
Slow Synchro
Fires to illuminate the main subject (such as people) while shooting at a
slower shutter speed to illuminate backgrounds out of ash range.
● In [ ] mode, mount the camera on a tripod or take other
measures to keep it still and prevent camera shake. Additionally,
you should set [IS Mode] to [Off] when using a tripod or other
means to secure the camera (
] mode, even after the ash res, ensure that the main
● In [
subject does not move until the shutter sound is nished playing.
=
41).
Movies
Before Use
Basic Guide
Advanced Guide
Camera Basics
Auto Mode /
Hybrid Auto Mode
Other Shooting Modes
P Mode
Playback Mode
Wi-Fi Functions
Setting Menu
Accessories
Appendix
Index
62
Page 63
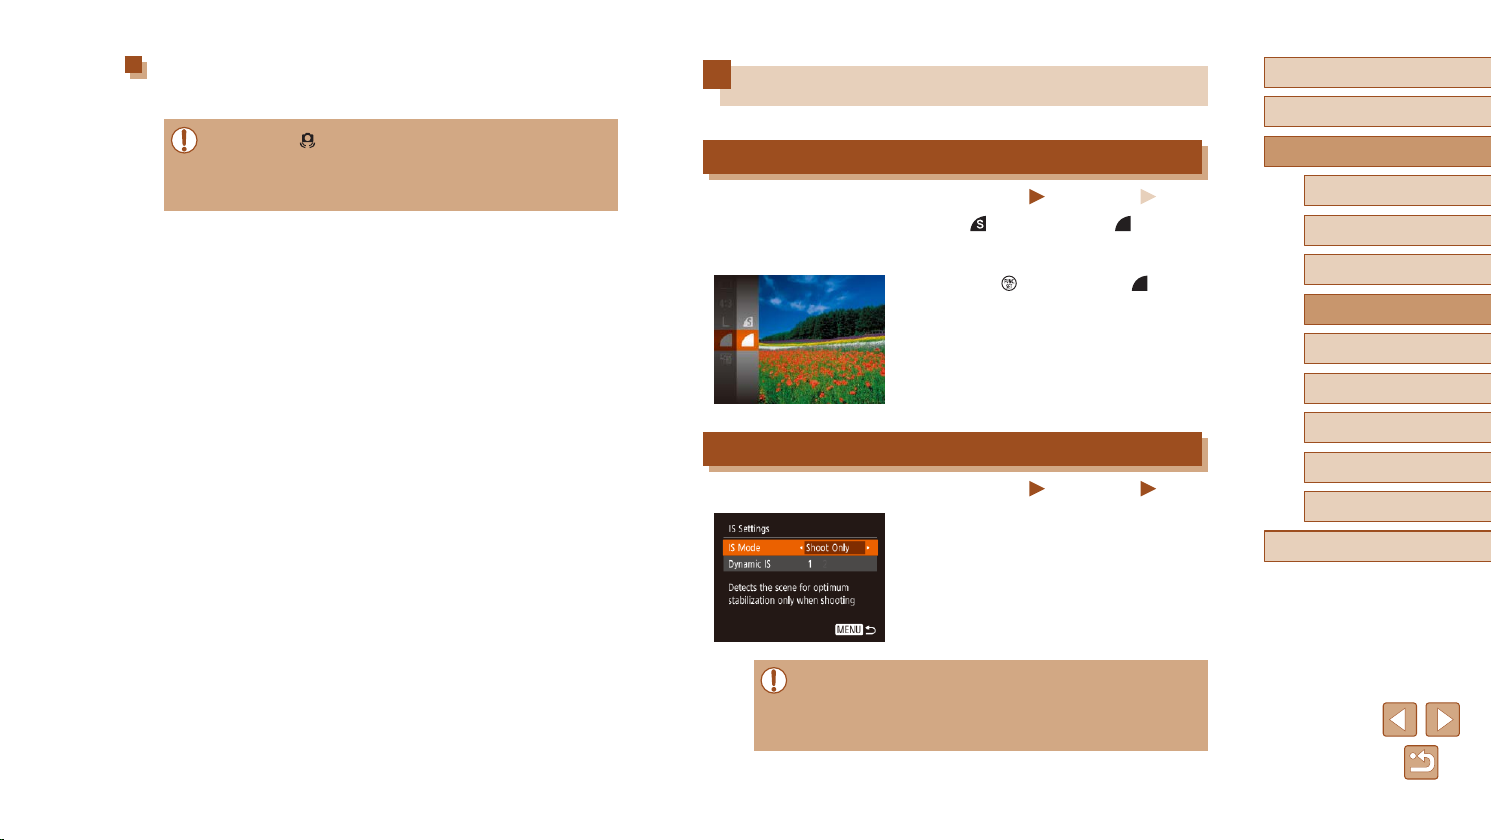
Off
For shooting without the ash.
● If a blinking [ ] icon is displayed when you press the shutter
button halfway in camera-shake inducing, low-light conditions,
mount the camera on a tripod or take other measures to keep it
still.
Other Settings
Changing the Compression Ratio (Image Quality)
Still Images
Choose from two compression ratios, [ ] (Super Fine) and [ ] (Fine), as
follows. For guidelines on how many shots at each compression ratio can
t on a memory card, see “Number of Shots per Memory Card” (=
● Press the [
] button, choose [ ] in the
menu, and choose the desired option
(=
24).
Changing the IS Mode Settings
Still Images
● Follow steps 1 – 2 in “Deactivating Image
Stabilization” (=
[Shoot Only].
41) and choose
Movies
151).
Movies
Before Use
Basic Guide
Advanced Guide
Camera Basics
Auto Mode /
Hybrid Auto Mode
Other Shooting Modes
P Mode
Playback Mode
Wi-Fi Functions
Setting Menu
Accessories
Appendix
Index
● If image stabilization cannot prevent camera shake, mount the
camera on a tripod or take other measures to hold it still. In this
case, set [IS Mode] to [Off].
● The setting is changed to [Continuous] for movie recording.
63
Page 64
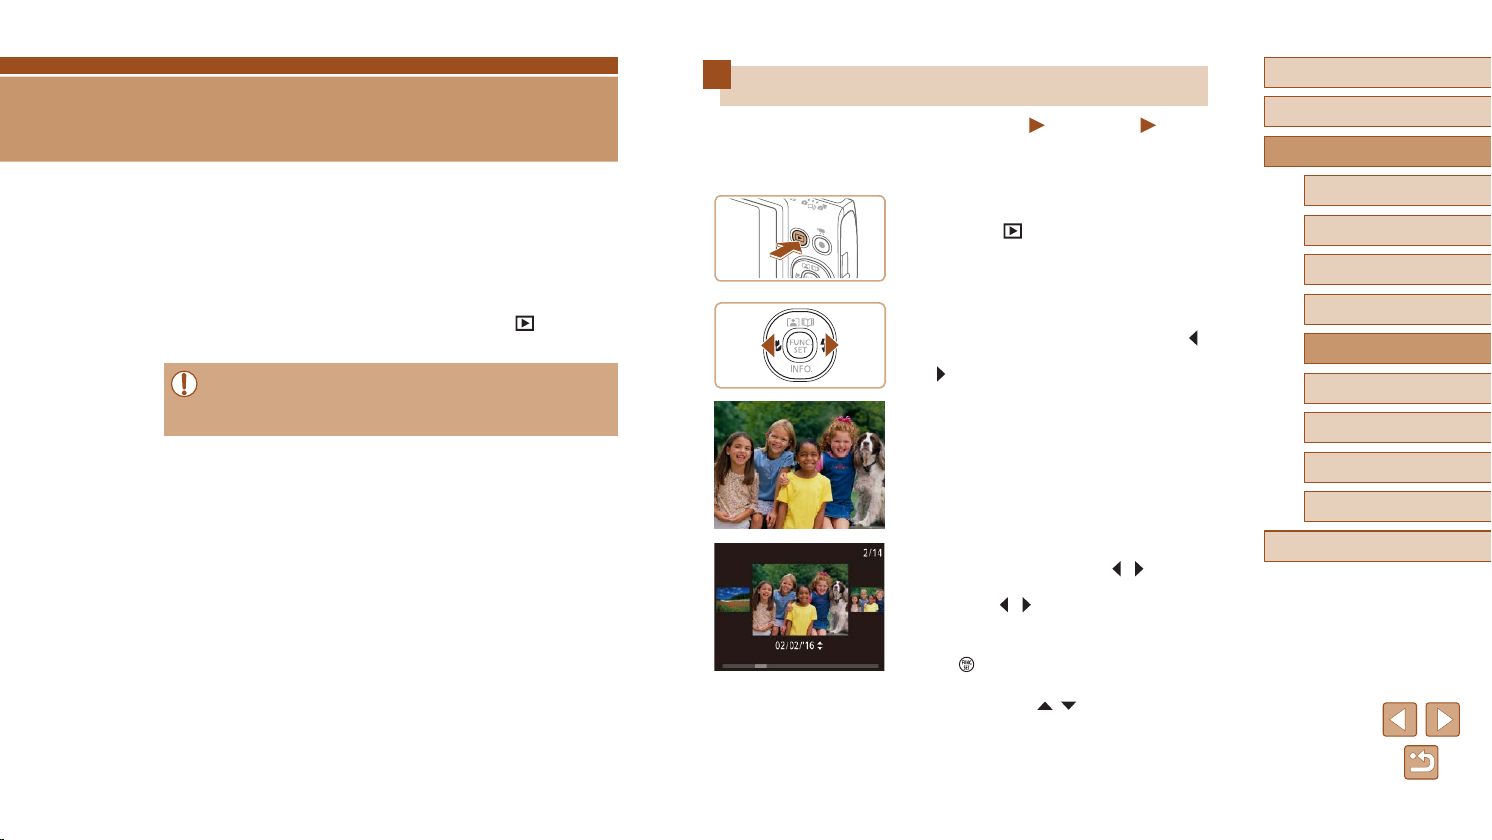
Playback Mode
Have fun reviewing your shots, and browse or edit them in many ways
● To prepare the camera for these operations, press the [
enter Playback mode.
● It may not be possible to play back or edit images that were
renamed or already edited on a computer, or images from other
cameras.
] button to
Viewing
Still Images
After shooting images or movies, you can view them on the screen as
follows.
Enter Playback mode.
1
● Press the [ ] button.
● Your last shot is displayed.
Choose images.
2
● To view the previous image, press the [ ]
button. To view the next image, press the
[ ] button.
Movies
Before Use
Basic Guide
Advanced Guide
Camera Basics
Auto Mode /
Hybrid Auto Mode
Other Shooting Modes
P Mode
Playback Mode
Wi-Fi Functions
Setting Menu
Accessories
Appendix
● To access this screen (Scroll Display
mode), press and hold the [
for at least one second. In this mode,
press the [ ][ ] buttons to browse
through images.
● To return to single-image display, press
] button.
the [
● To browse images grouped by shooting
date, press the [
Display mode.
][ ] buttons in Scroll
][ ] buttons
Index
64
Page 65
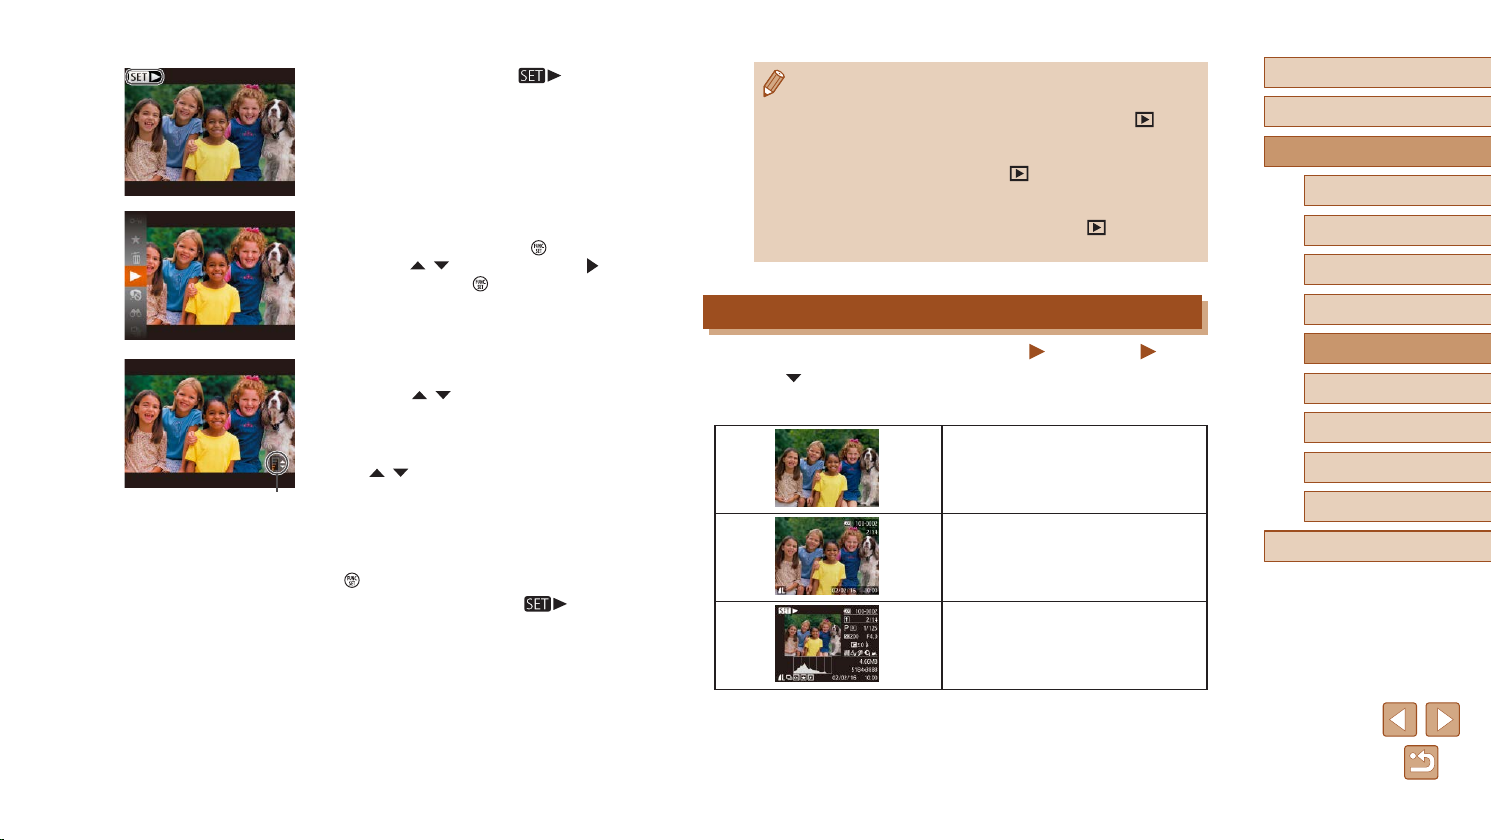
● Movies are identied by a [
(1)
To play movies, go to step 3.
Play movies.
3
● To start playback, press the [ ] button,
press the [ ][ ] buttons to choose [ ],
and then press the [ ] button again.
] icon.
● To switch to Shooting mode from Playback mode, press the
shutter button halfway.
● To deactivate Scroll Display, choose MENU (
► [Scroll Display] ► [Off].
● To have the most recent shot displayed when you enter Playback
mode, choose MENU (
shot].
● To change the transition shown between images, access MENU
=
25) and choose your desired effect on the [ ] tab ►
(
[Transition].
Switching Display Modes
=
25) ► [ ] tab
=
25) ► [ ] tab ► [Resume] ► [Last
Before Use
Basic Guide
Advanced Guide
Camera Basics
Auto Mode /
Hybrid Auto Mode
Other Shooting Modes
P Mode
Adjust the volume.
4
● Press the [ ][ ] buttons to adjust the
volume.
● To adjust the volume when the volume
indicator (1) is no longer displayed, press
][ ] buttons.
the [
Pause playback.
5
● To pause or resume playback, press the
[ ] button.
● After the movie is nished, [
displayed.
] is
Still Images
Movies
Press the [ ] button to view other information on the screen, or to hide
the information. For details on the information displayed, see “Playback
(Detailed Information Display)” (=
141).
No Information Display
Simple Information Display
Detailed Information Display
Playback Mode
Wi-Fi Functions
Setting Menu
Accessories
Appendix
Index
65
Page 66
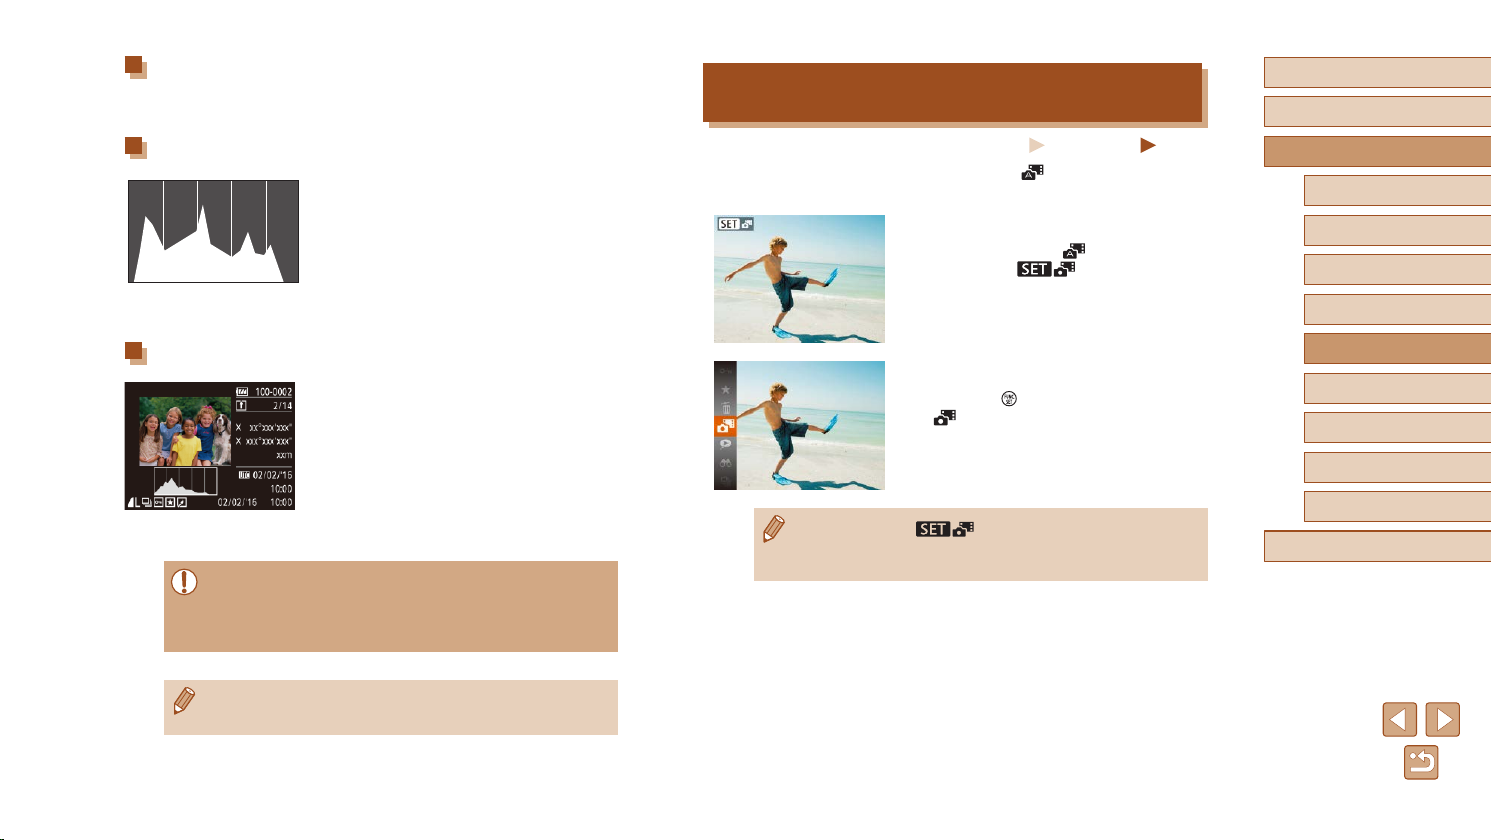
Overexposure Warning (for Image Highlights)
Washed-out highlights in the image ash on the screen in detailed
information display (=
65).
Histogram
● The graph in detailed information display
(=
65) is a histogram showing the
distribution of brightness in the image.
The horizontal axis represents the degree
of brightness, and the vertical axis, how
much of the image is at each level of
brightness. Viewing the histogram is a
way to check exposure.
Viewing Short Movies Created When Shooting
Still Images (Digest Movies)
Still Images
View digest movies recorded automatically in [ ] mode (=
day of still image shooting as follows.
Choose an image.
1
● Still images shot in [ ] mode are
labeled with [ ] icon.
30) on a
Movies
Before Use
Basic Guide
Advanced Guide
Camera Basics
Auto Mode /
Hybrid Auto Mode
Other Shooting Modes
P Mode
GPS Information Display
● Using a smartphone connected to the
camera via Wi-Fi, you can geotag images
on the camera, adding information such
as latitude, longitude, and elevation
(=
in the GPS information display.
● Latitude, longitude, elevation, and UTC
(shooting date and time) are listed from
top to bottom.
● GPS information display is not available for images that lack this
information.
● [---] is shown instead of numerical values for items not available
on your smartphone or items not recorded correctly.
● UTC: Coordinated Universal Time, essentially the same as
Greenwich Mean Time
110). You can review this information
Play the digest movie.
2
● Press the [ ] button, and then choose
] in the menu (=
[
24).
● The digest movie recorded automatically
on the day of still image shooting is
played back from the beginning.
● After a moment, [ ] will no longer be displayed when
you are using the camera with information display deactivated
=
65).
(
Playback Mode
Wi-Fi Functions
Setting Menu
Accessories
Appendix
Index
66
Page 67
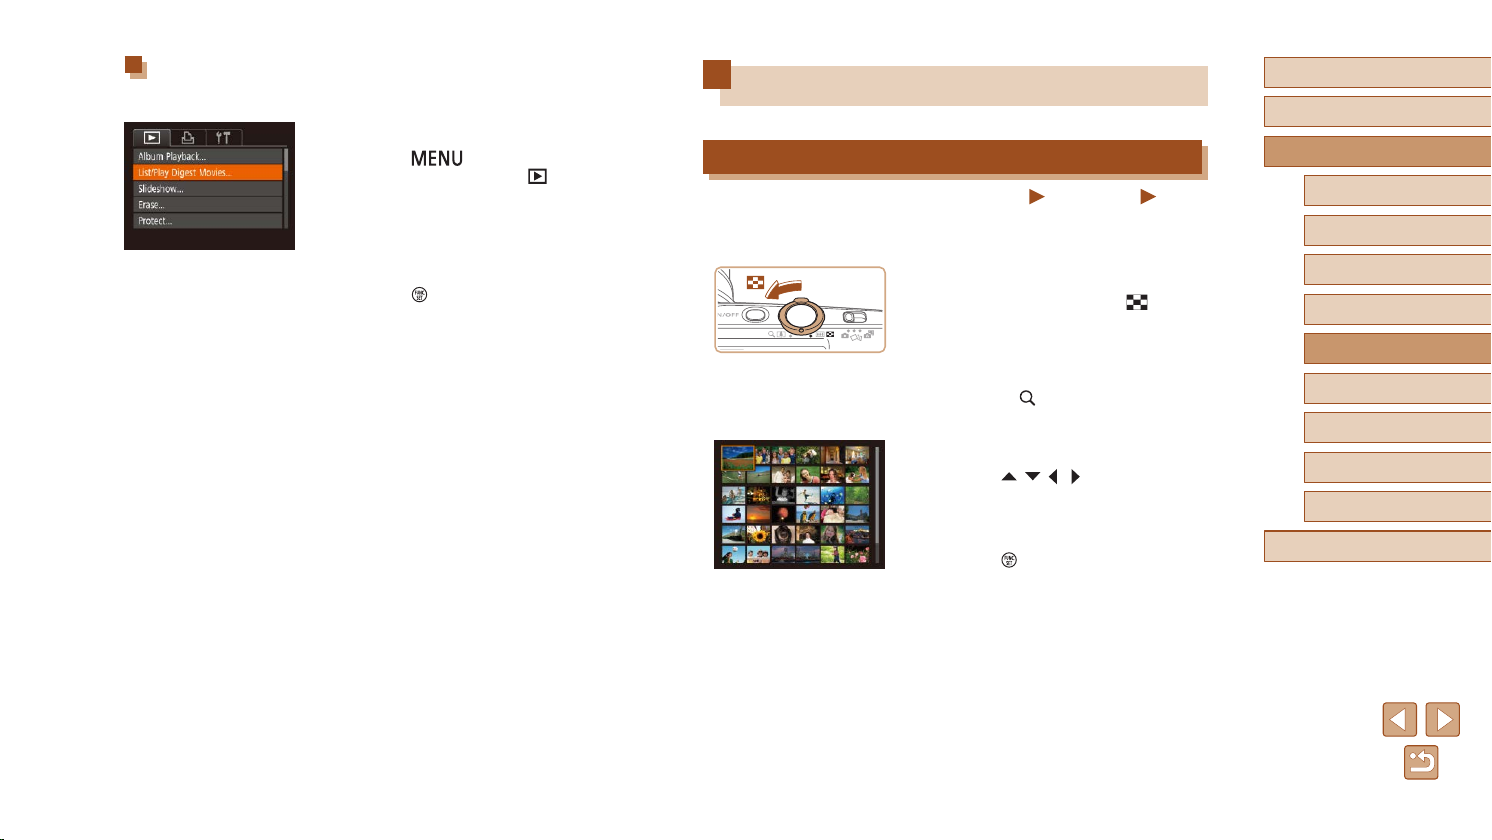
Viewing by Date
Digest movies can be viewed by date.
Choose a movie.
1
● Press the [ ] button, choose [List/
Play Digest Movies] on the [ ] tab, and
then choose a date (=
Play the movie.
2
● Press the [ ] button to start playback.
25).
Browsing and Filtering Images
Navigating through Images in an Index
Still Images
By displaying multiple images in an index, you can quickly nd the images
you are looking for.
Display images in an index.
1
● Move the zoom lever toward [ ] to
display images in an index. Moving the
lever again will increase the number of
images shown.
● To display fewer images, move the zoom
lever toward [
shown each time you move the lever.
Choose an image.
2
● Press the [ ][ ][ ][ ] buttons to choose
an image.
● An orange frame is displayed around the
selected image.
● Press the [
image in single-image display.
]. Fewer images are
] button to view the selected
Movies
Before Use
Basic Guide
Advanced Guide
Camera Basics
Auto Mode /
Hybrid Auto Mode
Other Shooting Modes
P Mode
Playback Mode
Wi-Fi Functions
Setting Menu
Accessories
Appendix
Index
67
Page 68
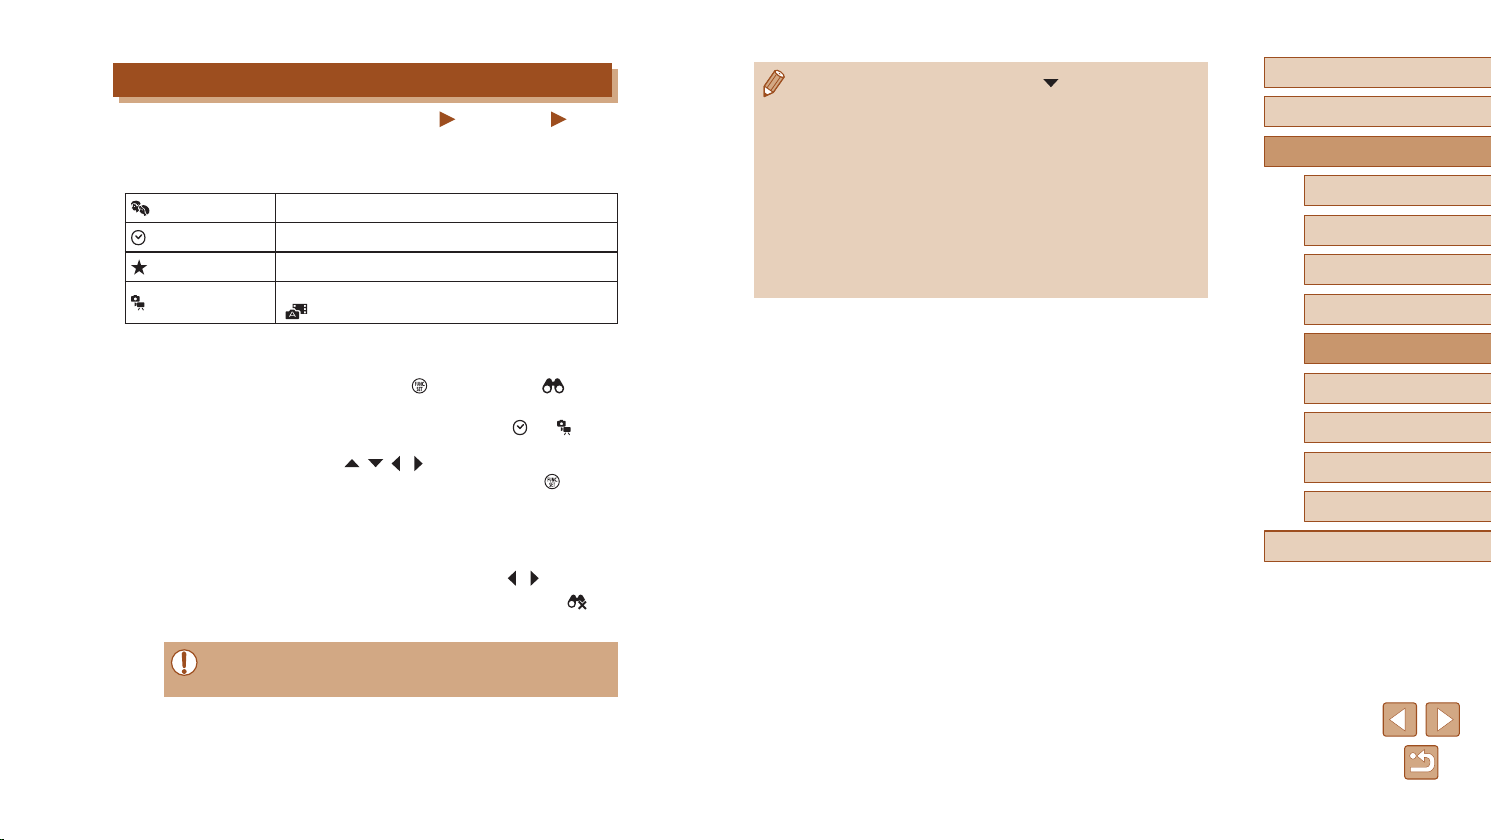
Finding Images Matching Specied Conditions
Still Images
Find desired images quickly on a memory card full of images by ltering
image display according to your specied conditions. You can also protect
(=
72) or delete (=
People
Shot Date
Favorites
Still image/Movie
74) these images all at once.
Displays images with detected faces.
Displays the images shot on a specic date.
Displays images tagged as favorites (
Displays still images, movies, or movies shot in
[
] mode (=
30).
=
78).
Movies
● To show or hide information, press the [ ] button in step 2.
● Options for viewing the images found (in step 2) include
“Navigating through Images in an Index” (
=
Images” (
can protect, erase, or print all images found or add them to
a photobook by choosing [Select All Images in Search] in
“Protecting Images” (
=
(
“Adding Images to a Photobook” (
● If you edit images and save them as new images (
=
found are no longer shown.
70), and “Viewing Slideshows” (=
=
75), “Adding Images to the Print List (DPOF)” (=
83), a message is displayed, and the images that were
72), “Erasing Multiple Images at Once”
=
133).
=
67), “Magnifying
70). You
131), or
=
79 –
Before Use
Basic Guide
Advanced Guide
Camera Basics
Auto Mode /
Hybrid Auto Mode
Other Shooting Modes
P Mode
Choose a search condition.
1
● Press the [ ] button, choose [ ] in the
menu, and choose a condition (=
● When you have selected [
24).
] or [ ],
choose the condition by pressing the
[ ][ ][ ][ ] buttons on the screen
displayed, and then press the [ ] button.
View the ltered images.
2
● Images matching your conditions are
displayed in yellow frames. To view only
these images, press the [ ][ ] buttons.
● To cancel ltered display, choose [
step 1.
● When the camera has found no corresponding images for some
conditions, those conditions will not be available.
Playback Mode
Wi-Fi Functions
Setting Menu
Accessories
Appendix
Index
] in
68
Page 69
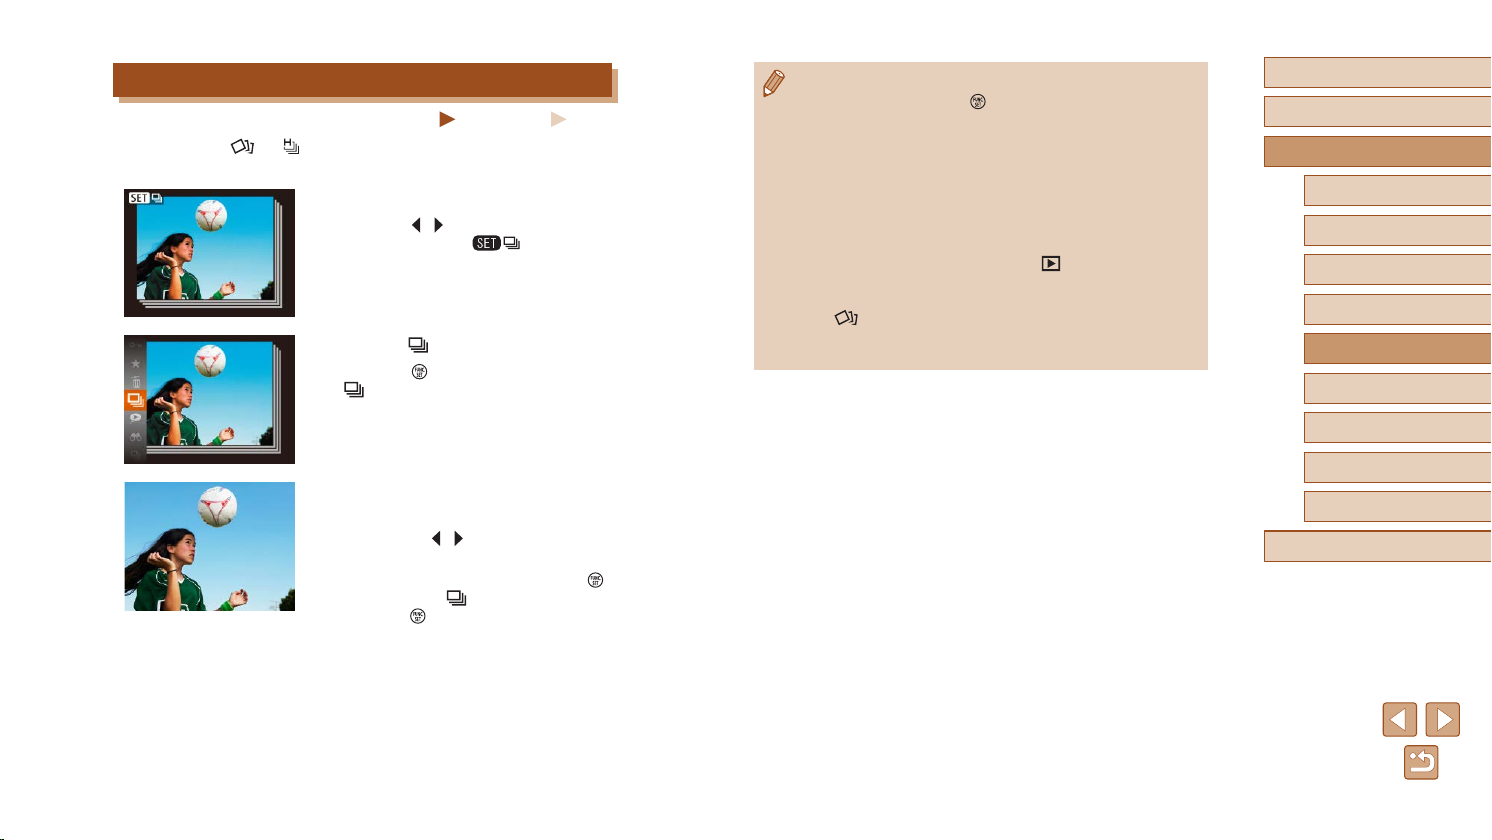
Viewing Individual Images in a Group
Still Images
Images shot in [ ] or [ ] mode (=
display, and these grouped images can be viewed one at a time.
1
2
3
44, =
52) are grouped for
Choose a grouped image.
● Press the [ ][ ] buttons to choose an
image labeled with [ ].
Choose [ ].
● Press the [ ] button, and then choose
[ ] in the menu (=
24).
View images in the group
individually.
● Pressing the [ ][ ] buttons will display
only images in the group.
● To cancel group playback, press the [
button, choose [ ] in the menu, and
press the [ ] button again (=
24).
Movies
● During group playback (step 3), you can use the menu functions
accessed by pressing the [
through images quickly “Navigating through Images in an Index”
=
67) and magnify them “Magnifying Images” (=
(
choosing [All Images in Group] for “Protecting Images” (
“Erasing Multiple Images at Once” (
to the Print List (DPOF)” (
Photobook” (
at once.
● To ungroup images so that they are displayed only as single
still images, choose MENU (
Images] ► [Off] (
ungrouped during individual playback.
● In [
a Variety of Images from Each Shot (Creative Shot)” (
only shown immediately after you shoot.
=
133), all images in the group can be manipulated
=
] mode, the simultaneous display after step 2 in “Enjoying
] button. You can also browse
70). By
=
=
72),
44) is
=
=
25). However, grouped images cannot be
75), “Adding Images
131), or “Adding Images to a
=
25) ► [ ] tab ► [Group
Before Use
Basic Guide
Advanced Guide
Camera Basics
Auto Mode /
Hybrid Auto Mode
Other Shooting Modes
P Mode
Playback Mode
Wi-Fi Functions
Setting Menu
Accessories
Appendix
Index
]
69
Page 70
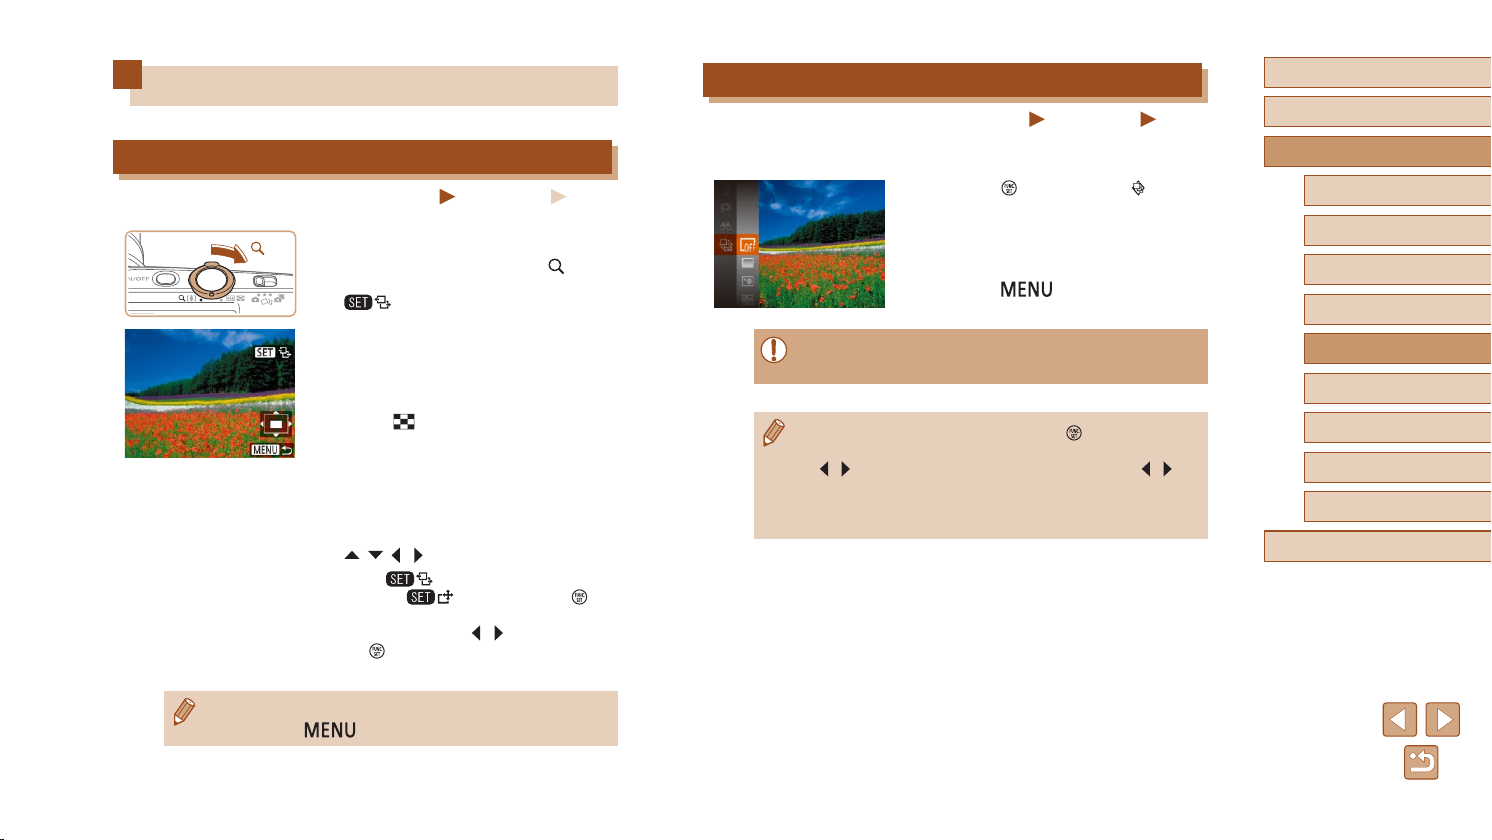
Image Viewing Options
Magnifying Images
Magnify an image.
1
● Moving the zoom lever toward [ ] will
zoom in and magnify the image, and
[ ] is displayed. You can magnify
images up to about 10x by continuing to
hold the zoom lever.
● The approximate position of the displayed
area (1) is shown for reference.
● To zoom out, move the zoom lever
toward [
image display by continuing to hold it.
Move the display position and
2
switch images as needed.
● To move the display position, press the
[ ][ ][ ][ ] buttons.
● While [
switch to [ ] by pressing the [ ]
button. To switch to other images while
zoomed, press the [ ][ ] buttons. Press
the [ ] button again to restore the
original setting.
Still Images
Movies
]. You can return to single-
] is displayed, you can
Viewing Slideshows
Still Images
Automatically play back images from a memory card as follows. Each
image is displayed for about three seconds.
● Press the [
] button, choose [ ] in the
menu, and choose the desired option
(=
24).
● The slideshow will start after [Loading
image] is displayed for a few seconds.
● Press the [
] button to stop the
slideshow.
● The camera’s power-saving functions (=
during slideshows.
● To pause or resume slideshows, press the [ ] button.
● You can switch to other images during playback by pressing the
][ ] buttons. For fast-forward or fast-rewind, hold the [ ][ ]
[
buttons down.
● In ltered display (
conditions are played.
=
68), only images matching search
23) are deactivated
Movies
Before Use
Basic Guide
Advanced Guide
Camera Basics
Auto Mode /
Hybrid Auto Mode
Other Shooting Modes
P Mode
Playback Mode
Wi-Fi Functions
Setting Menu
Accessories
Appendix
Index
● You can return to single-image display from magnied display by
pressing the [
] button.
70
Page 71
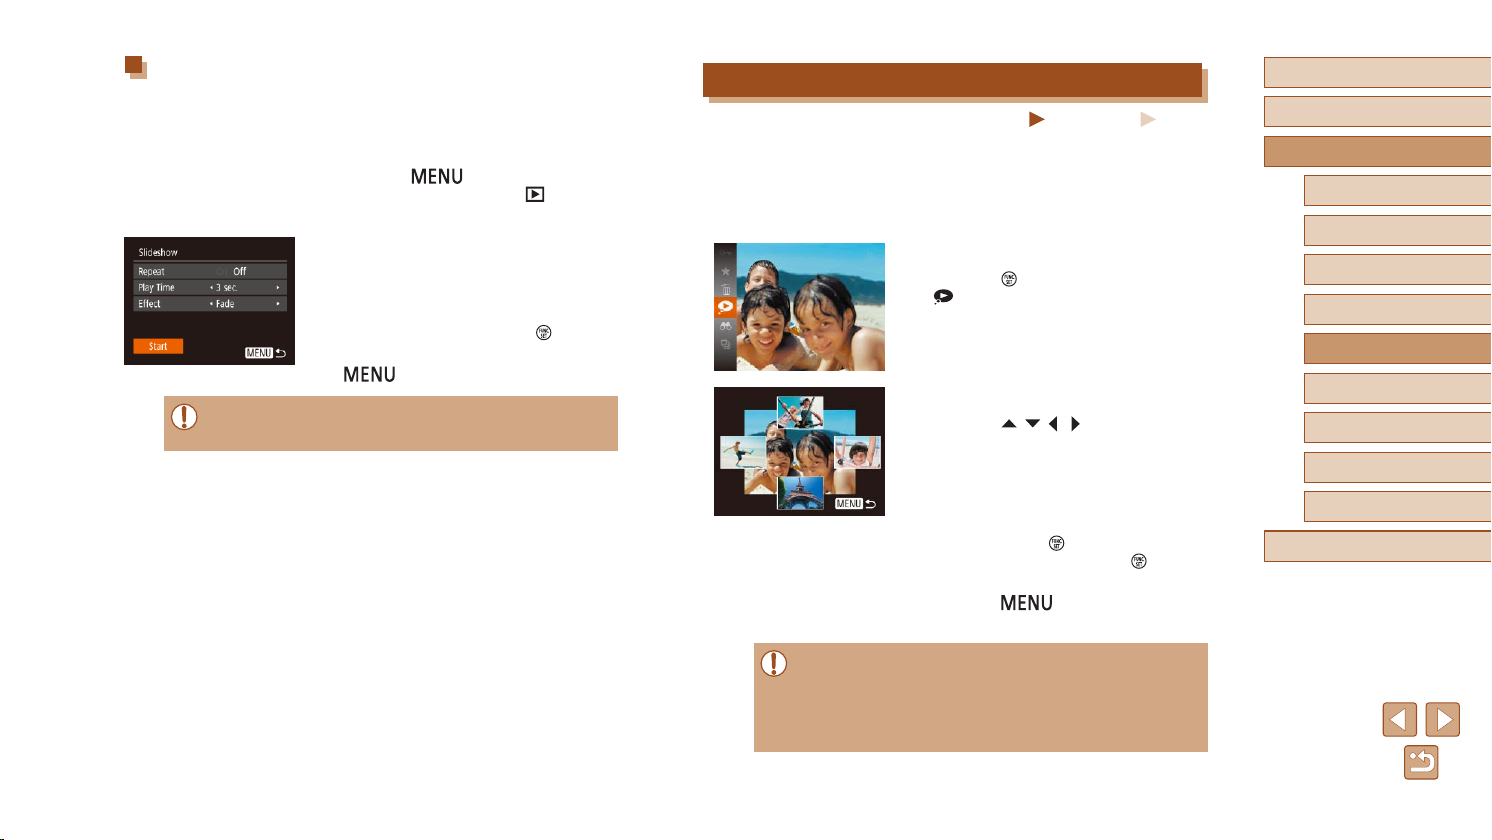
Changing Slideshow Settings
You can set up slideshows to repeat, and you can change the transitions
between images and the display duration of each image.
Access the setting screen.
1
● Press the [ ] button, and then
choose [Slideshow] on the [ ] tab
(=
25).
Congure the setting.
2
● Choose a menu item to congure, and
then choose the desired option (=
● To start the slideshow with your settings,
choose [Start] and press the [
● To return to the menu screen, press the
● [Play Time] cannot be modied when [Bubble] is chosen in
[Effect].
] button.
[
25).
] button.
Auto Playback of Related Images (Smart Shufe)
Still Images
Based on the current image, the camera offers four images that you may
wish to view. After you choose to view one of those images, the camera
offers four more images. This is an enjoyable way to play back images in
an unexpected order. Try this feature after you have taken many shots, in
many kinds of scenes.
Choose Smart Shufe.
1
● Press the [ ] button, and then choose
[ ] in the menu (=
● Four candidate images are displayed.
Choose an image.
2
● Press the [ ][ ][ ][ ] buttons to choose
the image you want to view next.
● Your chosen image is displayed in the
center, surrounded by the next four
candidate images.
● For full-screen display of the center
image, press the [
the original display, press the [ ] button
again.
● Press the [
single-image display.
24).
] button. To restore
] button to restore
Movies
Before Use
Basic Guide
Advanced Guide
Camera Basics
Auto Mode /
Hybrid Auto Mode
Other Shooting Modes
P Mode
Playback Mode
Wi-Fi Functions
Setting Menu
Accessories
Appendix
Index
● Smart Shufe is not available in the following cases:
- There are less than 50 shots taken with this camera
- An unsupported image is currently displayed
- Images are shown in ltered display (
- During group playback (
=
69)
=
68)
71
Page 72
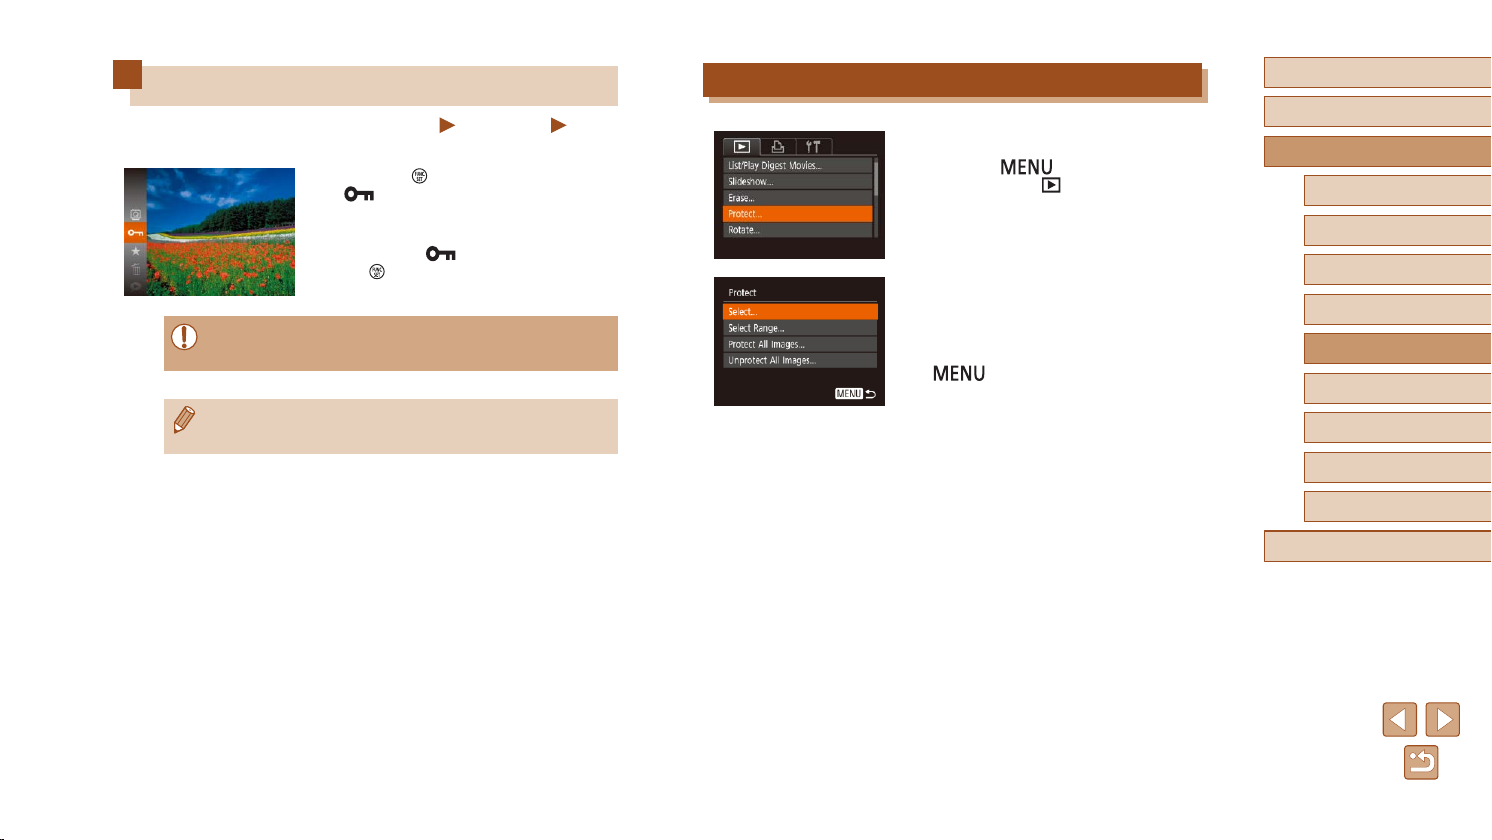
Protecting Images
Still Images
Protect important images to prevent accidental erasure (=
● Press the [
[ ] in the menu (=
is displayed.
● To cancel protection, repeat this process
and choose [
the [ ] button.
● Protected images on a memory card will be erased if you format
● Protected images cannot be erased using the camera’s erasure
=
the card (
function. To erase them this way, rst cancel protection.
117).
] button, and then choose
24). [Protected]
] again, and then press
74).
Movies
Using the Menu
Access the setting screen.
1
● Press the [ ] button and choose
[Protect] on the [ ] tab (=
Choose a selection method.
2
25).
● Choose a menu item and an option as
desired (=
25).
● To return to the menu screen, press the
] button.
[
Before Use
Basic Guide
Advanced Guide
Camera Basics
Auto Mode /
Hybrid Auto Mode
Other Shooting Modes
P Mode
Playback Mode
Wi-Fi Functions
Setting Menu
Accessories
Appendix
Index
72
Page 73
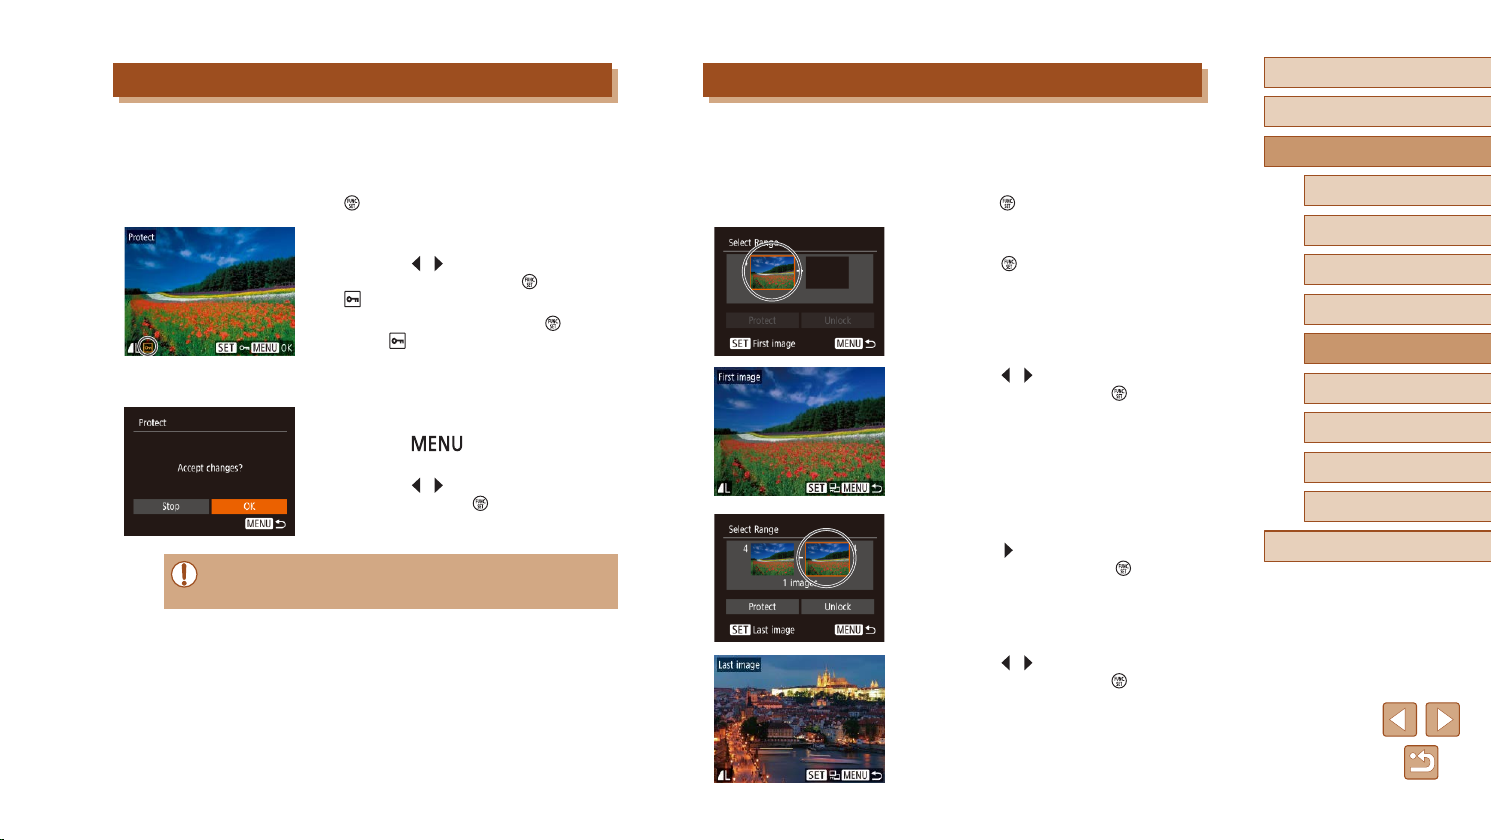
Choosing Images Individually
Choose [Select].
1
● Following step 2 in “Using the Menu”
(=
72), choose [Select] and press the
[ ] button.
Choose an image.
2
● Press the [ ][ ] buttons to choose an
image, and then press the [ ] button.
[ ] is displayed.
● To cancel selection, press the [
again. [ ] is no longer displayed.
● Repeat this process to specify other
images.
Protect the image.
3
● Press the [ ] button. A conrmation
message is displayed.
● Press the [
and then press the [ ] button.
● Images will not be protected if you switch to Shooting mode or
turn the camera off before nishing the setup process in step 3.
] button
][ ] buttons to choose [OK],
Selecting a Range
Choose [Select Range].
1
● Following step 2 in “Using the Menu”
(=
72), choose [Select Range] and
press the [ ] button.
Choose a starting image.
2
● Press the [ ] button.
● Press the [
image, and then press the [ ] button.
Choose an ending image.
3
● Press the [ ] button to choose [Last
image], and then press the [ ] button.
][ ] buttons to choose an
Before Use
Basic Guide
Advanced Guide
Camera Basics
Auto Mode /
Hybrid Auto Mode
Other Shooting Modes
P Mode
Playback Mode
Wi-Fi Functions
Setting Menu
Accessories
Appendix
Index
● Press the [
image, and then press the [ ] button.
● Images before the rst image cannot be
selected as the last image.
][ ] buttons to choose an
73
Page 74
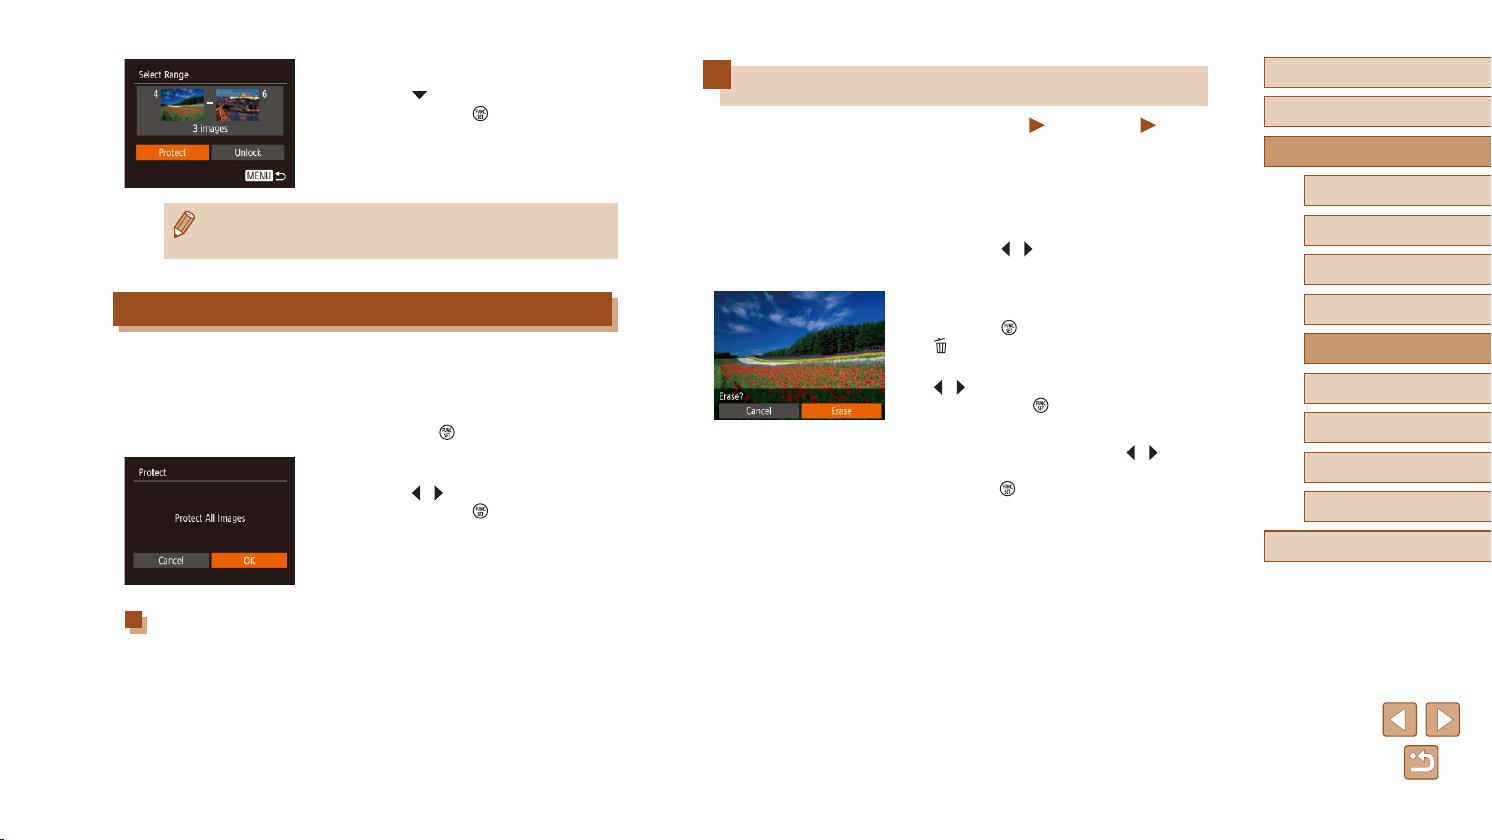
Protect the images.
4
● Press the [ ] button to choose [Protect],
and then press the [ ] button.
● To cancel protection for groups of images, choose [Unlock] in
step 4.
Protecting All Images at Once
Choose [Protect All Images].
1
● Following step 2 in “Using the Menu”
(=
72), choose [Protect All Images]
and press the [ ] button.
Protect the images.
2
● Press the [ ][ ] buttons to choose [OK],
and then press the [ ] button.
Clearing All Protection at Once
You can clear protection from all images at once.
To clear protection, choose [Unprotect All Images] in step 1 of “Protecting
All Images at Once”, and then complete step 2.
Erasing Images
Still Images
You can choose and erase unneeded images one by one. Be careful
when erasing images, because they cannot be recovered. However,
protected images (=
72) cannot be erased.
Choose an image to erase.
1
● Press the [ ][ ] buttons to choose an
image.
Erase the image.
2
● Press the [ ] button, and then choose
[ ] in the menu (=
● After [Erase?] is displayed, press the
][ ] buttons to choose [Erase], and
[
then press the [ ] button.
● The current image is now erased.
● To cancel erasure, press the [
buttons to choose [Cancel], and then
press the [ ] button.
24).
][ ]
Movies
Before Use
Basic Guide
Advanced Guide
Camera Basics
Auto Mode /
Hybrid Auto Mode
Other Shooting Modes
P Mode
Playback Mode
Wi-Fi Functions
Setting Menu
Accessories
Appendix
Index
74
Page 75
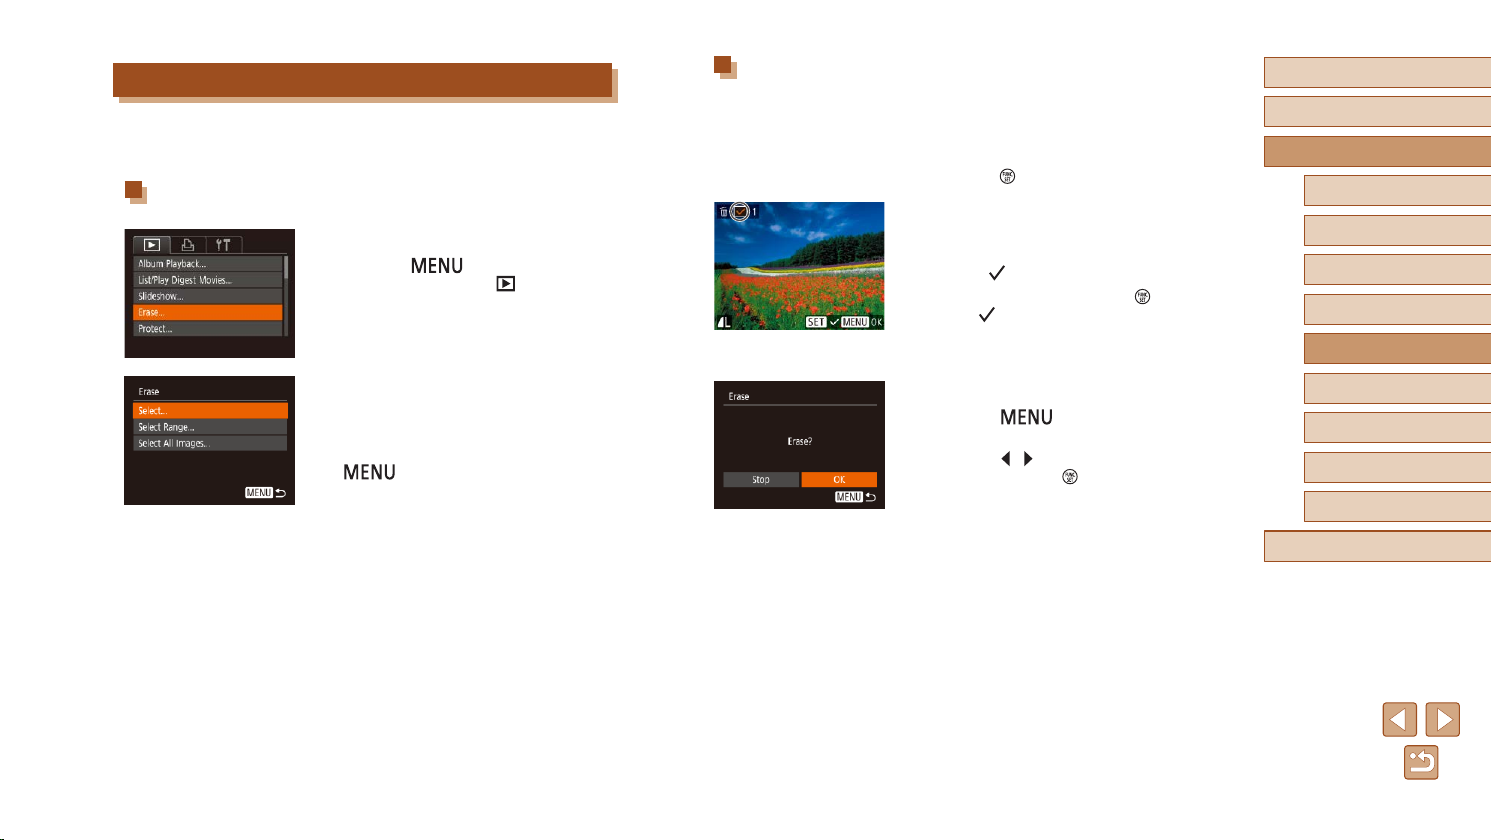
Erasing Multiple Images at Once
You can choose multiple images to erase at once. Be careful when
erasing images, because they cannot be recovered. However, protected
images (=
72) cannot be erased.
Choosing a Selection Method
Access the setting screen.
1
● Press the [ ] button, and then
choose [Erase] on the [ ] tab (=
Choose a selection method.
2
● Choose a menu item and an option as
desired (=
● To return to the menu screen, press the
[
25).
25).
] button.
Choosing Images Individually
Choose [Select].
1
● Following step 2 in “Choosing a Selection
Method” (=
press the [ ] button.
Choose an image.
2
● Once you choose an image following
step 2 in “Choosing Images Individually”
(=
73), [ ] is displayed.
● To cancel selection, press the [
again. [ ] is no longer displayed.
● Repeat this process to specify other
images.
Erase the images.
3
● Press the [ ] button. A conrmation
message is displayed.
● Press the [
and then press the [ ] button.
75), choose [Select] and
] button
][ ] buttons to choose [OK],
Before Use
Basic Guide
Advanced Guide
Camera Basics
Auto Mode /
Hybrid Auto Mode
Other Shooting Modes
P Mode
Playback Mode
Wi-Fi Functions
Setting Menu
Accessories
Appendix
Index
75
Page 76
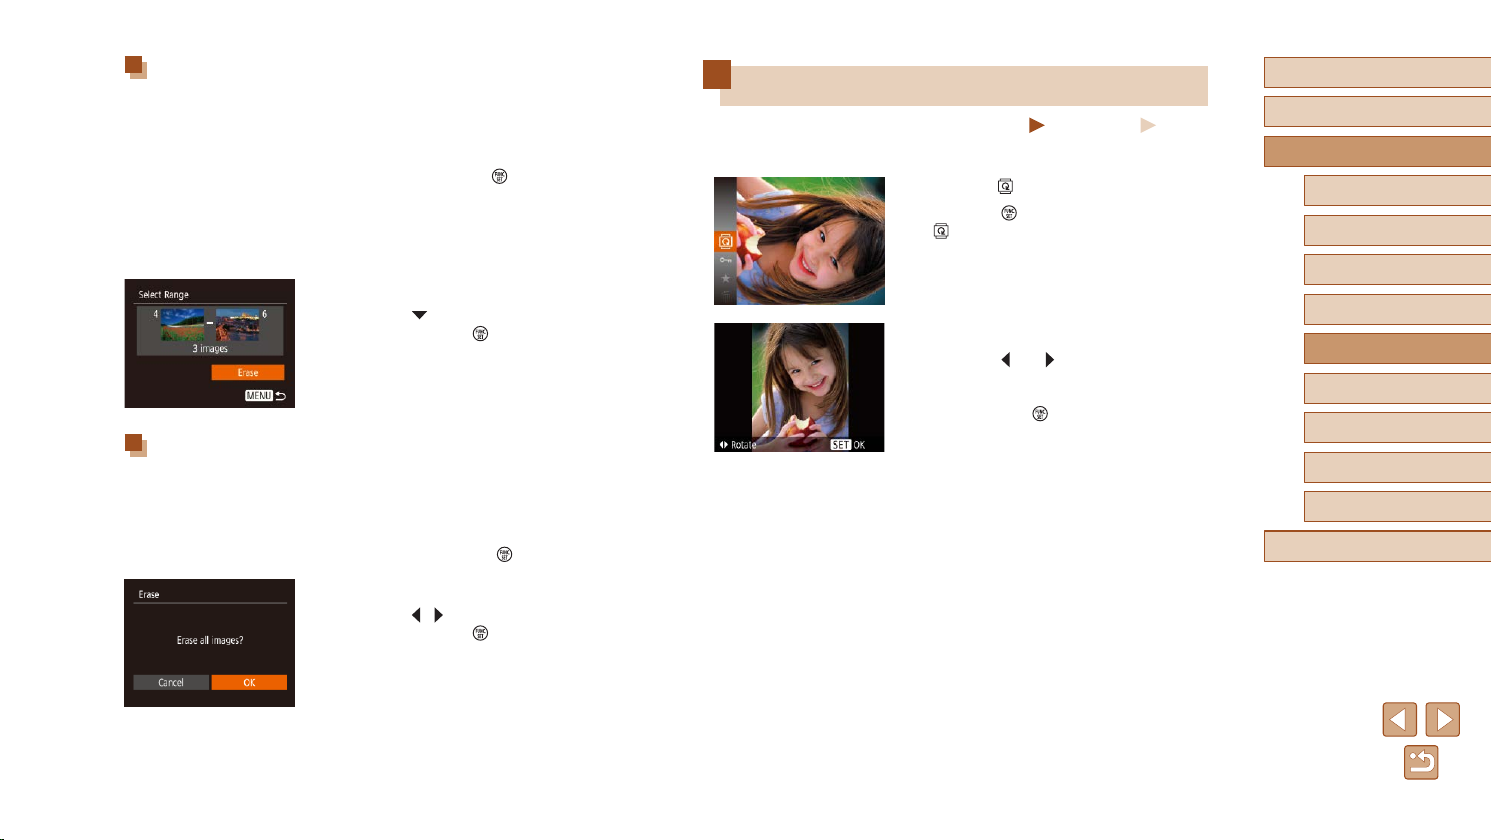
Selecting a Range
Choose [Select Range].
1
● Following step 2 in “Choosing a Selection
Method” (=
Range] and press the [ ] button.
Choose images.
2
● Follow steps 2 – 3 in “Selecting a Range”
(=
73) to specify images.
Erase the images.
3
● Press the [ ] button to choose [Erase],
and then press the [ ] button.
Specifying All Images at Once
Choose [Select All Images].
1
● Following step 2 in “Choosing a Selection
Method” (=
Images] and press the [ ] button.
Erase the images.
2
● Press the [ ][ ] buttons to choose [OK],
and then press the [ ] button.
75), choose [Select
75), choose [Select All
Rotating Images
Still Images
Change the orientation of images and save them as follows.
Choose [ ].
1
● Press the [ ] button, and then choose
[ ] in the menu (=
Rotate the image.
2
● Press the [ ] or [ ] button, depending
on the desired direction. Each time you
press the button, the image is rotated
90°. Press the [ ] button to complete the
setting.
24).
Movies
Before Use
Basic Guide
Advanced Guide
Camera Basics
Auto Mode /
Hybrid Auto Mode
Other Shooting Modes
P Mode
Playback Mode
Wi-Fi Functions
Setting Menu
Accessories
Appendix
Index
76
Page 77
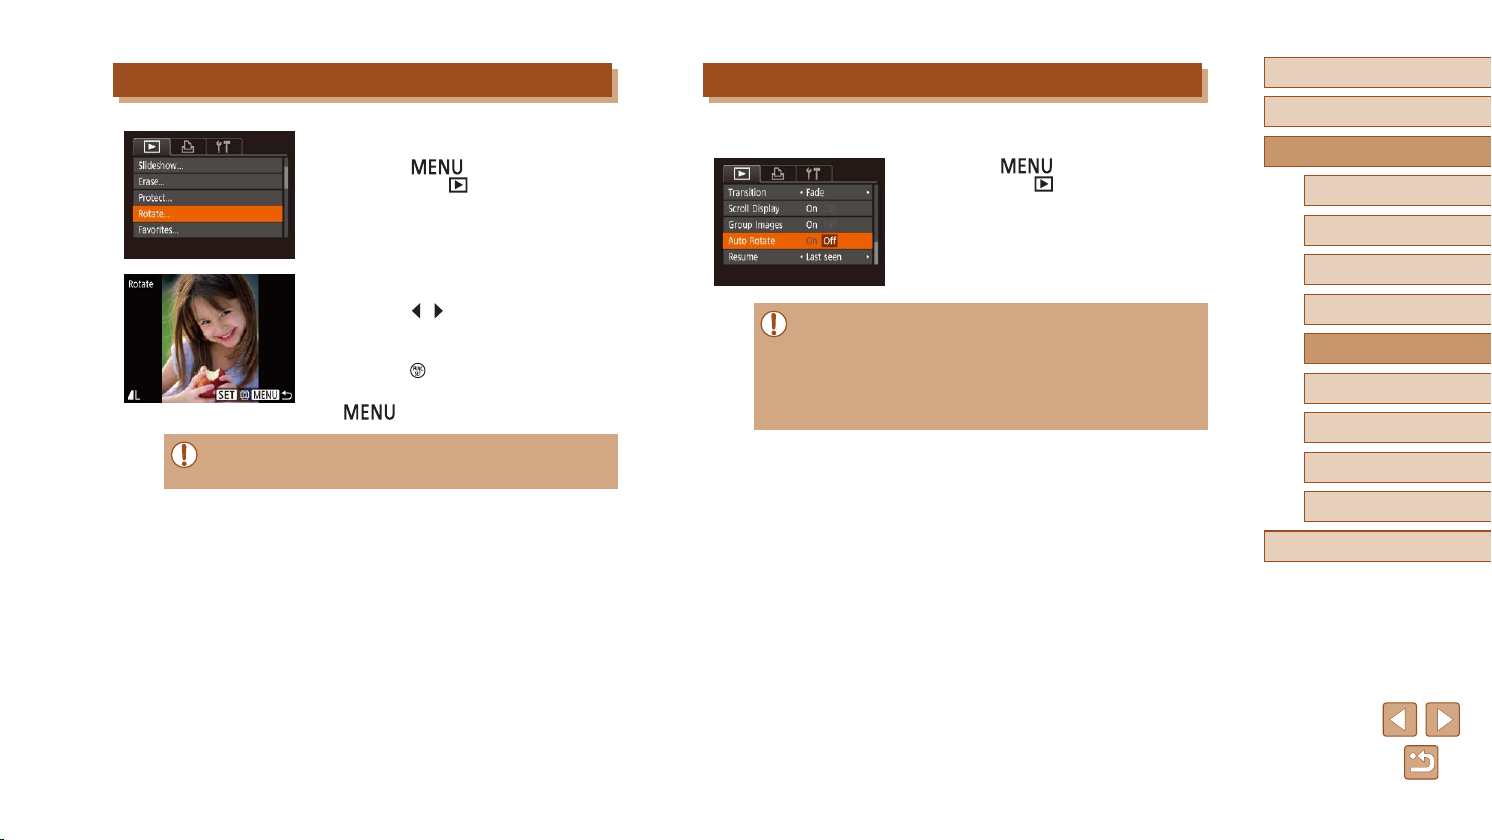
Using the Menu
● Rotation is not possible when [Auto Rotate] is set to [Off]
=
77).
(
Choose [Rotate].
1
● Press the [ ] button and choose
[Rotate] on the [ ] tab (=
Rotate the image.
2
25).
● Press the [ ][ ] buttons to choose an
image.
● The image is rotated 90° each time you
press the [
] button.
● To return to the menu screen, press the
] button.
[
Deactivating Auto Rotation
Follow these steps to deactivate automatic image rotation, which rotates
images based on the current camera orientation.
● Press the [
Rotate] on the [ ] tab, and then choose
[Off] (=
25).
● Images cannot be rotated (=
to [Off]. Additionally, images already rotated will be displayed in
the original orientation.
● In Smart Shufe (
to [Off], images shot vertically will be displayed vertically, and
rotated images will be displayed in the rotated orientation.
=
76) when you set [Auto Rotate]
71) mode, even if [Auto Rotate] is set
] button, choose [Auto
Before Use
Basic Guide
Advanced Guide
Camera Basics
Auto Mode /
Hybrid Auto Mode
Other Shooting Modes
P Mode
Playback Mode
Wi-Fi Functions
Setting Menu
Accessories
Appendix
Index
77
Page 78
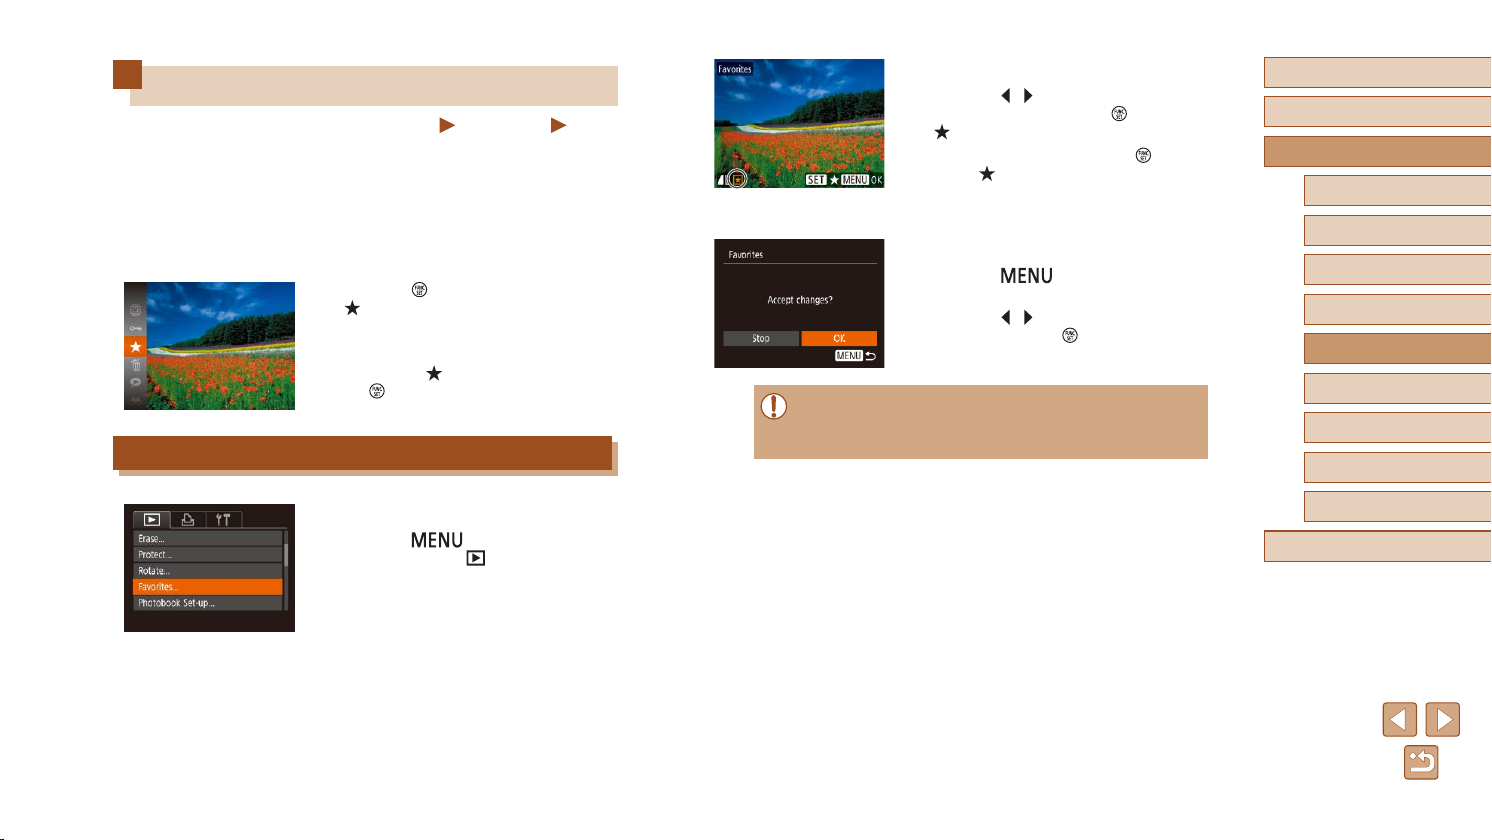
Tagging Images as Favorites
Still Images
You can organize images by tagging them as favorites. By choosing a
category in ltered playback, you can restrict the following operations to
all of those images.
=
● “Viewing” (
Images” (=
the Print List (DPOF)” (=
(=
133)
64), “Viewing Slideshows” (=
72), “Erasing Images” (=
131), “Adding Images to a Photobook”
● Press the [
[ ] in the menu (=
● [Tagged as Favorite] is displayed.
● To untag the image, repeat this process
and choose [
the [ ] button.
70), “Protecting
74), “Adding Images to
] button, and then choose
24).
] again, and then press
Using the Menu
Movies
Choose an image.
2
● Press the [ ][ ] buttons to choose an
image, and then press the [ ] button.
[ ] is displayed.
● To untag the image, press the [
again. [ ] is no longer displayed.
● Repeat this process to choose additional
images.
Finish the setup process.
3
● Press the [ ] button. A conrmation
message is displayed.
● Press the [
and then press the [ ] button.
● Images will not be tagged as favorites if you switch to Shooting
mode or turn the camera off before nishing the setup process in
step 3.
][ ] buttons to choose [OK],
] button
Before Use
Basic Guide
Advanced Guide
Camera Basics
Auto Mode /
Hybrid Auto Mode
Other Shooting Modes
P Mode
Playback Mode
Wi-Fi Functions
Setting Menu
Accessories
Choose [Favorites].
1
● Press the [ ] button and choose
[Favorites] on the [ ] tab (=
25).
Appendix
Index
78
Page 79
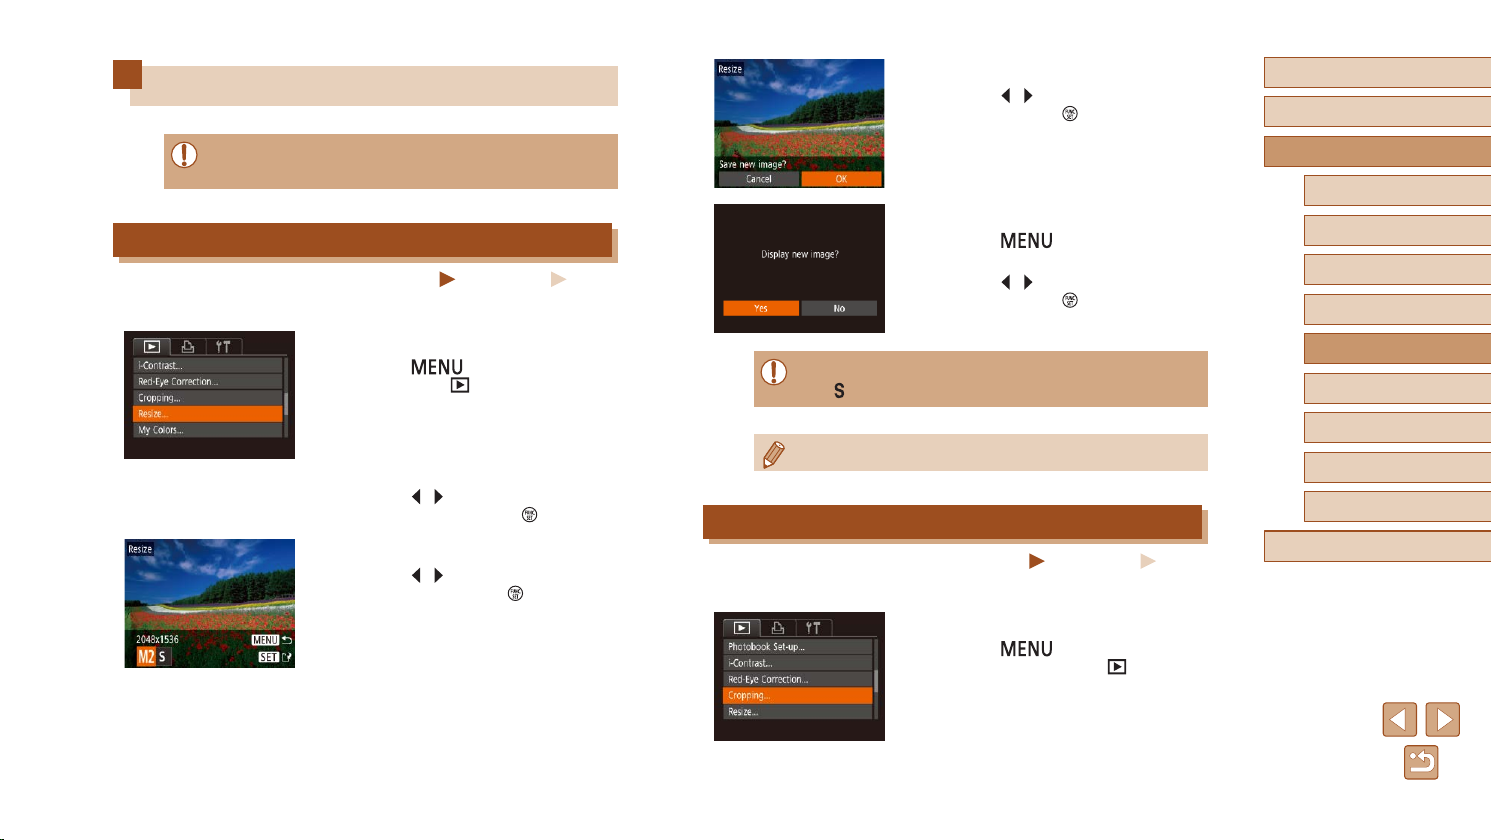
Editing Still Images
● Image editing (=
memory card has sufcient free space.
Resizing Images
Save a copy of images at a lower number of recording pixels.
79 – =
81) is only available when the
Still Images
Choose [Resize].
1
● Press the [ ] button and choose
[Resize] on the [ ] tab (=
Choose an image.
2
● Press the [ ][ ] buttons to choose an
image, and then press the [ ] button.
Choose an image size.
3
● Press the [ ][ ] buttons to choose the
size, and then press the [ ] button.
● [Save new image?] is displayed.
25).
Movies
Save the new image.
4
● Press the [ ][ ] buttons to choose [OK],
and then press the [ ] button.
● The image is now saved as a new le.
Review the new image.
5
● Press the [ ] button. [Display new
image?] is displayed.
● Press the [
and then press the [ ] button.
● The saved image is now displayed.
● Editing is not possible for images shot at a recording pixel setting
] (=
39).
of [
● Images cannot be resized to a higher number of recording pixels.
][ ] buttons to choose [Yes],
Cropping
Still Images
You can specify a portion of an image to save as a separate image le.
Choose [Cropping].
1
● Press the [ ] button, and then
choose [Cropping] on the [ ] tab
(=
25).
Movies
Before Use
Basic Guide
Advanced Guide
Camera Basics
Auto Mode /
Hybrid Auto Mode
Other Shooting Modes
P Mode
Playback Mode
Wi-Fi Functions
Setting Menu
Accessories
Appendix
Index
79
Page 80
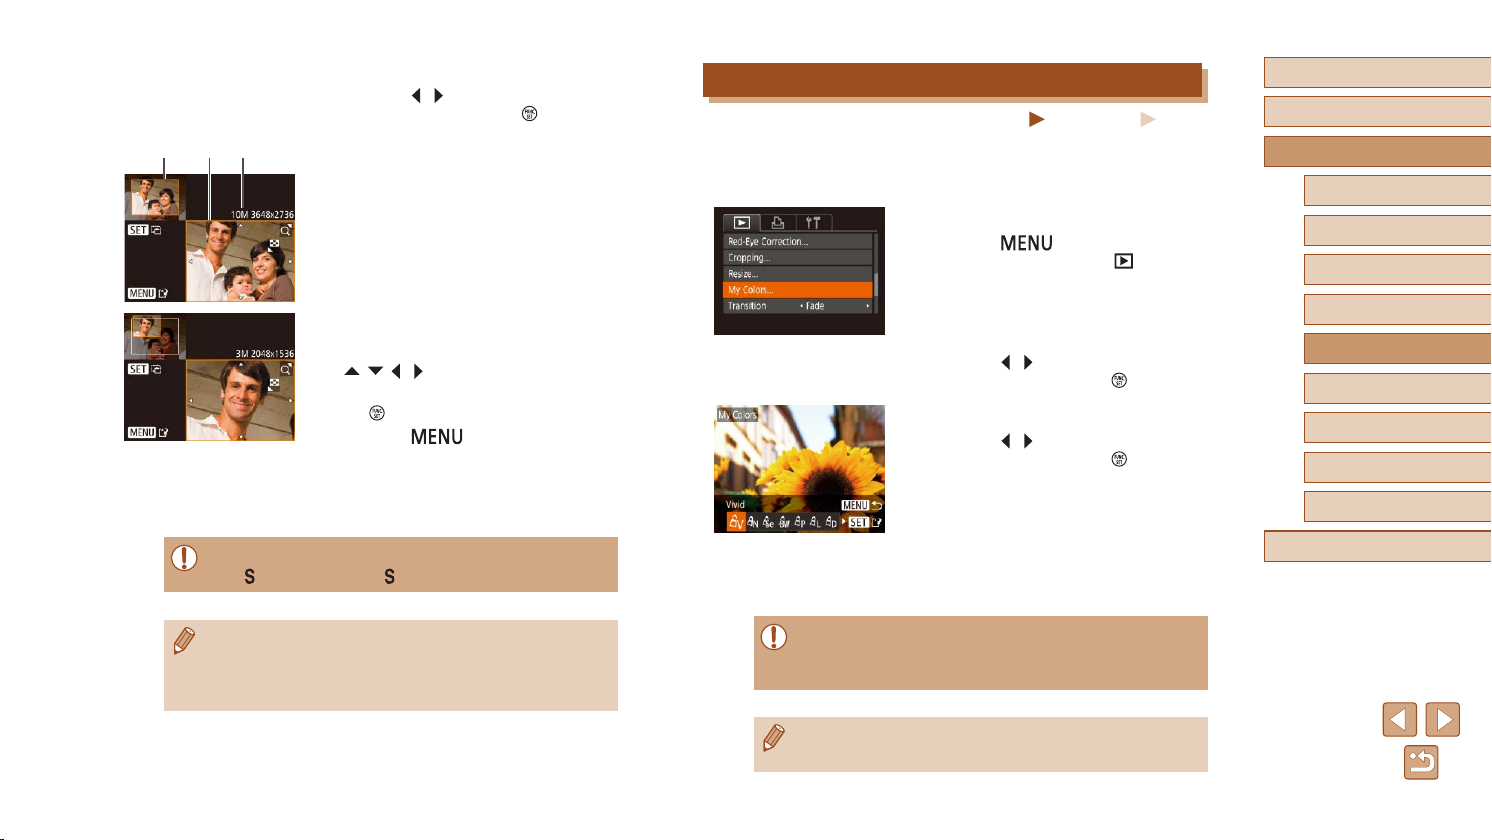
Choose an image.
(1) (2) (3)
2
● Press the [ ][ ] buttons to choose an
image, and then press the [ ] button.
Adjust the cropping area.
3
● A frame is displayed around the portion of
the image to be cropped (1).
● The original image is shown in the upper
left, and a preview of the image as
cropped (2) is shown in the lower right.
You can also see the number of recording
pixels after cropping (3).
● To resize the frame, move the zoom
lever.
● To move the frame, press the
][ ][ ][ ] buttons.
[
● To change the frame orientation, press
] button.
the [
● Press the [
Save as a new image and review.
4
● Follow steps 4 – 5 in “Resizing Images”
(=
79).
● Editing is not possible for images shot at a recording pixel setting
] (=
39) or resized to [ ] (=
of [
] button.
79).
Changing Image Color Tones (My Colors)
Still Images
You can adjust image colors and then save the edited image as a
separate le. For details on each option, see “Changing Image Color
Tones (My Colors)” (=
56).
Choose [My Colors].
1
● Press the [ ] button, and then
choose [My Colors] on the [ ] tab
(=
25).
Choose an image.
2
● Press the [ ][ ] buttons to choose an
image, and then press the [ ] button.
Choose an option.
3
● Press the [ ][ ] buttons to choose an
option, and then press the [ ] button.
Save as a new image and review.
4
● Follow steps 4 – 5 in “Resizing Images”
(=
79).
Movies
Before Use
Basic Guide
Advanced Guide
Camera Basics
Auto Mode /
Hybrid Auto Mode
Other Shooting Modes
P Mode
Playback Mode
Wi-Fi Functions
Setting Menu
Accessories
Appendix
Index
● Images supported for cropping will have the same aspect ratio
after cropping.
● Cropped images will have a lower number of recording pixels than
uncropped images.
● Image quality of pictures you repeatedly edit this way will be
a little lower each time, and you may not be able to obtain the
desired color.
● The color of images edited using this function may vary slightly
from the color of images shot using My Colors (
=
56).
80
Page 81
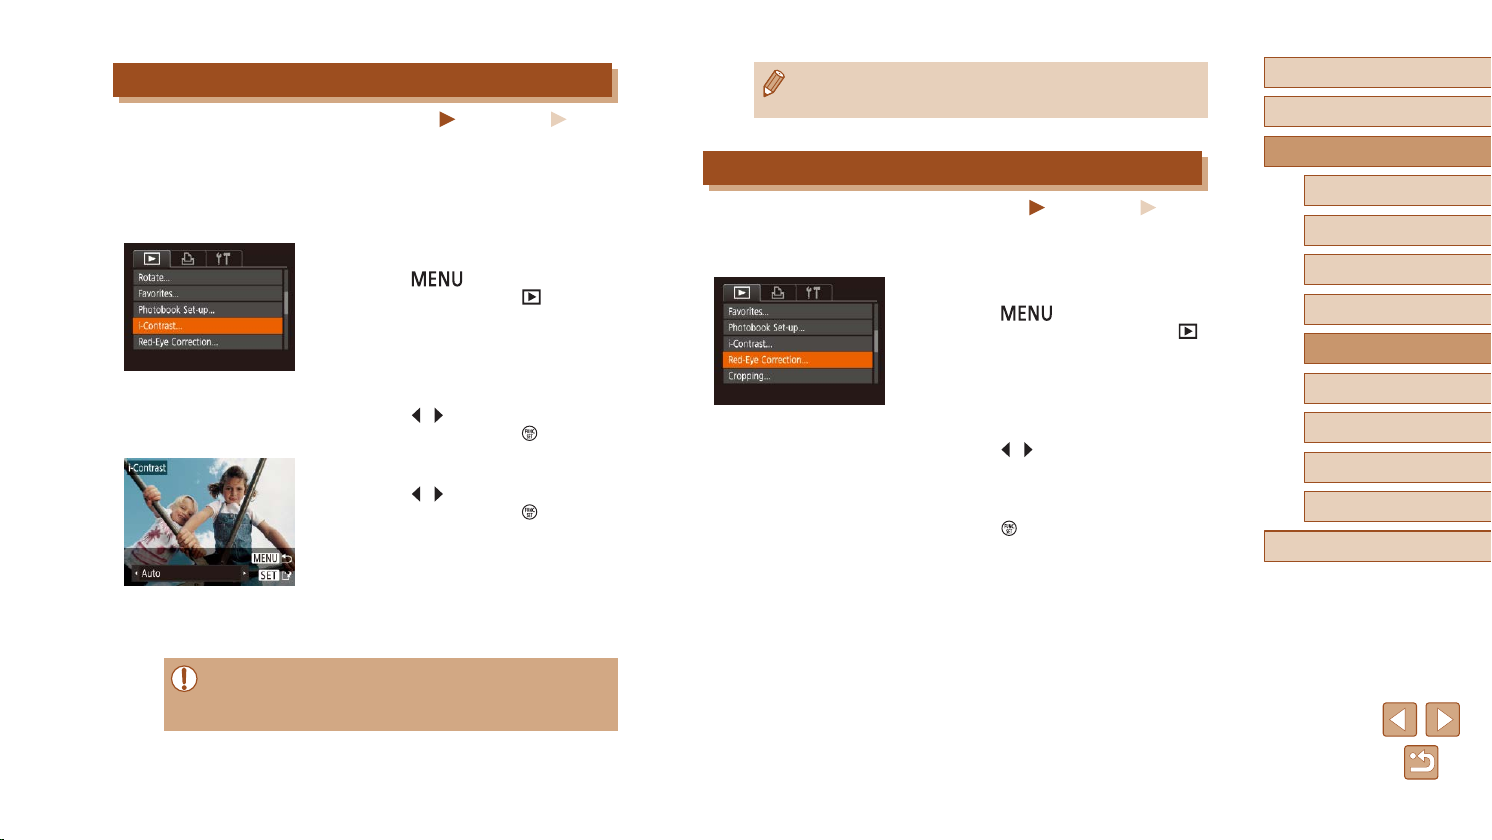
Correcting Image Brightness (i-Contrast)
Still Images
Excessively dark image areas (such as faces or backgrounds) can be
detected and automatically adjusted to the optimal brightness. Insufcient
overall image contrast is also automatically corrected, to make subjects
stand out better. Choose from four correction levels, and then save the
image as a separate le.
Choose [i-Contrast].
1
● Press the [ ] button, and then
choose [i-Contrast] on the [ ] tab
(=
25).
Movies
● If [Auto] does not produce the expected results, try correcting
images using [Low], [Medium], or [High].
Correcting Red-Eye
Still Images
Automatically corrects images affected by red-eye. You can save the
corrected image as a separate le.
Choose [Red-Eye Correction].
1
● Press the [ ] button, and then
choose [Red-Eye Correction] on the [ ]
tab (=
25).
Movies
Before Use
Basic Guide
Advanced Guide
Camera Basics
Auto Mode /
Hybrid Auto Mode
Other Shooting Modes
P Mode
Playback Mode
Choose an image.
2
● Press the [ ][ ] buttons to choose an
image, and then press the [ ] button.
Choose an option.
3
● Press the [ ][ ] buttons to choose an
option, and then press the [ ] button.
Save as a new image and review.
4
● Follow steps 4 – 5 in “Resizing Images”
(=
79).
● For some images, correction may be inaccurate or may cause
images to appear grainy.
● Images may look grainy after repeated editing using this function.
Choose an image.
2
● Press the [ ][ ] buttons to choose an
image.
Correct the image.
3
● Press the [ ] button.
● Red-eye detected by the camera is now
corrected, and frames are displayed
around corrected image areas.
● Enlarge or reduce images as needed.
Follow the steps in “Magnifying Images”
=
70).
(
Wi-Fi Functions
Setting Menu
Accessories
Appendix
Index
81
Page 82
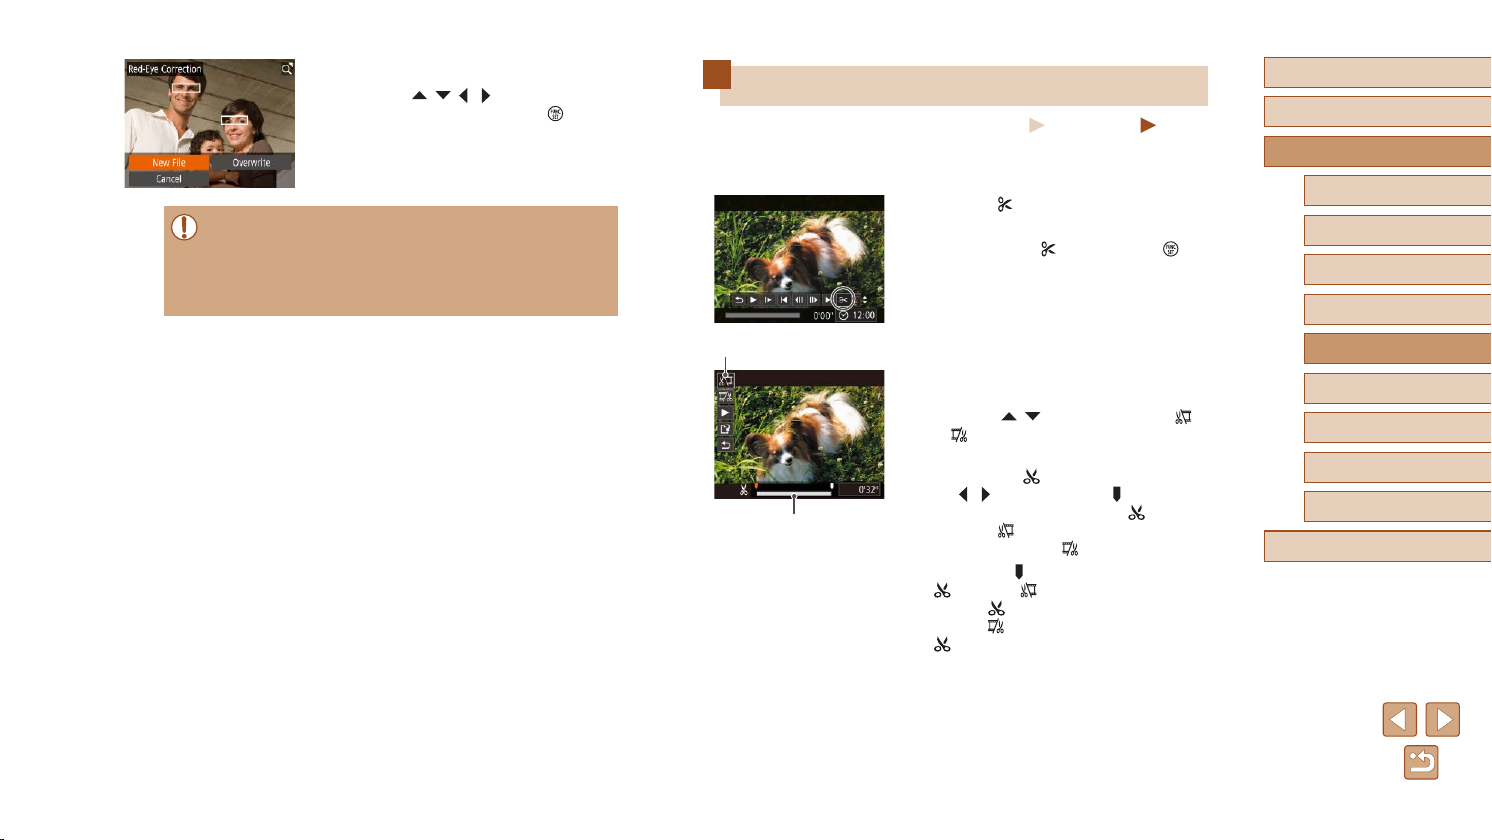
(1)
(2)
Save as a new image and review.
4
● Press the [ ][ ][ ][ ] buttons to choose
[New File], and then press the [ ] button.
● The image is now saved as a new le.
● Follow step 5 in “Resizing Images”
=
79).
(
● Some images may not be corrected accurately.
● To overwrite the original image with the corrected image, choose
[Overwrite] in step 4. In this case, the original image will be
erased.
● Protected images cannot be overwritten.
Editing Movies
Still Images
You can remove unneeded portions from the beginning and end of
movies.
Choose [ ].
1
● Following steps 1 – 5 in “Viewing”
(=
64), choose [ ] and press the [ ]
button.
● The movie editing panel and editing bar
are now displayed.
Movies
Before Use
Basic Guide
Advanced Guide
Camera Basics
Auto Mode /
Hybrid Auto Mode
Other Shooting Modes
P Mode
Specify portions to cut.
2
● (1) is the movie editing panel, and (2) is
the editing bar.
● Press the [
or [ ].
● To view the portions you can cut
(identied by [
the [ ][ ] buttons to move [ ]. Cut the
beginning of the movie (from [ ]) by
choosing [ ], and cut the end of the
movie by choosing [ ].
● If you move [
[ ] mark, in [ ] the portion before the
nearest [ ] mark on the left will be cut,
while in [ ] the portion after the nearest
[ ] mark on the right will be cut.
][ ] buttons to choose [ ]
] on the screen), press
] to a position other than a
Playback Mode
Wi-Fi Functions
Setting Menu
Accessories
Appendix
Index
82
Page 83
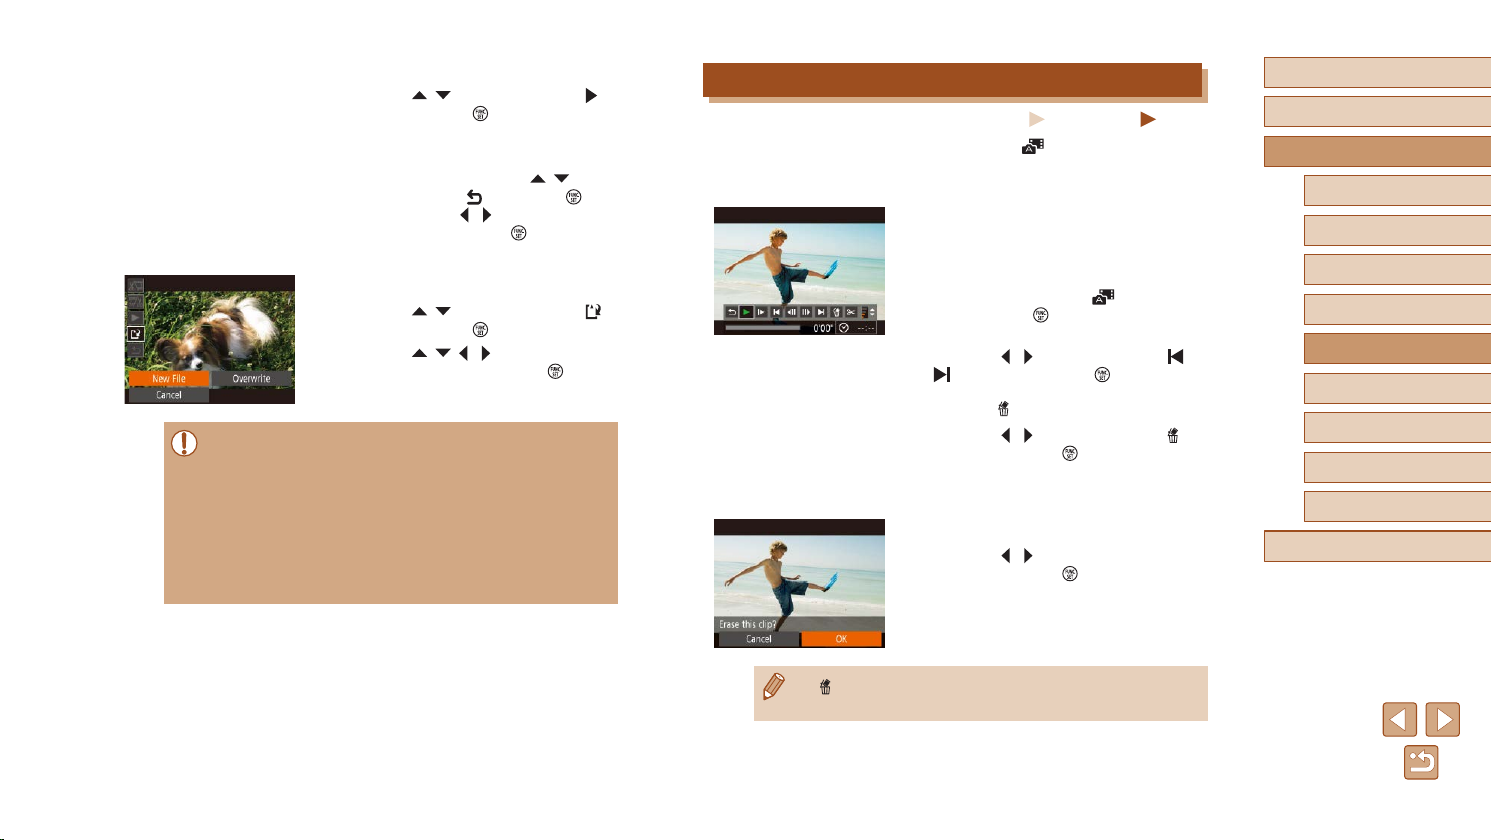
Review the edited movie.
3
● Press the [ ][ ] buttons to choose [ ],
and then press the [ ] button. The edited
movie is now played.
● To edit the movie again, repeat step 2.
● To cancel editing, press the [
buttons to choose [ ]. Press the [ ]
button, press the [ ][ ] buttons to choose
[OK], and then press the [ ] button
again.
Save the edited movie.
4
● Press the [ ][ ] buttons to choose [ ],
and then press the [ ] button.
● Press the [
[New File], and then press the [ ] button.
● The movie is now saved as a new le.
● To overwrite the original movie with the cut one, choose
[Overwrite] in step 4. In this case, the original movie will be
erased.
● If the memory card lacks sufcient space, only [Overwrite] will be
available.
● Movies may not be saved if the battery pack runs out while saving
is in progress.
● When editing movies, you should use a fully charged battery
pack.
][ ][ ][ ] buttons to choose
][ ]
Editing Digest Movies
Still Images
Individual chapters (clips) (=
erased, as needed. Be careful when erasing clips, because they cannot
be recovered.
30) recorded in [ ] mode can be
Select the clip to erase.
1
● Follow steps 1 – 2 in “Viewing Short
Movies Created When Shooting Still
Images (Digest Movies)” (=
play a movie created in [ ] mode, and
then press the [ ] button to access the
movie control panel.
● Press the [
[ ], and then press the [ ] button.
Choose [ ].
2
● Press the [ ][ ] buttons to choose [ ],
and then press the [ ] button.
● The selected clip is played back
repeatedly.
Conrm erasure.
3
● Press the [ ][ ] buttons to choose [OK],
and then press the [ ] button.
● The clip is erased, and the short movie is
overwritten.
][ ] buttons to choose [ ] or
66) to
Movies
Before Use
Basic Guide
Advanced Guide
Camera Basics
Auto Mode /
Hybrid Auto Mode
Other Shooting Modes
P Mode
Playback Mode
Wi-Fi Functions
Setting Menu
Accessories
Appendix
Index
● [ ] is not displayed if you select a clip when the camera is
connected to a printer.
83
Page 84
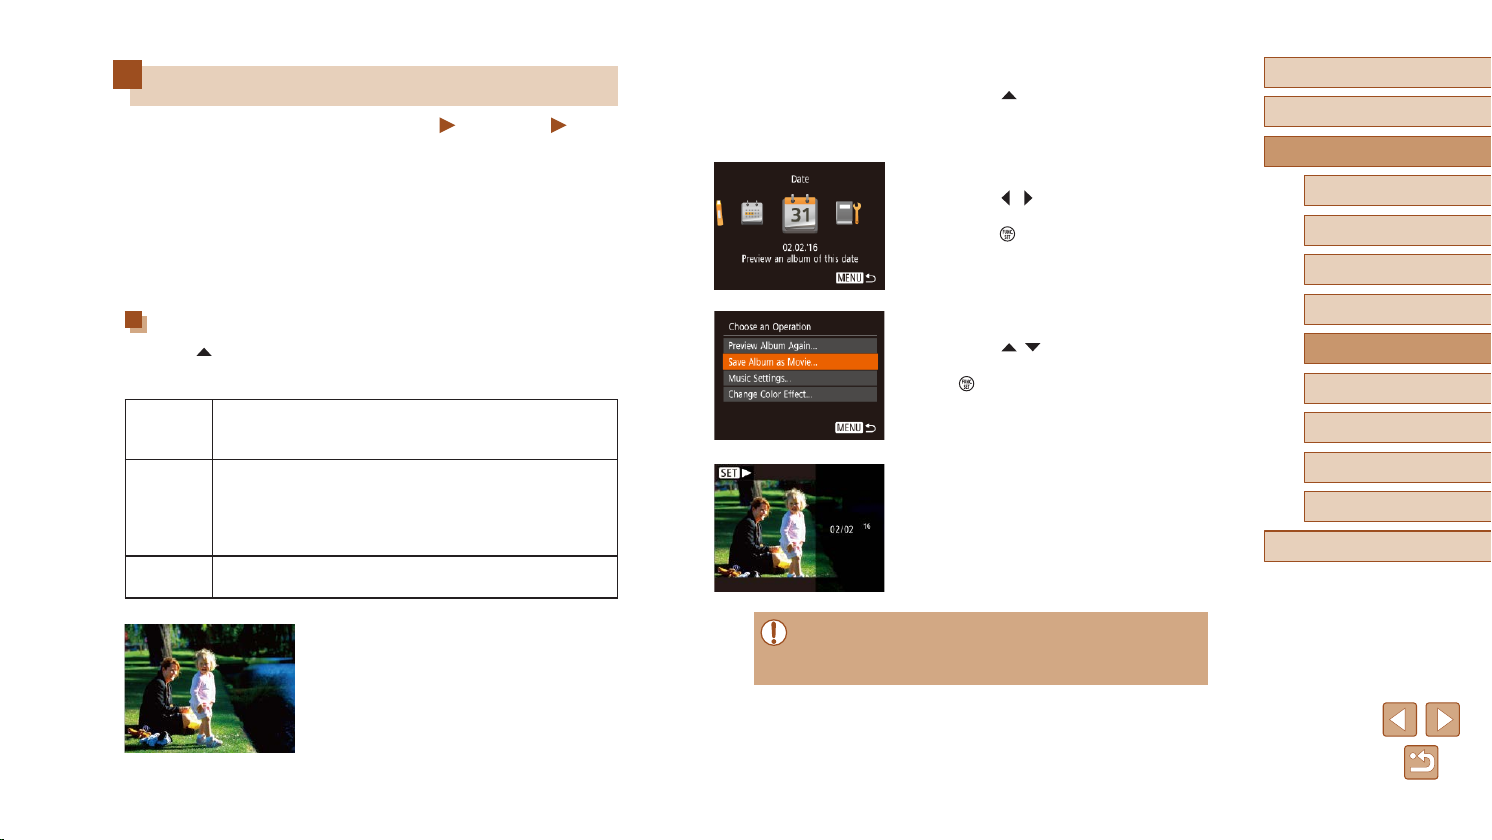
Viewing Albums (Story Highlights)
Still Images
You can choose themes such as a date to create an album of
automatically selected images that match the theme. These images are
combined into a slideshow that can be saved as a short movie of about
2 – 3 minutes.
Before using this feature, make sure the battery pack is fully charged.
Creating albums also requires free space on the memory card. As a
guideline, use a memory card with a capacity of 16 GB or higher, and
ensure at least 1 GB of free space.
Choosing Themes for Albums
Press the [ ] button to access the home screen and choose themes for
the camera to use when selecting album elements. Note that the camera
is more likely to add images tagged as favorites (=
Date
Event
Custom
Creates an album of images shot on the same day.
Images are selected from those shot on the same day as
the image displayed before you access the home screen.
A good choice for albums of vacations, parties, or other
events.
Images are selected from those shot during the event
before and after the image displayed before you access
the home screen.
Includes images based on your specied image or
shooting date.
78) to albums.
Movies
Access the home screen.
2
● Press the [ ] button.
● After [Busy] is displayed, the home
screen is displayed.
Preview an album.
3
● Press the [ ][ ] buttons to choose [Date]
or [Event] as the album theme, and then
press the [ ] button.
● After [Loading] is displayed for a few
seconds, the album is played.
Save the album.
4
● Press the [ ][ ] buttons to choose
[Save Album as Movie], and then press
the [ ] button.
● Once the album is saved, [Saved] is
displayed.
Play the album (= 64).
5
Before Use
Basic Guide
Advanced Guide
Camera Basics
Auto Mode /
Hybrid Auto Mode
Other Shooting Modes
P Mode
Playback Mode
Wi-Fi Functions
Setting Menu
Accessories
Appendix
Index
Choose an image.
1
● Choose an image in single-image display.
● Themes available in step 3 will vary
depending on image shooting date.
● Albums can include following images captured by the camera.
- Still images
- Digest movies (
=
30), except compressed movies
84
Page 85
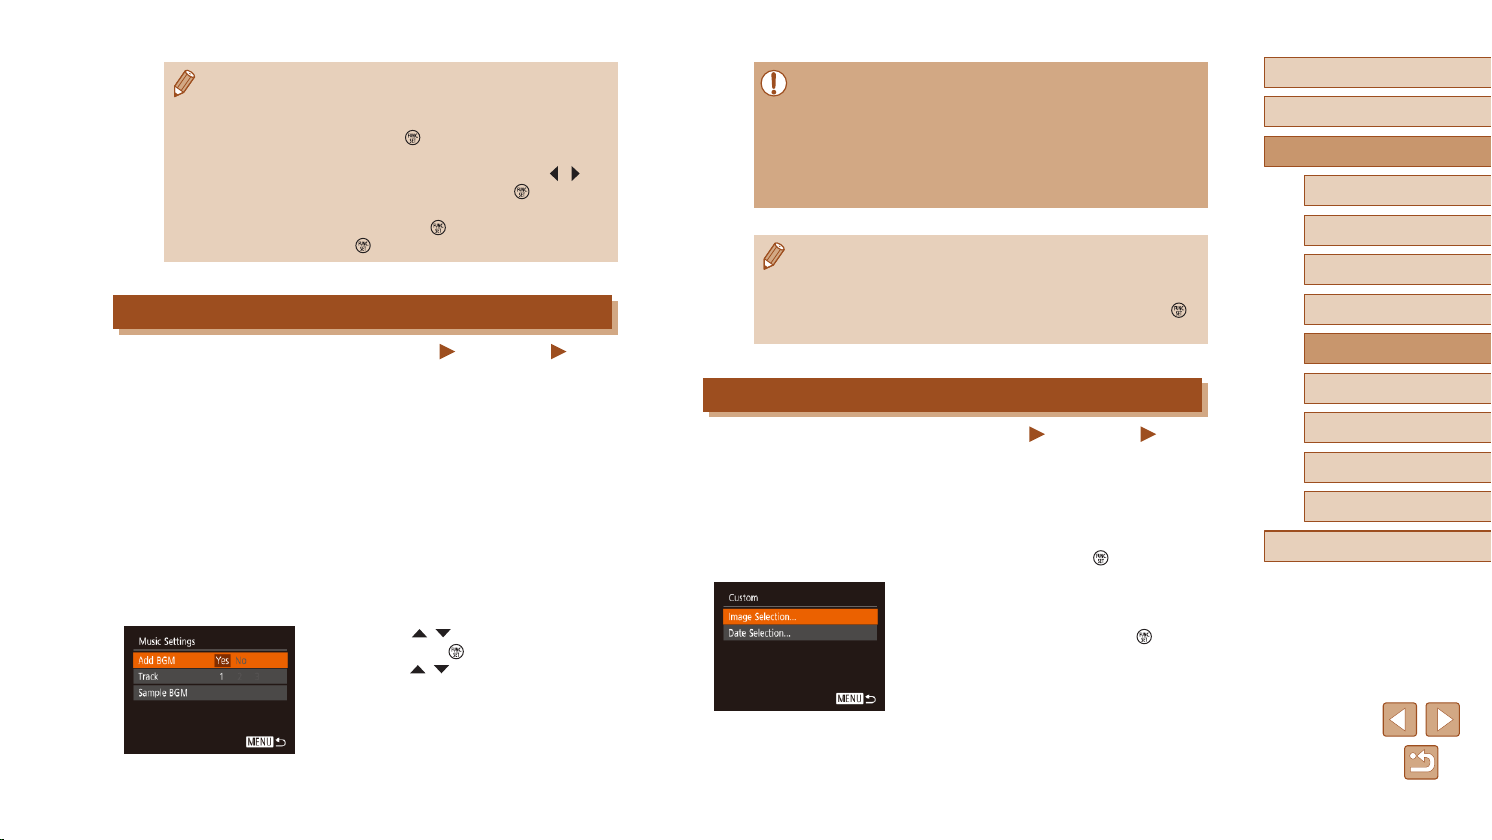
● Albums cannot be saved unless there is enough space on the
memory card.
● You can specify the color effect in step 4 by choosing [Change
Color Effect] and pressing the [
album looks with your selected effect applied, choose [Preview
Album Again] on the screen in step 4 after pressing the [
buttons to choose a color effect and pressing the [
● To play saved albums, choose [List of Albums] on the Story
Highlights home screen, press the [
album, and press the [
] button. To preview how the
] button.
] button, choose a listed
] button again.
Adding Background Music to Albums
Still Images
Choose from three kinds of background music to play during album
playback.
Create the album.
1
● Follow steps 1 – 3 in “Viewing Albums
(Story Highlights)” (=
album.
Congure background music
2
settings.
● On the screen in step 4 of “Viewing
Albums (Story Highlights)” (=
choose [Music Settings].
● Press the [
][ ] buttons to choose an
item. Press the [ ] button, and then
press the [ ][ ] buttons to choose the
desired option (=
25).
84) to create an
84),
][ ]
Movies
● Once albums are saved, background music cannot be added
later. Background music in albums cannot be removed or
changed.
● Chapters of albums with background music cannot be edited
=
83).
(
● Movie audio is not played if you add background music to the
album.
● If you prefer not to add background music, set [Add BGM] to [No]
on the screen in step 3.
● To listen to a sample of the background music selected in [Track],
choose [Sample BGM] on the screen in step 3 and press the [
button.
Creating Your Own Albums
Still Images
Create your own albums by choosing desired images.
Choose to create a Custom album.
1
● Following steps 1 – 3 in “Viewing Albums
(Story Highlights)” (=
[Custom] and press the [ ] button.
Choose a selection method.
2
● Choose [Image Selection] or [Date
Selection], and then press the [ ] button.
84), choose
]
Movies
Before Use
Basic Guide
Advanced Guide
Camera Basics
Auto Mode /
Hybrid Auto Mode
Other Shooting Modes
P Mode
Playback Mode
Wi-Fi Functions
Setting Menu
Accessories
Appendix
Index
Save the album.
3
● Follow step 4 in “Viewing Albums (Story
Highlights)” (=
84) to save albums.
85
Page 86
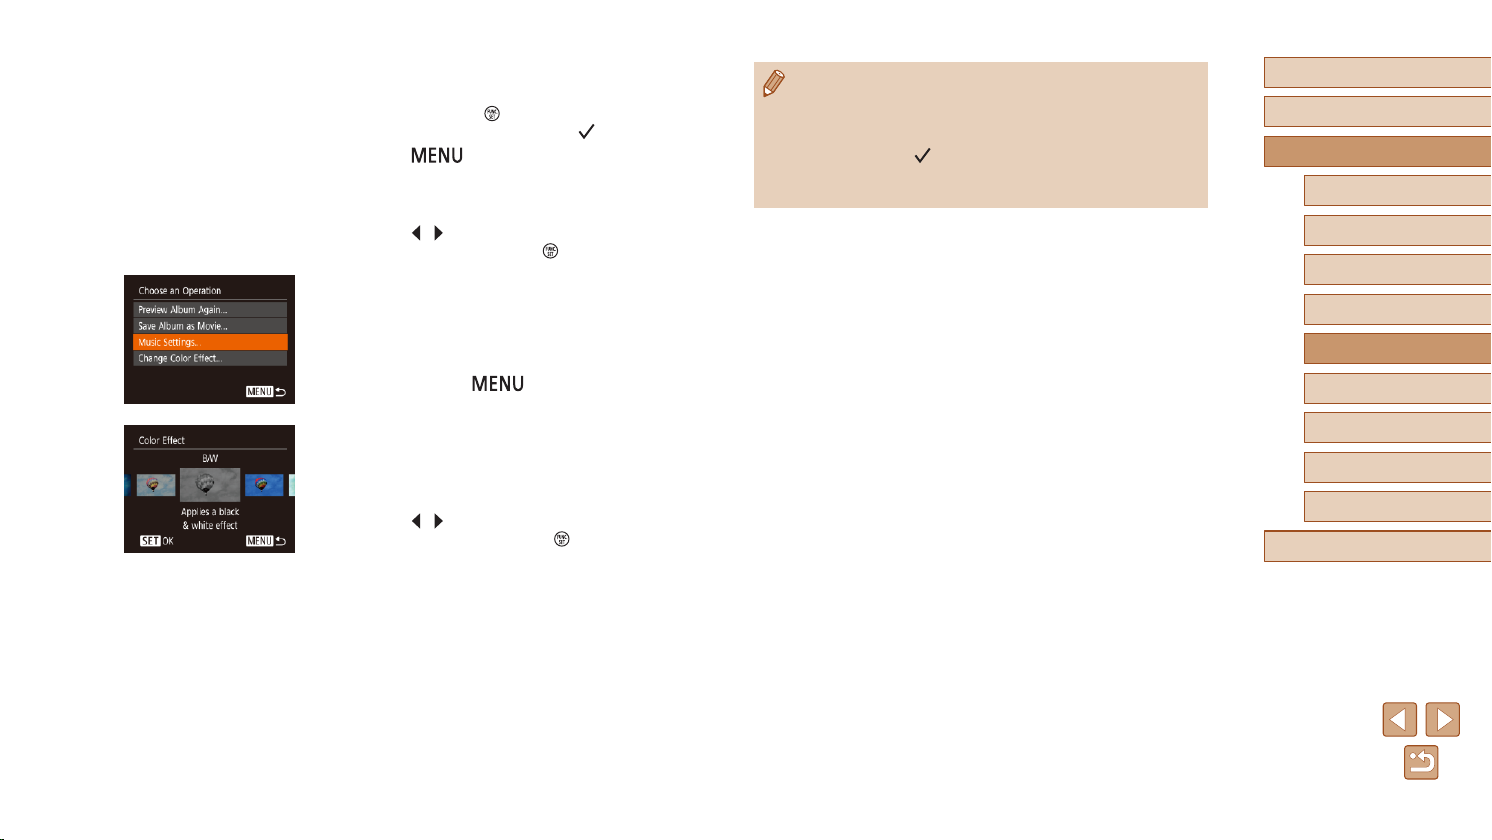
Choose album elements.
3
● Once you select the elements for your
album and press the [ ] button, your
selected elements are labeled with [ ].
● Press the [
nished selecting still images or digest
movies in [Image Selection], or dates in
[Date Selection].
● Press the [
[Preview], and then press the [ ] button.
Choose background music.
4
● When the screen at left is displayed,
choose [Music Settings]. Add background
music as described in “Adding
Background Music to Albums” (=
and then press the [ ] button.
] button after you are
][ ] buttons to choose
85),
● Up to 40 les can be selected if you choose [Image Selection].
The second time you create a custom album, [Select images
based on previous settings?] is displayed. To use previously
selected images as the basis, choose [Yes]. The previous images
are labeled with [
● Up to 15 dates can be selected if you choose [Date Selection].
● The color effect may not be applied to some images.
], and multiple images are displayed at once.
Before Use
Basic Guide
Advanced Guide
Camera Basics
Auto Mode /
Hybrid Auto Mode
Other Shooting Modes
P Mode
Playback Mode
Wi-Fi Functions
Choose a color effect.
5
● On the screen in step 4 of “Viewing
Albums (Story Highlights)” (=
choose [Change Color Effect].
● Press the [
color effect, and then press the [ ]
button.
Save the album.
6
● Follow step 4 in “Viewing Albums (Story
Highlights)” (=
][ ] buttons to choose a
84) to save albums.
84),
Setting Menu
Accessories
Appendix
Index
86
Page 87
Wi-Fi Functions
Send images wirelessly from the camera to a variety of compatible
devices, and use the camera with Web services
● Before using Wi-Fi, be sure to read “Wi-Fi (Wireless LAN)
Precautions” (
=
155).
Available Wi-Fi Features
You can send and receive images and control the camera remotely by
connecting it to these devices and services via Wi-Fi.
● Smartphones and Tablets
Send images to smartphones and tablet computers that have Wi-Fi
functions. You can also shoot remotely and geotag your shots from a
smartphone or tablet.
For convenience in this manual, smartphones, tablets, and other
compatible devices are collectively referred to as “smartphones”.
● Computer
Use software to save camera images to a computer connected via
Wi-Fi.
● Web Services
Add your account information to the camera for CANON iMAGE
GATEWAY online photography service or other Web services to
send camera images to the services. Unsent images on the camera
can also be sent to a computer or Web service via CANON iMAGE
GATEWAY.
● Printers
Send images wirelessly to a PictBridge-compatible printer (supporting
DPS over IP) to print them.
● Another Camera
Send images wirelessly between Wi-Fi-compatible Canon cameras.
Before Use
Basic Guide
Advanced Guide
Camera Basics
Auto Mode /
Hybrid Auto Mode
Other Shooting Modes
P Mode
Playback Mode
Wi-Fi Functions
Setting Menu
Accessories
Appendix
Index
87
Page 88
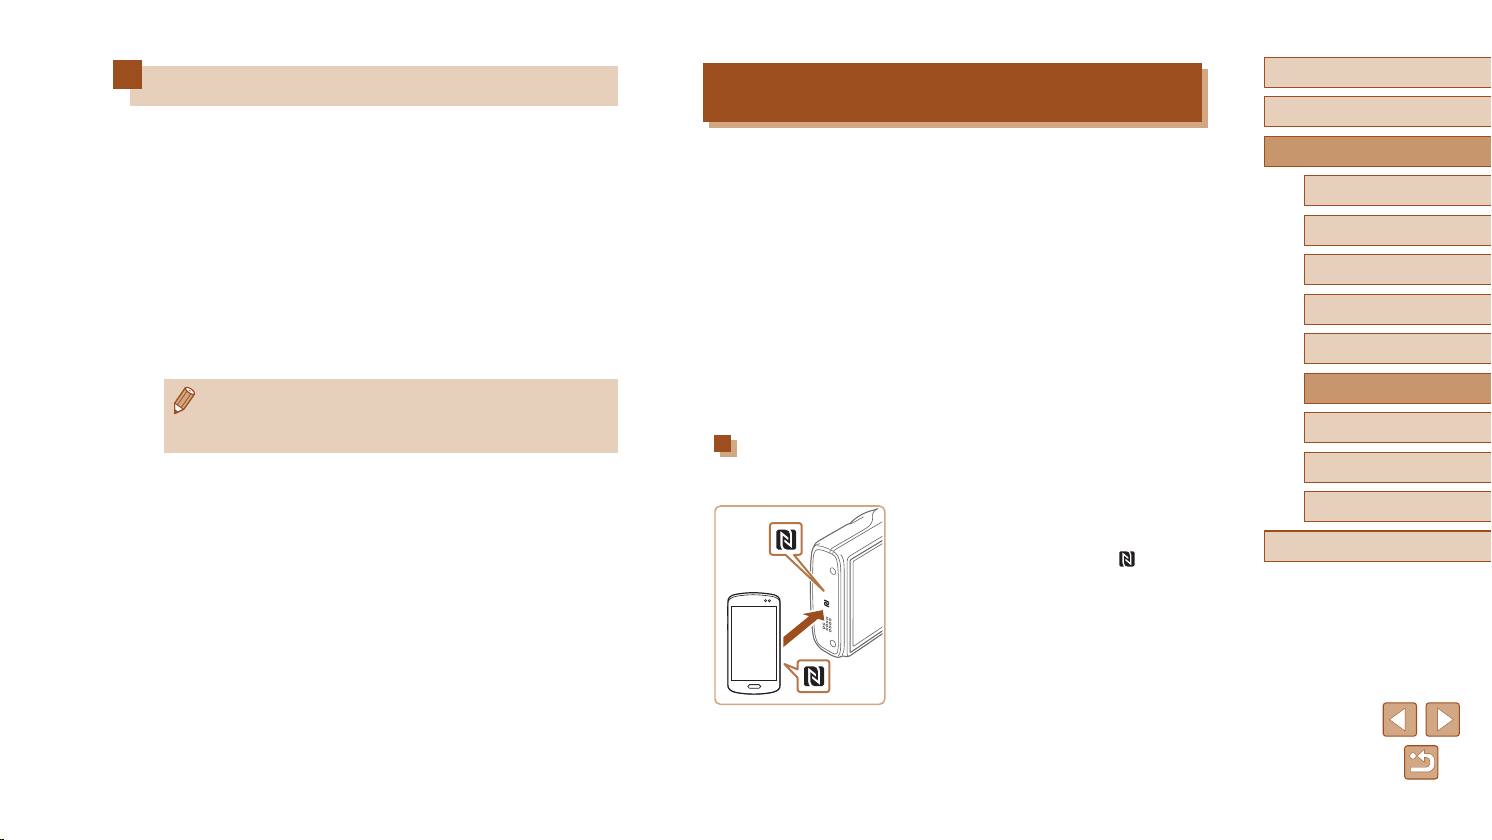
Sending Images to a Smartphone
There are several ways to connect the camera to a smartphone and send
images.
=
● Connect via NFC (
Simply touch an NFC-compatible Android smartphone (OS version 4.0
or later) against the camera to connect the devices.
● Connect via the Wi-Fi menu (
You can connect the camera to a smartphone as you would connect it
to a computer or other device. Multiple smartphones can be added.
Before connecting to the camera, you must install the free dedicated
Camera Connect app on the smartphone. For details on this application
(supported smartphones and included functions), refer to the Canon
website.
● Canon Wi-Fi-compatible camera users who connect their camera
to a smartphone via Wi-Fi should consider switching from the
CameraWindow mobile app to the Camera Connect mobile app.
88)
=
91)
Sending Images to an NFC-Compatible
Smartphone
Use an Android (OS version 4.0 or later) smartphone’s NFC to simplify the
process of installing Camera Connect and connecting to the camera.
Operation when devices are initially connected via NFC varies depending
on the camera mode when the devices are touched together.
● If the camera is off or in Shooting mode when the devices are touched
together, you can choose and send images on the image selection
screen. Once the devices are connected, you can also shoot remotely
and geotag your shots (
devices, which are listed in the Wi-Fi menu.
● If the camera is in Playback mode when the devices are touched
together, you can choose and send images from the index display
shown for image selection.
Follow the instructions in the following section for NFC-initiated connection
to a camera that is off or in Shooting mode.
Connecting via NFC When Camera Is Off or in
Shooting Mode
=
110). It’s easy to reconnect to recent
Before Use
Basic Guide
Advanced Guide
Camera Basics
Auto Mode /
Hybrid Auto Mode
Other Shooting Modes
P Mode
Playback Mode
Wi-Fi Functions
Setting Menu
Accessories
Install Camera Connect.
1
● Activate NFC on the smartphone and
touch the devices’ N-Marks ( ) together
to start Google Play on the smartphone
automatically. Once the Camera Connect
download page is displayed, download
and install the app.
Appendix
Index
88
Page 89
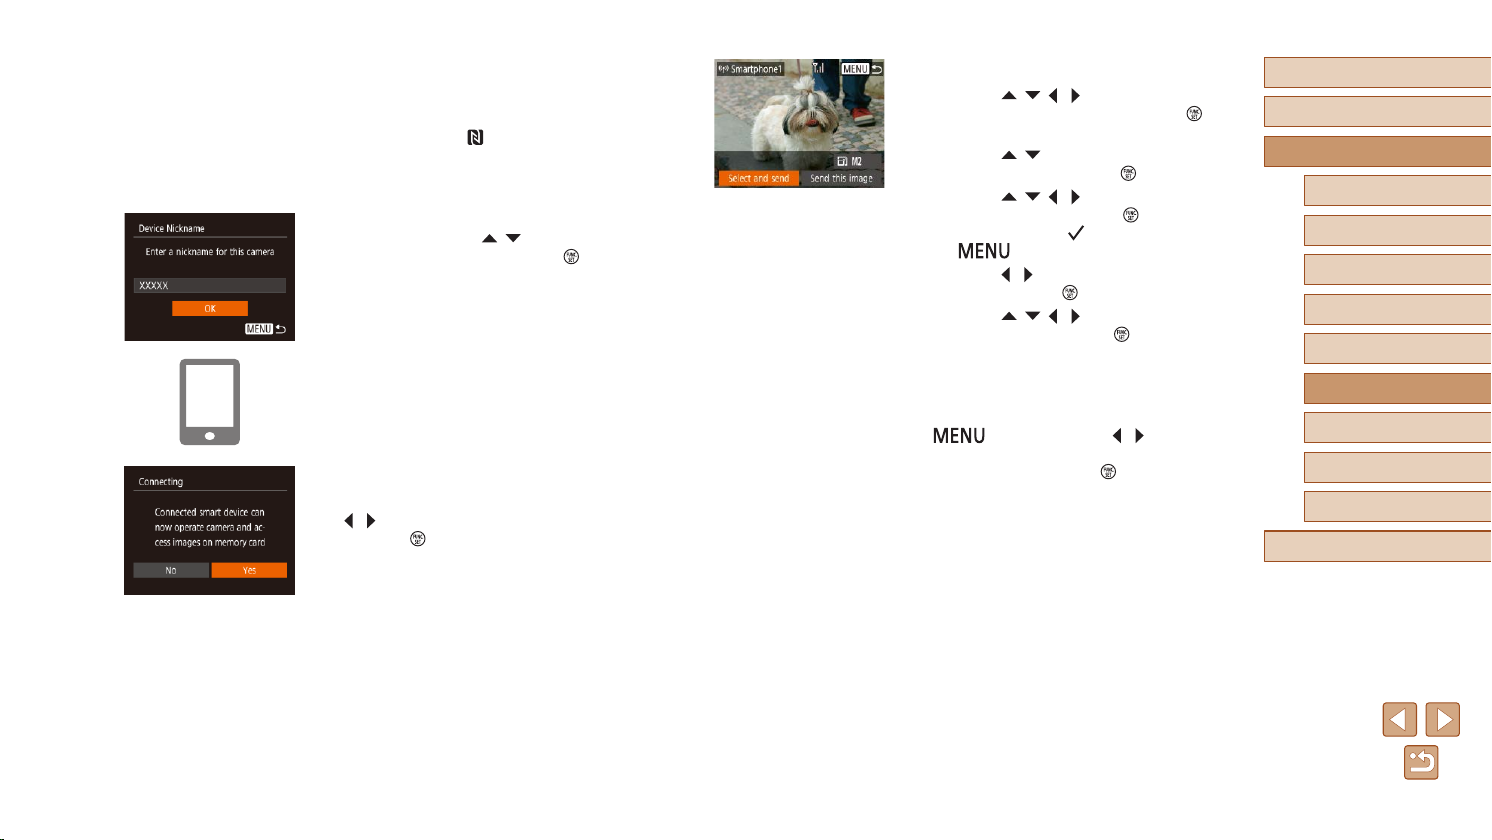
Establish the connection.
2
● Make sure the camera is off or in
Shooting mode.
● Touch the N-Mark (
with Camera Connect installed against
the camera’s N-Mark.
● The camera starts up automatically.
● If the [Device Nickname] screen is
displayed, press the [
choose [OK], and then press the [ ]
button.
● Camera Connect is started on the
smartphone.
● The devices are connected automatically.
Adjust the privacy setting.
3
● After this screen is displayed, press the
[ ][ ] buttons to choose [Yes], and then
press the [ ] button.
● You can now use the smartphone to
browse, import, or geotag images on the
camera or shoot remotely.
) on the smartphone
][ ] buttons to
Send an image.
4
● Press the [ ][ ][ ][ ] buttons to choose
[Select and send], and then press the [ ]
button.
● Press the [
[Select], and then press the [ ] button.
● Press the [
an image to send, press the [ ] button to
mark it as selected ([ ]), and then press
the [ ] button.
● Press the [
and then press the [ ] button.
● Press the [
[Send], and then press the [ ] button.
● [Transfer completed] is displayed after
the image is sent, and the image transfer
screen is displayed again.
● To end the connection, press the
[
on the conrmation screen to choose
[OK], and then press the [ ] button. You
can also use the smartphone to end the
connection.
][ ] buttons to choose
][ ][ ][ ] buttons to choose
][ ] buttons to choose [OK],
][ ][ ][ ] buttons to choose
] button, press the [ ][ ] buttons
Before Use
Basic Guide
Advanced Guide
Camera Basics
Auto Mode /
Hybrid Auto Mode
Other Shooting Modes
P Mode
Playback Mode
Wi-Fi Functions
Setting Menu
Accessories
Appendix
Index
89
Page 90
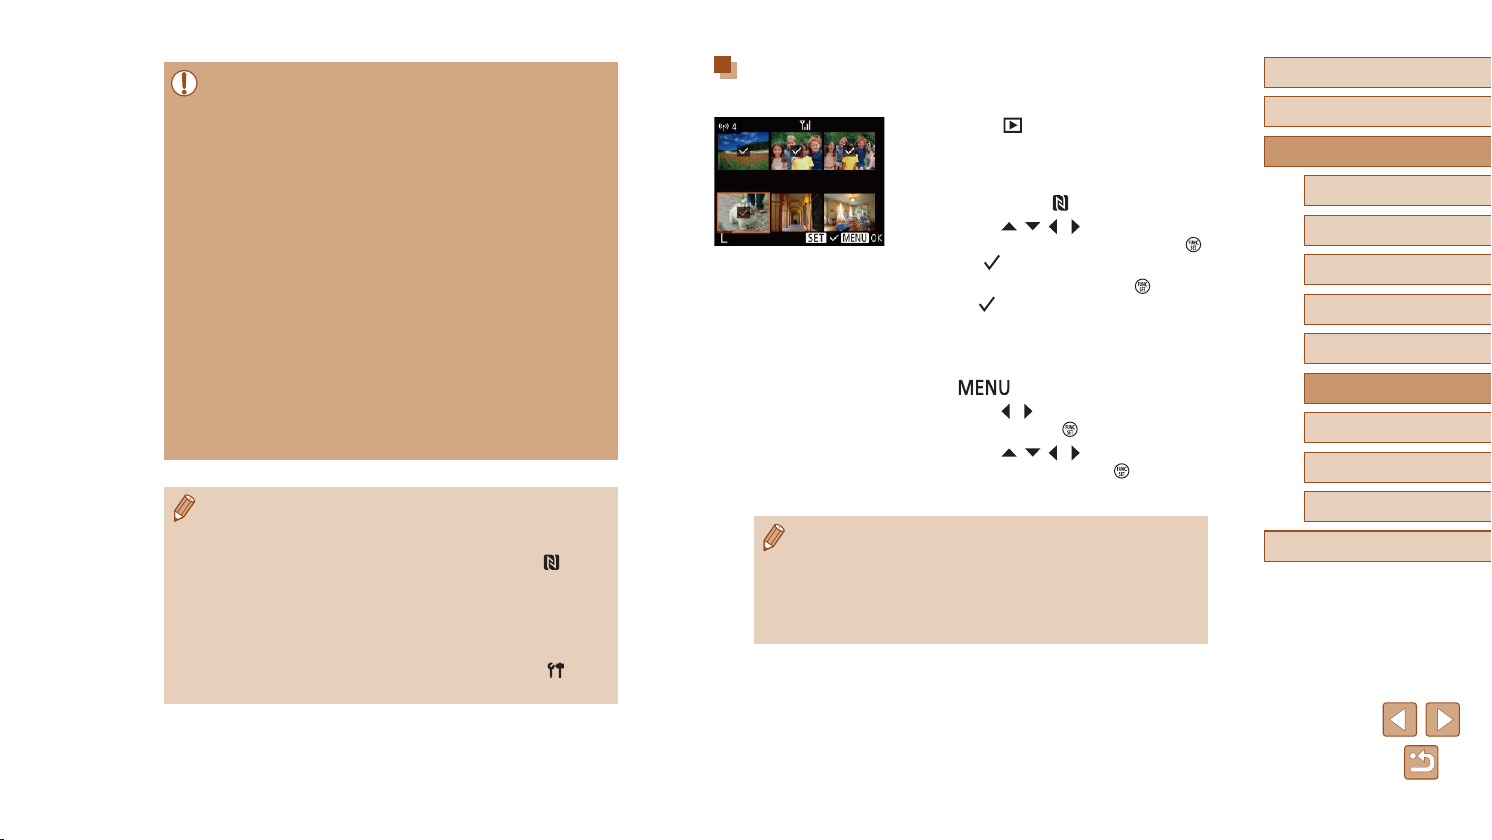
● When using NFC, keep the following points in mind.
- Avoid strong impact between the camera and smartphone. This
may damage the devices.
- Depending on the smartphone, the devices may not recognize
each other immediately. In this case, try holding the devices
together in slightly different positions. If connection is not
established, keep the devices together until the camera screen
is updated.
- If you attempt connection when the camera is off, a message
may be displayed on the smartphone reminding you to turn on
the camera. If so, turn the camera on and touch the devices
together again.
- Do not place other objects between the camera and
smartphone. Also, note that camera or smartphone covers or
similar accessories may block communication.
● All images in the camera can be viewed from the connected
smartphone when you choose [Yes] in step 3. To keep camera
images private, so that they cannot be viewed from the
smartphone, choose [No] in step 3.
● Once you have registered a smartphone, you can change privacy
settings for it on the camera (
● Connections require that a memory card be in the camera.
● You can also change the camera nickname on the screen in step 2
=
89).
(
● Not all NFC-compatible smartphones have an N-Mark (
details, refer to the smartphone user manual.
● You can also send multiple images at once and change the image
size before sending (
● You can send the current image by choosing [Send this image] on
the screen in step 4.
● To disable NFC connections, choose MENU (
► [Wireless settings] ► [Wi-Fi Settings] ► [NFC] ► [Off].
=
105).
=
111) .
=
25) ► [ ] tab
). For
Connecting via NFC When Camera Is in Playback
Mode
● Press the [ ] button to turn the camera
on.
● Touch the smartphone with Camera
Connect installed (
camera’s N-Mark ( ).
● Press the [
an image to send, and then press the [ ]
button. [ ] is displayed.
● To cancel selection, press the [
again. [ ] is no longer displayed.
● Repeat this process to choose additional
images.
● After you nish choosing images, press
the [
● Press the [
and then press the [ ] button.
● Press the [
[Send], and then press the [ ] button.
● The images are now sent.
● If during connection a message on the camera requests you to
enter the nickname, follow step 2 in “Sending Images to an NFCCompatible Smartphone” (
● The camera does not keep a record of smartphones you connect
to via NFC in Playback mode.
● You can preset images to transfer at your desired size (
=
88) to enter it.
=
88) against the
][ ][ ][ ] buttons to choose
] button
] button.
][ ] buttons to choose [OK],
][ ][ ][ ] buttons to choose
=
105).
Before Use
Basic Guide
Advanced Guide
Camera Basics
Auto Mode /
Hybrid Auto Mode
Other Shooting Modes
P Mode
Playback Mode
Wi-Fi Functions
Setting Menu
Accessories
Appendix
Index
90
Page 91
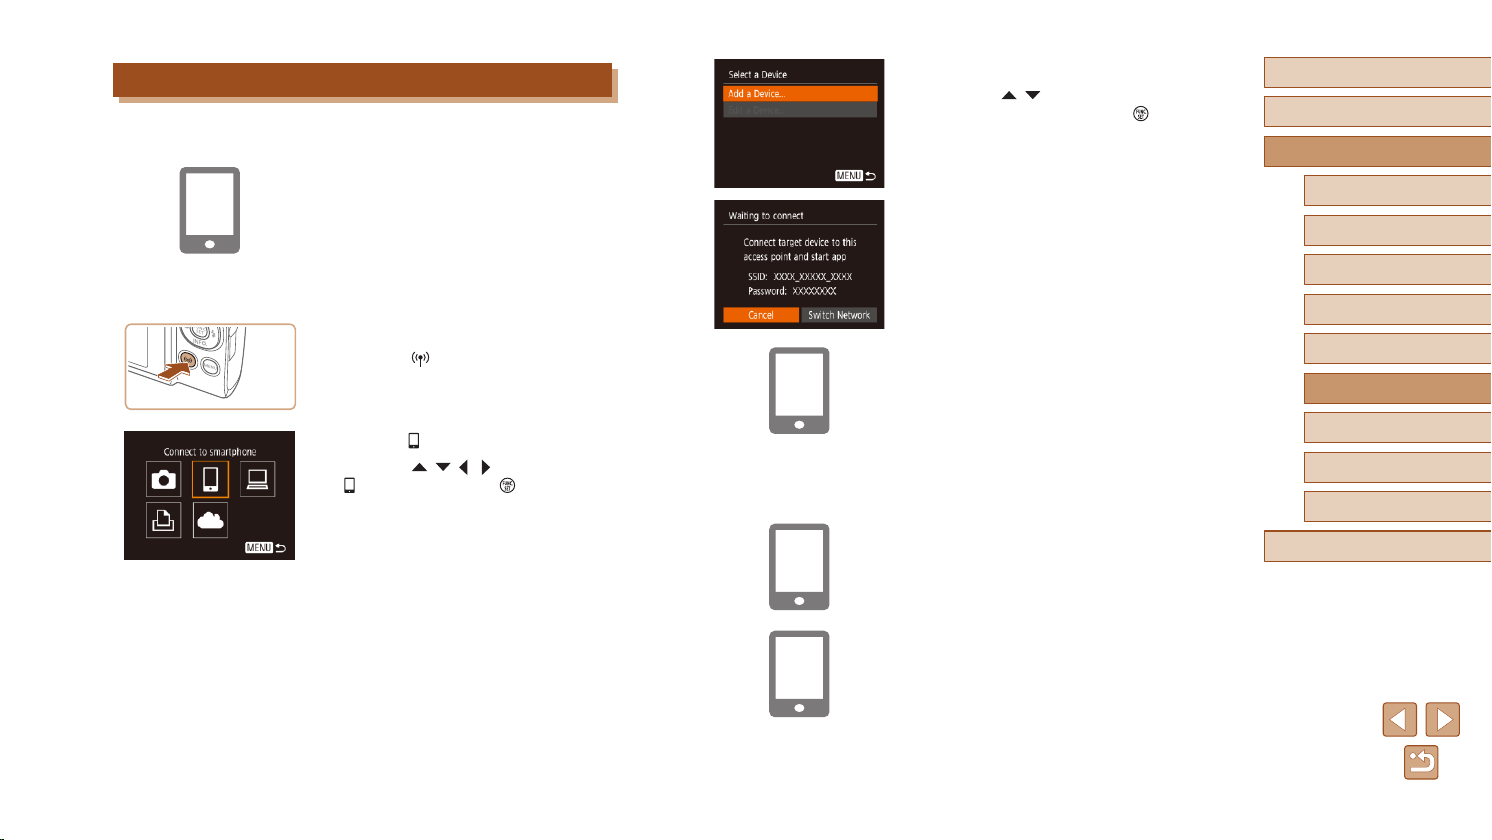
Adding a Smartphone
These steps show how to use the camera as an access point, but you can
also use an existing access point (=
1
2
3
93).
Install Camera Connect.
● For an iPhone or iPad, nd Camera
Connect in the App Store and download
and install the app.
● For Android smartphones, nd Camera
Connect in Google Play and download
and install the app.
Access the Wi-Fi menu.
● Press the [ ] button.
● If the [Device Nickname] screen is
displayed, choose [OK].
Choose [ ].
● Press the [ ][ ][ ][ ] buttons to choose
[ ], and then press the [ ] button.
Choose [Add a Device].
4
● Press the [ ][ ] buttons to choose [Add
a Device], and then press the [ ] button.
● The camera SSID and password are
displayed.
Connect the smartphone to the
5
network.
● In the smartphone’s Wi-Fi setting menu,
choose the SSID (network name)
displayed on the camera to establish a
connection.
● In the password eld, enter the password
displayed on the camera.
Start Camera Connect.
6
● Start Camera Connect on the
smartphone.
Select the camera to connect to.
7
● On the camera selection screen
displayed on the smartphone, choose the
camera to begin pairing.
Before Use
Basic Guide
Advanced Guide
Camera Basics
Auto Mode /
Hybrid Auto Mode
Other Shooting Modes
P Mode
Playback Mode
Wi-Fi Functions
Setting Menu
Accessories
Appendix
Index
91
Page 92
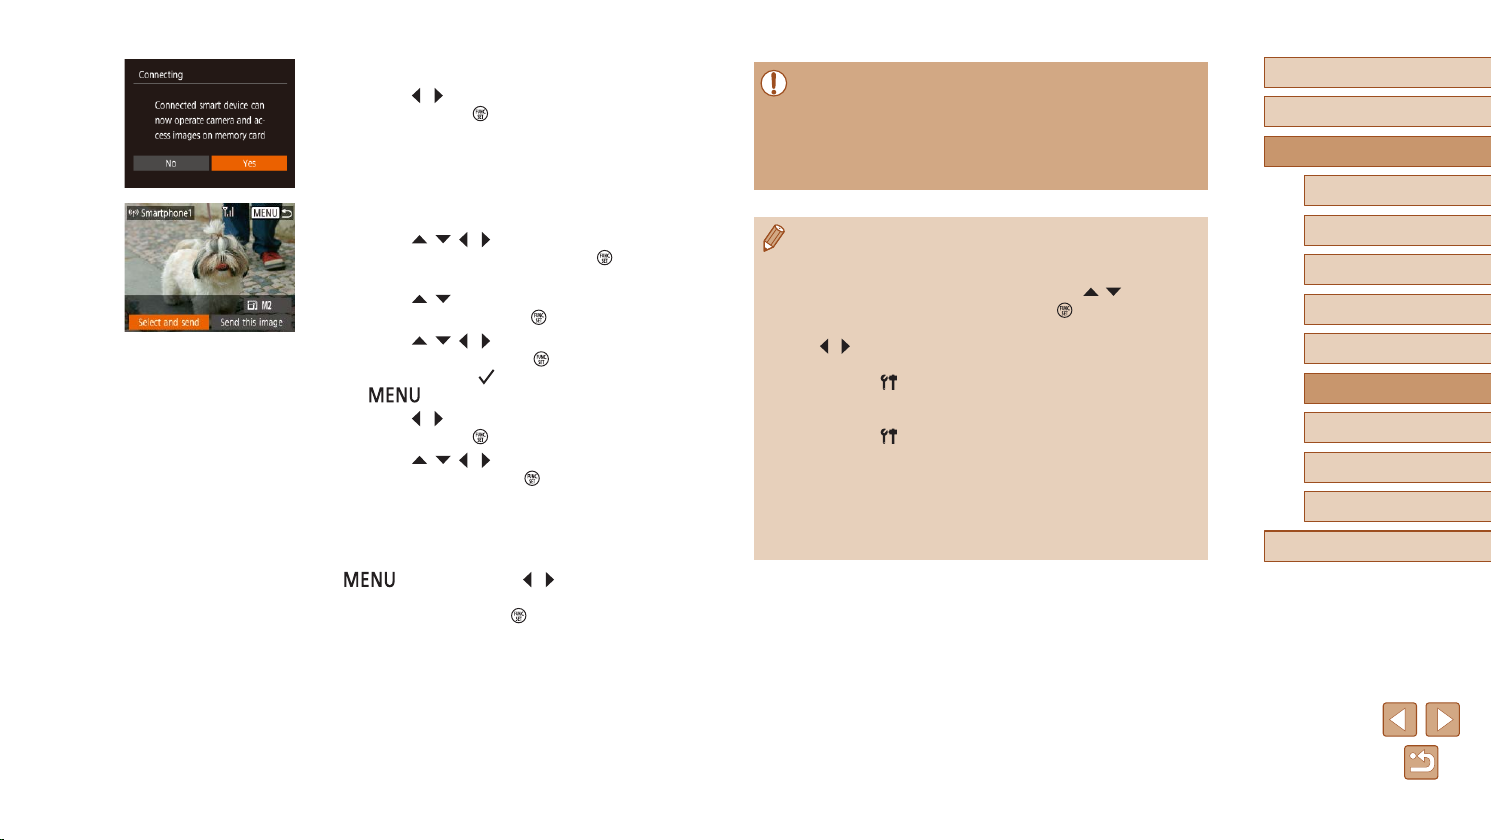
Adjust the privacy setting.
8
● Press the [ ][ ] buttons to choose [Yes],
and then press the [ ] button.
● You can now use the smartphone to
browse, import, or geotag images on the
camera or shoot remotely.
Send an image.
9
● Press the [ ][ ][ ][ ] buttons to choose
[Select and send], and then press the [ ]
button.
● Press the [
][ ] buttons to choose
[Select], and then press the [ ] button.
● Press the [
][ ][ ][ ] buttons to choose
an image to send, press the [ ] button to
mark it as selected ([ ]), and then press
the [ ] button.
● Press the [
][ ] buttons to choose [OK],
and then press the [ ] button.
● Press the [
][ ][ ][ ] buttons to choose
[Send], and then press the [ ] button.
● [Transfer completed] is displayed after
the image is sent, and the image transfer
screen is displayed again.
● To end the connection, press the
] button, press the [ ][ ] buttons
[
on the conrmation screen to choose
[OK], and then press the [ ] button. You
can also use the smartphone to end the
connection.
● To add multiple smartphones, repeat the
above procedure starting from step 1.
● All images in the camera can be viewed from the connected
smartphone when you choose [Yes] in step 8. To keep camera
images private, so that they cannot be viewed from the
smartphone, choose [No] in step 8.
● Once you have registered a smartphone, you can change privacy
settings for it on the camera (
● Connections require that a memory card be in the camera.
● Once you have connected to devices via the Wi-Fi menu, recent
destinations will be listed rst when you access the Wi-Fi menu.
You can easily connect again by pressing the [
choose the device and then pressing the [
new device, display the device selection screen by pressing the
][ ] buttons, and then congure the setting.
[
● If you prefer not to display recent target devices, choose MENU
=
25) ► [ ] tab ► [Wireless settings] ► [Wi-Fi Settings] ►
(
[Target History] ► [Off].
● To connect without entering a password in step 5, choose MENU
=
25) ► [ ] tab ► [Wireless settings] ► [Wi-Fi Settings]
(
► [Password] ► [Off]. [Password] is no longer displayed on the
SSID screen (in step 4).
● You can also send multiple images at once and change the image
size before sending (
● You can send the current image by choosing [Send this image] on
the screen in step 9.
=
105).
=
111) .
][ ] buttons to
] button. To add a
Before Use
Basic Guide
Advanced Guide
Camera Basics
Auto Mode /
Hybrid Auto Mode
Other Shooting Modes
P Mode
Playback Mode
Wi-Fi Functions
Setting Menu
Accessories
Appendix
Index
92
Page 93
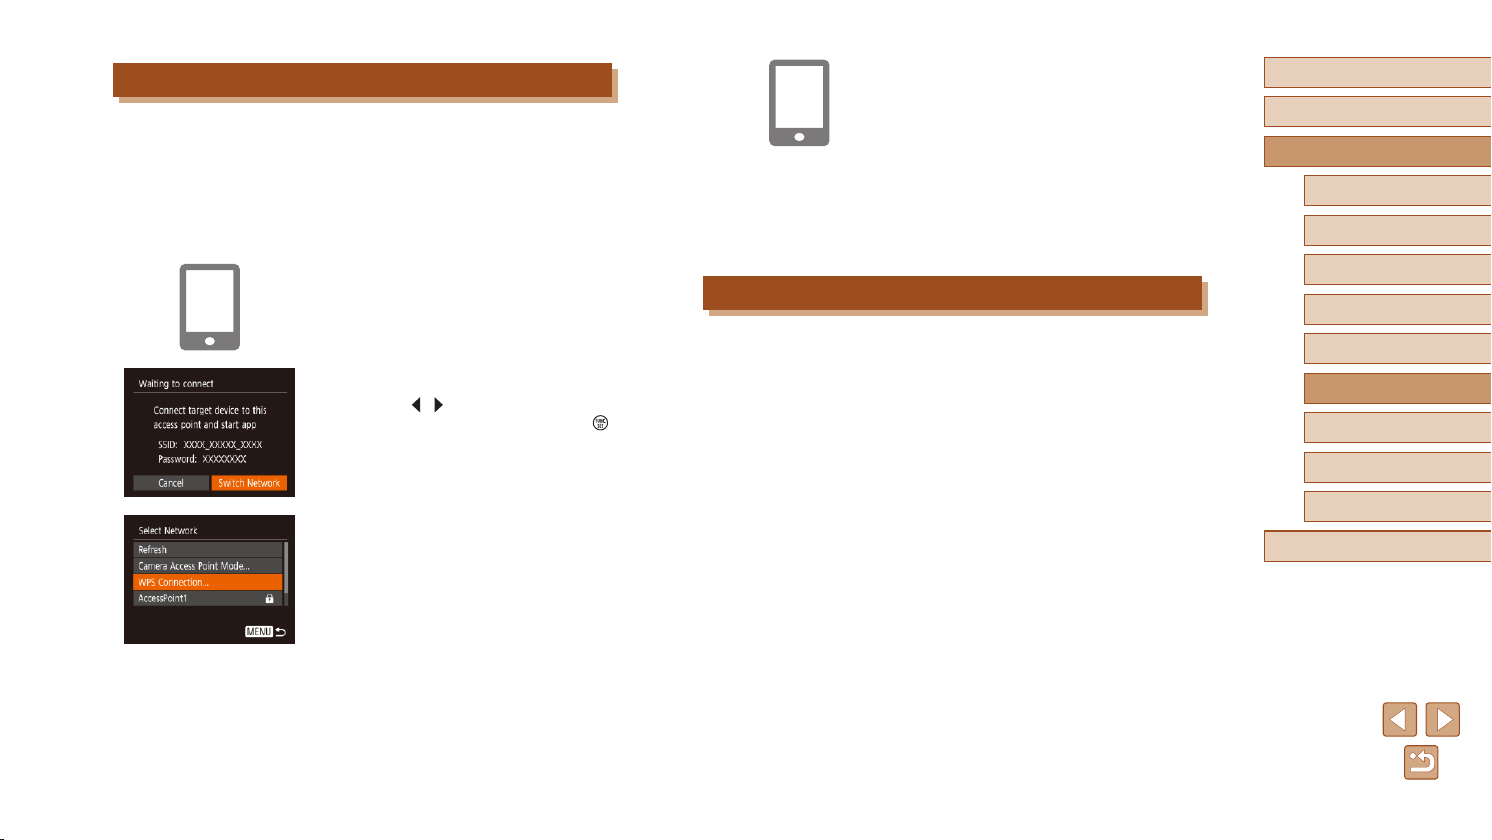
Using Another Access Point
When connecting the camera to a smartphone through the Wi-Fi menu,
you can also use an existing access point.
Prepare for the connection.
1
● Access the [Waiting to connect] screen
by following steps 1 – 4 in “Adding a
Smartphone” (=
Connect the smartphone to the
2
access point.
Choose [Switch Network].
3
● Press the [ ][ ] buttons to choose
[Switch Network], and then press the [ ]
button.
● A list of detected access points will be
displayed.
Connect to the access point.
4
● For WPS-compatible access points,
connect to the access point as described
in steps 5 – 8 in “Using WPS-Compatible
Access Points” (=
● For non-WPS access points, follow steps
2 – 4 in “Connecting to Listed Access
=
Points” (
access point.
91).
96).
98) to connect to the
Select the camera to connect to.
5
● On the camera selection screen
displayed on the smartphone, choose the
camera to begin pairing.
Congure the privacy settings and
6
send images.
● Follow steps 8 – 9 in “Adding a
Smartphone” (=
privacy settings and send images.
91) to congure the
Previous Access Points
You can reconnect to any previous access points automatically by
following step 4 in “Adding a Smartphone” (=
● To use the camera as an access point, choose [Switch Network] on the
screen displayed when you establish a connection, and then choose
[Camera Access Point Mode].
● To switch access points, choose [Switch Network] on the screen
displayed when you establish a connection, and then follow the
procedure in “Using Another Access Point” (
91).
=
93) from step 4.
Before Use
Basic Guide
Advanced Guide
Camera Basics
Auto Mode /
Hybrid Auto Mode
Other Shooting Modes
P Mode
Playback Mode
Wi-Fi Functions
Setting Menu
Accessories
Appendix
Index
93
Page 94
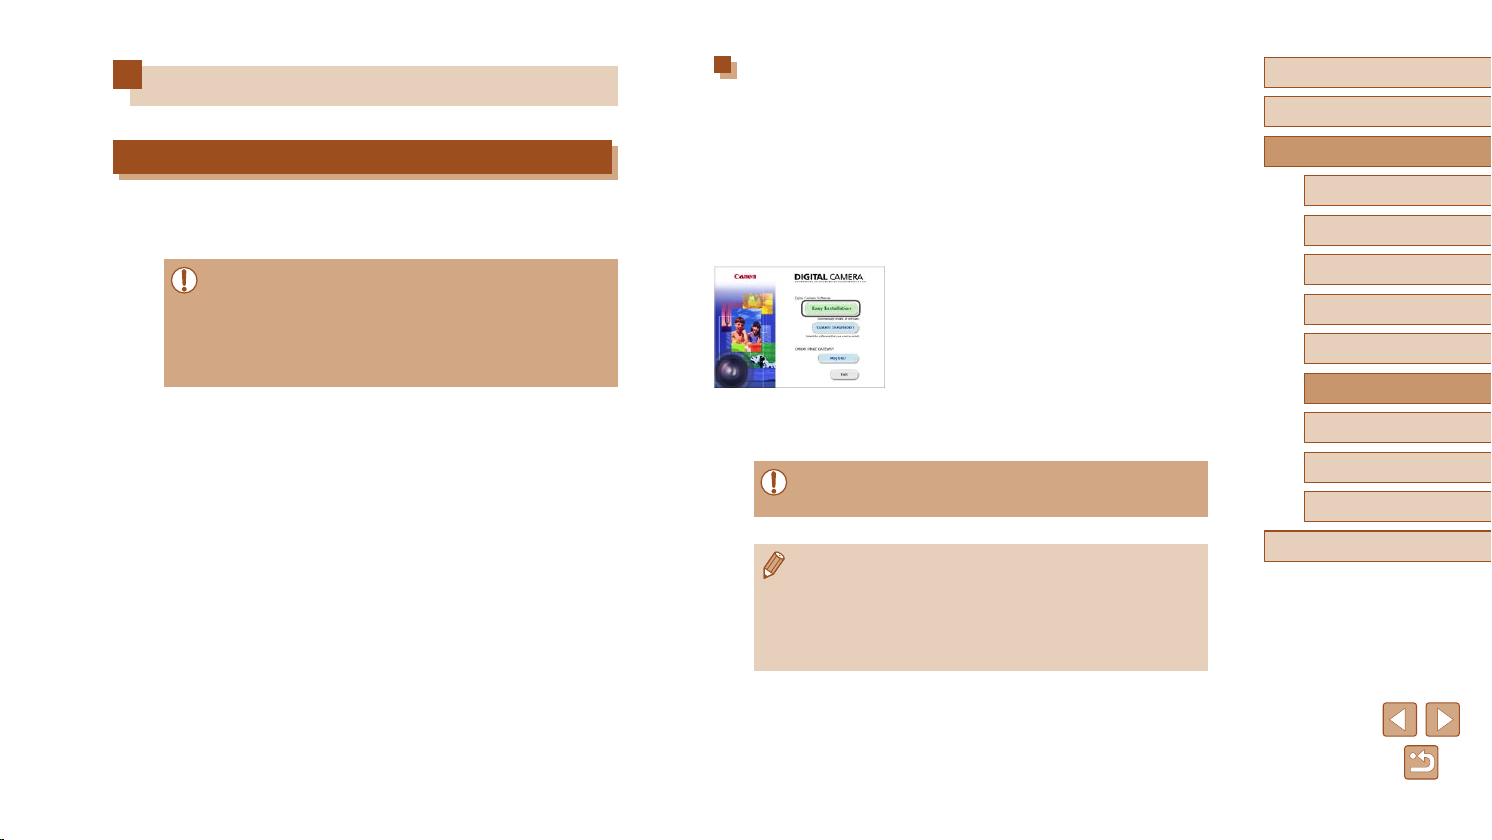
Saving Images to a Computer
Preparing to Register a Computer
For details on computers that you can connect the camera to via
Wi-Fi, system requirements, and other compatibility information (including
support in new operating systems), visit the Canon website.
● Windows 7 Starter and Home Basic editions are not supported.
● Windows 7 N (European version) and KN (South Korean version)
require a separate download and installation of Windows Media
Feature Pack.
For details, check the following website.
http://go.microsoft.com/fwlink/?LinkId=159730
Installing the Software
Windows 7 and Mac OS X 10.8 are used here for the sake of illustration.
Download the software.
1
● With a computer connected to the
Internet, access http://www.canon.com/
icpd/.
● Access the site for your country or region.
● Download the software.
Install the software.
2
● Click [Easy Installation] and follow the
on-screen instructions to complete the
installation process.
● Installation may take some time,
depending on computer performance and
the Internet connection.
● Click [Finish] or [Restart] on the screen
after installation.
● Internet access is required, and any ISP account charges and
access fees must be paid separately.
Before Use
Basic Guide
Advanced Guide
Camera Basics
Auto Mode /
Hybrid Auto Mode
Other Shooting Modes
P Mode
Playback Mode
Wi-Fi Functions
Setting Menu
Accessories
Appendix
● To uninstall the software, follow these steps.
- Windows: Select [Start] menu ► [All Programs] ► [Canon
Utilities], and then choose the software for uninstallation.
- Mac OS: In the [Canon Utilities] folder within the [Applications]
folder, drag the folder of the software for uninstallation to the
Trash, and then empty the Trash.
Index
94
Page 95
Conguring the Computer for a Wi-Fi Connection
(Windows Only)
On a computer running Windows, congure the following settings before
connecting the camera to the computer wirelessly.
Conrm that the computer is
1
connected to an access point.
● For instructions on checking your network
connection, refer to the computer user
manual.
Congure the setting.
2
● Click in the following order: [Start] menu
► [All Programs] ► [Canon Utilities] ►
[CameraWindow] ► [Wi-Fi connection
setup].
● In the application that opens, follow the
on-screen instructions and congure the
setting.
● The following Windows settings are congured when you run the
utility in step 2.
- Turn on media streaming.
This will enable the camera to see (nd) the computer to access
via Wi-Fi.
- Turn on network discovery.
This will enable the computer to see (nd) the camera.
- Turn on ICMP (Internet Control Message Protocol).
This allows you to check the network connection status.
- Enable Universal Plug & Play (UPnP).
This will enable network devices to detect each other
automatically.
● Some security software may prevent you from completing the
settings as described here. Check the settings of your security
software.
Saving Images to a Connected Computer
Connect to your access point via Wi-Fi as follows.
Also refer to the access point user manual.
Conrming Access Point Compatibility
Conrm that the Wi-Fi router or base station conforms to the Wi-Fi
standards in “Camera” (=
Connection methods vary depending on whether the access point
supports Wi-Fi Protected Setup (WPS, =
non-WPS access points, check the following information.
● Network name (SSID/ESSID)
The SSID or ESSID for the access point you use. Also called the
“access point name” or “network name”.
● Network authentication / data encryption (encryption method /
encryption mode)
The method for encrypting data during wireless transmission. Check
which security setting is used: WPA2-PSK (AES), WPA2-PSK
(TKIP), WPA-PSK (AES), WPA-PSK (TKIP), WEP (open system
authentication), or no security.
● Password (encryption key / network key)
The key used when encrypting data during wireless transmission. Also
called the “encryption key” or “network key”.
● Key index (transmit key)
The key set when WEP is used for network authentication / data
encryption. Use “1” as the setting.
● If system administrator status is needed to adjust network
settings, contact the system administrator for details.
● These settings are very important for network security. Exercise
adequate caution when changing these settings.
149).
96) or not (=
98). For
Before Use
Basic Guide
Advanced Guide
Camera Basics
Auto Mode /
Hybrid Auto Mode
Other Shooting Modes
P Mode
Playback Mode
Wi-Fi Functions
Setting Menu
Accessories
Appendix
Index
95
Page 96
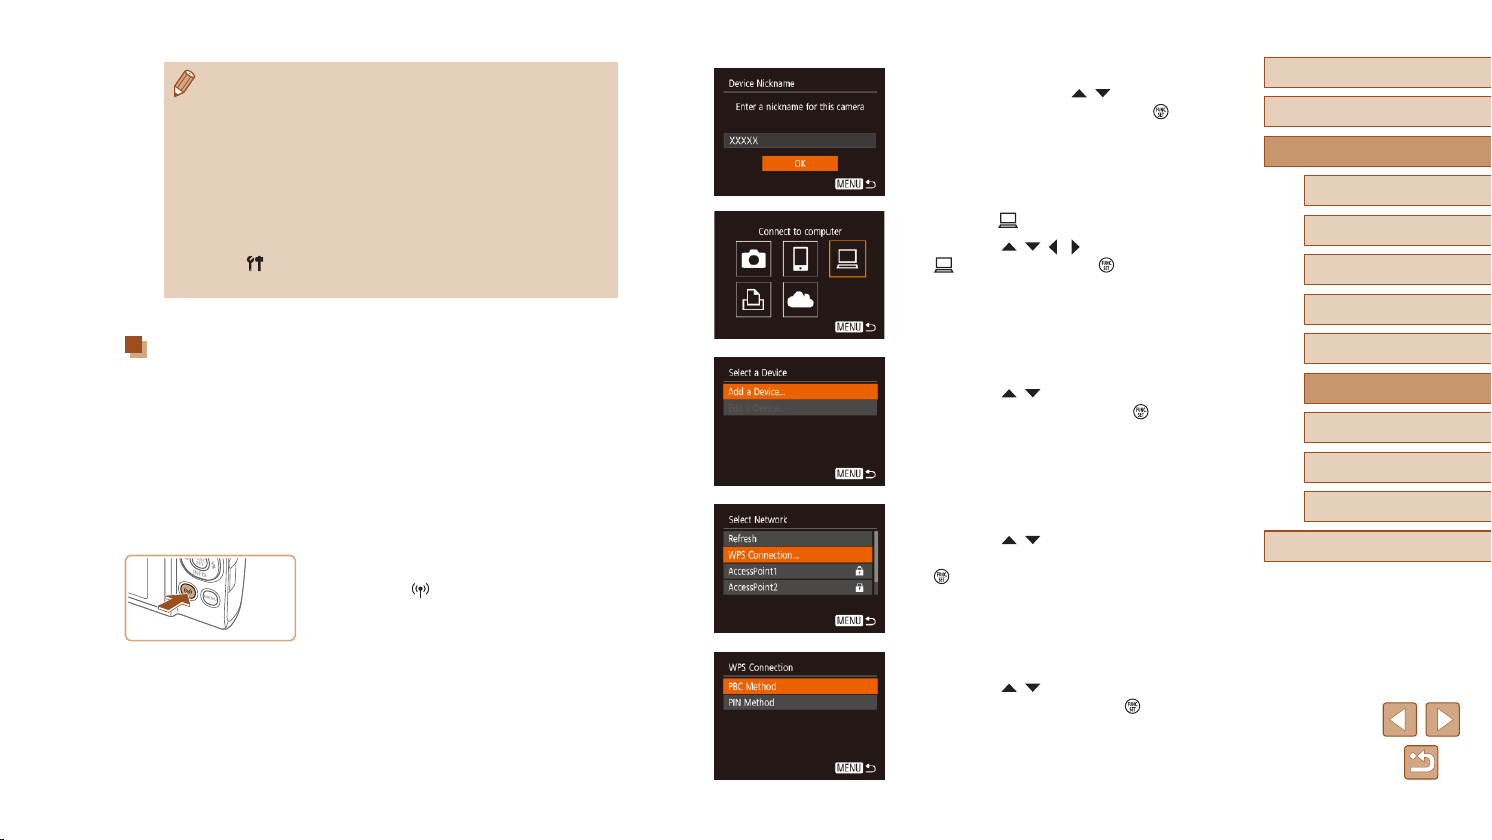
● For information on WPS compatibility and for instructions on
checking settings, refer to the access point user manual.
● A router is a device that creates a network (LAN) structure for
connecting multiple computers. A router that contains an internal
Wi-Fi function is called a “Wi-Fi router”.
● This guide refers to all Wi-Fi routers and base stations as “access
points”.
● If you use MAC address ltering on your Wi-Fi network, be sure
to add the camera’s MAC address to your access point. You can
check your camera’s MAC address by choosing MENU (
] tab ► [Wireless settings] ► [Wi-Fi Settings] ► [Check
► [
MAC Address].
=
25)
● If the [Device Nickname] screen is
displayed, press the [ ][ ] buttons to
choose [OK], and then press the [ ]
button.
Choose [ ].
3
● Press the [ ][ ][ ][ ] buttons to choose
[ ], and then press the [ ] button.
Before Use
Basic Guide
Advanced Guide
Camera Basics
Auto Mode /
Hybrid Auto Mode
Other Shooting Modes
P Mode
Using WPS-Compatible Access Points
WPS makes it easy to complete settings when connecting devices over
Wi-Fi. You can use either Push Button Conguration Method or PIN
Method for settings on a WPS supported device.
Conrm that the computer is
1
connected to an access point.
● For instructions on checking the
connection, refer to the device and
access point user manuals.
Access the Wi-Fi menu.
2
● Press the [ ] button.
Choose [Add a Device].
4
● Press the [ ][ ] buttons to choose [Add
a Device], and then press the [ ] button.
Choose [WPS Connection].
5
● Press the [ ][ ] buttons to choose
[WPS Connection], and then press the
[ ] button.
Choose [PBC Method].
6
● Press the [ ][ ] buttons to choose [PBC
Method], and then press the [ ] button.
Playback Mode
Wi-Fi Functions
Setting Menu
Accessories
Appendix
Index
96
Page 97
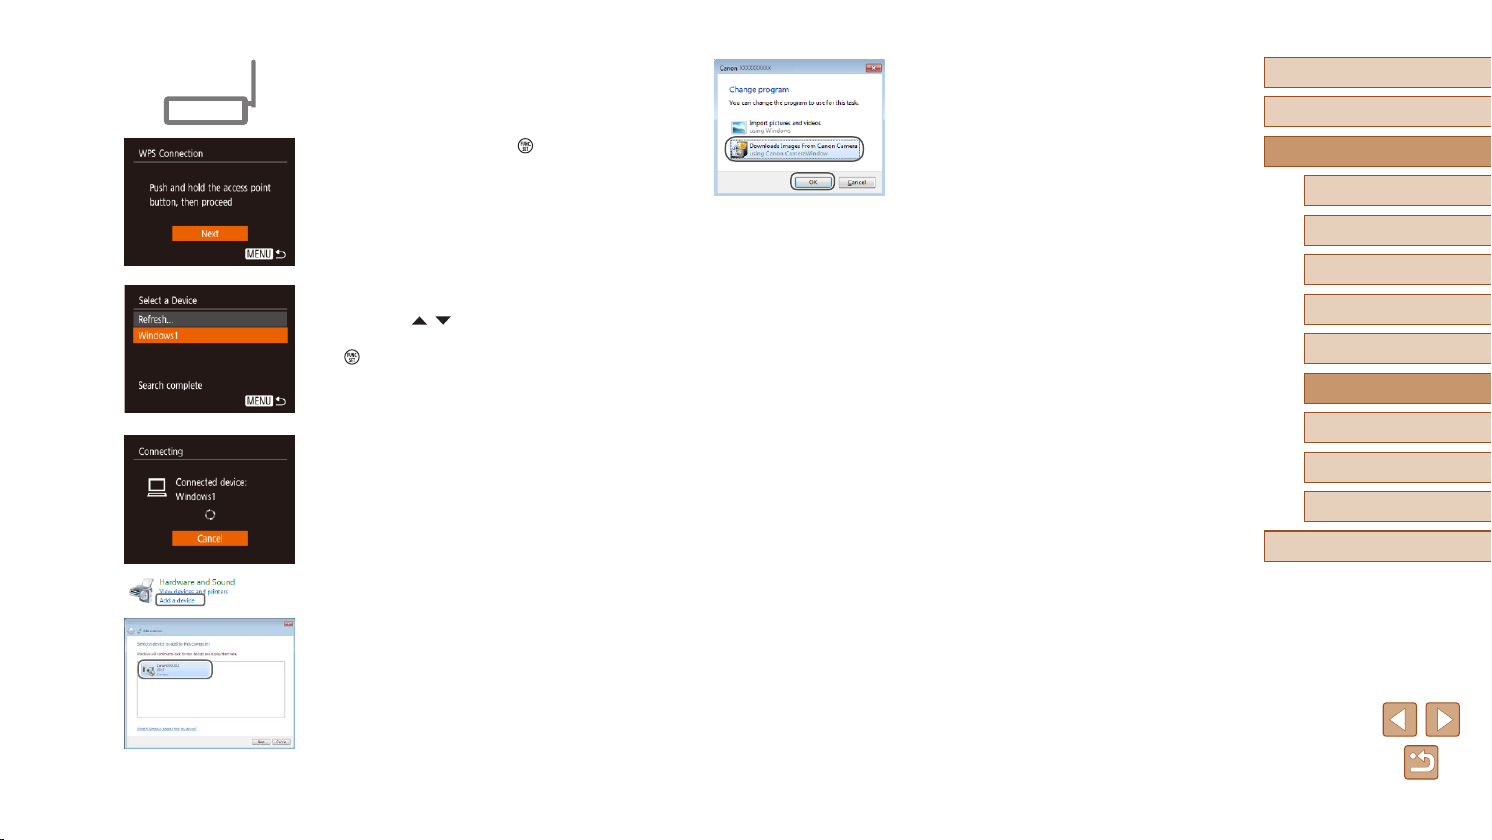
Establish the connection.
7
● On the access point, hold down the WPS
connection button for a few seconds.
● On the camera, press the [
go to the next step.
● The camera connects to the access point
and lists devices connected to it on the
[Select a Device] screen.
Choose the target device.
8
● Press the [ ][ ] buttons to choose the
target device name, and then press the
[ ] button.
Install a driver (rst Windows
9
] button to
connection only).
● When this screen is displayed on the
camera, click the Start menu on the
computer, click [Control Panel], and then
click [Add a device].
● Double-click the connected camera icon.
● Driver installation will begin.
● After driver installation is complete, and
the camera and computer connection
is enabled, the AutoPlay screen will be
displayed. Nothing will be displayed on
the camera screen.
Display CameraWindow.
10
● Windows: Access CameraWindow by
clicking [Downloads Images From Canon
Camera].
● Mac OS: CameraWindow is automatically
displayed when a Wi-Fi connection is
established between the camera and
computer.
Import images.
11
● Click [Import Images from Camera], and
then click [Import Untransferred Images].
● Images are now saved to the Pictures
folder on the computer, in separate
folders named by date.
● Click [OK] in the screen that is displayed
after image import is complete.
● To view images you save to a computer,
use preinstalled or commonly available
software compatible with images
captured by the camera.
Before Use
Basic Guide
Advanced Guide
Camera Basics
Auto Mode /
Hybrid Auto Mode
Other Shooting Modes
P Mode
Playback Mode
Wi-Fi Functions
Setting Menu
Accessories
Appendix
Index
97
Page 98
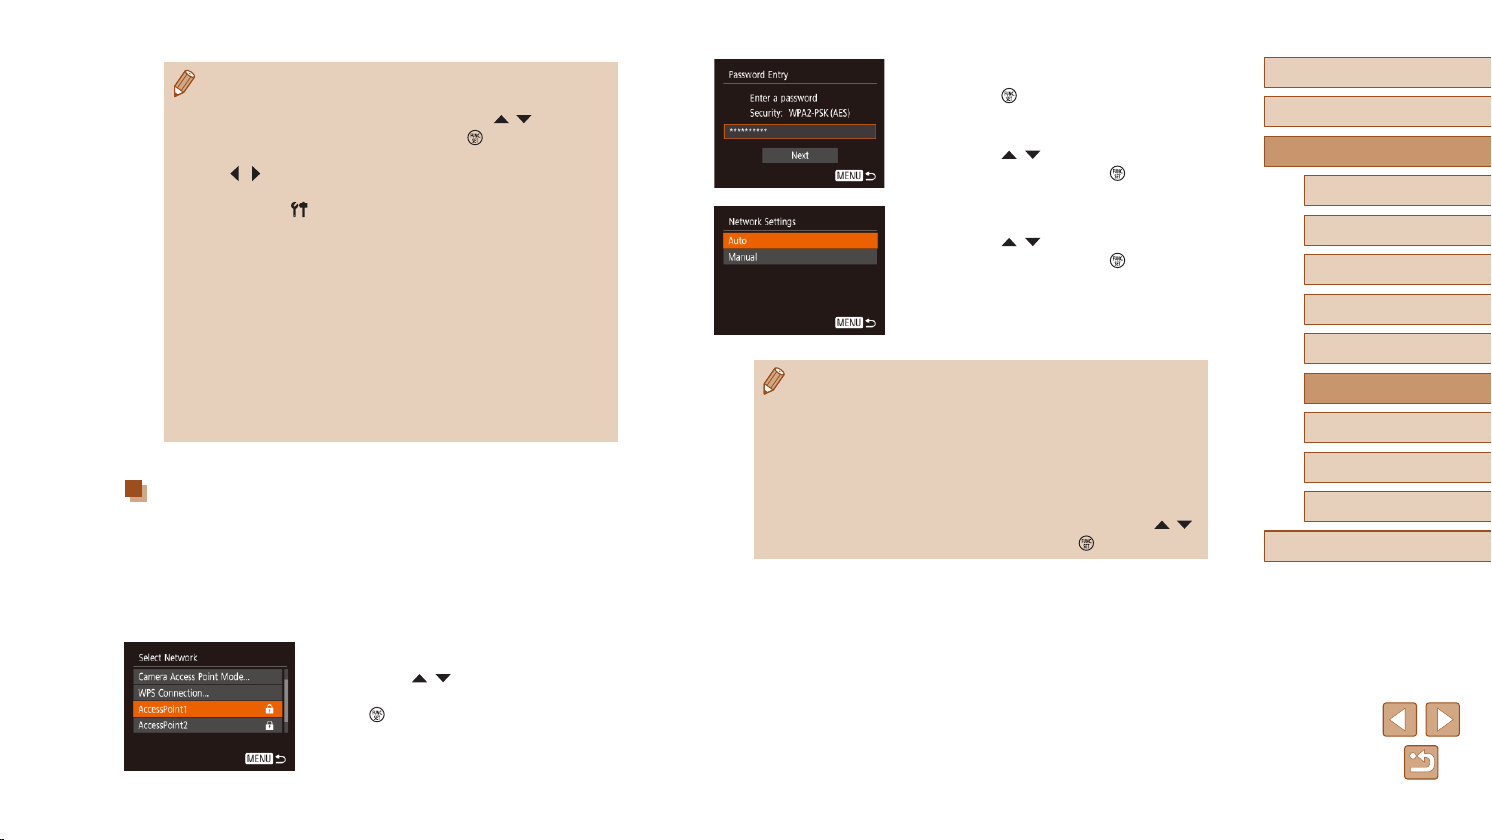
● Once you have connected to devices via the Wi-Fi menu, recent
destinations will be listed rst when you access the Wi-Fi menu.
You can easily connect again by pressing the [
choose the device and then pressing the [
new device, display the device selection screen by pressing the
][ ] buttons, and then congure the setting.
[
● If you prefer not to display recent target devices, choose MENU
=
25) ► [ ] tab ► [Wireless settings] ► [Wi-Fi Settings] ►
(
[Target History] ► [Off].
● You can also change the camera nickname on the screen in
=
step 2 (
● When the camera is connected to a computer, the camera screen
is blank.
● Mac OS: If CameraWindow is not displayed, click the
[CameraWindow] icon in the Dock.
● To disconnect from the camera, turn off the camera.
● If you chose [PIN Method] in step 6, a PIN code will be displayed
on the screen. Be sure to set this code in the access point.
Choose a device in the [Select a Device] screen. For further
details, refer to the user manual included with your access point.
96).
Connecting to Listed Access Points
View the listed access points.
1
● View the listed networks (access points)
as described in steps 1 – 4 of “Using
WPS-Compatible Access Points”
(=
96).
][ ] buttons to
] button. To add a
Enter the access point password.
3
● Press the [ ] button to access the
keyboard, and then enter the password
(=
26).
● Press the [
][ ] buttons to choose
[Next], and then press the [ ] button.
Choose [Auto].
4
● Press the [ ][ ] buttons to choose
[Auto], and then press the [ ] button.
● To save images to a connected computer,
follow the procedure from step 8 in
“Using WPS-Compatible Access Points”
=
96).
(
● To determine the access point password, check on the access
point itself or refer to the user manual.
● If no access points are detected even after you choose [Refresh]
in step 2 to update the list, choose [Manual Settings] in step 2
to complete access point settings manually. Follow on-screen
instructions and enter an SSID, security settings, and a password.
● When you use an access point that you have already connected
to for connecting to another device, [*] is displayed for the
password in step 3. To use the same password, press the [
buttons to choose [Next], and then press the [
] button.
][ ]
Before Use
Basic Guide
Advanced Guide
Camera Basics
Auto Mode /
Hybrid Auto Mode
Other Shooting Modes
P Mode
Playback Mode
Wi-Fi Functions
Setting Menu
Accessories
Appendix
Index
Choose an access point.
2
● Press the [ ][ ] buttons to choose a
network (access point), and then press
the [ ] button.
98
Page 99
Previous Access Points
You can reconnect to any previous access points automatically by
following step 4 in “Using WPS-Compatible Access Points” (=
● To connect to a device via an access point, conrm that the target
device is already connected to the access point, and then follow the
procedure from step 8 in “Using WPS-Compatible Access Points”
=
96).
(
● To switch access points, choose [Switch Network] on the screen
displayed when you establish a connection, and then either follow
the procedure in “Using WPS-Compatible Access Points” (
from step 5 or the procedure in “Connecting to Listed Access Points”
(=
98) from step 2.
96).
=
96)
Sending Images to a Registered
Web Service
Registering Web Services
Use a smartphone or computer to add to the camera Web services that
you want to use.
● A smartphone or computer with a browser and Internet connection is
required to complete camera settings for CANON iMAGE GATEWAY
and other Web services.
● Check the CANON iMAGE GATEWAY website for details on browser
(Microsoft Internet Explorer, etc.) requirements, including settings and
version information.
● For information on countries and regions where CANON iMAGE
GATEWAY is available, visit the Canon website (http://www.canon.
com/cig/).
● You must have an account with Web services other than CANON
iMAGE GATEWAY if you desire to use them. For further details, check
the websites for each Web service you want to register.
● Separate ISP connection and access point fees may be applicable.
● CANON iMAGE GATEWAY also provides user guides for
downloading.
Before Use
Basic Guide
Advanced Guide
Camera Basics
Auto Mode /
Hybrid Auto Mode
Other Shooting Modes
P Mode
Playback Mode
Wi-Fi Functions
Setting Menu
Accessories
Appendix
Index
99
Page 100
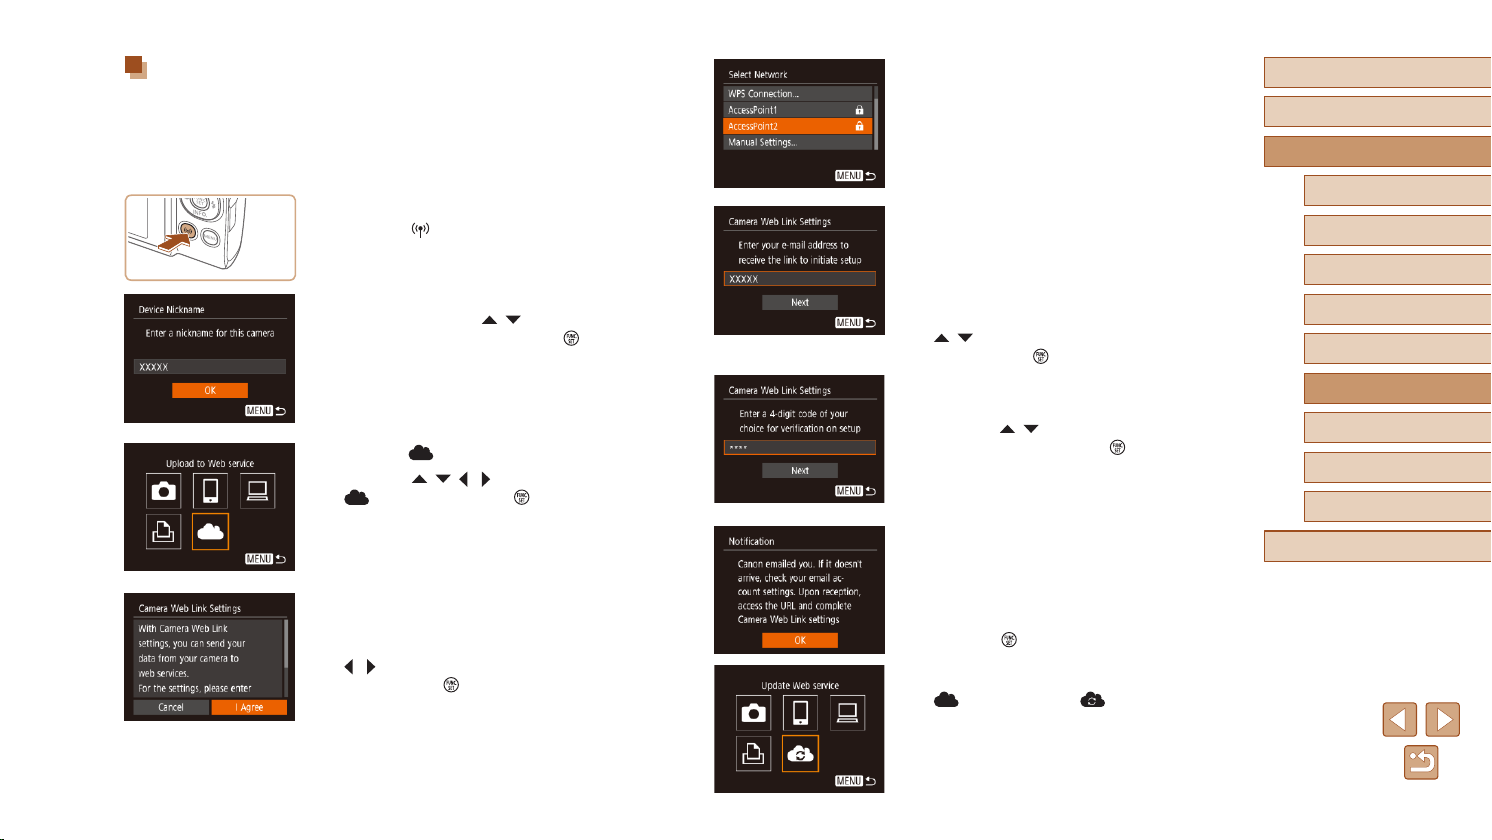
Registering CANON iMAGE GATEWAY
Link the camera and CANON iMAGE GATEWAY by adding CANON
iMAGE GATEWAY as a destination Web service on the camera. Note
that you will need to enter an email address used on your computer or
smartphone to receive a notication message for completing linkage
settings.
Access the Wi-Fi menu.
1
● Press the [ ] button.
● If the [Device Nickname] screen is
displayed, press the [
choose [OK], and then press the [ ]
button.
Choose [ ].
2
● Press the [ ][ ][ ][ ] buttons to choose
[ ], and then press the [ ] button.
Accept the agreement to enter an
3
email address.
● Read the agreement displayed, press the
[ ][ ] buttons to choose [I Agree], and
then press the [ ] button.
][ ] buttons to
Establish a connection with an
4
access point.
● Connect to the access point as described
in steps 5 – 7 in “Using WPS-Compatible
Access Points” (=
in “Connecting to Listed Access Points”
(=
98).
Enter your email address.
5
● Once the camera is connected to CANON
iMAGE GATEWAY via the access point, a
screen is displayed for entering an email
address.
● Enter your email address, press the
][ ] buttons to choose [Next], and
[
then press the [ ] button.
Enter a four-digit number.
6
● Enter a four-digit number of your choice,
press the [ ][ ] buttons to choose
[Next], and then press the [ ] button.
● You will need this four-digit number later
when setting up linkage with CANON
iMAGE GATEWAY in step 8.
Check for the notication message.
7
● Once information has been sent to
CANON iMAGE GATEWAY, you will
receive a notication message at the
email address entered in step 5.
● Press the [
which indicates that notication has been
sent.
] now changes to [ ].
● [
96) or in steps 2 – 4
] button on the next screen,
Before Use
Basic Guide
Advanced Guide
Camera Basics
Auto Mode /
Hybrid Auto Mode
Other Shooting Modes
P Mode
Playback Mode
Wi-Fi Functions
Setting Menu
Accessories
Appendix
Index
100
 Loading...