

Page 1
Series
ENG
Page 2
About the Manuals for the Machine
The manuals for this machine are divided as follows. Please read them to suit your needs.
For Basic Use ................................................
Troubleshooting .............................................
For Basic Copying ...........................................
For Convenient Copying ....................................
For Basic Mail Box Function Use .........................
For Convenient Mail Box Function Use ..................
For Remote UI Use ..........................................
For Setting Up the Network Connection & Installing
the CD-ROM Software ......................................
For Printer Use...............................................
Reference Guide
Copying Guide
Mail Box Function Guide
Remote UI Guide
Setup Guide
PS/PCL Printer Guide
(This Document)
CD-ROM
CD-ROM
For Installing Printer Driver, etc. .........................
PCL Driver Guide
CD-ROM
PS Driver Guide
For Connecting and Setting the Network.................
The manuals supplied with optional equipment are included in the list above.
Depending on the system configuration and product purchased, some manuals may be unavailable
(irrelevant).
Network Guide
CD-ROM
Page 3

How This Manual Is Organized
Please read this chapter first
Chap 1
Chap 2
Chap 3
Chap 4
Chap 5
Chap 6
Before You Start Using the Machine
Menu Functions and Operation
Printer Settings Menu Functions and Operation
Report Settings Menu
Troubleshooting
Appendix
Contains the Index and Appendix.
1
2
3
4
5
6
• Considerable effort has been made to make sure that this manual is free of inaccuracies and omissions.
• However, as we are constantly improving our products if you need an exact specification, please contact Canon.
Page 4
PREFACE
Thank you for purchasing the Canon Network Multi-PDL Printer Kit-C1/C2. This manual
describes the additional functionality this kit provides for an iR3300/2800/2200 Series
machine, and how to specify these functions from the touch panel display.
Please read this manual thoroughly before using the Network Multi-PDL Printer Kit-C1/C2
with an iR3300/2800/2200 Series machine in order to familiarise yourself with the added
capabilities, and to make the most of the functions. After reading this manual store it in a safe
place for future reference.
CAUTION:
In this manual, CAUTION MESSAGES with this symbol indicate that neglecting the
suggested procedure or practice could result in personal injury.
Copyright 2001 by Canon, Inc. All rights reserved.
No part of this publication may be reproduced or transmitted in any form or by any means,
electronic or mechanical, including photocopying and recording, or by any information storage or
retrieval system without the prior written permission of Canon, Inc.
ii
PREFACE
Page 5

About Trademarks
License Notice
Universal Font Scaling Technology, UFST, is licensed from Agfa Monotype Corporation.
Copyright © 1993-2000 Agfa Monotype Corporation.
Trademark Credits
Adobe, PostScript, and PostScript 3 are trademarks of Adobe Systems Incorporated.
Agfa is a trademark of Agfa-Gevaert AG and may be registered in some jurisdictions.
Apple, Macintosh and TrueType are trademarks of Apple Computer, Inc.
Albertus, Arial and Times New Roman are trademarks of The Monotype Corporation Plc.,
and may be registered in some jurisdictions.
CG and UFST are trademarks of Agfa Monotype Corporation or its affiliated companies and
may be registered in some jurisdictions.
CG Omega is a product of Agfa Monotype Corporation and CG Times, based on Times New
Roman under license from the Monotype Corporation, is a product of Agfa Monotype
Corporation.
Times and Universe are trademarks of Linotype-Hell AG and/or its subsidiaries and may be
registered in some jurisdictions.
Canon, the Canon logo and NetSpot are trademarks of Canon Inc.
Marigold, licensed by Agfa, is a trademark of AlphaOmega Typography, Inc.
Microsoft, Windows and Windows NT are registered trademarks of Microsoft Corporation
(US) in the U.S and other countries. Wingdings is a trademark of Microsoft Corporation.
PCL, PCL 5e and PCL 6 are trademarks of Hewlett-Packard Company.
UNIX is a registered trademark exclusively licensed from X/Open Company, Ltd. in the
United States and other countries.
As concerns typeface credit, the actual names on a FONT LIST for this printer may differ
from those listed above.
The following fonts are licensed from Bitstream Technologies, Inc.
Dutch™ 801 Roman, Dutch™ 801 Bold, Fixed Pitch 810 Courier 10 Pitch/Text, Fixed Pitch
810 Courier Bold 10 Pitch/Text.
Other company or product names used in this manual and not included in the list above are
trademarks of those companies and may be registered in certain jurisdictions.
About Abbreviations
In this manual, Microsoft® Windows® and PostScript 3 emulation are referred to as Windows
and PS, respectively.
About Trademarks
iii
Page 6
Safety Information
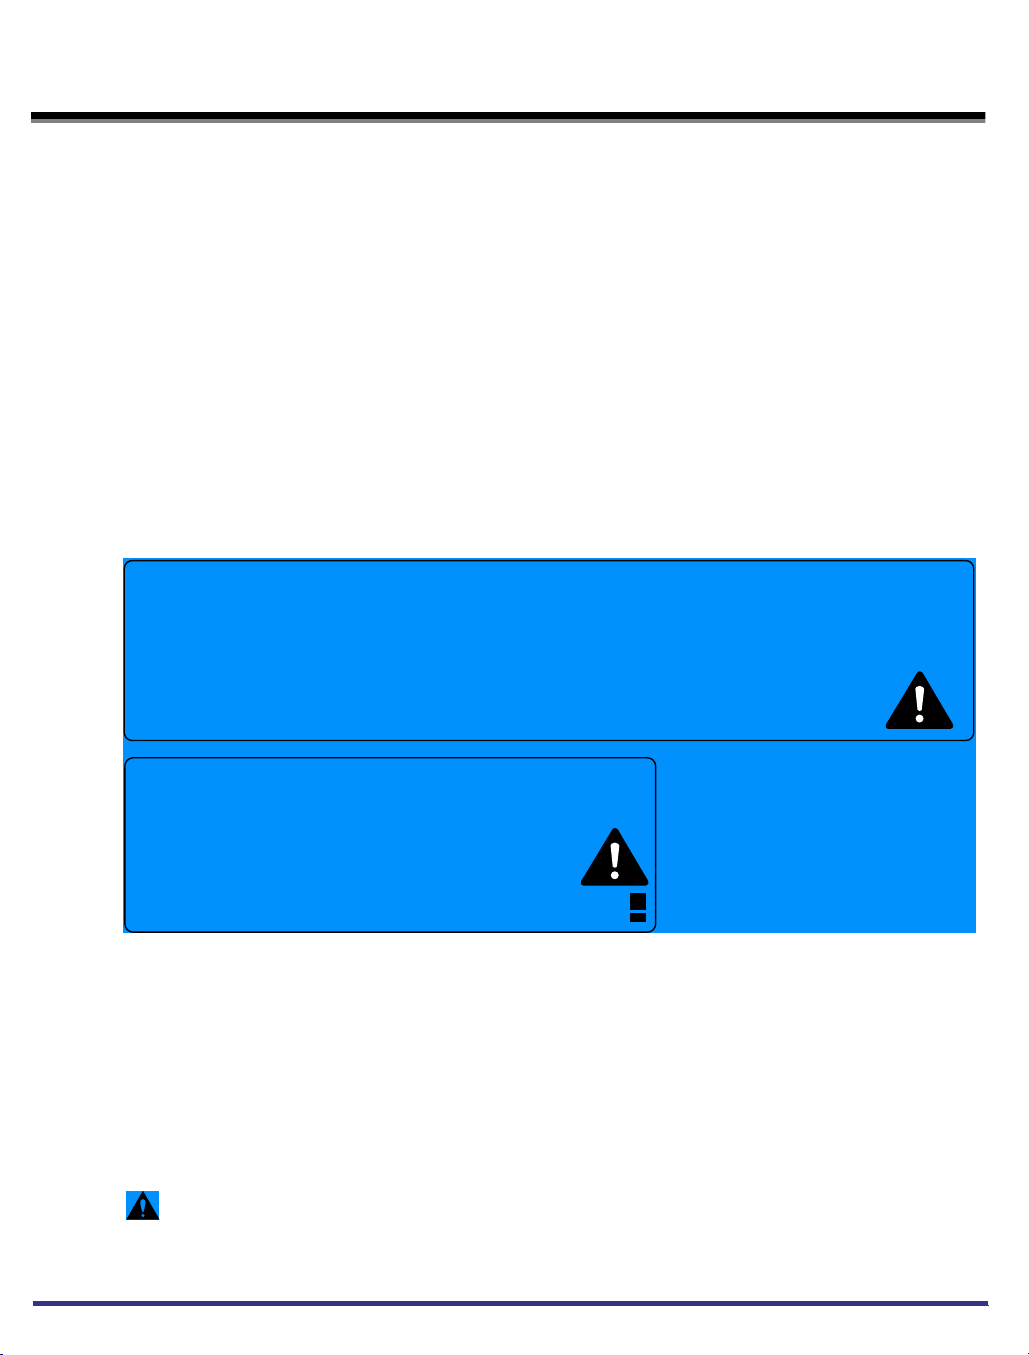
1. Laser Safety
This Product is certified as a Class 1 laser product under EN60825-1:1994. This means
that the product does not produce hazardous laser radiation.
Since radiation emitted inside the product is completely confined within protective
housings and external covers, the laser beam can not escape from the machine during
any phase of user operation.
2. Additional Information
When servicing or adjusting the optical system of the product, be careful not to place
screwdrivers or other shiny objects in the path of the laser beam. Also, accessories such
as watches and rings should be removed before working on the product. The reflected
beam, even though visible or invisible, can permanently damage your eyes.
The following label is attached to the main unit where there is danger of exposure to laser
radiation:
CAUTIONATTENTION
VORSICHT
PRECAUCION
ATTENZIONE
VARO!
VARNING!
ADVARSEL!
ADVARSEL
CAUTIONATTENTION
VORSICHT
PRECAUCION
ATTENZIONE
VARO!
VARNING!
ADVARSEL!
ADVARSEL
LASER RADIATION WHEN OPEN AND INTERLOCKS DEFEATED. AVOID EXPOSURE TO BEAM
RAYONNEMENT LASER DANGEREUX EN CAS D'OUVERTURE ET LORSQUE LA SÉCURITÉ EST NEUTRALISÉE. EXPOSITION DANGEREUSE AU FAISCEAU.
-
LASERSTRAHLUNG. WENN ABDECKUNG GEÖFFNET UND SICHERHEITSVERRIEGELUNG ÜBERBRÜCKT. NICHT DEM STRAHL AUSSETZEN.
-
RADIACION LASER EN EL INTERIOR. CIERRE SELLADO. EVITE LA EXPOSICION AL HAZ EN CASO DE ROTURA DE ESTE PARA SU APERTURA.
-
RADIAZIONE LASER PERICOLOSA IN CASO DI APERTURA E QUANDO IL BLOCCO DI SICUREZZA È GUASTO. EVITARE L'ESPOSIZIONE AL FASCIO.
-
AVATTAESSA JA SUOJALUKITUS OHITETTAESSA OLET ALTTIINA LASERSÄTEILYLLE ÄLÄ KATSO SÄTEESEEN.
-
LASERSTRÅLNING NÄR DENNA DEL ÄR ÖPPNAD OCH SPÄRREN ÄR URKOPPLAD. BETRAKTA EJ STRÅLEN.
-
LASER BESTRÅLING, NÅR ÅBEN OG LUKKE AFBRYDER ER SAT UD AF FUNKTION. UNDGÅ BESTRÅLING.
-
LASERSTRÅLING NÅR DEKSEL ÅPNES OG SIKKERHETSLÅS BRYTES. UNNGÅ EKSPONERING FOR STRÅLEN.
-
LASER RADIATION WHEN OPEN.
RAYONNEMENT LASER EN CAS D'OUVERTURE. EXPOSITION DANGEREUSE AU FAISCEAU.
-
LASERSTRAHLUNG, WENN ABDECKUNG GEÖFFNET. NICHT DEM STRAHL AUSSETZEN.
-
RADIACION LASER CUANDO SE ABRE. EVITAR EXPONERSE AL RAYO.
-
RADIAZIONE LASER IN CASO DI APERTURA. EVITARE L'ESPOSIZIONE AL FASCIO.
-
AVATTAESSA OLET ALTTIINA LASERSÄTEILYLLE. ÄLÄ KATSO SÄTEESEEN.
-
LASERSTRÅLNING NÄR DENNA DEL ÄR ÖPPNAD. BETRAKTA EJ STRÅLEN.
-
LASER STRÅLING, NÅR DENNE ER ÅBEN. UNDGÅ BESTRÅLING.
-
LASERSTRÅLING NÅR DEKSEL ÅPNES. UNNGÅ EKSPONERING FOR STRÅLEN.
-
AVOID EXPOSURE TO BEAM.
This Copier has been classified under EN60825-1:1994 and conforms to the following
classes;
CLASS 1 LASER PRODUCT
LASER KLASSE 1
APPAREIL A RAYONNEMENT LASER DE CLASSE 1
APPARECCHIO LASER DI CLASSE 1
PRODUCTO LASER DE CLASE 1
APARELHO A LASER DE CLASSE
iv
CAUTION
• Use of controls, adjustments or performance of procedures other than those specified in
the manual may result in hazardous radiation exposure.
Safety Information
Page 7

Table of Contents
How This Manual Is Organized . . . . . . . . . . . . . . . . . . . . . . . . . . . . . . . . . . . . . . . i
PREFACE . . . . . . . . . . . . . . . . . . . . . . . . . . . . . . . . . . . . . . . . . . . . . . . . . . . . . . . . ii
About Trademarks . . . . . . . . . . . . . . . . . . . . . . . . . . . . . . . . . . . . . . . . . . . . . . . .iii
License Notice . . . . . . . . . . . . . . . . . . . . . . . . . . . . . . . . . . . . . . . . . . . . . . . . . iii
Trademark Credits . . . . . . . . . . . . . . . . . . . . . . . . . . . . . . . . . . . . . . . . . . . . . . iii
About Abbreviations . . . . . . . . . . . . . . . . . . . . . . . . . . . . . . . . . . . . . . . . . . . . . iii
Safety Information . . . . . . . . . . . . . . . . . . . . . . . . . . . . . . . . . . . . . . . . . . . . . . . . iv
Table of Contents . . . . . . . . . . . . . . . . . . . . . . . . . . . . . . . . . . . . . . . . . . . . . . . . . v
How to Use This Manual . . . . . . . . . . . . . . . . . . . . . . . . . . . . . . . . . . . . . . . . . . . viii
Symbols Used in This Manual . . . . . . . . . . . . . . . . . . . . . . . . . . . . . . . . . . . . viii
Keys Used in This Manual . . . . . . . . . . . . . . . . . . . . . . . . . . . . . . . . . . . . . . . viii
Displays Used in This Manual . . . . . . . . . . . . . . . . . . . . . . . . . . . . . . . . . . . . . . ix
Illustrations Used in This Manual . . . . . . . . . . . . . . . . . . . . . . . . . . . . . . . . . . . ix
Operation of the Machine and Terms Used in This Manual . . . . . . . . . . . . . . . x
What the Machine Can Do . . . . . . . . . . . . . . . . . . . . . . . . . . . . . . . . . . . . . . . . . . xi
Additional Functions Screen . . . . . . . . . . . . . . . . . . . . . . . . . . . . . . . . . . . . . . . xi
Chapter 1 Before You Start Using the Machine
Menu Functions . . . . . . . . . . . . . . . . . . . . . . . . . . . . . . . . . . . . . . . . . . . . . . . . . 1-2
What Are Menu Functions? . . . . . . . . . . . . . . . . . . . . . . . . . . . . . . . . . . . . . .1-2
Accessing the Menus . . . . . . . . . . . . . . . . . . . . . . . . . . . . . . . . . . . . . . . . . . . 1-3
Using the Printer Settings Menu . . . . . . . . . . . . . . . . . . . . . . . . . . . . . . . . . . . . 1-5
Using the Report Settings Menu . . . . . . . . . . . . . . . . . . . . . . . . . . . . . . . . . . . . 1-8
Chapter 2 Menu Functions and Operation
Printer Settings Menu Functions . . . . . . . . . . . . . . . . . . . . . . . . . . . . . . . . . . . 2-2
Report Settings Menu Functions . . . . . . . . . . . . . . . . . . . . . . . . . . . . . . . . . . . 2-5
Table of Contents
v
Page 8

Chapter 3 Printer Settings Menu Functions and Operation
Settings Menu . . . . . . . . . . . . . . . . . . . . . . . . . . . . . . . . . . . . . . . . . . . . . . . . . . 3-3
Copies . . . . . . . . . . . . . . . . . . . . . . . . . . . . . . . . . . . . . . . . . . . . . . . . . . . . . 3-3
2-Sided Printing . . . . . . . . . . . . . . . . . . . . . . . . . . . . . . . . . . . . . . . . . . . . . 3-3
Paper Feed . . . . . . . . . . . . . . . . . . . . . . . . . . . . . . . . . . . . . . . . . . . . . . . . . 3-4
Default Paper Size . . . . . . . . . . . . . . . . . . . . . . . . . . . . . . . . . . . . . . . . . 3-4
Default Paper Type . . . . . . . . . . . . . . . . . . . . . . . . . . . . . . . . . . . . . . . . 3-5
Paper Size Override . . . . . . . . . . . . . . . . . . . . . . . . . . . . . . . . . . . . . . . 3-5
Print Quality . . . . . . . . . . . . . . . . . . . . . . . . . . . . . . . . . . . . . . . . . . . . . . . . 3-6
Image Refinement . . . . . . . . . . . . . . . . . . . . . . . . . . . . . . . . . . . . . . . . . 3-6
Density . . . . . . . . . . . . . . . . . . . . . . . . . . . . . . . . . . . . . . . . . . . . . . . . . 3-6
Toner Save . . . . . . . . . . . . . . . . . . . . . . . . . . . . . . . . . . . . . . . . . . . . . . 3-6
Layout . . . . . . . . . . . . . . . . . . . . . . . . . . . . . . . . . . . . . . . . . . . . . . . . . . . . . 3-7
Binding . . . . . . . . . . . . . . . . . . . . . . . . . . . . . . . . . . . . . . . . . . . . . . . . . 3-7
Margin . . . . . . . . . . . . . . . . . . . . . . . . . . . . . . . . . . . . . . . . . . . . . . . . . . 3-8
Offset X . . . . . . . . . . . . . . . . . . . . . . . . . . . . . . . . . . . . . . . . . . . . . . . 3-10
Offset Y . . . . . . . . . . . . . . . . . . . . . . . . . . . . . . . . . . . . . . . . . . . . . . . . 3-10
Auto Continue . . . . . . . . . . . . . . . . . . . . . . . . . . . . . . . . . . . . . . . . . . . . . . 3-11
Job Securing Time . . . . . . . . . . . . . . . . . . . . . . . . . . . . . . . . . . . . . . . . . . 3-11
Timeout . . . . . . . . . . . . . . . . . . . . . . . . . . . . . . . . . . . . . . . . . . . . . . . . . . . 3-12
Print After Completing RIP . . . . . . . . . . . . . . . . . . . . . . . . . . . . . . . . . . . . 3-12
Finisher . . . . . . . . . . . . . . . . . . . . . . . . . . . . . . . . . . . . . . . . . . . . . . . . . . . 3-13
Punch . . . . . . . . . . . . . . . . . . . . . . . . . . . . . . . . . . . . . . . . . . . . . . . . . . . . 3-16
Booklet . . . . . . . . . . . . . . . . . . . . . . . . . . . . . . . . . . . . . . . . . . . . . . . . . . . 3-17
Saddle Stitch . . . . . . . . . . . . . . . . . . . . . . . . . . . . . . . . . . . . . . . . . . . . . . . 3-18
Transparency Interleaving . . . . . . . . . . . . . . . . . . . . . . . . . . . . . . . . . . . . 3-19
Personality . . . . . . . . . . . . . . . . . . . . . . . . . . . . . . . . . . . . . . . . . . . . . . . . 3-19
Initialize . . . . . . . . . . . . . . . . . . . . . . . . . . . . . . . . . . . . . . . . . . . . . . . . . . . 3-19
PCL/PS Settings . . . . . . . . . . . . . . . . . . . . . . . . . . . . . . . . . . . . . . . . . . . . . . . 3-20
PCL . . . . . . . . . . . . . . . . . . . . . . . . . . . . . . . . . . . . . . . . . . . . . . . . . . . . . . 3-20
Orientation . . . . . . . . . . . . . . . . . . . . . . . . . . . . . . . . . . . . . . . . . . . . . . 3-20
Font Number . . . . . . . . . . . . . . . . . . . . . . . . . . . . . . . . . . . . . . . . . . . . 3-20
Point Size . . . . . . . . . . . . . . . . . . . . . . . . . . . . . . . . . . . . . . . . . . . . . . 3-20
Pitch . . . . . . . . . . . . . . . . . . . . . . . . . . . . . . . . . . . . . . . . . . . . . . . . . . 3-20
Form Lines . . . . . . . . . . . . . . . . . . . . . . . . . . . . . . . . . . . . . . . . . . . . . 3-21
Symbol Set . . . . . . . . . . . . . . . . . . . . . . . . . . . . . . . . . . . . . . . . . . . . . 3-21
Custom Paper . . . . . . . . . . . . . . . . . . . . . . . . . . . . . . . . . . . . . . . . . . . 3-21
Unit of Measure . . . . . . . . . . . . . . . . . . . . . . . . . . . . . . . . . . . . . . . . . . 3-21
X Dimension . . . . . . . . . . . . . . . . . . . . . . . . . . . . . . . . . . . . . . . . . . . . 3-21
Y Dimension . . . . . . . . . . . . . . . . . . . . . . . . . . . . . . . . . . . . . . . . . . . . 3-22
Append CR to LF . . . . . . . . . . . . . . . . . . . . . . . . . . . . . . . . . . . . . . . . . 3-22
PS (Printer Kit-C1 Only) . . . . . . . . . . . . . . . . . . . . . . . . . . . . . . . . . . . . . . 3-22
Job Timeout . . . . . . . . . . . . . . . . . . . . . . . . . . . . . . . . . . . . . . . . . . . . . 3-22
Wait Timeout . . . . . . . . . . . . . . . . . . . . . . . . . . . . . . . . . . . . . . . . . . . . 3-22
Print PS Errors . . . . . . . . . . . . . . . . . . . . . . . . . . . . . . . . . . . . . . . . . . 3-22
Utility Menu . . . . . . . . . . . . . . . . . . . . . . . . . . . . . . . . . . . . . . . . . . . . . . . . . . . 3-23
Reset Printer . . . . . . . . . . . . . . . . . . . . . . . . . . . . . . . . . . . . . . . . . . . . . . . 3-23
vi
Table of Contents
Page 9

Chapter 4 Report Settings Menu
PCL Menu . . . . . . . . . . . . . . . . . . . . . . . . . . . . . . . . . . . . . . . . . . . . . . . . . . . . . . 4-2
Configuration Page . . . . . . . . . . . . . . . . . . . . . . . . . . . . . . . . . . . . . . . . . . . . .4-2
Font List . . . . . . . . . . . . . . . . . . . . . . . . . . . . . . . . . . . . . . . . . . . . . . . . . . . . .4-2
PS Menu (Printer Kit-C1 Only) . . . . . . . . . . . . . . . . . . . . . . . . . . . . . . . . . . . . . .4-3
Configuration Page . . . . . . . . . . . . . . . . . . . . . . . . . . . . . . . . . . . . . . . . . . . . .4-3
Font List . . . . . . . . . . . . . . . . . . . . . . . . . . . . . . . . . . . . . . . . . . . . . . . . . . . . .4-3
Chapter 5 Troubleshooting
Responding to Error Messages . . . . . . . . . . . . . . . . . . . . . . . . . . . . . . . . . . . .5-2
Resetting the Machine After a Service Call Message . . . . . . . . . . . . . . . . . . . 5-2
When a Message Is Displayed . . . . . . . . . . . . . . . . . . . . . . . . . . . . . . . . . . . . . . 5-3
Printing Problems . . . . . . . . . . . . . . . . . . . . . . . . . . . . . . . . . . . . . . . . . . . . . . . . 5-5
Printer Trouble . . . . . . . . . . . . . . . . . . . . . . . . . . . . . . . . . . . . . . . . . . . . . . . .5-5
Printing Problems . . . . . . . . . . . . . . . . . . . . . . . . . . . . . . . . . . . . . . . . . . . . . .5-6
Print Quality Problems . . . . . . . . . . . . . . . . . . . . . . . . . . . . . . . . . . . . . . . . . .5-8
Chapter 6 Appendix
Some Basic Facts About Fonts . . . . . . . . . . . . . . . . . . . . . . . . . . . . . . . . . . . . . 6-2
What Is a Font? . . . . . . . . . . . . . . . . . . . . . . . . . . . . . . . . . . . . . . . . . . . . . . . .6-2
Attributes of Fonts . . . . . . . . . . . . . . . . . . . . . . . . . . . . . . . . . . . . . . . . . . . . . . 6-2
Bit-mapped Fonts and Scalable Fonts . . . . . . . . . . . . . . . . . . . . . . . . . . . . . . 6-8
Checking the Font Lists for Available Fonts . . . . . . . . . . . . . . . . . . . . . . . . . 6-14
Typeface Samples . . . . . . . . . . . . . . . . . . . . . . . . . . . . . . . . . . . . . . . . . . . .6-16
Symbol Sets . . . . . . . . . . . . . . . . . . . . . . . . . . . . . . . . . . . . . . . . . . . . . . . . . 6-30
Configuration Page Sample . . . . . . . . . . . . . . . . . . . . . . . . . . . . . . . . . . . . . . . 6-54
Specifications . . . . . . . . . . . . . . . . . . . . . . . . . . . . . . . . . . . . . . . . . . . . . . . . . .6-56
Index . . . . . . . . . . . . . . . . . . . . . . . . . . . . . . . . . . . . . . . . . . . . . . . . . . . . . . . . .6-57
Table of Contents
vii
Page 10
How to Use This Manual
Symbols Used in This Manual
The following symbols are used in this manual, for explanations of procedures and
restrictions, handling cautions, and instructions that should be observed for safety.
WARNING
CAUTION
IMPORTANT
NOTE
Indicates a warning concerning operations that may lead to death or
injury to persons if not performed correctly. In order to use the machine
safely, always pay attention to these warnings.
Indicates a caution concerning operations that may lead to injury to
persons or damage to property if not performed correctly. In order to use
the machine safely, always pay attention to these cautions.
Indicates operational warnings and restrictions. Be certain to read these
items to operate the machine correctly, and to avoid damage to the
machine.
Indicates notes for operation or additional explanations. Reading these is
highly recommended.
Keys Used in This Manual
The following symbols and key names are used in this manual:
• Control panel keys……………… (Start)
• Touch panel display keys………[OK]
viii
How to Use This Manual
Page 11
Displays Used in This Manual
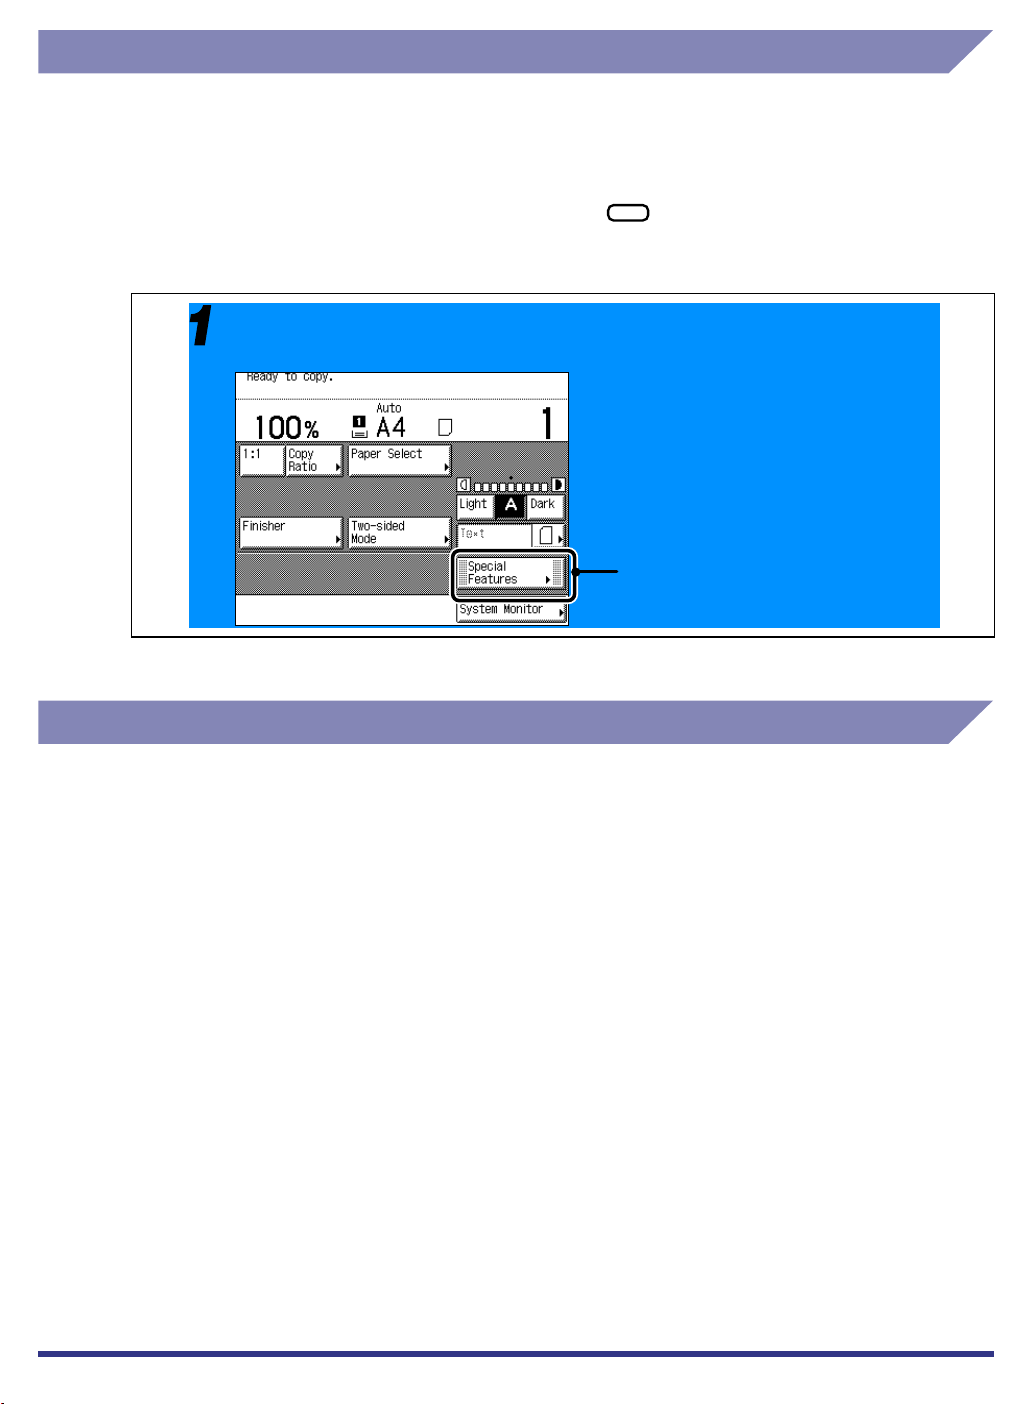
Screenshots of the touch panel display used in this manual are those taken when the
Finisher-J1, Cassette Feeding Unit-W1, Feeder (DADF-H1), Printer Kit, and Network
Interface Adapter are attached to the iR3300. Note that functions that cannot be used
depending on the model or options, are not displayed on the touch panel display.
The keys which you should press are marked with , as shown below.
When multiple keys can be pressed on the touch panel display, all keys are marked. Select
the keys which suit your needs.
Place the original, then press [Special Features].
Place the original, then press [Special Features].
Press this key for operation.
Press this key for operation.
Illustrations Used in This Manual
Unless otherwise noted, illustrations used in this manual are those taken when the FinisherJ1 and Cassette Feeding Unit-W1 are attached to the iR3300.
How to Use This Manual
ix
Page 12
Operation of the Machine and Terms Used in This
Manual
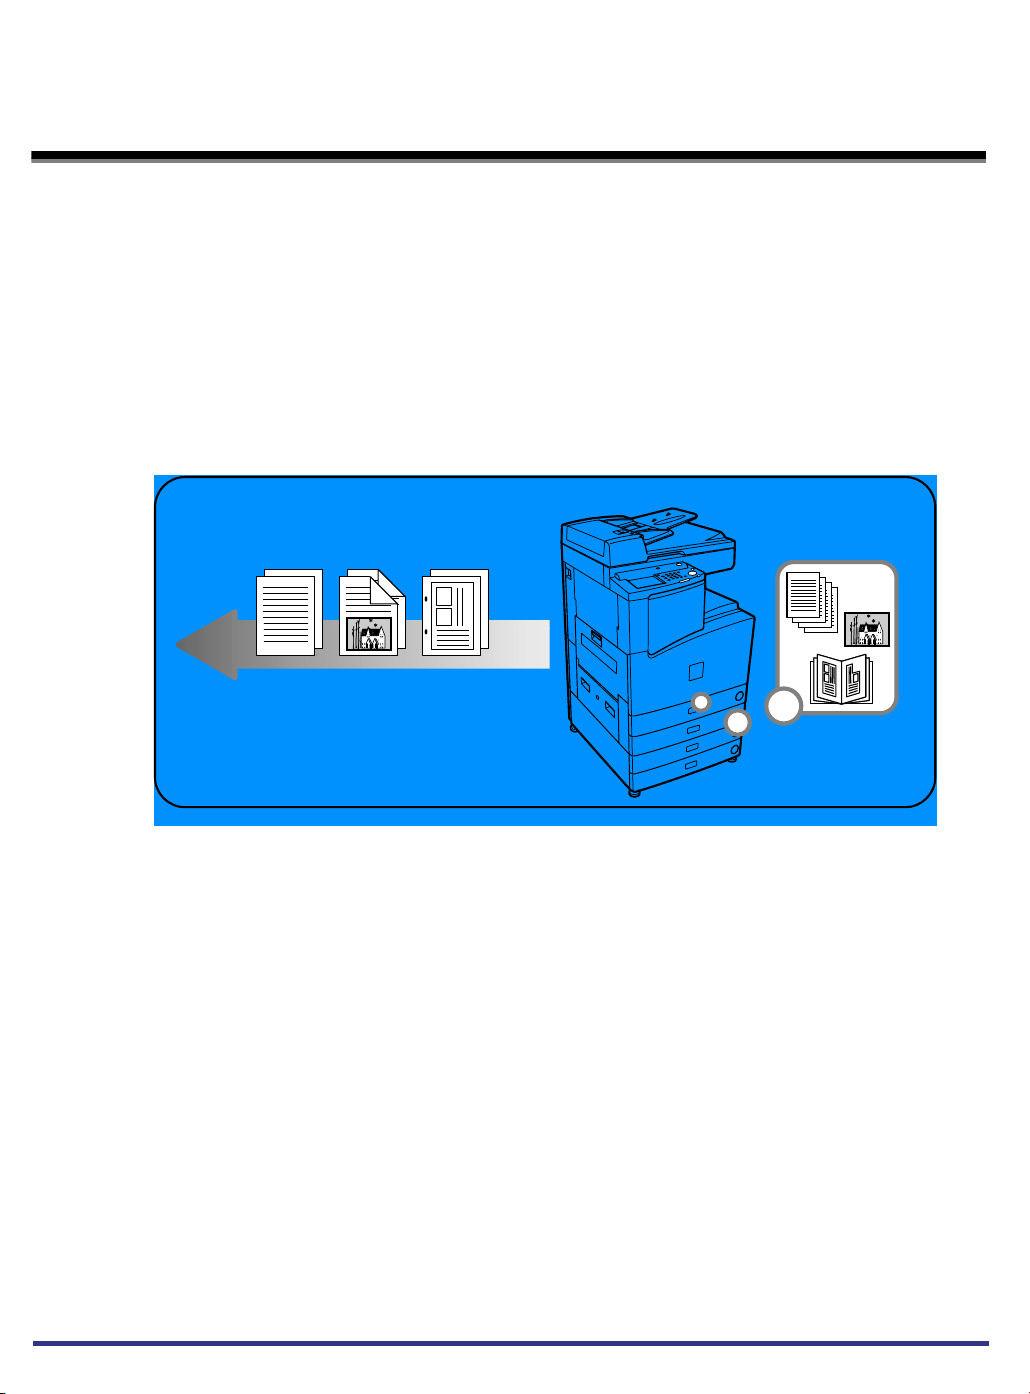
This machine makes effective use of memory in order to perform print operations efficiently.
For example, as soon as the machine has scanned the original that you want to copy, it can
immediately scan the next person’s original. You can also print from this machine, using a
function other than the Copy function. In this machine, these operations take place in a
complex way, so that not only copies, but also various kinds of prints may sometimes have to
wait their turn before they can be output.
To avoid confusion when reading this manual, the term “printing” used throughout this
manual is defined as set out below. The scanning of an original when making a copy, and the
process of making a print, are described separately.
Printing
Outputting a copy, outputting data stored in a mail
box, or outputting data sent from a personal
computer to the machine.
x
Operation of the Machine and Terms Used in This Manual
Page 13
What the Machine Can Do
Additional Functions Screen
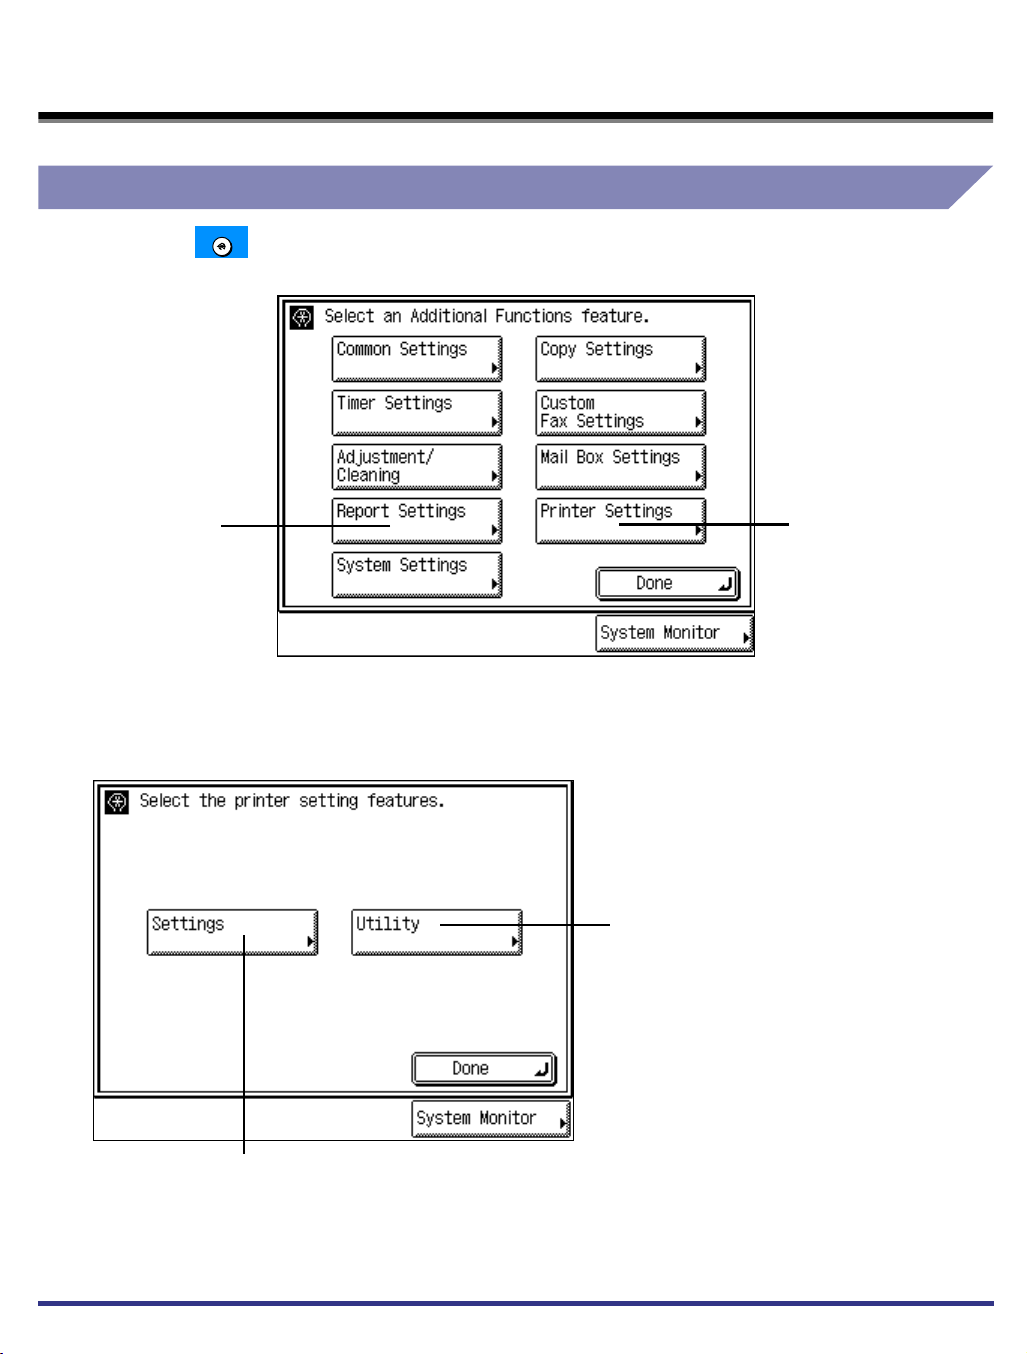
Press to open the Additional Functions screen. The Printer Settings or the Report
Settings can be accessed from this screen.
Report Settings
In the Additional Functions screen, press [Printer Settings] to open the Custom Priting
Settings menu.
Additional Functions
Printer Settings
Settings
Press this key to open the Settings menu.
Utility
Press this key to open the
Utility menu, for initializing the
printer.
What the Machine Can Do
xi
Page 14

xii
What the Machine Can Do
Page 15

CHAPTER
1-1
1
Before You Start Using the Machine
This chapter describes how to set up the printing environment from the touch panel display.
Menu Functions . . . . . . . . . . . . . . . . . . . . . . . . . . . . . . . . . . . . . . . . . . . . . . . . . . . . . . . . 1-2
What Are Menu Functions? . . . . . . . . . . . . . . . . . . . . . . . . . . . . . . . . . . . . . . . . . . . . . . . . . . . . .1-2
Accessing the Menus . . . . . . . . . . . . . . . . . . . . . . . . . . . . . . . . . . . . . . . . . . . . . . . . . . . . . . . . .1-3
Using the Printer Settings Menu . . . . . . . . . . . . . . . . . . . . . . . . . . . . . . . . . . . . . . . . . . . 1-5
Using the Report Settings Menu . . . . . . . . . . . . . . . . . . . . . . . . . . . . . . . . . . . . . . . . . . .1-8
Page 16

Menu Functions
This chapter describes the menu functions and how to access them with the touch
1
What Are Menu Functions?
Before You Start Using the Machine
panel display.
The machine lets you specify the number of copies, the paper size, etc., to use
when it receives a print job. Normally, however, these types of settings are specified
by the application sending the print job, or by the printer driver.
However, you can specify many other settings other than the number of copies, the
paper size, etc., which affect the printer function of the machine. These include
some settings that cannot be specified from an application or the printer driver.
These settings are referred to as “Menu Functions.”
The menu functions are set using the keys on the touch panel display and are
grouped together depending on the type of settings performed. This makes them
easy to set.
NOTE
•
The contents of the Printer Settings are stored in the nonvolatile memory of the machine.
This means that the settings are stored even if the power to the machine is switched off the settings will still be available when the power is switched on again.
Understanding the Printer Settings Priorities
When the same menu function setting can be specified by using the keys on the
machine, or by specifying the setting in an application or the printer driver, the
setting from the application or printer driver has priority. These settings will override
the settings made on the machine.
Setting priority
High
Application
Printer driver
• The Windows printer driver is included on the CD-ROM provided with the
Touch panel display
machine. For instructions on installing the printer driver, see the
Low
Setup Guide.
1-2
Menu Functions
Page 17
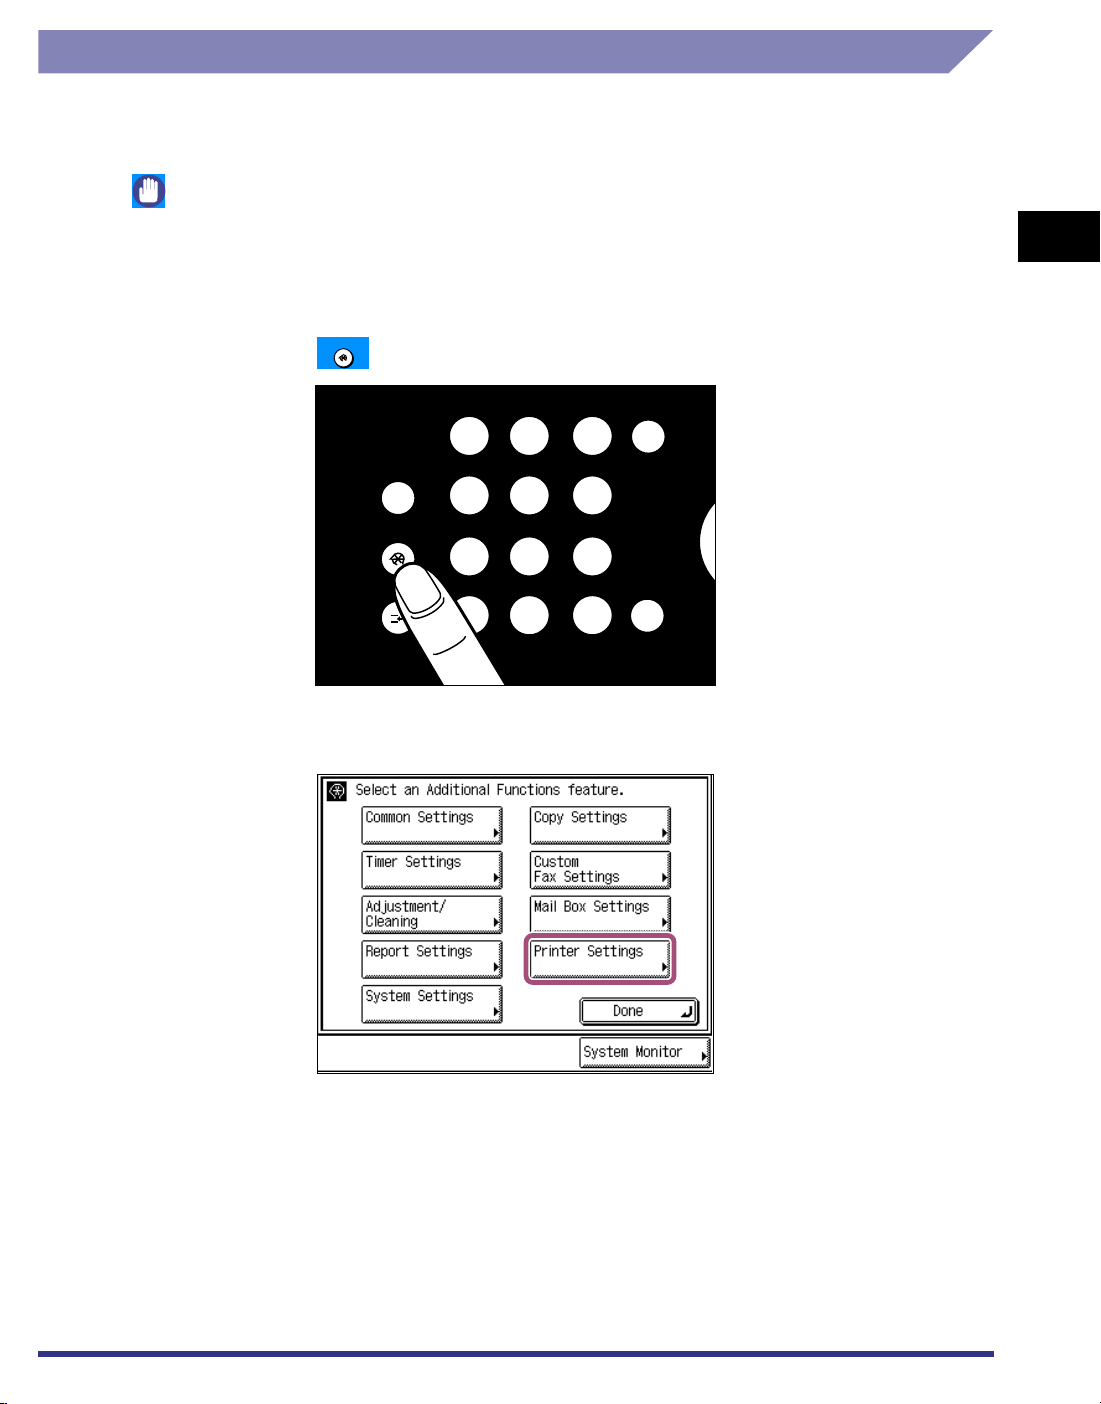
Accessing the Menus
r
To access the printer related menu functions, display the Printer Settings screen on
the touch panel display and use the keys on the display to specify the settings.
IMPORTANT
•
You can access menus and modify settings while print jobs are waiting in the queue.
However, any new settings will only affect print jobs sent to the queue after making the
modifications.
1
1
Press .
2
Press [Printer Settings].
Additional Functions
Reset
Guide
?
Additional Functions
Intereupt
123
456
78
✳
0
9
#
Clear
C
Sta
ID
Before You Start Using the Machine
Menu Functions
1-3
Page 18
1
3
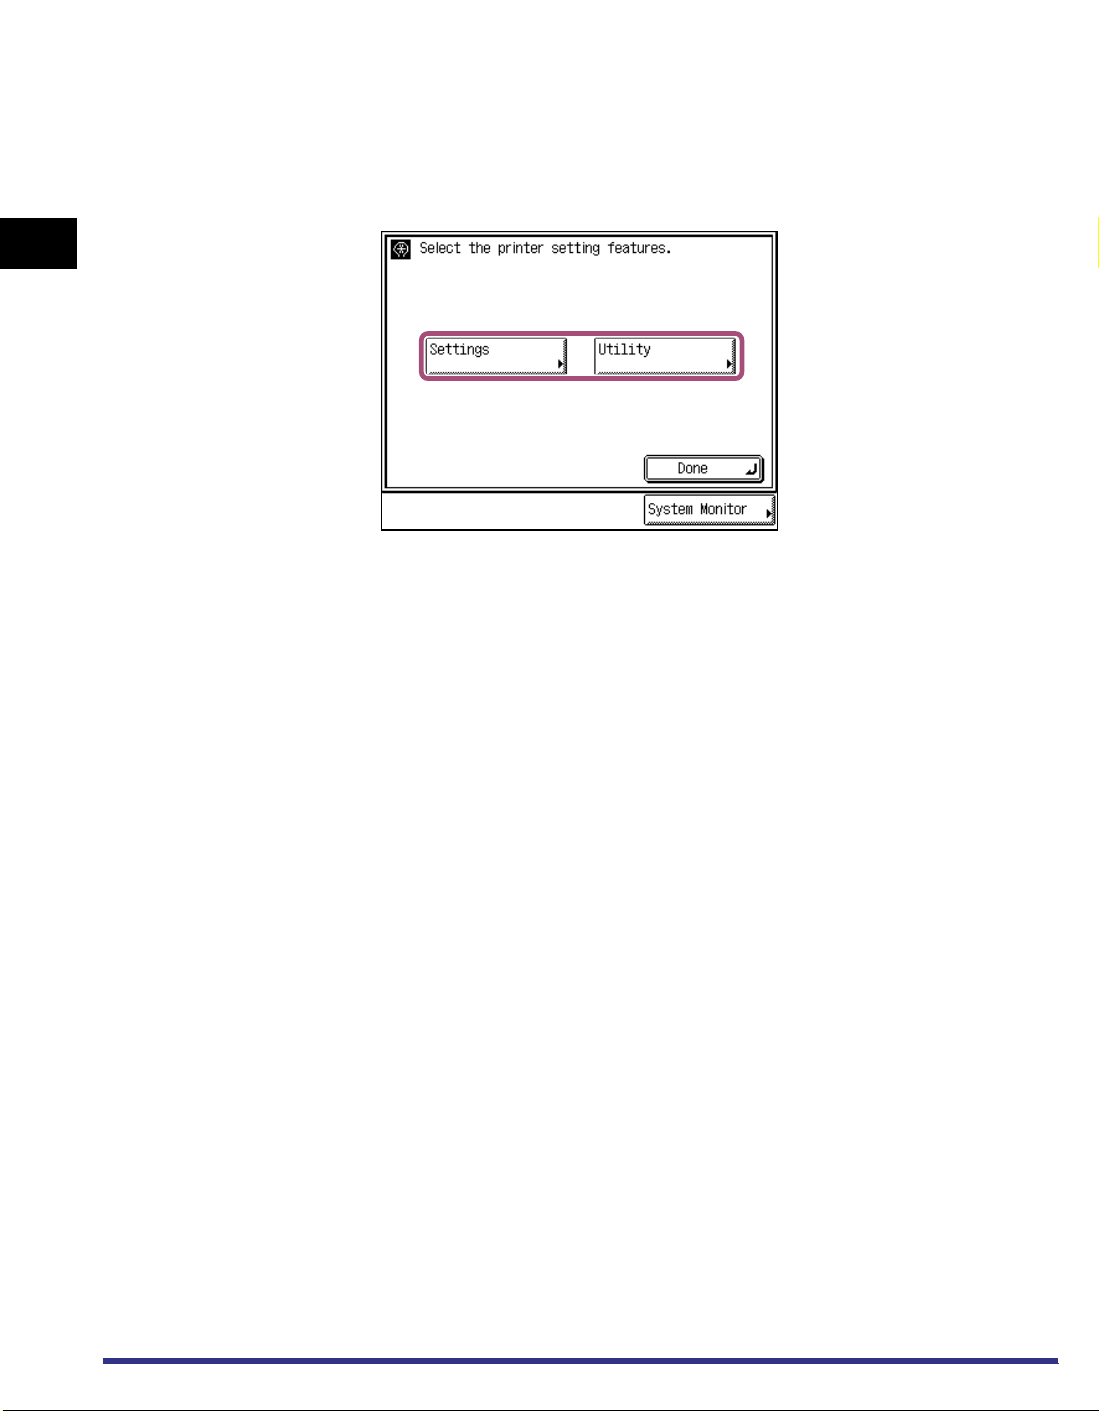
Press [Settings] or [Utility] to access the corresponding
menu.
The Settings menu provides access to common settings, such as number of
copies, error handling, and toner density.
The Utility menu provides access to the reset printer function.
Before You Start Using the Machine
1-4
Menu Functions
Page 19
Using the Printer Settings Menu
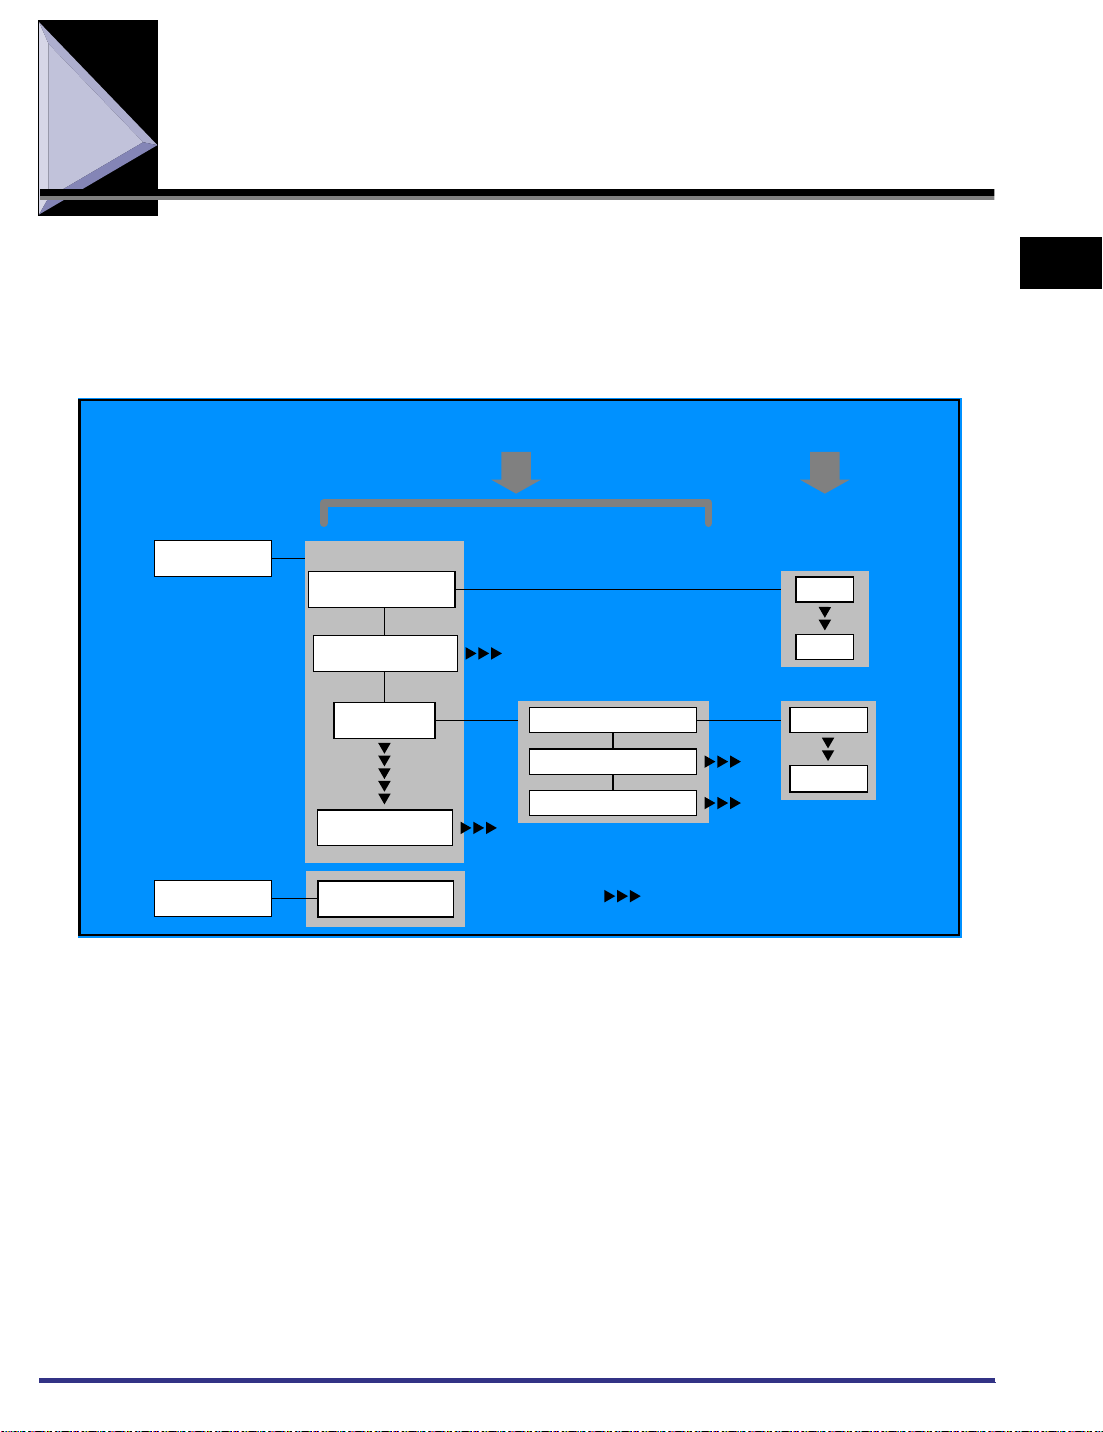
The Printer Settings Menu enables you to access common features. Below is an
abbreviated outline of the Printer Settings Menu structure. For a detailed
description of all Printer Settings Menu options, see “Printer Settings Menu
Functions and Operation,” on p. 3-1 through p. 3-23.
Settings Setting Value
1
Settings
Utility
Common Menu
Copies
2-Sided Printing
Paper Feed
PCL/PS
Reset Printer
2000
Default Paper Size
Default Paper Type
Statement
Paper Size Override
" " indicates that settings or levels are omitted.
1
Before You Start Using the Machine
A4
Using the Printer Settings Menu
1-5
Page 20
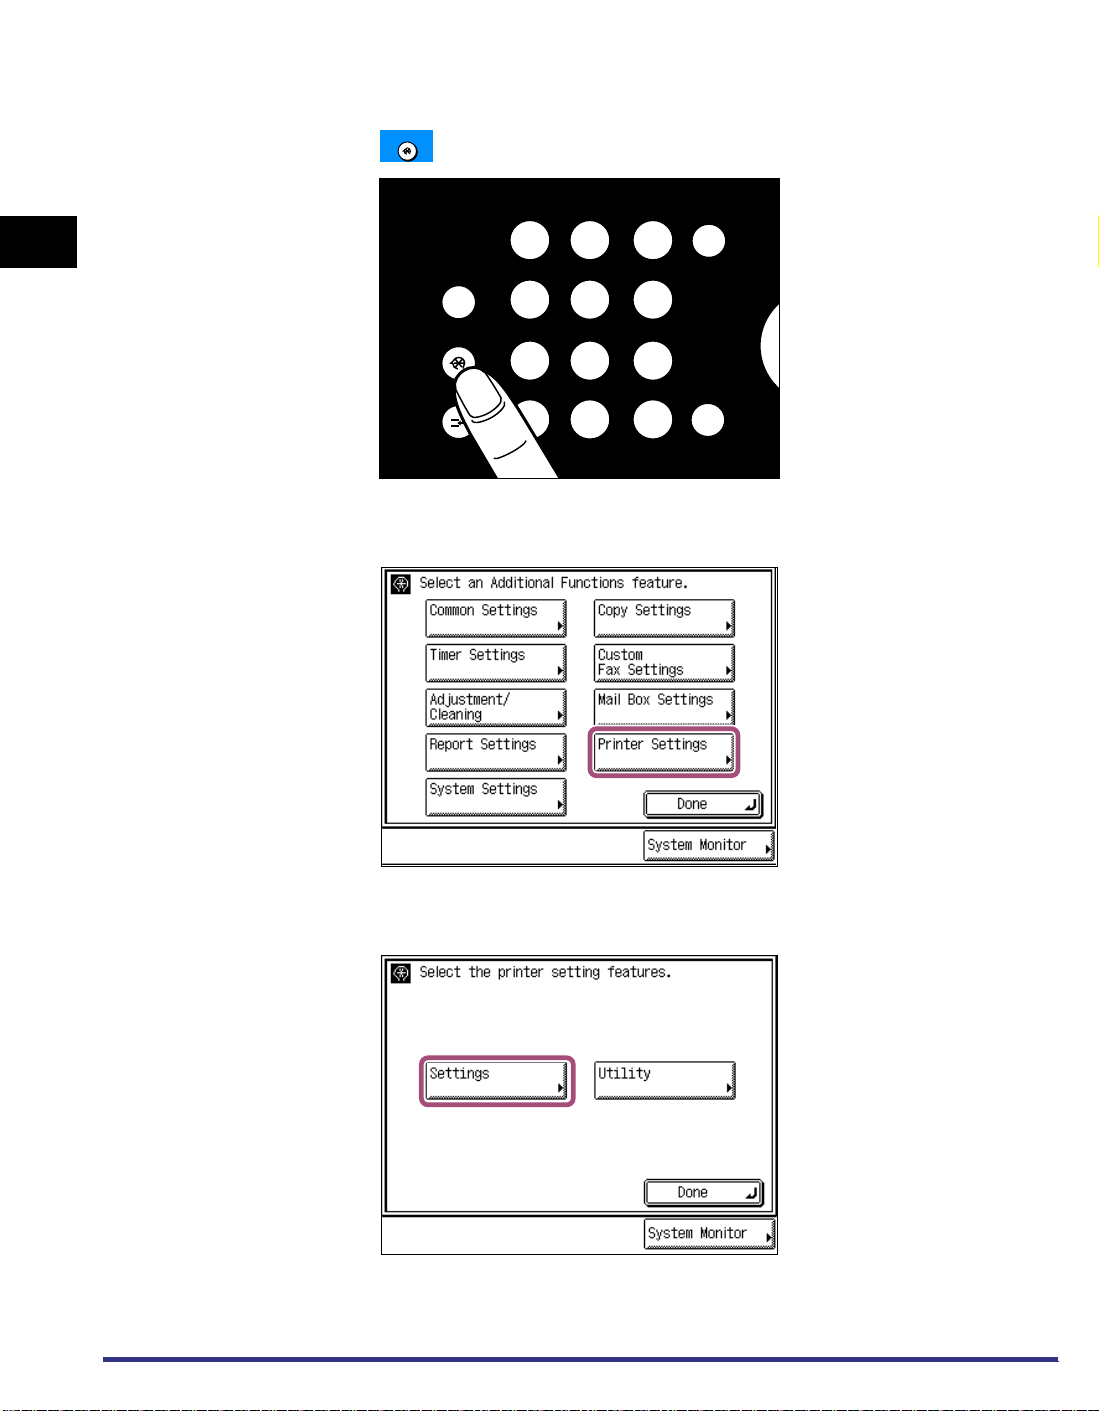
As an example, the following is the sequence of steps for setting the number of
t
copies.
1
Before You Start Using the Machine
1
Press .
2
Press [Printer Settings].
Additional Functions
Reset
Guide
?
Additional Functions
Intereupt
123
456
78
✳
0
9
#
Clear
C
Star
ID
1-6
3
Press [Settings].
Using the Printer Settings Menu
Page 21
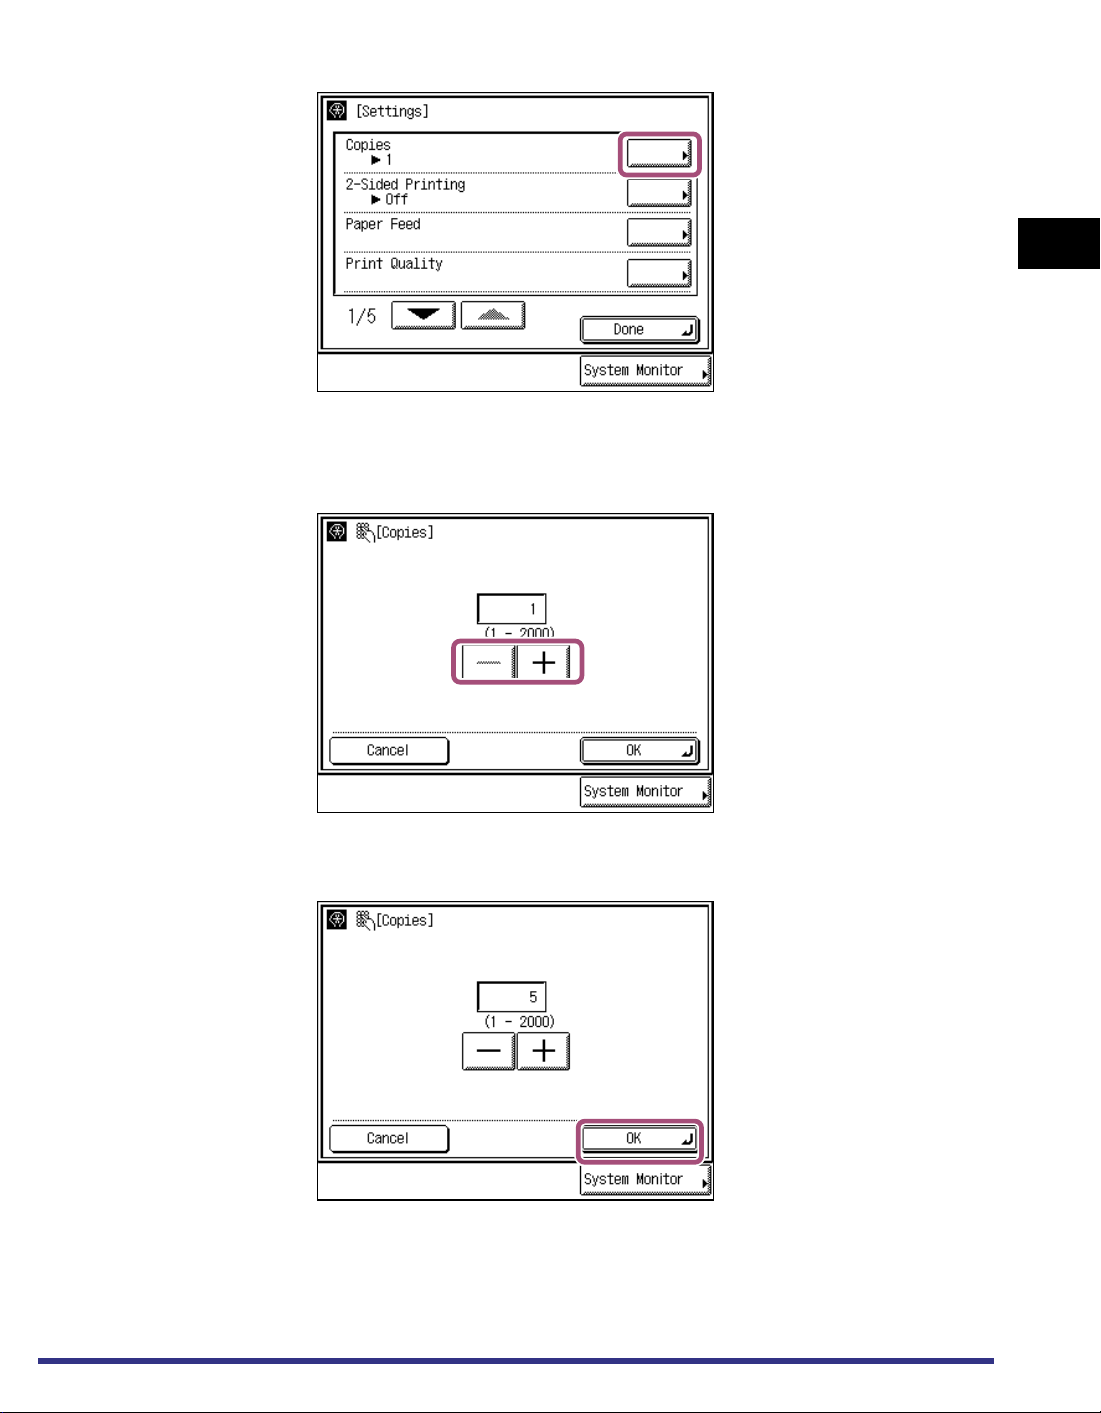
4
Press [Copies].
5
Enter the number of copies using the numeric keys or [-] and
[+].
1
6
Confirm the setting, then press [OK].
Before You Start Using the Machine
Using the Printer Settings Menu
1-7
Page 22
1
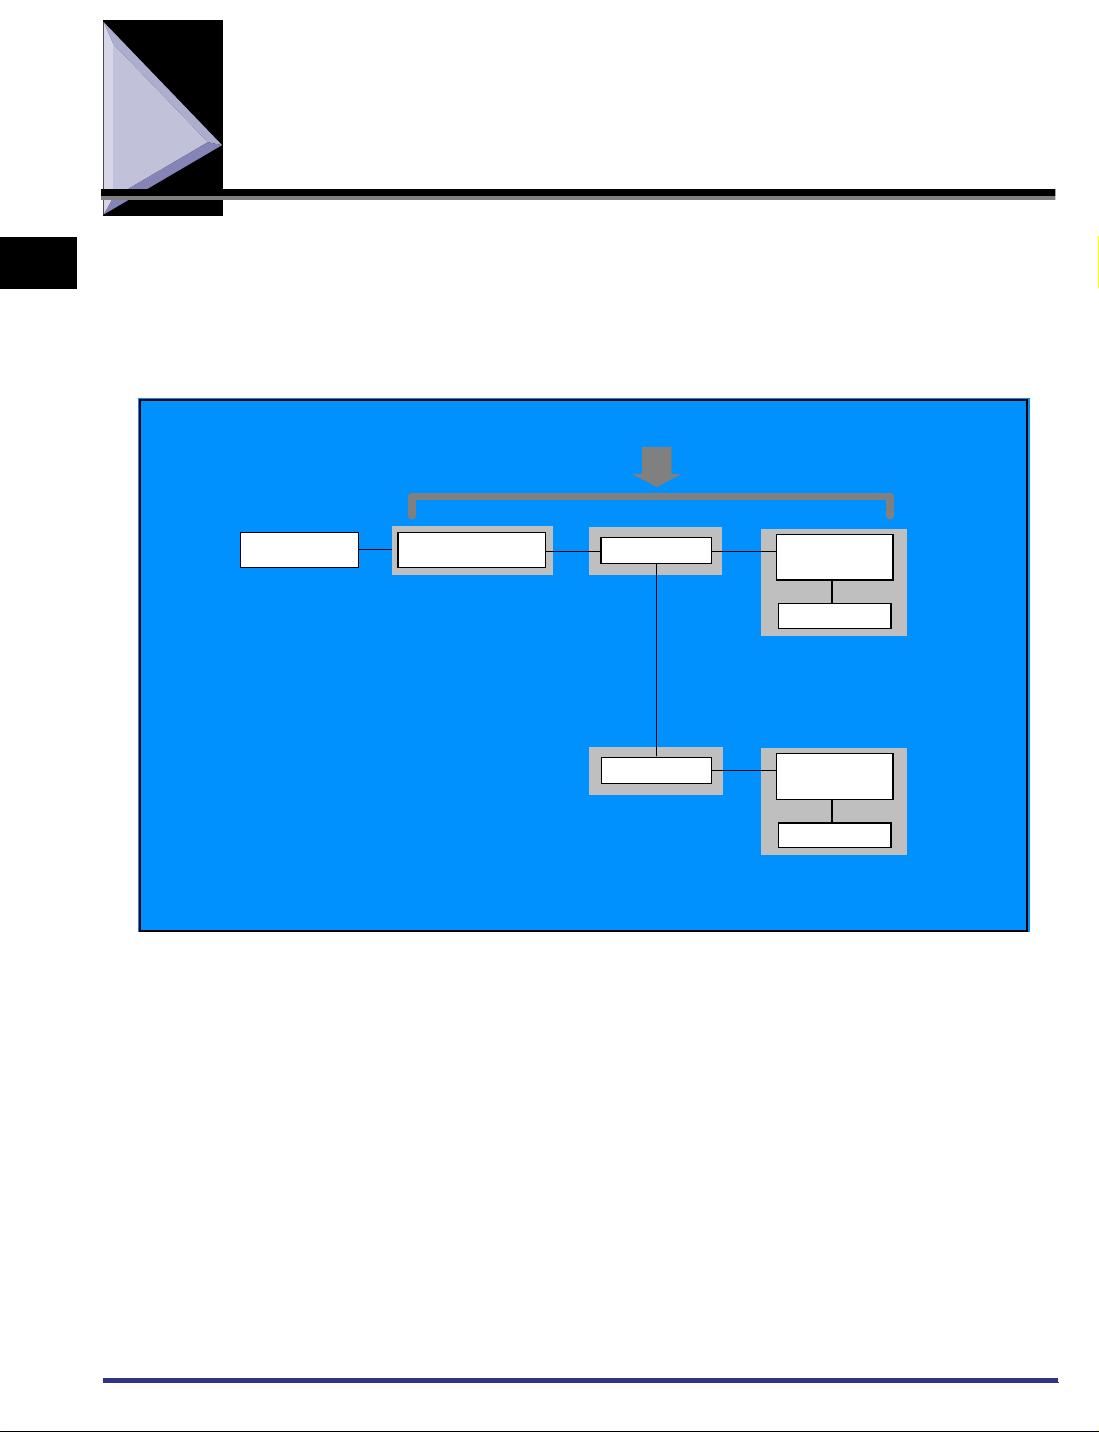
Using the Report Settings Menu
The Report Settings Menu enables you to access report print features such as
checking the configuration. Below is an abbreviated outline of the Report Settings
Menu structure. For a detailed description of Report Settings Menu options, see
“Report Settings Menu,” on p. 4-1.
Settings
Before You Start Using the Machine
Printer
PCL/PS
PCL
PS
(Printer Kit-C1 only)
Configuration
Page
Font List
Configuration
Page
Font List
1-8
Using the Report Settings Menu
Page 23
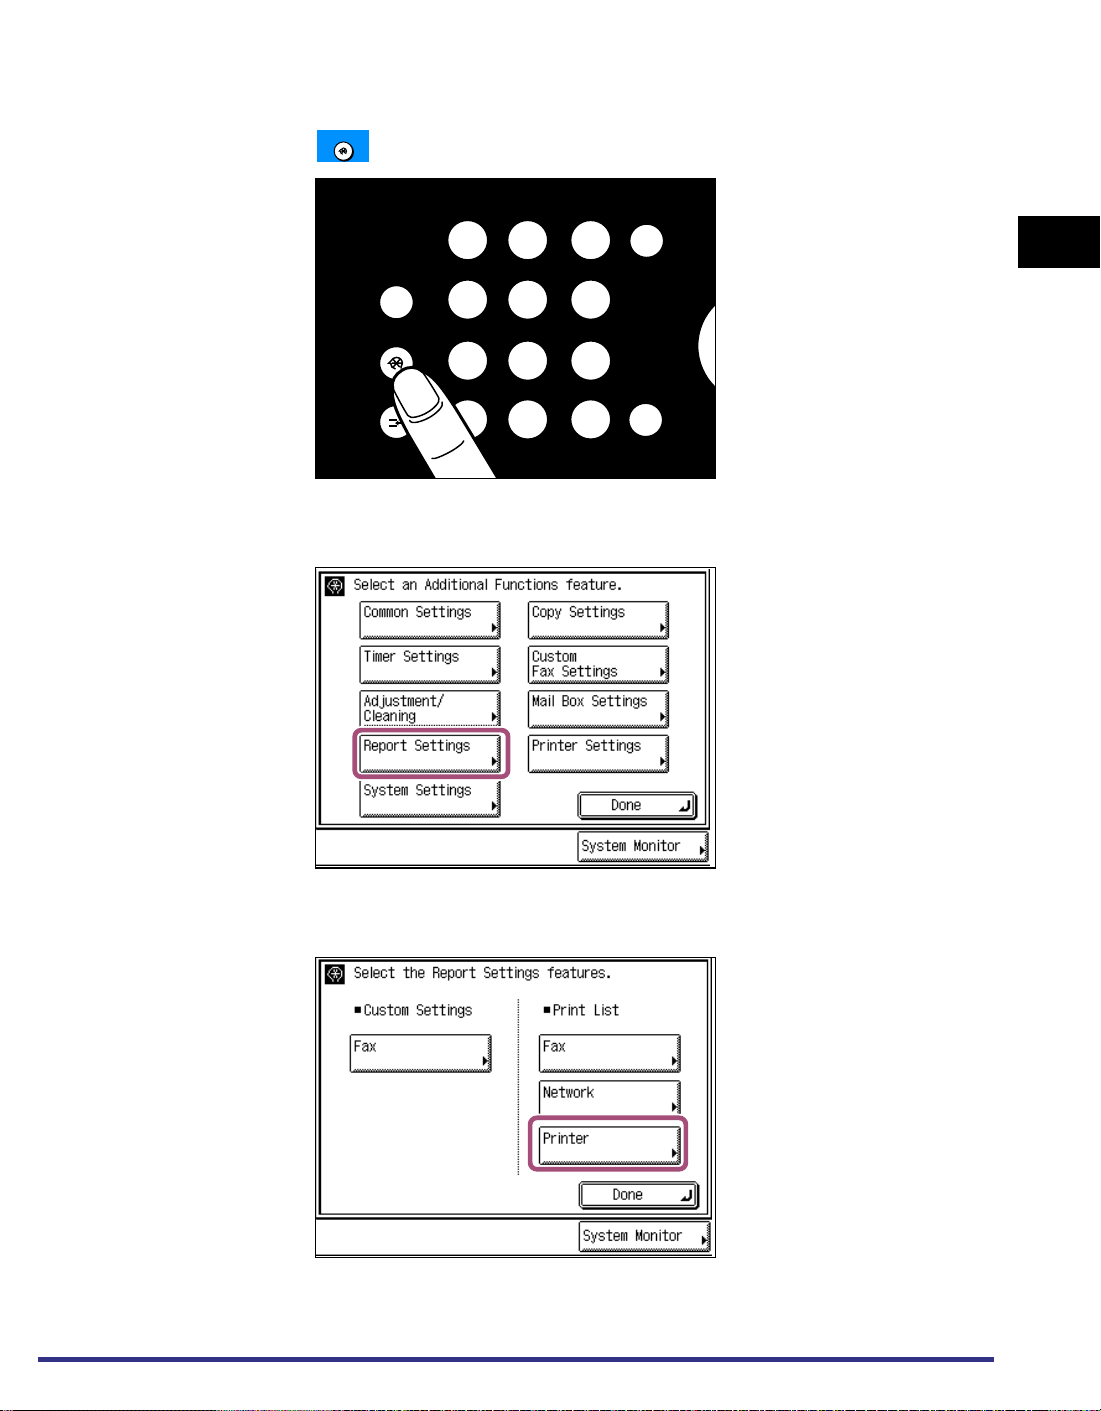
As an example, the following is the sequence of steps for printing a Configuration
r
Page.
1
Press .
2
Press [Report Settings].
Additional Functions
Reset
Guide
?
Additional Functions
Intereupt
123
456
78
✳
0
9
#
Clear
C
ID
1
Sta
Before You Start Using the Machine
3
Press [Printer].
Using the Report Settings Menu
1-9
Page 24
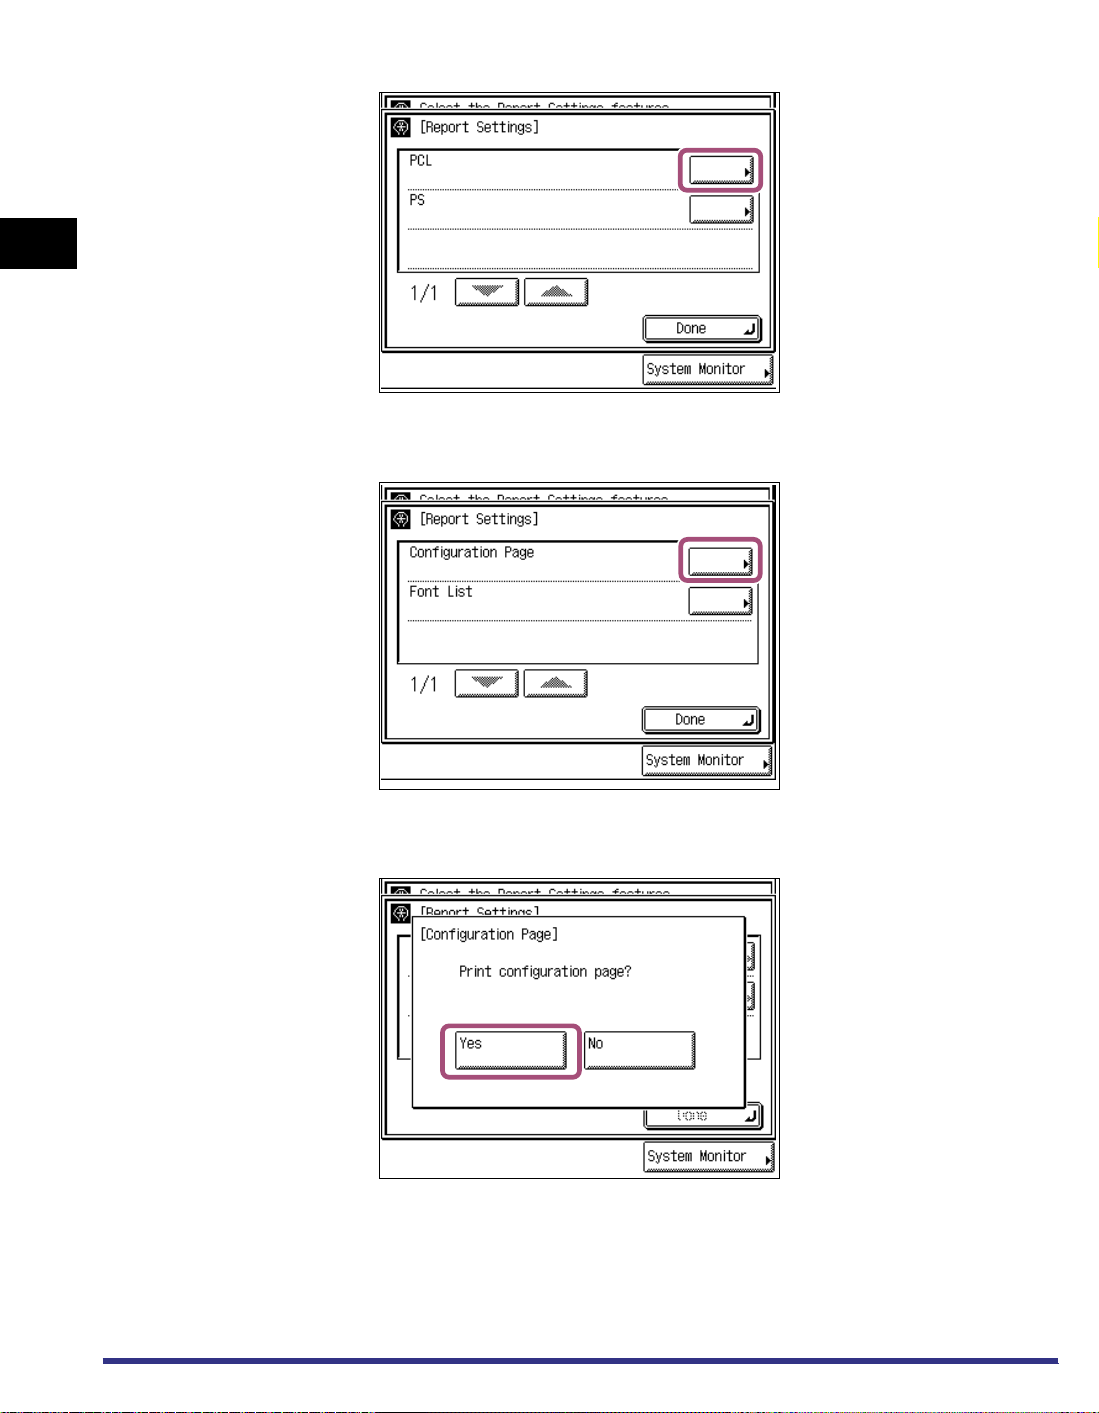
1
4
Press [PCL].
5
Press [Configuration Page].
Before You Start Using the Machine
6
Press [Yes] to print the page.
1-10
Using the Report Settings Menu
Page 25
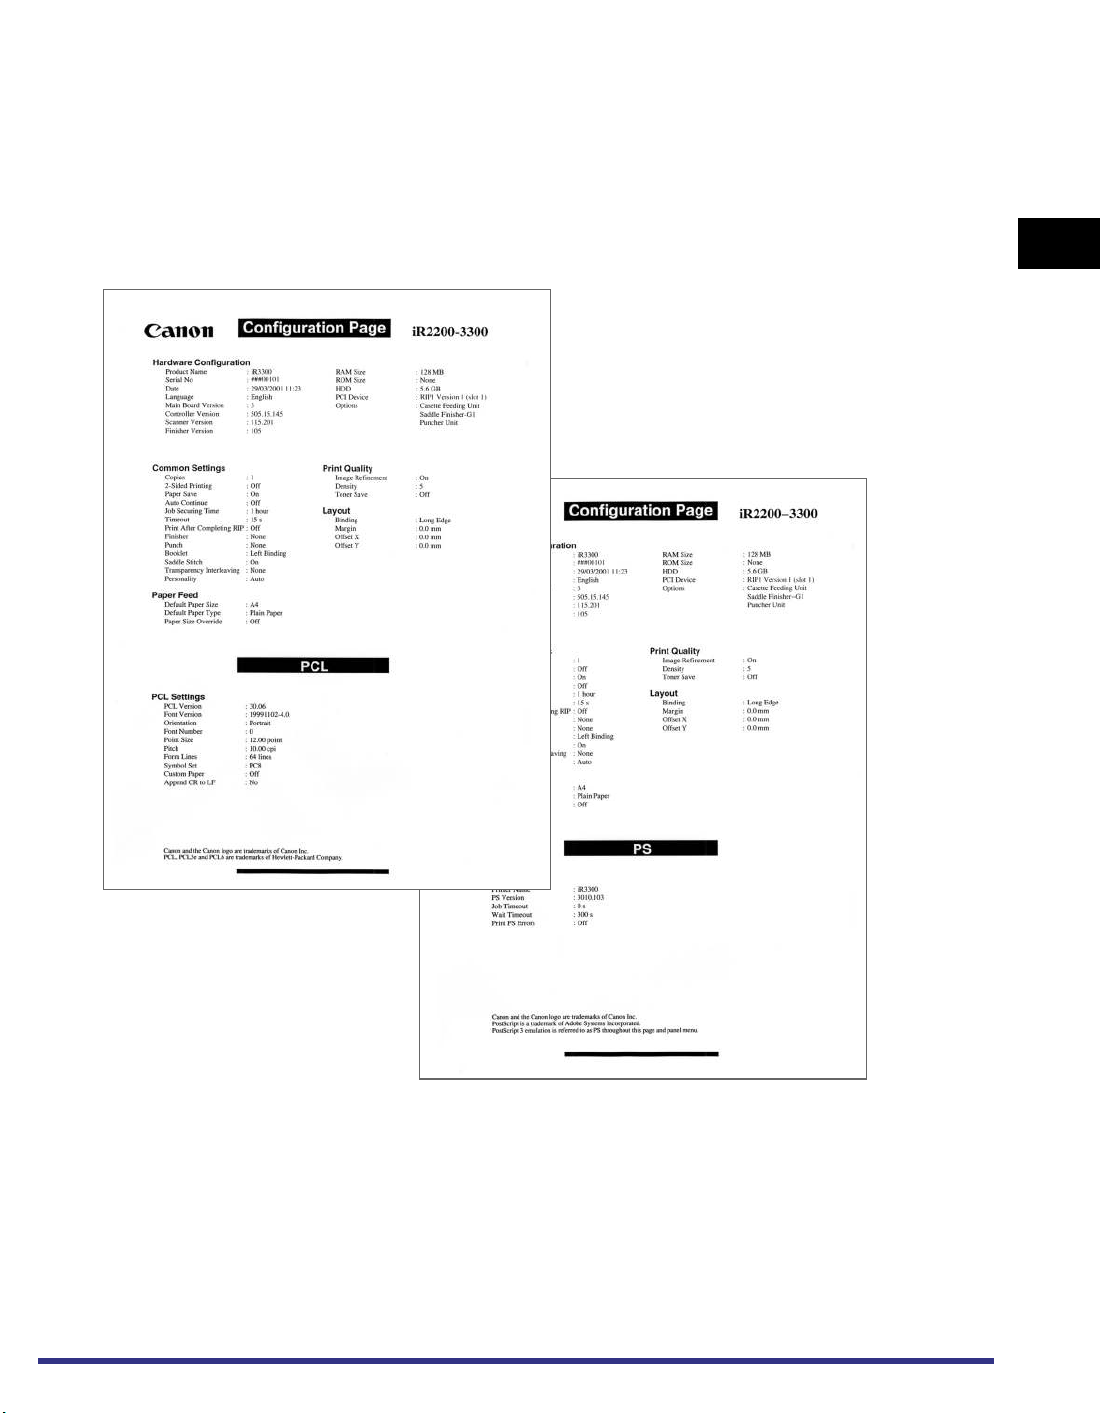
Configuration Page Sample
If the printer function is working correctly, the Configuration Page will be similar to
the sample below.
PCL Configuration Page
1
PS Configuration Page
(Printer Kit-C1 Only)
Before You Start Using the Machine
Using the Report Settings Menu
1-11
Page 26

1
Before You Start Using the Machine
1-12
Using the Report Settings Menu
Page 27

CHAPTER
2-1
2
Menu Functions and Operation
This chapter describes outline of all functions and settings.
Printer Settings Menu Functions . . . . . . . . . . . . . . . . . . . . . . . . . . . . . . . . . . . . . . . . . . . 2-2
Report Settings Menu Functions . . . . . . . . . . . . . . . . . . . . . . . . . . . . . . . . . . . . . . . . . . .2-5
Page 28

2
Printer Settings Menu Functions
The following table lists all settings of the Printer Settings Menu.
NOTE
•
The bold values indicate the default settings.
Setting Available Options Description
Settings Menu (See p.3-3)
Copies 1 - 2000 Sets the number of copies to be printed.
2-Sided Printing On, Off Turns double-sided printing on or off.
Paper Feed
Letter, Legal, A4, A3, A5,
Menu Functions and Operation
Default Paper Size
Default Paper Type
11x17, Executive, Statement,
Monarch, Com10, DL,
ISO-B5, ISO-C5
Plain Paper, Transparency,
Heavy Paper, Recycled,
Color, Letterhead, Tracing
Paper, Labels, Bond Paper,
Envelope
Sets the default paper size to be used when printing
from the machine.
Sets the default paper type to be used for printing.
Paper Size
Override
Print Quality
Image Refinement On, Off Turns Image Refinement on or off.
Density 1-5-9 Enables you to set the print density.
Toner Save On, Off Turns Toner Save on or off.
Layout
Binding Long Edge, Short Edge Sets long edge or short edge binding for print jobs.
Margin -30.0 - 0.0 - +30.0 mm Sets the margin in millimeters.
Offset X -50.0 - 0.0 - +50.0 mm Sets the X Offset.
Offset Y -50.0 - 0.0 - +50.0 mm Sets the Y Offset.
2-2
Printer Settings Menu Functions
On, Off Turns Paper Size Override on or off.
Page 29

Setting Available Options Description
Turns the Auto Continue function on or off. When
Auto Continue On, Off
Auto Continue is enabled, the machine
automatically continues if an error skip error ocurrs.
Job Securing Time
Timeout Timeout (5 - 15 - 300 s), Off Determines the timeout interval in seconds.
Print After
Completing RIP
Finisher
Punch
Booklet On, Off Turns booklet binding on or off.
Saddle Stitch On, Off Turns saddle stitching on or off.
Transparency
Interleaving
1 hour, 2 hours, 3 hours,
6 hours, 12 hours, 24 hours
On, Off
None, Rotate Collating,
Rotate Grouping, Offset
Collating, Offset Grouping,
Staple Sort
Staple position: Corner
(Upper-L), Double (Top),
Corner (Upper-R), Double
(Right), Corner (Lower-R),
Double (Bottom), Corner
(Lower-L), Double (Left)
None, Top, Bottom, Left,
Right
None, Blank, Printed
Determines how long a secured job remains in the
queue before being cancelled.
Selects whether to print the first page after all the
pages in job have been rastorized.
Selects the finisher or shift tray, if installed, and
selects the setting for collating and staple sort.
Sets the punch settings for the puncher unit, if
installed.
Enables you to determine the settings for
Transparency Interleaving.
2
Menu Functions and Operation
Personality Auto, PS, PCL Enables you to determine the Personality setting.
Initialize Enables you to initialize the settings.
PCL/PS Settings (See p.3-20)
PCL
Orientation Portrait, Landscape Sets the paper orientation.
Font Number 0 - 120 Sets the font number.
Point Size 4.00 - 12.00 - 999.75 point Sets the default point size.
Pitch 0.44 - 10.00 - 99.99 cpi Sets the default pitch.
Form Lines 5 - 64 - 128 lines Sets the number of lines on a page.
Printer Settings Menu Functions
2-3
Page 30

2
Setting Available Options Description
DESKTOP, ISO4, ISO6,
ISO11, ISO15, ISO17,
ISO21, ISO60, ISO69,
ISOL1, ISOL2, ISOL5,
ISOL6, LEGAL, MATH8,
MCTEXT, MSPUBL, PC775,
Symbol Set
Custom Paper On, Off Toggles custom paper on or off.
Unit of Measure Millimeters, Inches
X Dimension 138 - 432 mm
PC8, PC850, PC852,
PC8DN, PC8TK, PC1004,
PIFONT, PSMATH, PSTEXT,
ROMAN8, VNINTL,
VNMATH, VNUS, WIN30,
WINBALT, WINL1, WINL2,
WINL5
Sets the symbol set.
Sets the unit of measurement for specifying the
custom paper size.
*This setting is only displayed if Custom Paper is set
to on.
Sets the X dimension of the custom paper.
*This setting is only displayed if Custom Paper is set
to on.
Menu Functions and Operation
Y Dimension 100 - 297 mm
Append CR to LF Yes, No
PS (Print Kit-C1 Only)
Job Timeout 0 - 3600 s Sets the timeout setting in seconds.
Wait Timeout 0 - 300 - 3600 s
Print PS Errors On, Off Turns printing of PS errors on or off.
Utility Menu (See p.3-23)
Reset Printer
Sets the Y dimension of the custom paper.
*This setting is only displayed if Custom Paper is set
to on.
Append a carriage return to each line feed
encountered.
Determines how long a job waits, in seconds, before
it times out.
Enables you to reset the printer function and cancel jobs in the print queue or in the
machine’s memory.
2-4
Printer Settings Menu Functions
Page 31

Report Settings Menu Functions
The following table lists functions of the Report Settings Menu.
Setting Description
Printer Menu (See p.4-1)
PCL
Configuration Page Enables you to print the PCL Configuration Page.
Font List Enables you to print the PCL Font List.
PS (Printer Kit-C1 Only)
Configuration Page Enables you to print the PS Configuration Page.
Font List Enables you to print the PS Font List.
2
Menu Functions and Operation
Report Settings Menu Functions
2-5
Page 32

2
Menu Functions and Operation
2-6
Report Settings Menu Functions
Page 33

CHAPTER
3-1
3
Printer Settings Menu Functions
and Operation
This chapter describes how to use the Printer Settings Menu and its submenus.
Settings Menu . . . . . . . . . . . . . . . . . . . . . . . . . . . . . . . . . . . . . . . . . . . . . . . . . . . . . . . . .3-3
Copies . . . . . . . . . . . . . . . . . . . . . . . . . . . . . . . . . . . . . . . . . . . . . . . . . . . . . . . . . . . . . . . . . . . . .3-3
2-Sided Printing . . . . . . . . . . . . . . . . . . . . . . . . . . . . . . . . . . . . . . . . . . . . . . . . . . . . . . . . . . . . . .3-3
Paper Feed . . . . . . . . . . . . . . . . . . . . . . . . . . . . . . . . . . . . . . . . . . . . . . . . . . . . . . . . . . . . . . . . .3-4
Default Paper Size . . . . . . . . . . . . . . . . . . . . . . . . . . . . . . . . . . . . . . . . . . . . . . . . . . . . . . . . .3-4
Default Paper Type . . . . . . . . . . . . . . . . . . . . . . . . . . . . . . . . . . . . . . . . . . . . . . . . . . . . . . . .3-5
Paper Size Override . . . . . . . . . . . . . . . . . . . . . . . . . . . . . . . . . . . . . . . . . . . . . . . . . . . . . . .3-5
Print Quality . . . . . . . . . . . . . . . . . . . . . . . . . . . . . . . . . . . . . . . . . . . . . . . . . . . . . . . . . . . . . . . . .3-6
Image Refinement . . . . . . . . . . . . . . . . . . . . . . . . . . . . . . . . . . . . . . . . . . . . . . . . . . . . . . . . .3-6
Density . . . . . . . . . . . . . . . . . . . . . . . . . . . . . . . . . . . . . . . . . . . . . . . . . . . . . . . . . . . . . . . . .3-6
Toner Save . . . . . . . . . . . . . . . . . . . . . . . . . . . . . . . . . . . . . . . . . . . . . . . . . . . . . . . . . . . . . .3-6
Layout . . . . . . . . . . . . . . . . . . . . . . . . . . . . . . . . . . . . . . . . . . . . . . . . . . . . . . . . . . . . . . . . . . . . .3-7
Binding . . . . . . . . . . . . . . . . . . . . . . . . . . . . . . . . . . . . . . . . . . . . . . . . . . . . . . . . . . . . . . . . .3-7
Margin . . . . . . . . . . . . . . . . . . . . . . . . . . . . . . . . . . . . . . . . . . . . . . . . . . . . . . . . . . . . . . . . . .3-8
Offset X . . . . . . . . . . . . . . . . . . . . . . . . . . . . . . . . . . . . . . . . . . . . . . . . . . . . . . . . . . . . . . .3-10
Offset Y . . . . . . . . . . . . . . . . . . . . . . . . . . . . . . . . . . . . . . . . . . . . . . . . . . . . . . . . . . . . . . . .3-10
Auto Continue . . . . . . . . . . . . . . . . . . . . . . . . . . . . . . . . . . . . . . . . . . . . . . . . . . . . . . . . . . . . . .3-11
Job Securing Time . . . . . . . . . . . . . . . . . . . . . . . . . . . . . . . . . . . . . . . . . . . . . . . . . . . . . . . . . .3-11
Timeout . . . . . . . . . . . . . . . . . . . . . . . . . . . . . . . . . . . . . . . . . . . . . . . . . . . . . . . . . . . . . . . . . . .3-12
Print After Completing RIP . . . . . . . . . . . . . . . . . . . . . . . . . . . . . . . . . . . . . . . . . . . . . . . . . . . . .3-12
Finisher . . . . . . . . . . . . . . . . . . . . . . . . . . . . . . . . . . . . . . . . . . . . . . . . . . . . . . . . . . . . . . . . . . .3-13
Punch . . . . . . . . . . . . . . . . . . . . . . . . . . . . . . . . . . . . . . . . . . . . . . . . . . . . . . . . . . . . . . . . . . . .3-16
Booklet . . . . . . . . . . . . . . . . . . . . . . . . . . . . . . . . . . . . . . . . . . . . . . . . . . . . . . . . . . . . . . . . . . . .3-17
Saddle Stitch . . . . . . . . . . . . . . . . . . . . . . . . . . . . . . . . . . . . . . . . . . . . . . . . . . . . . . . . . . . . . . .3-18
Transparency Interleaving . . . . . . . . . . . . . . . . . . . . . . . . . . . . . . . . . . . . . . . . . . . . . . . . . . . . .3-19
Personality . . . . . . . . . . . . . . . . . . . . . . . . . . . . . . . . . . . . . . . . . . . . . . . . . . . . . . . . . . . . . . . . .3-19
Initialize . . . . . . . . . . . . . . . . . . . . . . . . . . . . . . . . . . . . . . . . . . . . . . . . . . . . . . . . . . . . . . . . . . .3-19
PCL/PS Settings . . . . . . . . . . . . . . . . . . . . . . . . . . . . . . . . . . . . . . . . . . . . . . . . . . . . . . 3-20
PCL . . . . . . . . . . . . . . . . . . . . . . . . . . . . . . . . . . . . . . . . . . . . . . . . . . . . . . . . . . . . . . . . . . . . . .3-20
Orientation . . . . . . . . . . . . . . . . . . . . . . . . . . . . . . . . . . . . . . . . . . . . . . . . . . . . . . . . . . . . . .3-20
Font Number . . . . . . . . . . . . . . . . . . . . . . . . . . . . . . . . . . . . . . . . . . . . . . . . . . . . . . . . . . . .3-20
Point Size . . . . . . . . . . . . . . . . . . . . . . . . . . . . . . . . . . . . . . . . . . . . . . . . . . . . . . . . . . . . . .3-20
Pitch . . . . . . . . . . . . . . . . . . . . . . . . . . . . . . . . . . . . . . . . . . . . . . . . . . . . . . . . . . . . . . . . . .3-20
Form Lines . . . . . . . . . . . . . . . . . . . . . . . . . . . . . . . . . . . . . . . . . . . . . . . . . . . . . . . . . . . . .3-21
Symbol Set . . . . . . . . . . . . . . . . . . . . . . . . . . . . . . . . . . . . . . . . . . . . . . . . . . . . . . . . . . . . .3-21
Page 34

3. Printer Settings Menu Functions and Operation
Custom Paper . . . . . . . . . . . . . . . . . . . . . . . . . . . . . . . . . . . . . . . . . . . . . . . . . . . . . . . . . . 3-21
Unit of Measure . . . . . . . . . . . . . . . . . . . . . . . . . . . . . . . . . . . . . . . . . . . . . . . . . . . . . . . . . 3-21
X Dimension . . . . . . . . . . . . . . . . . . . . . . . . . . . . . . . . . . . . . . . . . . . . . . . . . . . . . . . . . . . . 3-21
Y Dimension . . . . . . . . . . . . . . . . . . . . . . . . . . . . . . . . . . . . . . . . . . . . . . . . . . . . . . . . . . . . 3-22
Append CR to LF . . . . . . . . . . . . . . . . . . . . . . . . . . . . . . . . . . . . . . . . . . . . . . . . . . . . . . . . 3-22
PS (Printer Kit-C1 Only) . . . . . . . . . . . . . . . . . . . . . . . . . . . . . . . . . . . . . . . . . . . . . . . . . . . . . . 3-22
Job Timeout . . . . . . . . . . . . . . . . . . . . . . . . . . . . . . . . . . . . . . . . . . . . . . . . . . . . . . . . . . . . 3-22
Wait Timeout . . . . . . . . . . . . . . . . . . . . . . . . . . . . . . . . . . . . . . . . . . . . . . . . . . . . . . . . . . . 3-22
Print PS Errors . . . . . . . . . . . . . . . . . . . . . . . . . . . . . . . . . . . . . . . . . . . . . . . . . . . . . . . . . . 3-22
3
Utility Menu . . . . . . . . . . . . . . . . . . . . . . . . . . . . . . . . . . . . . . . . . . . . . . . . . . . . . . . . . . 3-23
Reset Printer . . . . . . . . . . . . . . . . . . . . . . . . . . . . . . . . . . . . . . . . . . . . . . . . . . . . . . . . . . . . . . . 3-23
Printer Settings Menu Functions and Operation
3-2
Page 35

Settings Menu
NOTE
•
The bold values indicate the default settings.
Copies
2-Sided Printing
1-2000
Enables you to specify the number of copies printed. The default setting is
1, but you can specify up to 2000 copies.
On, Off
This parameter selects one-sided or two-sided printing. When 2-Sided
Printing is specified, the document is printed on both sides of the paper.
IMPORTANT
•
Two-sided printing can use either the paper drawer or the
stack bypass tray, in sizes of A3, B4, A4, A4R, JIS-B5,
B5R, A5R, 11x17, Legal, Letter, Letter-R, Statement-R
and Executive.
•
When printing on letterhead paper, or paper with a logo
etc., such as a cover sheet, please note the following
points.
- If the paper is fed from an internal paper drawer, the
print surface of the first page should be face-down.
- If the paper is fed from the stack bypass or the optional
paper deck, the print surface of the first page should be
face-up.
3
Settings Menu
Printer Settings Menu Functions and Operation
3-3
Page 36

3
Paper Feed
Default Paper Size Letter, Legal, A4, A3, A5, 11x17, Executive, Statement,
Monarch, COM10, DL, ISO-B5, ISO-C5
This parameter defines the default paper size used when the paper size
cannot be set within the application software, when no paper source is
specified.
IMPORTANT
•
If you are printing from an OS that does not have a printer
driver for the machine (MS-DOS, UNIX, etc.) make sure
that the paper loaded in the paper drawer matches the
paper size specified in this setting. If the paper size
specified in this setting is not available, an error message
will be displayed when the machine tries to print the job
and the machine will stop. In addition, if a paper source
has not been selected through the application, the
machine will automatically select default print settings for
the paper size and type. See “Setting a Paper Drawer for
Auto Paper Selection/Auto Drawer Switching,” in the
Reference Guide.
NOTE
•
To avoid the possibility of your job being printed on the
wrong size paper, always make sure that Executive-size
paper is loaded in the Stack Bypass before printing an
Executive-size job. When the Manual Paper Select screen
is displayed, press [Free Size].
Printer Settings Menu Functions and Operation
3-4
Settings Menu
Page 37

Default Paper
Type
Plain Paper, Transparency, Heavy Paper, Recycled, Color,
Letterhead, Tracing Paper, Labels, Bond Paper, Envelope
This parameter sets the default paper type to be used for print job. This
printer has internally defined optimal print modes for each specified paper
type.
IMPORTANT
•
If you are printing from an OS that does not have a printer
driver for the machine (MS-DOS, UNIX, etc.) make sure
that the paper loaded in the paper drawer matches the
paper type specified in this setting. If the paper type
specified in this setting is not available, an error message
will be displayed when the machine tries to print the job
and the machine will stop. In addition, if a paper source
has not been selected through the application, the
machine will automatically select default print settings for
the paper type and size. See “Setting a Paper Drawer for
Auto Paper Selection/Auto Drawer Switching,” in the
Reference Guide.
NOTE
•
Use the following figures as a guideline to decide whether
paper should be specified as Plain Paper or Heavy Paper.
- Plain Paper: 64 gsm - 90 gsm (64 g/m
- Heavy Paper: Paper heavier than Plain Paper 128 gsm (128 g/m
•
Canon transparency film is recommended for printing on
transparencies.
•
Canon label paper is recommended for printing on labels.
•
Transparency, Tracing Paper, and Labels cannot be
printed using two-sided printing.
2
- 90 g/m2)
2
)
3
Paper Size
Override
On, Off
When paper of the size that is set in the printer driver has not been loaded
in the paper drawer, the paper that is printed will be changed to the
following sizes.
Printer driver setting Paper that will be printed on
A4 → Letter
Letter → A4
A3 → 11x17
11x17 → A3
If [On] is selected, the paper size will be changed.
If [Off] is selected, the paper supply message will be displayed and the
paper size will not be changed.
Settings Menu
Printer Settings Menu Functions and Operation
3-5
Page 38

3
Print Quality
Image Refinement On, Off
This setting smoothes the jagged outlines of characters and graphics. If
[On] is selected, smoothing is performed before printing. If [Off] is selected,
jobs are printed without being smoothed.
Density 1 - 5 - 9
This setting adjusts the print density. Pressing [Dark] makes the print
image darker, pressing [Light] makes the image lighter. You can adjust the
setting in 9 levels, with level 5 (middle level) being the factory setting.
Toner Save On, Off
This setting determines whether the Toner Save is enabled. Toner Save
uses less toner to print documents and may result in longer toner life.
NOTE
•
The results of image refinement might be different
depending on the types of characters and graphics you
want to print.
NOTE
•
If [On] is selected for Toner Save, very light or finely
detailed images may not be printed clearly.
Printer Settings Menu Functions and Operation
3-6
Settings Menu
Page 39
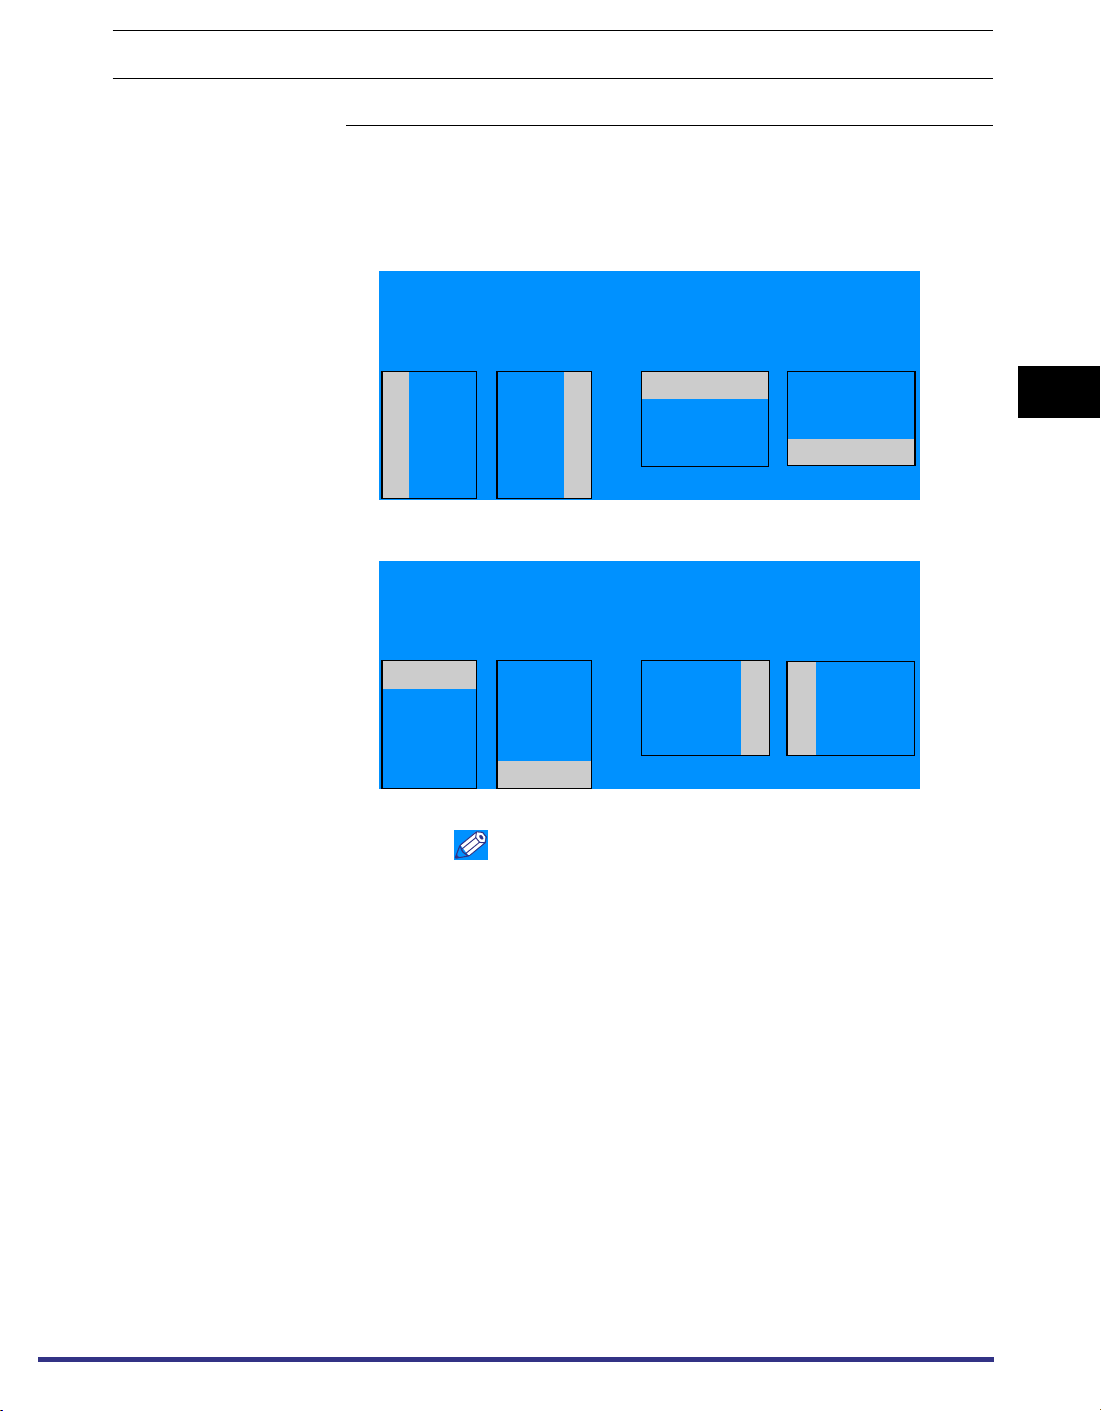
Layout
Binding Long Edge, Short Edge
This parameter determines whether the binding position is along the long
edge or the short edge of the paper. When binding for
2-sided printing, the image orientation is automatically adjusted for correct
layout.
When the binding position is on the long edge of the paper:
Two-sided printing
in portrait orientation
Two-sided printing
in landscape orientation
Front Back Front Back
DEF
Binding Position
Binding Position
ABC
DEF
Binding Position
Two-sided printing
in landscape orientation
Binding Position
ABC
When the binding position is on the short edge of the paper:
Two-sided printing
in portrait orientation
Front Back Front Back
Binding Position
ABC
DEF
Binding Position
ABC
Binding Position
DEF
Binding Position
NOTE
•
You cannot create a binding margin with this setting
alone. Use this setting in combination with the Margin
setting to create a binding margin.
•
For 2-Sided Printing, the orientation of the back image
may be changed by this setting.
3
Printer Settings Menu Functions and Operation
Settings Menu
3-7
Page 40
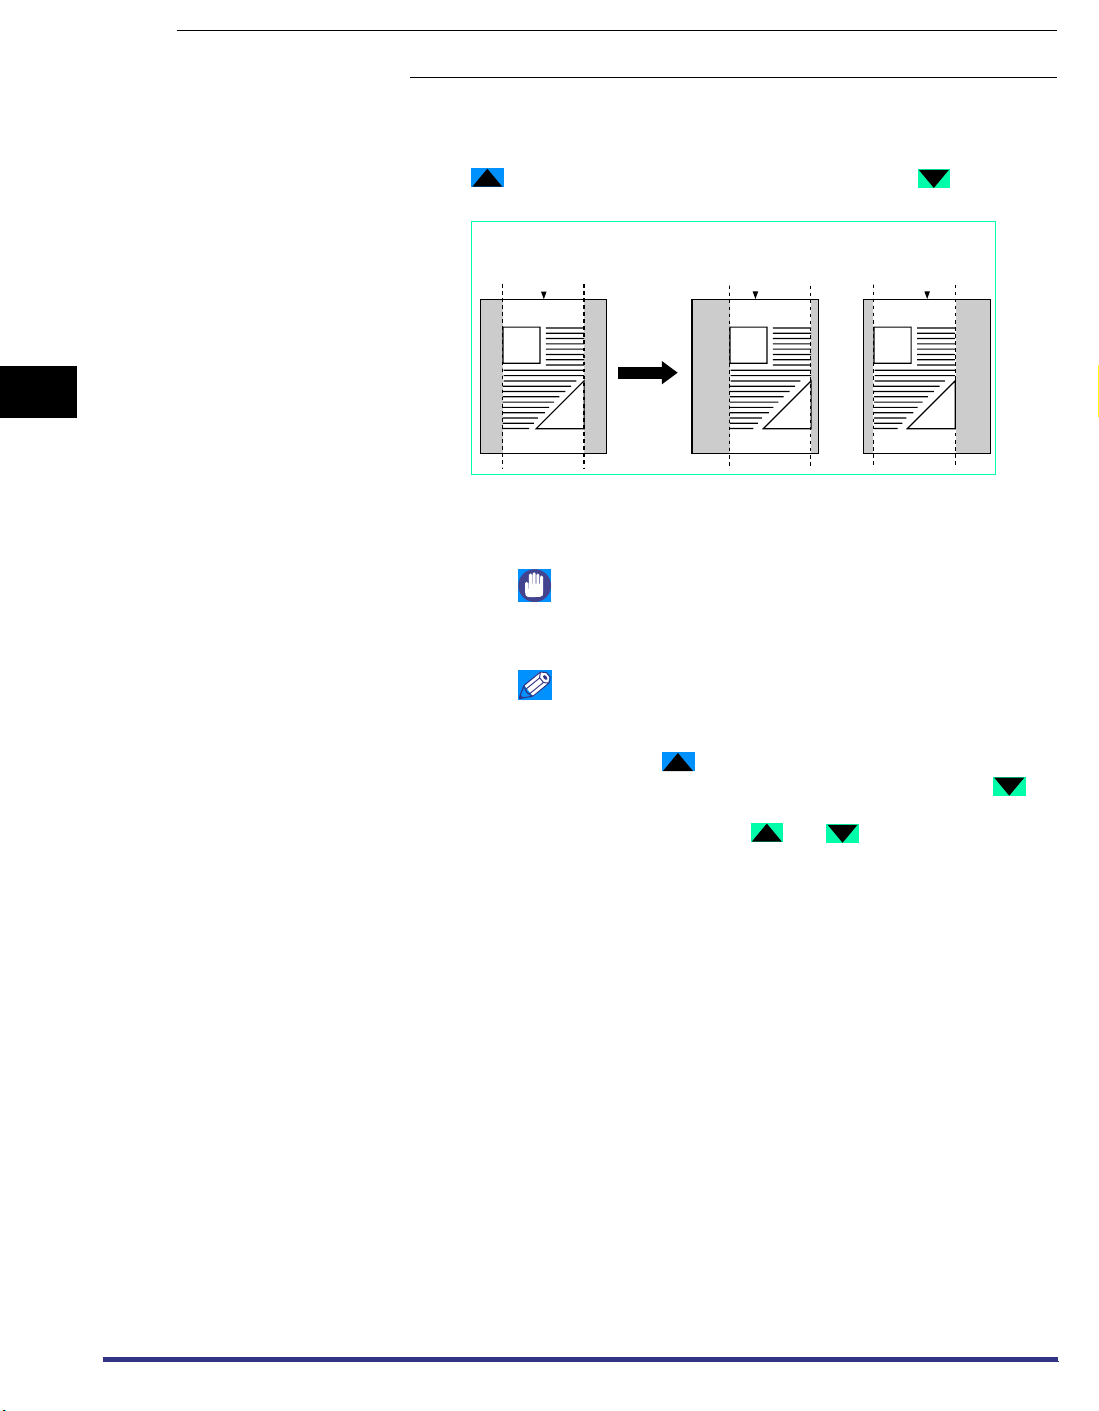
Margin -30.0 - 0.0 - +30.0 mm (in increments of 0.5 mm)
This setting sets the page margin in mm. The settings can be set between
-30.0 mm (-1.20 inch) to +30.0 mm (+1.20 inch) in increments of 0.5 mm
(0.01 inch).
Use [ ] to increase the width of the inside margin. Use [ ] to
increase the size of the outside margin.
3
[ + ]
[ - ][0mm]
Center Center Center
Left Margin
You can specify the edge along which the margin will be created in the
Binding setting (previous setting.) To create a margin along one of the
edges of the paper, use this setting in combination with the Binding setting.
Right Margin
IMPORTANT
•
If this setting moves the image outside the printable area,
part of the image may be cut off.
NOTE
•
If this setting is used in combination with the Offset X/
Offset Y setting, the two settings are added together.
•
Pressing [ ] increases the setting value by 0.5 mm
(0.01 inch) each time the key is pressed. Pressing [ ]
decreases the value by 0.5 mm (0.01 inch) each time.
Holding down either [ ] or [ ] continuously speeds
up the value alteration.
Printer Settings Menu Functions and Operation
3-8
Settings Menu
Page 41
Binding and Margin Settings
Refer to the figures below to set binding and margins.
Portrait printing
with margin
Front Back
ABC
ABC
ABC
(Two-sided printing)
ABC
DEF
DEF
DEF
DEF
Binding : Long edge
Margin : [+]
Binding : Long edge
Margin : [-]
Binding : Short edge
Margin : [+]
Binding : Short edge
Margin : [-]
Landscape printing
with margin
Front
ABCDE
ABCDE
ABCDEABCDE
Back
(Two-sided printing)
FGHIJK
3
FGHIJK
FGHIJKFGHIJK
Set the paper orientation in the application you are using.
Printer Settings Menu Functions and Operation
Settings Menu
3-9
Page 42
3
Offset X
Offset Y
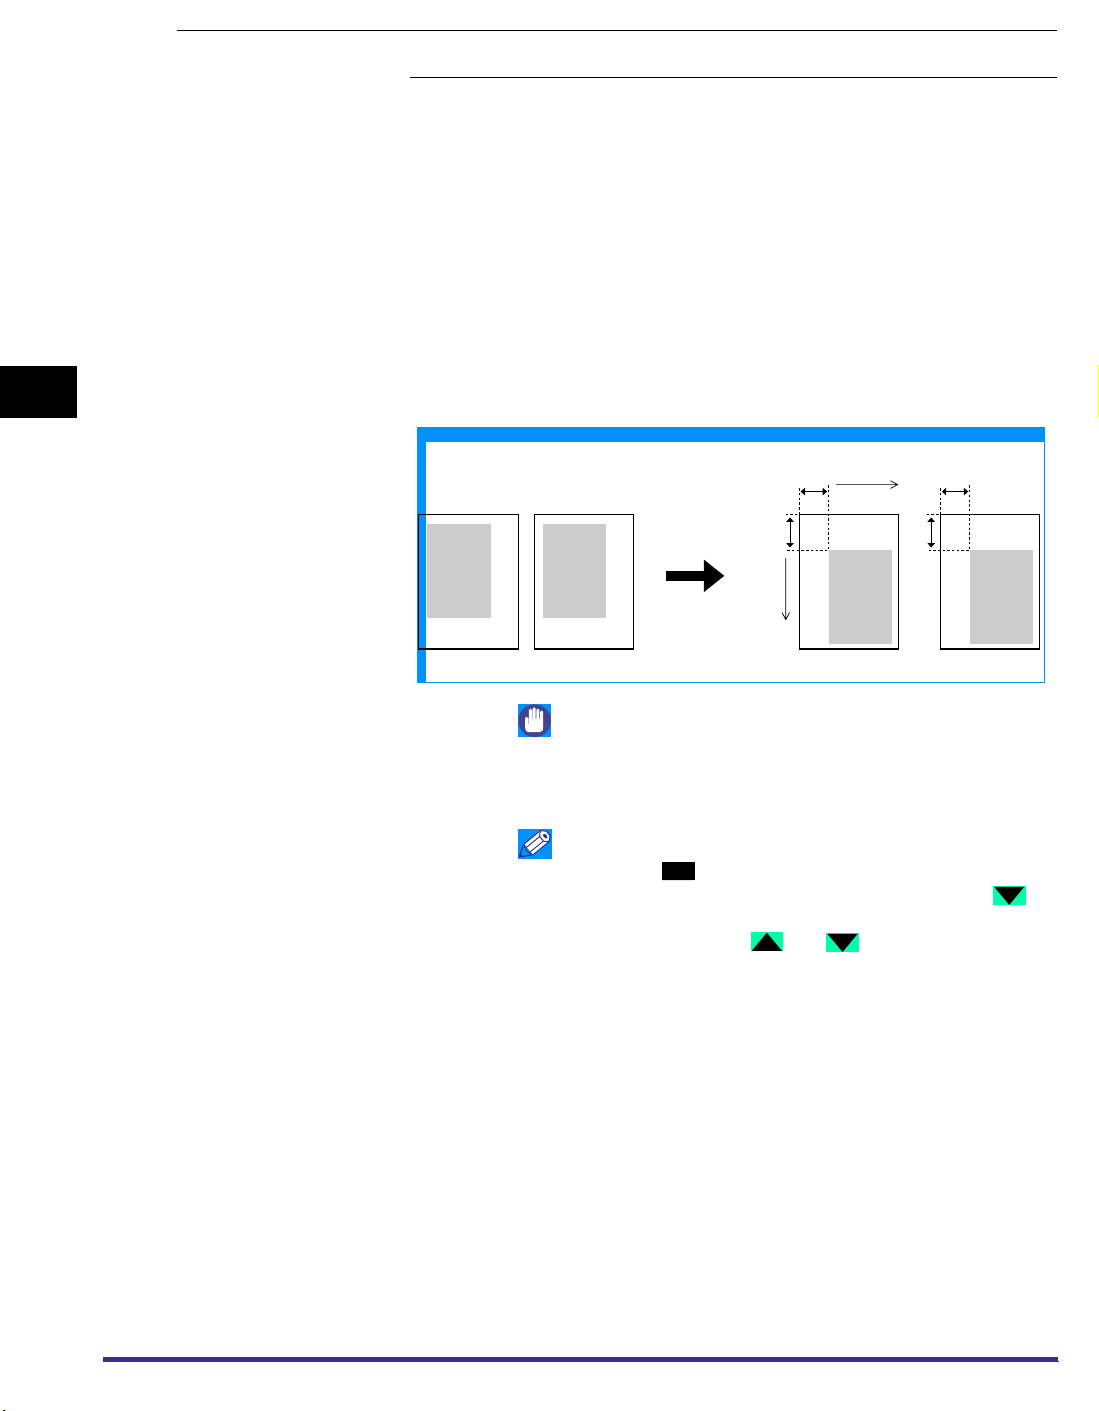
-50.0 - 0.0 - +50.0 mm (in increments of 0.5 mm)
This setting sets the offset position in mm. The settings can be set
between -50.0 mm (-2.00 inch) to +50.0 mm (+2.00 inch) in increments of
0.5 mm (0.01 inch).
The print position is adjusted in the vertical or horizontal direction only to
the value specified in the setting value.
You can increase or decrease the setting in increments of 0.5 mm (0.01
inch) to adjust the print position as described below.
Offset X: Increasing the setting value moves the image in the X
direction on the paper. Decreasing the setting value moves
the image in the X direction on the paper.
Offset Y: Increasing the setting value moves the image in the Y
direction on the paper. Decreasing the setting value moves
the image in the Y direction on the paper.
Area adjusted using
X-Adjustment
[+]
XX
Printer Settings Menu Functions and Operation
DEFABC
Adjust using
X/Y-Adjustment
Y
ABC
[+]
Y-Adjustment
Area adjusted using
Y
IMPORTANT
•
Please note that if the print position is adjusted to place
print data outside the valid print area, the portion outside
the valid print area will not be printed.
NOTE
•
Pressing [ ] increases the setting value by 0.5 mm
(0.01 inch) each time the key is pressed. Pressing [ ]
decreases the value by 0.5 mm (0.01 inch) each time.
Holding down either [ ] or [ ] continuously speeds
up the value alteration.
DEF
3-10
Settings Menu
Page 43

Auto Continue
On, Off
You can set whether or not this function is used automatically to
temporarily clear an error and continue printing (Error skip) when an error
occurs.
When [Off] has been selected, you must use the touch panel display to
perform an error skip.
When [On] has been selected, an error skip is performed automatically.
NOTE
•
To perform an error skip, press the [Print] key on the
System Monitor screen, select the job where the error has
occurred, then press [Details] and [Error Skip].
•
Error skip only temporarily clears an error, so there is the
possibility that the data may not be printed correctly.
•
For information on types of errors that can be temporarily
cleared with Auto Continue, see “You cannot stop the print
job,” on p. 5-5.
•
When Auto Continue has been set to [On], errors will be
automatically skipped (this is valid even if multiple errors
have occurred).
3
Job Securing Time
1 hour, 2 hours, 3 hours, 6 hours, 12 hours, 24 hours
When a secured print job is sent to the machine, it is stored on the
machine’s hard disk, and a password must be entered before the job can
be printed. This setting specifies how long the job will be stored before it is
automatically cancelled.
NOTE
•
Even if the time period specified with this setting has not
elapsed, the print job data will be deleted if the main
power to the machine is switched off.
•
The password is set from the printer driver.
Printer Settings Menu Functions and Operation
Settings Menu
3-11
Page 44

3
Timeout
Timeout (5 - 15 - 300 s), Off
When the machine is set to switch between printer modes, the machine
detects the control commands and starts printing in the appropriate mode.
After all the data has been received and the end of the data is detected,
the print mode stops. This processing of print data is called a job.
If the data for a job does not end, the machine will not start the next job
even if it receives other print commands. In cases like this, use the Timeout
setting to force jobs to finish if no data is received during the set period of
time.
When Timeout is On, if print data is still remaining in the machine because
of being unable to send a form feed command, the paper can be fed
automatically. When the set time is finished, the job will automatically be
finished.
When Timeout is Off, jobs will not end automatically.
IMPORTANT
•
When this function is set so that a job will timeout, the
machine may end a print job before all the data has been
received if it takes a long time for the PC to send the data.
If this occurs, adjust the length of the Timeout setting.
•
If [Off] is selected, you will not be able to make copies
until print jobs that use the staple sort, punch, and booklet
settings have been completed.
•
If this setting is set to more than 60 seconds, the machine
will cancel a job, due to a timeout, if it does not receive an
end-of-jo command causing the job not to print correctly.
•
This setting specifies the timeout setting for jobs received
from the parallel port interface. If [Off] is selected the
machine will not be able to receive print jobs from the
network until jobs received from the parallel port interface
have been completed.
Printer Settings Menu Functions and Operation
3-12
Print After
Completing RIP
Settings Menu
NOTE
•
When a job is being processed, the Processing/Data lamp
on the control panel lights.
On, Off
Sets whether to use the Print after completing RIP function or not.
If Print after completing RIP is selected, the first page is printed after all the
pages in the job have been processed.
Although it may take longer to print the first page, the remaining pages in
the job will be printed more quickly. This is useful when several people are
using the machine since the printing time for a print job is reduced, or
when using the other functions, such as the Copy function.
Page 45
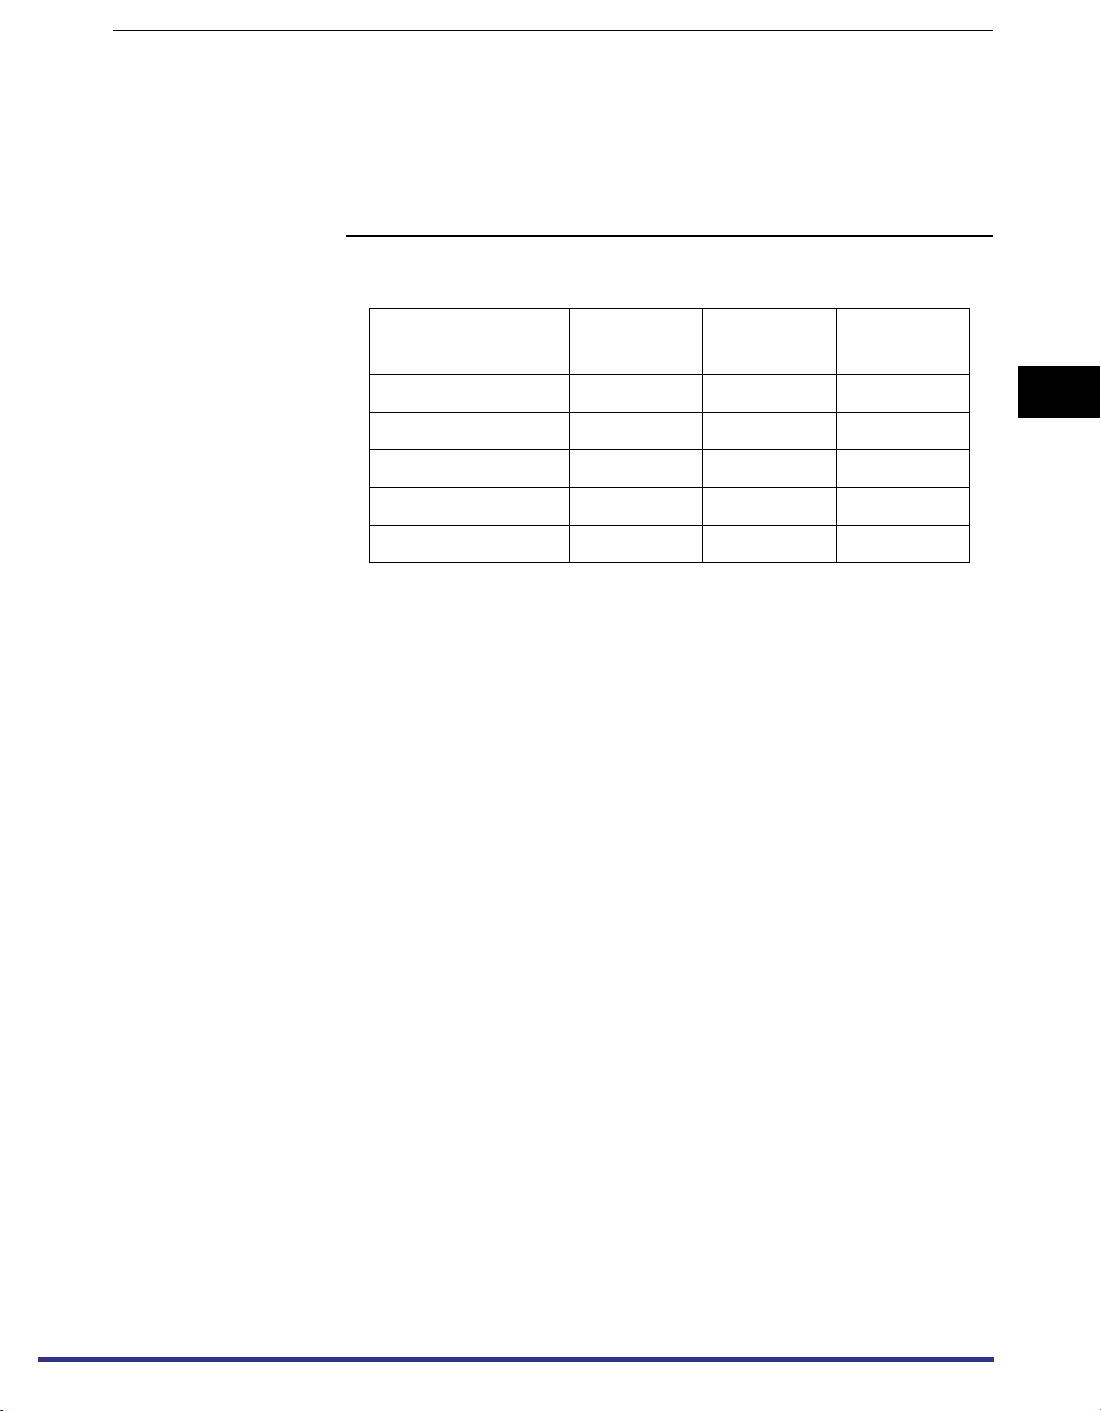
Finisher
None, Rotate Collating, Rotate Grouping,
Offset Collating, Offset Grouping, Staple Sort
Staple Position Corner (Upper-L), Double (Top)
Corner (Upper-R), Double (Right)
Corner (Lower-R), Double (Bottom)
Corner (Lower-L), Double (Left)
Some of the above options require specific delivery trays and may not be
available unless appropriate delivery trays are installed:
No options
Rotate Collating Yes Yes No
Rotate Grouping Yes Yes No
Offset Collating No Yes Yes
Offset Grouping No Yes Yes
Staple Sort No Yes Yes
You can choose from several features when collating printed matter.
None: This setting prints all copies of the same page before printing the
next page.
Rotate Collating: This setting prints all pages of each copy (collating), and
rotates every other complete copy90 degrees to indicate where each copy
starts.
Rotate Grouping: This setting prints all copies of the same page before
printing the next page. It rotates every other complete set of pages to
indicate where each new set starts.
Offset Collating: This setting prints all pages of each copy (collating), and
offsets every other complete copy to indicate where each copy starts.
Offset Grouping: This setting prints all copies of the same page before
printing the next page. It offsets every other complete set of pages to
indicate where each new set starts.
Staple Sort: This setting prints all pages of each copy (collating) and
prepares them for stapling according to the option selected for Staple Sort
(the following examples).
Saddle
Finisher-G1
Finisher-J1
3
Printer Settings Menu Functions and Operation
Settings Menu
3-13
Page 46
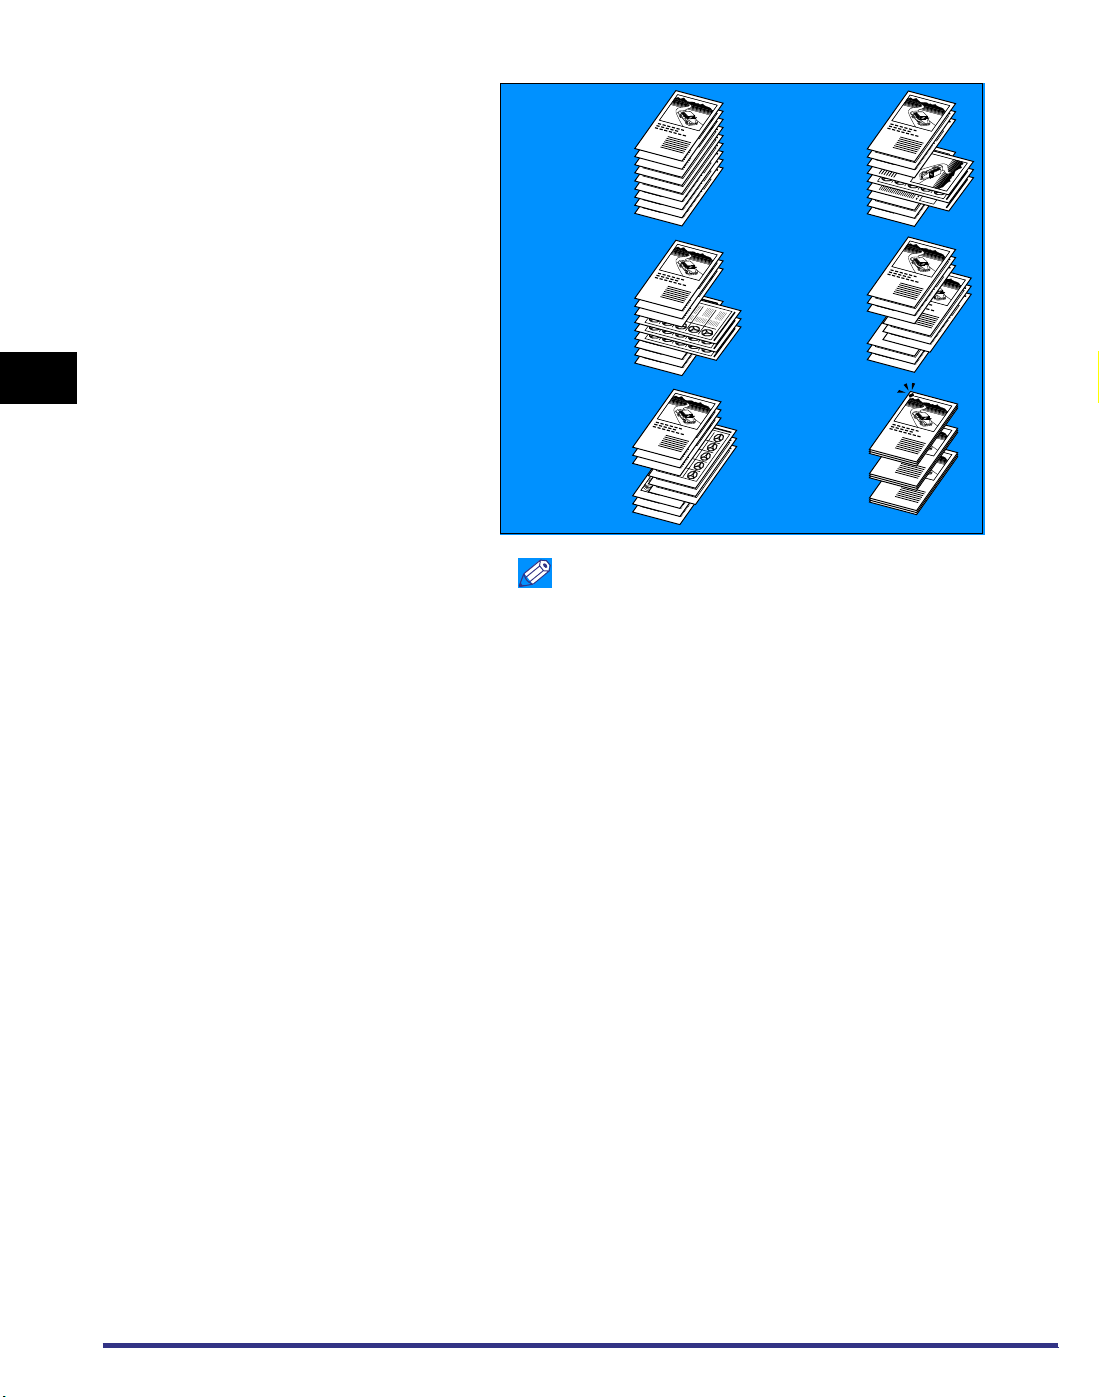
Examples of each Finisher option when printing three copies of a threepage document:
3
None
Rotate Grouping
Offset Grouping
NOTE
•
Rotate Collating and Rotate Grouping are available for
selection if the paper size is A5, A4, JIS-B5, Letter or
Statement, and if the printer has paper of the selected
size loaded in both orientations (e.g. A4 and A4R or Letter
and Letter-R).
•
When Rotate Collating or Rotate Grouping is selected,
part of the printer image may be cut off when the image is
rotated.
•
Offset Grouping and Offset Collating are available for
selection if the paper size is A3, B4, A4, A4R, JIS-B5,
B5R, A5, 11x17, Legal, Letter, Letter-R or Statement.
Rotate Collating
1
1
1
2
2
2
3
3
3
1
1
2
2
3
3
1
2
3
Offset Collating
1
2
1
2
1
2
3
3
3
1
2
3
1
2
3
1
2
3
Staple Sort
1
1
1
2
2
2
3
3
3
1
1
1
Printer Settings Menu Functions and Operation
3-14
Settings Menu
Page 47
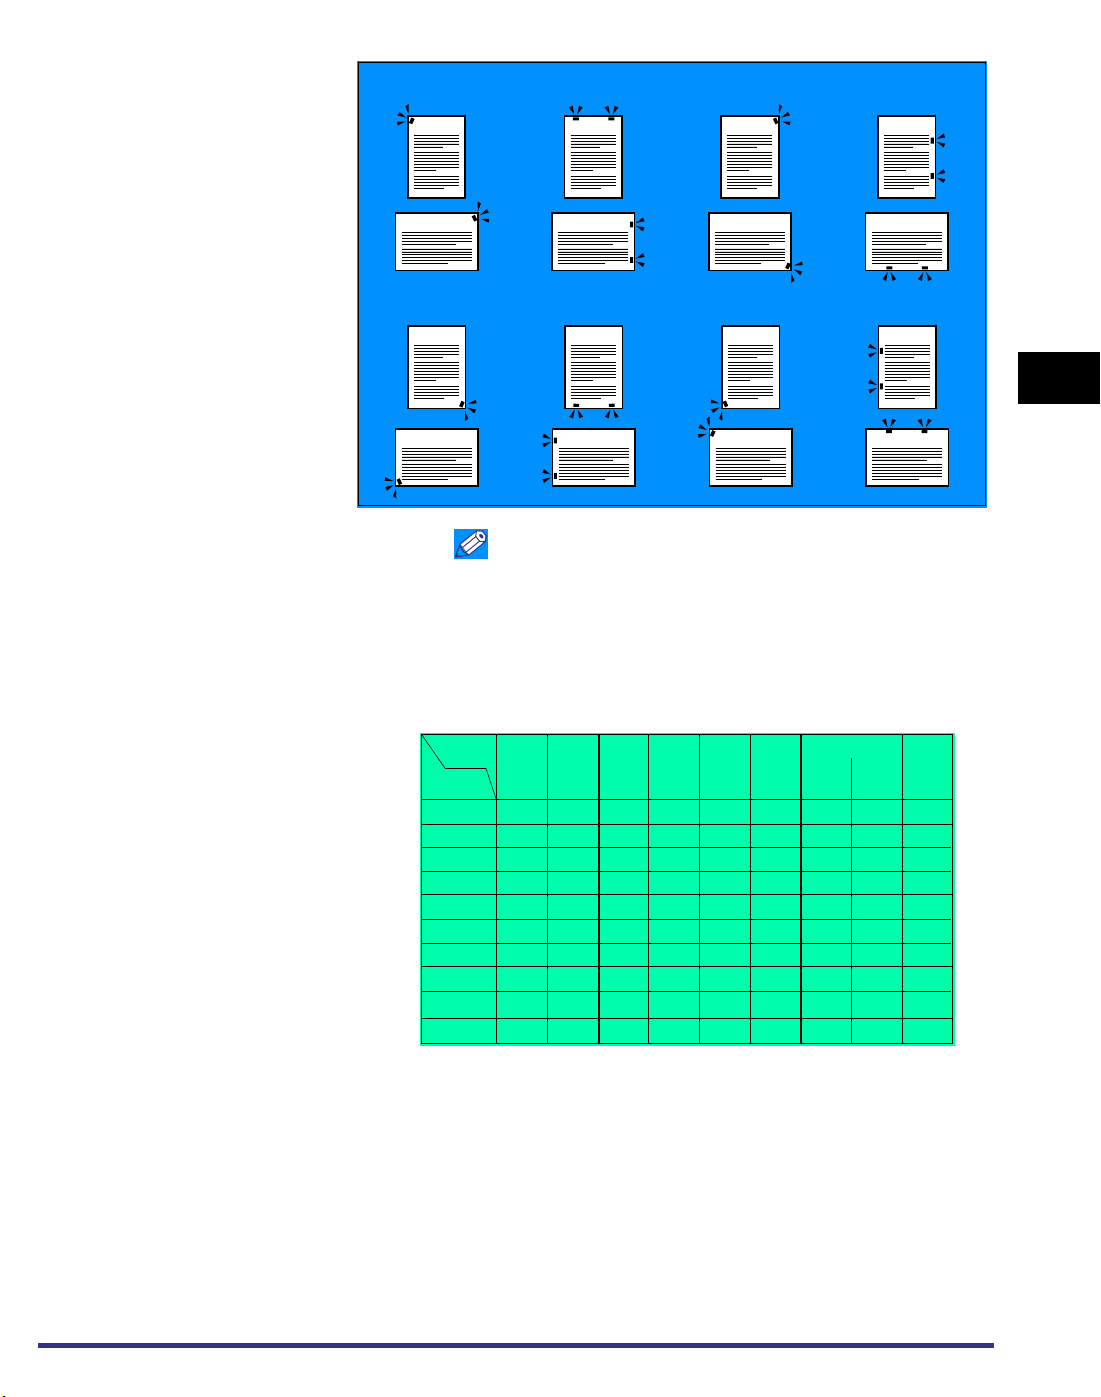
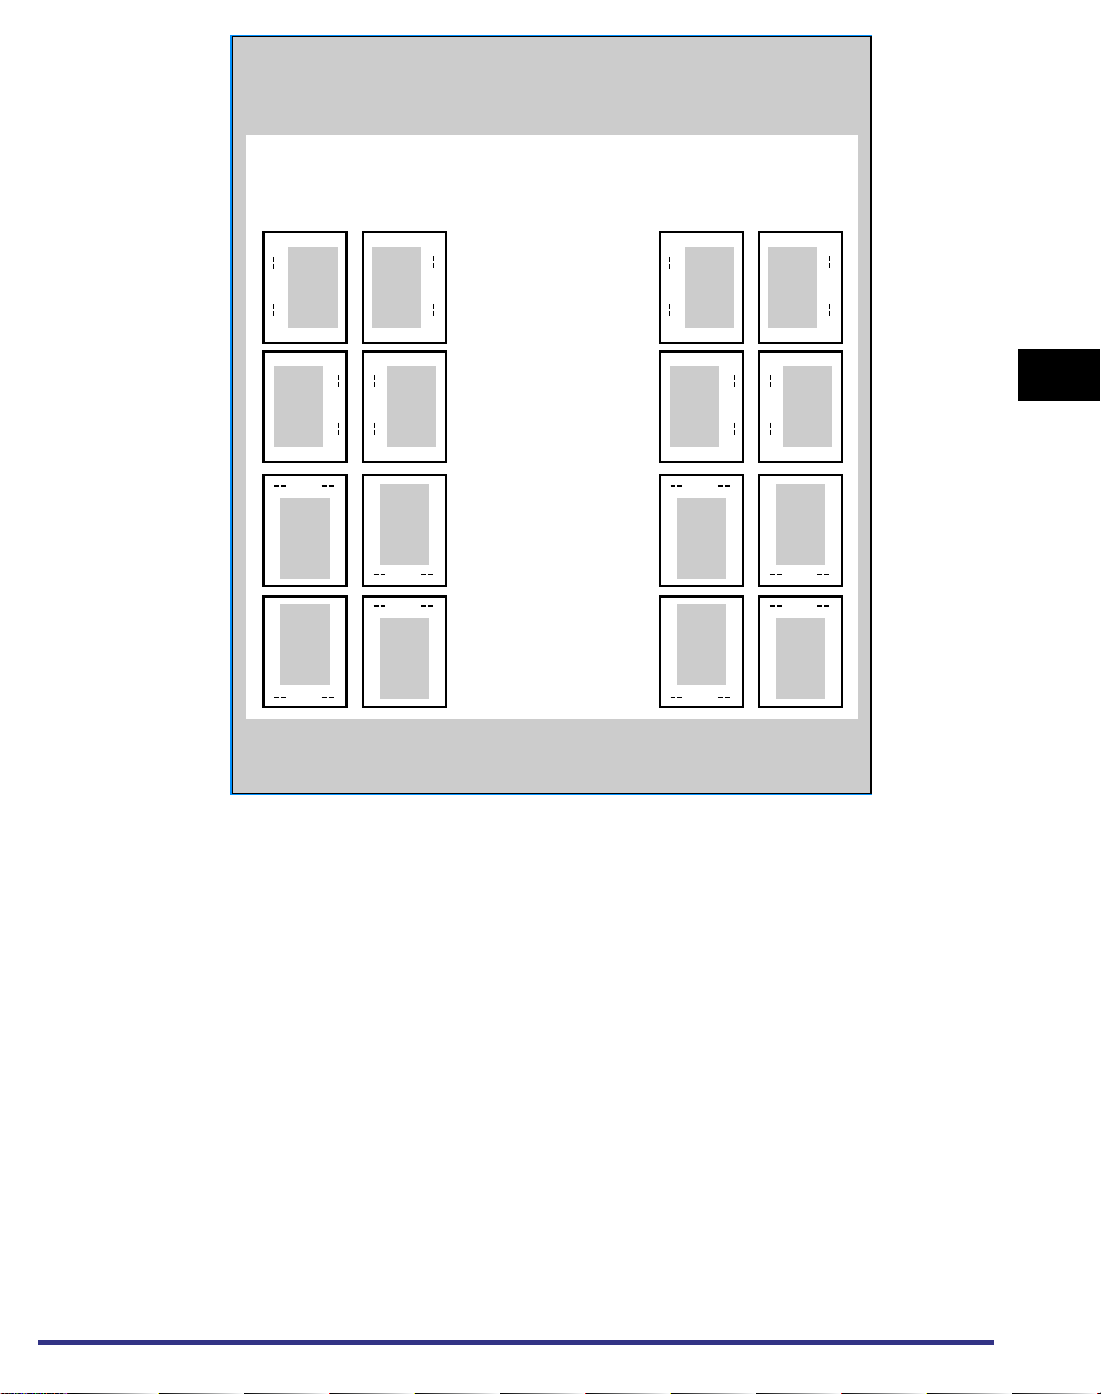
When you select [Staple Sort], you can select the stapling position.
Corner
(Upper-L)
ABC
ABC
Corner
(Lower-R)
ABC
ABC
Double
(Top)
ABC
ABC
Double
(Bottom)
ABC
ABC
Corner
(Upper-R)
ABC
ABC
Corner
(Lower-L)
ABC
ABC
NOTE
•
When stapling paper in landscape orientation, the image
orientation and the staple position may not match.
•
Staple Sort is available for selection if the paper size is
A3, B4, A4, A4R, JIS-B5, 11x17, Legal, Letter, Letter-R,
Statement or Executive. Available staple locations depend
on paper size and image orientation, as shown.
- Saddle Finisher-G1
Staple
Position
Corner
Double
(Upper-L)
Paper Size
x17
11
Legal
Letter Yes YesYes YesYes Yes YesYes
Letter-R Yes YesYes* YesYes Yes* NoNo
Executive Yes YesYes NoNo Yes YesYes 50
A3B4Yes
A4 Yes YesYes Yes NoYes Yes Yes
A4R Yes NoYes* YesYes Yes* NoNo
JIS-B5 No NoYes Yes NoNo Yes Yes
(Top)
Yes Yes
Yes
Yes
Yes
Yes
Yes
Double
Corner
(Upper-R)
Yes No
Yes
Yes
(Right)
No
No
Corner
(Lower-R)
(Bottom)
Yes Yes
Yes
Yes
Yes
Double
Yes
Yes
Corner
(Lower-L)
Yes
Yes No
Yes
Double
(Right)
Double
Double
(Left)
NoNoYesNoYes
NoNo
ABC
ABC
(Left)
ABC
ABC
Capacity
(Sheets)
3
25
25
50
50
Printer Settings Menu Functions and Operation
25
25
50
50
50
* Will be stapled parallel to the edge of the paper.
Settings Menu
3-15
Page 48

3
- Finisher-J1
Staple
Position
Paper Size
x17
11
LegalNoNo
Letter Yes YesNo No
Letter-R No NoYes* Yes*
Executive Yes YesNo No 30
A3
B4
A4 Yes YesNo No
A4R No NoYes* Yes*
JIS-B5 Yes YesNo No
Corner
(Upper-L)
No
No
Corner
(Upper-R)
Yes
Yes
Yes
Corner
(Lower-R)
No
No
No
No
Corner
(Lower-L)
Yes
YesYes
Yes
Yes
NOTE
•
The maximum number of sheets that can be stapled is 15
for A3 and 11x17, 20 for B4 and Legal, 30 for A4, A4R,
JIS-B5, Letter, Letter-R and Executive. If the number of
sheets is greater than this, they will not be stapled.
•
Make sure to select compatible settings when using
Staple Sort and Punch simultaneously. If conflicting
settings are selected, such as the staple setting for the
right side of the paper and the punch setting for the left,
the printer will use neither Staple Sort nor Punch.
Capacity
(Sheets)
15
20
30
30
15
20
30
30
30
Printer Settings Menu Functions and Operation
Punch
None, Top, Bottom, Left, Right
This setting enables you to specify the desired paper edge for holes to be
punched for binding (two or four holes).
NOTE
•
This function can only be selected if a Saddle Finisher-G1
is installed with a Puncher Unit-G1, a Puncher Unit-J1 or
a Puncher Unit-H1.
•
Acceptable paper sizes for this option are A3, B4, A4, JISB5, 11x17, Legal, Letter or Executive.
•
Make sure to select compatible settings when using
Staple Sort and Punch simultaneously. If conflicting
settings are selected, such as the staple setting for the
right side of the paper and the punch setting for the left,
the printer will use neither Staple Sort nor Punch.
3-16
Settings Menu
Page 49
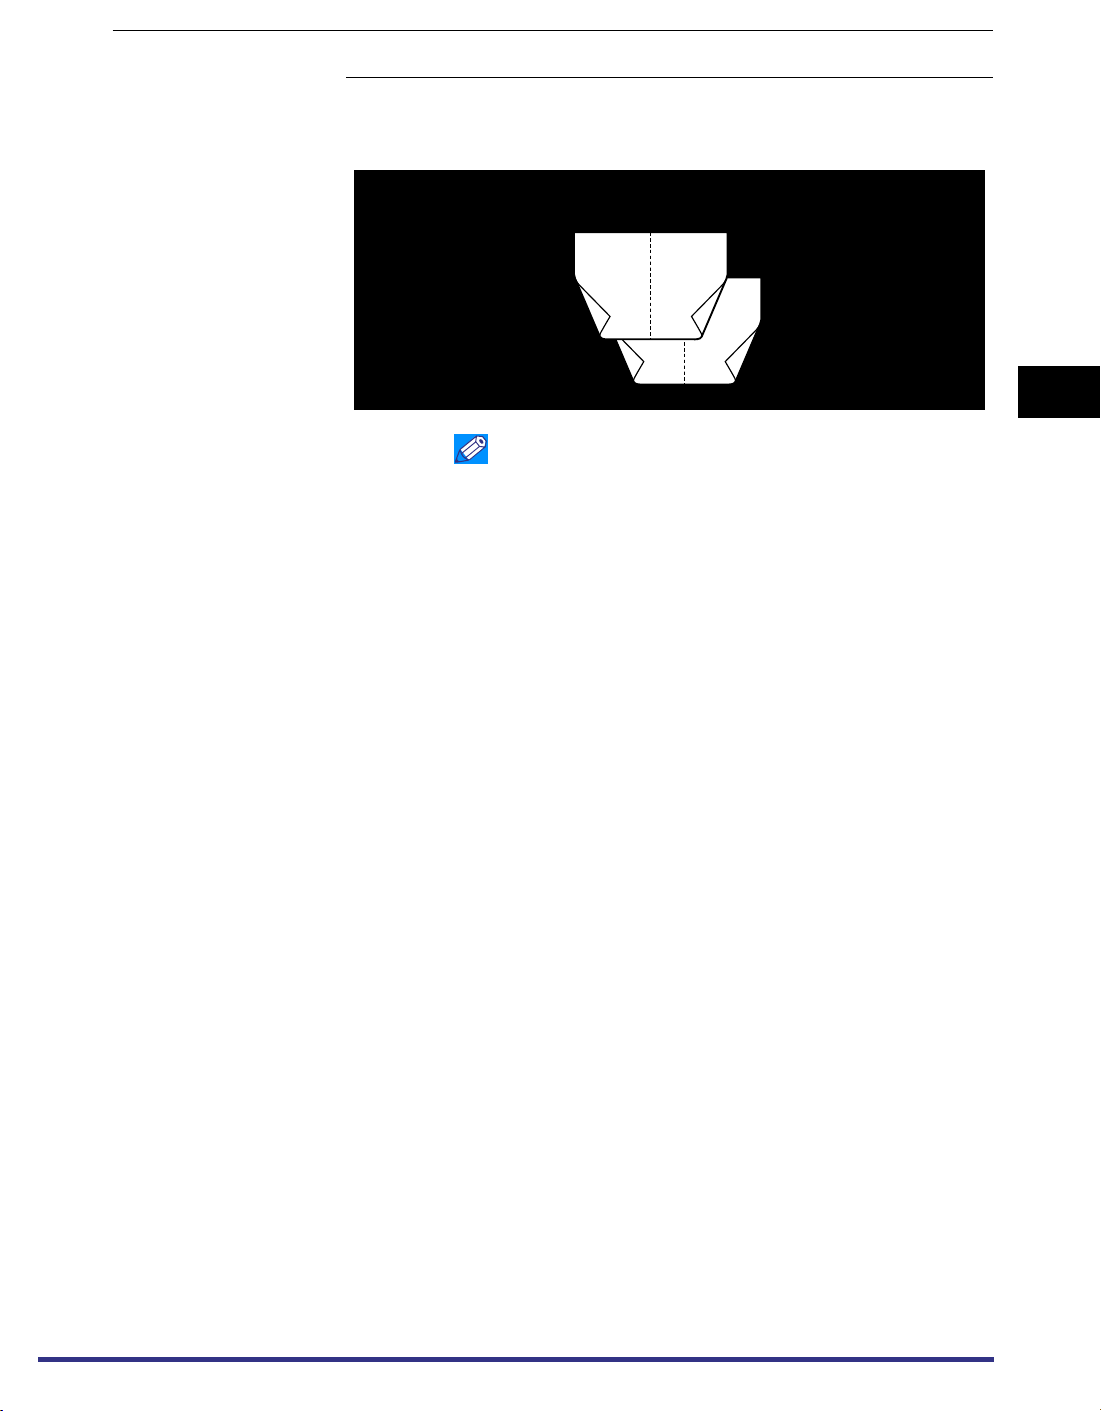
Booklet
On, Off
Enables you to prepare the printout for binding as a booklet. Unlike a book,
pages in a booklet are bound on the same side. If [On] is selected, the
pages are bound on the left side.
On
7
8
5
2
1
6
4
3
NOTE
•
This function is available for selection if the image page
size is B4, A4, A5, Letter-R or Statement. A4 pages are
printed on A3 paper, and A5 pages on A4R paper, LetterR pages on 11x17 paper, and Statement pages on Letter
paper.
•
If the pages are not all the same size, this function will not
work.
3
Settings Menu
Printer Settings Menu Functions and Operation
3-17
Page 50
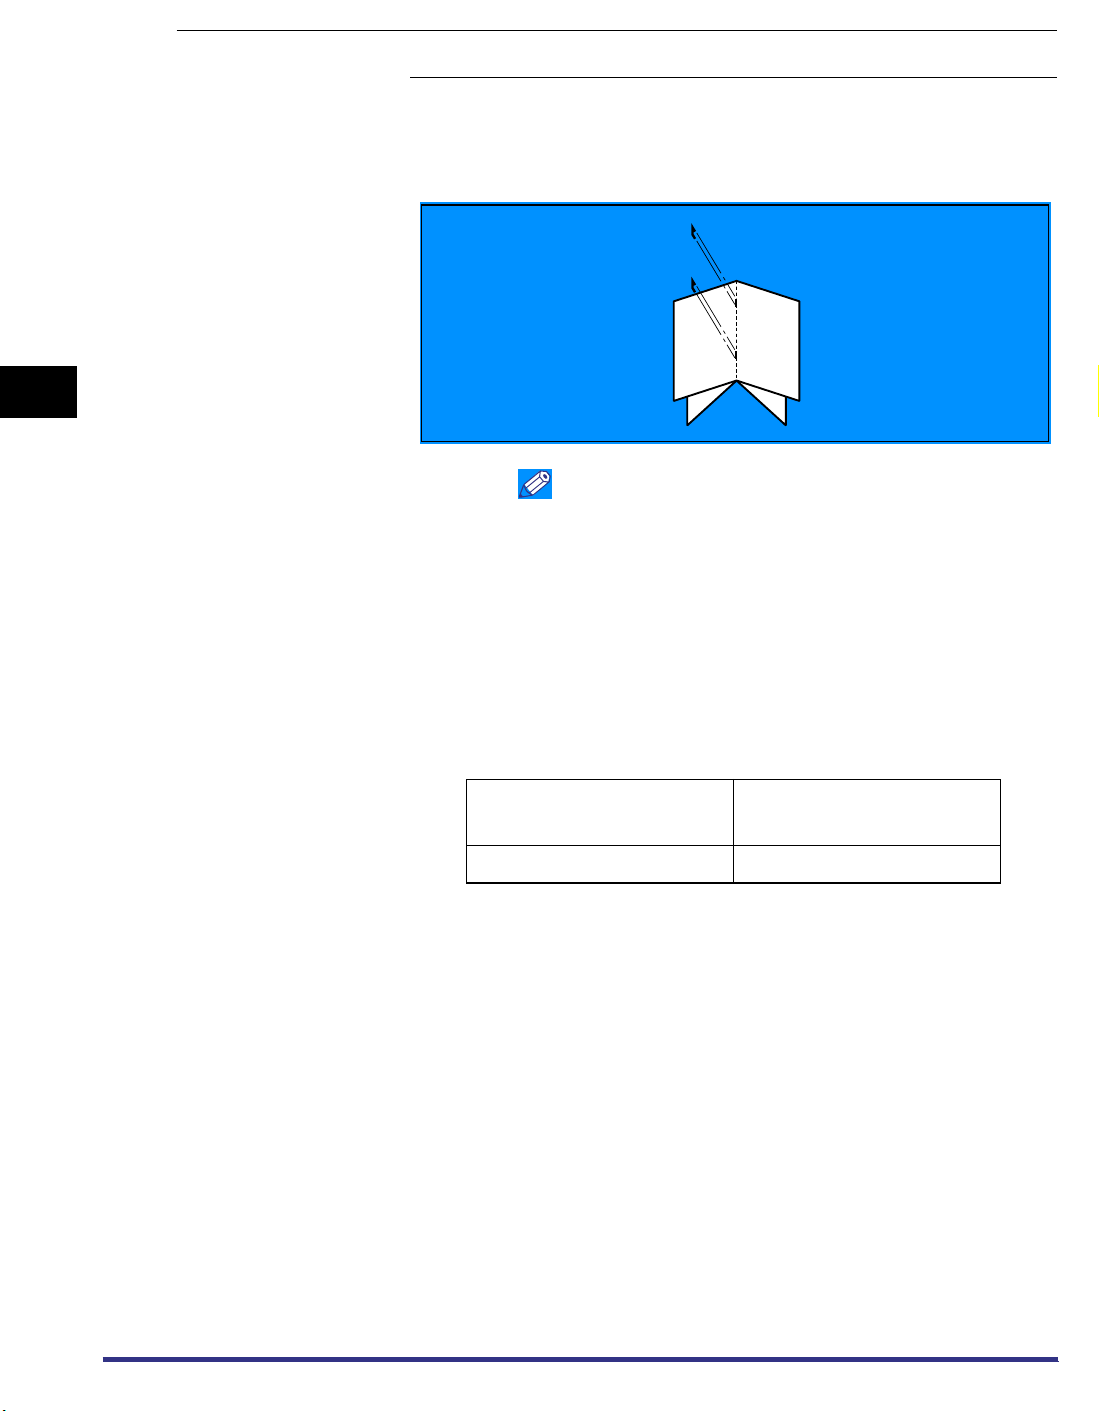
Saddle Stitch
On, Off
Saddle Stitch enables the machine to bind a finished print job by stapling
and folding the pages of a booklet in the center. The Saddle Stitch function
is valid only when booklet print is selected. This can be selected
independently from the driver.
3
Printer Settings Menu Functions and Operation
8
NOTE
•
Saddle Stitch can only be performed if the Saddle
Finisher-G1 is installed.
•
Saddle Stitch is not available if [Off] has been selected for
[Booklet].
•
If the print job contains only one sheet of paper, the paper
will be folded but not stapled.
•
The maximum number of sheets that can be saddle
stitched is 10. If the number of sheets is greater than this,
they will not be saddle stitched.
•
The number of copies of a saddle stitched booklet that
can be made at one time is limited as shown below:
Number of sheets in
each booklet
1 - 10 10
1
6
3
Max. number of copies
that can be printed
3-18
Settings Menu
Page 51
Transparency Interleaving
None, Blank, Printed
When printing on transparencies you can use this setting to output a sheet
of paper after each transparency. The paper can be blank, or it can be a
paper copy of the transparency.
If [None] is selected, no sheets are interleaved with the transparencies.
If [Blank] is selected, a blank sheet of paper is inserted between each
transparency.
If [Printed] is selected, a printed paper from the print job is inserted
between each transparency.
IMPORTANT
•
The transparencies should be fed from the Stack Bypass
tray. The paper will be fed from a paper drawer.
NOTE
•
If [Printed] is selected, the paper printouts are included in
the [Copies] count.
3
Personality
Initialize
Auto, PS, PCL
This selection enables the machine to process data received from the host
computer in the specified data format. Setting the Personality to Auto
causes the machine to determine the type of data received from the host
on a job-by-job basis. When printing from applications on a computer, we
recommended that you use the Auto setting.
NOTE
•
If you find that the printer does not correctly switch to the
appropriate personality when Personality is set to Auto,
change the setting manually to match the data you are
sending from the host computer.
The menu settings can be reset to the factory defaults by initializing the
printer settings.
When you select [Initialize], the confirmation message “Is it OK to initialize
the settings?” is displayed. If you select [Yes], the settings are initialized. If
you select [No], the settings are not initialized.
IMPORTANT
•
Do not turn off the printer while the settings are being
initialized, as this may damage the machine’s memory.
Printer Settings Menu Functions and Operation
Settings Menu
3-19
Page 52
3
PCL/PS Settings
This section explains the different menu settings available for PCL and PS,
respectively.
PCL
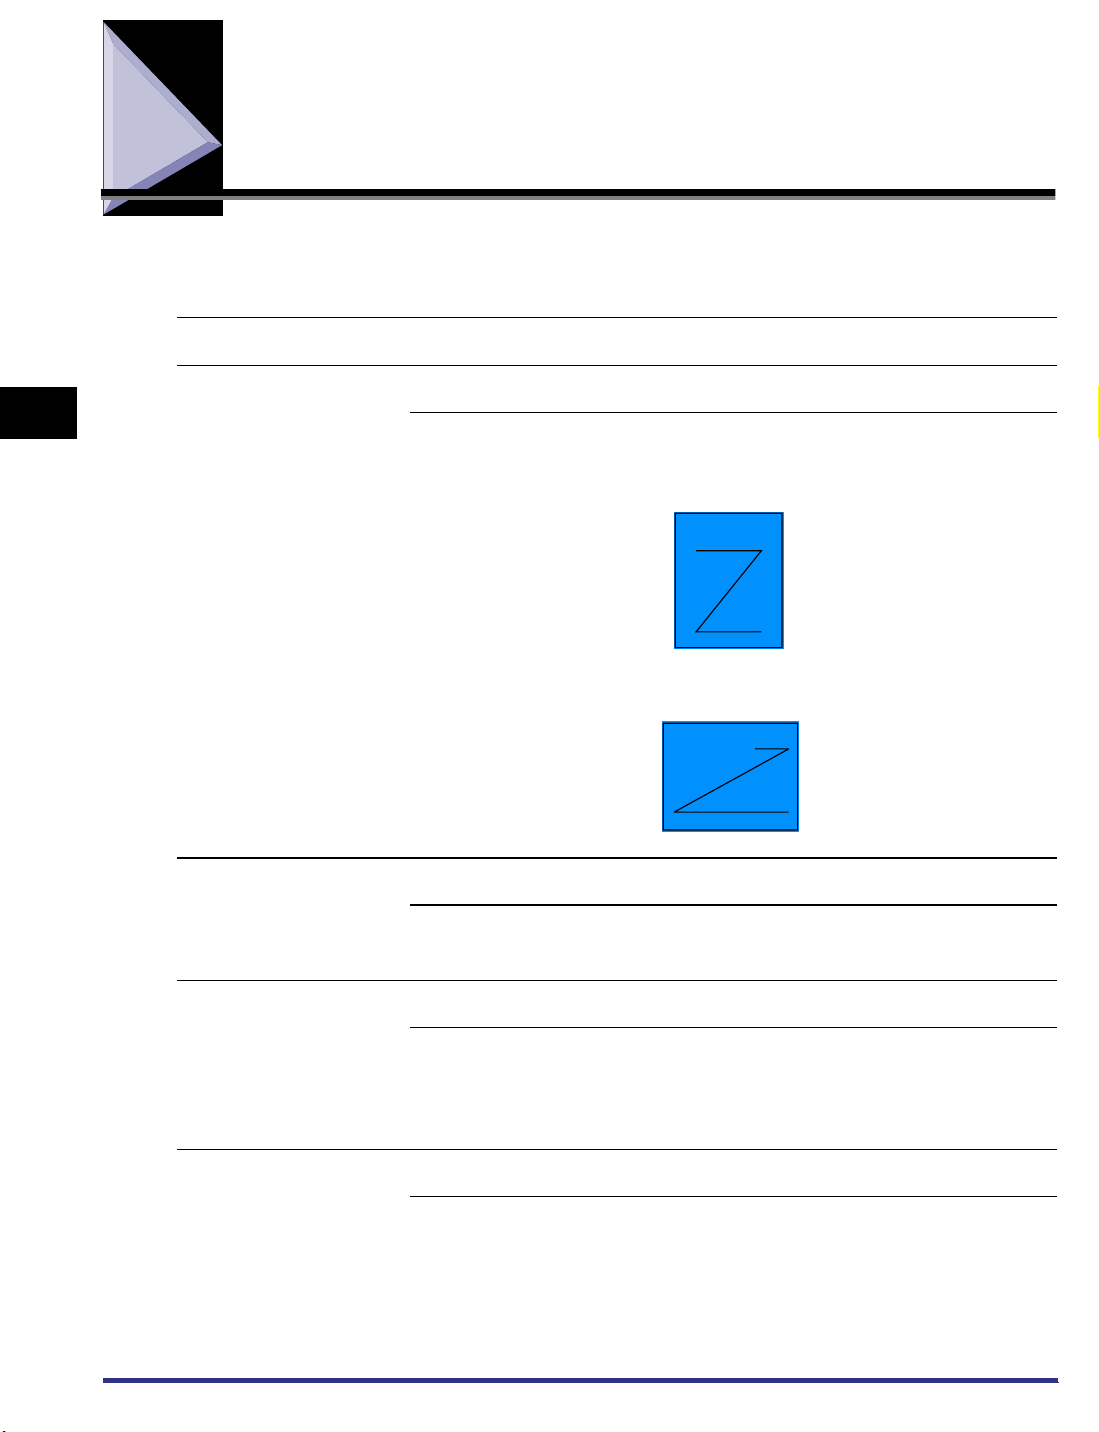
Orientation Portrait, Landscape
Enables you to set the paper orientation.
If [Portrait] is selected, the print image is printed in portrait orientation
regardless of the orientation of the paper in the paper drawers.
A B C D E
If [Landscape] is selected, the print image is printed in landscape
orientation regardless of the orientation of the paper in the paper drawers.
Printer Settings Menu Functions and Operation
A B C D E
Font Number 0 - 120
You can set the default font typeface for this printer function using the
corresponding font numbers. Valid font numbers are from 0 to 120.
Point Size 4.00 - 12.00 - 999.75 point (in increments of 0.25 point)
When the number selected in Font Number is that of a proportionally
spaced scalable font, this option appears in the PCL menu. It enables you
to specify a point size for the default font. The point size can be adjusted in
increments of 0.25 pts.
Pitch 0.44 - 10.00 - 99.99 cpi (in increments of 0.01 cpi)
When the number selected in Font Number is that of a fixed pitch scalable
font, Pitch appears in the PCL menu. It enables you to specify the pitch for
the default font. The pitch can be adjusted in increments of 0.01 cpi.
3-20
PCL/PS Settings
Page 53

Form Lines 5 - 64 - 128 lines
Enables you to specify the number of lines to be printed on a page. You
can specify from 5 to 128 lines.
Symbol Set DESKTOP, ISO4, ISO6, ISO11, ISO15, ISO17, ISO21,
ISO60, ISO69, ISOL1, ISOL2, ISOL5, ISOL6, LEGAL,
MATH8, MCTEXT, MSPUBL, PC775, PC8, PC850, PC852,
PC8DN, PC8TK, PC1004, PIFONT, PSMATH, PSTEXT,
ROMAN8, VNINTL, VNMATH, VNUS, WIN30, WINBALT,
WINL1, WINL2, WINL5
Enables you to select the symbol set most suited to the needs of the host
computer.
Custom Paper On, Off
This setting enables you to specify a custom paper size. When [On] is
selected, you can enter a custom size using the following settings.
NOTE
•
You can only select the custom paper size entered with
these settings from the printer driver.
Unit of Measure Millimeters, inches
Enables you to specify the unit of measurement you would like to use to
specify your custom paper size.
NOTE
•
This function is not available if the Custom Paper option is
set to [Off.]
X Dimension 138 - 432 mm
Enables you to specify the X dimension of the custom paper. The X
dimension can be adjusted in increments of 1 mm.
This function can be very useful when part of the printed image is cut off.
By increasing the dimension some of the missing text may be correctly
printed. Make sure you do not increase the X dimension beyond the actual
size of the paper you are using for printing.
3
Printer Settings Menu Functions and Operation
NOTE
•
This function is not available if the Custom Paper option is
set to [Off].
PCL/PS Settings
3-21
Page 54

3
Y Dimension 100 - 297 mm
Enables you to specify the Y dimension of the custom paper. The Y
dimension can be adjusted in increments of 1 mm.
This function can be very useful when part of the printed image is cut off.
By increasing the dimension some of the missing text may be correctly
printed. Make sure you do not increase the X dimension beyond the actual
size of the paper you are using for printing.
Append CR to LF Yes, No
This option allows the user to append the required carriage return to each
line feed.
Select Yes to append a carriage return to each line feed encountered in
backward-compatible PCL jobs (pure text, no job control).
PS (Printer Kit-C1 Only)
Job Timeout 0 - 3600 s
Enables you to specify the amount of time before a job times out. If data
has not finished within the set time limit, the job automatically cancels.
NOTE
•
This function is not available if the Custom Paper option is
set to Off.
Printer Settings Menu Functions and Operation
Wait Timeout 0 - 300 - 3600 s
Enables you to specify the amount of time a job will wait for data before it
times out. If data is not received within the set time limit, the job
automatically cancels.
Print PS Errors On, Off
This setting determines whether an error page is printed when an error is
encountered.
3-22
PCL/PS Settings
Page 55

Utility Menu
This section explains the Utility Menu function.
Reset Printer
If, for whatever reason, you want to clear all print jobs in progress as well
as data that has been received in the memory, you must reset the printer
function. Resetting deletes print jobs in the machine’s memory and print
data that have been received by all interfaces.
NOTE
•
If the machine is being used on a network, please note
that resetting the printer function may affect data being
received from other users.
•
When you reset the printer function, data for print jobs
that have already been received, or are received while the
printer function is being reset, may be deleted. However,
in some cases the data is not deleted from the machine’s
memory. Even if the data has not been deleted, the print
job may not print correctly. Canon recommends that you
delete the data and print the job again.
3
Utility Menu
Printer Settings Menu Functions and Operation
3-23
Page 56

3
Printer Settings Menu Functions and Operation
3-24
Utility Menu
Page 57

CHAPTER
4-1
4
Report Settings Menu
This chapter describes how to use the Report Settings Menu to check the configuration of the
print function or print a font list.
PCL Menu . . . . . . . . . . . . . . . . . . . . . . . . . . . . . . . . . . . . . . . . . . . . . . . . . . . . . . . . . . . .4-2
PS Menu (Printer Kit-C1 Only) . . . . . . . . . . . . . . . . . . . . . . . . . . . . . . . . . . . . . . . . . . . . . 4-3
Page 58

4
PCL Menu
This section explains the report functions available for PCL.
Configuration
Page
Details of RAM capacity, settings in the printer’s menus, etc. are printed.
When you select Configuration Page, the confirmation message “Print
configuration page?” is displayed. If you select [Yes], the configuration
page will be printed, and if you select [No], it will not be printed.
Font List
ID numbers, names and samples of fonts held by the printer will be printed.
When you select Font List, the confirmation message “Print font list?” is
displayed. If you select [Yes], the font list will be printed, and if you select
[No], it will not be printed.
Report Settings Menu
4-2
PCL Menu
Page 59

PS Menu (Printer Kit-C1 Only)
This section explains the report functions available for PS.
Configuration
Page
Details of RAM capacity, settings in the printer’s menus, etc. are printed.
When you select Configuration Page, the confirmation message “Print
configuration page?” is displayed. If you select [Yes], the configuration
page will be printed, and if you select [No], it will not be printed.
Font List
4
ID numbers, names and samples of fonts held by the printer will be printed.
When you select Font List, the confirmation message “Print font list?” is
displayed. If you select [Yes], the font list will be printed, and if you select
[No], it will not be printed.
Report Settings Menu
PS Menu (Printer Kit-C1 Only)
4-3
Page 60

4
Report Settings Menu
4-4
PS Menu (Printer Kit-C1 Only)
Page 61

CHAPTER
5-1
5
Troubleshooting
This chapter explains how to solve printing problems and the steps to take if printing fails.
Responding to Error Messages . . . . . . . . . . . . . . . . . . . . . . . . . . . . . . . . . . . . . . . . . . . . 5-2
Resetting the Machine After a Service Call Message . . . . . . . . . . . . . . . . . . . . . . . . . . . . . . . . .5-2
When a Message Is Displayed . . . . . . . . . . . . . . . . . . . . . . . . . . . . . . . . . . . . . . . . . . . . 5-3
Printing Problems . . . . . . . . . . . . . . . . . . . . . . . . . . . . . . . . . . . . . . . . . . . . . . . . . . . . . .5-5
Printer Trouble . . . . . . . . . . . . . . . . . . . . . . . . . . . . . . . . . . . . . . . . . . . . . . . . . . . . . . . . . . . . . . .5-5
Printing Problems . . . . . . . . . . . . . . . . . . . . . . . . . . . . . . . . . . . . . . . . . . . . . . . . . . . . . . . . . . . .5-6
Print Quality Problems . . . . . . . . . . . . . . . . . . . . . . . . . . . . . . . . . . . . . . . . . . . . . . . . . . . . . . . . .5-8
Page 62
5
Responding to Error Messages
When the status indicator is orange, printing is not possible. If this happens during
printing, the print operation stops. Read the displayed error message to determine
the appropriate actions necessary to correct the problem.
This section describes how to handle error messages that appear on the touch
panel display. The two types of error messages are:
• Service Call Messages
• Error Messages
NOTE
•
Other messages that may appear indicate the current condition of the machine.
Resetting the Machine After a Service Call Message
If a Service Call message occurs (Exxx-xxxx, where x represents a number), use
the following procedure to clear the message.
Troubleshooting
1
Press .
2
Press [Printer Settings].
When a Service Call error occurs, the normal Printer Settings screen does not
appear and only the Reset Printer screen appears.
3
Press [Reset Printer].
IMPORTANT
•
If the Service Call error message still appears after you have performed this procedure,
make a note of the number of the message and contact a service representative. When
you contact the service representative, tell them the number of the message and the
conditions under which the error occurs.
Additional Functions
5-2
Responding to Error Messages
Page 63

When a Message Is Displayed
If the printer is unable to print for some reason, the error indicator lights up and a
message indicating the cause of the problem is displayed on the touch panel
display. When these messages are displayed, take the following action to solve the
problem.
NOTE
•
When a message indicating another problem occurs at the same time as the first error
message, a warning message will not be displayed.
•
When the message is shown with the "Error Skip" mark, you can bypass the error and
continue printing by pressing [Error skip]. However if you do this, print data may be lost or
the data may not be printed correctly. If you want to cancel the procedure, cancel the
print job to remove the cause of the problem, and print the data again.
•
To perform an error skip, press [Print] on the System Monitor screen, select the job
containing the error, then press [Details] and [Error Skip].
•
To cancel a print job, press [Print] on the System Monitor screen, select the job
containing the error, then press [Cancel]. (See "Cancelling a Job," in the
.)
Guide
5
Reference
PDL Offending Command
Cause
Solution
The printer was unable to understand a print command it received.
Try resending the PS job. If the problem persists, verify the PS options in the
application and print again.
E677-5801 PDL Accelerator Service Call
Cause
Solution
An internal error has occurred for the printer function.
Perform a printer reset to try to initialize the function again. If this error persists, contact
a service representative.
E677-5802 PDL Initialize Error Service Call
Cause
Solution
An error occurred during the initialization of the printer function.
Perform a printer reset to try to initialize the function again. If this error persists, contact
a service representative.
Troubleshooting
When a Message Is Displayed
5-3
Page 64

E677-5800 PDL Service Call Service Call
5
Cause
Solution
An internal error has occurred.
Perform a printer reset to try to initialize the function again. If this error persists, contact
a service representative.
PDL RIP Initialize Error Error Skip
Cause
Solution
An error occurred during printer initialization, and the initialization could not be
performed correctly.
Try to initialize again. If the error still occurs, perform a reset and try to initialize again. If
the problem still persists, contact a service representative. You must perform a Error
Skip manually to skip this error.
PDL Memory Over Error Skip*
Cause
Solution
The machine’s memory is full and printing can not proceed.
Change the mode setting in the printer driver and try printing again. Or reduce the
complexity of the print job by reducing the number of fonts or macros that need to be
downloaded to the machine.
* : If Auto Continue is selected, this error is skipped automatically.
Troubleshooting
PDL HD Error Error Skip
PDL Warning
Cause
Solution
Cause
Solution
The printer has reported a hard disk error.
Perform a reset and try printing again. If the problem persists, contact a service
representative. You must perform a Error Skip manually to skip this error.
An internal error has occurred for the printer function.
Perform a printer reset to try to initialize the function again. If this error persists, contact
a service representative.
5-4
When a Message Is Displayed
Page 65
Printing Problems
If you have trouble printing, we recommend dealing with the problems in the
following ways.
NOTE
•
Please contact your Canon service representative if a problem persists, or if you
encounter problems not listed below.
Printer Trouble
The printer does not work
Cause 1
Solution
Reference
Cause 2
Solution
Reference
There is data remaining in the printer’s memory (The Processing/Data lamp is flashing
or lit.)
Print out the data.
See “Operating Print Jobs Sent from a Computer,” in the
There is a problem with the printer or the software.
Look at the message on the display and act accordingly.
See “When a Message Is Displayed,” on p. 5-3.
Printing stops before the job is complete
Cause
Solution
Reference
There is data remaining in the printer’s memory (The Processing/Data lamp is flashing
or lit.)
Print out the data.
See “Operating Print Jobs Sent from a Computer,” in the
You cannot stop the print job
Cause
The print job is too large to be stopped.
5
Reference Guide.
Troubleshooting
Reference Guide.
Solution
Restart any jobs that have been suspended by performing an error skip.
Printing Problems
5-5
Page 66
Printing Problems
Meaningless characters are being printed
5
Troubleshooting
Cause 1
Solution
Reference
Cause 2
Solution
Reference
You have printed from Windows without installing the printer driver for Windows that
was included with the printer.
Install the printer driver for Windows that was included with the printer and print the
data again.
See the
DOS application software printer settings are inadequate.
Reset the DOS application software printer settings on a printer that is compatible with
the machine.
See the
PCL Driver Guide and the PS Driver Guide.
PCL Driver Guide and the PS Driver Guide.
A font that is different to the one specified is printed
Cause
Solution
Reference
The “Replace with TrueType font” setting has been set on the printer driver for
Windows.
Set the “Replace with TrueType font” setting to the correct setting and print the data
again.
See the Help function on the printer driver.
You cannot print the last page
5-6
Cause
Solution
Reference
Printing Problems
The command that identifies the end of the data has not been sent from the PC (The
Processing/Data lamp is flashing or lit.).
Clear the print data. (When you print from application software that does not have a
print function and the last page of data is less than one page, the data will remain in the
printer’s memory.)
See “Operating Print Jobs Sent from a Computer,” in the
Reference Guide.
Page 67
The data does not fit on the page properly (All of the data that should be on the
page is not printed)
Cause 1
Solution
Reference
Cause 2
Solution
Reference
The paper is not in the correct position.
Make sure the printer’s set correctly and try printing again.
See “Loading Paper,” in the
A full page of data, without a border, was printed.
Insert a border greater than 5 mm (3/16 in.) around the data and print the data again.
(Data cannot be printed in a border area of 5 mm (3/16 in.) around the data.)
See the application software manual.
The printing location has slipped
Cause 1
Solution
Reference
Cause 2
Solution
Reference
Margin, Offset X or Offset Y in the printer settings menu have been changed.
Set Margin, Offset X and Offset Y to 0.0 and print the data again.
See “Margin,” on p. 3-8.
See “Offset X,” and “Offset Y,” on p. 3-10.
The application software’s top margin and paper location settings are not correct.
Set the correct settings for the top margin and the paper location and print the data
again.
See the application software manual.
Reference Guide.
5
Troubleshooting
Data that should be printed on the same page is printed on two separate pages
Cause 1
Solution
Reference
Cause 2
Solution
Reference
The application software’s “Line spacing” and “Number of lines on a page” settings are
not correct.
Change the settings so that the data fits on one page and print the data again.
See the application software manual.
The Timeout setting is too short, when the Personality setting is set to Auto.
Change the Personality setting to a setting other than Auto, or the increase the Timeout
setting.
See “Personality,” on p. 3-19.
See “Timeout,” on p. 3-12.
Printing Problems
5-7
Page 68

Print Quality Problems
The printout is too light or too dark
5
Troubleshooting
Cause 1
Solution
Reference
Cause 2
Solution
Reference
The toner density settings are not correct.
Adjust Density in the printer settings menu.
See “Density,” on p. 3-6.
Toner Save in the printer settings menu is set to [On].
Toner Save Mode to [Off].
See “Toner Save,” on p. 3-6
5-8
Printing Problems
Page 69

CHAPTER
6-1
6
Appendix
This chapter shows print samples for different fonts, describes font information, including
sources and font lists, and lists a summary of the specifications for the machine.
Some Basic Facts About Fonts . . . . . . . . . . . . . . . . . . . . . . . . . . . . . . . . . . . . . . . . . . . . 6-2
What Is a Font? . . . . . . . . . . . . . . . . . . . . . . . . . . . . . . . . . . . . . . . . . . . . . . . . . . . . . . . . . . . . . .6-2
Attributes of Fonts . . . . . . . . . . . . . . . . . . . . . . . . . . . . . . . . . . . . . . . . . . . . . . . . . . . . . . . . . . . .6-2
Bit-mapped Fonts and Scalable Fonts . . . . . . . . . . . . . . . . . . . . . . . . . . . . . . . . . . . . . . . . . . . .6-8
Checking the Font Lists for Available Fonts . . . . . . . . . . . . . . . . . . . . . . . . . . . . . . . . . .6-14
Typeface Samples . . . . . . . . . . . . . . . . . . . . . . . . . . . . . . . . . . . . . . . . . . . . . . . . . . . . . . . . . . .6-16
Symbol Sets . . . . . . . . . . . . . . . . . . . . . . . . . . . . . . . . . . . . . . . . . . . . . . . . . . . . . . . . . . . . . . . .6-30
Configuration Page Sample . . . . . . . . . . . . . . . . . . . . . . . . . . . . . . . . . . . . . . . . . . . . . .6-54
Specifications . . . . . . . . . . . . . . . . . . . . . . . . . . . . . . . . . . . . . . . . . . . . . . . . . . . . . . . . . 6-56
Index . . . . . . . . . . . . . . . . . . . . . . . . . . . . . . . . . . . . . . . . . . . . . . . . . . . . . . . . . . . . . . . 6-57
Page 70
Some Basic Facts About Fonts
This section summarises some of the basic facts you should know about fonts.
What Is a Font?
A font is a collection of letters and symbols used when printing a document. In
general, a group of letters and symbols sharing a common design is referred to as
a font. A font consists of the letters A to Z in both upper and lowercase, digits, and
symbols.
The design that distinguishes one font from another is referred to as a “typeface.”
Each font has a typeface name, such as Courier, CG Times, Letter Gothic, etc.
Attributes of Fonts
6
Appendix
All fonts share some common characteristics, which are called “attributes.” The
typeface is one such attribute. The letters and symbols that are actually printed are
determined by the values of a collection of these attributes.
Typeface The design of the letters (for example, Courier, CG Times, Letter, or Gothic).
Stroke weight The thickness of the lines with which the letters are drawn (e.g. bold, medium, or light).
Style Whether the letters are drawn straight or at an angle (e.g. upright or italic).
Point size Height of the letters (e.g. 10 point or 5 point).
Pitch (cpi) Number of characters that are printed in one inch (e.g. 10 cpi, 12 cpi, or Scale).
Character width
(Fix/PS)
Defaults
Orientation
Symbol set
Indicates whether the character width is set to “Fixed” or “Proportional.”
Orientation of the characters on a page (“Portrait” or “Landscape”).
The rule that defines the correspondence between the character codes coming from
the host computer, and the letter forms that appear on the page (for example,
Roman-8).
6-2
Some Basic Facts About Fonts
Page 71
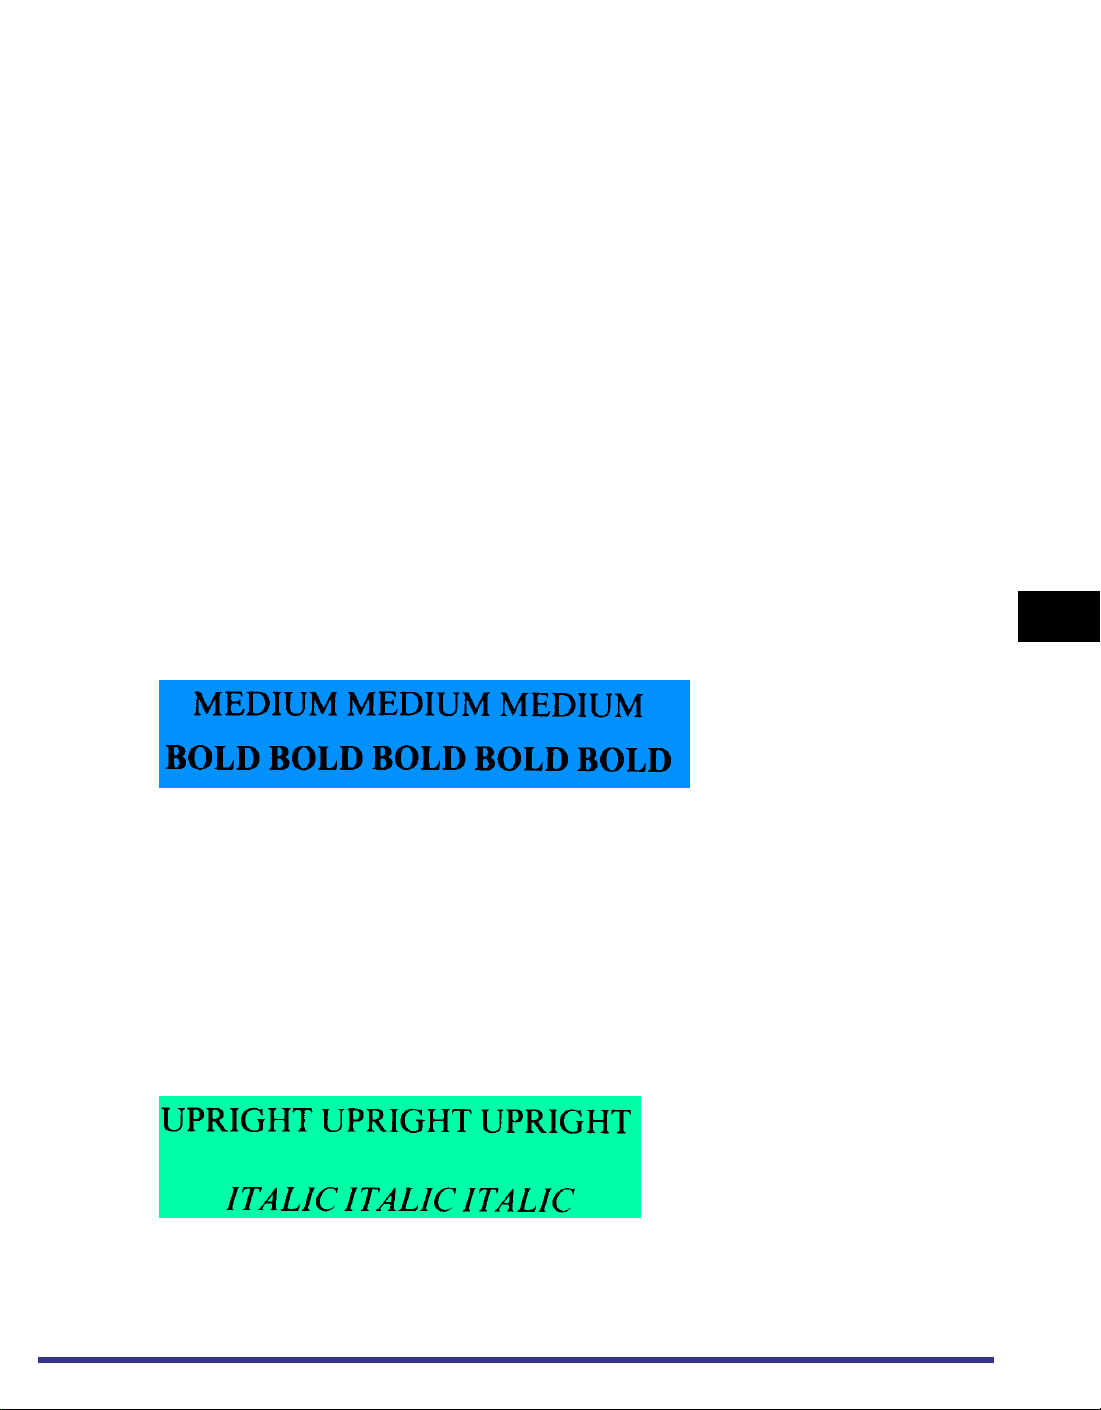
Typeface
Typeface refers to the design of the characters and symbols. The following figure
shows an example of some typefaces.
■ Typeface
Courier ABCDEFGHIJKLMNOPQRSTUVWXYZ
Times ABCDEFGHIJKLMNOPQRSTUVWXYZ
Helvetica ABCDEFGHIJKLMNOPQRSTUVWXYZ
Stroke Weight
Stroke weight refers to the thickness of the print. There are light, medium, and bold
stroke weights. The printer function has medium and bold fonts available. The figure
below shows an example of medium and bold printing.
■ Stroke weight
Style
Style refers to the shape of the characters. The printer function can print in two
styles:
upright and italic. With some fonts like Letter Gothic, the term “Oblique” is used in
the same manner as italics.
■ Style
6
Appendix
Some Basic Facts About Fonts
6-3
Page 72
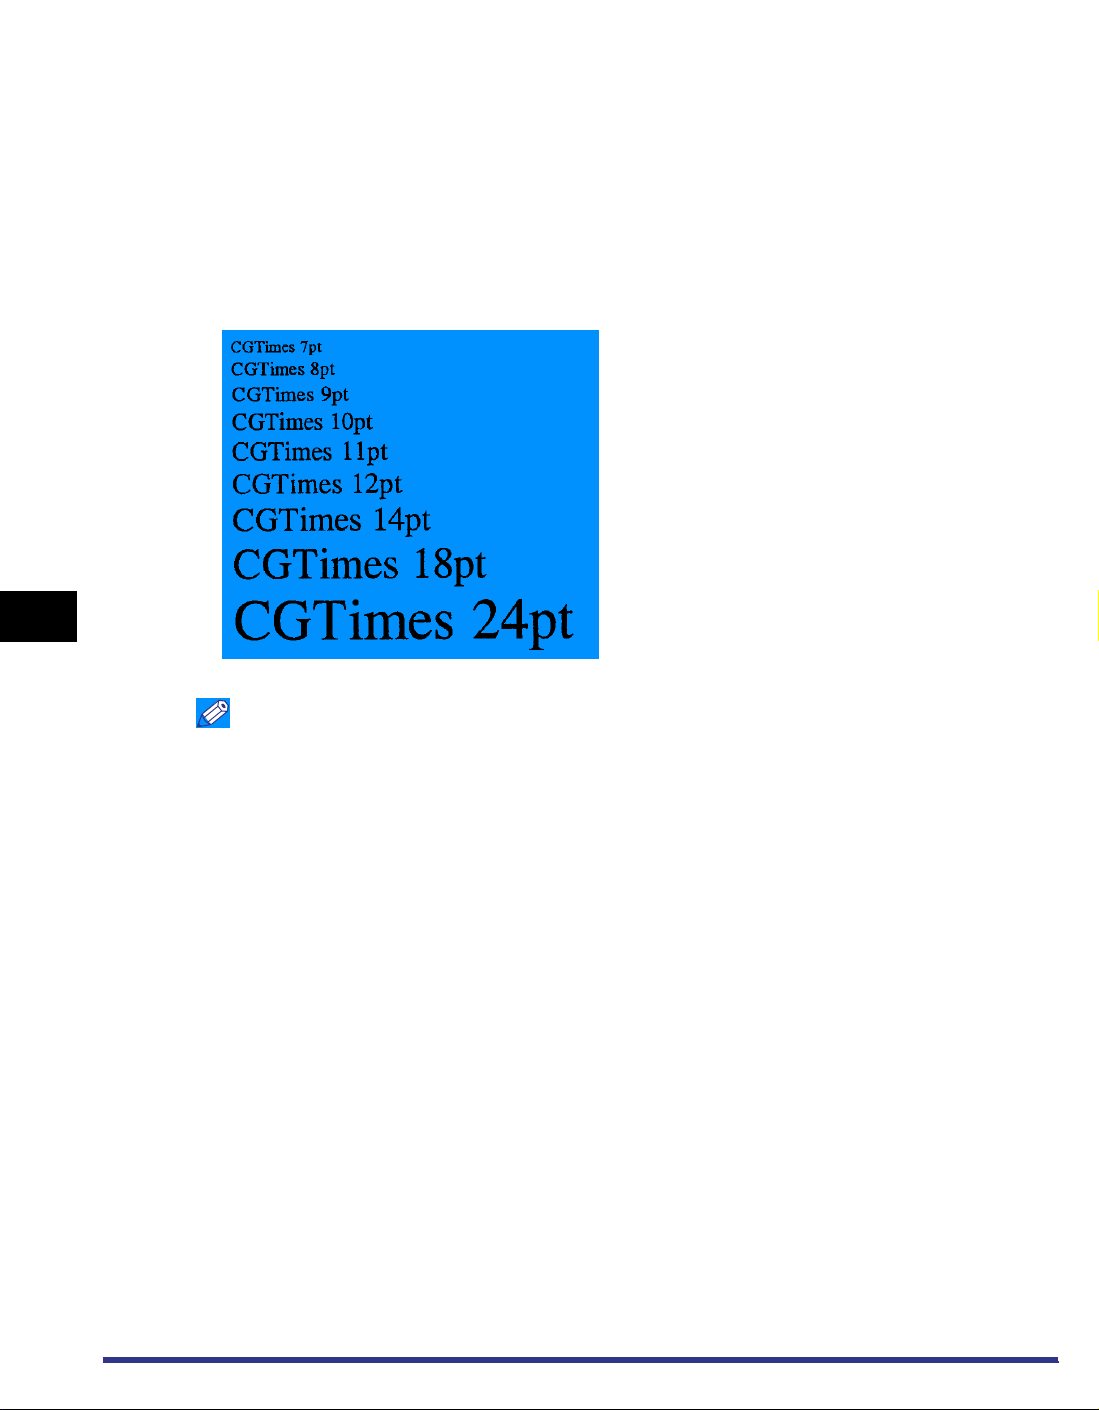
6
Point size
Point size refers to the height of the character. Point size is measured in points. One
inch is divided into 72 points and 1 point is 1/72 of an inch (about 0.35 mm). The
printer function has bit-mapped fonts and scalable fonts available. The bit-mapped
fonts are fixed in size, but the scalable fonts are not fixed in size. Scalable fonts are
freely scalable to any size you wish in 0.1 point increments. The following figure
shows an example of various point sizes.
■ Points size
Appendix
NOTE
•
Refer to the section “Bit-mapped Fonts and Scalable Fonts,” on p. 6-8 for more
information on bit-mapped fonts and scalable fonts.
6-4
Some Basic Facts About Fonts
Page 73
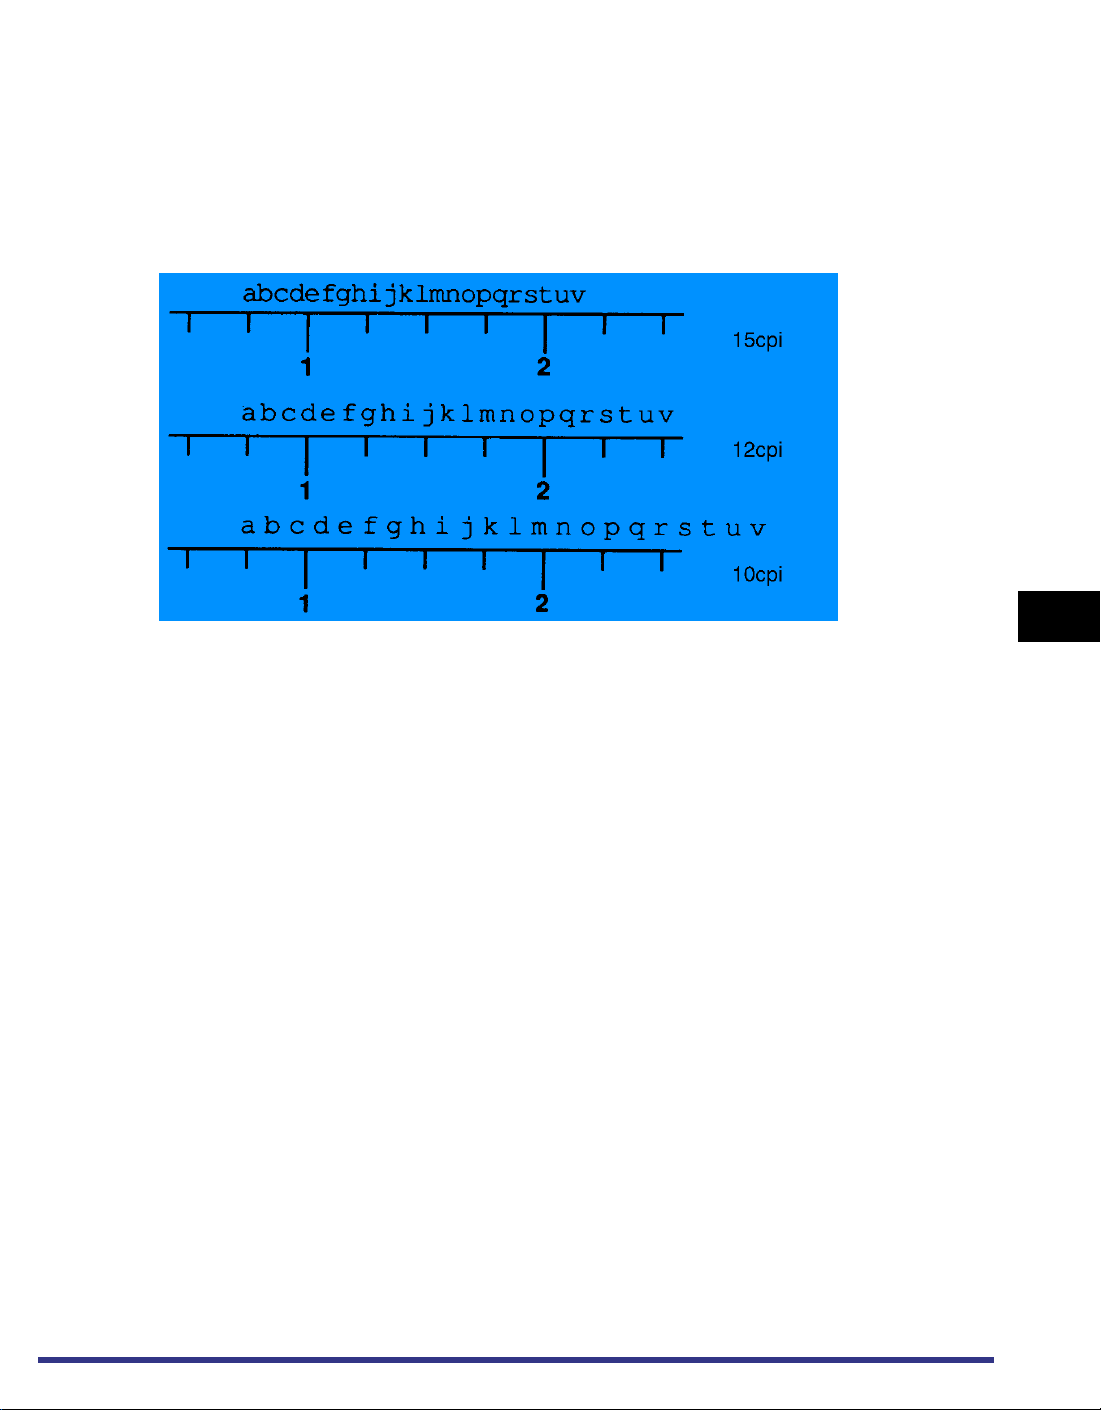
Pitch (cpi)
Pitch refers to the number of characters that are printed in one inch. The unit is cpi
(characters per inch). As the number of characters per inch increases, the space
between characters decreases; as the cpi decreases, the space between
characters increases.
■ Pitch
6
Character Width (Fix and PS)
Each character has a different width from all the other characters in a font at a given
point size. For example, “W” is a wider letter than “I.” There are two ways to go
about printing letters of different widths: you can print all letters with the same
spacing, regardless of their actual width; or you can change the spacing between
letters to accommodate these different widths. Printing all letters with the same
spacing is called “Fixed spacing”, while changing the spacing to accommodate
different letter widths is called “Proportional spacing.”
Because the Fixed spacing method prints all letters with the same spacing, the
number of characters which will fit into a given length is a fixed quantity which can
be specified.
If the characters are printed with Proportional spacing, then the number of
characters that will fit into an inch varies depending on the letters printed.
Appendix
Some Basic Facts About Fonts
6-5
Page 74
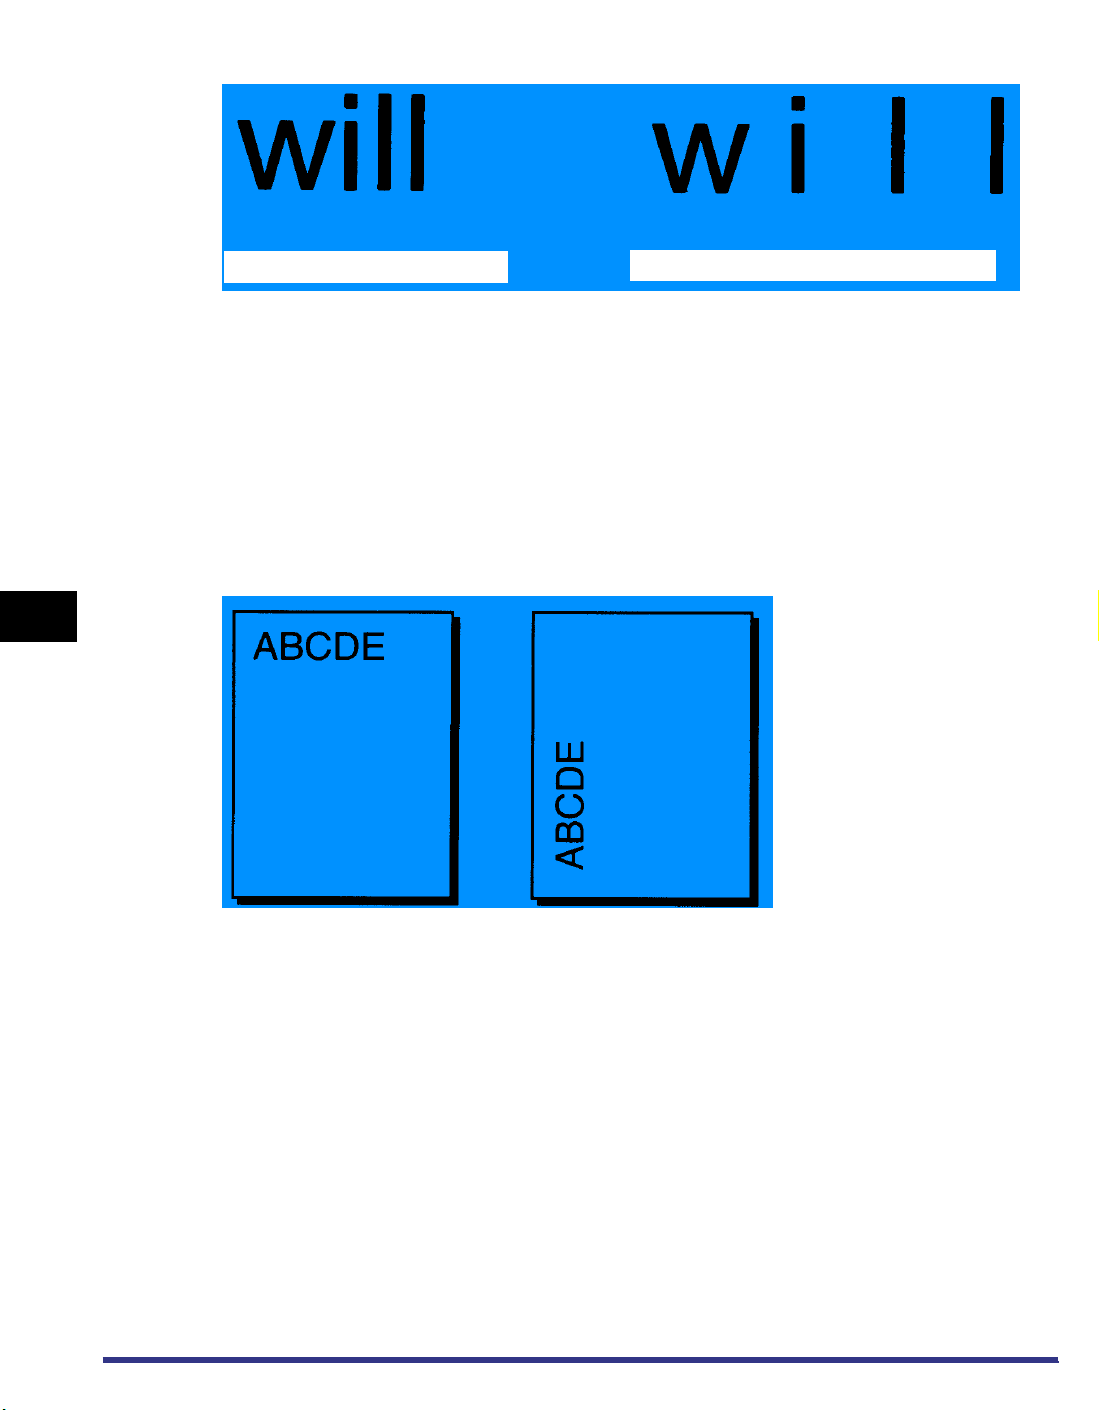
■ Fixed spacing and Proportional spacing
6
Appendix
Proportional spacing
Fixed spacing
Orientation
Orientation refers to the direction of printing. The printer function can print using
two different paper orientations: portrait and landscape. With portrait orientation,
text is printed across the width of the paper (short edge), and with landscape
orientation, text is printed across the length of the paper (long edge).
■ Orientation
6-6
Portrait Landscape
Some Basic Facts About Fonts
Page 75
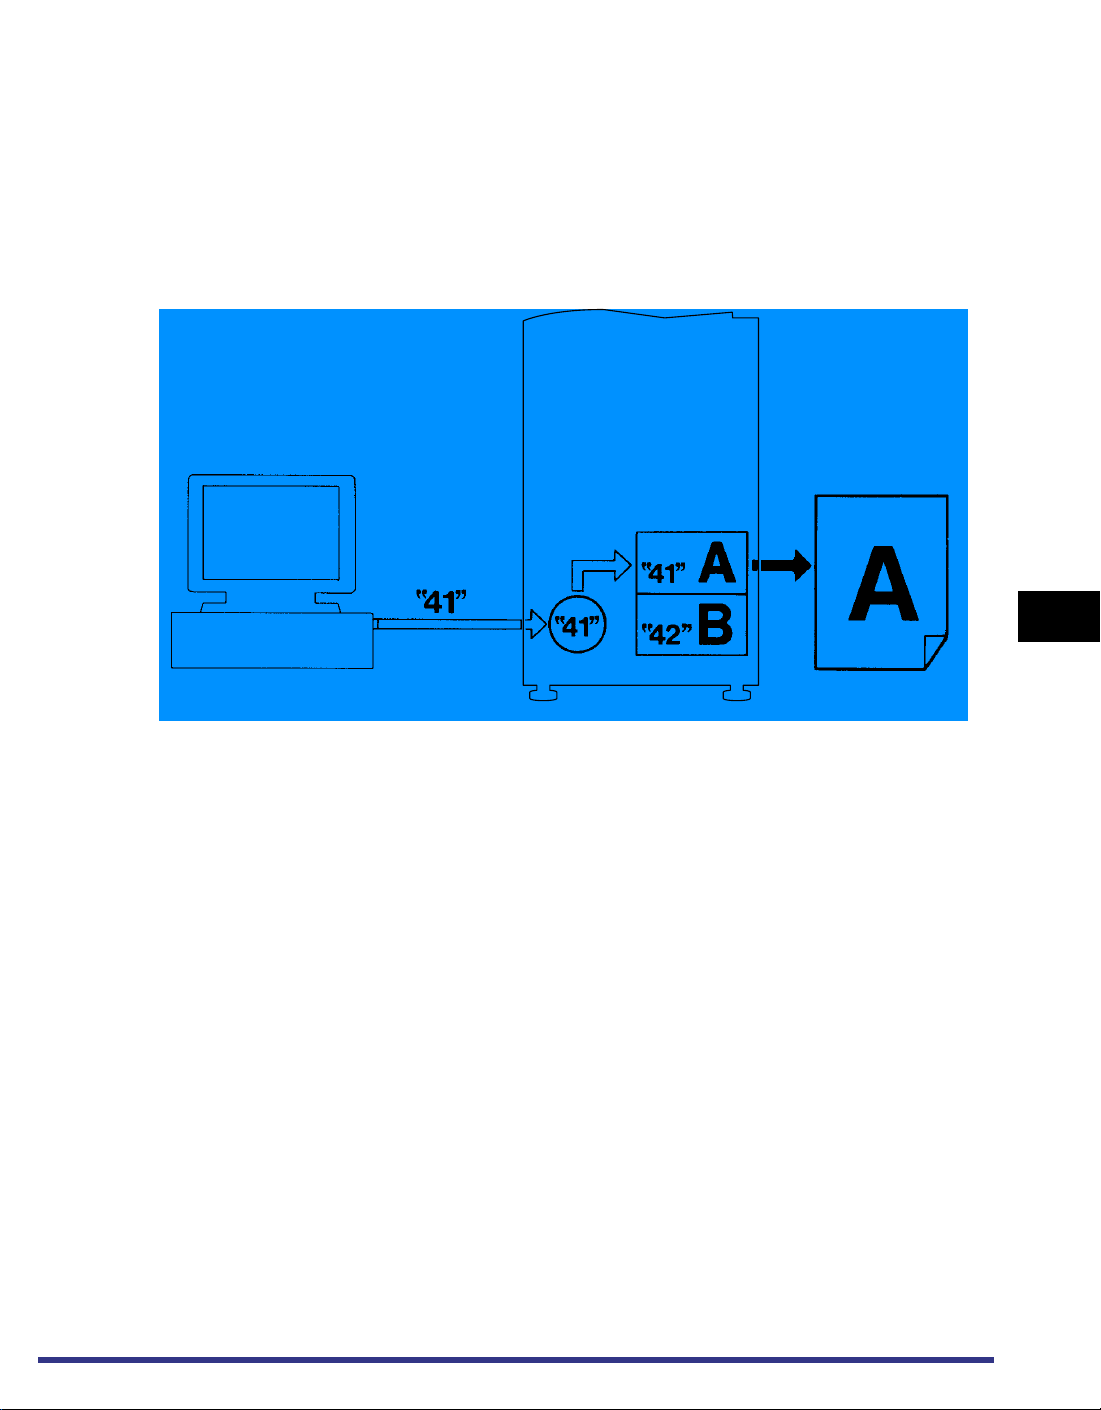
Symbol Set
When you print the letter “A,” the host computer sends a code corresponding to “A”
(hexadecimal 41 is an example of this) to the machine. This code is referred to as
the character code. The machine stores an internal representation of each
character, and selects from among these character patterns the pattern
corresponding to the received code. In this case, the machine searches for the
pattern for “A,” and prints it.
■ The process by which letters are printed
6
Computer
Machine
Character
patterns
The machine uses a fixed rule to decide which letter or symbol corresponds to the
character code sent from the host computer. For example, the letter “A” is printed
for the hexadecimal code “41”. The rule which determines the correspondence
between character codes and printed letter is called the ”symbol set.”
Appendix
Some Basic Facts About Fonts
6-7
Page 76
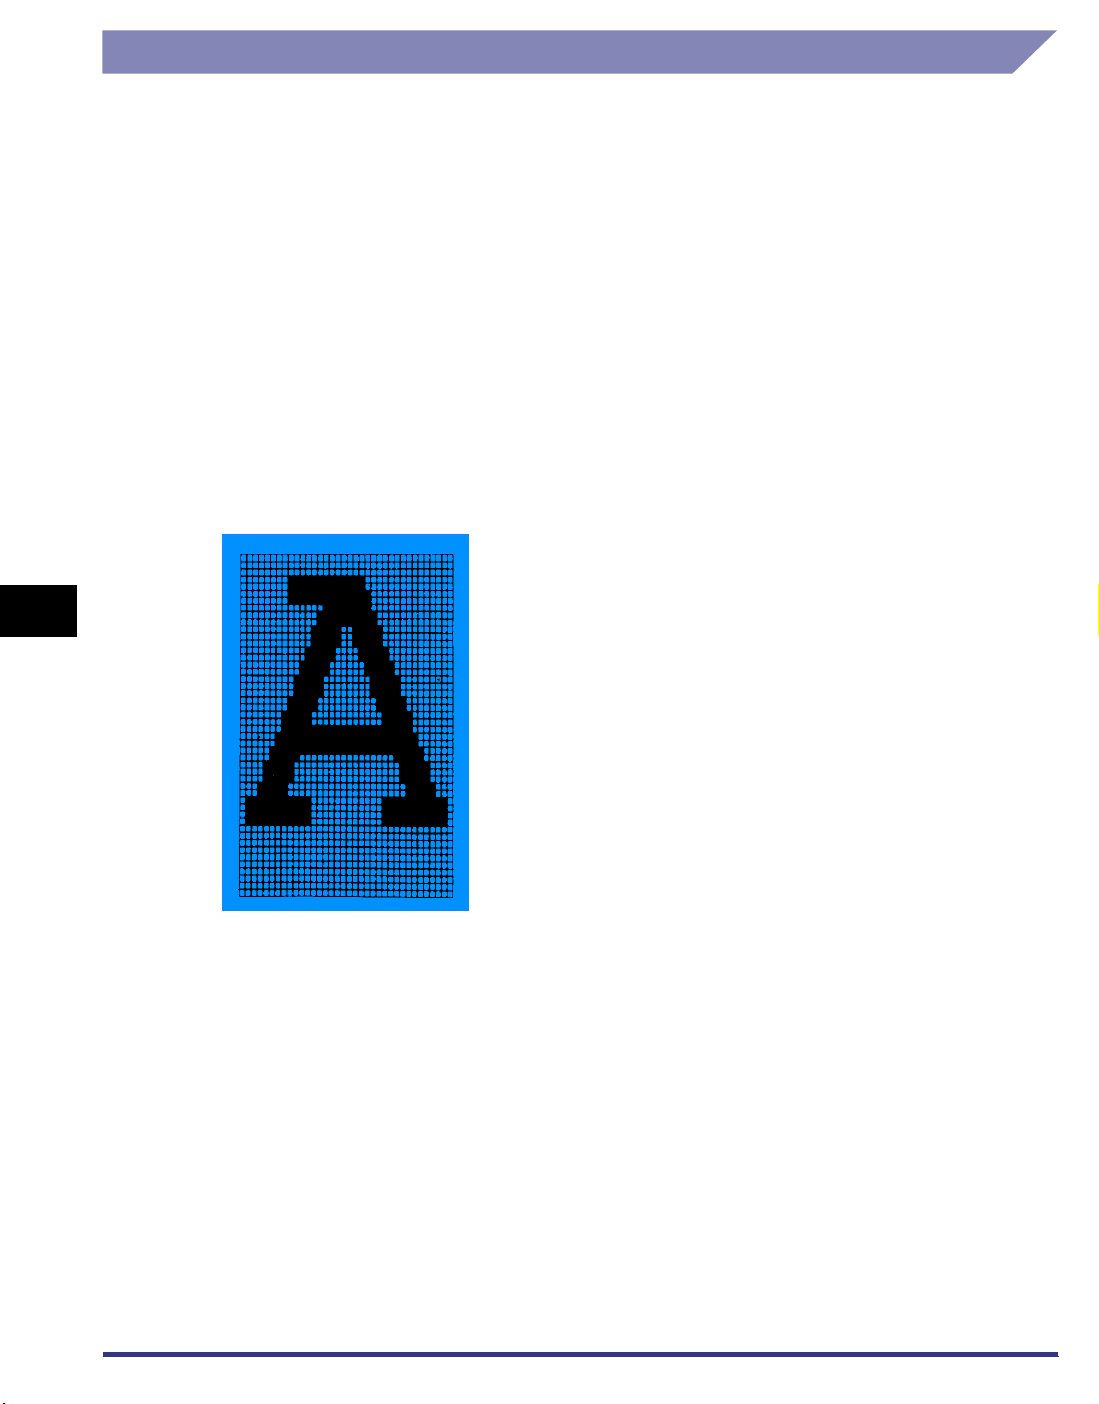
6
Bit-mapped Fonts and Scalable Fonts
There are two types of fonts available, and these fonts are distinguished by the type
of data from which they are formed.
• Bit-mapped fonts
• Scalable fonts
Bit-mapped Fonts
Each character of bit-mapped fonts are composed of grid of small dots and stored
in the machine’s memory in dot matrix.
Bit-mapped fonts are fixed in size and specified by the characteristics called
“attributes,” such as typeface, stroke weight, style and so on. Various types of bit
mapped fonts are produced by the combination of these attributes.
■ Bit-mapped fonts
Appendix
6-8
Some Basic Facts About Fonts
Page 77
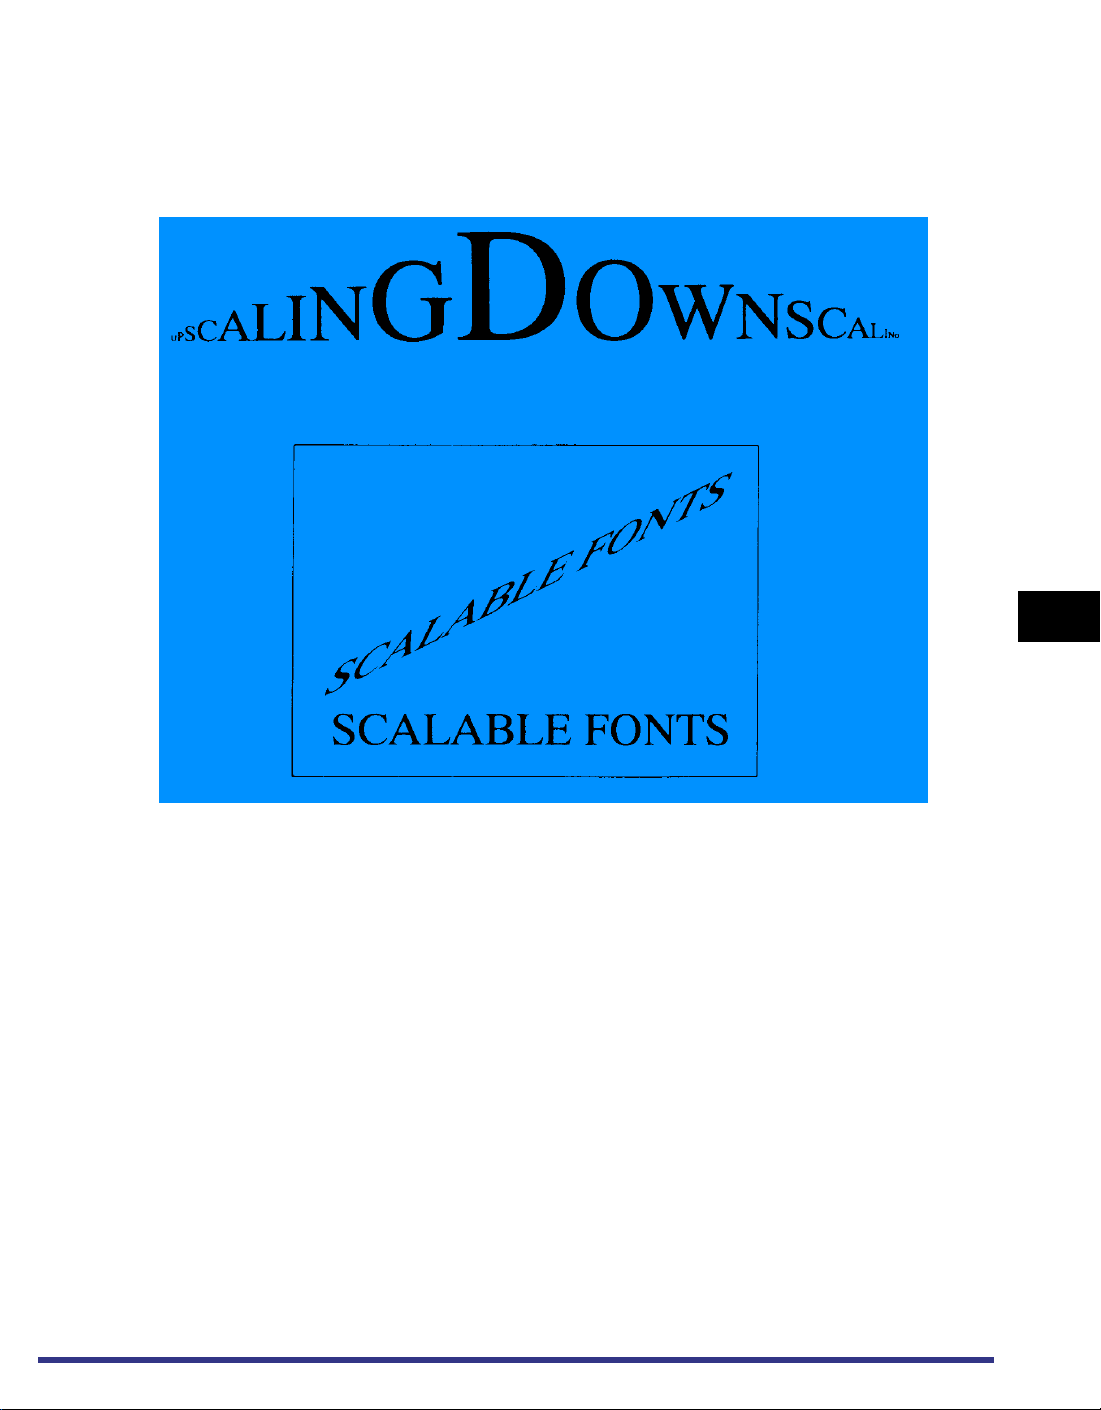
Scalable Fonts
With scalable fonts, characters are freely enlarged or compressed from the one
point to any size you wish in 0.1 point increments.
■ Scalable fonts
6
Appendix
Some Basic Facts About Fonts
6-9
Page 78

Standard Scalable Fonts (PCL)
With scalable fonts, characters are freely enlarged or compressed from one point to
any size you wish in 0.1 point increments. (The maximum range of scaling depends
on the size of the memory installed in the machine and the size of the paper used.)
The following scalable typefaces are included with the machine.
6
Appendix
Albertus Extra Bold
Albertus Medium
AntiqOlive
AntiqOlive Bold
AntiqOlive Italic
Arial
Arial Bold
Arial Bold Italic
Arial Italic
CG Omega
CG Omega Bold
CG Omega Bold Italic
CG Omega Italic
CG Times
CG Times Bold
CG Times Bold Italic
CG Times Italic
Clarendon Con-
densed Bold
Coronet
Courier
Courier Bold
Courier Bold Italic
Courier Italic
CourierPS
CourierPS Bold
CourierPS Oblique
CourierPS Bold
Oblique
Garamond Antique
Garamond Halbfett
Garamond Kursiv
Garamond Kursiv Hal-
bfett
Helvetica
Helvetica Bold
Helvetica Bold
Oblique
Helvetica Narrow
Helvetica Narrow
Bold
Helvetica Narrow Bold
Oblique
Helvetica Narrow
Oblique
Helvetica Oblique
ITC Avant Garde
Gothic Book
ITC Avant Garde
Gothic Book Oblique
ITC Avant Garde
Gothic Demi
ITC Avant Garde
Gothic Demi Oblique
ITC Bookman Demi
ITC Bookman Demi
Italic
ITC Bookman Light
ITC Bookman Light
Italic
ITC Zapf Chancery
Medium Italic
ITC Zapf Dingbats
Letter Gothic
Letter Gothic Bold
Letter Gothic Italic
Marigold
New Century School-
book Bold
New Century Schoolbook Bold Italic
New Century Schoolbook Italic
New Century Schoolbook Roman
Palatino Bold
Palatino Bold Italic
Palatino Italic
Palatino Roman
Symbol *
SymbolPS
Times Bold
Times Bold Italic
Times Italic
Times New
Times New Bold
Times New Bold Italic
Times New Italic
Times Roman
Universe Medium
Universe Bold
Universe Bold Con-
densed
Universe Bold Con-
densed Italic
Universe Bold Italic
Universe Italic
Universe Medium
Condensed
Universe Medium
Condensed Italic
Wingdings *
6-10
* Support the euro symbol.
OCR Sets Fonts (PCL)
OCR A
OCR B
Bar Code Fonts (PCL)
BC3 of 9 Thin
BC3 of 9 Light
BC3 of 9
BC3 of 9 SemiBold
Some Basic Facts About Fonts
BC3 of 9 Heavy
Code 128
Code 128 Bold
Code 128 Condensed
Code 128 Condensed
Bold
Code 128 Expanded
Page 79

Code 128 Expanded
Bold
Codebar
Codebar Condensed
Codebar Expanded
Interleaved 2 of 5
Light
Interleaved 2 of 5
Interleaved 2 of 5
Semi
Interleaved 2 of 5 Bold
Interleaved 2 of 5 Nar-
row Light
Interleaved 2 of 5 Nar-
row
Interleaved 2 of 5 Nar-
row Semi
Interleaved 2 of 5 Nar-
row Bold
MSI Plessey
Symbol Sets (For Scalable Typefaces Only)
The following symbol sets are included with the machine.
PostNet
UPC/EAN
UPC/EAN Bold
UPC/EAN Condensed
UPC/EAN Con-
densed Bold
UPC/EAN Expanded
UPC/EAN Expanded
Bold
ASCII (ISO6)
BC3 of 9 Barcode
Code 128 Barcode
Codebar
Desktop
Interleaved Barcode
ISO 8859-1 Latin 1
ISO 8859-10 Latin 6
ISO 8859-2 Latin 2
ISO 8859-9 Latin 5
ISO French (ISO69)
ISO German (ISO21)
ISO Italian (ISO15)
ISO Norwegian
(ISO60)
ISO Spanish (ISO17)
ISO Swedish:names
(ISO11)
* Support the euro symbol.
PS Fonts (Printer Kit-C1 Only)
AlbertusMT
AlbertusMT Italic
AlbertusMT Light
AntiqueOlive Roman
AntiqueOliveCE
Roman
AntiqueOlive Italic
AntiqueOliveCE Italic
AntiqueOlive Bold
AntiqueOliveCE Bold
AntiqueOlive Compact
AntiqueOliveCE Com-
pact
Apple Chancery
Apple ChanceryCE
ArialMT
ArialCE
ISO United Kingdom
(ISO4)
Legal
Math-8
MC Text
Microsoft Publishing
MSI Plessey
PC-1004 (OS/2)
PC-775
PC-8
PC-8 Danish/Norwe-
gian
PC-8 Greek Alternate
CodePage437
PC-850
PC-852
PC-860 Portugal
PC-865 Norway
PC-Turkish
Arial ItalicMT
ArialCE Italic
Arial BoldMT
ArialCE Bold
Arial BoldItalicMT
ArialCE BoldItalic
AvantGarde Book
AvantGardeCE Book
AvantGarde BookOb-
lique
AvantGardeCE
BookOblique
AvantGarde Demi
AvantGardeCE Demi
AvantGarde DemiOb-
lique
PI Font
PostNet
PS Math
PS Text
Roman-8
Symbol
UPC/EAN Barcode
Ventura International
Ventura Math
Ventura US
Windows 3.0 Latin 1
Windows Baltic *
Windows Latin 1 *
Windows Latin 2 *
Windows Latin 5 *
Wingdings
AvantGardeCE DemiOblique
Bodoni
BodoniCE
Bodoni Italic
BodoniCE Italic
Bodoni Bold
BodoniCE Bold
Bodoni BoldItalic
BodoniCE BoldItalic
Bodoni Poster
BodoniCE Poster
Bodoni PosterCom-
pressed
BodoniCE Poster-
Compressed
Bookman Light
6
Appendix
Some Basic Facts About Fonts
6-11
Page 80

6
Appendix
BookmanCE Light
Bookman LightItalic
BookmanCE LightI-
talic
Bookman Demi
BookmanCE Demi
Bookman DemiItalic
BookmanCE DemiI-
talic
Candid
Chicago
Chicago CE
Clarendon
ClarendonCE
Clarendon Light
ClarendonCE Light
Clarendon Bold
ClarendonCE Bold
CooperBlack
CooperBlack Italic
Copperplate ThirtyT-
woBC
Copperplate ThirtyTh-
reeBC
Coronet Regular
CoronetCE Regular
Courier
CourierCE
Courier Oblique
CourierCE Oblique
Courier Bold
CourierCE Bold
Courier BoldOblique
CourierCE BoldOb-
lique
Eurostile
EurostileCE
Eurostile Bold
EurostileCE Bold
Eurostile Extend-
edTwo
EurostileCE Extend-
edTwo
Eurostile BoldExtend-
edTwo
EurostileCE BoldEx-
tendedTwo
Geneva
GenevaCE
GillSans
GillSansCE Roman
GillSans Italic
GillSansCE Italic
GillSans Bold
GillSansCE Bold
GlllSans BoldItalic
GlllSansCE BoldItalic
GillSans Condensed
GillSansCE Con-
densed
GillSans BoldCon-
densed
GillSansCE BoldCon-
densed
GillSans Light
GillSansCE Light
GillSans LightItalic
GillSansCE LightItalic
GillSans ExtraBold
GillSansCE ExtraBold
Goudy
Goudy Italic
Goudy Bold
Goudy BoldItalic
Goudy ExtraBold
Helvetica
HelveticaCE
Helvetica Oblique
HelveticaCE Oblique
Helvetica Bold
HelveticaCE Bold
Helvetica BoldOblique
HelveticaCE BoldOb-
lique
Helvetica Condensed
HelveticaCE Cond
Helvetica Condensed
Oblique
HelveticaCE CondObl
Helvetica Condensed
Bold
HelveticaCE Cond-
Bold
Helvetica Condensed
BoldObl
HelveticaCE Cond-
BoldObl
Helvetica Narrow
HelveticaCE Narrow
Helvetica Narrow Bold
HelveticaCE Narrow-
Bold
Helvetica Narrow
BoldOblique
HelveticaCE Narrow
BoldOblique
Helvetica Narrow
Oblique
HelveticaCE Narro-
wOblique
HoeflerText Regular
HoeflerTextCE Regular
HoeflerText Italic
HoeflerTextCE Italic
HoeflerText Black
HoeflerTextCE Black
HoeflerText BlackItalic
HoeflerTextCE BlackI-
talic
HoeflerText Orna-
ments
JoannaMT
JoannaMTCE
JoannaMT Italic
JoannaMTCE Italic
JoannaMT Bold
JoannaMTCE Bold
JoannaMT BoldItalic
JoannaMTCE Bold-
Italic
LetterGothic
LetterGothicCE
LetterGothic Slanted
LetterGothicCE
Slanted
LetterGothic Bold
LetterGothicCE Bold
LetterGothic Bold-
Slanted
LetterGothicCE Bold-
Slanted
LubalinGraph Book
LubalinGraphCE Book
LubalinGraph
BookOblique
LubalinGraphCE
BookOblique
LubalinGraph Demi
LubalinGraphCE
Demi
LubalinGraph Demi-
Oblique
LubalinGraphCE
DemiOblique
Marigold
Monaco
MonacoCE
MonaLisa Recut
NewCenturySchlbk
Roman
NewCenturySchl-
bkCE Roman
NewCenturySchlbk
Italic
NewCenturySchl-
bkCE Italic
6-12
Some Basic Facts About Fonts
Page 81

NewCenturySchlbk
Bold
NewCenturySchlbkCE Bold
NewCenturySchlbk
BoldItalic
NewCenturySchlbkCE BoldItalic
NewYork
NewYorkCE
Optima
OptimaCE Roman
Optima Italic
OptimaCE Italic
Optima Bold
OptimaCE Bold
Optima BoldItalic
OptimaCE BoldItalic
Oxford
Palatino Roman
PalatinoCE Roman
Palatino Italic
PalatinoCE Italic
Palatino Bold
PalatinoCE Bold
Palatino BoldItalic
PalatinoCE BoldItalic
StempelGaramond
Roman
StempelGara-
mondCE Roman
StempelGaramond
Italic
StempelGara-
mondCE Italic
StempelGaramond
Bold
StempelGara-
mondCE Bold
StempelGaramond
BoldItalic
StempelGara-
mondCE BoldItalic
Symbol
Tekton
Times Roman
TimesCE Roman
Times Italic
TimesCE Italic
Times Bold
TimesCE Bold
Times BoldItalic
TimesCE BoldItalic
TimesNewRo-
manPSMT
TimesNewRomanCE
TimesNewRomanPS
ItalicMT
TimesNewRomanCE
Italic
TlmesNewRomanPS
BoldMT
TimesNewRomanCE
Bold
TimesNewRomanPS
BoldItalicMT
TimesNewRomanCE
BoldItalic
Univers
UniversCE Medium
Univers Oblique
UniversCE Oblique
Univers Bold
UniversCE Bold
Univers BoldOblique
UniversCE BoldOb-
lique
Univers Light
UniversCE Light
Univers Light Oblique
Univers CE Light
Oblique
Univers Condensed
UniversCE Con-
densed
Univers Condense-
dOblique
UniversCE Condense-
dOblique
Univers Condensed-
Bold
UniversCE Con-
densedBold
Univers Condensed-
BoldOblique
UniversCE Con-
densedBoldOblique
Univers Extended
UniversCE Extended
Univers ExtendedObl
UniversCE Extende-
dObl
Univers BoldExt
UniversCE BoldExt
Univers BoldExtObl
UniversCE BoldEx-
tObl
Wingdings Regular
ZapfChancery
MediumItalic
ZapfChanceryCE
MediumItalic
ZapfDingbats
6
Appendix
Some Basic Facts About Fonts
6-13
Page 82
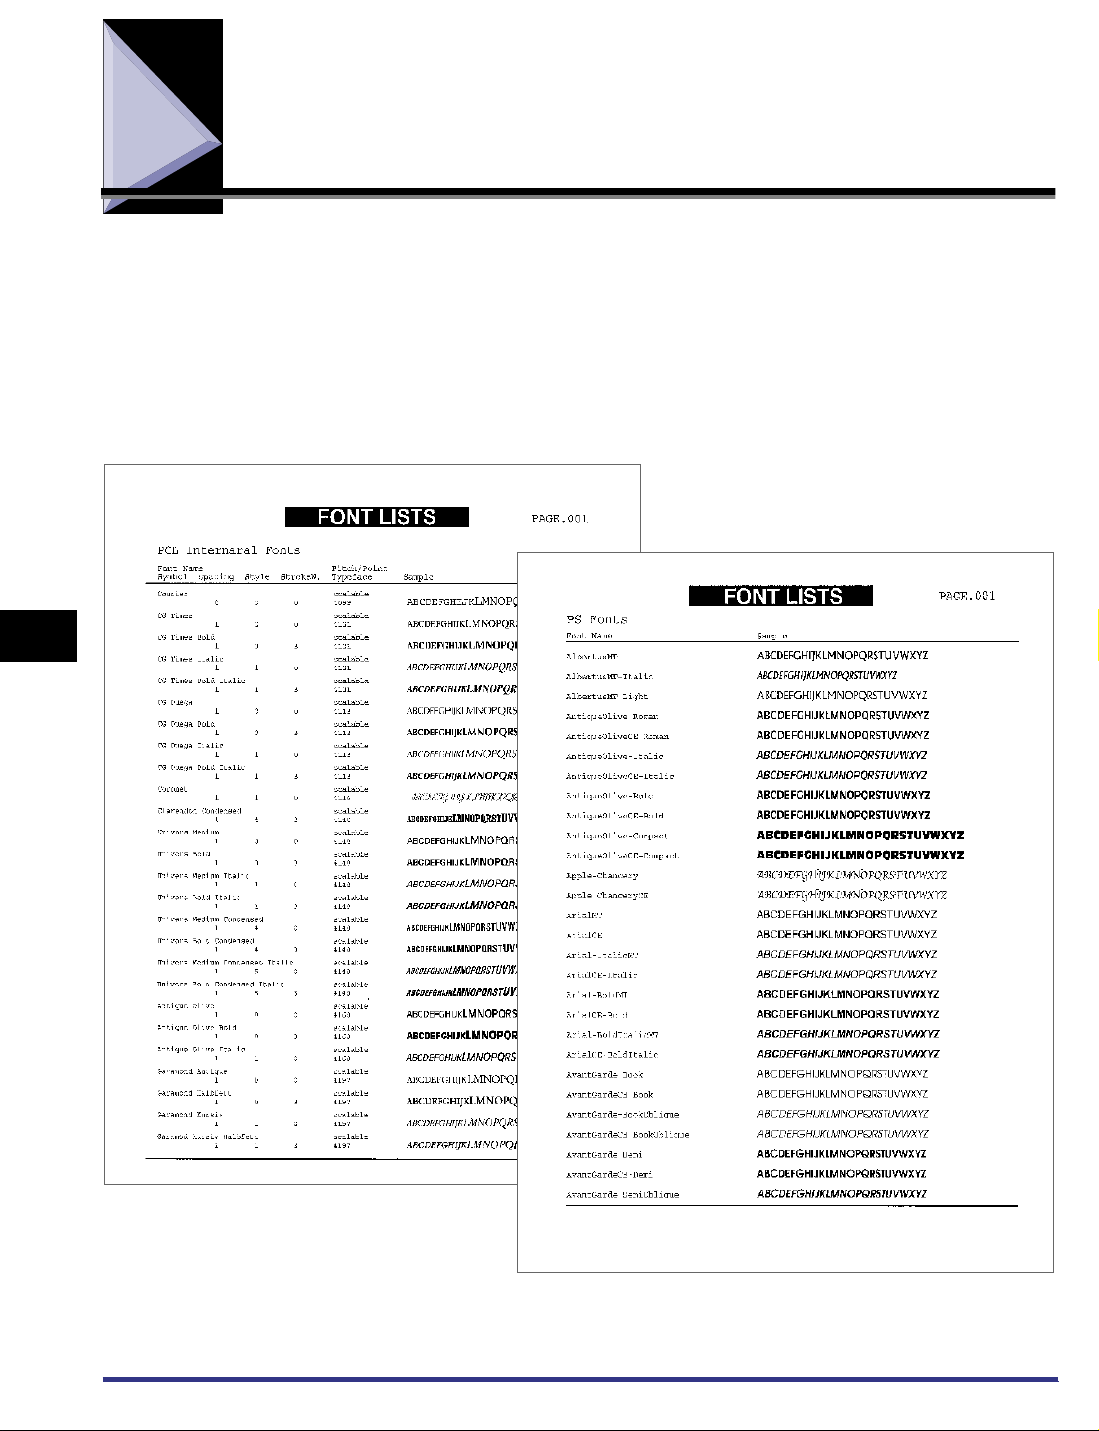
Checking the Font Lists for Available Fonts
Font lists are a comprehensive listing of all fonts currently available. The listing
contains both the names of resident fonts, and the names of the fonts stored on any
external hard disk that may be present.
PCL FONT LISTS
PS FONT LISTS
(Printer Kit-C1 Only)
q
w
r
e
t
y
6
Appendix
q
y
6-14
Checking the Font Lists for Available Fonts
Page 83

The Font List includes the following information:
q Font Name
The typeface name.
w Spacing
This indicates whether a font is a fixed-size, non-proportional font or a proportional font.
e Style
Upright (straight) characters or italic (slanted) characters.
r Stroke Weight
The stroke weight of the characters in the font.
t Pitch/Point Size
The pitch and point size. For a scalable font, Scale is displayed. The vertical distance in points
from the top of capital letters to the tail of the letter y.
y Print sample
A print sample of the font.
6
Appendix
Checking the Font Lists for Available Fonts
6-15
Page 84
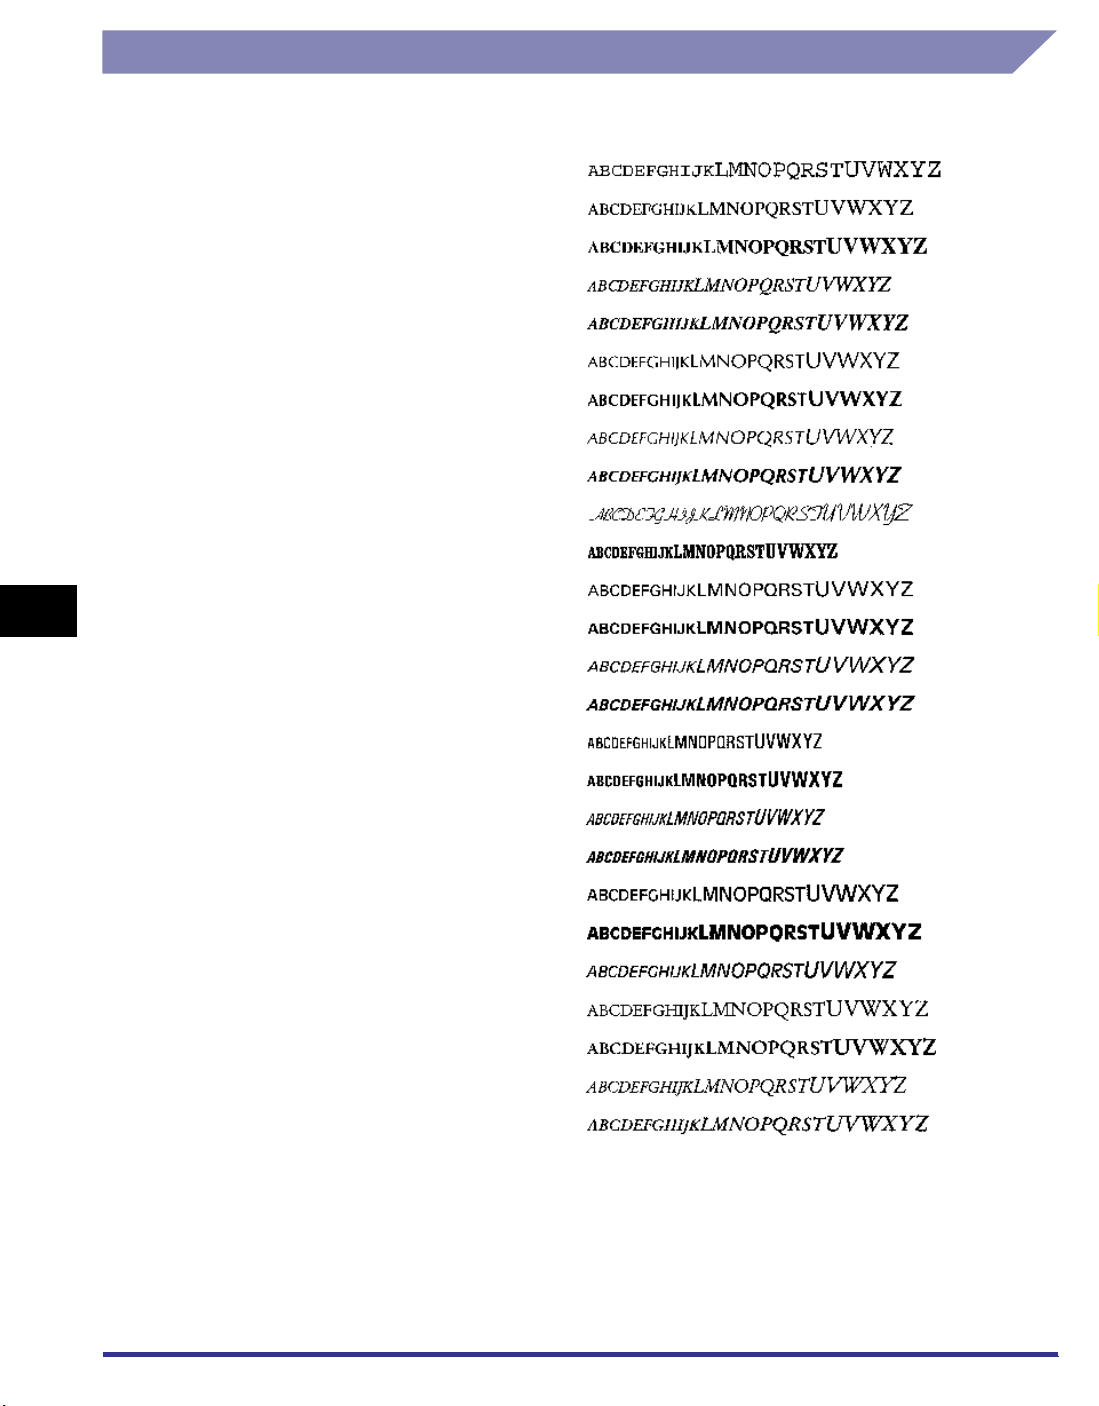
6
Typeface Samples
Standard Scalable Fonts (PCL)
Courier
CG Times
CG Times Bold
CG Times Italic
CG Times Bold Italic
CG Omega
CG Omega Bold
CG Omega Italic
CG Omega Bold Italic
Coronet
Clarendon Condensed
Univers Medium
Univers Bold
Appendix
Univers Medium Italic
Univers Bold Italic
Univers Medium Condensed
Univers Bold Condensed
Univers Medium Condensed Italic
Univers Bold Condensed Italic
Antique Olive
Antique Olive Bold
Antique Olive Italic
Garamond Antique
Garamond Halbfett
Garamond Kursiv
Garamond Kursiv Halbfett
6-16
Checking the Font Lists for Available Fonts
Page 85
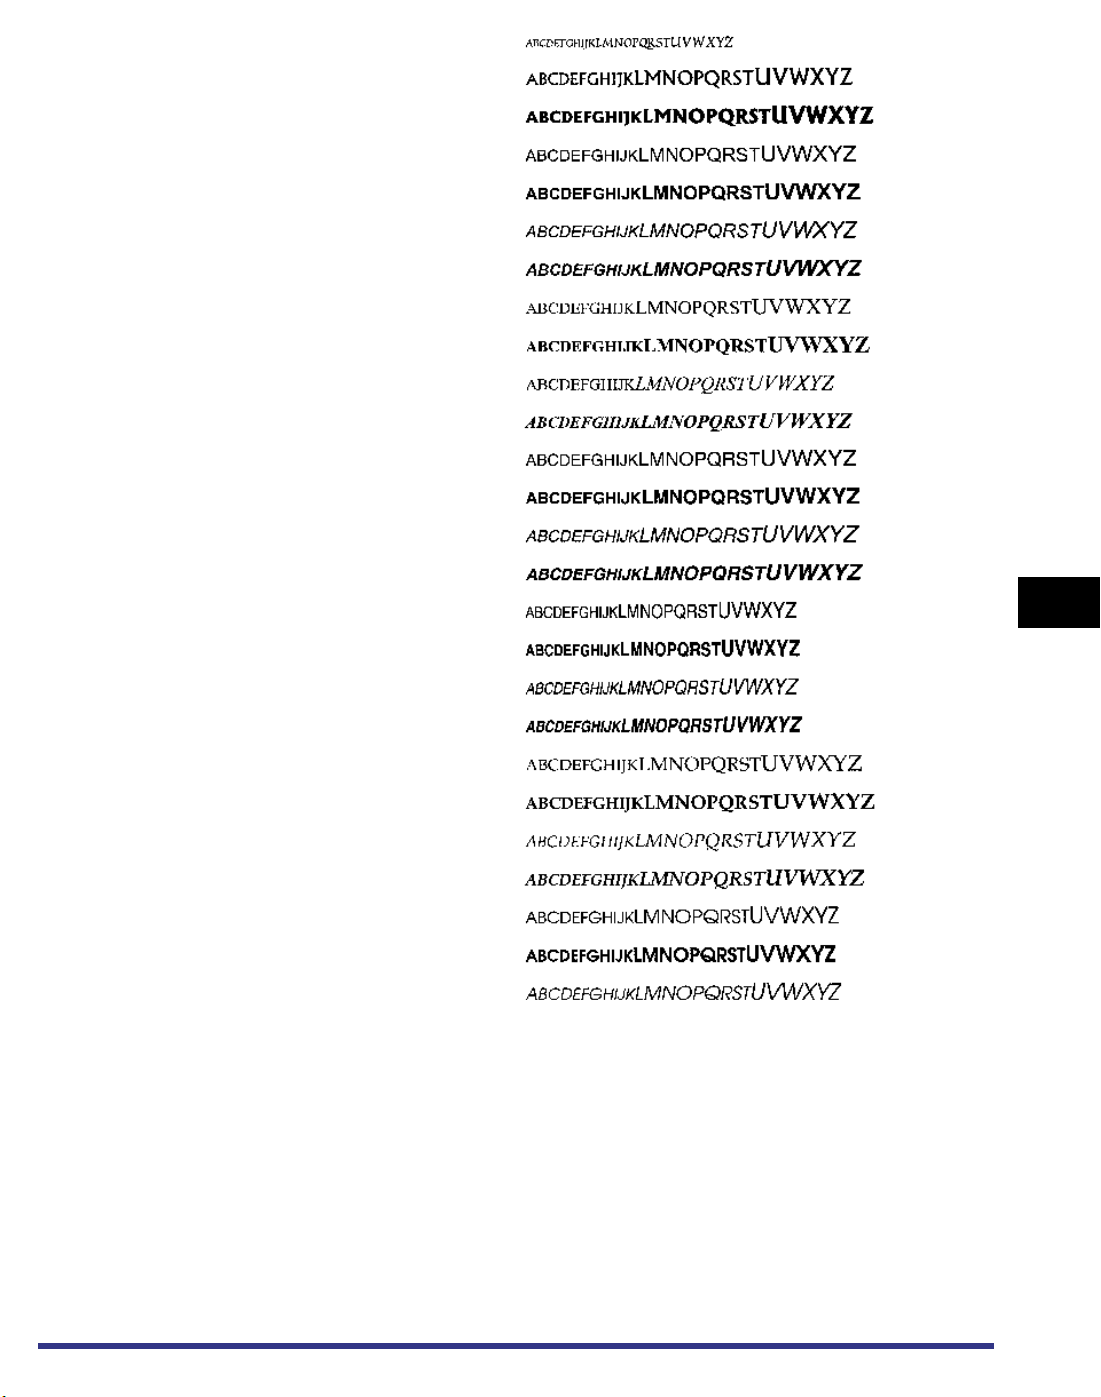
Marigold
Albertus Medium
Albertus Extra Bold
Arial
Arial Bold
Arial Italic
Arial Bold Italic
Times New
Times New Bold
Times New Italic
Times New Bold Italic
Helvetica
Helvetica Bold
Helvetica Oblique
Helvetica Bold Oblique
Helvetica Narrow
6
Helvetica Narrow Bold
Helvetica Narrow Oblique
Helvetica Narrow Bold Oblique
Palatino Roman
Palatino Bold
Palatino Italic
Palatino Bold Italic
ITC Avant Garde Gothic Book
ITC Avant Garde Gothic Demi
ITC Avant Garde Gothic Book Oblique
Appendix
Checking the Font Lists for Available Fonts
6-17
Page 86
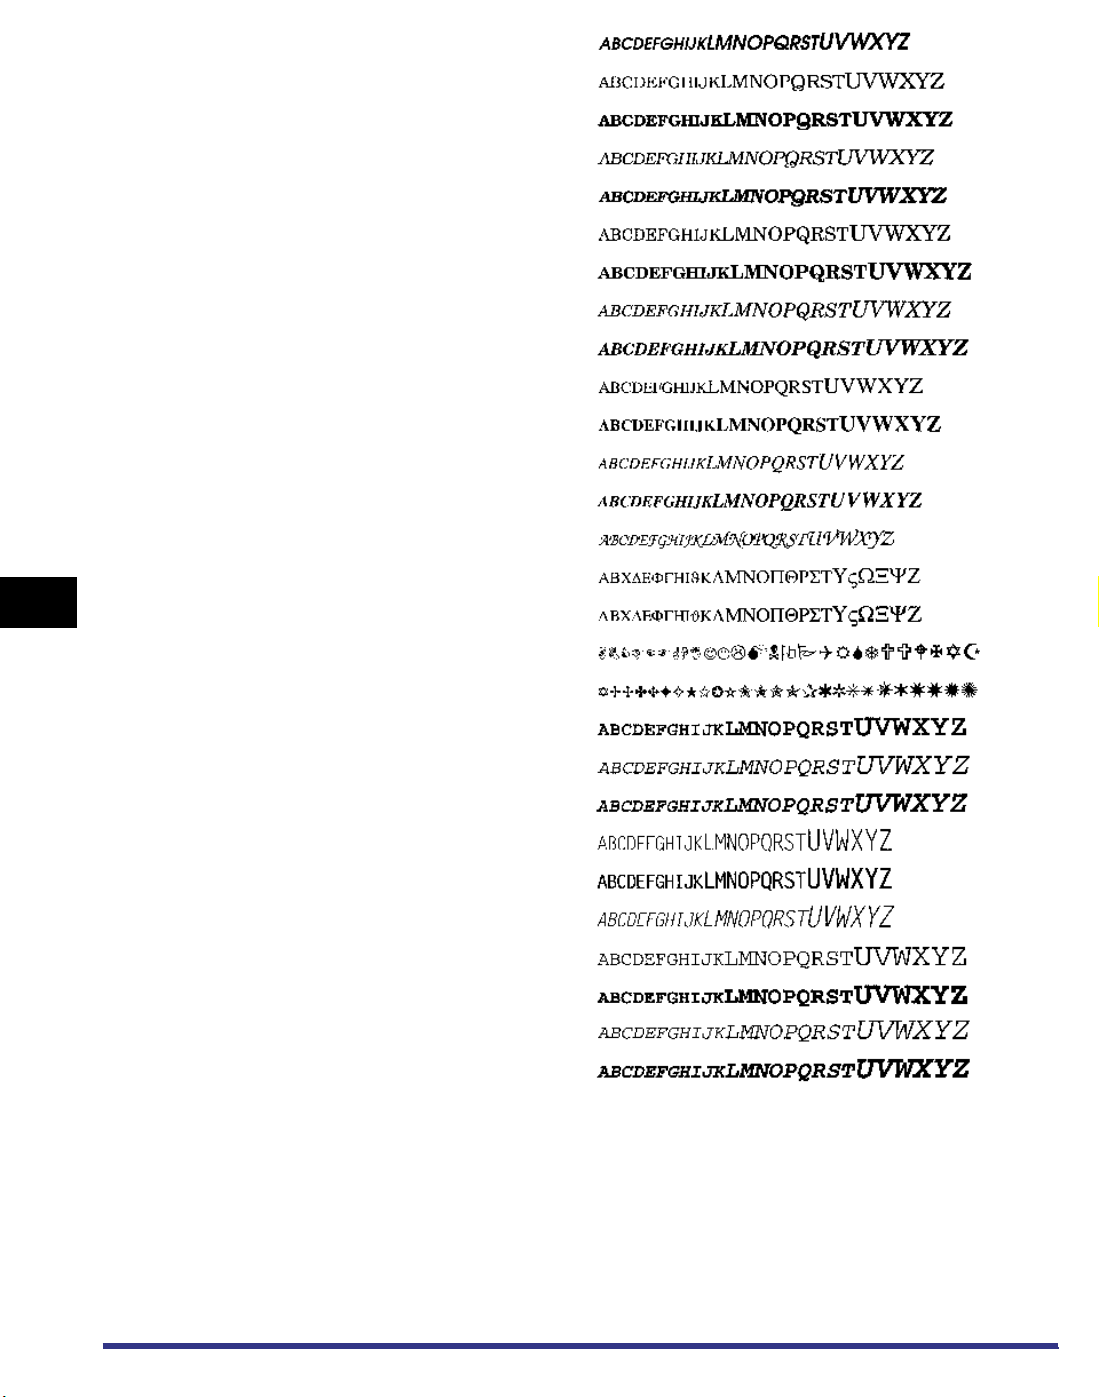
6
ITC Avant Garde Gothic Demi Oblique
ITC Bookman Light
ITC Bookman Demi
ITC Bookman Light Italic
ITC Bookman Demi Italic
New Century Schoolbook Roman
New Century Schoolbook Bold
New Century Schoolbook Italic
New Century Schoolbook Bold Italic
Times Roman
Times Bold
Times Italic
Times Bold Italic
ITC Zapf Chancery Medium Italic
Symbol
SymbolPS
Appendix
Wingdings
ITC Zapf Dingbats
Courier Bold
Courier Italic
Courier Bold Italic
Letter Gothic
Letter Gothic Bold
Letter Gothic Italic
CourierPS
CourierPS Bold
CourierPS Oblique
CourierPS Bold Oblique
6-18
Checking the Font Lists for Available Fonts
Page 87
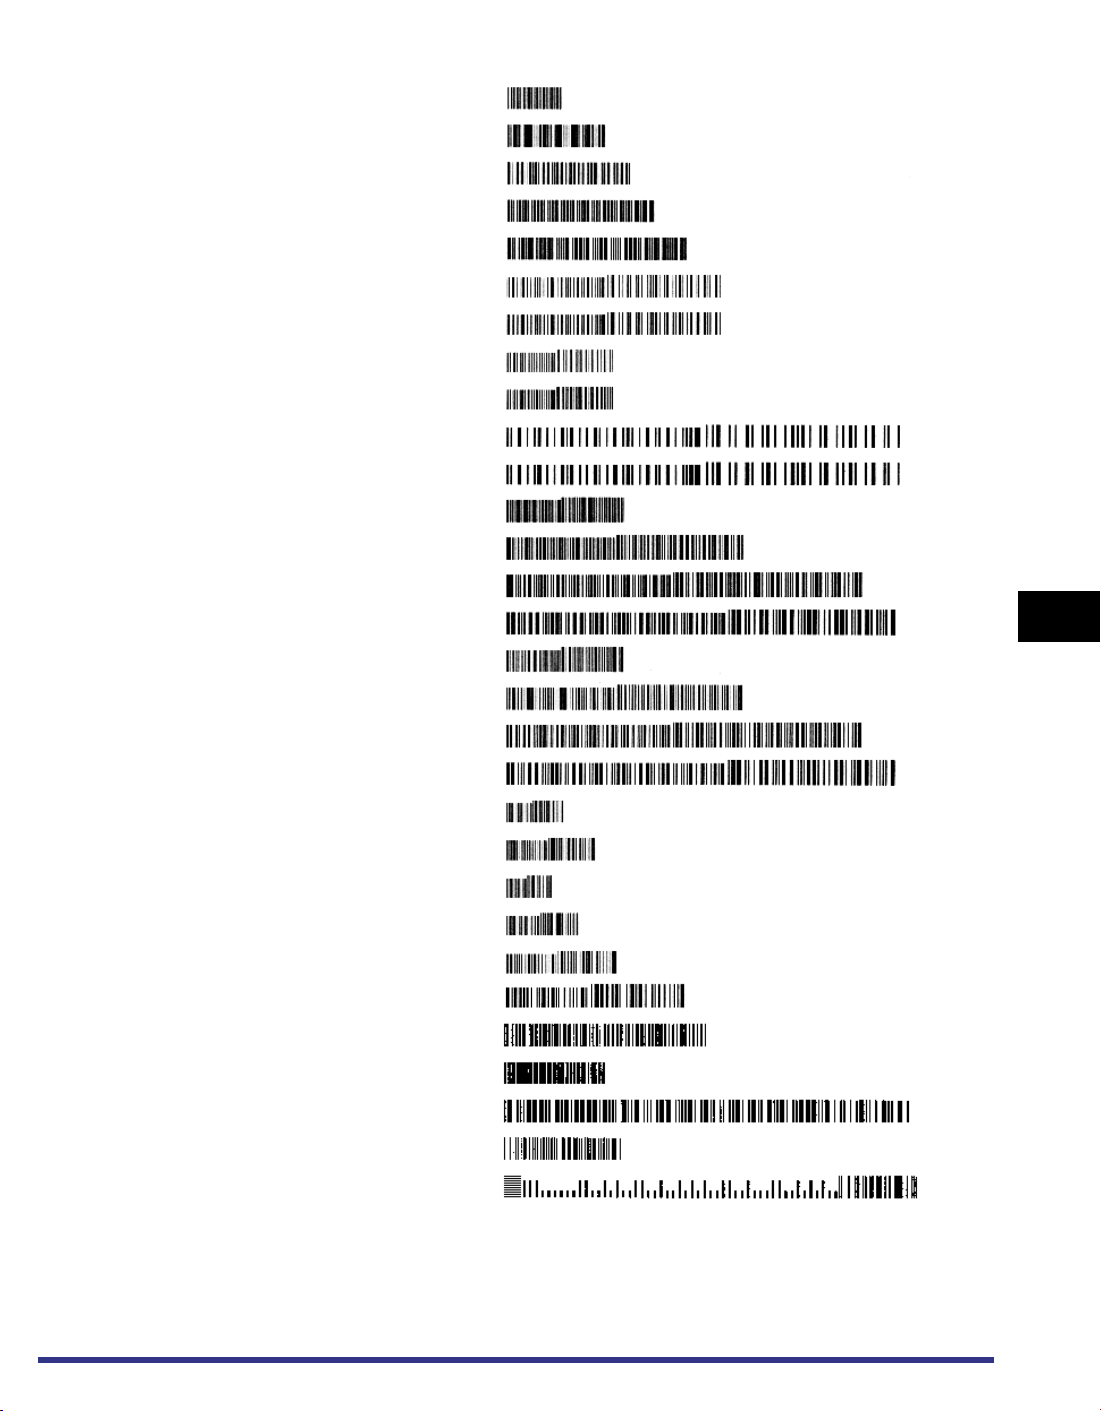
Bar Code Scalable Fonts (PCL)
BC 3 of 9 Thin
BC 3 of 9 Light
BC 3 of 9
BC 3 of 9 Semi
BC 3 of 9 Heavy
Code 128
Code 128 Bold
Code 128 Condensed
Code 128 Condensed Bold
Code 128 Expanded
Code 128 Expanded Bold
Interleaved 2 of 5 Light
Interleaved 2 of 5
Interleaved 2 of 5 Semi
Interleaved 2 of 5 Bold
Interleaved 2 of 5 Narrow Light
Interleaved 2 of 5 Narrow
Interleaved 2 of 5 Narrow Semi
Interleaved 2 of 5 Narrow Bold
UPC/EAN
UPC/EAN Bold
UPC/EAN Condensed
UPC/EAN Condensed Bold
UPC/EAN Expanded
UPC/EAN Expanded Bold
Codebar
Codebar Condenced
Codebar Expanded
MSI Plessey
PostNet
6
Appendix
Checking the Font Lists for Available Fonts
6-19
Page 88
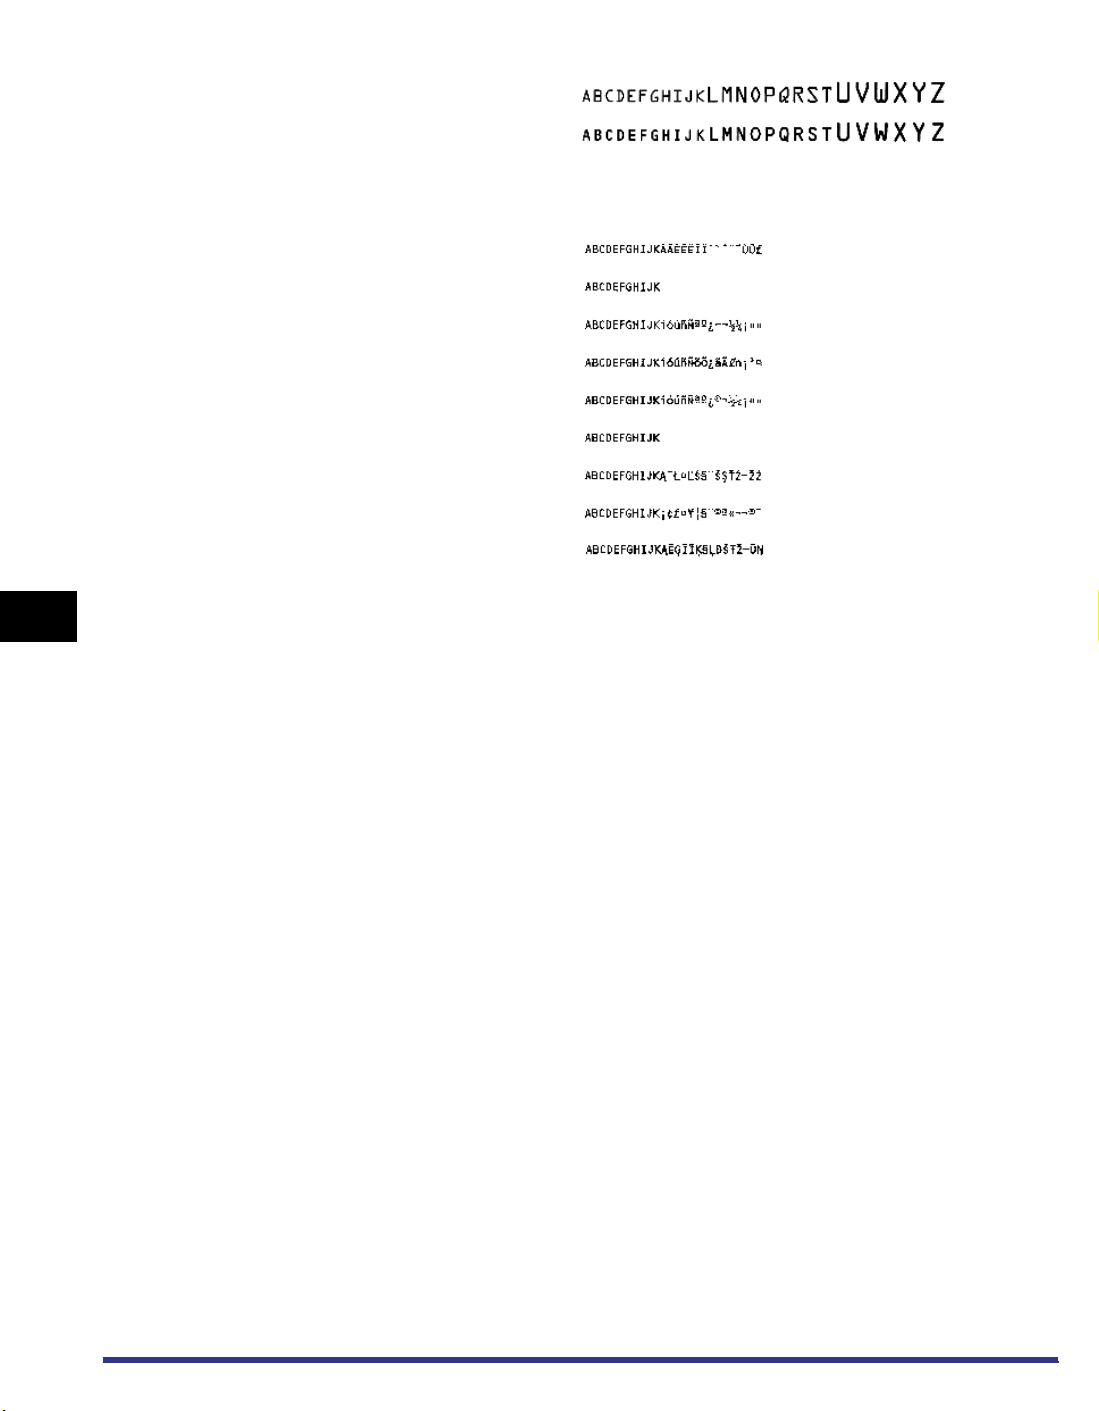
6
OCR Code Scalable Fonts (PCL)
OCR A
OCR B
Bit-mapped Fonts
Line Printer
Line Printer
Line Printer
Line Printer
Line Printer
Line Printer
Line Printer
Line Printer
Line Printer
Appendix
6-20
Checking the Font Lists for Available Fonts
Page 89
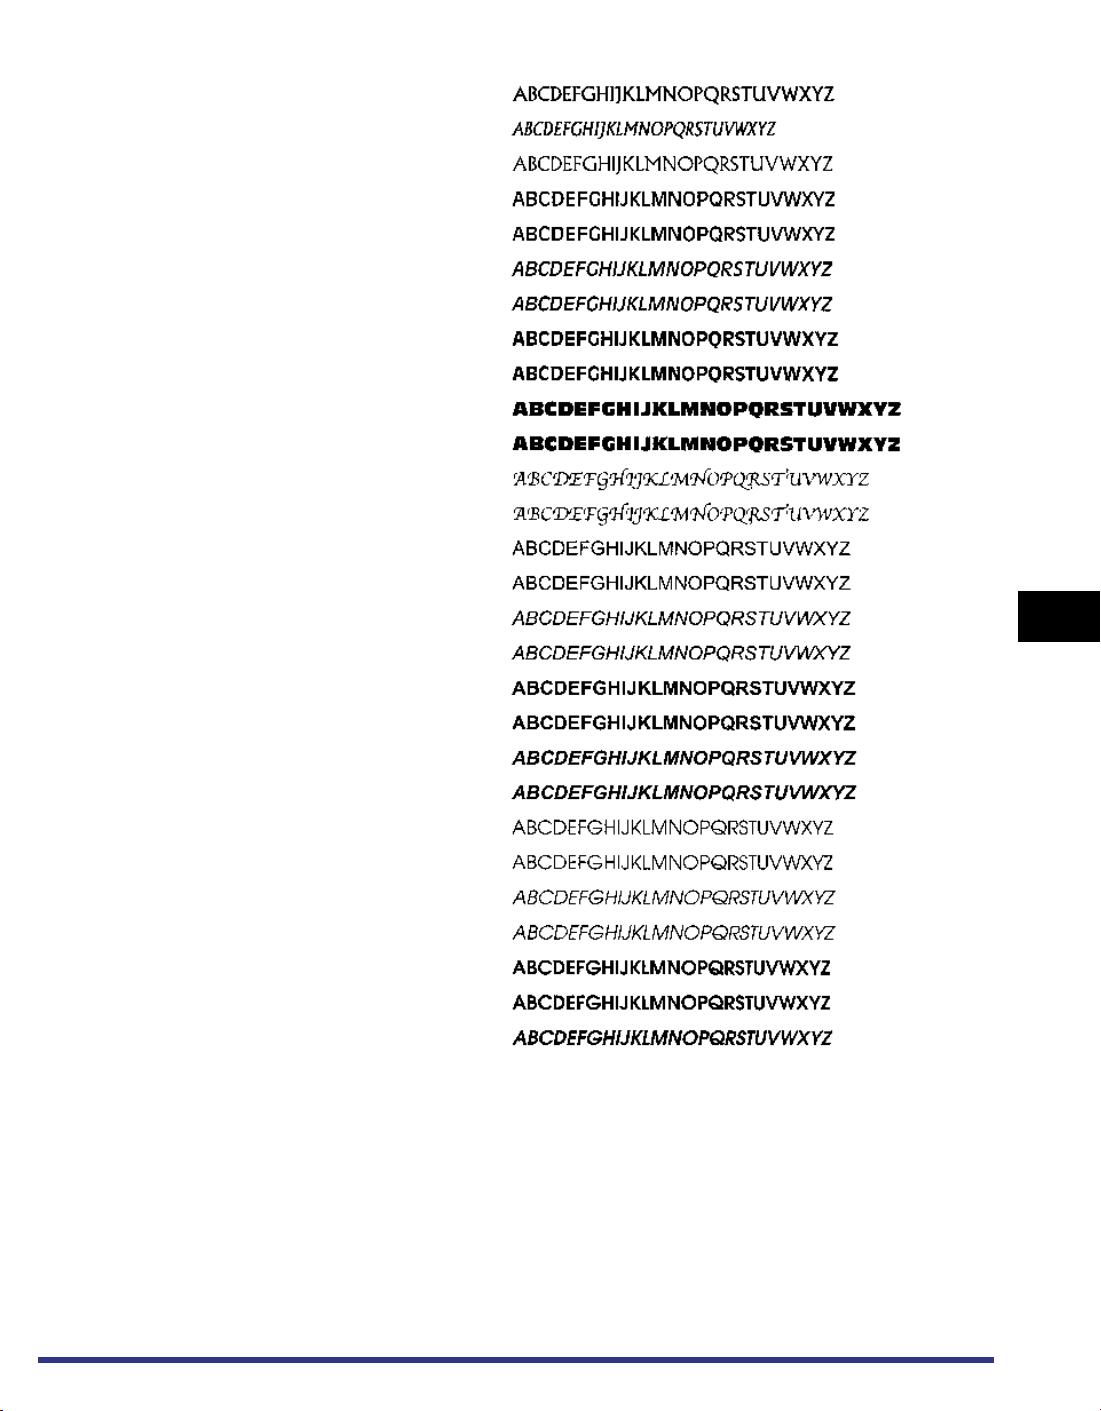
PS Fonts (Printer Kit-C1 Only)
AlbertusMT
AlbertusMT Italic
AlbertusMT Light
AntiqueOlive Roman
AntiqueOliveCE Roman
AntiqueOlive Italic
AntiqueOliveCE Italic
AntiqueOlive Bold
AntiqueOliveCE Bold
AntiqueOlive Compact
AntiqueOliveCE Compact
Apple Chancery
Apple ChanceryCE
ArialMT
ArialCE
Arial ItalicMT
ArialCE Italic
Arial BoldMT
ArialCE Bold
Arial BoldItalicMT
ArialCE BoldItalic
AvantGarde Book
AvantGardeCE Book
AvantGarde BookOblique
AvantGardeCE BookOblique
AvantGarde Demi
AvantGardeCE Demi
AvantGarde DemiOblique
6
Appendix
Checking the Font Lists for Available Fonts
6-21
Page 90
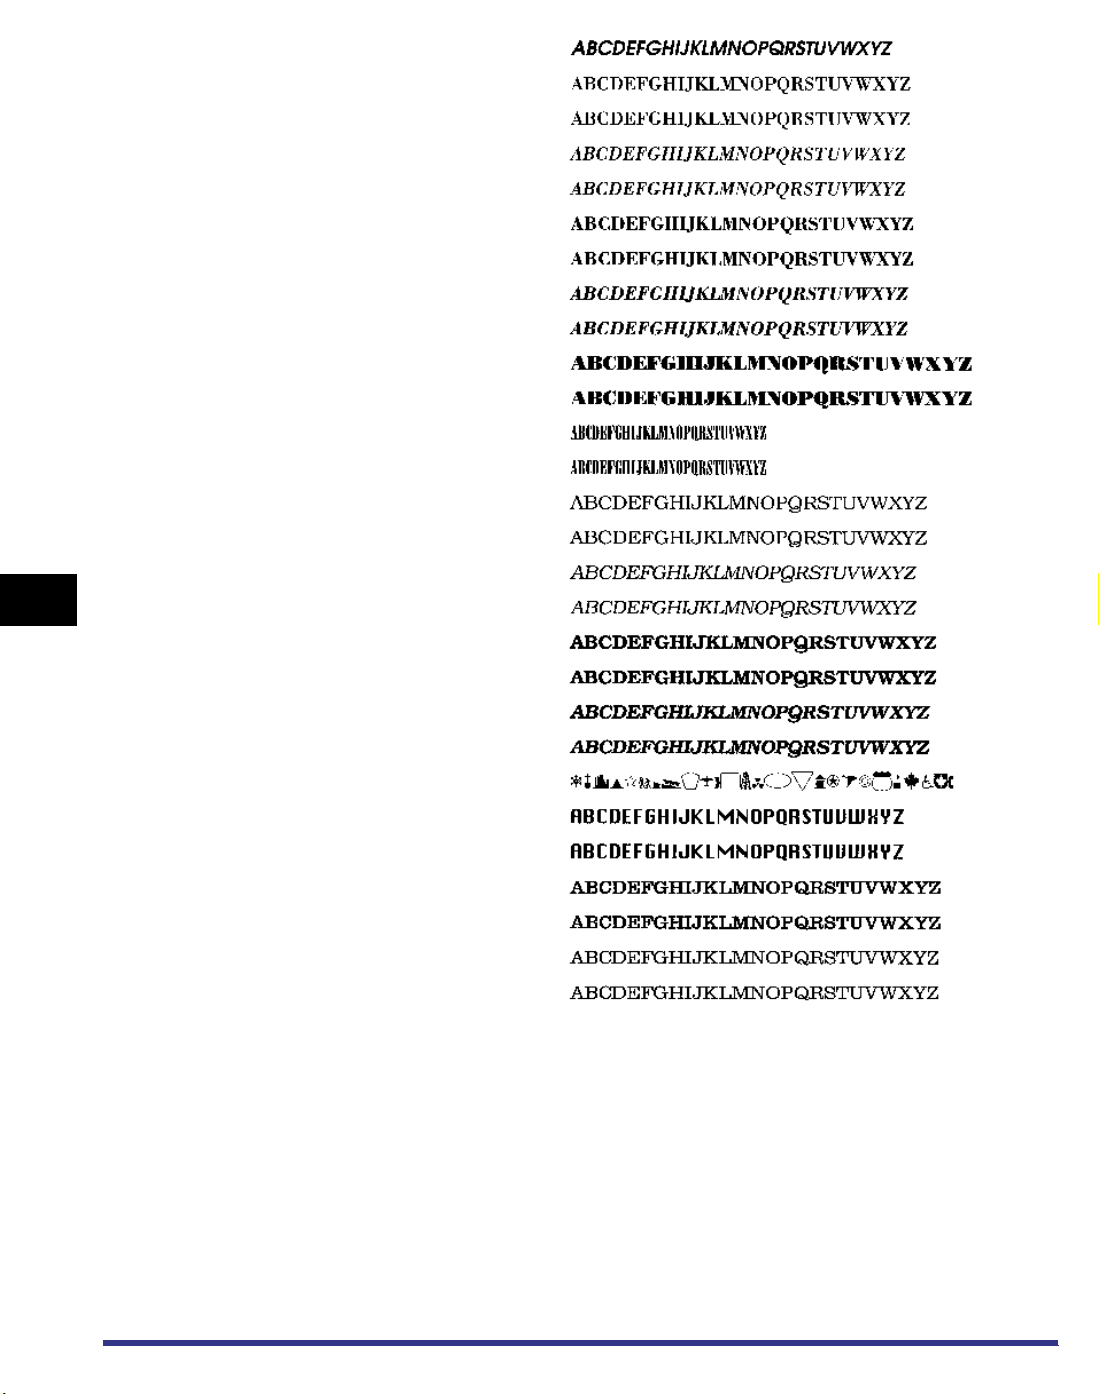
AvantGardeCE DemiOblique
Bodoni
BodoniCE
Bodoni Italic
BodoniCE Italic
Bodoni Bold
BodoniCE Bold
Bodoni BoldItalic
BodoniCE BoldItalic
Bodoni Poster
BodoniCE Poster
Bodoni PosterCompressed
BodoniCE PosterCompressed
Bookman Light
BookmanCE Light
Bookman LightItalic
6
Appendix
BookmanCE LightItalic
Bookman Demi
BookmanCE Demi
Bookman DemiItalic
BookmanCE DemiItalic
Candid
Chicago
Chicago CE
Clarendon
ClarendonCE
Clarendon Light
ClarendonCE Light
6-22
Checking the Font Lists for Available Fonts
Page 91
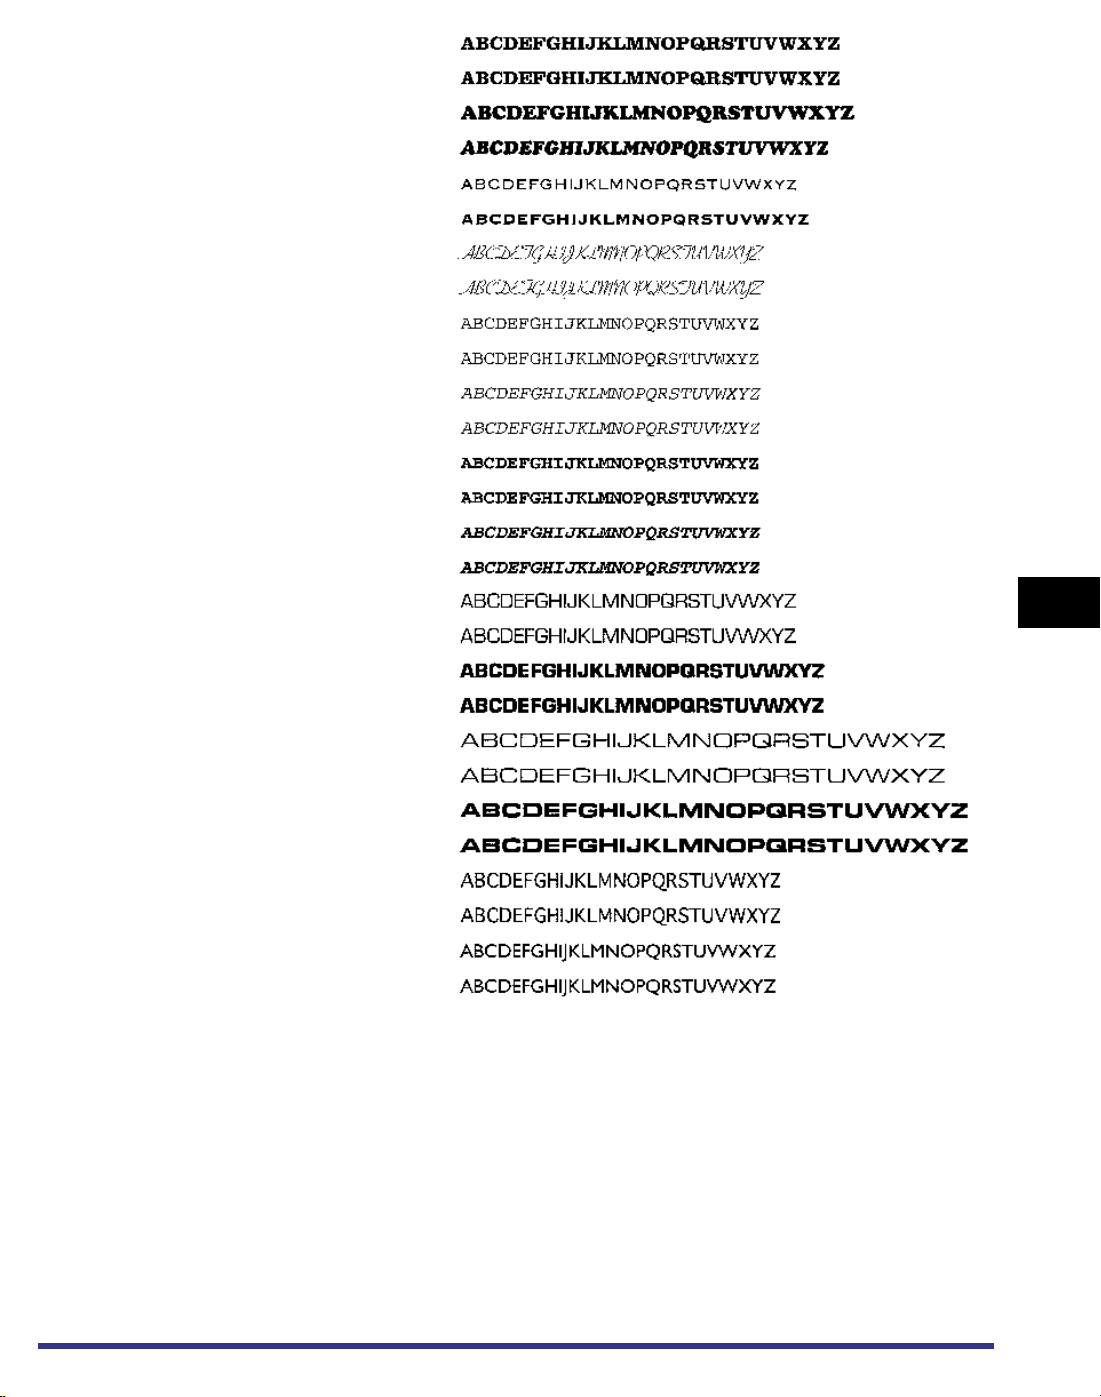
Clarendon Bold
ClarendonCE Bold
CooperBlack
CooperBlack Italic
Copperplate ThirtyTwoBC
Copperplate ThirtyThreeBC
Coronet Regular
CoronetCE Regular
Courier
CourierCE
Courier Oblique
CourierCE Oblique
Courier Bold
CourierCE Bold
Courier BoldOblique
CourierCE BoldOblique
Eurostile
EurostileCE
Eurostile Bold
EurostileCE Bold
Eurostile ExtendedTwo
EurostileCE ExtendedTwo
Eurostile BoldExtendedTwo
EurostileCE BoldExtendedTwo
Geneva
GenevaCE
GillSans
GillSansCE Roman
6
Appendix
Checking the Font Lists for Available Fonts
6-23
Page 92
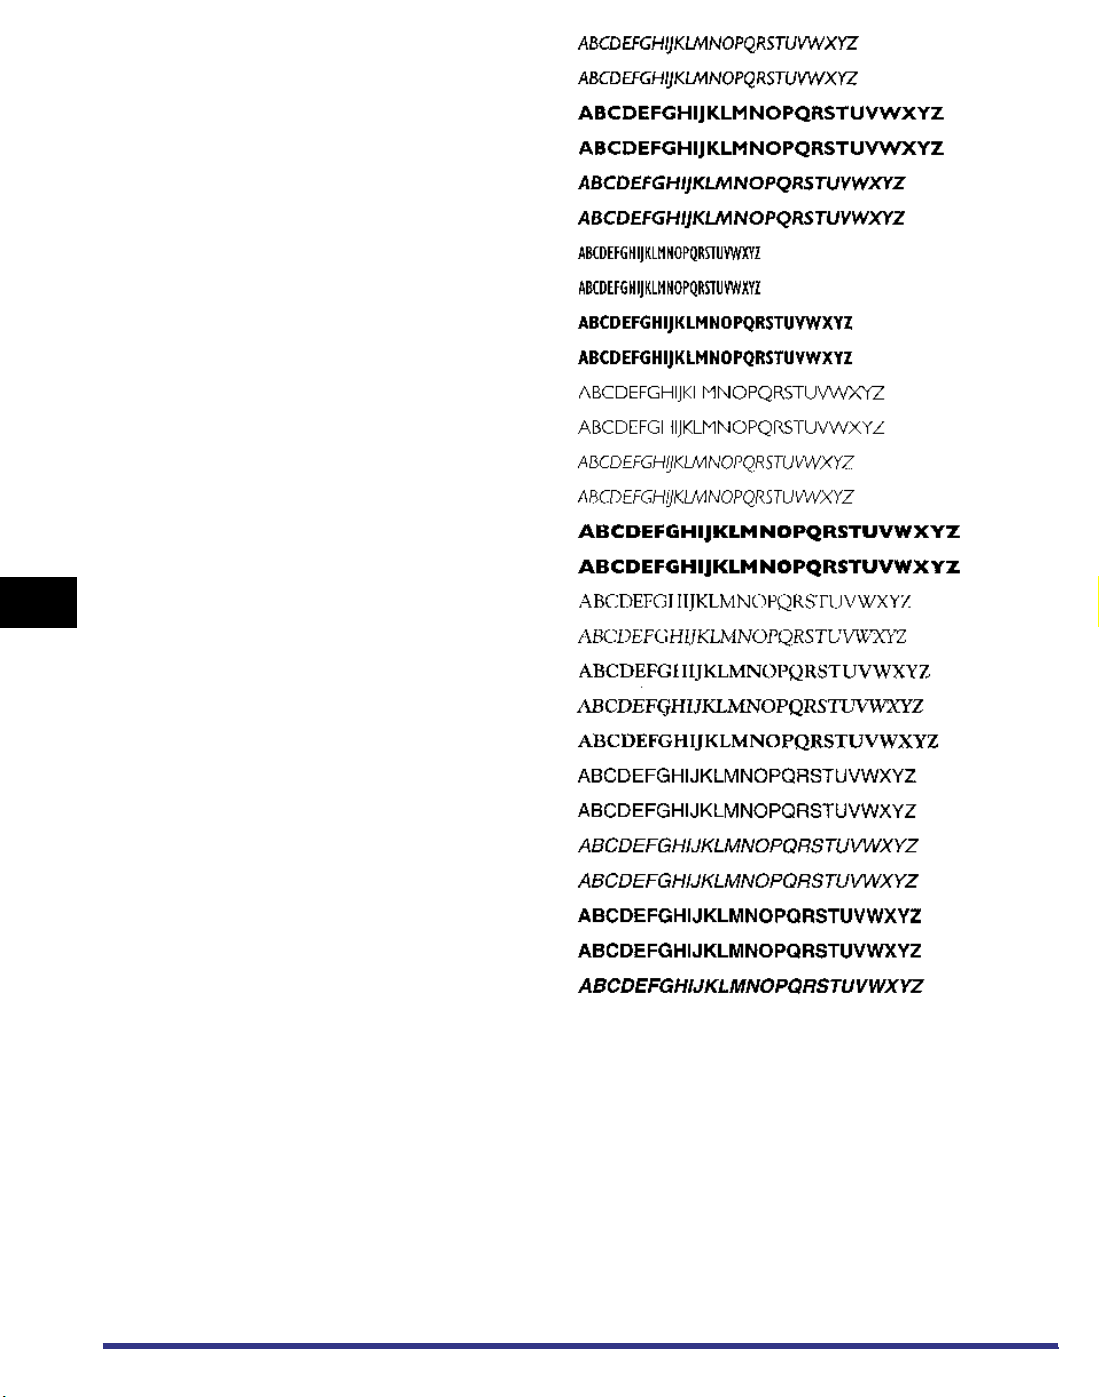
GillSans Italic
GillSansCE Italic
GillSans Bold
GillSansCE Bold
GlllSans BoldItalic
GlllSansCE BoldItalic
GillSans Condensed
GillSansCE Condensed
GillSans BoldCondensed
GillSansCE BoldCondensed
GillSans Light
GillSansCE Light
GillSans LightItalic
GillSansCE LightItalic
GillSans ExtraBold
GillSansCE ExtraBold
6
Appendix
Goudy
Goudy Italic
Goudy Bold
Goudy BoldItalic
Goudy ExtraBold
Helvetica
HelveticaCE
Helvetica Oblique
HelveticaCE Oblique
Helvetica Bold
HelveticaCE Bold
Helvetica BoldOblique
6-24
Checking the Font Lists for Available Fonts
Page 93
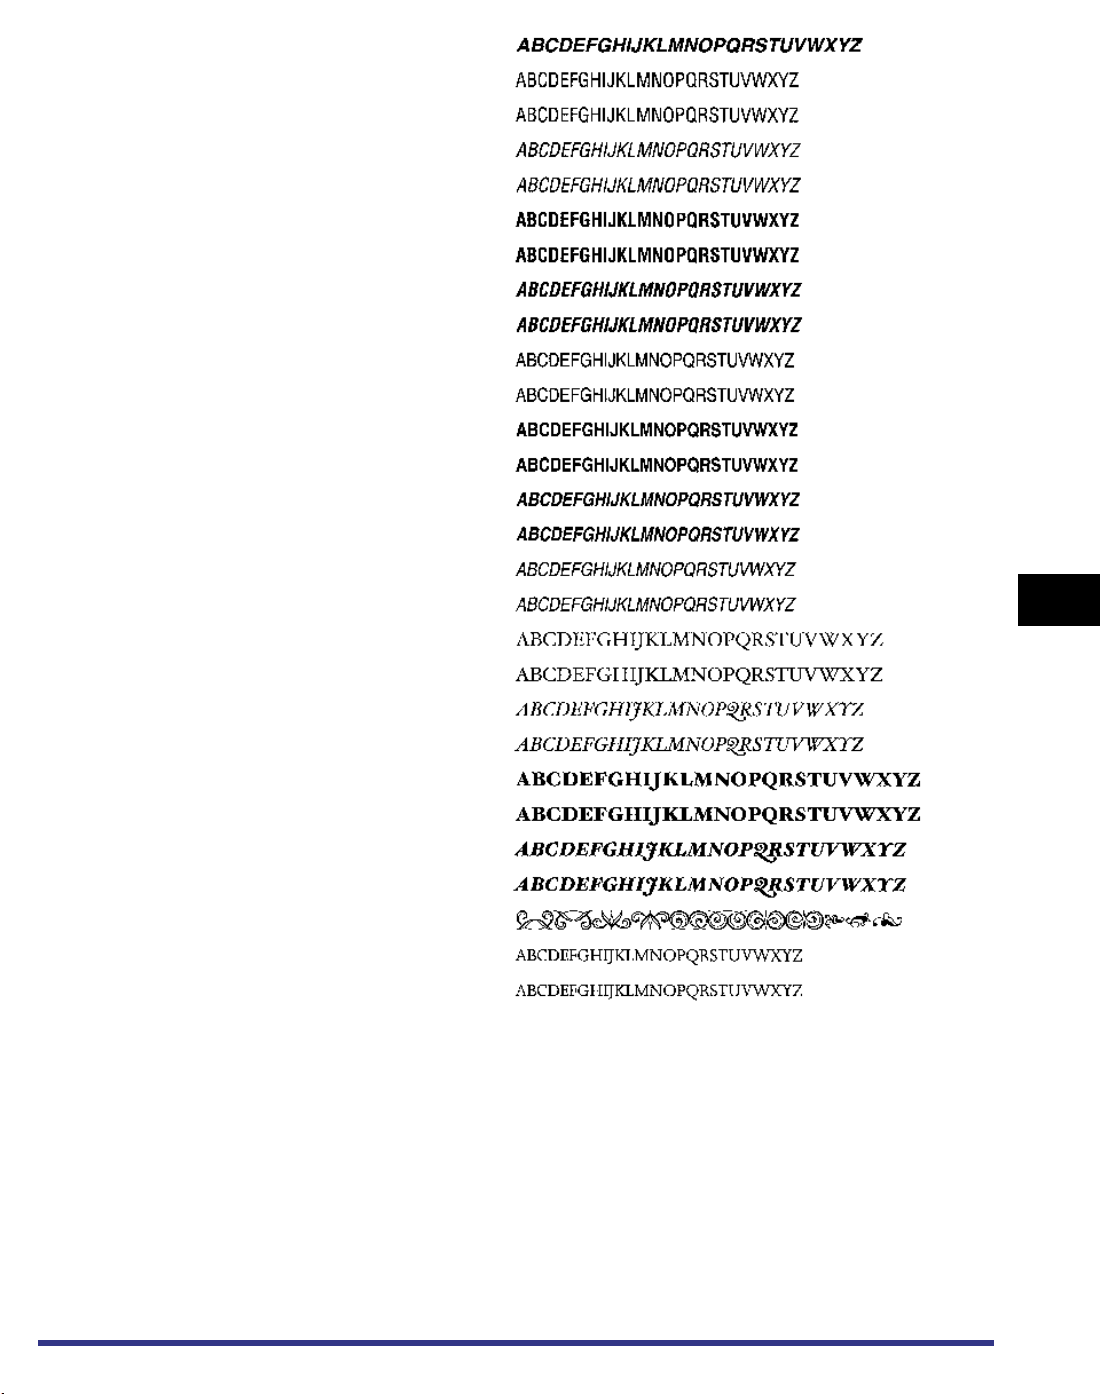
HelveticaCE BoldOblique
Helvetica Condensed
HelveticaCE Cond
Helvetica Condensed Oblique
HelveticaCE CondObl
Helvetica Condensed Bold
HelveticaCE CondBold
Helvetica Condensed BoldObl
HelveticaCE CondBoldObl
Helvetica Narrow
HelveticaCE Narrow
Helvetica Narrow Bold
HelveticaCE NarrowBold
Helvetica Narrow BoldOblique
HelveticaCE Narrow BoldOblique
Helvetica Narrow Oblique
HelveticaCE NarrowOblique
HoeflerText Regular
HoeflerTextCE Regular
HoeflerText Italic
HoeflerTextCE Italic
HoeflerText Black
HoeflerTextCE Black
HoeflerText BlackItalic
HoeflerTextCE BlackItalic
HoeflerText Ornaments
JoannaMT
JoannaMTCE
6
Appendix
Checking the Font Lists for Available Fonts
6-25
Page 94
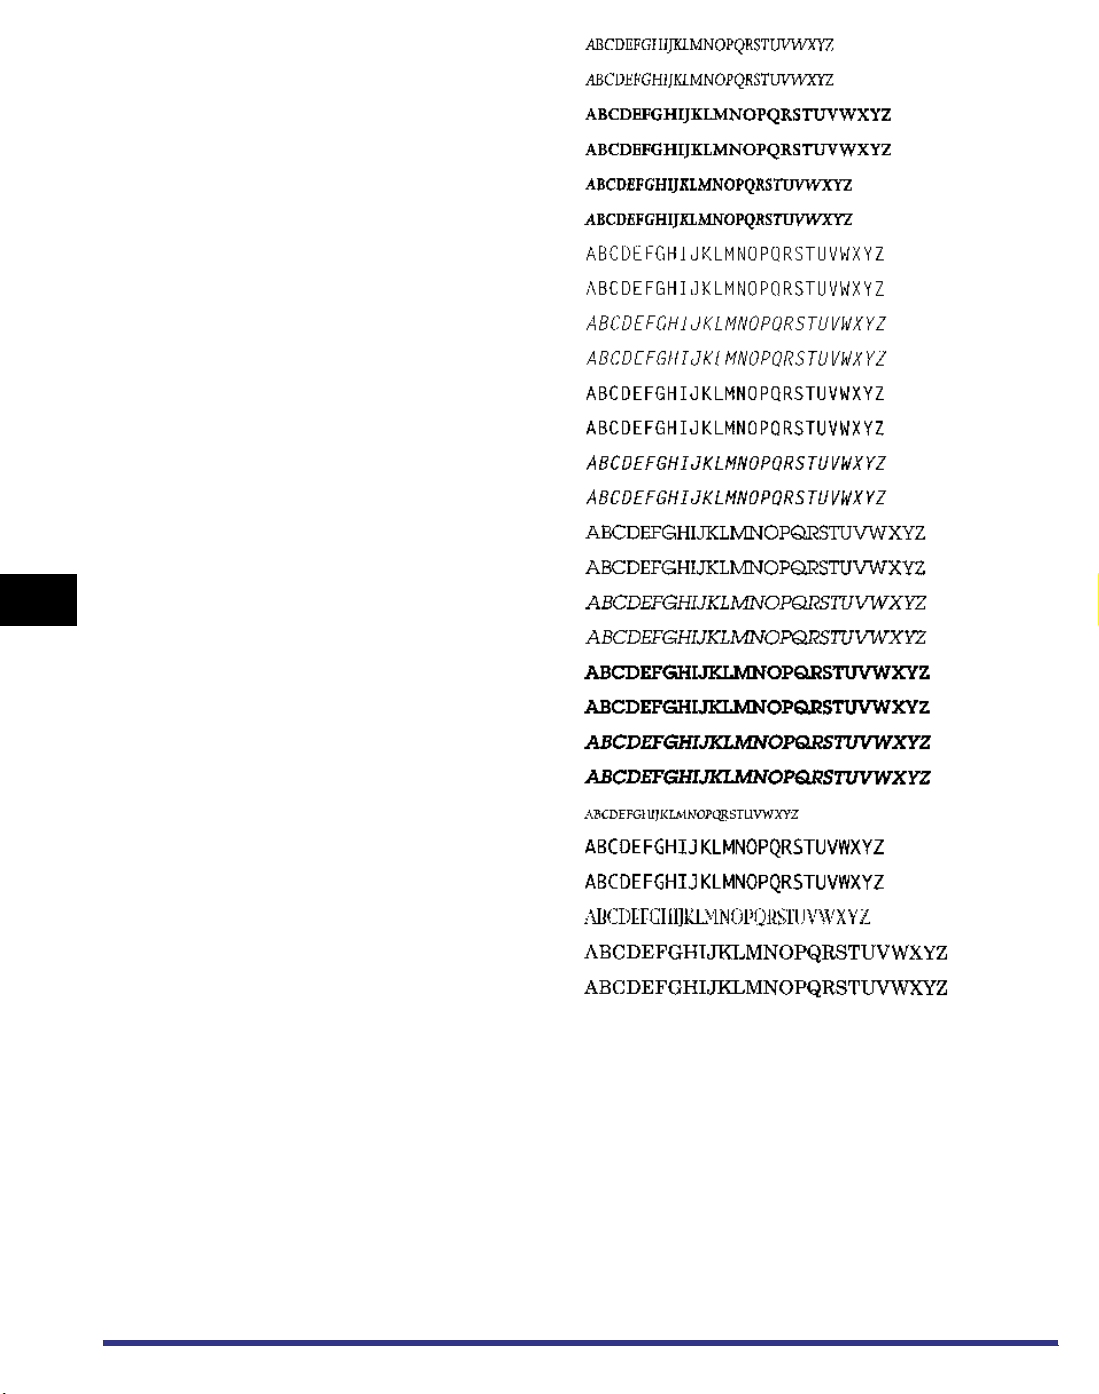
JoannaMT Italic
JoannaMTCE Italic
JoannaMT Bold
JoannaMTCE Bold
JoannaMT BoldItalic
JoannaMTCE BoldItalic
LetterGothic
LetterGothicCE
LetterGothic Slanted
LetterGothicCE Slanted
LetterGothic Bold
LetterGothicCE Bold
LetterGothic BoldSlanted
LetterGothicCE BoldSlanted
LubalinGraph Book
LubalinGraphCE Book
6
Appendix
LubalinGraph BookOblique
LubalinGraphCE BookOblique
LubalinGraph Demi
LubalinGraphCE Demi
LubalinGraph DemiOblique
LubalinGraphCE DemiOblique
Marigold
Monaco
MonacoCE
MonaLisa Recut
NewCenturySchlbk Roman
NewCenturySchlbkCE Roman
6-26
Checking the Font Lists for Available Fonts
Page 95
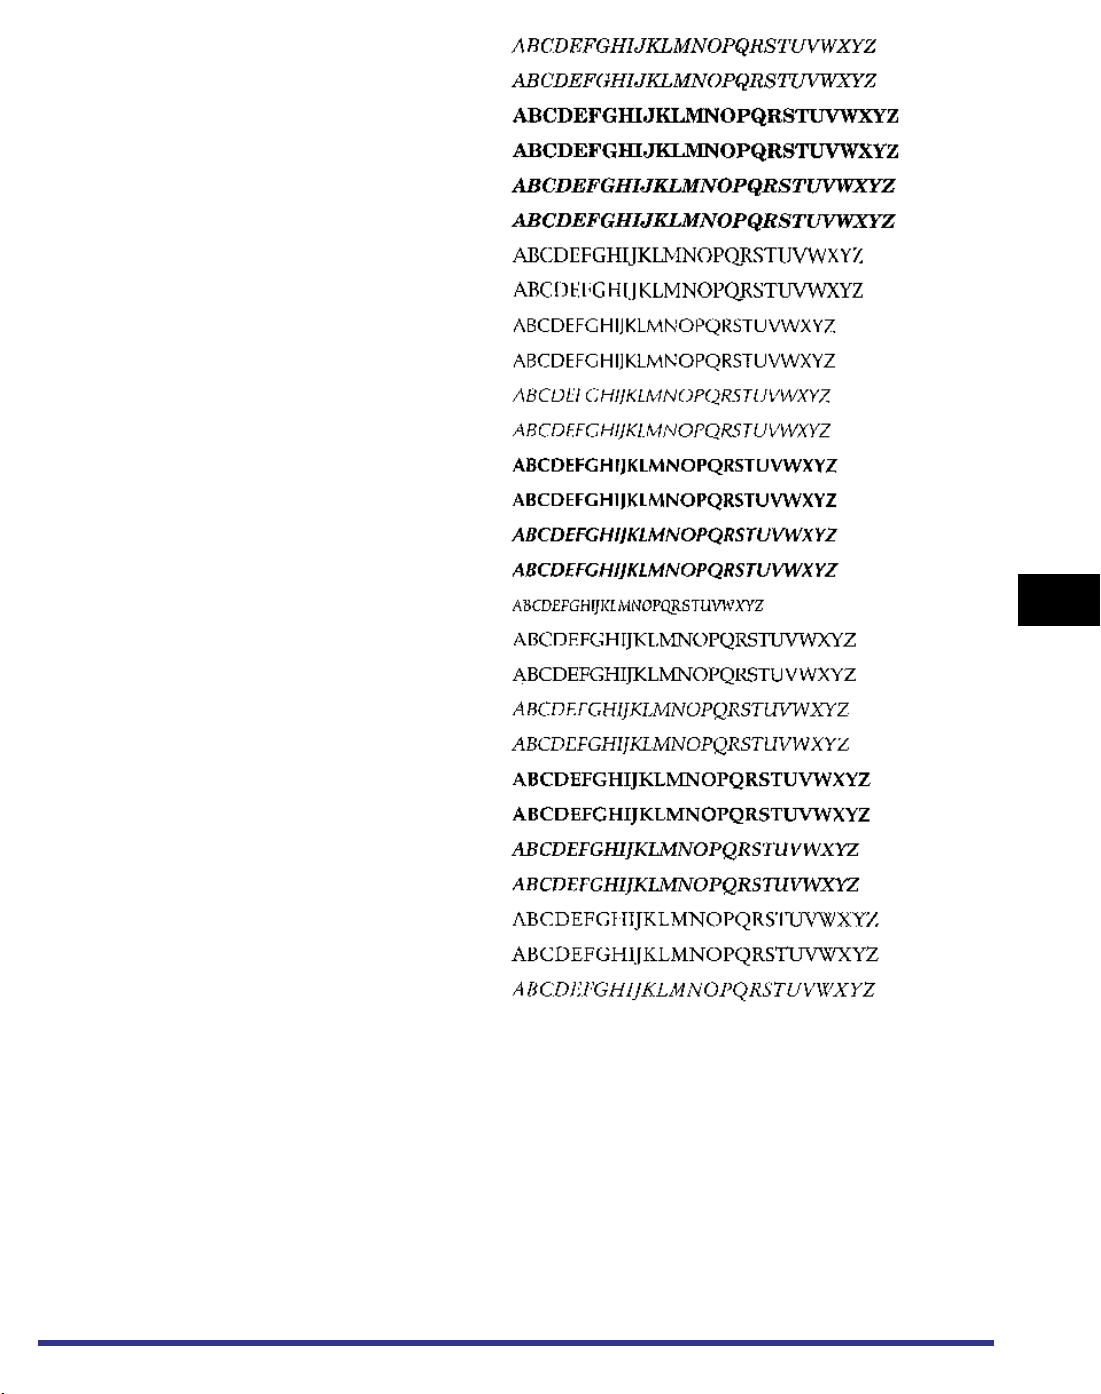
NewCenturySchlbk Italic
NewCenturySchlbkCE Italic
NewCenturySchlbk Bold
NewCenturySchlbkCE Bold
NewCenturySchlbk BoldItalic
NewCenturySchlbkCE BoldItalic
NewYork
NewYorkCE
Optima
OptimaCE Roman
Optima Italic
OptimaCE Italic
Optima Bold
OptimaCE Bold
Optima BoldItalic
OptimaCE BoldItalic
Oxford
Palatino Roman
PalatinoCE Roman
Palatino Italic
PalatinoCE Italic
Palatino Bold
PalatinoCE Bold
Palatino BoldItalic
PalatinoCE BoldItalic
StempelGaramond Roman
StempelGaramondCE Roman
StempelGaramond Italic
6
Appendix
Checking the Font Lists for Available Fonts
6-27
Page 96
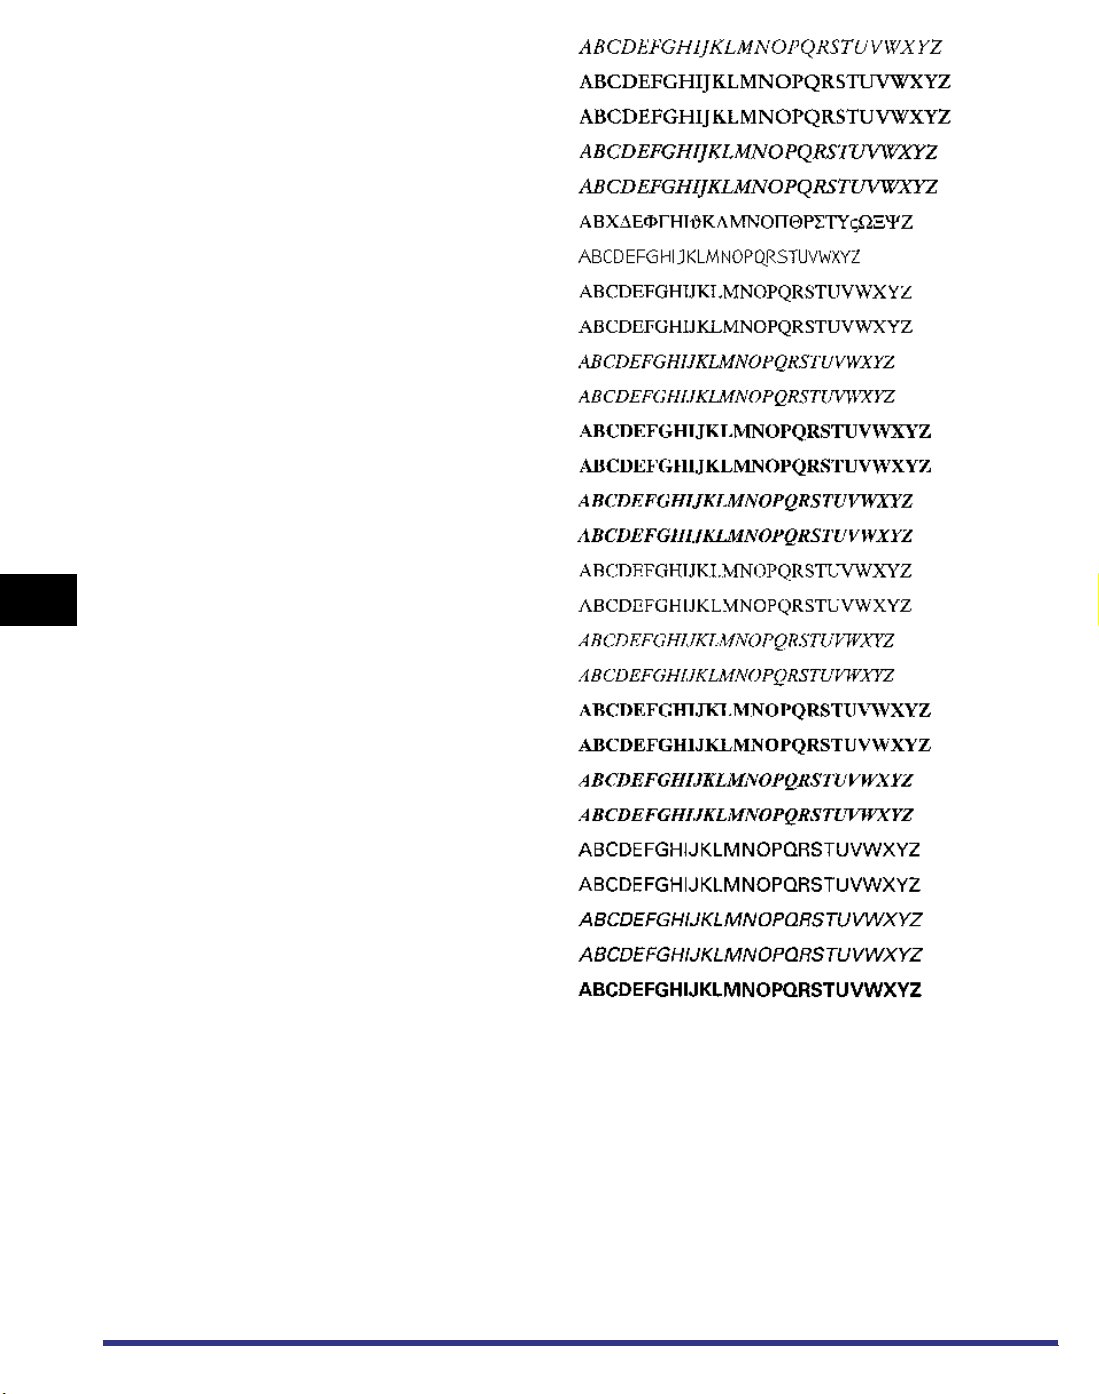
StempelGaramondCE Italic
StempelGaramond Bold
StempelGaramondCE Bold
StempelGaramond BoldItalic
StempelGaramondCE BoldItalic
Symbol
Tekton
Times Roman
TimesCE Roman
Times Italic
TimesCE Italic
Times Bold
TimesCE Bold
Times BoldItalic
TimesCE BoldItalic
TimesNewRomanPSMT
6
Appendix
TimesNewRomanCE
TimesNewRomanPS ItalicMT
TimesNewRomanCE Italic
TlmesNewRomanPS BoldMT
TimesNewRomanCE Bold
TimesNewRomanPS BoldItalicMT
TimesNewRomanCE BoldItalic
Univers
UniversCE Medium
Univers Oblique
UniversCE Oblique
Univers Bold
6-28
Checking the Font Lists for Available Fonts
Page 97
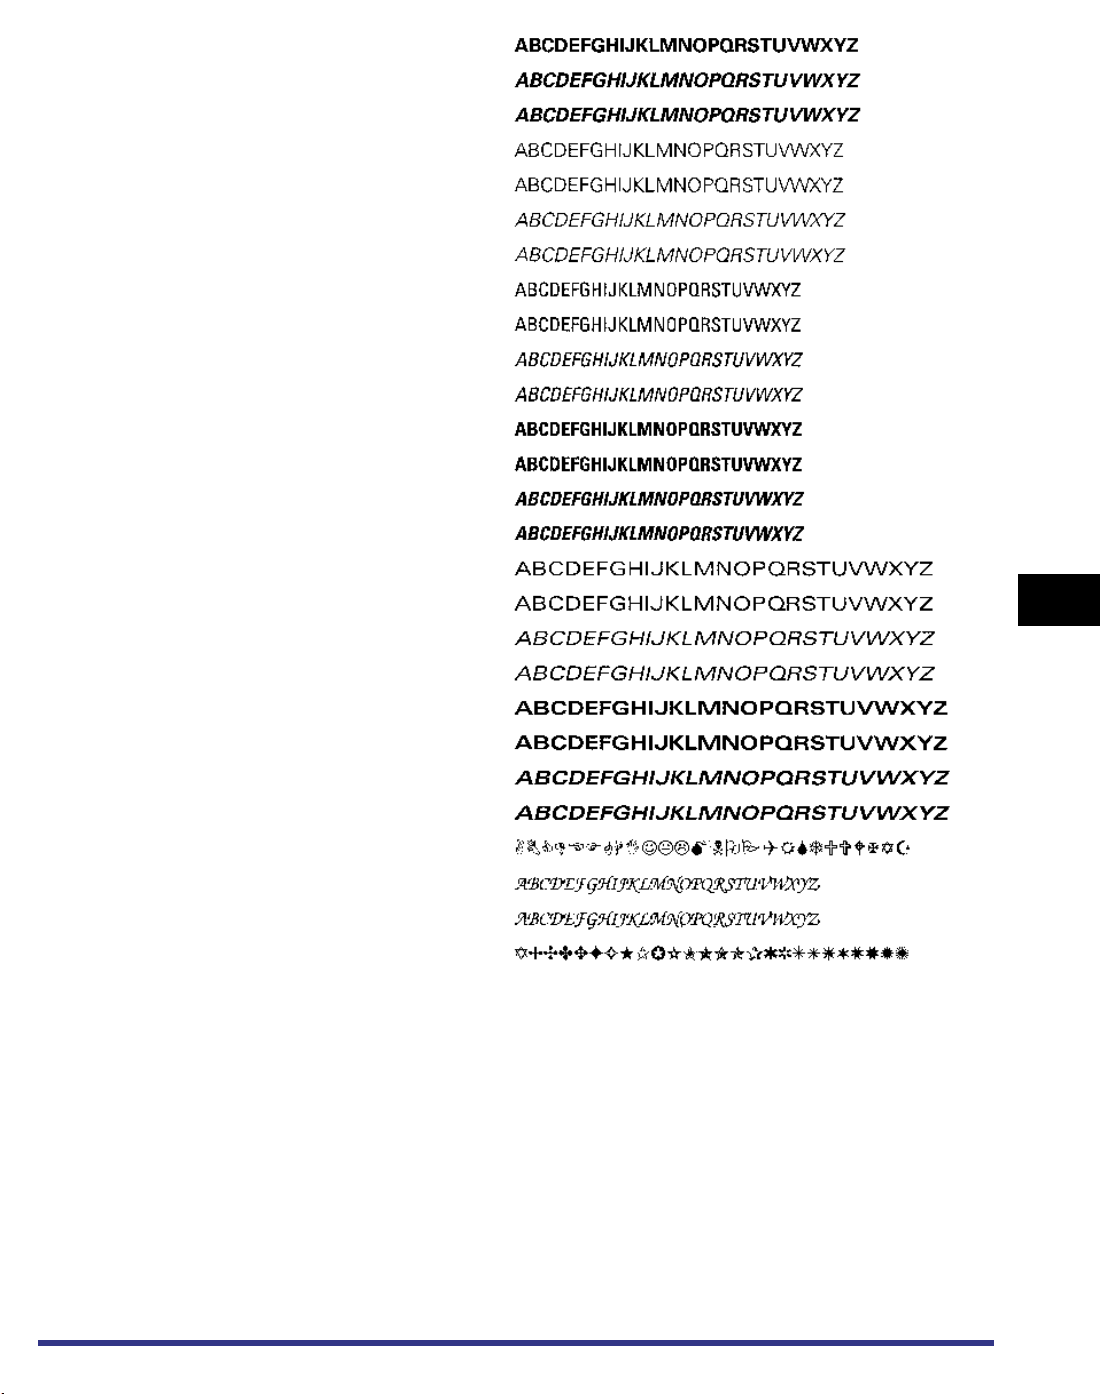
UniversCE Bold
Univers BoldOblique
UniversCE BoldOblique
Univers Light
UniversCE Light
Univers Light Oblique
Univers CE Light Oblique
Univers Condensed
UniversCE Condensed
Univers CondensedOblique
UniversCE CondensedOblique
Univers CondensedBold
UniversCE CondensedBold
Univers CondensedBoldOblique
UniversCE CondensedBoldOblique
Univers Extended
UniversCE Extended
Univers ExtendedObl
UniversCE ExtendedObl
Univers BoldExt
UniversCE BoldExt
Univers BoldExtObl
UniversCE BoldExtObl
Wingdings Regular
ZapfChancery MediumItalic
ZapfChanceryCE MediumItalic
ZapfDingbats
6
Appendix
Checking the Font Lists for Available Fonts
6-29
Page 98
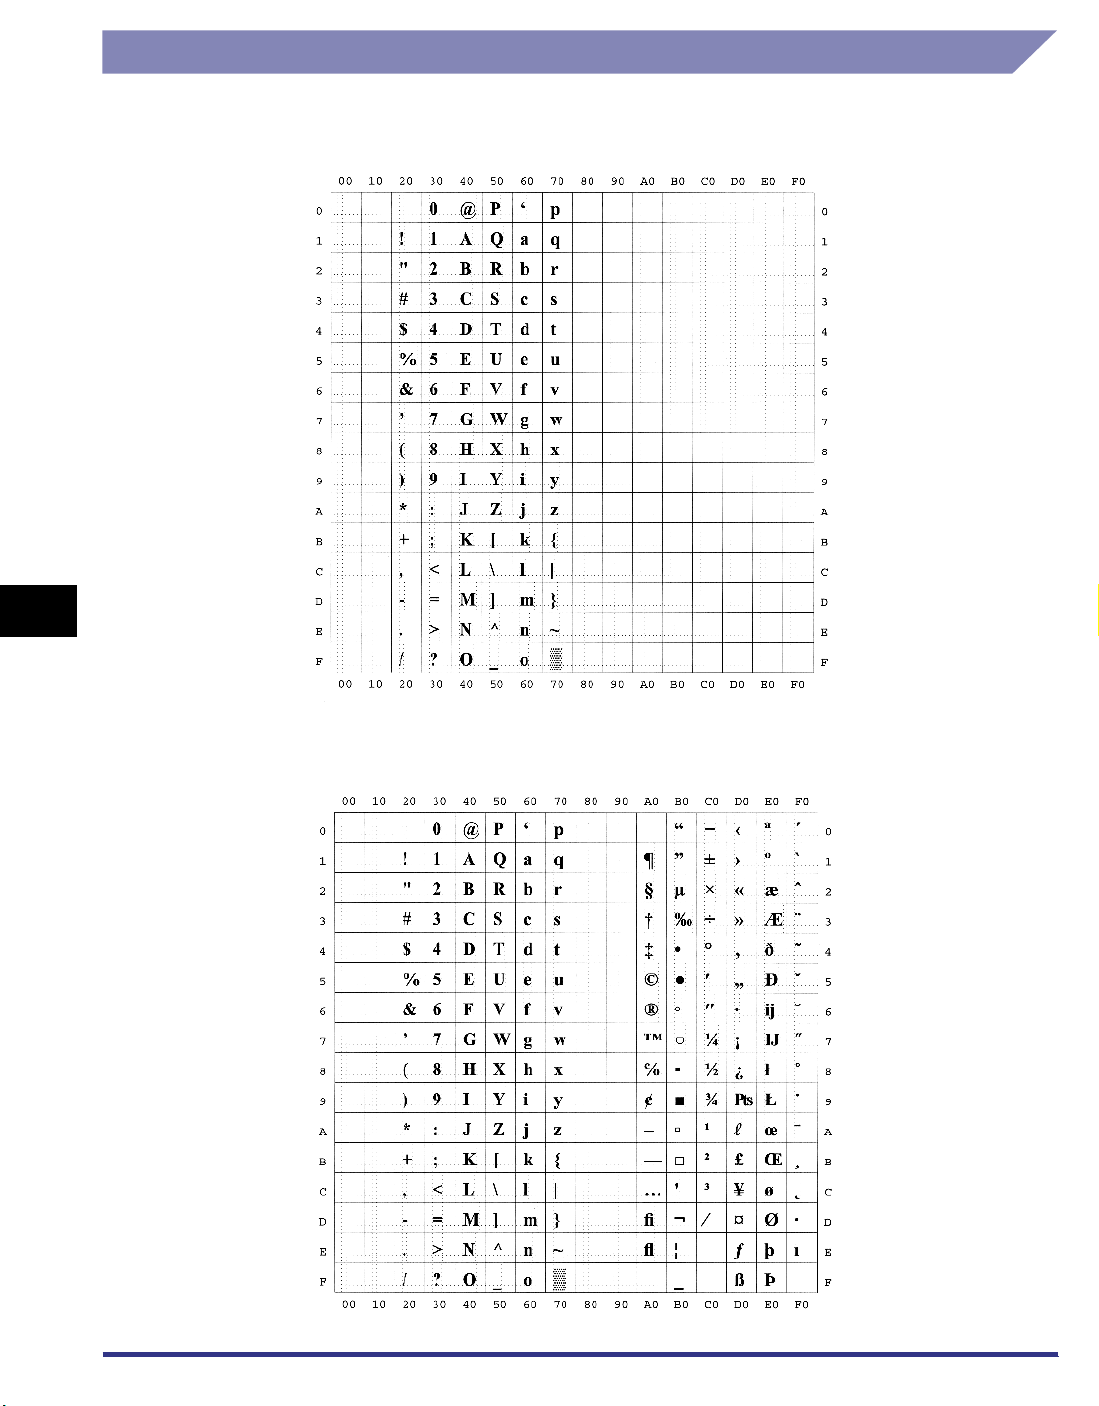
6
Symbol Sets
ASCII
Appendix
DeskTop
6-30
Checking the Font Lists for Available Fonts
Page 99
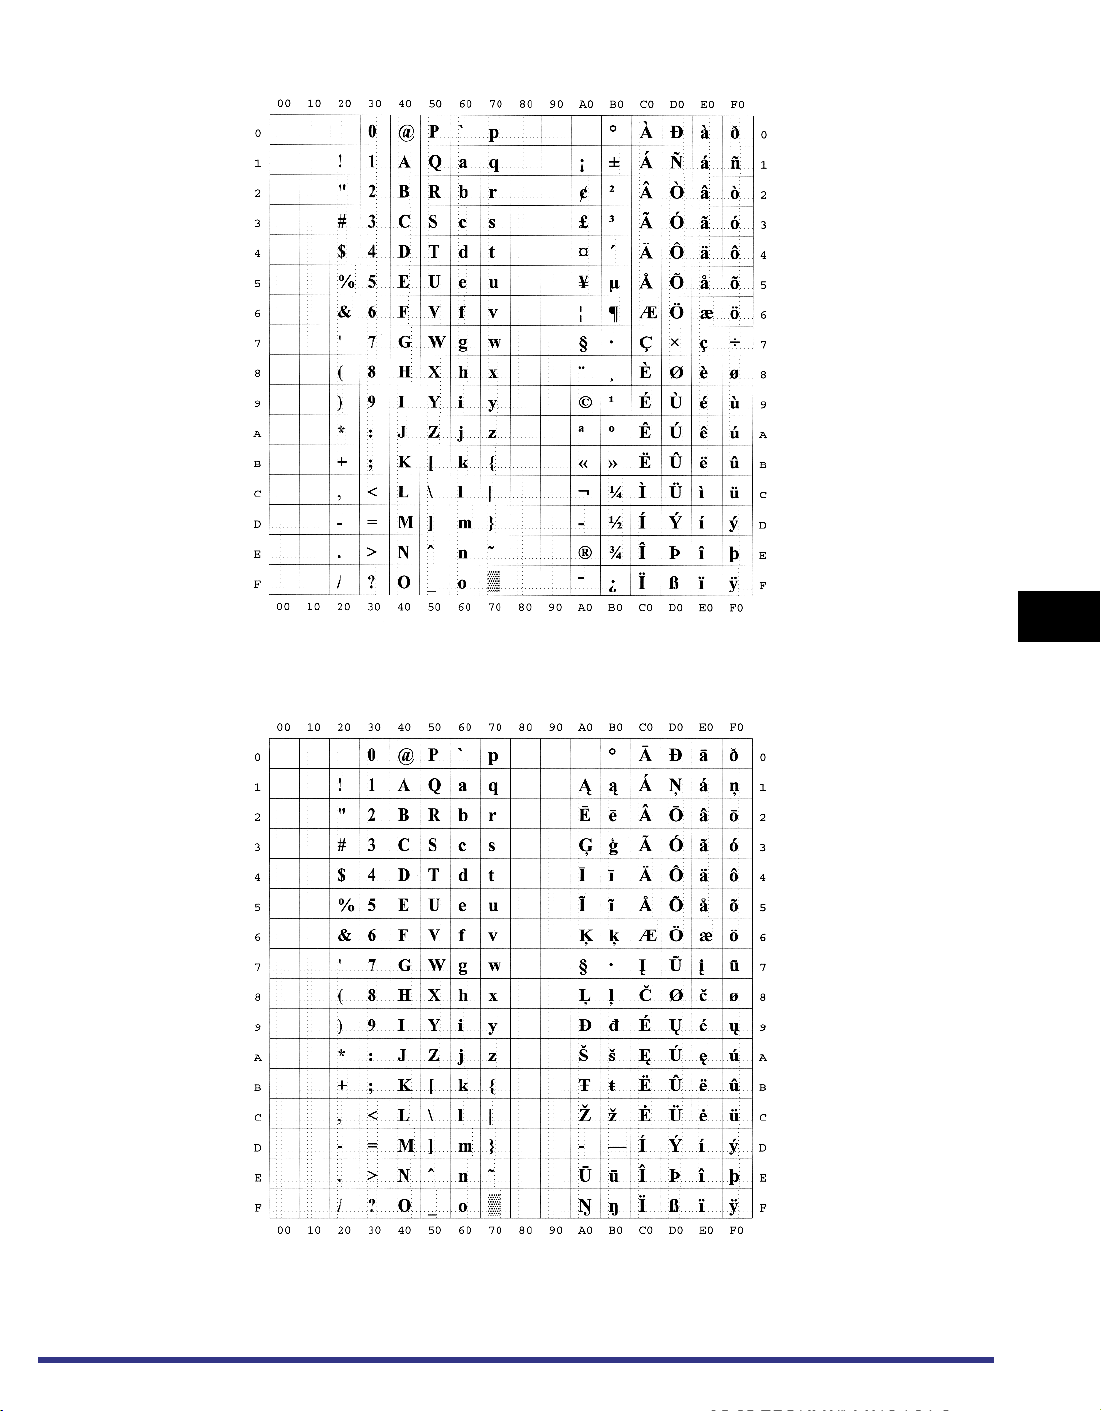
ISO 8859-1 Latin 1
6
ISO 8859-10 Latin 6
Appendix
Checking the Font Lists for Available Fonts
6-31
Page 100
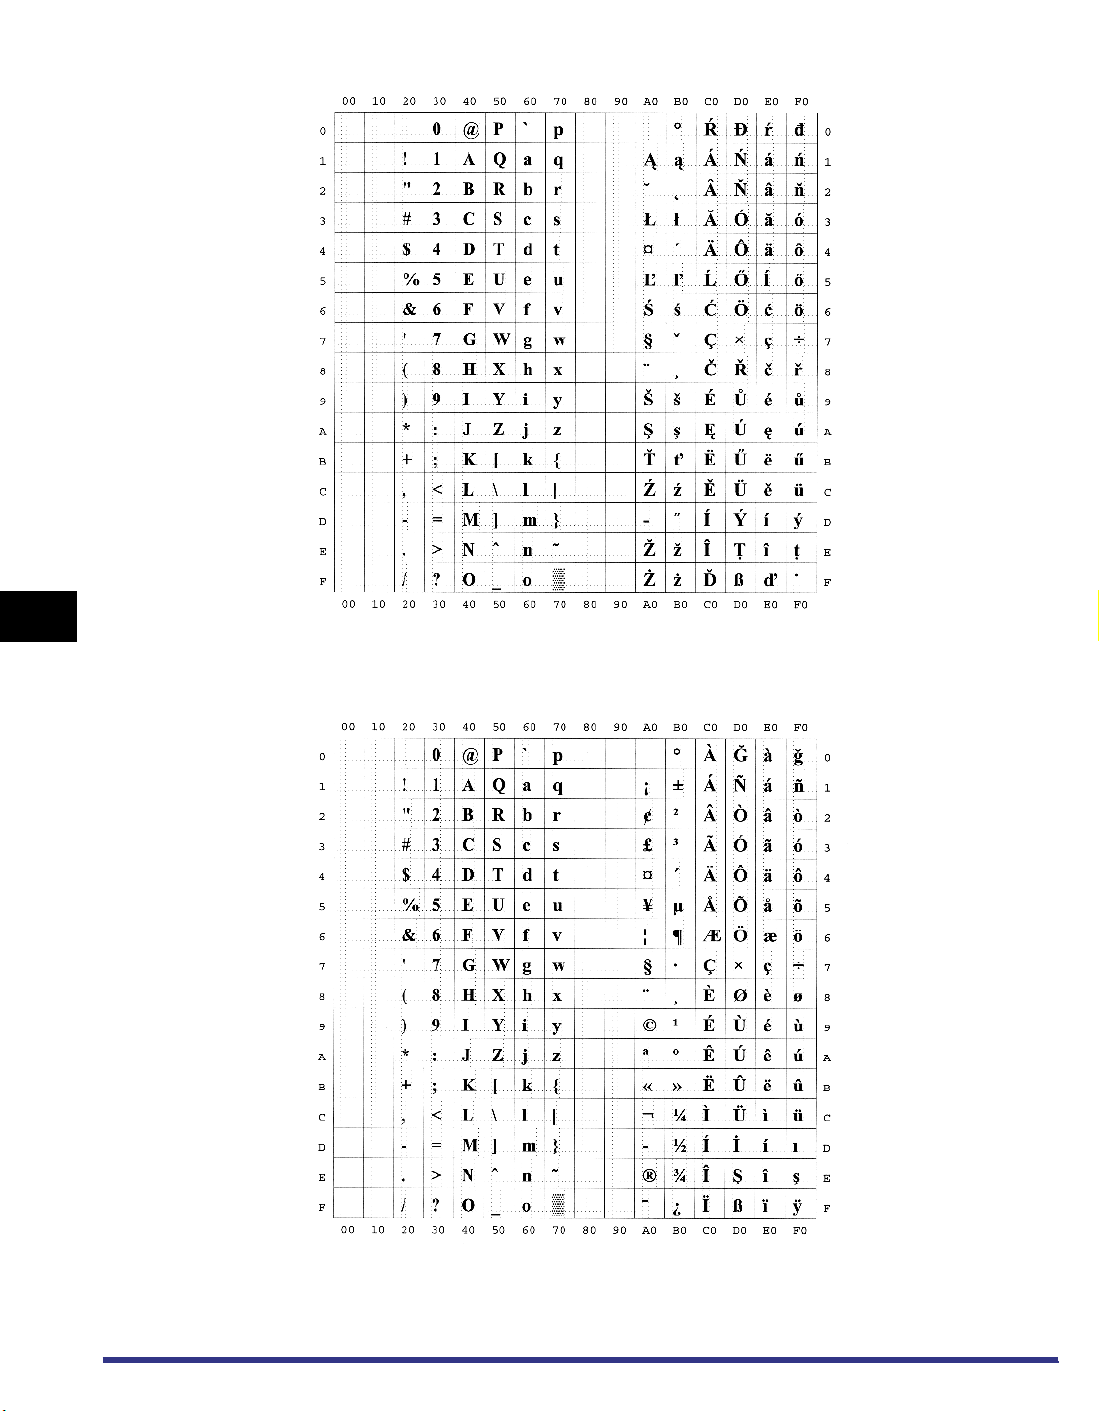
6
ISO 8859-2 Latin 2
Appendix
ISO 8859-9 Latin 5
6-32
Checking the Font Lists for Available Fonts
 Loading...