

Canon imageRUNNER ADVANCE C7580i II, imageRUNNER ADVANCE C7565i II, imageRUNNER ADVANCE C7570i II Advance Maintenance Manual
Preventative Maintenance Procedure
Last update 04/27/2018

Pre-Visit
Service
History Check
Common
Process
(Before)
Maintenance
Process
Common
Process
(After)
Purpose
Increase following items.
FCFR
Uptime
MCBV
Customer Satisfaction
How to use
This document was developed by Canon USA Engineering Services and Solutions to
perform consistent, effective and efficient maintenance on all Canon products.
FCFR, MCBV,
Uptime
Parts Cost
Visits, Labor
Implementation of the Preventative Maintenance Procedure
Service History Check - [Pre Visit]
Procedure Detail Note Time
Action Prior to
Customer Visit:
Whenever
possible,
Check Snapshot
for :
6
min
Check
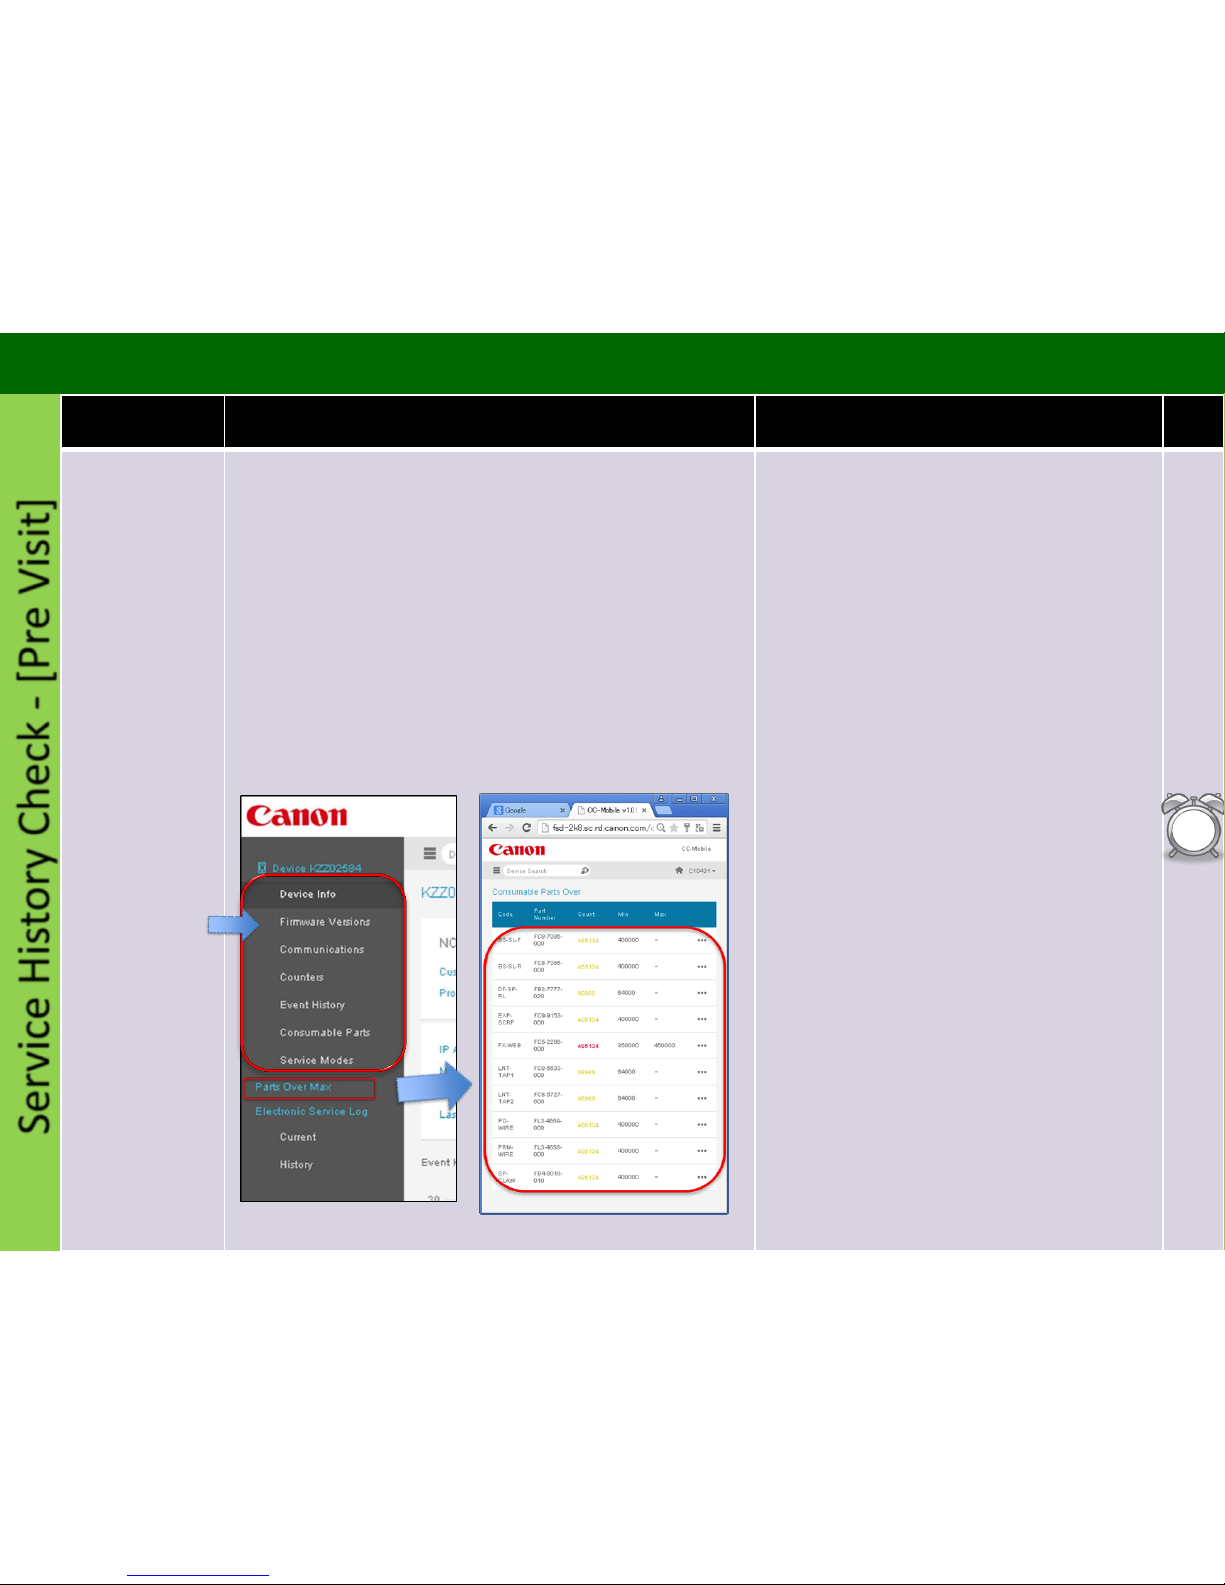
1. Log into Snapshot :
• Enter the machine Serial Number to check the
following:
1. Firmware Version – Prepare Firmware if necessary
2. Communications
3. Counters – Machine Usage
4. Event History – Check History for Errors, Alarms
and Jams
5. Consumable Part Counters -
Prepare Consumable and Durable
Parts
6. Service Modes
ITB Belt Position [disp_misc ITB-POS]
• Firmware Version
• Event History
• Part Counters
• Service Mode Settings
iRADV C7580i/C7570i/C7565i Advance Maintenance Guide
1. Understand the machine's current condition
(jams and error, needed consumable parts) before
visiting EM call or PM-Call.
2. Prepare all consumable parts that exceeded
Target and replace them on a PM-call, replace any
parts that exceeded life you have now at the EM
call.
3. Take the necessary actions for the jamming and
errors.
Common Process (Before)
Procedure Detail Note Time
Verify Customers’
Concern
Ask the customer about the condition of the machine
and validate any issues they have.
Ask Questions to find out if there are any following
issues on the machine?
1.Copy Quality
2.Jamming
3.ERROR
4.Other issues (Copier Only)
5.No Problem
Point:
- To perform efficient maintenance, we need to
ask the customer about machine condition.
Check the Serial
Number
Ensure the serial number on the machine matches the
serial number that you are dispatched to.
Point:
- If the serial number is incorrect and there is
more than one machine at the account that is
down please notify dispatch.
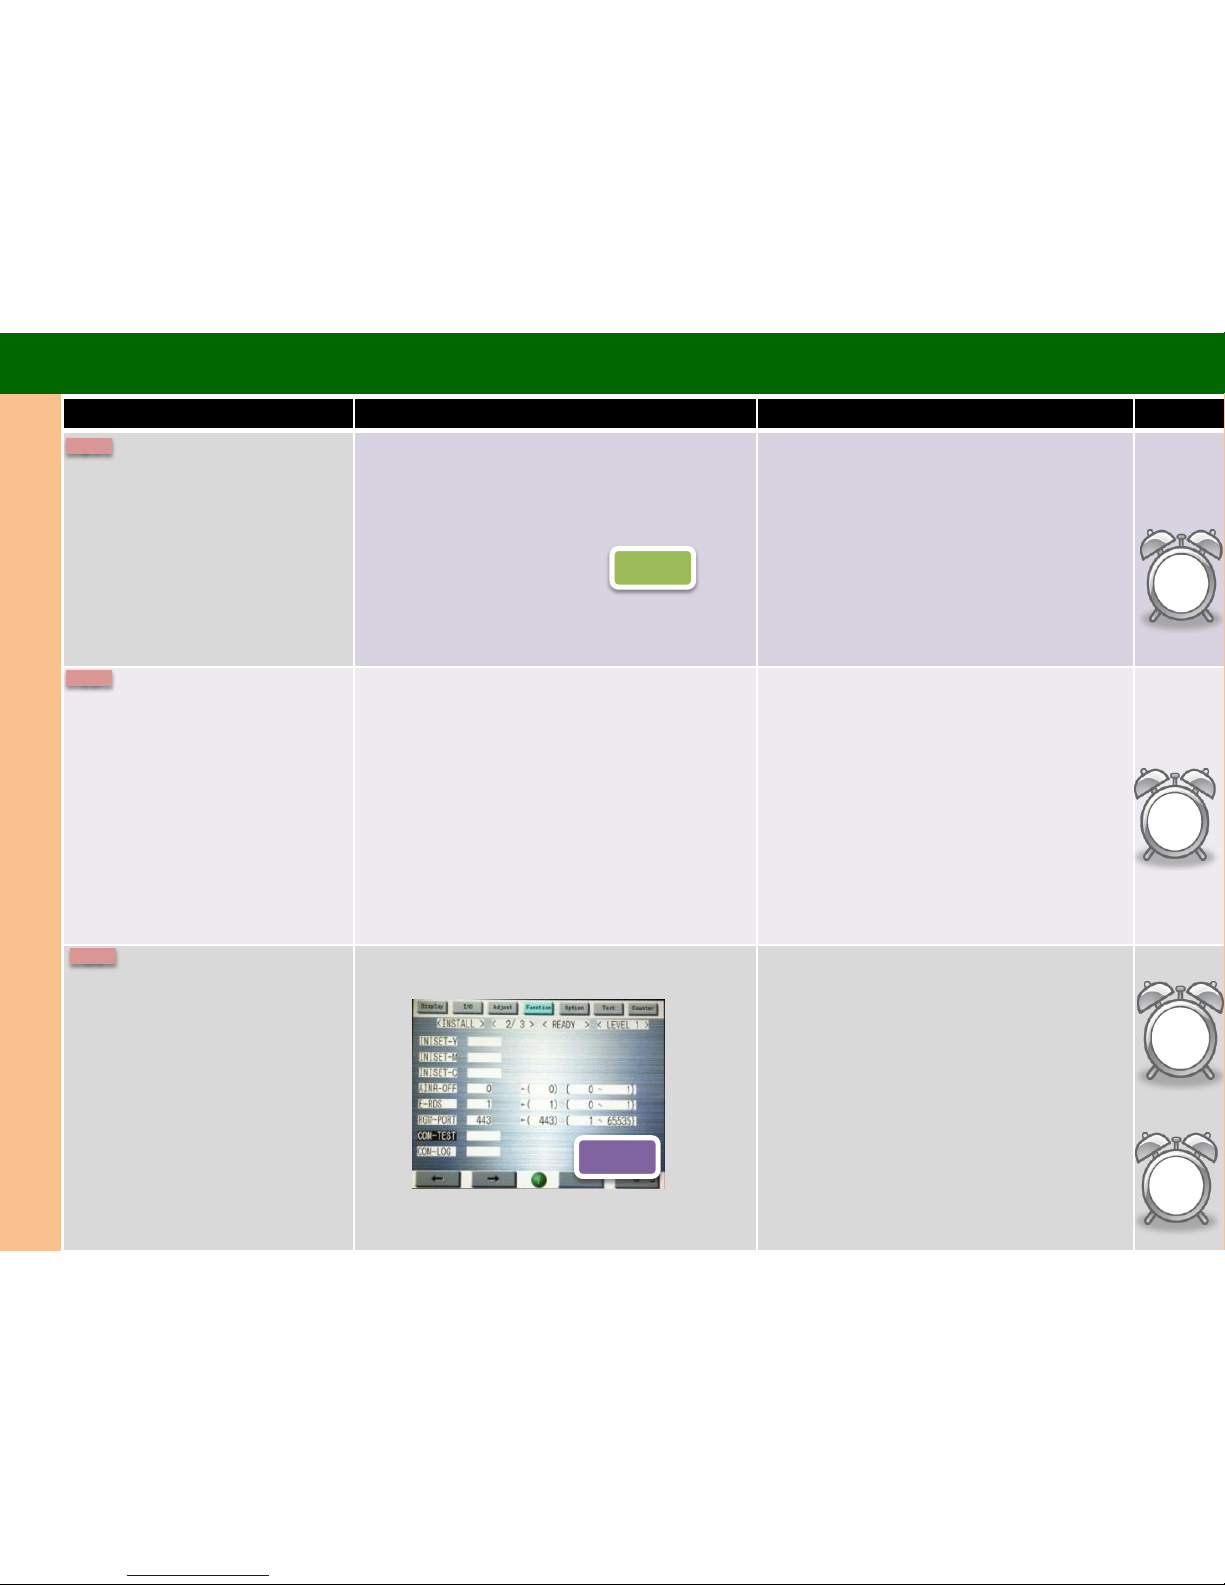
Perform COM-TEST
COPIER > Function > INSTALL>COM-TEST If COM-TEST is NG, fix this issue at first. If you can’t
fix this issue please insure the issue is resolved
prior to leaving the account.
C1
1
min
Check
1
min
Scan
Check
COM TEST
1
min
Check
1
min
COM TEST
C2
C3
iRADV C7580i/C7570i/C7565i Advance Maintenance Guide
Procedure Detail Note Time
Check Service Log
1. Check Service Log Point:
1. Check the log to see if there is any reoccurring
issues. If you see the same issues listed on the
log, then the root cause hasn’t been fixed.
2. Check what parts were replaced recently. These
parts should not be replaced again for the same
issue.
3. If the problem seems to be related to the
previous call, check what the previous tech did.
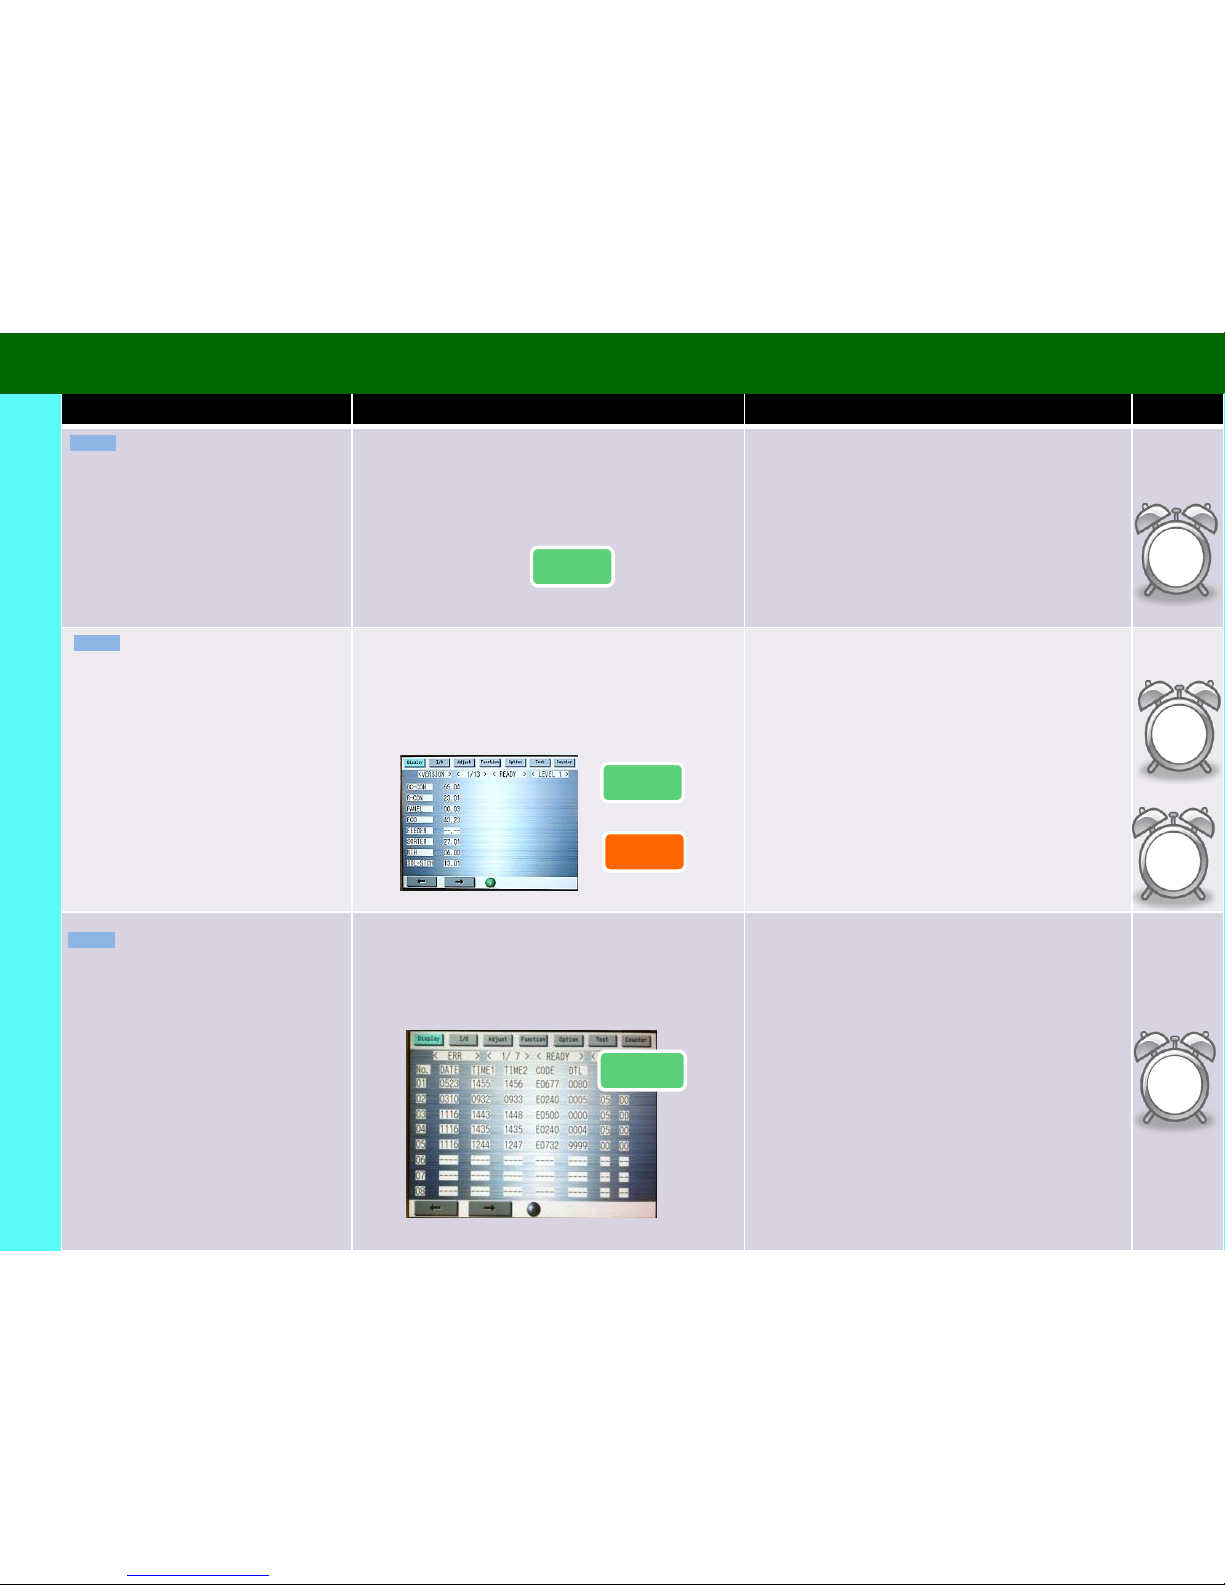
Check Service History
1. Check ERR/JAM/ALARM history
Address all Error and Jams.
Check
COPIER>DISPLAY>ERR
COPIER>DISPLAY>JAM
COPIER>DISPLAY>ALARM
Visual Check
Visual Check
Check
Update
1
min
20
min
1
min
1
min
Check System
Software Version
Check System Software Version
COPIER>DISPLAY>VERSION
Check for latest version on e-support and
recommend to update the system software to
latest version.
Point
Check
Update
Check
The latest firmware version should be installed on the
machine. Please visit e-Support for the latest version.
Common Process (Before)
C6
C5
C4
iRADV C7580i/C7570i/C7565i Advance Maintenance Guide
If Snapshot was used
successfully, skip steps C5
through C8
If Snapshot was used
successfully, skip steps C5
through C8
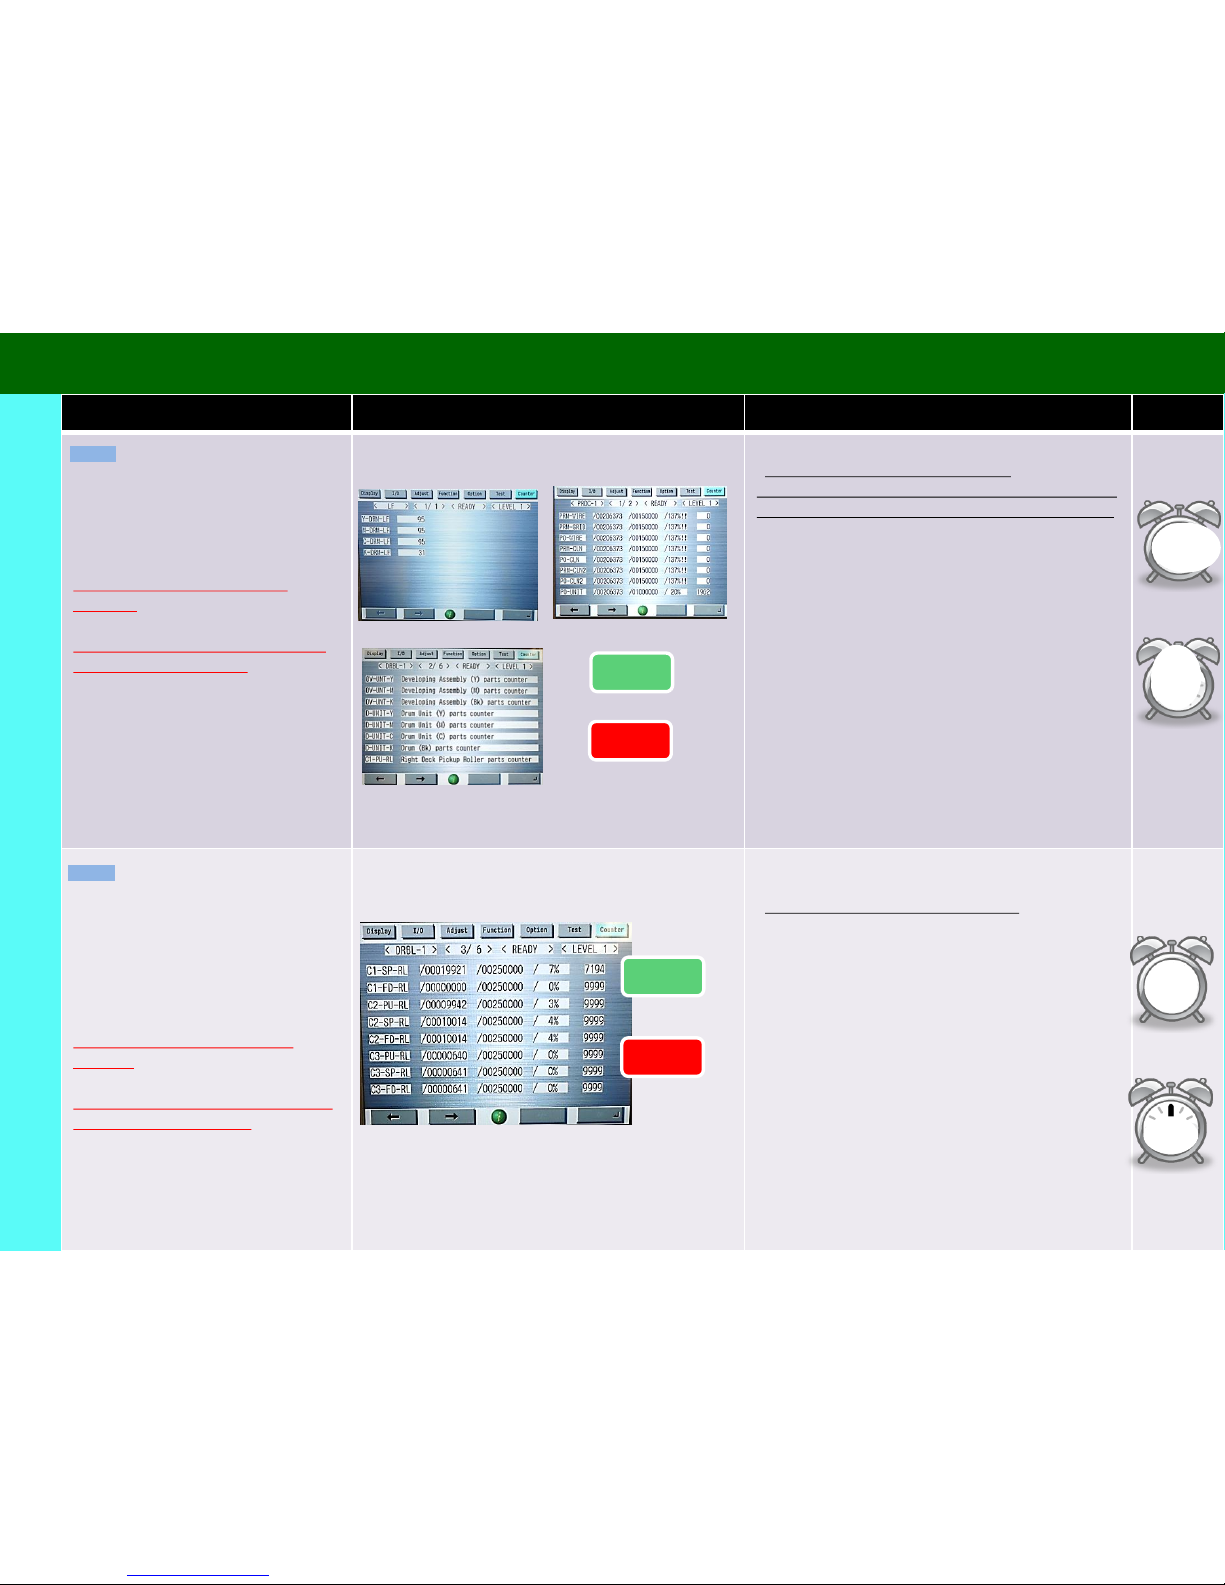
Procedure Detail Note Time
Check the Image
Formation Counters
*Reset the counters if parts are
replaced.
*Check that physical condition of the
part matches the counter
1. Check the Drum, Corona and Cleaning Blade
counters.
Point:
*Replace any parts at or above 100%
Drums and Developer may exceed rated life, change
based on counter, print quality and customer needs
Check the P/U Roller
Counters
*Reset the counters if parts are
replaced
*Check that physical condition of the
part matches the counter
Check the roller counters.
Point:
*Replace any rollers at or above 100%
Cassette 1,2,3,4, Bypass: COPIER>COUNTER>DRBL-1
C1/C2/C3/C4 - SP/FD/PU-RL
M-SP-RL
M-FD_RL
Multi Drawer Deck: COPIER>COUNTER>DRBL-2
PD-PU/SP/FD-RL (Upper Deck)
PD-PU/SP/FD-R2 (Middle Deck)
PD-PU/SP/FD-R3 (Lower Deck)
ADF: COPIER>COUNTER>DRBL-2
DF-PU-RL
DF-FD-RL
DF-SP-RL
LNT-TAP1
LNT-TAP2
COPIER>COUNTER>DRBL-1
COPIER>COUNTER>DRBL-2
Visual Check
1 min
Replace
10
min
Replace
10
min
Developer
COPIER>COUNTER
DRBL-1>DV-UNT-C
DRBL-1>DV-UNT-Y
DRBL-1>DV-UNT-M
DRBL-1>DV-UNT-K
Coronas
COPIER>COUNTER
PRDC-1 >PRM-WIRE
PRDC-1 >PRM-CLN
PRDC-1 >PRM-CLN2
PRDC-1 >PO-WIRE
PRDC-1 >PO-CLN
PRDC-1 >PO-CLN2
PRDC-1 >PRM-GRID
PRDC-1 >GRID-PAD
Drum
COPIER>COUNTER>LF
Y-DRM-LF = %
M-DRM-LF = %
C-DRM-LF = %
K-DRM-LF = %
Visual Check
1
min
Check
Replace
Replace
Check
Drum Cleaning
COPIER>COUNTER
DRBL-1 >CLN-BLD
SU-SHT-K
EDGE-F-K(2)
If Canon Snapshot tool was
used successfully, skip
steps C5 through C9
Common Process (Before)
C7
C8
iRADV C7580i/C7570i/C7565i Advance Maintenance Guide
If Snapshot was used
successfully, skip steps C5
through C8
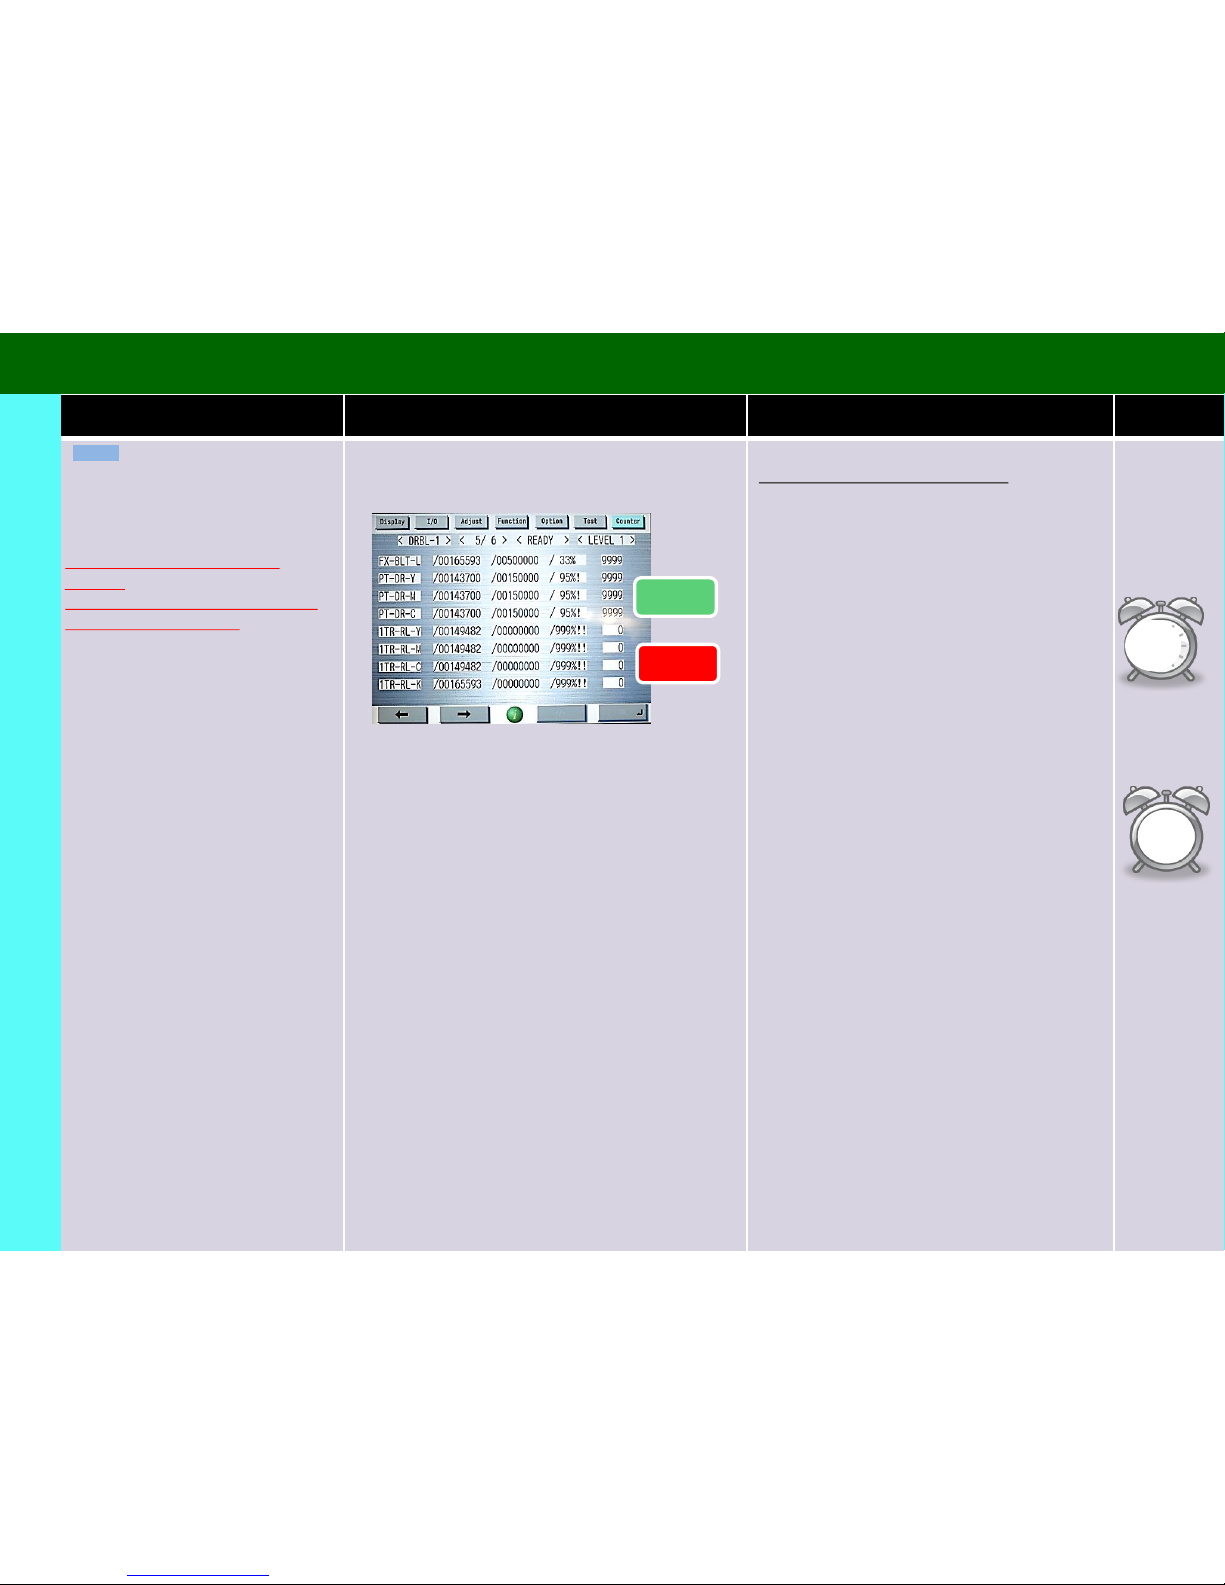
Procedure Detail Note Time
Check Transfer, Fixing
and Filter Counters
*Reset the counters if parts are
replaced
*Check that physical condition of the
part matches the counter
1. See the Parts counter.
COPIER>COUNTER>DRBL-1
COPIER>COUNTER>PRDC-1
Point:
Replace any parts at or above 100%
COPIER>COUNTER>DRBL-1/PRDC-1
ITB/2nd Transfer
2TR-ROLL
TR-BLT
2TR-INRL
1TR-RL-Y
1TR-RL-M
1TR-RL-C
1TR-RL-K
TR-STC-H
ITB-BLD-1
ITB-SCRP
Fixing
FX-BLT-U
FIX-TH1
FIX-TH2
Replace
60
min
Visual Check
1
min
Check
Replace
Filters
TN-FIL1
OZ-FIL1
OZ-FIL2
If Snapshot tool was used
successfully, skip steps C5
through C9
FX-WEB ( 1 to 4)
FX-L
FX-UH-RL
C9
Common Process (Before)
iRADV C7580i/C7570i/C7565i Advance Maintenance Guide
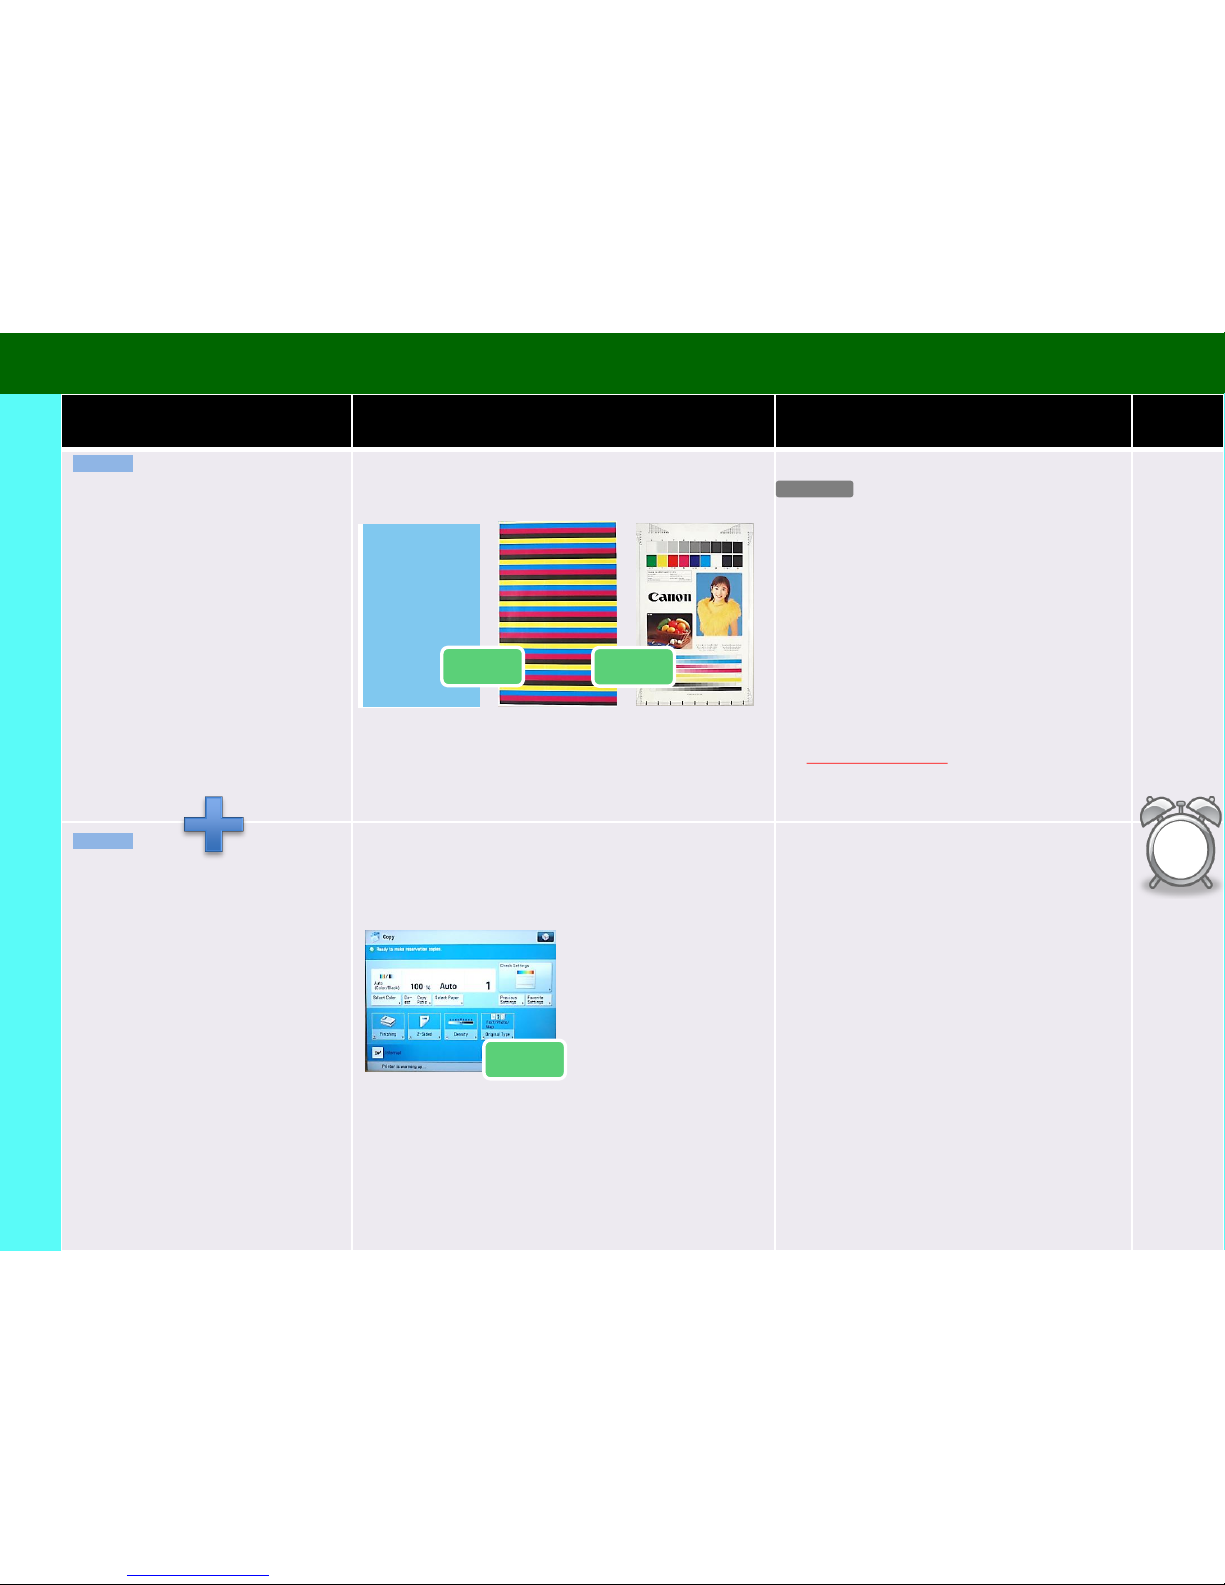
Procedure Detail Note Time
Make Samples (Before
Sample)
Take following Print/Copy samples. Copy from ADF and
Copy Glass.
PG5(Y,M,C,K) PG10 CA-8
If you find following PCQ, check the ADV Topics.
Test Paper Feed
Take copies from All Cassette at least 5 each from ADF.
Take copies from following cassette.
Point:
Make following jobs.
1.Double sided
2.Staple
3.Hole punch
If the machine jams, find the cause and fix that
issue.
PCQ
If you find following PCQ
1. Lines when using ADF - See iRADV Topic 2012
Archive C5000 Topic 13- Paper Feed Lines When
Scanning Originals via DADF (White Lines)
1. Cassette 1
2. Cassette 2
3. Cassette 3
4. Cassette 4
5. Bypass Tray or Paper
Deck
Perform C10 and C11 at the same time to save time
Check
5
min
1. Black band on 2nd side
2. Light or missing image on
rear side from developing
roller coating failure
3. White band
4. White line
5. White spots (Y, M or C)
6. Color Displacement (Main
or Sub scanning direction)
Check
Check
Check
Make sample copies on
“12x18” or larger size paper if
the customer utilizes them to
check for CQ issues on the
front and rear ends on the
copies.
Common Process (Before)
C10
C11
iRADV C7580i/C7570i/C7565i Advance Maintenance Guide
 Loading...