

Canon imageRunner 6020, imageRunner 6020i, imageRunner 5020, imageRunner 5020i Reference Manual Reference Manual
Reference Guide
Reference Guide
Read this guide first.
Please read this guide before operating this equipment.
After you finish reading this guide, store it in a safe place for future reference.
ENG


imageRUNNER
6020i/5020i
6020/5020
Reference Guide
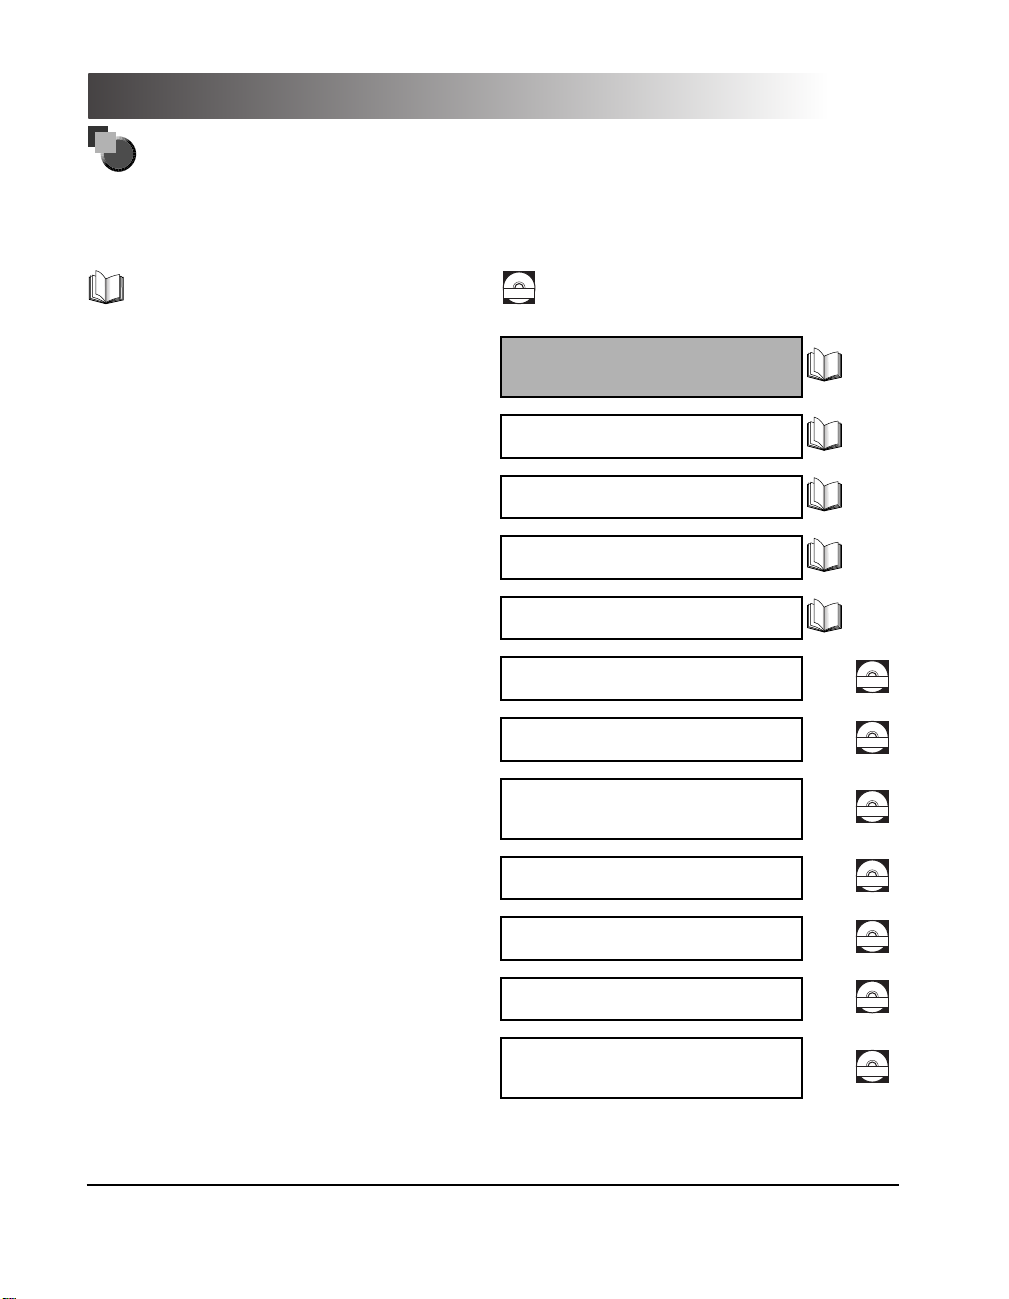
Manuals for the Machine
The manuals for this machine are divided as follows. Please refer to them for detailed information.
The manuals supplied with optional equipment are included in the list below. Depending on the system
configuration and product purchased, some manuals may not be needed.
Guides with this symbol are printed manuals.
•
Basic Operations
•
Troubleshooting
•
Copying Instructions
Mail Box Instructions
•
Sending Instructions
•
•
Setting Up the Network Connection and
Installing the CD-ROM Software
Remote User Interface Instructions
•
Network Connectivity and Setup Instructions
•
•
Network ScanGear Installation and
Instructions
Guides with this symbol are PDF manuals included on the
CD-ROM
accompanying CD-ROM.
Reference Guide
(This Document)
Copying Guide
Mail Box Guide
Sending Guide
Network Quick Start Guide
Remote UI Guide
Network Guide
Network ScanGear
User's Guide
CD-ROM
CD-ROM
CD-ROM
•
PS/PCL Printer Instructions
•
PCL Printer Driver Installation and
Instructions
•
PS Printer Driver Installation and
Instructions
•
Installing MEAP Applications and
Using the Login Service
Considerable effort has been made to make sure that this manual is free of inaccuracies and omissions.
PS/PCL Printer Guide
PCL Driver Guide
PS Driver Guide
MEAP SMS Administrator
Guide
CD-ROM
CD-ROM
CD-ROM
CD-ROM

How This Manual Is Organized
Chap 1
Chap 2
Chap 3
Chap 4
Chap 5
Chap 6
Chap 7
Chap 8
Before You Start Using This Machine
Checking Job and Device Status
Customizing Settings
System Manager Settings
Routine Maintenance
Troubleshooting
Optional Equipment
Appendix
Includes sample reports, the specifications of the main unit, the Relationship between
Original Orientation and Preprinted Paper Output Chart, and the index.
Please read this chapter
1
2
3
4
5
6
7
8
Considerable effort has been made to ensure that this manual is free of inaccuracies and omissions. However, as we are constantly improving our
products, if you need an exact specification, please contact Canon.

Contents
Preface . . . . . . . . . . . . . . . . . . . . . . . . . . . . . . . . . . . . . . . . . . . . . . . . . . . . . . . . . . xi
How to Use This Manual . . . . . . . . . . . . . . . . . . . . . . . . . . . . . . . . . . . . . . . . . . . .xi
Symbols Used in This Manual . . . . . . . . . . . . . . . . . . . . . . . . . . . . . . . . . . . . . .xi
Keys Used in This Manual . . . . . . . . . . . . . . . . . . . . . . . . . . . . . . . . . . . . . . . . .xi
Displays Used in This Manual . . . . . . . . . . . . . . . . . . . . . . . . . . . . . . . . . . . . . xii
Illustrations Used in This Manual . . . . . . . . . . . . . . . . . . . . . . . . . . . . . . . . . . . xii
Legal Notices . . . . . . . . . . . . . . . . . . . . . . . . . . . . . . . . . . . . . . . . . . . . . . . . . . . . xiii
FCC (Federal Communications Commission) . . . . . . . . . . . . . . . . . . . . . . . . . .xiii
Laser Safety . . . . . . . . . . . . . . . . . . . . . . . . . . . . . . . . . . . . . . . . . . . . . . . . . . xiii
CDRH Regulations . . . . . . . . . . . . . . . . . . . . . . . . . . . . . . . . . . . . . . . . . . . . . .xiv
International Energy Star Program . . . . . . . . . . . . . . . . . . . . . . . . . . . . . . . . . xv
Trademarks . . . . . . . . . . . . . . . . . . . . . . . . . . . . . . . . . . . . . . . . . . . . . . . . . . . xv
Copyright . . . . . . . . . . . . . . . . . . . . . . . . . . . . . . . . . . . . . . . . . . . . . . . . . . . . .xvi
Disclaimers . . . . . . . . . . . . . . . . . . . . . . . . . . . . . . . . . . . . . . . . . . . . . . . . . . .xvi
Important Safety Instructions. . . . . . . . . . . . . . . . . . . . . . . . . . . . . . . . . . . . . . xvii
Installation . . . . . . . . . . . . . . . . . . . . . . . . . . . . . . . . . . . . . . . . . . . . . . . . . . . xvii
Power Supply . . . . . . . . . . . . . . . . . . . . . . . . . . . . . . . . . . . . . . . . . . . . . . . . . .xix
Handling . . . . . . . . . . . . . . . . . . . . . . . . . . . . . . . . . . . . . . . . . . . . . . . . . . . . . . xx
Maintenance and Inspections . . . . . . . . . . . . . . . . . . . . . . . . . . . . . . . . . . . . xxiii
Consumables . . . . . . . . . . . . . . . . . . . . . . . . . . . . . . . . . . . . . . . . . . . . . . . . .xxiv
Other Warnings . . . . . . . . . . . . . . . . . . . . . . . . . . . . . . . . . . . . . . . . . . . . . . .xxiv
Periodic Inspection of the Breaker. . . . . . . . . . . . . . . . . . . . . . . . . . . . . . . . . . xxv
Legal Limitations on the Usage of Your Product and the Use
of Images . . . . . . . . . . . . . . . . . . . . . . . . . . . . . . . . . . . . . . . . . . . . . . . . . . . . . xxviii
Operations and Terms Used in This Manual . . . . . . . . . . . . . . . . . . . . . . . . . .xxix
Chapter 1 Before You Start Using This Machine
Installation Location and Handling . . . . . . . . . . . . . . . . . . . . . . . . . . . . . . . . . . 1-3
Installation Precautions. . . . . . . . . . . . . . . . . . . . . . . . . . . . . . . . . . . . . . . . . 1-3
Avoid Installing the Machine in the Following Locations . . . . . . . . . . . . . 1-3
Select a Safe Power Supply . . . . . . . . . . . . . . . . . . . . . . . . . . . . . . . . . . . 1-6
Provide Adequate Installation Space . . . . . . . . . . . . . . . . . . . . . . . . . . . . 1-6
Moving the Machine . . . . . . . . . . . . . . . . . . . . . . . . . . . . . . . . . . . . . . . . . 1-7
Handling Precautions. . . . . . . . . . . . . . . . . . . . . . . . . . . . . . . . . . . . . . . . . . . 1-7
What This Machine Can Do . . . . . . . . . . . . . . . . . . . . . . . . . . . . . . . . . . . . . . . . .1-9
Switching the Functions Indicated on the Touch Panel Display . . . . . . . . . . 1-9
New Functions Can Be Added . . . . . . . . . . . . . . . . . . . . . . . . . . . . . . . . . . . 1-10
iv
Contents

Setting Specifications to Suit Your Needs. . . . . . . . . . . . . . . . . . . . . . . . . . .1-12
Functions That Conserve Power . . . . . . . . . . . . . . . . . . . . . . . . . . . . . . . . . .1-13
Checking, Changing, and Canceling Jobs. . . . . . . . . . . . . . . . . . . . . . . . . . .1-16
Displaying a Guide Screen. . . . . . . . . . . . . . . . . . . . . . . . . . . . . . . . . . . . . . .1-17
Reading Messages from the System Manager . . . . . . . . . . . . . . . . . . . . . . .1-18
Types of Message Boards . . . . . . . . . . . . . . . . . . . . . . . . . . . . . . . . . . . .1-19
Other Useful Functions . . . . . . . . . . . . . . . . . . . . . . . . . . . . . . . . . . . . . . . . .1-20
Parts and Their Functions. . . . . . . . . . . . . . . . . . . . . . . . . . . . . . . . . . . . . . . . . 1-22
External View. . . . . . . . . . . . . . . . . . . . . . . . . . . . . . . . . . . . . . . . . . . . . . . . .1-22
Internal View . . . . . . . . . . . . . . . . . . . . . . . . . . . . . . . . . . . . . . . . . . . . . . . . .1-24
Feeder . . . . . . . . . . . . . . . . . . . . . . . . . . . . . . . . . . . . . . . . . . . . . . . . . . . . . .1-25
Control Panel Parts and Functions . . . . . . . . . . . . . . . . . . . . . . . . . . . . . . . .1-26
Checking the Counter . . . . . . . . . . . . . . . . . . . . . . . . . . . . . . . . . . . . . . . . . . . . 1-27
Checking Device Information. . . . . . . . . . . . . . . . . . . . . . . . . . . . . . . . . . . . . . 1-30
Main Power and Control Panel Power . . . . . . . . . . . . . . . . . . . . . . . . . . . . . . . 1-32
How to Turn ON the Main Power. . . . . . . . . . . . . . . . . . . . . . . . . . . . . . . . . . .1-32
Control Panel Power Switch. . . . . . . . . . . . . . . . . . . . . . . . . . . . . . . . . . . . . .1-38
System Settings. . . . . . . . . . . . . . . . . . . . . . . . . . . . . . . . . . . . . . . . . . . . . . . . . 1-39
Using the Touch Panel Display. . . . . . . . . . . . . . . . . . . . . . . . . . . . . . . . . . . . . 1-40
Frequently Used Keys . . . . . . . . . . . . . . . . . . . . . . . . . . . . . . . . . . . . . . . . . .1-40
Touch Panel Key Display. . . . . . . . . . . . . . . . . . . . . . . . . . . . . . . . . . . . . . . .1-41
Adjusting the Brightness . . . . . . . . . . . . . . . . . . . . . . . . . . . . . . . . . . . . . . . .1-42
Entering Characters from the Touch Panel Display . . . . . . . . . . . . . . . . . . . . 1-43
Entering Alphabet Characters . . . . . . . . . . . . . . . . . . . . . . . . . . . . . . . . . . . .1-43
Entering Special Characters . . . . . . . . . . . . . . . . . . . . . . . . . . . . . . . . . . . . .1-45
Entering Values in Inches . . . . . . . . . . . . . . . . . . . . . . . . . . . . . . . . . . . . . . .1-47
Entering the Department ID and Password. . . . . . . . . . . . . . . . . . . . . . . . . . . 1-48
Operations after Turning the Power ON. . . . . . . . . . . . . . . . . . . . . . . . . . . . .1-48
Operations after Using Functions . . . . . . . . . . . . . . . . . . . . . . . . . . . . . . . . .1-50
Logging in through the Authentication Screens of SDL and SSO . . . . . . . . 1-51
Placing Originals . . . . . . . . . . . . . . . . . . . . . . . . . . . . . . . . . . . . . . . . . . . . . . . . 1-55
Orientation of Originals . . . . . . . . . . . . . . . . . . . . . . . . . . . . . . . . . . . . . . . . .1-56
Placing an Original on the Platen Glass. . . . . . . . . . . . . . . . . . . . . . . . . . . . .1-57
Placing Originals in the Feeder . . . . . . . . . . . . . . . . . . . . . . . . . . . . . . . . . . .1-60
Making Prints Using the Stack Bypass . . . . . . . . . . . . . . . . . . . . . . . . . . . . . . 1-63
Using the Stack Bypass while Reserving Print Jobs. . . . . . . . . . . . . . . . . . .1-69
Multifunctional Operations. . . . . . . . . . . . . . . . . . . . . . . . . . . . . . . . . . . . . . . . 1-74
Available Paper Stock . . . . . . . . . . . . . . . . . . . . . . . . . . . . . . . . . . . . . . . . . . . . 1-75
Chapter 2 Checking Job and Device Status
Checking Job and Device Status. . . . . . . . . . . . . . . . . . . . . . . . . . . . . . . . . . . . 2-2
Confirmation/Cancellation of the Job. . . . . . . . . . . . . . . . . . . . . . . . . . . . . . . .2-5
Contents
v

Checking Job Details. . . . . . . . . . . . . . . . . . . . . . . . . . . . . . . . . . . . . . . . . . . . . .2-8
Checking Copy and Print Job Details. . . . . . . . . . . . . . . . . . . . . . . . . . . . . . . 2-8
Printing the Copy and Print Job Logs. . . . . . . . . . . . . . . . . . . . . . . . . . . . . . 2-10
Checking Send Job Details . . . . . . . . . . . . . . . . . . . . . . . . . . . . . . . . . . . . . 2-12
Performing Send Jobs . . . . . . . . . . . . . . . . . . . . . . . . . . . . . . . . . . . . . . . . . 2-14
Changing the Destination. . . . . . . . . . . . . . . . . . . . . . . . . . . . . . . . . . . . 2-14
Resending a Send Job. . . . . . . . . . . . . . . . . . . . . . . . . . . . . . . . . . . . . . 2-17
Printing the Send Job Status/Log. . . . . . . . . . . . . . . . . . . . . . . . . . . . . . 2-19
Checking Received Job Details . . . . . . . . . . . . . . . . . . . . . . . . . . . . . . . . . . 2-21
Performing Received Jobs. . . . . . . . . . . . . . . . . . . . . . . . . . . . . . . . . . . . . . 2-23
Printing a Received Job Log . . . . . . . . . . . . . . . . . . . . . . . . . . . . . . . . . 2-23
Checking Received I-Fax Jobs . . . . . . . . . . . . . . . . . . . . . . . . . . . . . . . 2-24
Checking Forwarded Job Details. . . . . . . . . . . . . . . . . . . . . . . . . . . . . . 2-25
Canceling a Job . . . . . . . . . . . . . . . . . . . . . . . . . . . . . . . . . . . . . . . . . . . . . . . . .2-27
Canceling from the Touch Panel Display . . . . . . . . . . . . . . . . . . . . . . . . . . . 2-27
Canceling Using the Stop Key . . . . . . . . . . . . . . . . . . . . . . . . . . . . . . . . . . . 2-28
Canceling a Job from the System Monitor Screen . . . . . . . . . . . . . . . . . . . . 2-29
Priority Printing . . . . . . . . . . . . . . . . . . . . . . . . . . . . . . . . . . . . . . . . . . . . . . . . . 2-31
Handling Print Jobs Sent from a Computer . . . . . . . . . . . . . . . . . . . . . . . . . . 2-33
Printing Secured Documents . . . . . . . . . . . . . . . . . . . . . . . . . . . . . . . . . . . . . .2-35
Chapter 3 Customizing Settings
Additional Functions Settings Table . . . . . . . . . . . . . . . . . . . . . . . . . . . . . . . . . 3-3
Setting Specifications That Are Common to Each Function
(Common Settings) . . . . . . . . . . . . . . . . . . . . . . . . . . . . . . . . . . . . . . . . . . . . . . . 3-8
Selecting the Initial Function at Power ON. . . . . . . . . . . . . . . . . . . . . . . . . . . 3-8
Selecting the Default Display after Auto Clear. . . . . . . . . . . . . . . . . . . . . . . 3-10
Setting the Entry Tone, Error Tone, and the Job Done Tone . . . . . . . . . . . . 3-11
Setting Inch Input . . . . . . . . . . . . . . . . . . . . . . . . . . . . . . . . . . . . . . . . . . . . 3-13
Setting a Paper Drawer for Auto Paper Selection/
Auto Drawer Switching . . . . . . . . . . . . . . . . . . . . . . . . . . . . . . . . . . . . . . . . . 3-14
Identifying the Type of Paper in a Paper Drawer . . . . . . . . . . . . . . . . . . . . . 3-17
Changing the Energy Saver Mode Setting . . . . . . . . . . . . . . . . . . . . . . . . . . 3-19
Setting Energy Consumption in the Sleep Mode . . . . . . . . . . . . . . . . . . . . . 3-21
Distinguishing between LTRR and STMT Originals . . . . . . . . . . . . . . . . . . . 3-22
Setting a Dedicated Tray for Each Function . . . . . . . . . . . . . . . . . . . . . . . . 3-24
Setting the Printing Priority . . . . . . . . . . . . . . . . . . . . . . . . . . . . . . . . . . . . . 3-26
Storing an Image Form . . . . . . . . . . . . . . . . . . . . . . . . . . . . . . . . . . . . . . . . . 3-28
Checking Image Form Details . . . . . . . . . . . . . . . . . . . . . . . . . . . . . . . . 3-32
Erasing an Image Form . . . . . . . . . . . . . . . . . . . . . . . . . . . . . . . . . . . . . 3-34
Setting the Standard Paper for the Stack Bypass. . . . . . . . . . . . . . . . . . . . 3-35
Setting the Standard Local Print Settings . . . . . . . . . . . . . . . . . . . . . . . . . . 3-39
Changing the Display Language . . . . . . . . . . . . . . . . . . . . . . . . . . . . . . . . . 3-41
Reversing the Display Colors. . . . . . . . . . . . . . . . . . . . . . . . . . . . . . . . . . . . 3-43
vi
Contents

Setting the Offset Jobs Mode . . . . . . . . . . . . . . . . . . . . . . . . . . . . . . . . . . . .3-44
Returning the Common Settings to Their Defaults. . . . . . . . . . . . . . . . . . . . .3-45
Setting the Timer (Timer Settings) . . . . . . . . . . . . . . . . . . . . . . . . . . . . . . . . . . 3-48
Setting the Current Date and Time. . . . . . . . . . . . . . . . . . . . . . . . . . . . . . . . .3-48
Setting the Time to Initiate Auto Sleep after Finishing Operations . . . . . . . .3-52
Setting the Time for the Display to Return to the Basic Features
Screen after Finishing Operations. . . . . . . . . . . . . . . . . . . . . . . . . . . . . . . . .3-54
Setting the Time for the Unit to Quiet Down after the Last Task . . . . . . . . . .3-55
Setting the Time for the Unit’s Power to Turn OFF on Different Days
of the Week . . . . . . . . . . . . . . . . . . . . . . . . . . . . . . . . . . . . . . . . . . . . . . . . . .3-57
Setting the Low-Power Mode Time. . . . . . . . . . . . . . . . . . . . . . . . . . . . . . . . .3-58
Adjusting the Machine (Adjustment/Cleaning). . . . . . . . . . . . . . . . . . . . . . . . 3-60
Making a Zoom Fine Adjustment . . . . . . . . . . . . . . . . . . . . . . . . . . . . . . . . . .3-60
Staple Repositioning for the Saddle Stitcher Unit . . . . . . . . . . . . . . . . . . . . .3-61
Changing the Saddle Stitch Position . . . . . . . . . . . . . . . . . . . . . . . . . . . . . . .3-63
Adjusting the Standard Exposure . . . . . . . . . . . . . . . . . . . . . . . . . . . . . . . . .3-65
Adjusting the Page Number Position . . . . . . . . . . . . . . . . . . . . . . . . . . . . . . .3-66
Report Settings . . . . . . . . . . . . . . . . . . . . . . . . . . . . . . . . . . . . . . . . . . . . . . . . . 3-68
Specifying Report Settings . . . . . . . . . . . . . . . . . . . . . . . . . . . . . . . . . . . . . .3-68
Send Result Report (TX Report). . . . . . . . . . . . . . . . . . . . . . . . . . . . . . . . 3-68
Setting the Specifications of an Activity Report . . . . . . . . . . . . . . . . . . . . 3-71
Printing Lists . . . . . . . . . . . . . . . . . . . . . . . . . . . . . . . . . . . . . . . . . . . . . . . . .3-75
Printing the Address Book List. . . . . . . . . . . . . . . . . . . . . . . . . . . . . . . . . 3-75
Printing the Additional Functions Settings List. . . . . . . . . . . . . . . . . . . . . 3-78
Chapter 4 System Manager Settings
Specifying the System Manager Settings (System Manager Settings) . . . . . 4-3
Setting Department ID Management (Dept. ID Management) . . . . . . . . . . . . . 4-8
Storing the Department ID, Password, and Impression Limit . . . . . . . . . . . . .4-9
Changing the Password and Impression Limit. . . . . . . . . . . . . . . . . . . . . . . .4-15
Erasing the Department ID and Password. . . . . . . . . . . . . . . . . . . . . . . . . . .4-18
Checking and Printing Counter Information. . . . . . . . . . . . . . . . . . . . . . . . . .4-22
Erasing Print Totals . . . . . . . . . . . . . . . . . . . . . . . . . . . . . . . . . . . . . . . . . . . .4-26
Setting to Accept Print Jobs with an Unknown ID . . . . . . . . . . . . . . . . . . . . .4-30
Specifying the Communications Settings (Communications Settings). . . . 4-32
E-mail/I-Fax Send Settings (E-mail/I-Fax Settings). . . . . . . . . . . . . . . . . . . .4-32
Memory RX Inbox Settings . . . . . . . . . . . . . . . . . . . . . . . . . . . . . . . . . . . . . .4-38
Setting the Memory RX Inbox Password . . . . . . . . . . . . . . . . . . . . . . . . . 4-38
Storing Received I-Fax Documents in Memory . . . . . . . . . . . . . . . . . . . .4-40
Memory Lock Start Time Settings . . . . . . . . . . . . . . . . . . . . . . . . . . . . . .4-41
Memory Lock End Time Settings . . . . . . . . . . . . . . . . . . . . . . . . . . . . . . .4-46
Specifying the Settings for the Remote UI (Remote UI). . . . . . . . . . . . . . . . . 4-50
Setting Access Restriction to an Address Book
(Manage/Access to Address Book) . . . . . . . . . . . . . . . . . . . . . . . . . . . . . . . . . 4-52
Contents
vii

Setting a Password for an Address Book (Address Book Password) . . . . . 4-52
Setting Access Number Management for an Address Book
(Access Number Management) . . . . . . . . . . . . . . . . . . . . . . . . . . . . . . . . . . 4-54
Setting Device Information (Device Information Settings). . . . . . . . . . . . . . .4-56
Setting Forwarding Conditions (Forwarding Settings) . . . . . . . . . . . . . . . . . 4-58
Storing Forwarding Settings. . . . . . . . . . . . . . . . . . . . . . . . . . . . . . . . . . . . . 4-58
Storing Forwarding Destinations When the Forwarding Conditions
Do Not Match . . . . . . . . . . . . . . . . . . . . . . . . . . . . . . . . . . . . . . . . . . . . . . . . 4-74
Checking/Changing Forwarding Setting Details. . . . . . . . . . . . . . . . . . . . . . 4-82
Forwarding Received Documents . . . . . . . . . . . . . . . . . . . . . . . . . . . . . . . . 4-83
Deleting a Forwarding Setting . . . . . . . . . . . . . . . . . . . . . . . . . . . . . . . . . . . 4-85
Printing a Forwarding Settings List . . . . . . . . . . . . . . . . . . . . . . . . . . . . . . . 4-86
Erasing a Message Board (Clear Message Board) . . . . . . . . . . . . . . . . . . . . . 4-88
Auto Online/Offline (Auto Online/Offline) . . . . . . . . . . . . . . . . . . . . . . . . . . . .4-90
Setting Auto Online (Auto Online) . . . . . . . . . . . . . . . . . . . . . . . . . . . . . . . . 4-90
Setting Auto Offline (Auto Offline) . . . . . . . . . . . . . . . . . . . . . . . . . . . . . . . . 4-91
Setting MEAP Settings (MEAP Settings) . . . . . . . . . . . . . . . . . . . . . . . . . . . . . 4-93
Setting Use HTTP Server (Use HTTP) . . . . . . . . . . . . . . . . . . . . . . . . . . . . . 4-93
Printing Installed Applications’ Information (Print System Information) . . . 4-95
LDAP Server Settings . . . . . . . . . . . . . . . . . . . . . . . . . . . . . . . . . . . . . . . . . . . . 4-97
Registering an LDAP Server . . . . . . . . . . . . . . . . . . . . . . . . . . . . . . . . . . . . 4-97
Changing an LDAP Server Setting . . . . . . . . . . . . . . . . . . . . . . . . . . . . . . . 4-111
Deleting an LDAP Server . . . . . . . . . . . . . . . . . . . . . . . . . . . . . . . . . . . . . . 4-113
Printing LDAP Server Settings. . . . . . . . . . . . . . . . . . . . . . . . . . . . . . . . . . 4-114
Chapter 5 Routine Maintenance
Loading Paper . . . . . . . . . . . . . . . . . . . . . . . . . . . . . . . . . . . . . . . . . . . . . . . . . . .5-2
Loading Paper in the Paper Drawers . . . . . . . . . . . . . . . . . . . . . . . . . . . . . . . 5-2
Adjusting a Paper Drawer to Hold a Different Paper Size. . . . . . . . . . . . . . . . 5-8
Adding Toner . . . . . . . . . . . . . . . . . . . . . . . . . . . . . . . . . . . . . . . . . . . . . . . . . . . 5-12
Routine Cleaning . . . . . . . . . . . . . . . . . . . . . . . . . . . . . . . . . . . . . . . . . . . . . . . .5-17
Cleaning the Platen Glass/Rear Side of the Platen Glass Cover. . . . . . . . . 5-17
Cleaning the Touch Panel Display . . . . . . . . . . . . . . . . . . . . . . . . . . . . . . . . 5-19
Cleaning the Feeder . . . . . . . . . . . . . . . . . . . . . . . . . . . . . . . . . . . . . . . . . . . 5-20
When an Original or Print Becomes Dirty . . . . . . . . . . . . . . . . . . . . . . . . . . . .5-25
While Using the Feeder (Feeder Cleaning) . . . . . . . . . . . . . . . . . . . . . . . . . . 5-25
Output Sheets Are Dirty (Wire Cleaning) . . . . . . . . . . . . . . . . . . . . . . . . . . . 5-26
Consumables and Optional Equipment. . . . . . . . . . . . . . . . . . . . . . . . . . . . . . 5-28
Consumables . . . . . . . . . . . . . . . . . . . . . . . . . . . . . . . . . . . . . . . . . . . . . . . . 5-28
Optional Equipment for the Main Unit. . . . . . . . . . . . . . . . . . . . . . . . . . . . . . 5-30
viii
Contents

Chapter 6 Troubleshooting
Clearing Paper Jams. . . . . . . . . . . . . . . . . . . . . . . . . . . . . . . . . . . . . . . . . . . . . . 6-2
Screen Shown When There Is a Paper Jam. . . . . . . . . . . . . . . . . . . . . . . . . . .6-2
Clearing Paper Jams in the Main Unit. . . . . . . . . . . . . . . . . . . . . . . . . . . . . . . .6-7
Clearing Paper Jams Inside the Right Cover . . . . . . . . . . . . . . . . . . . . . . . . .6-14
Clearing Paper Jams in Paper Drawer 1. . . . . . . . . . . . . . . . . . . . . . . . . . . . .6-17
Clearing Paper Jams in Paper Drawer 2. . . . . . . . . . . . . . . . . . . . . . . . . . . . .6-20
Clearing Paper Jams in the Stack Bypass. . . . . . . . . . . . . . . . . . . . . . . . . . .6-24
Clearing Paper Jams in Paper Drawers 3 or 4 . . . . . . . . . . . . . . . . . . . . . . . .6-27
Clearing Paper Jams in the Feeder . . . . . . . . . . . . . . . . . . . . . . . . . . . . . . . .6-29
List of Error Messages . . . . . . . . . . . . . . . . . . . . . . . . . . . . . . . . . . . . . . . . . . . 6-34
Self-Diagnostic Display . . . . . . . . . . . . . . . . . . . . . . . . . . . . . . . . . . . . . . . . .6-34
List of Error Codes without Messages. . . . . . . . . . . . . . . . . . . . . . . . . . . . . .6-37
If Memory Becomes Full during Scanning . . . . . . . . . . . . . . . . . . . . . . . . . . . 6-47
Service Call Messages . . . . . . . . . . . . . . . . . . . . . . . . . . . . . . . . . . . . . . . . . . . 6-49
When Calling Your Local Authorized Canon Dealer . . . . . . . . . . . . . . . . . . . .6-50
When the Power Does Not Turn ON . . . . . . . . . . . . . . . . . . . . . . . . . . . . . . . . . 6-52
Chapter 7 Optional Equipment
System Configuration . . . . . . . . . . . . . . . . . . . . . . . . . . . . . . . . . . . . . . . . . . . . . 7-2
Paper Deck-G1. . . . . . . . . . . . . . . . . . . . . . . . . . . . . . . . . . . . . . . . . . . . . . . . . . . 7-3
Parts and Their Functions . . . . . . . . . . . . . . . . . . . . . . . . . . . . . . . . . . . . . . . .7-3
Clearing Paper Jams in the Paper Deck. . . . . . . . . . . . . . . . . . . . . . . . . . . . . .7-4
Loading Paper in the Paper Deck. . . . . . . . . . . . . . . . . . . . . . . . . . . . . . . . . . .7-7
Finisher-F1/Saddle Finisher-F2/Puncher Unit-B1. . . . . . . . . . . . . . . . . . . . . . 7-10
Parts and Their Functions . . . . . . . . . . . . . . . . . . . . . . . . . . . . . . . . . . . . . . .7-10
Finishing Functions . . . . . . . . . . . . . . . . . . . . . . . . . . . . . . . . . . . . . . . . . . . .7-11
Clearing Paper Jams in the Finisher. . . . . . . . . . . . . . . . . . . . . . . . . . . . . . . .7-15
Replacing the Staple Cartridge in the Stapler Unit. . . . . . . . . . . . . . . . . . . . .7-18
Removing Jammed Staples from the Stapler Unit . . . . . . . . . . . . . . . . . . . . .7-22
Clearing Paper Jams in the Saddle Stitcher Unit . . . . . . . . . . . . . . . . . . . . . .7-25
Replacing the Saddle Stitcher Unit’s Staple Cartridge. . . . . . . . . . . . . . . . . .7-29
Removing Jammed Staples from the Saddle Stitcher Unit. . . . . . . . . . . . . . .7-32
Clearing Paper Jams in the Puncher Unit. . . . . . . . . . . . . . . . . . . . . . . . . . . .7-37
Removing Punch Waste. . . . . . . . . . . . . . . . . . . . . . . . . . . . . . . . . . . . . . . . .7-40
Consumables. . . . . . . . . . . . . . . . . . . . . . . . . . . . . . . . . . . . . . . . . . . . . . . . .7-42
Copy Tray-C3 . . . . . . . . . . . . . . . . . . . . . . . . . . . . . . . . . . . . . . . . . . . . . . . . . . . 7-43
Parts and Their Functions . . . . . . . . . . . . . . . . . . . . . . . . . . . . . . . . . . . . . . .7-43
Clearing Paper Jams in the Copy Tray. . . . . . . . . . . . . . . . . . . . . . . . . . . . . .7-44
Card Reader-C1 . . . . . . . . . . . . . . . . . . . . . . . . . . . . . . . . . . . . . . . . . . . . . . . . . 7-47
Operations before Using the Main Unit . . . . . . . . . . . . . . . . . . . . . . . . . . . . .7-48
Operations after Using the Main Unit. . . . . . . . . . . . . . . . . . . . . . . . . . . . . . .7-49
Contents
ix

Department ID Management When Using the Card Reader-C1 . . . . . . . . . . 7-50
Changing the Password and Impression Limit. . . . . . . . . . . . . . . . . . . . 7-50
Checking and Printing Counter Information . . . . . . . . . . . . . . . . . . . . . . 7-54
Erasing Print Totals . . . . . . . . . . . . . . . . . . . . . . . . . . . . . . . . . . . . . . . . . . . 7-57
Setting to Accept Print Jobs with an Unknown ID . . . . . . . . . . . . . . . . . . . . 7-60
Chapter 8 Appendix
Sample Reports and Lists. . . . . . . . . . . . . . . . . . . . . . . . . . . . . . . . . . . . . . . . . . 8-2
Send Job List . . . . . . . . . . . . . . . . . . . . . . . . . . . . . . . . . . . . . . . . . . . . . . . . . 8-2
TX Report/TX Error Report . . . . . . . . . . . . . . . . . . . . . . . . . . . . . . . . . . . . . . . 8-3
Activity Report TX/RX . . . . . . . . . . . . . . . . . . . . . . . . . . . . . . . . . . . . . . . . . . 8-5
Copy Log List . . . . . . . . . . . . . . . . . . . . . . . . . . . . . . . . . . . . . . . . . . . . . . . . . 8-7
Print Log List . . . . . . . . . . . . . . . . . . . . . . . . . . . . . . . . . . . . . . . . . . . . . . . . . 8-8
Forwarding Conditions List. . . . . . . . . . . . . . . . . . . . . . . . . . . . . . . . . . . . . . . 8-9
Registered LDAP Server List . . . . . . . . . . . . . . . . . . . . . . . . . . . . . . . . . . . . 8-10
Address Book List . . . . . . . . . . . . . . . . . . . . . . . . . . . . . . . . . . . . . . . . . . . . 8-11
User’s Data List . . . . . . . . . . . . . . . . . . . . . . . . . . . . . . . . . . . . . . . . . . . . . . 8-12
Specifications . . . . . . . . . . . . . . . . . . . . . . . . . . . . . . . . . . . . . . . . . . . . . . . . . .8-13
Main Unit . . . . . . . . . . . . . . . . . . . . . . . . . . . . . . . . . . . . . . . . . . . . . . . . . . . 8-13
Feeder . . . . . . . . . . . . . . . . . . . . . . . . . . . . . . . . . . . . . . . . . . . . . . . . . . . . . 8-15
Paper Deck-G1 . . . . . . . . . . . . . . . . . . . . . . . . . . . . . . . . . . . . . . . . . . . . . . 8-15
Finisher-F1/Saddle Finisher-F2 . . . . . . . . . . . . . . . . . . . . . . . . . . . . . . . . . . 8-16
Puncher Unit-B1. . . . . . . . . . . . . . . . . . . . . . . . . . . . . . . . . . . . . . . . . . . . . . 8-17
Copy Tray-C3 . . . . . . . . . . . . . . . . . . . . . . . . . . . . . . . . . . . . . . . . . . . . . . . . 8-18
Card Reader-C1 . . . . . . . . . . . . . . . . . . . . . . . . . . . . . . . . . . . . . . . . . . . . . . 8-18
Relationship between Original Orientation and Preprinted Paper
Output Chart. . . . . . . . . . . . . . . . . . . . . . . . . . . . . . . . . . . . . . . . . . . . . . . . . . . . 8-19
Index . . . . . . . . . . . . . . . . . . . . . . . . . . . . . . . . . . . . . . . . . . . . . . . . . . . . . . . . . .8-21
x
Contents

Preface
Thank you for purchasing the Canon imageRUNNER 6020i/5020i or imageRUNNER
6020/5020. Please read this manual thoroughly before operating the machine in order to
familiarize yourself with its capabilities, and to make the most of its many functions. After
reading this manual, store it in a safe place for future reference.
How to Use This Manual
Symbols Used in This Manual
The following symbols are used in this manual to explain procedures, restrictions,
handling precautions, and instructions that should be observed for safety.
WARNING
CAUTION
IMPORTANT
NOTE
Indicates a warning concerning operations that may
lead to death or injury to persons if not performed
correctly. In order to use the machine safely, always
pay attention to these warnings.
Indicates a caution concerning operations that may
lead to injury to persons, or damage to property if not
performed correctly. In order to use the machine
safely, always pay attention to these cautions.
Indicates operational requirements and restrictions. Be sure to
read these items carefully in order to operate the machine
correctly, and to avoid damage to the machine.
Indicates a clarification of an operation, or contains additional
explanations for a procedure. Reading these notes is highly
recommended.
Keys Used in This Manual
The following symbols and key names are a few examples of how keys to be
pressed are expressed in this manual:
Control Panel Keys .................. <Key icon> + (Key Name)
•
Examples: (Start)
Touch Panel Display Keys ....... [Key Name]
•
Examples: [Cancel]
[Done]
(Stop)
How to Use This Manual
xi
Displays Used in This Manual
Screen shots of the touch panel display used in this manual are those taken when
the optional Saddle Finisher-F2 and Puncher Unit-B1 are attached to the
imageRUNNER 5020i.
Note that functions that cannot be used depending on the model or options, are not
displayed on the touch panel display.
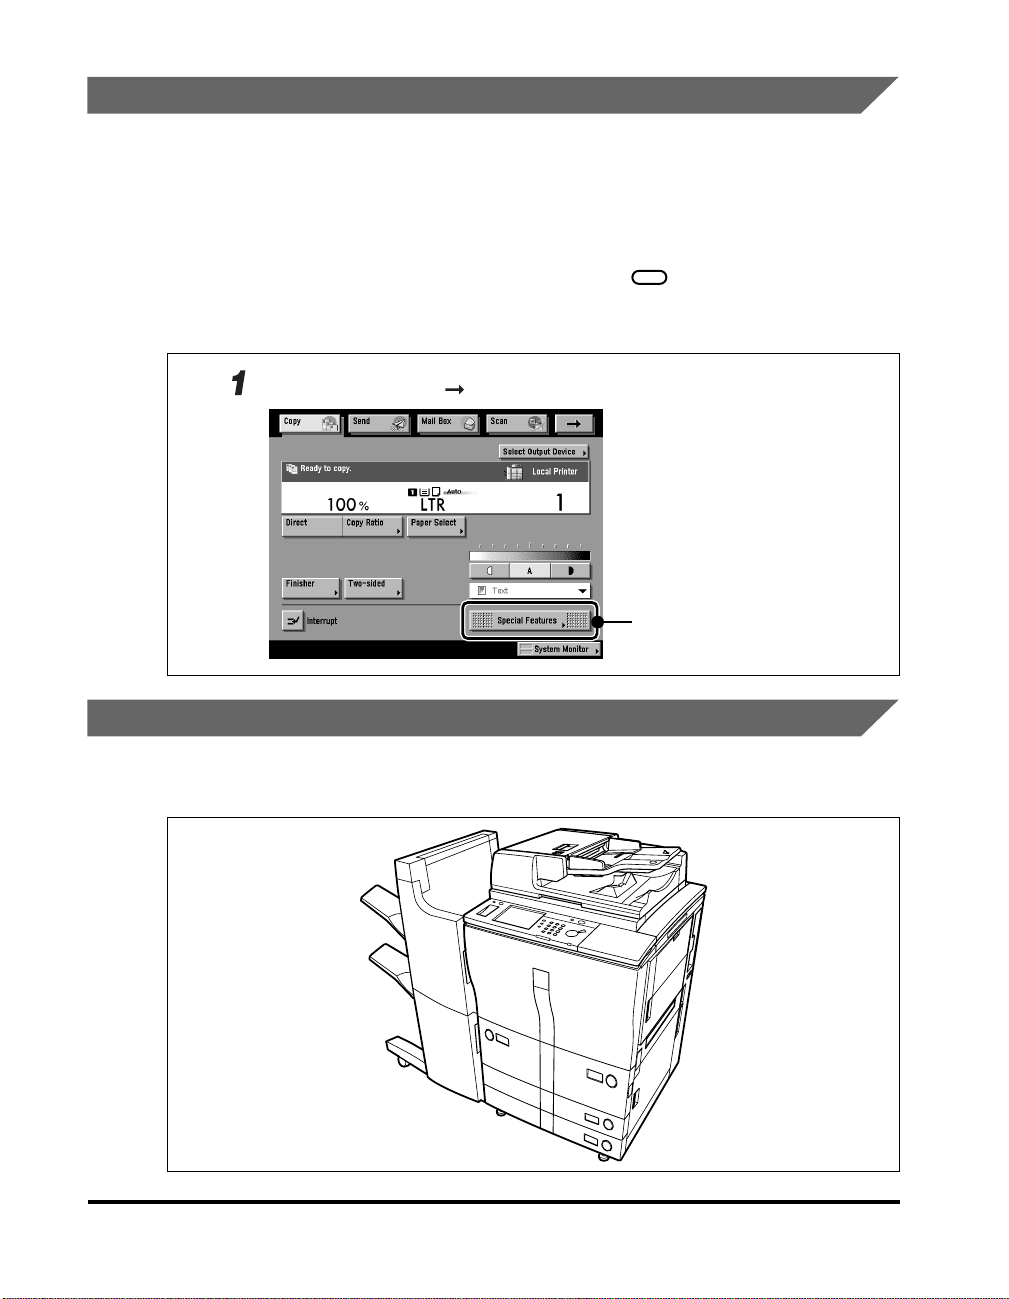
The keys which you should press are marked with a , as shown below.
When multiple keys can be pressed on the touch panel display, all keys are marked.
Select the keys which suit your needs.
Place your originals press [Special Features].
Press this key for operation.
Illustrations Used in This Manual
Illustrations used in this manual are those displayed when the optional Saddle
Finisher-F2 is attached to the imageRUNNER 5020i.
xii
How to Use This Manual

Legal Notices
FCC (Federal Communications Commission)
This equipment has been tested and found to comply with the limits for a Class A
digital device, pursuant to Part 15 of the FCC Rules. These limits are designed to
provide reasonable protection against harmful interference when the equipment is
operated in a commercial environment. This equipment generates, uses, and can
radiate radio frequency energy and, if not installed and used in accordance with the
Operator’s Manual, may cause harmful interference to radio communications.
Operation of this equipment in a residential area is likely to cause harmful
interference in which case the user will be required to correct the interference at his
own expense.
Do not make any changes or modifications to the equipment unless otherwise
specified in the manual. If such changes or modifications should be made, you
could be required to stop operation of the equipment.
Laser Safety
This product complies with 21 CFR Chapter 1 Subchapter J as a Class Ι laser
product under the U.S. Department of Health and Human Services (DHHS)
Radiation Performance Standard according to the Radiation Control for Health and
Safety Act of 1968. Class Ι levels of laser radiation are not considered to be
hazardous.
Since radiation emitted inside the product is completely confined within protective
housings and external covers, the laser beam cannot escape from the machine
during any phase of user operation. Do not remove protective housings or external
covers, except as directed by the equipment’s
Reference Guide
.
Legal Notices
xiii
CDRH Regulations
The Center for Devices and Radiological Health (CDRH) of the U.S. Food and Drug
Administration implemented regulations for laser products on August 2, 1976.
These regulations apply to laser products manufactured since August 1, 1976.
Compliance is mandatory for products marketed in the United States. The label
shown below indicates compliance with the CDRH regulations and must be
attached to laser products marketed in the United States.
CANON INC.
3-30-2 SHIMOMARUKO, OHTA-KU, TOKYO, JAPAN
MANUFACTURED:
THIS PRODUCT CONFORMS WITH DHHS RADIATION
PERFORMANCE STANDARD, 21 CFR CHAPTER 1 SUBCHAPTER J.
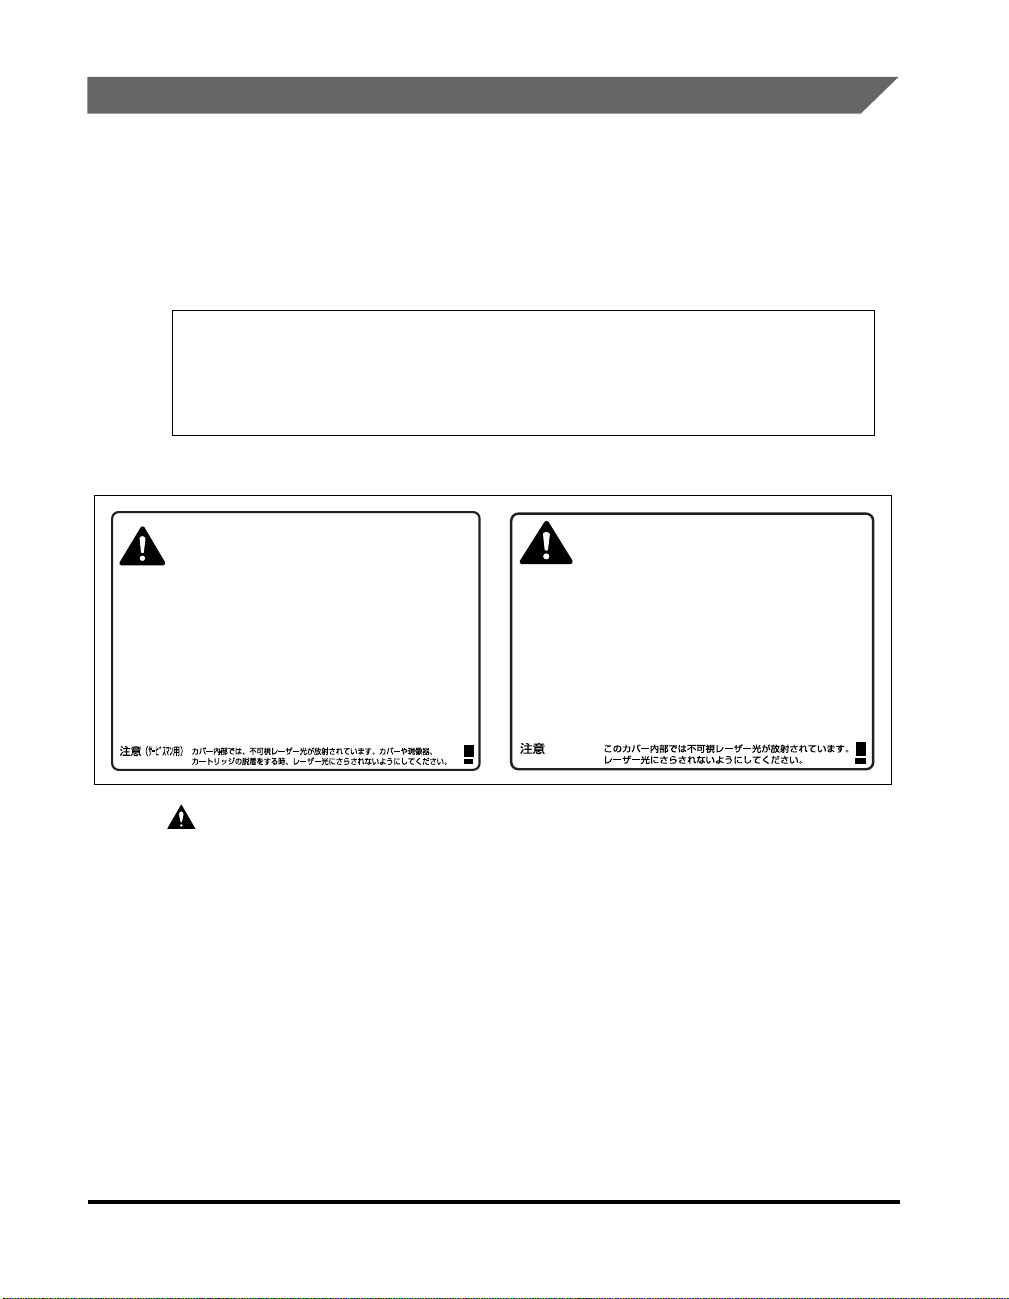
The labels shown below are attached to the laser scanner unit inside the machine.
Invisible laser radiation when opening the cover,
DANGER-
CAUTION-
ATTENTION
VORSICHT ATTENZIONE
PRECAUCIÓN
VARO! VARNING! ADVARSEL! ADVARSEL -
removing developing assembly, or cartridges.
AVOID DIRECT EXPOSURE TO BEAM.
INVISIBLE LASER RADIATION WHEN OPENING
THE COVER, REMOVING DEVELOPING ASSEMBLY.
AVOID EXPOSURE TO BEAM.
RAYONNEMENT LASER INVISIBLE EN CAS D’OUVERTURE DU COUVERCLE.
-
DU DÉMONTAGE DE L’ENSEMBLE DE DÉVELOPPEMENT.
EVITER TOUTE EXPOSITION DIRECTE AVEC LE FAISCEAU.
UNSICHTBARE LASERSTRAHLUNG, WENN ABDECKUNG GEÖFFNET.
NICHT DEM STRAHL AUSSETZEN.
EMISSIONE DI UN RAGGIO LASER INVISIBILE A SEGUITO DELL’ APERTURA
-
DELLA COPERTURA O DELLA RIMOZIONE DEL GRUPPO DI SVILUPPO.
EVITARE L’ESPOSIZIONE DIRETTA AL RAGGIO LASER.
RADIACIÓN LÁSER INVISIBLE EN CASO DE ABRIR LA CUBIERTA Y RETIRAR
-
LA UNIDAD REVELADORA. EVITE LA EXPOSICIÓN AL HAZ LÁSER.
AVATTAESSA KEHITYSYKSIKÖN POISSAOLLESSA OLET ALTTINA
NÄKYMÄTTÖMÄLLE LASERSÄTEILYLLE. ÄLÄ KATSO SÄTEESEEN.
OSYNLIG LASERSTRÄLNING NÄR DENNA DELÄR ÖPPNAD OCH.
FRAMKALLAREN ÄRURTAGEN. BETRAKTA EJ STRÄLEN.
USYNLIG LASER STRÅLING, NÅR DÆKSLET ÅBNES FOR AT FJERNE
FRAMKALLALDEREN. UNDGÅAT BLIVE RAMT AFSTRÅLEN.
USYNLIG LASERSTRÅLING NÅR DEKSELEÍ ÅPNES OG.
LASERENHETEN TASUT. IKKE SE DIREKTE PÅ STRÅLEN.
DANGERCAUTION-
ATTENTION
VORSICHT ATTENZIONE
PRECAUCION
VARO! VARNING! ADVARSEL! ADVARSEL -
Invisible laser radiation when open.
AVOID DIRECT EXPOSURE TO BEAM.
INVISIBLE LASER RADIATION WHEN OPEN.
AVOID EXPOSURE TO BEAM.
RAYONNEMENT LASER INVISIBLE EN CAS D’OUVERTURE.
-
EXPOSITION DANGEREUSE AU FAISCEAU.
UNSICHTBARE LASERSTRAHLUNG, WENN ABDECKUNG GEÖFFNET.
NICHT DEM STRAHL AUSSETZEN.
RADIAZIONE LASER INVISIBLE IN CASO DI APERTURA.
-
EVITARE L’ESPOSIZIONE AL FASCIO.
RADIACION LASER INVISIBLE CUANDO SE ABRE.
-
EVITAR EXPONERSE AL RAYO.
AVATTAESSA OLET ALTTIINA NÄKYMÄTTÖMÄLLE
LASERSÄTEILYLLE. ÄLÄ KATSO SÄTEESEEN.
OSYNLIG LASERSTRÄLNING NAR DENNA DELÄR ÖPPNAD.
BETRAKTA EJ STRÄLEN.
USYNLIG LASER STRÅLING, NÅR DENNE ER ÅBEN.
UNDGÅ BESTRÅLING.
USYNLIG LASERSTRÅLING NÅR DEKSEL ÅPNES.
UNNGÅ EKSPONERING FOR STRÅLEN.
xiv
CAUTION
Use of controls, adjustments, or performance of procedures other than those
specified in the manual may result in hazardous radiation exposure.
Legal Notices

International Energy Star Program
As an ENERGY STAR® Partner, Canon USA, Inc. has
determined that this machine meets the ENERGY STAR®
Program for energy efficiency.
The International ENERGY STAR® Office Equipment Program is
an international program that promotes energy saving through
the use of computers and other office equipment. The program
backs the development and dissemination of products with
functions that effectively reduce energy consumption. It is an
open system in which business proprietors can participate
voluntarily. The targeted products are office equipment, such as
computers, displays, printers, facsimiles, and copiers. The
standards and logos are uniform among participating nations.
Trademarks
Canon, the Canon logo, imageRUNNER, NetSpot Accountant, MEAP and MEAP logo are
trademarks of Canon Inc.
Acrobat is a trademark of Adobe Systems Incorporated.
Sun, Sun Microsystems, Java, Java 2 Platform Micro Edition (J2ME), Java 2 Platform,
Standard Edition (J2SETM)
Microsystems, Inc.
firm
Sun Microsystems, Inc.
in the U.S. and other regions. The Sun logo is a trademark of the U.S.
and
JDK
are trademarks of registered trademarks of
Sun
NetWare and Novell are registered trademarks of Novell, Inc. IPX/SPX and NDS are
trademarks of Novell, Inc. Copyright 1996 Novel Inc. All rights reserved.
UNIX is a registered trademark exclusively licensed to X/Open Company, Ltd. in the United
States and/or in other countries.
Active Directory and Windows are registered trademarks of Microsoft Corporation in the
United States and/or in other countries.
Other product and company names herein may be the trademarks of their respective
owners.
Legal Notices
xv

Copyright
Copyright 2003 by Canon Inc. All rights reserved.
No part of this publication may be reproduced or transmitted in any form or by any
means, electronic or mechanical, including photocopying and recording, or by any
information storage or retrieval system without the prior written permission of
Canon Inc.
Disclaimers
The information in this document is subject to change without notice.
CANON INC. MAKES NO WARRANTY OF ANY KIND WITH REGARD TO THIS
MATERIAL, EITHER EXPRESS OR IMPLIED, EXCEPT AS PROVIDED HEREIN,
INCLUDING WITHOUT LIMITATION, THEREOF, WARRANTIES AS TO
MARKETABILITY, MERCHANTABILITY, FITNESS FOR A PARTICULAR
PURPOSE OF USE OR AGAINST INFRINGEMENT OF ANY PATENT. CANON
INC. SHALL NOT BE LIABLE FOR ANY DIRECT, INCIDENTAL, OR
CONSEQUENTIAL DAMAGES OF ANY NATURE, OR LOSSES OR EXPENSES
RESULTING FROM THE USE OF THIS MATERIAL.
xvi
Legal Notices
Important Safety Instructions
Please read these “Important Safety Instructions” thoroughly before operating the
machine. As these instructions are intended to prevent injury to the user or other
persons or destruction of property, always pay attention to these instructions. Also,
since it may result in unexpected accidents or injuries, do not perform any operation
unless otherwise specified in the manual. Improper operation or use of this
machine could result in personal injury and/or damage requiring extensive repair
that may not be covered under your Limited Warranty.
Installation
WARNING
Do not install the machine near alcohol, paint thinner, or other flammable substances.
•
If flammable substances come into contact with electrical parts inside the machine, it
may result in a fire or electrical shock.
Do not place the following items on the machine. If these items come into contact
•
with a high-voltage area inside the machine, it may result in a fire or electrical shock.
If these items are dropped or spilled inside the machine, immediately turn OFF the
main power switch, and disconnect the power cord from the power outlet. Then,
contact your local authorized Canon dealer.
- Necklaces and other metal objects
- Cups, vases, flowerpots, and other containers filled with water or liquids
Important Safety Instructions
xvii
CAUTION
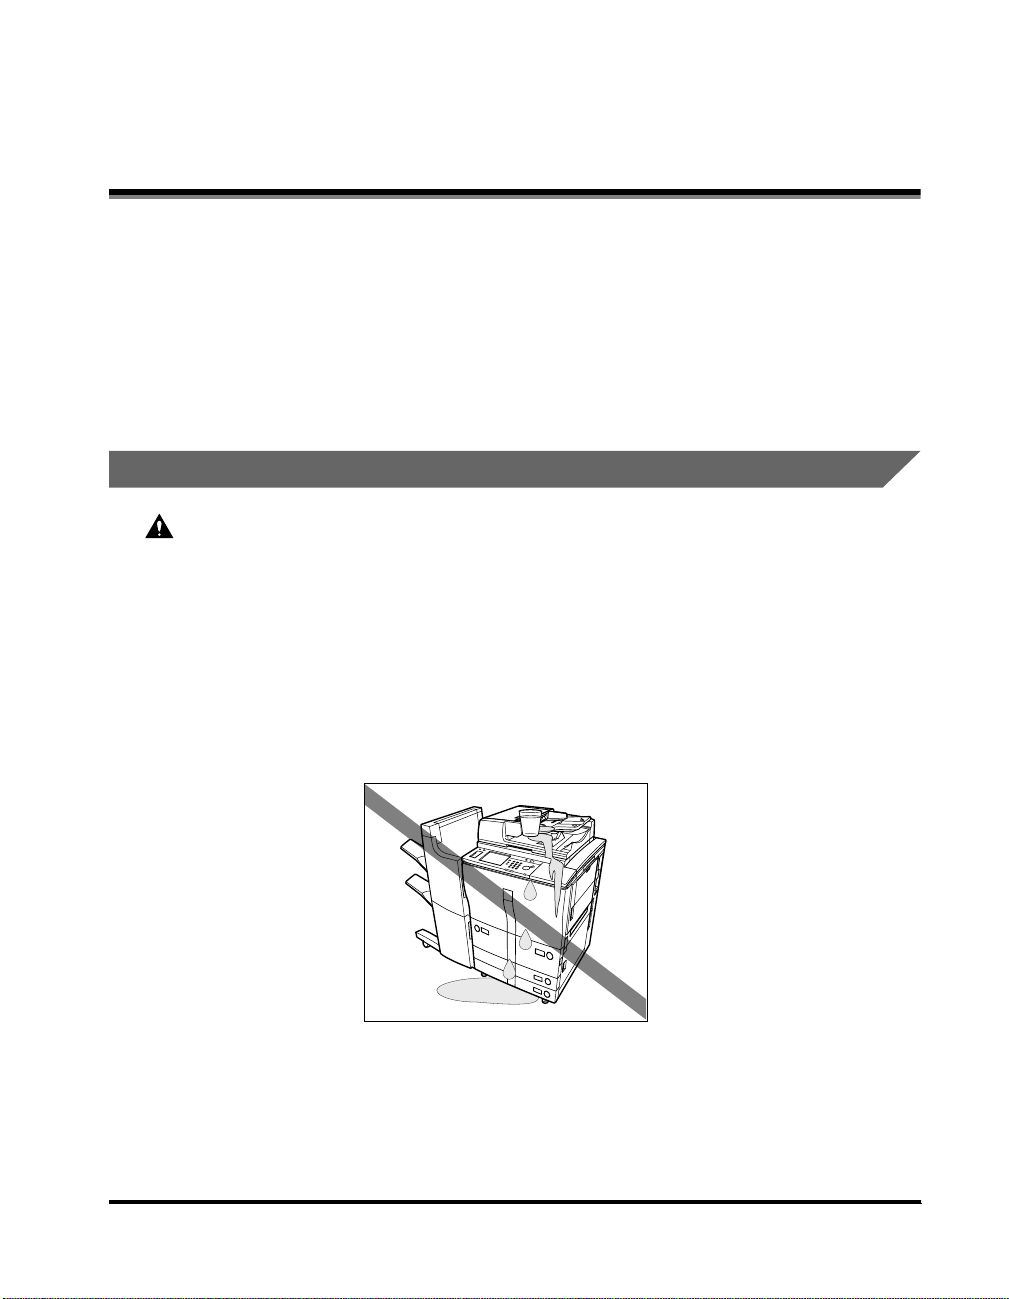
Do not install the machine in unstable locations, such as on unsteady platforms or on
•
inclined floors, or in locations subject to excessive vibrations, as this may cause the
machine to fall or tip over, resulting in personal injury.
Never block the ventilation slots and louvers on the machine. These openings are
•
provided for proper ventilation of working parts inside the machine. Blocking these
openings can cause the machine to overheat. Never place the machine on a soft
surface, such as a sofa or rug.
• Do not install the machine in the following locations.
- A damp or dusty location
- A location near a water faucet or water
- A location exposed to direct sunlight
- A location subject to high temperatures
- A location near open flames
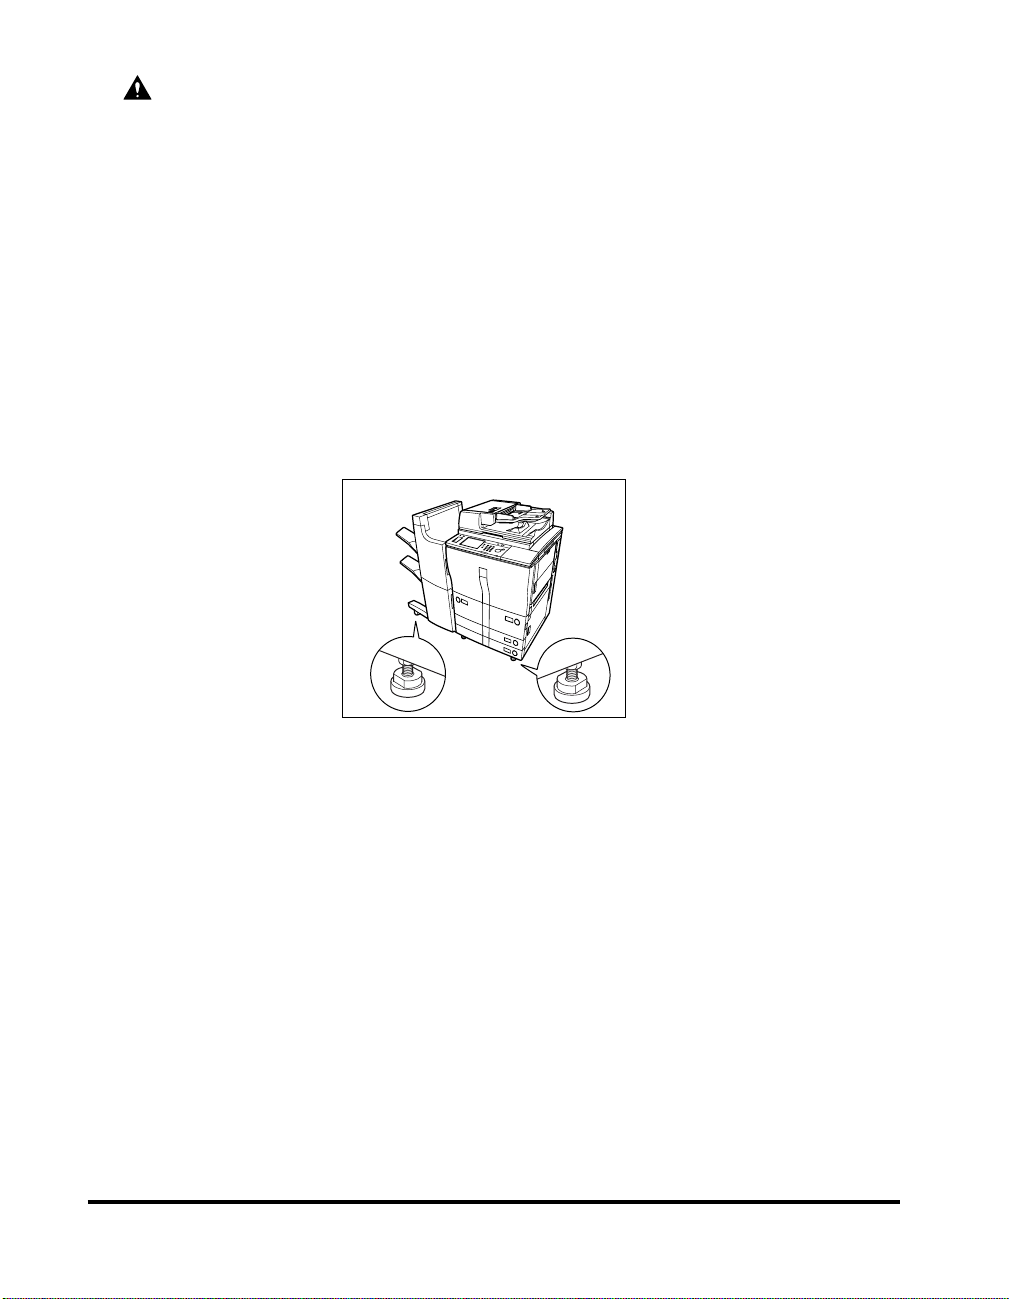
• Do not remove the machine’s leveling feet after the machine has been installed, as
this may cause the machine to fall or tip over, resulting in personal injury.
xviii
Important Safety Instructions

Power Supply
WARNING
• Do not damage or modify the power cord. Also, do not place heavy objects on the
power cord, or pull on or excessively bend it, as this could cause electrical damage,
resulting in a fire or electrical shock.
• Keep the power cord away from a heat source; failure to do this, may cause the cord
coating to melt, resulting in a fire or electrical shock.
• Do not connect or disconnect the power cord with wet hands, as this may result in
electrical shock.
• Do not connect the power cord a multiplug power strip, as this may cause a fire or
electrical shock.
• Do not bundle up or tie the power cord in a knot, as this may result in a fire or
electrical shock.
• Insert the power plug completely into the power outlet, as failure to do so may result
in a fire or electrical shock.
• Do not use power cords other than the power cord provided, as this may result in a
fire or electrical shock.
• As a general rule, do not use extension cords. Using an extension cord may result in
a fire or electrical shock. If an extension cord must be used, however, use one rated
for voltages of 120 V AC and over, untie the cord binding, and insert the power plug
completely into the extension cord outlet to ensure a firm connection between the
power cord and the extension cord.
CAUTION
• Do not use power supplies with voltages other than those specified herein, as this
may result in a fire or electrical shock.
• Always grasp the power plug when disconnecting the power cord. Pulling on the
power cord may expose or snap the core wire, or otherwise damage the power cord. If
the power cord is damaged, this could cause current to leak, resulting in a fire or
electrical shock.
• Leave sufficient space around the power plug so that it can be unplugged easily. If
objects are placed around the power plug, you will be unable to unplug it in an
emergency.
Important Safety Instructions
xix

Handling
WARNING
• Do not attempt to disassemble or modify the machine. There are high-temperature
and high-voltage components inside the machine which may result in a fire or
electrical shock.
• If the machine makes strange noises, or gives off smoke, heat, or strange smells,
immediately turn OFF the main power switch, and disconnect the power cord from the
power outlet. Then, contact your local authorized Canon dealer. Continued use of the
machine in this condition may result in a fire or electrical shock.
• Do not use highly flammable sprays near the machine. If gas from these sprays
comes into contact with the electrical components inside the machine, it may result
in a fire or electrical shock.
• To avoid damage to the power cord and creating a fire hazard, always turn OFF the
main power switch, and unplug the interface cable when moving the machine.
Otherwise, the power cord or interface cable may be damaged, resulting in a fire or
electrical shock.
• Do not drop paper clips, staples, or other metal objects inside the machine. Also, do
not spill water, liquids, or flammable substances (alcohol, benzene, paint thinner,
etc.) inside the machine. If these items come into contact with a high-voltage area
inside the machine, it may result in a fire or electrical shock. If these items are
dropped or spilled inside the machine, immediately turn OFF the main power switch,
and disconnect the power cord from the power outlet. Then, contact your local
authorized Canon dealer.
CAUTION
• Do not place heavy objects on the machine, as they may tip over or fall resulting in
personal injury.
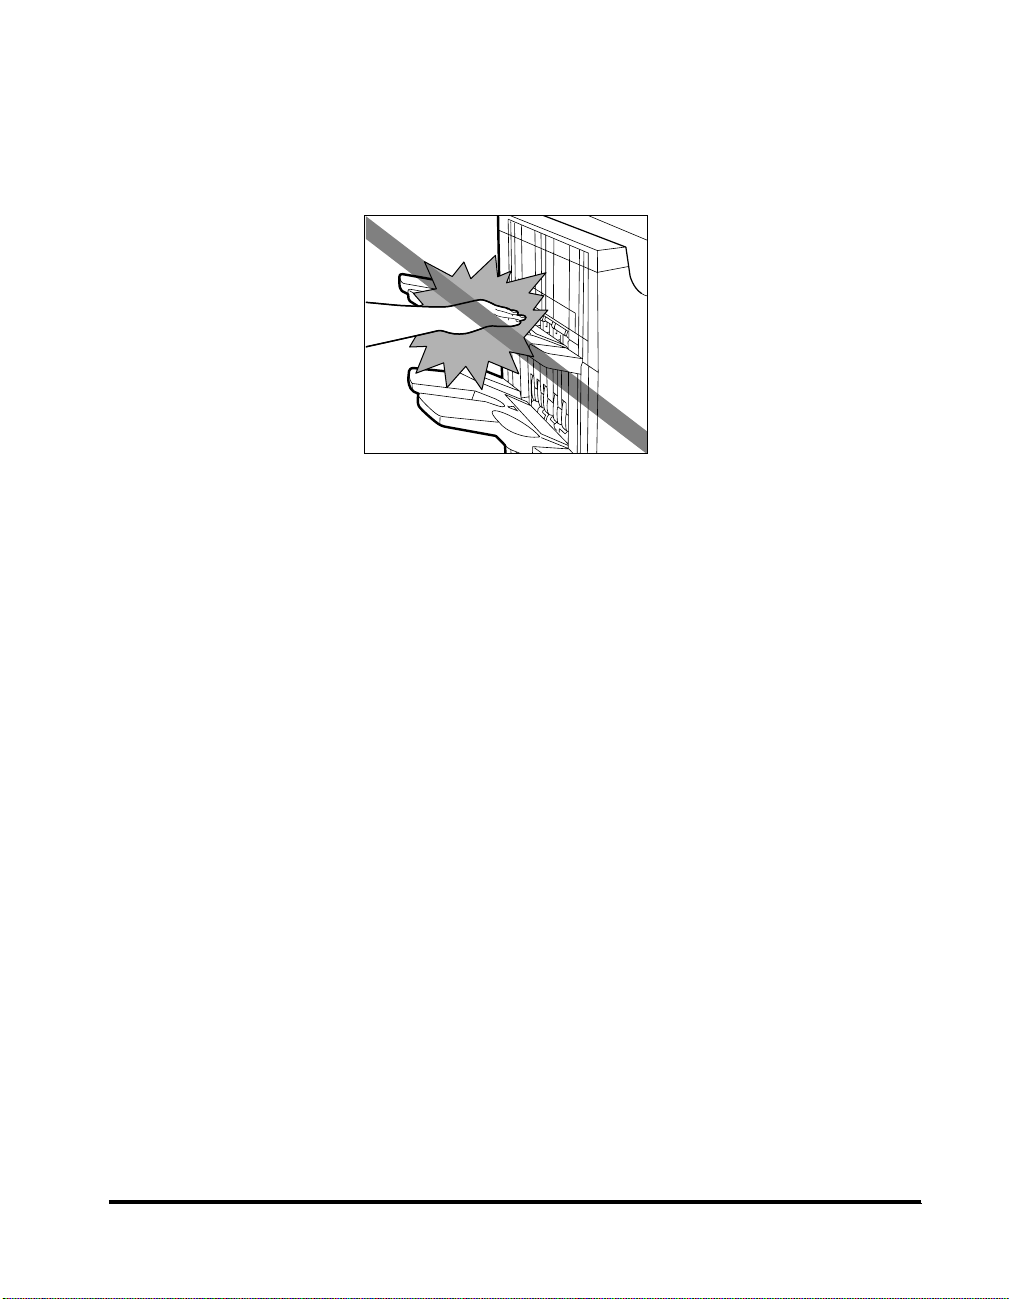
• Close the feeder/platen glass cover gently to avoid catching your hands, as this may
result in personal injury.
xx
• Do not press down hard on the feeder/platen glass cover when using the platen glass
to make copies of thick books. Doing so may damage the platen glass and result in
personal injury.
• Do not touch the finisher while the machine is printing, as this may result in personal
injury.
Important Safety Instructions
• Turn OFF the control panel power switch for safety when the machine will not be used
for a long period of time, such as overnight. Also, turn OFF the main power switch,
and disconnect the power cord for safety when the machine will not be used for an
extended period of time, such as during consecutive holidays.
• Do not place your hand in the part of the tray where stapling is performed when a
finisher is attached, as this may result in personal injury.
Important Safety Instructions
xxi
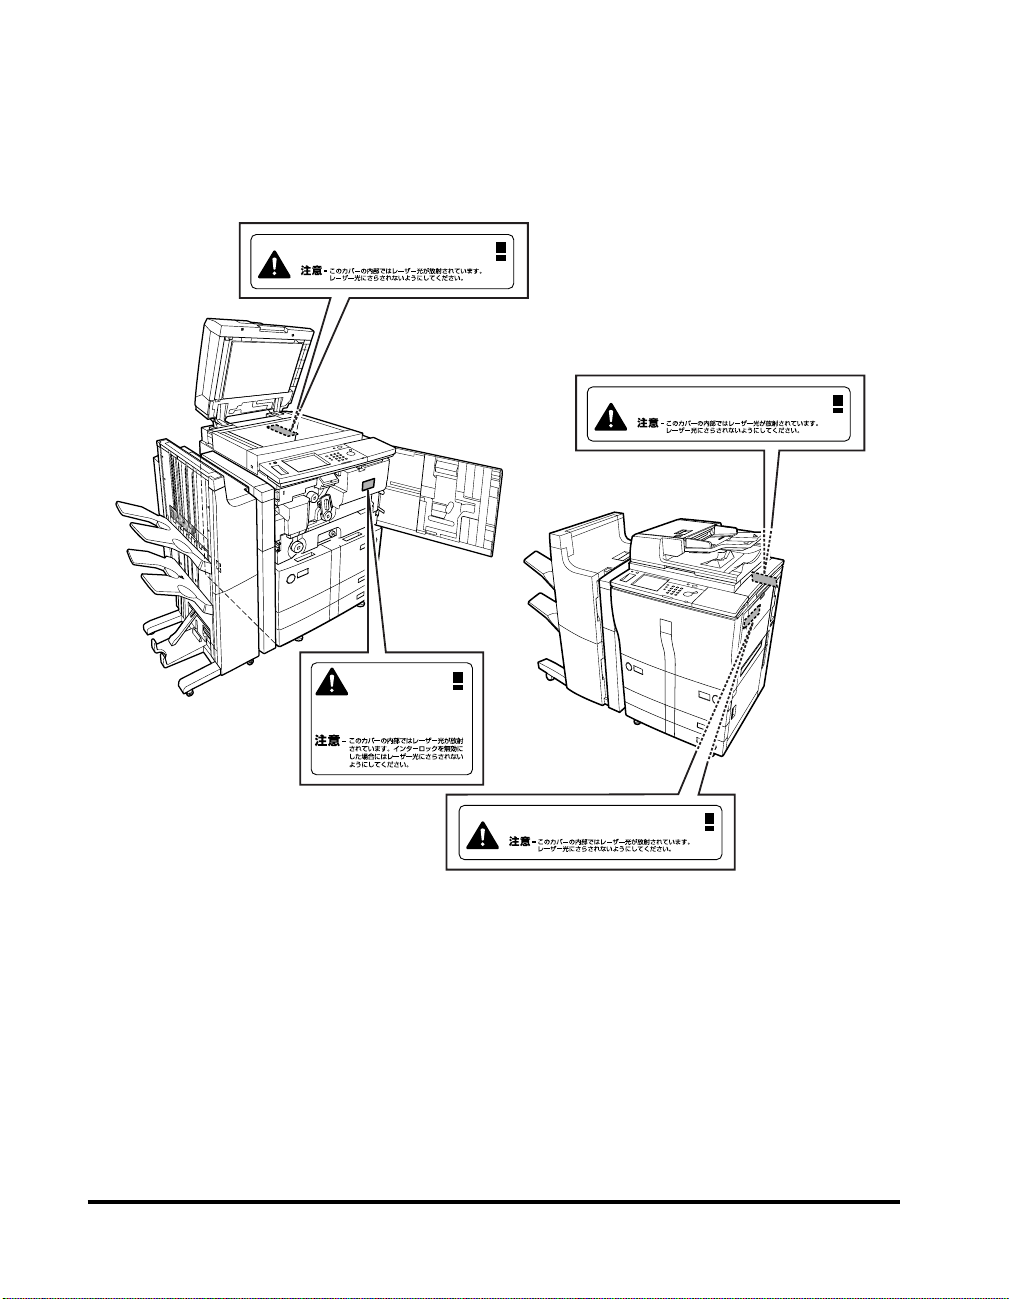
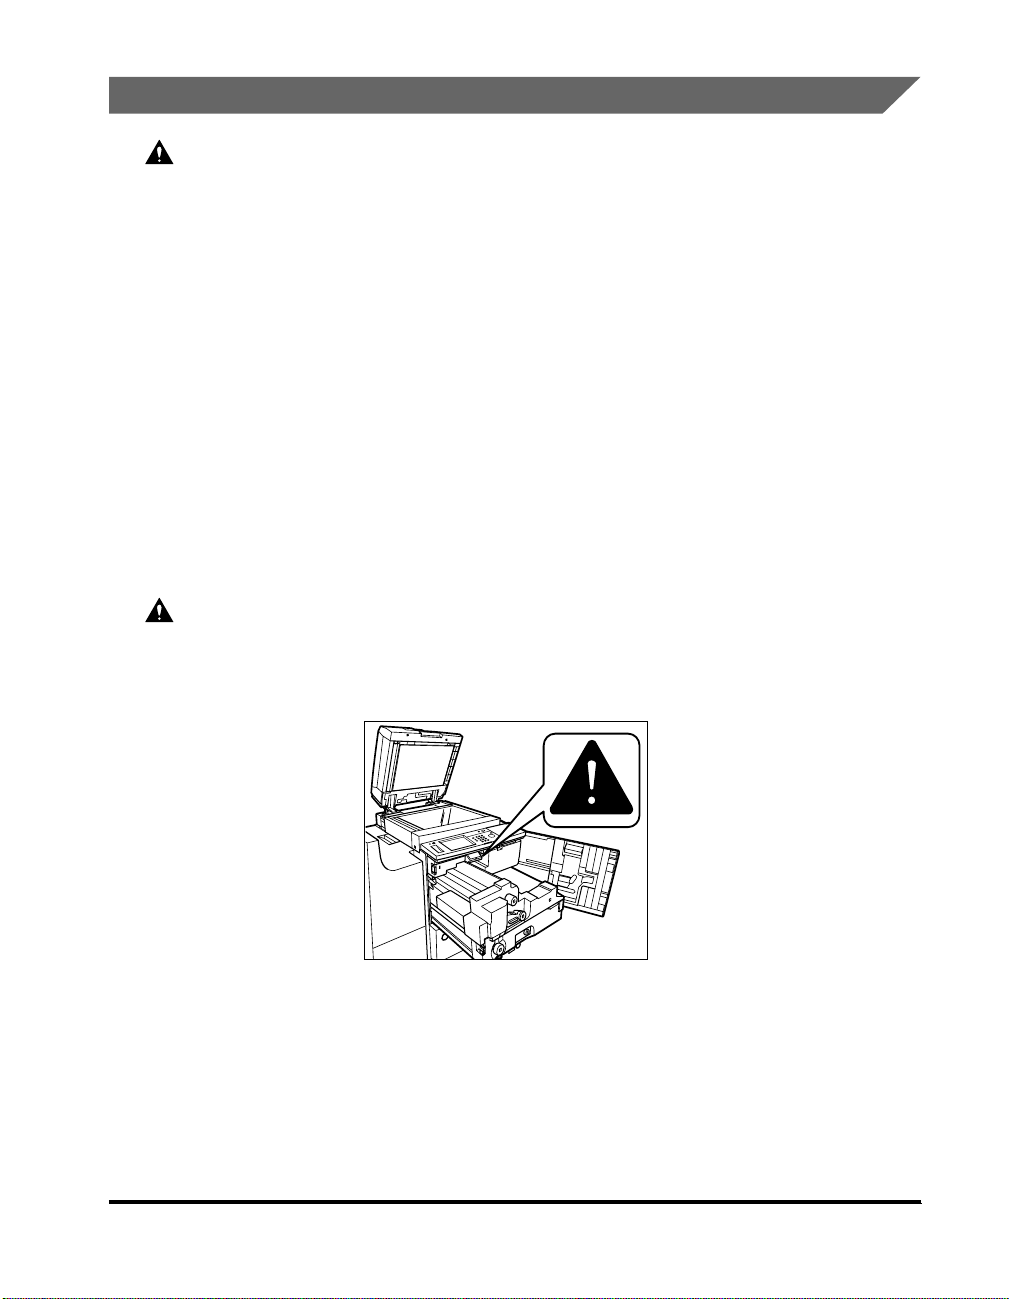
• The laser beam can be harmful to human bodies. Since radiation emitted inside the
product is completely confined within protective housings and external covers, the
laser beam cannot escape from the machine during any phase of user operation.
Read the following remarks and following instructions for safety.
• Never open covers other than those instructed in this manual.
• Do not remove the caution label attached to the cover of the laser scanner unit.
Laser radiation when open.
DANGER-
AVOID DIRECT EXPOSURE TO BEAM.
Laser radiation when open.
DANGER-
AVOID DIRECT EXPOSURE TO BEAM.
xxii
Laser radiation when open
DANGER-
and interlock defeated.
AVOID DIRECT EXPOSURE
TO BEAM.
Laser radiation when open.
DANGER-
AVOID DIRECT EXPOSURE TO BEAM.
• If the laser beam escapes from the machine, exposure may cause serious damage to
your eyes.
Important Safety Instructions
Maintenance and Inspections
WARNING
• When cleaning the machine, first turn OFF the main power switch, then disconnect
the power cord. Failure to observe these steps may result in a fire or electrical shock.
• Disconnect the power cord from the power outlet regularly, and clean the area around
the base of the power plug’s metal pins and the power outlet with a dry cloth to
ensure that all dust and grime is removed. If the power cord is connected for a long
period of time in a damp, dusty, or smoky location, dust can build up around the
power plug and become damp. This may cause a short circuit and result in a fire.
• Clean the machine using a slightly dampened cloth with a mild detergent mixed with
water. Do not use alcohol, benzene, paint thinner, or other flammable substances.
Check detergent for flammability prior to use. If flammable substances come into
contact with a high-voltage area inside the machine, it may result in a fire or electrical
shock.
• There are some areas inside the machine which are subject to high-voltages. When
removing jammed paper, or when inspecting the inside of the machine, do not allow
necklaces, bracelets, or other metal objects to touch the inside of the machine, as
this may result in burns or electrical shock.
• Do not burn or throw used toner bottles into open flames, as this may cause the toner
remaining inside the bottles to ignite, resulting in burns or a fire.
CAUTION
• The fixing unit and its surroundings inside the machine may become hot during use.
When removing jammed paper or when inspecting the inside of the machine, do not
touch the fixing unit and its surroundings, as doing so may result in burns or
electrical shock.
• When removing jammed paper or replacing the toner bottle, take care not to allow the
toner to come into contact with your hands or clothing, as this will dirty your hands
or clothing. If they become dirty, wash them immediately with cold water. Washing
them with warm water will set the toner, and make it impossible to remove the toner
stains.
Important Safety Instructions
xxiii

• When removing paper which has become jammed inside the machine, remove the
jammed paper gently to prevent the toner on the paper from scattering and getting
into your eyes or mouth. If toner gets into your eyes or mouth, wash them
immediately with cold water and consult a physician.
• When loading paper or removing jammed originals or paper, take care not to cut your
hands on the edges of the originals or paper.
• When removing a used toner bottle, remove the bottle carefully to prevent the toner
from scattering and getting in your eyes or mouth. If the toner gets in your eyes or
mouth, wash them immediately with cold water and immediately consult a physician.
Consumables
WARNING
• Do not burn or throw used toner bottles into open flames, as this may cause the toner
remaining inside the bottles to ignite, resulting in burns or a fire.
• Do not store toner bottles or copy paper in places exposed to open flames, as this
may cause the toner or paper to ignite, resulting in burns or a fire.
• When discarding used toner bottles, put the bottles in a bag to prevent the toner
remaining inside the bottles from scattering, and dispose of them in a location away
from open flames.
CAUTION
Keep toner and other consumables out of the reach of small children. If these items
are ingested, consult a physician immediately.
Other Warnings
WARNING
For cardiac pacemaker users:
This product generates a low level magnetic field. If you use a cardiac pacemaker
and feel abnormalities, please move away from the product and consult your doctor.
xxiv
Important Safety Instructions
Periodic Inspection of the Breaker
This machine has a breaker that detects excess current or leakage current. Be sure
to test the breaker once or twice a month using the following procedure.
IMPORTANT
•
Make sure that the main power is turned ON, and the machine is neither printing nor
scanning before inspecting the breaker.
•
If a malfunction occurs after a periodic inspection, contact your local authorized Canon
dealer.
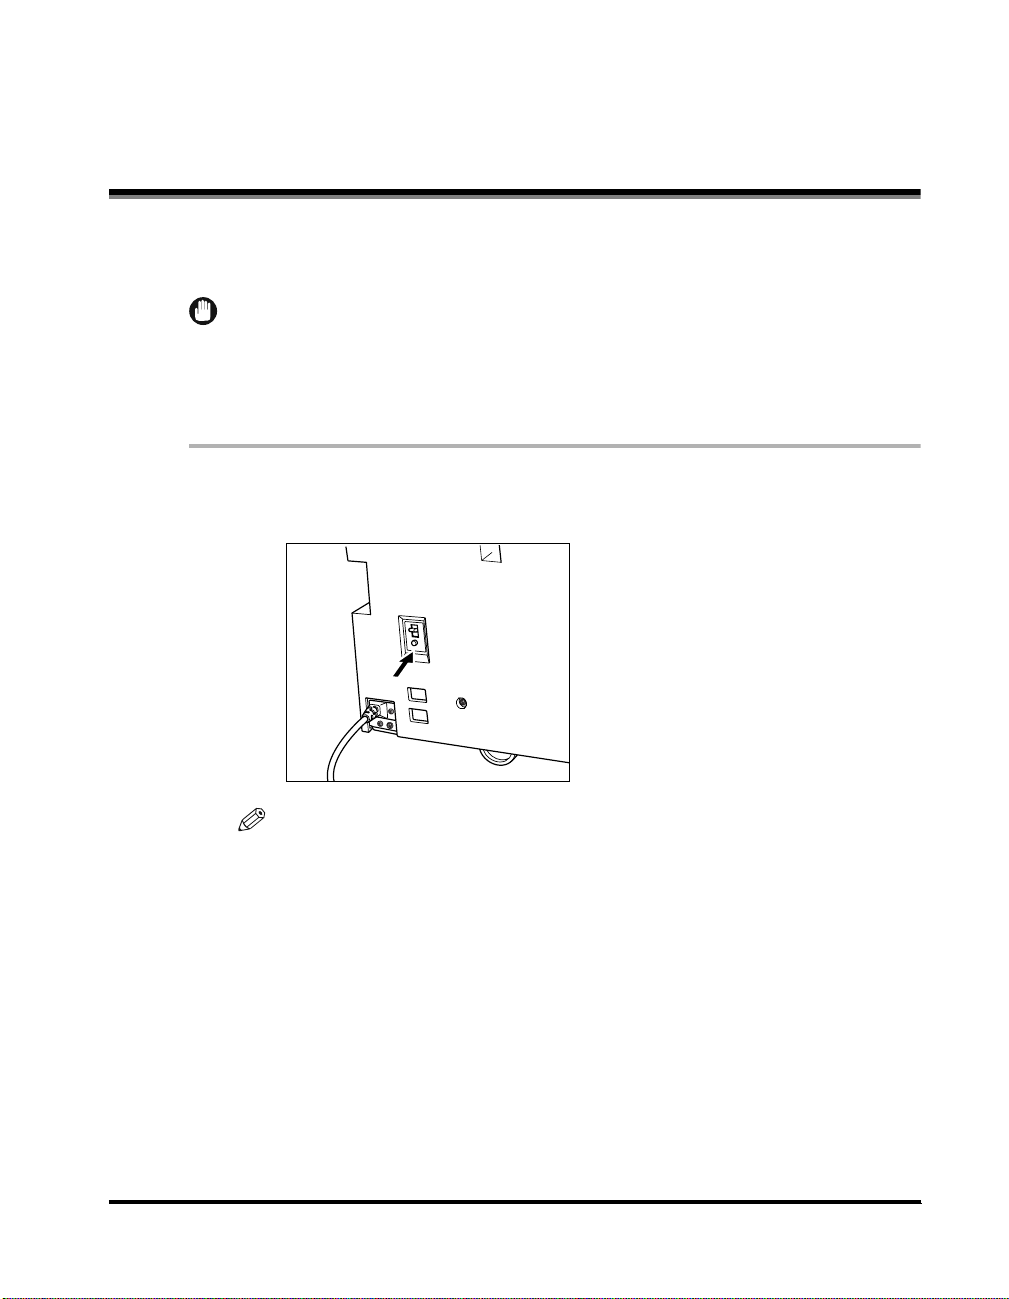
1
Push the test button with the tip of a ball-point pen, or similar
object.
NOTE
The breaker is located on the bottom left side of the machine, near the power cord.
Periodic Inspection of the Breaker
xxv
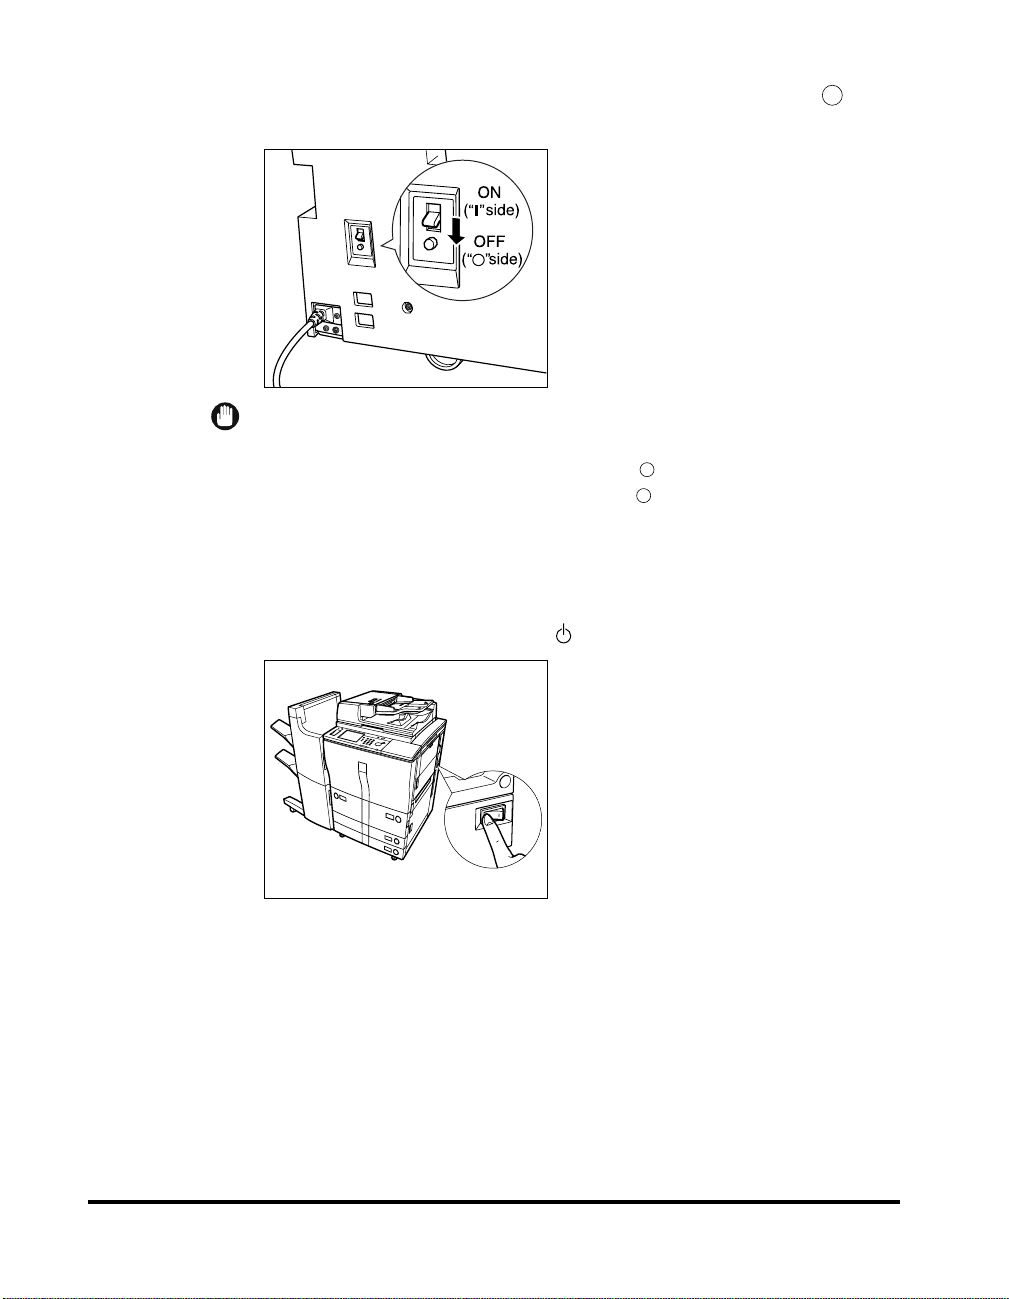
2
The breaker lever automatically switches to the OFF (“ ”
side) position. Confirm that the power is cut OFF.
IMPORTANT
•
Do not use the test button to turn the power ON and OFF.
•
If the breaker lever does not switch to the OFF (“ ” side) position, repeat step 1.
•
If the breaker lever does not switch to the OFF (“ ” side) position despite carrying
out the above procedure two or three times, contact your local authorized Canon
dealer.
3
Once you have confirmed that the power is OFF, press the
main power switch to OFF (“
” side).
xxvi
Periodic Inspection of the Breaker
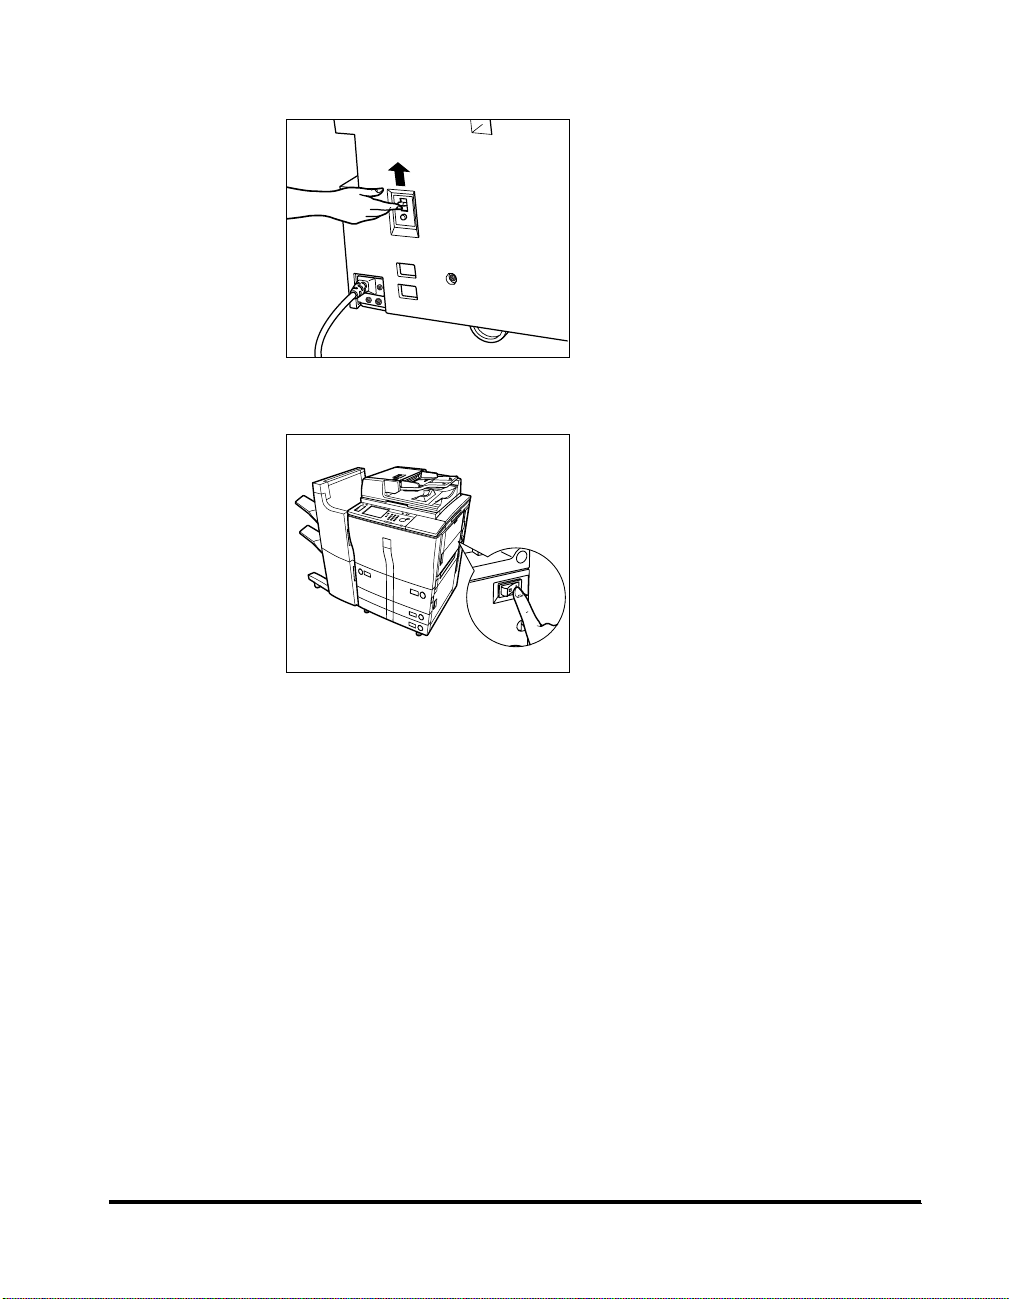
4
Move the breaker lever to the ON (“I” side) position.
5
Press the main power switch to ON (“I” side).
6
Fill in the check sheet, at the end of this manual, to document your
periodic inspections of the breaker.
Periodic Inspection of the Breaker
xxvii

Legal Limitations on the Usage of Your Product and the Use of Images
Using your product to scan, print or otherwise reproduce certain documents, and
the use of such images as scanned, printed or otherwise reproduced by your
product, may be prohibited by law and may result in criminal and/or civil liability. A
non-exhaustive list of these documents is set forth below. This list is intended to be
a guide only. If you are uncertain about the legality of using your product to scan,
print or otherwise reproduce any particular document, and/or of the use of the
images scanned, printed or otherwise reproduced, you should consult in advance
with your legal advisor for guidance.
• Paper Money • Travelers Checks
• Money Orders • Food Stamps
• Certificates of Deposit • Passports
• Postage Stamps
(canceled or uncanceled)
• Identifying Badges or Insignias • Internal Revenue Stamps
• Selective Service or Draft Papers • Bonds or Other Certificates of
• Checks or Drafts Issued by
Governmental Agencies
• Motor Vehicle Licenses and
Certificates of Title
• Immigration Papers
(canceled or uncanceled)
Indebtedness
• Stock Certificates
• Copyrighted Works/Works of Art
without Permission of Copyright
Owner
xxviii
Legal Limitations on the Usage of Your Product and the Use of Images
 Loading...