

Page 1
BJC-1000 Series Setup Instructions
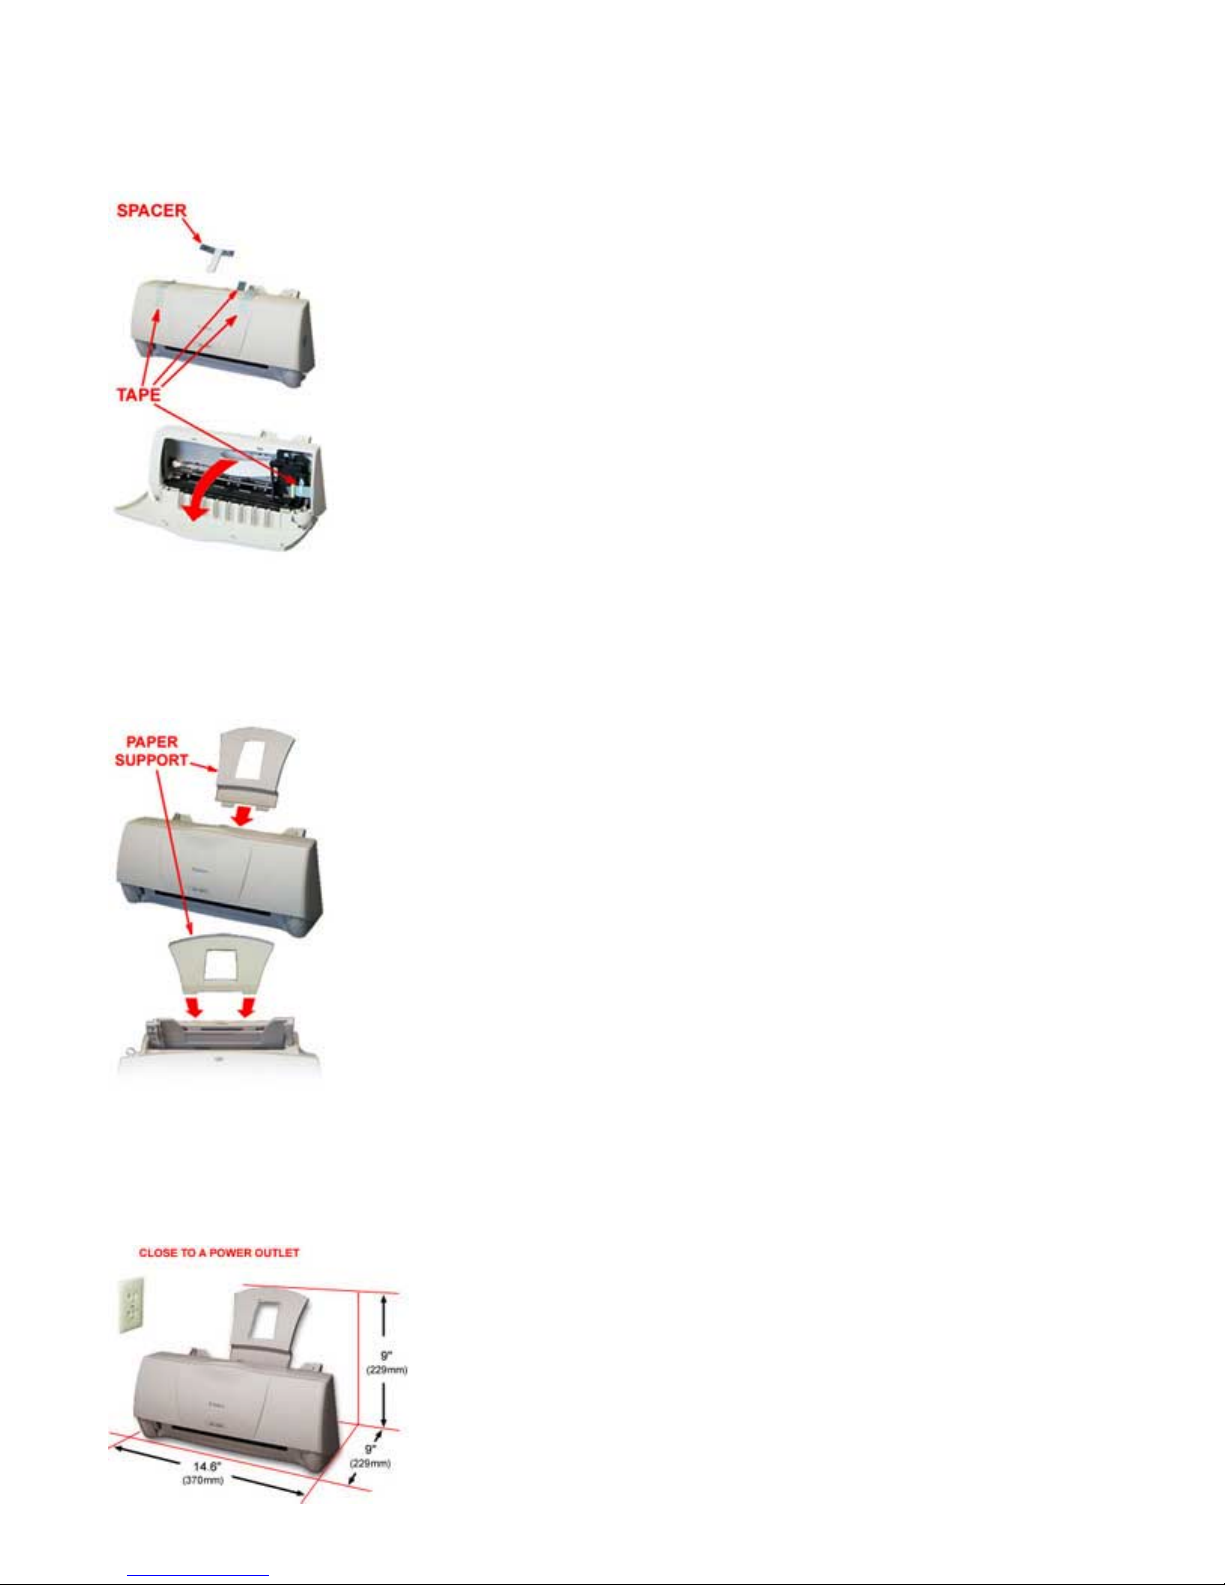
Step 1: Remove All Shipping Tape and Protective Materials
• Open the front cover. Grip the top of the cover in the center and pull it toward you.
o Note that tape may not be in the exact locations shown here.
Important! Save the box and shipping materials. You may need them later if you have to transport the printer
Step 2: Install The Paper Support
• Insert the tabs on the bottom of the paper support into the slots on the back of the sheet feeder.
Step 3: Select A Location For The Printer
• Choose a flat sturdy surface with enough space around the printer to store and feed paper.
• Avoid placing the paper in direct sunlight.
• Check that you have enough room for the printed output to come out in front of the printer.
Page 2

Step 4: Connect The Printer To The Computer
• Make sure the printer and your computer are turned off.
o Connect a parallel cable to the printer.
o You need to buy a parallel cable from your dealer.
o The cable must be a Centronics-compatible, bi-directional cable (IEEE 1284-compliant).
• Then connect the cable to your computer.
Step 5: Plug In The Printer Materials
• Attach the power cord to the back of the printer.
• Attach the other end of the power cord to a power outlet.
o There is no power button on the printer. After the power cord is conne cted to the power source,
the printer is automatically switched on.
Step 6: Take The BJ Cartridge Out Of Its Packaging
• Remove the orange protective cap from the print head and then r emove the orange tape.
o Do not attempt to replace the ca p on a BJ cartridge.
Page 3
Step 7: Install The BJ Cartridge
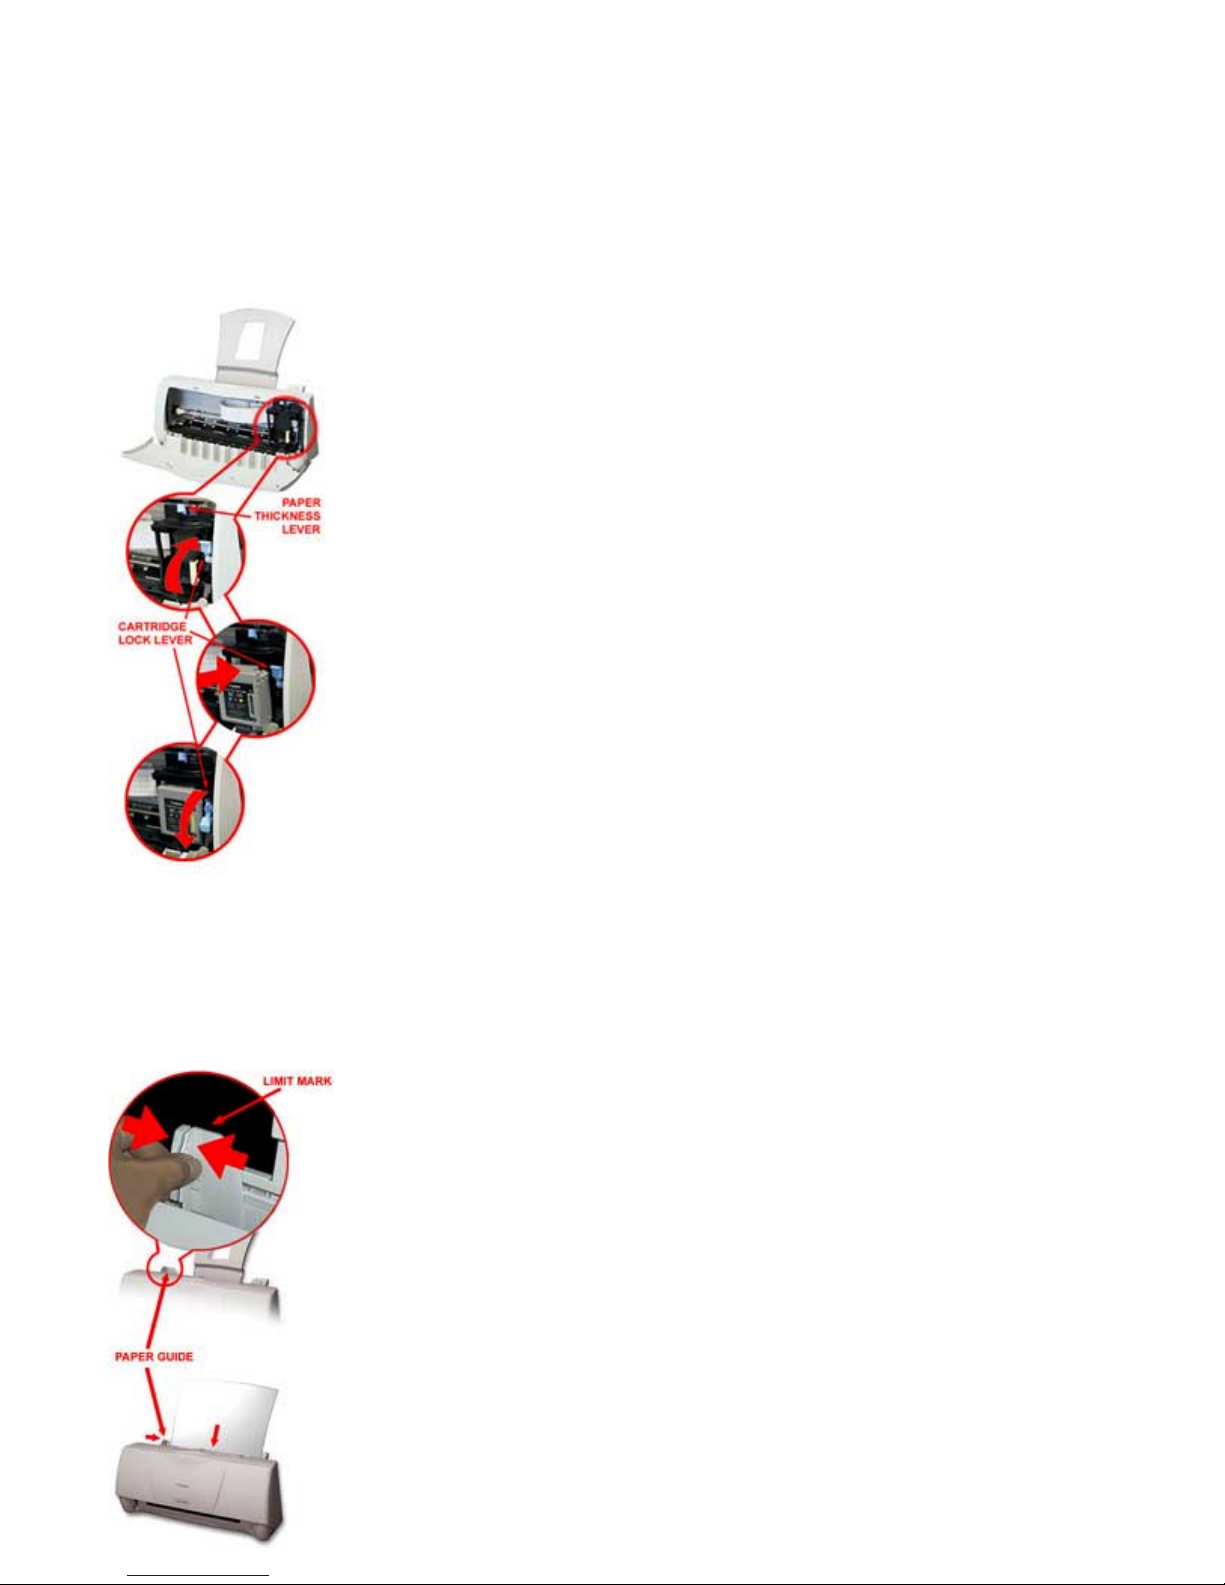
• Open the front cover. The cartridge holder moves to the center.
• Raise the blue cartridge lock lever.
• Align the slot in the BJ cartr idge with the yellow guide and g ently insert the cartridge.
• Press the lock lever down gently so that it locks into place. Do not apply excessive force.
• Adjust the blue paper thickness lever for paper or envelopes.
o Left for paper.
o Right for heavier-weight media and envelopes.
• Close the front cover . The cartridge holder moves to the right side of the printer (called the home
position).
Step 8: Load Paper
• Move the paper guide to the left to match the width of your paper.
• Fan a stack of paper and slide it into the sheet feeder until it stops.
• Adjust the paper guide to the stack.
• Make sure the stack of paper does not excee d the limit mark and tab.
Page 4

Step 9: Printer Setup For Windows
Important!
You must install the BJC-1000 Series Printer Driver for Windows. The printer driver controls the communication
between the printer and your computer. Installing your printer driver is easy. Use t he Canon Creative Home CDROM and follow these simple steps.
Start Your System in This Order
1. Make sure your computer is turned off.
2. Check that the printer is connected to the computer.
3. Make sure the printer is plugged in.
4. Now turn on the computer.
Starting Windows 98 or Windows 95 and Printer Setup
If you see a "New Hardware Found", "Update Device Driver Wizard", or "Add New Hardware Wizard" screen, click
Cancel. (Make sure you return to the Windows 98 or Windows 95 Desktop.)
When you see the Windows 98 or Windows 95 Desktop, follow these steps:
1. Insert the Canon Creative Home CD-ROM into your CD-ROM drive.
• If Setup starts automatically, go to 3.
• If Setup doesn't start, from the taskbar, click Start and then Run.
2. In the Run screen, type D:\SETUP (where D: is your CD-ROM drive - most CD-ROM drives are D: or E: -
try D: first; if you see an error message, try E:). Then click OK.
3. Follow the on-screen instructions.
• Be sure to wait for Windows to complete each operation.
• Some operations take awhile. If you hear your computer working, wait for it to finish.
When you see the Windows 3.1 Desktop, follow these steps:
1. Insert the Canon Creative Home CD-ROM into your CD-ROM drive.
• From the Program Manager, select Run in the File Menu.
2. In the Run screen, type D:\SETUP (where D: is your CD-ROM drive - most CD-ROM drives are D: or E: -
try D: first; if you see an error message, try E:). Then click OK.
3. Follow the on-screen instructions.
• Select BJC-1000 Series from the list of printers.
• Be sure to wait for Windows to complete each operation.
• When complete, restart Windows.
Congratulations!
You are ready to start printing with your BJC-1000. For complete information on the features and operations of
your printer, see your User's Manual.
 Loading...