

Page 1
A/M
OK
UP
T
P
DOWN
PWR
ROOM
TIME
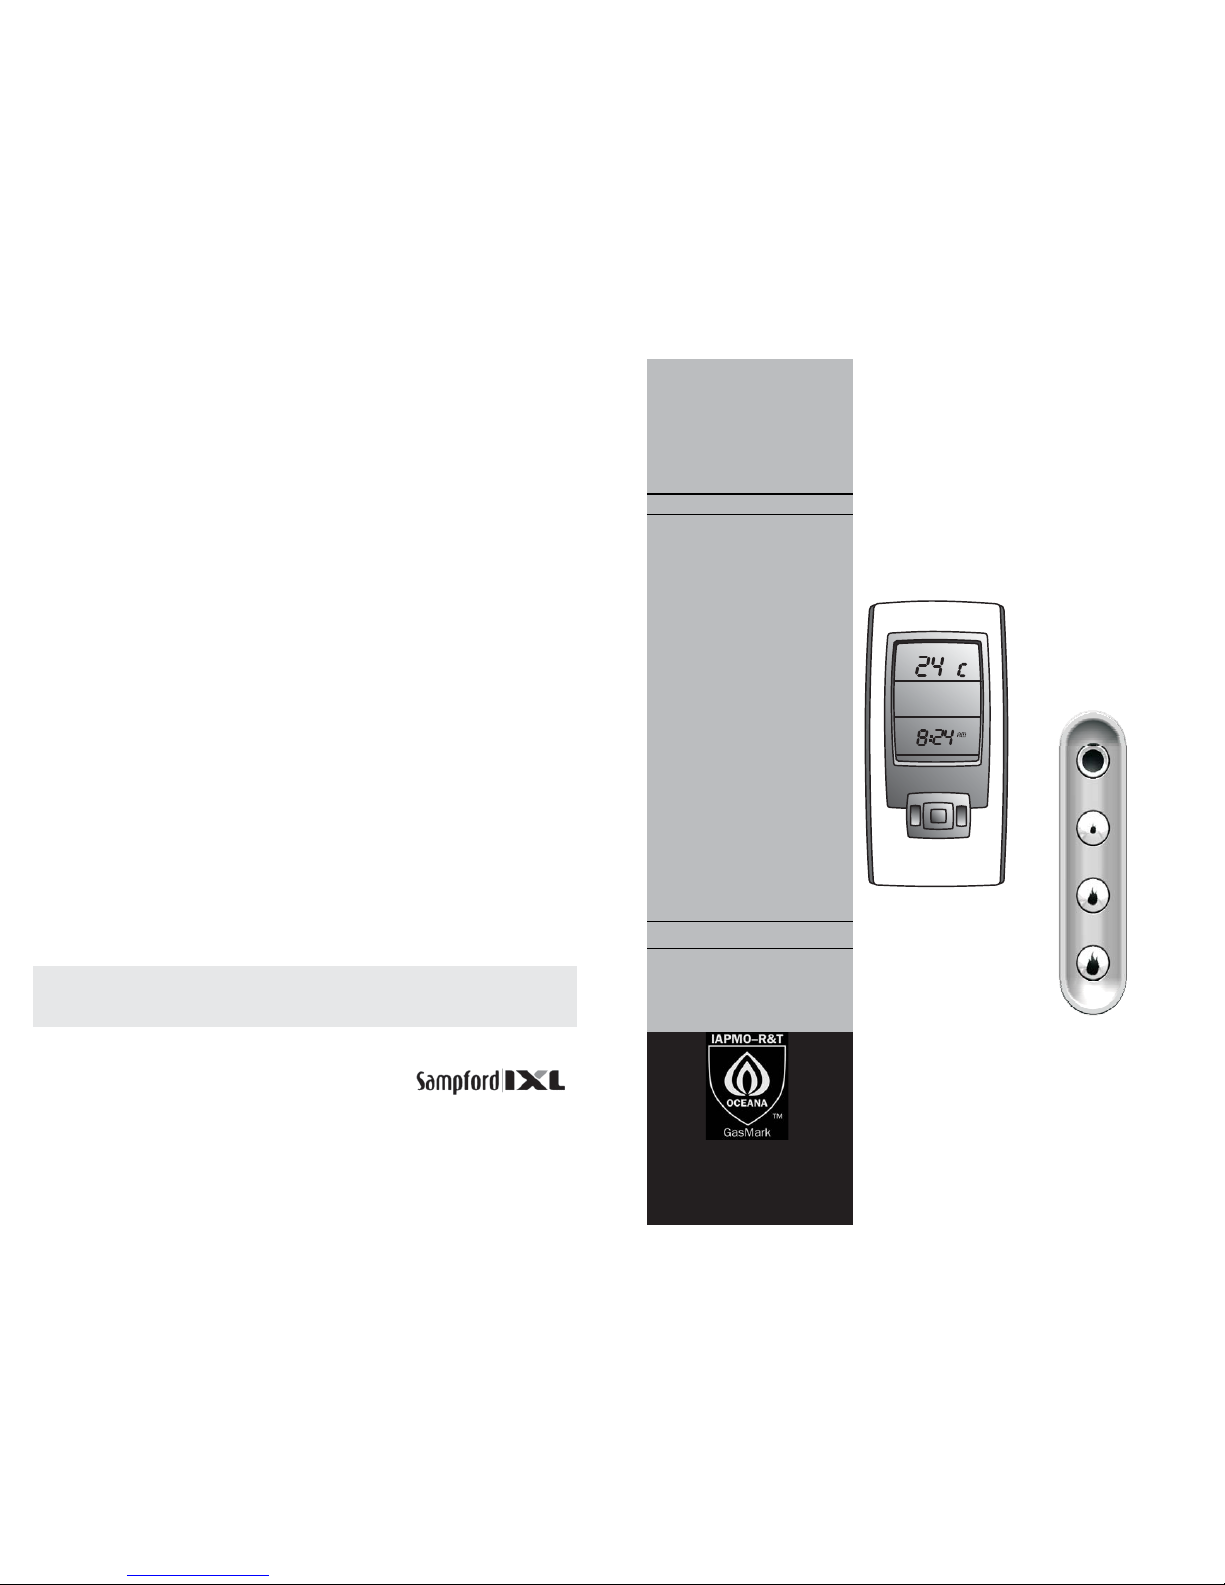
Cannon
Cannon
Remote Thermostat
USER INSTRUCTIONS
GMK10025, GMK10030,
GMK10112 & GMK10113
AS4553:2008
All Cannon models.
Please leave instructions with the owner
Cannon
For service to this appliance or spare
parts contact the CANNON distributor:
Email: aftersalesservice@sampfordixl.com.au
Date installed: ........................................
Compliance Certificate No .........................
Sampford IXL - Spare Parts
Phone: 1300 727 421
Fax: 1300 727 425
PLEASE READ THIS MANUAL
BEFORE INSTALLING AND
USING THIS PRODUCT
Part Number:
F3754_D
Page 2
Page 18.
Initial Start-up 1
Quick start guide. 2
Safety warnings 3
Thermostat LCD 5
Functions 7
Button functions
Programming button functions
Initial setup 8
On / Off
Time and day of the week
Manual mode 9
Automatic mode 9
Programming 10-11
Programming screen displays 12
Program mode 13
Factory default settings
Your settings
Settings 14
Change between C° and F°
Restore factory default settings
Teaching the thermostat ID code
to the control unit
Quick reference table 16
Back Up Switch 17
Service 18
Features 4
6-
Frequently asked questions 15
Battery type: 2 X AA batteries
Battery life : approximately 12 months
Transmission frequency: 433.92 Mhz
Dimensions: 140MM x 80mm x 20mm
Page 1.
NOTES
CONTENTS
INITIAL START-UP
1. Disconnect heater from power supply.
2. Fitted batteries to remote thermostat unit.
3.connect Heater back to power supply and point
Remote Thermostat at heater. Within 15 seconds press
Sequence of “ on Rp,t,t,up” emote Thermostat
If correctly done, a display of “ will appear on display.
Unit will now operate via Remote Thermostat.
For further details see page 14 settings
- Teaching RF Thermostat ID code to Control unit
lc”
Page 3

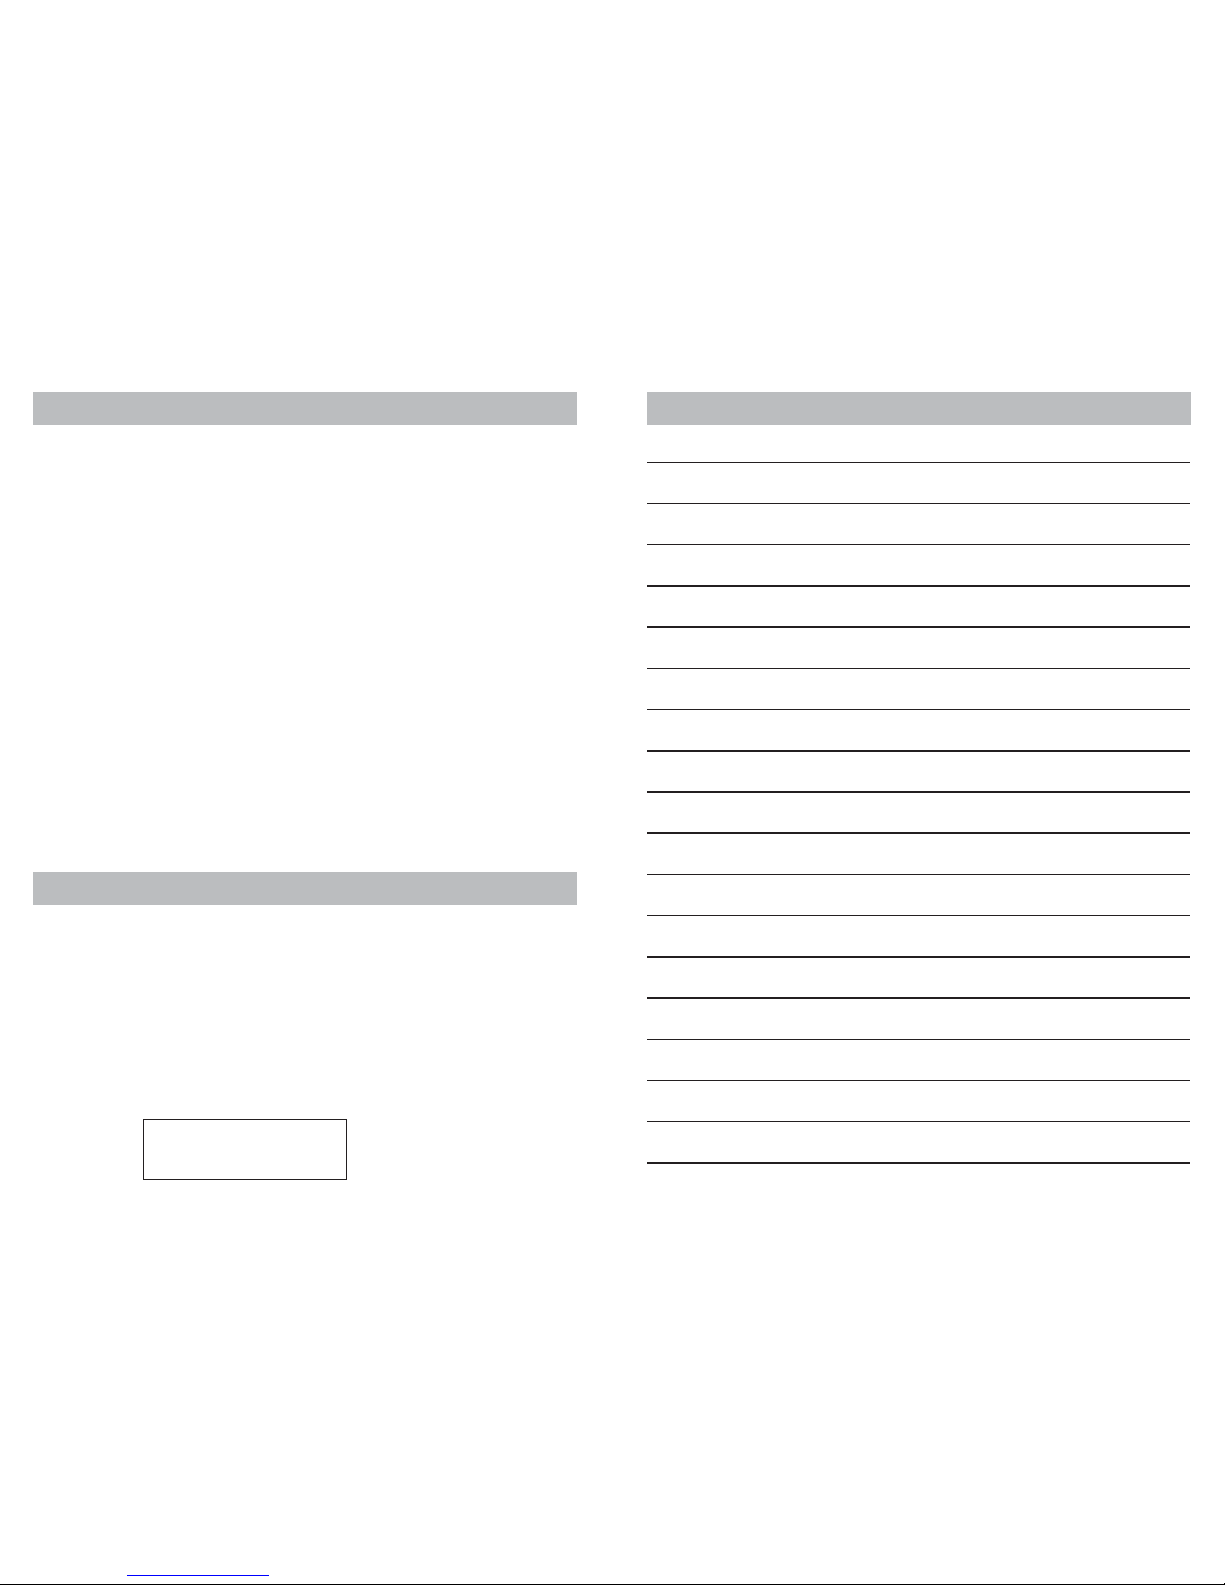
In the rare instance of the hand held unit failing to operate, the heater can
be operated manually. Remove the batteries from the remote to ensure the
remote unit is no longer sending signals to the heater.
The heater can now be controlled using the manual settings on the side of
the heater fascia as shown below. These controls come standard with the
heater and do not incorporate a thermostat.
Page 17.
This Remote Thermostat is a room thermostat and to function correctly it
should be located in the same room as the heater within personal
comfort zone.
The thermostat is factory set with the default settings shown below and
will operate at settings indicated. If you wish to change these times or
temperatures see the Programming section later in manual.
Automatic Factory default settings
Factory default settings
Time Period Start Time Heat Temperature (°C)
Wake up. 6.00 am 20 °C
Away. 8.30 am 7 °C
Coming home. 5.00 pm 21 °C
Sleep. 10.30 pm 7 °C
The room will be maintained at set temperature during set period.
21°C
7°C
20°C
6.00AM
6.00AM
8.30AM
5.00PM
10.30PM
At any time during the automatic program period, the temperature can be
increased or decreased by pressing the “ ” or “ ” buttons.UP DOWN
To start heater.
Select “ ” and “ ” buttons and press them together (then release).
Select Auto or Manual by pressing “ ” button (then release).
PWR OK
A/M
Press “ ” Button to select “Manual” mode.
Room temperature is shown at top of screen.
Selected temperature shown at mid screen.
The heater will only operate if the actual room temperature is lower
than the required temperature.
Manual Mode:
The required temperature can be selected by using ‘ ’ or ‘ ’
buttons.
A/M
UP DOWN
To start heater.
Select “ ” and “ ” buttons and press them together (then release).
Select Auto or Manual by pressing “ ” button (then release).
PWR OK
A/M
Automatic Mode
current
Press “ Button to select “Auto” mode.A/M”
Set time and date. (See setting time and date later in manual.)
Page 2.
Manual operation
QUICK START GUIDE
ON/OFF button
When there is power to the heater but it
is on standby mode a red LED will blink
intermittently behind this button.
To turn heater on press the ON/OFF
button.
There will be a 5 second delay (30
second for Powerflue unit) before the
burner ignites. At this point the burner is
on low flame / low fan for 3 minutes.
During the ignition process the red LED
will glow.
The red LED will fade out after 30
seconds when the ignition process is
complete.
Pressing the heat setting buttons will set
the heater to BOOST , NORMAL or
LOW heat.
The fan is set to a corresponding speed
for each setting.
To turn the heater off press the ON/OFF
button.
If the burner fails to ignite, wait 20
seconds and then press the ON/OFF
button.
In case of power failure, when the power
returns, wait 20 seconds for any unburnt
gas to vent and start re-ignition by
pressing the ON/OFF button.
ON / OFF
LOW
NORMAL
BOOST
Page 4

Do not place clothing or other flammable material on or near the heater.
Keep curtains, clothing, furniture and other flammable materials at least
900mm from front and sides of the heater.
At the owners discretion curtain clearances can be less than 900mm as
long as they are restrained from the front, top and sides of the heater.
The manufacturer takes no responsibility if curtain clearance is less than
900mm and not restrained.
For full safety warning information, Refer to Heater User Instructions.
Page 3.
This appliance is not intended for use by persons
(including children) with reduced physical, sensory or
mental capabilities, or lack of experience and knowledge,
unless they have been given supervision or instruction
concerning use of the appliance by a person responsible
for safety. Children should be supervised to ensure that
they do not play with the appliance.
Features of your thermostat model heater:
If the controller is turned on and there is a requirement for heating, the
heater will start up on Low Fire and Low Fan and operate for approximately
3 minutes.
The heater will then go to your preset desired temperature functions on
the remote controller
Once the selected room temperature has been reached, the heater will
go to Low Fire and Low Fan.
The full description on the operation of the heater is described in more
detail in the following section.
This heater features a safety interlock mode to prevent accidental or
inappropriate activation of the hand held remote control unit. It requires
both “ and “ buttons be pressed at the same time to turn on the
controller.
PWR” OK”
Page 16.
Function Action Page
Switch on/off
Change
between
manual and
automatic
mode.
Increase /
decrease
temperature.
Set the clock
and day of
the week.
Program the
thermostat
Press and release ‘ button.A/M ‘
Press and release button.‘UP ‘ or ‘DOWN ‘
With the thermostat off, press and hold the ‘ ’
button until the time, hour and flash.
Press and release the ‘ or ‘ buttons
to increase or decrease the hour setting.
Press and hold for the hour to increase or
decrease 1 hour every 0.5 seconds.
Press ‘ and set the minute setting similarly.
Press ‘ and press and release the ‘ ’ or
‘ ’ buttons to change the day of the week.
T
AM/PM
UP ’ DOWN ’
OK ’
OK ’ UP
DOWN
With the thermostat off, press and hold
the ‘ ’ button. Program 1 can now be set.
To select Monday press ‘ , or press and
release ‘ or ‘ to change the day of
the week, or to switch to the weekday or
weekend setting.
To set the period starting time, set the hour and
minute setting similarly to setting the clock.
Press ‘ . Press and release the ‘ or
‘ button to increase or decrease the
temperature setting by 1°C.
Press ‘ ’. Program 2 can now be set.
Repeat the programming process for the 4
periods.
P
OK ’
UP ’ DOWN ’
OK ’ UP ’
DOWN’
OK
8
9
9
8
10
Press ‘ & buttons at same time
(then release)
PWR’ ‘OK’
SAFETY WARNINGS
Quick reference table
Page 5

Frequently asked questions
Question Corrective actions
Heater comes on
at the wrong time.
Check the programmed period start and finish
times are correct.
Check that AM or PM is correctly set.
Check the programmed period temperature
setting is correct.
Check that °C or °F is correctly specified.
Reset the time and day of the week as was
required in the initial set up. Ref page 8.
Once the default settings have been reset, the
thermostat must be reprogrammed.
See page 8. for initial set up and pages 9-11 for
programming the automatic mode.
Check that the batteries are in place correctly.
Replace the batteries with new batteries and
see if thermostat display appears.
Check safety interlock mode
The back light will only appear when the
thermostat is on.
Heater comes on
at the wrong
temperature.
The time or day of
the week is wrong.
Factory default
settings have been
lost.
The thermostat won’t
turn on or the display
is blank.
The screen back light
is not working.
Page 15.
Normal operation:
If there is a request for heating, the heater will start up on Low Fire and
Low Fan operation for approximately 3 minutes after which the heater
will operate as necessary according to the selected temperature.
When the heater is turned off, the flame will extinguish and the fan will
continue to operate on Low speed for approximately 3 minutes to assist
with cooling the heater.
The heater will not
start.
Check safety interlock mode
Page 4.
Features of your thermostat kit
Auto mode cycle
The heater on start will operate on Low Fire and fan for approx 3 minutes.
The heater will then go to your preset desired settings on Remote Thermostat.
(Auto or Manual)
The heater on start will operate on Low Fire and fan for approx 3 minutes.
The heater will then go to your preset desired settings on remote thermostat.
As the preset temperature is reached, the heater will go to Low Fire and
Low Fan. If the preset temperature is exceeded, the burner is
extinguished and the fan will run on at low setting for approximately 3 min.
If room temperature is still higher than preset temperature, the heater will
stop. Once room temperature drops below preset temperature, the heater
will resume operation and continue the program cycle.
This feature is dependant upon the preset programmed temperature and
where the thermostat is located in the room. (See diagram below)
As the preset temperature is reached, the heater will go to Low Fire and
Low Fan. When the heater preset temperature is exceeded, the burner is
extinguished and the fan will run on at low setting for approximately 3 min.
If room temperature is still higher than preset temperature the heater will
stop. Once room temperature drops below preset temperature, the heater
will resume operation and continue the program cycle.
When the heater is shut down the fan will continue to operate on low for a
further period of 3 - 4 min to assist cooling down of the heater (common to
Manual and Auto cycles).
Thermostat should be located within the personal comfort zone of the room.
(This is dependant on room layout and heater positioning.)
The remote can also be wall mounted using the bracket supplied.
Heater
Personal comfort zone
Manual mode cycle
The heater can be set with your personal settings including temperature,
start and stop times and days of week.
(see programming section for setting temperatures and operating times.)
2 screws.
(Not supplied)
Wall bracket.
(Supplied)
Avoid locating remote
thermostat directly in front
of the heater
Page 6
Page 5.
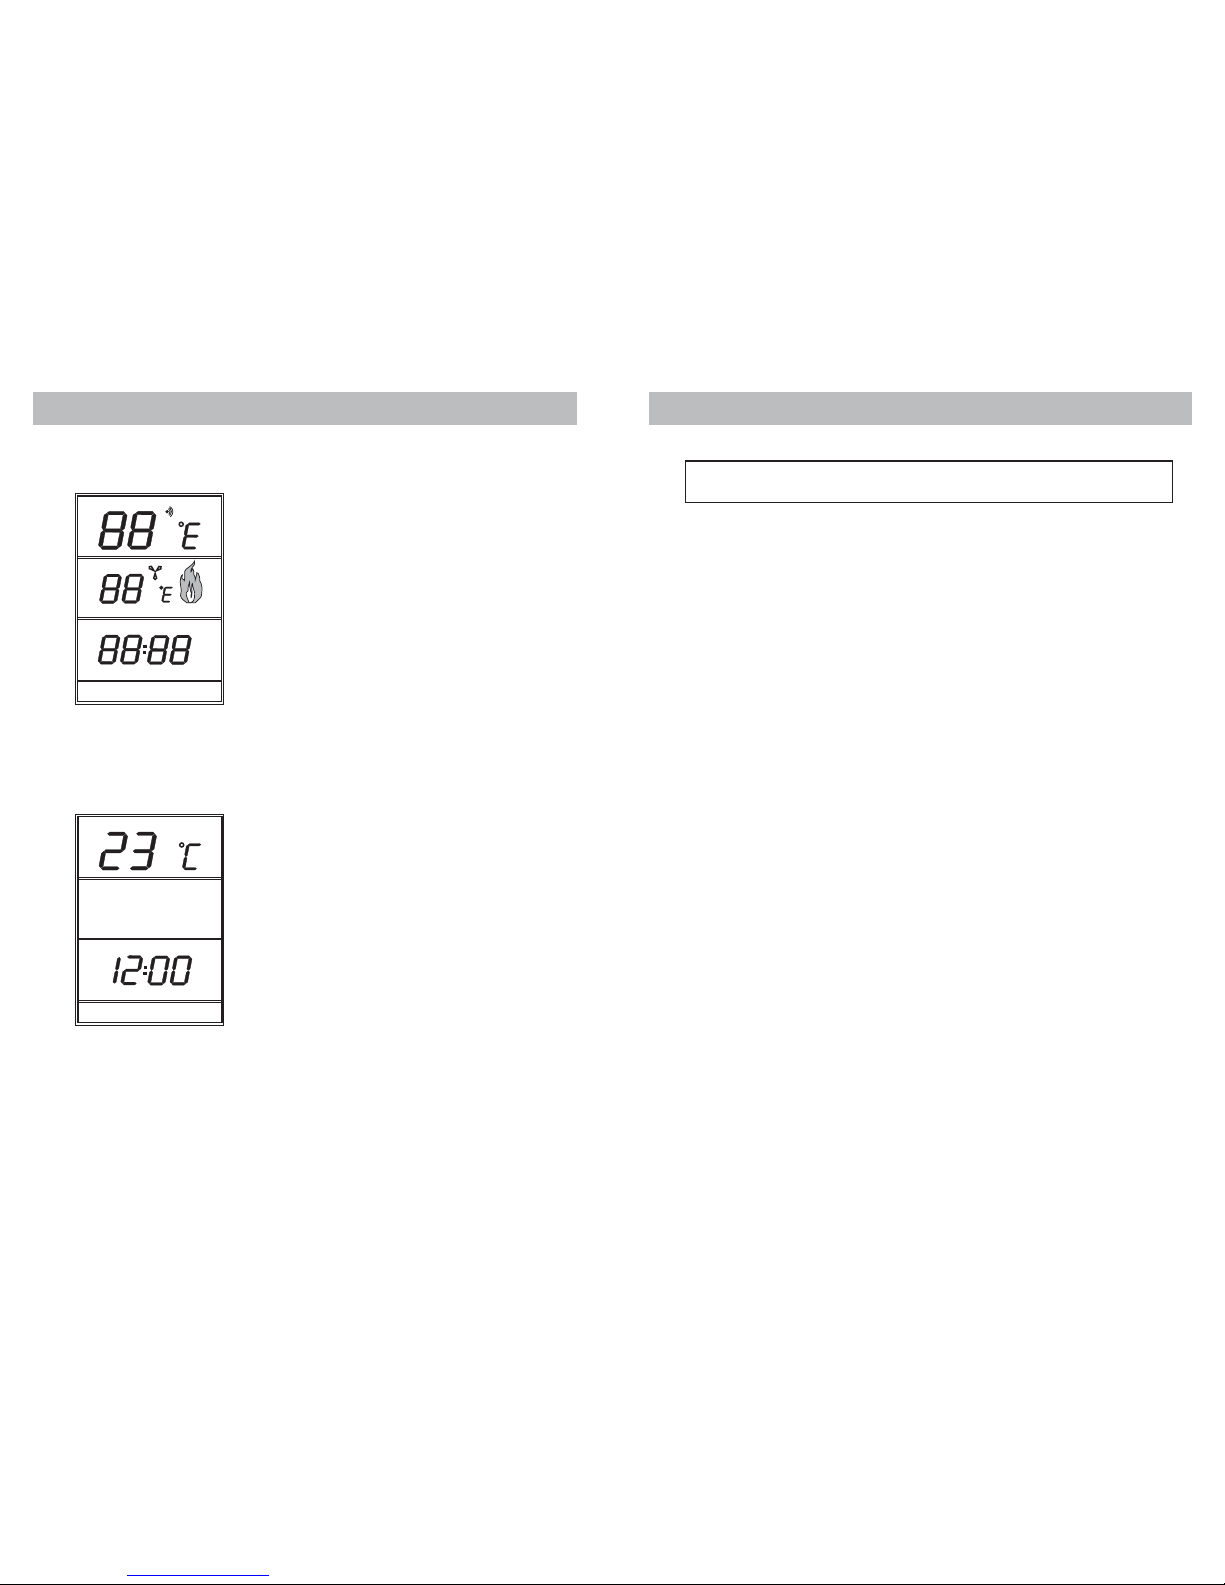
Thermostat LCD
Full display
ROOM
TIME
AM
MO
ROOM
SET
TIME
AM
PM
SU MO TU WE TH FR SA
PROG MANUAL AUTO
LCD Display features
1. Temperature of Room in ( C or F)
2. Transmitting indicator
3. Battery low indicator
4. Fan operating and speed
5. Fire indicator(low, medium or high)
6. Selected Temperature in C or F)
7. Time of day (in AM or PM)
8. Day of week
9. Programming mode
10. Manual mode
11. Automatic mode
°°
°°
Initial Display on set up
The display when the thermostat is
initially turned on or when batteries are
replaced shows;
Current room temperature;
default clock display;
Default day of the week display.
1
4
5
6
7
8
9
10
11
3
Page 14.
Settings
Change between °C and °F
Teaching RF thermostat ID code to control unit.
Restore factory default settings.
The automatic mode factory default settings can be restored to those
found on page 10.
With the thermostat off, press the following sequence of buttons:
.‘P ’, ‘T ’, ‘T ’,‘DOWN ’
The thermostat temperature display can be set to°C or °F. The default is °C.
With the thermostat off, press the following sequence of buttons:
.‘P ’, ‘T ’, ‘T ’ ,‘A/M ’
Please note, thermostat settings need to be actioned within a period
of 15 seconds total.
2
1. Leave the remote thermostat in the off or stand by position.
(the room temperature and time only will be displayed)
2.The heater must be turned off at its switch located on the rhs
of the heater.
3.Turn off the power point and fully remove power cord plug.
(if there is no access to the power cord plug then try switching off
the power switch which the installer has fitted externally)
4.Wait at least 30 seconds and then plug the cord plug back into
the power point and switch on the power point,(or switch on the power switch)
do not operate any heater buttons.
5.You have now 15 seconds to perform the code learning procedure.
6.With the remote thermostat unit still off, aim the control at the heater and
press the button(s) in sequence within 2 seconds
The seqence of pressing buttons is
7.When successful, the display will show (learning code) very briefly.
“P, T, T, UP ”
“LC”
Page 7
Page 13.
Program mode
Your Settings
After programming, record your personal settings weekday and weekend
settings here for future reference.
Weekdays
Weekend
Factory default settings
Time Period Start Time Heat Temperature (°C)
Wake up. 6.00 am 20 °C
Away. 8.30 am 7 °C
Coming home. 5.00 pm 21 °C
Sleep . 10.30 pm 7 °C
Time Period Start Time Heat Temperature (°C)
Wake up. °C
Away. °C
Coming home
.pm
°C
Sleep. pm °C
Time Period Start Time Heat Temperature (°C)
Wake up. °C
Away.
°C
Coming home
.
°C
Sleep. pm °C
The room will be maintained at set temperature during set period.
pm
AM
ROOM
SET
SU MO TU WE TH FR SA
PROG
MANUAL
AUTO
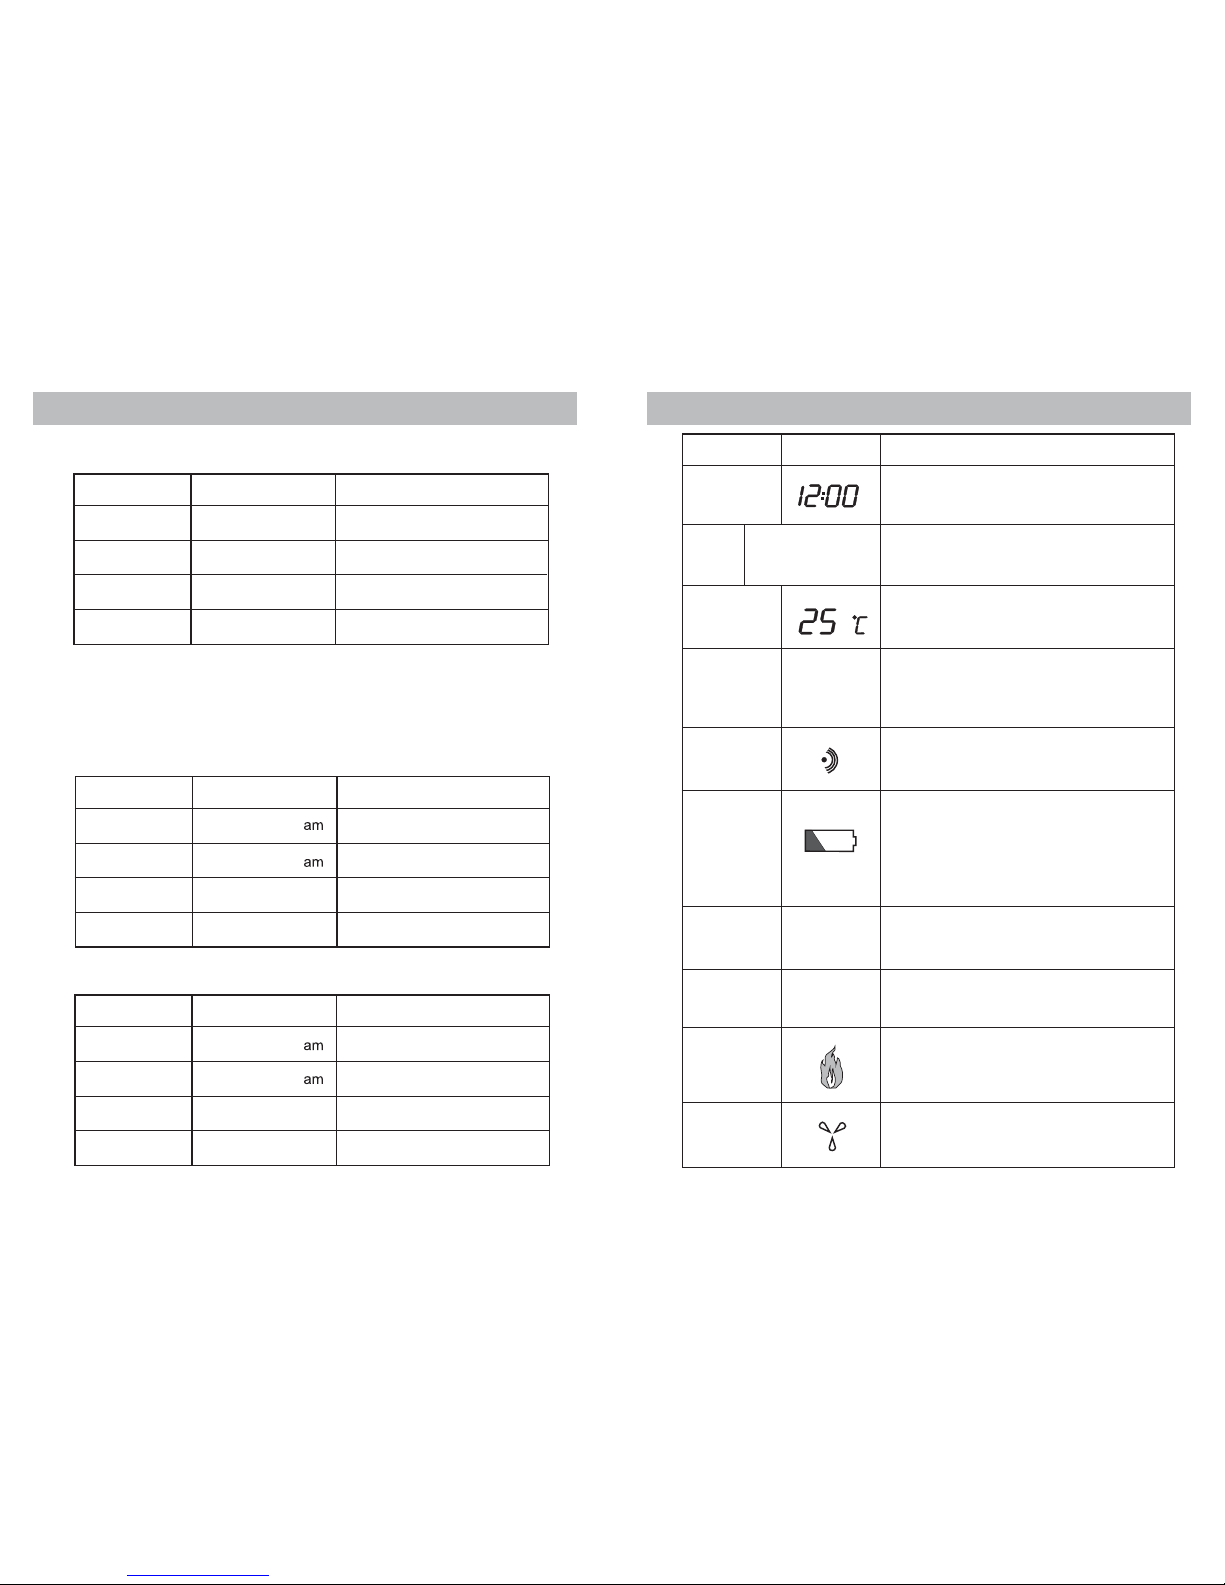
Feature Symbol Description
Time of day
Day of
week
Temperature
display
Room set
indicator
Transmit
indicator
Battery low
indicator
Programming
mode
indicator
Automatic /
manual mode
indication
Flame
indicator
Fan
indicator
Displays the time of day in hours and
minutes, AM or PM. The time is displayed
when the thermostat is on or off.
Displays the current day of the week. The
day is displayed when the thermostat is on
or off.
Displays the current temperature. C is the
default but F is available. The temperature
range is 7 C to 32 C.
°
°
°°
When the thermostat is on, the
programmed (set) temperature will be
displayed. When the thermostat is off, only
the room temperature will be displayed.
Indicates that the thermostat is transmitting
to the receiver, the symbol will appear on
the LCD for 1 second.
Indicates that battery power is below an
acceptable level. The symbol will flash to
indicate that the batteries need replacing.
The thermostat will remain functional for
approximately another 5 days before
shutting down.
Indicates that the thermostat is in
programming mode.
Indicates whether the thermostat is in
manual or automatic mode.
Indicates the flame height:
HIGH FLAME
MEDIUM FLAME
LOW FLAME
Indicates the fan speed.
The fan ranges are graduated settings:1,2,3
and are linked to the flame setting.
Page 6.
Thermostat LCD
Page 8

Period 4.
SET
TIME
PM
MO
PROG
SET
TIME
PM
MO
PROG
SET
TIME
AM
MO
PROG
ROOM
SET
TIME
AM
SU MO TU WE TH FR SA
PROG
ROOM
SET
TIME
AM
MO
PROG
ROOM
SET
TIME
AM
MO
PROG
SET
TIME
AM
MO
PROG
Set period day.
Days of week flash.
Set temperature.
Set and temperature
flash.
Period 2.
Period 1.
Period 3.
Set hours.
Time and hours flash.
Set minutes.
Time and minutes flash.
Page 12.Page 7.
Programming button function
T
P
T
P
Time
Program
Indicates time and day of the week
programming (must press and hold for 2
or more seconds when thermostat is off).
Indicates the programming mode (must
press and hold for 2 or more seconds
when thermostat is off).
Functions
Button Function Description
PWR
OK
UP
DOWN
PWR
UP
DOWN
OK
Switches the thermostat on.
If the thermostat is off, pressing and
releasing the PWR and OK button
together will turn the thermostat on to
the most recently selected working mode.
On
Accepts the current function and
advances the next function.
Increment hours, minutes, day or
temperature.
Decrement hours, minutes, day or
temperature.
Enter
Button Functions
PWR
OK
A/ M
Automatic
/ Manual
Toggles between automatic and manual
mode.
A/M
PWR
Off
Switches the unit off.
Programming Display Settings
Page 9

Initial Setup
‘’
‘’
If the is off, the heater will not start.
Press and release the and ‘OK’ buttons together, pressing
and releasing ‘ ’ and ‘ buttons will turn the thermostat on to the most
recently selected working mode or the factory default setting if not previously
programmed.
Note small Red LED Display light will be displayed constantly while heater is
on.Will
flash intermittently when unit is not in operation.
PWR
PWR
PWR OK’
Press and release the will shut unit down.‘’PWR
Setting the day of the week and time.
Press and release the ‘ ’ or ‘ ’ button to increase or decrease the
hour setting by 1 hour.
Press and hold the ‘ ’ or ‘ ’ button for 2 seconds or longer to
increase or decrease the hour setting by 1 hour every 0.5 seconds.
Press ‘ ’ to accept and select the minute.
Press and release, or press and hold down the ’ ’ or button to
increase or decrease the minute setting by 1 minute similarly to the hour
setting.
Press ‘ ’ to accept and select the day of the week.
Setting the hour function.
Setting the minute function.
UP DOWN
UP DOWN
OK
UP ‘DOWN ’
OK
Setting the day of the week function.
Press and release the ‘ ’ or ‘ ’ button to change the day of the
week to the following or previous day. Press and hold the ‘ ’ or ‘ ’
button for 2 seconds or longer to increase or decrease the day of the week
by 1 day every 0.5 seconds.
Press ‘ ’ to complete setting.
UP DOWN
UP DOWN
OK
The time and day of the week is now set.
Page 8.
Note: Use the outer edge of buttons to toggle through functions.
With the thermostat off, press and hold the ‘ ’ button for 2 seconds or
longer to initiate programming the time. , the setting and the
AM / PM will flash.
T
Time hour
Page 11.
Setting the period starting time.
The hour and AM / PM settings will now flash. To set the P1 starting time,
press and release the ‘ ’ and ‘ ’ button to increase or decrease
the hour setting. Press and hold the ‘ or ‘ ’ button for 2 seconds
or longer to increase or decrease the hour setting by 1 hour every 0.5
seconds.
The hour function is in 12 hour time, so please ensure that AM or PM is
set correctly.
To accept the hour press ‘ ’.
The minute setting will flash. Adjust the minute setting similarly using ‘ ’
or ‘ ’ buttons.
To accept the minute press ‘ ’.
UP DOWN
UP ’ DOWN
OK
UP
DOWN
OK
Setting the temperature.
The temperature setting will now flash. Press and release the ’ ’ or
‘ ’ button to increase or decrease the temperature setting by 1°C.
Press and hold th ‘ ’ or ‘ ’ button for 2 seconds or longer to
increase or decrease the temperature setting by 1°C every 0.5 seconds.
To accept the temperature press ‘ ’.
UP
DOWN
UP DOWN
OK
Period 1 is now set for the day/s of the week that you have chosen. The
LCD will display to indicate that period 2 can now be set for the same
day/s of the week.
P2
Repeat the programming process for periods 3 and 4.
After program 4 is set, press ‘ ’ and the program for the selected day/s
will be set.
OK
The thermostat will now automatically turn off.
Repeat the programming process for any other periods/days that are
required.
ON
OFF
Programming
Page 10

Manual mode
Flame height and Fan speed.
The mode allows setting the temperature at any level.
To select Manual mode, firstly the thermostat must be turned on, then press
and release the ‘ ’ button until appears on the display.
The flame height and fan speed are linked for safety purposes and are not
independently adjustable. The flame height and fan speed are set by the
thermostat according to the difference between the set temperature and the
current temperature. They are automatically controlled by the thermostat in
the program cycle.This will vary according to the selected temperature and
the actual room temperature.
manual
A/M MANUAL
Adjusting the temperature.
In the mode, adjust the set temperature by pressing or releasing
the ‘ or ‘ ’ buttons. Press and hold the ‘ ’ or ‘ ’ buttons
to increase or decrease the temperature by 1°C every 0.5 seconds.
manual
UP’ DOWN UP DOWN
Automatic mode.
To correctly operate in mode, the time and day of the week
must be set.
Manually overriding the set program.
The mode allows the temperature to be regulated according to a
programmed level and time.
With the thermostat on, press and release the ‘ ’ button until the word
AUTO appears on the LCD.
The thermostat will now operate according to the program set for the
current time period. Programming instructions are found on page 10.
At any time, the temperature or fan speed may be adjusted up or down
similar to operating in mode.
However, whenever the thermostat changes to a new time period, the
temperature will be automatically according to that period’s setting.
automatic
A/M
manual
reset
automatic
Page 9.
Programming
Each day of the week can be programmed individually for periods P1, P2,
P3, and P4, making a total of 28 programmed periods.
Alternatively, a weekday program can be set, so the same program is used
for Monday to Friday. Similarly, a weekday program can be set for Saturday
- Sunday. The entire week can also have the same program.
Alternatively, a weekday or weekend program can be set with individual
programs for the remaining days.
The suggested period settings for each day(s) are:
Period 1 - morning (Wake up)
Period 2 - daytime (Away)
Period 3 - evening (Coming home)
Period 4 - night time. (Sleep)
With the thermostat off, press and hold the ‘ ’ button for 2 seconds or longer
to initiate programming. The LCD will display and the time at
which the thermostat is currently set will flash.
Period 1 can now be set.
To begin programming.
PROG, Pd
MO
P
Setting the day of the week.
You must choose which day(s) of the week you wish to program.
Press and release the ‘ ’ or ‘ ’ button to change the day of the week
to the following or previous day. Press and hold the ‘ ’ or ‘ ’ button
for 2 seconds or longer to increase or decrease the day of the week by
1 day every 0.5 seconds.
The order that you can scroll through the days is as follows:
UP DOWN
UP DOWN
To accept the selected day(s) of the week press ‘ ’.OK
Page 10.
MO>TU>WE>TH>FR>MO TU WE TH FR>SA>SU>SU SA>MO TU WE TH FR SA SU
 Loading...