


Safety Instructions
• Please read this User’s Manual before starting the operation of the receiver.
• Never open the cover. It is dangerous to touch the inside of the receiver due to possible
electric hazard.
• When the receiver is unused for a long time, unplug the power cord from the wall outlet.
• Do not use a damaged power cord as it may cause a fire or an electric shock.
• Do not touch the power cord with wet hands. It may cause an electric shock.
• Place the receiver in a well-ventilated environment. Avoid extreme temperatures.
• When connecting cables, the receiver must be powered off.
• Do not expose the receiver to flames, such as placing a candle on top of the receiver.
• Do not expose the receiver to possible dripping or splashing of liquids. For example, do
not place a vase with water in it, on or near the receiver.
How to Use This Manual
This manual provides instructions for installing and using this receiver.
The following symbols are used in the manual:
MENU
(Bold Character) Represents a button on the remote controller or the receiver.
Move to
(Italic Character) Represents a menu item within a window.
Indicates warning information.
Indicates any other additional important or helpful information.
IMPORTANT SAFETY INSTRUCTION
• Do not use this apparatus near water.
• Clean only with dry cloth.
• Do not block any ventilation openings. Install in accordance with the manufacturer’s
instruction.
• Do not install near any heat sources such as radiators, heat registers, stoves, or other
apparatus (including amplifiers) that produce heat.
• Do not defeat the safety purpose of the polarized or grounding-type plug. A polarized
plug has two blades with one wider than the other. A grounding type plug has two bl ades
and a third grounding prong. The wide blade or the third prong is provided for your safety.
If the provided plug does not fit into your outlet, consult an electrician for replacement of
the obsolete outlet.
• Protect the power cord from being walked on or pinched particularly at the receptacle,
and the point where they exit from the apparatus.
• Only use attachments/accessories specified by the manufacturer.
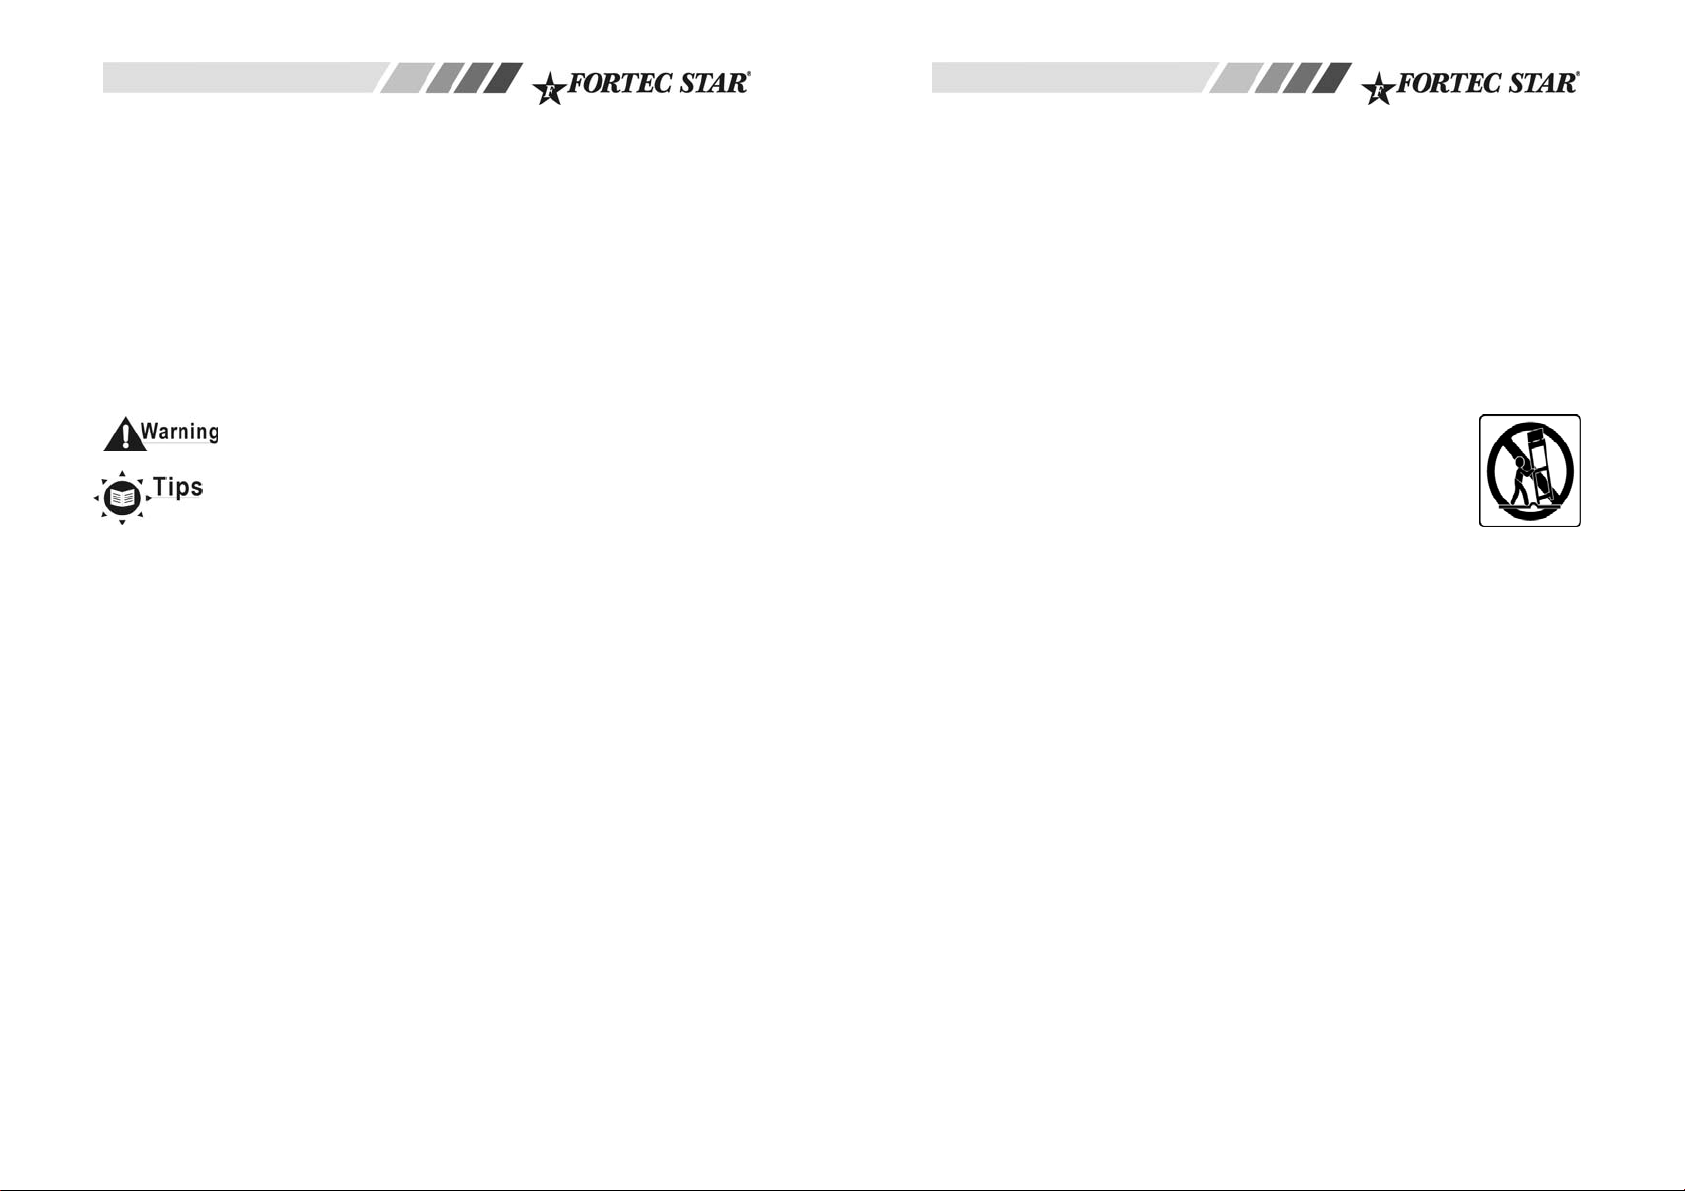
• Use only with the cart, stand, tripod, bracket, or table specified by the
manufacturer. When a cart is used, use caution when moving the
cart/apparatus combination to avoid injury from tip-over.
• Unplug this apparatus during lightning storms or when unused for long
periods of time.
• Refer all servicing to qualified service personnel. Servicing is required
when the apparatus has been damaged in any way, such as when the
power-supply cord or plug is damaged, liquid has been spilled or objects have fallen into
the apparatus, the apparatus has been exposed to rain or moisture, does not operate
normally, or has been dropped.
NOTE: THE MANUFACTURER IS NOT RESPONSIBLE FOR ANY RADIO OR TV
INTERFERENCE CAUSED BY UNAUTHORIZED MODIFICATIONS TO THIS
EQUIPMENT. SUCH MODIFICATIONS COULD VOID THE USER'S AUTHORITY
TO OPERATE THE EQUIPMENT.
NOTE: This equipment has been tested and found to comply with the limits for a Class B
digital device, pursuant to Part 15 of the FCC Rules. These limits are designed to
provide reasonable protection against harmful interference in a residential
installation. This equipment generates, uses, and can radiate radio frequency
energy and, if not installed and used in accordance with the instructions, may cause
harmful interference to radio communications. However, there is no guarantee that
interference will not occur in a particular installation. If this equipment does cause
harmful interference to radio or television reception, which can be determined by
turning the equipment off and on, the user is encouraged to try to correct the
interference by one or more of the following measures:
- Reorient or relocate the receiving antenna.
- Increase the separation between the equipment and receiver.
- Connect the equipment into an outlet on a circuit different from that to which the
receiver is connected.
- Consult the dealer or an experienced radio/TV technician for help.
1
2

Contents
1. Before You Begin
1.1 Features
1.2 Accessories
2.Controls and Functions
2.1 Front Panel
2.2 Remote Control Unit
2.3 Rear Panel
3.Connections
3.1 Connecting to a TV & VCR
3.2 Connecting to the Dish
3.3 Connection to a CAS / CI Module (for applicable models)
4.Settings and Operations
4.1 Before Settings
4.2 Basic Settings
4.3 Menu in the Normal view mode
4.4 Managing Channel Data
4.5 System Setup
4.6 Preferences
4.7 Name Editing
Additional Information
A.1 Trouble Shooting
A.2 Specifications
A.3 Glossary of Terms
Before You Begin
1.1 Features
Basic Features:
• Easy-to-use Graphic MENU Interface
• RS232 Port for Updating Software and Additional Services
• Supports DiSEqC1.0/1.2, 13/18V, 22Khz Tone
• S-Video Connector & 3-RCA Connectors
• S/PDIF Connector for AC3 audio pass-through
• Multi-language Functionality (Menu, Audio)
• Last Channel Memory (on the same satellite)
• OSD: Transparency & Blending, 256 Palette Colors
• Front Panel Buttons & IR Remote Controller User Interface
• Editing Functions (TV or Radio Channel: Channel Name, Favorite Name, Satellite Name)
• EPG for On Screen Channel Information (where available)
• Channel Memory for Multi-satellites (up to 64)
• 3 Operation Modes (Digital TV, Digital Radio, Favorite)
Digital Features:
• Receives QPSK Satellite Broadcasting RF Signal and Decodes the Digitally Encoded
Signal.
• Digital Tuner with Loop-through output
• SCPC/MCPC Receivable from C/KU-band Satellites
• MPEG-2 Main Profile at Main Level
• Teletext Supported Through VBI & OSD
• 4,800 Channel Memory
CI Features: (For CI model only)
• DVB Common Interface (Viaccess, Nagra Vision, Conax, Irdeto, Cryptowrks, ASTON)
Embedded CAS Features: (For embedded CAS model only)
• One Irdeto Embedded slot
3
4

1.2 Accessories
• User’s Manual
• Remote Control Unit
• Batteries
2. Front Panel
2.1 Front Panel
1. Power Button
Please don’t recharge, disassemble, electric short, or mix with used or other battery
types.
Figure 1. Accessories
Turns the receiver On/Off.
2. Channel UP/DOWN Button
Moves the cursor up/down in Menu state. Changes the current program to the
next/previous program in the Non-menu state.
3. Volume -/+ Button
Increases/decreases the volume levels in the Non-menu state. Change the setting
values in specific Menu items.
4. Display (4-digit, 7-segment / 3LED)
The 4-digit panel displays channel information. In STAND BY mode, the 7-segment panel
displays local time.
The red LED is the STAND BY indicator and the green LED is the CAM-in indicator (CI
Model Only). The other green LED is the Card-in indicator for CAS models.
5. CI Slot (CI Model Only)
Insert CI module into CI slot for conditional access.
For Embedded CAS models (i.e., Irdeto embedded), the card slot will appear
beside the CI slot position.
Figure 2. Front Panel
5
6

2.2 Remote Control Unit
All features of the set-top box can be controlled with the remote controller.
1. POWER
Turns the receiver On/Off.
2. MUTE
Mutes audio output of the receiver.
3. TV/SAT
Switches RF modulator output to receiver output
or ANT input. Whenever the TV/SAT
button is pressed, the RF modulator output is
changed to receiver video/audio output or bypass
the ANT input signal.
4. NUMERIC KEY(0-9)
Controls the numerical operations, and changes
the program channels directly.
5. SAT
Shows the satellite list and the channels
downloaded for that satellite.
6. TV
Shows the current digital TV program list.
7. RADIO
Shows the current digital Radio program list.
8. FAV(♥ )
Shows the current favorite program list.
9. TEXT
Shows Teletext information for the channel
if available.
10. RECALL
Shows previous channel (only on the same
satellite).
11. UP/DOWN
Change the current program to the previous/next
program in Non-menu state.
Moves the cursor to upward/downward in Menu
state.
12. P+/P-
13. OK
Activates the highlighted menu item. Or, view the program guide in Non-menu state.
14. LEFT/RIGHT
Change the setting value in certain Menu fields.
15. INFO
Normally used for viewing channel information.
16. MENU
Shows the menu or sub-menu and cancels the processing function if applicable.
17. EXIT
Exits from the menu or sub-menu and cancels the progressing function if applicable.
18. LANG
Shows the list of the audio languages available for the current channel.
19. PAUSE
Pause the video/audio output. (Not a PVR function.)
20. EPG
View the program guide in Non-menu state, if available.
21. SOUND
Select sound mode. (Stereo or mono).
Page up and down in menu list.
2.3 Rear Panel
1. LNB IN
Connect the digital signal from your LNB of your satellite dish to this connector.
2. LOOP OUT
Gives you the possibility to connect an extra receiver (analogue or digital).
3. VIDEO (Yellow RCA)
This connector has a constant video signal for additional VCR-connections, or to the TV.
4. AUDIO Right (Red RCA) and Left (White RCA)
These connectors give you the possibility to connect the audio signal to an external
amplifier, or to the audio inputs of your TV.
5. S/PDIF (AC3 Dolby Digital Pass-through)
Used to connect a digital audio amplifier to your receiver using a Toslink cable.
6. S-VIDEO
Provide better picture quality than above video out (yellow RCA).
If your general TV (analog TV) has S-VIDEO capability, use this jack along with the
Audio RCA jacks to connect the receiver to your TV.
7. RS232 Serial Port
This serial port can be used to connect your PC to your receiver, which enables you to
download new versions of software into your receiver. (Note: Changing the software
voids the manufacturing warranty.)
8. ANT
If you have an additional antenna (cable or terrestrial), it can be connected here. This
allows you to select the additional antenna using the satellite receiver remote.
9. TV/VCR
RF Modulator can be used to connect the receiver to your TV, using a coax cable. If you
connect your receiver to your TV like this, be sure that you set your TV to the correct
channel number. The yellow RCA connector or the S-Video connect will provide a
better video quality.
10. Power Cord
Your receiver requires a current of 100~120V AC, 60Hz. Make sure to check the power
specification before connecting your receiver to the wall outlet.
7
8

3. Connecting to the TV&VCR
3.1 Connecting to the TV & VCR
Basic Connection
1. Connect the satellite signal from the LNB to the LNB IN connector.
2. Connect the TV/VCR connector at the back of the receiver to the coax IN connector on
your TV set.
3. Connect the RCA connectors at the back of the receiver to the RCA in connectors on
your TV set for better picture quality. Or, also use the S-Video connector for the best
picture quality (not shown in diagram).
4. Optional: Connect an extra terrestrial or cable antenna to the ANT connector at th e back
of the receiver.
Advanced Connection of the Receiv er to the TV set, VCR and Audi Amplifier
1. Connect the satellite signal from the LNB to the LNB IN connector.
2. Connect the audio S/PDIF OUT on the back of the receiver to the S/PDIF input of an
Audio Amplifier (Dolby Digital decoder).
3. Connect the RCA connector on the back of the receiver to the RCA IN connector on your
VCR set.
4. Connect an extra terrestrial or cable antenna to the ANT connector on the back of the
receiver.
3.2 Connecting to Dish
Aiming a satellite dish and LNB with the correct longitude and azimuth (angle of elevation)
at a satellite is a specialist job, which a professional installer can do best.
Connecting a fixed satellite dish to your receiver
Make your choice of which satellite you want to receive your signals from, and have your
installer aim your dish at the required satellite. Connect a coax cable from your LNB with
the other end going directly to the LNB IN connector of your receiver.
9
10

Connecting multiple fixed dishes to your receiver using a DiSEqC switch
If you want to watch programs from more than one satellite (for example, from Intelsat
America 5 and from AMC4) it can be done using two fixed dishes (fixed, meaning
permanently pointed at one satellite) and a DiSEqC switch. Have your installer aim the
dishes at the requested satellites and connect the LNBs with coax cables to the IN
connectors of the DiSEqC switch. Connect the OUT connector of the DiSEqC switch to the
LNB IN connector on the back of your receiver.
Connecting a dish on a motorized positioner to your receiver
Another possibility to watch programs from multiple satellites is by mounting a dish to a
motorized DiSEqC 1.2 or USALS positioner. We recommend the use of STAB HH Motors.
Have your installer mount the dish to the positioner, set the correct azimuth (angle of
elevation) and let him set the center point for your positioner. For complete instructions on
connecting a STAB HH Motor, visit their Web site at www.usals.info.
Connect the LNB with a coax cable to the LNB IN connector of the positioner, and connect
the OUT connector of the positioner to the LNB IN connector at the back of your receiver.
Receiver to AMP with S/PDIF OUT
Connect the AMP to the S/PDIF OUT.
3.3 Connecting to SMART CARD (for CI or CAS models only)
Insert Smart Card into the Smart Card slot for watching TV programs from a Service
Provider. (Not Shown: the embedded card slot is located beside the CI slot embedded card
slot models)
11
12

4. Settings and Operations
4.1 Before Settings
Starting up for the First Time
Ensure that your satellite receiver is correctly connected to your television and dish, and
that your satellite signal is of good quality. (If you are not sure about this then ask your
installer to check your installation or satellite signal). The default language of the On
Screen Menu is set to English. To choose to another language refer to "Language Setting"
in the manual.
NOTE: Every time the receiver asks you for a PIN code,
enter '0000' on your remote control using [0-9]
numeric keys. You can change this PIN code in
the "Parental Lock" menu.
1. Turn on your TV and receiver.
2. If it is first time using the receiver, you will need
to set the parameters for the system
configuration. After displaying the login screen,
press the MENU button. The <Main Menu
Screen> will appear.
<Main Menu Screen>
The menu consists of main-menu and sub-menu, as you see in the <Main Menu Screen>.
Main-menu has 5 items and each main-item has its sub-menu items.
4.2 Basic Settings
Antenna Setup
With this menu, you can designate the satellite and
download the channels.
Up to 64 satellites can be stored in the receiver. In
this menu, you can edit the satellite name as well.
1. If you press OK for Antenna Setup in the
Installation Menu, the <Antenna Setup Screen>
will appear.
2. Use the Up/Down button to select the item, and
set up the parameters with the Left/Right button. <Antenna Setup Screen>
Scan: Indicates selected satellite number. Use Left/Right button to select other satellites.
To scan for channels on the current satellite, press the OK button. (Before you
scan, check the other values. If some values are incorrect, the channels cannot
be scanned properly).
Name: This menu item shows the selected satellite name. You can also select other
satellites using the Left/Right button. If you want to edit the satellite name, press
the OK button, then the satellite name edit screen will be displayed.
13
TP Freq.: This menu item shows the frequency value, polarization and symbol rate for the
LNB Type: This menu item shows the LNB frequency value. To scan channels, you must
LNB Power: For the Universal LNB type, the correct settings for LNB Power and 22KHz
22KHz: You can set the 22KHz switch to ON, OFF or AUTO mode. After selecting the
Positioner: If you use a USALS or DiSEqC 1.2 positioner, you would enter the parameters
Right arrow button moves the dish to the West and the Left arrow button moves the dish to
the East. If the dish position is correct to receive the satellite signal, the signal Level
Meter will indicated LOCKED. (Be sure to select an active TP.) The Set Limit field
allows you to set limits to the West and East (your dish will not move beyond those limits).
You do not have to set limits, but it may be necessary depending on the location of your
installation, i.e., if full range of movement is not permitted. To save the dish position,
press Save (red button) or Save & Exit (green button).
DiSEqC: The default value is 'OFF'. Select the position (1~4) according to the ports on the
14
transponders belonging to the satellite. To select another transponder, use
Left/Right button to view the dropdown list. You can highlight and press OK to
select the desired transponder. If the transponder is “active”, th e Level meter
will LOCK after you select it by pressing the OK button (assuming your dish is
aligned properly). If you want to scan only the indicated transponder, press the
OK button again after selecting it from the dropdown list.
You can add a new transponder to the dropdown list by going to the bottom of
the list of transponders. Press OK on NEW TP, and then enter the new
transponder parameters. Press OK to save the new transponder.
select the correct LNB type that you have on your dish. The default value is for
the Fortec Star Universal LNB. You can change the LNB Type by using the
Left/Right button. Other common LNB types used in North America are 5150
for C-band LNBs, 10750 for Standard LNBs and 11250 for Circular LNBs. You
can also directly enter your LNB frequency value by selecting the 0 value, then
using the number pad on your remote, enter the value you need. After you
select the correct LNB type, press the OK button to save the selected value.
are pre-determined and cannot be changed. For other types of LNBs, you can
select 13V or 18V for LNB power. Select Off if you want to turn off the LNB
power. After selecting the value you want, press the OK button to save the
selected value.
value you need, press the OK button to save the selected value.
by pressing OK.
Once you press OK, the USALS setup menu
appears. Go down to the My Longitude and My
Latitude fields. Enter this information for your
location. Pressing OK on the Goto REF field will
move the dish to the 0 center position. Pressing
Save (red button) or Save & Exit (green button) will
move the dish to the satellite position.
You can change the Positioner setting for a
DiSEqC 1.2 motor. Highlight the Move field to
then move the motor to the desired location. The
DiSEqC switch that the satellite dish is connected to. Press OK to save the
selected value.

Sat Lock: If this value is set to 'ON', you must input the Parental PIN code to view
Scan Mode: You can select one of three modes:
• FTA Only: When ‘FTA Only’ is selected, it downloads from the satellite only channels
• ALL: When 'All' is selected, it downloads from the satellite all channels that are
• Full Power Scan: When ‘Full Power Scan’ is selected, the receiver will first search the
Network Search: Select 'ON' to perform a network search for a transponder.
channels on the satellite when changing channels from an unlocked satellite
channel to this locked satellite channel.
indicated to be Free-to-air (FTA).
indicated to be Free-to-air (FTA) and scrambled. (Note: To view scrambled
channels, a valid subscription card is required. Occasionally, some channels
are indicated as scrambled, but are in fact FTA.)
satellite for all available transponders. These transponders will be
added to the bottom of the list of transponders stored in the receiver.
Once the Power Scan is completed, the receiver will then start the
channel download process. Press the OK button if you want to
modify the parameters for the Power Scan.
o Mode: Choose between FTA channels or ALL channels.
o Type: Choose between Horizontal and Vertical polarity, or Horizontal only,
or Vertical only.
o Start/Stop: Allows changing the frequency search range. For example, for
a Universal LNB, the values can be changed to any range between
10700-12750. For a C-band LNB, the values can be changed to any range
between 3400-4200. For a circular LNB with an L.O. frequency of 11250,
the values can be changed to any range between 12200-12750. For all
other LNBs, the values can be changed to any range between 11700-12200.
The default values are set to the most common search range.
o Step: Allows changing the step value. For example, instead of the search
moving in increments of 6 MHz, it can be changed to 10 MHz. It will be
faster to complete the search with a higher value, but a lower value may be
more precise in finding transponders especially at low symbol rates.
Manual Scan
You can also search channels on one transponder,
or add/modify/delete transponder information in
this menu.
1. If you press OK on the Manual Scan option of
the Installation Menu, <Manual Scan Screen>
will appear.
2. Use the Up/Down button to select the item, and
set up the parameters with the Left/Right button.
< Manual Scan Screen >
Scan Number: Indicates the selected satellite number. Use Left/Right button to display the
Name: This menu item shows the selected satellite name. Similar to the Scan Number,
TP Freq.: This menu item shows the frequency value of a transponder that belongs to the
Polarization: This item shows the current transponder's polarization type, i.e. Vertical or
Symbol Rate: This item shows the current transponder's symbol rate value.
Network Search: Select 'ON' to perform a network search for a transponder.
TP Scan: Searches channels from a specific transponder. Press the OK button to start the
PID Scan: You can search a specific channel by entering the PID values for the channel if
Before using the TP Scan menu, you should input
the correct satellite information in the Antenna
Setup Menu, for example, LNB type, LNB Power or
DiSEqC switch options if used. You can check
signal status with the Signal Level Meter display. If
all values are selected correctly, the signal bar
color will change and the word LOCK will appear.
satellite list. You can then highlight and select another satellite by
pressing the OK button.
you can also select another satellite using the Left/Right button to display the list of
satellites.
current satellite. To select another transponder, use the Left/Right button to
view the dropdown list of transponders. Then highlight the transponder you
want and press OK to select.
If you want to add a new transponder, modify a current transponder or delete
the current transponder, press the OK button. The transponder Edit Menu will
be displayed, and you can then select the operation you want.
Horizontal.
scan process.
you know its value. Press the OK button to input PID values. In the PID input
menu you should input the video, audio and PCR PID values. After inputting the
PID values, press the OK button to
search a given channel from the current
transponder.
Check the Web site www.lyngsat.com or www.satcodx.com for a complete list of
available satellites. These sites also indicate all the TP information and PID
information for each satellite.
15
16

Clear Data
Be careful when using this function because it will erase all the data and parameters you
may have set previously in your receiver. Once you have made a Factory Reset, you will
have to re-install your parameters and re-search your channels. To reset your receiver,
press the OK button and enter your PIN code (default is 0-0-0-0) to enter the reset menu.
Erase All Channel: It will erase all channel data
for all satellites you may have searched.
Erase One Satellite: It will erase all channel data
for the selected satellite. You can select the
satellite for the channels you want to erase.
Factory default: It will erase all channel data and
parameters you may have set previously in your
receiver. You will need to re-install your
parameters and re-search your channels again
after setting the receiver back to Factory Default
setting.
<Clear Data Screen>
4.3 Normal TV View Mode (Non-menu State)
During the normal TV viewing mode, various menus are displayed on the screen through
the use of the remote control unit. You can change the current status and mode with
various buttons including the Up/Down, INFO, and OK button. The banner displays
information when you press the INFO button,
or when you change the channel. If you press
the INFO button again before the banner
disappears, the detailed banner is displayed.
The detailed banner shows detailed
information for the current channel.
While viewing TV or Radio channels, various
functions can be controlled using your remote
control. The following is an explanation of the
buttons on your remote control and their
corresponding functions that can be
performed while watching TV or listening to
the Radio. <INFO Banners>
A. POWER: Turns the receiver On/Off.
B. MUTE: Mutes the audio output of the receiver.
C. Numeric KEYS (0 ~ 9): Change the channel directly by pressing the channel number.
D. TEXT: Shows the list of subtitle languages the current channel supports. You can
change the subtitle language by using the arrow keys and pressing OK. If no
other subtitle language options are available, nothing will display on the screen
when the button is pressed.
17
E. P+/P-: Not used in the normal view mode. With the TV, Radio or Favorite Channel List
F. TV: Shows the full list of TV channels for the current satellite or for all satellites if All
G. Radio: Shows the full list of Radio channels for the current satellite.
H. FAV (♥ ): Shows the list of your current favorite channels if you have added channels to
I. UP/DOWN ARROW: Change the current channel to the previous/next channel in the TV
J. LEFT/RIGHT ARROW: Left arrow reduces the volume level. Right arrow increases the
K. EPG: In the normal view mode, it shows the EPG screen. EPG shows the event
- Weekly (RED Button): The current transponder channel list is displayed on the left, and
- Daily (GREEN Button): If you want to display the Daily mode of the current channel,
- Extend (YELLOW Button): If you press the
- Timer (BLUE Button): Move the cursor to an
18
showing, it jumps 10 channels up or down.
Satellites is selected using the SAT button.
Note: TV/Radio List in Normal Viewing Mode
If you press the TV or Radio buttons in Normal Viewing Mode, you can preview
the channels via the P-I-G (Picture-in-Graphic). You can quickly move
through the list of channels by using the P+/P- buttons.
your list.
Note: Favorite List in Normal Viewing Mode
If you press FAV on the remote control in the Normal Viewing Mode, you can
preview the channels via P-I-G (Picture-in-Graph). You can quickly move
through the list of channels by using the P+/P- buttons.
or Radio list.
volume level.
information on the current TP channel by time zone. EPG is divided into Weekly
mode, Daily mode and Extend mode. It provides timer based recording and
automatic Power On/Off using the Timer function. The event is displayed ONLY
IF the channel supports EPG.
If you press the EPG button, the Weekly mode is displayed by default.
the event information is displayed on the right by time zone.
press the GREEN button. In the Daily
mode, the receiver shows the
designated channel in P-I-G, and
displays the channel event in detail.
YELLOW button, the receiver shows the
detailed information of the current event.
event in the required time zone and
press the BLUE button. The timer is set
to the designated time. Refer the "Timer
Setting" menu for details on the timer settings. <EPG Screen>

L. MENU: Shows the main menu. Pressing this button a second time will make the main
M. SAT: Displays the list of satellites you have scanned with your receiver. You can
N. LANG (Language): Shows the list of available audio languages for the channel you are
O. PAUSE: Freezes the picture on the screen. If pressed again, the picture will continue.
P. EXIT: Exits from the menu or sub-menu, and cancels any functions in progress if
Q. INFO: If you press the INFO button once, a banner is displayed on the bottom part of
R. SOUND: Sets the current channel audio to stereo, left-mono or right-mono. Pressing the
S. RECALL: Changes the channel to the previously viewed channel. This button does not
menu disappear.
change the satellite you want to watch by using Up/Down keys and pressing the
OK button. (If you have set up a motorized positioner to move the dish, a
message will indicate that the dish is moving.)
The SAT button is disabled in the favorite channel mode because there can be a
number of different satellites from which you have added channels to your
favorite list.
You can also use the Right arrow button from the Satellite list to view the
channels available for that satellite. If you press OK while highlighting a channel,
the receiver will display that channel, if the dish is already on that satellite. It will
move the dish before displaying the channel, if the dish is connected to a
positioner. It will switch to another satellite, if connected to a DiSEqC switch
before displaying the channel.
watching. You can change the audio language to the one you want
to hear.
It does not pause the program (like a PVR function), just the video image.
applicable.
the screen. If you press the button once again before the bottom banner has
disappeared, an extra banner is displayed at the top of your screen showing the
details of the current channel. Pressing it a third time removes the banner
information.
sound button changes the sound icon on the banner.
function if the previously viewed channel was on another satellite and your
dish is connected to a motor.
19
4.4 Managing Channel Data
You can edit the channels you have downloaded to your receiver through the Channel
Manager Menu. To access this menu press Menu on your remote, and use the Left/Right
arrow buttons to go to the Channels heading in the menu.
Channel Manager
Press OK on the Channel Manager menu and the following screen will be displayed. Use
Up/Down button to select the channel you want.
RENAME: You can change the name of any channel. Press the RED button, and then the
LOCK: If you lock a channel, you can only view it after entering your PIN code. To lock a
DELETE: You can delete a channel from the channel list. Use the YELLOW button to
MOVE: You can move a channel to another
In the Channel Edit menu, you can also change the channel mode. Press the TV button to
edit TV channels and Radio button to edit Radio channels. Also you can edit channels on a
different satellite by using the SAT button. If the SAT button is pressed, you can view the
satellite list for all satellites that you have downloaded channels from. From this list, select
a different satellite if you wish to edit its channels.
Add Favorites
You can set a list of Favorite channels from the current TV/Radio channel lists. To set
your Favorite channel lists, press the OK button on the Add Favorites menu item. The
Add Favorites Screen will be displayed.
Using Up/Down button or P+/P- button to select
the channel. Press the RED, GREEN, YELLOW,
or BLUE button to add the channel to one of four
Favorite lists. For example, if you press the
RED button, the channel is added to the 'Fav 1' list,
and a red heart will appear beside of selected
channel name. If the RED button is pressed again,
the selected channel is un-selected from the 'Fav
1' favorite list. The same channel can be added to
more than one list. Press Exit or Menu button to
save and exit this menu.
20
name-editing screen will be displayed. For more information, refer to the
name-editing section of this manual.
channel, press the GREEN button. The default PIN is 0-0-0-0. Once a channel is
locked, the Lock icon is shown in the Channel Manager beside the Channel Name.
To disable the lock function, repeat this procedure again.
delete a selected channel. Be careful when deleting a channel. If a channel is
deleted, it can't be recovered and you
must re-scan the channel if you want it
back.
position in the channel list. Press the
BLUE button, and then the selected
channel name will be displayed with a
different color. Use the Up/Down button to
move the selected channel to the new
position in the channel list. After moving
the channel, press OK again or the Exit
button to end the moving operation.
<Channel Manager Screen>
<Add Favorites Screen>

Favorite Manager
You can also edit channels in your Favorite list by using the Favorite Manager. This works
similar to the Channel Manager for editing channels in the Channel List. The Favorite
Manager is shown below in the Favorite Manager Screen.
Since using the Favorite Manger is the same as the Channel Manager, please refer to the
Channel Manager section for further instructions.
You can make four favorite channel lists using the
Add Favorite menu. To select another favorite
channel list, press the FAV button. Whenever the
FAV button is pressed, another favorite channel
list is displayed.
Similar to the Channel Edit menu, you can select
TV or Radio favorite channel lists using the TV or
Radio button. However, in the Favorite Edit menu,
you cannot use SAT button. <Favorite Manager Screen>
Sort Channels
To sort your channels, select the Channel Sort menu item and press the OK button. The
Sort Channels Screen will be displayed.
Name: If you press the RED button, you can sort
the list of channels alphabetically.
TP: If you press the GREEN button, you can sor t
the channels by transponder order from lowest
frequency value to highest for the current
satellite.
Type: If you pre ss the YELLOW button, you can
sort the channels by type of channel, i.e.,
Free-to-Air or scrambled program.
<Sort Channels Screen>
You can also sort other satellites’ channel lists using the SAT button. Once you have
finished sorting the channels, press Exit or Menu button to save and exit the menu. (A
message that the receiver is saving the changes you made will be displayed).
4.5 System Setup
TV Settings
You can select several of the receiver’s output features from this menu. Press Left/Right
button to select other values for each menu item. After selecting a value, you should press
the OK button to save it.
TV Mode: You can select the video display mode
Screen Mode: When a video channel program
SPDIF Output: If you connect the receiver to an AC3 amplifier (Dolby Digital decoder), and
Time Setting
You can define the receiver time mode in this menu. If a broadcaster transmits GMT time,
select the GMT Usage to ON. Enter your Time Zone information and the correct time is
automatically adjusted. (This function is not supported in all regions.)
When the GMT Usage is set to OFF, you can set
the date and time directly. To adjust the Set Date
value, press the OK button on the Set Data menu
item. A calendar window will appear. After
selecting the correct date, press the OK button. In
the calendar window, you can change month using
P+/P- button. To set the time value, move to Set
Time menu item and press numeric buttons to the
input time value. After changing any values, press
the OK button to save the information.
<Time Settings Screen>
to any of NTSC, PAL, or MULTI. In
North America, the TV Mode should be
set to NTSC. Press Left/Right button to
select other modes. After selecting the
mode, press the OK button to save the
selected mode value.
transmission is in 16:9, and you have a
TV set with 4:3 picture format, you can
select the Full Screen or Letter Box
picture format. <TV Settings Screen>
you want the AC3 audio to pass through the receiver to your amplifier, you
need to set the SPDIF Output to ON.
21
22

Timer Setting
The timer function can automatically switch On or
Off your receiver at any desired time. This enables
you, for example, to record programs with a VCR
while you are not at home.
Select Timer Setting item and press the OK button
to enter the Timer Setting menu. The Timer
Setting Screen will be displayed. You can then
set your VCR timer accordingly.
In this screen, you can see the list of current Timer Events already saved. Use Up/Down
to select a Timer Event. Press the OK button to open up the Timer Event. The following
Timer Setting Event Screen will be displayed.
Timer Number: You can select up to 8 different
Timer State: Set to 'Enable' to use the timer event,
Timer Cycle: You can set the cycle of the action
Timer Service: You can select the following
- Sleep : The receiver powers off at the designated date and time.
- Wake Up : The receiver powers on at the designated data and time.
- VCR Record : The designated channel gets displayed at the desired start time and
Date: You can set the starting da te of the Timer Event. Press OK button, then a calendar
window will be displayed and you can select the Month and Day value.
Start Time: You can set the starting time of the Timer Event. Use the numeric buttons to
End Time: If VCR Record service is selected, you should define this ending time.
Channel: You can set the channel to be shown when the receiver timer service is Wake Up
System Information
Shows the system information including the
Firmware version and model name.
Timer Events.
or 'Disable' to stop the Timer Event.
designated in the Timer Event.
functions:
played until the end time is reached.
input the start time directly.
or VCR Record. Press OK button, then
the channel list will be displayed. To
select a channel that is in another
satellite, use Left/Right button.
<Timer Setting Screen>
<Timer Setting Event Screen>
<System Information Screen>
23
4.6 Preference
Language Settings
You can change the language of the menu, audio and subtitles in this menu operation.
- Menu Language: To select another menu language, use the Right button to view the
- 1st audio lang / 2nd audio lang / subtitle lang :
OSD Settings
You can change the OSD (On Screen Display) of your receiver to your personal
preference.
- Color Scheme: Use the Left/Right button to select the OSD color scheme. After selecting
- Transparency: Use the Left/Right button to select how transparent you want your OSD.
- Brightness: Use the Left/Right button to select OSD's brightness level. After selecting,
- OSD Timeout: Use Left/Right button to select
24
language list. From the list, select the language you want to use and press the
OK button. After selecting a new language, you must press the OK button to
save the change. The menu will change
to the language of your choice.
Similar to the Menu Language, you can
also select your preferred audio language
and subtitle language, if they are
broadcast by following the same steps.
After your selection, you should press the
OK button to save your selected language
changes.
<Language Setting Screen>
your preferred color scheme, you should press the OK button to appl y
and save the color scheme change.
After selecting, you should use the OK button to save and apply the
transparency level change.
you should press the OK button to apply and save the brightness level
change.
how long you want the
information banner to be on the
screen when starting your
receiver or when changing
channels. If you select ON,
the information banner will
remain on until you press the
EXIT button or the INFO button
twice.
<OSD Setting Screen>

Parental Lock
This function changes the Personal Identification
Number (PIN) that is used to control access to the
menu and individual channels. In this function, you
can lock/unlock channels and you can change your
PIN code.
The default PIN to enter this menu is 0-0-0-0.
- Menu: If you select 'Lock', the receiver asks you to enter your PIN code every time you
To change your PIN code, apply the following steps.
After selecting Menu lock option and/or changing your PIN code, you should use the OK
button to save and apply your changes. If you don't use the OK button and exited using
'Exit' button, your changes will not be applicable.
want to access the menu. If you select 'Unlock' it gives you the possibility to
access the menu all the time without the receiver asking you for a PIN code.
1 - First, using Up/Down button select 'Old Pin' and enter your current your PIN code, f or
example 0-0-0-0 if the PIN has not been changed.
2 - Select 'New PIN' and enter a new PIN code.
3 - Select 'Verify PIN' and enter the SAME new PIN code entered in the 'New PIN' field.
<Parental Lock Screen>
GAMES:
Tetris / Snake / Sokoban
Tetris
If you want to play the Tetris game, select the
'Tetris' menu item and press the OK button.
- Left/Right button: Move block to the left or right.
- Down button: Drop block.
- OK: Rotate block
If you want to stop the game, use the EXIT button.
<Tetris Screen>
Snake
- Left/Right button: Move snake icon to the left or
- Up/Down button: Move snake icon in the up or
If Blue snake icon is passed through the Yellow
icon, its length is increased, but if passed through
the Green icon, its length is decreased. If passed
through the Gray icon, the game is ended.
Sokoban
You are the sokoban, and you have to push the
balls to their correct positions. The balls can only
be pushed, never pulled, so you have to be careful
not to push them into a corner where you can’t get
them out again. You can only push one ball at a
time.
You can move around by using the arrow keys.
You can restart the level by using the RED button.
You can use undo function by using the GREEN button (only one step).
You can go to previous or next level (between completed level) by using the YELLOW and
BLUE button.
right.
down direction.
<Snake Screen>
<Sokoban Screen>
25
26

CI Menu (Not applicable to the FTA Model)
You can navigate the menu, which is provided by
the CI Module.
This information varies depending on the service
provider.
CAS Embedded
If your model comes with an embedded CAS card
Slot, additional information will appear in this
Section.
<CI Screen>
4.7 Name Editing
In the menu function, you can edit the Channel name, Satellite name and Favorite Group
name. For example, to edit the channel name in the Channel Edit menu, move the cursor
to the channel you want to edit and press the RED button. Then following edit screen will
be displayed.
The current name is displayed on the upper part of editing screen, and the keypad is
displayed just below the name.
Use the Left, Right, Up and Down buttons to move
keypad cursor to the character you wish to input
and press the OK button. Then the selected
character will replace the character in the name
box. If you want to delete a character, move the
keypad cursor to 'Delete' keypad and press the OK
button.
Once you finish editing the name, move the
keypad cursor to 'Save' and press the OK button. If
you want to ignore name editing, press Exit button.
This procedure is applicable to Satellite Name edit and Favorite Group Name edit function
as well.
<Edit Name Screen>
A.1 Trouble Shooting
Occasionally, receivers can ‘hang-up’ so you are recommended to reset the receiver by
disconnecting it from main power. Wait more than 10 seconds and connect to main power
again. Check if the unit is working as expected. If the receiver does not work properly
after checking the trouble shooting section, please contact the dealer you purchased the
unit from.
Don't open the receiver cover as it may cause an electrical shock due to high current
voltage. Warranty of your receiver will be void if the receiver has been opened.
Symptom Cause Remedy
The red light and
segment lights on the
front panel do not light up
No picture and sound TV is set to wrong
No picture or sound Problem in cable
No picture and sound Receiver 'hang-up' Switch off receiver; disconnect the main
No sound The receiver or TV is in
No picture and sound Problem in cable
No picture Wrong alignment of the
Receiver display the
message "No or Bad
signal" during bad
weather conditions
The receiver displays the
message 'No or Bad
signal'
The receiver displays the
message 'No or Bad
signal'
The receiver displays the
message 'No or Bad
signal'
Front display 'LNBP' or
LEDs of front panel of
receiver are blinking
The remote control is not
working
The power cord is not
plugged in.
channel or wrong input.
connections between TV
and receiver.
'MUTE' mode
connections between
receiver and TV
antenna dish.
This is normal, the bad
weather is interfering the
signal between the
satellite and your dish.
Wrong satellite selected
in the menu.
Wrong parameters set in
the menu.
Wrong alignment of the
dish.
Overload of the maximum
available LNB power.
(Short circuit in the LNB
cable)
The batteries of the
remote control are not
inserted or exhausted.
Check that the power cord is
plugged in to the wall outlet.
Check if the TV is switched on and set your
TV to the correct EXT/AV or UHF channel.
Check if cable is connected correctly to the
TV and to the back of the receiver.
power cord of the receiver from the main
power. After more then 10 seconds
reconnect to the main power and check if it
is working properly.
Press the MUTE button on the remote
control unit of your receiver and TV.
Firmly press the connectors on the
backside of the TV and receiver. Replace
the cable.
Check the signal strength with a spectrum
analyzer and adjust your dish correctly.
Once the weather is better the picture will
appear. If not, check if there is snow built
up on your dish.
Press the SAT button on the RCU and
select the correct satellite.
Check settings of LNB type or related
values in the Installation menu.
Ask your dealer to check the outdoor unit
and antenna cable to LNB
Disconnect the main power and ask your
dealer to check the LNB cable.
Check whether the batteries are inserted
correctly in remote control unit. Check the
batteries.
27
28

A.2 Specifications
1. Conditional Access Interface (CI Model only)
PCMCIA 2 Slot (type I or type II)
2. Tuner & Channel <Digital Part>
Type 1X F-type, IEC169-24 Female
Frequency Range 950MHz to 2150MHz
Input Impedance 75 ohm unbalanced
Signal Level -25 to -65 dBm
LNB Power 13.5/18.5Vdc±5%, 0.5Amax, Overload protected
22kHz Tone Frequency: 22 kHz±2kHz Amplitude:0.6V± 0.2V
DiSEqC Control Version1.2 Compatible
Demodulation QPSK
Input Symbol Rate 2-45Ms/s
FEC Decoder Convolution Code Rate 1/2, 2/3, 3/4, 5/6 and 7/8 with Constant Length K=7
3. System & Memory
Main Processor STi5518
Flash Memory 2 Mbytes
SDRAM 8 Mbytes
EEPROM 8 Kbytes
Channel Memory Digital Channels: 4800
Multi-Satellite Up to 64
Multi-Language Menu English/ Italian/ Turkish/ French/ German/ Spanish/ Greek
Front 7 Keys, 1LED
Remote Controller 34 Keys, IR Remote Control
4. MPEG Transport Stream & A/V Decoding <Digital Part>
Transport Stream MPEG-2 ISO/IEC 13818 Transport Stream Specification
Profile Level MPEG-2 MP@ML
Input Rate Max 60Mbit/s
Aspect Ratio 4:3, 16:9
Frame Rate 25H for PAL, 30Hz for NTSC
Video Resolution 720 X 576(PAL), 720 X 480(NTSC)
Teletext Through VBI & OSD
Audio Decoding MPEG/MusiCam Layer I & II
Audio Mode Single channel/Dual channel Joint Stereo/Stereo
Frequency Response 20Hz~20kHz, <+/-2dB
Sampling Rate 32, 44.1, 48kHz
DVB Common Interface Standard
(Viaccess, Nagra Vision, Conax, Cryptoworks, Irdeto, ASTON)
60Hz~18kHz <+/-0.5dB
5. A/V & Data In/Out
S-video Output North American model only
RCA Output CVBS, L, R Output (Yellow, White, Red Jack) with Volume Control
S/PDIF Output RCA Output Black (Cinch) or Toslink Optical
Data Interface RS-232, Bit Rate: 115200 baud
Connector: 9-Pin D-Sub Male type
6. RF-Modulator
RF-Connector 75Ω IEC169-2, Male/Female
Frequency 470MHz to 860MHz
Output Channel CH 21-69 for the Demodulator or CH 3-4 for North America
TV Standard NTSC, PAL B/G, D/K, I Selectable by Menu Setting
Audio Output Mono with Volume Control
Preset Channel CH 3 (or TBD), Software changeable by Menu screen
7. Power Supply
Input Voltage AC 90~240V, 50Hz~60Hz
Power Consumption Max. 40W
Stand-by Power <= 6.5W
Protection Separate Internal Fuse
The input shall have the lightning protection
8. Physical Specification
Size (W x H x D) 280 X 55 X 235mm
Excluding the foot. Foot height is 6mm
Weight 2.0kg
9. Environmental Condition
Operating Temperature 0 +/-40 Celsius
Storage Temperature -10 ~ 50 Celsius
Operating Humidity Range 10 ~ 85% RH, Non-condensing
Storage Humidity Range 5 ~ 90% RH, Non-condensing
29
30

A.3 Glossary of Terms
C band
3.4 ~ 4.2 GHz Frequency.
DiSEqC
Digital Satellite Equipment Control.
Ku band
10700 ~ 12750 GHz Frequency.
LNB(Low-Noise Block converter)
The LNB is an electronic unit mounted on the satellite dish. It receives the signals reflected
by the dish and converts them to signals that can be used by Satellite receiver.
PID
Package Identifier.
PIN Code
Personal Identification Number. A four-digit code that is used fo r locking/unlocking. e.g.
with the parental control feature.
Polarization
Polarization allows two programs to be fitted into the same frequency band. The signals
from a satellite are transmitted either with linear(vertical or horizontal) polarization or
circular(right or left) polarization.
RS232
Serial data port.
Fortec Communications Inc.
Mississauga, ON
Canada L4W 5A7
www.fortecstar.com
© 2005 Fortec Communications Inc.

FCC NOTICE
THIS DEVICE COMPLIES WITH PART 15 OF THE FCC FULES.
OPERATION IS SUBJECT TO THE FOLLOWI NG TWO CONDITION:
(1) THIS DEVICE MAY NOT CAUSE HARMFUL INTERFERENCE, AND
(2) THIS DEVICE MUST ACCEPT ANY INTERFERENCE RECEIVED,
INCLUDING INTERFERENCE THAT MAY CAUSE UNDERSIRED
OPERATION.
This equipment has been tested and found to comply with the limits for a Class B digital device, pursuant to part 15 of the FCC Rules.
These limits are designed to provide reasonable protection against harmful interference in a residential installation. This equipment generates, uses
and can radiate radio frequency energy and, if not installed and used in accordance with the instructions, may cause harmful interference to radio
communication. However, there is no guarantee that interference will not occur in a particular installation. If this equipment does cause harmful
interference to radio or television reception, which can be determined by turning the equipment off and on, the user is encouraged to try to correct
the interference by one or more of the following measures :
- Reorient or relocate the receiving antenna.
- Increase the separation between the equipment and receiver.
- Connect the equipment into an outlet on a circuit difference from that to which
the receiver is connected.
- Consult the dealer of an experienced radio/TV technician for help.
NOTE : The manufacturer is not responsible for any radio or TV interference cau sed by un authorized modifications to this equipment.
Such modifications could void the user’s authority to operate the equipment.
 Loading...