

Page 1
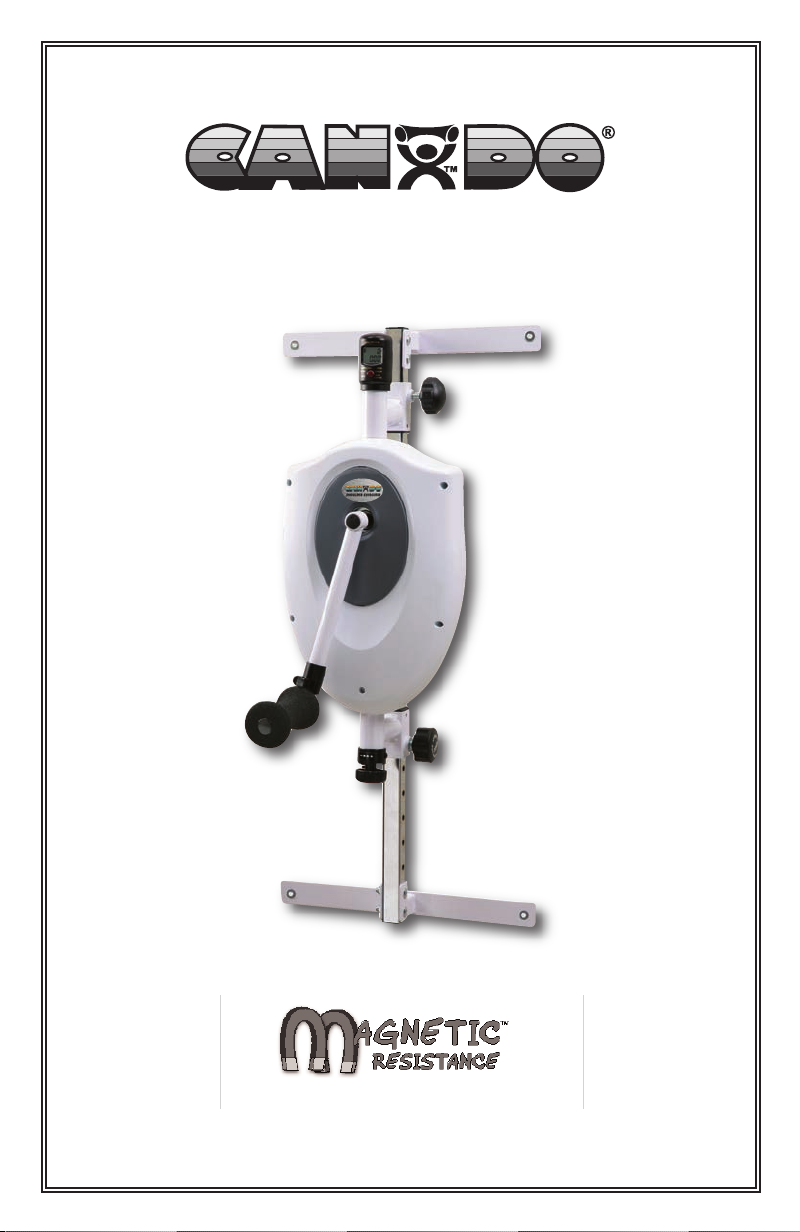
SHOULDER EXERCISER
01-8025
bi-directional
exerciser
with magnetic resistance for smooth operation
Fabrication Enterprises Inc. PO Box 1500 White Plains, NY 10602 (USA)
tel: 914-345-9300 fax: 914-345-9800 www.Fab-Ent.com
ver 10/11
Page 2

SHOULDER EXERCISER
TABLE OF CONTENTS
Safety Precautions ................................................................................ 3-4
Assembly Parts & Hardware Pack ........................................................ 5
Mounting and Assembly ........................................................................ 6-7
Parts List ................................................................................................. 8
Assembly Diagram.................................................................................. 9
Electronic Monitor .................................................................................. 10
Operating Instructions ............................................................................ 11
2
Page 3

SHOULDER EXERCISER
SAFETY PRECAUTIONS
Read this instruction guide before using your Shoulder Exerciser and follow all
safety precautions.
CAUTION
● Check unit before each use to make sure it is in working condition. Never
operate this unit if it is not functioning properly.
● Make sure unit is securely fastened to wall before each use.
● Handle unit with care.
● DO NOT permit any foreign materials or liquids to enter the unit.
● DO NOT modify or remodel the unit.
● This unit should not be used by or near children.
● Handicapped or disabled people must have medical approval before using
unit, and should be under close supervision when using any exercise equipment.
● Do not put hands, feet, or any foreign objects on or near this unit when in
use by other people.
● Use caution to prevent fingers or hands from being pinched in moving parts
when operating the unit.
● Use this unit only for its intended purpose described in this manual.
● If you have difficulty operating the unit after carefully reviewing this operator’s
guide, contact your dealer for assistance.
● Failure to use and maintain the Shoulder Exerciser in accordance with the
instructions outlined in this manual will invalidate your warranty.
● Dispose of product in accordance with applicable regulations and codes.
● Consult your healthcare professional before beginning an exercise program
with this machine. Ask what exercise program is best for you including warmup, amount of exercise, and cool-down. No specific health claims are made
or implied as they relate to the equipment.
● Know your heart rate and pulse, as well as your physician recommended
target heart rate. Monitor these during exercise.
● If the user experiences dizziness, nausea, chest pain, or any other abnormal
symptoms, stop the exercise at once and consult a physician immediately.
● Warm up before exercise program with stretching or as advised by your
healthcare provider.
3
Page 4

SHOULDER EXERCISER
● Wear comfortable clothes that allow freedom of movement and are not tight
or restricting.
● Wear comfortable shoes with good support and nonslip soles.
● Breathe naturally, and never hold your breath during an exercise.
● Perform exercises consistently with proper technique, and with a full range
of motion.
● Avoid over-training.
● Start exercising slowly and gradually increase the amount of resistance on
the exerciser.
● After exercise session, cool down with slow stretching, cycling, or walking.
4
Page 5
SHOULDER EXERCISER
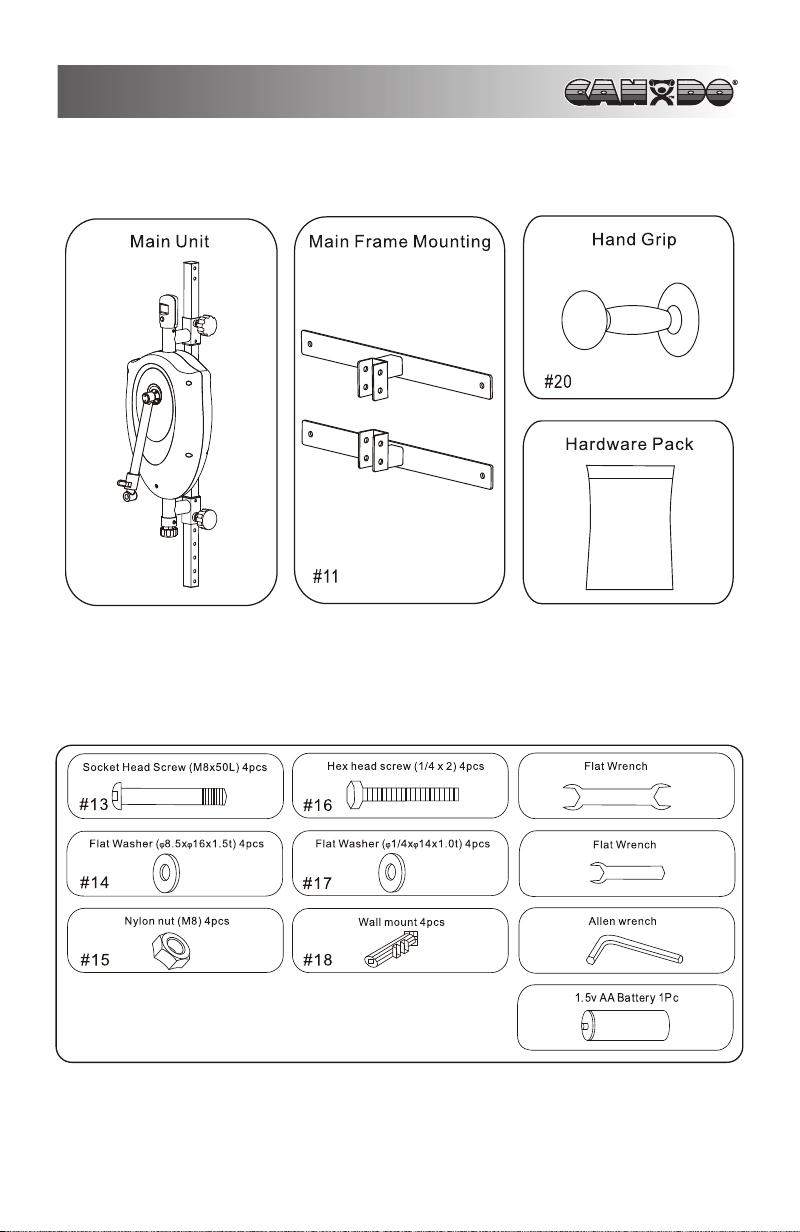
ASSEMBLY PARTS
HARDWARE PACK
5
Page 6
SHOULDER EXERCISER
MOUNTING and ASSEMBLY
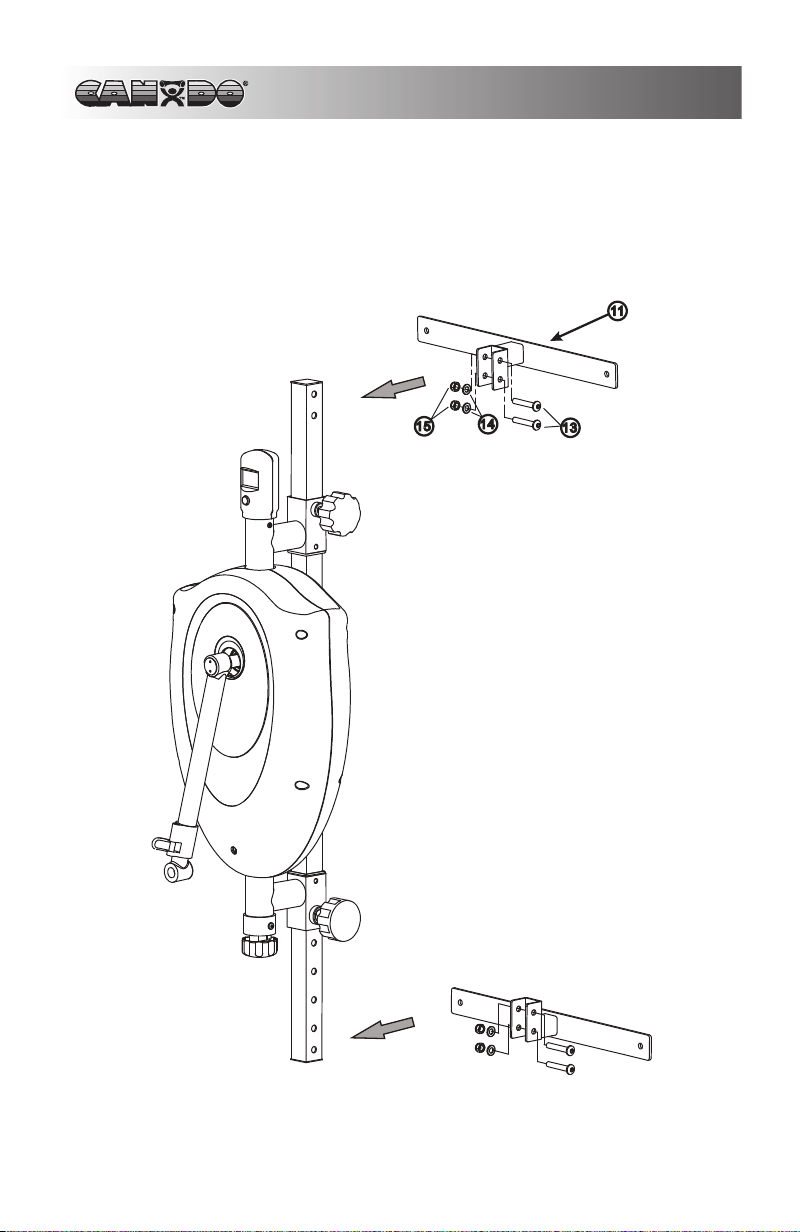
STEP 1.
Attach the Main Unit to the Main Frame Mounting (#11). Then secure it with
four M8X50L Socket screws (#13), four Flat washers (#14) and four M8
Nylon Nut (#15).
6
Page 7
SHOULDER EXERCISER
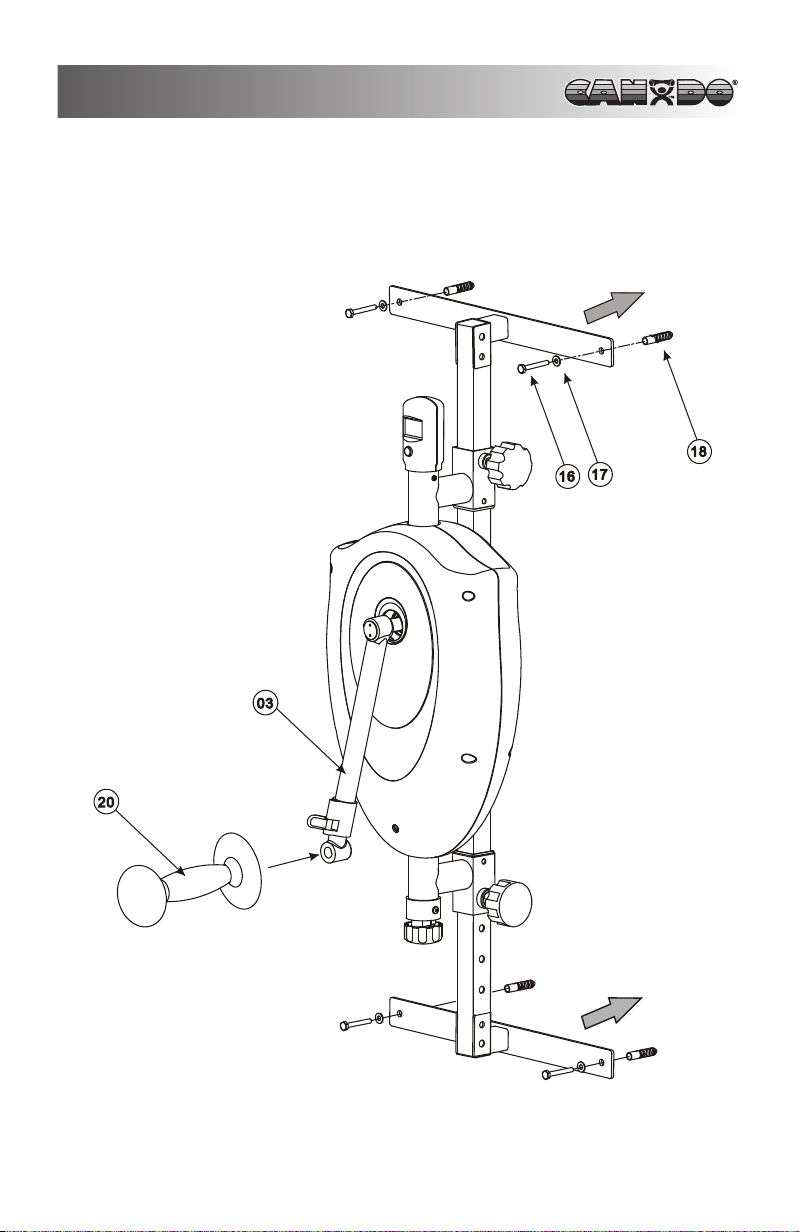
STEP 2.
Secure the Main Unit to a level wall, board with four Hex Head screw (#16),
four Flat washers (#17) and four Wall mounts (#18). Attach the Hand Grip
(#20) to the Handle bar (# 03) and tighten it.
7
Page 8

SHOULDER EXERCISER
PARTS LIST
NO. DESCRIPTIONS QTY
01 Main Unit........................................................................ 1
02 Decoration Plate ............................................................ 2
03 Handle Bar ..................................................................... 1
04 Electronic Monitor ......................................................... 1
05 Resistance Control Knob .............................................. 1
06 Knob .............................................................................. 1
07 Pop Knob ...................................................................... 1
08 Upright Tube .................................................................. 1
10 Square Plug .................................................................. 2
11 Main Frame Mounting .................................................... 2
19 Shaft Clamp ................................................................... 1
20 Hand Grip....................................................................... 1
8
Page 9
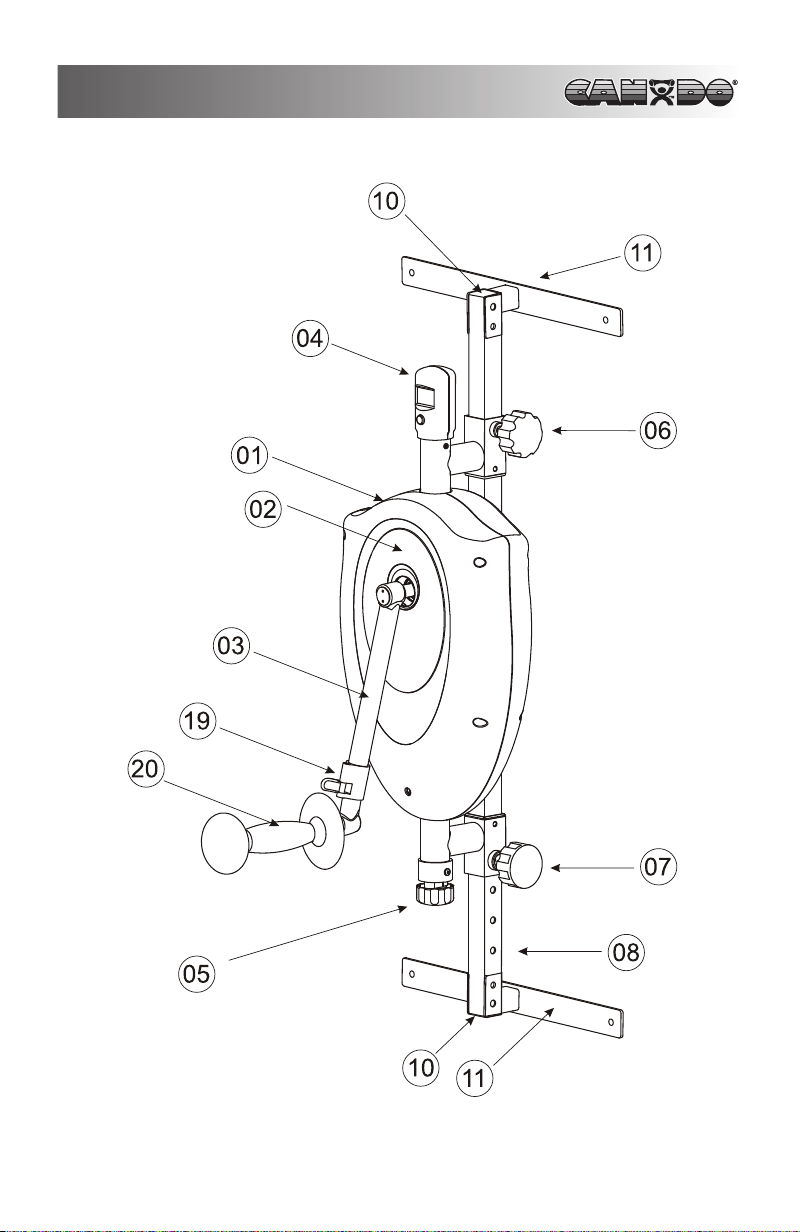
SHOULDER EXERCISER
ASSEMBLY DIAGRAM
9
Page 10
SHOULDER EXERCISER
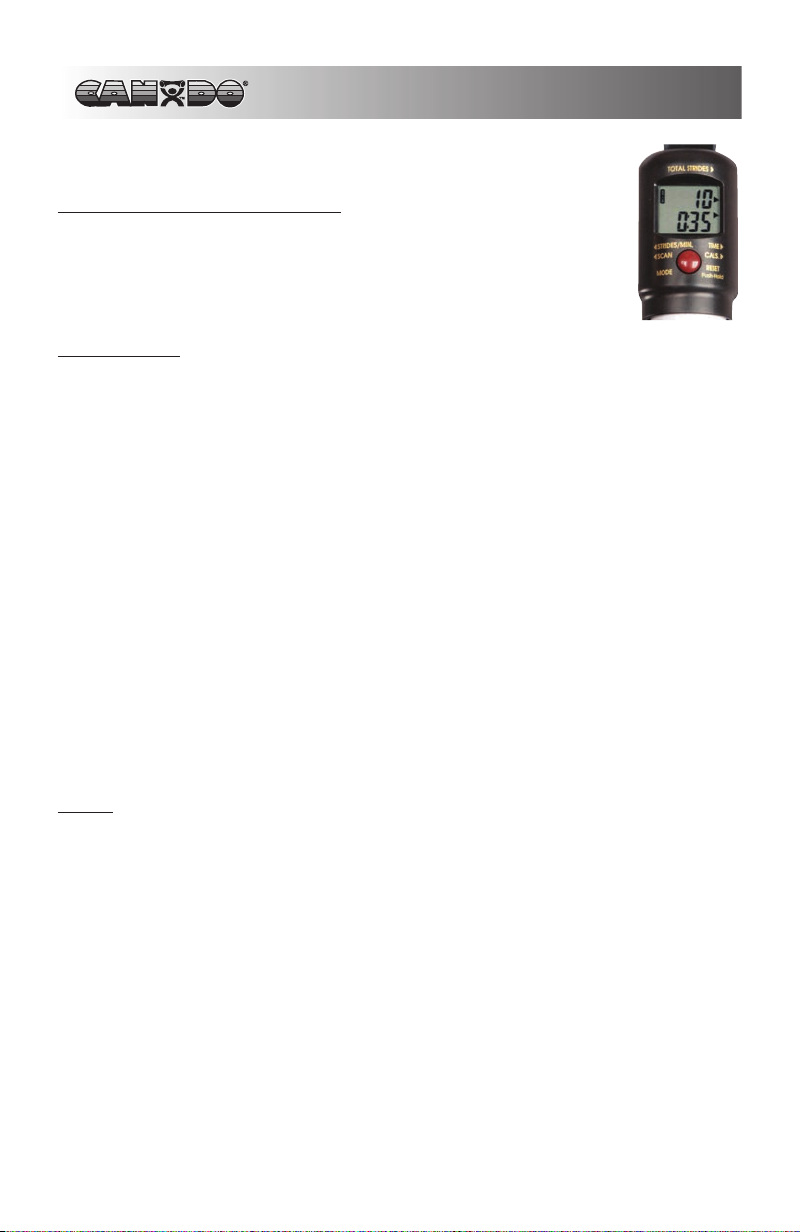
ELECTRONIC MONITOR
FUNCTION “MODE” BUTTON
Use “MODE” button to select functions: time, revolutions per
minute, and total revolutions. Hold the “MODE” button for 2 seconds to reset all values.
FUNCTIONS
SCAN Press “MODE” button to select “SCAN” mode with
a “SCAN” sign on the upper left corner of the monitor. This function will automatically scan through
all the functions displayed on the bottom line of
the monitor.
TIME Automatically accumulates workout time when
starting exercise.
REVOLUTIONS / MIN Displays current number of revolutions per
minute.
TOTAL REVOLUTIONS Displays number of revolutions completed during
exercise session.
STOP “STOP” displays on LCD when exercise ends.
NOTE
1. If an improper display is seen on the monitor replace the batteries.
2. Monitor uses two 1.5v “AA” batteries for power supply.
3. The monitor will automatically shut off if no input signal is received for a 4 to
5 minute period.
4. Monitor will automatically start when you start exercising or press the button.
10
Page 11
SHOULDER EXERCISER
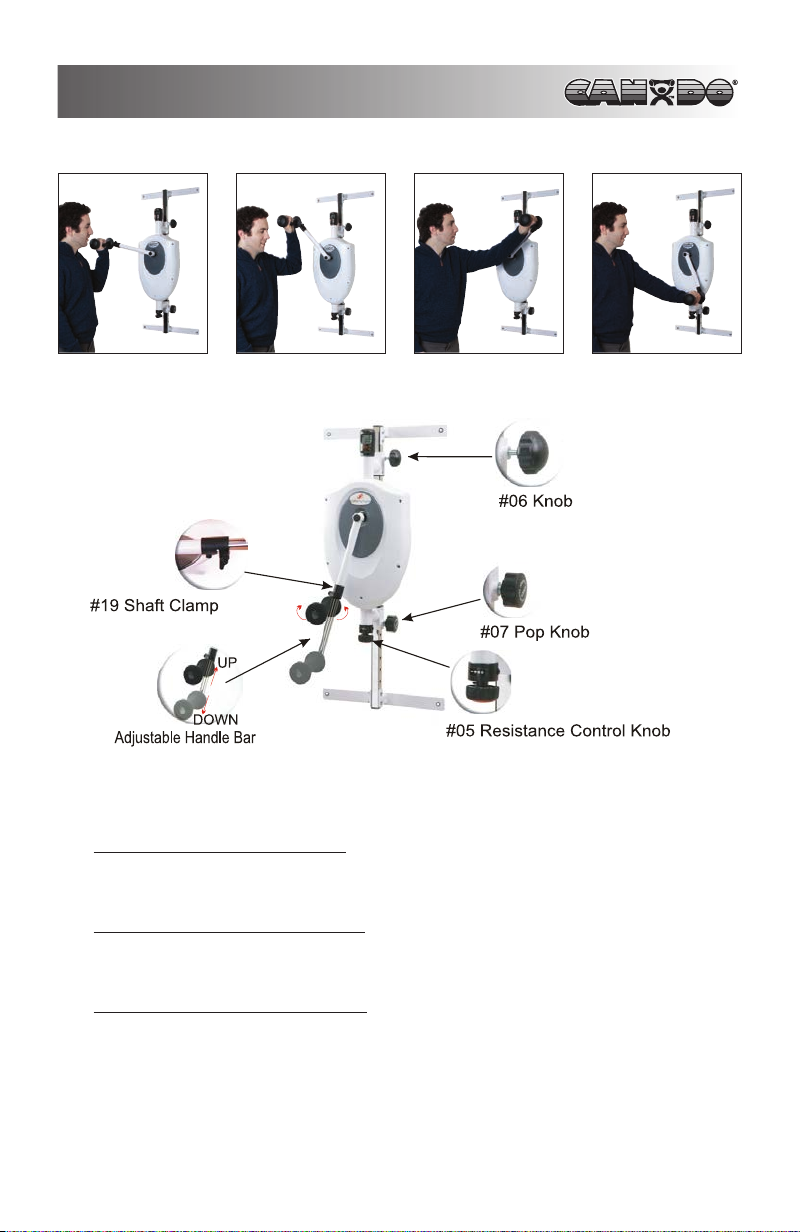
OPERATION INSTRUCTIONS
Hold the Hand Grip (#20 on page 9), then exercise clockwise or counter-clockwise.
Before using your Shoulder Exerciser, please adjust the height of the Main
Unit to a proper height.
1. Main Unit Height Adjustment
Loosen the Knob (#06) and Pop Knob (#07), then adjust the Main Unit up
or down to your desire position, then fasten them.
2. Handle Bar Length Adjustment
Pull up the Shaft Clamp (#19) to loosen the handle bar, then adjust the
length to proper position, then push down to tighten it.
3. Resistance Control Knob (#05)
This is to control the amount of resistance applied during exercise.
Turn the Resistance Control Knob clockwise (+) for a more difficult workout,
and counter clockwise (-) for a less difficult workout.
It is recommended for a beginner to start the exercise from the lightest resistance to avoid injury. Gradually increase the resistance for increased difficulty.
11
Page 12

™
Fabrication Enterprises Inc.
P.O. Box 1500
White Plains, NY 10602 (USA)
tel: 1-914-345-9300
fax: 1-914-345-9800
www.Fab-Ent.com
Authorized CE representative:
RMS UK Ltd.
28 Trinity Road
Nailsea, Somerset BS48 4NU (UK)
Cando and are trademarks of Goldberg
©2011 FEI, all rights reserved
 Loading...