

Page 1
Part Number #35782
1. Introduction
Sierra Wireless Airlink®
4G LTE Cellular Modem
For Private Dynamic IP Addresses
Revision: 04/2021
CSL I.D - 1312
www.campbellsci.eu/rv50x
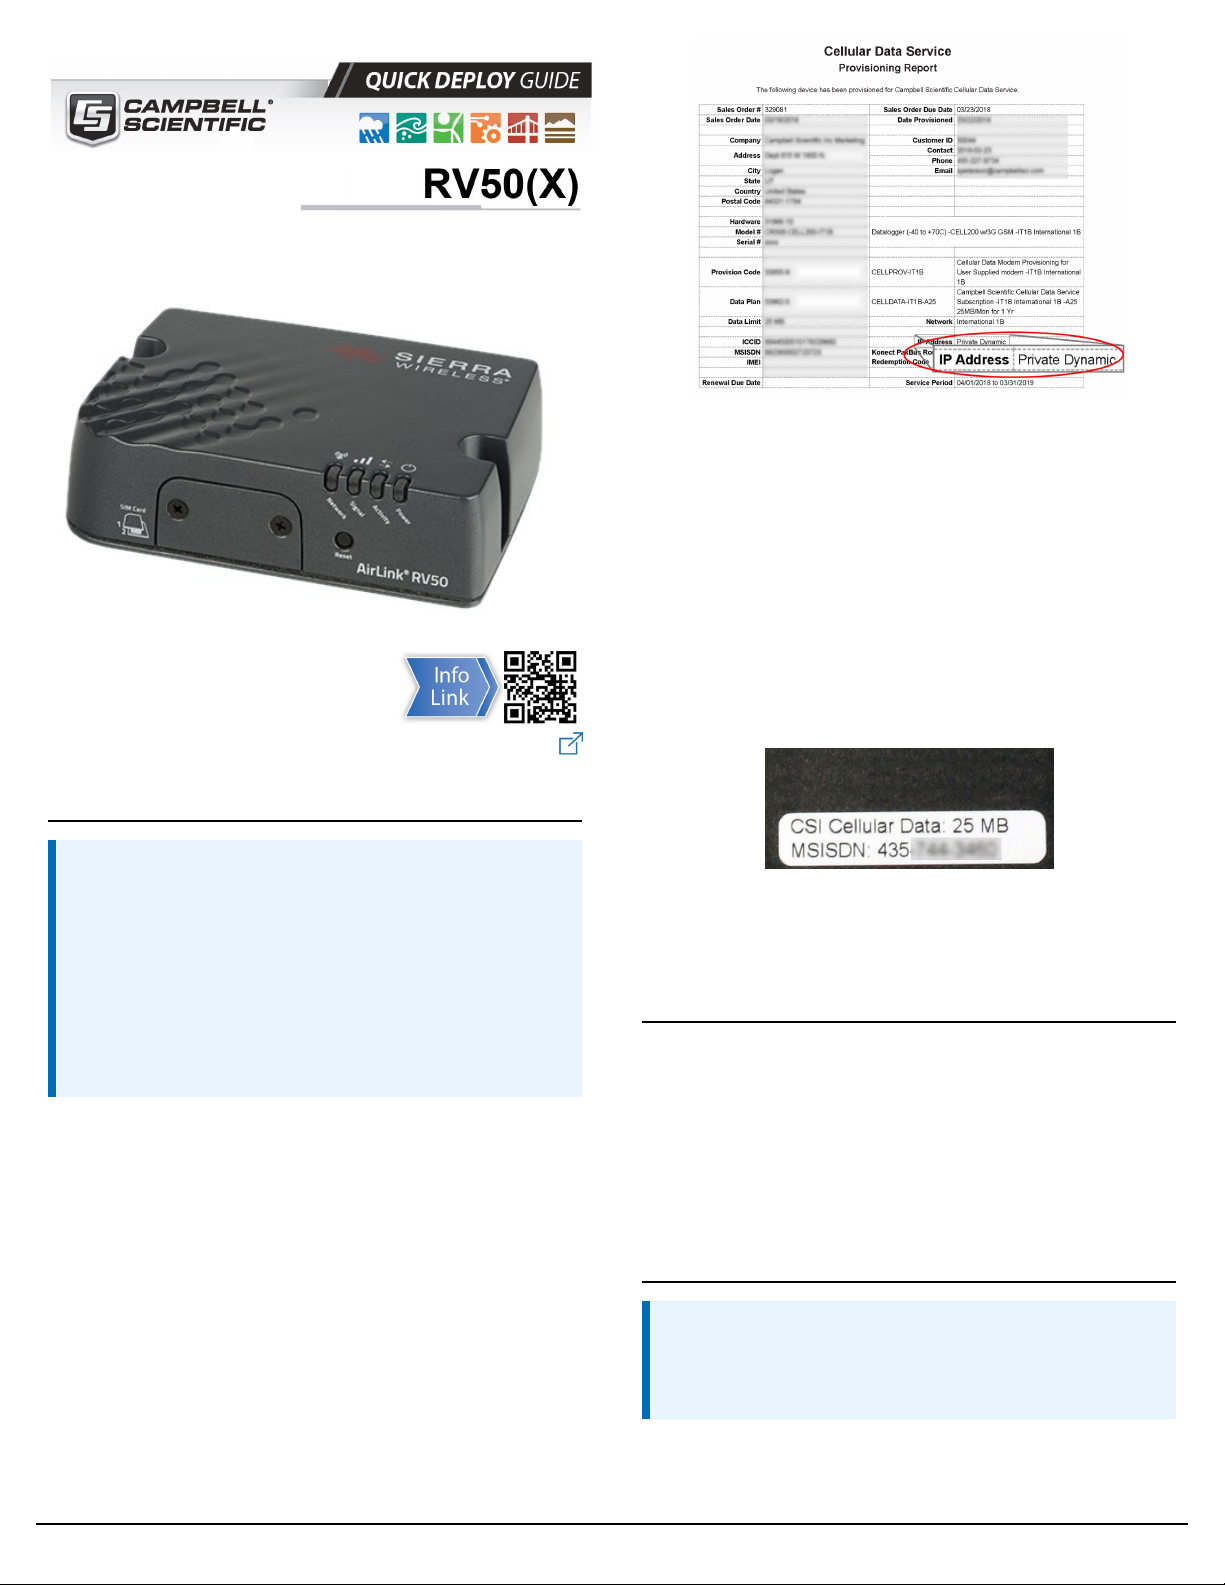
FIGURE 1-1. Private dynamic IP provisioning report
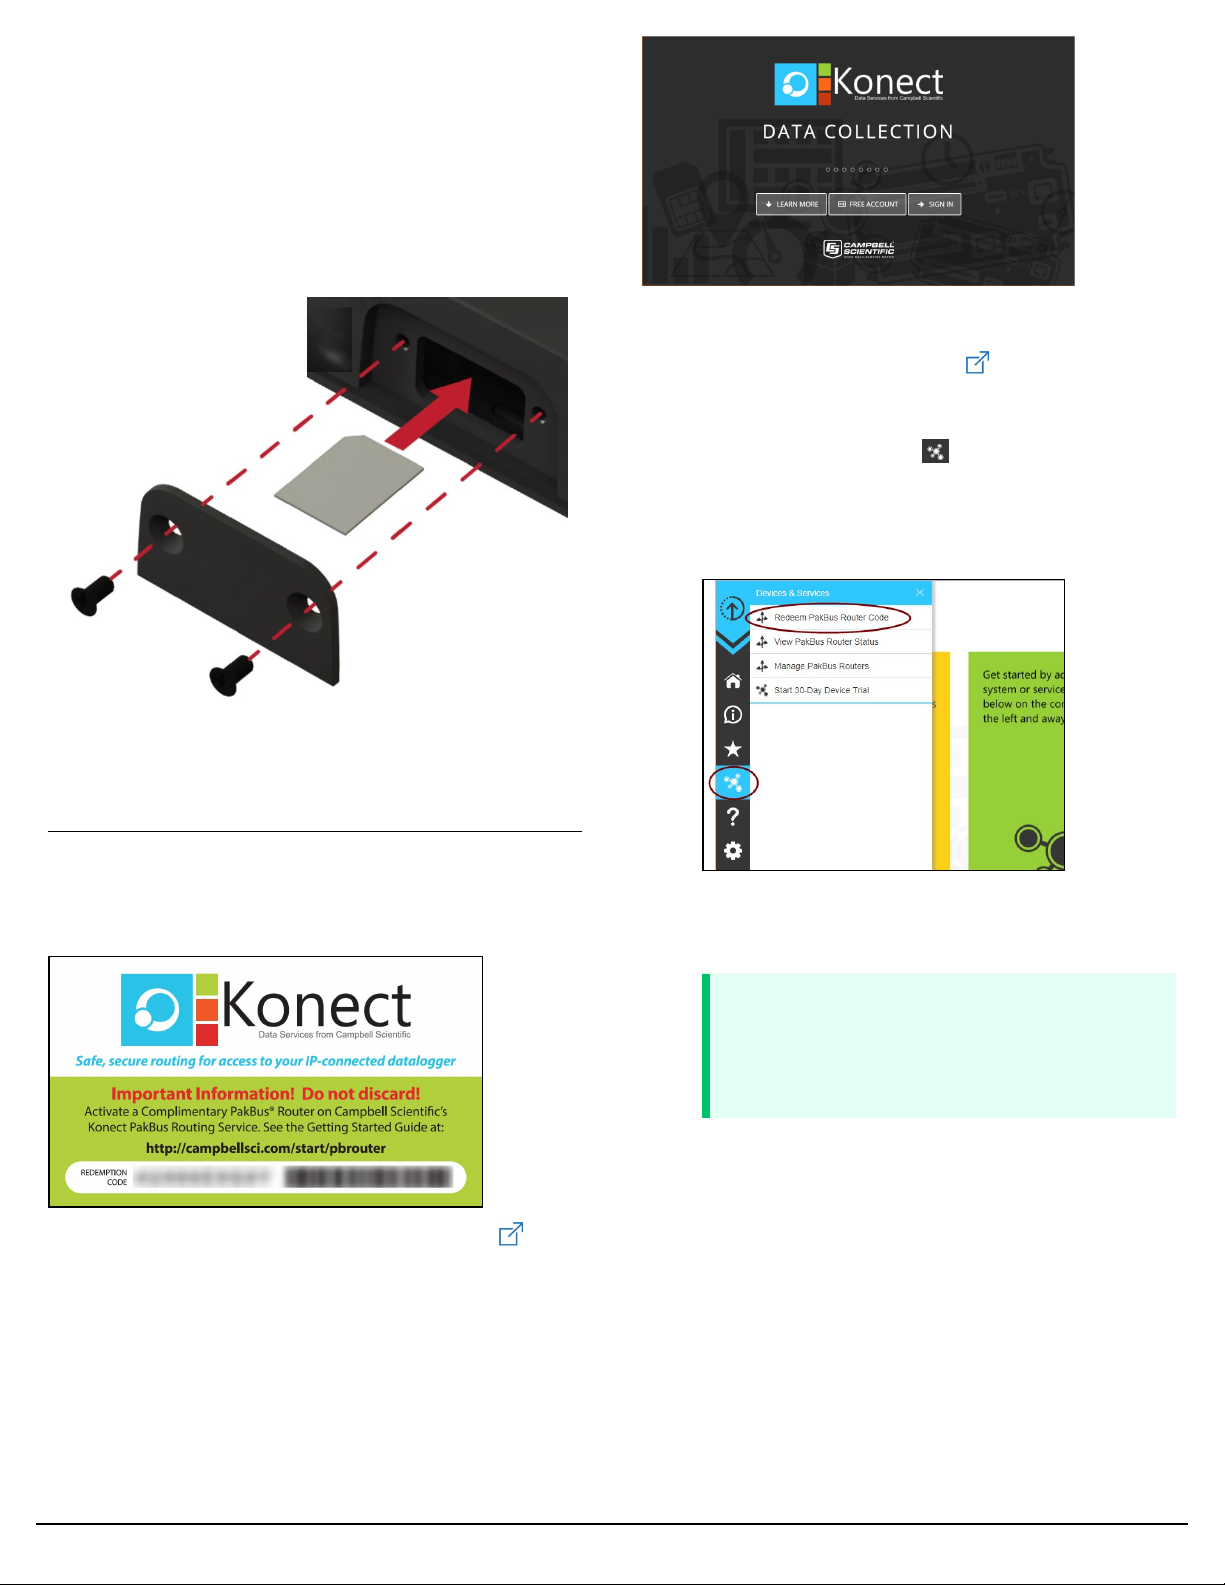
Additionally, Campbell Scientific cellular modules configured
with a private dynamic IP address will have one sticker on the
module, as shown in the following figure. It will show the
module phone number and data plan. USE THIS GUIDE.
Campbell Scientific cellular modules configured with a public
static IP address will have two stickers on the module. One
sticker will show the module phone number and data plan. The
second sticker will show the static IP address. USE THE OTHER
GUIDE.
NOTE:
This Quick Deploy Guide is a general reference to give the
installer an overview of the steps required to make this
system operational. The Product Manual is the definitive
source for detailed installation instructions and
information.
For best results, update to the latest data logger
operating system and version of Device Configuration
Utility.
You should have received two Quick Deploy Guides with your
RV50(X) module. The one you follow will depend on whether
your module was configured with a private dynamic or public
static IP address.
The Provisioning Report received with your Cellular Data
Service shows whether the module was configured with a
private dynamic or public static IP address. See the following
figure for an example of a Campbell Scientific Provisioning
Report. Other cellular providers should provide similar
information.
USE THIS GUIDE if your module has a private dynamic IP
address.
FIGURE 1-2. Module with private dynamic IP address
2. Campbell Scientific cellular data service
Campbell Scientific can provide subscriptions to cellular
service through Verizon, AT&T, T-Mobile, Vodafone, Telstra,
and over 600 other providers worldwide. When this cellular
service is purchased with the module, the module will come
pre-provisioned with the required SIM card and APN. If you
have already purchased the RV50(X), call Campbell Scientific
to set up service.
3. Install the SIM card
NOTE:
If you purchased cellular service from Campbell Scientific
with the module, it will come with the SIM (Subscriber
Identity Module) card already installed.
1
Page 2
1. Remove the SIM card cover.
2. Note the location of the notched corner for correct
alignment. The gold contact points of the SIM face
down when inserting the SIM card as shown in the
following figure. Gently slide the card into the slot until
it stops and locks into place. To eject the SIM card,
press it in slightly and release.
3. Replace the SIM card cover.
4.2 Set up Konect PakBus Router
1. Sign in to www.konectgds.eu using your Passport
ID and Password found in the two received emails. Once
logged in, you will be at the Welcome page.
2. Click Devices and services on the command bar to
the left and select Redeem PakBus Router Code. Enter
your complimentary Router Code found on the included
card with your cellular-enabled device and click Submit.
FIGURE 3-1. SIM card installation
4. Konect PakBus Router setup
4.1 Get started
You will need the Konect PakBus Router redemption code that
came on a card with the RV50(X).
Open a web browser and go to www.konectgds.eu.
First-time users need to create a free account. After you submit
your information, you will receive two emails up to five minutes
apart. One email will contain a Passport ID and the other your
Password. If emails are not received, check your email junk
folder.
3. The next screen shows the assigned DNS address and
Port for the router. Enter a TCP Password and select a
unique PakBus Address for your data logger.
TIP:
Make note of this information; it will be required
for data logger configuration as well as LoggerNet
setup. Please note your DNS, Port, TCP Password
and PakBus address; you will need them later.
2
Page 3

NOTE:
If Campbell Scientific did not provision the RV50(X)
or it does not automatically connect to the network,
you may need to to confirm or enter your APN
information. Follow steps 6 through 8 to
WAN/Cellular > SIM Slot 1 Configuration >
Network Credentials > User Entered APN.
6. Connect your Windows® computer to the RV50(X)
using the supplied Ethernet cable.
CAUTION:
Your computer may use the RV50(X) as a network
interface while connected resulting in cellular data
usage. Campbell Scientific recommends
disconnecting the computer from the RV50(X) as
soon as configuration is complete.
5. Configure RV50(X)
1. Download the collection of RV50(X) configuration
templates from www.campbellsci.eu/downloads
and run the executable downloaded.
2. Connect the Cellular antenna.
3. Connect the Diversity antenna, if used. Use of a diversity
antenna is recommended, it can improve system
performance. It is required in 4G networks, but not 2G or
3G. Note: If a Diversity antenna is not used on a 2G or
3G cellular network, use ACEmanager to disable WAN/
Cellular > Network Credentials > RX Diversity.
4. Connect the power cable wires to a power supply.
Wire
Colour
Black Ground G
White
Red
5. Connect the power cable to the RV50(X) DC Power
input. When the RV50(X) is properly set up and
powered, the status LEDs will turn on. The RV50(X) will
begin the activation/provisioning process and attempt
to connect to the mobile network. This process typically
takes 5 to 10 minutes. A successful connection is
indicated by a solid green or solid amber Network LED.
Function Connect To
Enable
(On/Off)
Power (7 to 36
V)
12V or SW12V or control
port
12V
7. Launch a web browser, and enter
https://192.168.13.31:9443 into the address bar. The
ACEmanager login screen should appear in your
browser.
NOTE:
RV50(X)s running OS version 4.13 and older had
both HTTP port 9191 and HTTPS port 9443 enabled
by default. When using HTTP (not HTTPS) with these
older OS versions, enter the IP address using port
number 9191, for example, http://192.168.13.31:9191.
8. Look for a sticker on the bottom of your modem with
the manufacturer-generated default password. Log in
using User Name = user and that Password. If there is
no sticker try 12345 for the password. Make note of the
password used so it can be easily referenced when off
site. Remote access to the modem interface will require
the password.
TIP:
We strongly recommend changing the default
password to prevent unauthorized access and the
potential of malware infection. The password can
be changed from the Admin tab.
WARNING:
Failure to set a strong password in the RV50(X) may
result in misuse of the modem by malware or
hackers. Significant data overage charges may
apply.
3
Page 4

9. Once logged in, check the Status > Home > Network
State field. It should read Network Ready, indicating the
RV50(X) is connected to the cellular network. You can
easily test the RV50(X) connection to the Internet by
selecting the Admin > Advanced tab and using the PING
tool to ping an Internet server, such as
www.campbellsci.eu.
10. Click the Template button in the ACEmanager toolbar. A
template application window will appear. Browse to
and upload one of the configuration templates
downloaded from Campbell Scientific.
Template Files
On the Com Ports Settings tab, select the COMPort where the
module is connected; this is generally RS-232. Change the
Baud Rate to 115200 Fixed.
Template File
Name
Description
Default configuration with RS-232
RV50_115200.xml
at 115200 baud and Ethernet
communication enabled.
1
Default configuration with RS-232
RV50_9600.xml
1
CR1000X series, CR300 series, CR6 series, CR1000, CR3000,
CR800 series, CR5000, and GRANITE 6/9/10
2
CR10X, CR10X-PB, CR510, CR510-PB, CR23X, CR23X-PB, and
CR200(X) series data loggers
at 9600 baud and Ethernet
communication enabled.
2
11. Reboot the RV50(X) after successfully applying the
configuration template. You can do this by clicking the
Reboot button on the ACEmanager toolbar, by
momentarily pressing the Reset button (2 sec), or by
temporarily removing power from the RV50(X).
6. Enabling PPP mode
Launch the Device Configuration Utility . All tabs are within
the Deployment category.
On the PPP tab select the Config/Port Used where the modem
is connected. This is the same as was selected on the Com Ports
Settings tab. Set Modem Dial String to ATH;AT\APPP.
On the Network Services tab, in the PakBus/TCP Clients box,
type the DNS address and Port number noted during the Set
up Konect PakBus Router (p. 2) step.
On the Datalogger tab, change the data logger PakBus
Address and PakBus/TCP Password to match the values
entered in the Set up Konect PakBus Router (p. 2) step.
Apply to save your changes.
Disconnect the Ethernet cable between the RV50(X) and
computer.
4
Page 5

7. Set up LoggerNet
The LoggerNet Network Map is configured from the
LoggerNet Setup screen.
NOTE:
Setup has two options, EZ (simplified) and Standard. Click
on the View menu at the top of the Setup screen, and
select Standard view.
From the LoggerNet toolbar, click Main > Setup and configure
the Network Map as described in the following steps:
1. Select Add Root > IPPort.
2. Select PakBusPort and pbRouter for PakBus data
loggers such as the CR6 or CR1000X.
NOTE:
PakBus data loggers include the following
models:GRANITE-series, CR6, CR3000, CR1000X,
CR800-series, CR300-series, CR1000, and CR200(X)series.
5. Leave the default settings for the PakBusPort. PakBus
Port Always Open should not be checked. In the TCP
Password field enter the TCP Password; this must match
the value entered in the Konect PakBus Router setup
and LoggerNet setup.
6. Select the pbRouter in the Network Map and set the
PakBus Address to 4070.
3. Add a data logger to the pbRouter.
4. From the Entire Network, on the left side, select the
IPPort. Enter the Konect PakBus Router DNS address
and port number as noted in the Konect PakBus Router
setup (Set up Konect PakBus Router (p. 2)). Enter them
into the Internet IP Address field in the format DNS:Port
with a colon separating DNS and Port. For example,
axanar.konectgds.com:pppp where pppp is the port
number.
7. Select the data logger in the Network Map and set the
PakBus Address to match that of the data logger
(default address in the data logger is 1). If a PakBus
Encryption Key was entered during data logger setup,
also enter it here. Click Apply to save the changes.
5
Page 6

8. Test the connection
Use the Connect screen to test the connection. Click on the
appropriate station and click Connect to initiate a call to the
data logger. The data logger must have 12 V power.
TIP:
The connection time is subject to many external factors. It
is often less than 30 seconds but could be up to 15 minutes.
Be patient.
If the connection is successful, the connectors at the bottom of
the screen will come together and clock information from the
data logger will be displayed in the Station Date/Time field.
6
 Loading...