

Page 1
Getting Started Guide
Complimentary
Revision: 02/2021
Copyright © 2018 – 2021
Campbell Scientific
CSL I.D - 1283
Page 2

Guarantee
This equipment is guaranteed against defects in materials and workmanship.
We will repair or replace products which prove to be defective during the
guarantee period as detailed on your invoice, provided they are returned to us
prepaid. The guarantee will not apply to:
Equipment which has been modified or altered in any way without the
written permission of Campbell Scientific
Batteries
Any product which has been subjected to misuse, neglect, acts of God or
damage in transit.
Campbell Scientific will return guaranteed equipment by surface carrier
prepaid. Campbell Scientific will not reimburse the claimant for costs incurred
in removing and/or reinstalling equipment. This guarantee and the Company’s
obligation thereunder is in lieu of all other guarantees, expressed or implied,
including those of suitability and fitness for a particular purpose. Campbell
Scientific is not liable for consequential damage.
Please inform us before returning equipment and obtain a Repair Reference
Number whether the repair is under guarantee or not. Please state the faults as
clearly as possible, and if the product is out of the guarantee period it should
be accompanied by a purchase order. Quotations for repairs can be given on
request. It is the policy of Campbell Scientific to protect the health of its
employees and provide a safe working environment, in support of this policy a
“Declaration of Hazardous Material and Decontamination” form will be
issued for completion.
When returning equipment, the Repair Reference Number must be clearly
marked on the outside of the package. Complete the “Declaration of
Hazardous Material and Decontamination” form and ensure a completed copy
is returned with your goods. Please note your Repair may not be processed if
you do not include a copy of this form and Campbell Scientific Ltd reserves
the right to return goods at the customers’ expense.
Note that goods sent air freight are subject to Customs clearance fees which
Campbell Scientific will charge to customers. In many cases, these charges are
greater than the cost of the repair.
Campbell Scientific Ltd,
80 Hathern Road,
Shepshed, Loughborough, LE12 9GX, UK
Tel: +44 (0) 1509 601141
Fax: +44 (0) 1509 270924
Email: support@campbellsci.co.uk
www.campbellsci.co.uk
Page 3

Table of contents
1. Introduction 1
2. Get started 1
3. Set up Konect PakBus Router 2
4. Configure data logger 4
4.1 Data loggers connected to CELL200-series modules 5
4.2 Data loggers with internal cellular modules (CR300-CELL200) 7
4.3 Data loggers connected to RV50 modems 8
5. Set up LoggerNet 10
6. Set up LoggerLink (optional) 14
7. Maintenance and troubleshooting 14
7.1 Review 14
7.2 Status 15
Table of contents - i
Page 4
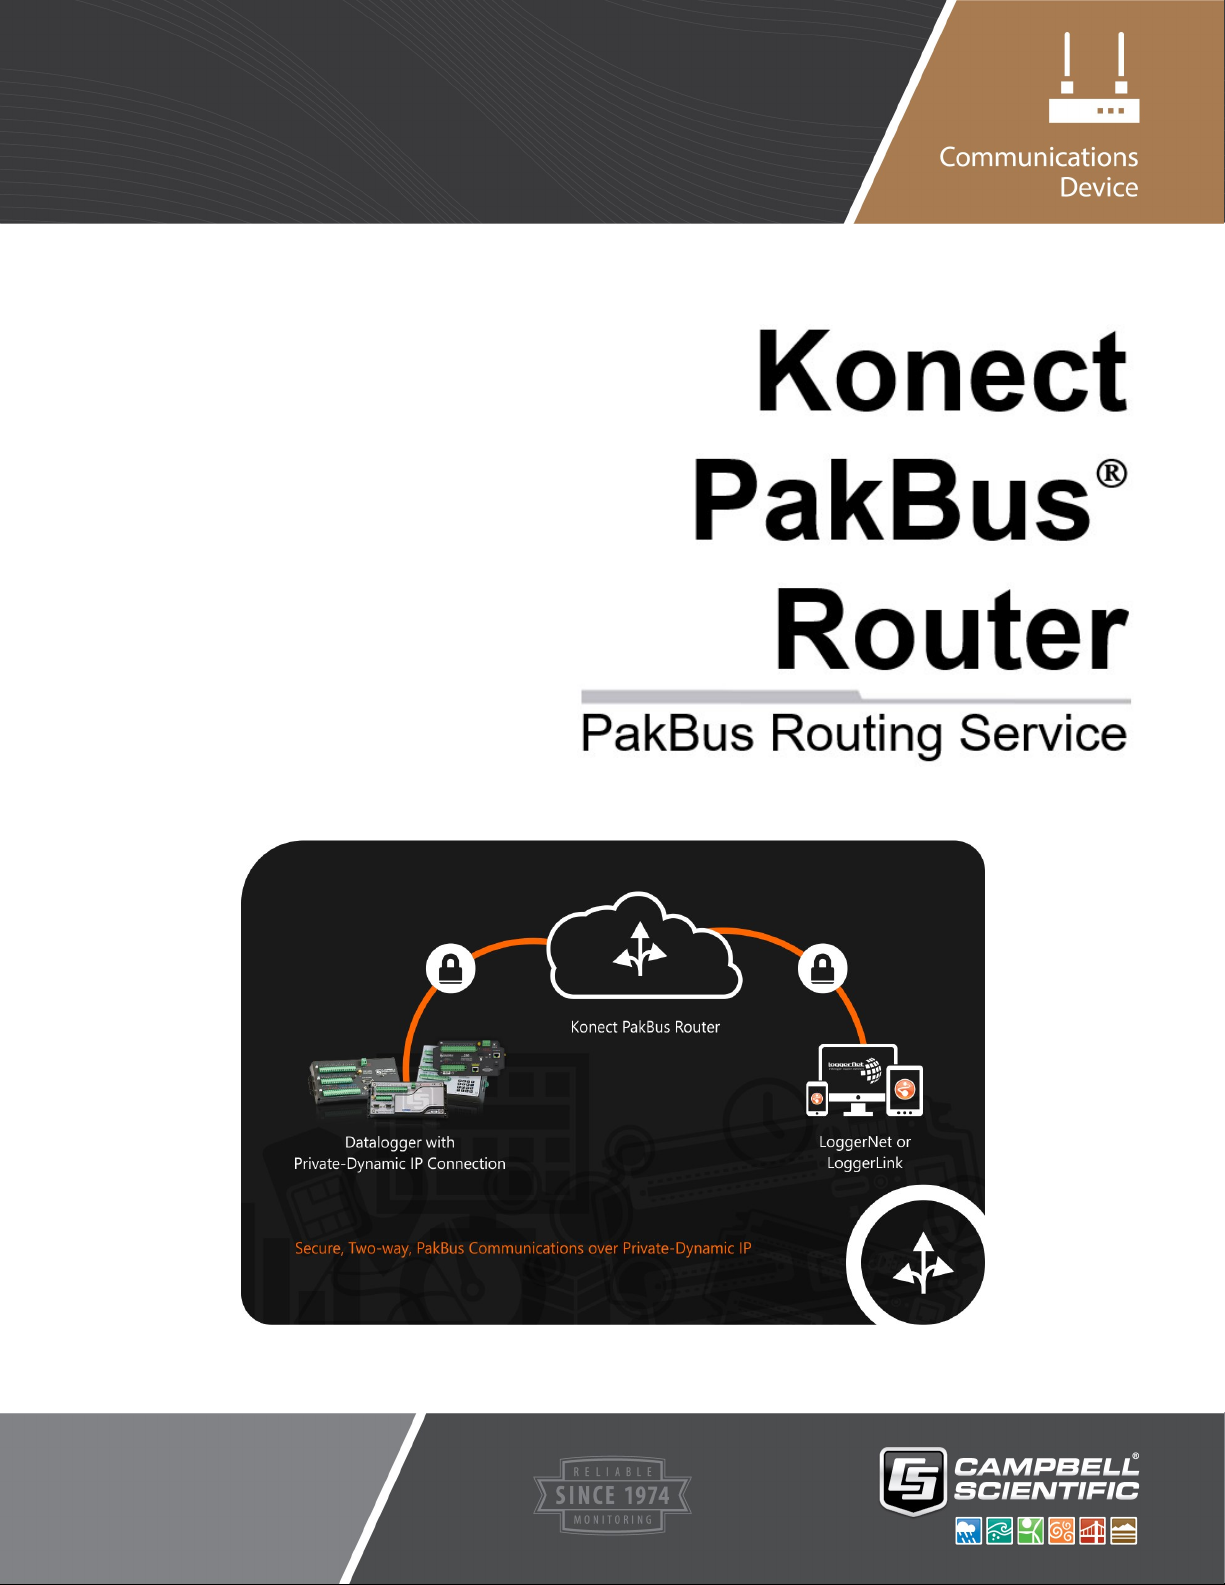
1. Introduction
Take advantage of the secure Konect PakBus®1Router for on-demand two-way access to your
data logger. The Konect PakBus router is a cloud-based service that acts as a bridge between an
internet-enabled data logger and LoggerNet or LoggerLink data logger support software.
This guide will walk you through the steps to:
1. Set up the Konect PakBus Router.
2. Configure a data logger.
3. Set up LoggerNet.
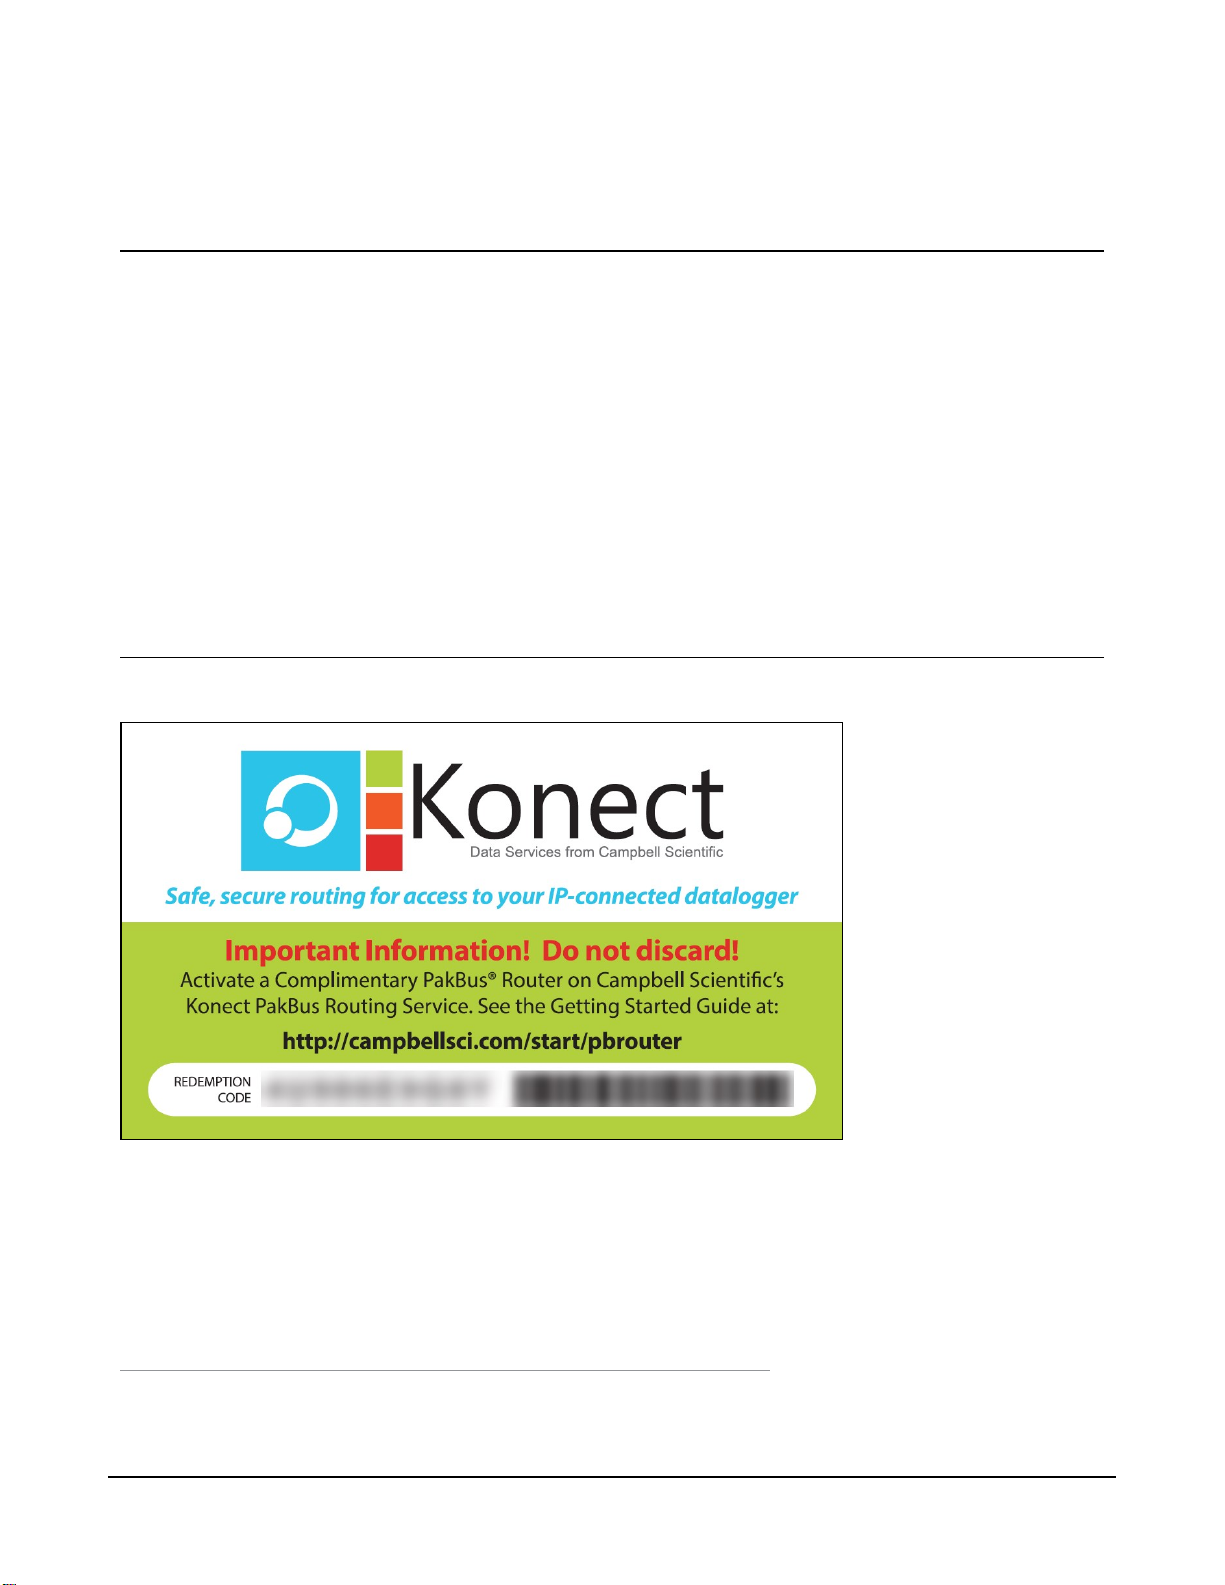
2. Get started
You will need the Konect PakBus Router redemption code that came on a card with the CR1000X.
Open a web browser and go to www.konectgds.eu.
First-time users need to create a free account. After you submit your information, you will receive
two emails up to five minutes apart. One email will contain a Passport ID and the other your
Password. If emails are not received, check your email junk folder.
1
PakBus is a registered trademark of Campbell Scientific, Inc.
Konect PakBus®Router Getting Started Guide 1
Page 5
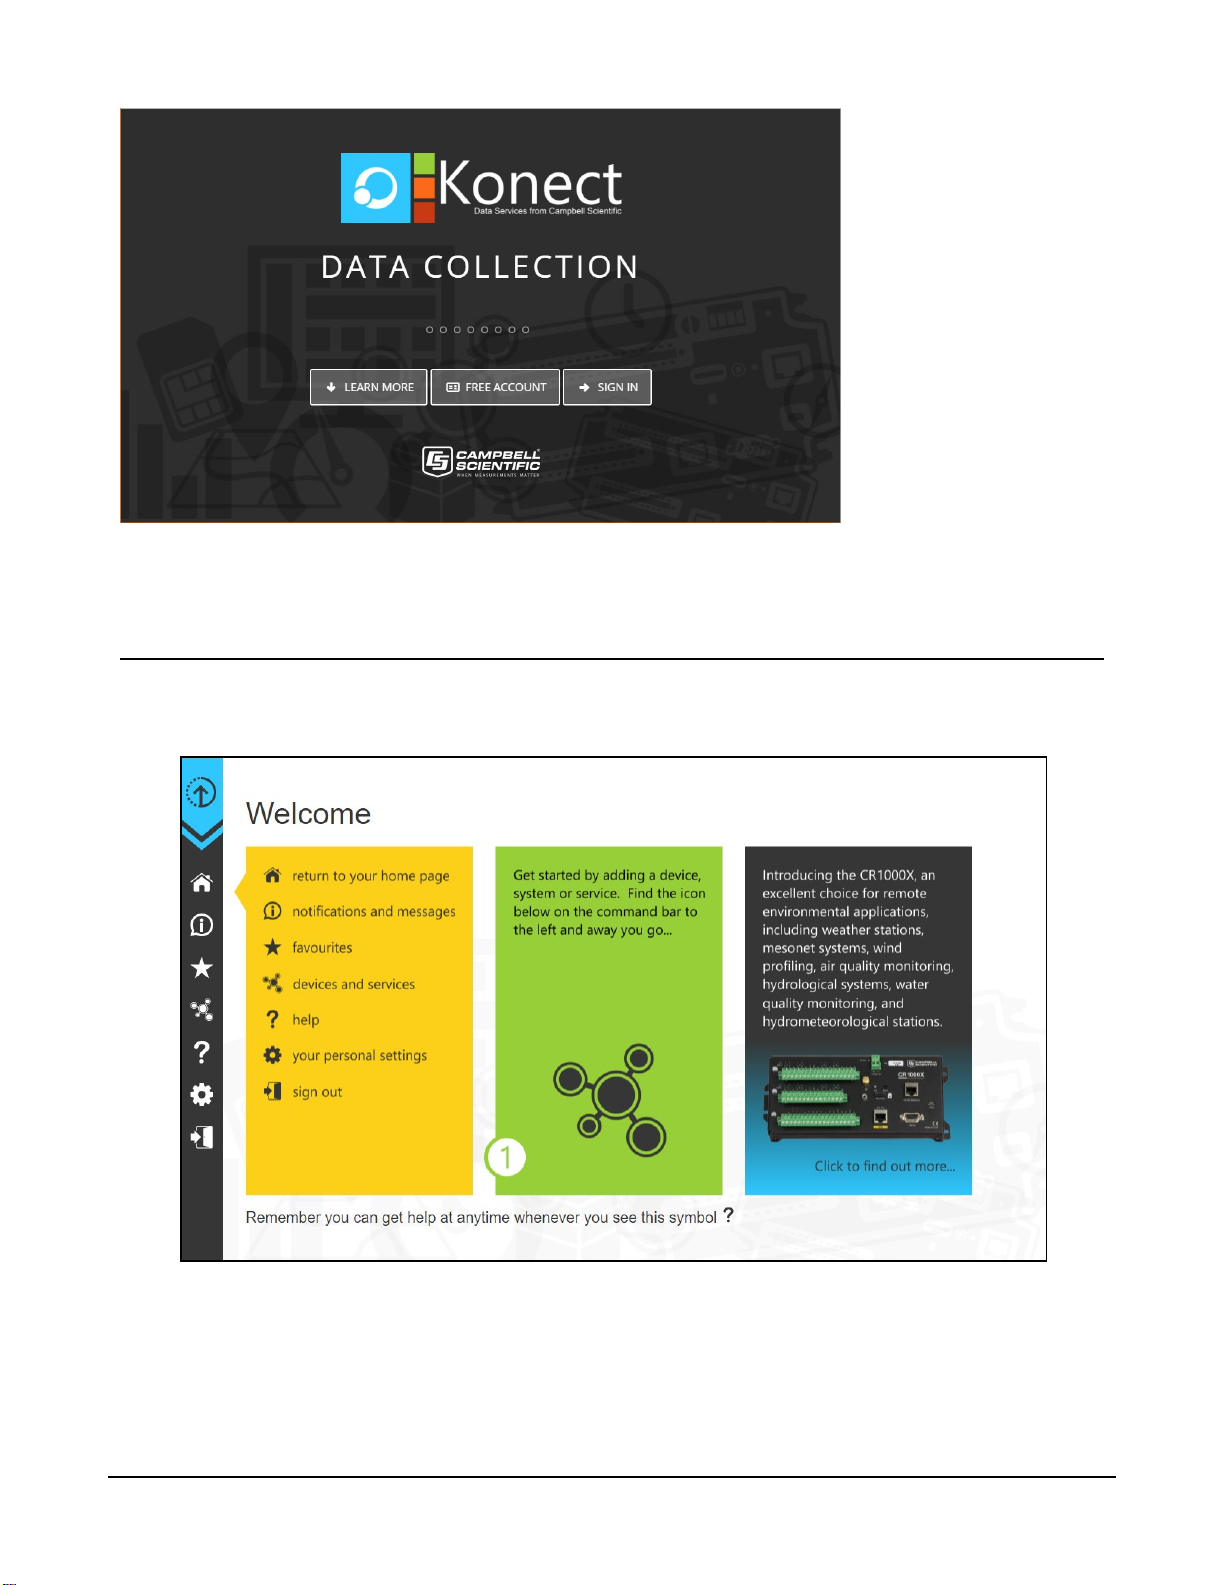
3. Set up Konect PakBus Router
1. Sign in to www.konectgds.eu using your Passport ID and Password found in the two
received emails. Once logged in, you will be at the Welcome page.
Konect PakBus®Router Getting Started Guide 2
Page 6
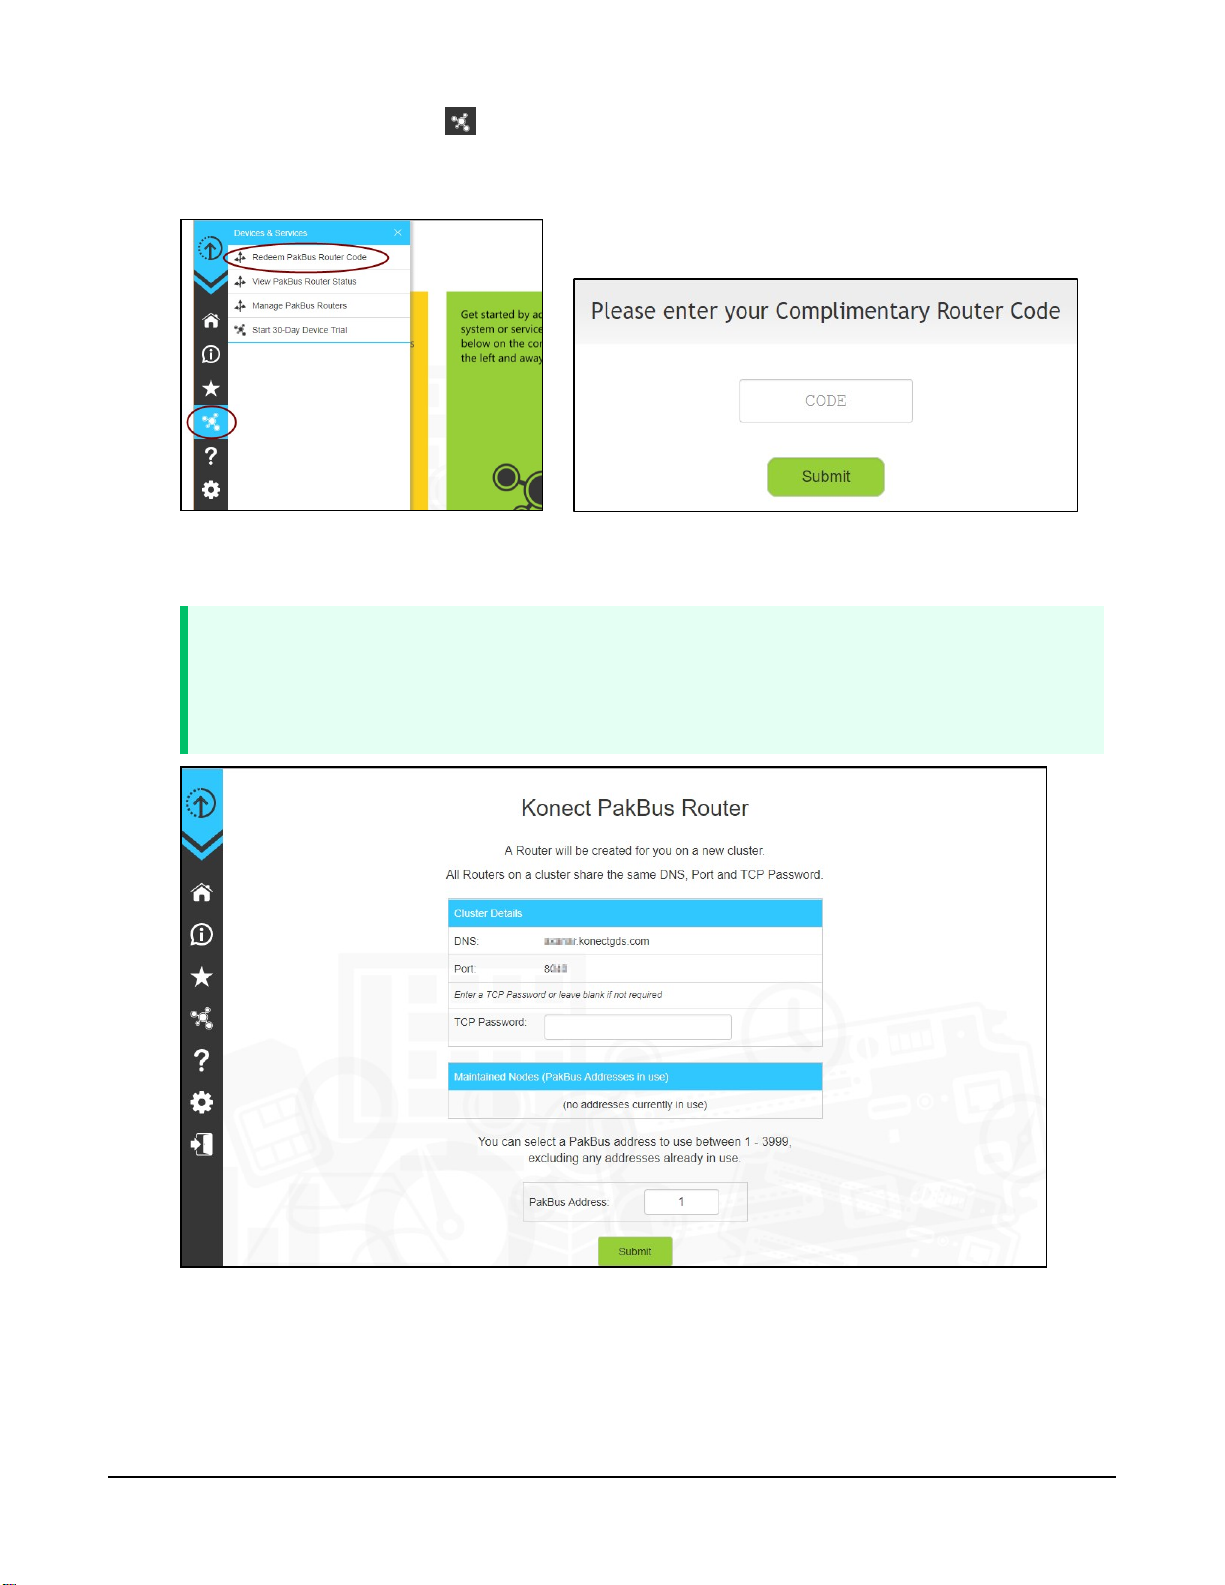
2.
Click Devices and services on the command bar to the left and select Redeem PakBus
Router Code. Enter your complimentary Router Code found on the included card with your
cellular-enabled device and click Submit.
3. The next screen shows the assigned DNS address and Port for the router. Enter a TCP
Password and select a unique PakBus Address for your data logger.
TIP:
Make note of this information; it will be required for data logger configuration as well
as LoggerNet setup. Please note your DNS, Port, TCP Password and PakBus address;
you will need them later.
4. Click Submit.
Konect PakBus®Router Getting Started Guide 3
Page 7

5.
To edit settings at a later date, click devices and services on the command bar and
select Manage PakBus Routers.
NOTE:
The DNS address and Port number, assigned when your account was setup, cannot be
edited.
4. Configure data logger
The data logger setup depends on the type of cellular hardware you are using. Follow the
instructions in the section that applies to your hardware configuration.
1. Data logger connected to a CELL200-series module
2. Data logger with an internal cellular module
3. Data logger connected to an RV50 modem
Konect PakBus®Router Getting Started Guide 4
Page 8

4.1 Data loggers connected to
CELL200-series modules
1.
Launch the Device Configuration Utility . All tabs are within the Deployment category.
On the Datalogger tab, change the data logger PakBus Address and PakBus/TCP Password
to match the values entered in the Set up Konect PakBus Router (p. 2) step.
2. On the Com Ports Settings tab, select the COMPort where the module is connected; this is
generally RS-232 or CS I/O. When connecting to the CS I/O port, the default address is
SDC8. When connecting via RS-232, change the Baud Rate to 115200 Fixed.
Konect PakBus®Router Getting Started Guide 5
Page 9

3. On the PPP tab select the Config/Port Used where the modem is connected. This is the
same as was selected on the Com Ports Settings tab. Leave the Modem Dial String blank.
4. On the Network Services tab, in the PakBus/TCP Clients box, type the DNS address and
Port number noted during the Set up Konect PakBus Router (p. 2) step.
5. Apply to save your changes.
Konect PakBus®Router Getting Started Guide 6
Page 10

4.2 Data loggers with internal cellular modules (CR300-CELL200)
1.
Launch the Device Configuration Utility . All tabs are within the Deployment category.
On the Datalogger tab, change the data logger PakBus Address and PakBus/TCP Password
to match the values entered in the Set up Konect PakBus Router (p. 2) step.
2. On the Network Services tab, in the PakBus/TCP Clients box, type the DNS address and
Port number noted during the Set up Konect PakBus Router (p. 2) step.
3. Apply to save your changes.
Konect PakBus®Router Getting Started Guide 7
Page 11

4.3 Data loggers connected to RV50 modems
1.
Launch the Device Configuration Utility . All tabs are within the Deployment category.
On the Datalogger tab, change the data logger PakBus Address and PakBus/TCP Password
to match the values entered in the Set up Konect PakBus Router (p. 2) step.
2. On the Com Ports Settings tab, select the COMPort where the module is connected; this is
generally RS-232 or CS I/O. When connecting to the CS I/O port, the default address is
SDC8. When connecting via RS-232, change the Baud Rate to 115200 Fixed.
Konect PakBus®Router Getting Started Guide 8
Page 12

3. On the PPP tab select the Config/Port Used where the modem is connected. This is the
same as was selected on the Com Ports Settings tab. Set Modem Dial String to AT\APPP.
4. On the Network Services tab, in the PakBus/TCP Clients box, type the DNS address and
Port number noted during the Set up Konect PakBus Router (p. 2) step.
5. Apply to save your changes.
Konect PakBus®Router Getting Started Guide 9
Page 13

5. Set up LoggerNet
1.
In the Standard View of LoggerNet Setup , add an IPPort > PakBusPort > pbRouter, and
data logger.
2. On the IPPort Hardware tab, select the Internet IP Address field. Enter the Konect PakBus
Router DNS address and Port number separated by a colon as noted during the Set up
Konect PakBus Router (p. 2).
NOTE:
Address format: dddd.konectgds.eu:pppp
Konect PakBus®Router Getting Started Guide 10
Page 14
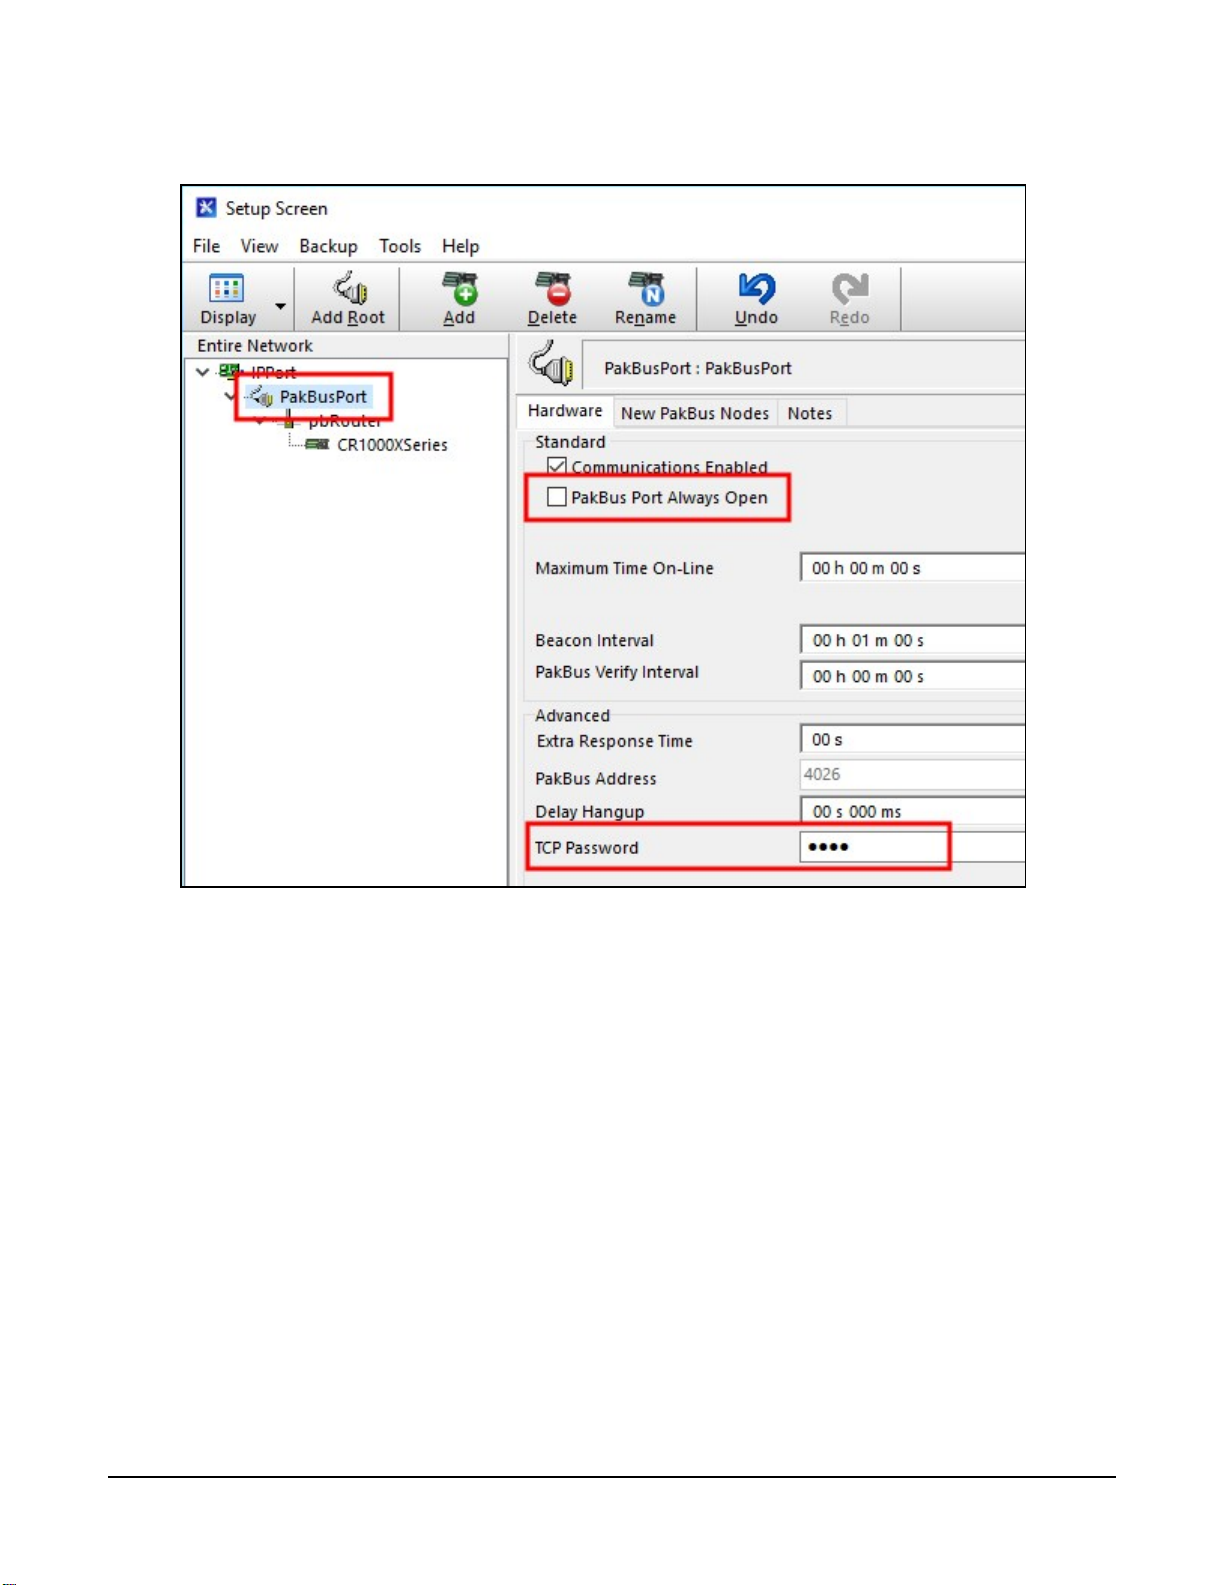
3. Leave the default settings for the PakBusPort. PakBus Port Always Open; it should not be
checked. Set the TCP Password on the PakBusPort Hardware tab.
Konect PakBus®Router Getting Started Guide 11
Page 15

4. Select pbRouter from the Entire Network. On the Hardware tab, enter 4070 in the PakBus
Address box.
Konect PakBus®Router Getting Started Guide 12
Page 16

5. On the data logger Hardware tab, enter the PakBus Address chosen during the Set up
Konect PakBus Router (p. 2) step.
6. Apply to save your changes.
7. Apply power to the data logger and cellular module. On the Clock tab, Check Clocks.
When communications are successful, the Station Date/Time field will update.
Konect PakBus®Router Getting Started Guide 13
Page 17

6. Set up LoggerLink (optional)
LoggerLink mobile apps are another way to connect to your data logger through the
Konect PakBus Router. When using LoggerLink the PakBus Neighbour setting must be set
to 4070.
See the help in LoggerLink or https://www.campbellsci.eu/loggerlink for more information. Or,
watch a video about using LoggerLink https://www.campbellsci.eu/videos/loggerlink-
software-an-introduction.
7. Maintenance and troubleshooting
7.1 Review
1. You have created a free KonectGDS account. In this account, a complimentary Konect
PakBus Router Code was redeemed and a router set up.
2. The data logger was configured to use the information received during the Konect PakBus
Router setup. The data logger now maintains a connection with the Konect PakBus Router.
Konect PakBus®Router Getting Started Guide 14
Page 18

3. LoggerNet has been configured with information received during the Konect PakBus
Router setup. LoggerNet can now connect through the Konect PakBus Router to the data
logger.
7.2 Status
Check the connection status between the data logger and Konect PakBus Router.
1. Sign in to www.konectgds.eu using your Passport ID and Password.
2.
Click devices and services on the command bar and select View PakBus Router Status.
Konect PakBus®Router Getting Started Guide 15
Page 19

3. The next screen shows the DNS, Port, and assigned PakBus addresses. Click Show Status.
4. A Connected status indicates that the data logger has successfully established a connection
to the Konect PakBus Router.
NOTE:
This does not indicate the communication status with LoggerNet.
5. To troubleshoot a Not Connected status:
l Verify the data logger and module have adequate power.
l Verify the module is connected to the Internet.
l Verify settings in the data logger are as described in Configure data logger (p. 4).
Konect PakBus®Router Getting Started Guide 16
Page 20

Campbell Scientific regional offices
Australia
Location:
Phone:
Email:
Website:
Brazil
Location:
Phone:
Email:
Website:
Canada
Location:
Phone:
Email:
Website:
China
Location:
Phone:
Email:
Website:
Garbutt, QLD Australia
61.7.4401.7700
info@campbellsci.com.au
www.campbellsci.com.au
São Paulo, SP Brazil
11.3732.3399
vendas@campbellsci.com.br
www.campbellsci.com.br
Edmonton, AB Canada
780.454.2505
dataloggers@campbellsci.ca
www.campbellsci.ca
Beijing, P. R. China
86.10.6561.0080
info@campbellsci.com.cn
www.campbellsci.com.cn
France
Location:
Phone:
Email:
Website:
Germany
Location:
Phone:
Email:
Website:
India
Location:
Phone:
Email:
Website:
South Africa
Location:
Phone:
Email:
Website:
Vincennes, France
0033.0.1.56.45.15.20
info@campbellsci.fr
www.campbellsci.fr
Bremen, Germany
49.0.421.460974.0
info@campbellsci.de
www.campbellsci.de
New Delhi, DL India
91.11.46500481.482
info@campbellsci.in
www.campbellsci.in
Stellenbosch, South Africa
27.21.8809960
sales@campbellsci.co.za
www.campbellsci.co.za
Thailand
Location:
Phone:
Email:
Website:
UK
Location:
Phone:
Email:
Website:
USA
Location:
Phone:
Email:
Website:
Bangkok, Thailand
66.2.719.3399
info@campbellsci.asia
www.campbellsci.asia
Shepshed, Loughborough,
UK
44.0.1509.601141
sales@campbellsci.co.uk
www.campbellsci.co.uk
Logan, UT USA
435.227.9120
info@campbellsci.com
www.campbellsci.com
Costa Rica
Location:
Phone:
Email:
Website:
San Pedro, Costa Rica
506.2280.1564
info@campbellsci.cc
www.campbellsci.cc
Spain
Location:
Phone:
Email:
Website:
Barcelona, Spain
34.93.2323938
info@campbellsci.es
www.campbellsci.es
 Loading...