

Page 1

COM320 Voice
Communications Modem
Revision: 9/11
Copyright © 2002-2011
Campbell Scientific, Inc.
Page 2

Page 3

Warranty
“PRODUCTS MANUFACTURED BY CAMPBELL SCIENTIFIC, INC. are
warranted by Campbell Scientific, Inc. (“Campbell”) to be free from defects in
materials and workmanship under normal use and service for twelve (12)
months from date of shipment unless otherwise specified on the corresponding
Campbell invoice. Batteries, fine-wire thermocouples, desiccant, and other
consumables have no warranty. Campbell's obligation under this warranty is
limited to repairing or replacing (at Campbell's option) defective products,
which shall be the sole and exclusive remedy under this warranty. The
customer shall assume all costs of removing, reinstalling, and shipping
defective products to Campbell. Campbell will return such products by surface
carrier prepaid within the continental United States of America. To all other
locations, Campbell will return such products best way CIP (Port of Entry)
INCOTERM® 2010, prepaid. This warranty shall not apply to any Campbell
products which have been subjected to modification, misuse, neglect, improper
service, accidents of nature, or shipping damage. This warranty is in lieu of all
other warranties, expressed or implied. The warranty for installation services
performed by Campbell such as programming to customer specifications,
electrical connections to products manufactured by Campbell, and product
specific training, is part of Campbell’s product warranty. CAMPBELL
EXPRESSLY DISCLAIMS AND EXCLUDES ANY IMPLIED
WARRANTIES OF MERCHANTABILITY OR FITNESS FOR A
PARTICULAR PURPOSE. Campbell is not liable for any special, indirect,
incidental, and/or consequential damages.”
Page 4

Assistance
Products may not be returned without prior authorization. The following
contact information is for US and International customers residing in countries
served by Campbell Scientific, Inc. directly. Affiliate companies handle
repairs for customers within their territories. Please visit
www.campbellsci.com to determine which Campbell Scientific company serves
your country.
To obtain a Returned Materials Authorization (RMA), contact CAMPBELL
SCIENTIFIC, INC., phone (435) 227-2342. After an applications engineer
determines the nature of the problem, an RMA number will be issued. Please
write this number clearly on the outside of the shipping container. Campbell
Scientific's shipping address is:
CAMPBELL SCIENTIFIC, INC.
RMA#_____
815 West 1800 North
Logan, Utah 84321-1784
For all returns, the customer must fill out a "Statement of Product Cleanliness
and Decontamination" form and comply with the requirements specified in it.
The form is available from our web site at www.campbellsci.com/repair. A
completed form must be either emailed to repair@campbellsci.com or faxed to
435-227-9579. Campbell Scientific is unable to process any returns until we
receive this form. If the form is not received within three days of product
receipt or is incomplete, the product will be returned to the customer at the
customer's expense. Campbell Scientific reserves the right to refuse service on
products that were exposed to contaminants that may cause health or safety
concerns for our employees.
Page 5

COM320 Table of Contents
PDF viewers note: These page numbers refer to the printed version of this document. Use
the Adobe Acrobat® bookmarks tab for links to specific sections.
1. Introduction..................................................................1
2. Specifications ..............................................................2
3. Quick Start....................................................................2
4. System Components ................................................. 11
4.1 COM320 Modem....................................................................................11
4.2 Surge Suppressor ....................................................................................12
4.3 Voice Capable Dataloggers ....................................................................12
4.4 Telephone ...............................................................................................12
5. Datalogger Voice Programming ...............................12
5.1 Features...................................................................................................13
5.1.1 Callback ........................................................................................13
5.1.1.1 Data Callback ......................................................................13
5.1.1.2 Voice Callback ....................................................................13
5.1.2 Voice Callin ..................................................................................13
5.1.3 Voice Storage Data .......................................................................13
5.2 Voice Instructions...................................................................................14
5.2.1 VoiceBeg / EndVoice ...................................................................14
5.2.2 VoiceSpeak ...................................................................................14
5.2.3 VoiceKey ......................................................................................14
5.2.4 VoiceNumber................................................................................15
5.2.5 DialVoice ......................................................................................15
5.2.6 VoiceHangup ................................................................................15
5.2.7 VoiceSetup....................................................................................15
5.2.8 VoicePhrases.................................................................................16
5.3 Data Callback .........................................................................................16
5.3.1 Example Data Callback Program..................................................16
5.3.2 Data Callback Instructions............................................................17
5.4 Answer in Data Mode.............................................................................18
5.5 LoggerNet...............................................................................................18
6. Hardware Installation ................................................19
6.1 Site Requirements...................................................................................19
6.2 Powering the COM320 Modem..............................................................21
6.3 Grounding the COM320 System ............................................................21
6.4 Telephone Service ..................................................................................22
6.5 Connecting to a Surge Protector .............................................................23
i
Page 6

COM320 Table of Contents
7. Troubleshooting COM320 Voice Systems ...............24
Appendices
A. IC Information .......................................................... A-1
B. Updating and Configuring the COM320 ................B-1
C. CS I/O 9 Pin Serial Port ........................................... C-1
7.1 No Communications .............................................................................. 24
7.2 Communications Problems .................................................................... 25
B.1 Removing the Cover to Access the USB Port..................................... B-1
B.2 COM320 USB Communications Cable............................................... B-1
B.3 COM320 Driver Installation ............................................................... B-1
B.4 Downloading a New Operating System to the COM320 .................... B-4
B.5 Changing COM320 Settings ............................................................... B-5
B.6 Retrieving a Vocabulary List .............................................................. B-7
D. COM320 Word List ..................................................D-1
D.1 COM320 Word List – Alphabetical Order.......................................... D-1
List of Figures
1. COM320 Voice Synthesizer Modem......................................................... 1
2. COM320 Hardware Connection Using Standard RJ11 Phone Jack ........ 20
3. COM320 / CR1000 Using Surge Protection Device................................ 21
4. COM320 Grounding and Alternate 12VDC Power................................. 22
5. Top View of Surge Suppressor Wiring.................................................... 23
6. Side View of Surge Suppressor Wiring ................................................... 24
B-1. Send OS Screen in Device Configuration.......................................... B-5
B-2. Device Configuration Screen ............................................................. B-6
B-3. Device Configuration Settings Editor ................................................ B-7
C-1. COM320’s Male 9 Pin Connector ..................................................... C-1
List of Tables
C-1. Pin Description................................................................................... C-2
ii
Page 7
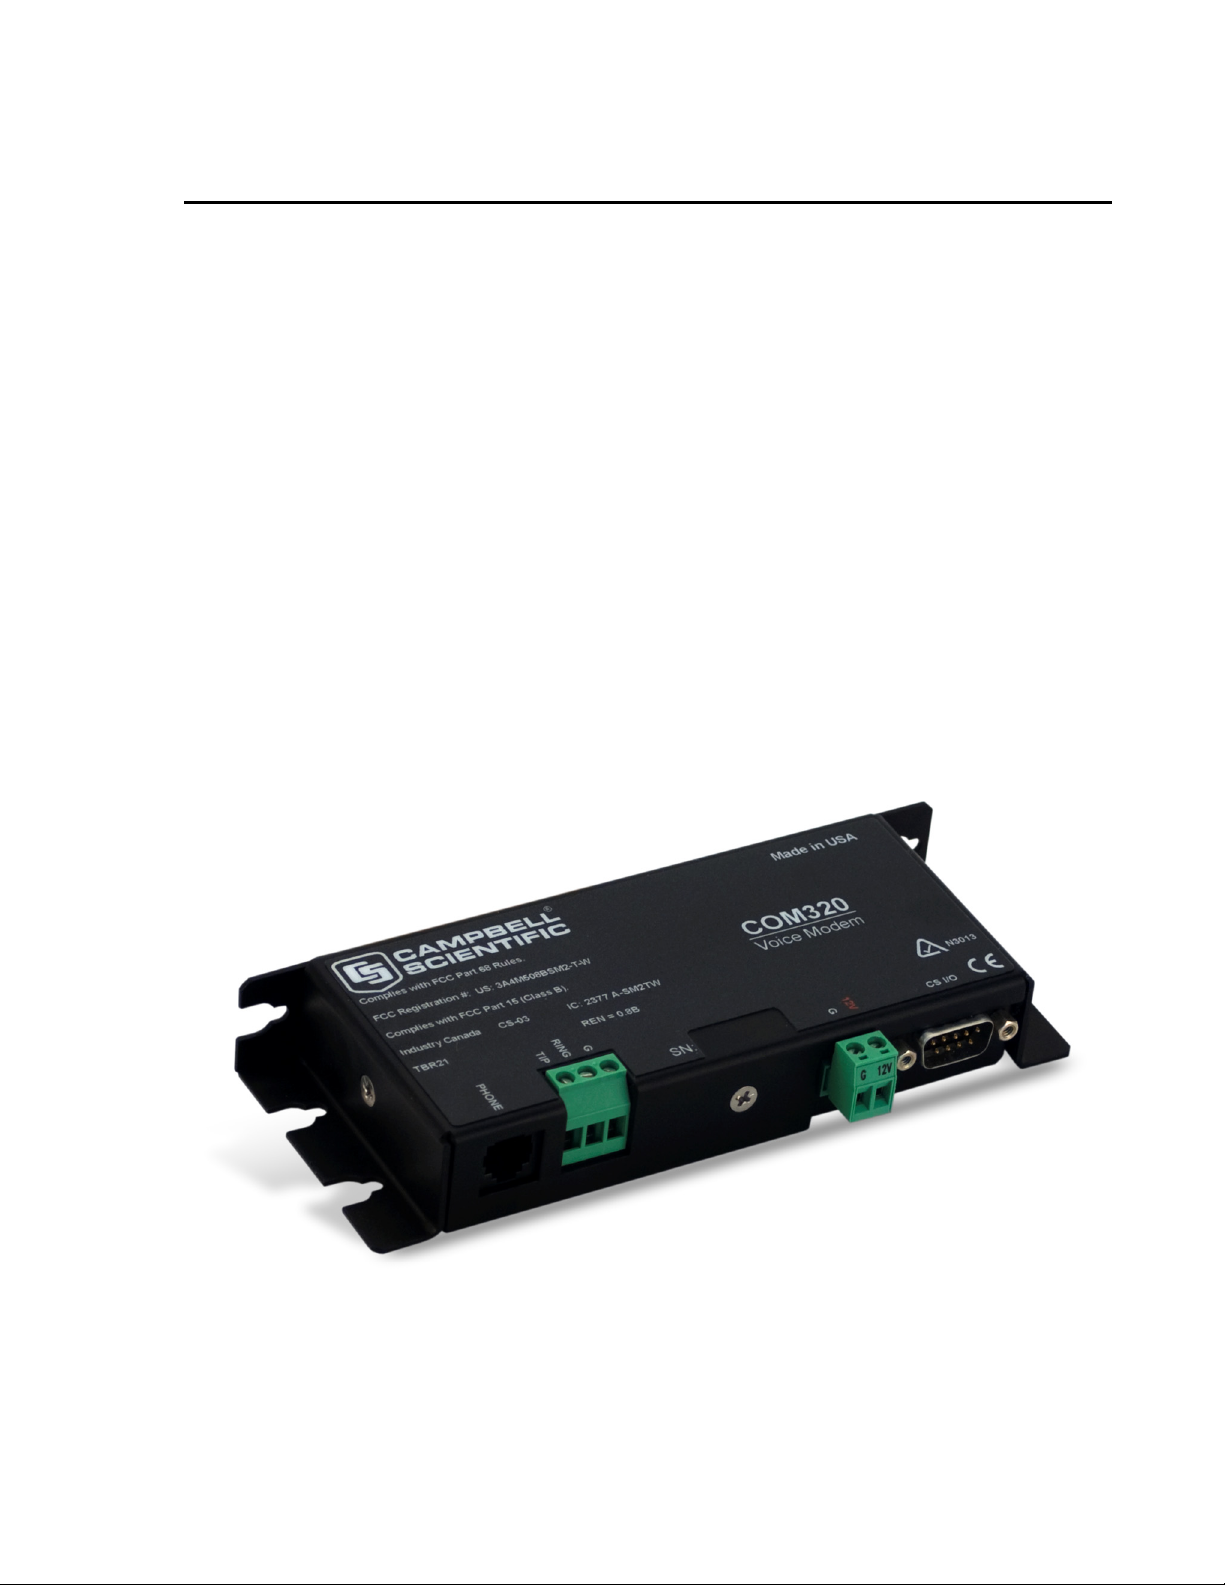
COM320 Voice Communications Modem
1. Introduction
The COM320 is a voice-synthesized modem that supports the CR800, CR850,
CR1000, and CR3000 dataloggers. The COM320 allows the datalogger to
announce over the telephone specific variable data, present state of flags and/or
control ports, and the ability to toggle flags and/or control ports. Along with
announcing information over the phone, the datalogger can also be
programmed to call specific phone numbers with different messages when
specific conditions are met.
Although the primary function of the COM320 is voice communications, the
modem is also capable of data communications. In data mode the COM320
supports standard datalogger functions including program send, data
collection, and data callback.
This manual provides information regarding COM320 specifications,
installation, and operation. Quick Start (Section 3) presents an example
CR1000 voice callback/callin program with descriptions of the code.
Section 6.3 explains how to make a good earth ground connection to maximize
protection of the COM320 against lightning and electro-static discharge.
FIGURE 1. COM320 Voice Synthesizer Modem
1
Page 8

COM320 Voice Communications Modem
2. Specifications
• Standards: V.92, K56Flex, V.90, V.34, V.32bis, V32, V23, V22bis, V22,
V.21, B212, B103
• Registration:
FCC US: 3A4M508BSM2-T-W
IC 2377 A-SM2TW
TBR21
• Operating voltage: 12 VDC
• Current drain: 100 μA quiescent; 35 mA active
• Operation: Full-duplex over standard analog phone lines
• Operating temperature: -25° to +50°C std, -40° to +85°C optional
• Dimensions: 6.5” x 1.0” x 2.6” (16.5 x 2.5 x 6.6 cm)
• Weight: 0.35 lbs (0.16 kg)
For information regarding the COM320 theory of operation refer to Appendix
A of this manual.
3. Quick Start
NOTE
This section presents Basic_Voice_2.cr1 an example voice callback/callin
program written to demonstrate functions of the COM320. It can serve as a
starting point from which to build an application program. Test the autodisconnect capability as you customize the voice code and merge your
measurement sections with the voice code.
To demo the example program, obtain the following items or their equivalent:
1) COM320 (COM320_OS.03 or later OS)
2) SC12 Cable
3) CR1000 datalogger
4) 3 inches of thermocouple wire
5) PS100 Power Supply
6) Phone modem for your PC
7) LED in series with 1000 Ohm resistor
8) Analog phone line
The COM320 cannot interface with office digital phone lines.
Connect the COM320 to analog phone lines only, such as a fax
line.
You will also need:
2
1) Windows compatible PC with available COM port
2) LoggerNet 3.4.1 or later installed on PC.
Page 9

The datalogger’s voice code is created along with the measurement program
using the CRBasic editor. It is recommended to finish and debug the voice
portion of the program first, and then add the measurement code.
The example CR1000 voice callback/callin program that follows supports the
following functions:
• Voice callin
• Voice callback
• Auto-disconnect
• Auto redial
• Alarm reset
The following steps show how to build a station to demo the example voice
callback/callin program. The voice station can further serve to test/debug a
custom voice program and merge it with an application program.
Step 1 – LoggerNet Setup
1) In LoggerNet Setup create the following device map
COM320 Voice Communications Modem
2) Configure ComPort and PhoneBase for your PC’s phone modem.
3) Configure PhoneRemote to include the COM320’s analog phone number
followed by six commas and a 9.
4) Click on CR1000phone (renamed) and verify that the PakBus Address is 1.
Step 2 – Hardware Setup
1) Start with a CR1000 having factory settings. If unsure of settings, close
LoggerNet, connect SC12 cable from PC ComPort to CR1000 RS-232
port, run Device Configuration Utility, set Serial Port to match the PC
ComPort, Connect and click on the Factory Defaults button, Apply
settings and Disconnect.
2) Turn off PS100 if it isn’t already.
3) Connect CR1000 to PS100 (turned off).
4) Connect SC12 cable from COM320 to CR1000 CS I/O port.
5) Connect analog phone line to COM320.
6) Turn on PS100.
7) Connect prepared TC to CR1000’s DIFF 7 analog input.
8) Connect LED with 1000 Ohm resistor connected to anode lead from C1 to
G (resister to C1).
3
Page 10

COM320 Voice Communications Modem
Step 3 – Send BASIC_VOICE_2.CR1 to CR1000
1) Download BASIC_VOICE_2.CR1 from CSI web site under Support,
Downloads, Program Examples, COM310 Examples to a folder on your
hard drive.
2) From LoggerNet Toolbar run CRBasic editor and open
BASIC_VOICE_2.CR1.
3) Change PHONE1 (a constant in SlowSequence near bottom of program)
to your office phone number to be used for callback and Save and
Compile the change.
4) You can change PHONE2, etc. to nearby phone numbers for testing or
comment out those lines of code. NUMPHONES should equal the number
of active phone numbers.
5) If the TC at DIFF 7 isn’t Type T, change the program to match your TC
type and Compile and Save.
6) Connect to CR1000phone and in Connect Screen, File Control send
BASIC_VOICE_2.CR1 to CR1000phone.
7) Close File Control and Disconnect from CR1000phone.
Step 4 – Callin
Step 5 – Callback
8) Your CR1000 voice station is ready to demo.
1) Using a touch-tone phone, dial the number of the analog phone line
connected to the COM320.
2) You should hear a ring or two, some faint clicking and then the voice
announcements:
CURRENT STATION DATA
PRESS ONE TO HEAR THE BATTERY VOLTAGE
PRESS TWO TO HEAR THE DATALOGGER TEMPERATURE
PRESS THREE TO HEAR THE T C TEMPERATURE
PRESS STAR TO DISCONNECT
3) Pressing 1, 2, 3, or * should produce the result indicated.
1) Grip the end of the thermocouple to raise its temperature above 85F
setting an alarm condition.
2) In a few seconds you should be able to detect the dial tones as a voice
callback proceeds. The first phone number in the program should ring.
Picking up the phone you should hear:
PRESS POUND TO RESET ALARM, PRESS STAR TO DISCONNECT
Pressing the # key you should hear:
C R ONE THOUSAND STATION
PRESS ONE TO HEAR A SENSOR VALUE
4
Page 11

COM320 Voice Communications Modem
PRESS TWO TO HEAR OR TOGGLE PORT
PRESS THREE TO HEAR OR TOGGLE FLAG
PRESS STAR TO DISCONNECT
3) Navigate around in the menus to learn the program’s capabilities:
a) Press 2 to access the Ports Menu.
b) Press 1 to read the logic state of Control Port 1.
c) Press # to toggle the logic state of Control Port 1 (C1’s LED should
turn on).
d) Press # again (C1’s LED should turn off).
e) Press * to return to “C R ONE THOUSAND STATION” menu.
f) Press * to hang up.
4) Try hanging up the phone without pressing * (disorderly exit) and see if
the modem automatically hangs up after a few seconds.
5) As you press the keys to navigate around in the menus you will find that
occasionally you get an unexpected response. Phone connections are
susceptible to noise pickup and signal attenuation. Depending on your
particular phone equipment and the phone lines and equipment between
you and the voice station, you may at times experience some of the
following:
a) You press * and the voice station hangs up but doesn’t say,
“Goodbye.”
b) A voice callback rings your phone but you pick up to silence
Certain phones are more of a problem due to low signal levels or
switch bounce.
6) Helpful hints for pressing phone keys to control a voice station
a) Press a key firmly (but not too long).
b) Allow a second between key presses.
c) Press the same key again if getting an incorrect response.
d) If no response, try pressing the same key again or press the # key to
recover.
e) If unresponsive, try rapidly pressing a series of five * keys to
disconnect station.
f) Worst case, hang up and allow 6 minutes for the voice station to reset
itself.
Following is the text of the BASIC_VOICE_2.CR1 example voice
callback/callin program employing VoiceSetup( ). The program should be
available for download on CSI’s website under Support/Downloads/Program
Examples. Following the program is a description of its main sections.
5
Page 12

COM320 Voice Communications Modem
' CR1000
' BASIC_VOICE_2.CR1
' Program employs VoiceSetup instruction available in OS CR1000.Std.12 and later
' 1st phone number is called if Diff 7 TC temperature > 85F
‘ Program continues to call callback phone number list until someone answers and presses # key
‘ resetting alarm.
' Callback phone numbers are in constants in the SlowSequence at the bottom of the program.
' Key Press Functions:
' # resets alarm condition or toggles port/flag
' 1,2,3,4,5,6,7,8 select certain menu items
' * returns one menu level (returns from subroutine) or disconnects
' 0 is not used in this program
' 9 should be avoided since it will trigger an attempt to connect to a modem
' Timeouts (for key presses and for the total on line time) are constants listed below
' and can be adjusted.
Public Value(3)
Alias Value(1) = BatteryV
Alias Value(2) = PTemp
Alias Value(3) = TCValue_F
Const KeyTimeout = 800 ' 8 second timeout waiting for key stroke before hangup
Const SecsOnLine = 360 ' 6 minutes On Line Timeout
Const STAR = 42 ' The * key (STAR)
Const POUND = 35 ' The # key
Const HangupIfKeyTimeout = TRUE ' Will hangup if times out waiting for a key
Const RINGTIME = 20 ‘ Maximum time allowed for a phone to be picked up and # pressed
Public mykey As Long
' **** VOICE CODE executed when DL detects COM320 RING or when DialVoice() succeeds ****
Public CallingOut As Boolean ' Detects whether we are calling out or calling in
' STAR (*) key will be used to return from subroutines and to disconnect if not in a subroutine
VoiceSetup (STAR,STAR,0,SecsOnLine,HangupIfKeyTimeout,CallingOut)
VoiceBeg
If CallingOut Then ' We are calling out triggered by DialVoice()
Call CallOutVoice
Else
Call CallInVoice ' We are calling in
EndIf
EndVoice
6
Page 13

COM320 Voice Communications Modem
' ***** Subroutines *****
' Called when calling in:
Sub CallInVoice
Do
VoiceSpeak ("CURRENT STATION DATA 50MS 50MS", 0)
VoiceSpeak ("PRESS ONE TO HEAR THE BATTERY VOLTAGE 50MS", 0)
VoiceSpeak ("PRESS TWO TO HEAR THE DATALOGGER TEMPERATURE 50MS", 0)
VoiceSpeak ("PRESS THREE TO HEAR THE T C TEMPERATURE 50MS", 0)
VoiceSpeak ("PRESS STAR TO DISCONNECT", 0)
Select Case VoiceKey(keytimeout)
Case 1
VoiceSpeak ("THE BATTERY VOLTAGE IS" + Value(1) + "VOLTS", 1)
Case 2
VoiceSpeak ("THE REFERENCE IS" + Value(2) + "DEGREES", 1)
Case 3
VoiceSpeak ("THE AIR TEMPERATURE IS" + Value(3) + "DEGREES", 0)
EndSelect
Loop ' Until timeout or STAR
EndSub
' Called when calling out:
Public Alarm As Boolean, ArmAlarm As Boolean, ManualAlarm As Boolean
Sub CallOutVoice
' Dial # reset to reset alarm = 0
Timer(1,Sec,2) ‘ Start timer
Do
VoiceSpeak("50MS PRESS POUND TO RESET ALARM 50MS PRESS STAR TO DISCONNECT", 0)
mykey = VoiceKey(0)
If Timer(1,Sec,4) >= RINGTIME Then ExitSub ‘ Max time to await pick up and # press
Loop Until mykey = POUND
' Someone cleared the alarm, let them proceed and do other things
Alarm = False
Do ' Until timeout
VoiceSpeak ("50MS C R ONE THOUSAND STATION 50MS 50MS", 0)
VoiceSpeak ("PRESS ONE TO HEAR A SENSOR VALUE 50MS 50MS", 0)
VoiceSpeak ("PRESS TWO TO HEAR OR TOGGLE PORT 50MS 50MS", 0)
VoiceSpeak ("PRESS STAR TO DISCONNECT 50MS 50MS", 0)
Select Case VoiceKey(KeyTimeout)
Case 1
Call SubKey1
Case 2
Call SubKey2
Case 3
Call SubKey3
EndSelect
Loop ' Until timeout
EndSub
7
Page 14

COM320 Voice Communications Modem
' Monitors a value
Sub SubKey1
Do
VoiceSpeak ("50MS PRESS SENSOR NUMBER 50MS PRESS STAR TO RETURN", 0)
mykey = VoiceKey (KeyTimeout)
If mykey = 1 Then VoiceSpeak ("50MS THE BATTERY VOLTAGE IS" + Value(1) + "VOLTS", 1)
If (mykey = 2) Then VoiceSpeak ("50MS THE REFERENCE IS" + Value(2) + "DEGREES", 1)
If (mykey = 3) Then VoiceSpeak ("50MS THE T C IS" + Value(3) + "DEGREES", 1)
Loop ' Sensor value loop
EndSub
' Read a port and possibly toggle
Sub SubKey2
Do ' Until * or timeout
Dim keybit,port As Long,state
VoiceSpeak("50MS PRESS PORT NUMBER 50MS PRESS STAR TO RETURN", 0)
port = VoiceKey(keyTimeout)
If (port > 0) AND (port <= 8) Then
keybit = 2^(port-1) ' Bit 0..7 is set in keybit. Keybit = 2^(port-1).
Do
ReadIO(state, &b11111111)
VoiceSpeak("50MS C" + port + "IS",0)
If state AND keybit Then
VoiceSpeak("ON",0)
Else
VoiceSpeak("OFF",0)
EndIf
VoiceSpeak("50MS PRESS POUND TO TOGGLE 50MS PRESS STAR TO RETURN", 0)
If VoiceKey(KeyTimeout) = POUND Then
ReadIO (state,&b11111111)
If state AND keybit Then
state = state AND (NOT keybit)
Else
state = state OR keybit
EndIf
WriteIO(&b11111111,state) ' Toggle control port
EndIf
Loop
EndIf
Loop
EndSub
‘ Read a flag and possibly toggle
Sub SubKey3
Const NUMBERFLAGS = 8
Public Flags(NUMBERFLAGS)
Do ' Until * or timeout
VoiceSpeak("50MS PRESS FLAG NUMBER 50MS PRESS STAR TO RETURN", 0)
mykey = VoiceKey(keyTimeout)
If (mykey > 0) AND (mykey <= NUMBERFLAGS) Then
Do
VoiceSpeak("50MS FLAG" + mykey + "IS",0)
8
Page 15

COM320 Voice Communications Modem
If Flags(mykey) Then
VoiceSpeak("ON",0)
Else
VoiceSpeak("OFF",0)
EndIf
VoiceSpeak("50MS PRESS POUND TO TOGGLE 50MS PRESS STAR TO RETURN", 0)
If VoiceKey(KeyTimeout) = POUND Then
flags(mykey) = NOT flags(mykey)
Else
ExitDo
EndIf
Loop
EndIf
Loop ' Port loop
EndSub
DataTable (Test,1,-1)
DataInterval (0,0,Sec,10)
Minimum (1,BatteryV,FP2,0,False)
Sample (1,PTemp,FP2)
Sample (1,TCvalue_F,FP2)
EndTable
' <<<<<<<<<<<<<<<<<< MEASUREMENT PROGRAM >>>>>>>>>>>>>>>>>>
BeginProg
Scan (1,Sec,3,0)
Battery (BatteryV)
PanelTemp (PTemp,250)
TCDiff (TCvalue_F,1,mV2_5C,7,TypeT,PTemp,True,0,250,1.8,32)
' Add measurement code here *******************
CallTable Test
NextScan
' <<< VOICE CALLBACK CODE that executes when alarm conditions are met >>>
SlowSequence
' Slow Sequence do loop forever possibly doing alarm call out
Const NUMPHONES = 3 ' 3 phone numbers to try
Const PHONE1 = "1112223333"
Const PHONE2 = "1112224444"
Const PHONE3 = "1112225555"
Dim i,Phones(NUMPHONES) As String
phones(1) = PHONE1
phones(2) = PHONE2
phones(3) = PHONE3
Alarm = FALSE
ArmAlarm = TRUE
Do ' Forever
Delay(1,1,sec)
If (TCvalue_F < 85) Then
ArmAlarm = TRUE
9
Page 16

COM320 Voice Communications Modem
ElseIf (TCvalue_F > 85 AND ArmAlarm) OR ManualAlarm = TRUE Then
ManualAlarm = False
Alarm = TRUE'
Do
For i = 1 To NUMPHONES
' Call these numbers until the alarm is cleared
If Alarm Then DialVoice(phones(i)) ' Calls only if alarm is set
Next i
If Alarm Then Delay(1,1,min)
Loop Until Alarm = FALSE
ArmAlarm = False
EndIf
Loop
EndProg
Example Program Description
NOTE
VoiceSetup( )
Bold text indicates a CRBasic instruction. Italic text indicates a
subroutine.
Basic_Voice_2.cr1 has five main sections:
1. VoiceSetup( ) - handles auto-disconnect.
2. Voice Beg / EndVoice - routes execution to callin or callout subroutines.
3. CallInVoice Subroutine - executes when VoiceBeg detects a callin
4. CallOutVoice Subroutine - executes when VoiceBeg detects a dial-up. It
looks for a pound (#) key to reset “alarm” variable to false.
5. SlowSequence - continually looks for the “alarm” variable to be true,
which if it is, it dials a list of phone numbers until “alarm” is no longer
true. It signals Voice Beg when a callout dial-up is in progress.
The VoiceSetup instruction is used to control the hang up of the COM320
voice modem. It controls which key is used to exit a subroutine and which is
used to continue to the next VoiceKey instruction. It also determines how long
the COM320 can be ‘off hook’ before the datalogger automatically hangs it up
(auto-disconnect). And it controls whether or not the modem hangs up after a
VoiceKey instruction timeout. The “Callout” parameter indicates that the
modem has received a ‘call in’ or has dialed a ‘call out.‘
10
Page 17

COM320 Voice Communications Modem
WARNING
Voice Beg / EndVoice
CallInVoice Subroutine
CallOutVoice Subroutine
The VoiceSetup SecsOnLine setting is important as it
hangs up (auto-disconnects) the modem in case
someone hangs up the phone or leaves the phone offhook without pressing star keys for an orderly “goodbye” disconnect. Test the entire program in this regard
before deployment to avoid possible lengthy off-hook
states disallowing incoming calls, running up a phone
bill and draining the station power supply.
At call in, the VoiceBeg / EndVoice instruction pair enclose the code that is
executed when the datalogger detects a ring from the COM320.
This subroutine contains the code pointed to by VoiceBeg / EndVoice that is
to execute after a call in occurs. It consists mainly of VoiceSpeak menu
announcements followed by a VoiceKey instruction prompting caller input and
a Select Case statement choosing the program’s responses to various caller key
presses.
The CallOutVoice subroutine contains the code that is to execute when
VoiceBeg / EndVoice detects that a call out phone number has been dialed. It
prompts a responding party to press the # key after which it announces the
menu selections to hear: battery voltage, panel temperature, or thermocouple
temperature (SubKey1); datalogger port status of C1 - C8 (SubKey2); or
datalogger flag status of F(1) - F(8) (SubKey3). The state of the ports and flags
can be toggled as well as heard.
SlowSequence
Contains code that continually executes looking for the Diff 7 thermocouple to
exceed 85°F in which case the variable “alarm” is set to “True” and a call out
(callback) is initiated. It dials the first phone number on the list. If no answer,
after 20 seconds the second number is dialed. The list of phone numbers is
dialed repeatedly until someone picks up and presses the # key (monitored by
the CallOutVoice subroutine) which resets “alarm” to False and allows the
responding party to proceed into the CallOutVoice menus.
4. System Components
4.1 COM320 Modem
Connecting a COM320 voice modem to a datalogger provides all COM220
supported functions plus the following:
• Voice retrieval of data (user or datalogger initiated)
• Reading/Toggling of datalogger control ports
• Reading/Toggling of program Flags
11
Page 18

COM320 Voice Communications Modem
The COM320 ships with an SC12 cable (9-pin to 9-pin) for connecting
between the modem CS I/O port and datalogger CS I/O port.
NOTE
The COM320’s communication port is designed to function with
a Campbell Scientific CS I/O port. This is not an RS-232 port.
See Appendix E for the CS I/O port description.
4.2 Surge Suppressor
If the phone company does not provide surge protection at the datalogger site,
you will need to install some. CSI offers surge protectors in two forms. Item #
6362 is a surge protector with environmental enclosure mounting hardware.
Item # 4330 is the surge protector with no mounting hardware (see Section
6.5).
4.3 Voice Capable Dataloggers
The COM320 is compatible only with the CR800, CR850, CR1000, and
CR3000 dataloggers. They must have an operating system equal to, or greater
than, the following: CR800/CR850 version 7, CR1000 version 16 and CR3000
version 9. It is not compatible with the CR200-series, CR5000, CR7,
CR9000X, or any of our retired dataloggers.
The COM320 supports such functions as program send, data collection, clock
check, voice callback, voice calling, and data callback.
The modem also supports concurrent communications. Dataloggers with
multiple peripherals (COM320, RF450, RF401, MD485, NL115, CR1000KD,
and SC32B) can communicate simultaneously via those peripherals.
4.4 Telephone
A touch-tone phone is normally used to call the COM320 modem. A rotary
phone will work if the programmed voice announcements do not require you to
navigate through the COM320’s menu system.
NOTE
The COM320 must connect to an analog phone line. Some
office environment PBX phone lines are digital and don’t
interface to an analog modem such as the COM320. Of course,
any phone may be used to call in to or receive callbacks from the
COM320. A touch-tone phone is necessary for input.
5. Datalogger Voice Programming
The voice code for the datalogger is integrated with the main program. It is
probably advantageous to write your custom voice program and debug it
before adding the measurement part. The example voice callback/callin
program in Quick Start can provide a starting point for your program.
12
Page 19

5.1 Features
5.1.1 Callback
5.1.1.1 Data Callback
COM320 Voice Communications Modem
The voice instructions listed in 5.2 are combined with standard CRBasic
instructions to create the code needed for telephone answering, dialing, voicing
word strings, voicing data, receiving key presses from the remote phone, and
acting upon those key presses.
Callback is the ability of a datalogger/COM320 station to initiate a phone call
‘back’ to a PC running LoggerNet (data mode) or to a telephone (voice mode).
Data callback and voice callback code can be included in the same program.
See example CR1000 voice callback/callin program for details.
A station can be programmed to do a data callback in the event specified
conditions are met to a PC (with phone modem) running LoggerNet. Data
callback causes LoggerNet to collect datalogger data marked for collection.
You must enable Callback (sometimes in two places) in LoggerNet Setup.
The datalogger program uses a SendVariables instruction to effect a data
callback (see example data callback program below). No callback ID is used.
5.1.1.2 Voice Callback
The COM320 gives you the ability to do voice callbacks. You can program a
station to call one or more telephone numbers and announce an alarm message
when conditions you specify are met. You can input multiple phone numbers
to increase the probability that someone will receive the message.
Dataloggers accomplish voice callback with a combination of VoiceSetup,
VoiceKey, VoiceSpeak, and DialVoice instructions (see example voice
callback/callin program).
5.1.2 Voice Callin
Callin is the ability of a station to accept a phone call and announce words and
data and, possibly, accept menu key presses. All voice capable dataloggers
support callin. The dataloggers require that callin code be added to the
program (see example voice callback/callin program in Quick Start).
5.1.3 Voice Storage Data
The COM320 recites data stored in variables. You can also recite data stored
in tables by setting a variable equal to Tablename.Fieldname (fieldname index,
records back). You can then get a specific field from the data table (for more
information see CR1000 section Program Access to Data Tables).
The VoiceSpeak code might look like this:
TC_1 = Public.AirTemp(1,1)
VoiceSpeak ("THE AIR TEMPERATURE WAS" + TC_1 + "DEGREES", 0)
13
Page 20

COM320 Voice Communications Modem
5.2 Voice Instructions
The Quick Start example voice callback/callin program
“BASIC_VOICE_2.CR1” provides a starting point from which to build the
features you want.
Patterned after the example program in Quick Start, voice instructions can be
combined in a variety of ways to provide phone access to datalogger data and
for control of datalogger flags/output control ports.
5.2.1 VoiceBeg / EndVoice
This instruction pair contains the code executed when the datalogger detects a
RING signal from the COM320 (a call in). It is placed in the declarations
portion of the program before the BeginProg instruction. The EndVoice
instruction hangs up the modem. So, VoiceHangup is not required unless you
want to hang up the modem under certain condition(s) prior to the execution of
the EndVoice instruction.
The VoiceKey instruction is also used to add a delay before the EndVoice
instruction is executed so that the datalogger will not end the VoiceSpeak
command before the spoken message is completed.
5.2.2 VoiceSpeak
5.2.3 VoiceKey
The VoiceSpeak() instruction defines the string spoken by the voice modem.
The string is comprised of concatenated words and string variables. To ensure
coded words are valid, CRBasic checks them against the voice.txt file, which
mirrors the word list internal to the COM320. Voice.txt resides in the
“C:\CAMPBELLSCI\LIB\COMPILER” folder. To use VoiceSpeak(), select it
from the instruction list in CRBasic Editor and click Insert. CRBasic Editor
brings up a list of available words. Words can be inserted in any order. Words
are enclosed with quotes and variables are concatenated with words using a
plus sign. For example, "50MS THE BATTERY VOLTAGE IS" + Value(1) +
"VOLTS" is a valid string. The word “50MS” inserts a 50 millisecond pause
during the announcement. 50MS can be inserted multiple times in series.
The VoiceKey instruction is used to add a delay before the EndVoice
instruction is executed so that the datalogger does not end the VoiceSpeak
command before the announcement is finished.
The VoiceKey instruction’s timeout parameter is used to add a delay (in 0.01
seconds) before EndVoice or Loop is executed. Multiple VoiceKey
instructions placed before an EndVoice or Loop instruction increase the delay.
The VoiceKey timeout provides silent time for a user to respond to the
announced menu; however, the user can respond by pressing a key in the
middle of an announcement.
14
If doing concurrent communications (via multiple communication peripherals)
with your datalogger it is recommended that the VoiceKey timeout be
extended to over 5 seconds.
VoiceSetup’s UseTimeout parameter determines whether or not the datalogger
will hang up the COM320 after the timeout in the VoiceKey instruction
expires.
Page 21

5.2.4 VoiceNumber
5.2.5 DialVoice
5.2.6 VoiceHangup
COM320 Voice Communications Modem
The VoiceNumber instruction returns the accumulated touch tone digits that
are received prior to the receipt of a # or * key. The example voice
callback/callin program uses no VoiceNumber instructions; however, this
instruction may be useful for phone transfer of long numbers such as for
passwords, etc.
The DialVoice instruction is used to define the dialing string for a COM320
voice modem, usually for voice callback. If the DialVoice instruction is set
equal to a variable, a True will be returned if the communication attempt was
successful or a False will be returned if it failed. VoiceHangup is used after a
communication attempt to hang up the voice modem. The DialString is the
telephone number and any other codes used to dial the modem. The DialString
can be a variable. A comma in the DialString inserts a 2 second pause.
The VoiceHangup instruction is used most often with the DialVoice instruction
to hang up the modem after communication. The VoiceHangup instruction is
not needed if the voice commands are enclosed within the VoiceBeg /
EndVoice instructions.
5.2.7 VoiceSetup
The VoiceSetup instruction controls the hang up of the COM320 voice
modem. It also allows you to specify certain handset key functions.
The HangUpKey parameter specifies the key that, when pressed, will
disconnect the COM320.
The ExitSubKey parameter specifies the key that will exit a subroutine if the
datalogger is running one. The ContinueKey parameter specifies the key that
will begin announcing the next VoiceSpeak phrase.
The SecsOnLine parameter specifies the maximum number of seconds that the
COM320 will be off-hook before it is hung up by the datalogger.
The UseTimeout parameter determines whether or not the datalogger will hang
up the COM320 after the timeout in the VoiceKey instruction expires. If this
parameter is set to True, the timeout will be used. If False, the timeout will not
be used.
The CallOut parameter is a Boolean value that indicates the COM320 mode.
When the value returned in this parameter is True the datalogger has called
out. When the value is False the datalogger has received an incoming call.
If the same ASCII character is used for HangUpKey and ExitSubKey, the
datalogger will exit a subroutine if it is in one, otherwise, it will hang up the
COM320. When the specified ContinueKey is pressed, the COM320 will skip
the current VoiceSpeak string and move to the next one. If any other key is
pressed, the COM320 will skip to the next group of VoiceSpeak instructions.
15
Page 22

COM320 Voice Communications Modem
5.2.8 VoicePhrases
The VoicePhrases instruction is used to provide a list of phrases for a
VoiceSpeak instruction. This instruction allows the VoiceSpeak instruction to
output a string from a list of several strings, depending upon some condition in
the program.
5.3 Data Callback
The COM320 can be put into data mode to accomplish data callback,
instructing LoggerNet to do a collection of datalogger data.
5.3.1 Example Data Callback Program
The following program (downloadable from CSI web site under
Support/Download/Program Examples) does data callbacks to the phone
number associated with the DialModem instruction whenever the TC
temperature exceeds 85°F. To complete the system, provide a PC running
LoggerNet with a phone modem connected to the phone line dialed.
' CR1000 Series Datalogger
' BASIC_DATA_CLBK_1.CR1
' Program description: Does a DATA CALLBACK via COM320 when DIFF 7 TC temp > 85F
' LoggerNet Map:
' ComPort
' PhoneBase
' PhoneRemote
' PakBusPort
' CR1000 (PakBus Address matches remote DL)
‘ Use Type T thermocouple or change TCDiff instruction accordingly
Public batt_volt, Result
Public PTemp, TCvalue_F, dummy
Dim DialSuccess
DataTable (TestA,1,1000)
DataInterval (0,0,Sec,10)
Sample (1,PTemp,FP2)
Sample (1,TCvalue_F,FP2)
Sample (1,batt_volt,FP2)
Sample (1,DialSuccess,FP2)
Sample (1,Result,FP2)
EndTable
DataTable (TestB,1,1000)
DataInterval (0,0,Sec,10)
Sample (1,PTemp,IEEE4)
Sample (1,TCvalue_F,IEEE4)
Average (1,TCvalue_F,IEEE4,False)
Sample (1,batt_volt,FP2)
16
Page 23

COM320 Voice Communications Modem
Sample (1,DialSuccess,FP2)
Sample (1,Result,FP2)
EndTable
DialSequence (4094)
DialSuccess = DialModem (COM320, 9600,"1112223333","") 'Phone number to call
EndDialSequence (DialSuccess)
BeginProg
Scan (30,Sec,0,0)
PanelTemp (PTemp,250)
Battery (Batt_volt)
dummy = 0
TCDiff (TCvalue_F,1,mV2_5C,7,TypeT,PTemp,True ,0,250,1.8,32)
If TCvalue_F > 85 then
SendVariables (Result,COM320,4094,4094,0000,2500,"Public","Callback",dummy,1)
Delay (1,15,Sec) ‘Prevents too soon callback
Endif
CallTable TestA
CallTable TestB
NextScan
EndProg
In the above data callback program, the phone number is dialed in the
DialSequence/EndDialSequence using the DialModem instruction. Any
needed re-dials are handled by EndDialSequence (DialSuccess).
LoggerNet recognizes the incoming call as a data callback by the arrival of the
“Public” and “Callback” strings sent by the SendVariables instruction in the
Table and Field parameters (visible in low-level log for ComPort). Callback
must be enabled in both the station and the ComPort screens.
The 25 second SendVariables timeout (2500 hundredths of a sec) allows the
slow phone connection time to build.
The program should be available for download from our website under
Support/Downloads/Program Examples.
5.3.2 Data Callback Instructions
The following instructions are used to program a data callback.
DialSequence/EndDialSequence
The DialSequence/EndDialSequence instructions are used to define the code
necessary to route packets to a PakBus datalogger. Any time an instruction
(SendVariables) in the main program requires that communication be made
17
Page 24

COM320 Voice Communications Modem
with the remote PakBus device identified by the PakBusAddr parameter
(LoggerNet server with PakBus address = 4094), the DialSequence code for
that datalogger will be executed.
DialModem
The DialModem instruction is used to send a modem dial string out one of the
datalogger's ports. DialModem can be used within DialSequence /
EndDialSequence to specify a communication route to be used for a PakBus
device.
The ResponseString is used to specify the response code expected back from
the modem when a connection is made. When a null string is entered ("") the
default is "1"+ CHR(13).
SendVariables
The SendVariables instruction is used to send value(s) from a variable or
variable array to a data table in a destination PakBus device.
In the example data callback program, the variable “dummy” is sent to
LoggerNet as a signal for LoggerNet to begin collection of the datalogger.
5.4 Answer in Data Mode
In most applications the COM320 will answer with voice prompts and phrases.
If a phone modem was used in making the call, in order to establish a data
connection, a series of commas followed by a “9” would be appended to the
dialed phone number to switch the COM320 into a data mode.
Some applications may require the COM320 to answer in a data mode without
the intervention of sending the “9”. This can be done via datalogger control by
having a “#9” as the last or only word in a VoiceSpeak instruction. Example:
VoiceSpeak(“#9”,0).
You can also force the modem to hang-up by using the word “#HANGUP” as
the last or only word in the VoiceSpeak instruction.
5.5 LoggerNet
By default the COM320 operates in voice mode, enabling you to call a station
and hear voice announcements or enabling the station to do a callback to you
and announce an alarm. The COM320 also has the ability to function in data
mode. In data mode, the COM320 supports data collection and other standard
LoggerNet functions.
You can set up LoggerNet to call and perform scheduled collections of storage
data or you can program the datalogger to do callbacks under the conditions
you specify at which time LoggerNet will collect the data.
18
For scheduled (or manual) collection you change the COM320 to data mode
by including six commas and a “9” in LoggerNet’s dial script in the Setup
Screen’s Hardware Tab for PhoneRemote.
Page 25

For callback collection, the datalogger’s DialSequence instruction changes the
COM320 from default voice mode to data mode.
The commas create a delay so that the “9” is received by the COM320 during
the voice announcement. When the COM320 detects the “9” it disables voice
communications and enables data mode for the remainder of that connection.
For example, in LoggerNet, if the phone number is "555-4321" then in order to
call the COM320 and enable data mode the dial script becomes:
In LoggerNet a comma represents a 2 second delay. You may need to adjust
the number of commas so that the “9” occurs during the voice announcement,
depending upon the length of time required to establish the connection with the
modem. The COM320 must be speaking when the “9” is sent.
6. Hardware Installation
6.1 Site Requirements
COM320 Voice Communications Modem
"555-4321,,,,,,9"
NOTE
Connection to telephone company provided COIN service
(Central Office Implemented systems) is prohibited. Connection
to party line service is subject to state tariffs.
The COM320 is compatible with standard (analog) telephone lines. It
connects to the telephone line by means of a USOC RJ11C jack (standard
modular telephone jack). Connect the cable from the telephone RJ11C jack to
the modem as shown in Figure 2.
19
Page 26

COM320 Voice Communications Modem
Telephone Wall
Jack
Earth Ground
12 34 56 78
SE
1234
DIFF
L
H
H
11
SE
109
5678
DIFF
H
L
H
POWER OUT
SW-12
GGGGC1C2C3
5V
Earth
Ground
1412
12V
12V
SDM
HLHLL
EX1
15 1613
HLHLL
EX2
COM2 COM3 COM4
COM1
Tx
Rx Tx Rx Tx Rx Tx Rx
C4
G
POWER IN
G 12V
P2
P1
EX3
C5
C6C7C8
CAUTION
DC ONLY
12VG
GROUND
LUG
CR1000
WIRING PANEL
RS-232 (Not Isolated)
CS I/O
G
SN:
PERIPHERAL PORT
MADE IN USA
SC12 Cable
FIGURE 2. COM320 Hardware Connection Using Standard RJ11
Phone Jack
20
Page 27

12 34 56 78
SE
1234
DIFF
L
H
H
11
SE
109
5678
DIFF
H
L
H
POWER OUT
SW-12
GGGGC1C2C3
5V
12V
HLHLL
1412
15 1613
HLHLL
COM1
Tx
Rx Tx Rx Tx Rx Tx Rx
12V
SDM
EX1
P1
EX3
EX2
COM2 COM3 COM4
C5
C4
G
C6C7C8
COM320 Voice Communications Modem
POWER IN
G12V
G
GROUND
LUG
12VG
CR1000
WIRING PANEL
RS-232 (Not Isolated)
CS I/O
SN:
CAUTION
DC ONLY
PERIPHERAL PORT
MADE IN USA
P2
Earth
Ground
Phone Line
Transient Protector
(Model 6362 or 2372-01)
FIGURE 3. COM320 / CR1000 Using Surge Protection Device
(where there’s no available Standard RJ11 Connection)
6.2 Powering the COM320 Modem
The datalogger provides 12 VDC on the CS I/O connector’s pin 8 for powering
peripherals such as the COM320.
6.3 Grounding the COM320 System
Connect the green 14 AWG grounding wire (provided with the COM320) to
the GND terminal on the COM320 and to the station enclosure’s earth ground
connection. It is important that you connect the COM320 and datalogger
directly to a high quality earth ground. Read the datalogger manual section on
GROUNDING for details on creating such an earth ground.
Blue = Ring
Blue/White = Tip
SC12 Cable
Burial Phone Cable
WARNING
A quality EARTH GROUND connection to the COM320
and datalogger maximizes protection against electrostatic discharge! Follow carefully the EARTH
GROUND scheme in Figure 4. The COM320 employs
spark gaps on the phone lines; however, they will be
ineffective without quality earth grounding.
21
Page 28

COM320 Voice Communications Modem
Telephone Wall
Jack
Earth Ground
12 34 56 78
SE
1234
DIFF
L
H
H
11
SE
109
5678
DIFF
H
L
H
POWER OUT
SW-12
GGGGC1C2C3
5V
Earth
Ground
1412
12V
12V
SDM
HLHLL
EX1
15 1613
HLHLL
EX2
COM2 COM3 COM4
COM1
Tx
Rx Tx Rx Tx Rx Tx Rx
C4
G
POWER IN
G 12V
P2
P1
EX3
C5
C6C7C8
CAUTION
DC ONLY
12VG
GROUND
LUG
CR1000
WIRING PANEL
RS-232 (Not Isolated)
CS I/O
G
SN:
PERIPHERAL PORT
MADE IN USA
SC12 Cable
FIGURE 4. COM320 Grounding and Alternate 12VDC Power
6.4 Telephone Service
Telephone companies occasionally make changes in their equipment,
operations, or procedures. If you have any questions about your telephone
line, such as how many pieces of equipment you can connect to it, the
telephone company should be able to furnish this information upon request. If
the telephone company requests information from you concerning the
equipment that you have connected to your telephone line, the COM320 label
shows its FCC registration number and ringer equivalence number (REN).
COM320 information pertaining to the FCC and Industry Canada is available
in Appendices B and C.
If any of your telephone equipment is malfunctioning, you should remove it
immediately from the telephone line as it may damage the telephone network.
If the telephone company notices a problem from their end, they may
temporarily discontinue service. They should notify you in advance of
disconnection and give you opportunity to correct the problem. If not feasible,
they should notify you as soon as possible.
22
NOTE
If the local phone company does not provide phone-line surge
protection, a Campbell Scientific surge suppressor should be
used. Refer to Section 6.5 for more information.
Page 29

6.5 Connecting to a Surge Protector
Campbell Scientific offers two surge protectors (CSI model 4330 and CSI
model 6362). The 4330 and 6362 are essentially the same, except the 6362 has
hardware for mounting to an enclosure backplate.
COM320 Voice Communications Modem
NOTE
CAUTION
The 4330 is also known as the 2374-01.
The 4330 and 6362 have a protector element for each line that consists of a
heavy-duty-rated, two-element gas tube, an external backup gap assembly, and
a switch-grade shorting mechanism. The gas tubes (tip and ring) are sealed in
a fire-resistant plastic body. DC Breakdown @ 100 V/sec is 300 to 500 volts;
DC extinguishing @ 52 V, 135 V, and 150 V is less than 150 milliseconds.
Figures 5 and 6 show the wiring for connecting the surge suppressor. Color
coding of wires may vary. The important consideration is to follow TIP all the
way through and RING all the way through. Getting wires crossed typically
does not damage anything. The phone line just will not work until the wires
are straightened out.
Phone wires are live, typically with low voltage (30-50
Vdc). While not harmful in most situations, Campbell
Scientific recommends installing the surge protector in dry
weather only by technicians with a healthy heart.
FIGURE 5. Top View of Surge Suppressor Wiring
23
Page 30

COM320 Voice Communications Modem
FIGURE 6. Side View of Surge Suppressor Wiring
7. Troubleshooting COM320 Voice Systems
Following are some possible reasons for your COM320 system not working or
not working properly.
7.1 No Communications
Voice Mode — No voice announcements when you call the station
1) The COM320 is connected to a digital rather than an analog phone line.
2) The COM320 configuration was changed from its default factory settings
(see Appendix D).
Data Mode — Can’t connect to the station with LoggerNet software.
1) No commas and/or “9” added to the dial string in LoggerNet to
temporarily put the COM320 into data mode.
2) The “9” is being dialed before the COM320 ‘picks up’ and voices the
announcement (not enough commas).
3) No phone number in the LoggerNet dial string.
4) COM320 is connected to a digital rather than an analog phone line.
24
5) LoggerNet Setup configured for the wrong PC modem.
6) LoggerNet configured for a baud rate the station cannot handle (try 9600).
7) COM320 configuration was changed from its default factory settings
(see Appendix D).
Page 31

7.2 Communications Problems
Voice Mode
1) Can’t get beyond the initial voice announcement
a) The security code was not received. Try pressing # again, then xxx#
again (where xxx = modem security code).
2) Pressing handset keys sometimes fails to produce the correct response.
a) Handset keys not being pressed long enough.
b) Key presses (especially # #) were not spaced far enough apart and the
station is waiting for the last key (#).
c) Phone line introducing excessive noise or signal attenuation.
d) Handset introducing excessive noise or producing too low signal
levels.
3) Station has become unresponsive (try the following in the order given).
COM320 Voice Communications Modem
a) Press # which will usually announce the current menu again.
b) Press five or more * (star) keys in rapid succession to recover.
c) Allow station to time out and disconnect (usually 15 – 40 sec, rarely 5
min), then call again.
4) Volume levels vary.
This is normal due to the PCM voice encoding compression scheme.
Sometimes the modem will negotiate a higher volume for a given
connection.
25
Page 32

COM320 Voice Communications Modem
26
Page 33

Appendix A. IC Information
NOTE
Industry Canada (IC) was formerly known as DOC.
CP-01, Issue 8, Part I Section 14.1
“NOTICE: The Industry Canada label identifies certified equipment. This
certification means that the equipment meets certain telecommunications
network protective, operational and safety requirements as prescribed in the
appropriate Terminal Equipment Technical Requirements document(s). The
Department does not guarantee the equipment will operate to the user’s
satisfaction.
“Before installing this equipment, users should ensure that it is permissible to
be connected to the facilities of the local telecommunications company. The
equipment must also be installed using an acceptable method of connection.
The customer should be aware that compliance with the above conditions may
not prevent degradation of service in some situations.
“Repairs to certified equipment should be coordinated by a representative
designated by the supplier. Any repairs or alterations made by the user to this
equipment, or equipment malfunctions, may give the telecommunications
company cause to request the user to disconnect the equipment.
“Users should ensure for their own protection that the electrical ground
connections of the power utility, telephone lines and internal metallic water
pipe system, if present, are connected together. This precaution may be
particularly important in rural areas.
CAUTION
Users should not attempt to make such connections
themselves, but should contact the appropriate electric
inspection authority, or electrician, as appropriate.”
CP-01, Issue 8, Part I Section 14.2
“NOTICE: The Ringer Equivalence Number (REN) assigned to each terminal
device provides an indication of the maximum number of terminals allowed to
be connected to a telephone interface. The termination on an interface may
consist of any combination of devices subject only to the requirement that the
sum of the Ringer Equivalence Numbers of all the devices does not exceed 5.”
A-1
Page 34

Appendix A. IC Information
A-2
Page 35

Appendix B. Updating and Configuring the COM320
The COM320 has an internal USB port for connecting the mode to a computer.
Connection to a computer is required to install the drivers, download an
operating system, change COM320 settings, and retrieve a vocabulary list.
NOTE
The COM320’s case must be removed to access the USB port
(see Section B.1).
B.1 Removing the Cover to Access the USB Port
1) Use a Philips screwdriver to remove the five screws on the sides of the
COM320.
2) Lift off the case.
B.2 COM320 USB Communications Cable
The COM320 uses a USB Type-A Male to Type-B Male cable (Campbell
Scientific #17648) for updating firmware, vocabulary and configuration. This
is a common USB cable used with USB connected printers and scanners.
B.3 COM320 Driver Installation
If this is the first time a COM320 has been plugged into your computer, it will
be necessary to install the drivers to enable communication with the COM320.
The driver is available from the www.campbellsci.com/download
“View by Download” select COM320 USB Driver). Assuming that you have
already downloaded the driver to your computer, this procedure should walk
you through the path of installing the driver on Windows XP. In order to install
this driver, follow this procedure:
(under
1) Remove the cover of the COM320 to access the USB port (see Section
B.1).
2) Connect a USB cable between the COM320's USB port and one of your
computer's USB ports.
3) Power the modem by connecting the modem’s green 12V and G terminals
to a 12 Vdc power source or by connecting the modem to the CS I/O port
of a datalogger.
B-1
Page 36

Appendix B. Updating and Configuring the COM320
4) After some delay, your computer should show a dialog similar to that
shown below. Since the driver is obtained from Campbell Scientific, you
should select the option No, not this time in the dialog.
5) After pressing the Next button, you will need to specify that the driver
be installed from a specific location as shown below:
B-2
Page 37

Appendix B. Updating and Configuring the COM320
6) In the next dialog, you will need to specify the location where the
downloaded driver file was stored. In the example shown, the driver was
stored in the c:\download directory.
7) You will get a warning from the operating system indicating that the
driver is "unsigned". In order to continue with installation, you need to
select the Continue Anyway button.
B-3
Page 38

Appendix B. Updating and Configuring the COM320
8) When the driver installation process has completed, the following final
dialog should be shown:
B.4 Downloading a New Operating System to the
COM320
To download a new operating system to the COM320, follow these steps:
1) You must remove the top cover of the modem to expose the USB port.
This is done by first removing the five Phillips head screws on the sides of
the COM320.
2) You must also provide a power source (+12VDC) for the modem. This
can be done by applying power on the green 12Vand G terminals on the
device or plugging the modem into the CS I/O port of a datalogger.
3) Connect the COM320 USB port to one of the USB ports on your computer
and wait for the computer operating system to load its device drivers. If
this is the first time a COM320 has been plugged into your computer, you
may need to install the device driver for the COM320. See B.2 for device
driver installation.
4) Run Device Configuration Utility ver 1.12 or newer.
5) Select COM320 from the Device Configuration utility menu and select the
Send OS tab at the top (Figure B-1).
B-4
6) Once the device drivers have been successfully loaded, you should be able
to see the serial port name allocated for the modem in the PC Serial Port
field when you click on the browse button.
Page 39

Appendix B. Updating and Configuring the COM320
7) Click the Start button.
8) In the resulting file open dialogue box that appears, select the file that
should be sent as the modem's operating system.
CAUTION
CAUTION
Do not attempt to load any operating system other than
that designed for the COM320 modem.
9) The program should now send the operating system to the modem.
Interrupting this process may corrupt the modem operating
system.
FIGURE B-1. Send OS Screen in Device Configuration
B.5 Changing COM320 Settings
There are two items that can be configured in the COM320, the number of
rings before the COM320 answers and the country code. You will need the
Campbell Scientific Device Configuration Utility ver 1.12 or newer and a USB
Type-A male to Type-B male cable to change these settings.
1) You must remove the top cover of the modem to expose the USB port.
This is done by first removing the five Phillips head screws on the sides of
the COM320.
B-5
Page 40

Appendix B. Updating and Configuring the COM320
2) You must also provide a power source (+12VDC) for the modem. This
can be done by applying power on the green 12Vand G terminals on the
device or plugging the modem into the CS I/O port of a datalogger.
3) Connect the COM320 USB port to one of the USB ports on your computer
and wait for the computer operating system to load its device drivers. If
this is the first time a COM320 has been plugged into your computer, you
may need to install the device driver for the COM320. See B.3 for device
driver installation.
4) Run Device Configuration Utility ver 1.12 or newer.
5) Select COM320 from the Device Configuration utility menu and select the
COM320 tab at the top (Figure B-2).
6) Once the device drivers have been successfully loaded, you should be able
to see the serial port name allocated for the modem in the PC Serial Port
field when you click on the browse button.
B-6
FIGURE B-2. Device Configuration Screen
Page 41

Appendix B. Updating and Configuring the COM320
7) Click on the Connect button to connect to the COM320 and enter the
settings editor (Figure B-3).
FIGURE B-3. Device Configuration Settings Editor
CAUTION
When doing datalogger to datalogger communications with
the COM320, if more than six rings are specified, the
datalogger may time out before the modem answers;
communication will never be established! Be sure to try
the set up locally before installing at a remote location.
B.6 Retrieving a Vocabulary List
In the case when you are unsure of the COM320’s current vocabulary, a list of
words can be retrieved from the modem. You will need a USB cable, the
Device Configuration Utility or terminal program, a +12 volt power supply and
the COM320 drivers installed on your computer as described in the section
entitled COM320 driver installation instructions.
With the above requirements taken care of do the following:
1) Connect the USB cable between the computer and the COM320.
2) Apply +12 volts to the modem via the CS I/O port from a datalogger or
the +12 volt and ground terminals.
B-7
Page 42

Appendix B. Updating and Configuring the COM320
3) Launch the Device Configuration Utility and select device type Unknown,
the correct PC serial port connected to the COM320, a baud rate of 9600
and press the connect button.
4) By pressing the “V” key you should see a list of words scroll by in the
Device Configuration Utility terminal window.
If you want to save this list to a file, select the Start Export button and enter a
name for the file it will create. Now press the “V” key and wait until the
words stop scrolling and press the End Export button to create the file This
new file is a complete vocabulary list from the COM320 voice modem.
Start with the CRBasic Editor version 3.1 you can select multiple vocabulary
files from the VoiceSpeak vocabulary window if the file name begins with
voice and ends with .txt (i.e. VoiceTestWords.txt). The file needs to be located
in the directory where the CRBasic Editor looks for its compilers (default
location is C:\Campbellsci\Lib\Compilers).
B-8
Page 43

Appendix C. CS I/O 9 Pin Serial Port
NOTE
Pin Description
The COM320’s CS I/O port is not a standard RS-232
connection.
The COM320 modem connects to the datalogger using an SC12 cable
connected to the datalogger’s CS I/O port. The COM320’s connector
configuration is shown in Figure C-1. Table C-1 shows the I/O pin
configuration, and gives a brief description of the function of each pin.
CS I/O
FIGURE C-1. COM320’s Male 9 Pin Connector
C-1
Page 44

Appendix C. CS I/O 9 Pin Serial Port
ABR = Abbreviation for the function name.
PIN = Pin number.
O = Signal Out of the datalogger to a peripheral.
I = Signal Into the datalogger from a peripheral.
PIN ABR I/O Description
1 5V I 5 VDC supply (not used for COM320).
2 SG Signal Ground: Provides a power return for pin 1
3 RING O Ring: Raised by the modem to put the datalogger
4 RXD O Receive Data: Serial data transmitted by the
5 ME I Modem Enable: A logic high internally switches
TABLE C-1. Pin Description
(5V), and is used as a reference for voltage levels.
in the telecommunications mode.
modem are transmitted on pin 4.
power to the modem. A logic low internally
powers down the modem.
6 SDE I Synchronous Device Enable: A logic high
disables communication with the modem, without
removing power or changing the modem’s mode.
8 TE I +12 VDC power supply.
9
TXD
Transmit Data: Serial data are transmitted from
I
the datalogger to the modem on pin 9; logic low
marking (0V) logic high spacing (5V) standard
asynchronous ASCII, 8 data bits, no parity, 1 start
bit, 1 stop bit, 300, 1200, 9600, 76,800 baud (user
selectable).
C-2
Page 45

Appendix D. COM320 Word List
D.1 COM320 Word List - Alphabetical Order
500MS
50MS
A
A-M
ABOVE
ACCUMULATE
ACKNOWLEDGE
ACRE
ADDITION
ADDITIONAL
AGAIN
AGO
AIR
ALARM
ALL
AMMONIUM
AND
APPROACH
ARE
AREA
AT
AUTOMATION
AVAILABLE
AVERAGE
B
BACK-UP
BAROMETRIC
BARS
BATTERY
BAY
BE
BEAVER
BEDS
BEEN
BEHIND
BELOW
BIG
BILLION
BLAST
BOILER
BUILDING
BY
C
C-O
CALCIUM
CALIBRATE
CALL
CALLBACK
CALLS
CAMPBELL
CAN
CANAL
CELSIUS
CEMENT
CENTI
CENTRAL
CHECK
CHILL
CHILLER
CHLORIDE
CHLORINE
CLOSED
CODE
COMPUTED
CONDITIONS
CONDUCTIVITY
CONTACT
CORRECTED
CREEK
CROSSING
CUBIC
CURRENT
CYCLES
D
D-O
DAM
DATA
DATALOGGER
DAY
DAYS
DEGREES
DELTA
DEPTH
DEVIATION
DEW
DING
DIRECTION
DISCHARGE
DISCONNECT
DISTRICT
DIVERSION
DOCK
DOOR
DOWN
DRAW
DURING
E
E-T-O
E08'S
EAST
EASTERN
EFFLUENT
EIGHT
EIGHTEEN
EIGHTY
ELECTRON
ELEVATION
ELEVEN
EMPTIED
ENGINE
ENTER
EPROM
EQUAL
ERROR
EVENT
EXCEEDS
EXTERNAL
F
FAHRENHEIT
FAILED
FAILURE
FALL
FALLING
FEET
FIFTEEN
FIFTY
FIRST
FISH
FIVE
FLAG
FLAGS
FLOW
FLUORIDE
FOLLOWING
FORTY
FOUR
FOURTEEN
FREEZER
FREQUENCY
FRIDAY
FROM
FUEL
G
GALLONS
D-1
Page 46

Appendix D. COM320 Word List
GAS
GATE
GAUGE
GENERATOR
GOING
GOOD
GOODBYE
GRADIENT
GRAM
GRASS
GROUND
H
H-2-S
HAD
HARDNESS
HAS
HASH
HAVE
HEAD
HEAR
HEAT
HELLO
HERTZ
HIGH
HOLD
HOT
HOUR
HOURS
HUMIDITY
HUNDRED
HYDROLOGIC
I
IN
INCHES
INDEX
INF
ING
INPUT
INTAKE
INTERNAL
INTRUDER
IRRADIANT
IRRIGATION
IS
IT
J
K
KEY
KILO
KILOBYTES
KNOTS
L
LAKE
LAST
LAYER
LEVEL
LINE
LISTEN
LISTENING
LITER
LOAD
LOCATED
LOCATION
LOCATIONS
LOGAN
LOW
M
M-R-P
MANAGEMENT
MAXIMUM
MEMORY
MENDON
MENU
MERCURY
MESSAGE
METER
METERS
MICRO
MID
MID-MOUNTAIN
MIDNIGHT
MILES
MILLI
MILLION
MINIMUM
MINUS
MINUTE
MINUTES
MODEM
MOISTURE
MONDAY
MONITOR
MONTH
MOUNT
MOUNTAIN
MULTIPLIER
N
N-T-U
NAN
NEEDS
NETWORK
NEW
NEXT
NINE
NINETEEN
NINETY
NITRATE
NITROGEN
NO
NOON
NORTH
NOT
NUMBER
O
OF
OFF
OFFSET
OK
ON
ONE
OPEN
OR
OUT
OVERFLOW
OVERRUNS
OZONE
P
P-H
P-M
P-S-I
PACIFIC
PARAMETER
PARTS
PAST
PEAK
PENDING
PER
PERCENT
PHONE
PLANT
PLEASE
POINT
POND
POOL
PORT
PORTS
POTASSIUM
POUND
POWDER
POWER
PRECIPITATION
PREHEAT
PRESS
PRESSURE
PREVIOUS
PROBE
PRODUCT
PROGRAM
PROGRESS
PUMP
Q
QUALITY
QUIT
R
R-P-M
D-2
Page 47

Appendix D. COM320 Word List
RACE
RADIAL
RADIATION
RAIN
RANGE
RATE
REACHED
READING
RECEIVED
REFERENCE
RELATIVE
RESERVOIR
RESET
RESIDUAL
RETURN
REVISION
RISING
RIVER
ROAD
ROOM
RUN
RUNOFF
S
S-O-2
SAMPLE
SATURDAY
SCIENTIFIC
SECOND
SECONDS
SECURITY
SEDIMENT
SELECTED
SELECTION
SENSOR
SENSORS
SET
SEVEN
SEVENTEEN
SEVENTY
SHAFT
SIEMENS
SIGNATURE
SINCE
SITE
SIX
SIXTEEN
SIXTY
SKIING
SMOG
SNOW
SODIUM
SOIL
SOLAR
SONAR
SOUTH
SPEED
SPILL
SQUARED
STAGE
STANDARD
STAR
STATES
STATION
STATUS
STORM
STREAM
STREAMBED
SUMMIT
SUMP
SUNBURN
SUNDAY
SURFACE
SURFACTANCE
SYSTEM
T
TABLE
TAIL
TANK
TEMPERATURE
TEN
TESTING
THANK
THAT
THE
THERE
THIRTEEN
THIRTY
THIS
THOUSAND
THREE
THRESHOLD
THRU
THURSDAY
TIME
TING
TO
TODAY
TODAYS
TOGGLE
TOTAL
TRIGGERED
TUESDAY
TURBIDITY
TWELVE
TWENTY
TWO
U
ULTRAVIOLET
UNITS
UP
V
V-O-C
VALUE
VELOCITY
VERSION
VERTICAL
VIA
VOLTAGE
VOLTS
W
WARNING
WAS
WATER
WATTS
WE
WEATHER
WEDNESDAY
WELCOME
WELL
WEST
WHAT
WIND
WITH
X
Y
YEAR
YESTERDAY
YOU
YOUR
Z
ZERO
D-3
Page 48

Appendix D. COM320 Word List
D-4
Page 49

Page 50

Campbell Scientific Companies
Campbell Scientific, Inc. (CSI)
815 West 1800 North
Logan, Utah 84321
UNITED STATES
www.campbellsci.com • info@campbellsci.com
Campbell Scientific Africa Pty. Ltd. (CSAf)
PO Box 2450
Somerset West 7129
SOUTH AFRICA
www.csafrica.co.za • cleroux@csafrica.co.za
Campbell Scientific Australia Pty. Ltd. (CSA)
PO Box 444
Thuringowa Central
QLD 4812 AUSTRALIA
www.campbellsci.com.au • info@campbellsci.com.au
Campbell Scientific do Brazil Ltda. (CSB)
Rua Luisa Crapsi Orsi, 15 Butantã
CEP: 005543-000 São Paulo SP BRAZIL
www.campbellsci.com.br • suporte@campbellsci.com.br
Campbell Scientific Canada Corp. (CSC)
11564 - 149th Street NW
Edmonton, Alberta T5M 1W7
CANADA
www.campbellsci.ca • dataloggers@campbellsci.ca
Campbell Scientific Centro Caribe S.A. (CSCC)
300 N Cementerio, Edificio Breller
Santo Domingo, Heredia 40305
COSTA RICA
www.campbellsci.cc • info@campbellsci.cc
Campbell Scientific Ltd. (CSL)
Campbell Park
80 Hathern Road
Shepshed, Loughborough LE12 9GX
UNITED KINGDOM
www.campbellsci.co.uk • sales@campbellsci.co.uk
Campbell Scientific Ltd. (France)
3 Avenue de la Division Leclerc
92160 ANTONY
FRANCE
www.campbellsci.fr • info@campbellsci.fr
Campbell Scientific Spain, S. L.
Avda. Pompeu Fabra 7-9, local 1
08024 Barcelona
SPAIN
www.campbellsci.es • info@campbellsci.es
Please visit www.campbellsci.com to obtain contact information for your local US or International representative.
 Loading...