

Page 1

CS475, CS476 and C477 Radar
Water Level Sensor
Revision: 1/10
Copyright © 2009-2010
Campbell Scientific, Inc.
Page 2

Warranty and Assistance
The CS475, CS476, and CS477 RADAR WATER LEVEL SENSOR is
warranted by CAMPBELL SCIENTIFIC, INC. to be free from defects in
materials and workmanship under normal use and service for twelve (12)
months from date of shipment unless specified otherwise. Batteries have no
warranty. CAMPBELL SCIENTIFIC, INC.'s obligation under this warranty is
limited to repairing or replacing (at CAMPBELL SCIENTIFIC, INC.'s option)
defective products. The customer shall assume all costs of removing,
reinstalling, and shipping defective products to CAMPBELL SCIENTIFIC,
INC. CAMPBELL SCIENTIFIC, INC. will return such products by surface
carrier prepaid. This warranty shall not apply to any CAMPBELL
SCIENTIFIC, INC. products which have been subjected to modification,
misuse, neglect, accidents of nature, or shipping damage. This warranty is in
lieu of all other warranties, expressed or implied, including warranties of
merchantability or fitness for a particular purpose. CAMPBELL SCIENTIFIC,
INC. is not liable for special, indirect, incidental, or consequential damages.
Products may not be returned without prior authorization. The following
contact information is for US and International customers residing in countries
served by Campbell Scientific, Inc. directly. Affiliate companies handle
repairs for customers within their territories. Please visit
www.campbellsci.com to determine which Campbell Scientific company
serves your country.
To obtain a Returned Materials Authorization (RMA), contact CAMPBELL
SCIENTIFIC, INC., phone (435) 753-2342. After an applications engineer
determines the nature of the problem, an RMA number will be issued. Please
write this number clearly on the outside of the shipping container.
CAMPBELL SCIENTIFIC's shipping address is:
CAMPBELL SCIENTIFIC, INC.
RMA#_____
815 West 1800 North
Logan, Utah 84321-1784
For all returns, the customer must fill out a “Declaration of Hazardous Material
and Decontamination” form and comply with the requirements specified in it.
The form is available from our website at
completed form must be either emailed to repair@campbellsci.com
435-750-9579. Campbell Scientific will not process any returns until we
receive this form. If the form is not received within three days of product
receipt or is incomplete, the product will be returned to the customer at the
customer’s expense. Campbell Scientific reserves the right to refuse service on
products that were exposed to contaminants that may cause health or safety
concerns for our employees.
www.campbellsci.com/repair
. A
or faxed to
Page 3

CS475, CS476, CS477 Table of Contents
PDF viewers note: These page numbers refer to the printed version of this document. Use
the Adobe Acrobat® bookmarks tab for links to specific sections.
1. Overview.......................................................................1
2. Specifications ..............................................................2
3. Installation....................................................................4
3.1 General Safety Instructions.......................................................................4
3.2 Unpacking Equipment..............................................................................4
3.3 Components and Hardware.......................................................................4
3.4 Installation Recommendations..................................................................6
3.4.1 Site Selection ..................................................................................6
3.5 Sensor Mounting.......................................................................................7
3.5.1 Vertical Alignment..........................................................................7
3.5.2 Azimuth Alignment.........................................................................7
3.6 Instrument Housing Adjustment...............................................................8
4. Wiring............................................................................9
4.1 Datalogger Connection.............................................................................9
4.2 Multiple Sensors Connection....................................................................9
4.3 Built-in Self Test (BIST)..........................................................................9
5. Configuration.............................................................10
5.1 Default Settings ......................................................................................10
5.2 Startup Procedure ...................................................................................10
5.2.1 Start False Echo Learn..................................................................10
5.2.2 Set Water Stage.............................................................................11
6. Programming .............................................................12
6.1 CRBasic..................................................................................................12
6.1.1 Example Program..........................................................................13
6.2 Edlog.......................................................................................................14
6.2.1 Example Program..........................................................................15
7. Diagnostics, Repair, and Maintenance....................16
7.1 Testing Procedure................................................................................... 16
7.1.1 Start Measurement Command.......................................................16
7.1.2 Check Unit Response....................................................................17
7.1.3 Check for Valid Data....................................................................17
7.1.4 Cyclic Redundancy Check (CRC) ................................................18
7.1.4.1 Check CRC for Valid Data..................................................18
7.1.5 Get Units.......................................................................................19
7.1.6 Get Water Conditions ...................................................................19
7.1.7 Get Power Operation Mode..........................................................19
i
Page 4

CS475, CS476, CS477 Table of Contents
7.2 Diagnostics and Repair ..........................................................................20
7.2.1 No Measured Value Available - Error E013................................ 20
7.2.2 No Measured Value Available - Error E041, E042, E043........... 20
7.2.2.1 Exchange Electronics Module............................................ 20
7.3 Maintenance........................................................................................... 23
Appendices
A. Replacing the Cable................................................A-1
B. Entering SDI-12 Commands/Changing Settings ..B-1
B.1 Changing Settings ............................................................................... B-3
B.1.1 Query/Set the Address............................................................... B-3
B.1.2 Set Units .................................................................................... B-3
B.1.3 Set Water Conditions................................................................. B-4
B.1.4 Set Power Operation Mode........................................................ B-4
C. FCC/IC Equipment Authorization...........................C-1
List of Figures
1-1. CS475, CS476, and CS477..................................................................... 2
3-1. Components and Hardware .................................................................... 5
3-2. Polarization Markings............................................................................. 8
7-1. Changing the Electronics...................................................................... 22
A-1. Connecting the Instrument Housing..................................................A-2
List of Tables
3-1. Description of Components and Hardware Labels................................. 5
3-2. Radiation Beam Spread for CS475 (10° Beam Angle)........................... 7
3-3. Radiation Beam Spread for CS476/CS477 (8° Beam Angle)................. 7
3-4. Description of Polarization Markings Labels......................................... 8
4-1. Wiring Diagram...................................................................................... 9
5-1. Default Settings .................................................................................... 10
5-2. Example of a Start False Echo Learn Command.................................. 11
5-3. Example for Setting Water Stage ......................................................... 12
6-1. SDI-12 Command Codes...................................................................... 13
7-1. Example of Start Measurement Command........................................... 17
7-2. Acknowledge Active Command........................................................... 17
7-3. Send Identification Command.............................................................. 18
7-4. Checking CRC Example....................................................................... 19
7-5. Description of Changing the Electronics Labels ..................................22
A-1. Description of Instrument Housing Labels........................................A-2
B-1. SDI-12 Commands............................................................................. B-2
B-2. SDI-12 Command for Querying the Address..................................... B-3
B-3. Example of Setting Address............................................................... B-3
B-4. Example of Setting Units................................................................... B-3
B-5. Example for Setting Water Conditions.............................................. B-4
B-6. Example for Setting Power Operation Mode..................................... B-5
ii
Page 5

CS475, CS476, and CS477 Radar Water
Level Sensor
1. Overview
The CS475, CS476, and CS477 are radar ranging sensors typically used for
water-level applications. They emit short microwave pulses and then measure
the elapsed time between the emission and return of the pulses. The elapsed
time measurement is used to calculate the distance between the sensor face and
the target (e.g., water, grain, slurry). The distance value can then be used to
determine depth.
These radar sensors output a digital SDI-12 signal to indicate distance and
stage. This output is acceptable for recording devices with SDI-12 capability
including Campbell Scientific dataloggers. Compatible dataloggers include
our CR200(X)-series, CR800-series, CR1000, CR3000, CR5000, CR510, and
CR10X.
Three sensor models are available that differ in their measurement range and
accuracy. The CS475 can measure distances up to 65 feet with an accuracy of
±0.2 inches; the CS476 can measure up to 98 feet with an accuracy of ±0.1
inches; and the CS477 can measure up to 230 feet with an accuracy of ±0.6
inches.
The -L after the model name indicates that the cable length is user specified.
1
Page 6

CS475, CS476, and CS477 Radar Water Level Sensor
FIGURE 1-1. CS475, CS476, and CS477
2. Specifications
Measurement Range
CS475: 2 inch to 65 ft (50 mm to 20 m)
CS476: 2 inch to 98 ft (50 mm to 30 m)
CS477: 16 inch to 229 ft (400 mm to 70 m)
Accuracy
CS475 (20 inch to 65 ft): ±0.2 inch (±5 mm)
CS476 (20 inch to 98 ft): ±0.1 inch (±3 mm)
CS477 (20 inch to 230 ft): ±0.6 inch (±15 mm)
Resolution: 0.0033 ft (1 mm)
Output Protocol: SDI-12
2
Page 7

CS475, CS476, and CS477 Radar Water Level Sensor
Radar Unit
Frequency: ~26 GHz
Electromagnetic Compatibility: Emission to EN 61326;
Electrical Equipment Class B
Pulse E nergy: 1 mW maxi mum
Beam angle
CS475: 10° (3-in dia horn)
CS476, CS477: 8° (4-in dia horn)
Power Requirements
Input Voltage: 9.6 to 16 Vdc
Surge Protection: 1.5 KVA
Typical Current Drain with 12 V power supply
Sleeps: 4.7 mA
Measurement: 14 mA
Environmental
Operating Temperature Range: -40° to +80°C
Storage Ranges
Temperature: -40° to +80°C
Relative Humidity: 20% to 80% RH
Temperature Sensitivity: average TK: 2 mm/10 K,
max 5 mm over the entire
temperature range of
-40°to +80°C
Vibration Resistance: Mechanical vibrations with 4 g
and 5 to 100 Hz
Mechanical
Rating: NEMA 4x
Housing: Aluminum, coated IP66/68
Face Diameter: 0.625 inches (16 mm)
Horn Length
CS475: 5.4 inches (137 mm)
CS476, CS477: 16.9 inches (430 mm)
Horn Material: 316L stainless steel
3
Page 8

CS475, CS476, and CS477 Radar Water Level Sensor
3. Installation
3.1 General Safety Instructions
Observe standard regulations and guidelines while installing and operating the
radar sensors. You should follow country-specific installation standards,
prevailing safety regulations, accident prevention rules, and this manual’s
safety instructions.
Depending on the model, the emitting frequencies of these radar sensors are
either in the C or K band range. Their low transmitting power is well below
the internationally permitted limits. When used correctly, the radar sensors
present no danger to people.
It is the responsibility of the user to ensure that the sensors are maintained and
functioning properly.
3.2 Unpacking Equipment
When unpacking the equipment, do the following:
• Unpack the unit in a clean, dry area.
• Inspect the equipment for any damage that occurred during shipping or
storage.
• If the equipment is damaged, file a claim against the carrier and report the
damage in detail.
3.3 Components and Hardware
The radar sensor consists of an integrated microwave transmitter and sensor
together with a horn antenna (see Figure 3-1 and Table 3-1). The horn antenna
serves to focus the transmitted signal and to receive the reflected echo. A builtin SDI-12 interface provides data processing and SDI-12 communications with
the datalogger.
4
Page 9

CS475, CS476, and CS477 Radar Water Level Sensor
(A)
1
(B)
3
2
4
5
3
2
4
5
6
7
8
9
12
13
14
15
(C)
10
11
(D)
FIGURE 3-1. Components and Hardware
(see Table 3-1 for description of labels)
TABLE 3-1. Description of Components and Hardware Labels
(A) CS475
(B) CS476 or CS477
(C) Optional Mounting Base
(D) Optional Protective Shield
1 Mounting Loop
2 PULS Housing Side Cap
3 PULS Housing Cap
4 PULS Unit Secondary 1/2” NPT Cable Port, Primary Port on Opposite
Side
5 PULS Instrument Horn
6 5/8” Hex Head Cap Screw & Lock Washer
7 Swivel Mounting Flange
8 Upper Shield
9 Upper Shield Twist Lock Tab (3x)
10 Mounting Base
11 1/2” NPT, Mounting Base, Cable Entry Port
12 Lower Shield Locking Tab
13 Notch in Lower Shield Mounting Plate for Twist Lock Upper Shield
14 Lower Shield Mounting Stud, 5/8-11 (2x)
15 Lower Shield
5
Page 10

CS475, CS476, and CS477 Radar Water Level Sensor
3.4 Installation Recommendations
Before installing the radar sensor, you must consider all the suggested
guidelines for site and maintenance issues. Do not attempt to install the sensor
unless you are qualified to perform the installation. The sensor is designed for
safe operation in accordance with the current technical, safety and ANSI
standards.
CAUTION
If you are uncertain of the safe installation and operation of
this unit, read and understand all the instructions included
in this manual before attempting any installation or
operation.
3.4.1 Site Selection
1. Handle the sensor carefully, since it is a precision instrument.
2. Mount the sensor high enough to prevent submersion during flooding
3. Ensure that the sensor is mounted securely to prevent any movement.
WARNING
NOTE
Since the sensor is commonly installed over water
from tall structures, use appropriate safety equipment
such as a safety harness or a life preserver when you
install or perform maintenance on the sensor.
4. Install the sensor above the smoothest part of the water surface.
The smoothest part of the water surface is typically found
halfway between bridge piers. However, bridges with long
spans between the piers experience more vibration. For these
bridges, vibration can be minimized by mounting the sensor a
quarter to a third of the distance to the next pier.
conditions.
5. Align the antenna horn within 1° of vertical to prevent trigonometric
6. Avoid mounting near horizontal structural surfaces such as beams,
7. Center the sensor beam a minimum of 2.5 m from any obstruction in the
NOTE
6
Usually the beam path is 10° for the CS475, and 8° for the
CS476/CS477.
measurement errors. (A level indicator is provided on the top cap of the
sensor for zero bubble).
brackets, and sidewall joints because these surfaces reflect a strong signal.
If these structures cannot be avoided, use the false echo learn command to
map out the interfering structures in the beam profile (see Section 5.2.1).
measurement range. Obstructions to be aware of include excessive waves,
splashing, pipes, wires, and logs. Note that the radiation beam spreads as
it leaves the sensor (see Tables 3-2 and 3-3).
Page 11

CS475, CS476, and CS477 Radar Water Level Sensor
TABLE 3-2. Radiation Beam Spread for CS475
(10° Beam Angle)
Distance in
Meters
1 0.18
5 0.87
10 1.76
15 2.64
20 3.53
TABLE 3-3. Radiation Beam Spread for CS476/CS477
Distance in Meters Diameter of Footprint in Meters
1 0.14
5 0.70
10 1.41
15 2.11
20 2.81
30 4.216
70 (CS477 only) 9.84
Diameter of Footprint in
Meters
(8° Beam Angle)
8. Be aware that bridges contract and expand with temperature changes.
Traffic loads or trucks can also cause changes to the bridge height.
9. Do not install the sensor where submerged obstructions such as rocks or
bridge piers can distort or disturb water level.
3.5 Sensor Mounting
3.5.1 Vertical Alignment
Use a user-supplied bubble level or the 25619 bubble level to make certain the
antenna horn is aligned within 1° of vertical. The cap needs to be removed
when using the 25619. If the antenna is not vertical, a trigonometric
measurement error can occur with respect to the water. The maximum range is
reduced because of the off-axis return signal.
3.5.2 Azimuth Alignment
The sensor’s radar beam is polarized so that it emits radar waves in an elliptical
or football shape. You should orient the unit so the lobes are parallel to, and do
not intersect the pier, when you install on a wall or close to a bridge pier. The
radar housing has a large hex nut on its mount stem. Two drill marks below the
7
Page 12

CS475, CS476, and CS477 Radar Water Level Sensor
hex nut indicate which direction the lobes extend the least. Orient the sensor
such that one of the marks is aligned towards the wall or pier (see Figure 3-2
and Table 3-4).
CS475 CS476/CS477
1
FIGURE 3-2. Polarization Markings
(see Table 3-4 for label descriptions)
TABLE 3-4. Description of Polarization Markings Labels
Sensor Description
1 CS475 Polarization marks are designated by the mounting loop
screws.
2 CS476/CS477 Polarization mark is machine-tooled.
3.6 Instrument Housing Adjustment
2
After mounting, you can rotate the housing up to 350° to simplify access to the
conduit entry and terminal compartment. Proceed as follows to rotate the
housing to the desired position:
1. Loosen the set screw on the housing.
2. Rotate the housing as desired.
3. Tighten the set screw.
8
Page 13

4. Wiring
4.1 Datalogger Connection
CS475, CS476, and CS477 Radar Water Level Sensor
As shipped from Campbell Scientific, the sensor is fitted with a cable for
connection with the datalogger. Appendix A describes replacing this cable.
Connections to Campbell Scientific dataloggers are given in Table 4-1. When
Short Cut is used to create the datalogger program, the sensor should be wired
to the channels shown on the wiring diagram created by Short Cut.
CAUTION
Color
white SDI-12 Signal Odd Numbered
clear Chassis ground
red +12V (power
black ground G G
Description
supply for
sensor)
Connect the wires in the order shown in Table 4-1.
TABLE 4-1. Wiring Diagram
CR800,
CR850,
CR1000,
CR3000,
Control Port
(C1, C3…)
12V 12V 12V 12V Battery+
CR10(X),
CR510, CR500
Odd Numbered
Control Port
(C1, C3…)
G
4.2 Multiple Sensors Connection
CR23X
Odd Numbered
Control Port
(C1, C3…)
CR5000
SDI-12 C1/SDI-12
G G
CR200(X)
4.3 Built-in Self Test (BIST)
To use more than one probe per datalogger, you can either connect the
different probes to different SDI-12 compatible ports on the datalogger or
change the SDI-12 addresses of the probes and let them share the same
connection. Using the SDI-12 address minimizes the use of ports on the
datalogger and also allows probes to be connected in a “daisy-chain” fashion
which can minimize cable runs in some applications.
After connecting the sensor to the datalogger’s power terminals, the sensor
performs a BIST (built-in self test) for approximately 80 seconds (factory
default). During this self-check, an internal check of the electronics occurs.
9
Page 14
CS475, CS476, and CS477 Radar Water Level Sensor
5. Configuration
5.1 Default Settings
In most circumstances, the default settings (see Table 5-1) should be used.
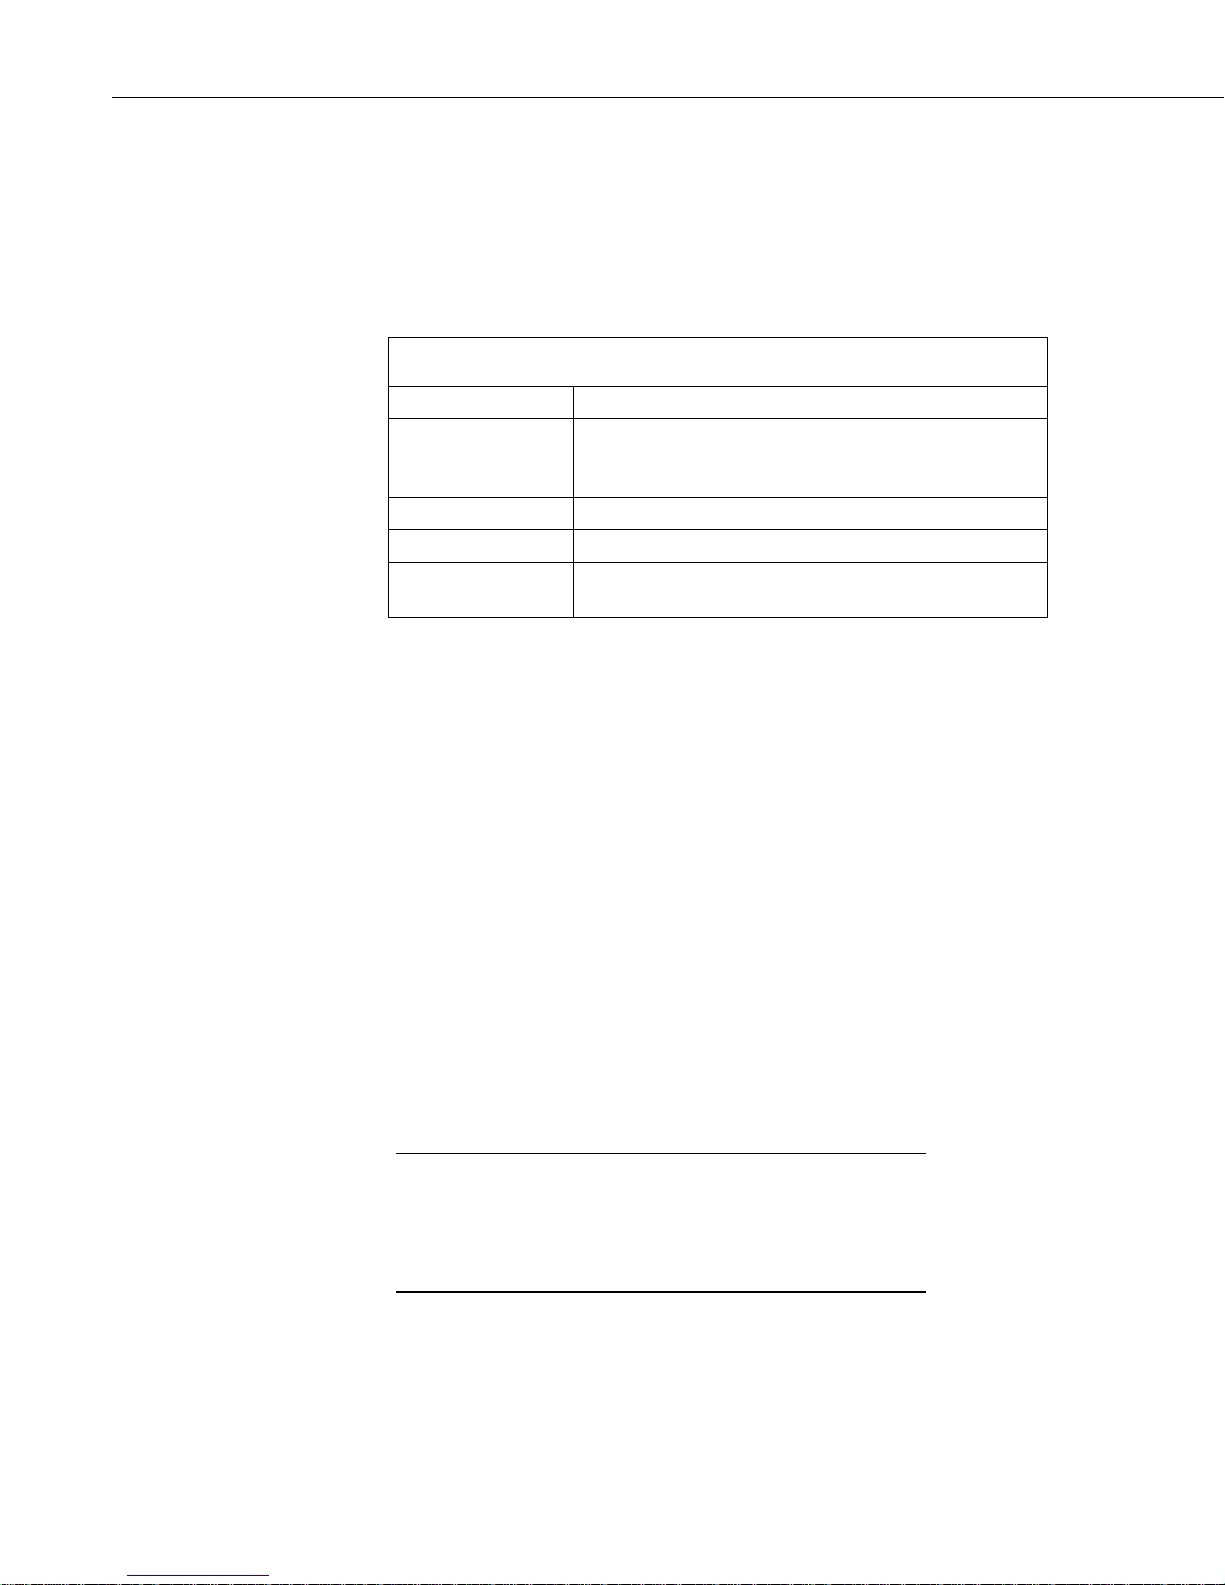
Refer to Appendix B for other setting options and SDI-12 commands.
Setting Default Setting
SDI-12 Address 0 (You only need to change this if two sensors are
connected to the same port; valid addresses are 0
through 9, A through Z, and a through z.)
Units of Measure 1 = feet
Water Conditions 1 = smooth; (typical peak to trough of wave ≤4 inches)
Power Operation
Mode
1=on (Sensor is always on until a new power operation
mode command is received.)
TABLE 5-1. Default Settings
5.2 Startup Procedure
The basic startup procedure for the radar sensor is as follows:
1. Mount, wire, and install the sensor (see Sections 3 and 4).
2. Do a Start False Echo Learn command followed by a Send Data
command. The Start False Echo Learn command is an essential function
during the setup of the sensor (see Section 5.2.1).
3. Enter the current water level using the Set Water Stage command followed
by a Send Data command (see Section 5.2.2).
4. Refer to Appendix B if you want to change defaults for the address, units
of measure, water conditions, and power operation mode.
5. Program the datalogger to measure the sensor (see Section 6).
5.2.1 Start False Echo Learn
NOTE
The settings are changed using the 25616 Adjustment/Display
Module or the terminal emulator in LoggerNet or PC400.
During normal communication, the datalogger sends the address,
together with a command, to the sensor. The sensor then replies
with a “response”.
The Start False Echo Learn command is an essential function during the
startup of the sensor. It is also used during testing if a problem is encountered.
The command allows the unit to learn about false echoes (noise) in the area.
With the False Echo Learn command, you enter the actual distance to the water
surface, as measured in meters or feet, depending on the Unit setting. The
10
Page 15

CS475, CS476, and CS477 Radar Water Level Sensor
radar sensor then emits the short microwave pulses. Any echo occurring 0.5 m
(1.6 ft) short of the distance you entered will be considered noise.
To start false echo learn, do the aXSFEL+nnn.nnn! command (where nnn.nnn
= the actual distance to the water) followed by the aD0! (Send Data) command.
Table 5-2 shows an example of the command and response.
TABLE 5-2. Example of a Start False Echo Learn Command
Initial Command Response
0XSFEL+2.500!
Where (from left to right),
0—sensor’s address;
2.500—the water surface distance.
02001<cr><If>
Where (from left to right),
0—sensor’s address;
200—the amount of time (in seconds)
that you must wait before sending the
send data command;
1—the number of values that will be
placed in the buffer.
Subsequent Command Response
0D0!
Where the first zero is the sensor
address.
This is the send data command.
0+2.500<cr><lf>
Where (from left to right),
0—sensor’s address;
2.500—the water surface distance.
5.2.2 Set Water Stage
NOTE
The settings are changed using the 25616 Adjustment/Display
Module or the terminal emulator in LoggerNet or PC400.
During normal communication, the datalogger sends the address,
together with a command, to the sensor. The sensor then replies
with a “response”.
With the Set Water Stage command, you enter the initial depth of the water,
and the sensor will automatically measure the distance between the sensor and
the water surface. The water stage setting and the initial distance measurement
are used to calculate subsequent water stage measurements. Correct stage
measurements require that the water stage setting be in the same units as the
Units of Measure setting. You can find out if the sensor is set to meters or feet
by using the aXGU! (Get Unit) command.
To set the water stage, do an aXSS+nnn.nnn! command (where nnn.nnn = the
initial water depth) followed by the aD0! (send data) command. Table 5-3
shows an example of the command and response for entering this setting.
11
Page 16

CS475, CS476, and CS477 Radar Water Level Sensor
TABLE 5-3. Example for Setting Water Stage
Initial Command Response
0XSS+7.010!
Where (from left to right),
0—sensor’s address;
7.010—the initial water depth value
used to calculate subsequent stage
measurements
Subsequent Command Command Response
0D0!
Where the first zero is the sensor
address.
This is the send data command.
00011<cr><If>
Where (from left to right),
0—sensor’s address;
001—the amount of time (in seconds)
that you must wait before sending the
send data command;
1—the number of values that will be
placed in the buffer.
0+7.010<cr><If>
Where (from left to right),
0—sensor’s address;
7.010—the initial water depth value
used to calculate subsequent stage
measurements
6. Programming
6.1 CRBasic
This section is for users who write their own datalogger programs. A
datalogger program to measure this sensor can be created using Campbell
Scientific’s Short Cut Program Builder software. You do not need to read this
section to use Short Cut.
The radar sensor’s output is measured using a standard SDI-12 instruction to
read the data from an SDI-12 sensor. If using the sensor with other SDI-12
recorders, please refer to your system’s documentation. Further details of the
SDI-12 commands can be found at: www.sdi-12.org.
Dataloggers that are programmed with CRBasic include the CR200(X) series,
CR800, CR850, CR1000, CR3000, and CR5000. These dataloggers use the
SDI12Recorder instruction to read the sensor. The SDI12Recorder instruction
should only be ran in the sequential mode.
The values returned from the SDI12Recorder( ) instruction are different
depending on the SDI12 measurement command issued. The SDI12Recorder
instruction sends the command specified by the SDI12Command parameter as
(address)SDI12Command!.
SDI12Recorder (Dest, SDIPort, SDIAddress, "SDICommand", Multiplier,
Offset)
12
Page 17

CS475, CS476, and CS477 Radar Water Level Sensor
The SDI12Recorder instruction has the following parameters:
Dest The Dest parameter is a variable in which to store the results
of the measurement. Dest must have enough elements to
store all the data that is returned by the sensor or a 'variable
out of range' error will result during the execution of the
instruction.
SDIPort The SDIPort parameter is the port to which the SDI-12
sensor is connected. A numeric value is entered:
Description
Code
1 Control Port 1
3 Control Port 3
5 Control Port 5
7 Control Port 7
SDIAddress The SDIAddress parameter is the address of the sensor that
will be affected by this instruction. Valid addresses are 0
through 9, A through Z, and a through z. Alphabetical
characters should be enclosed in quotes (e.g., "0").
SDICommand The SDICommand parameter is used to specify the
command strings that will be sent to the sensor. The
command should be enclosed in quotes. See Table 6-1
shows the specific SDI-12 Command Codes and their
returned values.
TABLE 6-1. SDI-12 Command Codes
SDI12 Measurement Command Returned Values
M! 1) Stage in meters or feet
6.1.1 Example Program
‘CR1000 Series Datalogger
‘Declare the variable for the water level measurement
Public CS475(3)
‘Rename the variable names
Alias CS475(1)=Stage
Alias CS475(2)=Distance
Alias CS475(3)=Error_Code
2) Distance in meters or feet
3) Error Code (see Section 7)
13
Page 18

CS475, CS476, and CS477 Radar Water Level Sensor
‘Define a data table for 60 minute maximum and minimums
DataTable (Hourly,True,-1)
DataInterval(0,60,Min,10)
Maximum(1,Distance,FP2,0,0)
Minimum(1,Distance,FP2,0,0)
Average(1,Distance,FP2,False)
StdDev(1,Distance,FP2,False)
Maximum(1,Stage,FP2,0,0)
Minimum(1,Stage,FP2,0,0)
Average(1,Stage,FP2,False)
StdDev(1,Stage,FPs,False)
Sample (1,Error_Code,UINT2)
EndTable
‘Read sensor every 60 seconds
BeginProg
Scan(60,sec,1,0)
‘Code for SDI-12 measurements:
SDI12Recorder(CS475,1,0,”M!”,1,0)
‘Call the data table:
CallTable(Hourly)
NextScan
EndProg
6.2 Edlog
Dataloggers that are programmed with Edlog include the CR500, CR510,
CR10(X), and CR23X. These dataloggers use Instruction 105 to read the
sensor.
Instruction 105 allows data to be collected from the radar sensor; each sensor
requires a separate Instruction 105.
Instruction 105 has the following parameters:
Parameter 1 - Address. Valid addresses are 0 through 9; 65 through 90
(decimal value for ASCII upper-case letters); and 97 through 122 (decimal
values for ASCII lower-case letters). Refer to Table xx for a list of the decimal
values for the upper- or lower-case letters.
Parameter 2 - Command. Refer to the Edlog help for the command codes used
with this instruction.
Parameter 3 - Port. Enter the datalogger port in which the datalogger is
connected.
Parameter 4 - Location. Enter the input location in which to store the results.
Parameter 5 - Multiplier
Parameter 6 - Offset
14
Page 19

CS475, CS476, and CS477 Radar Water Level Sensor
NOTE
Edlog allocates only one of the input locations needed for this
instruction. Three input locations are required for this sensor.
The additional input locations must be inserted manually using
the Input Location Editor. For information on manually inserting
input locations, refer to Manually Inserting Input Locations in
the Edlog help.
6.2.1 Example Program
Below is a portion of a CR10X program that measures the radar sensor.
NOTE
;{CR10X}
;
*Table 1 Program
01: 60 Execution Interval (seconds)
1: SDI-12 Recorder (P105)
1: 0 SDI-12 Address
2: 0 Start Measurement (aM0!)
3: 1 Port ;this is where the white wire is connected
4: 1 Loc[Data_1 ]
5: 1.0 Mult
6: 0.0 Offset
*Table 2 Program
02: 0.000 Execution Interval (seconds)
*Table 3 Subroutines
End Program
The instructions below do not store data in final storage.
Instruction 92, Instruction 77 and processing instructions such as
Instruction 70 are required to store the data permanently.
After Instruction 105 is executed, the input location called “Data_1” will hold
the measured stage, reported in feet or meters (depending on the Unit of
Measure setting). The input location called Data_2 will hold the distance
measurement, reported in feet or meters (depending on the Unit of Measure
setting). The input location called Data_3 will hold the error code; an error
code of 0 indicates that the sensor is functioning properly (see Section 7).
Note that Port 1 specifies that the SDI-12 data line is to be connected to the
Port C1.
15
Page 20

CS475, CS476, and CS477 Radar Water Level Sensor
7. Diagnostics, Repair, and Maintenance
7.1 Testing Procedure
The test procedures for the sensor require the following steps:
1. Double check all wiring connections.
2. Connect the sensor to your datalogger and apply +12V power.
3. Compare the Output Stage versus the Actual Stage using the Start
Measurement command followed by the Send Data command (see Section
7.1.1)
4. Send the Acknowledge Active command (see Section 7.1.2). This
command is used to check the presence of the sensor on the bus. Only the
address is sent back in response.
5. Send the Identification command (see Section 7.1.3).
6. Send the Start Verification command followed by the Get Data command
(see Section 7.1.4).
7. Use the Get Unit command to ensure the units are what you want (see
Section 7.1.5).
8. Use the Get Water Condition command to ensure that the water condition
fit the body of water you are monitoring (see Section 7.1.6).
9. Use the Get Power Operation mode to ensure that the power mode is what
you want (see Section 7.1.7).
10. Use the False Echo Learn command if you encounter a problem that could
be caused by noise (see Section 5.2.1).
7.1.1 Start Measurement Command
NOTE
The 25616 Adjustment/Display Module or the terminal emulator
in LoggerNet or PC400 can be used to enter this command. The
Start Measurement command is also used in CRBasic or Edlog
programming. Refer to the Edlog help for the appropriate
command code entry.
The aM! command requests measurement values from the sensor. This
command is always followed by the aD0! (Send Data) command (see Table
7-1). As a response of the Send Data command, the following information will
be returned.
• Stage--the water level as measured in meters or feet. This measurement is
16
calculated using the Water Stage Setting and the Units setting.
Page 21

CS475, CS476, and CS477 Radar Water Level Sensor
• Distance--the distance between the sensor and water surface. This value
will be reported in either meters or feet, depending on the Units setting.
• Diagnostic Values—an error code. For example, Code 0 = OK, Code 13 =
error E013 (see Section 7.2).
TABLE 7-1. Example of Start Measurement Command
Initial Command Response
0M!
Where zero is the
sensor address
Subsequent
Command
0D0!
Where the first zero is
the sensor address
00023<cr><If>
Where (from left to right),
0—sensor’s address;
002—the amount of time (in seconds) that you must
wait before sending the send data command;
3—the number of values that will be placed in the
buffer.
Response
0+100.050+25.000+0<cr><If>
Where (from left to right),
0—sensor’s address;
100.050—the stage in meters or feet;
25.000—the distance in meters or feet
0—error code
7.1.2 Check Unit Response
The Acknowledge Active command is used to check the presence of the sensor
on the bus (see Table 7-2).
Initial Command Response
a! a<cr><If!>
7.1.3 Check for Valid Data
The aI! command gets the following identification information in response to
sending al! (see Table 7-3).
• Compatibility level: Version of SDI-12 protocol version. For example, 1.3
• Manufacturer’s Name: VEGA
TABLE 7-2. Acknowledge Active Command
Only the address is sent back in response.
17
Page 22

CS475, CS476, and CS477 Radar Water Level Sensor
• Manufacturer’s Model Number: PS61 (CS475), PS62 (CS476), or PS63
(CS477)
• Three Digit Firmware Version Number.
• Eight Digit Serial Number of Sensor.
TABLE 7-3. Send Identification Command
Initial Command Response
aI! a13VEGAbbbbPS6233212345678<cr><If>
Where (from left to right),
a—sensor address
13—SDI-12 compatibility number
VEGA = manufacturer’s Name
PS62=Manufacturer’s Model Number
3.32Sensor Version Number =
Serial Number = 12345678
7.1.4 Cyclic Redundancy Check (CRC)
A cyclic redundancy check (CRC) is used to produce and send a small, fixedsize checksum of a larger block of data to the datalogger. This checksum
detects errors after transmission or storage. The CRC is computed and added
before any transmission or storage. The CRC is also authenticated by the
recipient, after the transmission, to confirm that no alterations occurred. CRCs
are very good at identifying errors caused by noise in transmission channels.
7.1.4.1 Check CRC for Valid Data
The aV! command requests three verification values from the sensor. This
command is always followed by the aD0! (Send Data) command.
The verification values that will be returned are:
• CRC check (error check)—values are 0 (OK) or 1 (failed)
• SDI-12 Radar firmware version number
• HART Sensor firmware version
18
Page 23

CS475, CS476, and CS477 Radar Water Level Sensor
Table 7-4 shows an example of checking the CRC.
TABLE 7-4. Checking CRC Example
Initial Command Response
0V!
where 0=the sensor’s address
Subsequent Command Response
0D0!
Where the first zero is the
sensor’s address.
00013<cr><If>
Where (from left to right),
0—sensor’s address;
001—the amount of time (in seconds) that
you must wait before sending the send data
command;
3—the number of values that will be
placed in the buffer.
0+0+1610000+3320000<cr><If>
Where (from left to right),
0—sensor’s address;
0—CRC check (0 = OK)
1610000—adapter version (1.61.00.00)
3320000—sensor version (3.32.00.00)
7.1.5 Get Units
Use the aXGU! command to get the current units setting of the sensor. The
units can be either feet or meters. If the units are feet, a 1 will be returned, and
if the units are meters, a 0 will be returned.
7.1.6 Get Water Conditions
The aXGWC! command returns the current setting of the water conditions.
Possible water conditions are:
1 = smooth (default)
2 = medium
3 = rough
0 = undefined (custom settings)
7.1.7 Get Power Operation Mode
The 0XGPOM! command provides the current power operation mode setting
of the sensor.
19
Page 24

CS475, CS476, and CS477 Radar Water Level Sensor
7.2 Diagnostics and Repair
The radar sensor is extremely reliable, but problems can occur during
operation. Most of these problems are caused by the following:
• Sensor
• Environmental Conditions
• Power Supply
• Signal Processing
When you encounter a problem with the radar sensor, check the error messages
from the aM!, followed by the aD0! command to help evaluate the issue.
NOTES
1. During the initial power-up or resumption of supply voltage
to the sensor, some SDI-12 commands, such as the I command,
will not yield the expected responses.
2. A typical response to the aD0! command results in a response
of 108003 where approximately 80 seconds is the required time
to complete the BIST (Built in Self Test) of the instrument.
After power-up is complete, normal SDI-12 communication
starts.
7.2.1 No Measured Value Available - Error E013
If you are unable to find a measured value, check the following:
• Sensor in boot phase
• Update the Start False Echo Learn (aXSFEL).
7.2.2 No Measured Value Available - Error E041, E042, E043
If you have a hardware error or have defective electronics, try cycling the
power to the sensor. If the sensor recovers, no further steps are required. If the
sensor does not recover, do one of the following:
• Exchange the electronics module (see Section 7.2.2.1)
• Return the equipment for repair (an RMA is required)
7.2.2.1 Exchange Electronics Module
If you do not have an electronics module onsite, order one from Campbell
Scientific.
20
Page 25

CS475, CS476, and CS477 Radar Water Level Sensor
The electronics module is replaced by doing the following steps (see Figure 71 and Table 7-5):
1. Unscrew the housing cap (cap is not shown in Figure 7-1).
2. Remove all wires that are attached or plugged into the electronics and note
their location for reassembly.
3. Loosen the two (2) screws “A” securing the electronics to the housing.
These screws are captive screws and will remain nested with the
electronics.
4. Gently remove the electronics “B” from the housing.
NOTE
NOTE
Some friction is normal when removing the electronics because a
seal is between the electronics and the lower portion of the
housing.
5. Replace the electronics with a new module.
Make sure the two (2) screws holding the electronics module in
are tight, but do not over tighten. Over tightening these screws
can strip the threads.
6. Tighten the two (2) screws “A” to secure the electronics to the housing.
7. Re-assemble all wires that were originally attached or plugged into the
electronics.
8. Tighten the housing cap.
21
Page 26

CS475, CS476, and CS477 Radar Water Level Sensor
1
2
3
3
4
5
Description
1 Red Wire
2 Housing Top View
3 Screws to Secure Electronics to Housing
4 Electronics
5 Housing Side View
22
FIGURE 7-1. Changing the Electronics
(see Table 7-5 for label descriptions)
TABLE 7-5. Description of Changing the Electronics
Labels
Page 27

7.3 Maintenance
The sensors are maintenance free under normal operation.
CS475, CS476, and CS477 Radar Water Level Sensor
23
Page 28

CS475, CS476, and CS477 Radar Water Level Sensor
24
Page 29

Appendix A. Replacing the Cable
The sensor is fitted with a cable for connection to the dataogger. The
following procedure is for replacing the original cable (see Figure A-1 and
Table A-1).
1. Unscrew the housing side compartment screw cap.
2. Loosen the cord grip on the cable entry.
3. Remove approximately 4 inches (10 cm) of the cable mantle.
4. Strip approximately 0.4 inches (1 cm) of the insulation from the end of the
individual wires.
5. Insert the cable into the sensor through the cable entry.
6. Lift the opening levers of the terminals with a screwdriver.
7. Insert the wire ends into the open terminals.
• Connect the Power Supply +12 Vdc to the terminals marked 1 (+).
• Connect the Power Supply Ground to the terminals marked 2(-).
• Connect the Data Line to the terminals marked 3 (data).
8. Press the opening lever of the terminal down. You will hear the terminal
spring closed.
9. Check that the wires are firmly connected in the terminal by lightly pulling
on them.
10. Connect the screen to the internal ground terminal and the external gr ound
terminal to potential equalization (ground).
11. Tighten the cord grip on the cable entry. The seal ring must completely
encircle the cable.
12. Place the housing side compartment screw cap on and tighten to ensure a
mechanical seal.
A-1
Page 30

Appendix A. Replacing the Cable
(A)
(C)
1
2
3
4
5
6
7
8
9
18
17
16
13
12
10
FIGURE A-1. Connecting the Instrument Housing
(see Table A-1 for description of labels)
(B)
15
14
(D)
11
TABLE A-1. Description of Instrument Housing Labels
Connections Description
(A) Side Chamber SDI-12 Wiring
(B) Top Chamber Inner Housing C on nect i o ns
(C) Typical SDI-12 Network Configuration
(D) DIS61 (Optional) (Reference V-2799S0)
1 Inner Housing Connections (Modular Plu g M ou nt ed in D u al
Chamber Housing), Plugs into Back of SDI-12 Board
2 SDI-12 Data
3 Ground Connection
4 Data Acquisition Device
5 Serial Data Line
6 12V (-) Ground
7 12V (+) Line
8 SDI-12 Sensor #1
9 SDI-12 Sensor #2
10 Ground Connection
11 To Instrument
12 Remote Display
13 Ground Connection
14 Dig ital Output (To Optional Remote Display)
15 Plug for Laptop Connection
16 Remote Display
17 Red
18 Other
A-2
Page 31

Appendix B. Entering SDI-12
Commands/Changing Settings
The SDI-12 commands are entered using the 25616 Adjustment/Display
Module or the terminal emulator in LoggerNet or PC400. These commands are
also used in CRBasic or Edlog programming (see Section 6).
During normal communication, the datalogger sends the address, together with
a command, to the sensor. The sensor then replies with a “response”.
SDI-12 command codes that are used with the radar sensor are listed in Table
B-1. The SDI-12 address and the command/response terminators are defined
as follows:
Initial Command Response
a Is the sensor address. The following ASCII Characters
are valid addresses: 0-9, AZ, a-z, *, ?. Sensors are
initially programmed at the factory with the address of 0
for use in single sensor systems. Addresses 1 to 9 and A
to Z or a to z are used for additional sensors connected
to the same port.
Where:
NOTES
a is the sensor address (0-9, A-Z, a-z, *, ?)
M is an upper-case ASCII character ! Is the last character of a command block
<cr><lf> Are carriage return (0D) hex and line feed (0A) hex characters. They
are the last two characters of a response block
• All commands/responses are upper-case printable ASCII
characters.
• Commands must be terminated with a ! character.
• Responses are terminated with <cr><lf> characters.
• The command string must be transmitted in a contiguous block
with no gaps of more than 1.66 milliseconds between characters
B-1
Page 32

Appendix B. Entering SDI-12 Commands/Changing Settings
TABLE B-1. SDI-12 Commands
Function SDI-12 Command
Address Query
Send Identification
Acknowledge Active
Change Address
Start Verification
Start Measurement
Start Measurement and
Request CRC
Send Data
Additional Measurements
Additional Measurement and
Request CRC
Start Concurrent Measurement
Start Concurrent Measurement
and Request CRC
Additional Concurrent
Measurements
Additional Concurrent
Measurements and Request
CRC
Start False Echo Learn
Set Power n Operation Mode
(ON, OFF, AUTO)
Get Power Operation Mode
(ON, OFF, AUTO)
Get Water Conditions
Set Water Conditions
Where n is the new Water
Condition
Set Water Stage
Where n is the new Water
Stage
Get Unit
Set Unit
Where n is the new unit of
measurement
Reset Sensor
Resets the sensor to its factory
settings
?!
aI!
a!
aAb!
Where a is the current address and b is the
new address
aV!
aM!
aMC!
aD0!...aD9!
aM1!...aM9!
aMC1!...aMC9!
aC!
aCC!
aC1!...aC9!
aCC1!...aCC9!
aXSFEL+n!
n=distance necessary to clear the obstruction
aXSPOM+n!
n=2 (auto), 1 (on), or 0 (off)
aXGPOM!
2=auto; 1=on; 0=off
aXGWC!
n=0 (auto), 1 (smooth) 2 (medium), or 3
(rough)
aXSWC+n!
n=0 (auto), 1 (smooth) 2 (medium), or 3
(rough)
aXSS+n!
n=floating point number that is the initial
distance between the sensor and the water
surface.
aXGU!
0=meters; 1=feet
aXSU+n!
n= 0 (meters) or 1 (feet)
aXRS!
0=reset unsuccessful; 1=reset successful
B-2
Page 33

Appendix B. Entering SDI-12 Commands/Changing Settings
B.1 Changing Settings
B.1.1 Query/Set the Address
Valid addresses are 0 to 9; A through Z; and a through z. The factory default
address is set to 0. The address can be verified by sending the sensor the
Address Query command (see Table B-2).
TABLE B-2. SDI-12 Command for Querying the Address
Initial Command Response
?!
Change the sensor’s address by sending the sensor the aAb! command, where a
is the original address and b is the new address. Table B-3 shows an examp le
of the command and response for setting the address.
a<cr><If>
Where a is the current address of the sensor.
TABLE B-3. Example of Setting Address
B.1.2 Set Units
Initial Command Response
0A1!
Where 0 is the original address
and 1 is the new address
The distance measurement can be reported in feet (default) or meters. Change
the units by first using the aXSU+n! command (where n=1 (feet) or 0 (meters))
followed by the aXGU! (Get Units) command. Table B-3 shows an example of
the command and response for changing this setting.
TABLE B-4. Example of Setting Units
Initial Command Response
0XSU+0!
Where the first zero is the sensor
address and the second zero sets the
units to meters
Subsequent Command Response
0XGU!
Where zero is the sensor address.
This is the get units command.
1<cr><If>
The new address (1) is set in response.
00011<cr><If>
Where (from left to right),
0—sensor’s address;
001—the amount of time (in seconds)
that you must wait before sending
another command;
1—the number of values that will be
placed in the buffer.
0+0<cr><If>
Where the first zero is the sensor
address and the second zero indicates
that the units are now meters
B-3
Page 34

Appendix B. Entering SDI-12 Commands/Changing Settings
B.1.3 Set Water Conditions
The Set Water Conditions command adapts the sensor to different water
conditions.
There are four different settings:
• 0 (custom setting)
• 1 (smooth--typical peak to trough of wave < 4”)
• 2 (medium--typical peak to trough of wave < 8”)
• 3 (rough--typical peak to trough of wave > 8”)
The factory default water conditions are set to 1, which is smooth. The water
condition settings should closely mimic the actual water conditions during
normal river flow.
Change this setting by first using the aXSWC+n! command (where n=0
(custom), 1 (smooth), 2 (medium), or 3 (rough)) followed by the aXG W C !
(Get Water Conditions) command. Table B-5 shows an example of the
command and response for changing this setting.
TABLE B-5. Example for Setting Water Conditions
Initial Command Response
0XSWC+2!
Where,
0—sensor’s address;
2—the new water condition setting
(2=medium)
Subsequent Command Response
0XGWC!
Where zero is the sensor address.
This is the send water conditions
command.
B.1.4 Set Power Operation Mode
The following three power operation modes are available:
00011<cr><If>
Where (from left to right),
0—sensor’s address;
001—the amount of time (in seconds)
that you must wait before sending
another command;
1—the number of values that will be
placed in the buffer.
0+2<cr><If>
Where,
0—sensor’s address;
2—the new water condition setting
(2=medium)
• 1 (ON--sensor is always on until a new set power command is received.)
• 2 (Auto--sensor is powered by an incoming request from the SDI-12 bus
B-4
and sends back a response including the information on power up time.)
Page 35

Appendix B. Entering SDI-12 Commands/Changing Settings
• 0 (OFF—this mode is typically not recommended; sensor is completely off
until a new set power command is received)
CAUTION
The OFF power mode should only be used by advanced users
who want to turn the sensor off for extended time periods. In this
mode the sensor is completely off and only responds to a new set
power command.
The factory default Power Operation Mode is 1 (ON). In this mode of
operation, the instrument is continuously making measurements and draws
approximately 13.5 mA. The AUTO Power Operation Mode puts the
instrument in quiescent mode between measurement request queries.
Change this setting by first using the aXSPOM+n! command (where n=1 (on),
2 (auto), or 0 (off)) followed by the aXGPOM! (Get Power Mode) command.
Table B-6 shows an example of the command and response for changing this
setting.
TABLE B-6. Example for Setting Power Operation Mode
Initial Command Response
0XSPOM+2!
Where,
0—sensor’s address;
2—the new power mode setting
(2=auto).
00011<cr><If>
Where (from left to right),
0—sensor’s address;
001—the amount of time (in seconds)
that you must wait before sending
another data command;
1—the number of values that will be
placed in the buffer.
Subsequent Command Response
aXGPOM!
Where zero is the sensor address.
This is the get power mode
command.
0+2<cr><If>
Where,
0—sensor’s address;
2—the new power mode setting
(2=auto).
B-5
Page 36

Appendix B. Entering SDI-12 Commands/Changing Settings
B-6
Page 37

Appendix C. FCC/IC Equipment
Authorization (USA/Canada only)
The CS475, CS476, and CS477 are FCC approved. Modifications to the
sensors must have express agreement from Campbell Scientific. Any
modifications not approved by Campbell Scientific will cause the expiration of
the operating license issued by the FCC/IC. The radar sensor is in conformity
with Part 15 of the FCC directives and fulfills the RSS-210 regulations.
Regulations for operation include:
• These devices must not cause any interfering emissions.
• These devices must accept any interfering emissions received, including
interference that may cause unwanted operating conditions.
C-1
Page 38

Page 39

Page 40

Campbell Scientific Companies
Campbell Scientific, Inc. (CSI)
815 West 1800 North
Logan, Utah 84321
UNITED STATES
www.campbellsci.com • info@campbellsci.com
Campbell Scientific Africa Pty. Ltd. (CSAf)
PO Box 2450
Somerset West 7129
SOUTH AFRICA
www.csafrica.co.za • cleroux@csafrica.co.za
Campbell Scientific Australia Pty. Ltd. (CSA)
PO Box 444
Thuringowa Central
QLD 4812 AUSTRALIA
www.campbellsci.com.au • info@campbellsci.com.au
Campbell Scientific do Brazil Ltda. (CSB)
Rua Luisa Crapsi Orsi, 15 Butantã
CEP: 005543-000 São Paulo SP BRAZIL
www.campbellsci.com.br • suporte@campbellsci.com.br
Campbell Scientific Canada Corp. (CSC)
11564 - 149th Street NW
Edmonton, Alberta T5M 1W7
CANADA
www.campbellsci.ca • dataloggers@campbellsci.ca
Campbell Scientific Centro Caribe S.A. (CSCC)
300 N Cementerio, Edificio Breller
Santo Domingo, Heredia 40305
COSTA RICA
www.campbellsci.cc • info@campbellsci.cc
Campbell Scientific Ltd. (CSL)
Campbell Park
80 Hathern Road
Shepshed, Loughborough LE12 9GX
UNITED KINGDOM
www.campbellsci.co.uk • sales@campbellsci.co.uk
Campbell Scientific Ltd. (France)
Miniparc du Verger - Bat. H
1, rue de Terre Neuve - Les Ulis
91967 COURTABOEUF CEDEX
FRANCE
www.campbellsci.fr • info@campbellsci.fr
Campbell Scientific Spain, S. L.
Psg. Font 14, local 8
08013 Barcelona
SPAIN
www.campbellsci.es • info@campbellsci.es
Please visit www.campbellsci.com to obtain contact information for your local US or International representative.
 Loading...