

Page 1
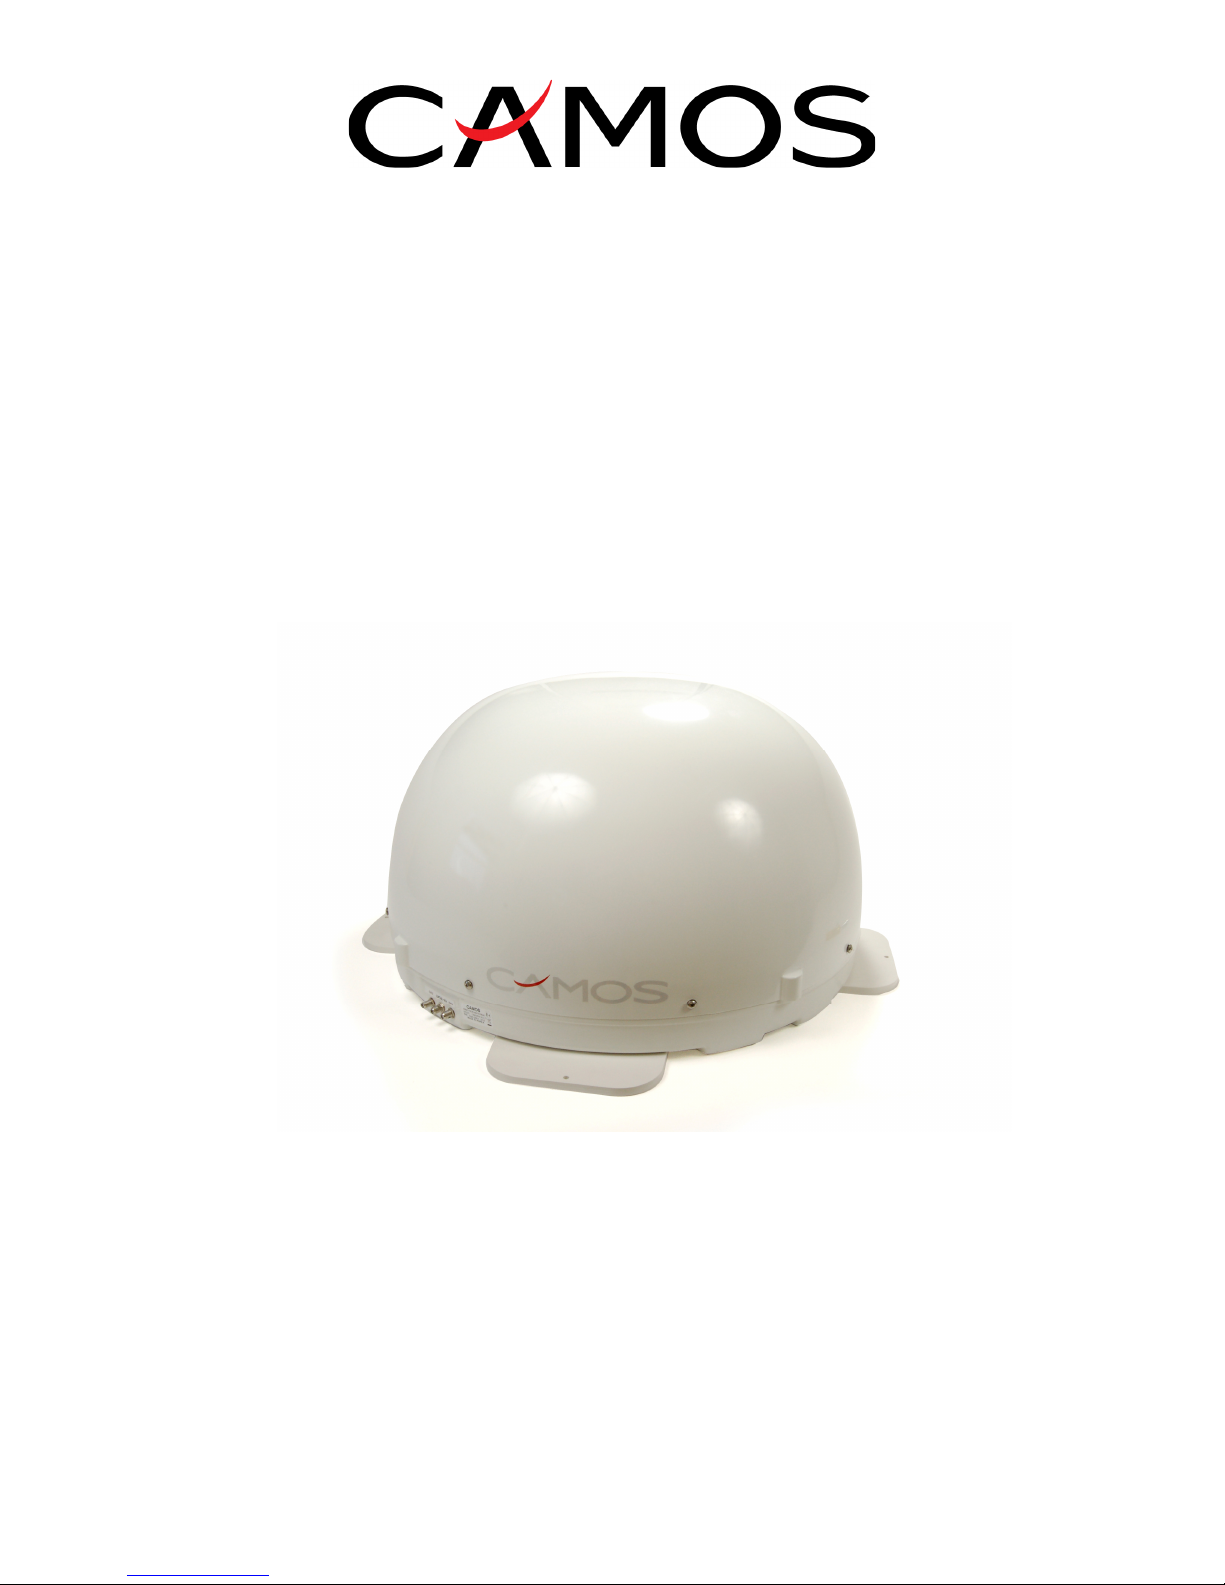
CSA-345
Fully automatic, auto-tracking Satellite antenna
with 3 multi-outputs
Instruction Manual
Ver. 1.5
Thank you for purchasing our product.
Please read this instruction manual carefully before installing
and operating this antenna!
Please write down the serial number of this antenna.
In case of queries please inform us of this number:
Serial No: _________________________________
Page 2
The Camos CSA-345 enables reception on the move of the major European satellites
including all Astra-Satellites, Eutelsat/Hotbird, Sirius, Atlantik Bird3 and Hispasat.
If you want to watch TV or access the Internet via satellite, even when your vehicle is
moving, here’s the equipment you need. The sat-dome is compact in size, light in weight,
reliable in operation and incredibly easy to operate and install: there’s just one co-ax cable
to run.
1. Supplied standard equipment
- Sat-Antenna CSA-345
- Control box incl. power cable
- 1 HQ co-ax cable (10m) with F-plug on both ends
- 1 HQ co-ax cable (1m, black)
2. Installing your antenna
We recommend installing the CSA-345 with the help of your professional dealer/workshop.
Pls pay attention that installing the antenna increases the height of your vehicle!
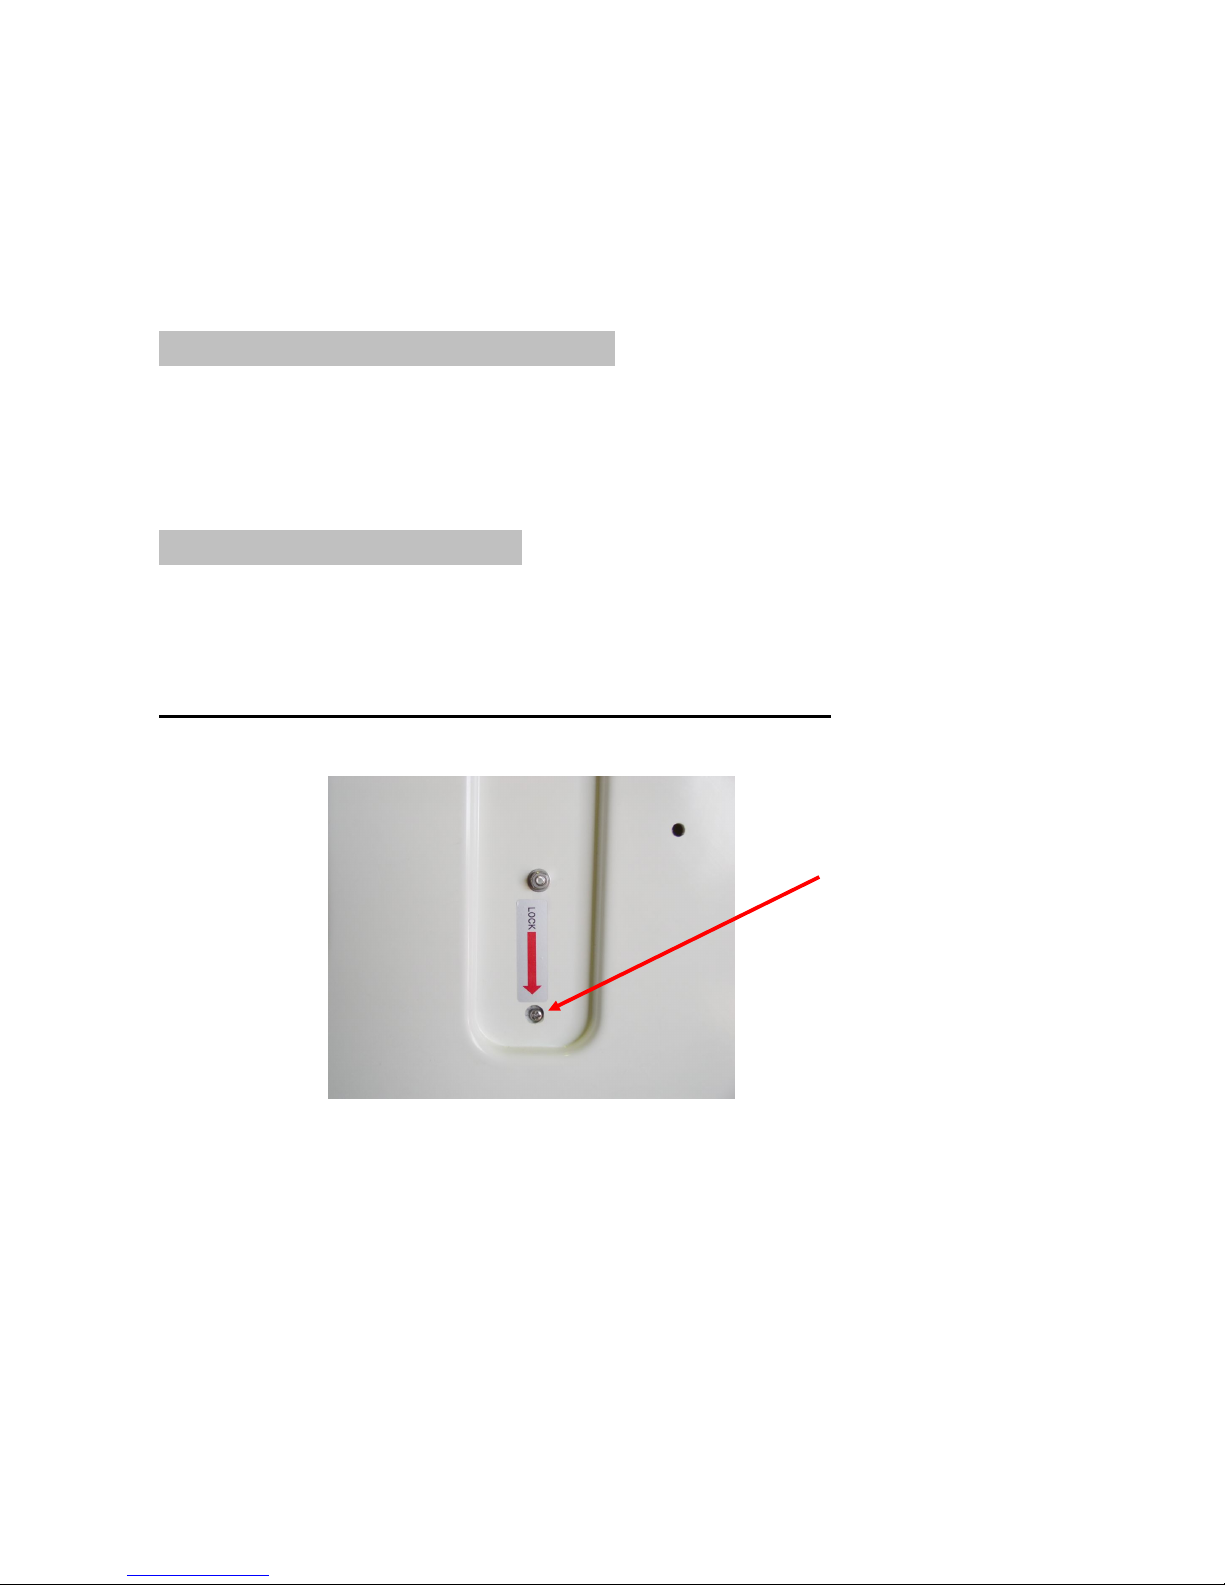
Attention! Pls remove the safety screws on bottom of antenna!
Bottom Side of Antenna
Important!
Pls absolutely keep to each individual point of mounting instruction!
General:
Pls take care of a suitable workplace, a garage or hall is better than a place outside. The
ambient temperature during sticking the antenna should lie within a temperature between
+5°C to max.+25°C. If you work outside avoid direct sunlight!
Always keep to the instructions dealing with chemical products.
Take care of necessary hygienic working conditions.
Safety Screw
Page 3
Before mounting we recommend to test the antenna at the selected mounting place!
In some cases it may happen that the antenna does not work properly.
After checking pls mount the antenna as follows:
Preparation:
1. Assure that the roof of your vehicle is able to carry the antenna. If you are not sure pls
fix a metal plate (Alu, appr. 2mm thickness) onto the roof. Pls also ask the vehicle's
manufacturer.
2. Pleas check completeness of parts.
3. Put the antenna on the selected mounting place on the car roof and adjust if
necessary. The mounting place must be even and no other roof constructions may
cover the reception area of the antenna.
Mark the outline of antenna feet with a suitable pen.
In case of problems (e.g. the roof is not even but has a curved form instead) pls call our
hotline to arrange further steps.
4. Replace the antenna.
Clean the mounting place and the antenna feet with the supplied special cleaning fluid
"Reiniger1" and the supplied fleece (pls wear the supplied Latex gloves!).
Grind the marked fixing areas and antenna feet with sandpaper (not too much, the
surface must be rough a little bit only), clean the surface and antenna feet with cleaning
fluid 1 again and wait another 10 minutes.
Attention! Now do not touch the cleaned surface any more!
5. Apply (with the help of the wool wiper - pls wear the supplied Latex gloves!) the
Primer 2 evenly and thin onto the cleaned surface and feet. Then pls wait another 10
minutes. Attention! Do not touch the cleaned surfaces any more!
Close the Primer 2 bottle at once after use.
Note:
If the surface of the mounting place is made from unknown material, we recommend a
"test sticking". If necessary we can arrange a material analysis at your cost.
Sticking the antenna to your vehicle's roof:
1. Cut the tip of the supplied cartouche special glue "Spezialkleber 3" (pls wear the
supplied Latex gloves!).
2. Apply evenly the glue onto the antenna feet (thickness of glue layer appr. 3 to 4mm
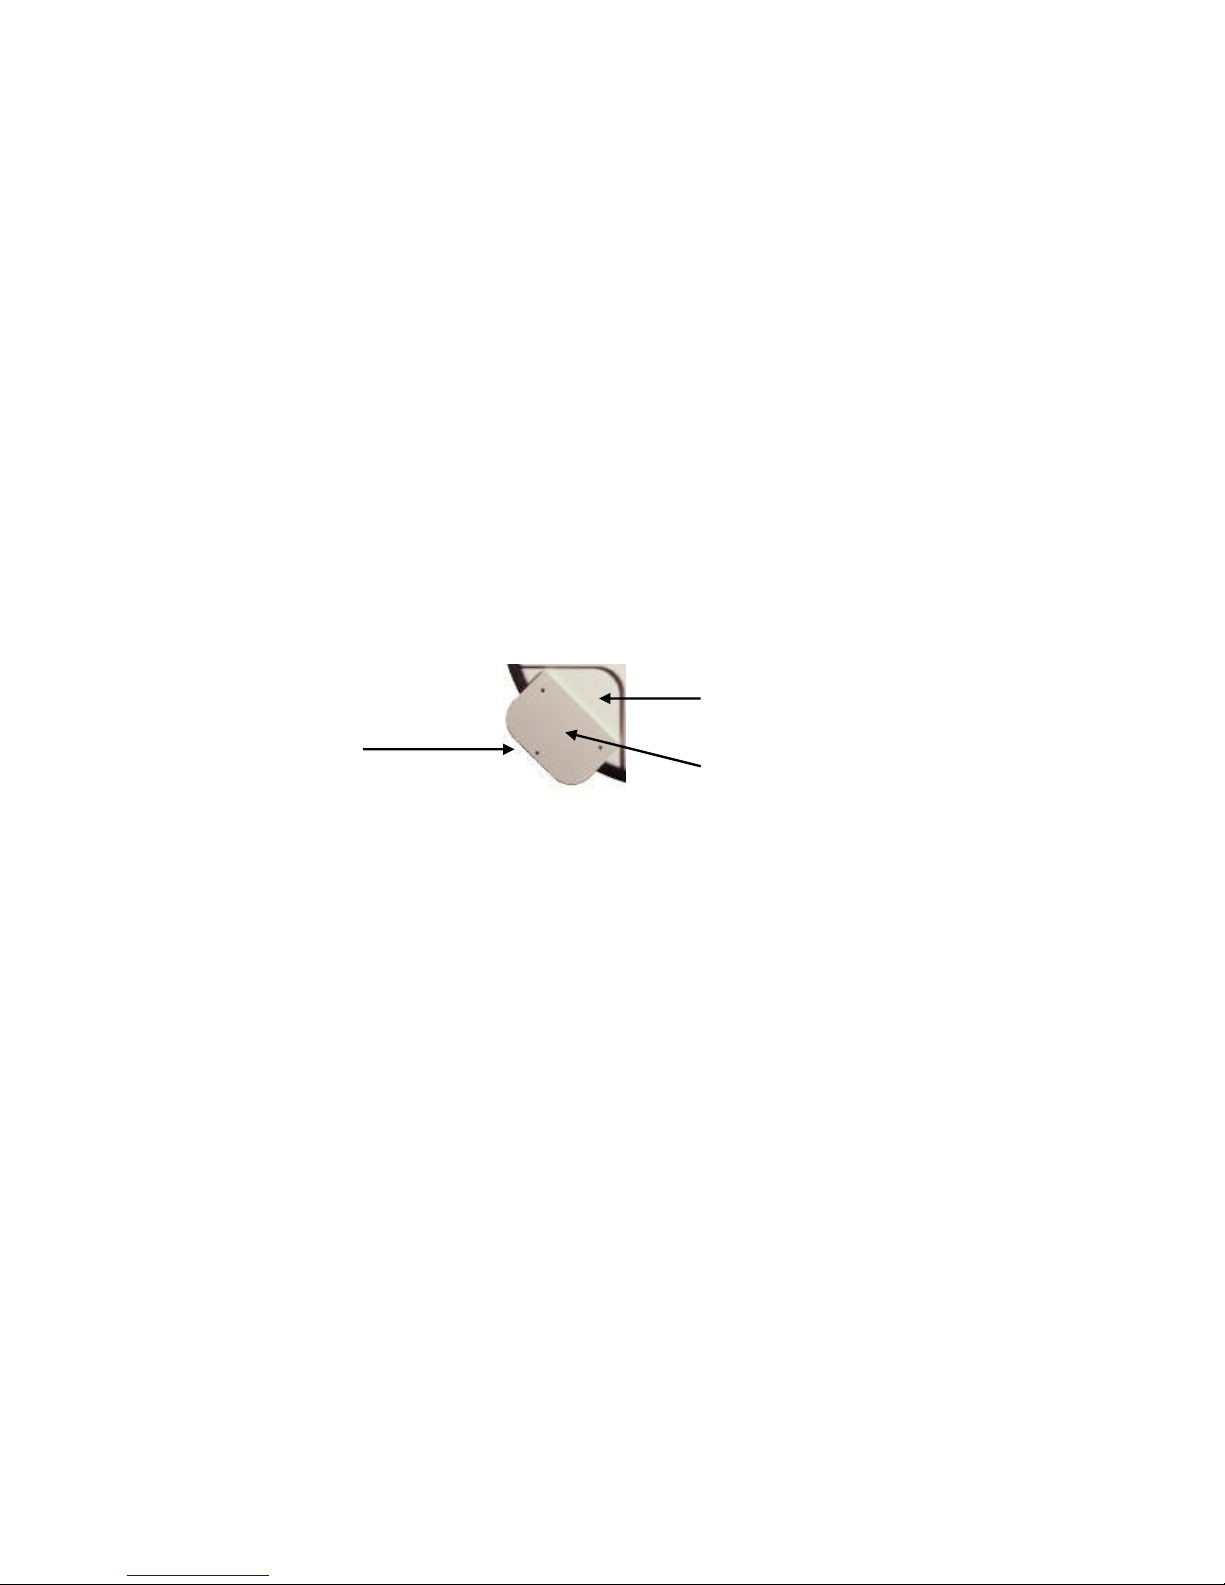
bottom of antenna
Screw hole
Page 4
3. Pls put the antenna (max. 5 minutes after applying the glue!) on the selected mounting
place on the car roof. Press the antenna feet smoothly ontot the roof and fix the
antenna with tape e.g. to avoid moving. After pressing the antenna feet onto the roof
the minimum thickness of the glue layer must be appr. 2mm.
Now the glue needs a hardening time of appr. 48 hours (air humidity of 50%).
If the air humidity is lower than 50% pls spray some water into the air in the
surrounding of the antenna feet.
4. Remove the outcropped glue on the sides of antenna feet and clean the surface with
the supplied fleece and special cleaning fluid "Reiniger1".
5. In addition you can fix the antennas feet with the help of 4 screws. Pls set the screw
after hardening of the glue.
3. Connections
Lay the cables carefully to avoid short circuits! Pay attention to existing cables!
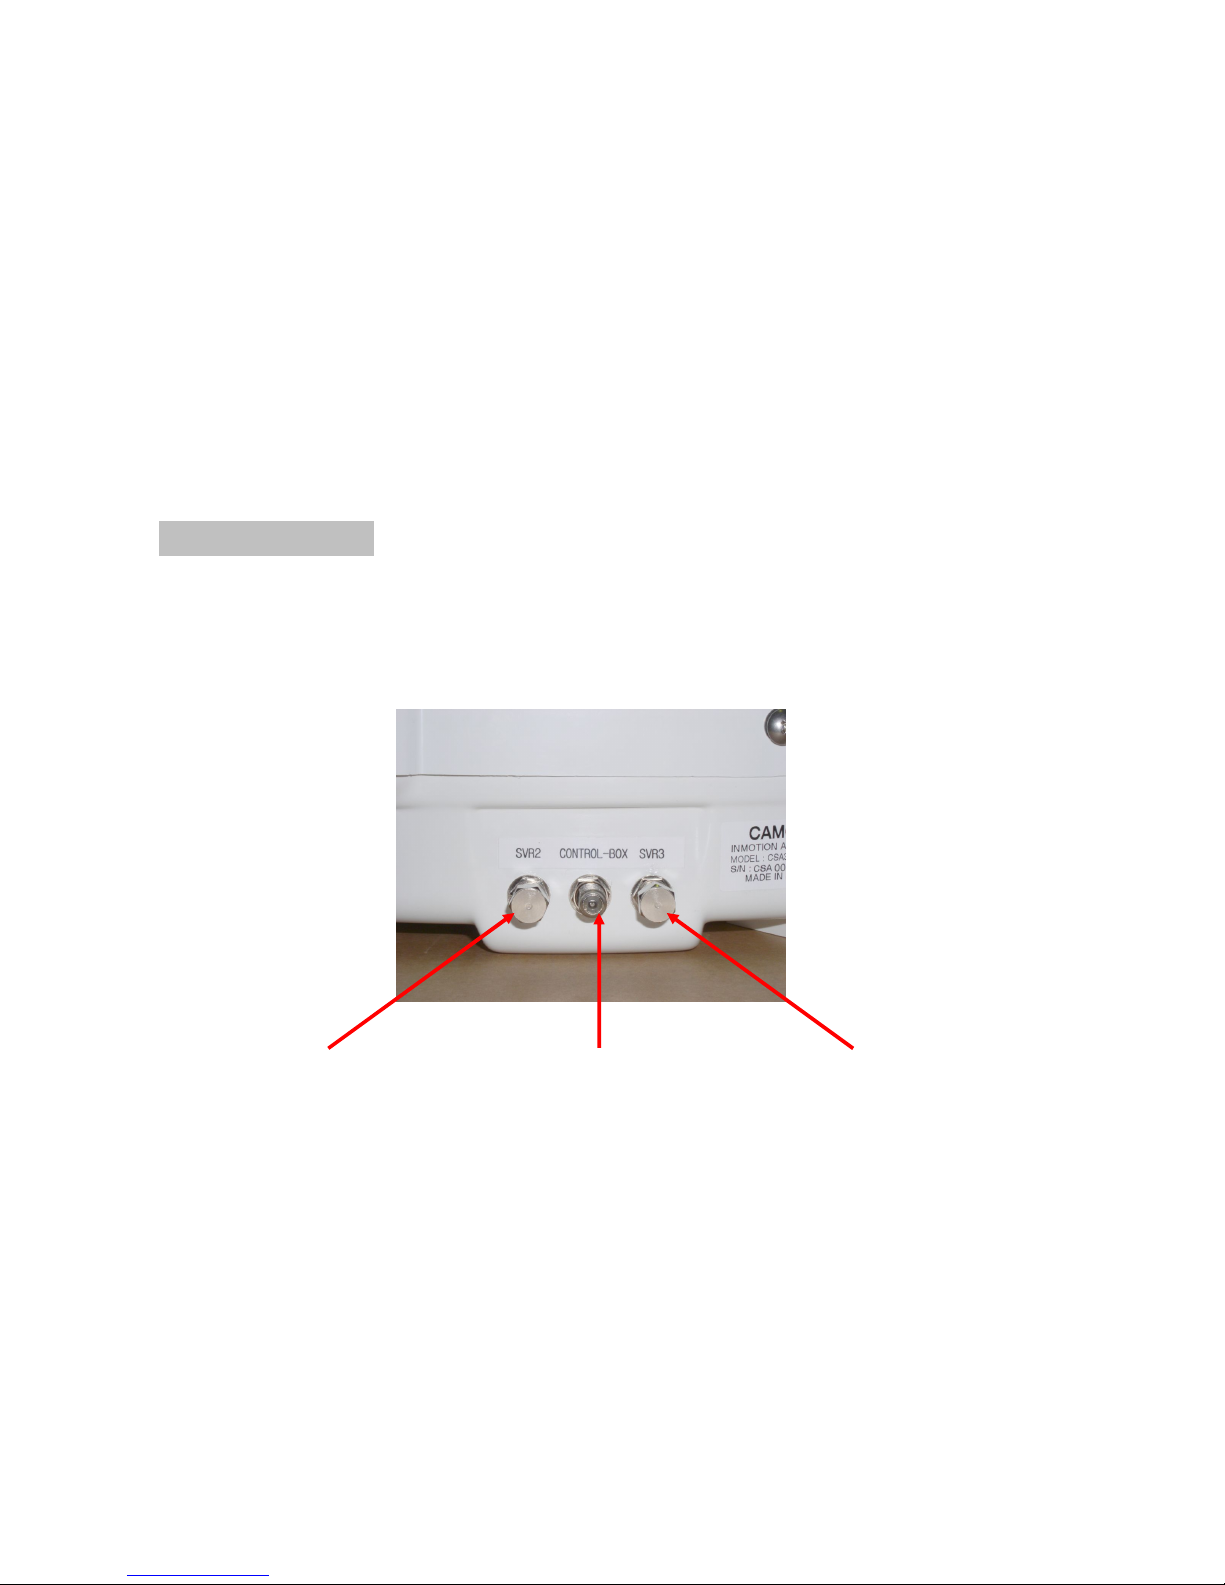
1. Connect the antenna by plugging the long white cable into the middle antenna cable
socket.
Connection for 2. Receiver
Connection for control box
Connection for 3. Receiver
Page 5
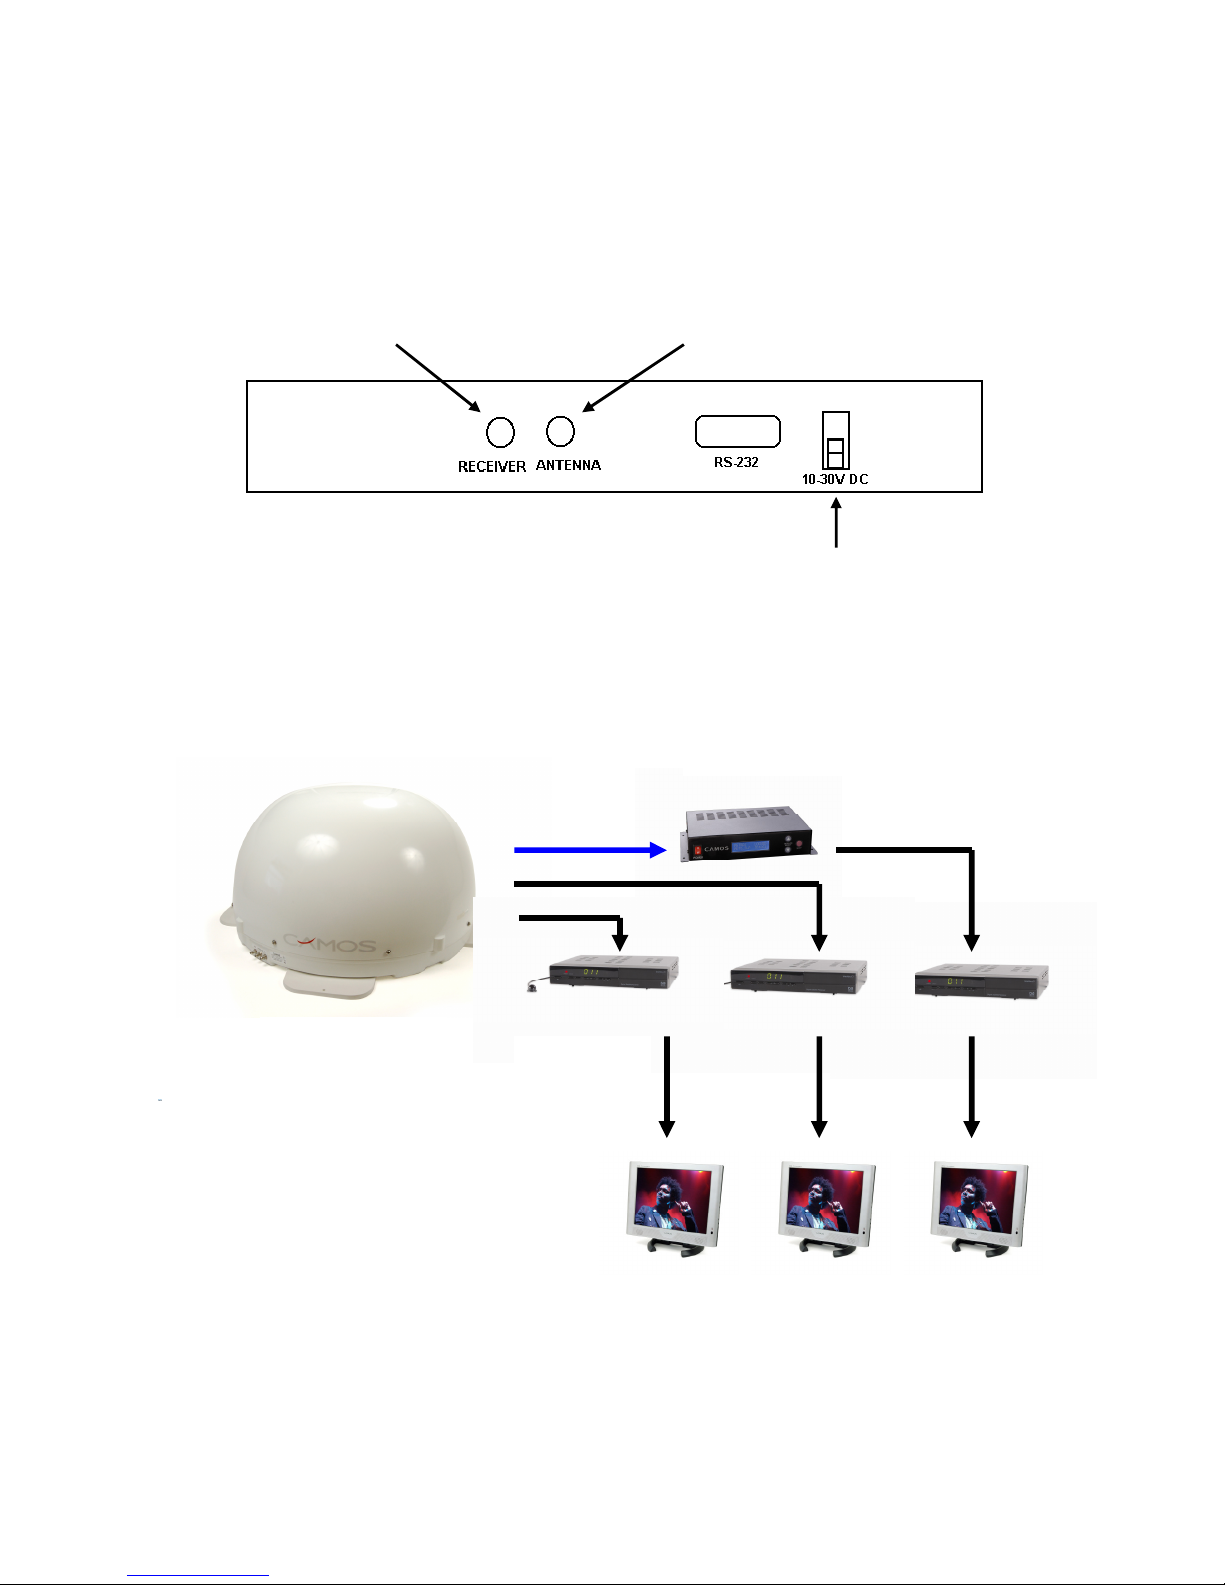
2. Connect the power cable (red/black) to the control box and power source. This can be
between 10V & 30V D.C.
Positive terminal (+) = red colour
Negative terminal (-) = black colour
3. Connect the control box with the middle antenna cable socket.
Then connect one receiver (via the short co-ax cable) with the socket marked
"RECEIVER" on the back of the control box, the other receivers pls connect directly
with the remaining sockets of the antenna.
4. Instead of the 3 receiver you can also connect a satellite multi switch to the antenna.
This enables you to use more than 3 receiver with the antenna.
Pleas pay attention that the multi switch is able to be connected directly with "Quad
LNB", not only "Quattro LNB".
3x Satellite-
receiver
3x Monitor or TV
with AV input
Receiver socket
Antenna socket (F)
Power socket
Control box (rear-view)
Control box
CAMOS CSA-450
CSA
-
345
Page 6
4. Starting up
1. Switch on your satellite receiver and monitor/TV. Then switch on the control box.
2. The antenna goes to search mode and, after a while, finds the desired satellite.
5. Operating the antenna
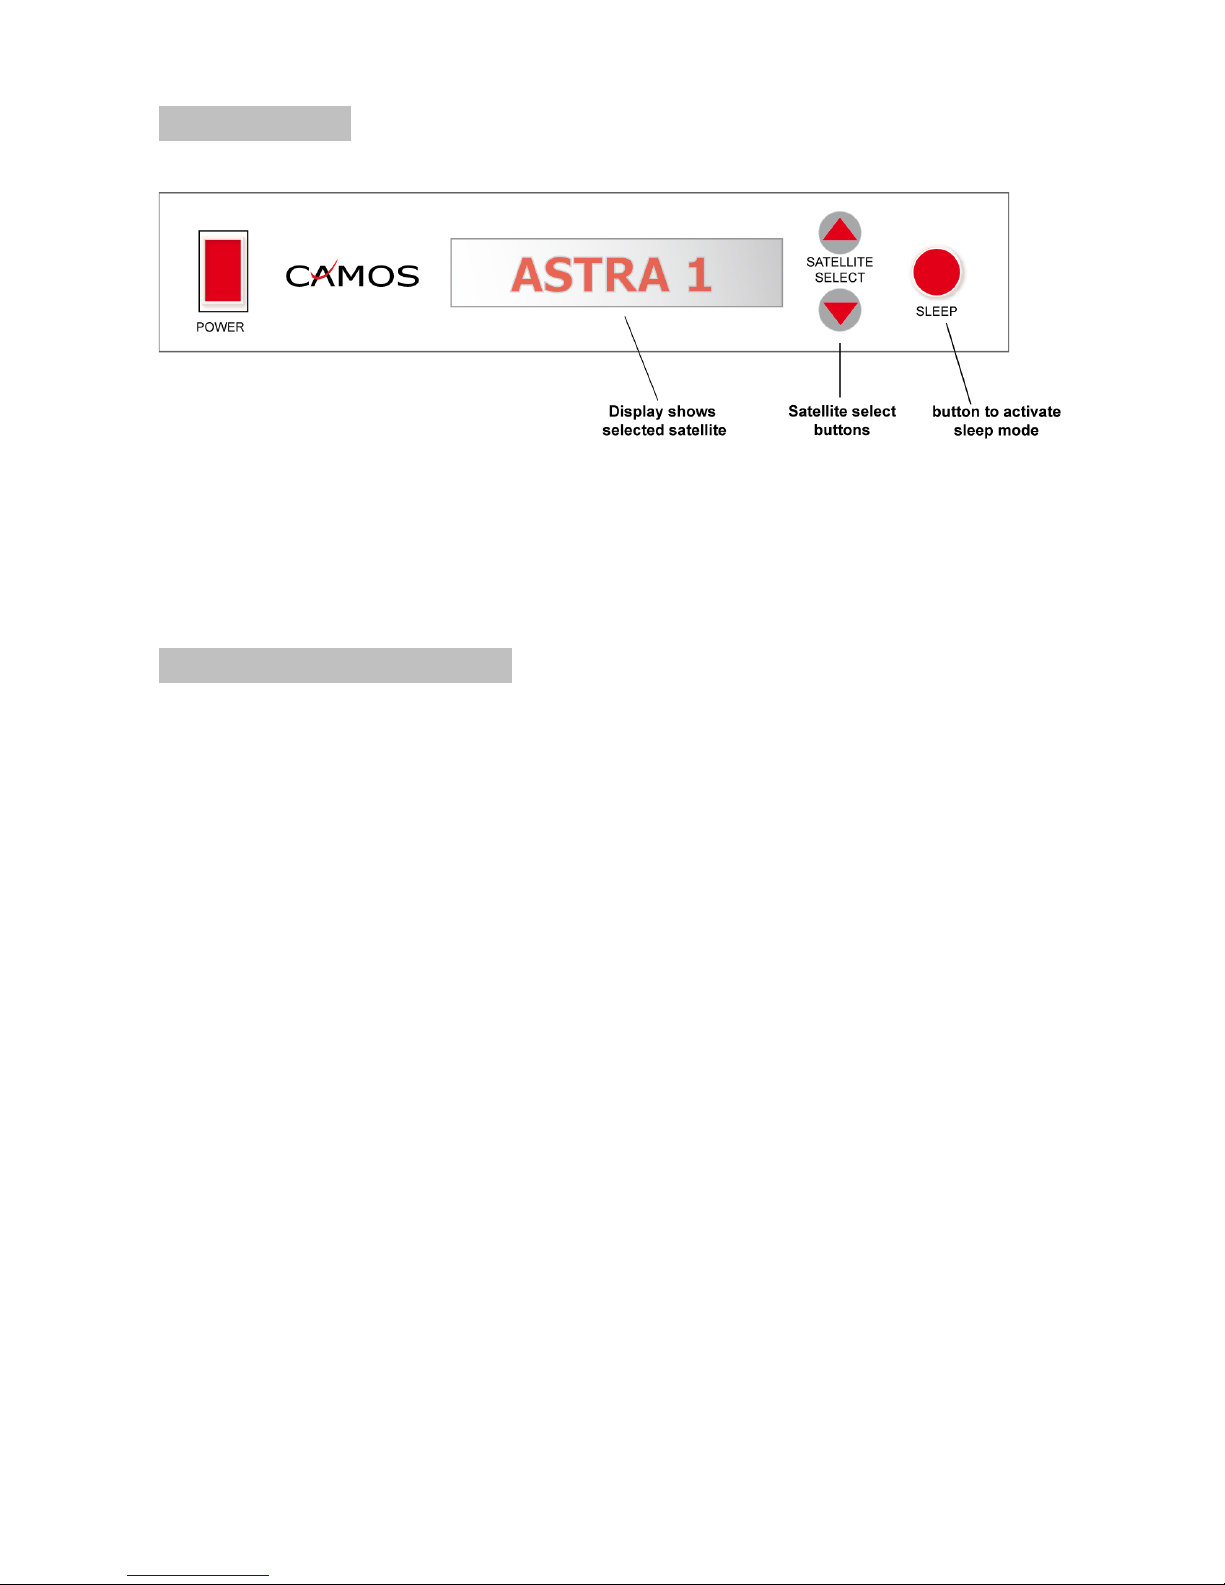
1. Selecting a satellite / Search mode
Push the "SATELLITE SELECT" button several times until the desired satellite
indicator lights up.
ASTRA 2-N Select this position when you are in the northern part of ASTRA2
footprint.
ASTRA 2-S Select this position when you are in the southern part of ASTRA2
footprint.
ASTRA 1 Select this position for Astra 1
HOTBIRD Select this position for Hotbird
SIRIUS Select this position for Sirius
AB 3 Select this position for Atlantik Bird 3
Thor Select this position for Thor 2/3
HISPA Select this position for Hispasat
Now the antenna starts searching and the indicator for the search mode (SEARCH)
lights up.
Page 7

2. Tracking mode
When the antenna has found the selected satellite, the satellite indicator goes out for 1
second and lights up again. Now the satellite is logged in and the tracking indicator
(TRACKING) lights up.
Sometimes it happens that the antenna at first stops and locks onto a different satellite
(depending on your position, signal strength and weather conditions). In this case the
indicator of the different satellite lights up for a second and goes out again. The
antenna has now recognized that it has found the wrong satellite and moves to the
correct position.
The controller will remember which satellite it last found and will always look for that
one when it is switched on again.
Now you can enjoy TV.
3. Standby / Sleep mode
When your vehicle does not move for a longer time (antenna keeps position) the
antenna automatically falls into a "Sleep" mode (Standby). That means the tracking
movements will be stopped (to avoid tracking noise).
If the antenna position is changed (vehicle starts moving again) the antenna
automatically starts the tracking mode (TRACKING) or search mode (SEARCH),
depending on how much the antenna position has changed.
You can also manually activate the standby / sleep mode:
After logging in (TRACKING mode indicator lights up) push the "SATELLITE SELECT"
button once. Now the SLEEP mode indicator lights up in addition and the antenna
stops moving. Recommended if the vehicle keeps its position during longer time
(Camping ground).
You can deactivate the SLEEP mode by pushing the "SATELLITE SELECT" button
once again.
If you completely switch off the antenna (e.g. overnight) the antenna will go to search
mode again after switching on the next day.
6. In case of problems
No reception / no picture:
a) Any obstacles (trees, buildings or roof constructions) between antenna and satellite?
Choose a different position with a clear line of sight to the satellite.
b) Correct installation of antenna cables? Defective cables (broken)?
Please check the cables!
c) Did you select the right satellite? Please check whether the satellite you have selected
on your receiver corresponds with the satellite you have selected on the control box.
d) Did you switch on both the control box and satellite receiver?
e) Power supply ok? Please check power cable(s).
If you want to use a different cable (from antenna to control box):
Only use high quality. low loss co-ax cable. The F-plugs must be high quality types as well,
because as well as the RF signal, the power supply voltage for the antenna passes down
this cable. Even small losses may have an effect on reception.
We strongly advise to use the supplied cables.
Page 8

Varnishing of the antenna:
In principle, we recommend not to varnish the antennas dome, because every additional
coating may affect the reception quality.
Although if you want to varnish your antenna, please note that the colour does not contain
any metal particle and the varnish layer is applied as thinly as possible.
Furthermore, we do not assume any liability for damages on the antennas dome, which
can result from solvent-based varnish.
7. Technical Data
Frequency range: 10.7 to 12.75 GHz
LNB-Type: universal
Polarisation: horizontal and vertical
Gain: 33dBi
Full evation range: 17° - 60°
Azimuth turn range: 720°
Power supply: 10 - 30V / 27W max.
Operating temperature: -22°C to +55°C
Radome Diameter: 69,5cm
Radome Heigh: approx.40cm
Tracking rate: max. 50° per second
Weight (without control box): appr.12,7kg
IMC GmbH (Camos Europe)
Carl-Zeiss-Str. 7
D-22946 Trittau
GERMANY
www.camos-multimedia.com
Page 9
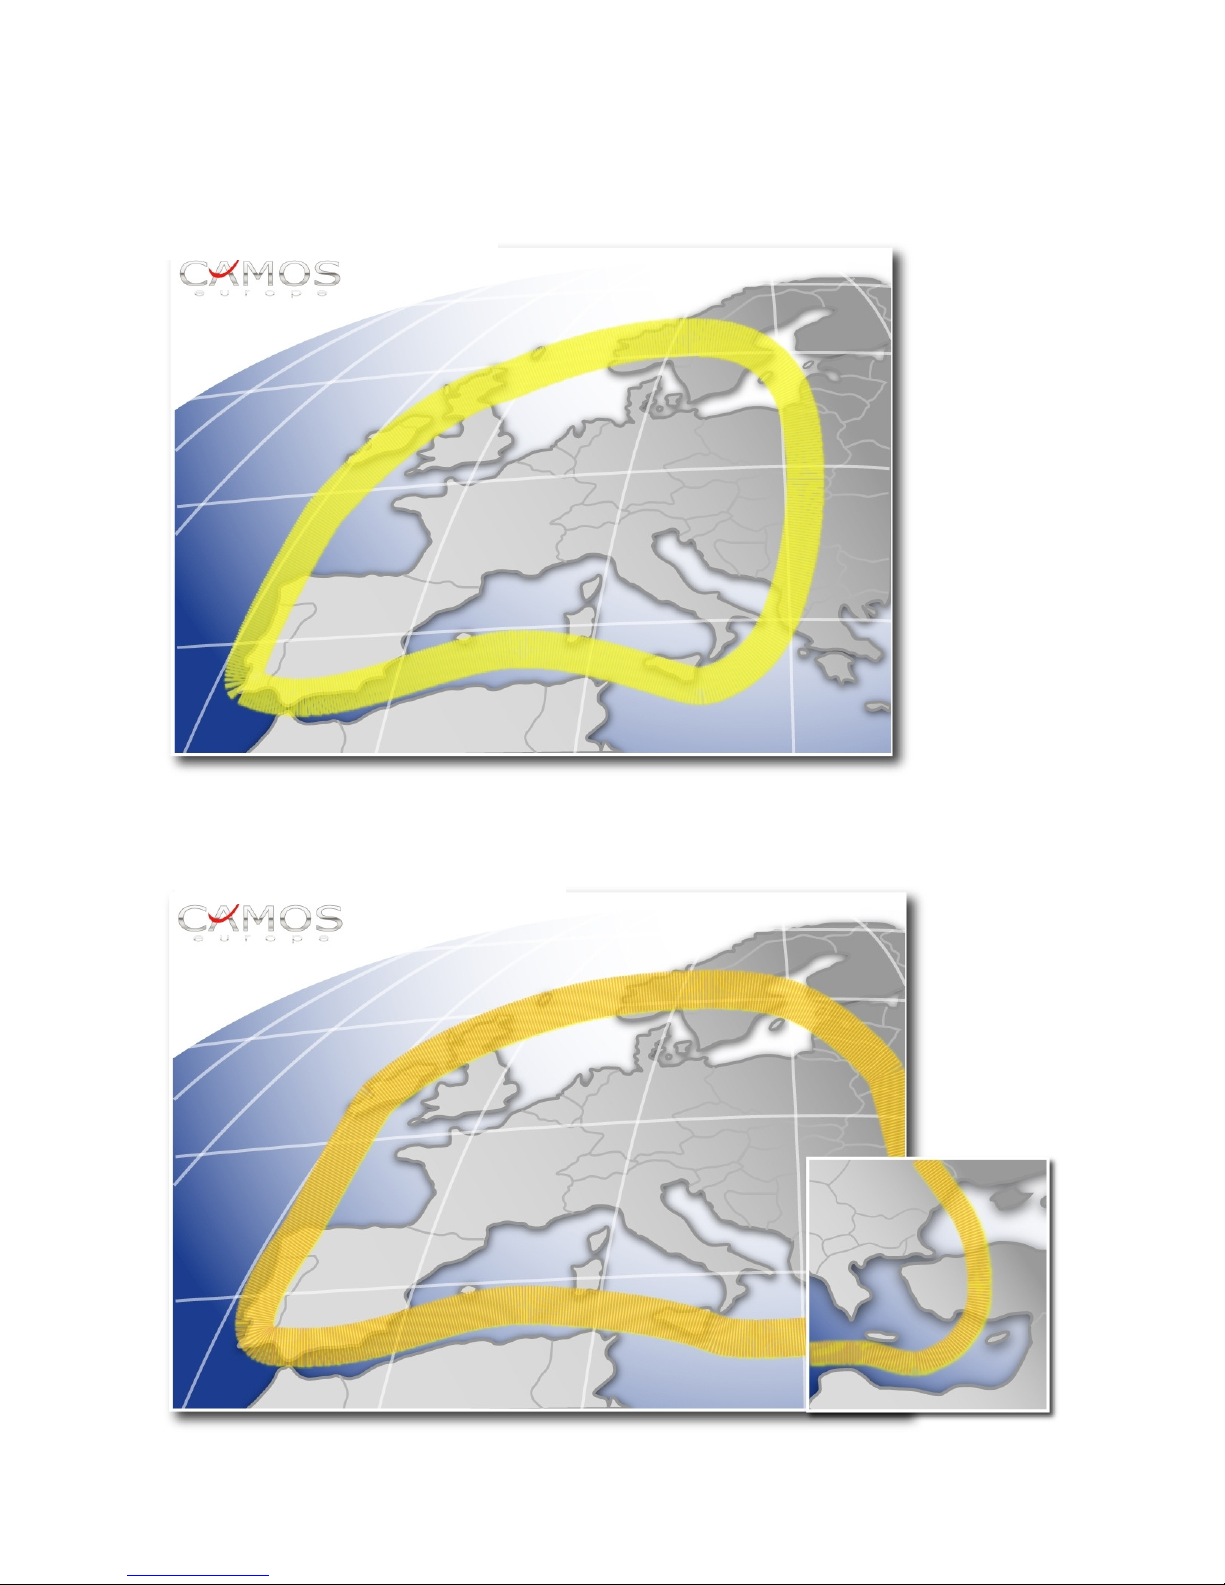
Frootprint Hotbird (digital)
Footprint ASTRA 1 digital)
(no responsibility is taken for the correctness of this information)
 Loading...