

Page 1
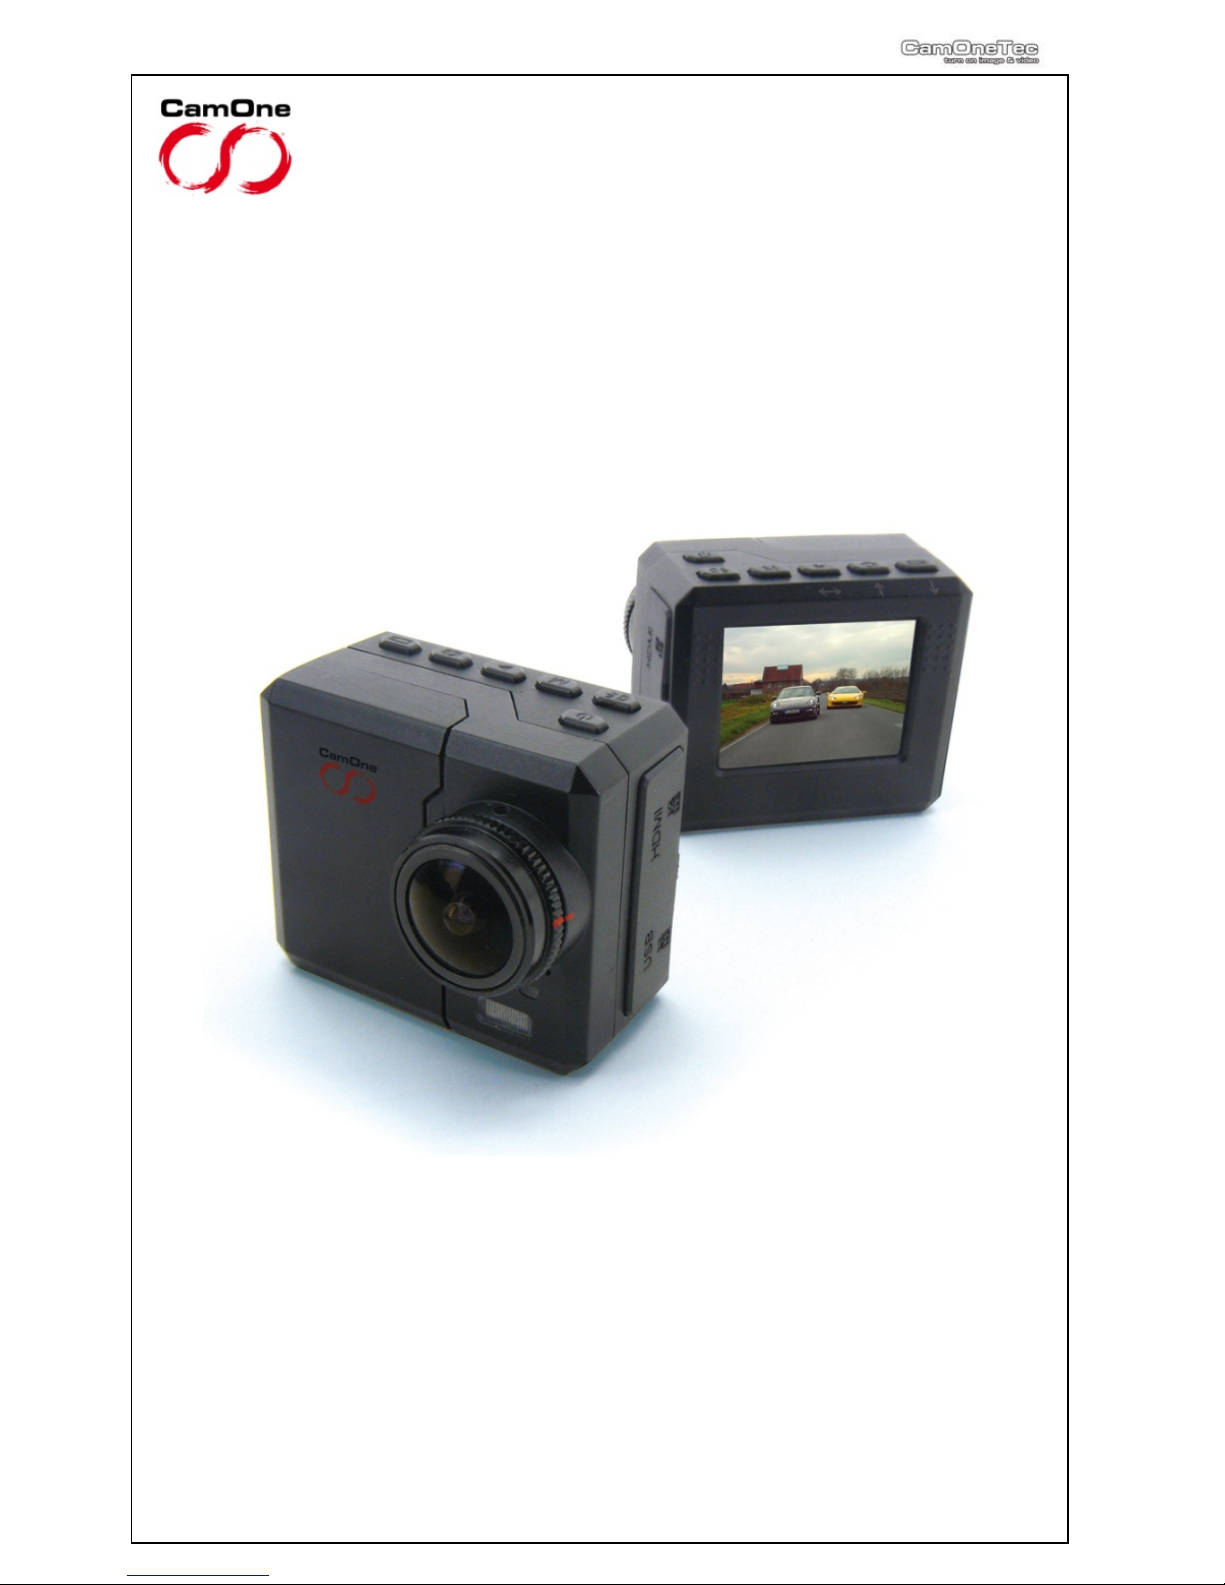
Manual
for download at www.CamOnetec.com
Vers.: 1.02
CamOneTec is a Division of ACME the game company GmbH, Germany
"FlyCamOne", “CarCamOne” and "CamOne" are registered Trademarks of ACME the game company GmbH, Germany
© copyright 2011 by CamOneTec
Page 2
2
Safety advice
WARNING:
Follow these instruction to prevent damage of
the unit:
DO NOT USE UNPROTECTED IF RAIN OR
WATER. PREVENT CONTACT WITH ANY
KIND OF LIQUIDS
USE RECOMMENDED ACCESSORIES
ONLY
DO NOT DISASSEMBLE
THERE ARE NO PARTS AT THE INSIDE
THAT NEED TO ME MAINTAINED
REPAIRS SHOULD BE MADE BY
QUALIFIED PERSONNEL ONLY
SERVICE & SUPPORT
CamOneTec
by ACME
Industriestr. 10a
33397 Rietberg
Germany
Tel: +49 5244 7000 70
or
http:// www.camonetec.c om
WARNING Li-Ion BATTERY
Mishandling the battery may occur
explosion, fire and smoke including
damage of health or goods. It will also
reduce battery performance.
Never charge a damaged Li-Ion battery
pack.
Stop charging if the Li-Ion battery pack
is getting deformed (blown up).
Charge and store the battery pack at a
temperature of 0°C to 40°C – avoid a
temperature higher than 65°C when
discharging.
Do not shortcut – Risk of explosion and
fire!
CE Declaration
Herewith we declare that this item is in
accordance with the essential requirements and
other relevant regula tions of the directive
2004/108/EC. A copy of the original declaration
of conformity can be obtained at the address
above.
WEEE Reg. Nr.: DE64989527
Information for disposal of crossed
Bin marked products
This symbol is marked on a product or
packaging, it means that the product including
the batteries must not be disposed of with your
general household waste. Only discard
electrical/electronic items in separate collection
schemes, which cater for the recovery and
recycling of materials contained within. Your
co-operation is vital to ensure the success of
these schemes and for the protection of the
environment.
This product uses Li-Ion batteries. Li-Ion
batteries are recyclable, and a valuable
resource. To dispose of the battery, remove it
and take it to a resource recovery facility.
ATTENTION!
The privacy of others is protected by law and should be taboo. The recording of
third party can be an illegal act. You are responsible for your acting.
Electrostatic discharge or strong electromagnetic fields can affect the Camera.
Restart the Camera in this case.
Page 3
3
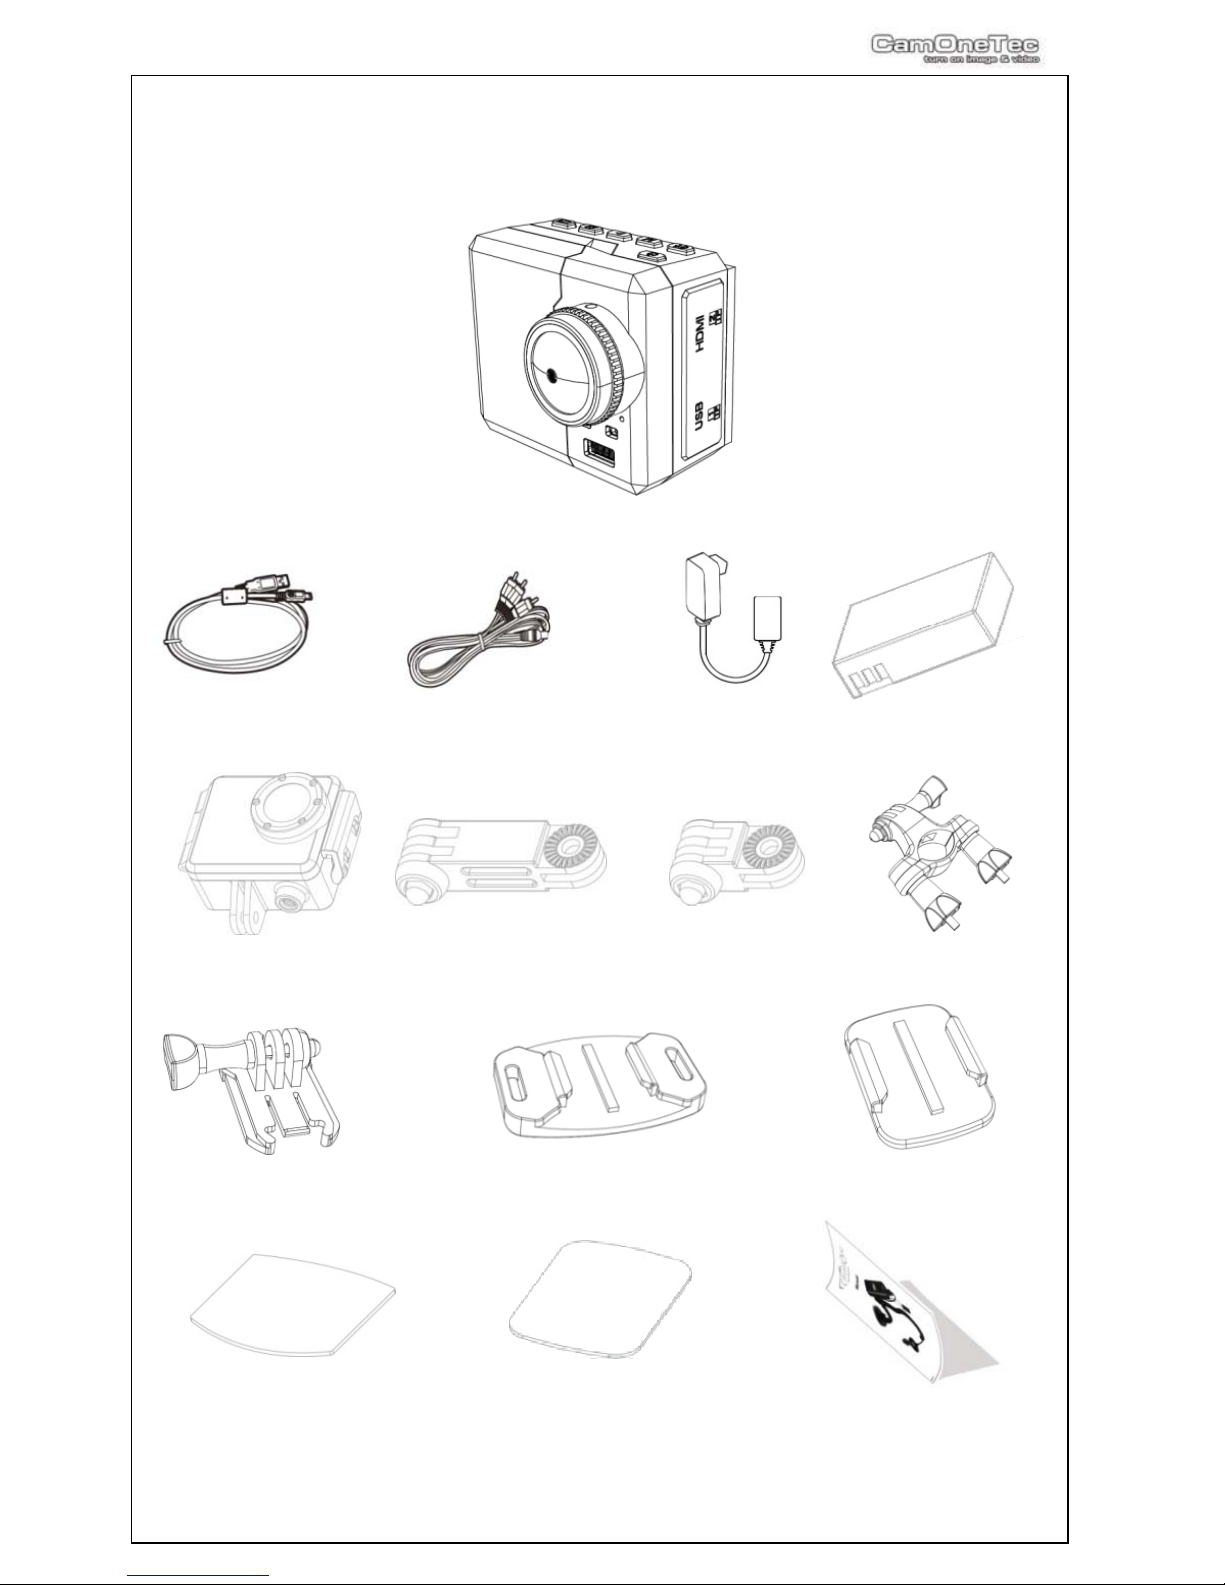
Content of Box
Check the completeness before using the product
CamOne Infinity Camera 1080p
USB-Cable USB –AV-Cable Ten-2-Ten Adaptor Battery
DiveBox Long connector Short connector Bike Mount
M-Mount
Helmet Mount Universal Mount
Velcro Pad small Velcro Pad big Manual
Page 4
4
Preparation
Compensation for recorded content
ACME will not be responsible in any case for any consequential or direct problems that will
lead to a loss of recorded or edited data. Furthermore ACME will not guarantee the content in
case the recording or saving is not working properly. The above limitations are as well valid in
case the unit has been repaired.
Do not remove the micro SD Card while recording or saving. Do not switch off or take out the
battery before the recording has been stopped or as long there is access to the memory,
indicated by a rotating circle.
Protect the unit from extreme temperatures. Stop recording at temperatures less than minus
10°C and higher than 60°C. Remove the camera from the windshield/sucking pad in case
extreme temperatures might be possible!
It is known that forged accumulators which remarkably look like the original product are
offered for the sale again and again. Some of these accumulators are not equipped with a
proper protection circuit which would satisfy the regulations of the prevailing safety
regulations. These accumulators can perhaps lead to fires or explosions. We assume no
liability for accidents, damages or failures which result from the use of a forged accumulator.
Surface of the camera
The shell of the camera is made of high quality aluminum, an energy-consuming process.
Accepting tiny superficial casting defects, not affecting the quality of the camera, reduces the
reject rate by 80%.
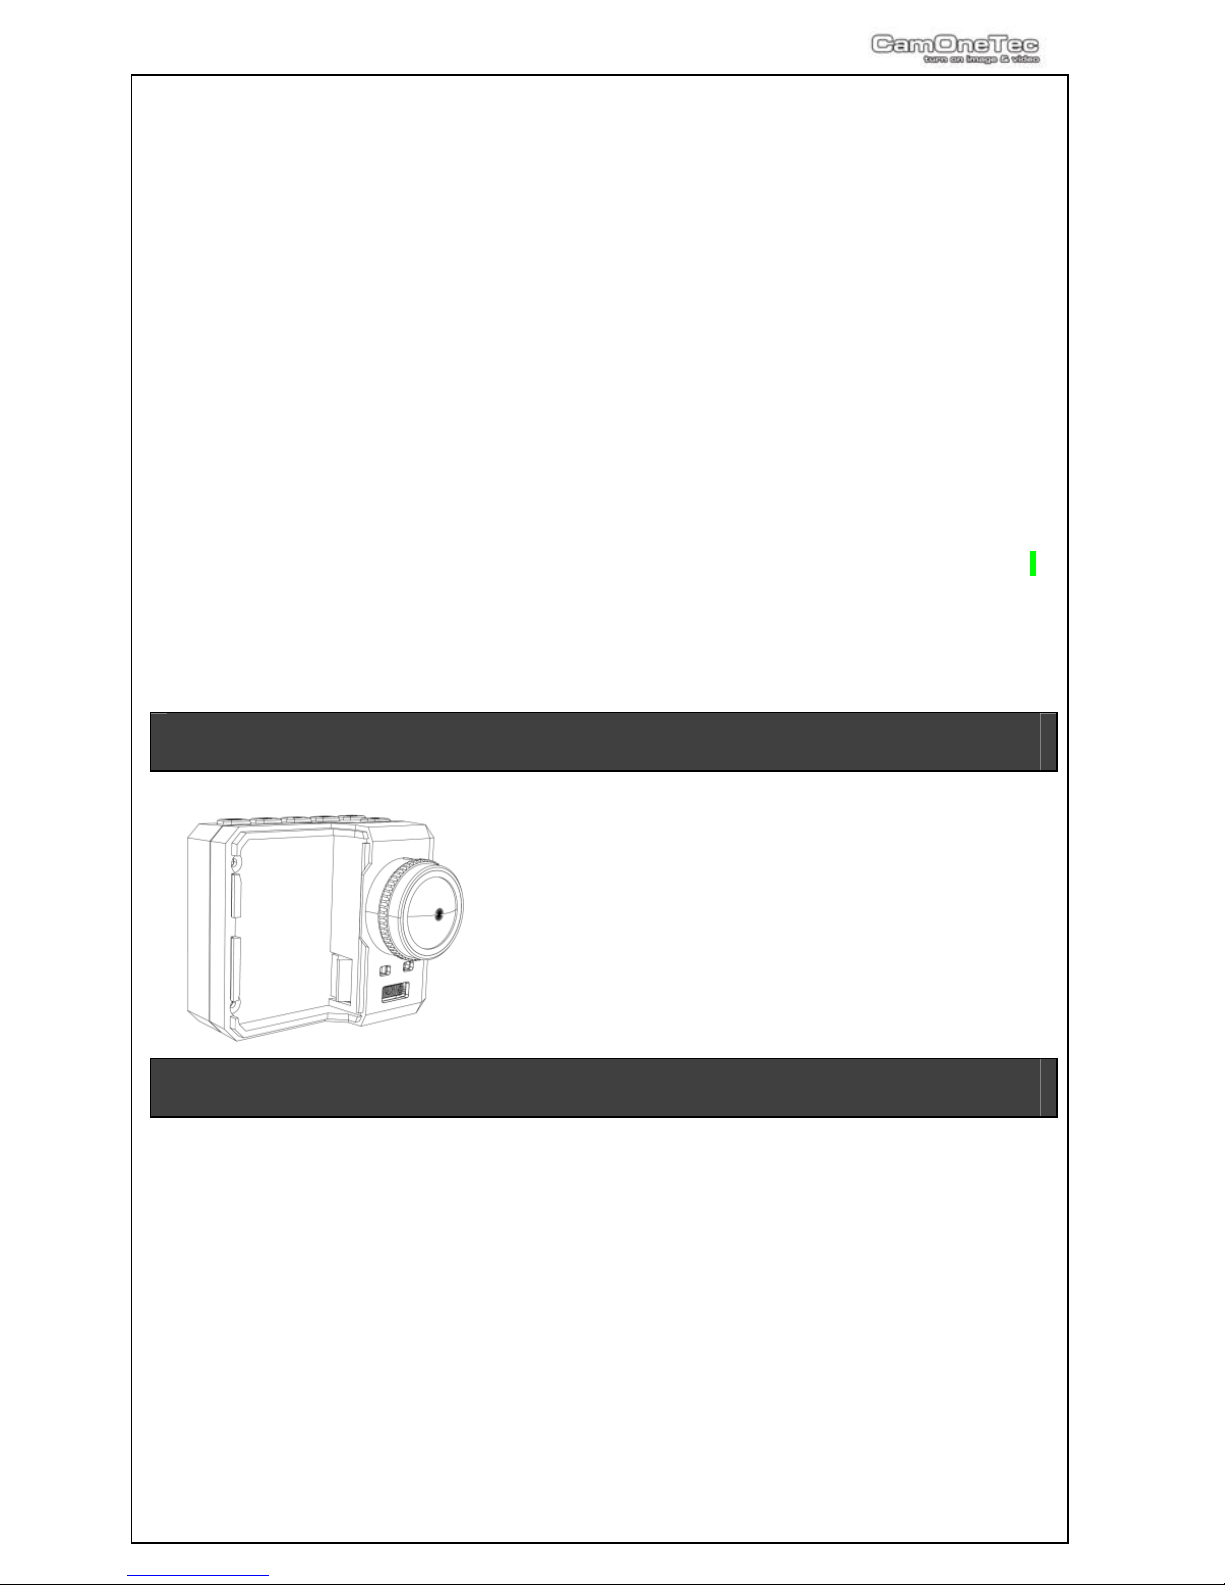
Insert the battery
Push up the lock battery compartments lock and remove
the cover. Below this you will find the battery case. Insert
the battery by following the golden contacts inside the
cam.
Only use the original battery (Art-No.: COIN08).
Batteries of other suppliers may have different polarities
and cause damages!
Charging the battery
The inside battery is not fully charged when being purchased. Please charge the battery
before you are going to use the CamOne Infinity the first time!
Connect the camera with your computer using the included USB-cable. The charging process
is indicated by the red LED light which switches to green as soon as charging is finished.
Charging takes around 2 hours.
You can alternately use the 5V USB-Power adaptor (Art. No.: FCHD43).
Page 5
5
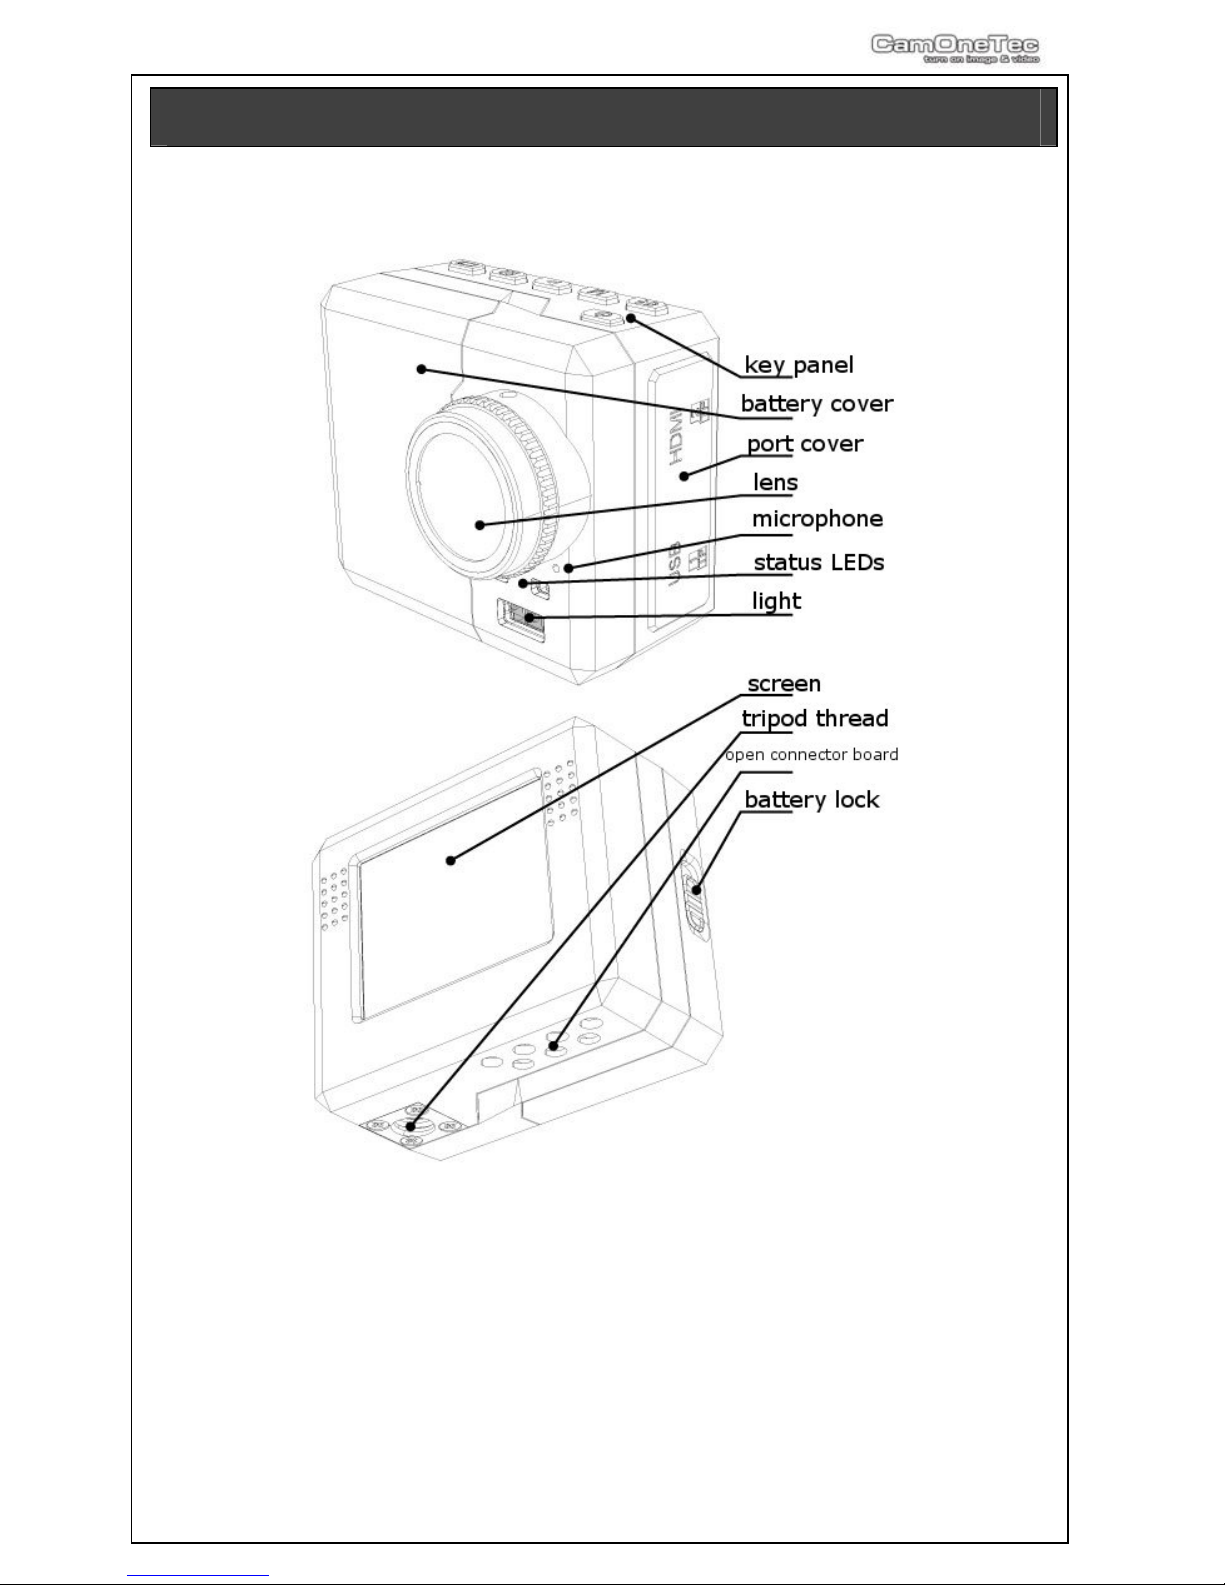
Functional diagram
The USB comport has the following setup:
-AV-Out
-5V IN
-Signal IN for external Start/Stop (CarCamOne-Cable / Motion sensor)
-GPS-Module / Video transmitter Set data input
Due to limitations in the technology of the display production, single or few dark or
light dots might appear. This is not a defect and will not have any impact to the
recorded video or photo!
Page 6
6
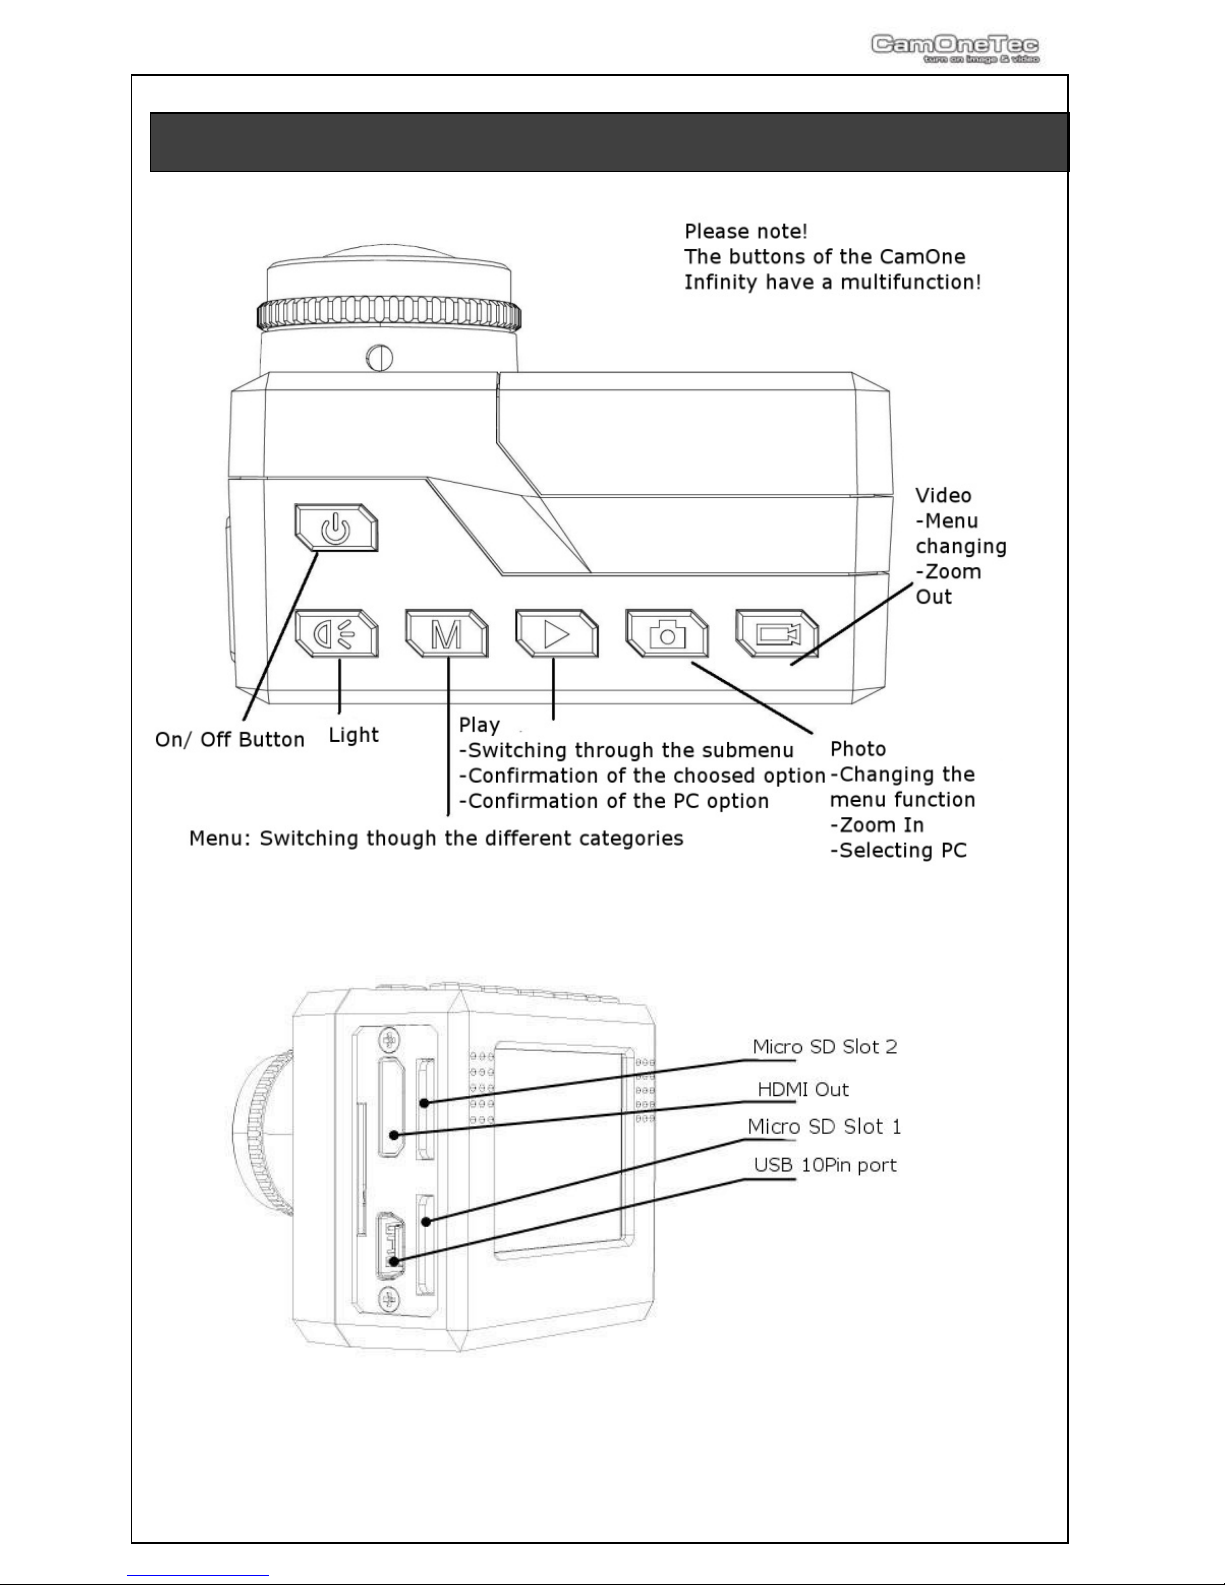
Key Panel – Interface Overview
Page 7
7
Compatible cards
Only use Micro-SDHC-Cards rank „Class4“ or
higher. The camera can be used with cards up to
32GB. The recommended cards are "FCO Rapid
Rush" cards at a minimum size of 8GB.
Using a 32GB card allows a recording time of 4,5
hours at highest resolution.
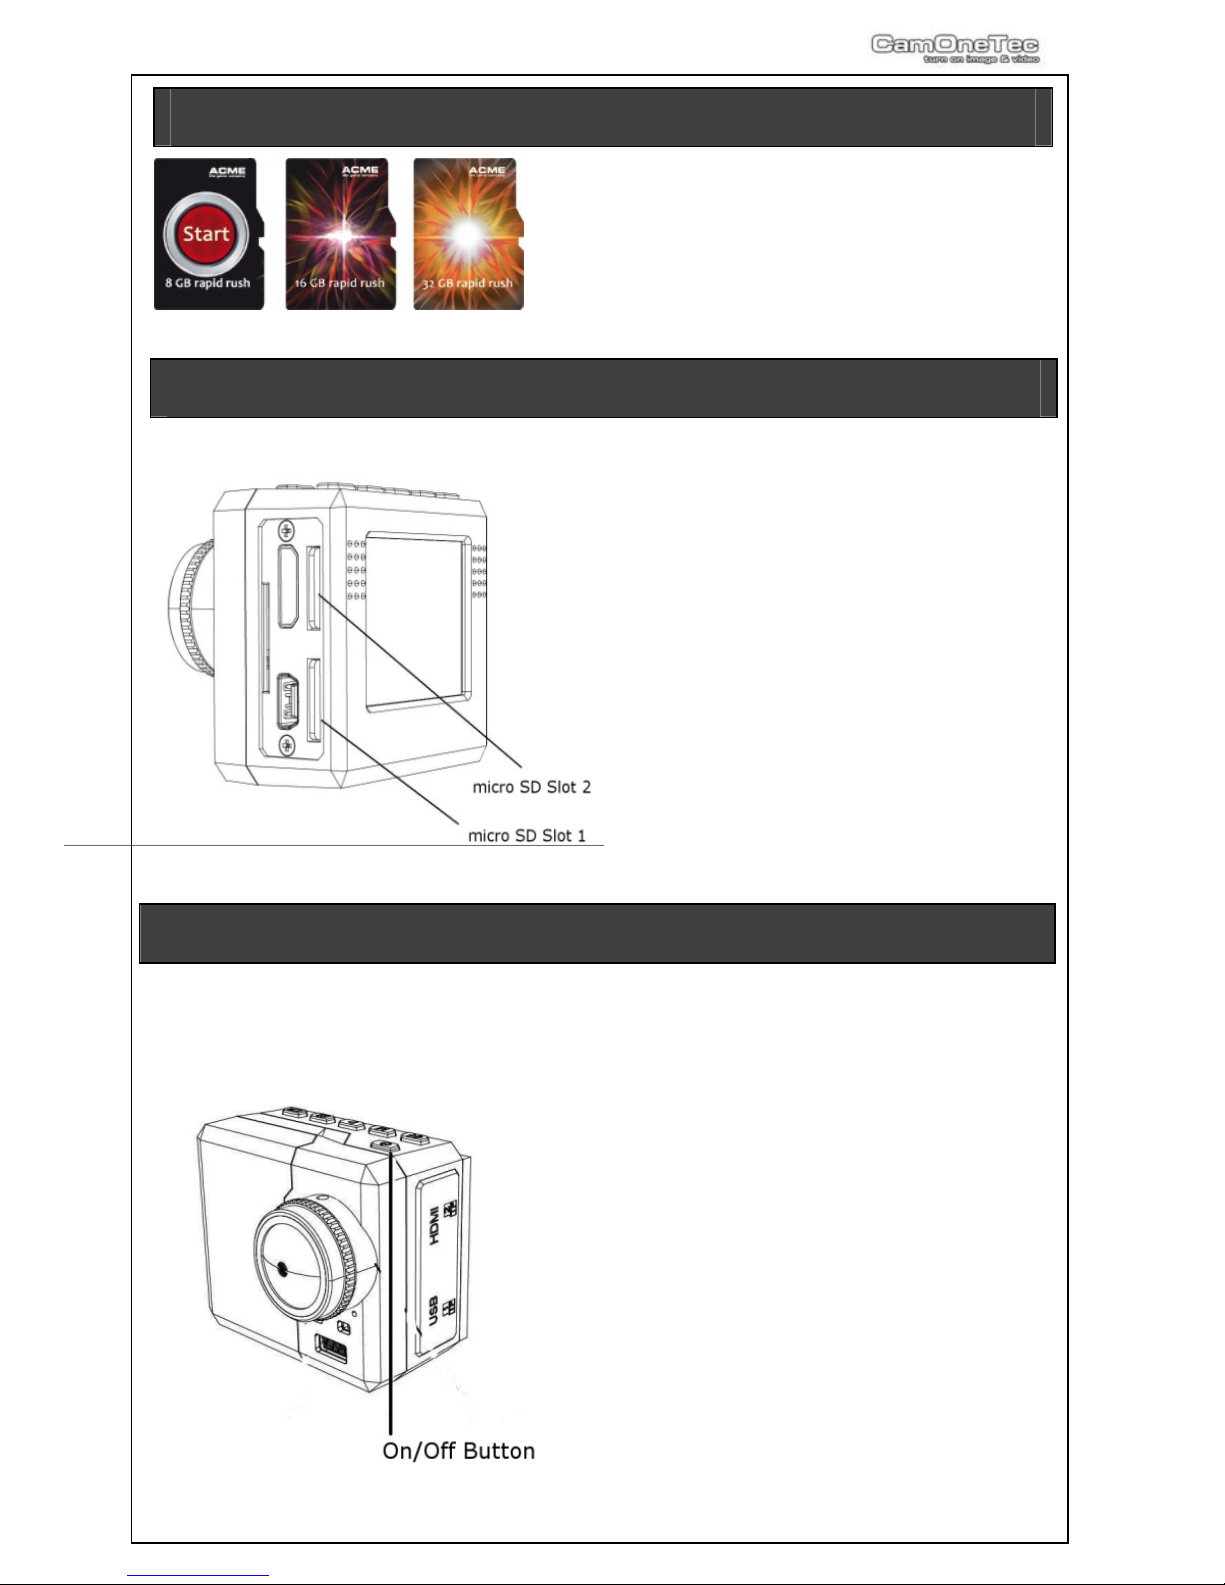
Insert/ Remove Memory Card
Remove the comport cover protecting the
sockets and the card slot. Slide in the card
upside down - printed side to the bottom until it clicks in. Use Slot 1 at first. If you are
using 2 cards, the cam automatically
switches to the second card as soon as the
memory is full. To remove press onto the
visible edge of the card, so it will get out by
the spring mechanism.
Turn on the camera
On/Off
Press the power button on the top of the
cam until it turns on.
Page 8
8
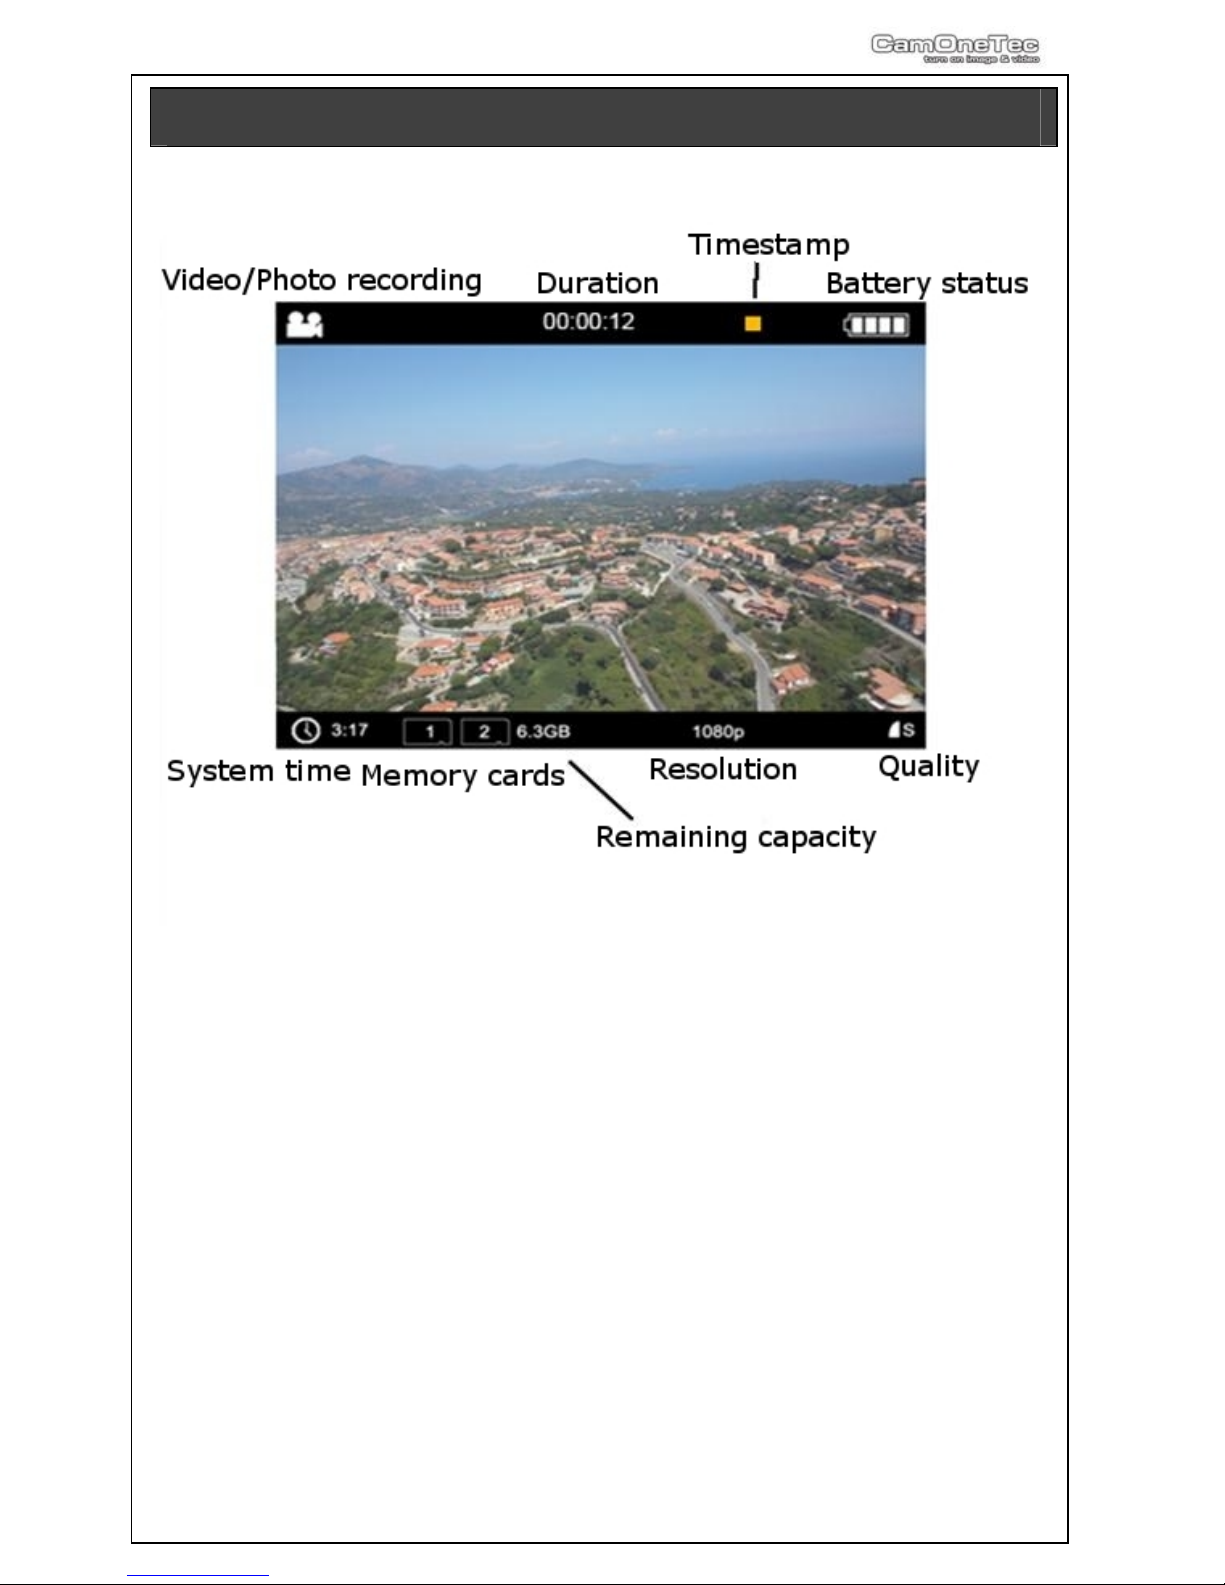
Icons at the Display
Due to the different configurations, you will see various icons on the display:
Page 9
9
SETUP Menu
Please press the M- Button f or 3 seconds to enter the setup.
The menu is divided in 3 categories that can be selected by the different tabs (Photo, Video
and system settings). By pressing the M- Button you will enter the next tab.
Photo-Menu
Here you can select all necessary settings for photo
recordings.
-Picture quality:
-Photo Intervals:
-Serial Picture:
-Time stamp:
Choice between 3, 5 or 8 Mega Pixel
Off, quick recording of 3, 5 or 10 pictures directly behind each
other
Off, pictures will be shot every 3 Sec., 5 Sec., 10Sec., 30 Sec.
or 60 Sec.
On or Off (embedded in the picture)
Video-Menu
Here you can select all necessary settings for video recordings.
-Video Quality:
-Recording Quality:
-Recording:
-Time stamp:
-Time lapse:
-Loop Mode:
-Microphone:
Resolution | Videoformat PAL / NTSC:
480p (720 x 480 Pixel) | 25 / 30 FPS
720p (1280 x 720 Pixel) | 25 / 30 FPS
720pH (1280 x 720 Pixel) | 50 / 60 FPS
1080ps (1440 x 1080 Pixel) | 25 / 30 FPS
1080p (1920 x 1080 Pixel) | 25 / 30 FPS
Low, Medium or High
Duration of the recording. 5, 10, 15, 20 or 30 Minutes. Due to
the data volumes a longer recording is not possible.
On or Off (embedded in the video)
Off, 1 frame per Second (FPS), 6 frames per minute (FPM), 2
FPM or 1 FPM
Overwriting of older recordings on or off (in case of storage
space is wasted)
On or off
System Settings
Here you can choose all general settings.
-Languages:
-Date:
-Time:
-Auto Screen off:
Choose between German, English, French, Spanish, Italian or
Dutch
Setting the date (Year-Month-Day)
Setting the time (Hour : Minute)
Battery saving to be selected here:
Off, 30 Sec., 60 Sec. or 120 Sec.
Page 10
10
-Auto Power off:
-Motion detection:
-Flip picture:
-Image mirroring:
-Light Frequency:
-Video System:
-Status LED:
-Card formatting:
-Factory setting
-Firmware:
Select the Auto off function: Off, 60 Sec., 120 Sec. or 300 Sec.
Off, low, medium or high
normal or 180° flipped
normal or mirrored
50/60Hz - Before you start recording indoor, choose the
correct frequency:
Europe, Asia and Australia: 50Hz
America: 60Hz
Japan: Depending on the area 50 or 60Hz
NTSC or PAL
On or Off of the front LEDs
Choice between Slot 1 or Slot 2 (All recorded data will be
deleted!)
Resetting the camera
Information about current firmware and update
Please note that some functions are only available after a firmware-/ software update.
Using the DiveBox and different mounts
Please make sure that the lens of the cam and also the lens-protection of the inner side of the
box is clean.
Insert the cam. Please check carefully that the fastener of the box is properly locked. The
cam can still be operated though the buttons.
When using the bike or helmet mount, please pay attention that the adjusting screws are fixed
tightly.
Mounts that are glued on must have a clean surface.
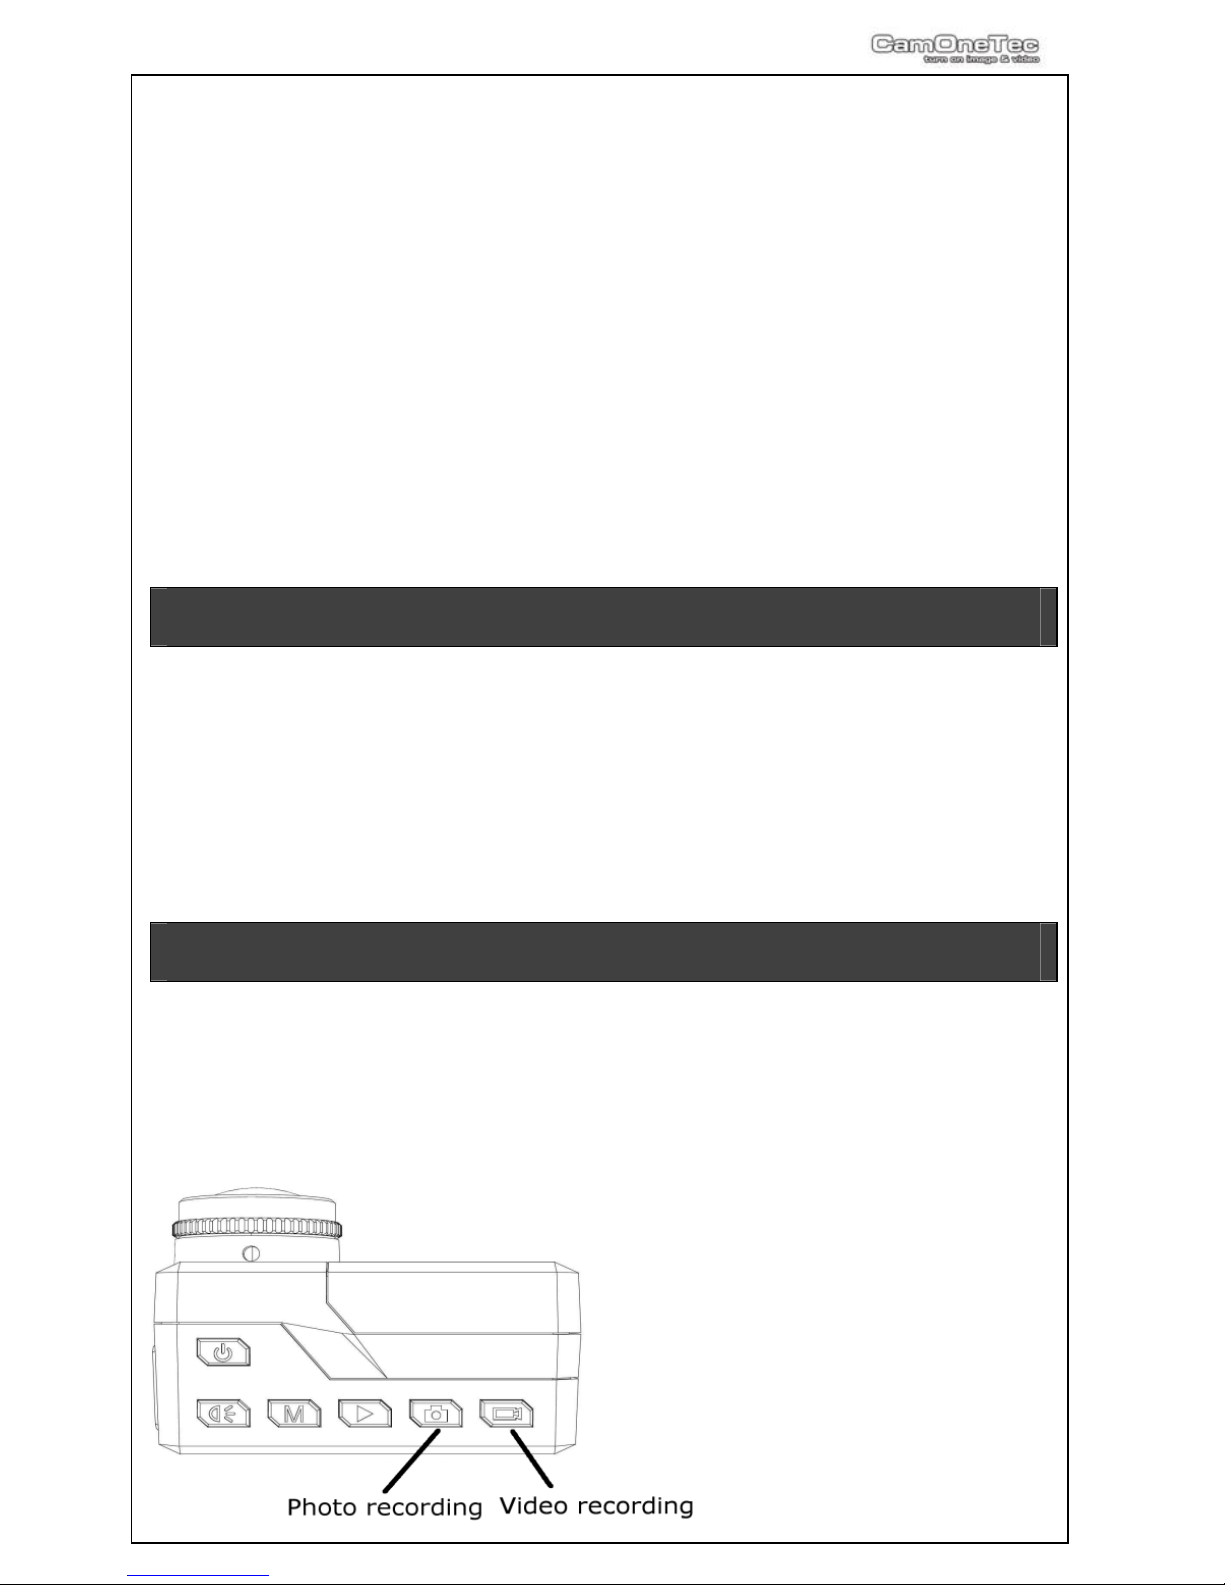
Photo/ Video recording
Right after switching on the Cam it is possible
to take pictures or videos by pressing the
’record’ button.
Press the button again to stop the recording.
Never remove the SD-card or the battery
during the data-saving. (shown with a rotating
circle in the display).
Page 11
11
Time lapse recording
Press the „M-Button“ to enter the setup menu. Choose the video menu and then „Time lapse“.
You can choose between: 1 FPS, 6 FPM, 2 FP M or 1 FPM.
Confirm the requested function and leave the menu.
By pressing the record button you can start the video. By pressing this button again the
recording is stopped and will be saved on the memory card. If you are planning to record for a
longer time, we recommend to turn off the screen in order to save power (Menu: „Auto Screen
off“).
Photo Serial Recording
Press the „M-Button“ to enter the Setup Menu. Choose the photo menu and then „Serial
Picture“.
You can choose between: 3 Sec., 5 Sec., 10Sec., 30 Sec. or 60 Sec. Confirm the requested
function and leave the menu.
By pressing the record button photos will be shot. By pressing this button again the recording
is stopped and will be saved as JPG on the memory card.
Photo Interval
Press the „M-Button“ to enter the Setup Menu. Choose the photo menu and then „Photo
Interval“.
You can choose between: 3, 5 or 10 photos.
Confirm the requested function and leave the menu.
By pressing the record button the camera will release the intervals. The photos will be saved
as JPG on the card.
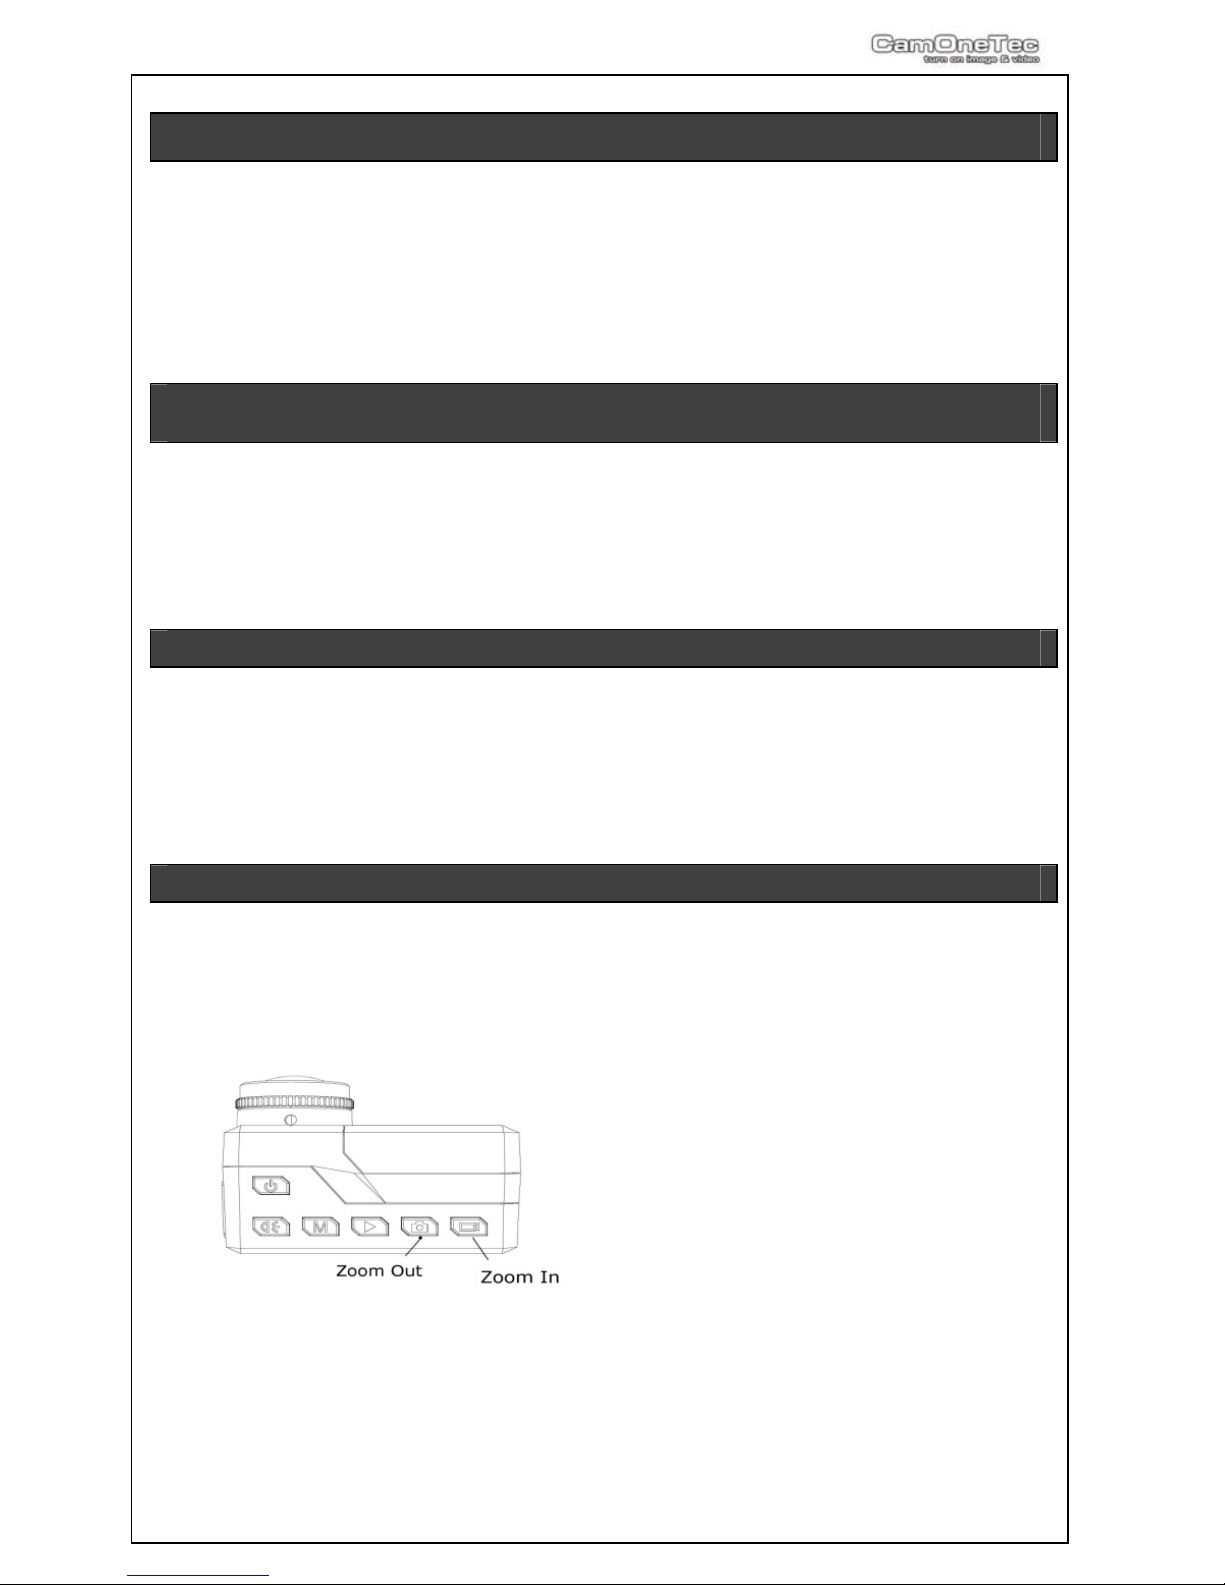
Using the zoom (only NTSC)
During the recording (Video) in mode
720p you can Zoom In and Out. The
zoom wi ll be shown by a status bar
in the display. Zooming in 1080p and
PAL mode is not possible.
By pressing the Video or Photo
button you can choose the zoom
factor.
Page 12
12
Playback of Videos and Photos
To watch your recorded data, press the „Play“ button.
You have the choice between photos and videos. Choose this with the Photo and Video
button.
Confirm your choice by pressing the Play button.
To playback the recordings, press „Play“. The display shows the name of the files.
Playback on the TV
Connect the camera with your TV by using a HDMI Cable and switch to the corresponding
channel. Enter the Playback Mode on the camera to watch your videos.
Playback on PC (MS Windows)
The videos can be easily watched on your
PC.
We recommend the free VLC- Player.
This can be downloaded on www.vlc-
player.org
Connect the camera to your PC by using the
USB- Cable. Turn on the camera.
Choose the card access with the buttons
„Photo and Video“ and confirm with the Play
button. The PC will recognize the cam as a
hard drive.
The display will show „Connect to PC“ for a short time.
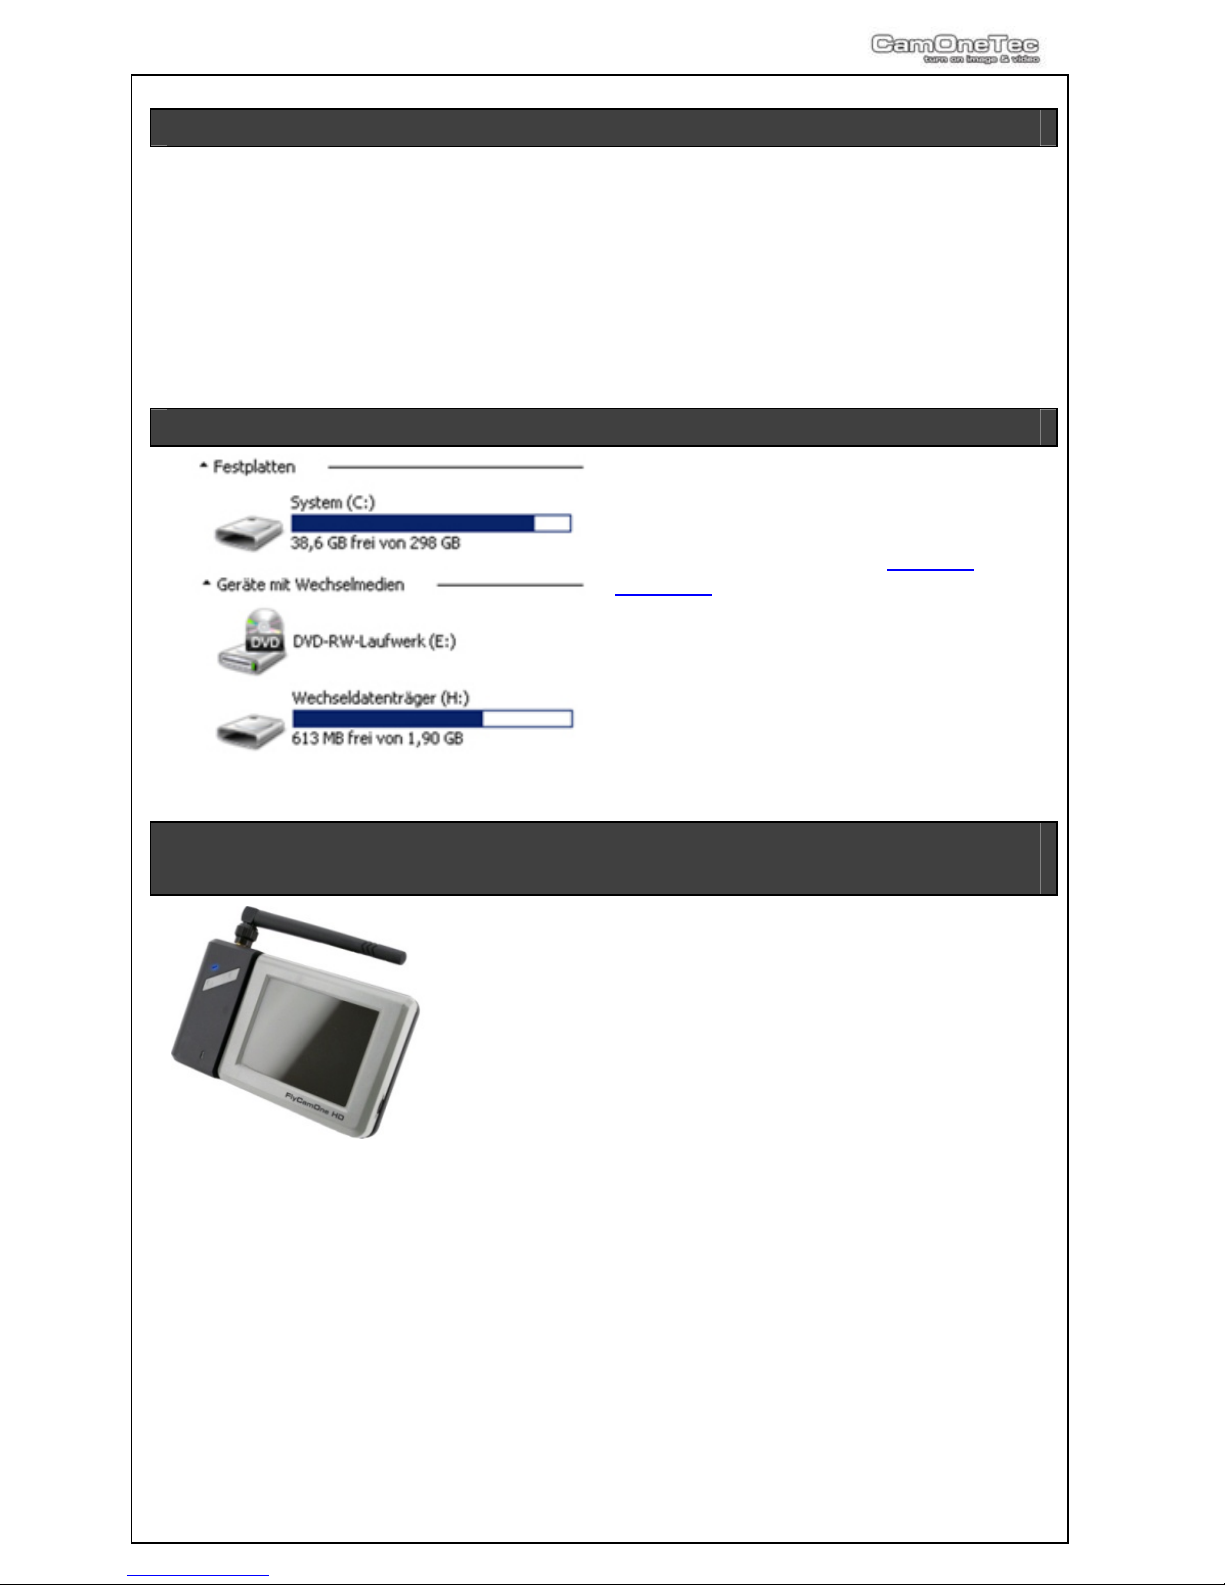
Usage of external Video Transmission / Screen / Motion
Sensor / GPS (optional)
With the supplied Ten2Ten Adaptor you can easily connect
the camera with many accessories of the FlyCamOne HD
family.
Plug in the adaptor to the USB plug of the cam and connect
the accessories.
The following products are available (optional):
-GPS Module (Art. No. FCHD15)
Indication of various GPS-Data
-2,5“ external screen (Art. No. FCHD02)
Watch the video on the bigger display. The camera display shuts off automatically.
-Video Transmission 5,8GHz (Art. No. FCHD03)
Transmit the picture on the screen or the video goggles. The camera display shuts off
automatically.
For more detailed advice please contact the homepage www.CamOneTec.com
Page 13
13
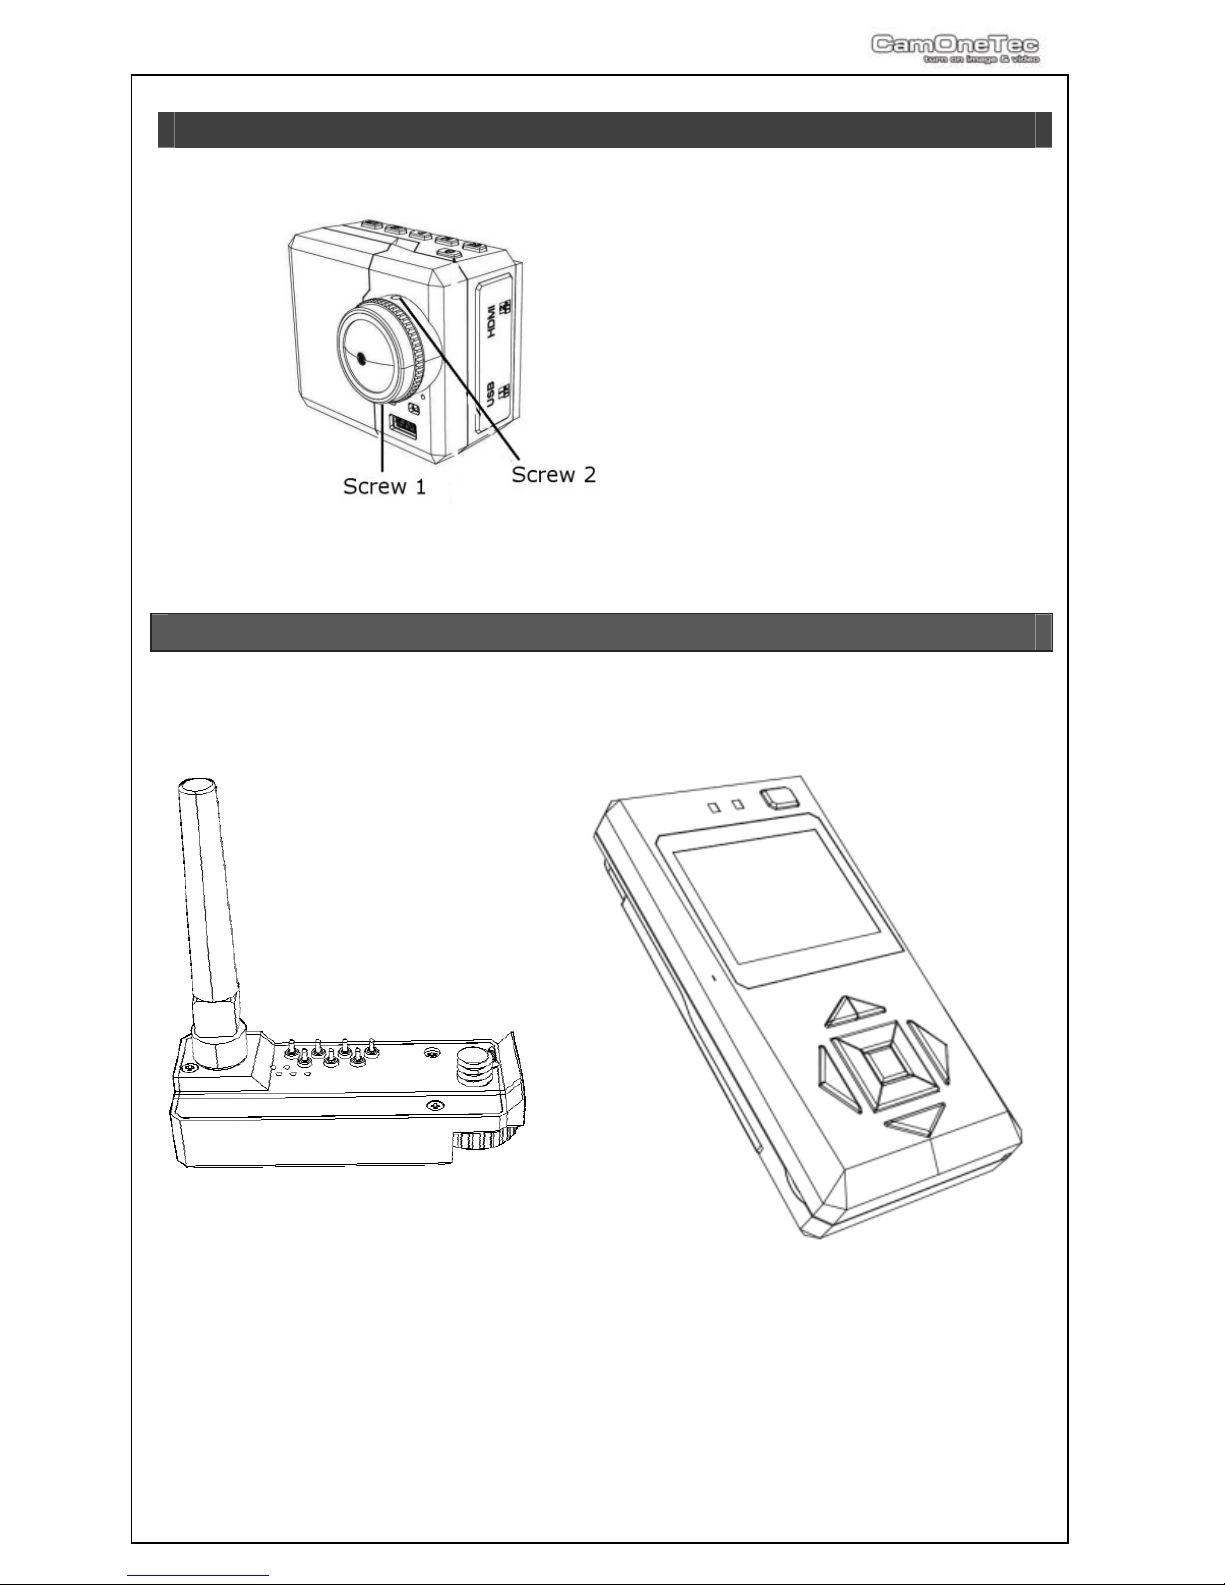
Replacing the lens (optional
)
FPV-Kopf für den
To replace th e lens, twist off the two
screws on the picture shown.
Unscrew the lens.
Please pay attention that no dust or
dirt get into the cam.
Screw in the replacement lens.
Check the sharpness with a TV. Fix
the cam with the two screws.
Please note! Inappropriate opening may damage the camera head and ports.
Perform this work very carefully and take your time!
LinX 2.4GHz Digital Video Transmission & Remote (optional)
In conjunction with the optional bi-directional LinX 2.4GHz digital transmitter (Art.No.:COIN10) you can control the camera up to a distance of 300 meters (on view) and
watch the video image also. Obstacles may affect the range.
The LinX System is able to control several cameras and supports also the direction of the
cam using the looka-O-module.
Page 14
14
Firmware Update
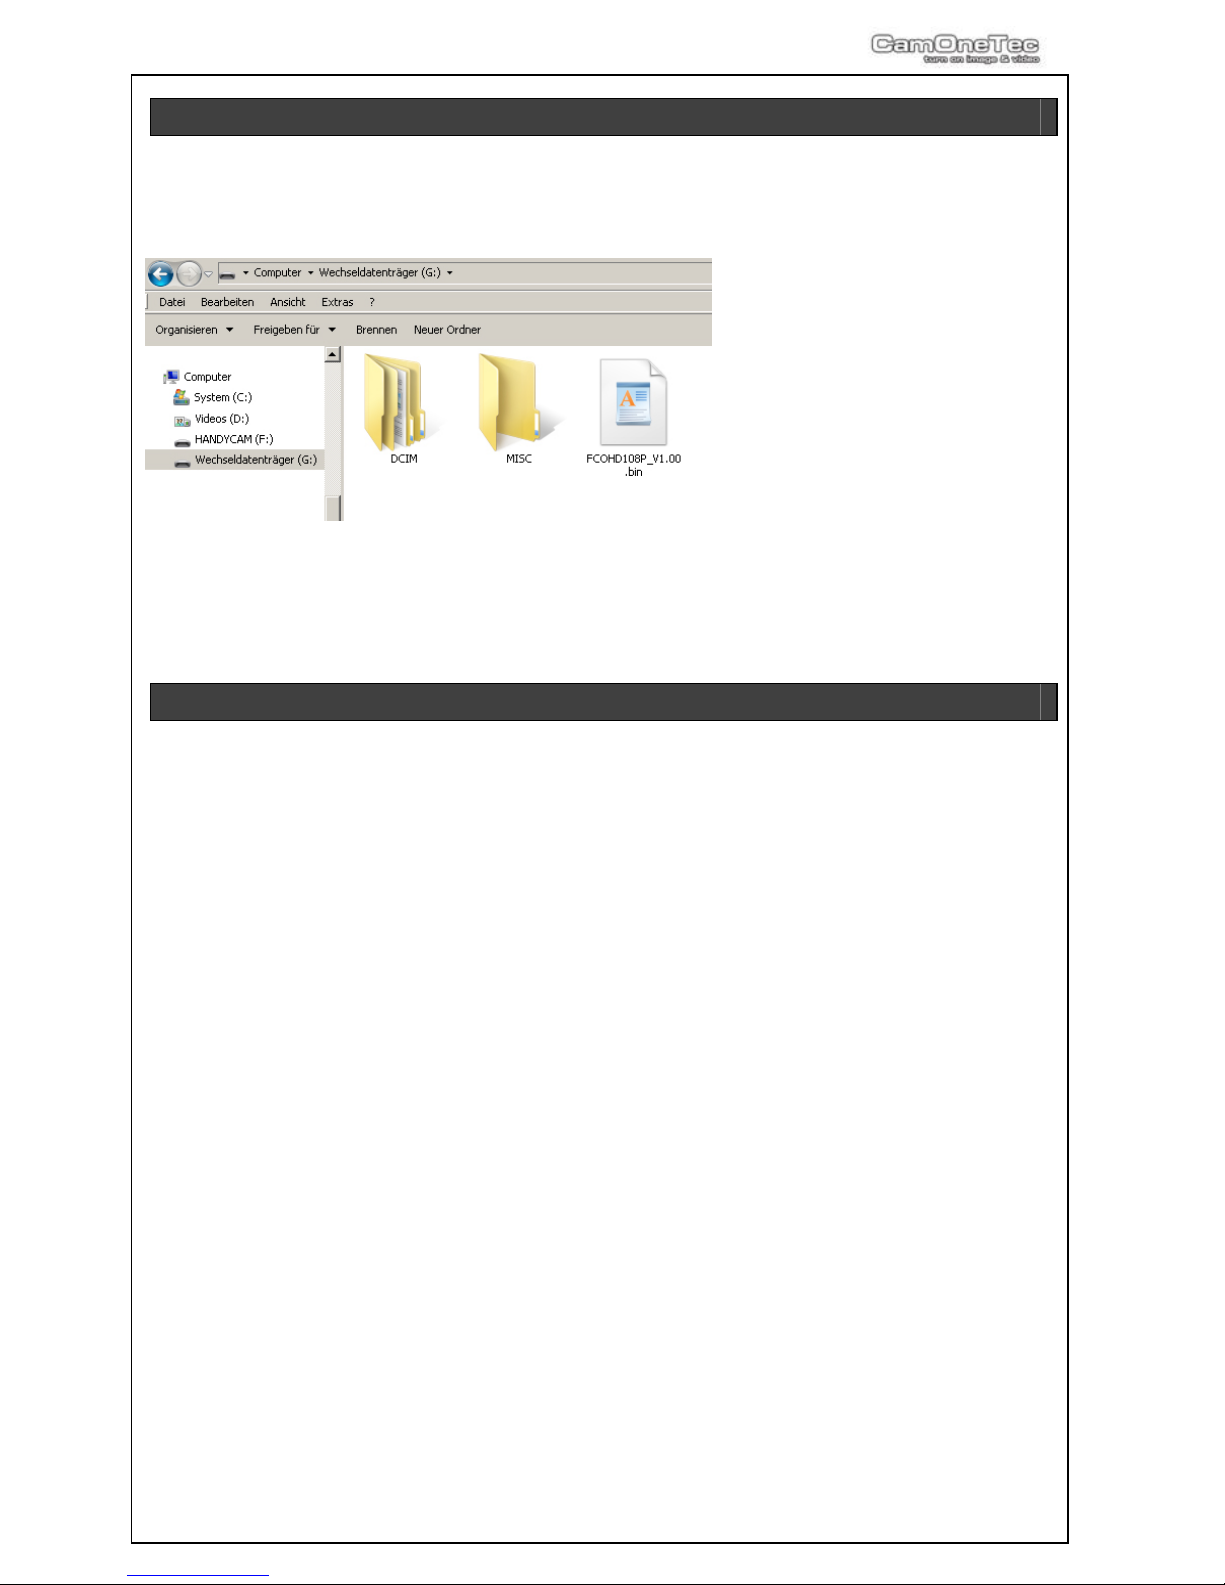
To get the most out of your camera, install the latest software (Firmware).
The firmware version of your camera is shown in the system settings.
Download the ZIP file from our
homepage first.
Unzip the file on the main root
of the memor y card. Enter the
system settings of the camera
and choose Firmware Update > "Yes" and confirm with the
“Play”- button.
This process takes about 1 minute. The display shows the procedure.
Do not turn off the cam while updating!
Make sure that the battery is fully charged.
Technical Data
Operating Voltage: 5V (USB) / 3,7V (LiPo-Battery, 900mAh)
Consumption: 250 - 450mAh (depending on camera settings)
Size: 49 x 42 x 34mm
Weight: 88g incl. battery
Battery: 3,7V 900mAh LiPo
Format: MPEG4, AVI or MOV
Sensor: 5MPix CMOS
Lens: 170° (exchangeable)
Zoom: digital 4times (only NTSC)
Screen: 1,5“ / 38mm TFT
Microphone: yes (Mono, 48 kHz)
AV-Output: yes, via USB-10 Pin
USB: Hi-Speed USB (2.0)
HDMI: yes, 1.2
Interface: Open Connector Board (OCB, bottom of the cam)
Remote: yes, LinX-System 2,4 GHz (optional)
Operating-/Storagetemp.: -10°C till 60°C
Memory: Micro SD/SDHC-<= 32GB – Class 4 or higher
2 slots for cards with 32GB each
White balanc e : automatically
Page 15
15
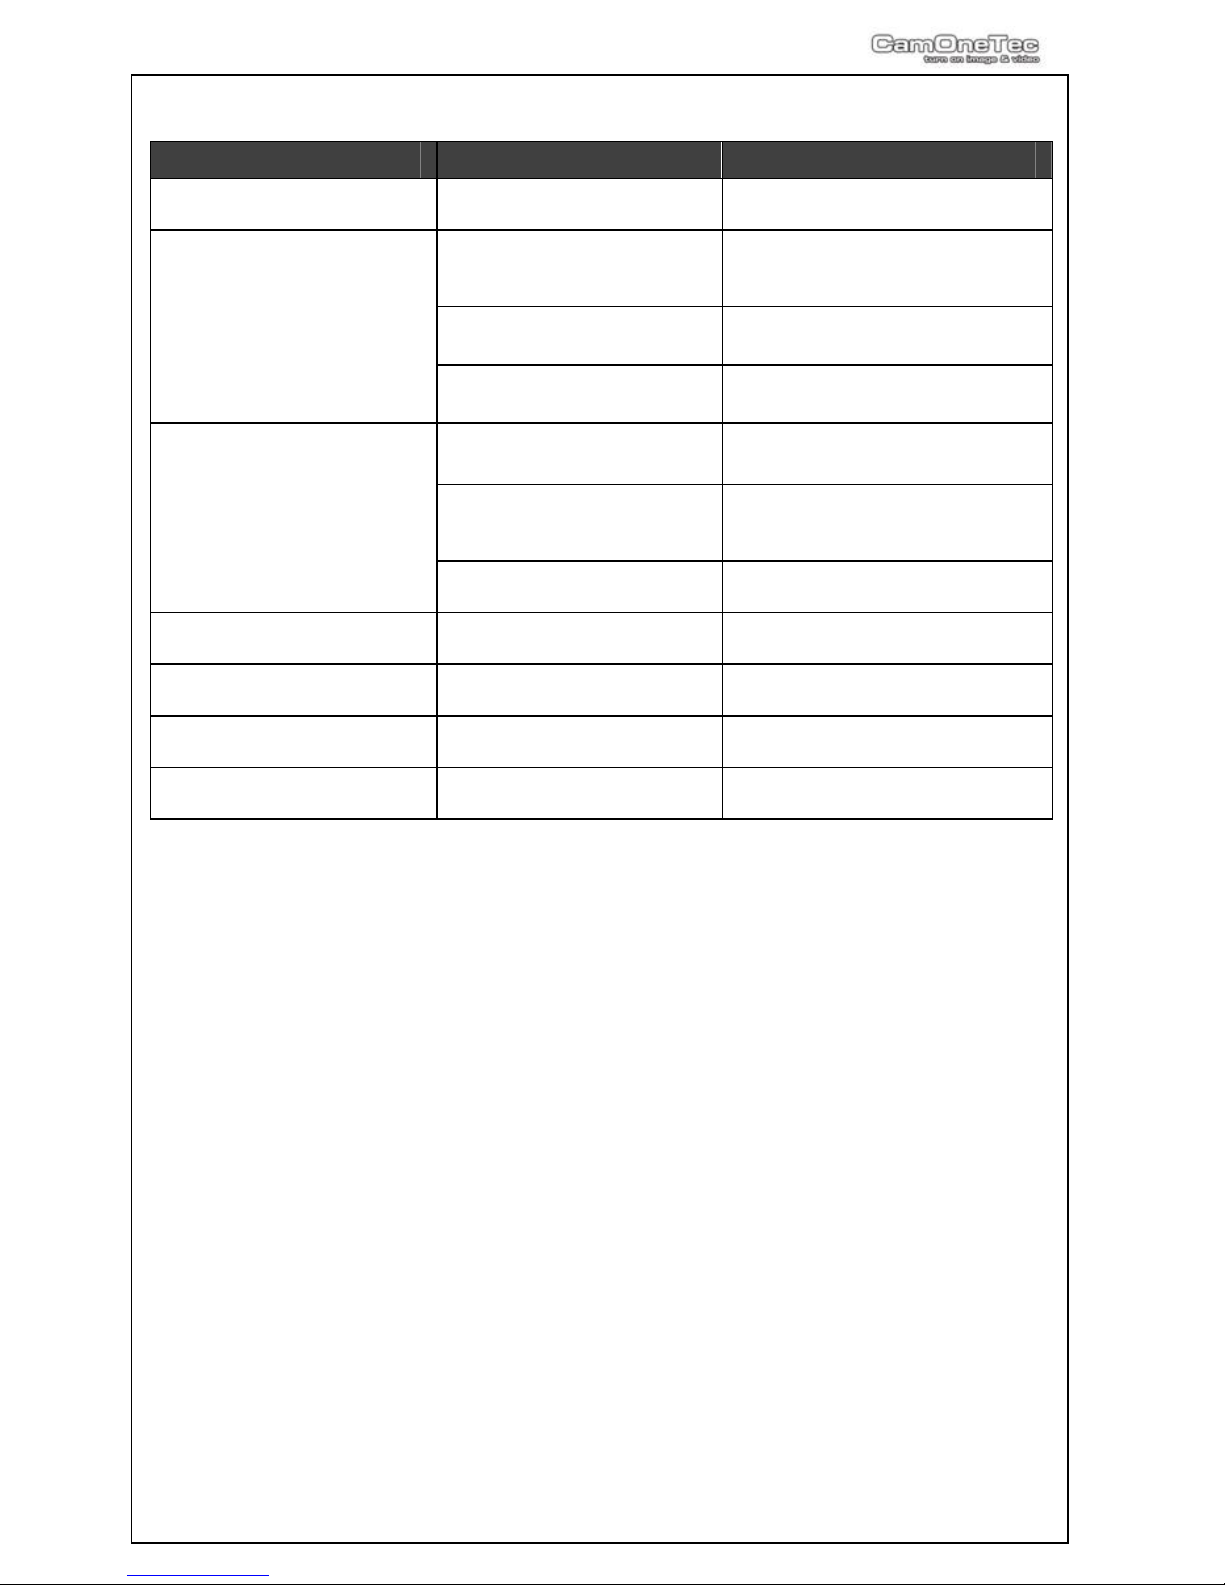
Troubleshooting
Error Reason Solution
Camera switches off
immediately.
Battery is not charged
correctly.
Charge the camera for at least
4 hours.
Unable to switch ON the
camera
Battery is not plugged
correctly.
Check connection between
camera and battery.
Battery is defective.
Replace the battery.
The camera had a hangup during recording.
Remove the battery for 10
seconds.
The Video jerks when
playing at the PC.
The USB- connection is
too slow.
Download the file to the PC
first.
The micro SD- Ca rd is too
slow.
Try one of the recommended
micro SD- Cards.
The computer is too slow Connect the camera and your
TV with the AV- Cable.
The data rate is too high
for the computer.
Reduce data rate to
“Standard”."
The video is turned 180°
Wrong Settings
Use setup configuration
To turn the picture
Date and time will not be
displayed in a correct way
Wrong Settings Change Settings in the Setup
Display shows „Error“ The memory card is not
working correctly
Format the memory card.
Card is possibly damaged.
Page 16
16
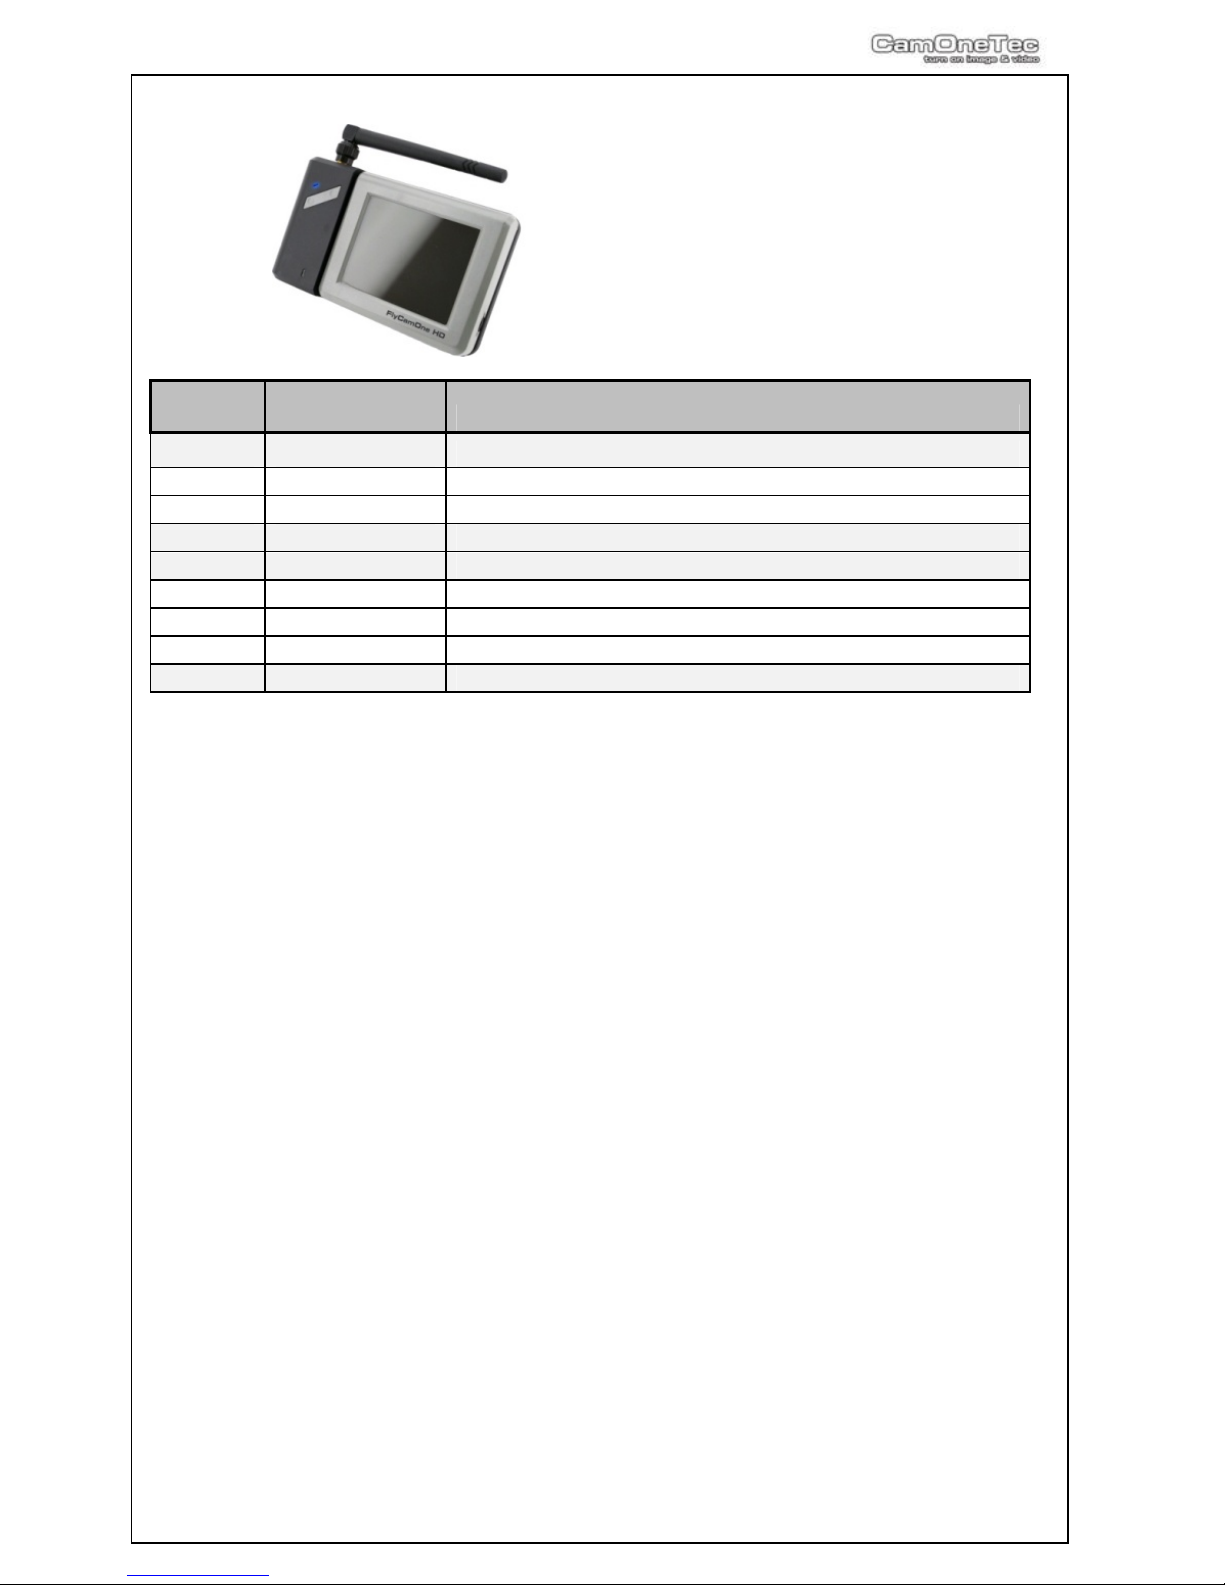
CamOne Infinity HD Accessories
Art‐No.: EAN Item
FCHD02 4260033049520 FlyCamOneHDScreen2,5";150cmcable
FCHD03 4260033049537 FlyCamOneHDTransmissionSet5.8GHz;Range300m
COIN08 4260033041975 CamOneInfinityBatteryLiPo3,7V900mAh
COIN10 CamOneLinX2.4GHzDigitalRemote
FCHD15 4260033049650 FlyCamOneHDGPSModule
FCHD16 4260033049667 FCHDRapidRush16GBMicroSD‐Card
FCHD32 4260033049827 FCHDRapidRush32GBMicroSD‐Card
FCHD43 4260033048578 USBPoweradaptor110‐220V
FC3104 4260033048721 5.8GHzShieldantenna+500m
...get inside at www.camonetec.com
 Loading...