

Page 1

CamFi Remote Camera Controller
CamFi Limited
Copyright © 2015 CamFi. All Rights Reserved.
CamFi User Guide
CamFi
TM
Page 2

Contents
Chapter 1:CamFi at glance ���������������������������������������������������������������������
1
Packaging List �������������������������������������������������������������������������������������������
1
CamFi Overview ����������������������������������������������������������������������������������������
1
Chapter 2:Getting started ���������������������������������������������������������������������
2
Charging battery ���������������������������������������������������������������������������������������
2
Quick installation ��������������������������������������������������������������������������������������
2
Connect CamFi with your camera .........................................................................................
2
Get the CamFi app ...................................................................................................................
2
Connect to the Wi-Fi hotspot of CamFi ...............................................................................
2
Start CamFi App .......................................................................................................................
3
Firmware Upgrade ....................................................................................................................
3
Chapter 3:Using the iOS App ���������������������������������������������������������������
4
Remote capture �����������������������������������������������������������������������������������������
5
Live view ....................................................................................................................................
5
Change the capture settings ..................................................................................................
5
Time-lapse ................................................................................................................................
6
Quick mode ...............................................................................................................................
6
Advanced Mode ........................................................................................................................
6
Grid .............................................................................................................................................
7
Manual Focus ............................................................................................................................
7
Auto Focus ................................................................................................................................
8
Zoom in / Zoom out live view ................................................................................................
9
Advanced bracketing .............................................................................................................
10
Focus stacking .........................................................................................................................
11
Video ........................................................................................................................................
12
Auto view ��������������������������������������������������������������������������������������������������
13
Browse photo �������������������������������������������������������������������������������������������
14
View the photos ......................................................................................................................
14
Share ........................................................................................................................................
14
Download .................................................................................................................................
15
Delete .......................................................................................................................................
15
Page 3

Settings �����������������������������������������������������������������������������������������������������
16
Wireless Settings ....................................................................................................................
16
Network Settings ....................................................................................................................
16
Chapter 4:Precautions and FAQ ����������������������������������������������������������
17
PRECAUTIONS �����������������������������������������������������������������������������������������
17
Battery charging and maintenance .......................................................................................
17
Hardware connection ..............................................................................................................
17
Transmit speed ........................................................................................................................
17
FAQ ������������������������������������������������������������������������������������������������������������
18
Page 4
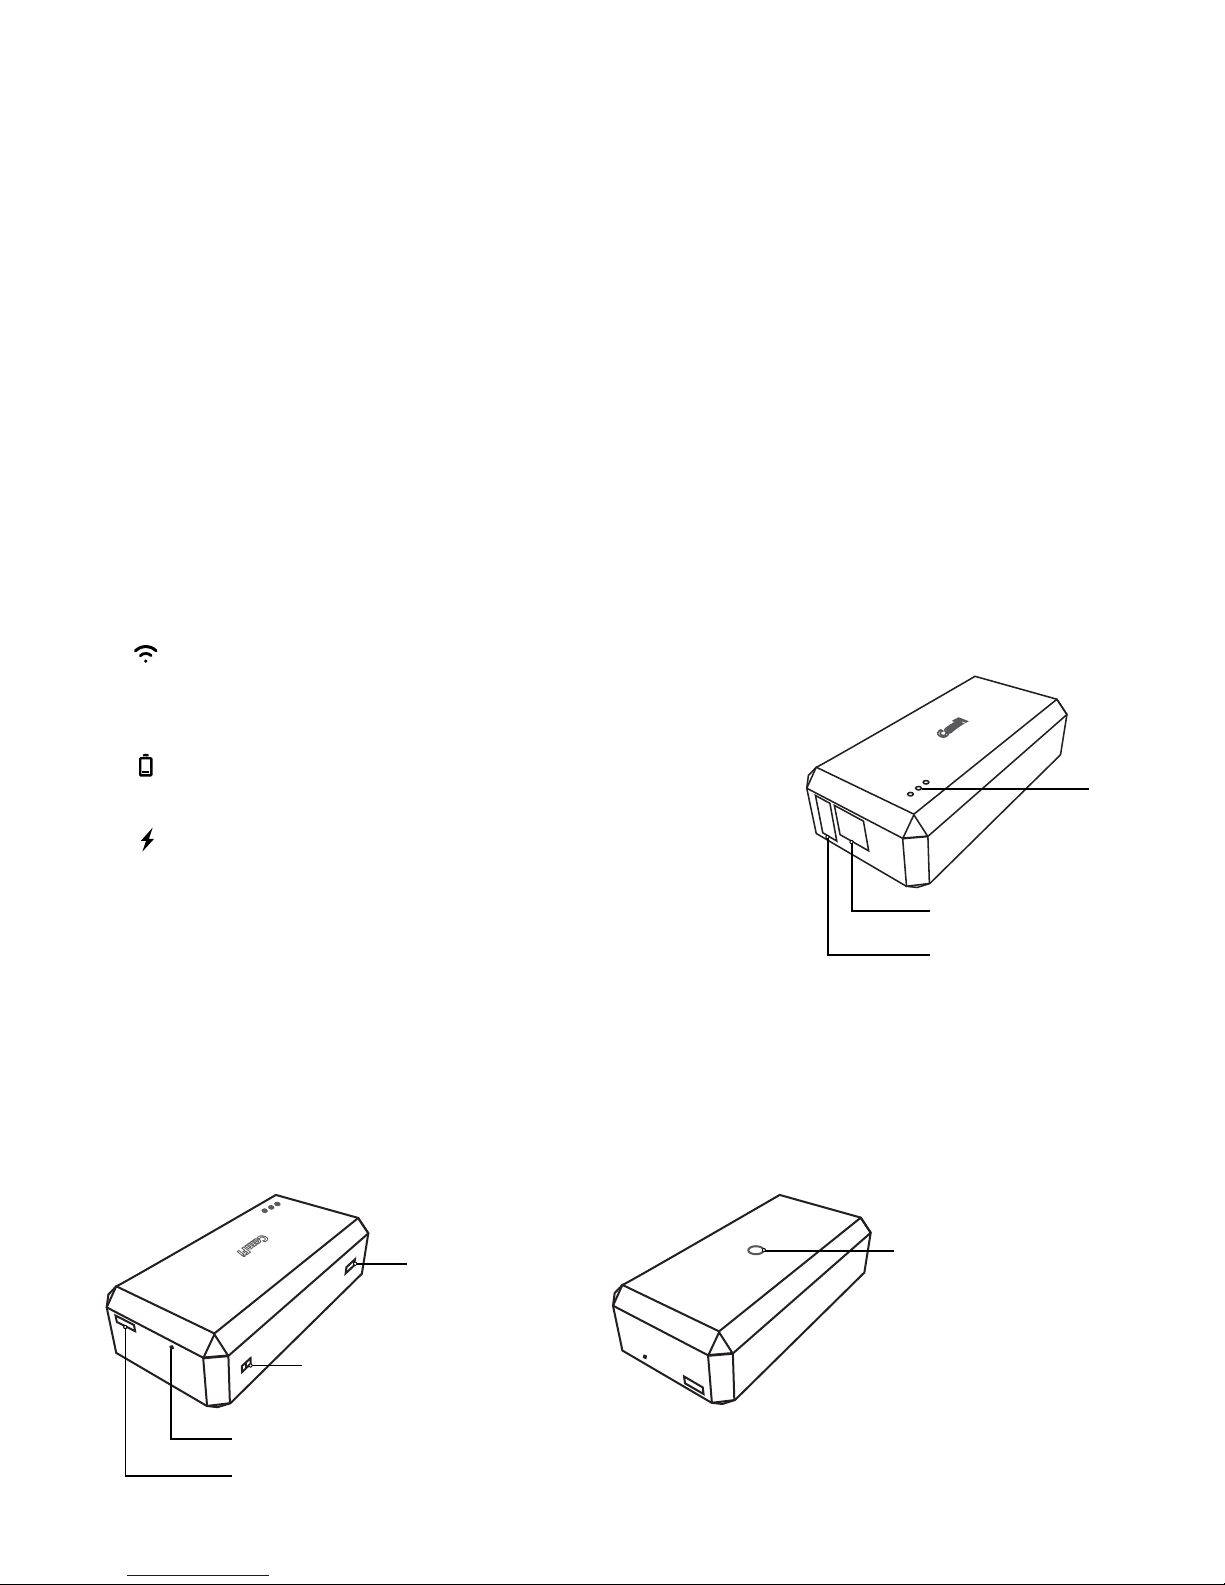
Chapter 1:CamFi at glance
Packaging List
CamFi Overview
1. CamFi remote camera controller
2. Mini USB cable for connecting to the camera
3. Micro USB cable for charging the battery
4. Double screw to hot shoe adapter
5. Lanyard
6. Quick start guide
① USB connector for connecting to the camera
② Network port for connection to the PC
③ Status Indicators
④ Battery charging port
⑤ Reset button
⑥ Lanyard hole
⑦ Power switch
⑧ Tapping hole for hot shoe adapter
System status
Flashing indicates the system is staring up
Always on after the system starts up successfully
Battery status
Turned on when the battery is running low
Battery charging status
Turned red when the battery is being charged.
Turned green when the battery is charged fully.
1
⑦
⑥
⑤
④
③
②
①
⑧
Page 5
2
Chapter 2:Getting started
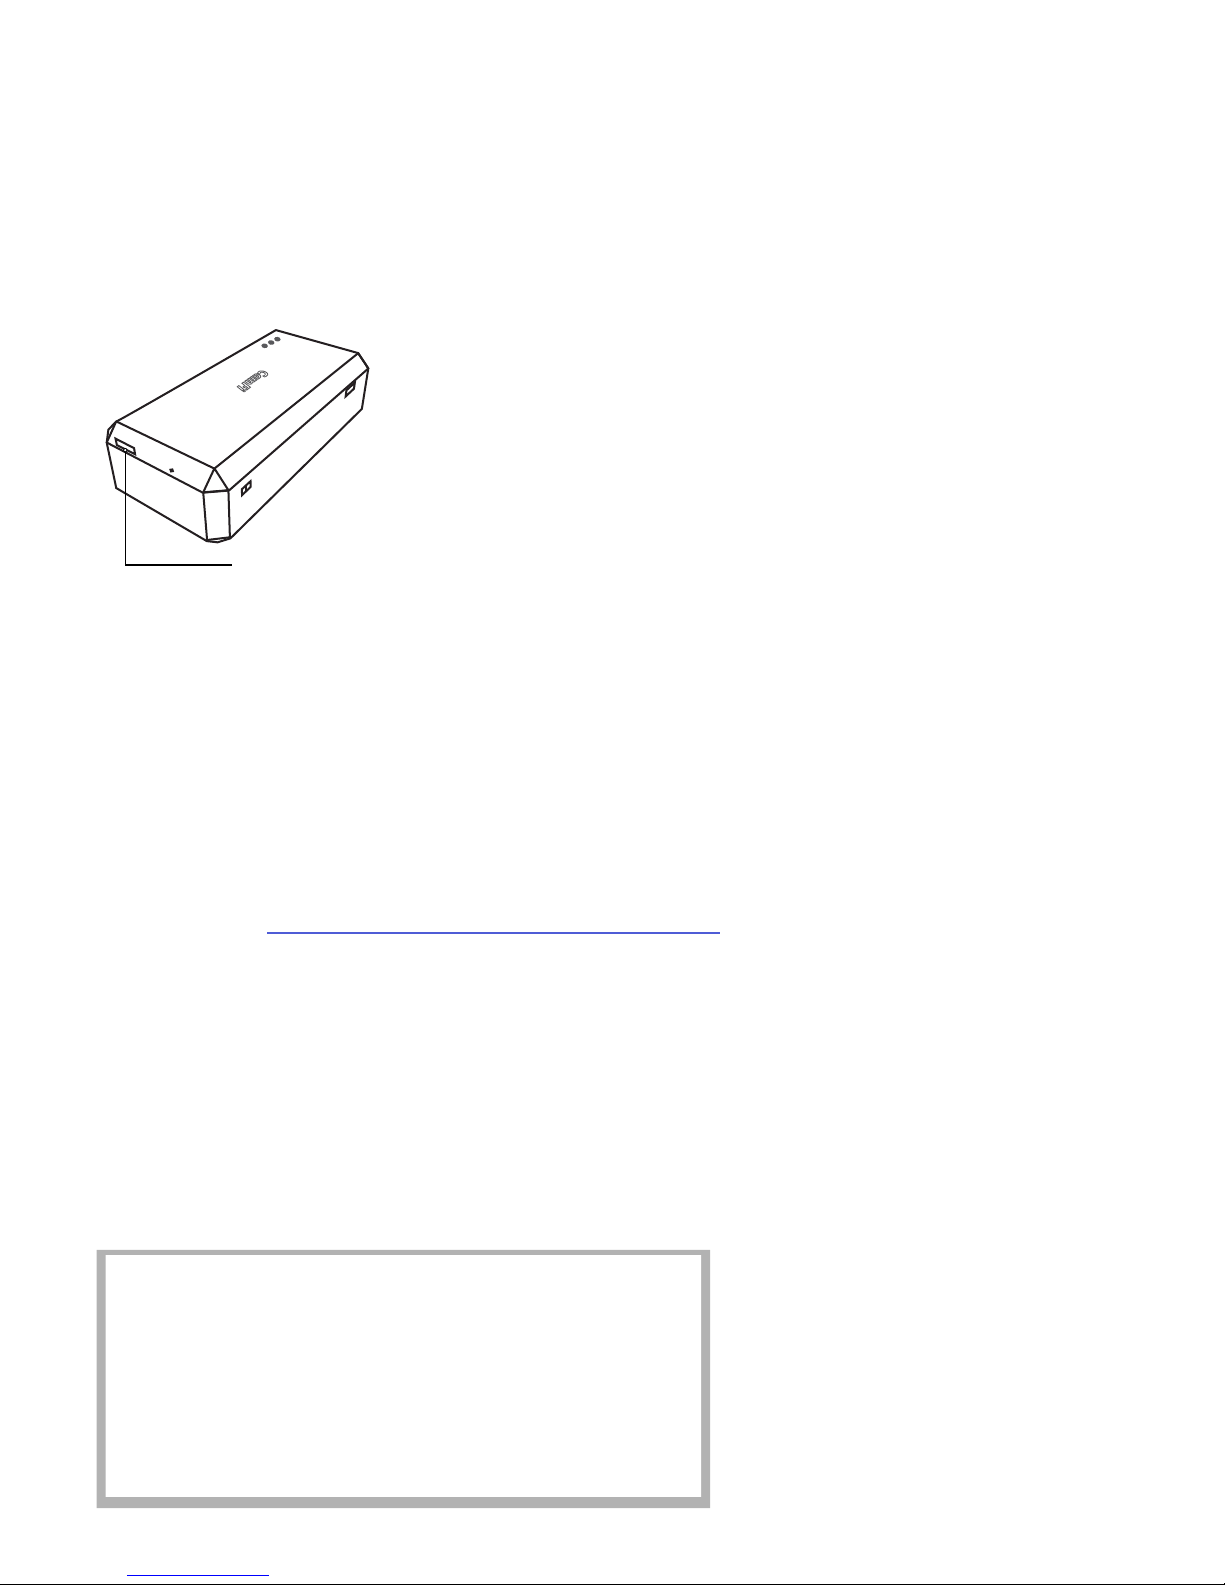
Charging battery
Quick installation
Connect CamFi with your camera
Get the CamFi app
Connect to the Wi-Fi hotspot of CamFi
Use the micro USB cable to connect to a mobile phone charger or the USB port of a
computer to charge the battery of the CamFi device.
Connect the CamFi device with your camera using the mini USB cable, then turn on
CamFi and you camera.
You will need to install the CamFi app on your smartphone or your PC. The CamFi app
is available for iPhone®, AndroidTM, Windows®, Mac OSX®. For a full list of supported
devices, visit: http://www.cam-.com/download.html
1. On your smartphone or your computer browser, visit: http://www.cam-fi.com/
download.html
2. Follow the instructions to install the CamFi app on your smartphone or your
computer.
After you turn on CamFi and the system status indicator light turns constant green, you
can nd and connect to the Wi-Fi hotspot of CamFi with the name prexed with“CamFi
”on your smart phone or your computer.
Battery charging port
5V,1A
Page 6

3
Start CamFi App
Firmware Upgrade
Launch the CamFi app on your smartphone or your computer.
The CamFi app will automatically check if there is a new version rmware available for
the CamFi. When there is a new version available, the app will start the upgrade wizard
to upgrade the rmware of the CamFi. You can follow the instructions provided by the
wizard to upgrade the rmware.
Note: It needs to connect the CamFi’s Wi-Fi again after the upgrade�
Page 7

Camera status bar
Exposure mode,
shutter speed,
aperture,ISO,EV
Open live view
Toolbar
Browse photo mode
Auto view mode
Capture
Settings
The CamFi app supports iPad, iPhone, Android, Windows and Mac. We’ll only introduce
the iOS app to illustrate the use of CamFi. The apps on the other platforms are similar,
and any parts where signicant dierences exist will be called out.
The user can slide the toolbar to show more buttons.
Chapter 3:Using the iOS App
4
Page 8

Live view
Change the capture settings
Tap the “Live view” at the center of the
screen or the “View On” button at the
bottom to start the live view.
Tap the shutter button at the bottom to remote control the camera to capture.
To change the capture settings, please tap the top area of the screen where shows the
exposure mode, shutter, aperture and ISO.
It will pop up a setting window. User can drag the sliders to change the settings.
Note: the exposure mode for Canon camera cannot be set.
Open live view
Live view switch
Tap to set the exposure mode,
shutter, aperture and ISO
5
Remote capture
Page 9

Time-lapse
Quick mode
Advanced Mode
6
There are two modes for time-lapse: the quick mode and the advanced mode.
It has two options, 3s and 10s. You can use it for quick self-portrait.
After switching to the advanced mode, you may change the following properties:
• Start-up time
• Shooting interval
• Shooting numbers
• Bulb mode
• Bulb time
After setting, tap the Start button to begin capture.
Page 10

Grid
Manual Focus
Show and hide the grid.
Please tap the Manual Focus button to change the focus
manually. Manual Focus can only be used when the lens
is set to AF mode and the live view is on.
7
Manual focus
Page 11

Auto Focus
Tap the viewnder and the camera will try to focus automatically. Auto Focus can only
be used when the lens is set to AF mode and the live view is on.
1. For Canon, you need to change the AF options to the live mode by using the
camera's menu button. Quick or Face Detect Live modes are not supported by the app.
2. For Nikon, it will not work if the AF area mode is Face priority or Subject tracking.
Please change the mode to Wide area or Normal area.
8
Page 12

Zoom in / Zoom out live view
When live view is on,double taping or spreading gesture can zoom in live view.
The “White Capture” button changes to “Record” and pressing the “Record” button
will start and then stop the recording of a video.
The camera should not explicitly be put into a separate movie mode if such a mode
exists, whether through a dial or switch.
Note: movies cannot be downloaded to the iOS device.
9
Page 13

Advanced bracketing
Advanced bracketing can be used to generate a series of photos with varying
exposures.
• Advanced bracketing is only enabled when the camera is in Manual mode.
• The Property eld species the camera property to be varied. There are three options, Shutter
Speed, Aperture, and ISO.
10
Page 14

Focus stacking
Increasing the depth of field by taking a series of photographs with different focus
settings.
Focus stacking can only be used when the lens is set to AF mode.
11
Page 15

12
Video
Tap the video button to change the camera to video record mode.
The white capture button will change to red when it is in the video mode. Tap the
button will start and then stop the recording of a video.
Video button
Page 16

Auto view
Auto View
EXIF info
Thumbnail
Share and save
Tap the Auto View button to start the Auto View
mode.
Once the app is in the Auto View mode, the photos
captured by the camera manually can be streamed
to mobile phones, tablets, and PCs. This feature
can be used to show the photos immediately to
the client or model on a large screen as the photos
are taken.
The raw file format is also supported, and
it uses a smart-view technology to view the
raw files, which is much faster than other
technology types.
The transmit speed for Auto View is about
2-3MB/S and the speed is dependent on the
transmit distance and signal interference.
13
Page 17

Browse photo
Browse photo
Tap the thumbnail in the lower left to start the browse mode. After entering the browse
mode, you may tap the thumbnail to view a large image.
Share
While viewing thumbnails, tap Select, select items, tap the action button on the bottom
left, and select Share to share the photo to your social networks.
14
View the photos
Share and save
Select all
Delete
Page 18

• While viewing thumbnails, tap Select, select items, tap the action button on the
bottom left, and select Original or Standard to download the selected photos.
• Original is for downloading the raw les or JPEG photos. Choosing this option will
download the photo to the album just like the camera.
• When you select Standard, the photo will be resized to a smaller size and saved to
the album as JPEG.
While viewing thumbnails, tap Select, select items, tap the delete button on the bottom
center to delete the selected photos in the camera.
Download
Delete
15
Page 19

To change CamFi’s settings, please tap the top right Settings icon to open the Settings
view.
Settings
App settings
Go to Settings → Wireless to:
• Change the SSID of the CamFi
• Set the password of the CamFi
• Change the channel of the CamFi
• Go to Settings->Network to:
• Change the IP address of the CamFi
• Change the subnet mask
• Change the gateway
• Change the DNS
Wireless Settings
Network Settings
16
Page 20

Chapter 4:Precautions and FAQ
PRECAUTIONS
Battery charging and maintenance
Hardware connection
Transmit speed
1. a. Please recharge the CamFi for the rst use or if it is left unused for a long time.
The requirement for a charger is 5V/1A, and the usual charger for a mobile phone
like an iPhone or iPad can also be used.
2. b. The working temperature for the CamFi is -20~50 Celsius degree and the
relatively humidity is 0%~95%. Low temperature may cause degradation to the
battery.
3. c. Charging your mobile phone through the CamFi is not recommended, as this will
cause degradation to the battery.
4. d. Please keep CamFi from high temperature, moisture and water.
1. 1. It is strongly recommend that you use the provided USB cable of the camera to
connect the CamFi. Low quality USB cables will cause unstable or poor connection
and unexpected problems.
2. 2. You can use the lanyard in the accessories to hang the CamFi to the tripod or use
the hot shoe screw to install the CamFi.
The transmission of the CamFi is the standard IEEE802.11bgn and the fastest speed
is 150Mbps. The transmit distance is the same as a usual WiFi equipment. The actual
transmit speed of the CamFi is dependent on the camera, wireless network environment
and distance. You can take the following measures to improve the transmit speed.
1. Turn o other Wi-Fi devices.
2. Remove the obstacles between CamFi and controlled terminals, especially those
like metals and concrete.
3. Try to place the CamFi on a higher position.
4. Try to use the CamFi with a full battery. Low battery may cause the instability the
transmission.
5. Try to use the original USB cables provided instead of other compatible USB
cables.
17
Page 21

18
FAQ
Can I use a CamFi with the ash lamp or ash trigger at the same time?
The USB cable of CamFi does not t for my camera, what shall I do?
Why does the app always pop up a window asking to input IP address?
Putting the CamFi on the hot shoe is just for xation, it is not necessary to always be
on the hot shoe. If needed, you can hang CamFi on a tripod or on your wrist, and you
can also buy a dual shoe bracket on Amazon, then you can put the ash trigger and
the CamFi on the bracket at the same time.
The cable of CamFi is designed for standard mini USB 2.0 which is used in most of
DSLR cameras. Some new cameras use USB 3.0 port such as Canon 7D mark II, 5Ds,
Nikon D810. And some Nikon cameras use the USB port with special size, such as
Nikon D3200, D5100 and D7100. So for these cameras, please just use their original
cables to connect to CamFi.
It is always caused by that the client device does not connect to the CamFi's Wi-Fi hot
spot. To solve this issue, please tap the home button, and tap the Settings->WLAN,
select the network named cam-XXXXX, and then restart the app.
Why does the focus function not work?
1. For Canon, it needs change the AF options to Live mode by using the camera's menu
button. Quick mode or Face Detect Live mode is not supported by the app.
2. For Nikon, it will do not work if the AF area mode is Face priority or Subject tracking.
Please change the mode to Wide area or Normal area. How to set AF area mode on
your Nikon 7100 illustrates the steps thoroughly.
How to connect CamFi with PC?
CamFi supports the following two ways to connect with a PC:
1. Wireless connection. You can connect CamFi to your PC through the CamFi wireless
network by using a portable USB Wi-Fi.
2. Cable connection. Connect CamFi to your PC via the LAN cable.
Page 22

19
Does CamFi use my mobile broadband? Can CamFi be used for outdoor
purposes? How about the transmission distance?
CamFi is a wireless remote controller for DSLR cameras. It is a Wi-Fi transmitter, and
as such, it will NOT need your mobile broadband. You can connect a CamFi device
to a DSLR camera with a USB cable, then use your mobile phone to connect to the
CamFi device over the Wi-Fi to remotely control the DSLR camera, which allows you
to view, focus and shoot photos. It supports 802.11n Wi-Fi technology, and has a high
transmission speed and wide signal coverage. The Wi-Fi signal can be up to 50 meters
in a barrier-free environment.
Can the photographs be transmitted between the two oors?
Is there a battery in CamFi? How long can it be used?
It is related to the structure of the building because the signal may be weakened
through the wall. We recommend that you use the Wi-Fi signal amplier, or use a cable
to connect the devices when the signal is weak.
CamFi has a built-in 1800mAh rechargeable battery and it can NOT be removed. The
duration of the battery is more than 6 hours for the normal work.
How to receive pictures by using TV?
There are two ways:
1. By using a PC or laptop connected to the TV through our PC client to display the
photographs in a photo shoot.
2. By using an Amazon Fire TV stick or other android TV stick. After having installed
our TV client app, you can use an LCD TV to show your photos as they are taken.
 Loading...