

Cameo Communications WLG2210 User Manual
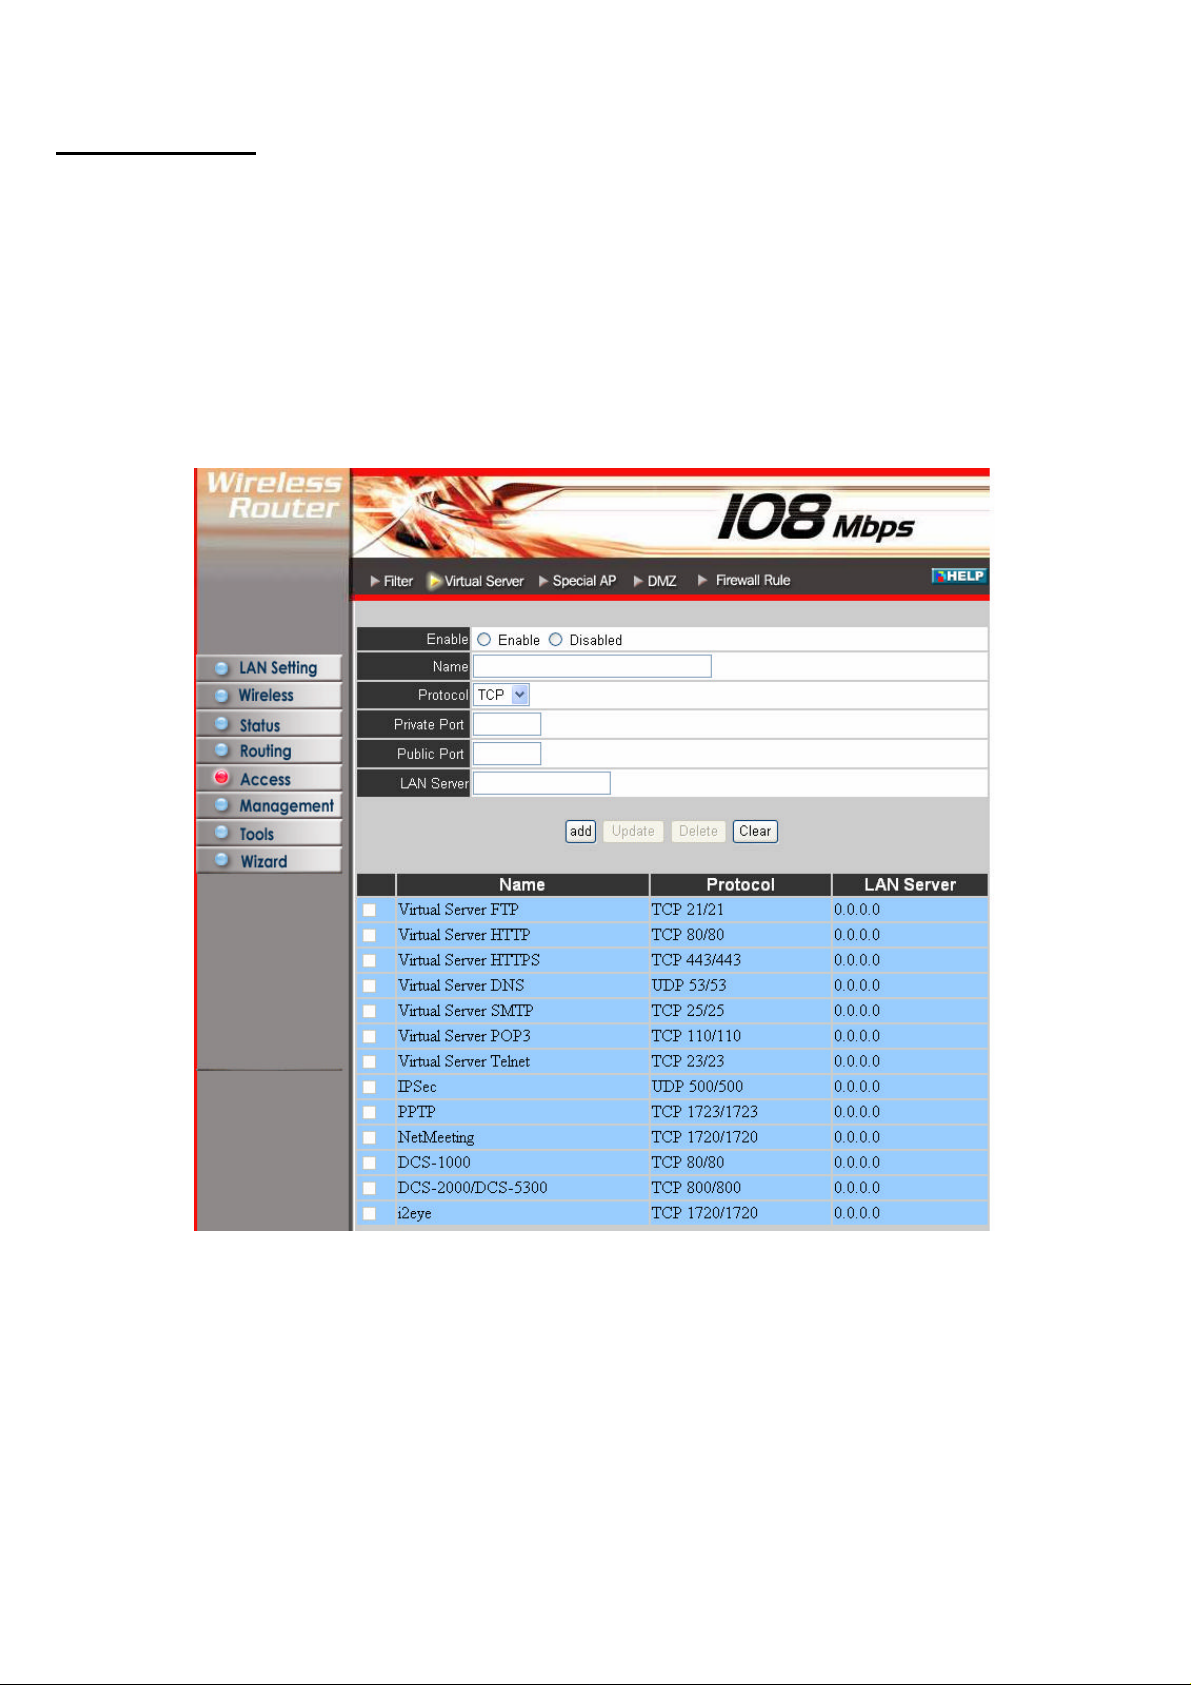
Virtual Server
This screen enables user to create a virtual server via the router. If the router is set
as a virtual server, remote users requesting Web or FTP services through the WAN
are directed to local servers in the LAN. The router redirects the request via the
protocol and port numbers to the correct LAN server. The Virtual Sever profiles are
listed in the table at the bottom of the page.
Note: When selecting items in the table at the bottom, click anywhere in the item.
The line is selected, and the fields automatically load the item's parameters, which
user can edit.
Enable: Click to enable or disable the virtual server.
Name: Type a descriptive name for the virtual server.
Protocol: Select a protocol (TCP or UDP) to use for the virtual server.
Private Port: Type the port number of the computer on the LAN that is being used
to act as a virtual server.
Public Port: Type the port number on the WAN that will be used to provide access
to the virtual server.
LAN Server: Type the LAN IP address that will be assigned to the virtual server.
Add: Click to add the virtual server to the table at the bottom of the screen.
Update: Click to update information for the virtual server if user have selected a
list item and have made changes.
Delete: Select a list item and click “Delete” to remove the item from the list.
New: Click “New” to erase all fields and enter new information.
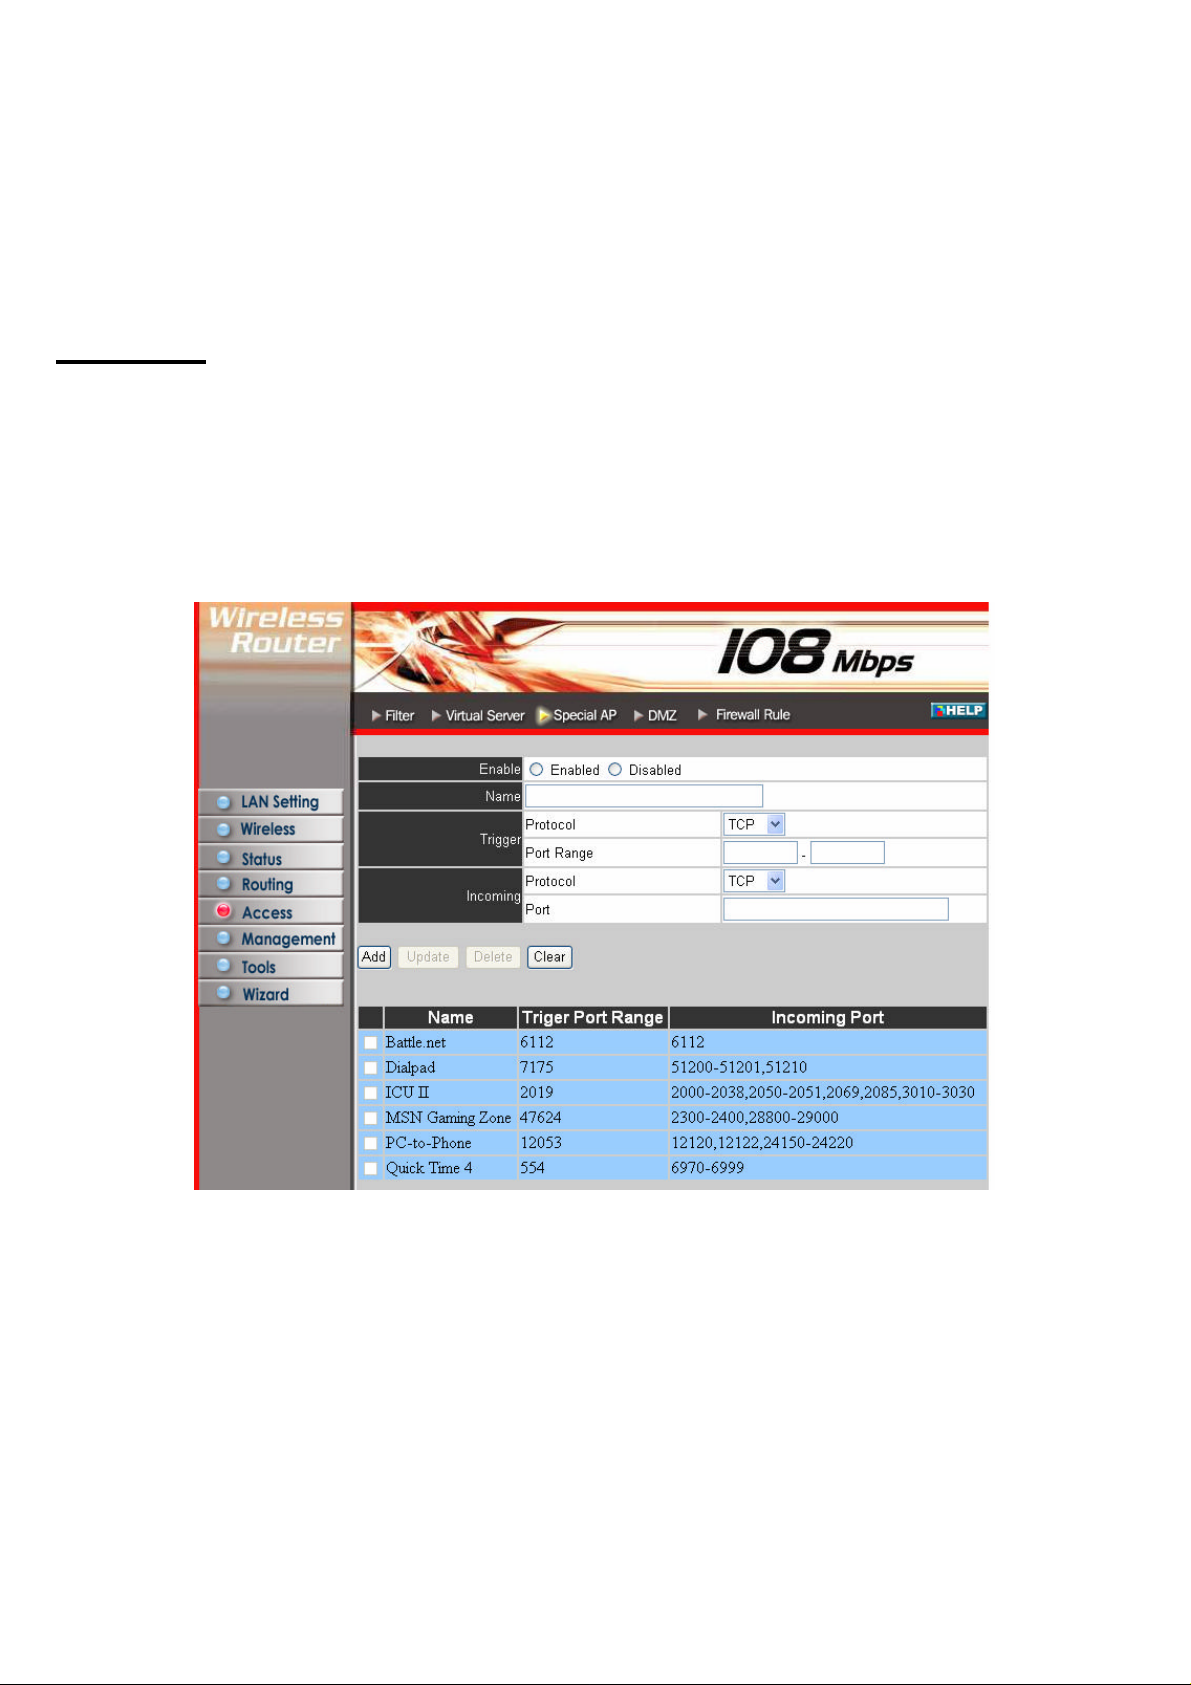
Special AP
This screen enables user to specify special applications, such as games, that req uire
multiple connections that are inhibited by NAT. The special applications profiles
are listed in the table at the bottom of the page.
Note: When selecting items in the table at the bottom, click anywhere in the item.
The line is selected, and the fields automatically load the item's parameters, which
user can edit.
Enable: Click to enable or disable the application profile. When enabled, users will
be able to connect to the application via the router WAN connection. Click
“Disabled” on a profile to prevent users from accessing the application on the
WAN.
Name: Type a descriptive name for the application.
Trigger: Defines the outgoing communication that determines whether the user has
legitimate access to the application.
? Protocol: Select the protocol (TCP, UDP, or ICMP) that can be used to
access the application.
? Port Range: Type the port range that can be used to access the application
in the text boxes.
? Incoming: Defines which incoming communications users are permitted
to connect with.
? Protocol: Select the protocol (TCP, UDP, or ICMP) that can be used by
the incoming communication.
? Port: Type the port number that can be used for the incoming communication.
Add: Click to add the special application profile to the table at the bottom of the
screen.
Update: Click to update information for the special application if user have
selected a list item and have made changes.
Delete: Select a list item and click Delete to remove the item from the list.
New: Click “New” to erase all fields and enter new information.
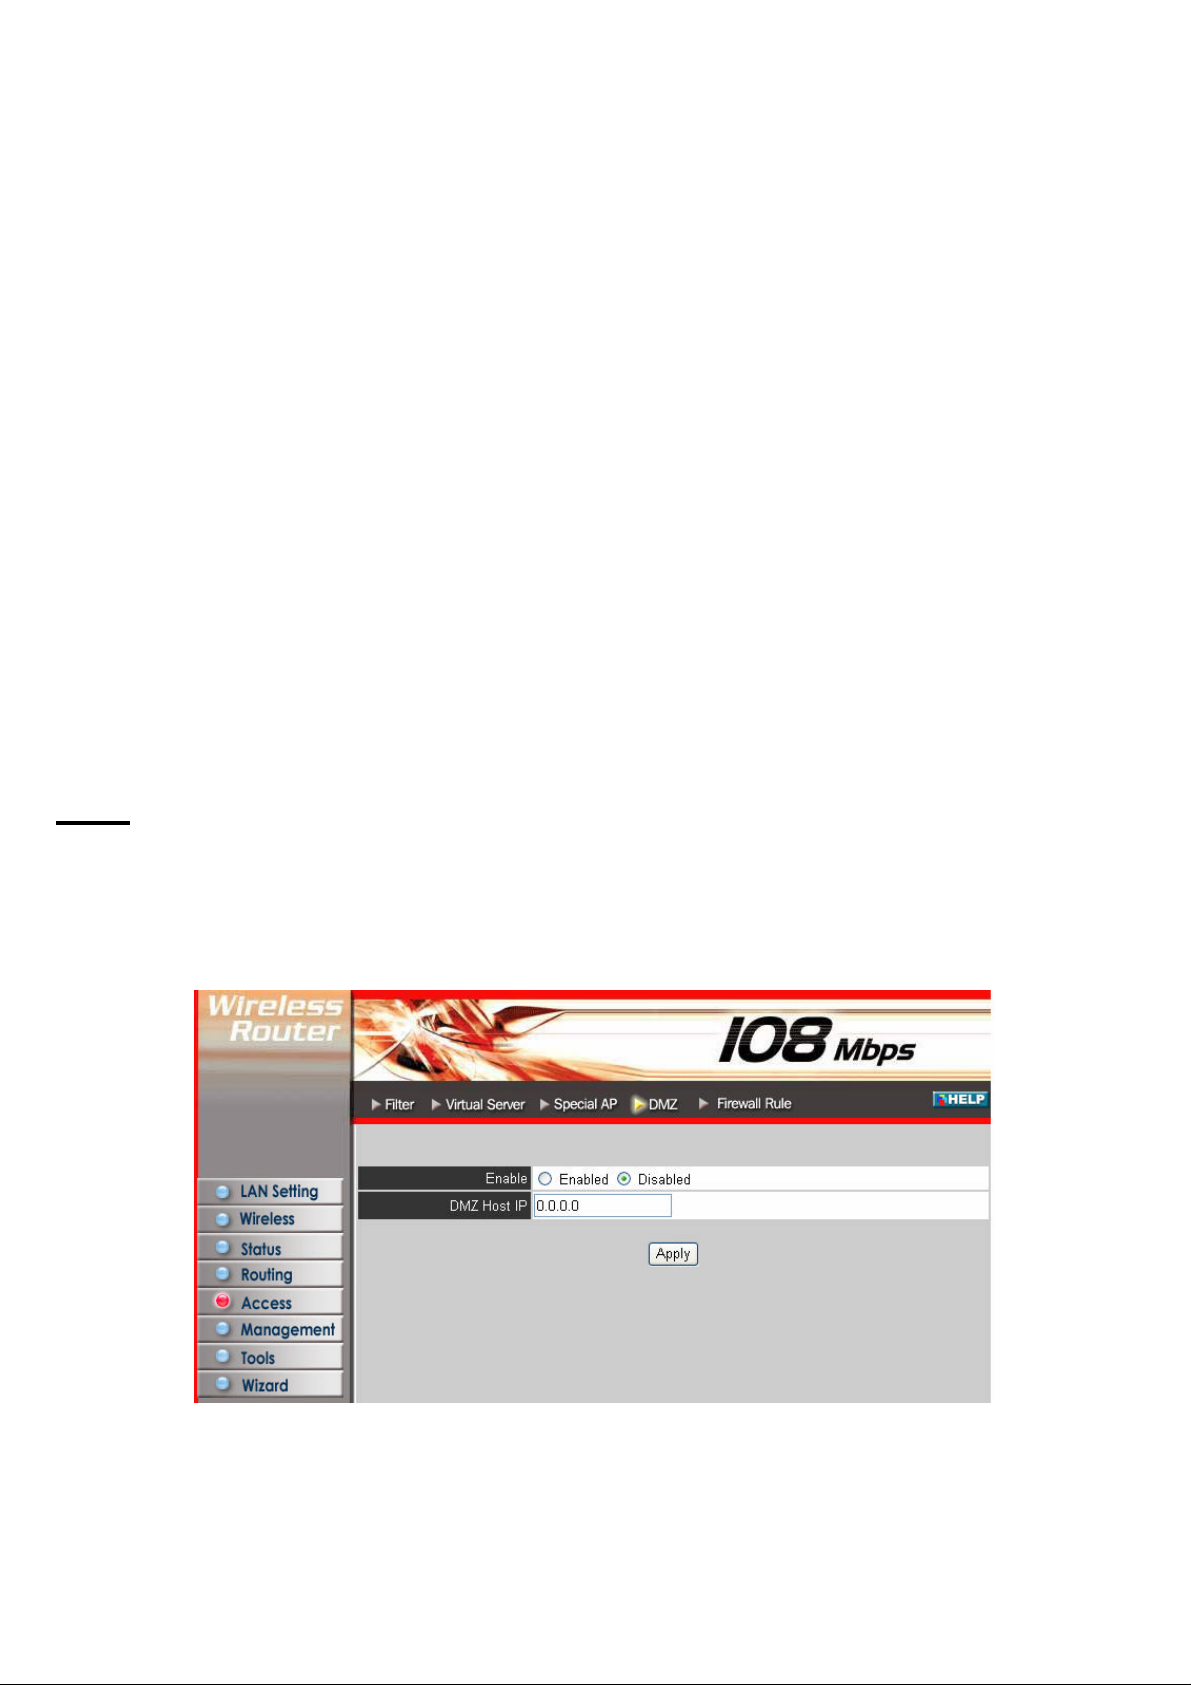
DMZ
This screen enables user to create a DMZ for those computers that cannot access
Internet applications properly through the router and associated security settings.
Note: Any clients added to the DMZ exposes the clients to security risks such as
viruses and unauthorized access.
Enable: Click to enable or disable the DMZ.
DMZ Host IP: Type a host IP address for the DMZ. The computer with this IP
address acts as a DMZ host with unlimited Internet access.
Apply: Click to save the settings.
 Loading...