

Page 1

Professional Access Point
Administrator Guide
SNMP
The Simple Network Management Protocol (SNMP) is an Internet standard protocol that facilitates the
monitoring and managing of network devices. SNMP lets you monitor events on your network through an
SNMP software application.
The following sections describe how to configure SNMP on your network:
• Understanding SNMP
• Navigating to Simple Network Management Protocol
• Enabling and Disabling Simple Network Management Protocol (SNMP)
• Updating Settings
• Configuring Your Network Management System
Understanding SNMP
SNMP defines a standard for recording, storing, and sharing information about network devices. SNMP is
a subset of Transmission Control Protocol/Internet Protocol (TCP/IP) that facilitates network management,
troubleshooting, and maintenance.
Key components of any SNMP-managed network are managed devices, SNMP agents, and a network
management system. The agents, store data about their devices in Management Information Bases
(MIBs) and return this data to the network management system when requested. Managed devices can be
network nodes such as access point base stations, routers, switches, bridges, hubs, servers, or printers.
The Professional Access Point can function as an SNMP managed device for seamless integration into
network management systems such as HP OpenView. The Professional Access Point supports the
following SNMP MIBs:
• Standard SNMP MIBs
• SNMP v1 and v2 MIBs
• IEEE802.11 MIB
• Proprietary MIB
• USR5453-PRODUCTS MIB—stores product identification information.
• USR5453-SYSTEM MIB—facilitates system-level requests, such as reboot and upgrade.
• USR5453-WIRELESS-CHAN MIB—maintains channel assignment information for access points
in a cluster.
• USR5453-WIRELESS-MIB—stores information about the wireless system, including peer statistics, beacon report, radio, and client statistics tables.
For more information about SNMP, visit http://www.snmplink.org.
SNMP - 155
Page 2
Professional Access Point
Administrator Guide
Navigating to Simple Network Management Protocol
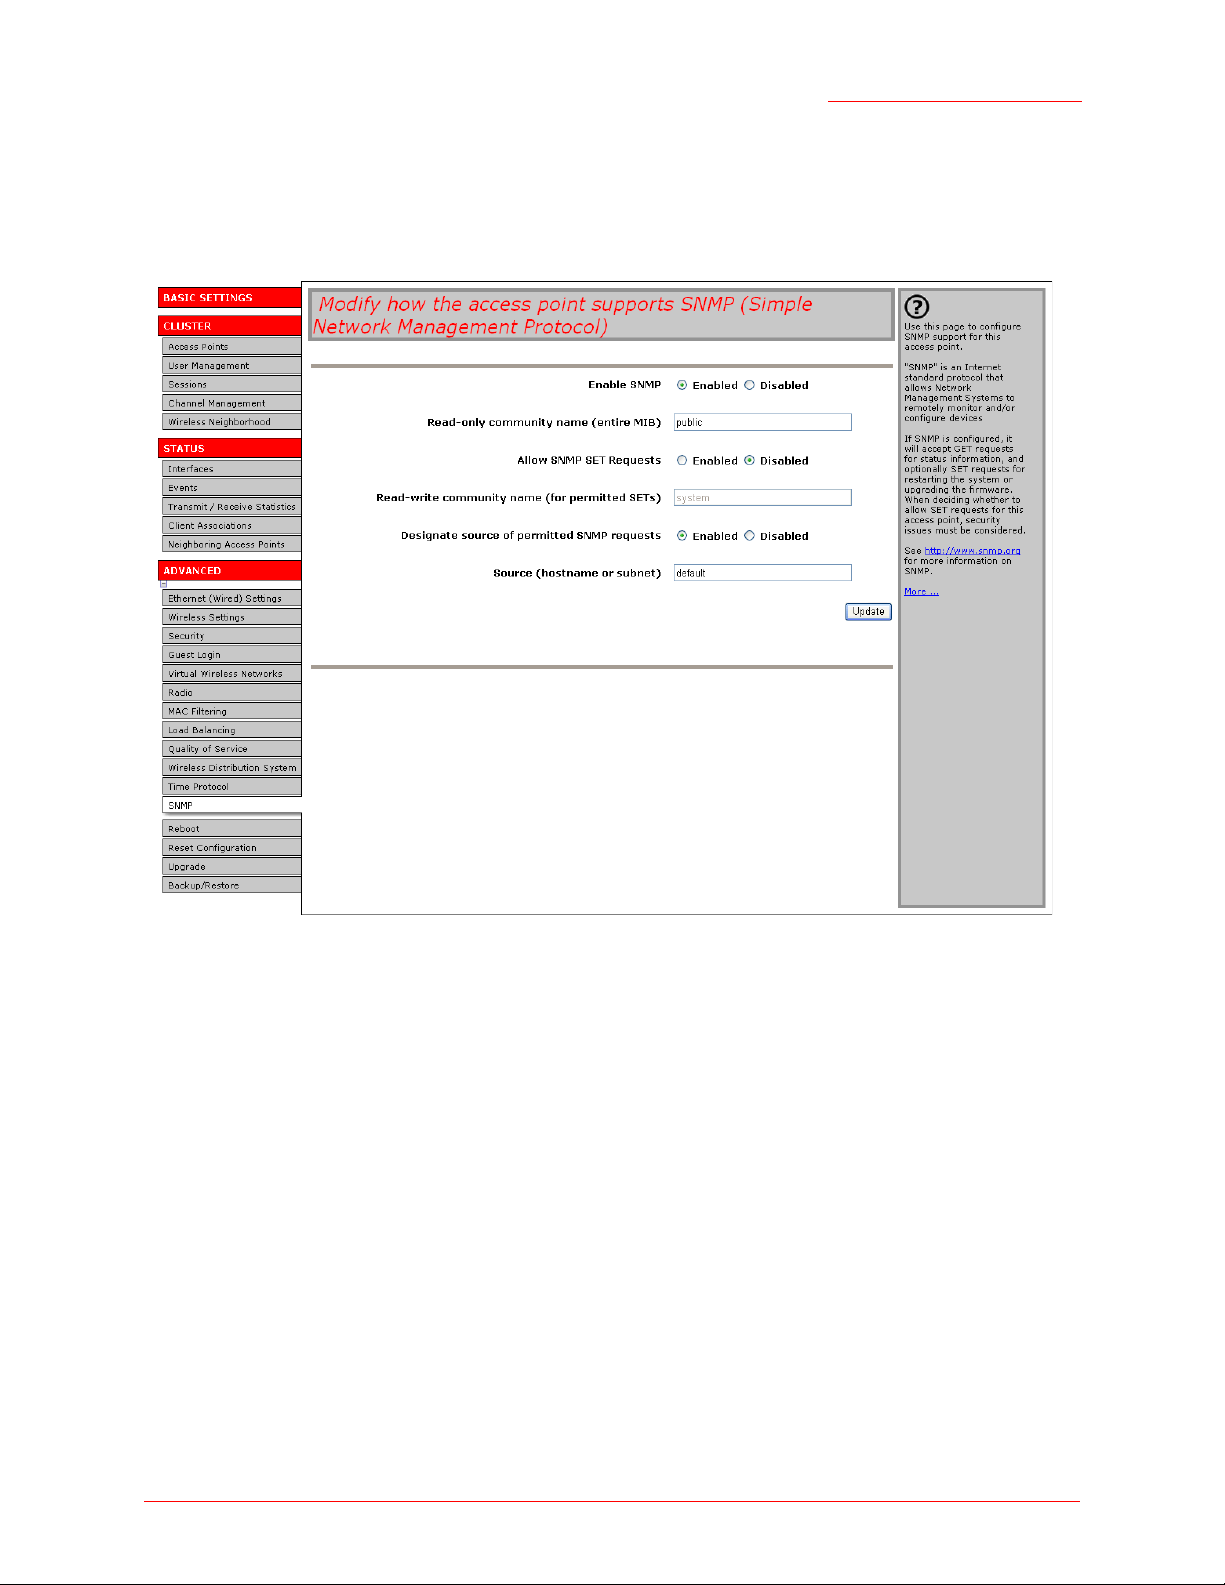
To enable SNMP, click the Advanced menu’s SNMP tab and update the fields as described below.
Enabling and Disabling Simple Network Management Protocol
(SNMP)
To configure your access point to use Simple Network Management Protocol (SNMP) server, first enable
the SNMP option that you want to use, and then provide the name of the community or host that can use
SNMP - 156
Page 3

Professional Access Point
Administrator Guide
the option.
Field Description
Enable SNMP SNMP provides a way for the access point to store management information
and to provide the information to a network-management system (NMS). (See
http://www.snmplink.org/ for more general information on SNMP.)
Choose to either enable (default) or disable use of Simple Network Management Protocol:
Read-only Community Name (entire
MIB)
Allow SNMP SET Requests Choose to either enable or disable the honouring of SNMP SET requests:
Read-write community name (for permitted SETs)
If SNMP is enabled, enter the name of the community that is allowed to make
information queries against the MIB.
The community name acts an as authentication mechanism. The name functions as a password, and a request is considered authentic if the requester
knows the password.
The community name is alphanumeric; do not use special characters or
spaces.
• Enable—Machines on the network that provide the correct community name
can issue SET requests.
• Disable—(default) SET requests are not honoured.
SET requests are restricted to the USR5453-SYSTEM MIB and USR5453WIRELESS-CHAN MIB..
If SET requests are enabled, enter the name of the community that is allowed
to make SET requests.
The community name acts an as authentication mechanism. The name functions as a password, and a request is considered authentic if the requester
knows the password.
Designate source of permitted SNMP
requests
The community name is alphanumeric; do not use special characters or
spaces.
Choose to either enable or disable designating the source of the SNMP
requests:
• Enable—(default) A machine must be designated in the Source field in order
for its requests to be honoured.
• Disable—Any machine in the network may issue requests.
SNMP - 157
Page 4

Professional Access Point
Administrator Guide
Field Description
Source (hostname or subnet) If source designation is enabled, enter the IP address of the host or subnet that
is allowed to issue SNMP requests to the access point.
If you use this option, the Professional Access Point honours requests from the
specified host or subnet only.
If you also enable a read-write community, the specified source must be a
member of that community in order for the access point to honour the source’s
requests.
Note: Even if you explicitly name a machine or a subnet in this field, any
machine issuing a request must also know the proper community name in
order to have the request honoured.
To shut down SNMP on the access point, select Disable in the SNMP field.
Updating Settings
To apply your changes, click Update.
Configuring Your Network Management System
In order to access the USRobotics proprietary MIBs, you need to import the MIBs into your network
management system. You can find the MIB files in the Mib folder on the USRobotics CD-ROM. Refer to
your network management system for instructions on importing and compiling MIBs.
SNMP - 158
Page 5
Professional Access Point
Administrator Guide
Reboot
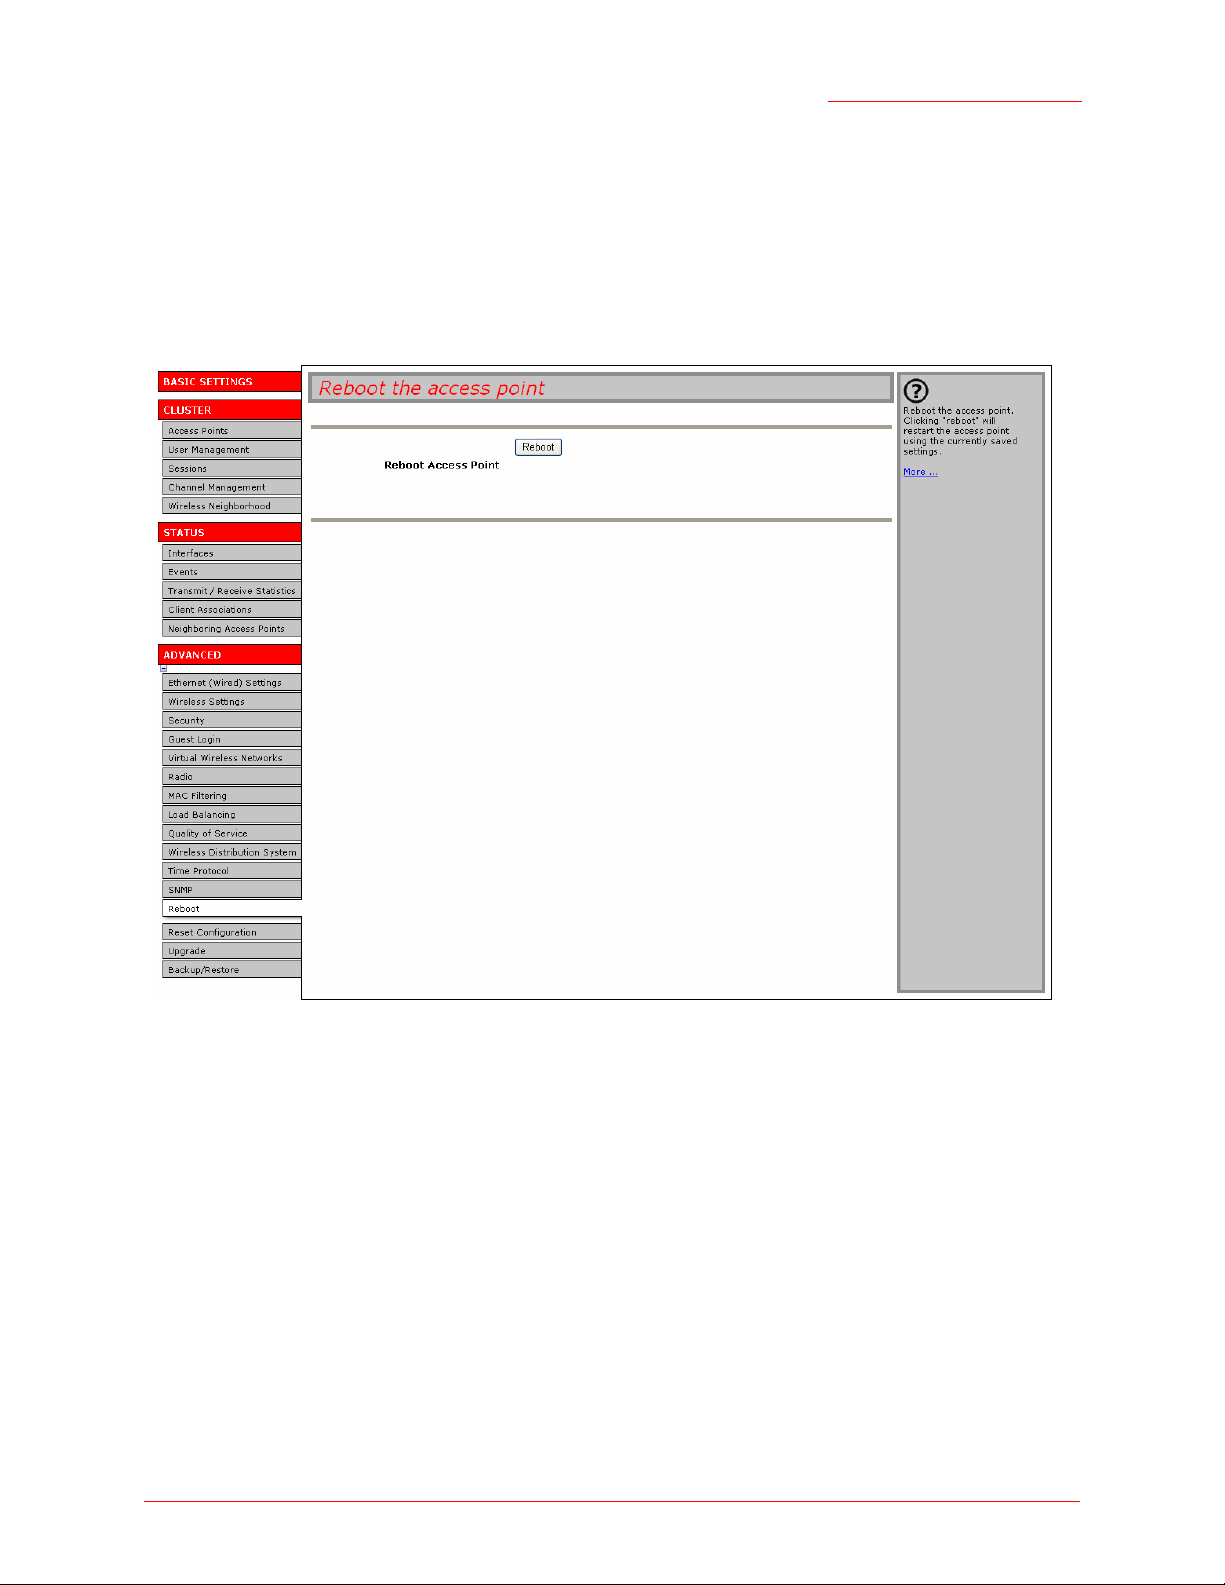
For maintenance purposes or as a troubleshooting measure, you can reboot the Professional Access Point
as follows.
1. Click the Advanced menu’s Reboot tab.
2. Click the Reboot button.
The access point reboots. If the IP address of the access point changes after the reboot, you need to
specify the new address in your Web browser in order to access the Web User Interface.
Reset Configuration
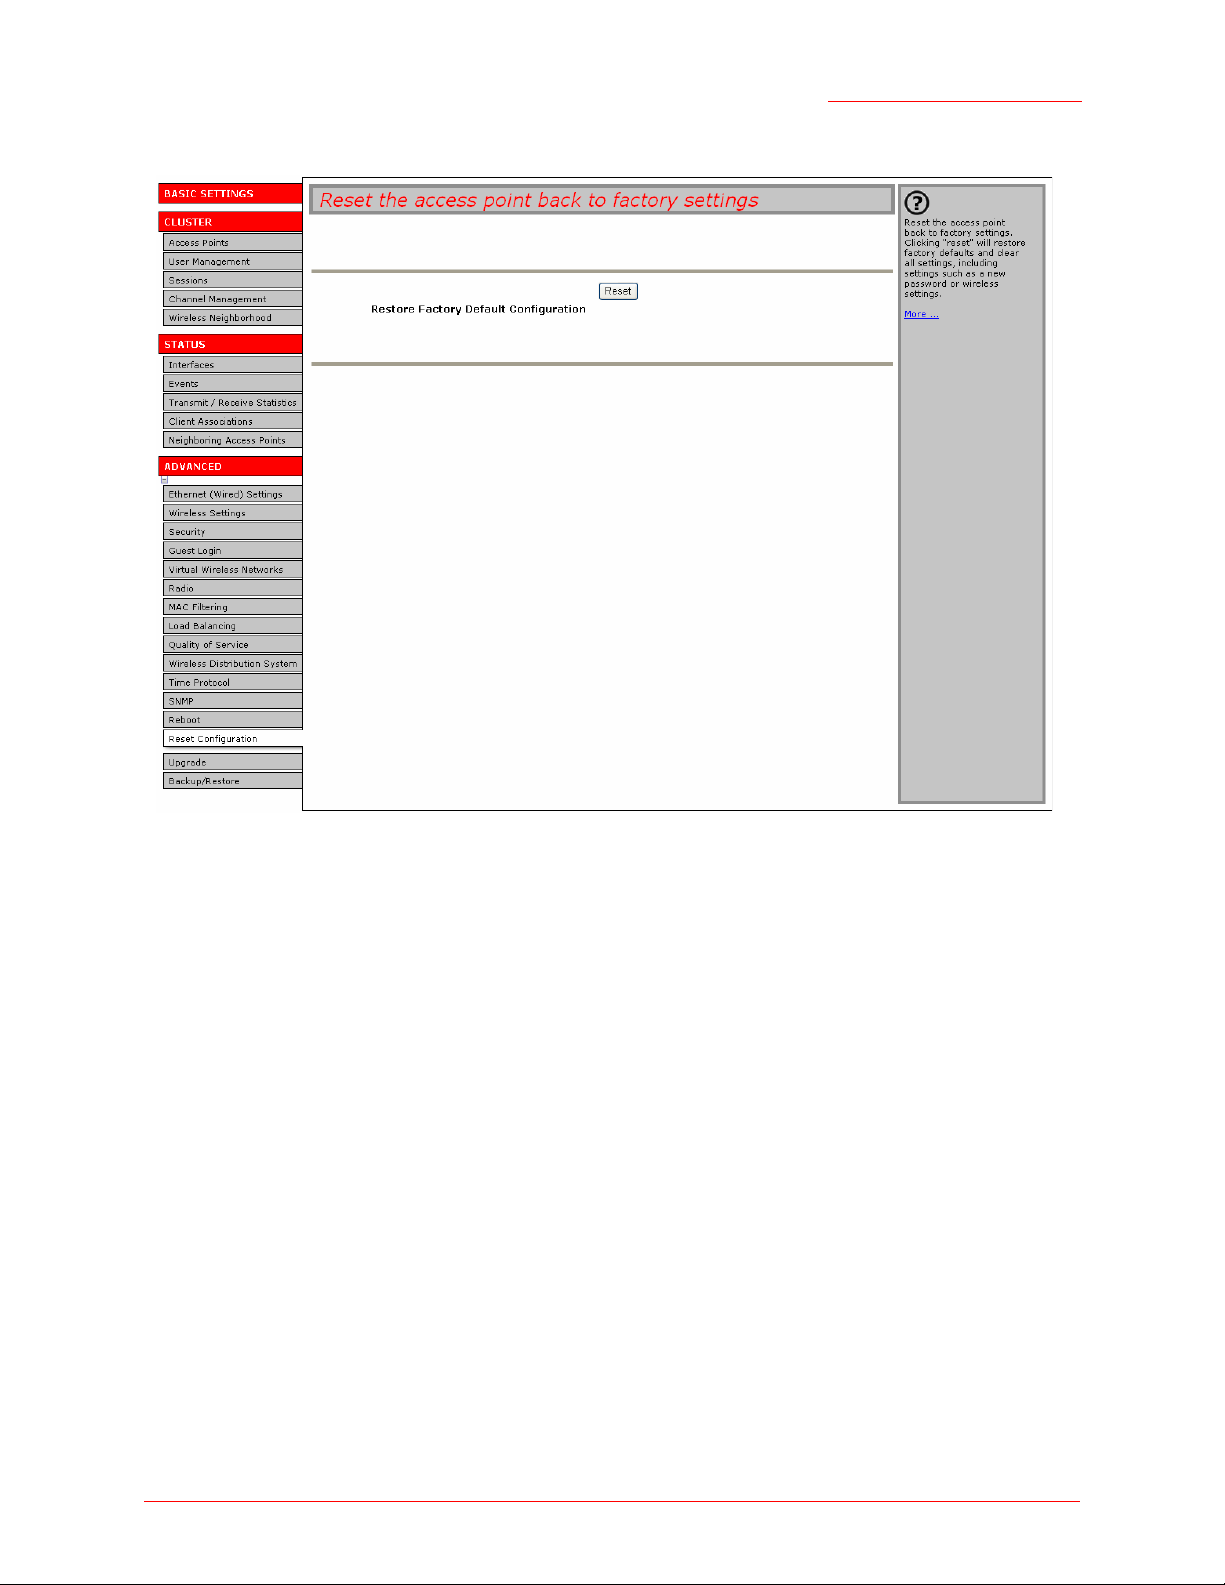
If you are experiencing extreme problems with the Professional Access Point and have tried all other
troubleshooting measures, use the Reset Configuration function. This will restore factory defaults and clear
all settings, including settings such as a new password and wireless settings.
1. Click the Advanced menu’s Reset Configuration tab.
Reboot - 159
Page 6
Professional Access Point
Administrator Guide
2. Click the Reset button.
Factory defaults are restored.If the IP address of the access point changes after the reset, you need to
specify the new address in your Web browser in order to access the Web User Interface.
Note
Keep in mind that if you do reset the configuration from this page, you are doing so for this access
point only; not for other access points in the cluster.
For information on the factory default settings, see “Default Settings for the Professional Access Point”
on page 6.
If you cannot access the Web User Interface, you can reset the access point by using a thin object,
such as a paper clip, to press the Reset button until both the LAN and WLAN LEDs turn off briefly.
Upgrade
As new versions of the Professional Access Point firmware become available, you can upgrade the
Upgrade - 160
Page 7

Professional Access Point
Administrator Guide
firmware on your devices to take advantages of new features and enhancements.
Caution
Do not upgrade the firmware from a wireless client that is associated with the access point you are
upgrading. Doing so will cause the upgrade to fail. Furthermore, all wireless clients will be disassociated and no new associations will be allowed.
If you are reading this section because you already tried to upgrade the firmware through a wireless
client, use a wired client to regain access to the access point as follows:
• Create a wired Ethernet connection from a PC to the access point.
• Open the Web User Interface.
Repeat the upgrade process using with the wired client.
Caution
The upgrade process may take several minutes during which time the access point will be unavailable.
Do not power down the access point while the upgrade is in process. When the upgrade is complete,
the access point will restart and resume normal operation.
Note
You must upgrade firmware for each access point; you cannot upgrade firmware automatically across
the cluster.
To upgrade the firmware on a particular access point:
1. Navigate to Advanced menu’s Upgrade tab on the Web User Interface for that access point.
Upgrade - 161
Page 8

Professional Access Point
Administrator Guide
Information about the current firmware version is displayed and an option to upgrade a new firmware
image is provided.
2. If you know the path to the New Firmware Image file, enter it in the textbox. Otherwise, click the Browse
button and locate the firmware image file.
3. Click Update to apply the new firmware image.
A confirmation window describes the upgrade process.
4. Click OK to confirm the upgrade and start the process.
Caution
The firmware upgrade takes approximately 5 minutes, during which the Web User Interface displays a status message and progress bar. Do not power off the access point, and do not navigate
away from the upgrade page in your Web browser during the firmware upgrade.
When the upgrade is complete, the Web User Interface redisplays the Upgrade firmware page. You
can verify that the ugrade was successful by checking the firmware version shown on that page.
Backup/Restore
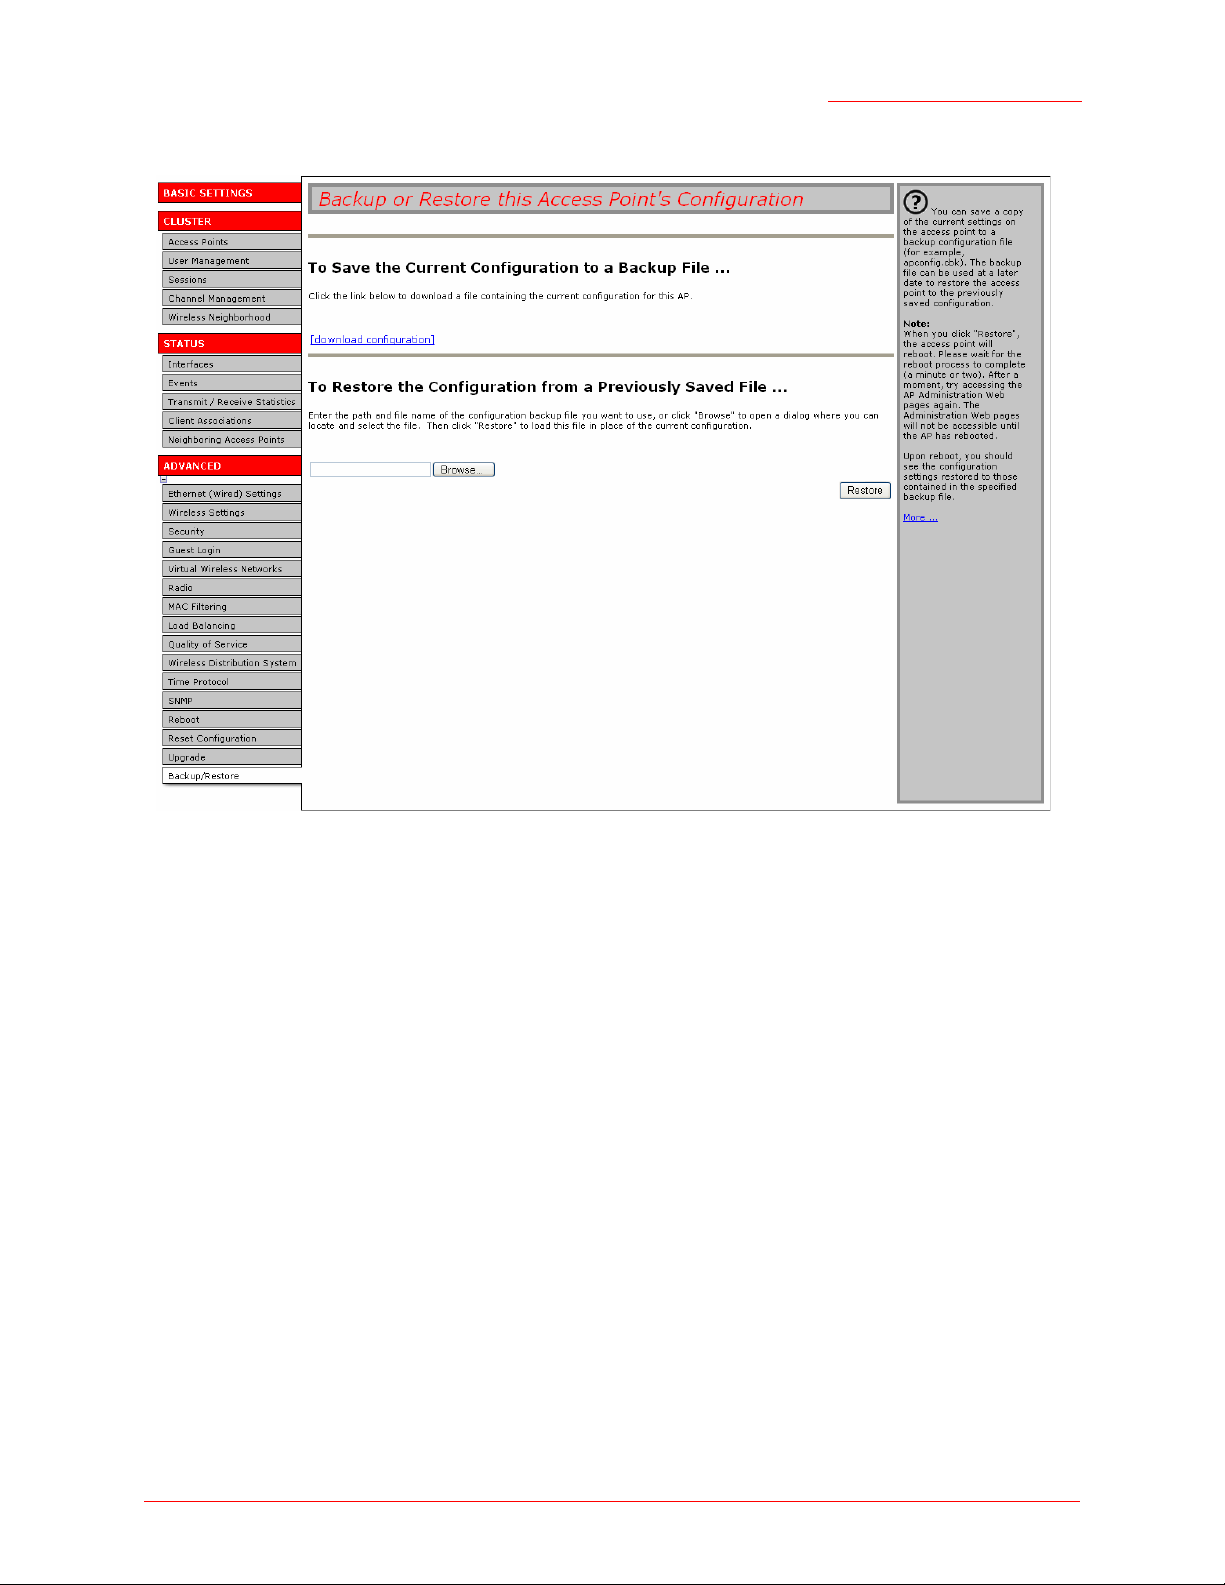
You can save a copy of the current settings on the Professional Access Point to a backup configuration file.
The backup file can be used at a later date to restore the access point to the previously saved
configuration.
• Navigating to Backup and Restore Settings
• Backing up Configuration Setting for an Access Point
• Restoring Access Point Settings to a Previous Configuration
Navigating to Backup and Restore Settings
To backup or restore a configuration for an access point, click the Advanced menu’s Backup and Restore tab
and use the Web User Interface as described below.
Backup/Restore - 162
Page 9
Professional Access Point
Administrator Guide
Backing up Configuration Setting for an Access Point
To save a copy of the current settings on an access point to a backup configuration file (
1. Click the download configuration link.
A File Download or Open dialogue is displayed.
2. Choose the Save option on this first dialogue.
This brings up a file browser.
3. Use the file browser to navigate to the directory where you want to save the file, and click Save to save
the file.
You can use the default file name (
to save the file with a
.cbk
extension.
apconfig.cbk
) or type a new name for the backup file, but be sure
.cbk
format):
Restoring Access Point Settings to a Previous Configuration
To restore the configuration on an access point to previously saved settings:
Backup/Restore - 163
Page 10

Professional Access Point
Administrator Guide
1. Select the backup configuration file you want to use, either by typing the full path and file name in the
Restore field or by clicking Browse, selecting the file, and clicking
Open.
(Only those files that were created with the Backup function and saved as
files are valid to use with Restore; for example,
apconfig.cbk
.)
.cbk
backup configuration
2. Click the Restore button.
The access point will reboot.
Note
When you click Restore, the access point will reboot. A reboot confirmation dialogue and follow-on
rebooting status message will be displayed. Wait a minute or two for the reboot process to complete. Then try to access the Web User Interface as described in the next step; the Web User Interface will not be accessible until the access point has rebooted.
3. When the access point has rebooted, access the Web User Interface either by clicking again on one of
the tabs (if the Web User Interface is still displayed) or by typing the IP address the Professional
Access Point as a URL in the address field of the Web browser. Enter the URL for the access point as
http://IPAddressOfAccessPoint
.
The Web User Interface displays the configuration settings restored from the backup file that you
selected.
Backup/Restore - 164
Page 11

Professional Access Point
Administrator Guide
Command Line Interface
In addition to the Web-based user interface, the Professional Access Point includes a command line
interface (CLI) for administering the access point. The CLI lets you view and modify status and
configuration information.
From the client station perspective, even a single deployed Professional Access Point broadcasting its
"network name" to clients constitutes a wireless network. Keep in mind that CLI configuration commands,
like Web User Interface settings, can affect a single access point running in stand-alone mode or
automatically propagate to a network of clustered access points that share the same settings. (For more
information on clustering, see “Access Points” on page 33
to stand-alone or cluster mode from the CLI, see “Set Configuration Policy for New Access Points” on
page 29)
This part of the Professional Access Point Administrator Guide introduces the interface and provides a
complete description of classes and their associated fields:
. For information on how to set an access point
• Class Structure, Commands, and Examples
• Class and Field Reference
Class Structure, Commands, and Examples
The following topics in this appendix provide an introduction to the class structure upon which the CLI is
based, CLI commands, and examples of using the CLI to get or set configuration information on an access
point or cluster of APs:
• Comparison of Settings Configurable with the CLI and Web User Interface
• How to Access the CLI for an Access Point
• Telnet Connection to the Access Point
• SSH2 Connection to the Access Point
• Quick View of Commands and How to Get Help
• Command Usage and Configuration Examples
• Understanding Interfaces as Presented in the CLI
• Saving Configuration Changes
• Basic Settings
Class Structure, Commands, and Examples - 165
Page 12

• Access Point and Cluster Settings
• User Accounts
• Status
• Ethernet (Wired) Interface
• Wireless Interface
• Security
• Enable/Configure Guest Login Welcome Page
• Configuring Multiple BSSIDs on Virtual Wireless Networks
• Radio Settings
• MAC Filtering
• Load Balancing
Professional Access Point
Administrator Guide
• Quality of Service
• Wireless Distribution System
• Time Protocol
• Reboot the Access Point
• Reset the Access Point to Factory Defaults
• Keyboard Shortcuts and Tab Completion Help
• CLI Class and Field Overview
Comparison of Settings Configurable with the CLI and Web
User Interface
The command line interface (CLI) and the Web User Interface to the Professional Access Point are
designed to suit the preferences and requirements for different types of users or scenarios. Most
administrators will probably use both interfaces in different contexts. Some features (such as Clustering)
can only be configured from the Web User Interface, and some details and more complex configurations
are only available through the CLI.
The CLI is particularly useful in that it provides an interface to which you can write programmatic scripts for
access point configurations. Also, the CLI may be less resource-intensive than a Web interface.
The following table shows a feature-by-feature comparison of which settings can be configured through the
CLI or the Web User Interface, and which are configurable with either.
Class Structure, Commands, and Examples - 166
Page 13

Professional Access Point
Administrator Guide
Feature or Setting Configurable from CLI Configurable
from Web User
Interface
Basic Settings
• Getting/changing Administrator Password
• Getting/changing access point name and
location
• Viewing information like MAC, IP address,
and Firmware version
Access Point and Cluster Settings Get existing settings only.
User Accounts
User Database Backup and Restore You cannot backup or restore a user data-
Sessions The CLI does not provide session monitor-
yes yes
You cannot set configuration policy or
other cluster features from the CLI.
Use for clustering settings.
yes yes
base from the CLI.
To restore a user database, use the Web
User Interface as described in “Backing
Up and Restoring a User Database” on
page 46.
ing information.
yes
yes
yes
To view client sessions, use the Web User
Interface.
Channel Management You cannot configure Channel Manage-
ment from the CLI.
To configure channel management, use
the Web User Interface as described in
“Channel Management” on page 53
Wireless Neighborhood You cannot view the cluster-based "Wire-
less Neighborhood" from the CLI.
To view the wireless neighbourhood,use
the Web User Interface as described in
“Wireless Neighborhood” on page 61
Status
yes yes
.
.
yes
yes
Class Structure, Commands, and Examples - 167
Page 14

Professional Access Point
Administrator Guide
Feature or Setting Configurable from CLI Configurable
from Web User
Interface
Ethernet (Wired) Interface
Wireless Interface
Security
Set Up Guest Access
Enable/Configure Guest Login Welcome Page
Configuring Multiple BSSIDs on Virtual Wireless Networks
Radio Settings
MAC Filtering
yes
You can configure all Ethernet (Wired)
settings from the CLI except "Connection
Type".
To change the Connection Type from
DHCP to Static IP addressing (or vice
versa), you must use the Web User Interface.
yes yes
yes yes
yes yes
yes
yes yes
yes
You can configure all Radio settings from
the CLI except for turning on/off Super G.
yes yes
yes
yes
Load Balancing
Quality of Service
Wireless Distribution System
Time Protocol
Reboot the Access Point
Reset the Access Point to Factory Defaults
Upgrade the Firmware You cannot upgrade the firmware from the
Backup and Restore You cannot backup or restore an access
yes yes
yes yes
yes yes
yes yes
yes
yes yes
CLI. To upgrade firmware, use the Web
User Interface as described in “Upgrade”
on page 160.
point configuration from the CLI. To
backup or restore an access point configuration, use the Web User Interface as
described in “Backup/Restore” on
page 162.
yes
yes
Class Structure, Commands, and Examples - 168
Page 15

Professional Access Point
Administrator Guide
How to Access the CLI for an Access Point
Use one of the following methods to access the command line interface (CLI) for the access point or
wireless network:
• Telnet Connection to the Access Point
• SSH2 Connection to the Access Point
Telnet Connection to the Access Point
If you already have your network deployed and know the IP address of your access point, you can use a
remote Telnet connection to the access point to view the system console over the network.
Notes
The default Static IP address is 192.168.1.10. If there is no DHCP server on the network, the
access point retains this static IP address at first-time startup. You can use the Detection Utility to
find the IP address of the access point. (For more about IP addressing, see “Understanding
Dynamic and Static IP Addressing on the Professional Access Point” on page 10)
1. Bring up a command window on your PC.
(For example, from the Start menu, select Run to bring up the Run dialogue, type
and click OK.)
2. At the command prompt, type the following:
telnet
where
(If your Domain Name Server is configured to map domain names to IP addresses via DHCP, you can
also telnet to the domain name of the access point.)
3. You will be prompted for an Administrator user name and password for the access point.
USR5453-AP login:
Password:
Enter the default Administrator username and password for the Professional Access Point (
admin
screen.)
When the user name and password is accepted, the screen displays the Professional Access Point
help command prompt.
IPAddressOfAccessPoint
IPAddressOfAccessPoint
), and press "Enter" after each. (The password is masked, so it will not be displayed on the
is the address of the access point you want to monitor.
cmd
in the Open field,
admin
,
USR5453-AP login:
Password:
Enter 'help' for help.
You are now ready to enter CLI commands at the command line prompt.
admin
Class Structure, Commands, and Examples - 169
Page 16
Professional Access Point
Administrator Guide
SSH2 Connection to the Access Point
If you already have your network deployed and know the IP address of your access point, you can use a
remote SSH2 connection to the access point to view the system console over the network.
Notes
The Professional Access Point supports SSH version 2 only.
The default Static IP address is 192.168.1.10. If there is no DHCP server on the network, the
access point retains this static IP address at first-time startup. You can use the Detection Utility to
find the IP address of the access point. (For more about IP addressing, see “Understanding
Dynamic and Static IP Addressing on the Professional Access Point” on page 10.)
Using an SSH2 connection to the access point is similar to Telnet in that it gives you remote access to the
system console and CLI. SSH2 has the added advantage of being a secure connection traffic encrypted.
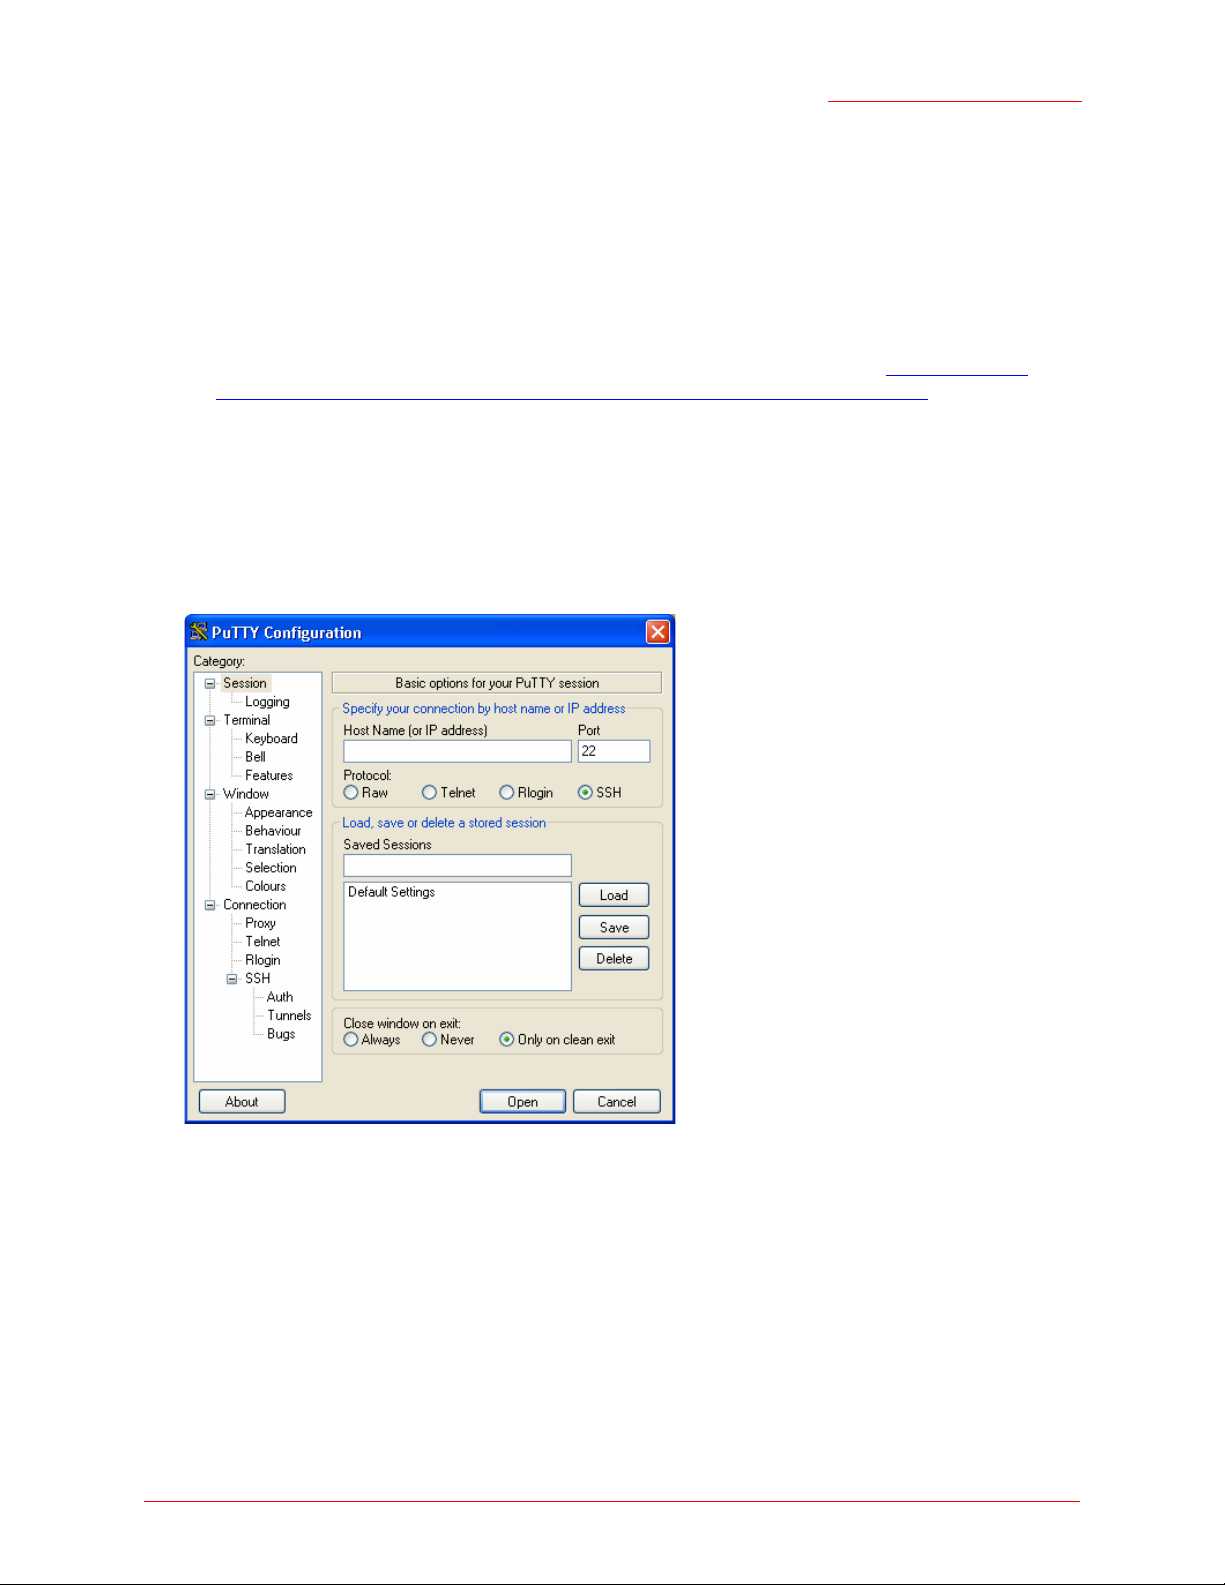
To use an SSH2 connection, you need to have SSH software installed on your PC (such as PuTTY, which
is available at http://www.chiark.greenend.org.uk/~sgtatham/putty/).
1. Start your SSH application. (This example uses PuTTY.)
2. Enter the IP address of the access point and click Open.
(If your Domain Name Server is configured to map domain names to IP addresses via DHCP, you can
enter the domain name of the access point instead of an IP address.)
This brings up the SSH command window and establishes a connection to the access point. The login
prompt is displayed.
login as:
3. Enter the default Administrator username and password for the Professional Access Point (
admin
), and press "Enter" after each. (The password is masked, so it will not be displayed on the
Class Structure, Commands, and Examples - 170
admin
,
Page 17

screen.)
Professional Access Point
Administrator Guide
login as:
admin@10.10.100.110's password:
Enter 'help' for help.
When the user name and password is accepted, the screen displays the Professional Access Point
help command prompt.
USR5453-AP#
You are now ready to enter CLI commands at the command line prompt.
admin
Quick View of Commands and How to Get Help
• Commands and Syntax
• Getting Help on Commands at the CLI
•
Ready to Get Started?
Caution
Settings updated from the CLI (with get, set, add, remove commands) will not be saved to the startup
configuration unless you explicitly save them via the save-running command. For a description of configurations maintained on the access point and details on how to save your updates, see ““Saving Con-
figuration Changes” on page 178.
Commands and Syntax
The CLI for the Professional Access Point provides the following commands for manipulating objects.
Notes
•
named_class
named.
•
instance
• field values cannot contain spaces unless the value is in quotes
For a detailed class and field reference, see “Class and Field Reference” on page 239
is a class of an object from the configuration whose instances are individually
is a name of an instance of class.
.
Class Structure, Commands, and Examples - 171
Page 18

Professional Access Point
Administrator Guide
Command Description
get The "get" command allows you to get the field values of existing instances of a class.
Classes can be "named" or "unnamed". The command syntax is:
get unnamed-class [ field ... | detail ]
get named-class [ instance | all [ field ... | name | detail ] ]
The rest of the command line is optional. If provided, it is either a list of one or more
fields
An example of using the "get" command on an unnamed class with a single instance is:
, or the keyword detail.
get log
(There is only one log on the access point. This command returns information on the log
file.)
An example of using the "get" command on an unnamed class with multiple instances
is:
get log-entry
(There are multiple log entries but they are not named. This command returns all log
entries.)
An example of using the "get" command on a named class with multiple instances is:
get bss wlan0bssInternal
(There are multiple bss’s and they are named. This command returns information on the
BSS named "wlan0bssInternal".)
An example of using the "get" command on a named class to get all instances:
get radius-user all name
get radius-user all
Note: "
wlan0bssInternal
network (
as Presented in the CLI” on page 177.
wlan0
interface). For information on interfaces, see “Understanding Interfaces
" is the name of the basic service set (BSS) on the internal
Class Structure, Commands, and Examples - 172
Page 19

Professional Access Point
Administrator Guide
Command Description
set The "set" command allows you to set the field values of existing instances of a class.
set unnamed-class [ with qualifier-field qualifier-value ... to ] field value . . .
The first argument is an unnamed class in the configuration.
After this is an optional qualifier that restricts the set to only some instances. For singleton classes (with only one instance) no qualifier is needed. If there is a qualifier, it starts
with the keyword with, then has a sequence of one or more qualifier-field
value pairs, and ends with the keyword to. If these are included, then only instances
whose present value of qualifier-field is qualifier-value will be set. The qualifier-value
arguments cannot contain spaces. Therefore, you cannot select instances whose
desired qualifier-value has a space in it.
The rest of the command line contains field-value pairs.
set named-class instance | all [ with qualifier-field qualifier-value ... to ] field value . . .
The first argument is either a named class in the configuration.
qualifier-
The next argument is the name of the instance to set, or the keyword all, which indicates that all instances should be set. Classes with multiple instances can be set consecutively in the same command line as shown in Example 4 below. The qualifier-value
arguments cannot contain spaces.
Here are some examples. (Bold text indicates class names, field names, or keywords;
text that is not bold indicates values to which the fields are being set.)
set interface wlan0 ssid "Vicky's AP"
1.
2.
set radio all beacon-interval 200
3.
set tx-queue wlan0 with queue data0 to aifs 3
4.
set tx-queue wlan0 with queue data0 to aifs 7 cwmin 15 cwmax
burst
5.
Note: For information on interfaces used in this example (such as
see “Understanding Interfaces as Presented in the CLI” on page 177
add The "add" command allows you to add a new instance of a class.
add named-class instance [ field value ... ]
add anonymous-class [ field value ... ]
For example:
0
set bridge-port br0 with interface eth0 to path-cost
add radius-user wally
200
wlan0, br0
.
, or
1024
eth0
)
Class Structure, Commands, and Examples - 173
Page 20

Professional Access Point
Administrator Guide
Command Description
remove The "remove" command allows you to remove an existing instance of a class.
remove unnamed-class [ field value . . . ]
remove named-class instance | all [ field value . . .]
For example:
remove radius-user wally
The CLI also includes the following commands for maintenance tasks:
save-running The save-running command saves the running configuration as the startup configuration.
For more information, see ““Saving Configuration Changes” on page 178.
reboot The reboot command restarts the access point (a soft reboot).
For more information, see ““Reboot the Access Point” on page 233.
factory-reset The factory-reset command resets the access point to factory defaults and reboots.
For more information, see ““Reset the Access Point to Factory Defaults” on page 233
.
Getting Help on Commands at the CLI
Help on commands can be requested at the command line interface (CLI) by using the TAB key. This is a
quick way to see all valid completions for a class.
Hitting TAB once will attempt to complete the current command.
If multiple completions exist, a beep will sound and no results will be displayed. Enter TAB again to display
all available completions.
• Example 1: At a blank command line, hit TAB twice to get a list of all commands.
USR5453-AP#
add Add an instance to the running configuration
factory-reset Reset the system to factory defaults
get Get field values of the running configuration
reboot Reboot the system
remove Remove instances in the running configuration
save-running Save the running configuration
set Set field values of the running configuration
• Example 2: Type "get " TAB TAB (including a space after get) to see a list of all field options for the get
command.
USR5453-AP# get
association Associated station
basic-rate Basic rate of the radio
bridge-port Bridge ports of bridge interfaces
bss Basic Service Set of the radio
cluster Clustering-based configuration settings
Class Structure, Commands, and Examples - 174
Page 21

Professional Access Point
Administrator Guide
cluster-member Member of a cluster of like-configured access points
config Configuration settings
detected-ap Detected access point
dhcp-client DHCP client settings
dot11 IEEE 802.11
host Internet host settings
interface Network interface
ip-route IP route entry
klog-entry Kernel log entry
log Log settings
log-entry Log entry
mac-acl MAC address access list item
ntp Network Time Protocol client
portal Guest captive portal
radio Radio
radius-user RADIUS user
ssh SSH access to the command line interface
supported-rate Supported rate of the radio
system System settings
telnet Telnet access to the command line interface
tx-queue Transmission queue parameters
wme-queue Transmission queue parameters for stations
• Example 3: Type "get system v" TAB. This will result in completion with the only matching field, "get sys-
tem version". Hit ENTER to display the output results of the command.
For detailed examples on getting help, see “Tab Completion and Help” on page 234.
Ready to Get Started?
If you know the four basic commands shown above (get, set, remove, and add) and how to get help at the
CLI using tab completion, you are ready to get started.
The best way to get up-to-speed quickly is to bring up the CLI on your access point and follow along with
some or all of the examples in the next topic “Command Usage and Configuration Examples” on page 175
Command Usage and Configuration Examples
“Understanding Interfaces as Presented in the CLI” on page 177
“Saving Configuration Changes” on page 178
“Basic Settings” on page 179
“Access Point and Cluster Settings” on page 183
“User Accounts” on page 183
.
“Status” on page 186
“Ethernet (Wired) Interface” on page 194
Class Structure, Commands, and Examples - 175
Page 22

“Wireless Interface” on page 200
“Security” on page 200
“Enable/Configure Guest Login Welcome Page” on page 215
“Configuring Multiple BSSIDs on Virtual Wireless Networks” on page 216
“Radio Settings” on page 217
“MAC Filtering” on page 222
“Load Balancing” on page 224
“Quality of Service” on page 224
“Wireless Distribution System” on page 231
“Time Protocol” on page 232
“Reboot the Access Point” on page 233
Professional Access Point
Administrator Guide
“Reset the Access Point to Factory Defaults” on page 233
“Keyboard Shortcuts” on page 234
Class Structure, Commands, and Examples - 176
Page 23

Professional Access Point
Administrator Guide
Understanding Interfaces as Presented in the CLI
The following summary of interface names is provided to help clarify the related CLI commands and output
results. These names are not exposed on the Web User Interface, but are used throughout the CLI. You
get and set many configuration values on the access point by referring to interfaces. In order to configure
the access point through the CLI, you need to understand which interfaces are available on the access
point, what role they play (corresponding setting on the Web User Interface), and how to refer to them.
Interface Description
lo Local loopback for data meant for the access point itself.
eth0 The wired (Ethernet) interface for the Internal network.
br0 The Internal bridge represents the Internal interface for the access point. To telnet
or ssh into the access point, use the IP address for this interface.
br0 consists:
• eth0 (or vlan
• wlan0
The IP address of the access point is provided in the output detail for br0. So, a
useful command is get interface. This gives you common information on all interfaces. From the output results, you can find the IP address for
address to connect to the access point.
brguest The Guest bridge, which consists of eth1 and wlan0guest.
brvwn1 The bridge interface for Virtual Wireless Network (VWN) 1.
The bridge interface for VWN1 consists of:
SomeNumber
if you have VLANs configured)
• wlan0vwn1
•
vlanVLANID
example, if you provided a VLAN ID of 1234, the VLAN interface would be
"
vlan1234
brvwn2 This is for the second Virtual Wireless Network (VWN) 2.
The bridge interface for VWN2 consists of:
where
"
VLANID
is a four-digit VLAN ID that you provided. (For
• wlan0vwn1
br0
. Use this IP
•
vlanVLANID
example, if you provided a VLAN ID of 1234, the VLAN interface would be
vlan1234
wlan0 The wireless (radio) interface for the Internal network.
wlan0guest The wireless (radio) interface for the Guest network.
wlan0vwn1 The wireless interface for Virtual Wireless Network (VWN) 1.
wlan0vwn2 The wireless interface for Virtual Wireless Network (VWN) 2.
.)
where
VLANID
is a four-digit VLAN ID that you provided. (For
Class Structure, Commands, and Examples - 177
Page 24

Interface Description
Professional Access Point
Administrator Guide
wlan0wdsx
vlanxxxx
A wireless distribution system (WDS) interface where "x" indicates the number of
the WDS link. (For example,
A VLAN interface for VLAN ID
(Internal, Guest, VWN1 or VWN2), use the following command to look at the "
field:
wlan0wds1
xxxx
.)
. To find out what this VLAN interface is
role
"
get interface vlanVLANID role
For example:
get interface vlan
1234
role
Saving Configuration Changes
The Professional Access Point maintains three different configurations.
• Factory Default Configuration - This configuration consists of the default settings shipped with the
access point (as specified in
You can always return the access point to the factory defaults by using the factory-reset command, as
described in
“Reset the Access Point to Factory Defaults” on page 233.
• Startup Configuration - The startup configuration contains the settings that the access point will use
the next time it starts up (for example, upon reboot).
“Default Settings for the Professional Access Point” on page 6).
To save configuration updates made from the CLI to the startup configuration, you must execute the
save-running or "set config startup running" command from the CLI after making changes.
• Running Configuration - The running configuration contains the settings with which the access point
is currently running.
When you view or update configuration settings through the command line interface (CLI) using get,
set, add, and remove commands, you are viewing and changing values on the running configuration
only. If you do not save the configuration (by executing the save-running or "set config startup running"
command at the CLI), you will lose any changes you submitted via the CLI upon reboot.
The save-running command saves the running configuration as the startup configuration. (The save-running
command is a shortcut command for "set config startup running", which accomplishes the same thing)
Settings updated from the CLI (with get, set, add, remove commands) will not be saved to the startup
configuration unless you explicitly save them via the save-running command. This gives you the option of
maintaining the startup configuration and trying out values on the running configuration that you can
discard (by not saving).
By contrast, configuration changes made from the Web User Interface are automatically saved to both the
running and startup configurations. If you make changes from the Web User Interface that you do not want
to keep, your only option is to reset to factory defaults. The previous startup configuration will be lost.
Class Structure, Commands, and Examples - 178
Page 25

Professional Access Point
Administrator Guide
Basic Settings
Note
Before configuring this feature, make sure you are familiar with the names of the interfaces as
described in “Understanding Interfaces as Presented in the CLI” on page 177
reference in a command determines whether a setting applies to a wired or wireless interface, or to the
Internal or Guest network.
The following CLI command examples correspond to tasks you can accomplish on the Basic Settings tab
of the Web User Interface for access points with clustering capabilities. In some cases, the CLI get
command provides additional details not available through the Web User Interface.
This table shows a quick view of Basic Settings commands and provides links to detailed examples.
Basic Setting Example
. The interface name you
Get the IP Address for the Internal Interface on an Access Point
Get the MAC Address for an Access Point
Get Both the IP Address and MAC
Address
Get Common Information on All Interfaces
for an Access Point
Get the Firmware Version for the Access
Point
Get the Location of the Access Point
Set the Location for an Access Point
get interface br0 ip
or
get interface
get interface is a catch-all command that shows common information
on all interfaces for the access point such as IP addresses, MAC
addresses, and so on. The IP address for the Internal interface (and
the one used to access the access point) is that shown for br0. (See
“Understanding Interfaces as Presented in the CLI” on page 177
)
get interface br0 mac
get interface br0 mac ip
get interface
get system version
get cluster location
set system location NewLocation
For example:
set system location hallway
or
set system location "Vicky’s Office
"
Get the Current Password
Set the Password
Get the Wireless Network Name (SSID))
get system encrypted-password
set system password NewPassword
For example:
set system password admin
get interface wlan0 ssid
Class Structure, Commands, and Examples - 179
Page 26

Basic Setting Example
Professional Access Point
Administrator Guide
Set the Wireless Network Name (SSID)
set interface wlan0 ssid NewSSiD
For example:
set interface wlan0 ssid Vicky
set interface wlan0 ssid "Vicky’s AP"
Get the IP Address for the Internal Interface on an Access Point
In the following example, the IP address for the access point is: 10.10.55.216. Use the get command as
shown to obtain the IP address for the Internal network.
USR5453-AP#
get interface br0 ip
10.10.55.216
Get the MAC Address for an Access Point
In the following example, the MAC address for the access point is: 00:a0:c9:8c:c4:7e. Use the get
command as shown to obtain the MAC address.
USR5453-AP#
get interface br0 mac
00:a0:c9:8c:c4:7e
Get Both the IP Address and MAC Address
The following command returns both the IP address and the MAC address for an access point:
USR5453-AP#
get interface br0 mac ip
Field Value
--------------------ip 10.10.55.216
mac 00:a0:c9:8c:c4:7e
Get Common Information on All Interfaces for an Access Point
The following example shows common information (including IP addresses) for all interfaces.
USR5453-AP#
get interface
name type status mac ip mask
---------------------------------------------------------------------------
----lo up 00:00:00:00:00:00 127.0.0.1 255.0.0.0
eth0 up 00:02:B3:01:01:01
eth1 down 00:02:B3:02:02:02
br0 bridge up 00:02:B3:01:01:01 10.10.100.110
255.255.255.0
brguest bridge down 00:00:00:00:00:00
wlan0 service-set up 00:0C:41:16:DF:A6
wlan0guest service-set up
wlan0wds0 wds down
Class Structure, Commands, and Examples - 180
Page 27

wlan0wds1 wds down
wlan0wds2 wds down
wlan0wds3 wds down
USR5453-AP#
Professional Access Point
Administrator Guide
Class Structure, Commands, and Examples - 181
Page 28

Professional Access Point
Administrator Guide
Get the Firmware Version for the Access Point
In the following example, the access point is running Firmware Version: 1.0.0.9. Use the get command as
shown to obtain the Firmware Version.
USR5453-AP#
get system version
1.0.0.9
Get the Location of the Access Point
In the following example, the location of the access point has not been set. Use the get command as
shown to obtain the location of the access point.
USR5453-AP#
get cluster location
not set
Set the Location for an Access Point
To set the location for an access point, use the set command as follows:
USR5453-AP# set system location
USR5453-AP# set system location
hallway
"Vicky's Office"
To check to make sure that the location was set properly, use the get command again to find out the
location
USR5453-AP#
get system location
Vicky’s Office
Get the Current Password
USR5453-AP#
get system encrypted-password
2yn.4fvaTgedM
Set the Password
USR5453-AP#
set system password admin
USR5453-AP# get system encrypted-password
/rYSvxS4Okptc
Get the Wireless Network Name (SSID)
USR5453-AP#
get interface wlan0 ssid
Internal Instant802 Network
Set the Wireless Network Name (SSID)
USR5453-AP#
USR5453-AP#
set interface wlan0 ssid
get interface wlan0 ssid
Vicky’s AP
"Vicky’s AP"
Class Structure, Commands, and Examples - 182
Page 29

Professional Access Point
Administrator Guide
Access Point and Cluster Settings
The command examples in this section show how to get the configuration for a cluster of access points.
These settings generally correspond to those on the Cluster menu’s Access Points tab in the Web User
Interface.
Note
You cannot use the CLI to add or remove an access point from a cluster or set the configuration policy.
If you want to configure clustering, please use the Web User Interface as described in “Access Points”
on page 33
This table provides a quick view of Access Point Cluster commands and provides links to detailed
examples.
Cluster Command Example
Determine whether the Access Point is a Cluster Member or is in
Stand-alone Mode
Get MAC Addresses for all Access Points in the Cluster
get cluster detail
get clustered-ap all name
Determine whether the Access Point is a Cluster Member or is in Stand-alone Mode
This command shows whether the access point is clustered or not. If the command returns 0, the access
point is in stand-alone mode (not clustered). If the command returns 1, the access point is a member of a
cluster. In the following example, the access point is in stand-alone mode.
USR5453-AP# get cluster detail
Field Value
-------------------clustered 0
clusterable 0
kickstarted 0
location not set
formation
Get MAC Addresses for all Access Points in the Cluster
USR5453-AP# get cluster-member all
name mac ip location removed
--------------------------------------------------------------------00:e0:b8:76:23:b4 00:e0:b8:76:23:b4 10.10.10.248 not set 0
00:e0:b8:76:16:88 00:e0:b8:76:16:88 10.10.10.230 not set 0
User Accounts
The following command examples show configuration tasks related to user accounts. These tasks
correspond to the Cluster menu’s User Management tab in the Web User Interface.
Class Structure, Commands, and Examples - 183
Page 30

Professional Access Point
Administrator Guide
This table shows a quick view of User Management commands and provides links to detailed examples.
User Account Command Example
Get All User Accounts To view all usernames:
get radius-user all name
To view all user accounts:
get radius-user all
Add Users
To set the user’s real name:
To set user’s password:
Remove a User Account
Get All User Accounts
To view all user names:
USR5453-AP#
get radius-user all name
name
-------larry
add radius-user
For example:
UserName
add radius-user samantha
set radius-user
For example:
UserName RealName
set radius-user samantha "Elizabeth Montgomery"
(or
set radius-user samantha Elizabeth
set radius-user
For example:
UserName
password
Password
)
set radius-user samantha password westport
remove radius-user UserName
To view all user accounts:
USR5453-AP# get radius-user all
name username disabled password realname
-----------------------------------------------------------larry David White
(At the start, "larry" is the only user configured.)
Add Users
In this example, you will add four new users: (1) samantha, (2) endora, (3) darren, and (4) wally. You will
set up user names, real names, and passwords for each.
1. Add username "samantha":
USR5453-AP#
add radius-user samantha
Class Structure, Commands, and Examples - 184
Page 31

2. Provide a real name (Elizabeth Montgomery) for this user:
Professional Access Point
Administrator Guide
USR5453-AP#
set radius-user samantha realname "Elizabeth Montgomery"
3. Set the user password for samantha to "westport":
USR5453-AP#
set radius-user samantha password westport
4. Repeat this process to add some other users (endora, darren, and wally):
USR5453-AP#
USR5453-AP#
USR5453-AP#
USR5453-AP#
USR5453-AP#
USR5453-AP#
USR5453-AP#
USR5453-AP#
USR5453-AP#
add radius-user endora
set radius-user endora realname "Agnes Moorhead"
set radius-user endora password scotch
add radius-user darren
set radius-user darren realname "Dick York"
set radius-user darren password martini
add radius-user wally
set radius-user wally realname "Tony Dow"
set radius-user wally password sodapop
5. After configuring these new accounts, use the "get" command to view all users. (Passwords are always
hidden.)
USR5453-AP#
get radius-user all
name username disabled password realname
-----------------------------------------------------------larry David White
samantha Elizabeth Montgomery
endora Agnes Moorhead
darren Dick York
wally Tony Dow
Remove a User Account
To remove a user account, type the following
USR5453-AP#
remove radius-user wally
Use the "get" command to view all user names. (You can see "wally" has been removed.)
USR5453-AP#
get radius-user all name
name
-------larry
samantha
endora
darren
Class Structure, Commands, and Examples - 185
Page 32

Professional Access Point
Administrator Guide
Status
The command tasks and examples in this section show status information on access points. These
settings correspond to what is shown on the Status tabs in the Web User Interface. (“Status” on page 67
This table provides a quick view of all Status commands and links to detailed examples.
Note
Make sure you are familiar with the names of the interfaces as described in “Understanding Interfaces
as Presented in the CLI” on page 177. The interface name you reference in a get command deter-
mines whether the command output shows a wired or wireless interface or the Internal or Guest network.
This table shows a quick view of Status commands and provides links to detailed examples
Status Command Example
)
Understanding Interfaces as Presented in
the CLI
Global command to get all detail on a
Basic Service Set (BSS).
This is a useful command to use to get a
comprehensive understanding of how the
access point is currently configured.
Get Common Information on the Internal
Interface for the Access Point
Get All Wired Settings for the Wired Internal Interface
Get Current Settings for the Ethernet
(Wired) Guest Interface
Get the MAC Address for the Wired Internal Interface
Get the Network Name (SSID) for the
Wired Internal Interface
Get the Current IEEE 802.11 Radio Mode
Get the Channel the Access Point is Currently Using
Reference of interface names and purposes as described in “Under-
standing Interfaces as Presented in the CLI” on page 177.
get bss all detail
get interface br0
get interface br0
get interface brguest
get interface brguest mac
get interface brguest ssid
get interface wlan0 mac
get interface wlan0 ssid
get radio wlan0 mode
get radio wlan0 channel
Get Basic Radio Settings for the Internal
Interface
Get Status on Events
get radio wlan0
get radio wlan0 detail
get log-entry all
Class Structure, Commands, and Examples - 186
Page 33

Status Command Example
Professional Access Point
Administrator Guide
Enable Remote Logging and Specify the
Log Relay Host for the Kernel Log
As a prerequisite to remote logging, the Log Relay Host must be configured first as described in Setting Up the Log Relay Host.
See complete explanation of CLI commands at Enable Remote Log-
ging and Specify the Log Relay Host for the Kernel Log. Here are a
few:
set log relay-enabled 1
set log relay-enabled 1
enables remote logging
disables remote logging
get log
Get Transmit / Receive Statistics
set log
get interface all ip mac ssid tx-packets tx-bytes
TAB TAB shows values you can set on the log
tx-errors rx-packets rx-bytes rx-errors
Get Client Associations
Get neighbouring Access Points
get association
get clustered-ap
Get Common Information on the Internal Interface for the Access Point
The following command obtains all information on the internal interface for an access point:
USR5453-AP#
get interface br0
Field Value
-------------------type bridge
status up
hello 10
mac 00:a0:c9:8c:c4:7e
ip 192.168.1.1
mask 255.255.255.0
Get Current Settings for the Ethernet (Wired) Internal Interface
The following example shows how to use the CLI to get the Ethernet (Wired) settings for the Internal
interface for an access point. You can see by the output results of the command that the MAC address is
00:a0:c9:8c:c4:7e, the IP address is 192.168.1.1, and the subnet mask is 255.255.255.0.
Get All Wired Settings for the Wired Internal Interface
USR5453-AP#
get interface br0
Field Value
-------------------mac 00:a0:c9:8c:c4:7e
ip 192.168.1.1
mask 255.255.255.0
Get the MAC Address for the Wired Internal Interface
USR5453-AP#
get interface wlan0 mac
02:0C:41:00:02:00
Get the Network Name (SSID) for the Wired Internal Interface
USR5453-AP#
get interface wlan0 ssid
Class Structure, Commands, and Examples - 187
Page 34

Professional Access Point
Administrator Guide
elliot_AP
Get Current Settings for the Ethernet (Wired) Guest Interface
The following example shows how to use the CLI to get the Ethernet (Wired) settings for the Guest
interface for an access point. You can see by the output results of the command that the MAC address is
00:50:04:6f:6f:90, the IP address is 10.10.56.248, and the subnet mask is 255.255.255.0.
USR5453-AP#
get interface brguest
Field Value
-------------------type bridge
status up
mac 00:50:04:6f:6f:90
ip 10.10.56.248
mask 255.255.255.0
Note
You can get specifics on the Guest interface by using the same types of commands as for the
Internal interface but substituting
guest interface:
get interface wlan0 ssid
brguest
for
wlan0
. For example, to get the MAC address for the
Get Current Wireless (Radio) Settings
The following examples show how to use the CLI to get wireless radio settings on an access point, such as
mode, channel, and so on. You can see by the results of the commands that the access point mode is set
to IEEE 802.11g, the channel is set to 6, the beacon interval is 100, and so forth.
For information on how to configure Radio settings through the CLI, see “Radio Settings” on page 217
(Radio settings are fully described in “Configuring Radio Settings” on page 120
Get the Current IEEE 802.11 Radio Mode
USR5453-AP#
get radio wlan0 mode
.)
.
g
Get the Channel the Access Point is Currently Using
USR5453-AP#
get radio wlan0 channel
2
Get Basic Radio Settings for the Internal Interface
USR5453-AP#
get radio wlan0
Field Value
-----------------------------status up
max-bsses 2
channel-policy best
channel 6
static-channel 9
mode g
fragmentation-threshold 2346
rts-threshold 2347
ap-detection on
beacon-interval 100
Class Structure, Commands, and Examples - 188
Page 35

Get All Radio Settings on the Internal Interface
USR5453-AP#
get radio wlan0 detail
Field Value
---------------------------------------------------status up
description IEEE 802.11
mac
max-bss 2
channel-policy best
mode g
static-channel 11
channel 2
tx-power 100
tx-rx-status up
beacon-interval 100
rts-threshold 2347
fragmentation-threshold 2346
load-balance-disassociation-utilization 0
load-balance-disassociation-stations 0
load-balance-no-association-utilization 0
ap-detection on
station-isolation off
frequency 2417
wme on
Professional Access Point
Administrator Guide
Get Status on Events
USR5453-AP#
get log-entry all
Number Time Priority Daemon
Message
-----------------------------------------------------1 Apr 20 21:39:55 debug udhcpc
Sending renew...
2 Apr 20 21:39:55 info udhcpc
Lease of 10.10.55.216 obtained, lease time 300
3 Apr 20 21:37:25 debug udhcpc
Sending renew...
4 Apr 20 21:37:25 info udhcpc
Lease of 10.10.55.216 obtained, lease time 300
5 Apr 20 21:34:55 debug udhcpc
Sending renew...
6 Apr 20 21:34:55 info udhcpc
Lease of 10.10.55.216 obtained, lease time 300
Enable Remote Logging and Specify the Log Relay Host for the Kernel Log
The Kernel Log is a comprehensive list of system even its and kernel messages such as error conditions
like dropping frames. To capture Access Point Kernel Log messages you need access to a remote syslog
server on the network. The following sections describe how to set up remote logging for the access point.
1. Prerequisites for Remote Logging
2. View Log Settings
3. Enable / Disable Log Relay Host
Class Structure, Commands, and Examples - 189
Page 36

Professional Access Point
Administrator Guide
4. Specify the Relay Host
5. Specify the Relay Port
6. Review Log Settings After Configuring Log Relay Host
Prerequisites for Remote Logging
To capture Kernel Log messages from the access point system, you must first set up a remote server
running a syslog process and acting as a syslog "log relay host" on your network. (For information on how
to set up the remote server, see “Setting Up the Log Relay Host” on page 70
.)
Then, you can use the CLI to configure the Professional Access Point to send its syslog messages to the
remote server.
View Log Settings
To view the current log settings:
USR5453-AP#
get log
Field Value
-------------------------depth 15
relay-enabled 0
relay-host
relay-port 514
When you start a new access point, the Log Relay Host is disabled. From the above output for the "
log
" command, you can identify the following about the Log Relay Host (syslog server):
• The syslog server is disabled (because "relay-enabled" is set to "0")
• No IP address or Host Name is specified for the syslog server.
• The access point is listening for syslog messages on the default port 514
Enable / Disable Log Relay Host
To enable the Log Relay Host:
USR5453-AP#
set log relay-enabled 1
To disable the Log Relay Host:
get
USR5453-AP#
Specify the Relay Host
set log relay-enabled 0
To specify the Relay Host, provide either the IP Address or a DNS name for the Log Relay Host as
parameters to the "set log relay-host" command as shown below.
Note
If you are using Instant802 Conductor, the Repository Server should receive the syslog messages
from all access points. In this case, use the IP address of the Conductor Repository Server as the
Relay Host.
• To specify an IP address for the syslog server:
Class Structure, Commands, and Examples - 190
Page 37

Professional Access Point
Administrator Guide
set log relay-host
Where
IP_Address_Of_LogRelayHost
IP_Address_Of_LogRelayHost
is the IP Address of the Log Relay Host.
For example:
USR5453-AP#
set log relay-host 10.10.5.220
• To specify a Host Name for the syslog server:
set log relay-host Host_Name_Of_LogRelayHost
Where
Host_Name_Of_LogRelayHost
is the a DNS name for the Log Relay Host.
For example:
USR5453-AP#
Specify the Relay Port
set log relay-host myserver
To specify the Relay Port for the syslog server:
set log relay-port
Where
Number_Of_LogRelayPort
Number_Of_LogRelayPort
is the port number for the Log Relay Host.
For example:
USR5453-AP#
Review Log Settings After Configuring Log Relay Host
set log relay-port 514
To view the current log settings:
USR5453-AP#
get log
Field Value
-------------------------depth 15
relay-enabled 1
relay-host 10.10.5.220
relay-port 514
From the above output for the "
get log
" command, you can identify the following about the Log Relay
Host (syslog server):
• The syslog server is enabled (because "relay-enabled" is set to "1")
• The syslog server is at the IP address
10.10.5.220
• The access point is listening for syslog messages on the default port 514
Get Transmit / Receive Statistics
USR5453-AP#
get interface all ip mac ssid tx-packets tx-bytes tx-errors rx-packets
rx-bytes rx-errors
Class Structure, Commands, and Examples - 191
Page 38

Professional Access Point
Administrator Guide
Name Ip Mac Ssid Tx-packets
Tx-bytes Tx-errors Rx-packets Rx-bytes Rx-errors
--------------------------------------------------------------------------lo 127.0.0.1 00:00:00:00:00:00 1319
151772 0 1319 151772 0
eth0 00:A0:C9:8C:C4:7E 4699
3025566 0 11323 1259824 0
eth1 0.0.0.0 00:50:04:6F:6F:90 152
49400 0 6632 664298 0
br0 10.10.55.216 00:A0:C9:8C:C4:7E 4699
3025566 0 10467 885264 0
brguest 10.10.56.248 00:50:04:6F:6F:90 152
48032 0 5909 293550 0
wlan0 0.0.0.0 02:0C:41:00:02:00 AAP1000 (Trusted) 6483
710681 0 0 0 0
wlan0guest 0.0.0.0 02:0C:41:00:02:01 AAP1000 (Guest) 5963
471228 0 0 0 0
wlan0wds0
wlan0wds1
wlan0wds2
wlan0wds3
Get Client Associations
USR5453-AP#
get association
Interf Station Authen Associ Rx-pac Tx-pac Rx-byt Tx-byt Tx-rat
wlan0 00:0c:41:8f:a7:72 Yes Yes 126 29 9222 3055 540
wlan0 00:09:5b:2f:a5:2f Yes Yes 382 97 16620 10065 110
USR5453-AP#
get association detail
Inter Station Authe Assoc Rx-pa Tx-pa Rx-byt Tx-byt Tx-ra Liste
wlan0 00:0c:41:8f:a7:72 Yes Yes 126 29 9222 3055 540 1
wlan0 00:09:5b:2f:a5:2f Yes Yes 382 97 16620 10065 110 1
Get neighbouring Access Points
The Neighboring access point view shows wireless networks within range of the access point. These
commands provide a detailed view of neighboring access points including identifying information (SSIDs
and MAC addresses) for each, and statistical information such as the channel each access point is
broadcasting on, signal strength, and so forth.
To see the kinds of information about access point neighbours you can search on, type
get detected-ap
TAB TAB.
USR5453-AP# get detected-ap
[Enter] * Get common fields *
band Frequency band
beacon-interval Beacon interval in kus (1.024 ms)
capability IEEE 802.11 capability value
channel Channel
detail * Get all fields *
erp ERP
last-beacon Time of last beacon
mac MAC address
Class Structure, Commands, and Examples - 192
Page 39

Professional Access Point
Administrator Guide
num_beacons Number of beacons received
phy-type PHY mode detected with
privacy WEP or WPA enabled
rate Rate
signal Signal strength
ssid Service Set IDentifier (a.k.a., Network Name)
supported-rates Supported rates list
type Type (AP, Ad hoc, or Other)
wpa WPA security enabled
To get the neighbouring access points, type
USR5453-AP#
get detected-ap
get detected-ap
Field Value
----------------------------------------mac 00:e0:b8:76:28:e0
type AP
privacy On
ssid Purina
channel 6
signal 2
Field Value
----------------------------------------mac 00:0e:81:01:01:62
type AP
privacy Off
ssid Internal Instant802 Network
channel 6
signal 1
Field Value
----------------------------------------mac 00:e0:b8:76:1a:f6
type AP
privacy Off
ssid domani
channel 6
signal 3
.
Field Value
----------------------------------------mac 00:e0:b8:76:28:c0
type AP
privacy Off
ssid domani
channel 6
signal 4
Class Structure, Commands, and Examples - 193
Page 40

Professional Access Point
Administrator Guide
Ethernet (Wired) Interface
Note
Before configuring this feature, make sure you are familiar with the names of the interfaces as
described in “Understanding Interfaces as Presented in the CLI” on page 177
reference in a command determines whether a setting applies to a wired or wireless interface or to the
Internal or Guest network.
This table shows a quick view of commands for getting and setting values for the Wired interface and
provides links to detailed examples.
Wired Interface Command Example
. The interface name you
Get Summary View of Internal and Guest Interfaces
Get the DNS Name
Set the DNS Name
get bss
get host id
set host id HostName
For example:
set host id vicky-ap
Get Current Settings for the Ethernet (Wired) Internal Interface
Get Current Settings for the Ethernet (Wired) Guest Interface
Set Up Guest Access Setting up Guest Access consists of configur-
Find out if Guest Access is enabled and configured.
Get/Change the Connection Type (DHCP or Static IP)
Re-Configure Static IP Addressing Values
get interface br0
get interface brguest
ing Internal and Guest Wired interfaces on
VLANs.
For detailed examples, see “Set Up Guest
Access” on page 195.
get interface brguest status
(will be "up" or "down")
See detailed example in “Get/Change the Con-
nection Type (DHCP or Static IP)” on
page 198.
For detailed examples see:
Set DNS Nameservers to Use Static IP Addresses (Dynamic to
Manual Mode)
Set DNS Nameservers to Use DHCP IP Addressing (Manual to
Dynamic Mode)
“Set the Static IP Address” on page 199
“Set the Static Subnet Mask Address” on
page 199
“Set the Static Subnet Mask Address” on
page 199
See example below.
See example below.
Class Structure, Commands, and Examples - 194
Page 41

Get Summary View of Internal and Guest Interfaces
Professional Access Point
Administrator Guide
USR5453-AP#
get bss
name status radio beacon-interface mac
-------------------------------------------------------------------wlan0bssInternal up wlan0 wlan0 00:0C:41:16:DF:A6
wlan0bssGuest down wlan0 wlan0guest
Get the DNS Name
USR5453-AP#
get host id
USR5453-AP
Set the DNS Name
USR5453-AP#
bob#
get host id
set host id vicky-ap
vicky-ap
Get Wired Internal Interface Settings
See “Get Current Settings for the Ethernet (Wired) Internal Interface” on page 187 under Status.
Get Wired Guest Interface Settings
See “Get Current Settings for the Ethernet (Wired) Guest Interface” on page 188 under Status.
Set Up Guest Access
Note
Before configuring this feature, make sure you are familiar with the names of the interfaces as
described in “Understanding Interfaces as Presented in the CLI” on page 177
. The interface name you
reference in a command determines whether a setting applies to a wired or wireless interface or to the
Internal or Guest network.
Configuring a Guest interface from the CLI is a complex task. Unless this is your area of expertise, you
may find it easier to use the Web User Interface to set up Guest Access. For information on how to set up
Guest Access from the Web User Interface, see “Ethernet (Wired) Settings” on page 79
and “Guest Login”
on page 111.
Before configuring guest or internal interface settings, make sure you are familiar the names of the
interfaces as described in “Understanding Interfaces as Presented in the CLI” on page 177
Note
After you configure the Guest Network (as described in the sections below), you can enable a "captive
.
portal" Welcome page for guest clients who are using the Web over your Guest network. You can
modify the Welcome page text that is displayed to guests when they log on to the Web. For more information, see “Enable/Configure Guest Login Welcome Page” on page 215
.
The following Guest Access configuration examples are provided:
• Enable / Configure Guest Access on VLANs
Class Structure, Commands, and Examples - 195
Page 42

Professional Access Point
Administrator Guide
• Disable Guest Access on VLANs
• Change VLAN IDs (VLANs Must Be Enabled Already)
Enable / Configure Guest Access on VLANs
Caution
• You cannot use an ssh or telnet connection to configure VLANs, because you will lose network
connectivity to the access point when you remove the bridge-port. Therefore, you cannot configure
VLANs through the CLI.
• Be sure to verify that the switch and DHCP server you are using can support VLANs per the
802.1Q standard. After configuring the VLAN on the Advanced menu’s Ethernet (Wired) Settings
page, physically reconnect the Ethernet cable on the switch to the tagged packet (VLAN) port.
Then, re-connect via the Web User Interface to the new IP address. (If necessary, check with the
infrastructure support administrator regarding the VLAN and DHCP configurations.)
This example assumes you start with Guest Access "disabled" and provides commands to enable it on
VLANs.
1. Get the current status of Guest Access (it is "down" or disabled initially):
USR5453-AP#
get interface brguest status
down
2. Enable Guest and remove bridge-port:
USR5453-AP#
USR5453-AP#
USR5453-AP#
USR5453-AP#
USR5453-AP#
set bss wlan0bssGuest status up
set bss wlan1bssGuest status up
set interface brguest status up
set portal status up
remove bridge-port br0 interface eth0
3. Enable VLANs:
USR5453-AP#
add interface vlan1111 type vlan status up vlan-id 1111 vlan-interface
eth0
USR5453-AP#
USR5453-AP#
add bridge-port br0 interface vlan1111
add interface vlan2222 type vlan status up vlan-id 2222 vlan-interface
eth0
USR5453-AP#
add bridge-port brguest interface vlan2222
4. Check the current settings:
USR5453-AP#
get bss
name status radio beacon-interface mac
-------------------------------------------------------------------wlan0bssInternal up wlan0 wlan0 00:01:02:03:04:01
wlan0bssGuest up wlan0 wlan0guest 00:01:02:03:04:02
USR5453-AP#
get interface brguest
Field Value
------------------------type bridge
status up
mac 00:01:02:03:04:02
Class Structure, Commands, and Examples - 196
Page 43

Professional Access Point
Administrator Guide
ip 10.10.56.248
mask 255.255.255.0
Disable Guest Access on VLANs
This example assumes you start with Guest Access "enabled" on VLANs and provides commands to
disable it.
1. Get the current status of Guest Access (it is "up" or enabled initially):
USR5453-AP#
get interface brguest status
up
The output for the following commands show that VLANs are configured for the Internal and Guest
interfaces (because both interfaces are VLANs: "
USR5453-AP#
get bridge-port brguest
brguest
" is
vlan2222
and "
br0
" is
vlan1111
):
Name Interface
------------------brguest wlan0
brguest vlan2222
USR5453-AP#
get bridge-port br0
Name Interface
--------------br0 wlan0guest
br0 vlan1111
2. The following series of commands reconfigures the Internal interface to use an Ethernet port (by
setting
USR5453-AP#
USR5453-AP#
USR5453-AP#
USR5453-AP#
USR5453-AP#
USR5453-AP#
USR5453-AP#
USR5453-AP#
USR5453-AP#
br0
to
eth0
), disables Guest Access, and removes the two VLANs.
add bridge-port br0 interface eth0
set bss wlan0bssGuest status down
set bss wlan1bssGuest status down
remove bridge-port br0 interface vlan1111
remove interface vlan1111
remove bridge-port brguest interface vlan2222
remove interface vlan2222
set interface brguest status down
set portal status down
Change VLAN IDs (VLANs Must Be Enabled Already)
1. Check the current configuration of Wired interfaces.
The output of the following command shows that the Guest interface is already configured on VLANs:
USR5453-AP#
get bridge-port br0
Name Interface
--------------br0 wlan0guest
br0 vlan1111
2. Set up a new VLAN and remove the old one:
Class Structure, Commands, and Examples - 197
Page 44

Professional Access Point
Administrator Guide
USR5453-AP#
set interface vlan1111 vlan-id 1112
Error: vlan-id cannot be changed after insert.
USR5453-AP#
USR5453-AP#
USR5453-AP#
remove bridge-port br0 interface vlan111
1
remove interface vlan1111
add interface vlan1113 type vlan status up vlan-id 1113 vlan-interface
eth0
Get/Change the Connection Type (DHCP or Static IP)
Note
For more information on DHCP and Static IP connection types, see the topic ““Understanding Dynamic
and Static IP Addressing on the Professional Access Point” on page 10.
To get the connection type:
USR5453-AP# get dhcp-client status
up
You cannot use the CLI to reset the connection type from DHCP to Static IP because you will lose
connectivity during the process of assigning a new static IP address. To make such a change, use the
Web User Interface on a computer connected to the access point with an Ethernet cable.
To reset the connection type from Static IP to DHCP:
USR5453-AP# set dhcp-client status up
To view the new settings:
USR5453-AP#
get interface br0 detail
Field Value
----------------------------------type bridge
status up
description Bridge - Internal
mac 00:E0:B8:76:23:B4
ip 10.10.12.221
mask 255.255.255.0
static-ip 10.10.12.221
static-mask 255.255.255.0
nat
Re-Configure Static IP Addressing Values
Note
This section assumes you have already set the access point to use Static IP Addressing and set some
initial values as described in “Get/Change the Connection Type (DHCP or Static IP)” on page 198
.
If you are using static IP addressing on the access point (instead of DHCP), you may want to reconfigure
the static IP address, subnet mask, default gateway, or DNS name servers.
The following examples show how to change these values from the CLI. With the exception of DNS name
servers, these values can only be reconfigured if you are using Static IP Addressing mode.
You do have the option of manually configuring DNS name servers for either a DHCP or Static IP
connection type, so that task is covered in a separate section following this one.
Class Structure, Commands, and Examples - 198
Page 45

Professional Access Point
Administrator Guide
Set the Static IP Address
1. Check to see what the current static IP address is. (In this example, the current static IP address is the
factory default.)
USR5453-AP#
get interface br0 static-ip
10.10.12.221
2. Re-set to a new static IP address:
USR5453-AP#
Set the Static Subnet Mask Address
set interface br0 static-ip 10.10.12.81
1. Check to see the current Subnet Mask. (In this example, the current subnet mask is the factory
default.)
USR5453-AP#
get interface br0 static-mask
255.255.255.0
2. Re-set to a new static Subnet Mask:
USR5453-AP#
Set the IP Address for the Default Gateway
set interface br0 static-mask 255.255.255.128
This example sets the Default Gateway to 10.10.12.126:
USR5453-AP#
set ip-route with gateway 10.10.12.126 in-use yes
Set DNS Nameservers to Use Static IP Addresses (Dynamic to Manual Mode)
This example shows how to reconfigure DNS Nameservers from Dynamic mode (where name server IP
addresses are assigned through DHCP) to Manual mode, and specify static IP addresses for them.
1. Check to see which mode the DNS Name Service is running in. (In this example, DNS naming is
running in DHCP mode initially because the following command returns
USR5453-AP#
get host dns-via-dhcp
up
for the mode.)
up
2. Turn off Dynamic DNS Nameservers and re-check the settings:
USR5453-AP# set host dns-via-dhcp down
USR5453-AP#
get host dns-via-dhcp
down
3. Get the current IP addresses for the DNS Nameservers:
USR5453-AP#
get host static-dns-1
10.10.3.9
USR5453-AP#
get host static-dns-2
10.10.3.11
Class Structure, Commands, and Examples - 199
Page 46

4. Re-set the IP addresses for the DNS Nameservers as desired:
Professional Access Point
Administrator Guide
USR5453-AP#
USR5453-AP#
10.10.3.10
USR5453-AP#
USR5453-AP#
10.10.3.12
Set DNS Nameservers to Use DHCP IP Addressing (Manual to Dynamic Mode)
To switch DNS Nameservers from Manual (static IP addresses) to Dynamic mode (nameserver addresses
assigned by DHCP), use the reverse command and check to see the new configuration:
USR5453-AP#
USR5453-AP#
up
set host static-dns-1 10.10.3.10
get host static-dns-1
set host static-dns-2 10.10.3.12
get host static-dns-2
set host dns-via-dhcp up
get host dns-via-dhcp
Wireless Interface
To set up a wireless (radio) interface, configure the following on each interface (Internal or Guest) as
described in other sections of this CLI document.
• Configure the Radio Mode and Radio Channel as described in “Configure Radio Settings” on
page 219.
• Configure the Network Name as described in “Set the Wireless Network Name (SSID)” on page 182.
Security
Note
Before configuring this feature, make sure you are familiar with the names of the interfaces as
described in “Understanding Interfaces as Presented in the CLI” on page 177
reference in a command determines whether a setting applies to a wired or wireless interface or to the
Internal or Guest network.
The following sections show examples of how to use the CLI to view and configure security settings on the
access point. These settings correspond to those available in the Web User Interface on the Advanced
menu’s Security tab. For a detailed discussion of concepts and configuration options, see“Security” on
page 91.
This section focuses on configuring security on the Internal network. (Security on the Guest network
defaults to None. See “When to Use No Security” on page 92
This table shows a quick view of Security commands and links to detailed examples.
Security Command Example
Get the Current Security Mode
get interface wlan0 security
.)
. The interface name you
Class Structure, Commands, and Examples - 200
Page 47

Security Command Example
Professional Access Point
Administrator Guide
Get Detailed Description of Current Security Settings
get bss wlan0bssInternal detail
get interface wlan0 detail
Set the Broadcast SSID (Allow or Prohibit)
set bss wlan0bssInternal ignore-broadcast-ssid on
set bss wlan0bssInternal ignore-broadcast-ssid off
Enable / Disable Station Isolation
Set Security to None
Set Security to Static WEP See detailed example in “Set Security to Static WEP” on page 202.
Set Security to IEEE 802.1x
Set Security to WPA/WPA2 Personal
(PSK)
Set Security to WPA/WPA2 Enterprise
(RADIUS)
set interface wlan0 security plain-text
See detailed example in“Set Security to IEEE 802.1x” on page 206.
See detailed example in “Set Security to WPA/WPA2 Personal (PSK)”
on page 208.
See detailed example in “Set Security to WPA/WPA2 Enterprise
(RADIUS)” on page 210.
Get the Current Security Mode
USR5453-AP#
get interface wlan0 security
none
Get Detailed Description of Current Security Settings
USR5453-AP#
get bss wlan0bssInternal detail
Field Value
--------------------------------------------status up
description Internal
radio wlan0
beacon-interface wlan0
mac 00:0C:41:16:DF:A6
dtim-period
max-stations
ignore-broadcast-ssid off
mac-acl-mode deny-list
mac-acl-name wlan0bssInternal
radius-accounting
radius-ip 127.0.0.1
radius-key secret
open-system-authentication
shared-key-authentication
wpa-cipher-tkip
wpa-cipher-ccmp
wpa-allowed off
wpa2-allowed off
rsn-preauthentication
Class Structure, Commands, and Examples - 201
Page 48

Set the Broadcast SSID (Allow or Prohibit)
To set the Broadcast SSID to on (allow):
Professional Access Point
Administrator Guide
USR5453-AP#
set bss wlan0bssInternal ignore-broadcast-ssid on
To set the Broadcast SSID to off (prohibit):
USR5453-AP#
set bss wlan0bssInternal ignore-broadcast-ssid off
Enable / Disable Station Isolation
USR5453-AP#
get radio wlan0 station-isolation
off
USR5453-AP#
USR5453-AP#
set radio wlan0 station-isolation off
get radio wlan0 detail
Field Value
--------------------------------------------------------------status up
description Radio 1 - IEEE 802.11g
mac
max-bss 4
channel-policy static
mode g
static-channel 6
channel 6
tx-power 100
tx-rx-status up
beacon-interval 100
rts-threshold 2347
fragmentation-threshold 2346
load-balance-disassociation-utilization 0
load-balance-disassociation-stations 0
load-balance-no-association-utilization 0
ap-detection off
station-isolation off
frequency 2437
wme on
Set Security to None
USR5453-AP#
set interface wlan0 security none
Set Security to Static WEP
1. Set the Security Mode
2. Set the Transfer Key Index
3. Set the Key Length
4. Set the Key Type
5. Set the WEP Keys
6. Set the Authentication Algorithm
7. Get Current Security Settings After Re-Configuring to Static WEP Security Mode
Class Structure, Commands, and Examples - 202
Page 49

1. Set the Security Mode
USR5453-AP#
2. Set the Transfer Key Index
set interface wlan0 security static-wep
The following commands set the Transfer Key Index to 4.
Professional Access Point
Administrator Guide
USR5453-AP#
USR5453-AP#
USR5453-AP#
USR5453-AP#
3. Set the Key Length
set interface wlan0 wep-default-key 1
set interface wlan0 wep-default-key 2
set interface wlan0 wep-default-key 3
set interface wlan0 wep-default-key 4
For the CLI, valid values for Key Length are 40 bits or 104 bits.
Note
The Key Length values used by the CLI do not include the initialisation vector in the length. On the
Web User Interface, longer Key Length values may be shown which include the 24-bit initialisation
vector. A Key Length of 40 bits (not including initialisation vector) is equivalent to a Key Length of 64
bits (with initialisation vector). A Key Length of 104 bits (not including initialisation vector) is equivalent
to a Key Length of 128 bits (which includes the initialisation vector).
To set the WEP Key Length, type one of the following commands:
To set the WEP Key Length to 40 bits:
To set the WEP Key Length to 104 bits:
set interface wlan0 wep-key-length 40
set interface wlan0 wep-key-length 104
In this example, you will set the WEP Key Length to 40.
USR5453-AP#
set interface wlan0 wep-key-length 40
4. Set the Key Type
Valid values for Key Type are ASCII or Hex. The following commands set the Key Type.
To set the Key Type to ASCII:
To set the Key Type to Hex:
set interface wlan0 wep-key-ascii yes
set interface wlan0 wep-key-ascii no
In this example, you will set the Key Type to ASCII:
USR5453-AP#
set interface wlan0 wep-key-ascii yes
Class Structure, Commands, and Examples - 203
Page 50

Professional Access Point
Administrator Guide
5. Set the WEP Keys
Note
The number of characters required for each WEP key depends on how you set Key Length and Key
Type:
• If Key Length is 40 bits and the Key Type is "ASCII", then each WEP key be 5 characters long.
• If Key Length is 40 bits and Key Type is "Hex", then each WEP key must be 10 characters long.
• If Key Length is 104 bits and Key Type is "ASCII", then each WEP Key must be 13 characters
long.
• If Key Length is 104 bits and Key Type is "Hex", then each WEP Key must be 26 characters long.
Although the CLI will allow you to enter WEP keys of any number of characters, you must use the correct number of characters for each key to ensure a valid security configuration.
USR5453-AP#
USR5453-AP#
USR5453-AP#
USR5453-AP#
6. Set the Authentication Algorithm
set interface wlan0 wep-key-1 abcde
set interface wlan0 wep-key-2 fghi
set interface wlan0 wep-key-3 klmno
set interface wlan0 wep-key-4
The options for the authentication algorithm are Open System, Shared Key or Both:
To set Authentication Algorithm
to Open System:
set bss wlan0bssInternal open-system-authentication on
set bss wlan0bssInternal shared-key-authentication off
To set Authentication Algorithm
to Shared Key:
set bss wlan0bssInternal open-system-authentication off
set bss wlan0bssInternal shared-key-authentication on
To set Authentication Algorithm
to Both:
set bss wlan0bssInternal open-system-authentication on
set bss wlan0bssInternal shared-key-authentication on
In this example, you will set the authentication algorithm to Shared Key:
USR5453-AP#
USR5453-AP#
set bss wlan0bssInternal shared-key-authentication on
set bss wlan0bssInternal open-system-authentication off
7. Get Current Security Settings After Re-Configuring to Static WEP Security Mode
Now you can use the "get" command again to view the updated security configuration and see the results
of your new settings.
The following command gets the security mode in use on the Internal network:
USR5453-AP#
get interface wlan0 security
static-wep
The following command gets details on how the internal network is configured, including details on
Security.
USR5453-AP#
get bss wlan0bssInternal detail
Field Value
Class Structure, Commands, and Examples - 204
Page 51

--------------------------------------------status up
description Internal
radio wlan0
beacon-interface wlan0
mac 00:0C:41:16:DF:A6
dtim-period 2
max-stations 2007
ignore-broadcast-ssid off
mac-acl-mode deny-list
mac-acl-name wlan0bssInternal
radius-accounting off
radius-ip 127.0.0.1
radius-key secret
open-system-authentication off
shared-key-authentication on
wpa-cipher-tkip off
wpa-cipher-ccmp off
wpa-allowed off
wpa2-allowed off
rsn-preauthentication off
Professional Access Point
Administrator Guide
The following command gets details on the interface and shows the WEP Key settings, specifically.
USR5453-AP#
get interface wlan0 detail
Field Value
------------------------------------------type service-set
status up
description Wireless - Internal
mac 00:0C:41:16:DF:A6
ip 0.0.0.0
static-ip 0.0.0.0
static-mask
nat
rx-bytes 0
rx-packets 0
rx-errors 0
rx-drop 0
rx-fifo 0
rx-frame 0
rx-compressed 0
rx-multicast 0
tx-bytes 259662
tx-packets 722
tx-errors 0
tx-drop 0
tx-fifo 0
tx-colls 0
tx-carrier 0
tx-compressed 0
ssid Vicky’s AP
bss wlan0bssInternal
security static-wep
Class Structure, Commands, and Examples - 205
Page 52

Professional Access Point
wpa-personal-key
wep-key-ascii yes
wep-key-length 104
wep-default-key 4
wep-key-1 abcde
wep-key-2 fghij
wep-key-3 klmno
wep-key-4
vlan-interface
vlan-id
radio
remote-mac
wep-key
Set Security to IEEE 802.1x
1. Set the Security Mode
2. Set the Authentication Server
3. Set the RADIUS Key (For External RADIUS Server Only)
4. Enable RADIUS Accounting (External RADIUS Server Only)
5. Get Current Security Settings After Re-Configuring to IEEE 802.1x Security Mode
Administrator Guide
1. Set the Security Mode
USR5453-AP#
2. Set the Authentication Server
set interface wlan0 security dot1x
You can use the built-in authentication server on the access point or an external RADIUS server.
Note
To use the built-in authentication server, set the RADIUS IP address to that used by the built-in server
(
127.0.0.1
) and turn RADIUS accounting off (because it is not supported by the built-in server)
RADIUS Option Example
To set the AP to use the Built-in
Authentication Server:
To set the AP to use an External
RADIUS Server:
set bss wlan0bssInternal radius-ip 127.0.0.1
set bss wlan0bssInternal radius-ip
where
RADIUS_IP_Address
is the IP address of an external RADIUS server.
RADIUS_IP_Address
In this example, you will set it to use the built-in server:
USR5453-AP#
set bss wlan0bssInternal radius-ip 127.0.0.1
3. Set the RADIUS Key (For External RADIUS Server Only)
If you use an external RADIUS server, you must provide the RADIUS key. (If you use the built-in
authentication server the RADIUS key is automatically provided.)
This command sets the RADIUS key to
secret
for an external RADIUS server.
Class Structure, Commands, and Examples - 206
Page 53

Professional Access Point
Administrator Guide
USR5453-AP#
4. Enable RADIUS Accounting (External RADIUS Server Only)
set bss wlan0bssInternal radius-key secret
You can enable RADIUS Accounting if you want to track and measure the resources a particular user has
consumed such system time, amount of data transmitted and received, and so on.
Note
RADIUS accounting is not supported by the built-in server, so if you are using the built-in server make
sure that RADIUS accounting is off.
To enable RADIUS accounting:
To disable RADIUS accounting:
set bss wlan0bssInternal radius-accounting on
set bss wlan0bssInternal radius-accounting off
In this example, you will disable RADIUS accounting since you are using the built-in server:
USR5453-AP#
5. Get Current Security Settings After Re-Configuring to IEEE 802.1x Security Mode
set bss wlan0bssInternal radius-accounting off
Now you can use the "get" command again to view the updated security configuration and see the results
of your new settings.
The following command gets the security mode in use on the Internal network:
USR5453-AP#
get interface wlan0 security
dot1x
The following command gets details on how the internal BSS is configured, including details on Security.
USR5453-AP#
get bss wlan0bssInternal detail
Field Value
--------------------------------------------status up
description Internal
radio wlan0
beacon-interface wlan0
mac 00:0C:41:16:DF:A6
dtim-period 2
max-stations 2007
ignore-broadcast-ssid off
mac-acl-mode deny-list
mac-acl-name wlan0bssInternal
radius-accounting off
radius-ip 127.0.0.1
radius-key secret
open-system-authentication off
shared-key-authentication on
wpa-cipher-tkip off
wpa-cipher-ccmp off
wpa-allowed off
wpa2-allowed off
Class Structure, Commands, and Examples - 207
Page 54

Professional Access Point
rsn-preauthentication off
Set Security to WPA/WPA2 Personal (PSK)
1. Set the Security Mode
2. Set the WPA Versions
3. Set the Cipher Suites
4. Set the Pre-shared Key
5. Get Current Security Settings After Re-Configuring to WPA/WPA2 Personal (PSK)
1. Set the Security Mode
USR5453-AP#
2. Set the WPA Versions
set interface wlan0 security wpa-personal
Select the WPA version based on what types of client stations you want to support.
WPA Option Example
Administrator Guide
WPA: If all client stations on the
network support the original
WPA but none support the
newer WPA2, then use WPA.
To support WPA clients:
WPA2: If all client stations on the
network support WPA2, we
suggest using WPA2 which
provides the best security per
the IEEE 802.11i standard.
To support WPA2 clients:
Both: If you have a mix of
clients, some of which support
WPA2 and others which
support only the original WPA,
select "Both". This lets both
WPA and WPA2 client stations
assoicate and authenticate, but
uses the more robust WPA2 for
clients who support it. This
WPA configuration allows more
interoperability, at the expense
of some security.
set bss wlan0bssInternal wpa-allowed on
set bss wlan0bssInternal wpa2-allowed off
set bss wlan0bssInternal wpa-allowed off
set bss wlan0bssInternal wpa2-allowed on
set bss wlan0bssInternal wpa-allowed on
set bss wlan0bssInternal wpa2-allowed on
To support both WPA and
WPA2 clients:
In this example, you will set the access point to support Both WPA and WPA2 client stations:
USR5453-AP# set bss wlan0bssInternal wpa-allowed on
USR5453-AP# set bss wlan0bssInternal wpa2-allowed on
Class Structure, Commands, and Examples - 208
Page 55

3. Set the Cipher Suites
Set the cipher suite you want to use. The options are:
Cipher Suite Option Example
Professional Access Point
Administrator Guide
TKIP: Temporal Key Integrity
Protocol (TKIP), which is the
default.
To set the cipher suite to TKIP
only:
CCMP (AES) - Counter mode/
CBC-MAC Protocol (CCMP) is
an encryption method for IEEE
802.11i that uses the Advanced
Encryption Algorithm (AES).
To set the cipher suite to CCMP
(AES) only:
Both - When the authentication
algorithm is set to "Both", both
TKIP and AES clients can associate with the access point.
WPA clients must have either a
valid TKIP key or a valid CCMP
(AES) key to be able to associate with the AP.
To set the cipher suite to Both:
set bss wlan0bssInternal wpa-cipher-tkip on
set bss wlan0bssInternal wpa-cipher-ccmp off
set bss wlan0bssInternal wpa-cipher-tkip off
set bss wlan0bssInternal wpa-cipher-ccmp on
set bss wlan0bssInternal wpa-cipher-tkip on
set bss wlan0bssInternal wpa-cipher-ccmp on
In this example, you will set the cipher suite to Both:
USR5453-AP# set bss wlan0bssInternal wpa-cipher-tkip on
USR5453-AP# set bss wlan0bssInternal wpa-cipher-ccmp on
4. Set the Pre-shared Key
The Pre-shared Key is the shared secret key for WPA-PSK. Enter a string of at least 8 characters to a
maximum of 63 characters. Following are two examples; the first sets the key to "
sets the key to "
Ex 1. USR5453-AP#
KeepSecret
".
set interface wlan0 wpa-personal-key "SeCret !"
SeCret !
", the second
or
Ex 2. USR5453-AP#
Note
Shared secret keys can include spaces and special characters if the key is placed inside quotation
set interface wlan0 wpa-personal-key KeepSecret
marks as in the first example above. If the key is a string of characters with no spaces or special characters in it, the quotation marks are not necessary as in the second example above..
Class Structure, Commands, and Examples - 209
Page 56

Professional Access Point
Administrator Guide
5. Get Current Security Settings After Re-Configuring to WPA/WPA2 Personal (PSK)
Now you can use the "get" command again to view the updated security configuration and see the results
of your new settings.
The following command gets the security mode in use on the Internal network:
USR5453-AP#
get interface wlan0 security
wpa-personal
The following command gets details on how the internal network is configured, including details on
Security.
USR5453-AP#
get bss wlan0bssInternal detail
Field Value
--------------------------------------------status up
description Internal
radio wlan0
beacon-interface wlan0
mac 00:0C:41:16:DF:A6
dtim-period
max-stations
ignore-broadcast-ssid off
mac-acl-mode deny-list
mac-acl-name wlan0bssInternal
radius-accounting
radius-ip 127.0.0.1
radius-key secret
open-system-authentication
shared-key-authentication
wpa-cipher-tkip on
wpa-cipher-ccmp on
wpa-allowed on
wpa2-allowed on
rsn-preauthentication
Set Security to WPA/WPA2 Enterprise (RADIUS)
1. Set the Security Mode
2. Set the WPA Versions
3. Enable Pre-Authentication
4. Set the Cipher Suites
5. Set the Authentication Server
6. Set the RADIUS Key (For External RADIUS Server Only)
7. Enable RADIUS Accounting (External RADIUS Server Only))
8. Get Current Security Settings After Re-Configuring to WPA/WPA2 Enterprise (RADIUS)
8. Get Current Security Settings After Re-Configuring to WPA/WPA2 Enterprise (RADIUS)
1. Set the Security Mode
USR5453-AP#
set interface wlan0 security wpa-enterprise
Class Structure, Commands, and Examples - 210
Page 57

Professional Access Point
2. Set the WPA Versions
Select the WPA version based on what types of client stations you want to support.
WPA Option Example
Administrator Guide
WPA: If all client stations on the
network support the original
WPA but none support the
newer WPA2, then use WPA.
To support WPA clients:
WPA2: If all client stations on the
network support WPA2, we
suggest using WPA2 which
provides the best security per
the IEEE 802.11i standard.
To support WPA2 clients:
Both: If you have a mix of
clients, some of which support
WPA2 and others which
support only the original WPA,
select "Both". This lets both
WPA and WPA2 client stations
assoicate and authenticate, but
uses the more robust WPA2 for
clients who support it. This
WPA configuration allows more
interoperability, at the expense
of some security.
set bss wlan0bssInternal wpa-allowed on
set bss wlan0bssInternal wpa2-allowed off
set bss wlan0bssInternal wpa-allowed off
set bss wlan0bssInternal wpa2-allowed on
set bss wlan0bssInternal wpa-allowed on
set bss wlan0bssInternal wpa2-allowed on
To support both WPA and
WPA2 clients:
In this example, you will set the access point to support WPA client stations only:
USR5453-AP# set bss wlan0bssInternal wpa-allowed on
USR5453-AP# set bss wlan0bssInternal wpa2-allowed off
Class Structure, Commands, and Examples - 211
Page 58

Professional Access Point
Administrator Guide
3. Enable Pre-Authentication
If you set WPA versions to "WPA2" or "Both", you can enable pre-authentication for WPA2 clients.
Enable pre-authentication if you want
WPA2 wireless clients to send preauthentication packet. The pre-authentication information will be relayed from the
access point the client is currently using to
the target access point. Enabling this feature can help speed up authentication for
roaming clients who connect to multiple
access points.
To enable pre-authentication for WPA2
clients:
To disable pre-authentication for WPA2
clients:
set bss wlan0bssInternal rsn-preauthentication on
set bss wlan0bssInternal rsn-preauthentication on
This option does not apply if you set the WPA Version to support "WPA" clients only because the original
WPA does not support this pre-authentication
In this example, you will disable pre-authentication.
USR5453-AP# set bss wlan0bssInternal rsn-preauthentication off
4. Set the Cipher Suites
Set the cipher suite you want to use. The options are:
Cipher Suite Option Example
TKIP: Temporal Key Integrity
Protocol (TKIP), which is the
default.
To set the cipher suite to TKIP
only:
CCMP (AES) - Counter mode/
CBC-MAC Protocol (CCMP) is
an encryption method for IEEE
802.11i that uses the Advanced
Encryption Algorithm (AES).
To set the cipher suite to CCMP
(AES) only:
set bss wlan0bssInternal wpa-cipher-tkip on
set bss wlan0bssInternal wpa-cipher-ccmp off
set bss wlan0bssInternal wpa-cipher-tkip off
set bss wlan0bssInternal wpa-cipher-ccmp on
Class Structure, Commands, and Examples - 212
Page 59

Cipher Suite Option Example
Professional Access Point
Administrator Guide
Both - When the authentication
algorithm is set to "Both", both
TKIP and AES clients can associate with the access point.
WPA clients must have either a
valid TKIP key or a valid CCMP
(AES) key to be able to associate with the AP.
To set the cipher suite to Both:
set bss wlan0bssInternal wpa-cipher-tkip on
set bss wlan0bssInternal wpa-cipher-ccmp on
In this example, you will set the cipher suite to TKIP Only:
USR5453-AP# set bss wlan0bssInternal wpa-cipher-tkip on
USR5453-AP# set bss wlan0bssInternal wpa-cipher-ccmp off
5. Set the Authentication Server
You can use the built-in authentication server on the access point or an external RADIUS server.
Note
To use the built-in authentication server, set the RADIUS IP address to that used by the built-in server
(
127.0.0.1
) and turn RADIUS accounting off (because it is not supported by the built-in server)
RADIUS Option Example
To set the AP to use the Built-in
Authentication Server:
To set the AP to use an External
RADIUS Server:
set bss wlan0bssInternal radius-ip 127.0.0.1
set bss wlan0bssInternal radius-ip
where
RADIUS_IP_Address
is the IP address of an external RADIUS server.
RADIUS_IP_Address
In this example, you will use an external RADIUS server with an IP address of 142.77.1.1:
USR5453-AP#
6. Set the RADIUS Key (For External RADIUS Server Only)
set bss wlan0bssInternal radius-ip 142.77.1.1
If you use an external RADIUS server, you must provide the RADIUS key. (If you use the built-in
authentication server the RADIUS key is automatically provided.)
This command sets the RADIUS key to
USR5453-AP#
7. Enable RADIUS Accounting (External RADIUS Server Only)
set bss wlan0bssInternal radius-key KeepSecret
KeepSecret
for an external RADIUS server.
You can enable RADIUS Accounting if you want to track and measure the resources a particular user has
Class Structure, Commands, and Examples - 213
Page 60

Professional Access Point
Administrator Guide
consumed such system time, amount of data transmitted and received, and so on.
Note
RADIUS accounting is not supported by the built-in server, so if you are using the built-in server make
sure that RADIUS accounting is off.
To enable RADIUS accounting:
To disable RADIUS accounting:
set bss wlan0bssInternal radius-accounting on
set bss wlan0bssInternal radius-accounting off
For this example, you will enable RADIUS accounting for your external RADIUS server:
USR5453-AP#
8. Get Current Security Settings After Re-Configuring to WPA/WPA2 Enterprise (RADIUS)
set bss wlan0bssInternal radius-accounting on
Now you can use the "get" command again to view the updated security configuration and see the results
of your new settings.
The following command gets the security mode in use on the Internal network:
USR5453-AP#
get interface wlan0 security
wpa-enterprise
The following command gets details on how the internal network is configured, including details on
Security.
USR5453-AP#
get bss wlan0bssInternal detail
Field Value
--------------------------------------------status up
description Internal
radio wlan0
beacon-interface wlan0
mac 00:0C:41:16:DF:A6
dtim-period 2
max-stations 2007
ignore-broadcast-ssid off
mac-acl-mode deny-list
mac-acl-name wlan0bssInternal
radius-accounting on
radius-ip 142.77.1.1
radius-key KeepSecret
open-system-authentication on
shared-key-authentication off
wpa-cipher-tkip on
wpa-cipher-ccmp off
wpa-allowed on
wpa2-allowed off
rsn-preauthentication off
Class Structure, Commands, and Examples - 214
Page 61

Enable/Configure Guest Login Welcome Page
Guest Welcome Option Example
Professional Access Point
Administrator Guide
View Guest Login Settings:
Enable/Disable the Guest
Welcome Page
Set Guest Welcome Page
Textl:
Note
Guest Login settings are only relevant if you have first configured a Guest Network. For information
about configuring a Guest Network, see “Set Up Guest Access” on page 195
get portal
set portal status
set portal welcome-screen-text "Welcome Screen Text"
Where "
want displayed on the Guest Welcome Web Page. The Welcome message must
be in quotes if it contains spaces, punctuation, and special characters."
Welcome Screen Text
" is the content of the Welcome message you
.
You can set up a "captive portal" that Guest clients will see when they log on to the Guest network. or
modify the Welcome screen guest clients see when they open a Web browser or try to browse the Web.
View Guest Login Settings
To view the current settings for Guest Login:
USR5453-AP#
get portal
Field Value
--------------------------------------------------------------------------status down
welcome-screen on
welcome-screen-text Thank you for using wireless Guest Access as provided
by this U.S. Robotics Corporation wireless AP. Upon clicking "Accept", you
will gain access to our wireless guest network. This network allows complete
access to the Internet but is external to the corporate network. Please note
that this network is not configured to provide any level of wireless
security.
Enable/Disable the Guest Welcome Page
To enable the Guest welcome page:
USR5453-AP#
set portal status up
To disable the Guest welcome page:
USR5453-AP#
set portal status down
Set Guest Welcome Page Text
To specify the text for the Guest welcome page:
USR5453-AP#
set portal welcome-screen-text "Welcome to the Stephens Network"
Class Structure, Commands, and Examples - 215
Page 62

Review Guest Login Settings
Professional Access Point
Administrator Guide
The following example shows the results of the "
set portal
" command after specifying some new
settings:
USR5453-AP#
get portal
Field Value
----------------------------------------------------status up
welcome-screen on
welcome-screen-text Welcome to the Stephens Network
Configuring Multiple BSSIDs on Virtual Wireless Networks
Note
Before configuring this feature, make sure you are familiar with the names of the interfaces as
described in “Understanding Interfaces as Presented in the CLI” on page 177
reference in a command determines whether a setting applies to a wired or wireless interface or to the
Internal or Guest network,.
Configuring Virtual Wireless Network "One" on Radio One
1. Configure these settings from the Web User Interface first:
• On Advanced menu’s Ethernet (Wired) Settings tab on the Web User Interface, enable Virtual
Wireless Networks as described in
“Enabling and Disabling Virtual Wireless Networks on the
Access Point” on page 82.
. The interface name you
• On Advanced menu’s Virtual Wireless Networks tab on the Web User Interface, provide a VLAN
ID as described in
“Configuring VLANs” on page 116.
2. Use the CLI to configure Security on the interface.
The following example shows commands for configuring WPA/WPA2 Enterprise (RADIUS) security
mode, allowing "Both" WPA and WPA2 clients to authenticate and using a TKIP cipher suite:
USR5453-AP#
USR5453-AP#
USR5453-AP#
USR5453-AP#
USR5453-AP#
USR5453-AP#
USR5453-AP#
USR5453-AP#
USR5453-AP#
USR5453-AP#
set bss wlan0bssvwn1 open-system-authentication on
set bss wlan0bssvwn1 shared-key-authentication on
set bss wlan0bssvwn1 wpa-allowed on
set bss wlan0bssvwn1 wpa2-allowed on
set bss wlan0bssvwn1 wpa-cipher-tkip on
set bss wlan0bssvwn1 wpa-cipher-ccmp off
set bss wlan0bssvwn1 radius-ip 127.0.0.1
set bss wlan0bssvwn1 radius-key secret
set bss wlan0bssvwn1 status up
set interface wlan0vwn1 security wpa-enterprise
3. Use the CLI to set the Network Name (SSID) for the new Virtual Wireless Network:
USR5453-AP#
set interface wlan0vwn1 ssid my-vwn-one
Class Structure, Commands, and Examples - 216
Page 63

Professional Access Point
Administrator Guide
Creating VWN 'Two' on Radio One with WPA security
To configure the second Virtual Wireless Network, repeat steps 1-3 as described above (in Configuring
Virtual Wireless Network "One" on Radio One) with the following differences:
• Create a second VLAN ID from the Web User Interface with a new SSID
• In the CLI commands, replace
wlan0bssvwn1
with
wlan0bssvwn2
.
Radio Settings
Note
Before configuring this feature, make sure you are familiar with the names of the interfaces as
described in “Understanding Interfaces as Presented in the CLI” on page 177
reference in a command determines whether a setting applies to a wired or wireless interface or to the
Internal or Guest network.
This table shows a quick view of Radio Settings commands and provides links to detailed examples.
Radio Setting Command Example
Get Radio Settings
get radio
get radio wlan0
get radio wlan0 detail
Get IEEE 802.11 Radio Mode
Get Radio Channel
Get Basic Radio Settings
Get All Radio Settings
get radio wlan0 mode
get radio wlan0 channel
get radio wlan0
get radio wlan0 detail
. The interface name you
Get Supported Rate Set
Get Basic Rate Set
Configure Radio Settings See detailed examples in:
get supported-rate
get basic-rate
“1. Turn the Radio On or Off” on page 220
“2. Set the Radio Mode” on page 220
“3. Enable or Disable Super G” on page 220
“4. Set the Beacon Interval” on page 220
“5. Set the DTIM Period” on page 220
“6. Set the Fragmentation Threshold” on page 220
“7. Set the RTS Threshold” on page 221
“8. Configure Basic and Supported Rate Sets” on page 221
Get IEEE 802.11 Radio Mode
To get the current setting for radio Mode:
USR5453-AP#
get radio wlan0 mode
g
Class Structure, Commands, and Examples - 217
Page 64

(The radio in this example is using IEEE 802.11g mode.)
Get Radio Channel
To get the current setting for radio Channel:
Professional Access Point
Administrator Guide
USR5453-AP#
get radio wlan0 channel
6
(The radio in this example is on Channel 6.)
Get Basic Radio Settings
To get basic current Radio settings:
USR5453-AP#
get radio wlan0
Field Value
---------------------status up
mac
channel-policy static
mode g
static-channel 6
channel 6
tx-rx-status up
Get All Radio Settings
To get all current Radio settings: get radio wlan0 detail
USR5453-AP#
get radio wlan0 detail
Field Value
---------------------------------------------------status up
description IEEE 802.11
mac
max-bss 2
channel-policy static
mode g
static-channel 6
channel 6
tx-power 100
tx-rx-status up
beacon-interval 100
rts-threshold 2347
fragmentation-threshold 2346
load-balance-disassociation-utilization 0
load-balance-disassociation-stations 0
load-balance-no-association-utilization 0
ap-detection off
station-isolation off
frequency 2437
Class Structure, Commands, and Examples - 218
Page 65

Professional Access Point
Administrator Guide
wme on
Get Supported Rate Set
The Supported Rate Set is what the access point supports. The access point will automatically choose the
most efficient rate based on factors like error rates and distance of client stations from the access point.
USR5453-AP#
get supported-rate
name rate
----------wlan0 54
wlan0 48
wlan0 36
wlan0 24
wlan0 18
wlan0 12
wlan0 11
wlan0 9
wlan0 6
wlan0 5.5
wlan0 2
wlan0 1
Get Basic Rate Set
The Basic Rate Set is what the access point will advertise to the network for the purposes of setting up
communication with other APs and client stations on the network. It is generally more efficient to have an
access point broadcast a subset of its supported rate sets.
USR5453-AP#
get basic-rate
name rate
----------wlan0 11
wlan0 5.5
wlan0 2
wlan0 1
Configure Radio Settings
Note
To get a list of all fields you can set on the access point radio, type the following at the CLI prompt: set
radio wlan0 [SpaceKey] [TAB] [TAB]
1. Turn the Radio On or Off
2. Set the Radio Mode
3. Enable or Disable Super G
4. Set the Beacon Interval
5. Set the DTIM Period
6. Set the Fragmentation Threshold
7. Set the RTS Threshold
8. Configure Basic and Supported Rate Sets
Class Structure, Commands, and Examples - 219
Page 66

1. Turn the Radio On or Off
To turn the radio on:
Professional Access Point
Administrator Guide
set radio wlan0 status up
To turn the radio off:
2. Set the Radio Mode
set radio wlan0 status down
Valid values depend on the capabilities of the radio. Possible values and how you would use the CLI to set
each one are shown below.
IEEE 802.11b
IEEE 802.11g
set radio wlan0 mode
set radio wlan0 mode
b
g
The following command sets the Wireless Mode to IEEE 802.11g:
USR5453-AP#
3. Enable or Disable Super G
set radio wlan0 mode g
You cannot enable/disable Super G from the CLI. You must set this from the Web User Interface. For
information on how to set this option, please see the field description for this option in “Configuring Radio
Settings” on page 120.
4. Set the Beacon Interval
The following command sets the beacon interval to 80.
USR5453-AP#
5. Set the DTIM Period
set radio wlan0 beacon-interval 80
The Delivery Traffic Information Map (DTIM) period indicates how often wireless clients should check to
see if they have buffered data on the access point awaiting pickup. The measurement is in beacons.
Specify a DTIM period within a range of 1 - 255 beacons. For example, if you set this to "1" clients will
check for buffered data on the access point at every beacon. If you set this to "2", clients will check on
every other beacon.
The following command sets the DTIM interval to 3.
USR5453-AP#
set bss wlan0bssInternal dtim-period 3
To get the updated value for DTIM interval after you have changed it:
USR5453-AP#
get bss wlan0bssInternal dtim-period
3
6. Set the Fragmentation Threshold
You can specify a fragmentation threshold as a number between 256 and 2,346 to set the frame size
threshold in bytes. The fragmentation threshold is a way of limiting the size of packets (frames) transmitted
over the network. If a packet exceeds the fragmentation threshold set here, the fragmentation function will
be activated and the packet will be sent as multiple 802.11 frames. If the packet being transmitted is equal
to or less than the threshold, fragmentation will not be used. Setting the threshold to the largest value
Class Structure, Commands, and Examples - 220
Page 67

(2,346 bytes) effectively disables fragmentation.
The following command sets the fragmentation threshold to 2000.
Professional Access Point
Administrator Guide
USR5453-AP#
7. Set the RTS Threshold
set radio wlan0 fragmentation-threshold 2000
You can specify an RTS Threshold value between 0 and 2347. The RTS threshold specifies the packet
size of a request to send (RTS) transmission. This helps control traffic flow through the access point,
especially one with a lot of clients.
The following command sets the RTS threshold at
USR5453-AP#
8. Configure Basic and Supported Rate Sets
Add a basic rate set
set radio wlan0 rts-threshold 2346
add basic-rate WirelessInterface rate SomeRate
For example:
add basic-rate wlan0 rate 48
Get current basic rates
Add supported rate
get basic-rate
add supported-rate WirelessInterfaceName rate SomeRate
For example:
add supported-rate wlan0 rate 9
Get current supported rates
get supported-rate wlan0
The following command adds "48" as a basic rate to
USR5453-AP#
add basic-rate wlan0 rate 48
wlan0
(the internal, wireless interface):
To get the basic rates currently configured for this access point:
USR5453-AP#
get basic-rate
name rate
----------wlan0 11
wlan0 5.5
wlan0 2
wlan0 1
wlan1 24
wlan1 12
wlan1 6
wlan0 48
The following command adds "9" as a supported rate to
USR5453-AP#
add supported-rate wlan0 rate 9
wlan0
(the internal, wireless interface):
To get the supported rates currently configured for this access point (using "
example):
wlan0
" as the interface for this
Class Structure, Commands, and Examples - 221
Page 68

Professional Access Point
Administrator Guide
USR5453-AP#
get supported-rate wlan0
rate
---1
2
5.5
6
11
12
18
24
36
48
54
9
Note
You can use the get command to view current rate sets from the CLI as described in “Get Supported
Rate Set” on page 219 and “Get Basic Rate Set” on page 219. However, cannot reconfigure Sup-
ported Rate Sets or Basic Rate Sets from the CLI. You must use the Advanced menu’s Radio page on
the Web User Interface to configure this feature.
MAC Filtering
Note
Before configuring this feature, make sure you are familiar with the names of the interfaces as
described in “Understanding Interfaces as Presented in the CLI” on page 177
. The interface name you
reference in a command determines whether a setting applies to a wired or wireless interface or to the
Internal or Guest network.
You can control access to Professional Access Point based on Media Access Control (MAC) addresses.
Based on how you set the filter, you can allow only client stations with a listed MAC address or prevent
access to the stations listed.
Specify an Accept or Deny List
Add MAC Addresses of Client Stations to the Filtering List
Remove a Client Station’s MAC Address from the Filtering List
Get Current MAC Filtering Settings
Specify an Accept or Deny List
To set up MAC filtering you first need to specify which type of list you want to configure
To set up an Accept list:
(With this type of list, client stations whose
MAC addresses are listed will be allowed
access to the access point.)
set bss wlan0bssInternal mac-acl-mode accept-list
Class Structure, Commands, and Examples - 222
Page 69

Professional Access Point
Administrator Guide
To set up a Deny list:
(With this type of list, the access point will
prevent access to client stations whose
MAC addresses are listed.)
set bss wlan0bssInternal mac-acl-mode deny-list
Add MAC Addresses of Client Stations to the Filtering List
To add a MAC address to the list:
add mac-acl wlan0bssInternal mac
Where
MAC_Address_Of_Client
is the MAC address of a wireless client you want to add to the MAC
MAC_Address_Of_Client
filtering list.
For example, to add 4 new clients to the list with the following MAC addresses:
USR5453-AP#
USR5453-AP#
USR5453-AP#
USR5453-AP#
add mac-acl wlan0bssInternal mac 00:01:02:03:04:05
add mac-acl wlan0bssInternal mac 00:01:02:03:04:06
add mac-acl wlan0bssInternal mac 00:01:02:03:04:07
add mac-acl wlan0bssInternal mac 00:01:02:03:04:08
Remove a Client Station’s MAC Address from the Filtering List
To remove a MAC address from the list:
remove mac-acl wlan0bssInternal mac
Where
MAC_Address_Of_Client
is the MAC address of a wireless client you want to remove from the
MAC_Address_Of_Client
MAC filtering list.
For example:
USR5453-AP#
remove mac-acl wlan0bssInternal mac 00:01:02:03:04:04
Get Current MAC Filtering Settings
Get the Type of MAC Filtering List Currently Set (Accept or Deny)
The following command shows which type of MAC filtering list is currently configured:
USR5453-AP#
get bss wlan0bssInternal mac-acl-mode
accept-list
Get MAC Filtering List
The following command shows the clients on the MAC filtering list:
USR5453-AP#
get mac-acl
name mac
----------------------------------wlan0bssInternal 00:01:02:03:04:05
Class Structure, Commands, and Examples - 223
Page 70

Professional Access Point
Administrator Guide
wlan0bssInternal 00:01:02:03:04:06
wlan0bssInternal 00:01:02:03:04:07
wlan0bssInternal 00:01:02:03:04:08
Load Balancing
Note
Before configuring this feature, make sure you are familiar with the names of the interfaces as
described in “Understanding Interfaces as Presented in the CLI” on page 177
reference in a command determines whether a setting applies to a wired or wireless interface or to the
Internal or Guest network.
Load balancing parameters affect the distribution of wireless client connections across multiple access
points. Using load balancing, you can prevent scenarios where a single access point in your network
shows performance degradation because it is handling a disproportionate share of the wireless traffic. (For
an overview of Load Balancing, see “Load Balancing” on page 129
The access point provides default settings for load balancing.
The following command examples reconfigure some load balancing settings and get details on the
configuration:
.)
. The interface name you
USR5453-AP#
USR5453-AP#
2
USR5453-AP#
USR5453-AP#
USR5453-AP#
25
USR5453-AP#
USR5453-AP#
USR5453-AP#
50
set radio wlan0 load-balance-disassociation-stations 2
get radio wlan0 load-balance-disassociation-stations
set radio wlan0 load-balance-disassociation-utilization 25
get radio wlan0 load-balance-disassociation-utilization
set radio wlan0 load-balance-no-association-utilization 50
get radio wlan0 load-balance-no-association-utilization
Quality of Service
Note
Before configuring this feature from the CLI, make sure you are familiar with the names of the interfaces as described in “Understanding Interfaces as Presented in the CLI” on page 177
name referenced in a command determines if a setting applies to a wired or wireless interface or to the
Internal or Guest network.
Quality of Service (QoS) provides you with the ability to specify parameters on multiple queues for
increased throughput and better performance of differentiated wireless traffic like Voice-over-IP (VoIP),
other types of audio, video, and streaming media as well as traditional IP data over the Professional
Access Point.
The interface
For a complete conceptual overview of QoS, see“Quality of Service” on page 133
Class Structure, Commands, and Examples - 224
.
Page 71

Professional Access Point
Administrator Guide
This table shows a quick view of QOS commands and provides links to detailed examples.
QoS Command Example
Enable/Disable Wi-Fi Multimedia
set radio wlan0 wme off
set radio wlan0 wme on
get radio wlan0 wme
About Access Point and Station EDCA
Parameters
Understanding the Queues for Access
Point and Station
Distinguishing between Access Point and
Station Settings in QoS Commands
Get QoS Settings on the Access Point
Get QoS Settings on the Client Station
Set Arbirtation Interframe Spaces (AIFS) On the access point:
See “About Access Point and Station EDCA Parameters” on
page 226.
See “Understanding the Queues for Access Point and Station” on
page 226.
See ““Distinguishing between Access Point and Station Settings in
QoS Commands” on page 226.
get tx-queue
get wme-queue
set wme-queue wlan0 with queue
aifs
AIFS_Value
On a client station:
set wme-queue wlan0 with queue
aifs
AIFS_Value
See examples in “Set Arbirtation Interframe Spaces (AIFS)” on
page 227
Queue_Name
Queue_Name
to
to
Setting Minimum and Maximum Contention Windows (cwmin, cwmax)
Set the Maximum Burst Length (burst) on
the Access Point
Set Transmission Opportunity Limit (txoplimit) for WMM client stations
Enable/Disable Wi-Fi Multimedia
On the access point:
set tx-queue wlan0 with queue
cwmin
On a client station:
cwmin_Value
cwmax
cwmax_Value
set wme-queue wlan0 with queue
cwmin
See examples in “Setting Minimum and Maximum Contention Win-
dows (cwmin, cwmax)” on page 228.
cwmin_Value
cwmax
cwmax_Value
set tx-queue wlan0 with queue
burst
See examples in “Set the Maximum Burst Length (burst) on the
Access Point” on page 229.
burst_Value
set wme-queue wlan0 with queue
txop-limit
See examples in “Set Transmission Opportunity Limit (txop-limit) for
WMM client stations” on page 230.
txop-limit_Value
Queue_Name
Queue_Name
Queue_Name
Queue_Name
to
to
to
to
By default, Wi-Fi MultiMedia (WMM) is enabled on the access point. With WMM enabled, QoS settings on
Class Structure, Commands, and Examples - 225
Page 72

Professional Access Point
Administrator Guide
the Professional Access Point control both downstream traffic flowing from the access point to client
station (access point EDCA parameters) and upstream traffic flowing from the station to the access point
(station EDCA parameters). Enabling WMM essentially activates station-to-access-point QoS control.
Disabling WMM will deactivates QoS control of "station EDCA parameters" on upstream traffic flowing
from the station to the access point. With WMM disabled, you can still set downstream access-point-tostation QoS parameters but no station-to-access-point QoS parameters.
• To disable WMM:
USR5453-AP#
USR5453-AP#
set radio wlan0 wme off
get radio wlan0 wme
off
• To enable WMM:
USR5453-AP#
USR5453-AP#
set radio wlan0 wme on
get radio wlan0 wme
on
About Access Point and Station EDCA Parameters
AP Enhanced Distributed Channel Access (EDCA) Parameters affect traffic flowing from the access point
to the client station (access-point-to-station).
Station Enhanced Distributed Channel Access (EDCA) Parameters affect traffic flowing from the client
station to the access point (station-to-access-point). Keep in mind that station-to-access-point parameters
apply only when WMM is enabled as described in “Enable/Disable Wi-Fi Multimedia” on page 225
.
Understanding the Queues for Access Point and Station
The same types of queues are defined for different kinds of data transmitted from access-point-to-station
and station-to-access-point but they are referenced by differently depending on whether you are
configuring access point or station parameters.
Data Access Point Station
Voice - Highest priority queue, minimum delay. Time-sensitive data
such as VoIP and streaming media are automatically sent to this
queue.
Video - High priority queue, minimum delay. Time-sensitive video
data is automatically sent to this queue.
Best Effort - Medium priority queue, medium throughput and delay.
Most traditional IP data is sent to this queue.
Background - Lowest priority queue, high throughput. Bulk data that
requires maximum throughput and is not time-sensitive is sent to this
queue (FTP data, for example).
data0 vo
data1 vi
data2 be
data3 bk
Distinguishing between Access Point and Station Settings in QoS Commands
Access Point - To get and set QoS settings on the access point, use "tx-queue" class name in the
command.
Class Structure, Commands, and Examples - 226
Page 73

Professional Access Point
Administrator Guide
Station - To get and set QoS settings on the client station, use the "wme-queue" class name in the
command.
Get QoS Settings on the Access Point
To view the current QoS settings and queue names for access-point-to-station parameters:
USR5453-AP#
get tx-queue
name queue aifs cwmin cwmax burst
--------------------------------------wlan0 data0 1 3 7 1.5
wlan0 data1 1 7 15 3.0
wlan0 data2 3 15 63 0
wlan0 data3 7 15 1023 0
Get QoS Settings on the Client Station
To view the current QoS settings queue names for station-to-access-point parameters:
USR5453-AP#
get wme-queue
name queue aifs cwmin cwmax txop-limit
-------------------------------------------wlan0 vo 2 3 7 47
wlan0 vi 2 7 15 94
wlan0 be 3 15 1023 0
wlan0 bk 7 15 1023 0
Set Arbirtation Interframe Spaces (AIFS)
Arbitration Inter-Frame Spacing (AIFS) specifies a wait time (in milliseconds) for data frames.
Valid values for AIFS are 1-255.
Set AIFS on the Access Point
To set AIFS on access-point-to-station traffic:
set tx-queue wlan0 with queue
Where
AIFS_Value
Queue_Name
is the queue on the access point to which you want the setting to apply and
is the wait time value you want to specify for AIFS.
Queue_Name
to aifs
AIFS_Value
For example, this command sets the AIFS wait time on the access point Voice queue (data0) to 13
milliseconds.
USR5453-AP#
set tx-queue wlan0 with queue data0 to aifs 13
View the results of this configuration update (bold in the command output highlights the modified value):
USR5453-AP#
get tx-queue
name queue aifs cwmin cwmax burst
---------------------------------------
Class Structure, Commands, and Examples - 227
Page 74

wlan0 data0 13 3 7 1.5
wlan0 data1 1 7 15 3.0
wlan0 data2 3 15 63 0
wlan0 data3 7 15 1023 0
Set AIFS on the Client Station
To set the AIFS on station-to-access-point traffic:
Professional Access Point
Administrator Guide
set wme-queue wlan0 with queue
Where
Queue_Name
is the queue on the station to which you want the setting to apply and
Queue_Name
to aifs
AIFS_Value
AIFS_Value
the wait time value you want to specify for AIFS.
For example, this command sets the AIFS wait time on the station Voice queue (vo) to 14 milliseconds.
USR5453-AP#
set wme-queue wlan0 with queue vo to aifs 14
View the results of this configuration update (bold in the command output highlights the modified value):
USR5453-AP#
get wme-queue
name queue aifs cwmin cwmax txop-limit
-------------------------------------------wlan0 vo 14 3 7 47
wlan0 vi 2 7 15 94
wlan0 be 3 15 1023 0
wlan0 bk 7 15 1023 0
Setting Minimum and Maximum Contention Windows (cwmin, cwmax)
The Minimum Contention Window (
cwmin
) sets the upper limit (in milliseconds) of the range from which the
initial random backoff wait time is determined. For more details, see “Random Backoff and Minimum /
Maximum Contention Windows” on page 136.)
is
cwmin
Valid values for the "
lower than the value for "
" are 1, 3, 7, 15, 31, 63, 127, 255, 511, or 1023. The value for "
cwmax
".
The Maximum Contention Window (
cwmax
) sets the upper limit (in milliseconds) for the doubling of the
cwmin
" must be
random backoff value. This doubling continues until either the data frame is sent or the Maximum
Contention Window size is reached. For more details, see “Random Backoff and Minimum / Maximum
Contention Windows” on page 136.)
Valid values for the "
higher than the value for "
Set cwmin and cwmax on the Access Point
cwmax
" are 1, 3, 7, 15, 31, 63, 127, 255, 511, or 1023. The value for "
cwmin
".
cwmax
" must be
To set the Minimum and Maximum Contention Windows (cwmin, cwmax) on access-point-to-station traffic:
set tx-queue wlan0 with queue
Where
cwmin_Value
Queue_Name
and
cwmax_Value
is the queue on the access point to which you want the setting to apply and
are the values (in milliseconds) you want to specify for contention back-off
Queue_Name
to cwmin
cwmin_Value
cwmax
cwmax_Value
windows.
Class Structure, Commands, and Examples - 228
Page 75

Professional Access Point
Administrator Guide
For example, this command sets the access point Video queue (data1)
cwmin
value to 15 and
cwmax
value
to 31.
USR5453-AP#
set tx-queue wlan0 with queue data1 cwmin 15 cwmax 31
View the results of this configuration update (bold in the command output highlights the modified values):
USR5453-AP#
get tx-queue
name queue aifs cwmin cwmax burst
--------------------------------------wlan0 data0 13 3 7 1.5
wlan0 data1 1 15 31 3.0
wlan0 data2 3 15 63 0
wlan0 data3 7 15 1023 0
Set cwmin and cwmax on the Station
To set the Minimum and Maximum Contention Windows (cwmin, cwmax) on station-to-access-point traffic:
set wme-queue wlan0 with queue
Queue_Name
to cwmin
cwmin_Value
cwmax
cwmax_Value
Where
and
Queue_Name
cwmax_Value
is the queue on the station to which you want the setting to apply and
cwmin_Value
are the values (in milliseconds) you want to specify for contention back-off windows.
For example, this command sets the client station Video queue (vi)
cwmin
value to 15 and
cwmax
value to
31.
USR5453-AP#
set wme-queue wlan0 with queue vi cwmin 7 cwmax 15
View the results of this configuration update (bold in the command output highlights the modified values):
USR5453-AP#
get wme-queue
name queue aifs cwmin cwmax txop-limit
-------------------------------------------wlan0 vo 14 3 7 47
wlan0 vi 2 7 15 94
wlan0 be 3 15 1023 0
wlan0 bk 7 15 1023 0
Set the Maximum Burst Length (burst) on the Access Point
The Maximum Burst Length (
burst
) specifies (in milliseconds) the Maximum Burst Length allowed for
packet bursts on the wireless network. A packet burst is a collection of multiple frames transmitted without
header information. The
burst
applies only to the access point (access-point-to-station traffic).
Valid values for maximum burst length are 0.0 through 999.9.
To set the maximum burst length on access-point-to-station traffic:
set tx-queue wlan0 with queue
Where
burst_Value
Queue_Name
is the queue on the access point to which you want the setting to apply and
is the wait time value you want to specify for maximum burst length.
Queue_Name
to burst
Class Structure, Commands, and Examples - 229
burst_Value
Page 76

Professional Access Point
Administrator Guide
For example, this command sets the maximum packet burst length on the access point Best Effort queue
(data2) to 0.5.
USR5453-AP#
set tx-queue wlan0 with queue data2 to burst 0.5
View the results of this configuration update (bold in the command output highlights the modified value):
USR5453-AP#
get tx-queue
name queue aifs cwmin cwmax burst
--------------------------------------wlan0 data0 13 3 7 1.5
wlan0 data1 1 15 31 3.0
wlan0 data2 3 15 63
0.5
wlan0 data3 7 15 1023 0
Set Transmission Opportunity Limit (txop-limit) for WMM client stations
The Transmission Opportunity Limit (
WMM client station has the right to initiate transmissions on the wireless network. The
txop-limit
) specifies an interval of time (in milliseconds) when a
txop-limit
applies
only to the client stations (station-to-access-point traffic).
To set the
Where
limit_Value
txop-limit
on station-to-access-point traffic:
set wme-queue wlan0 with queue
Queue_Name
is the queue on the station to which you want the setting to apply and
is the value you want to specify for the
Queue_Name
txop-limit
to txop-limit
.
txop-limit_Value
txop-
For example, this command sets the
USR5453-AP#
set wme-queue wlan0 with queue vo to txop-limit 49
txop-limit
on the station Voice queue (vo) to 49.
View the results of this configuration update (bold in the command output highlights the modified value):
USR5453-AP#
get wme-queue
name queue aifs cwmin cwmax txop-limit
-------------------------------------------wlan0 vo 14 3 7
49
wlan0 vi 2 7 15 94
wlan0 be 3 15 1023 0
wlan0 bk 7 15 1023 0
Class Structure, Commands, and Examples - 230
Page 77

Professional Access Point
Administrator Guide
Wireless Distribution System
Note
Before configuring this feature, make sure you are familiar with the names of the interfaces as
described in “Understanding Interfaces as Presented in the CLI” on page 177
reference in a command determines whether a setting applies to a wired or wireless interface or to the
Internal or Guest network.
This table shows a quick view of WDS commands and links to detailed examples.
WDS Command Example
Configuring a WDS Link See detailed command example below.
. The interface name you
Configuring a WDS Link
get interface wlan0wds0 detail
Configuring a WDS Link
To set up a Wireless Distribution System (WDS) link between two wireless networks:
1. Enable the WDS interface (
USR5453-AP#
USR5453-AP#
set interface wlan0wds0 status up
set interface wlan0wds0 radio wlan0
wlan0wds0
) on the current access point:
2. Provide the MAC address of the remote access point to which you want to link:
USR5453-AP#
set interface wlan0wds0 remote-mac MAC_Address_Of_Remote_AP
For example:
USR5453-AP#
set interface wlan0wds0 remote-mac 00:E0:B8:76:1B:14
Getting Details on a WDS Configuration
Verify the configuration of the WDS link you just configured by getting details on the WDS interface:
USR5453-AP#
get interface wlan0wds0 detail
Field Value
------------------------------------------------------type wds
status up
description Wireless Distribution System - Link 1
mac 00:E0:B8:76:26:08
ip
mask
static-ip
static-mask
rx-bytes 0
rx-packets 0
rx-errors 0
rx-drop 0
rx-fifo 0
Class Structure, Commands, and Examples - 231
Page 78

rx-frame 0
rx-compressed 0
rx-multicast 0
tx-bytes 0
tx-packets 0
tx-errors 0
tx-drop 0
tx-fifo 0
tx-colls 0
tx-carrier 0
tx-compressed 0
ssid
bss
security
wpa-personal-key
wep-key-ascii no
wep-key-length 104
wep-default-key
wep-key-1
wep-key-2
wep-key-3
wep-key-4
vlan-interface
vlan-id
radio wlan0
remote-mac 00:E0:B8:76:1B:14
wep-key
Professional Access Point
Administrator Guide
Time Protocol
The Network Time Protocol (NTP) is an Internet standard protocol that synchronizes computer clock times
on your network. NTP servers transmit Coordinated Universal Time (UTC, also known as Greenwich Mean
Time) to their client systems. NTP sends periodic time requests to servers, using the returned time stamp
to adjust its clock. The timestamp will be used to indicate the date and time of each event in log messages.
See http://www.ntp.org for more general information on NTP.
To enable the Network Time Protocol (NTP) server on the access point do the following:
1. Enable the NTP Server
set ntp status up
2. Provide the Host Name or Address of an NTP Server
set ntp server
Where
mends using the host name rather than the IP address, since IP addresses these change more frequently.)
For example, this command sets the NTP server by host name to "
NTP_Server
set ntp server ntp.instant802.com
3. Get Current Time Protocol Settings
USR5453-AP#
NTP_Server
is the host name or IP address of the NTP server you want to use. (USRobotics recom-
ntp.instant802.com
"
get ntp detail
Class Structure, Commands, and Examples - 232
Page 79

Field Value
-------------------------status up
server ntp.instant802.com
Reboot the Access Point
Professional Access Point
Administrator Guide
To reboot the access point, simply type "
USR5453-AP#
reboot
reboot
" at the command line:
Reset the Access Point to Factory Defaults
If you are experiencing extreme problems with the Professional Access Point and have tried all other
troubleshooting measures, you can reset the access point. This will restore factory defaults and clear all
settings, including settings such as a new password or wireless settings.
The following command resets the access point from the CLI:
USR5453-AP#
Note
Keep in mind that the
istering; not other access points in the cluster.
For information on the factory default settings, see “Default Settings for the Professional Access Point”
on page 6.
factory-reset
factory-reset
command resets only the access point you are currently admin-
Keyboard Shortcuts and Tab Completion Help
The CLI provides keyboard shortcuts to help you navigate the command line and build valid commands,
along with "tab completion" hints on available commands that match what you have typed so far. Using the
CLI will be easier if you use the tab completion help and learn the keyboard shortcuts.
• Keyboard Shortcuts
• Tab Completion and Help
Class Structure, Commands, and Examples - 233
Page 80

Professional Access Point
Administrator Guide
Keyboard Shortcuts
Action on CLI Keyboard Shortcut
Move cursor to the beginning of the current line Ctrl-a
Home
Move cursor to the end of the current line Ctrl-e
End
Move cursor back on the current line, one character at a time Ctrl-b
Left Arrow key
Move the cursor forward on the current line, one character at a time Ctrl-f
Right Arrow Key
Start over at a blank command prompt (abandons the input on the current line) Ctrl-c
Remove one character on the current line. Ctrl-h
Remove the last word in the current command.
(Clears one word at a time from the current command line, always starting with the
last word on the line.)
Remove characters starting from cursor location to end of the current line.
(Clears the current line from the cursor forward.)
Remove all characters before the cursor.
(Clears the current line from the cursor back to the CLI prompt.)
Clear screen but keep current CLI prompt and input in place. Ctrl-l
Display previous command in history.
(Ctrl-p and Ctrl-n let you cycle through a history of all executed commands like Up
and Down arrow keys typically do. Up/Down arrow keys also work for this.)
Display next command in history.
(Ctrl-p and Ctrl-n let you cycle through a history of all executed commands like Up
and Down arrow keys typically do. Up/Down arrow keys also work for this.)
Exit the CLI. (At a blank command prompt, typing Ctrl-d closes the CLI.)
(Typing Ctrl-d within command text also removes characters, one at a time, at cursor location like Ctrl-h.)
Ctrl-W
Ctrl-k
Ctrl-U
Ctrl-p
Up Arrow key
Ctrl-n
Down Arrow key
Ctrl-d
Tab Completion and Help
Help on commands can be requested at the command line interface (CLI) by using the TAB key. (See also
“Basic Settings” on page 179
Hitting TAB once will attempt to complete the current command.
If multiple completions exist, a beep will sound and no results will be displayed. Enter TAB again to display
all available completions.
.)
Class Structure, Commands, and Examples - 234
Page 81

Professional Access Point
Administrator Guide
• Example 1: At a blank command line, hit TAB twice to get a list of all commands.
USR5453-AP#
add Add an instance to the running configuration
factory-reset Reset the system to factory defaults
get Get field values of the running configuration
reboot Reboot the system
remove Remove instances in the running configuration
save-running Save the running configuration
set Set field values of the running configuration
• Example 2: Type "get " TAB TAB (including a space after get) to see a list of all field options for the get
command.
USR5453-AP# get
association Associated station
basic-rate Basic rate of the radio
bridge-port Bridge ports of bridge interfaces
bss Basic Service Set of the radio
cluster Clustering-based configuration settings
cluster-member Member of a cluster of like-configured access points
config Configuration settings
detected-ap Detected access point
dhcp-client DHCP client settings
dot11 IEEE 802.11
host Internet host settings
interface Network interface
ip-route IP route entry
klog-entry Kernel log entry
log Log settings
log-entry Log entry
mac-acl MAC address access list item
ntp Network Time Protocol client
portal Guest captive portal
radio Radio
radius-user RADIUS user
ssh SSH access to the command line interface
supported-rate Supported rates of the radio
system System settings
telnet Telnet access to the command line interface
tx-queue Transmission queue parameters
wme-queue Transmission queue parameters for stations
• Example 3: Type "get system v" TAB. This will result in completion with the only matching field, "get sys-
tem version". (Hit ENTER to get the output results of the command.)
USR5453-AP#
USR5453-AP#
get system v
get system v
ersion
• Example 4: Type "set" TAB TAB (including a space after set) to get a list of all field options for the set
command.
USR5453-AP#
set
bss Basic Service Set of the radio
cluster Clustering-based configuration settings
cluster-member Member of a cluster of like-configured access po
config Configuration settings
Class Structure, Commands, and Examples - 235
Page 82

Professional Access Point
Administrator Guide
dhcp-client DHCP client settings
dot11 IEEE 802.11
host Internet host settings
interface Network interface
ip-route IP route entry
log Log settings
mac-acl MAC address access list item
ntp Network Time Protocol client
portal Guest captive portal
radio Radio
radius-user RADIUS user
ssh SSH access to the command line interface
system System settings
telnet Telnet access to the command line interface
tx-queue Transmission queue parameters
wme-queue Transmission queue parameters for stations
• Example 5: Type "set mac" TAB, and the command will complete with the only matching option:
USR5453-AP#
• Example 6: Type "set cluster" TAB TAB, and the two matching options are displayed:
USR5453-AP# set cluster
cluster Clustering-based configuration settings
cluster-member Member of a cluster of like-configured access points
• Example 7: Type "add" TAB TAB (including a space after add) to get a list of all field options for the add
command.
USR5453-AP#
basic-rate Basic rate of the radio
bridge-port Bridge ports of bridge interfaces
bss Basic Service Set of the radio
interface Network interface
mac-acl MAC address access list item
radius-user RADIUS user
supported-rate Supported rate of the radio
• Example 8: Type "remove" TAB TAB (including a space after remove) to get a list of all field options for
the remove command
USR5453-AP#
basic-rate Basic rate of the radio
bridge-port Bridge ports of bridge interfaces
bss Basic Service Set of the radio
interface Network interface
ip-route IP route entry
mac-acl MAC address access list item
radius-user RADIUS user
supported-rate Supported rates of the radio
set mac-acl
add
remove
CLI Class and Field Overview
The following is an introduction to the CLI classes and fields. For a complete reference guide, see “Class
Class Structure, Commands, and Examples - 236
Page 83

Professional Access Point
Administrator Guide
and Field Reference” on page 239.
Configuration information for the Professional Access Point is represented as a set of classes and objects.
Different kinds of information uses different classes. For example, information about a network interface is
represented by the "interface" class, while information about an NTP client is represented by the "ntp"
class.
Depending on the type of class, there can be multiple instances of a class. For example, there is one
instance of the "interface" class for each network interface that the access point has (Ethernet, radio, and
so on), while there is just a singleton instance of the "ntp" class, since an access point needs only a single
NTP client. Some classes require their instances to have names to differentiate between them; these are
called named classes. For example, one interface might have a name of
Ethernet interface, while another interface could have a name of
wlan0
eth0
to indicate that it is an
to indicate it is a wireless LAN
(WLAN) interface. Instances of singleton classes do not have names, since they only have a single
instance. Classes that can have multiple instances but do not have a name are called anonymous classes.
Together, singleton and anonymous classes are called unnamed classes. Some classes require their
instances to have names, but the multiple instances can have the same name to indicate that they are part
of the same group. These are called group classes.
has name? \ # of instances? one multiple
no singleton anonymous
yes - unique n/a unique named
yes - non-unique n/a group named
Each class defines a set of fields, that describe the actual information associated with a class. Each
instance of a class will have a value for each field that contains the information. For example, the interface
class has fields such as "ip" and "mask". For one instance, the
while the
10.0.0.1 and
mask
field has a value of 255.255.0.0; another instance might have an ip field with a value of
mask
field with a value of 255.0.0.0.
ip
field might have a value of 192.168.1.1
Class Structure, Commands, and Examples - 237
Page 84

Figure 10. CLI Class Relationships
Professional Access Point
Administrator Guide
Class Structure, Commands, and Examples - 238
Page 85

Class and Field Reference
Class Index
Class Description
association An associated station.
basic-rate
bridge-port
bss
cluster
cluster-member
config
detected-ap
dhcp-client
dot11
host
interface
ip-route
jvm
kickstartd
log
log-entry
mac-acl
ntp
portal
radio
radius-user
serial
snmp
ssh
supported-rate
system
telnet
traphost
tx-queue
web-ui
wme-queue
A radio rate.
A port that is a member of a bridge.
A BSS of a radio.
Stores arbitrary data.
Stores arbitrary data.
Config settings.
A detected access point.
The handler for the DHCP client class.
802.11 settings (all radios).
IP host settings.
A network interface.
An IP route.
Java Virtual Machine.
The handler for the kickstartd class
Access point log settings.
An entry in the log.
A MAC access list entry.
Network Time Protocol client settings.
Guest captive portal settings.
A physical radio.
A local authentication server user.
The handler for the serial class.
SNMP server.
The handler for the ssh class.
A radio rate.
System-wide settings.
The handler for the telnet class.
An SNMP trap destination host.
A transmission queue.
Web user interface settings.
A WME station queue.
Professional Access Point
Administrator Guide
association
Class and Field Reference - 239
Page 86

Persistent: No.
Purpose: An associated station.
Field Index
Field Description
interface The interface with which the station is associated.
station
authenticated
associated
rx-packets
tx-packets
rx-bytes
tx-bytes
tx-rate
listen-interval
The MAC address of the station.
Whether the station is authenticated.
Whether the station is associated.
The number of packets received from the station.
The number of packets transmitted by the station.
The number of bytes received from the station.
The number of bytes transmitted by the station.
The transmission rate.
The listen interval.
Professional Access Point
Administrator Guide
interface
Purpose The interface with which the station is associated.
Valid values Linux network interface name.
station
Purpose The MAC address of the station.
Valid values Six colon-separated octets in hexadecimal.
authenticated
Purpose Whether the station is authenticated.
Valid values "Yes" or "-".
associated
Purpose Whether the station is associated.
Valid values "Yes" or "-".
rx-packets
Purpose The number of packets received from the station.
Valid values Positive integer.
tx-packets
Purpose The number of packets transmitted by the station.
Valid values Positive integer.
Class and Field Reference - 240
Page 87

rx-bytes
Purpose The number of bytes received from the station.
Valid values Positive integer.
tx-bytes
Purpose The number of bytes transmitted by the station.
Valid values Positive integer.
tx-rate
Purpose The transmission rate.
Valid values A rate, in 100 kbps.
listen-interval
Purpose The listen interval.
Valid values A time, in ms.
Professional Access Point
Administrator Guide
basic-rate
Persistent: Yes.
Purpose: A radio rate.
Description: Used to set the rate sets of radios.
Field Index
Field Description
rate A radio rate in MBps.
rate
Purpose A radio rate in MBps. Note that you cannot change an existing rate field; you can only insert
or delete the entire instance.
Valid values Positive integer, or 5.5.
bridge-port
Persistent: Yes.
Purpose: A port that is a member of a bridge.
Class and Field Reference - 241
Page 88

Field Index
Field Description
path-cost The path cost.
priority
path-cost
Purpose The path cost. Used only when STP is on.
Valid values 1-65535.
priority
Purpose The port priority. Used only when STP is on.
Valid values 0-255.
The port priority.
Professional Access Point
Administrator Guide
bss
Persistent: Yes.
Purpose: A BSS of a radio.
Description: Represents a basic service set.
Class and Field Reference - 242
Page 89

Field Index
Field Description
status Controls whether this is on or off.
description
radio
beacon-interface
mac
dtim-period
max-stations
ignore-broadcast-ssid
mac-acl-mode
mac-acl-name
radius-accounting
radius-ip
radius-key
open-system-authentication
shared-key-authentication
wpa-cipher-tkip
wpa-cipher-ccmp
A human-readable description of the interface.
The radio this is part of.
The service-set interface to send beacons for.
The MAC address of the interface.
Delivery Traffic Information Map period.
Maximum number of stations.
Do not send SSID in beacons and ignore probe
requests.
MAC address Access Control List mode.
The name of the mac access control list to use.
Whether RADIUS accounting is enabled.
The RADIUS server IP address.
The RADIUS server shared secret.
Whether Open System authentication is permitted.
Whether Shared Key authentication is permitted.
Whether TKIP is permitted as a WPA cipher.
Whether CCMP is permitted as a WPA cipher.
Professional Access Point
Administrator Guide
status
Purpose Controls whether this is on or off.
Valid values "up" or "down".
description
Purpose A human-readable description of the interface.
Valid values an ASCII string.
radio
Purpose The radio this is part of.
Valid values The name of an existing radio instance.
beacon-interface
Purpose The service-set interface to send beacons for.
Valid values The name of an existing interface instance with type of service-set.
Class and Field Reference - 243
Page 90

Professional Access Point
Administrator Guide
mac
Purpose The MAC address of the interface. Read-only; value is determined by the starting MAC of
the radio.
Valid values 6 colon-separated hexadecimal digit pairs.
dtim-period
Purpose Delivery Traffic Information Map period.
Valid values 1-225.
max-stations
Purpose Maximum number of stations.
Valid values 0-2007.
ignore-broadcast-ssid
Purpose Do not send SSID in beacons and ignore probe requests.
Valid values "on" or "off".
mac-acl-mode
Purpose MAC address Access Control List mode.
Valid values "deny-list": deny only stations in list. "accept-list": accept only stations in list. */
mac-acl-name
Purpose The name of the mac access control list to use.
Valid values the name of existing mac-acl instances.
radius-accounting
Purpose Whether RADIUS accounting is enabled. If unset defaults to "off".
Valid values "on" or "off".
radius-ip
Purpose The RADIUS server IP address.
Valid values An IP address.
radius-key
Purpose The RADIUS server shared secret.
Valid values A string.
Class and Field Reference - 244
Page 91

open-system-authentication
Purpose Whether Open System authentication is permitted.
Valid values "on" or "off".
shared-key-authentication
Purpose Whether Shared Key authentication is permitted.
Valid values "on" or "off".
wpa-cipher-tkip
Purpose Whether TKIP is permitted as a WPA cipher.
Valid values "on" or "off".
wpa-cipher-ccmp
Purpose Whether CCMP is permitted as a WPA cipher.
Valid values "on" or "off".
Professional Access Point
Administrator Guide
channel-planner
Persistent: Yes.
Purpose: Stores arbitrary data.
Field Index
This class has the same fields as class cluster-member.
cluster
Persistent: Yes.
Purpose: Stores arbitrary data.
Field Index
This class has the same fields as class cluster-member.
cluster-member
Persistent:Yes.
Class and Field Reference - 245
Page 92

Purpose: Stores arbitrary data.
Description: No services are restarted.
config
Persistent:Yes.
Purpose: Configuration settings.
Description: Used for configuration fields.
Field Index
Field Description
startup Configuration at boot time.
default
no-external-updates
Configuration after factory reset.
Prevent external configuration updates
Professional Access Point
Administrator Guide
startup
Purpose Configuration at boot time.
Write-only.
Valid values "default": Reset to factory defaults.
"rescue": Reset to rescue.
"running": Save running configuration.
default
Purpose Configuration after factory reset.
Write-only.
Valid values "rescue": Reset to rescue.
"running": Save running configuration.
no-external-updates
Purpose Prevent external configuration updates.
Valid values "up" or "down".
debug
Persistent:Yes.
Purpose: Access point debug settings.
Description: The debugging parameters of the access point.
Class and Field Reference - 246
Page 93

Field Index
Field Description
level Level of debugging information.
timestamp
klevel
olevel
ologhost
level
Purpose Level of debugging information.
Valid values 0-5.
timestamp
Purpose Add a timestamp to debugging information.
Valid values "on" or "off".
Add a timestamp to debugging information.
Level of kernel debugging information.
Level of Orchestrator debugging information.
Host for Orchestrator to send syslogs to.
Professional Access Point
Administrator Guide
klevel
Purpose Level of kernel debugging information.
Valid values 1-8.
olevel
Purpose Level of Orchestrator debugging information.
Valid values 0-7.
ologhost
Purpose Host for Orchestrator to send syslogs to.
Valid values IP address.
detected-ap
Persistent:No.
Purpose: A detected access point.
Description: Represents an access point that has been detected by passive scanning.
Class and Field Reference - 247
Page 94

Field Index
Field Description
mac The MAC address of the AP.
radio
beacon-interval
capability
type
privacy
ssid
wpa
phy-type
band
channel
rate
signal
erp
beacons
last-beacon
supported-rates
The radio that detected the AP.
The beacon interval of the AP in kus (1.
The capabilities of the AP.
The type of device detected.
Whether privacy (WEP or WPA) is enabled.
The SSID of the AP.
Whether WPA security is enabled.
The mode our radio was in when the AP was
detected.
The RF band the AP was detected in.
The channel of the AP.
The rate of the AP.
The signal of the AP.
The ERP of the AP.
The number of beacons received from this
AP.
The time of the last beacon received from
this AP.
The supported rates of the AP.
Professional Access Point
Administrator Guide
mac
Purpose The MAC address of the AP.
Valid values Six colon-separated octets in hexadecimal.
radio
Purpose The radio that detected the AP.
Valid values Linux network interface name.
beacon-interval
Purpose The beacon interval of the AP in kus (1.024 ms).
Valid values Positive integer.
capability
Purpose The capabilities of the AP.
Valid values C-formatted hexadecmial bitflag.
Class and Field Reference - 248
Page 95

type
Purpose The type of device detected.
Valid values "AP", "Ad hoc", or "Other".
privacy
Purpose Whether privacy (WEP or WPA) is enabled.
Valid values "On" or "Off".
ssid
Purpose The SSID of the AP.
Valid values String of up to 32 octets.
wpa
Purpose Whether WPA security is enabled.
Valid values "On" or "Off".
Professional Access Point
Administrator Guide
phy-type
Purpose The mode your radio was in when the AP was detected.
Valid values 4: IEEE 802.11b.
7: IEEE 802.11g.
band
Purpose The RF band the AP was detected in.
Valid values "2.4" or "5".
channel
Purpose The channel of the AP.
Valid values Positive integer.
rate
Purpose The rate of the AP.
Valid values Positive integer.
signal
Purpose The signal of the AP.
Valid values Positive integer.
Class and Field Reference - 249
Page 96

erp
Purpose The ERP of the AP.
Valid values C-formatted
hexadecimal number.
beacons
Purpose The number of beacons received from this AP.
Valid values Positive integer.
last-beacon
Purpose The time of the last beacon received from this AP.
Valid values Date and time, in Unix time format.
supported-rates
Purpose The supported rates of the AP.
Valid values Bracketed list of hexadecimal rate codes.
Professional Access Point
Administrator Guide
dhcp-client
Persistent:Yes.
Purpose: The handler for the DHCP client class.
Description: Represents a DHCP client.
Field Index
Field Description
status Controls whether this is on or off.
interface
status
Purpose Controls whether this is on or off.
Valid values "up" or "down".
interface
Purpose The interface to perform DHCP on.
Valid values The name of an existing interface instance. */
The interface to perform DHCP on.
Class and Field Reference - 250
Page 97

dot11
Persistent:Yes.
Purpose: 802.11 settings (all radios).
Description: Represents the wireless functions of the access point.
Field Index
Field Description
status Controls whether 802.
debug
dot11d
status
Purpose Controls whether 802.11 is in use.
Valid values "up" or "down".
The debugging level for 802.
Whether AP should enable 802.
Professional Access Point
Administrator Guide
debug
Purpose The debugging level for 802.11.
Valid values 0-3.
dot11d
Purpose Whether AP should enable 802.11d
Valid values "up" or "down".
host
Persistent:Yes.
Purpose: IP host settings.
Description: Used for IP host fields.
Class and Field Reference - 251
Page 98

Field Index
Field Description
dns-[12] Domain name servers in use.
domain
id
static-dns-[12]
static-domain
dns-via-dhcp
dns-[12]
Purpose Domain name servers in use.
Valid values IP address.
Domain name in use.
The host name.
Domain name servers to use when not
obtained through DHCP.
Domain name to use when not obtained
through DHCP.
Whether DNS parameters are obtained
through DHCP.
Professional Access Point
Administrator Guide
domain
Purpose Domain name in use.
Valid values DNS domain name.
id
purpose The host name.
Valid values DNS domain name.
static-dns-[12]
Purpose Domain name servers to use when not obtained through DHCP.
Valid values IP address.
static-domain
Purpose Domain name to use when not obtained through DHCP.
Valid values DNS domain name.
dns-via-dhcp
Purpose Whether DNS parameters are obtained through DHCP.
Valid values "up" or "down".
Class and Field Reference - 252
Page 99

interface
Persistent:Yes.
Purpose: A network interface.
Description: Used for per-interface fields.
Field Index
Field Description
ip The actual IP address of this interface.
mask
status
type
description
mac
static-ip
static-mask
rx-bytes
rx-packets
rx-errors
rx-drop
rx-fifo
rx-frame
rx-compressed
rx-multicast
tx-bytes
tx-packets
tx-errors
tx-drop
tx-fifo
tx-colls
tx-carrier
tx-compressed
The actual netmask of this interface.
Controls whether this is on or off.
The type of the interface.
A human-readable description of the interface.
The MAC address of the interface.
The static IP address of this interface.
The static netamsk of this interface.
Received bytes.
Received packets.
Received packets with errors.
Received packets that were dropped.
Received packets with FIFO overflows.
Received packets with frame errors.
Received packets with compression.
Received packets that were multicast.
Transmitted bytes.
Transmitted packets.
Transmitted packets with errors.
Transmitted packets that were dropped.
Transmitted packets with FIFO overflows.
Transmitted packets will collisions.
Transmitted packets with carrier errors.
Transmitted packets with compression.
Professional Access Point
Administrator Guide
ip
Purpose The actual IP address of this interface. Read-only.
Valid values IP address.
mask
Purpose The actual netmask of this interface.
Read-only.
Class and Field Reference - 253
Page 100

Professional Access Point
Administrator Guide
Valid values Netmask in dotted-decimal notation.
status
Purpose Controls whether this is on or off.
Valid values "up" or "down".
type
Purpose The type of the interface. Used to determine what additional fields are available. Read-only.
Valid values "service-set", "bridge", "vlan", "wds", "pptp", "pppoe".
description
Purpose A human-readable description of the interface.
Valid values an ASCII string.
mac
Purpose The MAC address of the interface.
Valid values 6 colon-separated hexadecimal digit pairs.
static-ip
Purpose The static IP address of this interface. Used when DHCP is not in use.
Valid values IP address.
static-mask
Purpose The static netamsk of this interface. Used when DHCP is not in use.
Valid values Netmask in dotted-decimal notation.
rx-bytes
Purpose Received bytes.
Valid values Integer.
rx-packets
Purpose Received packets.
Valid values Integer.
rx-errors
Purpose Received packets with errors.
Valid values Integer.
Class and Field Reference - 254
 Loading...