

Camec 043524 Instruction Manual
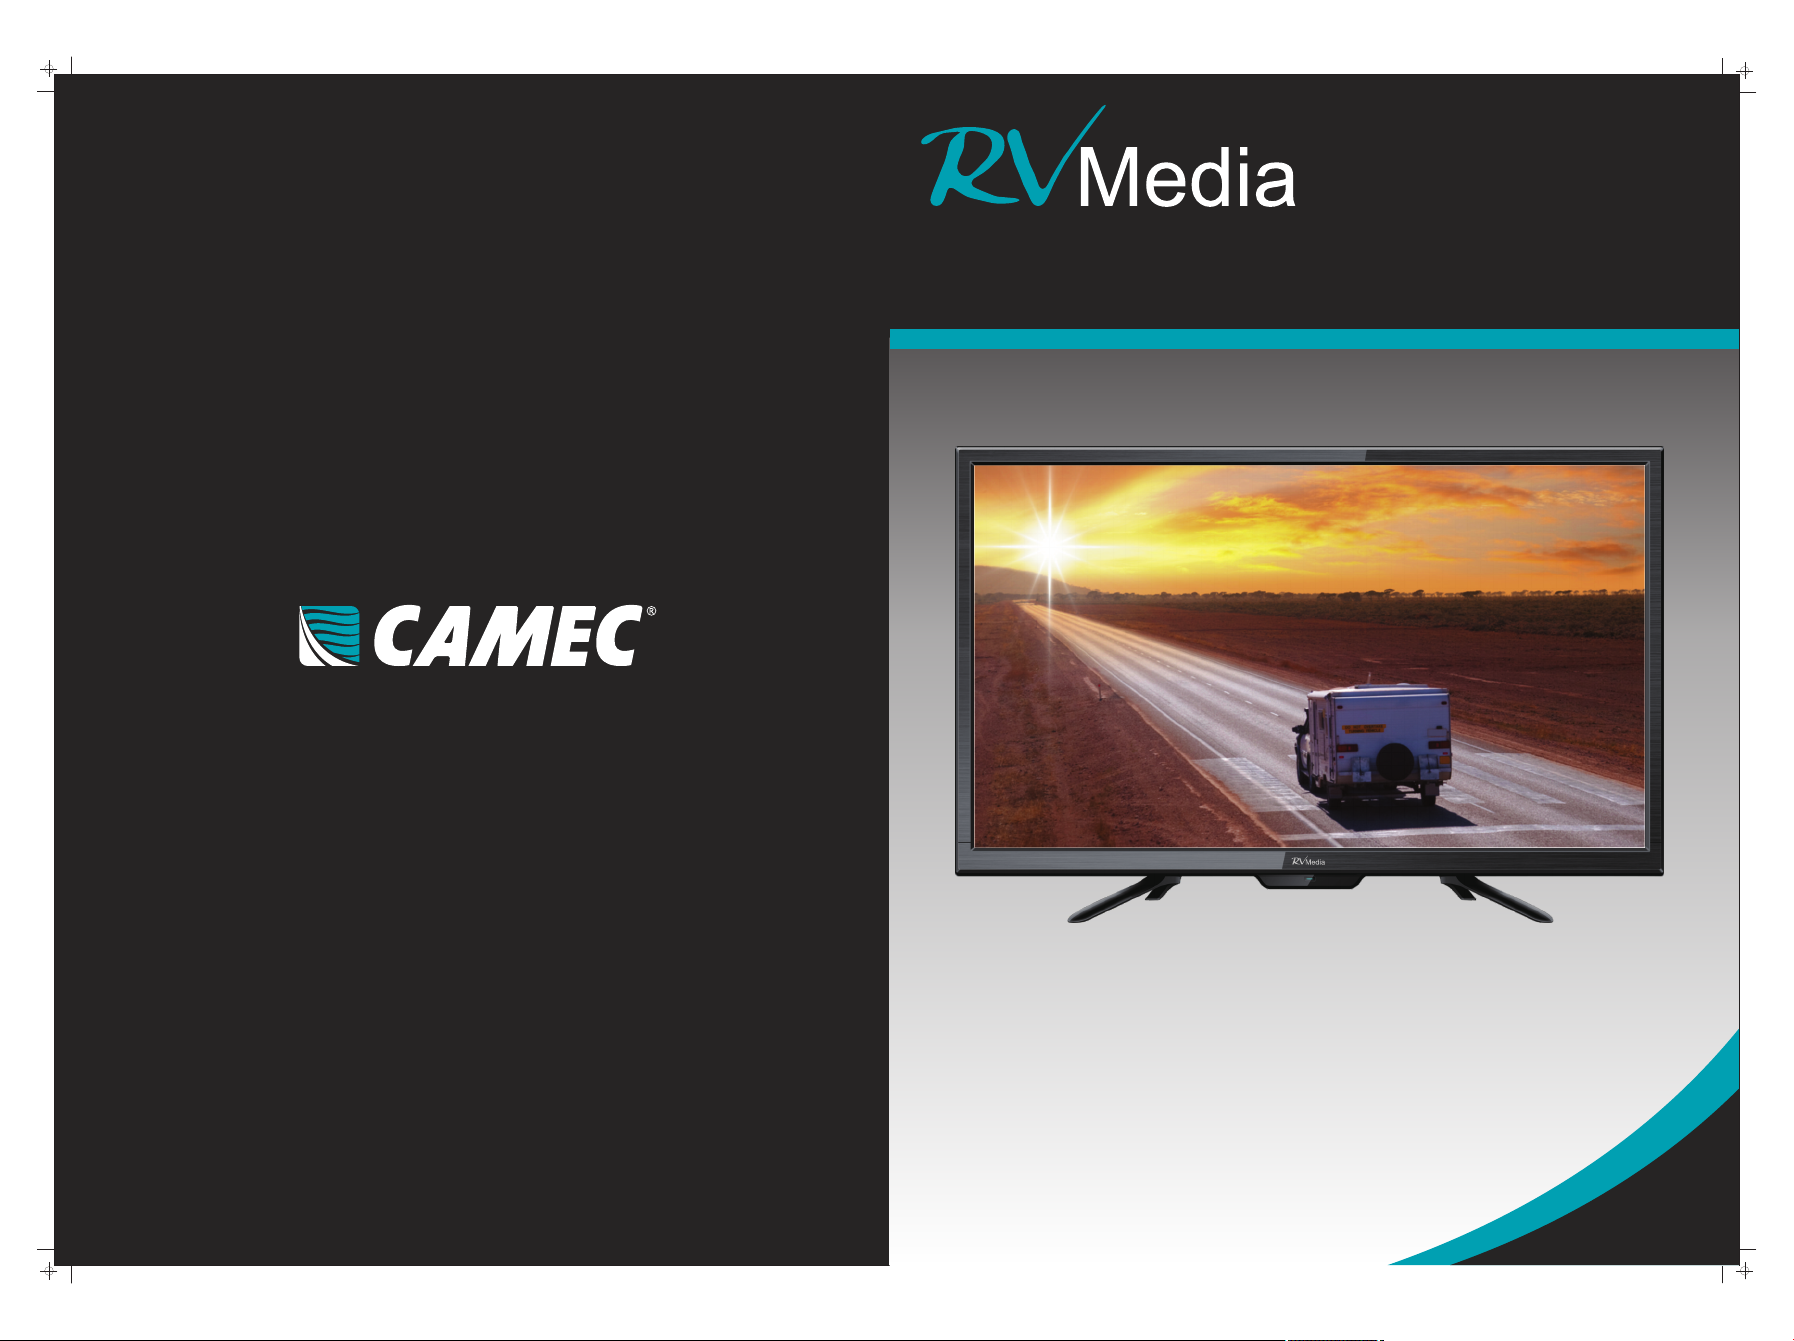
12/24/240V HD LED TV/DVD/USB Combo
043524 28( ")
Instruction Manual
Important Safety Instructions
What’s in the Box
TV Controls/Installation
Base bracket installation
TV Inputs and Outputs
SYSTEM CONNECTIONS
AV Input
PC Input
HDMI Input
YPbPr Component Input
COAXIAL Out put
USB Input
Antenna Connection
First time use
Remote Control
OSD MENU OPERATION
Source Selection
Picture
Sound
Channel
Feature
Setup
Remote Control Functions
EPG
PVR
MEDIA OP ERATION
Photo
Music
Mocie
E-Book
Contents
5
6
7
7
8
8
9
9
10
10
11
12-14
16-18
19
20-21
22-23
23-26
27-30
31-32
33-34
35
36-37
38
39-41
41
Built-in DVD Player Operation
Cleaning and Maintenance
Troubleshooting
Specifications
42-47
48
49-50
51
1
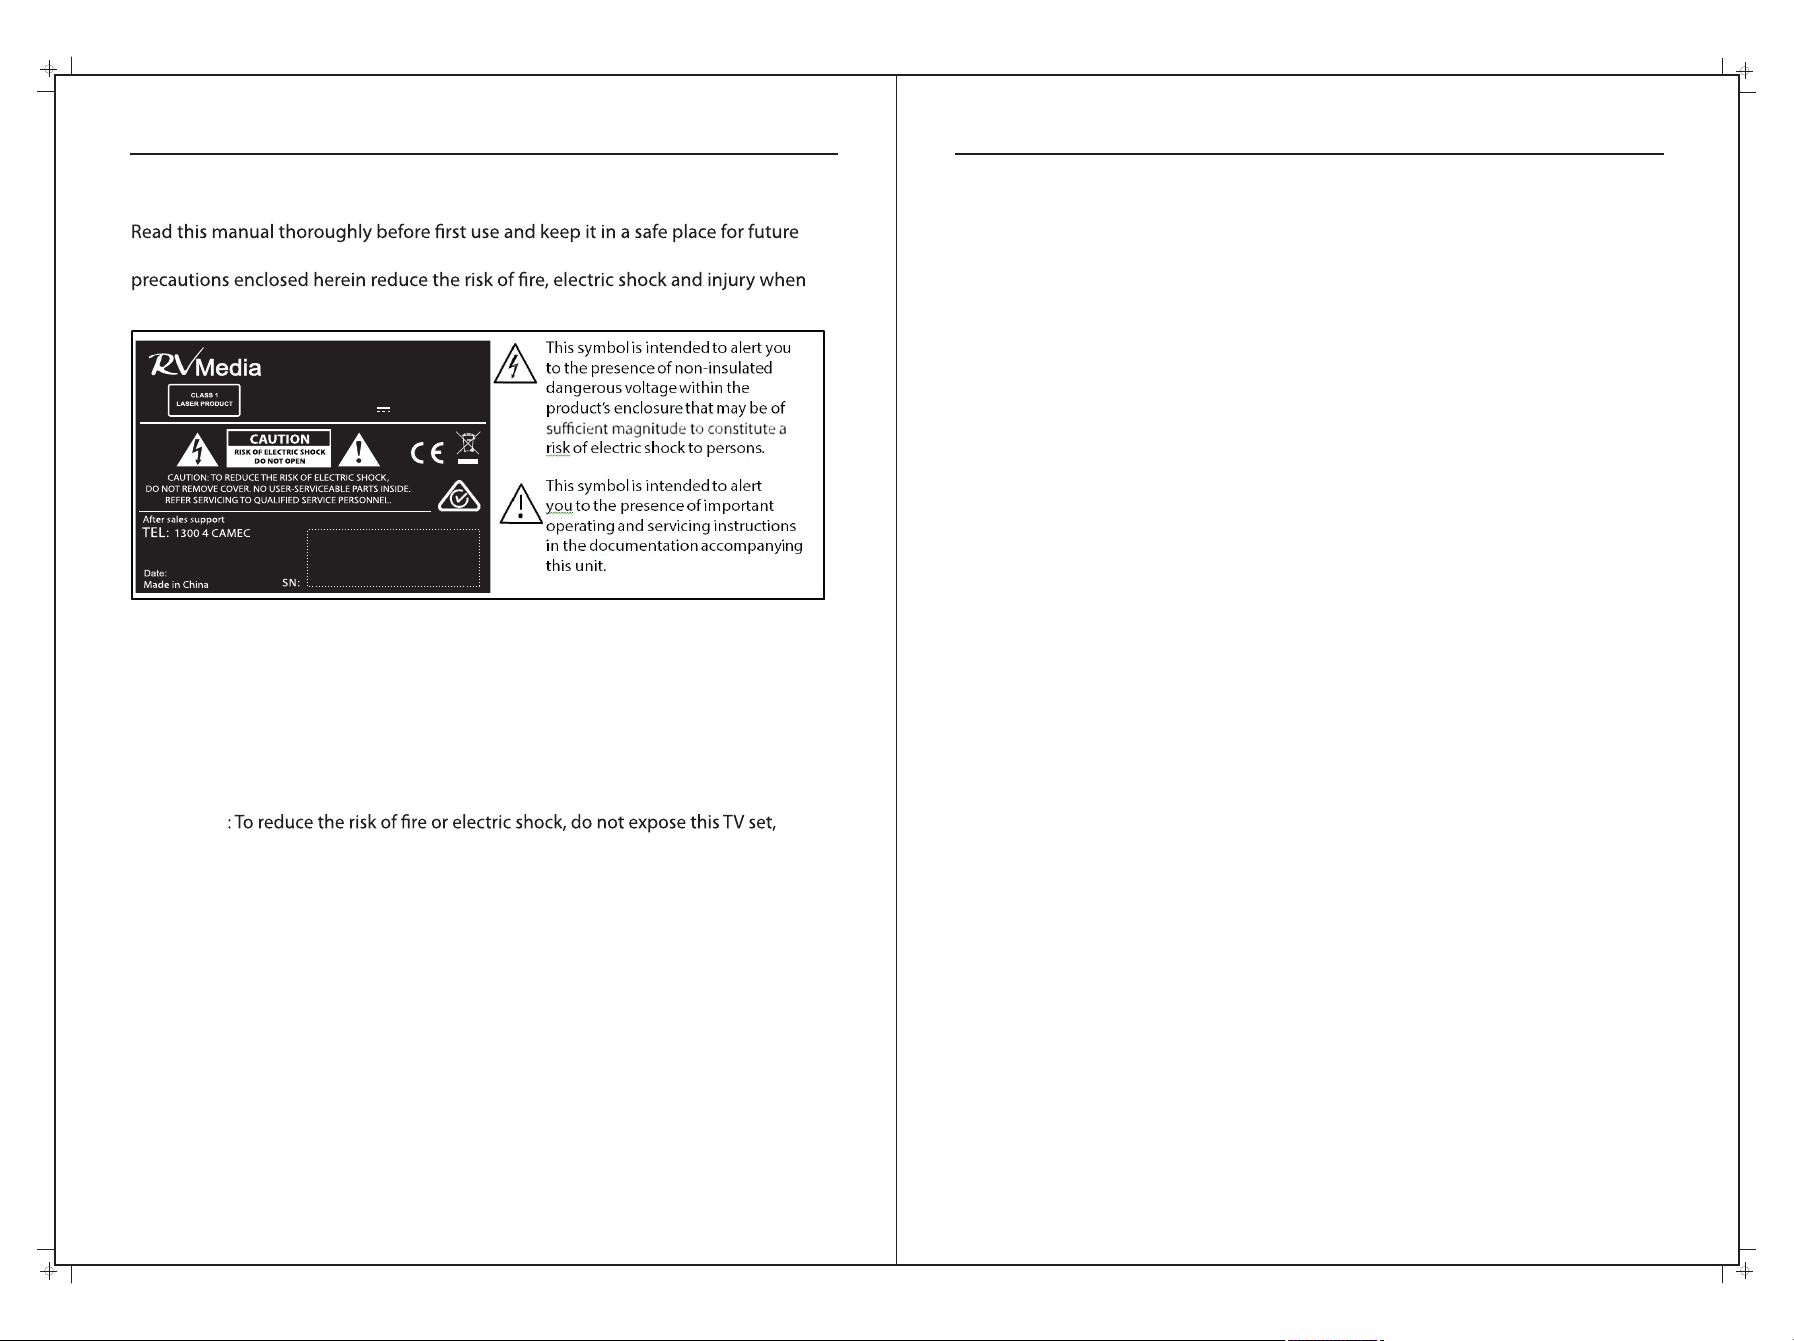
Important Safety Instructions
reference, along with the warranty card, purchase receipt and carton. The safety
correctly adhered to.
70cm (28")
HD LE D TV
Par t Numbe r: 0435 24
INP UT DC 12V 5 A 34W
Dec ember 2 015
• Before installing this TV set, make sure your outlet voltage corresponds to the
voltage stated on the appliance rating label of the power adaptor being used..
• Only use this TV with the power adaptors supplied. If either plug does
not fit into your outlets, consult your dealer or an RV service center for
• Do not overload the power outlet.
• CAUTION
the power supply cord, plug and antenna cable to rain or moisture; do not use it
anywhere near water; do not touch the power plug with wet hands.
• Do not let the cord hang over the edge of a table or counter, or touch hot surfaces.
• Do not allow anything to rest on or roll over the power cord and antenna cable.
Protect the cord and run all cables so that no one steps on or trips over them.
• Do not run the cord near heat-producing appliances such as radiators, stoves or
irons. The excessive heat could melt the insulation and expose live wires.
• When not in use, disconnect the power cord from the outlet. Hold the plug, not
the cord, when disconnecting the unit. Pulling the cord can damage the internal
wires and may cause a fire.
• Never touch the TV screen, antenna or cord during thunderstorms. Stop use
during thunderstorms; unplug the unit when a thunderstorm is approaching.
Important Safety Instructions (cont)
Usage conditions and restrictions
• Follow the instructions in this manual when installing and adjusting the TV set.
Only adjust those controls that are covered in this instruction manual; improper
adjustment of other controls may result in damage. If this happens, unplug the TV
and have it serviced by appropriately qualified personnel.
• Do not change or modify the TV set in any way. Only use the attachments/
accessories specified.
• Do not cover the ventilation openings with items such as newspapers, tablecloths,
curtains etc., as this could impede ventilation.
• Do not insert any objects of any kind into this unit through the ventilation slots or
DVD slot, as they could touch the current-carrying parts or short-circuit parts,
resulting in fire, electric shock or damage to the unit.
• Do not touch the screen with fingers, as this may scratch or smudge the TV screen.
• Do not expose the batteries to excessive heat such as sunshine, fire or the like.
• Unplug the TV set in all of the following circumstances:
• If it has been subject to impact or has been dropped and is damaged.
• If its voltage adaptor plugs, or the wall socket, are damaged.
• The appliance is not intended for use by persons (including children) with reduced
physical, sensory or mental capabilities, or lack of experience and knowledge,
unless they have been given supervision or instruction concerning use of the
appliance by a person responsible for their safety.
• Young children should be supervised to ensure they do not play with the TV.
Position
• If a television is not positioned in a sufficiently stable location, when stand
mounted, it can potentially be hazardous if it falls. Many injuries, particularly to
children, can be avoided by taking simple precautions such as:
• Using cabinets, shelves or stands that provide a sturdy support for the TV and
are not in areas where the TV can be accidently knocked or bumped .
• Only using furniture that can safely support the television.
• Ensuring the TV is not overhanging the edge of the supporting furniture.
• Not placing the TV on tall furniture (for example, cupboards or bookcases)
without anchoring both the furniture and the TV to a suitable support.
• Not standing the TV on cloth or other materials placed between the TV and
supporting furniture.
• Educating children about the dangers of climbing up to reach the TV controls.
2 3
Important Safety Instructions (cont)
• When deciding where to put the TV set, make sure the location is:
• Well ventilated. Leave at least a 20cm space all around the TV set for good
ventilation.
• Protected from overheating and away from direct sunlight.
• Away from damp and cold.
• Away from areas with extremes of temperature (below 0°C or exceeding 40°C)
or moisture.
• Away from moisture drips or splashes.
• Protected from excessive dust.
• Do not install this equipment in a confined space such as a bookcase or similar.
• Do not put any objects filled with liquids, such as vases, on top of the TV set.
• Do not place any naked flame sources, such as lighted candles, on top of the TV.
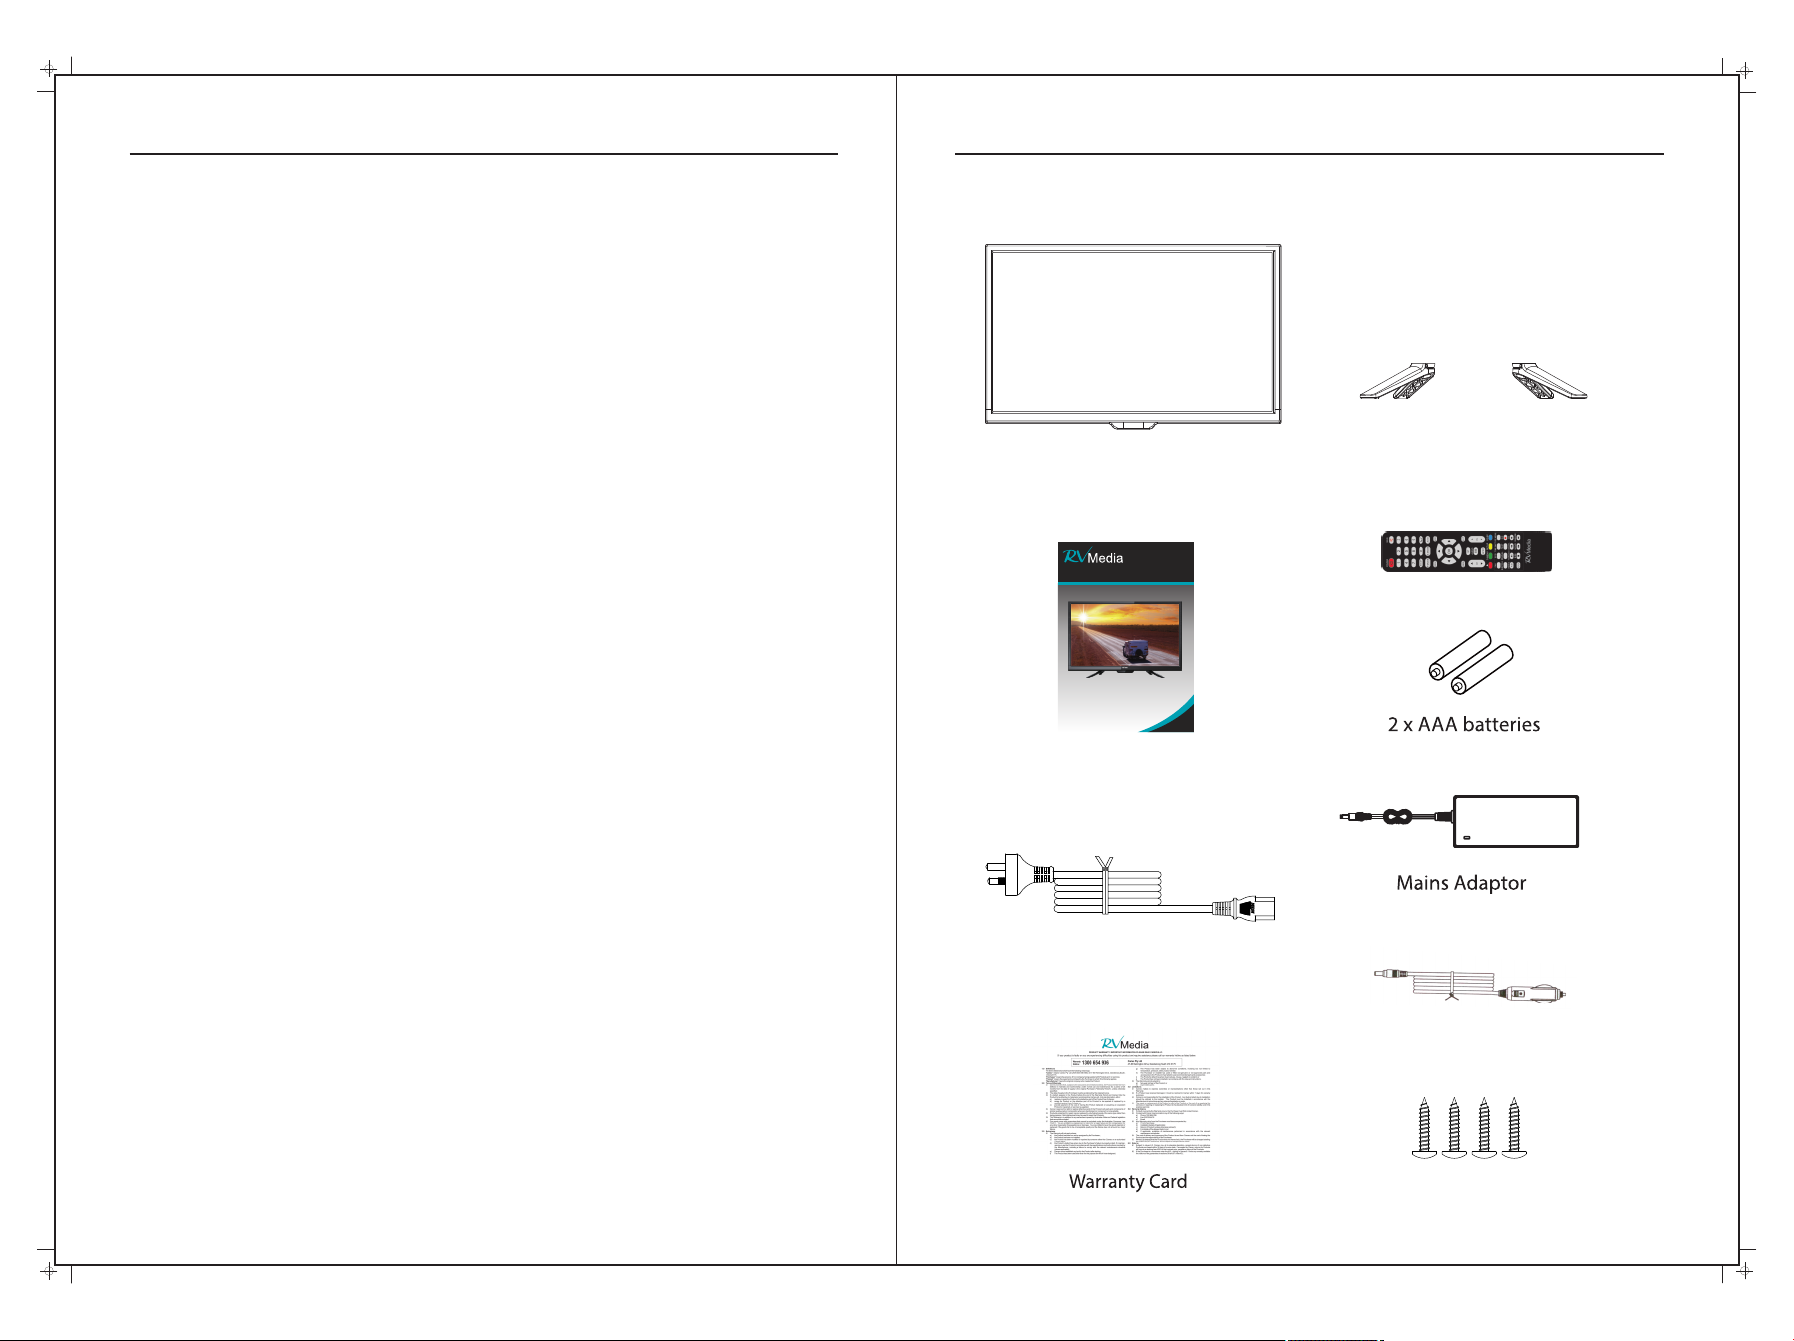
What’s in the Box
28" TV with inbuilt DVD Play er
12/24/240V FHD LED TV/DVD/USB Combo
043524 28( ")
Inst ructi on Manu al
Manual
Stand Brackets
Remote Control
240V Power Cord
4 5
12/24V Accessory Lead
4 Stand Screws

TV Controls
INPU T
MENU
VOL+
VOL-
CH+
CH-
STANDBY
Base bracket installation
Screw hole A
Screws
Screw hole C
Controls on the TV
1. After yo u loa d a disc, pre ss to play th e disc, and p res s twice to pa use.
2. Press t he bu tton w hen t he power is o n the disc wi ll ej ect, Pres s the butto n aga in to lo ad th e
disc aut oma tically.
3. INPUT - T his butto n switche s bet ween all th e diff ere nt source s of the TV. Wh en th e OSD is acti ve,
this but ton a cts as the en ter butto n and confi rms t he menu sel ection.
4. MENU - Th is button a ctivate s the O SD menu. If a s ub-menu i s active, p res sing this b utton wil l ret urn
the sele cti on to the pre vious men u level.
5. VOL(+ ) - This butt on increa ses t he TV’s volu me. I f the OSD men u is active , pre ssing thi s button wi ll
move the s ele ction to th e right.
6. VOL(- ) - This butt on decrea ses t he TV’s volu me. I f the On Scre en Displa y(O SD) menu is a ctive,
pressi ng th is button w ill move th e selecti on to t he left.
7. CH(+) - T his butto n perform s the c hannel up f unction . If the OSD me nu is a ctive, th is button f unc tion s
as up cont rol f or the menu .
8. CH(-) - T his butto n perform s the c hannel do wn functi on. If the OS D men u is active , this butt on
functi ons a s down cont rol for the m enu.
9. STAN DBY - Turn on th e TV by press ing the but ton o nce. Pres s the butto n again to tu rn off the TV.
200 100
For wall mounting, remove the 4 screws
and remove the two Base Brackets.
Screw hole B
Screw hole D
Instructions:
1. Place the TV on a flat and clean surface
2. Attach the 1st bracket with screws through holes B into A.
3. Attach the 2nd bracket with screws through holes D in to C.
TV Inputs & Outputs
Rear Bottom
EARP HONE
OUT
VIDE O RL
IN
1 2 4 53
Rear Side
COAX IAL
OUT
1. Earphone out: Output for headphones or head units such as RV Media Head Units with TV input.
2. AV Inputs: Composite Vid eo & Aud io (A /V) i n.
3. PC Au dio I npu t: Co nne ct to t he au dio o utp ut ja ck on a c omp ute r.
4. VGA Inp ut: C onn ect t o a com put er’s VGA output jack.
5. HDMI Input: HDMI in.
6. COAXIAL Out: Digital Audio output for Surround Sound amplifiers and other devices.
7. RF Input: Connect to an external antenna to receive ATV/DTV TV s ign als
in ATV/DTV mode.
8. USB: USB/Multimedia input.
9. Y/Pb/Pr Input: Component Video in.
10. POWER: (DC 12/24V) input
RF
IN
7 96
USB
Y PrPb
IN
8
AUDI O
DC 12V
10
PC
IN
VGA
HDMI
6
7
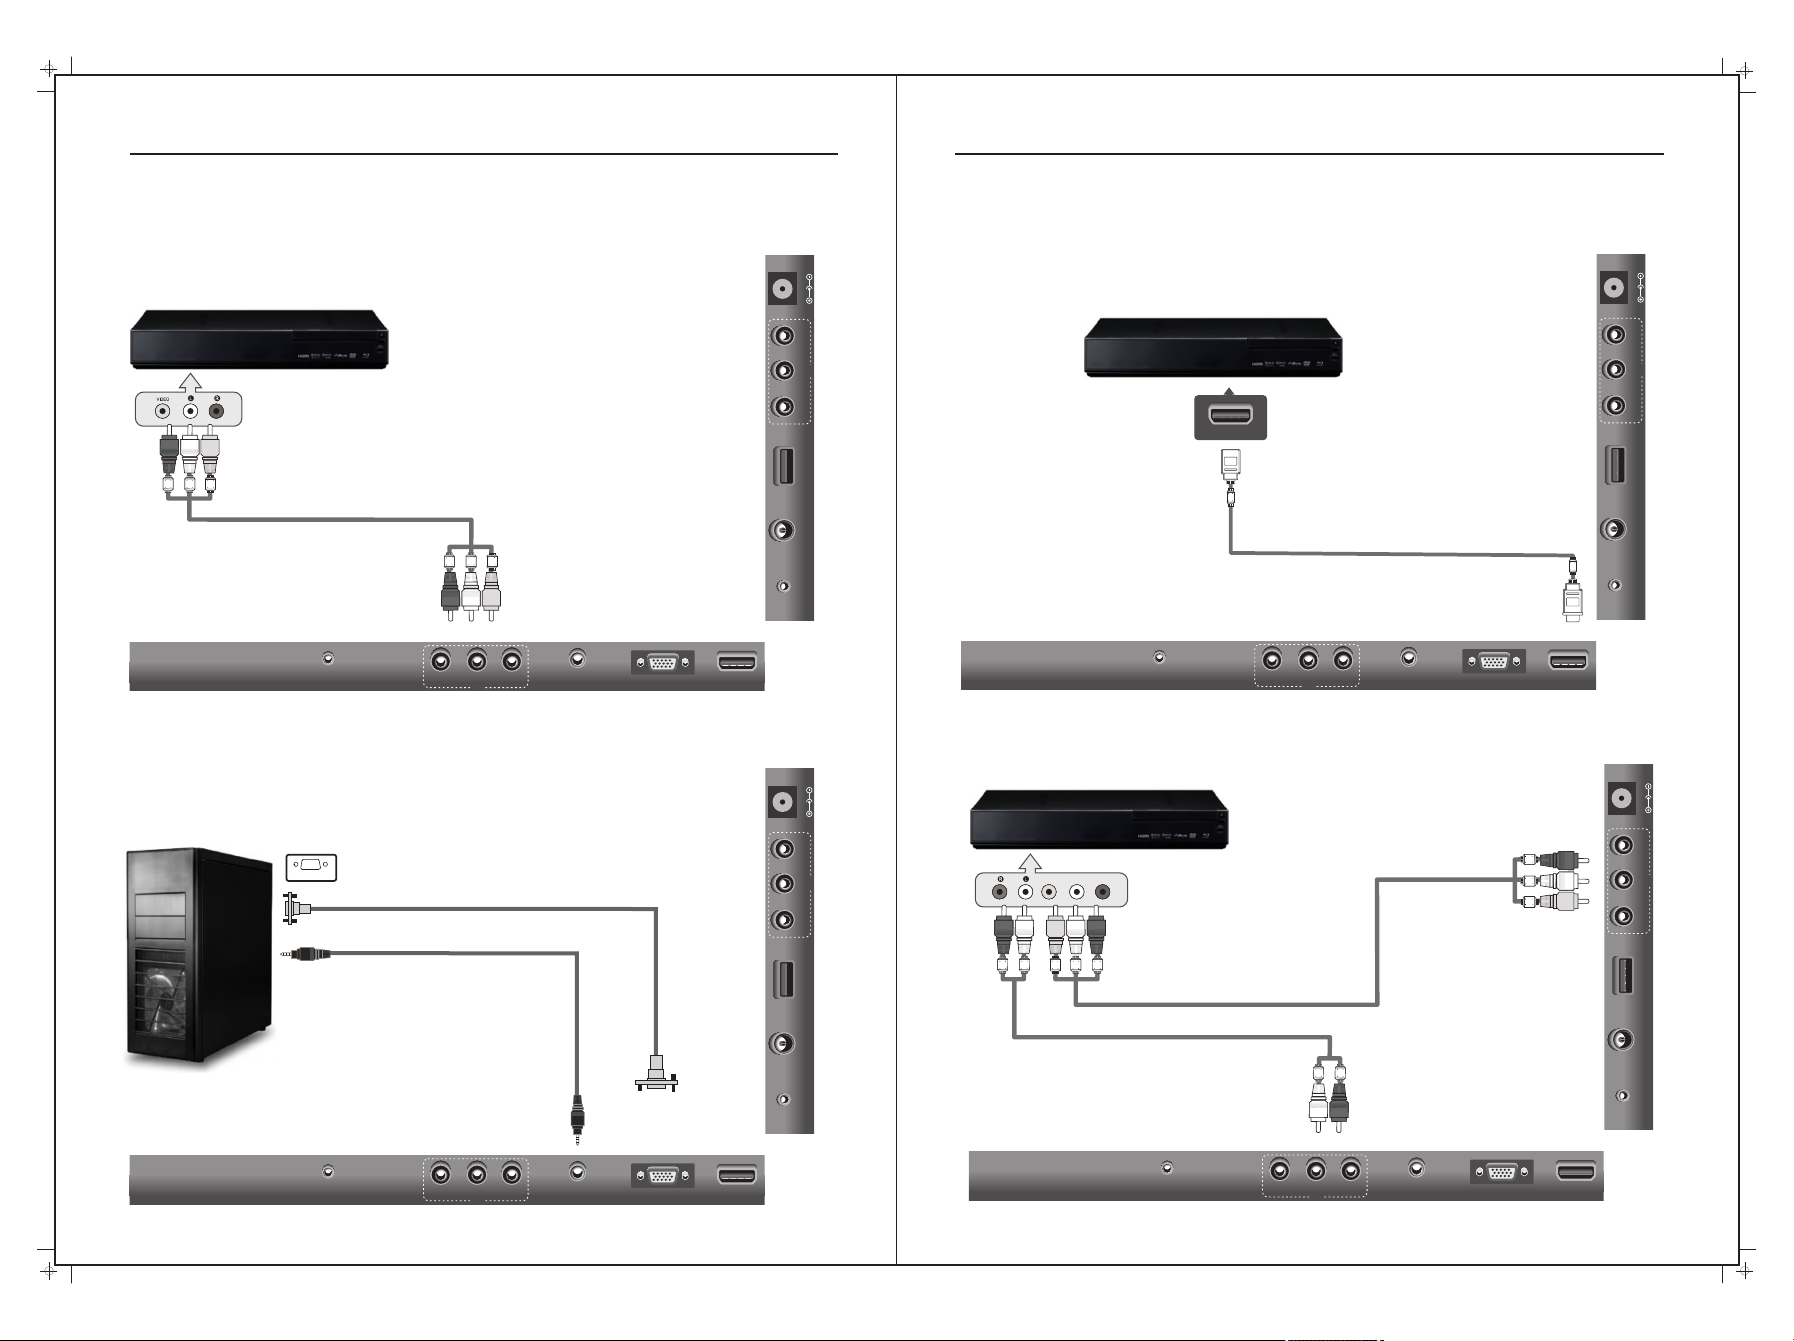
System Connection
NOTE: Please, make sure the inputs and outputs have firm connections before
connecting power.
1. COMPOSITE AV INPUT
Audio/video input: Use the SOURCE button to selec t AV on the TV.
System Connection
3. HDMI INPUT
HDMI input: Use the SOURCE button on the remote control to sele ct HD MI.
DC 12V
Source eg. Blu-ray, DVD, Satellite, camcorder etc
DC 12V
Video Cable Red/White/Yellow (Not supplied)
EARP HONE
OUT
VIDE O RL
IN
PC
AUDI O
IN
2. PC INPUT
PC input: Use the SOURCE button on the remote control to select P C.
VGA O UTPU T
VGA OUTP UT
IN
Y PrPb
HDMI 1
USB
IN
RF
OUT
COAX IAL
EARP HONE
VGA
HDMI
OUT
VIDE O RL
IN
AUDI O
PC
IN
VGA
HDMI
IN
Y PrPb
USB
IN
RF
OUT
COAX IAL
4. YPbPr COMPONENT INPUT
Video component input: Use the SOURCE button on the remote control to select YPbPr.
This input consists of both Video (Green/Blue/Red) and Audio (Red/White)
DC 12V
Y
Pb
IN
Y PrPb
Pr
DC 12V
IN
Y PrPb
PC AUD IO
OUTPUT
EARP HONE
OUT
USB
IN
RF
OUT
COAX IAL
VIDE O RL
PC
AUDI O
IN
IN
VGA
HDMI
EARP HONE
OUT
8 9
VIDE O RL
USB
IN
RF
OUT
COAX IAL
PC
AUDI O
IN
IN
VGA
HDMI
System Connection
5. COAXIAL OUTPUT
Allows connect ion o f Digital audio system s and S urround Sound.
COAXIAL
System Connection
7. Antenna connection
Antenna input impedance of this unit is 75ohm. VHF/UHF 75ohm coaxial cable can be
connected to the antenna jack directly.
DC 12V
Antenna lead with 75 ohm male PAL Connector
IN
Y PrPb
75ohm coaxial cable
USB
IN
RF
Antenna cable
COAXIAL Cable (Not supplied)
EARP HONE
OUT
VIDE O RL
IN
PC
AUDI O
IN
6. USB INPUT
Use the SOURCE but ton o n the remote controlle r to se lect Media.
USB memory
EARP HONE
OUT
VIDE O RL
IN
PC
AUDI O
IN
OUT
COAX IAL
Remote Control
Installing Batteries
VGA
HDMI
DC 12V
IN
Y PrPb
USB
IN
RF
OUT
COAX IAL
Open the battery compartment
1
cover on the back of the remote.
Battery
Insert two 1.5V AAA size batteries
using the correct polarity as shown.
2
Don’t mix old or used batteries with.
new ones..
Replace the cover.
3
Cover
2 x size AAA 1.5V
Battery
Cover
To use the remote control, point it
towards the remote sensor near
the power LED at the front of the
television. Th e remo te con trol h as
a range of up to approximately
seven meters from the TV a t an
angle of up to 60 degrees.
- Batteries should not be exposed to excessive hea t such as dire ct
sunlight, fire or the like.
- If not be ing used for a period of time, please remove the batterie s
from th e remote in case of leakage.
VGA
HDMI
- Do not mix old & new batteries together.
10
11
First Time Use First Time Use cont’d
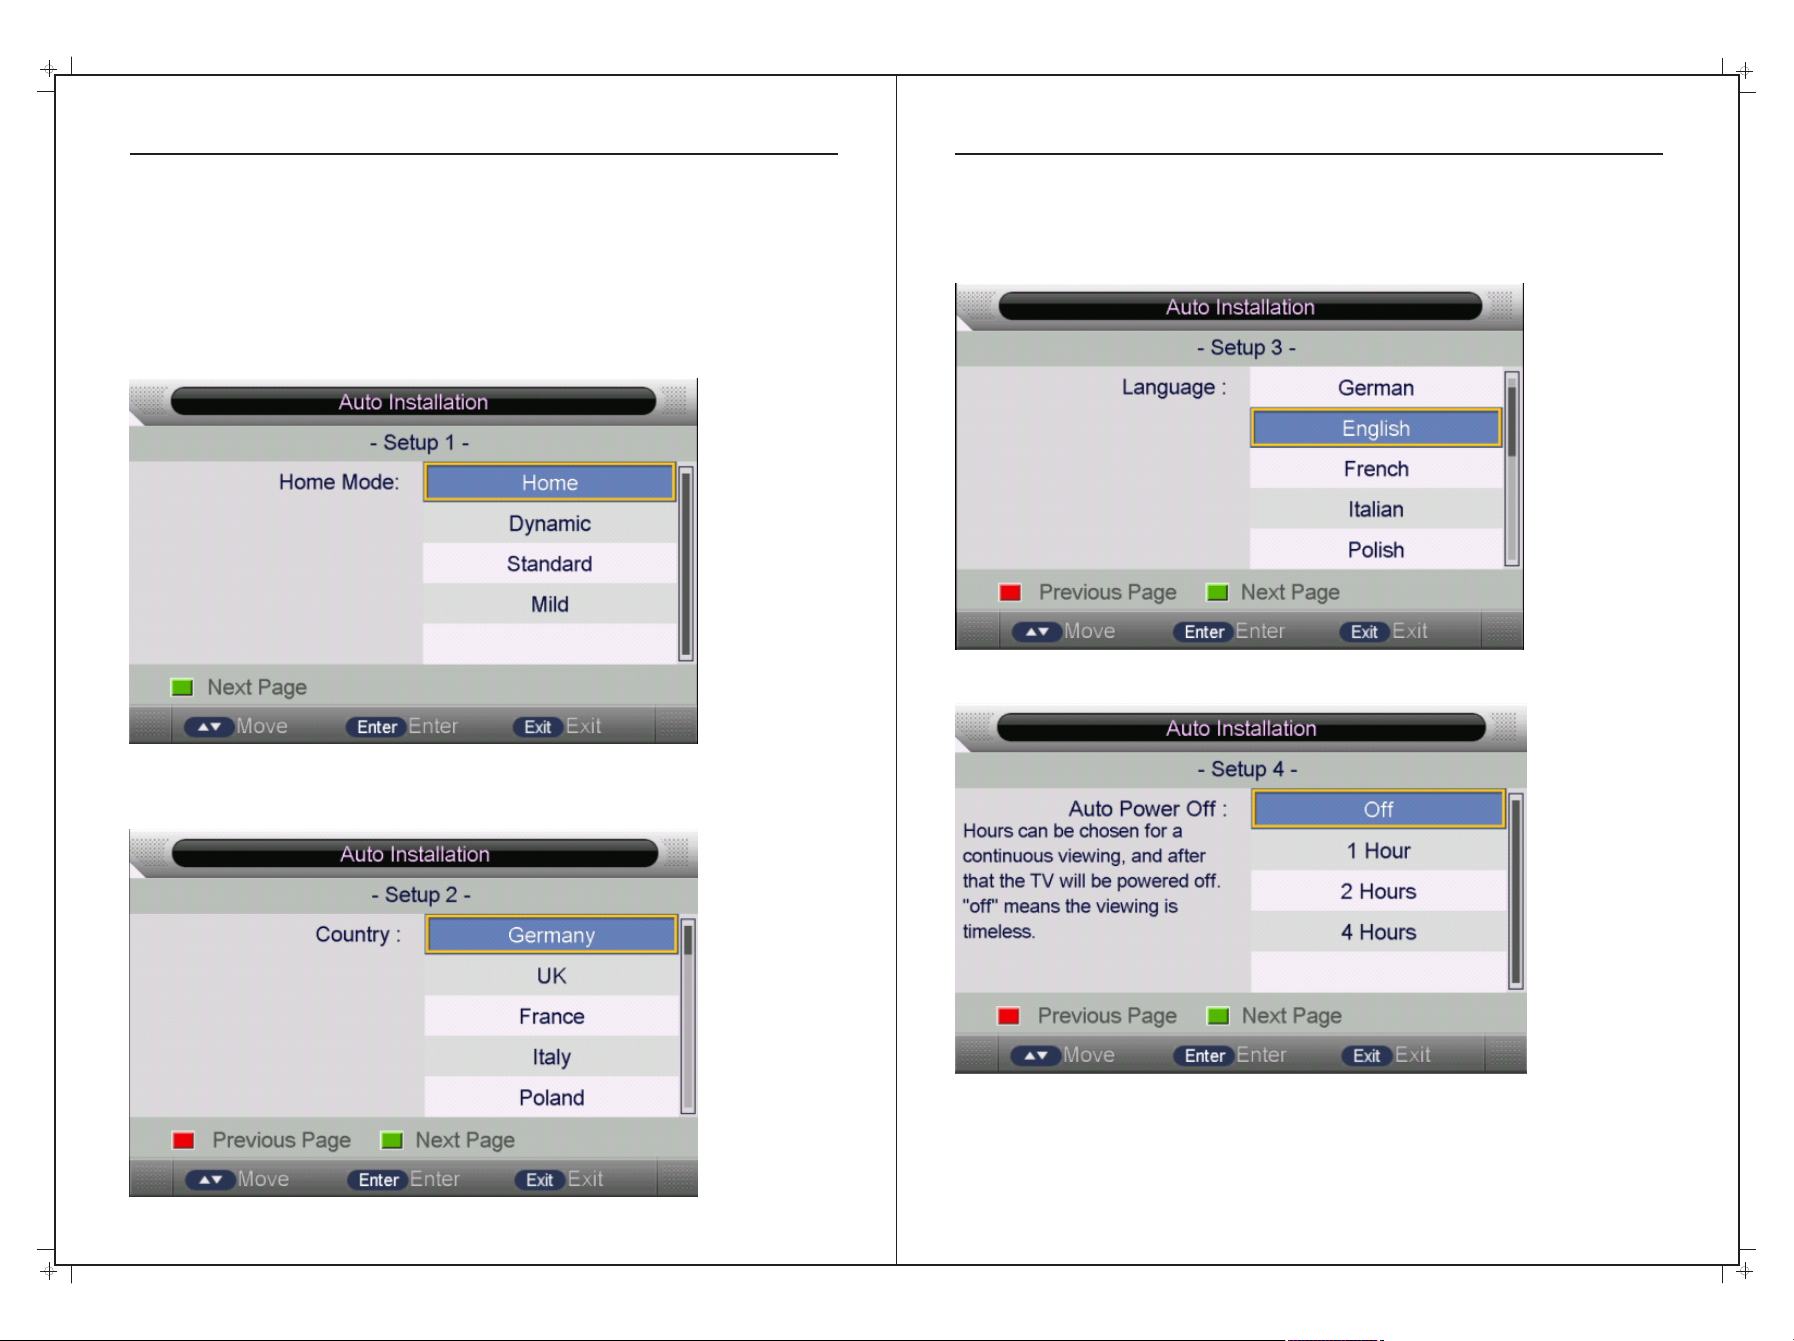
Auto Installation
If this is the first time you are turning on the TV and there are no programs stored in the TV
memory, the “Auto Installation” menu will appear on the screen.
Please use the following steps as a guide.
Step 1: Set up Home (Screen brightness setting)
The factory default is “Home” or you can select Dynamic for hig her c ont ras t, “S tan dar d” fo r
a picture to suit most types of viewing or “Mild” for a softer picture .
Step 2: Set up the Country
Please ensure “Australia” is selected. Note the E uro pea n sel ect ion s cre en is p ict ure d
below for reference.
Step 3: Set up the Menu Language
Select your desired language from the option s. En gli sh sh oul d be se t as th e def aul t
langrage.
Step 4: Set up the Aut o Pow er Of f Fun cti on
12 13
First Time Use cont’d
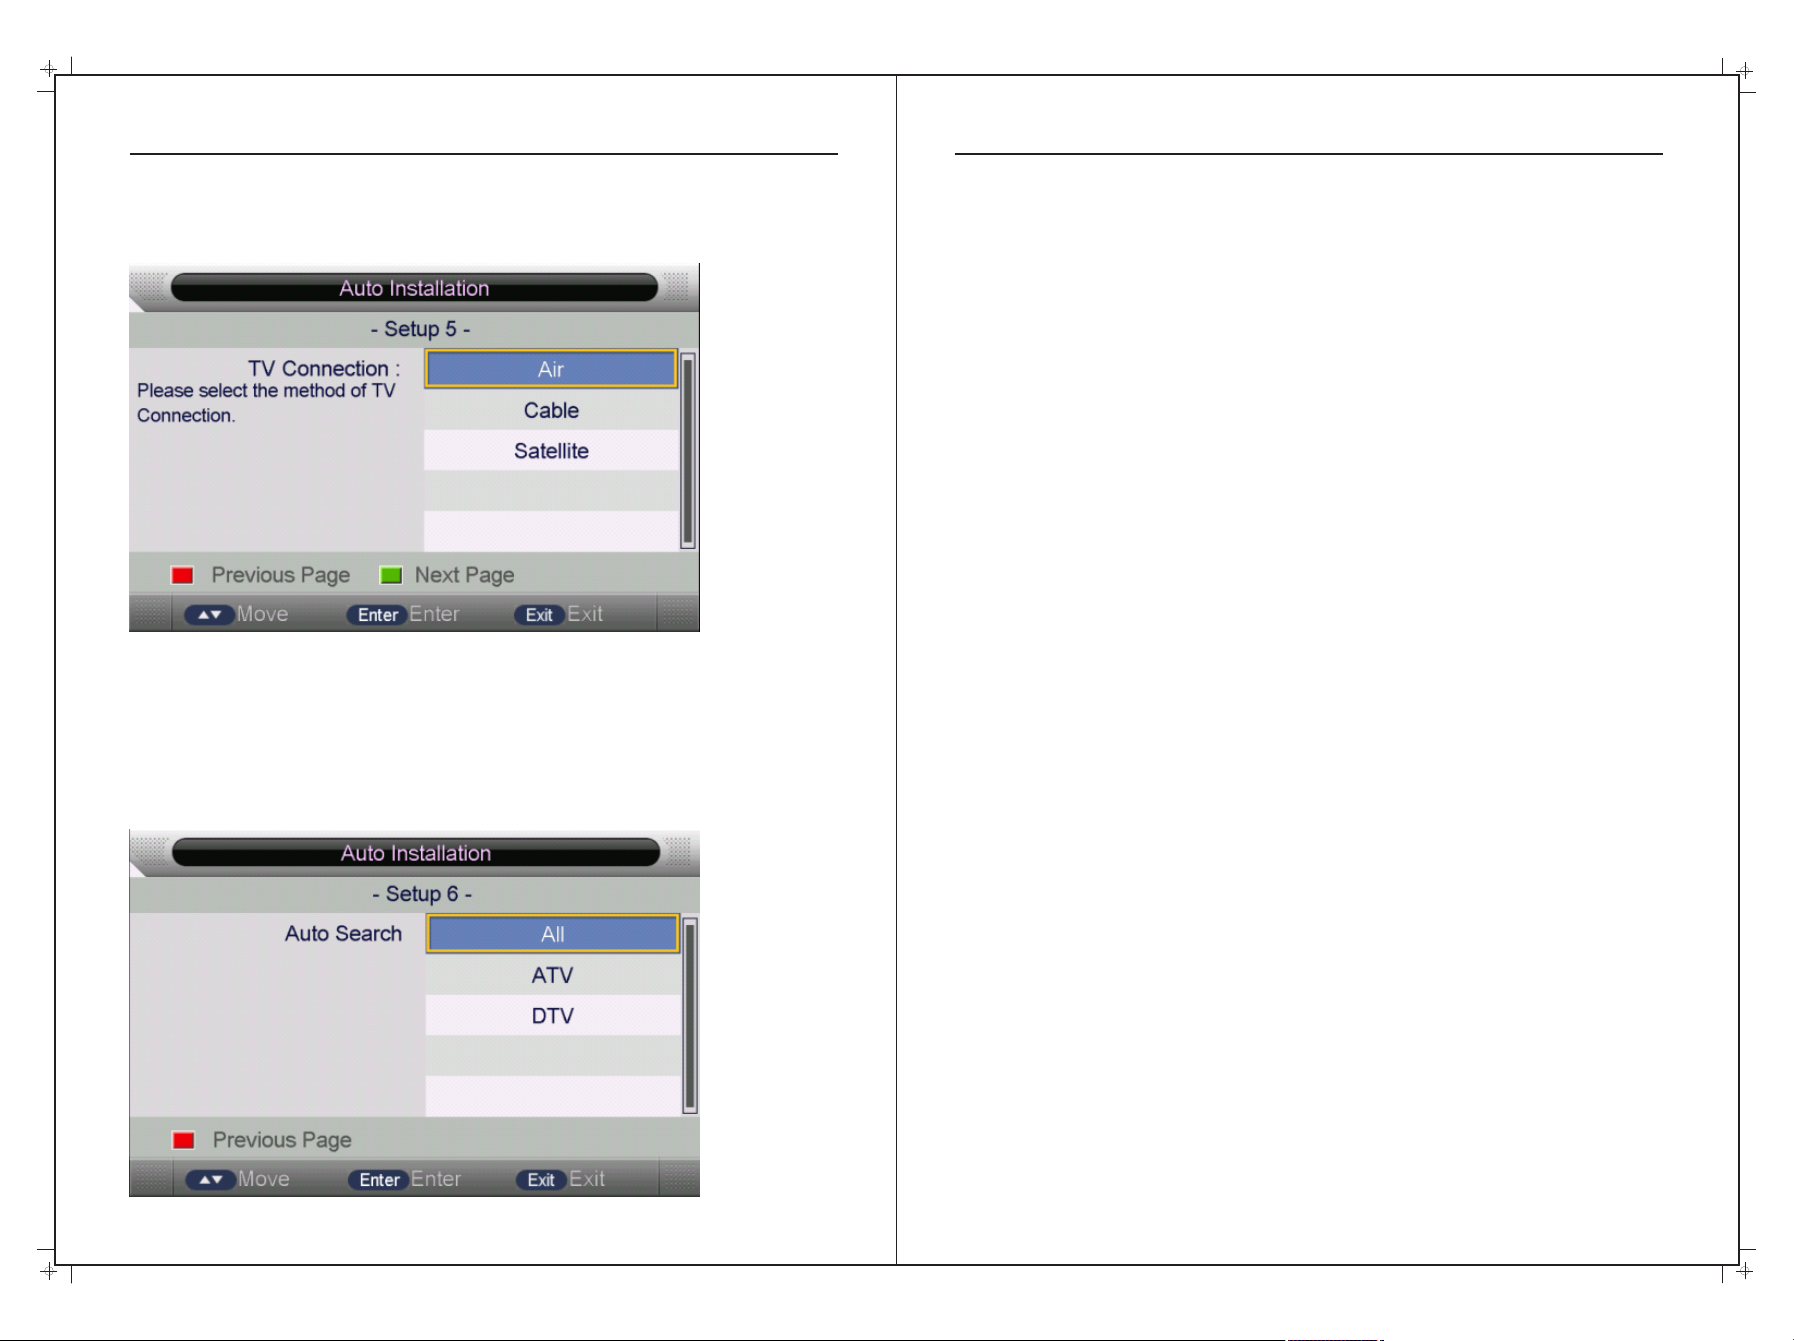
Step 5: TV Connection
“Air” is the default setting for this option and should no t be ch ang ed.
Step 6: Au to Se arc h
I MPO RTANT NOTE. Please make sure your TV Antenna is connected and correctly
orientated before completing this step.
For most Australian applications, select “DTV” on the remote using the ▼/▲ b utt ons t o
select, then press the ENTER button or ►button to scan for the TV Channels.
14 15
 Loading...