

Cambro IBSD37 Setup Manual And User Manual
SET UP GUIDE
AND USER MANUAL
IBSD37
Capacity: 37 Gallon (140 L)
Bin Colors: White (148), Yellow (229)
Unit ships complete with 18"(45,7cm)*
long clear drain hose made of FDA
approved PVC material. Can be used
with or without hose based on access to
floor drain.
* Available hose length when attached
to the drain elbow is 161⁄2" (42 cm).
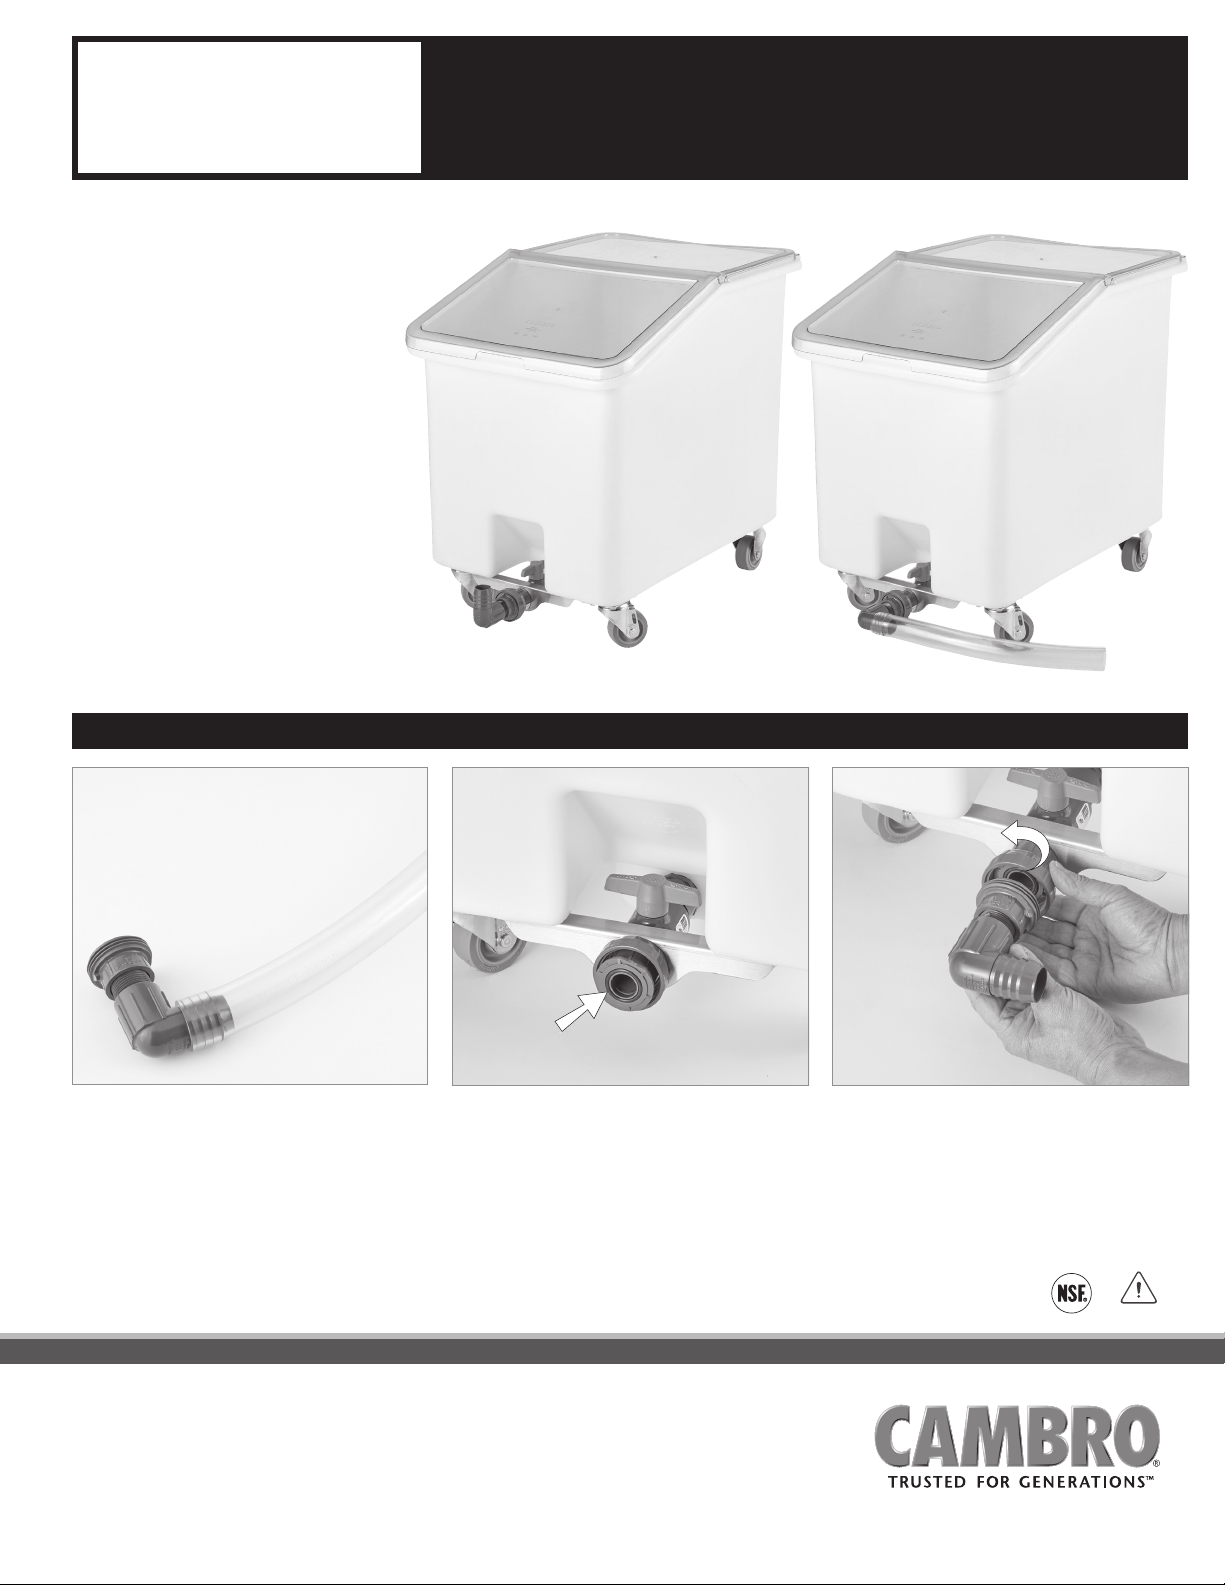
SOAK AND BRINE TANK
Set Up Guide and Usage Instructions
1. Remove the tank from the carton and locate the
drain elbow hose assembly.
2. Verify the presence of the black O-ring on the
plumbing union.
3. Attach the drain elbow hose assembly by engaging
the threaded ring and rotating it counterclockwise
until tight.
4. To re-position the drain elbow, loosen the threaded
ring slightly, turn drain elbow to the desired
position, then tighten to keep it in place.
CA PROP 65
www.cambro.com
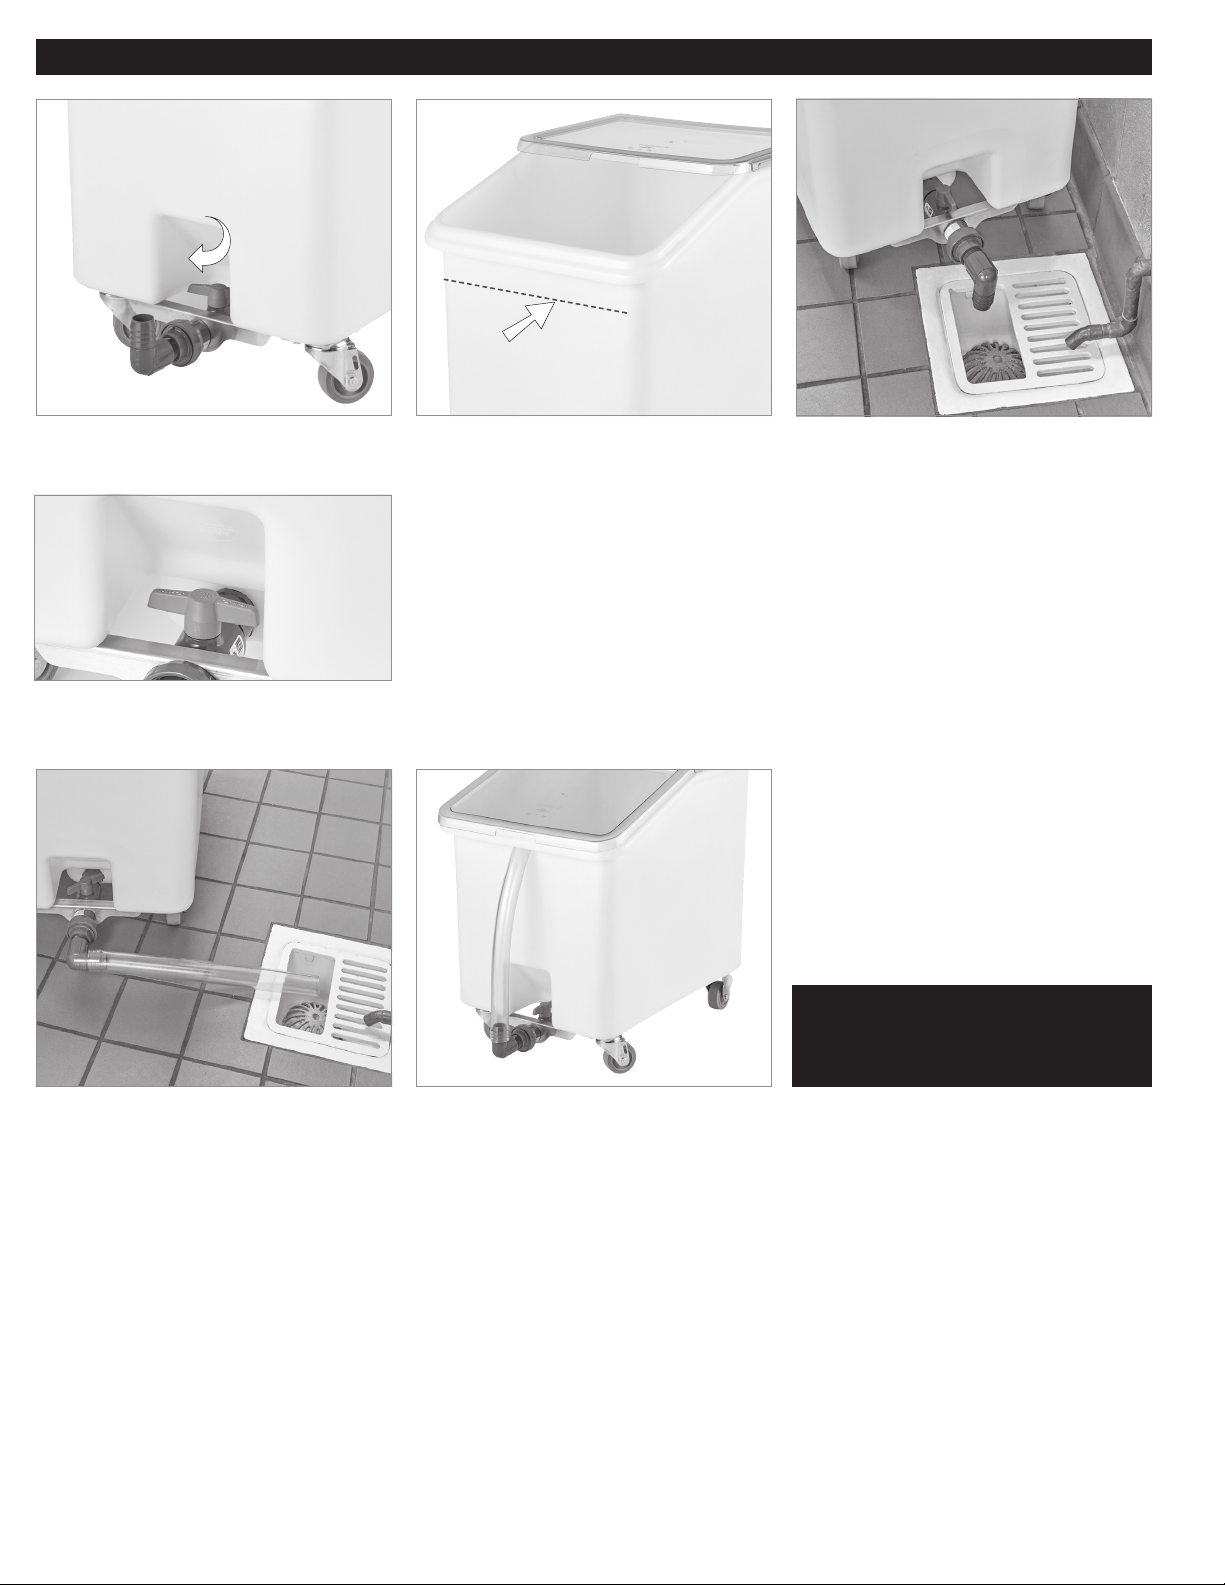
Set Up Guide and Usage Instructions Cont.
Recommended Safe Fill Line
5. Before filling tank, ensure blue valve handle is in
the closed position and drain elbow is facing up.
Valve handle shown in closed position.
6. Fill tank. Caution: Do not fill to the rim with
liquid or contents may spill during transport.
7. To drain directly over a floor drain, remove drain
hose, loosen plumbing union and twist drain elbow
to face down over the floor drain and re-tighten the
plumbing union. Do not allow any of the casters
to drop into the floor drain, as this could cause
damage to the drain components. Slowly turn blue
valve handle counterclockwise to the open position
to begin draining liquid. Continue to turn valve until
liquid is draining at an acceptable rate.
Caution: When the valve is fully open, liquid will
drain at an extremely rapid rate (37 gallons in
approximately 4 minutes) and could cause the
floor drain to overflow.
8. If the tank cannot be placed over a floor drain,
position the drain elbow with hose attached so the
drain hose reaches the floor drain. Slowly turn valve
handle counterclockwise to the open position to
begin draining liquid. Continue to turn valve until
liquid is draining at an acceptable rate.
2
9. After draining the contents of the tank, fully close
the valve and return the drain elbow to a vertical
position or remove and follow recommended
cleaning directions on page 4.
 Loading...