

Cambro CamKiosk KSC402, CamKiosk KSC402220 Owner's Manual
OWNER’S
PMS 185 + Black
PMS 185 + White
Black + White
Use this if 2 colors
MANUAL
™
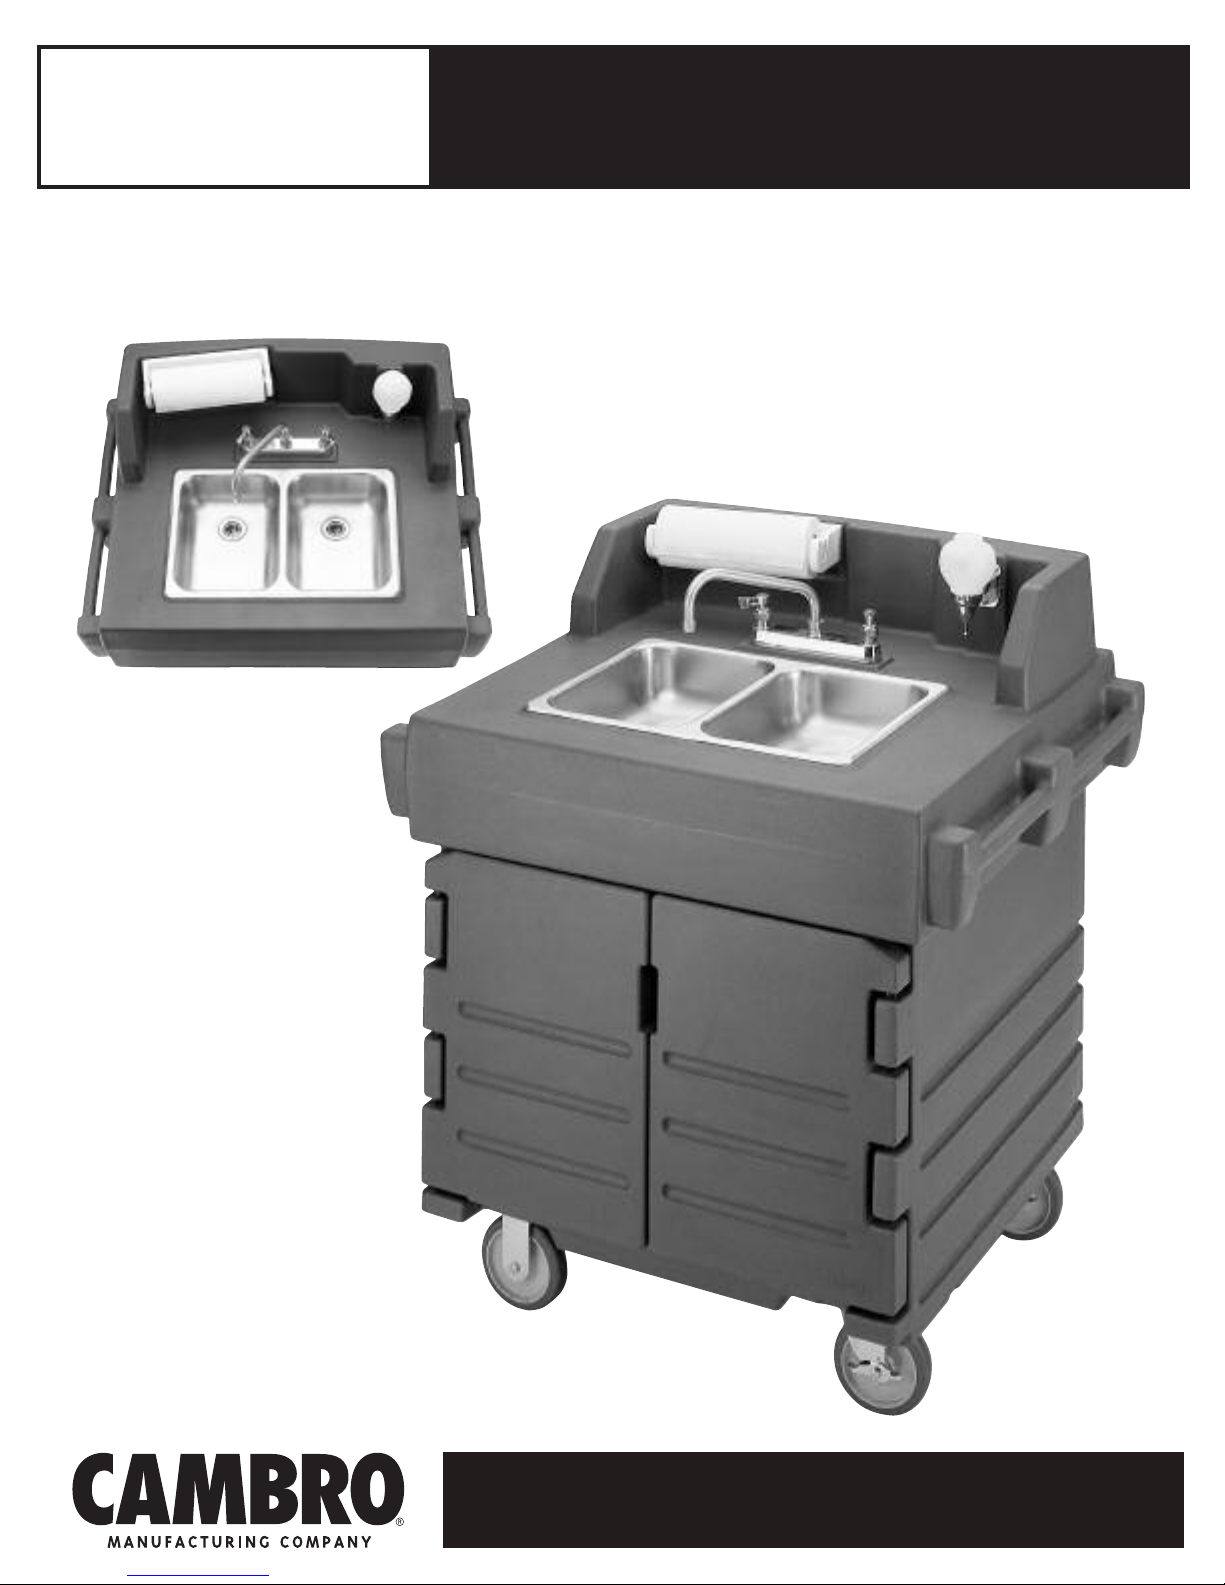
CamKiosk
This manual applies to the following CamKiosk Hand Sink Cart models:
Hand Sink Cart
KSC402
KSC402220
DURABILITY THAT MAKES A DIFFERENCE
®
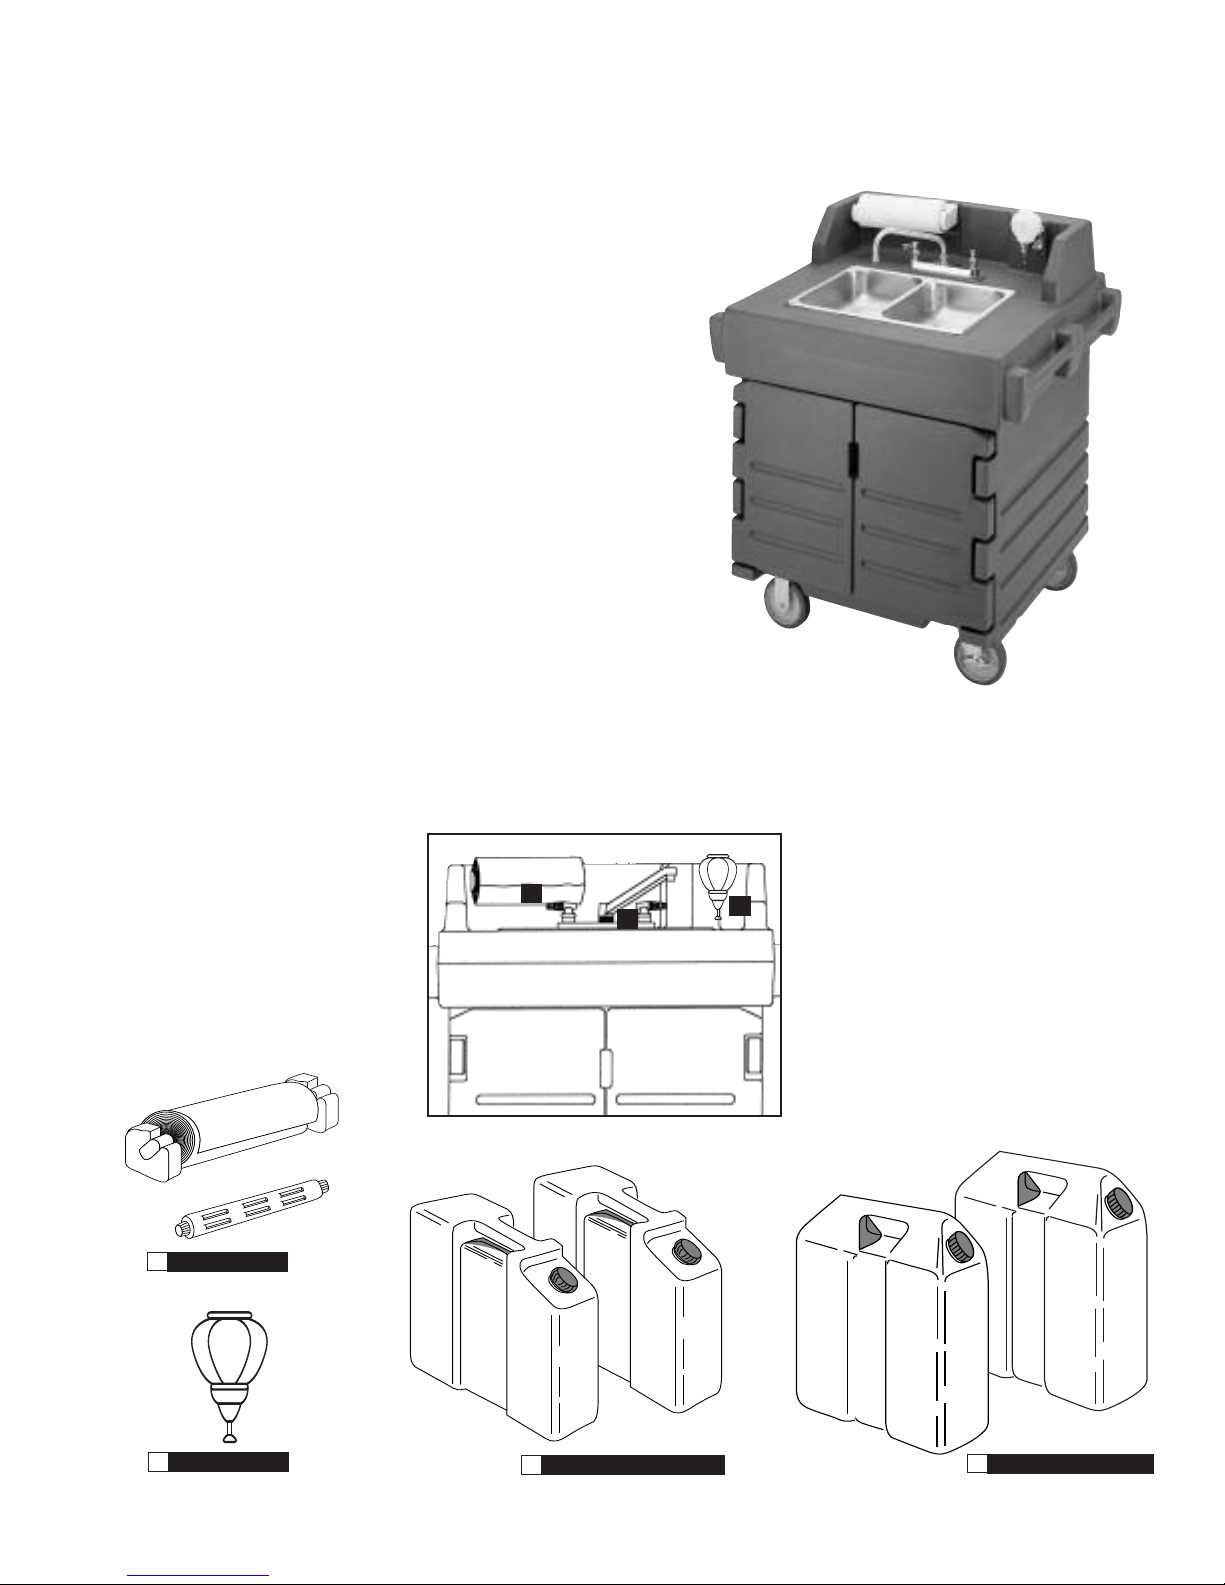
Table of Contents
Assembly
1.Parts Checklist.................................................................... 2
2.Assembly Instructions.......................................................... 2
Start Up and Daily Operation
1.Hand Sink Start Up.............................................................. 3
2.Daily Operation and Changing Tanks..................................... 4
3.Connecting Hand Sink to CamKiosk....................................... 4
Troubleshooting Guide
1.Water Heater........................................................................ 5
2.Water Pump......................................................................... 5
Cleaning Instructions
1.Cleaning and Maintenance Instructions.................................6
2.Proper Hand Washing Procedures...........................................6
Replacement Parts............................................................. 7
Warranty and Service...........................................Back Cover
Hand Sink Cart Parts
1
One faucet spout
2
One towel holder center bar
3
One soap dispenser
4
Two waste water tanks (Gray)
5
Two fresh water tanks (White)
L
TOWEL HOLDER
2
Assembly Instructions
1. Install faucet spout by carefully
2
1
R
3
positioning into center port and
then carefully tighten collar nut.
2. When placing towel bar into bracket,
make sure roller bar is in proper position. Use
towel r
towards operator.
3. Make sur
so it can flow to either waste tank
when properly placed in lower
compartment. See
Operation
L and R markings on roller so
oll is feeding from top of roll
e drain flex line is positioned
Start Up & Daily
for details.
SOAP DISPENSER
3
4
WASTE WATER TANKS
2
5
FRESH WATER TANKS
Start Up
Fresh Water Tank
First Time Use of Hand Sink Cart
ill one of the fresh water tanks with tap water, reconnect pump
1.F
line to water tank connector, and loosen cap for ventilation.
2. Check that drain nozzle is in the waste tank spout. Leave cap to
hang by tether line.
lug in electric cord to a convenient 110V outlet.
3.P
(Use 220V outside of U.S.). CEE 7 Type Euro Plug
rounded 3 wire type cord.)
g
4.
Open hot side valve on faucet about one quarter turn. Turn switch on
lectric box to start pump. With water heater turned
e
off, allow pump to fill water heater until water begins to run
out faucet spout, then shut valve.
5. Do the same for the coldside of faucet. This will bleed off
air in water lines.
6. Turn on switch on side of water heater, (switch will light up)
and allow time for heater to begin heating water inside tank.
Allow approximately ten (10) minutes.
7. Place second set of tanks in front area pushing first set to the
back of cart. Close door.
8. You are now ready to use the Hand Sink Cart.
(Must use a
Fresh Water Tank
Waste Tank Spout
Waste Water Tank
Q
uick Disconnect
Tether Line
Fitting
Pump
In
Out
Heat element switch on/off
3
Main switch to turn on
pump and water heater
Inlet side to fresh
water tank connector
Pump
 Loading...