

Cambridge Audio DVD-99 Service manual
HDMI DVD 99
Issue Date: December 2007
© Copyright Audio Partnership 2007
SERVICE MANUAL
SPECIFICATIONS:
Disc Types: DVD – Video, DVD – Audio, SACD, DVD +/-R/RW, CD/CD-R/CD-RW,
Output:
Rear connections:
Video Systems:
D/A Converters:
Video Amplitude:
S-Video Output Amplitude:
Frequency Response:
Signal to Noise Ratio:
THD:
Max. Power Consumption:
Dimensions (W x D x H):
Weight:
MPEG4/DivX, Compatible with digital photo albums
Video: DVI and HDMI support for HDTV with PAL/NTSC Progressive
Scan and Upscaling Component Video with 50Hz/60Hz Interlaced
Output; Scart (RGB/
Composite / 2 Channel Audio); S-Video; Composite Video, Audio: 5.1
Audio; Stereo Downmix, Digital: Digital Coaxial; Optical: DTS Digital via
Digital Outs
HDMI Output with HDCP, DVI Output, Component Video Out; S-Video
Out; RGB Scart Out; Composite Out; Optical Out; Coaxial Out; 5.1CH
out, USB In
Video resolution 480/576p,720/1080p, PAL or NTSC interlaced or noninterlaced
(progressive scan)
D/A Converters: 24-bit, 192kHz
Video Amplitude 1.0Vp-p (75ø)
S-Video Output Amplitude: Y:1.0p-p (75ø), C:O.286Vp-p (75ø)
5Hz-30kHz (+/-3dB)
>100dB
0.003% (A weighted) @ 1kHz 0.01% (no weighting)
20 Watts
420 x 45 x 266 (mm)
27 x 1.8 x 10 (inches)
2.5kg/5.5 lbs
Audio Partnership PLC; Gallery Court; Hankey Place; London; SE1 4BB; UK
Tel: +44 (0)207 940 2200 Fax: +44 (0)207 940 2233
AP23252/1

HDMI DVD 99 SERVICE MANUAL
2
TABLE OF CONTENTS
Specifications 1
Table of Contents
Front Panel Details
Rear Panel Connections
Remote Control
Troubleshooting
Power Supply Board
Power & USB Board
Display Board
Display Board – Surface Layer & Bottom Layer
Main Engine
DRAM & FLASH Memory
Surround & Video Outputs
2
3
4
5-6
7
8
9
10
11
12
13
14
Audio DAC & Output Connections
Surface Layer of Main Decode Board
Available Spare Parts
NOTE: A full version of the user instruction manual can be downloaded from the
www.cambridgeaudio.com site (DVD 99 Support).
15
16
17
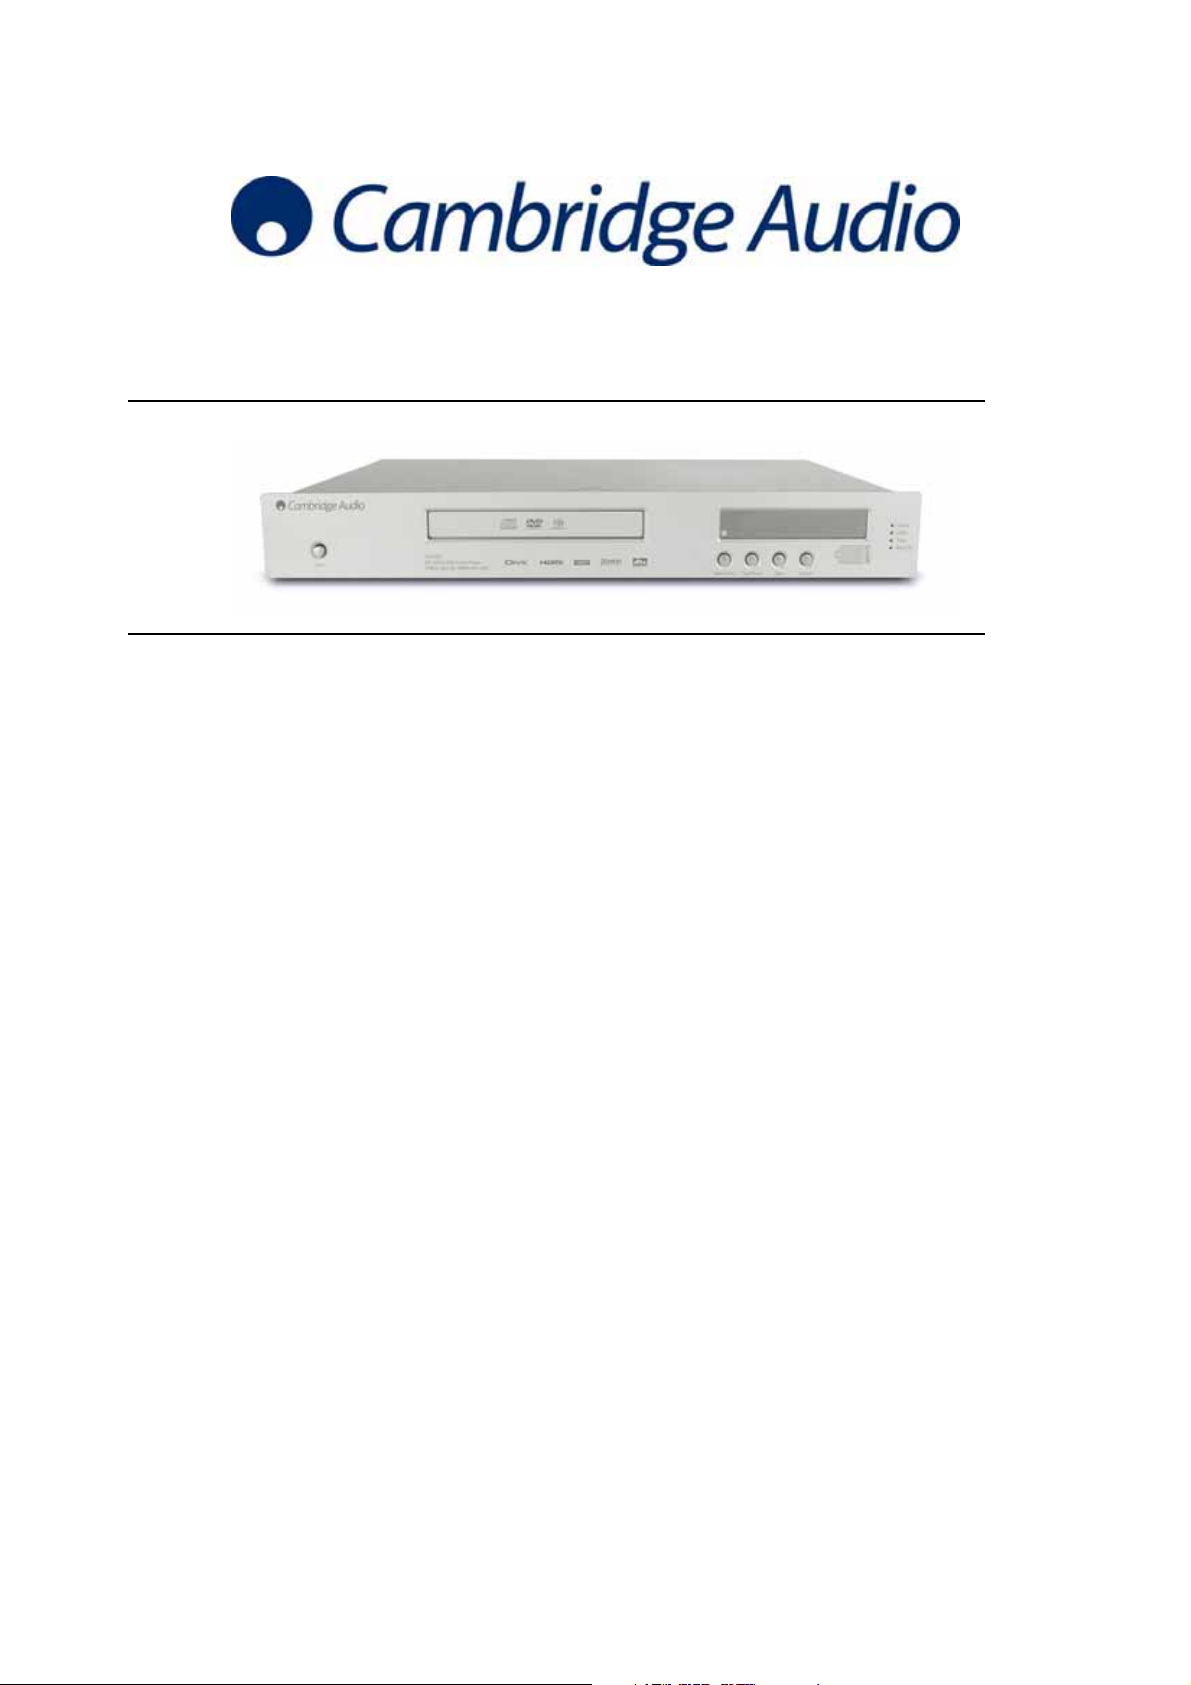
Cambridge Audio HDMI DVD 99
Front panel details
1
Power
1
Power
Switches the unit on and o.
2
Disc tray
DVD/Compact Disc tray. Use the Open/Close button to activate.
3
IR sensor
Receives IR commands from the supplied remote control. A clear
unobstructed line of sight between the remote control and the sensor is
required.
4
Display
Used to display the DVD99’s functions and playback state etc.
5
Open/Close
Allows you to open and close the disc tray for loading of discs. Pressing
Play will also close the tray and start playing a disc if one is loaded.
6
Play/Pause
Plays the disc and pauses (freezes) play when playing.
7
Stop
Press once to stop playback. Pressing Play will cause the playback to be
re-started from the same position. Press again to fully stop playback.
2
CD/SACD/DVD-Audio Player
1080p Upscale HDMI with USB
5
10
Resolution indicators
Indicates which HDMI resolution is in use:
1080p - Upscaled at 1080 lines progressive
1080i - Upscaled at 1080 lines interlaced
720p - Upscaled at 720 lines progressive
480/576 - Native NTSC/PAL resolution
Stop UpscalePlay/PauseOpen/Close
6
7 8
10
1080p
1080i
720p
480/576
43
9
8
Upscale
When playback is completely stopped press to switch the video output
resolution. Select the resolution that produces the best picture quality
on your TV. For most at panels and DLP™, LCD or LCoS (SXRD™, DILA™) rear projection televisions this will be 720p. For CRT rear
projection televisions this will likely be 1080i. For non HD displays (very
rare if they have HDMI or DVI) this will be 480p.
9
USB port
Port for interfacing to a ash/memory card or "Mass Storage Device".
Notes:
• Only USB 2.0 certied products with the USB 2.0 logo on them are
supported by the DVD99. Please either consult the manufacturer of
the USB 2.0 product to make sure it is properly certied, or go to
ww.usb.org for a list of approved products, before purchase. We
w
cannot be held responsible for any incompatibility issues.
• This unit supports "USB Mass Storage Class Bulk-Only Transport"
devices only. Most USB thumbs drives, portable hard disk drives and
card readers conform to this device class. Other USB devices such as
MP3 players, digital cameras, and mobile phones may not be
compatible.
• Supported USB drives must be formatted with the FAT (File Allocation
Table)or FAT32 lesystem. Drivesformatted withNTFS le system are
not supported.
Front Panel Details
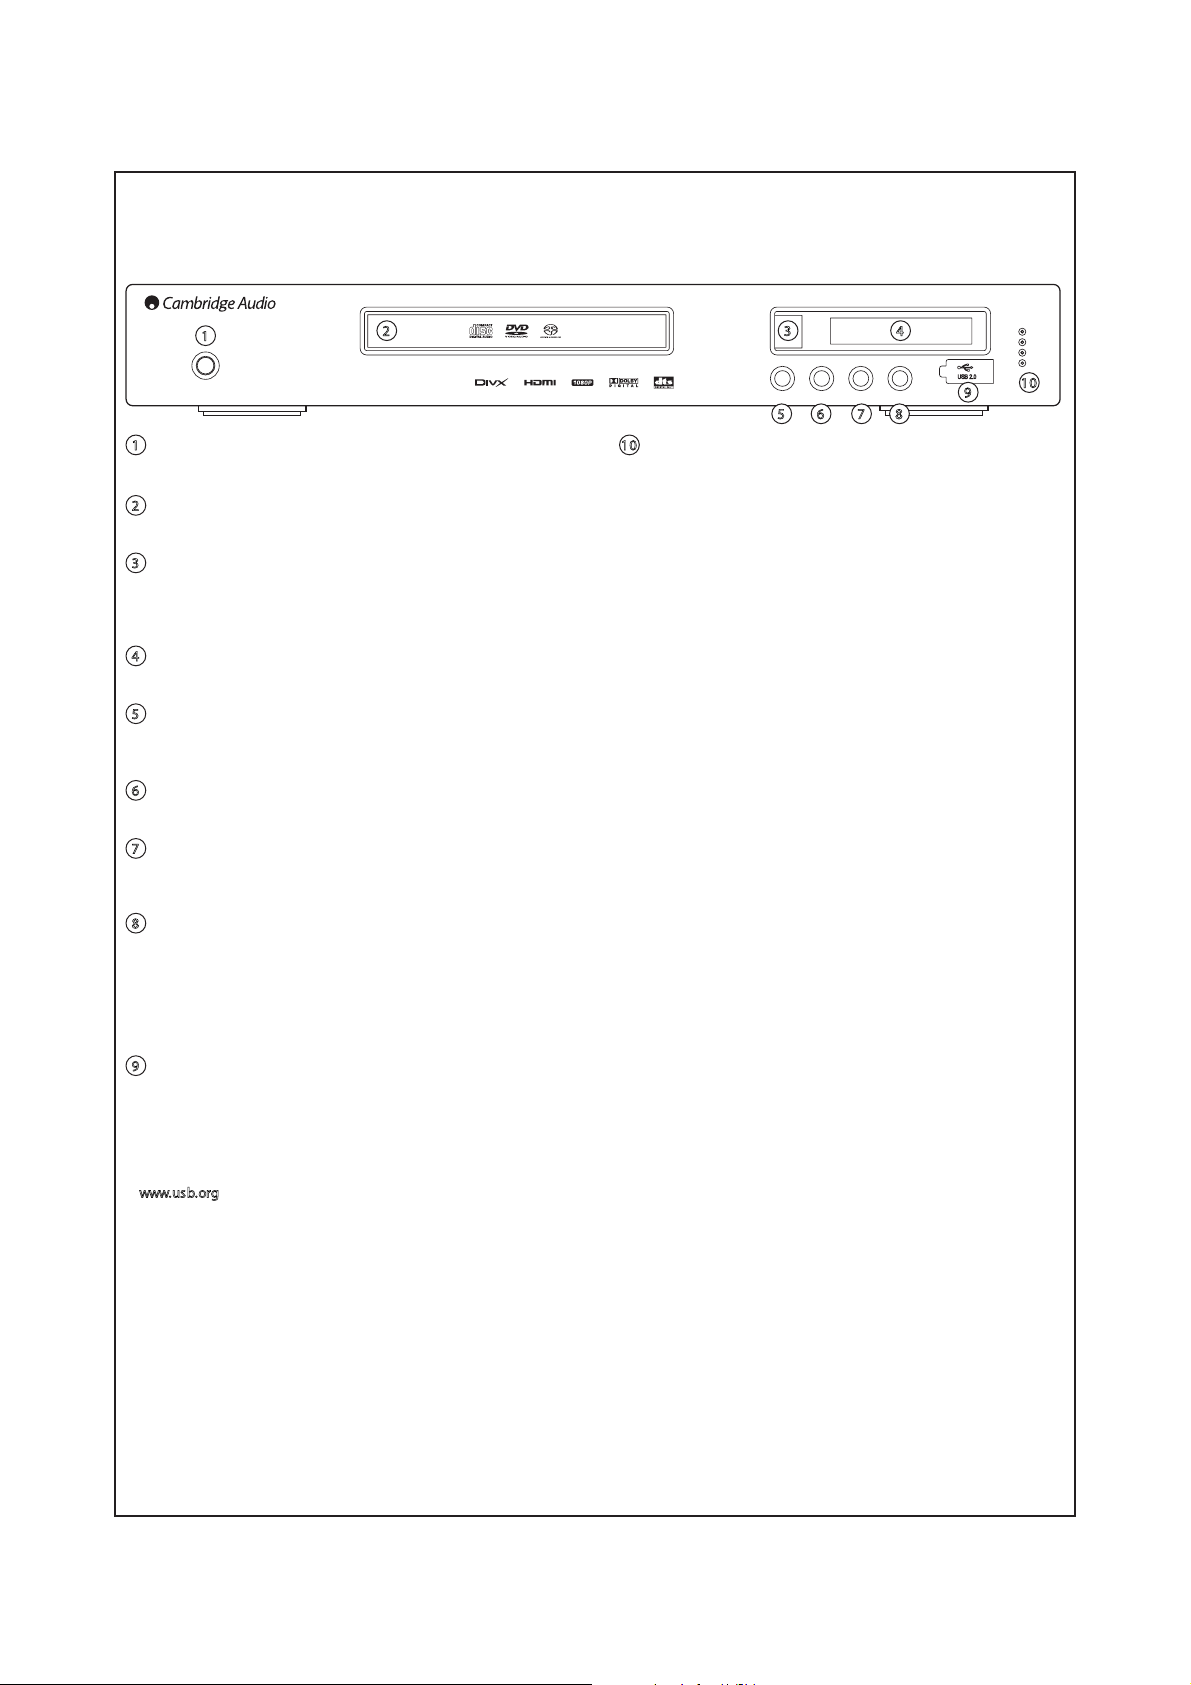
3
Cambridge Audio HDMI DVD 99
Rear panel connections
Digital
Component
Designed in London, England
DVD99 DVD Player
100-240VAC ~ 50/60Hz
:
Power Rating
Max Power Consumption
www.cambridge-audio.com
Class 1 Laser Product
Luokan 1 Laserplaite
Klass 1 Laserapparat
:
40W
1
HDMI Out
Composite
S-Video
Outputs
Y
S/P DIF
Co-axial
PCM/DTS/
Dolby Digital
Toslink
Optical
7.1 Channel Audio OutVideo Out
Cb
/
Pb
Cr
/
Pr
2 3 4
1
HDMI Out
HDMI (High-Denition Multi-Media Interface) is a purely digital
connection that can carry both audio and video. Use a dedicated HDMI
cable to connect to a TV/Monitor with a compatible HDMI input.
2
Analog Video Outputs
Composite - Connect to your television via 75 ohm RCA/phono cable
designed specically for video use.
-Video - Connect to your television via dedicated S-Video cable.
S
C
omponent - Connect to the YCbCr or YPbPr terminals of a television set
via three 75 ohm RCA/phono cables designed specically for video use.
3
Digital Outputs
Digital audio outputs are normally used to connect to a suitable
Audio/Video Receiver for surround sound decoding (output must be set
for 'RAW' - refer to the 'Audio setup' section). These outputs can also be
used to connect to a separate DAC or digital recording device (output
must be set for 'PCM' - refer to the ‘Audio setup’ section).
T
oslink Optical - Use a high quality TOSLINK bre optic cable.
S
/P DIF Co-Axial Digital - Use a high quality 75 ohm digital RCA/Phono
interconnect cable designed specically for digital audio use.
This product complies with DHHS rules 21 CFR,
CSLL / Mixed
SBL
5
SWSRR / Mixed
SBR
SCART (Composite/RGB/StereoAudio)
Chapter1, Subchapter J, Part 1040 at date of
manufacture.
Apparatus claims of US patent nos. 4,631,603;
4,577,216; 4,819,098 and 4,907,093 licensed for
limited viewing only.
“DTS” and “DTS Digital Out” is a trademark of
Digital Theatre Systems Inc.
Manufactured under license from Dolby Laboratories.
“Dolby” and the double-D symbol are trademarks of
Dolby Laboratories. CondentialUnpublished Works
©1992-1997 Dolby Laboratories. All rights reserved.
This device complies with part15 of the FCC Rules.
Operation is subject to the following two conditions:
1) This device may not cause harmful interference;
2) This device must accept any interference, including
interference that may cause undesired operation.
Note: The preferred connection method for video sources is always
HDMI (highest quality, and can also carry audio in some
circumstances) then Component Video then RGB/SCART then SVideo then Composite Video (lowest quality). The HDMI and
Component outputs also support Progressive Scan which gives
better picture quality if supported by your TV.
CAUTION
Risk of electric
shock.
Do not open.
6
AVIS
ACHTUNG
Risque de choc
Vorm önen
electrique.
des gerätes.
Ne pas ouvrir.
Netzstecker ziehen.
4
7.1 Channel Audio Out
If Down-mix is set to '7.1 CH' in the Speaker Setup page of the DVD99’s
Setup menus, these sockets provide 7.1 output from the DVD99's built
in Dolby Digital decoder. This can be used to connect to the 7.1 audio
line-level inputs of an amplier/AV receiver or amplied speaker
package if required. Similarly, Down-mix can be set to '5.1 CH' to provide
5.1 output. If Down-mix is set to 'LT/RT', 'Stereo' or 'V.Surround' the Left
and Right outputs only are active and provide a stereo downmixed
output. Refer to the 'Speaker setup page' section of this manual for
more information.
5
RGB/SCART
Use a SCART/Peritel cable to connect to the 21-pin scart input jack of a
TV. SCART carries both audio (stereo) and video (as either Composite, SVideo or RGB) at the same time.
6
AC power socket
Once you have made all audio and video connections, plug the IEC type
AC powercable into therear of the unitand an appropriatemains socket
then switch on. Your DVD player is now ready for use.
Rear Panel Details
4
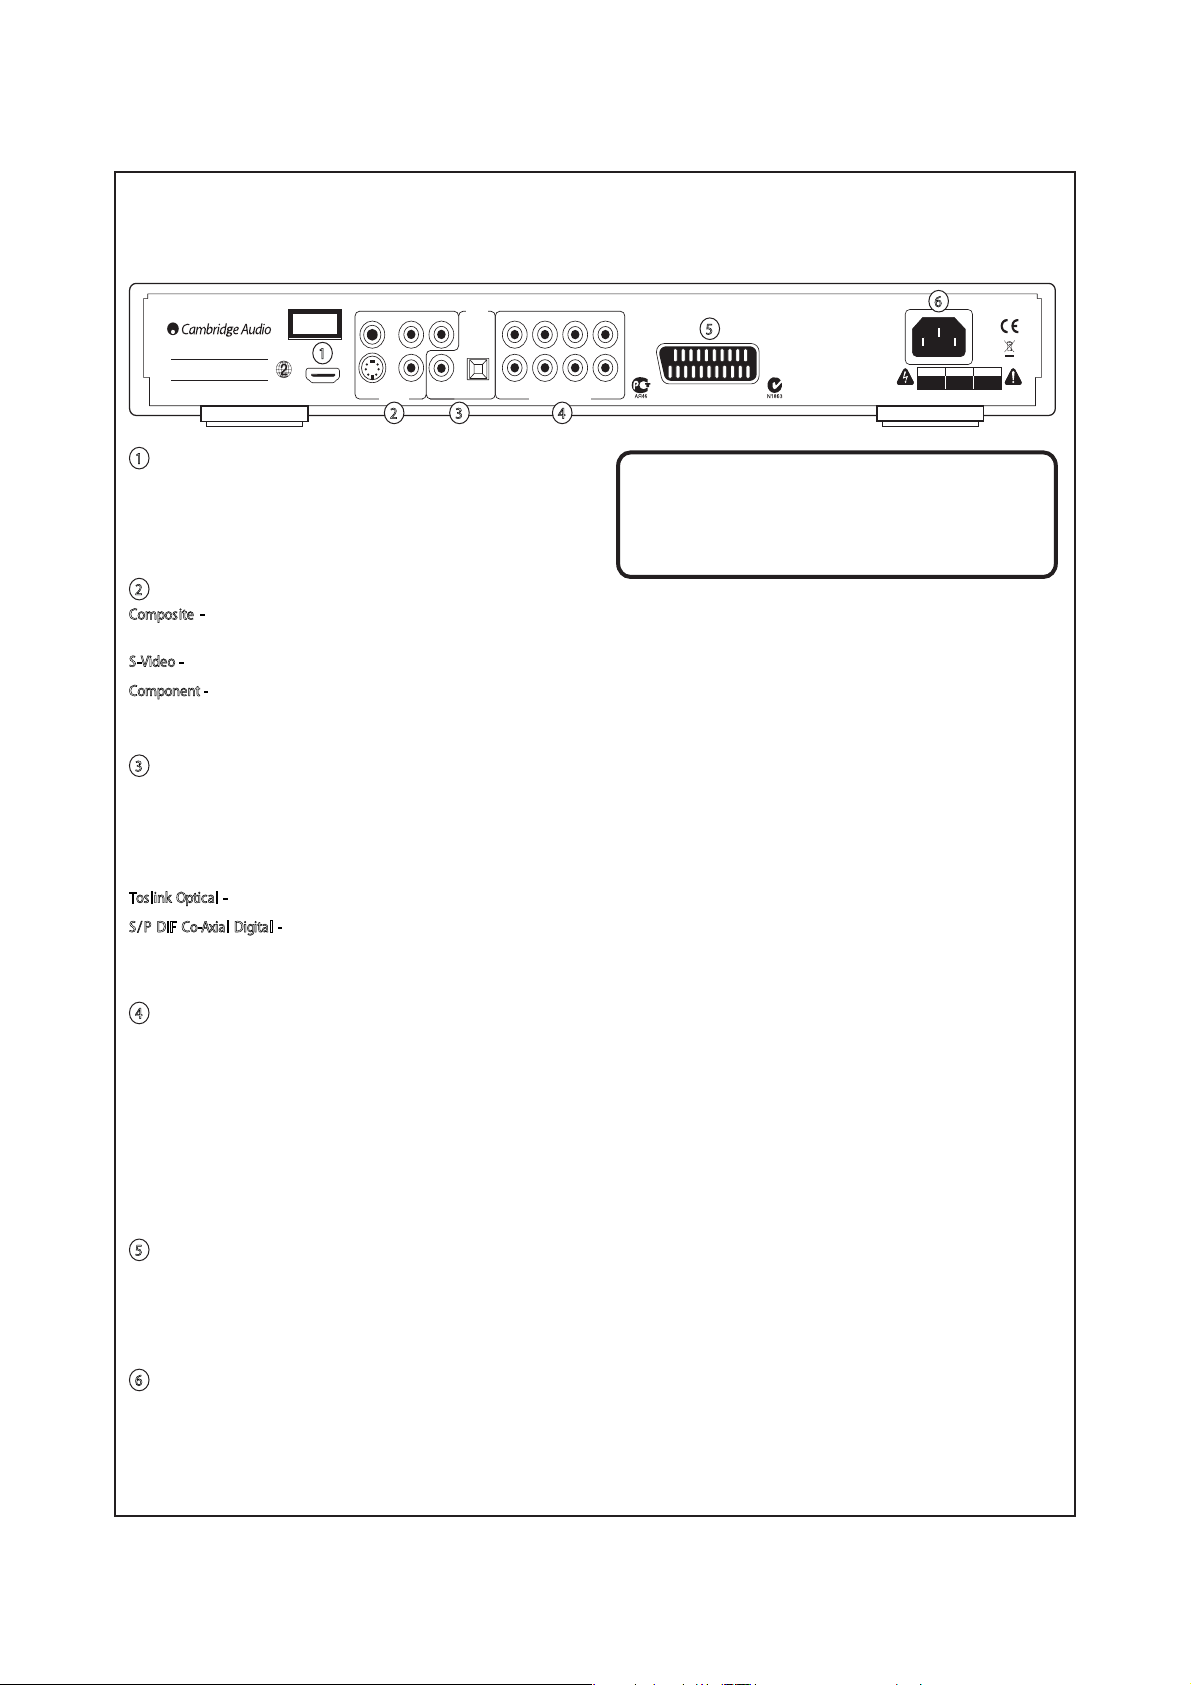
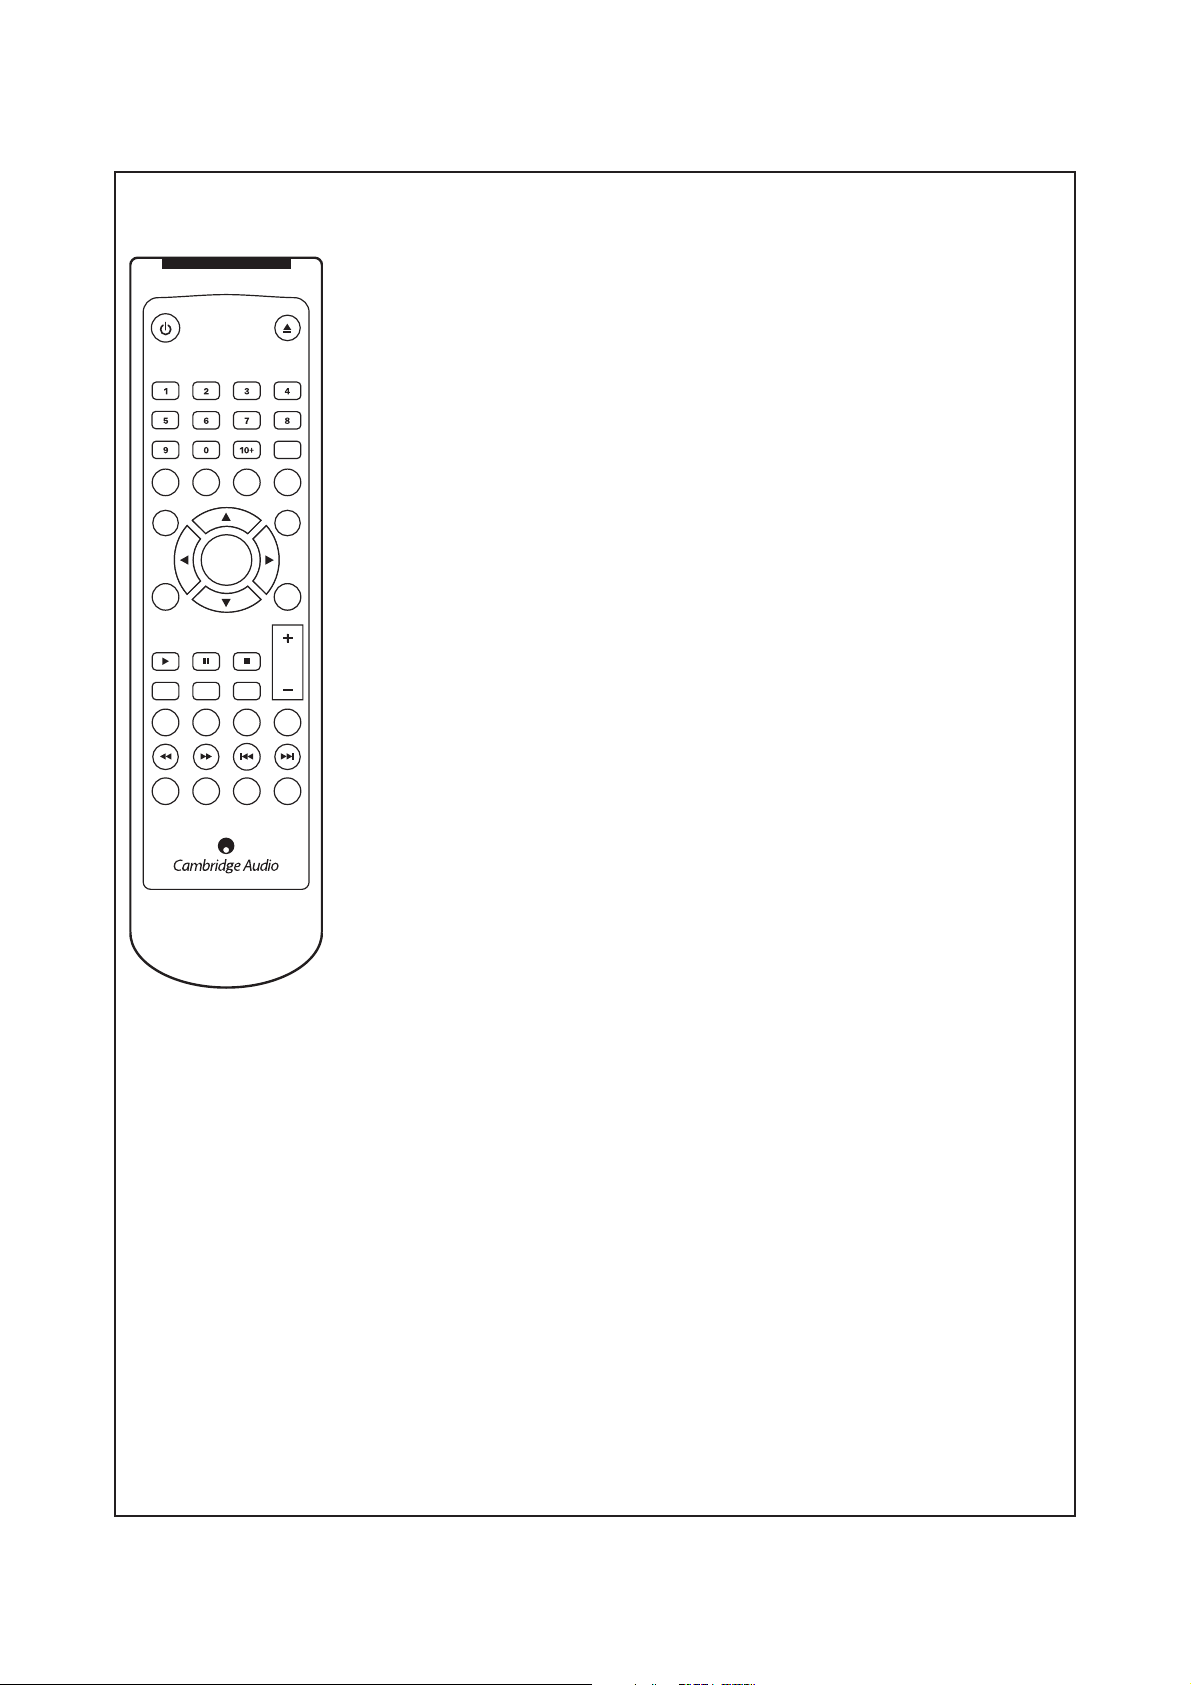
Remote Control
Eject
Cambridge Audio HDMI DVD 99
The DVD 99 is supplied with a remote control. Insert 2 AAA batteries to activate.
For further details of the various adjustment functions available, refer to the later sections of
this manual.
Standby / On
Switches the unit between On and Standby mode.
Go To
Audio Subtitle Angle Zoom
Eject
Opens and closes the disc tray.
Numerical Buttons
MenuTitle
Press the number of a desired chapter or track to go directly to it. For a number greater than ten,
press 10+ followed by the number(s) required.
Enter
Setup
CD
Slow
Mode
Repeat raelCofnI
Scan Skip
HDMI
Upscale
Return
StopPlay Pause/Step
Vol
Mute
A-B
PAL/
OSDUSB
NTSC
Go To
Press once to access Chapter Selection then enter the required chapter via the numerical buttons.
Press twice to access Disc Time Selection and enter the required time from the start of the disc as:
H:MM:SS (hours / minutes / seconds). Press three times to access Chapter Time Selection and
enter the required time from the start of the chapter.
Audio
Press to access alternate audio soundtracks on the DVD (if available on the DVD disc).
Subtitle
Press to enable / disable Subtitles (if available on the DVD disc).
Angle
Press to access various camera angles (if available on the DVD disc).
Zoom
Press to cycle through the various zoom magnifications (and back to normal display).
Navigation
Press the directional arrows to move around the Setup menus.
Enter
Press to accept the item / function highlighted in the display menu.
Title
Press to access the DVD Title Menu. This is usually the root menu from where the film can be started or where navigation to
scene selections, special features, etc, can be made.
Menu
Press to go to a DVD disc’s own Setup menu.
Setup
Press to enter the DVD 99’s Setup menu. Please refer to the ‘DVD Player Setup’ section of this manual for more information.
Return
Press to return to the previous operation in any setup menu.
Play / Stop / Pause
Press the relevant button to play, stop or pause playback.
NOTE: If Stop is pressed once, playback can be resumed from the same place by pressing play. Press Stop twice to completely
stop playback. If Pause is selected, pressing the Slow key then allows frame by frame advancement of the paused frame.
Slow
When playing a DVD, press repeatedly to cycle round the various speeds of slow motion, forwards, backwards and back to
normal speed.
Remote Control Details
5
Remote Control
Eject
Cambridge Audio HDMI DVD 99
CD Mode
When a disc is being played, press to turn on / off any connected display device. This function is
designed to be used when playing audio only discs to reduce “screen burn”.
Mute
During playback, press to turn off audio output. The TV will display “MUTE”. Press again to
resume audio output.
Audio Subtitle Angle Zoom
Enter
Setup
StopPlay Pause/Step
CD
Slow
Scan Skip
HDMI
Upscale
Mute
Mode
A-B
Repeat raelCofnI
PAL/
NTSC
Go To
MenuTitle
Return
Volume
Press to decrease or increase the volume of the DVD 99.
NOTE: If the DVD 99 is connected to an amplifier / AV receiver through a digital audio output
(Co-axial or Optical), the volume command from the remote control is unaffected.
Info
Displays on screen, the current DVD disc information not available in the OSD menu.
For example, disc format, video type and source.
Vol
OSDUSB
Repeat
Press to repeatedly play a single chapter / title on a DVD video or a single track / entire disc on a
CD. The first press selects chapter / track repeat, the second press selects title / disc repeat, the
third press, selects all repeat.
A-B
Press to mark a segment between A and B for repeated playback. The first press marks point A,
the second press marks point B.
Clear
Press to remove outstanding track programs.
Scan
Press repeatedly to cycle between 2 x, 4 x, 8 x, 16 x or 32 x playback speed (without sound) and
back to normal playback. Left button for backward playback options, right button for forward
playback.
Skip
Right Skip - press once to skip forward by one track / chapter on the disc.
Left Skip - press once to skip backward by one track / chapter on the disc.
HDMI Upscale
Press to switch between HDMI output resolution.
NOTE: Disc playback must be stopped and the Cambridge Audio DVD logo must be displayed.
USB
When a compatible USB device is connected, press this button to bring up a device selection menu. Use the navigational
arrows and the Enter button to select ‘REMOVABLE’ and then select ‘USB SLOT’. The DVD 99 will then start reading the
files stored on the USB device.
PAL / NTSC
Press to switch between the monitor / video display format: PAL. NTSC or Automatic (which switches format automatically
depending on the disc inserted).
OSD
While playing a DVD, press to cycle through the following information options to be displayed on the screen:
Title Elapsed, Title Remain, Chapter Elapsed, Chapter Remain, Info Off.
Remote Control Details Continued
6
 Loading...