

Cambridge CAM463D6PKGORB, CAM463D6PKGCP, CAM463D6PKGBN, CAM463D2PKGORB, CAM463D2PKGCP User Manual
...Page 1
463D
For this installation of your new deck mounted faucet it is presumed that
the water supply lines are underneath the floor and are in direct access for
faucet isntallation
7”.
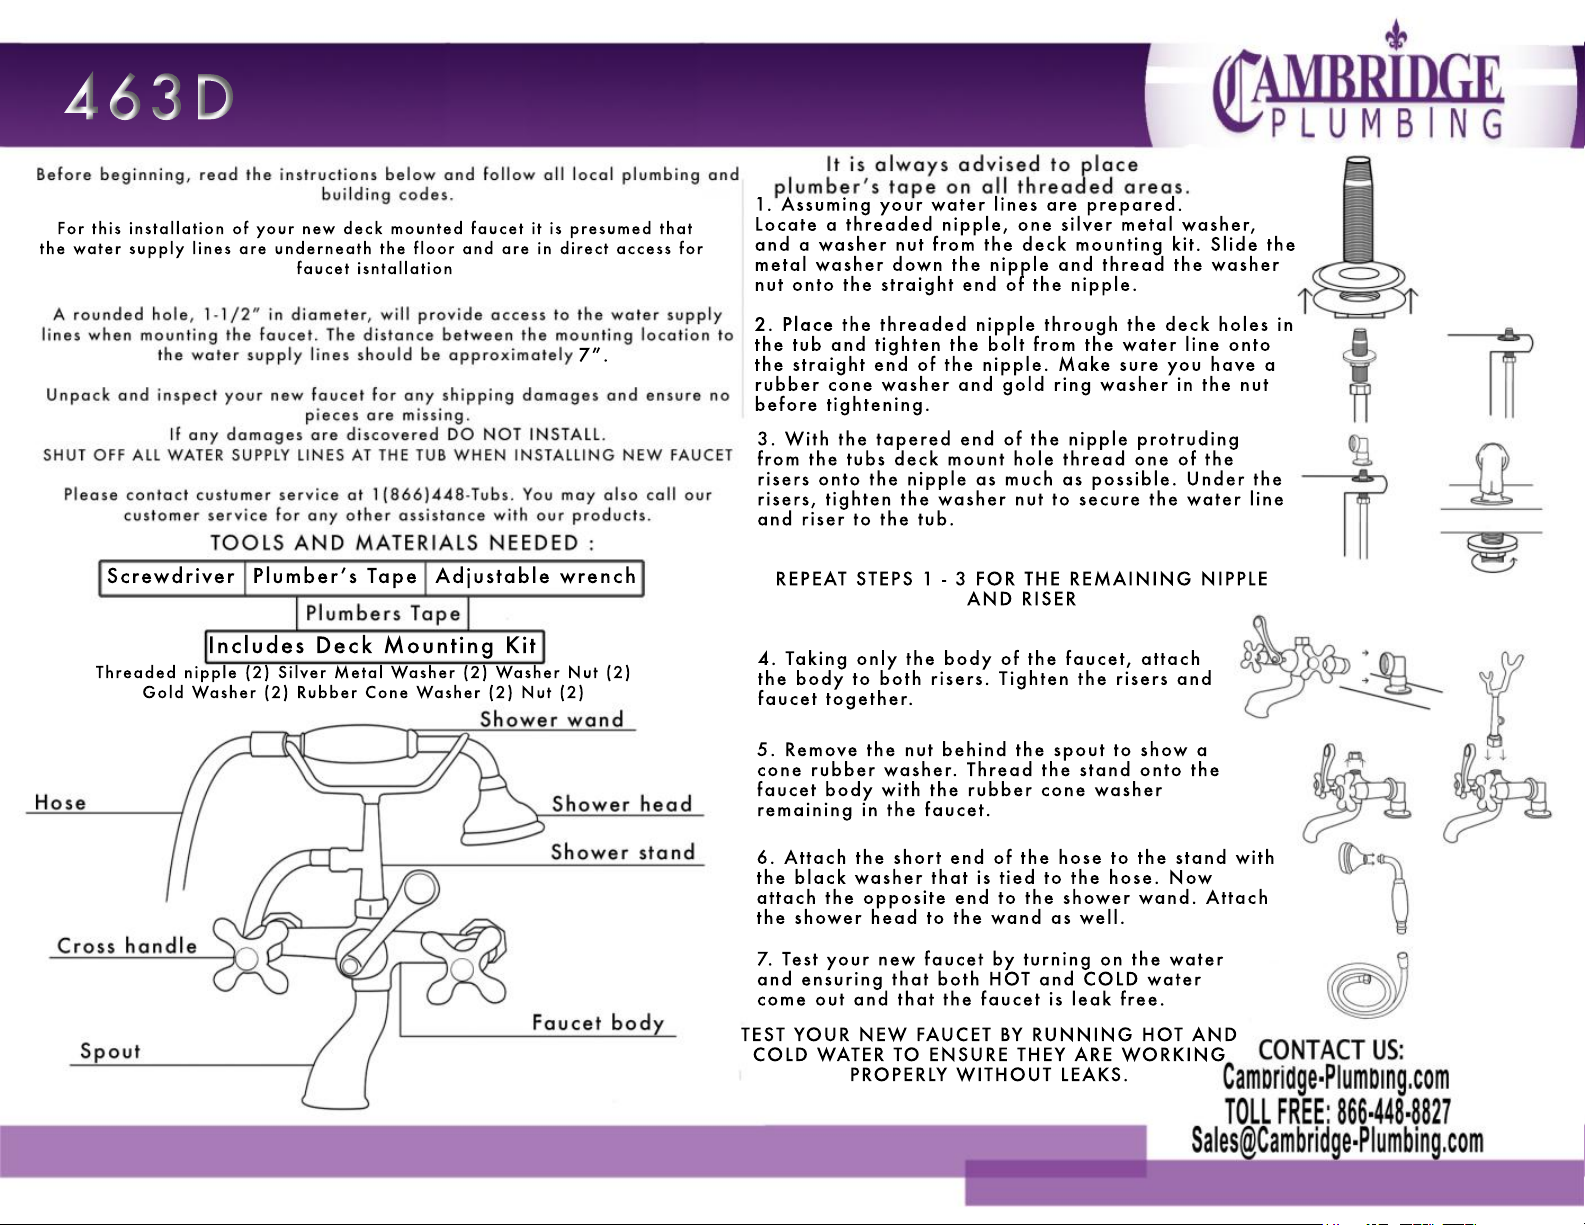
1. Assuming your water lines are prepared.
Locate a threaded nipple, one silver metal washer,
and a washer nut from the deck mounting kit. Slide the
metal washer down the nipple and thread the washer
nut onto the straight end of the nipple.
2. Place 2. Place the threaded nipple through the deck holes in
the tub and tighten the bolt from the water line onto
the straight end of the nipple. Make sure you have a
rubber cone washer and gold ring washer in the nut
before tightening.
3. W ith the tapered end of the nipple protruding
from the tubs deck mount hole thread one of the
risers onto the nipple as much as possible. Under the
risers, tighten the washer nut to secure the water line
and riser to the tub.
Screwdriver Plumberʼs Tape Adjustable wrench
Includes Deck Mounting Kit
Threaded nipple (2) Silver Metal Washer (2) Washer Nut (2)
Gold Washer (2) Rubber Cone Washer (2) Nut (2)
REPEAT STEPS 1 - 3 FOR THE REMAINING NIPPLE
AND RISER
4. Taking only the body of the faucet, attach
the body to both risers. Tighten the risers and
faucet together.
5. Remove the nut behind the spout to show a
cone rubber washer. Thread the stand onto the
faucet body with the rubber cone washer
remaining in the faucet.
6. Attach the short end of the hose to the stand with
the black washer that is tied to the hose. Now
attach the opposite end to the shower wand. Attach
the shower head to the wand as well.
7. Test your new faucet by turning on the water
and ensuring that both HOT and COLD water
come out and that the faucet is leak free.
TEST YOUR NEW FAUCET BY RUNNING HOT AND
COLD W ATER TO ENSURE THEY ARE W ORKING
PROPERLY W ITHOUT LEAKS.
 Loading...